LG Electronics USA EAX57538201 Bluetooth Module User Manual SAC31539704 en REV02
LG Electronics USA Bluetooth Module SAC31539704 en REV02
UserManual.wiki
>
LG Electronics USA
>
EAX57538201 User Manual
>
Host user manual 1 of 2
Contents
1.
Module user manual
2.
Host user manual 1 of 2
3.
Host user manual 2 of 2
Host user manual 1 of 2
Navigation menu
Upload a User Manual
Namespaces
Wiki Guide
HTML
PDF
Info
Views
User Manual
Discussion / Help
Navigation

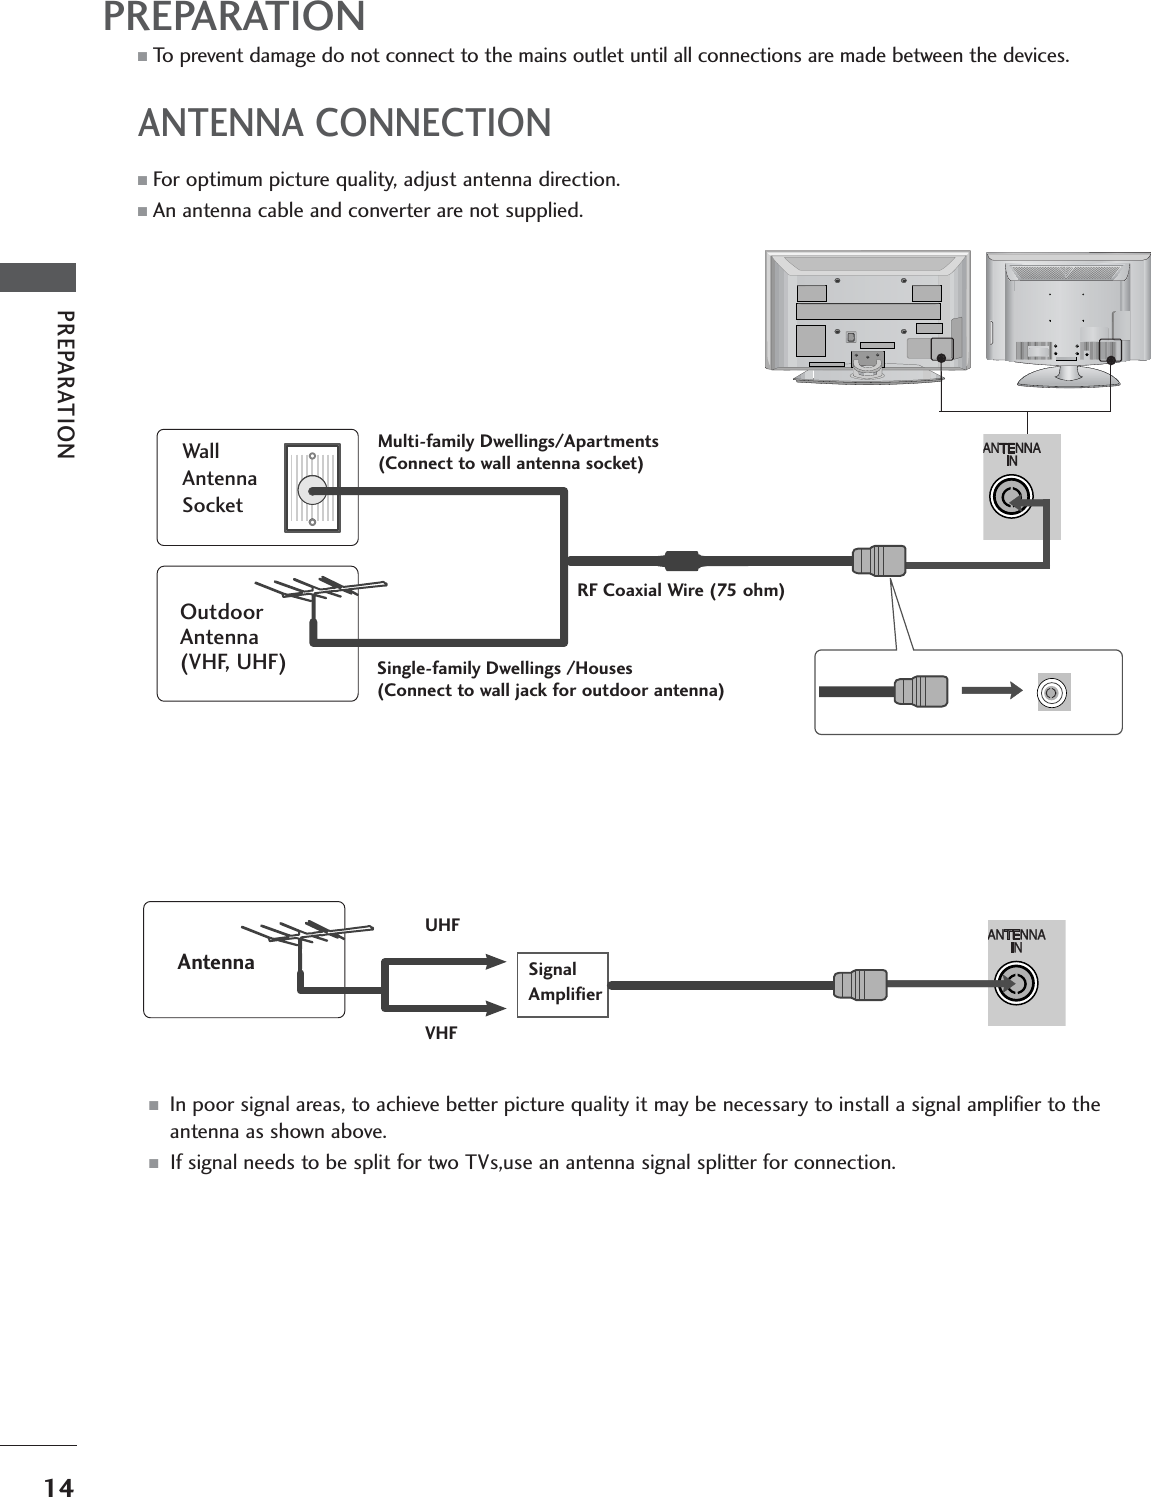
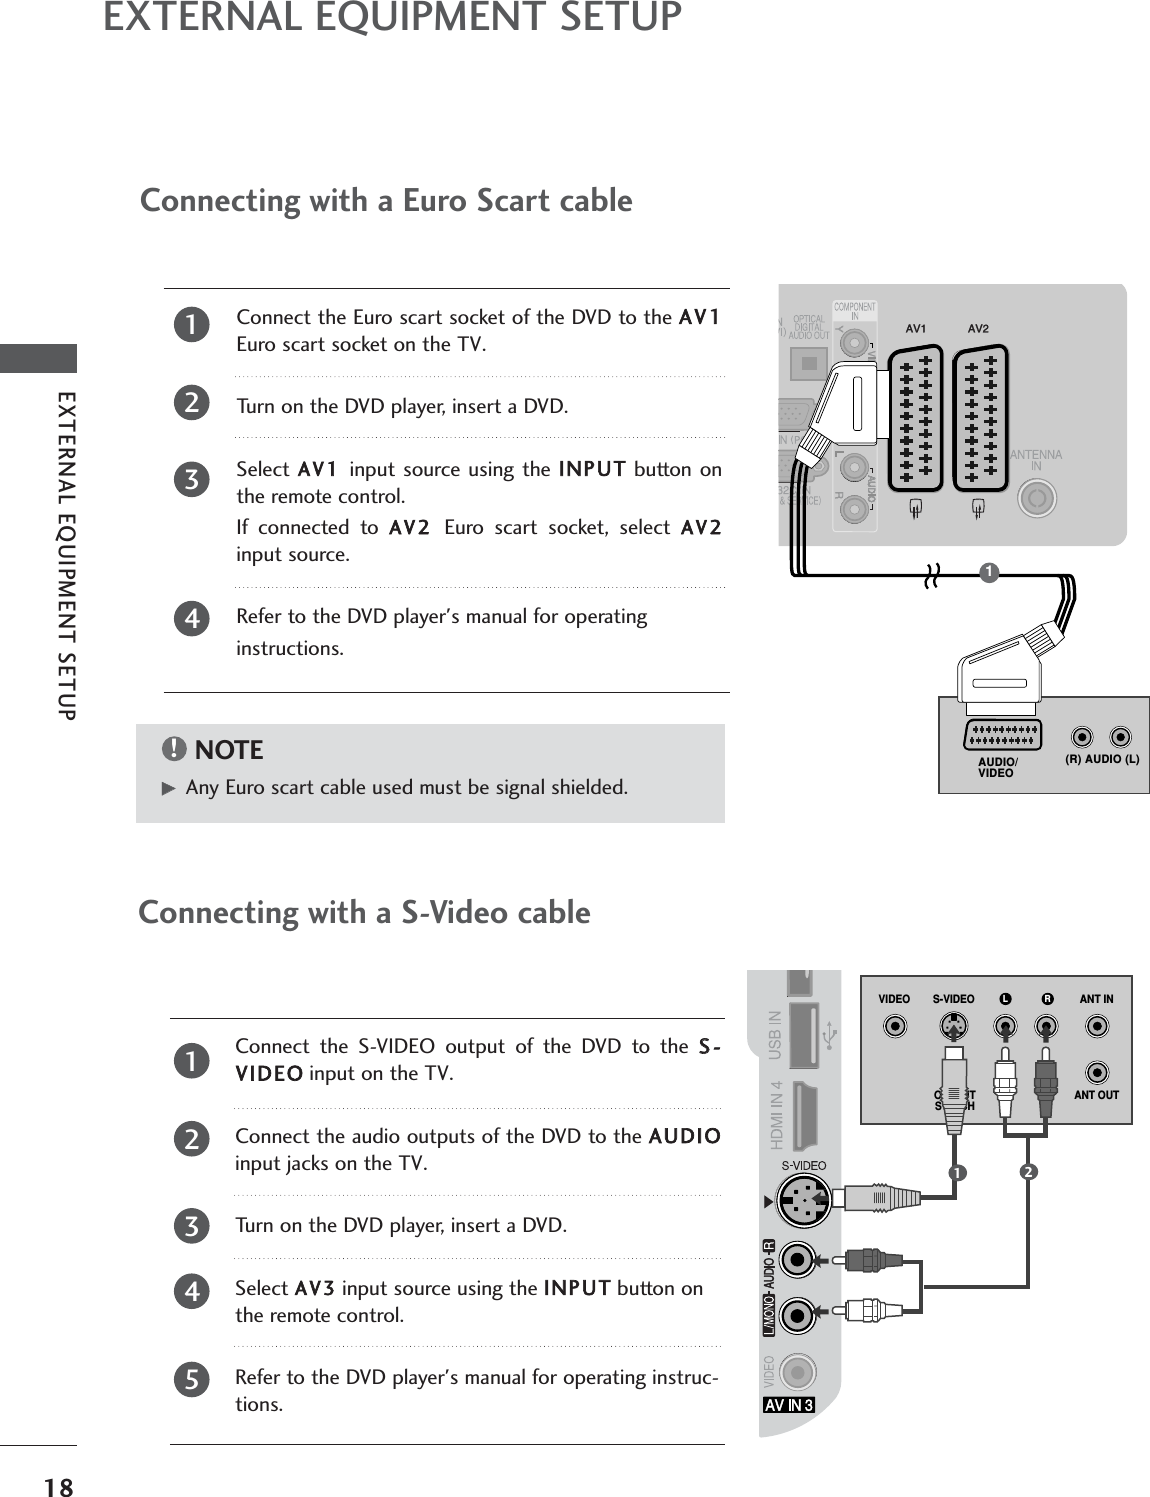

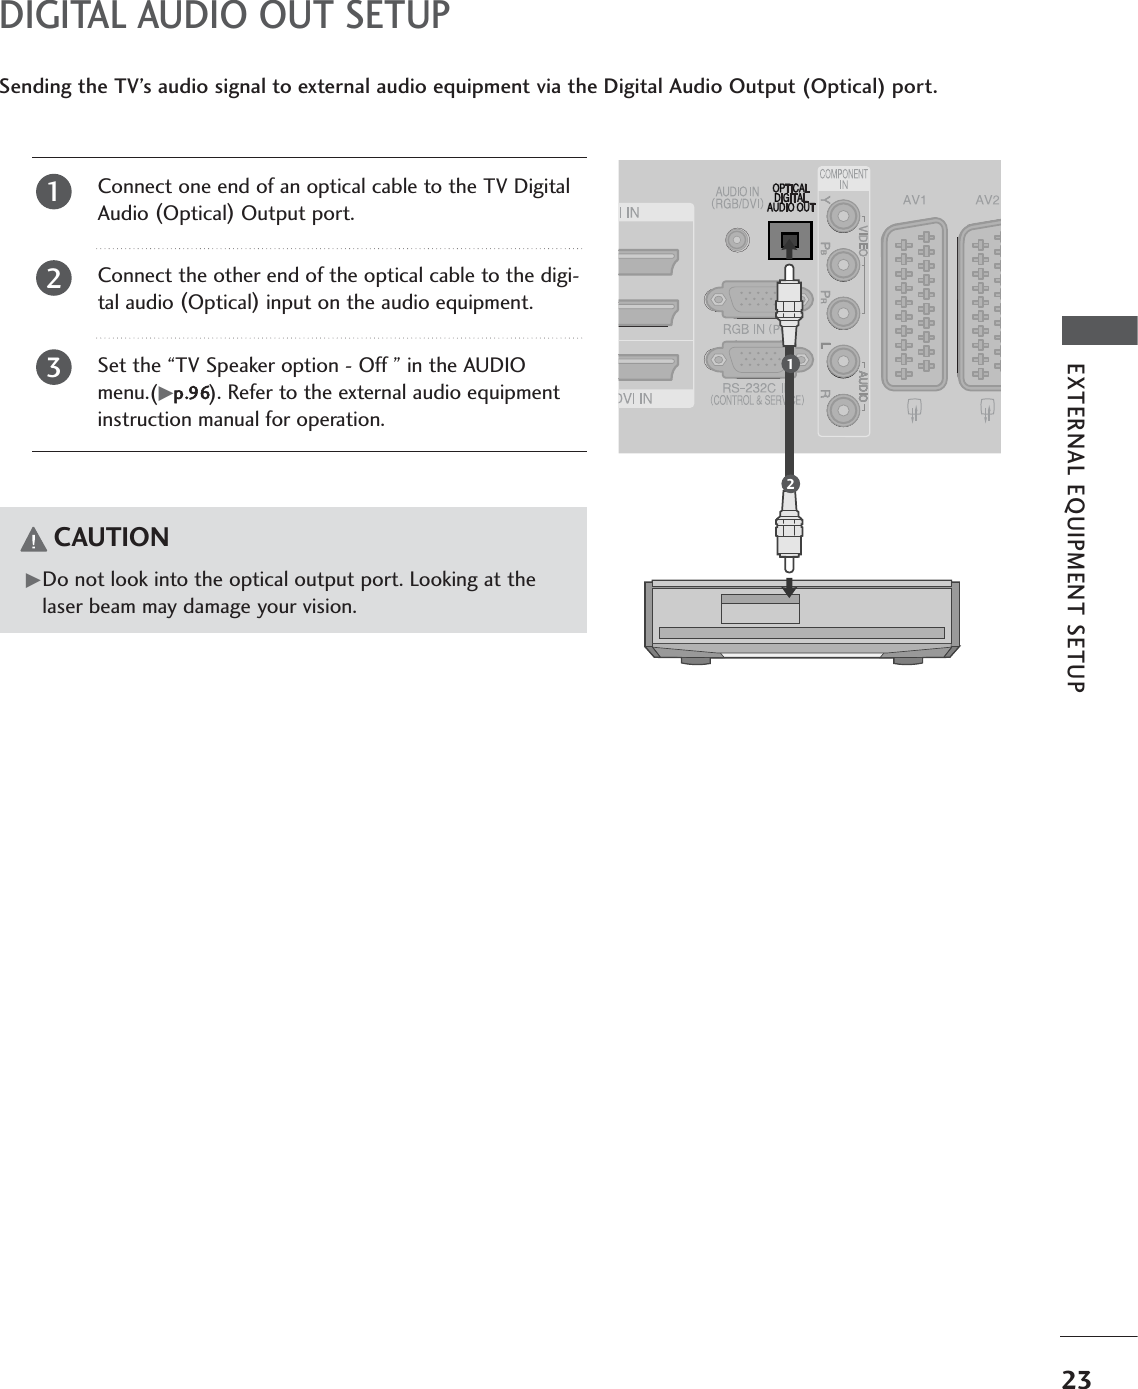
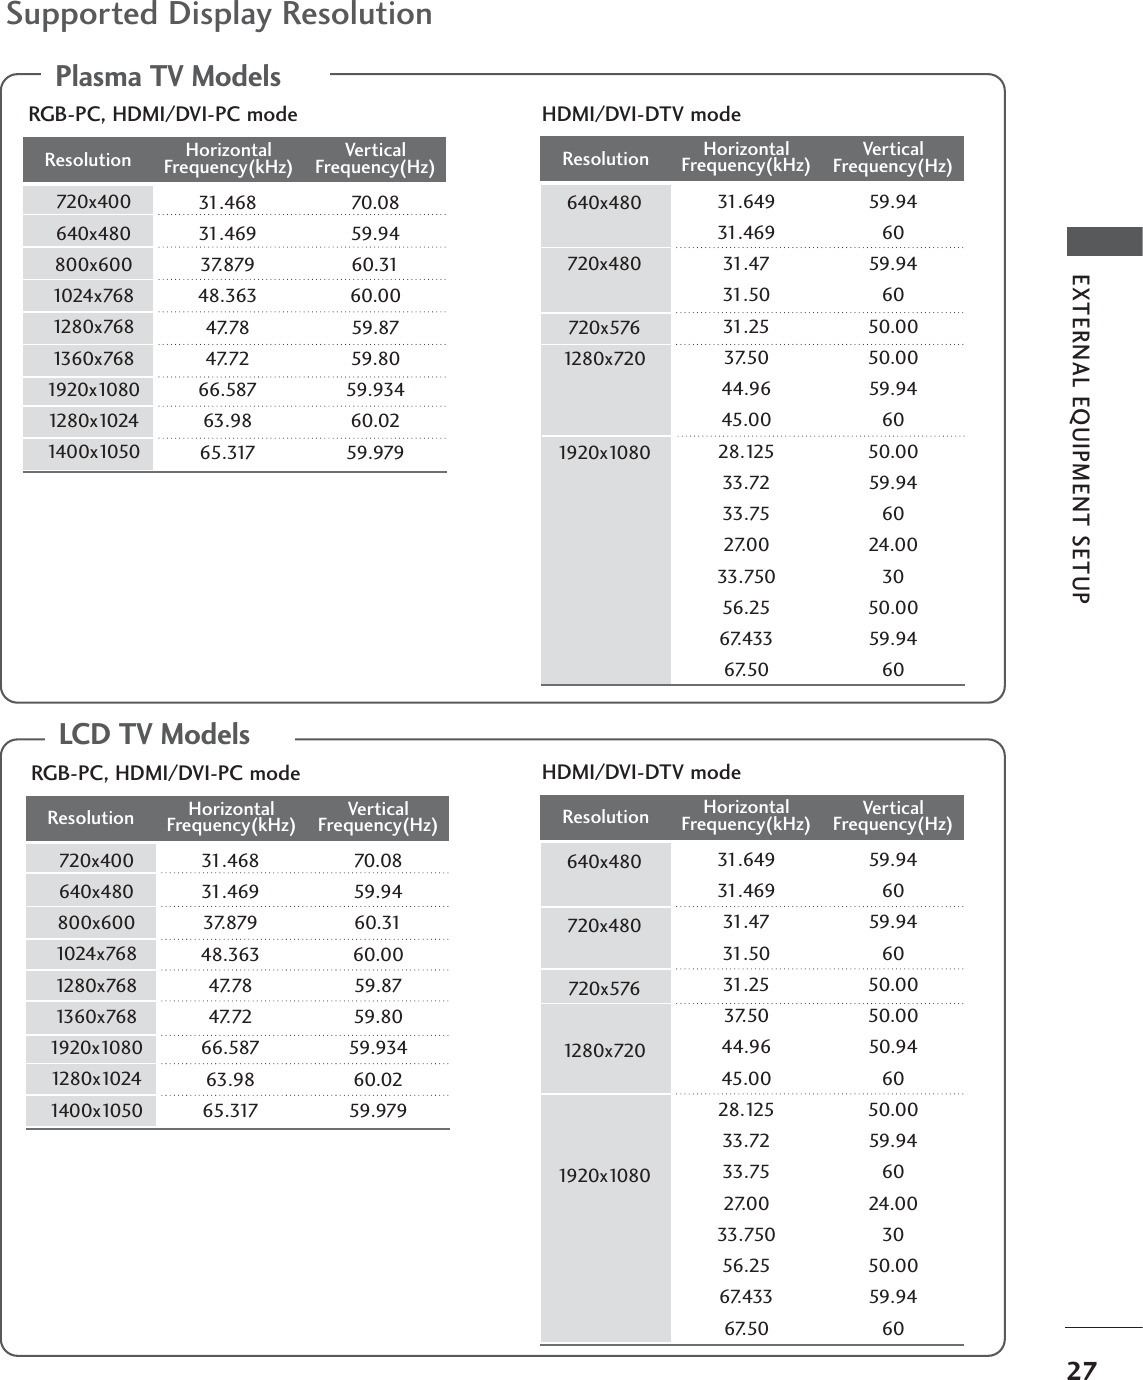
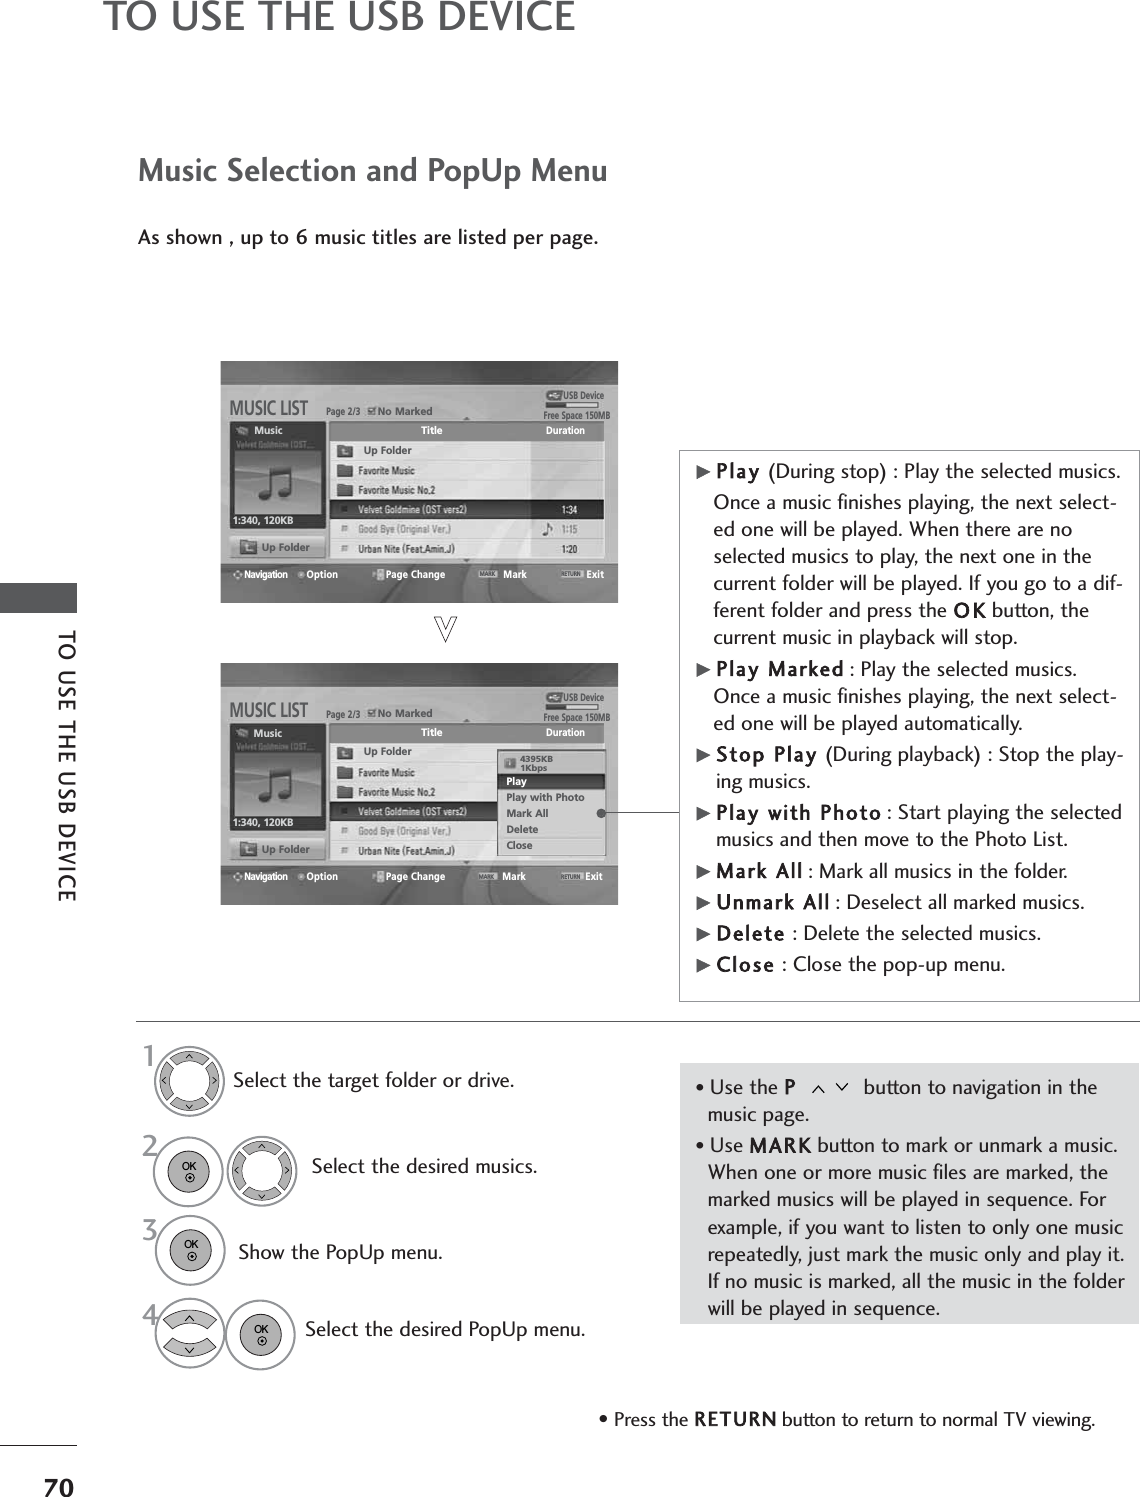
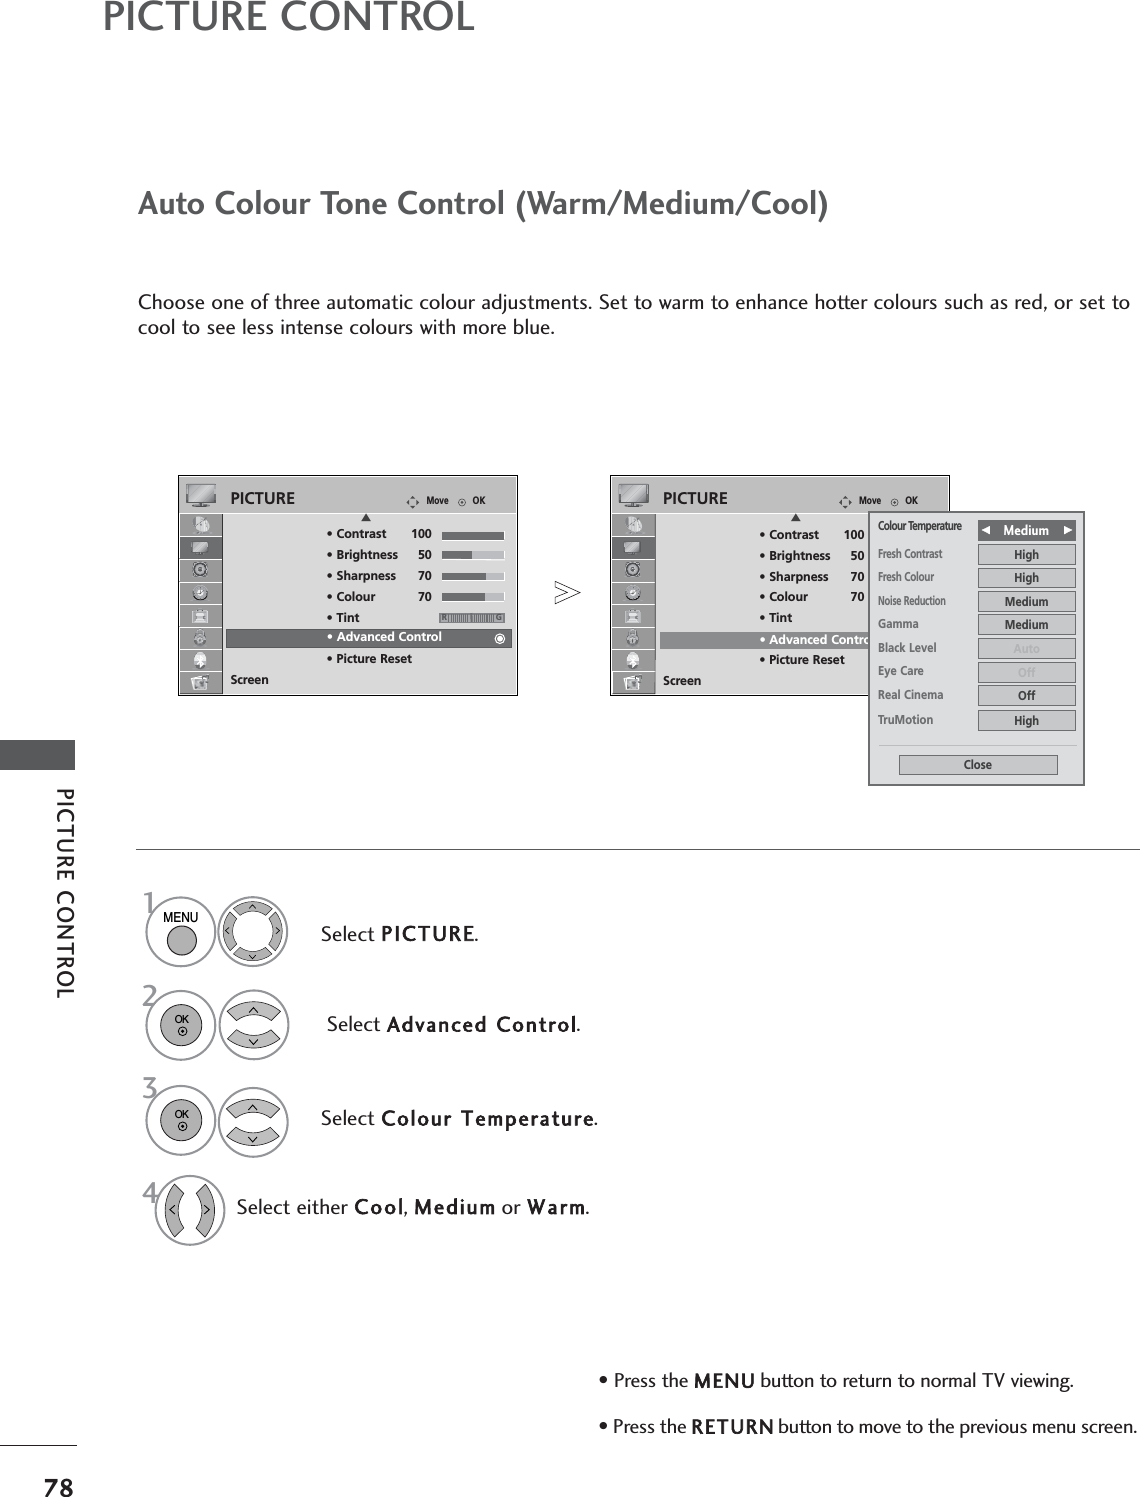
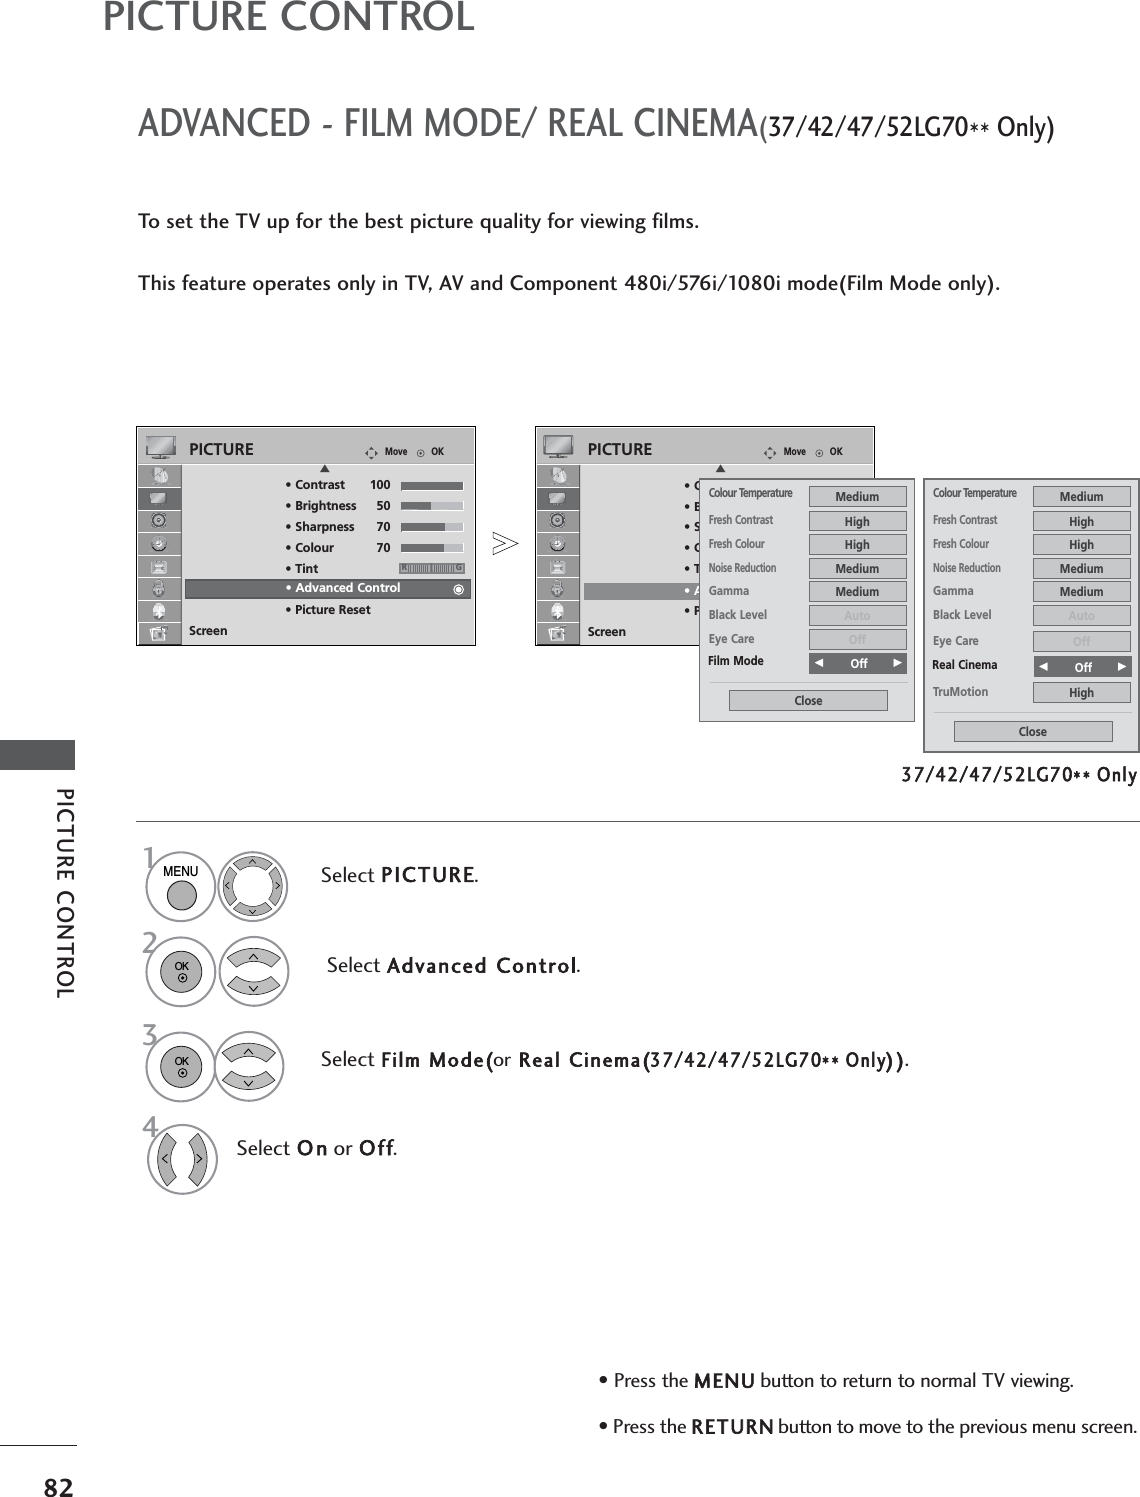
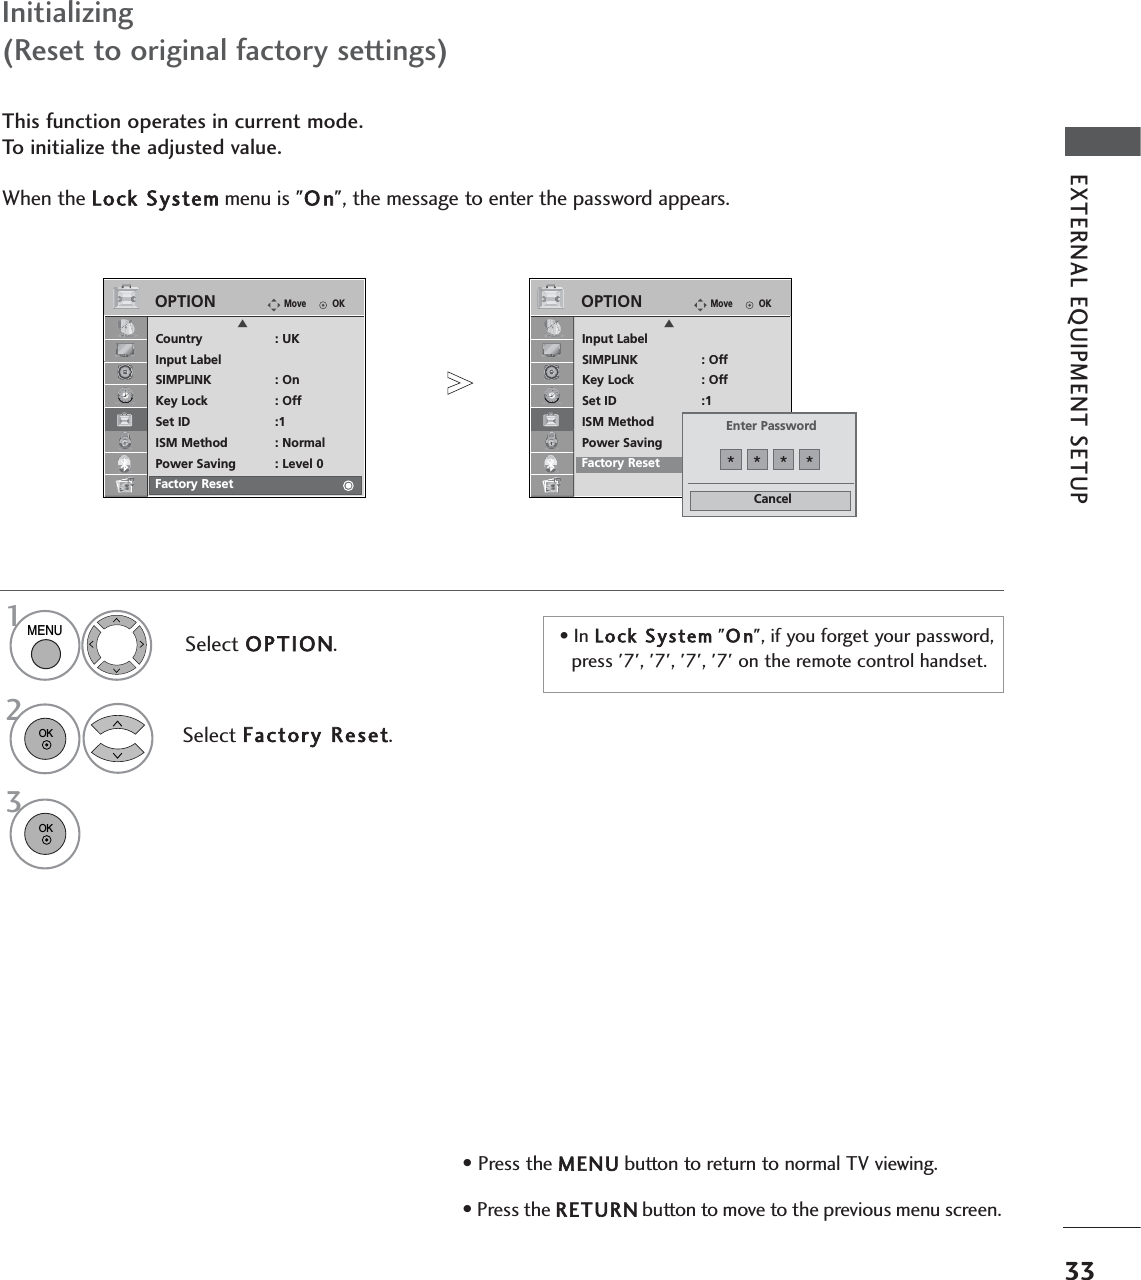
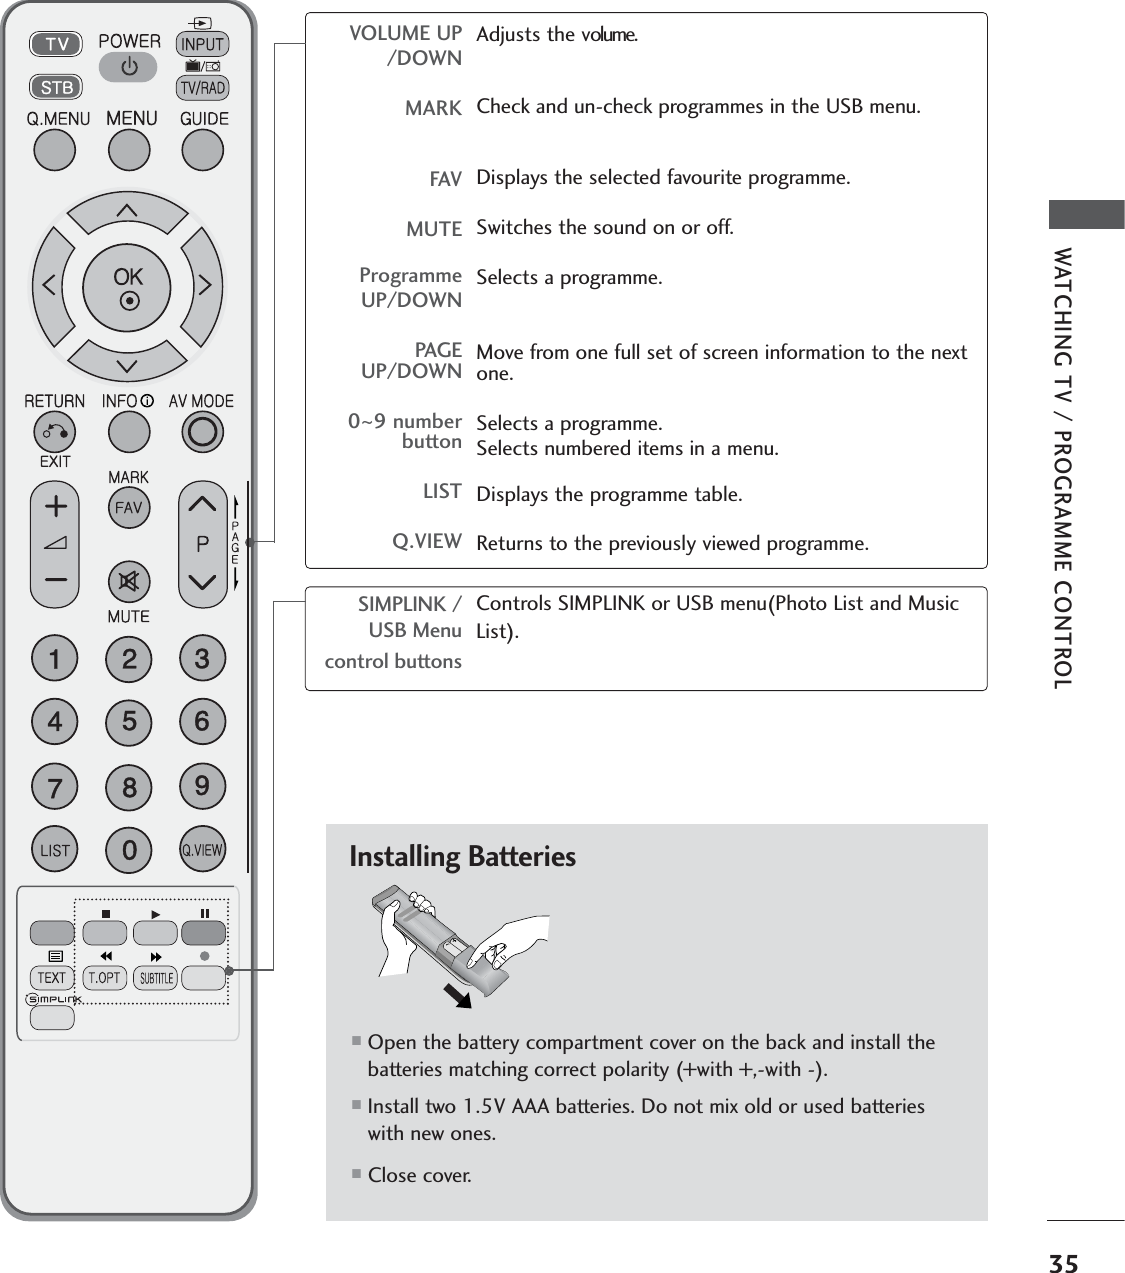
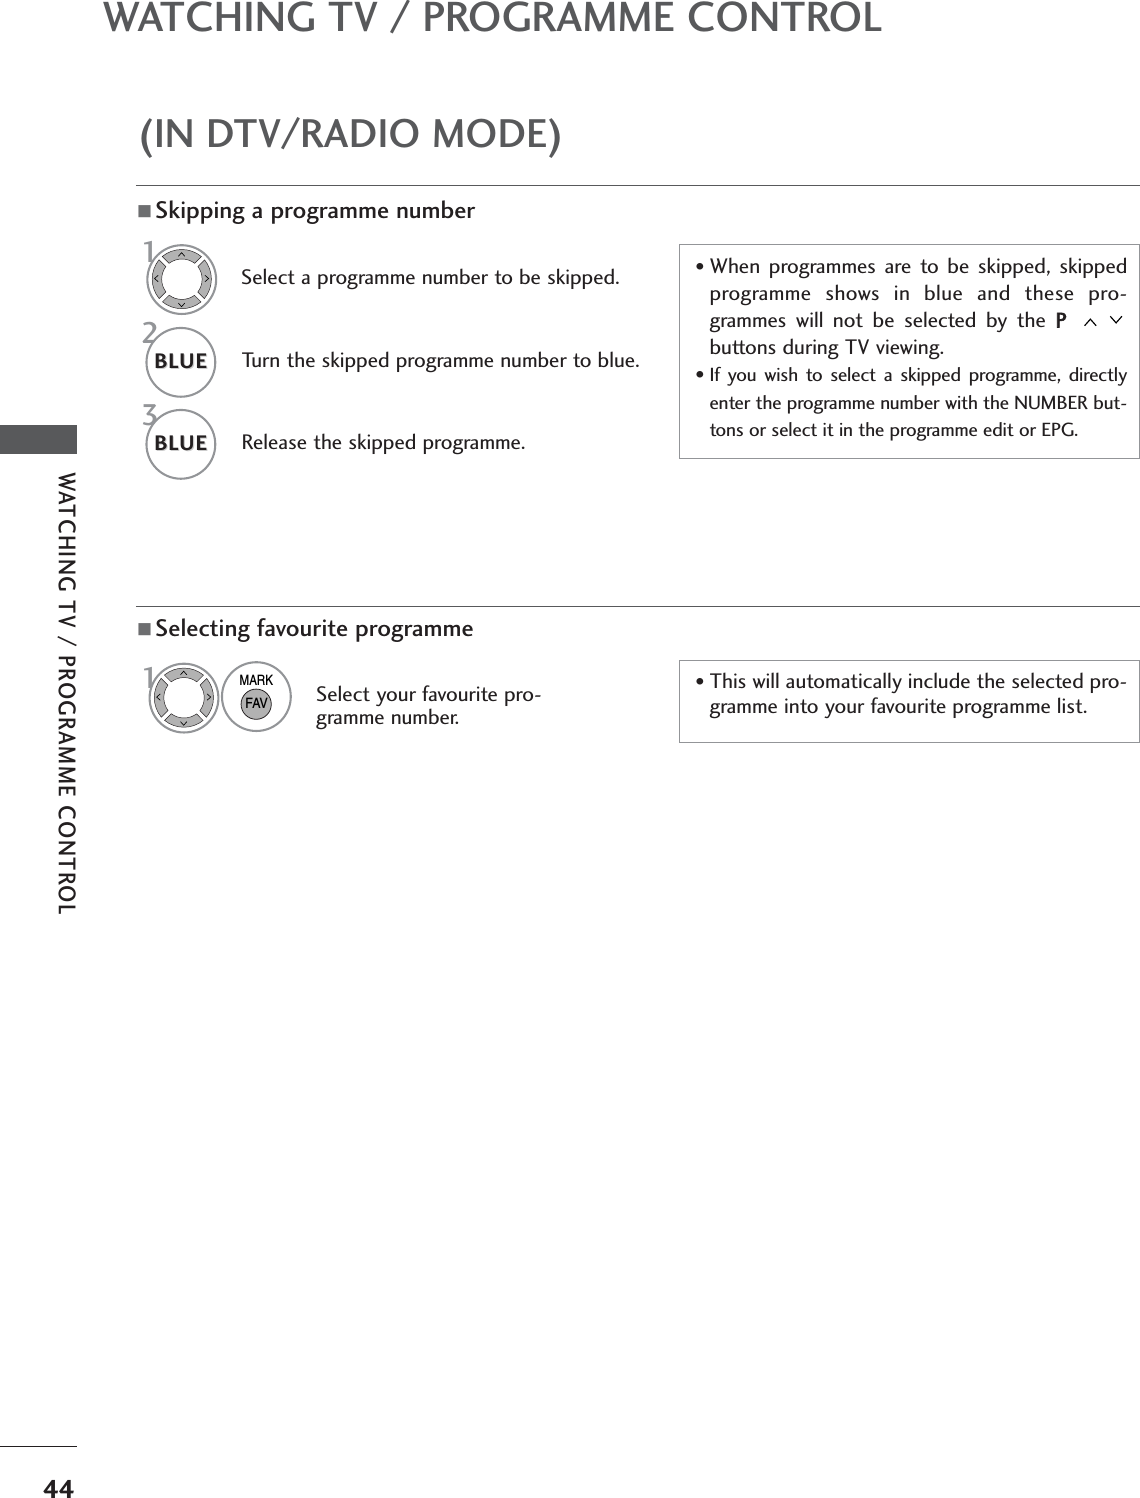
![1MENU29EXTERNAL EQUIPMENT SETUPScreen Setup for PC modeReturns Position, Size and Phase to the factory default settings.This function works in the following mode : RGB[PC].Screen ResetSelect PICTURE.Select SCREEN.3Select Reset.To SetAuto Config.SCREENMovePrev.RETURNResolutionPositionSizePhaseResetGOKMove• Contrast 90• Brightness 50• Sharpness 60• Colour 60• Tint 0• Advanced Control• Picture ResetScreenPICTUREEScreen2OK OK RG• Press the MENUbutton to return to normal TV viewing.• Press the RETURN button to move to the previous menu screen.Select Yes.Run Reset.4OK 5OK](https://usermanual.wiki/LG-Electronics-USA/EAX57538201.Host-user-manual-1-of-2/User-Guide-1067069-Page-31.png)
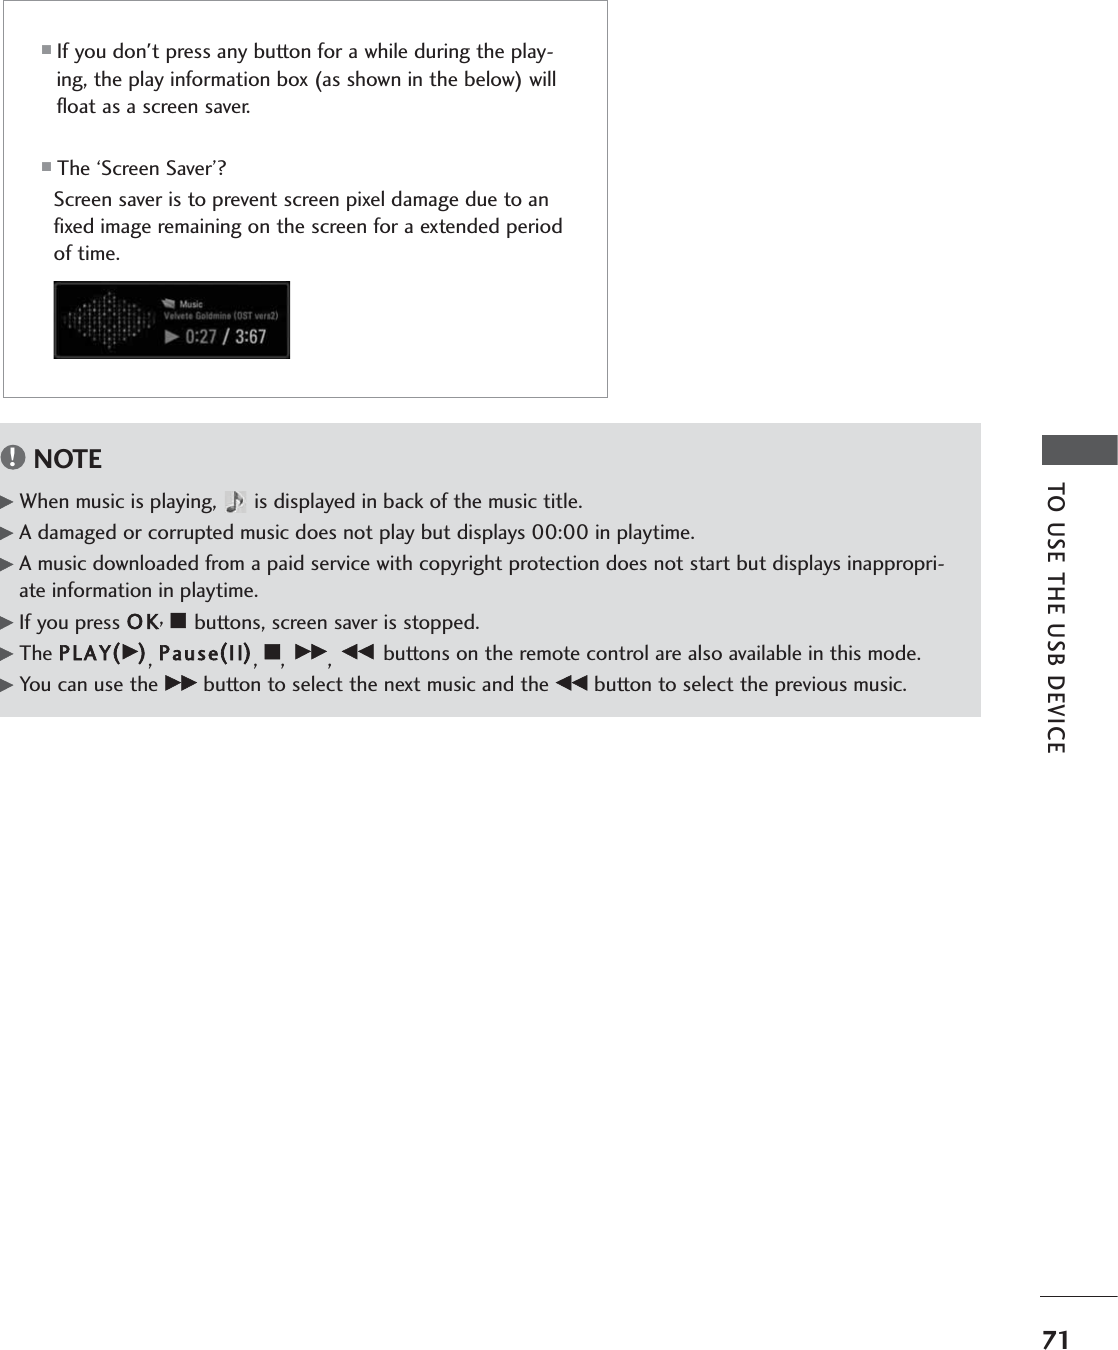
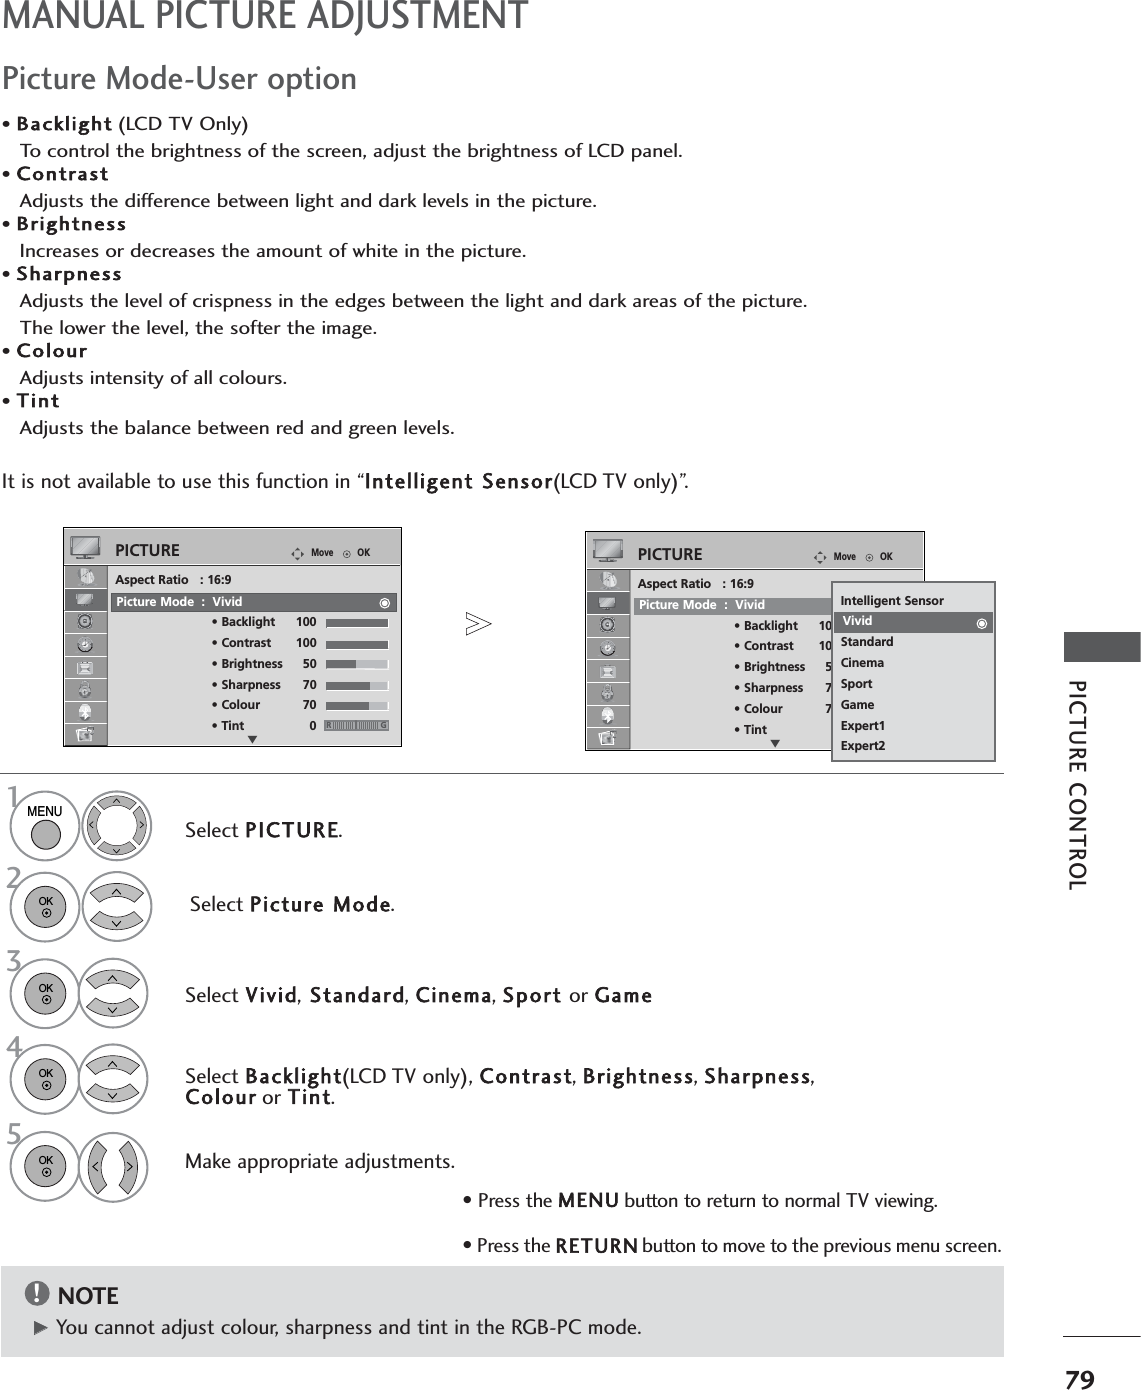
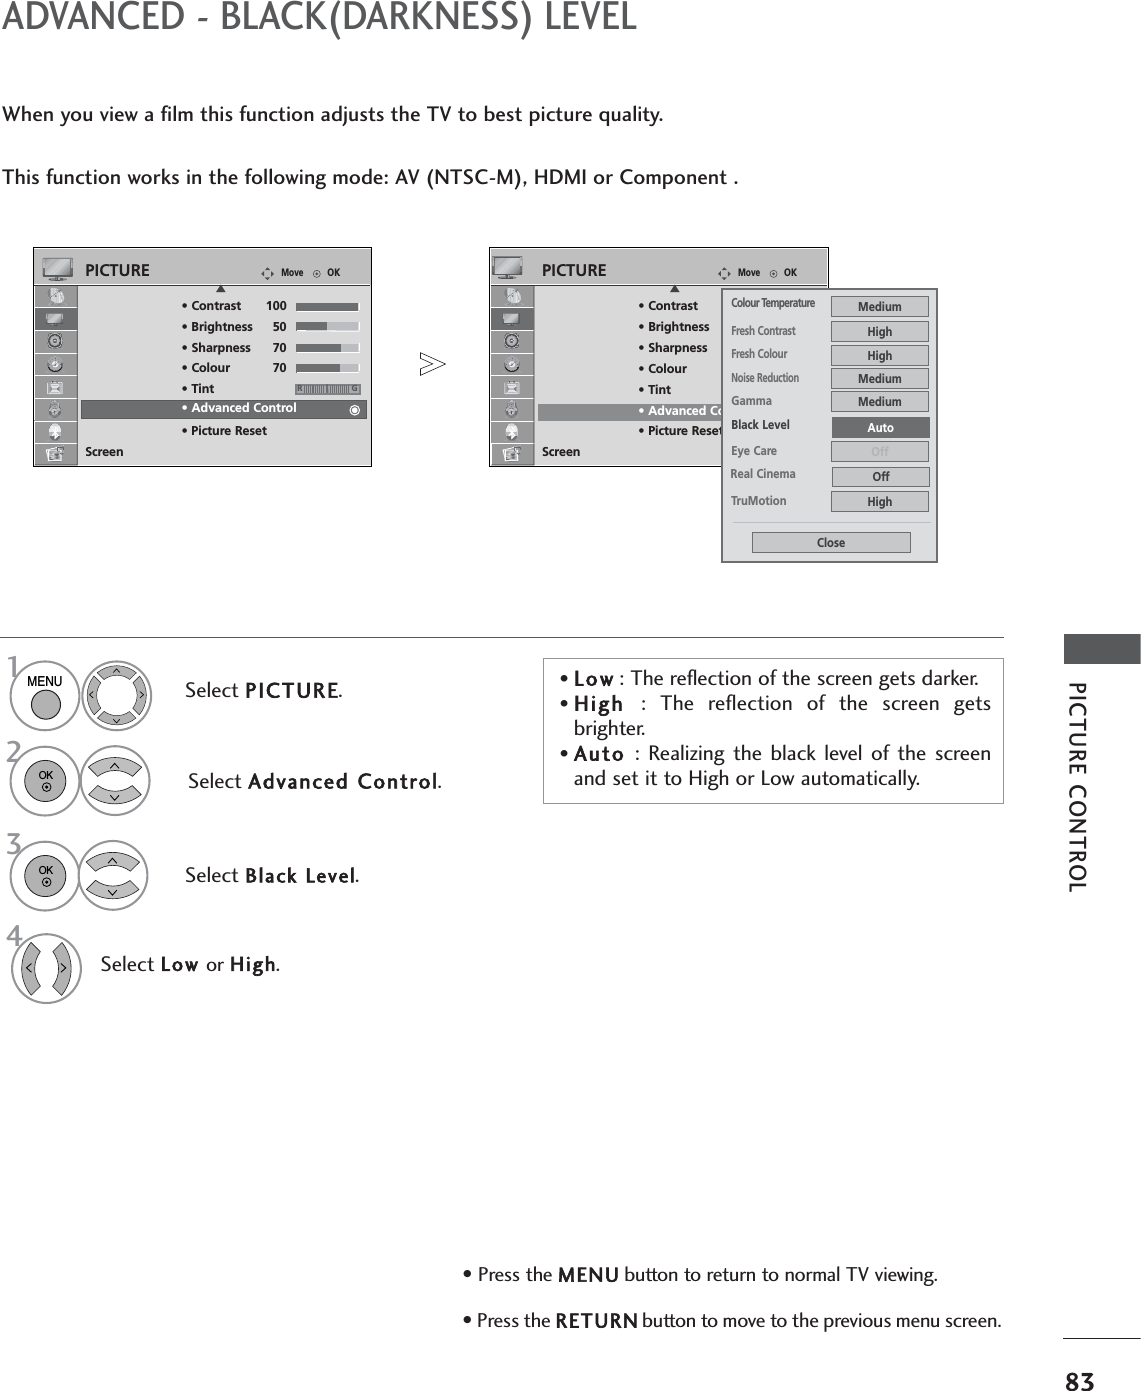
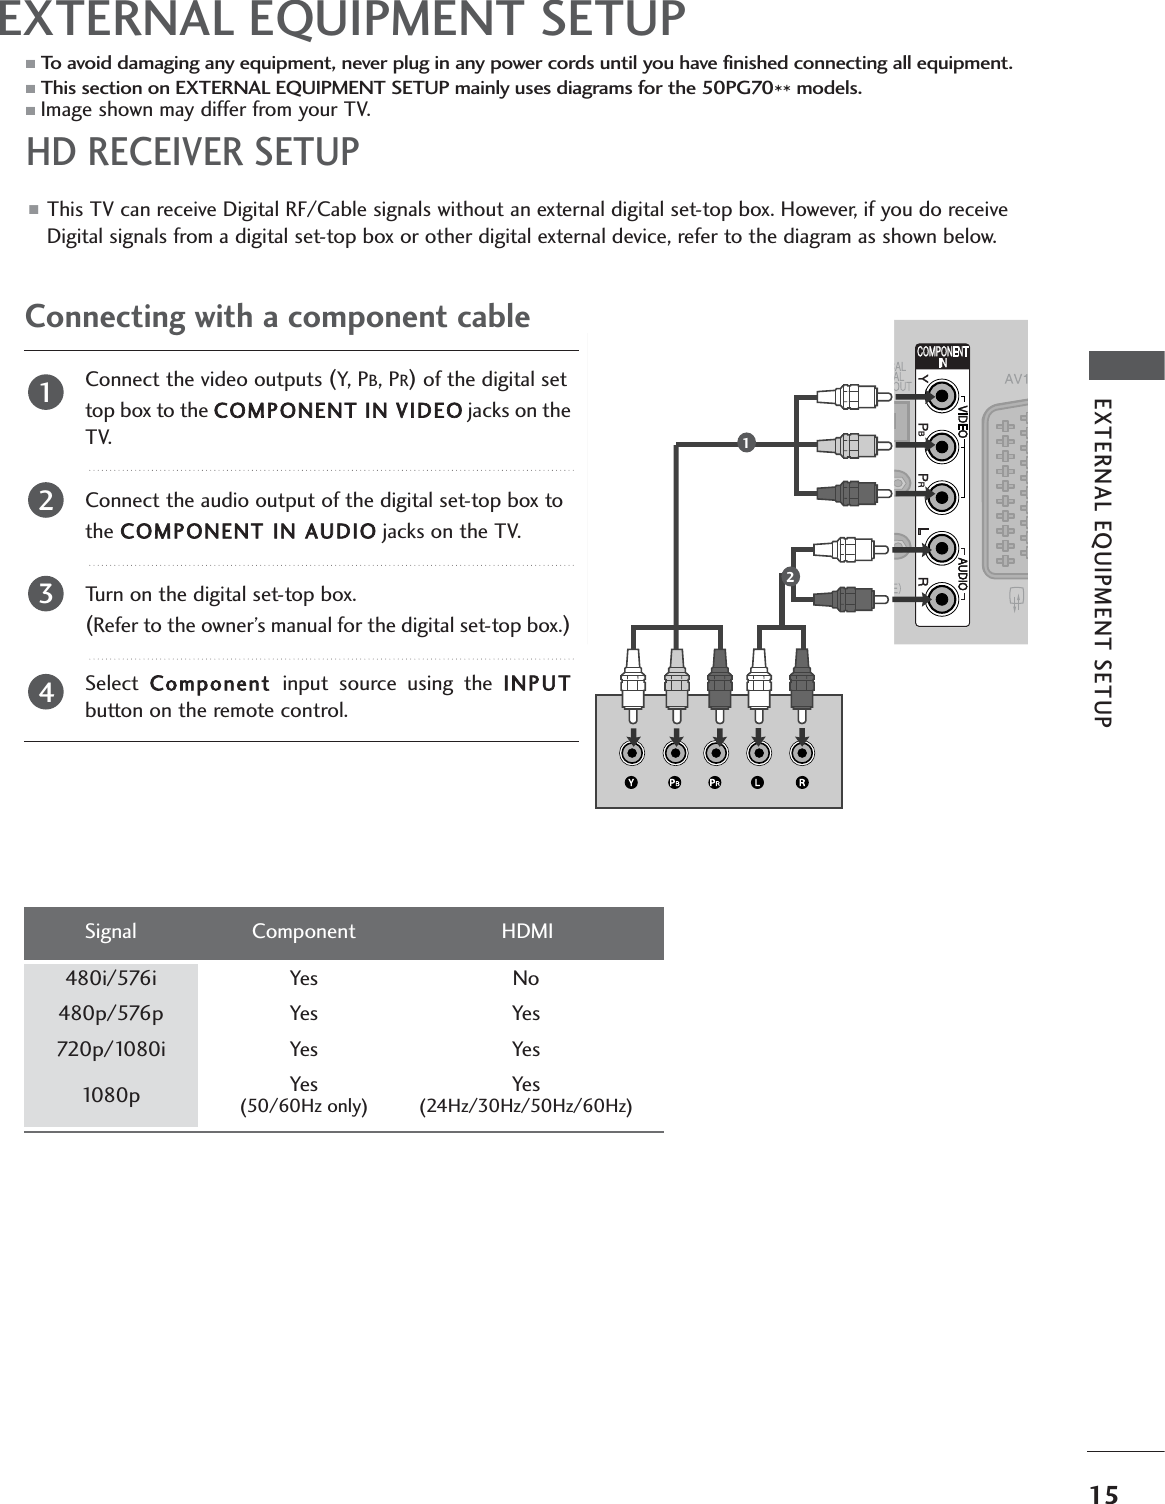
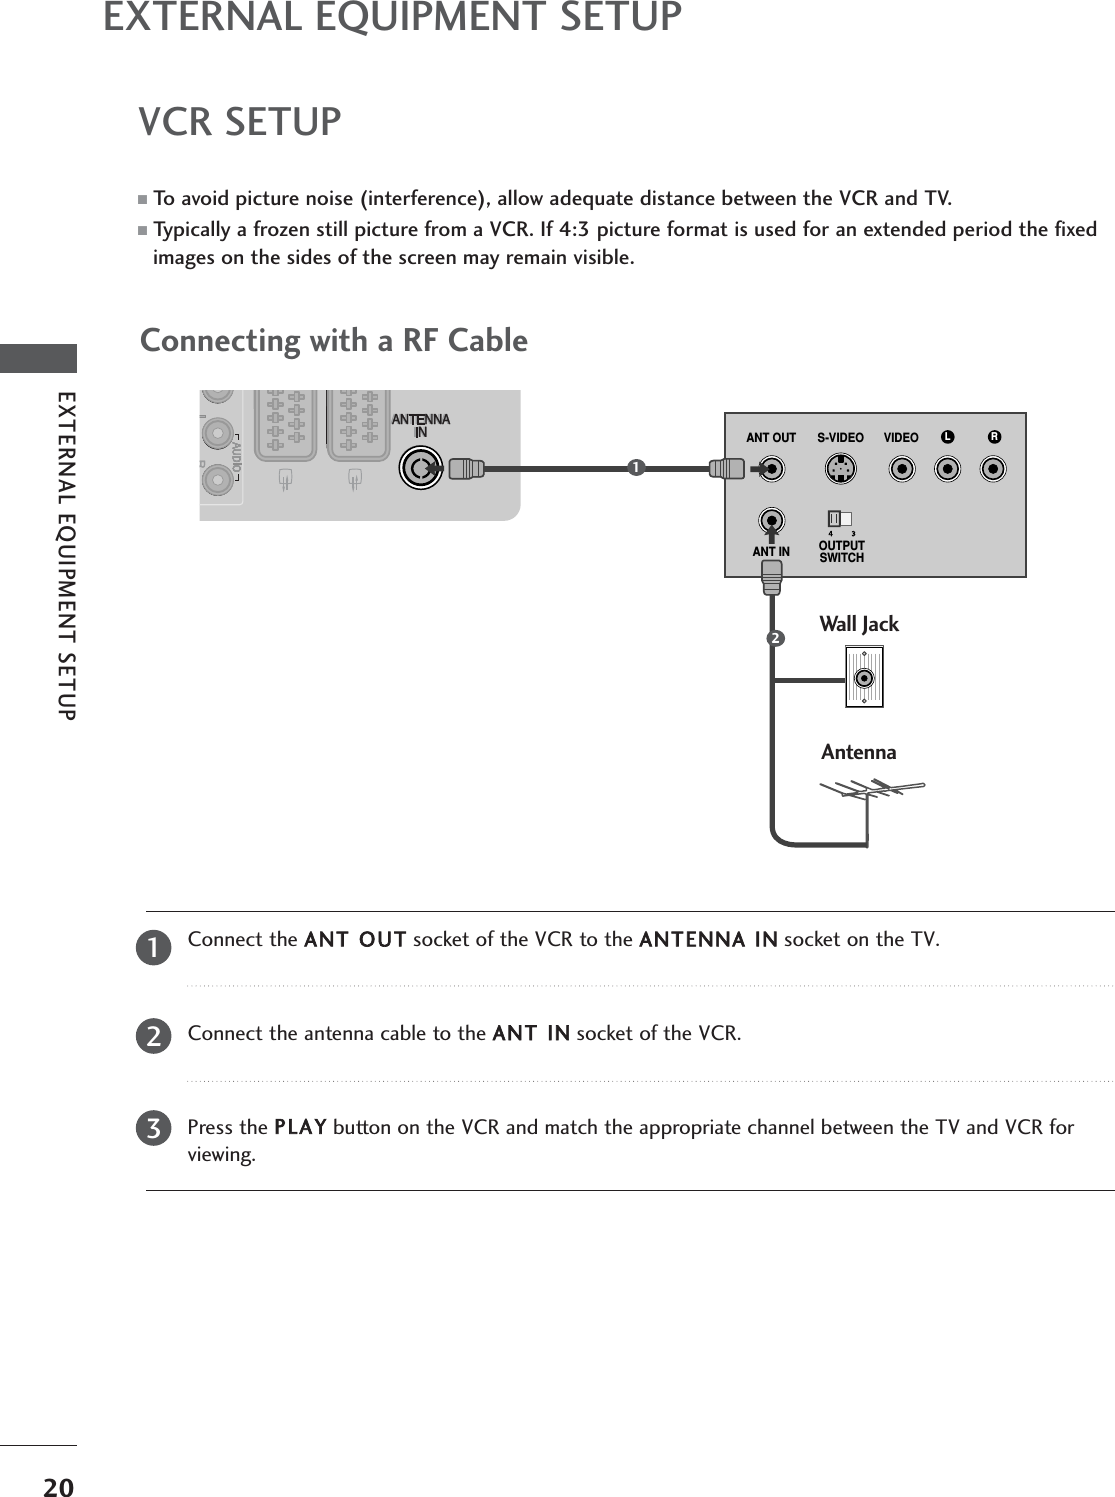
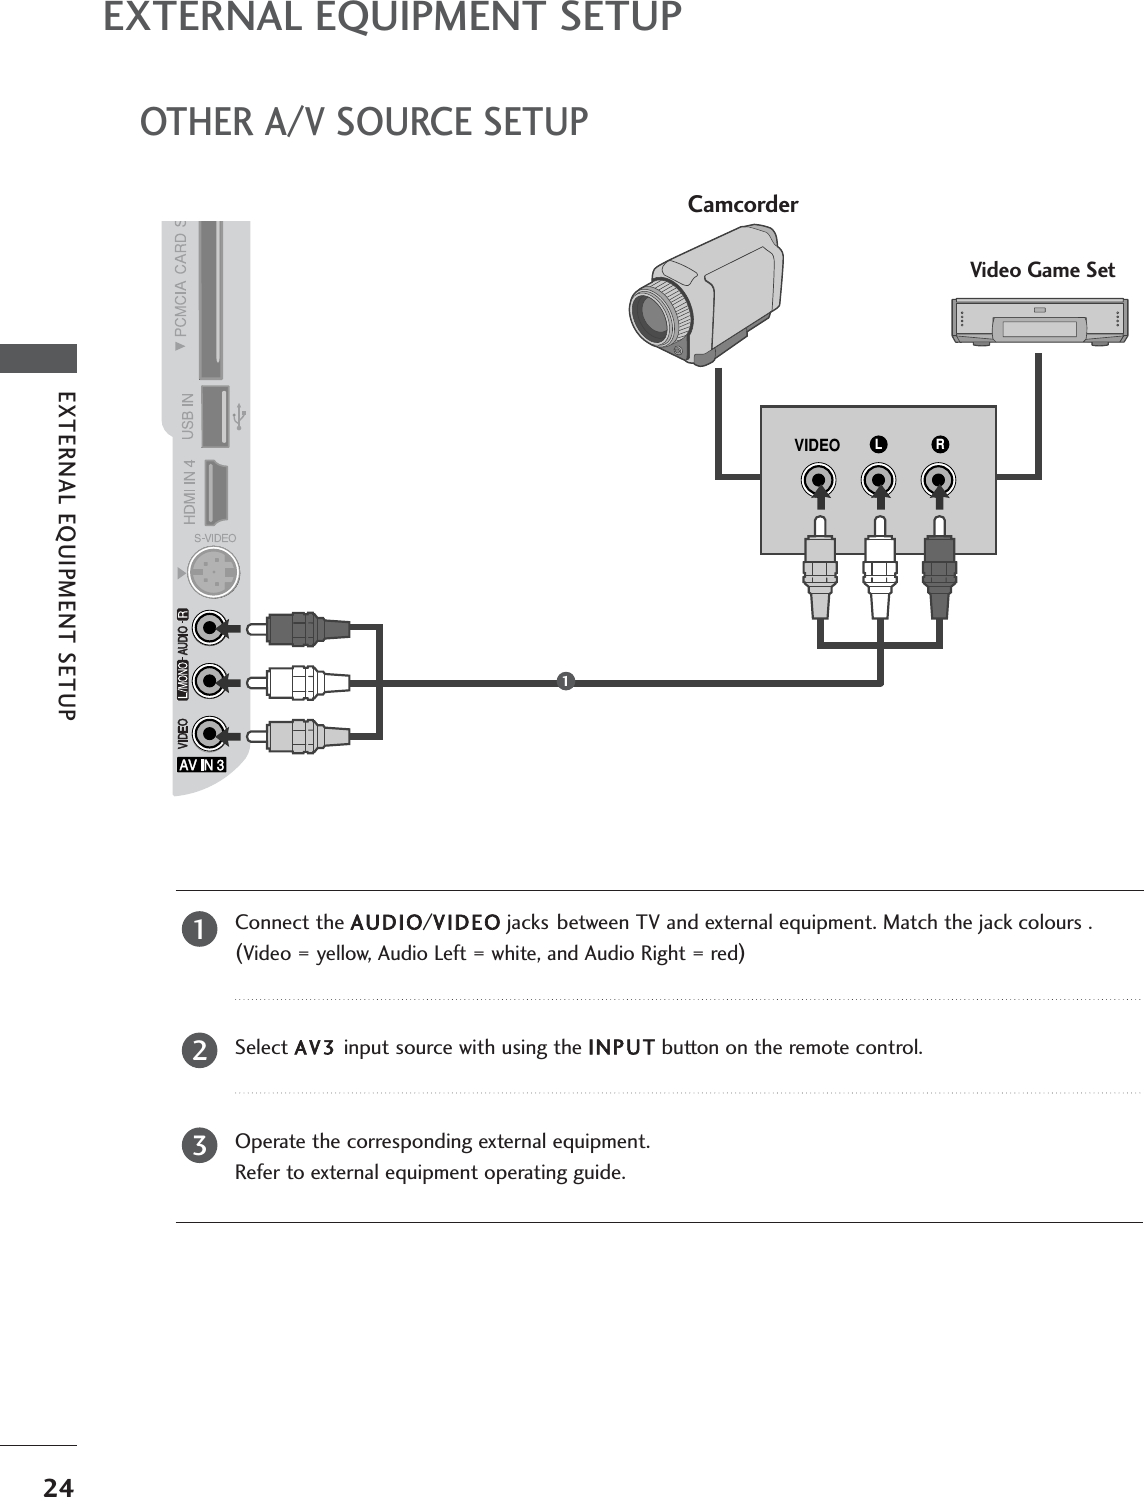
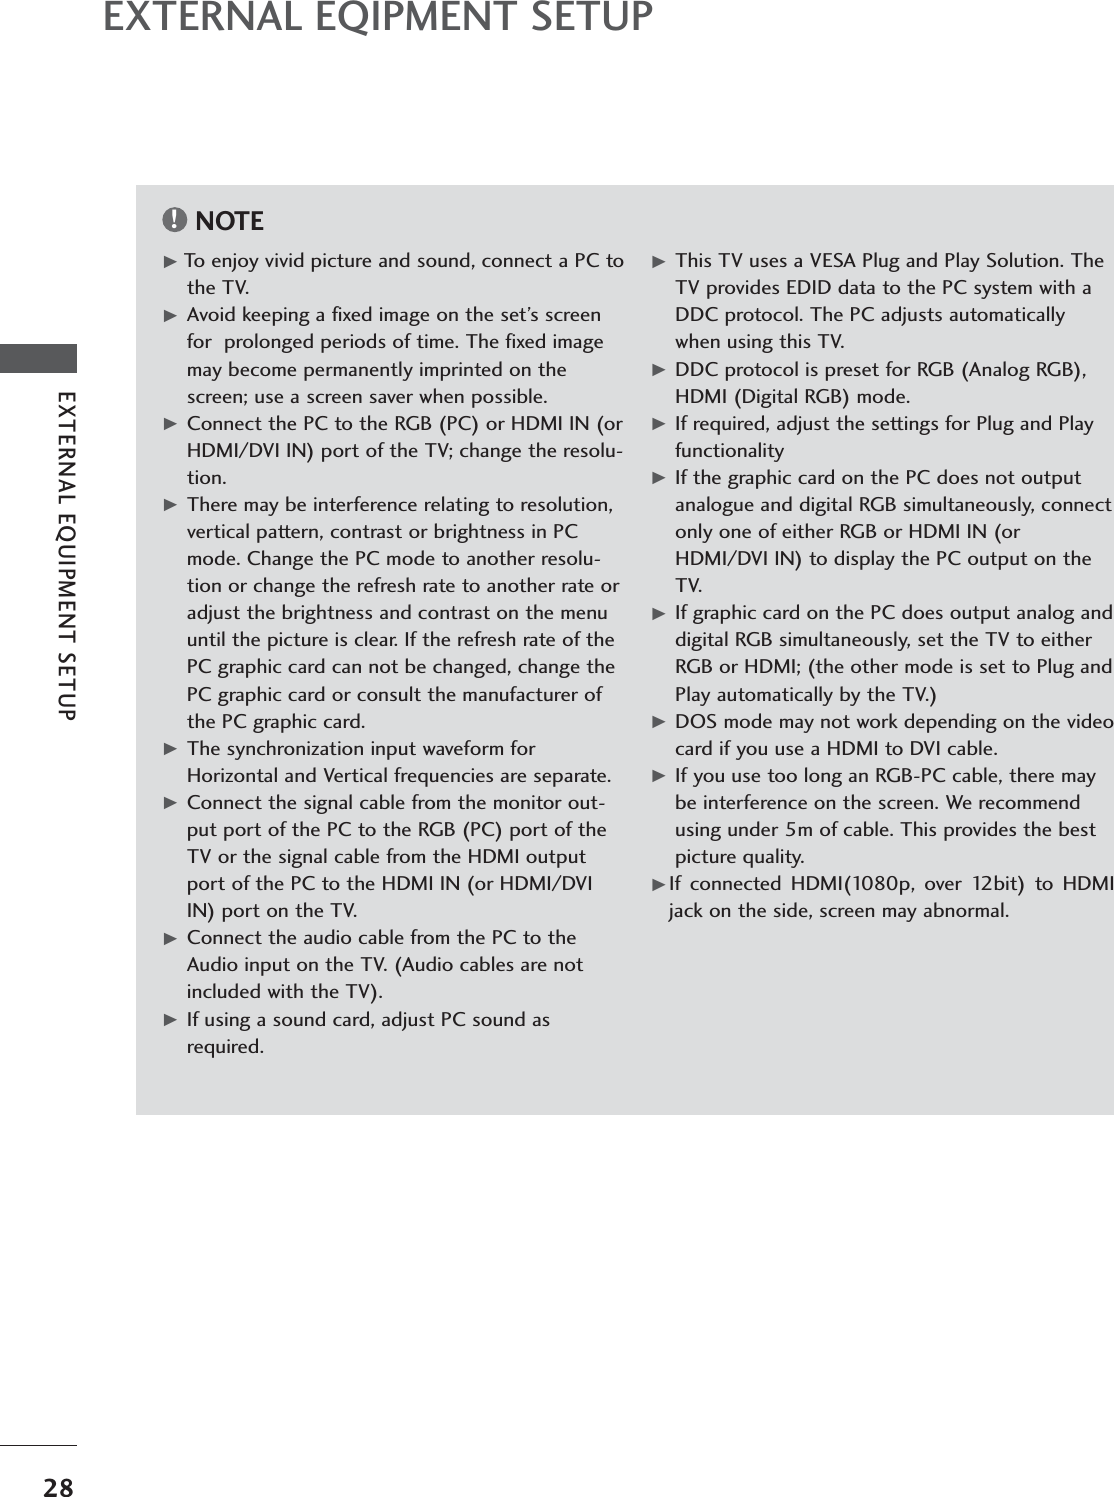
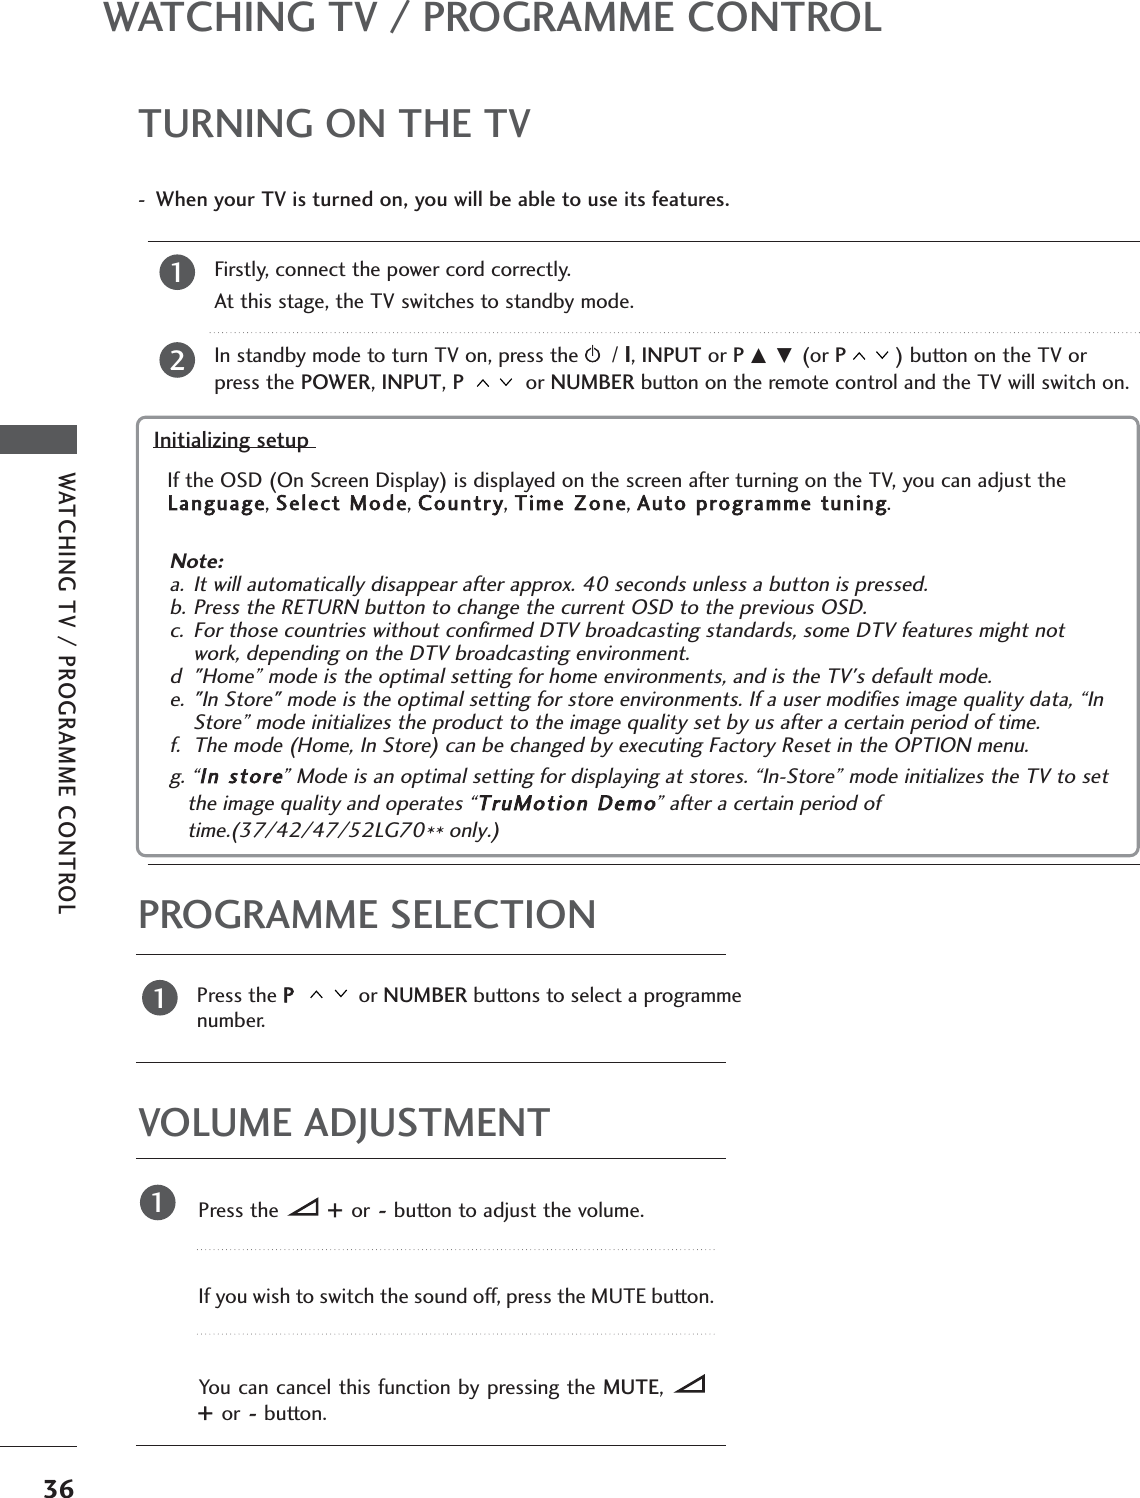
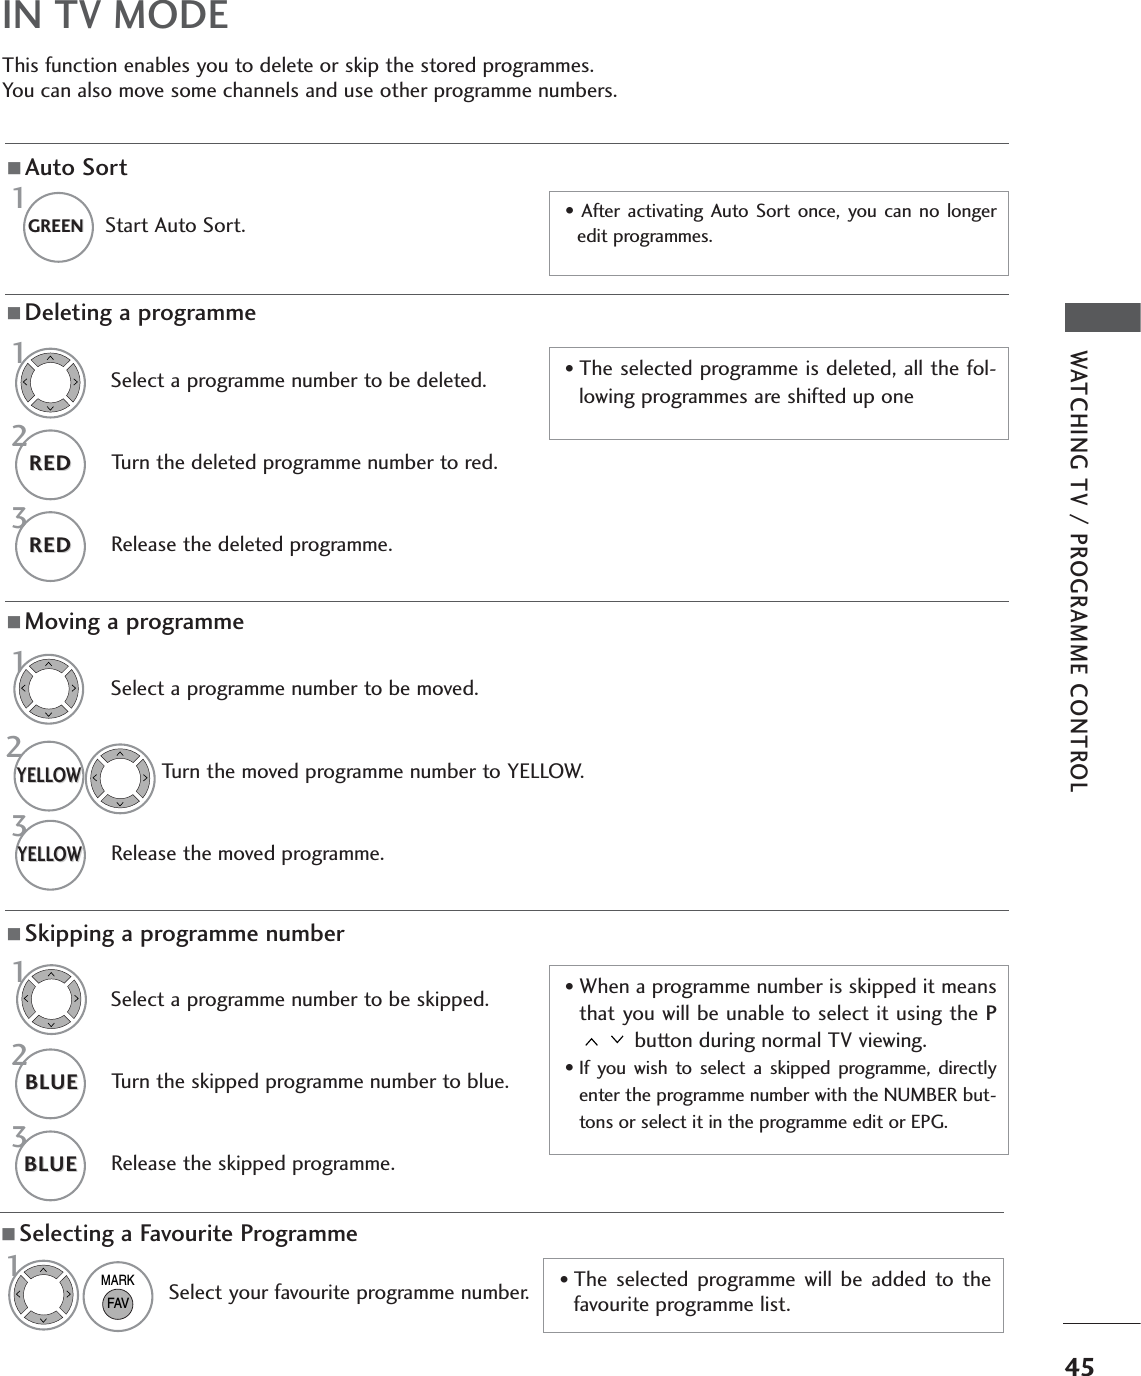
![30EXTERNAL EQIPMENT SETUPEXTERNAL EQUIPMENT SETUPIf the picture is not clear after auto adjustment and especially if characters are still trembling, adjust the pic-ture phase manually.This function works in the following mode : RGB[PC].Adjustment for screen Position, Size, PhaseSelect PICTURE.Select SCREEN.Select Position, Size or Phase.Make appropriate adjustments.Auto Config.ResolutionPositionGSizePhaseResetGFDEOKMove• Contrast 90• Brightness 50• Sharpness 60• Colour 60• Tint 0• Advanced Control• Picture ResetScreenPICTUREEScreenSCREENMovePrev.1MENU342OK OK RG• Press the MENUbutton to return to normal TV viewing.• Press the RETURNbutton to move to the previous menu screen.RETURN](https://usermanual.wiki/LG-Electronics-USA/EAX57538201.Host-user-manual-1-of-2/User-Guide-1067069-Page-32.png)
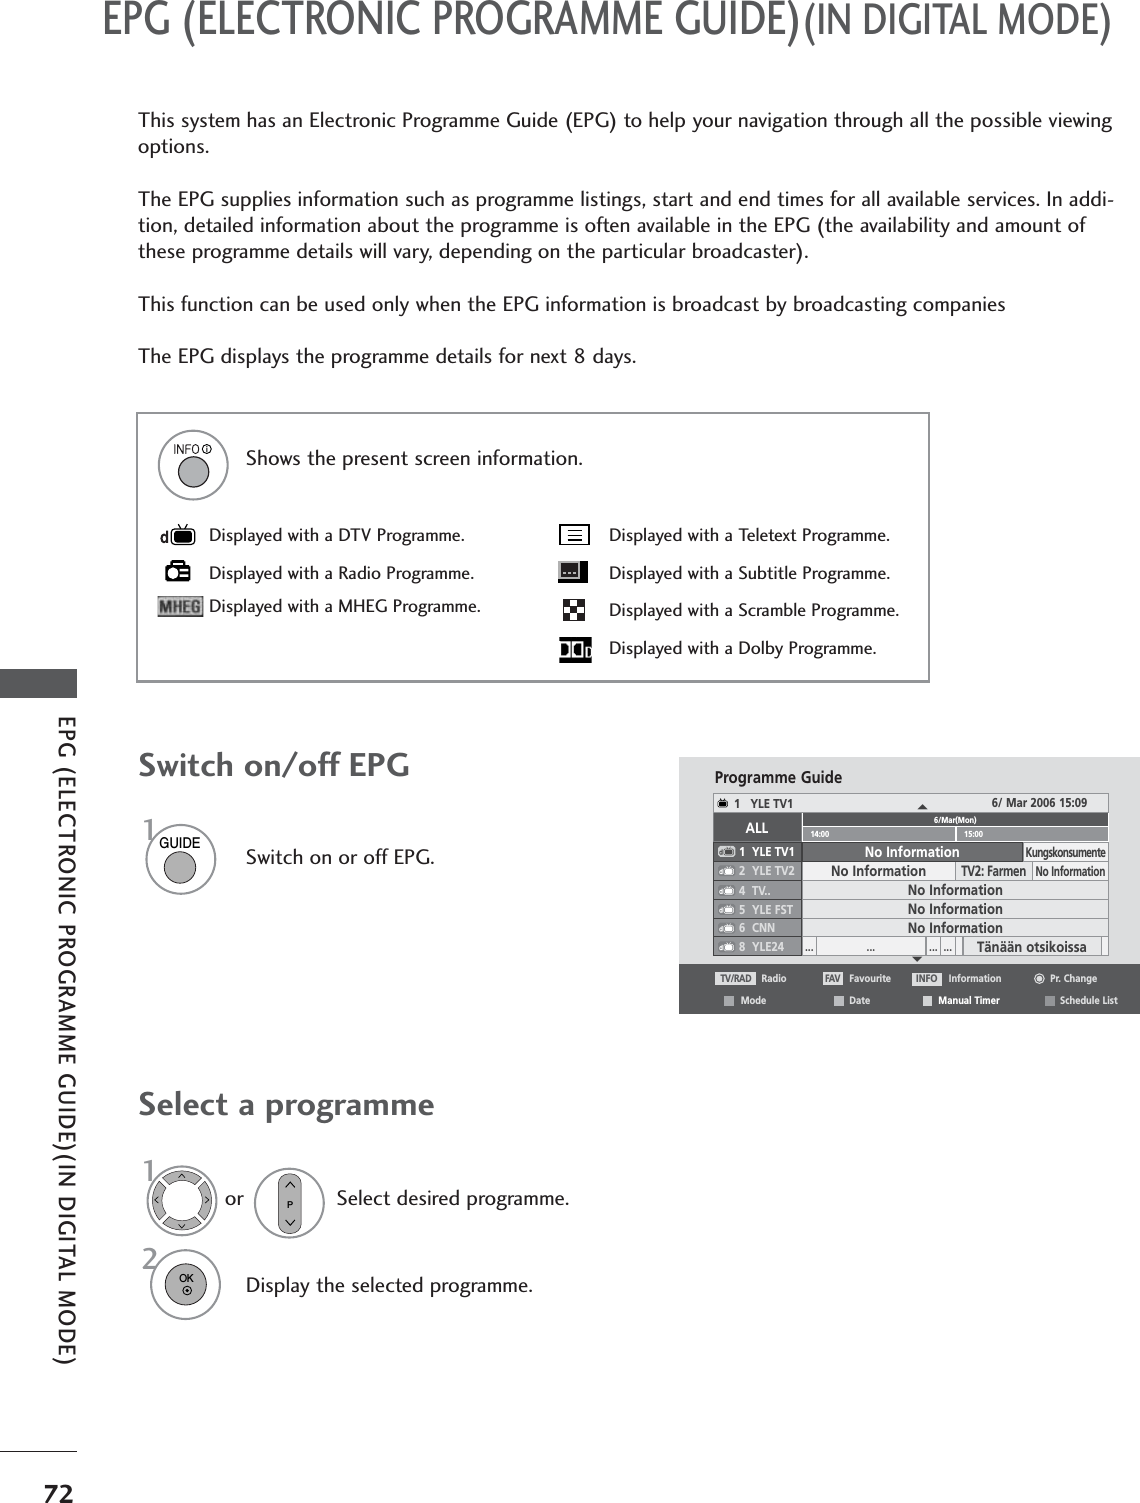
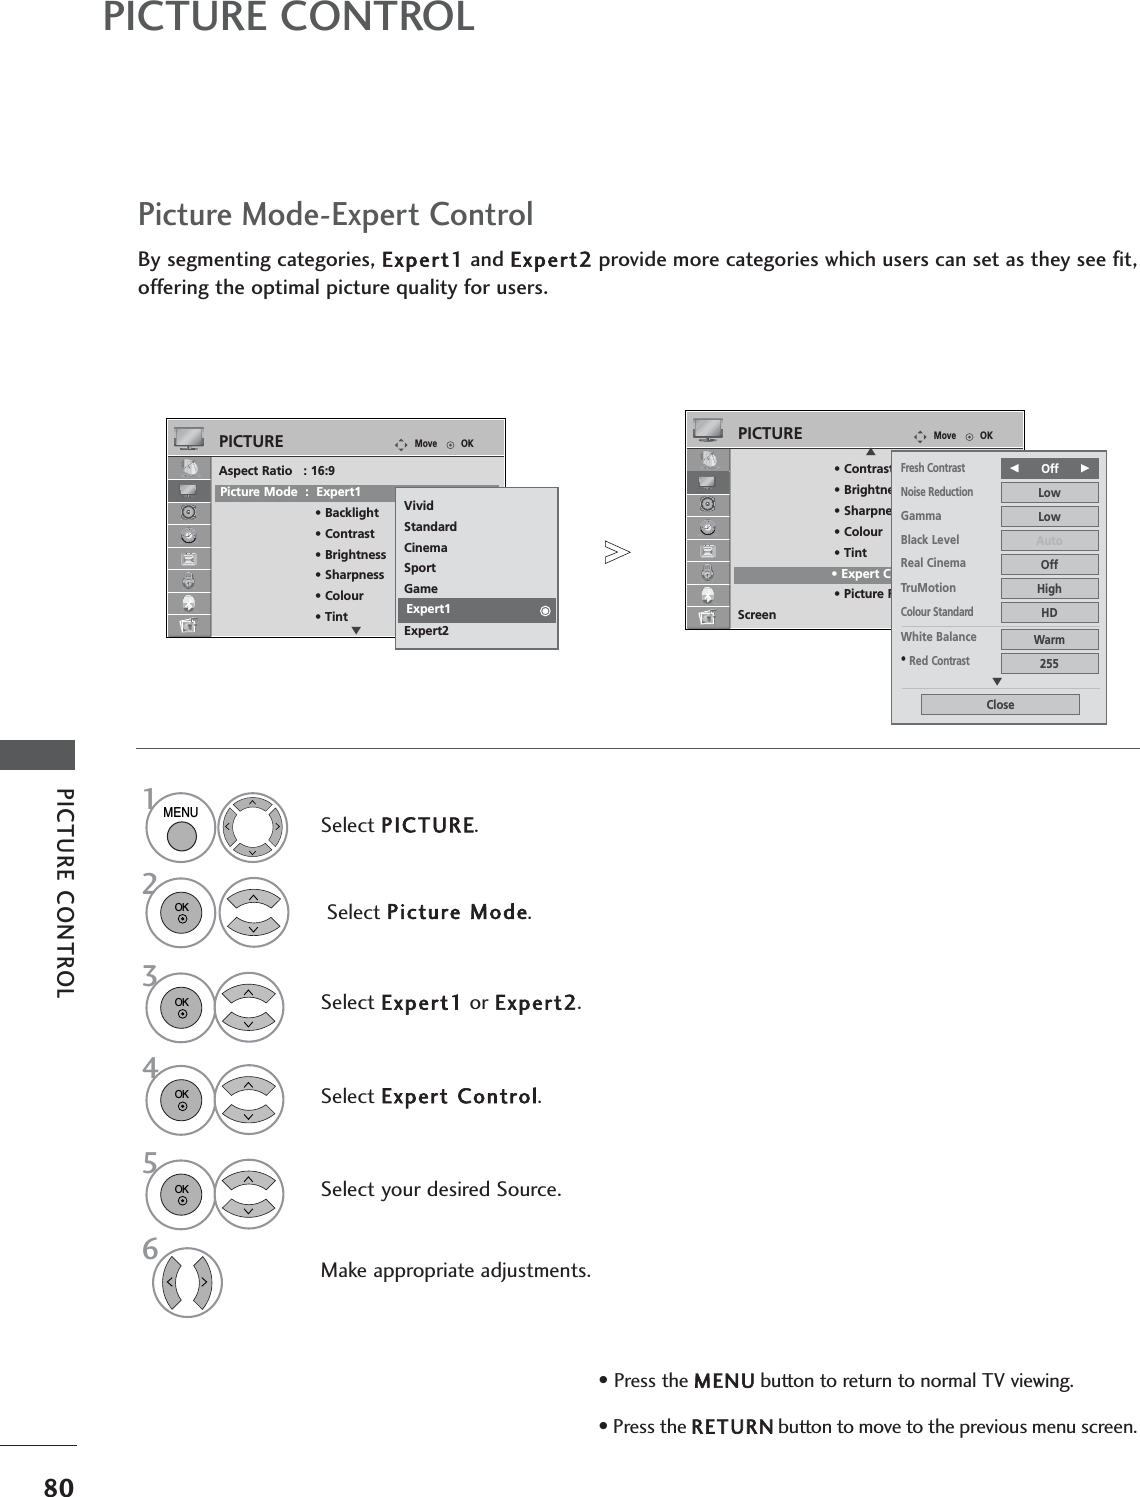
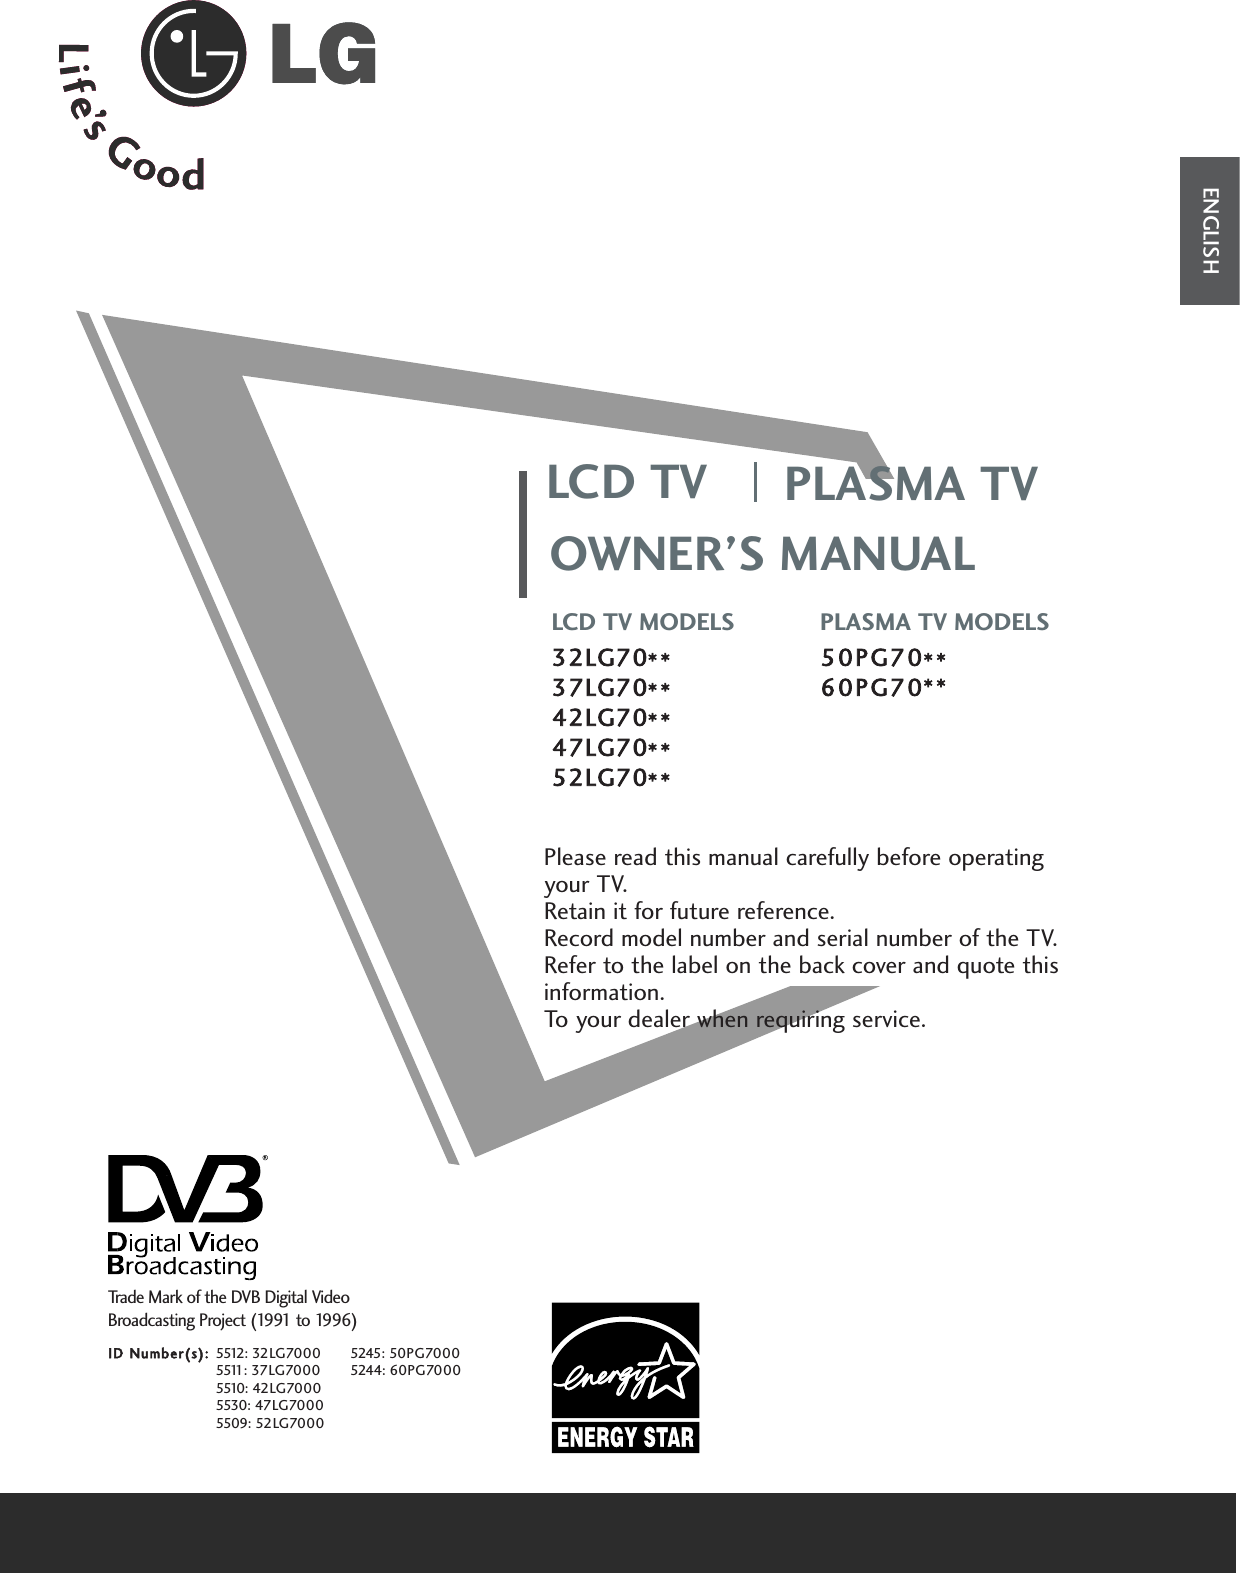
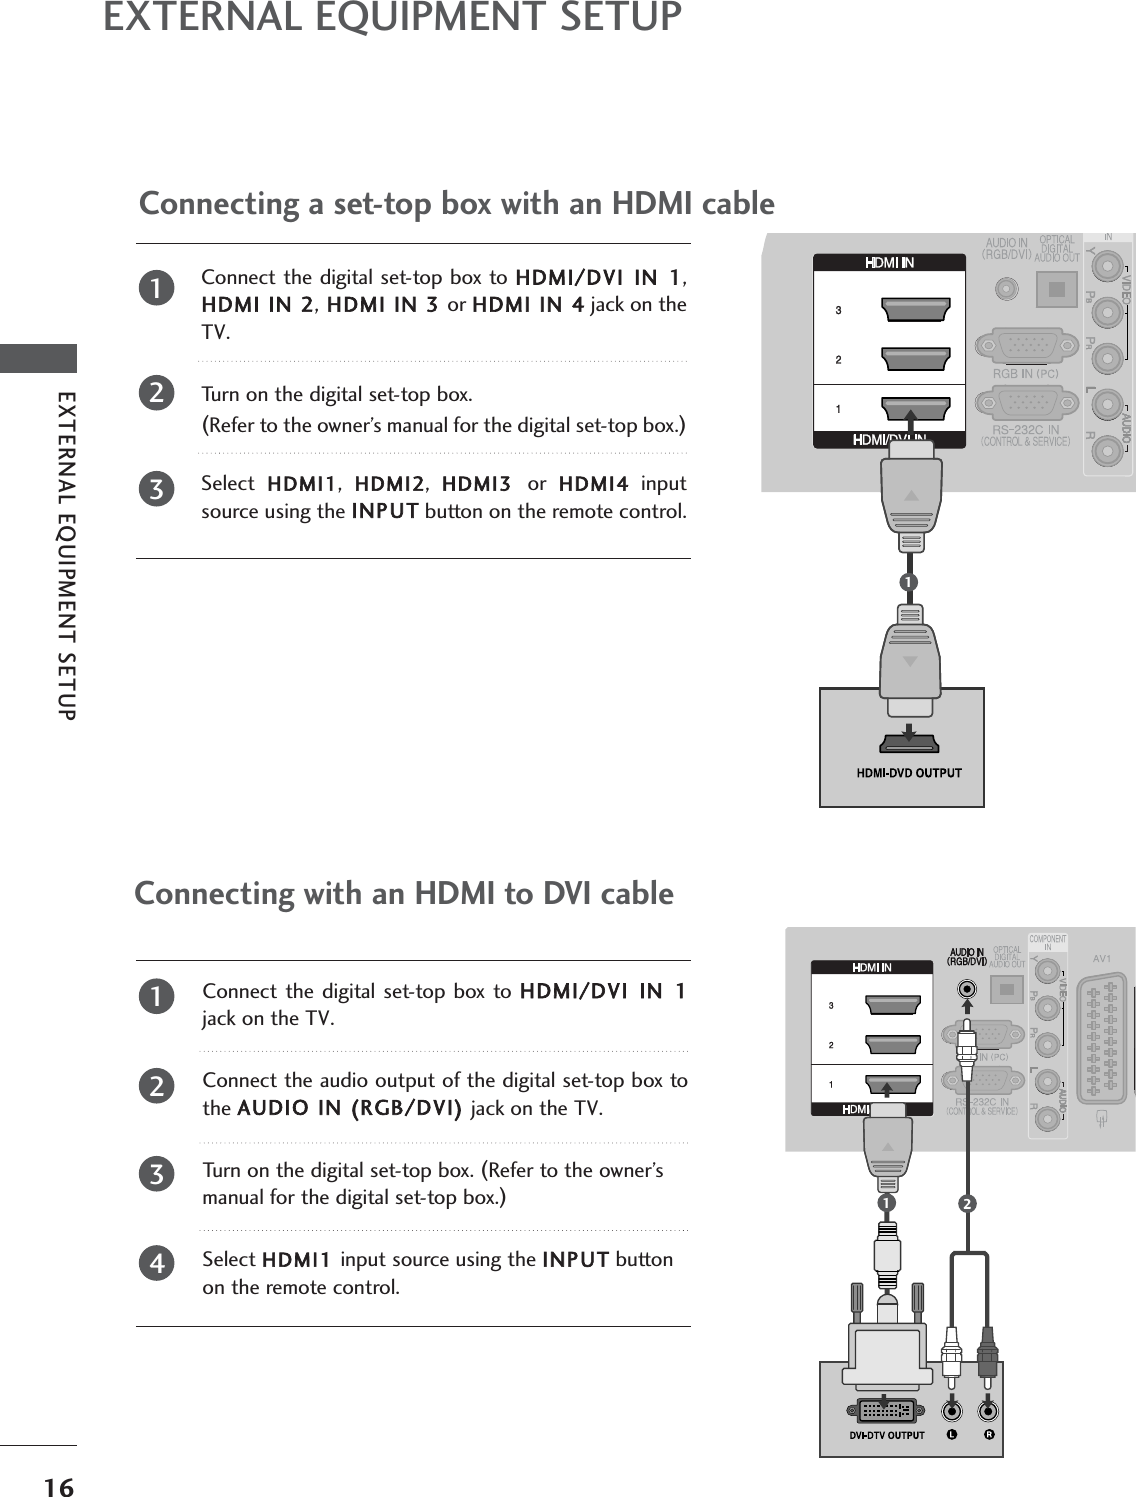
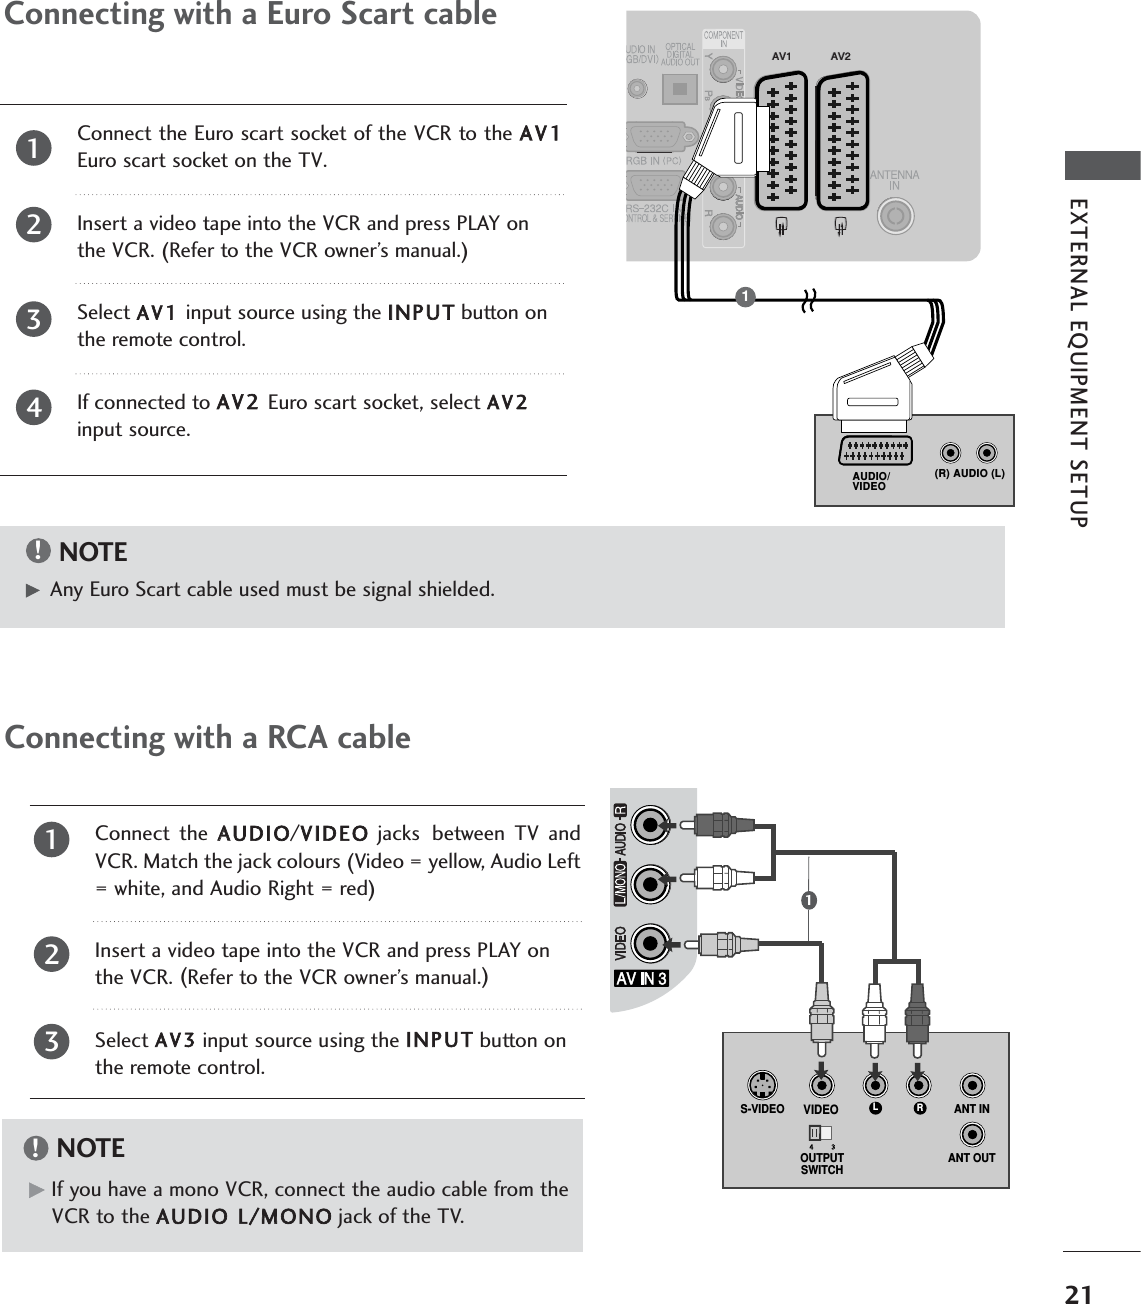
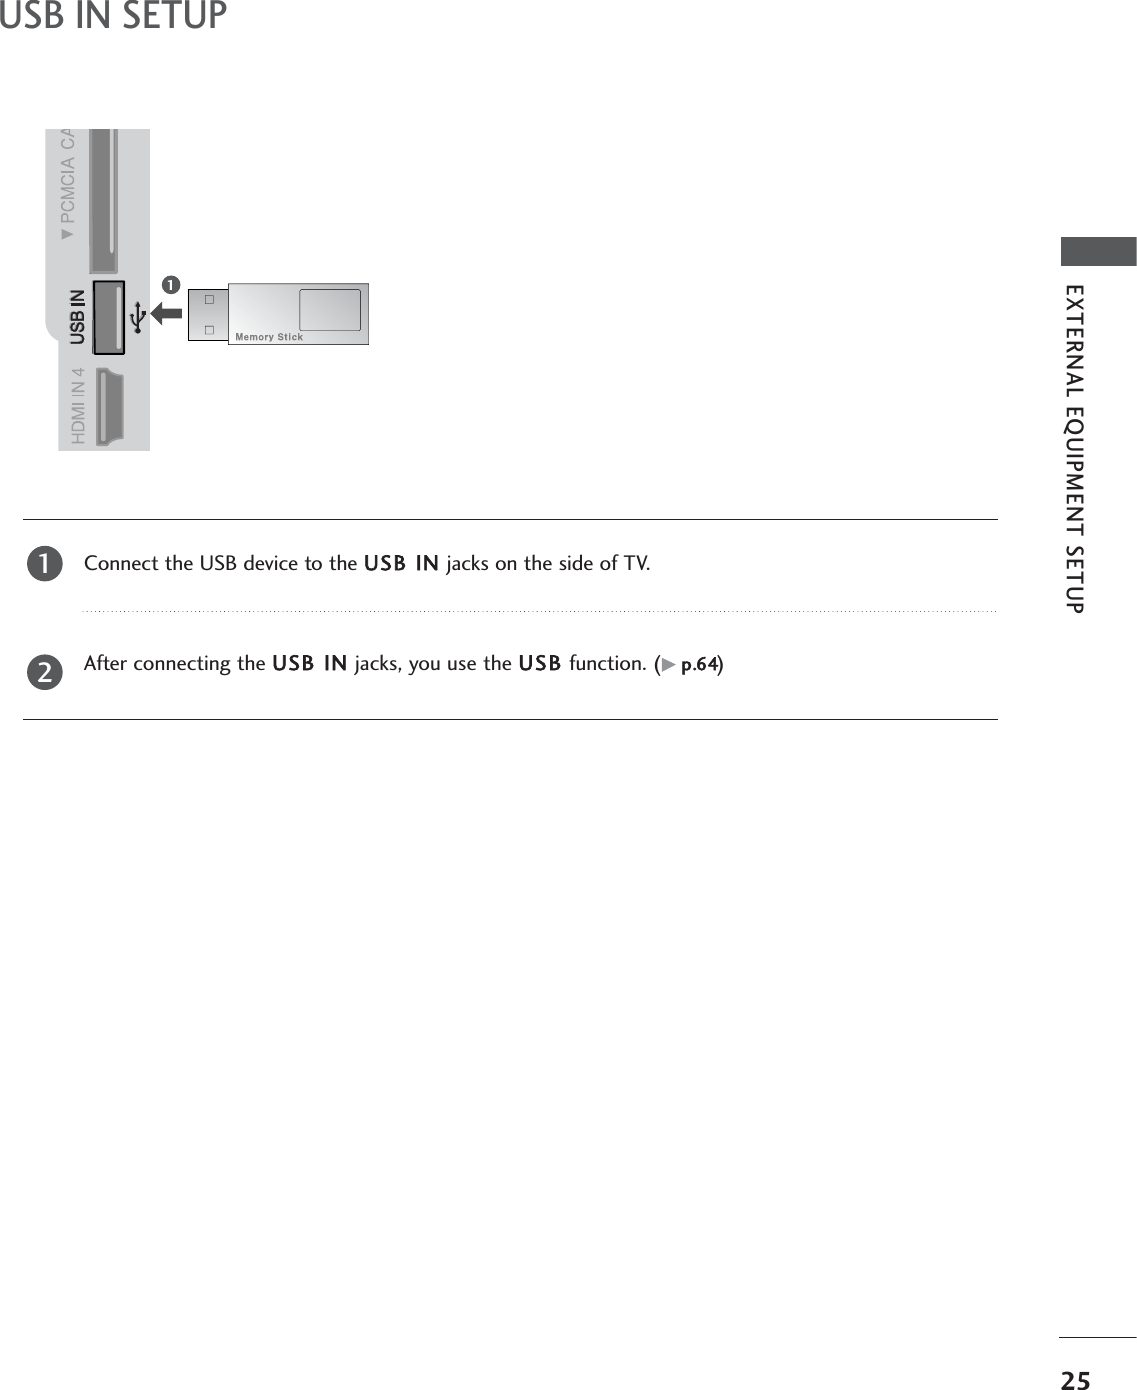
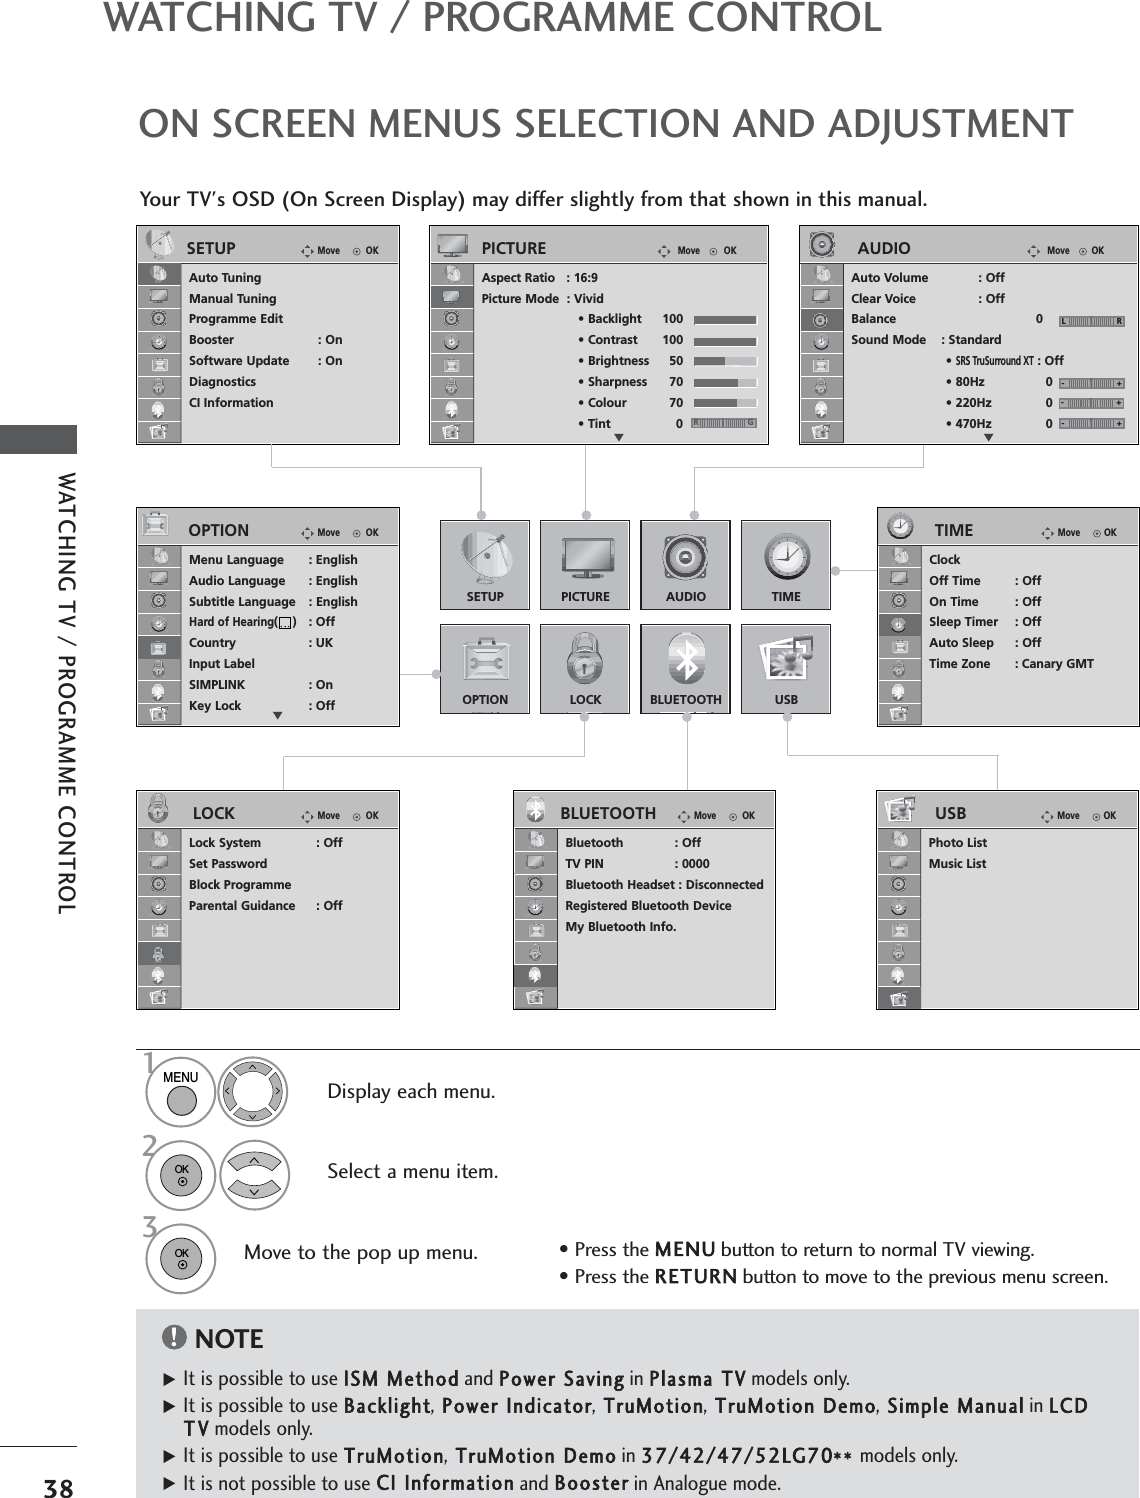
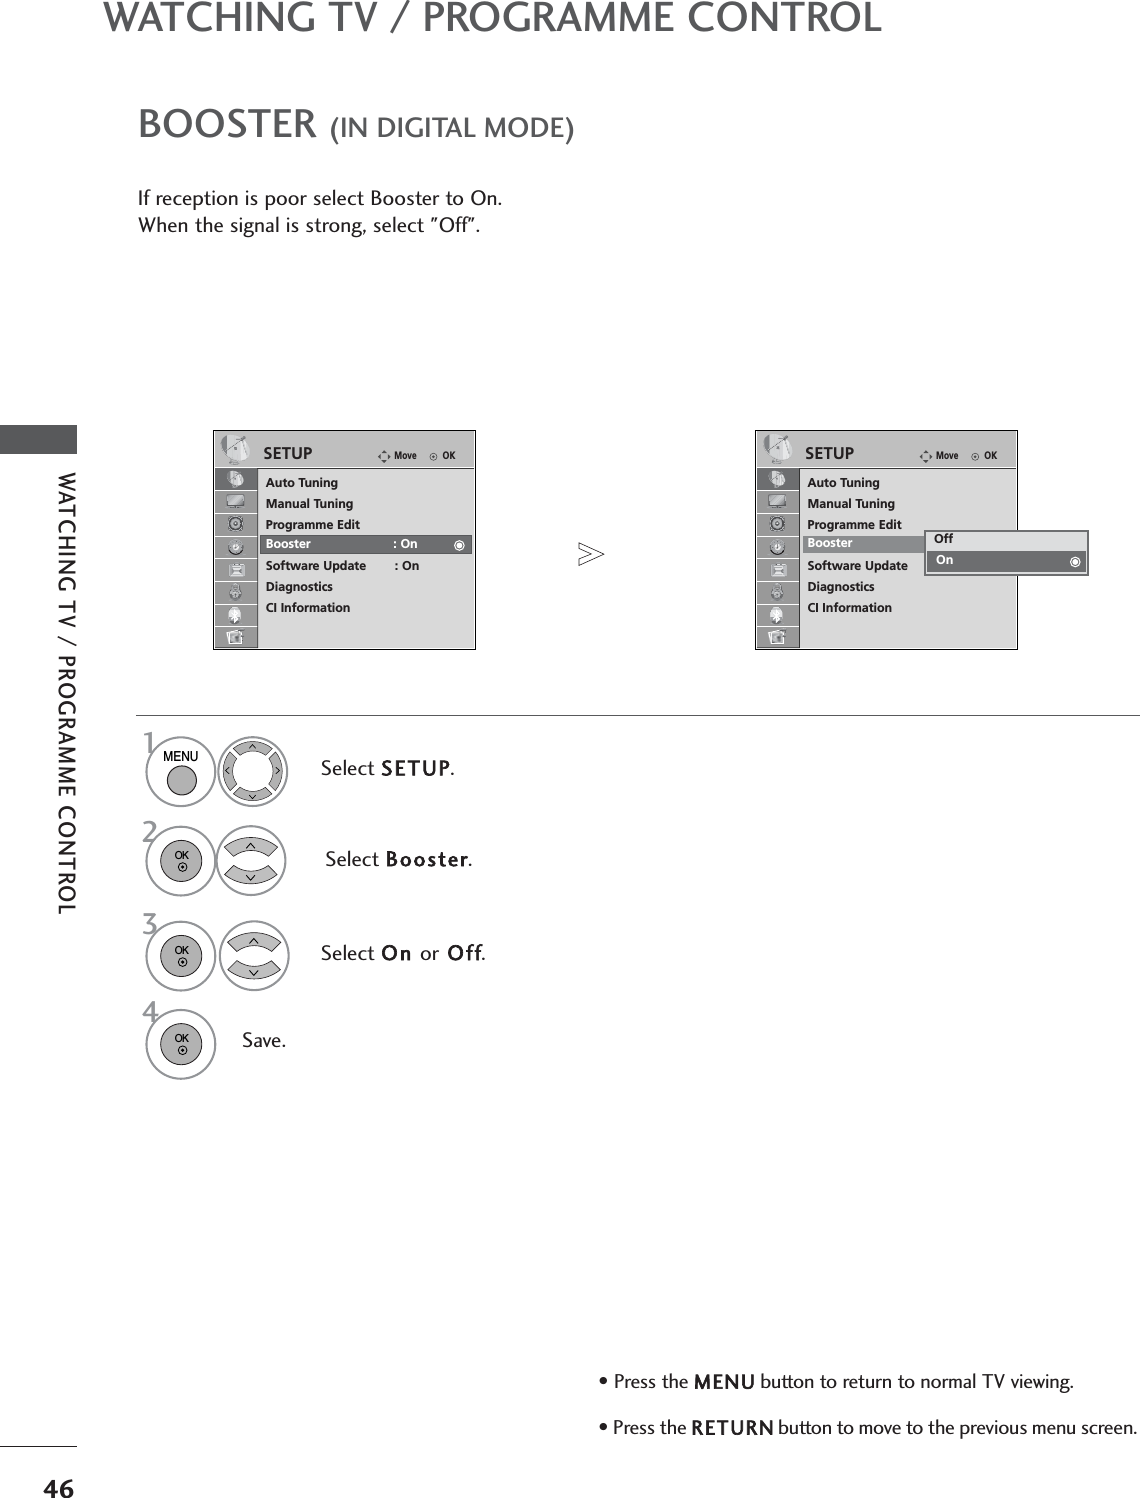
![31EXTERNAL EQUIPMENT SETUPTo view a normal picture, match the resolution of RGB mode and selection of PC mode.This function works in the following mode: RGB[PC]Selecting ResolutionSelect PICTURE.Select SCREEN.Select Resolution.Select the desired resolution.1024 x 7681280 x 7681360 x 768Auto Config.ResolutionGPositionSizePhaseResetOKMove• Contrast 90• Brightness 50• Sharpness 60• Colour 60• Tint 0• Advanced Control• Picture ResetScreenPICTUREEScreenSCREENMovePrev.1MENU342OK OK RG• Press the MENUbutton to return to normal TV viewing.• Press the RETURNbutton to move to the previous menu screen.RETURN](https://usermanual.wiki/LG-Electronics-USA/EAX57538201.Host-user-manual-1-of-2/User-Guide-1067069-Page-33.png)
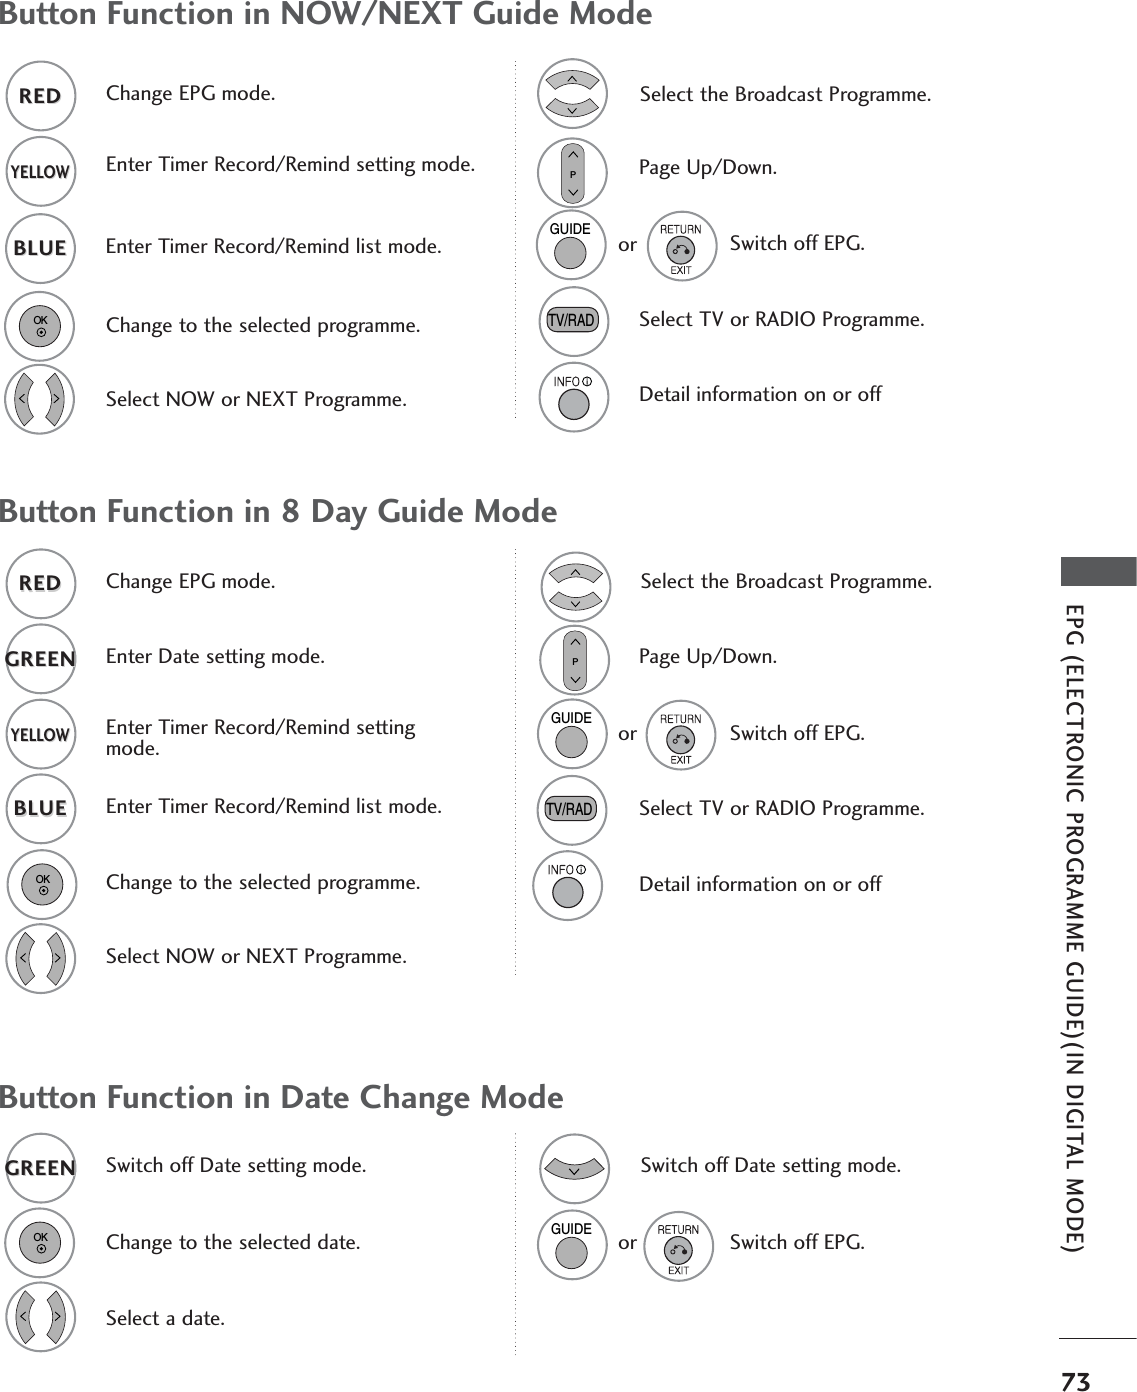
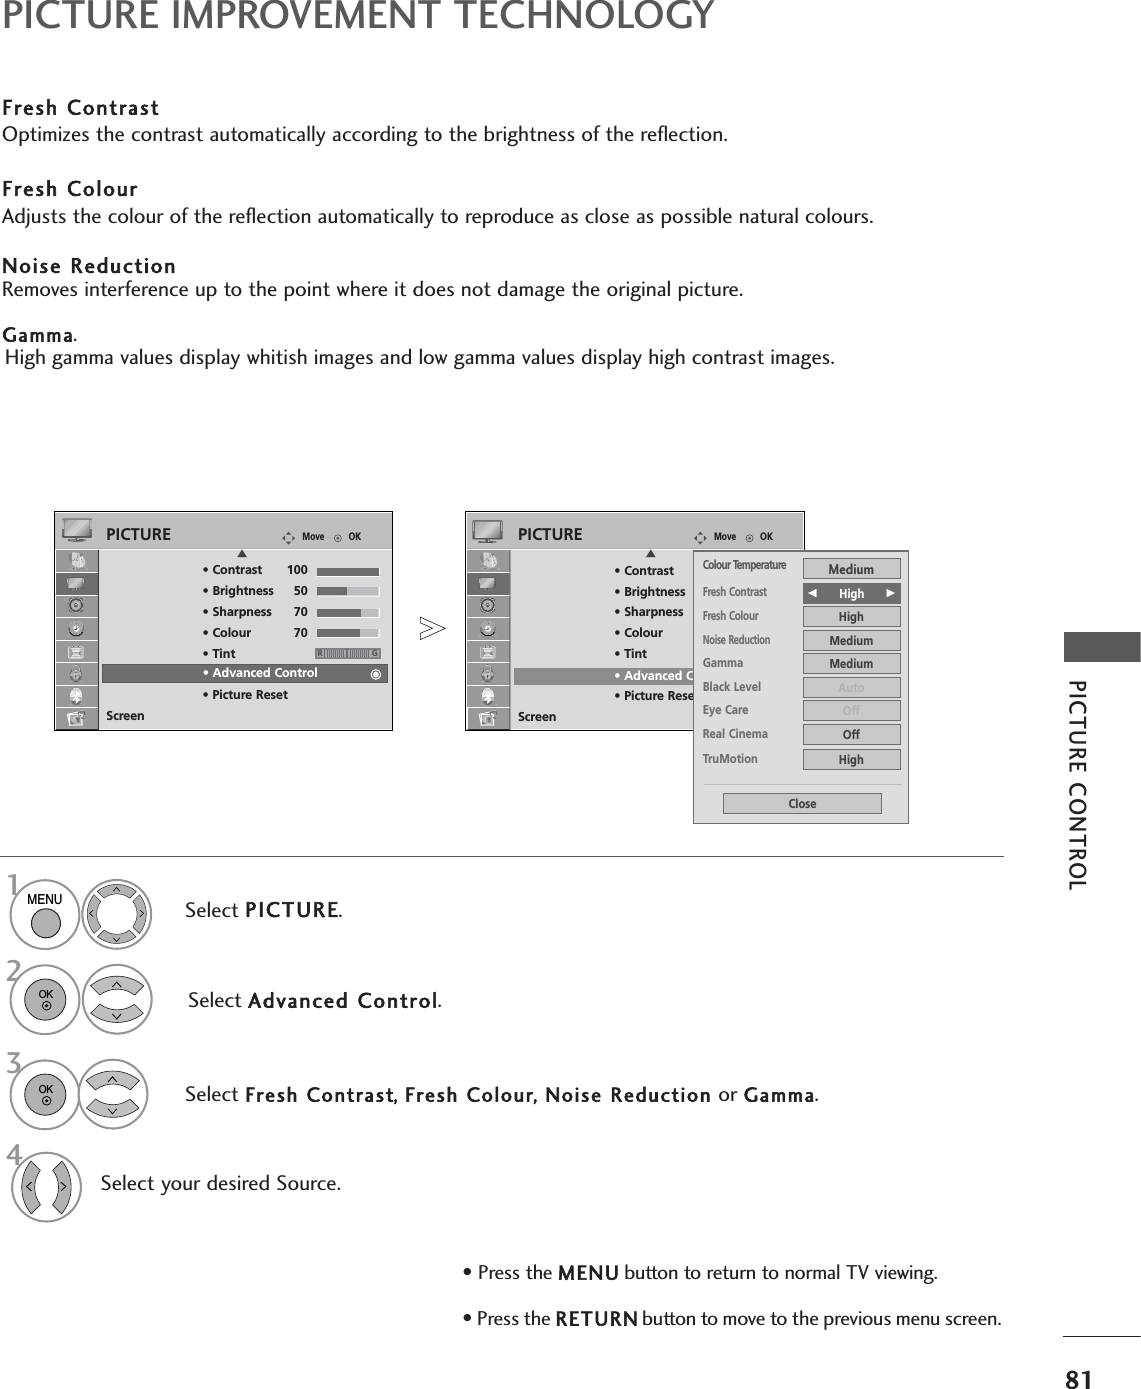
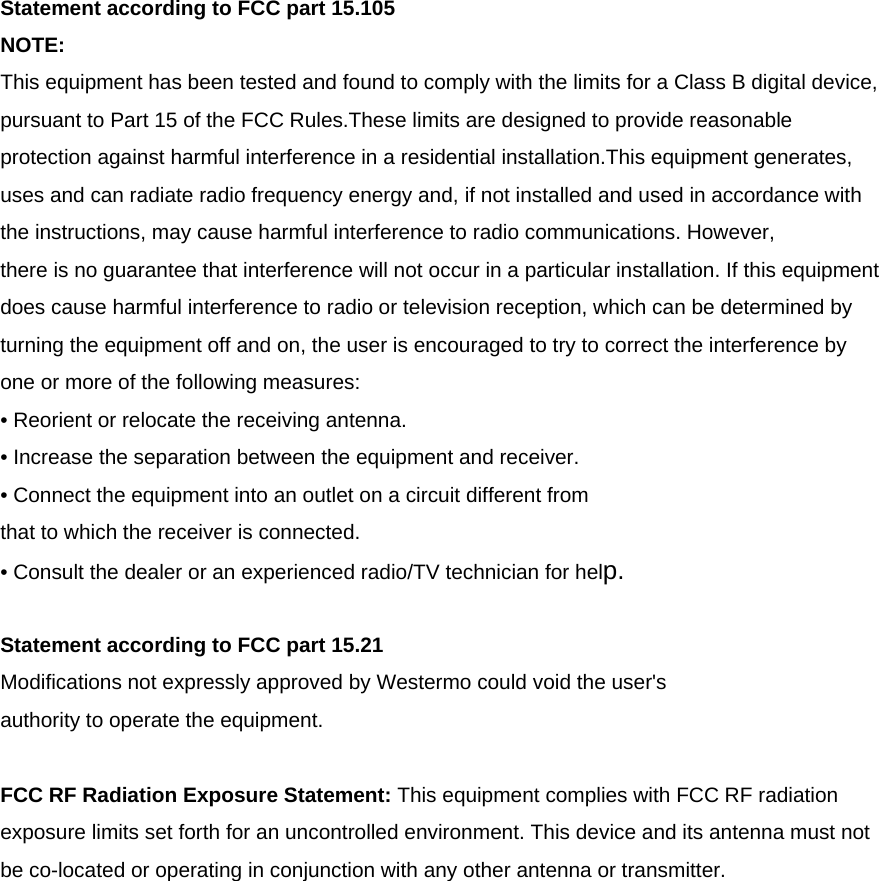
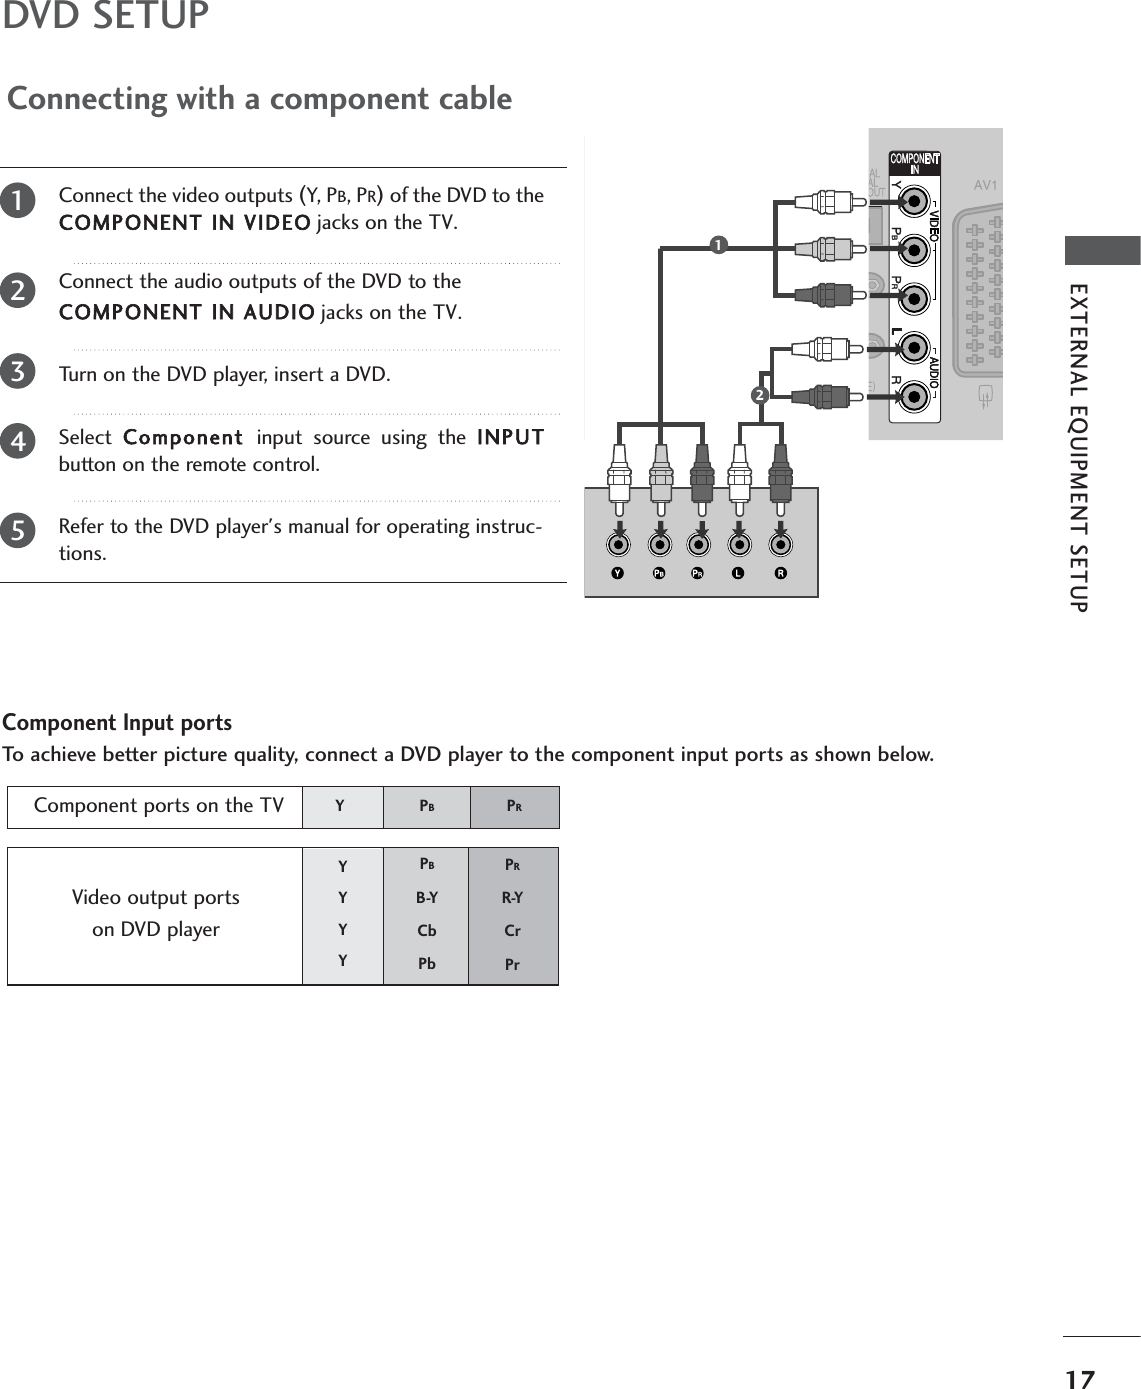
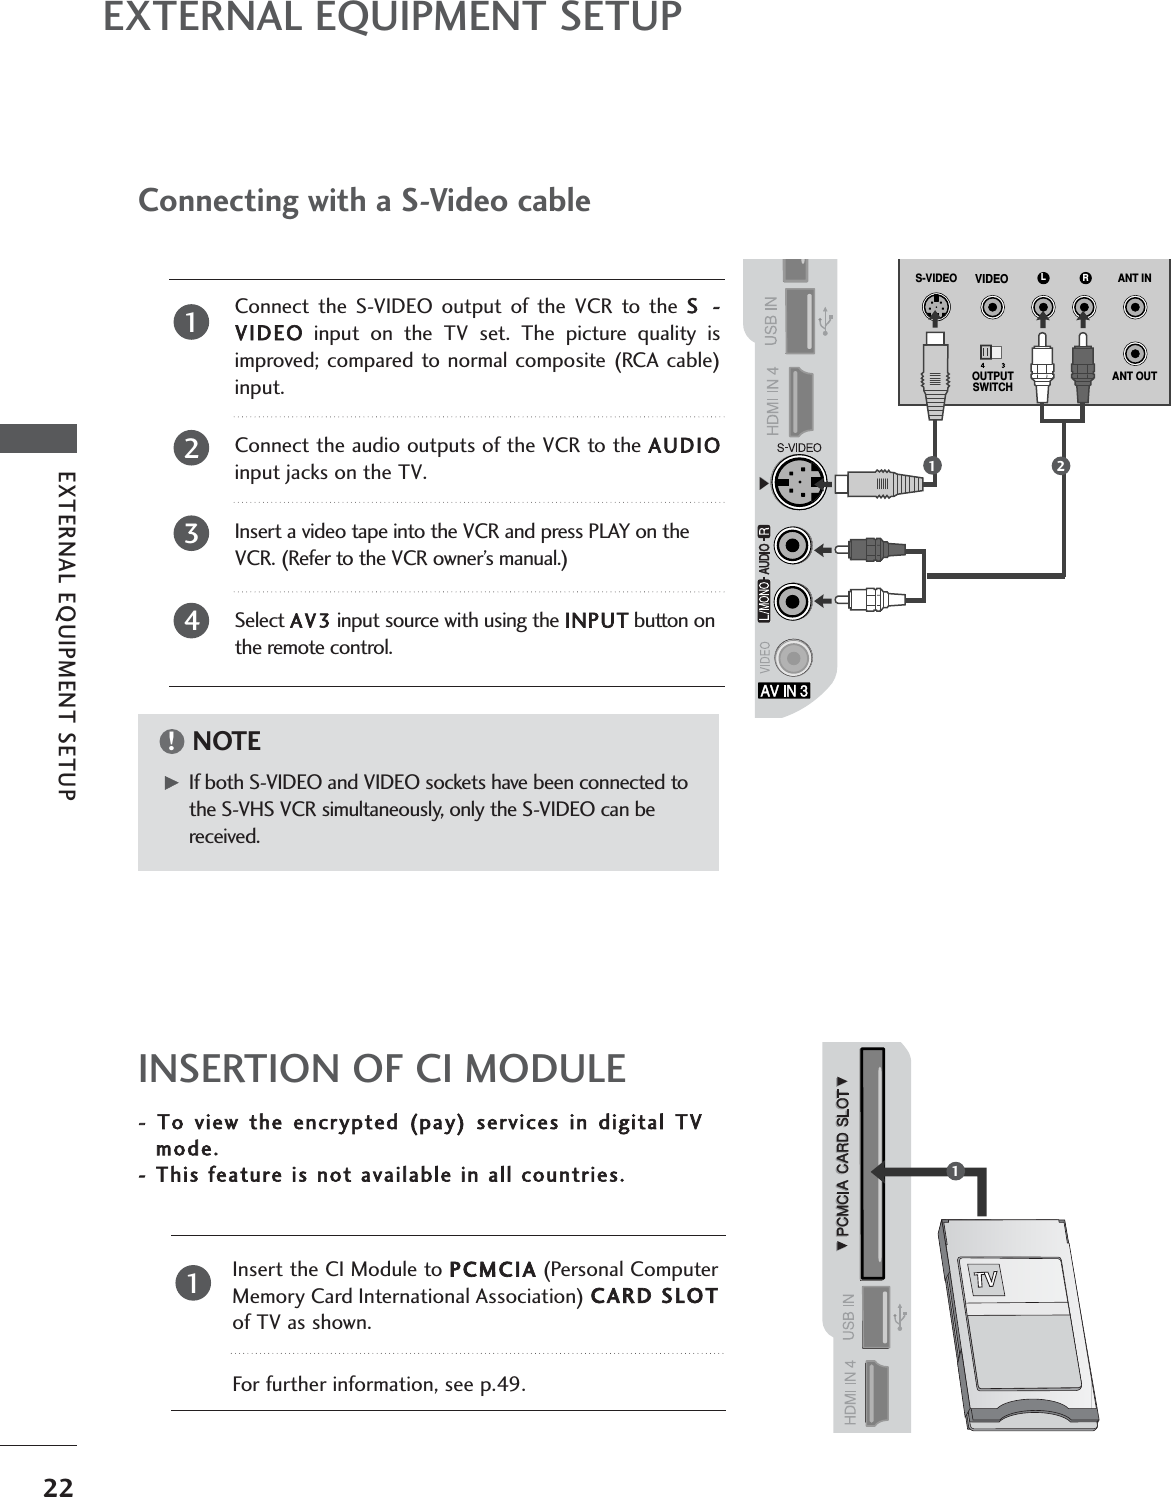
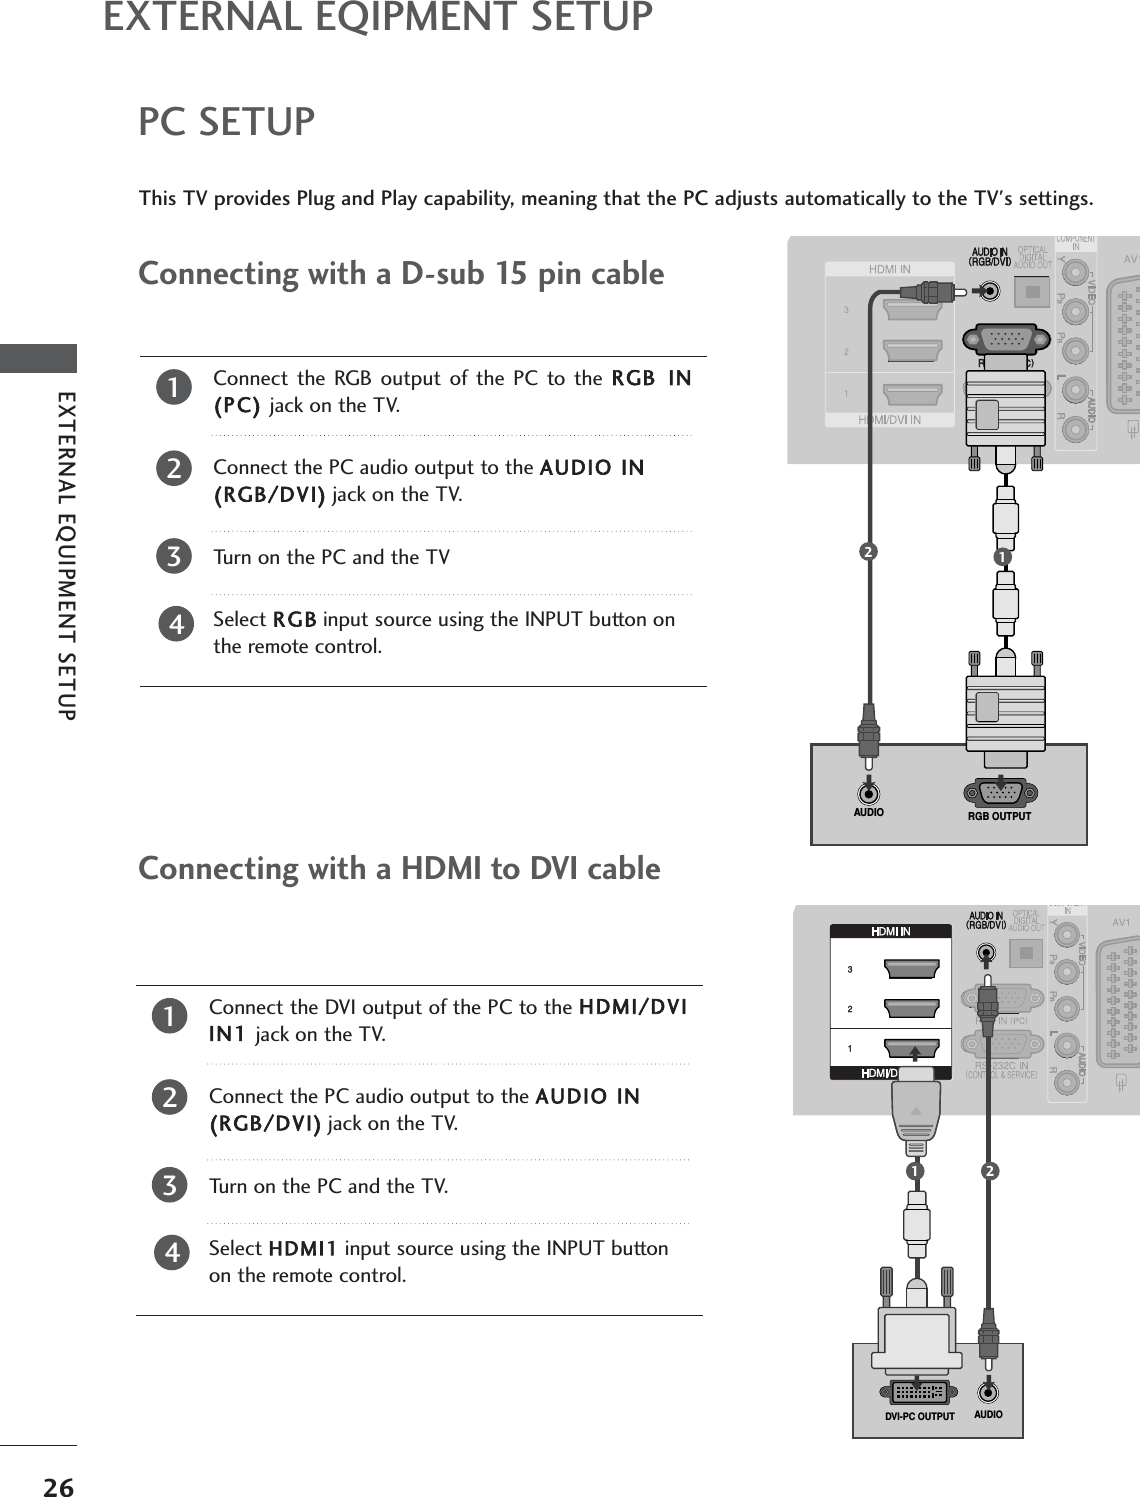
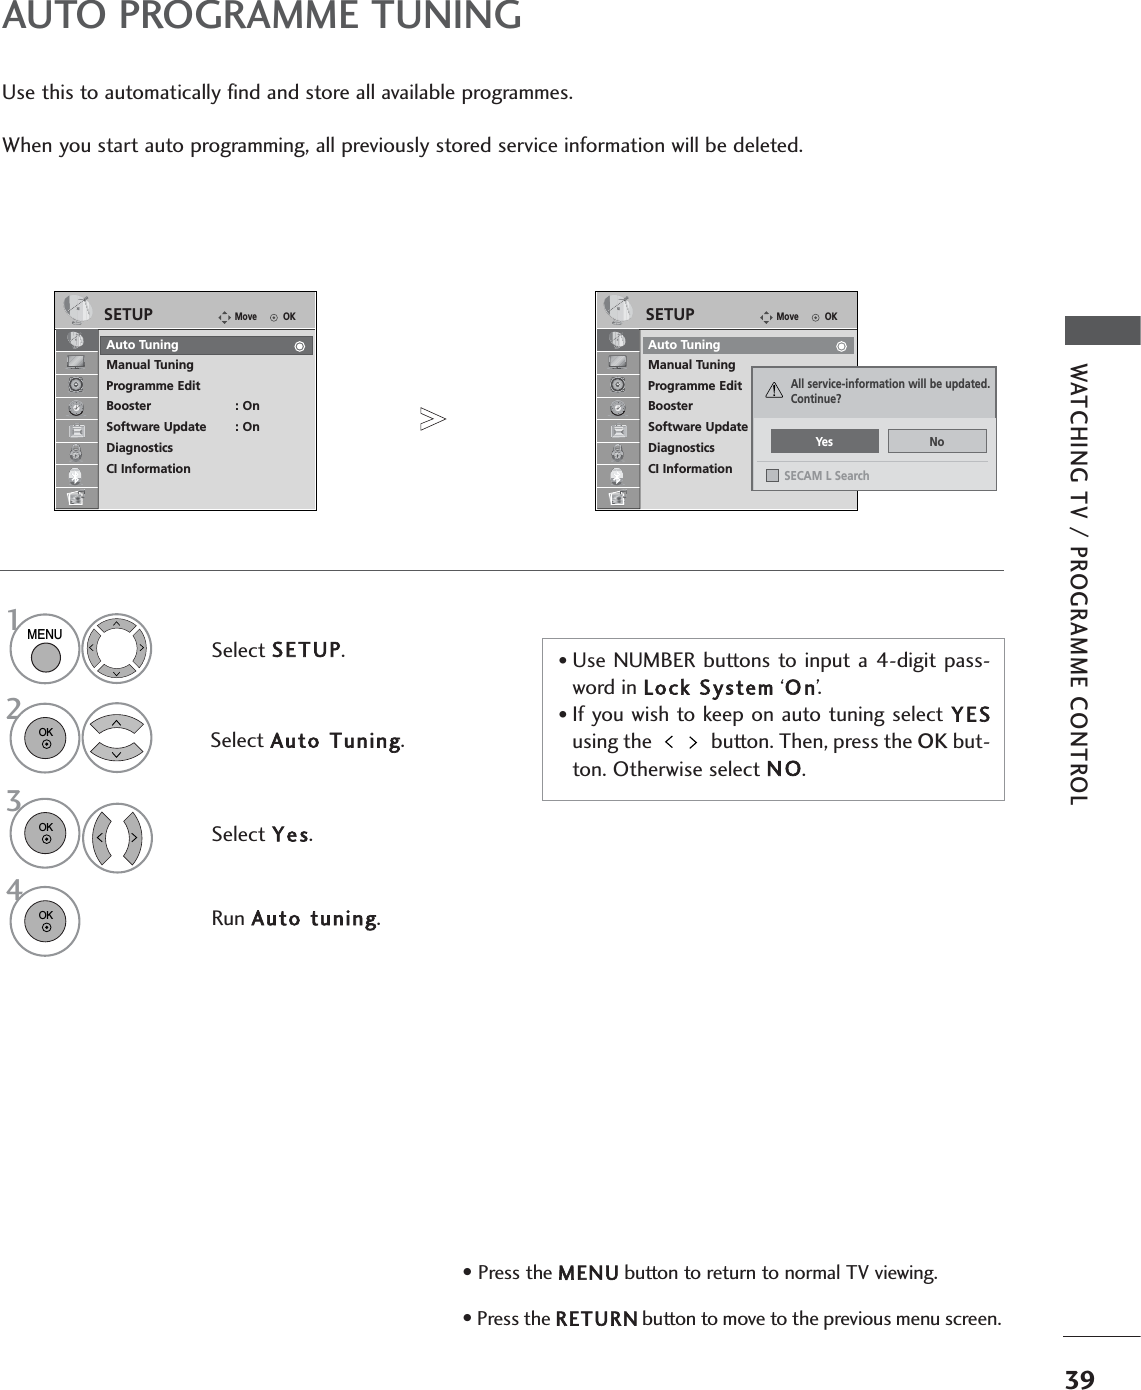
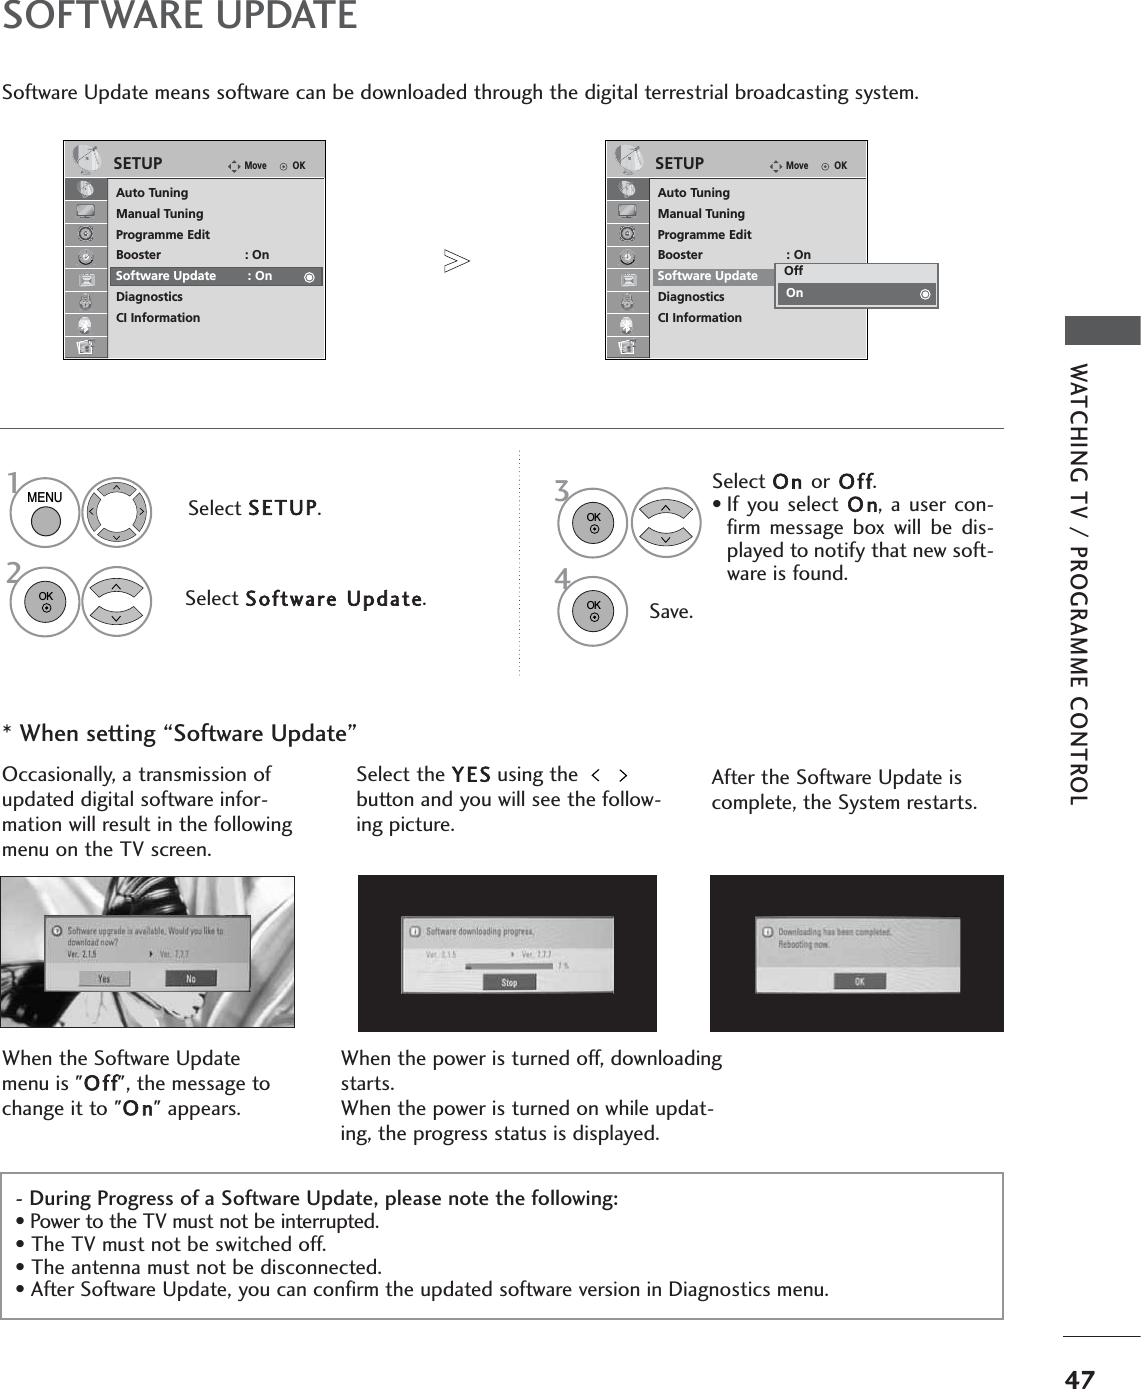
![32EXTERNAL EQIPMENT SETUPEXTERNAL EQUIPMENT SETUPAutomatically adjusts picture position and minimizes image instability. After adjustment, if the image is stillnot correct, your TV is functioning properly but needs further adjustment.Auto configureThis function is for automatic adjustment of the screen position, clock, and phase The displayed image willbe unstable for a few seconds while the auto configuration is in progress.Auto Configure (RGB [PC] mode only)•If the position of the image is still not correct,try Auto adjustment again.•If picture needs to be adjusted again after Autoadjustment in RGB (PC), you can adjust thePosition, Size or Phase.Select PICTURE.Select SCREEN.Select Auto Config..OKMove• Contrast 90• Brightness 50• Sharpness 60• Colour 60• Tint 0• Advanced Control• Picture ResetScreenPICTUREEScreenAuto Config. GResolutionPositionSizePhaseResetSCREENMovePrev.To Set1MENU32OK OK RG• Press the MENUbutton to return to normal TV viewing.• Press the RETURNbutton to move to the previous menu screen.RETURNSelect Yes.Run Auto Config..4OK 5OK](https://usermanual.wiki/LG-Electronics-USA/EAX57538201.Host-user-manual-1-of-2/User-Guide-1067069-Page-34.png)
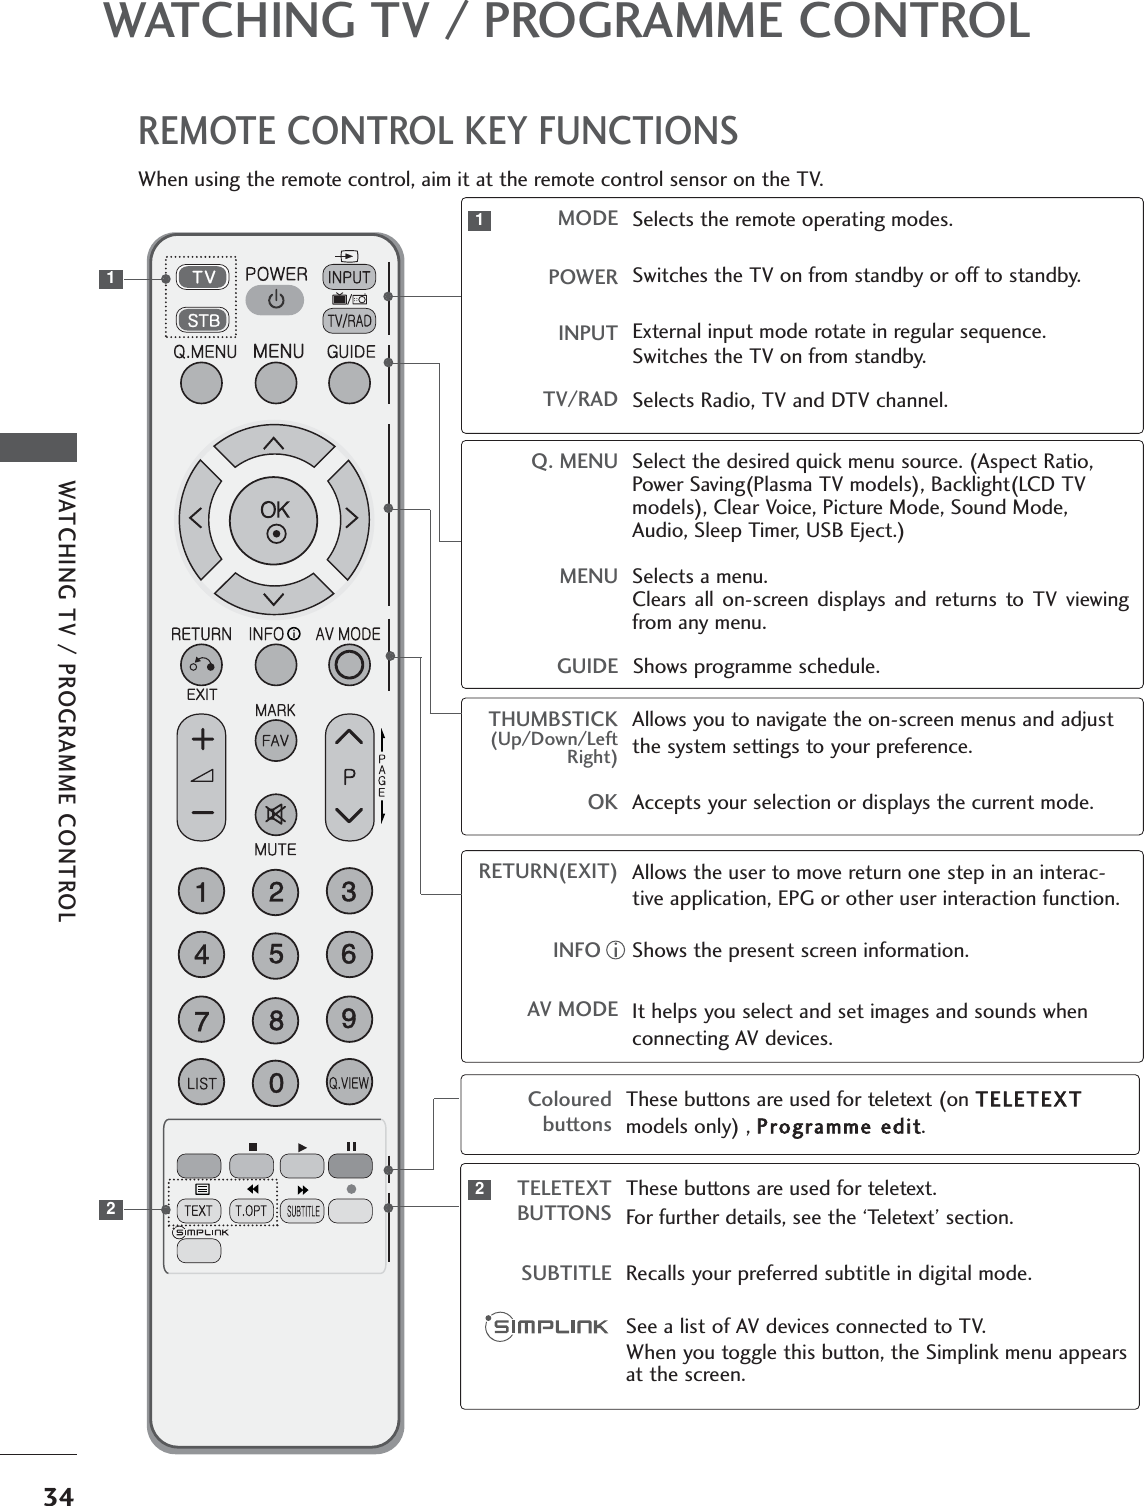

![49WATCHING TV / PROGRAMME CONTROLCI [COMMON INTERFACE] INFORMATIONThis function enables you to watch some encrypted services (pay services). If you remove the CI Module, you can-not watch pay services.When the module is inserted into the CI slot, you can access the module menu.To purchase a module and smart card, contact your dealer. Do not repeatedly insert or remove a CI module fromthe TV. This may cause a malfunction. When the TV is turned on after inserting a CI Module, you may not have anysound output.This may be incompatible with the CI module and smart card.CI (Common Interface) functions may not be possible depending upon the country broadcasting circumstances.• This OSD is only for illustration and the menu optionsand screen format will vary according to the Digital payservices provider.• It is possible for you to change CI (Common Interface)menu screen and service by consulting your dealer.Select SETUP.Select CI Information.Select the desired item: Module information, smart cardinformation, language, or software download etc.Viaccess ModuleSelect the itemConsultationsAuthorizationsModule informationOKMoveAuto TuningManual TuningProgramme EditBooster : OnSoftware Update : OnDiagnosticsCI InformationSETUPCI Information1MENU32OK OK 4OK • Press the MENUbutton to return to normal TV viewing.• Press the RETURNbutton to move to the previous menu screen.i](https://usermanual.wiki/LG-Electronics-USA/EAX57538201.Host-user-manual-1-of-2/User-Guide-1067069-Page-51.png)