LG Electronics USA GM210 Cellular/ PCS GSM/ EDGE Phone with Bluetooth User Manual 3
LG Electronics USA Cellular/ PCS GSM/ EDGE Phone with Bluetooth Users Manual 3
Contents
- 1. Users Manual 1
- 2. Users Manual 2
- 3. Users Manual 3
Users Manual 3

48
Video camera Menu 4.3
You can record and save a video clip.
1. To start recording press the OK key.
As soon as it starts to record, a timer
will be displayed.
Before recording a video clip, you
can set the following options by
pressing the left soft key [Options].
v
Video mode:
Allows you to send
video file through
MMS
or
General
.
v
Resolution:
Allows you to set the
size. (176x144/320x240)
v
Quality:
Allows you to set the
image quality from
Normal
,
Fine
and
Super
fine
.
v
Save to:
You can set the save option
for a video clip. (Phone/External)
v
Effects:
4 settings are available.
(Off/Sepia/Mono/Negative)
v
White balance:
Allows you to
change the settings according to
the enviroment. (Auto/Daylight/
Incandescent/Cloudy/Fluorescent)
v
Reset settings:
Allows you to reset
the settings.
2. Press the left soft key[Stop]/confirm
key/ camera hot key to end the
recording.
3. The video clip you recorded is
automatically saved in the
Videos
folder of
My
stuff
. After recording a
video, you can select the submenus
by pressing the left soft key
[Options].
Multimedia
Multimedia

49
v
New video:
You can record a new
video.
v
Play:
You can play the recorded
video clip.
v
Send via:
You can send the video
file via
message/Bluetooth
.
v
Album:
You can access the
Videos
folder of
My stuff
.
FM Radio Menu 4.4
1. Connect the headset with your
phone.
2. After presetting radio channels,
you can listen to other channel
by pressing the corresponding
number key (short press).
3. You can access the following option
menus by pressing the left soft key
[Options].
v
Edit channel:
You can adjust
frequency and change the radio
station in the selected channel. You
can change the frequency with
Left/Right navigation keys and
number keys.
v
Auto scan:
If you select "Auto scan
Now?" On, automatically set the
radio channel. And When "Save this
station" message will be popped
up, if you select Yes, the selected
frequency will be stored.
v
Reset all channels:
You can delete
all channels you saved.
v
Listen via:
Select this to listen to
the radio through Speaker/Wired
headset/Bluetooth in the [Options].
Multimedia

50
Voice recorder Menu 4.5
You can record a voice memo.
1. Press the OK key to start recording.
Once recording is started, the
message “
REC
” and the recording
time are displayed, talk into the
microphone.
2. If you want to finish recording,
press the right soft key [Stop]. The
recorded file is automatically saved
in
Sounds
folder of
My
stuff
.
3. If you press the left soft key
[Options], you can select the
submenus as follow:
v
New voice record:
You can start a
new voice recording.
v
Play:
You can play the recorded
voice memo.
v
Send via:
You can send the
recorded sound file via Message/
Bluetooth
v
Album:
You can access the
Sounds
folder of
My stuff
.
Multimedia
Multimedia

51
Messaging
New message Menu 5.1
This menu includes functions related
to SMS (Short Message Service), MMS
(Multimedia Message Service), as well
as the network’s service messages.
Options
v
Send to:
Sends text messages.
1. Enter numbers of recipient.
2. Press the down navigation key to
add more recipients.
3. You can add phone numbers in the
contacts.
4. Press the left soft key [Options] and
then select
Send
after entering
numbers. The message will
automatically be saved in the
Sent
folder. If the message has not been
sent, it will remain in the
Outbox
with a failed status.
v
Send to Group:
You can send to
group.
v
Insert
-
Image:
You can add image.
-
Sound:
You can add sound.
-
Video:
You can add video.
-
Symbol:
You can add special
characters.
-
Text template:
You can use
Text templates already set in the
phone.
-
Emoticon:
You can insert
emoticon.
-
Name& Number:
You can add
phone numbers or addresses in
the contacts.
-
New slide:
Select this to add a
new slide
Messaging

52
Messaging
-
Subject:
Select this to insert a
subject.
-
More:
Select this to add a Contact,
a My Business card, Schedule, and
Memo
v
Save to drafts:
Stores messages
in
Drafts
.
v
Set T9:
Activate/Deactivate T9 input
mode by selecting ON/OFF.
v
Writing language:
Select the
language for T9 input mode.
v
New T9 word:
Select the
New
T9
word
for inputting new word into
the dictionary.
v
Clear text:
You can clear text while
writing Message.
v
Exit:
If you select
Exit
while writing
a message, you can end the writing
message and back to the New
message menu. The message you
have written is not saved.
Note
If you select the picture (200K)
on writing multimedia message,
loading duration will take around 3
seconds at least. Furthermore, you
can’t activate any key during loading
time. After 3 seconds, it is available
to write multimedia message.
Messaging

53
Inbox Menu 5.2
You will be alerted when you have
received messages. They will be
stored in Inbox.
If the phone shows ‘
No space for SIM
message
’, you have to delete only SIM
messages from Inbox.
❈ SIM message
SIM message means the message
exceptionally stored in SIM card.
For notified multimedia message, you
have to wait for downloading and
processing of the message.
To read a message, select one of the
messages by pressing the left soft key
[Options].
The following options are available.
v
View:
You can view the received
messages.
v
Delete:
You can delete the current
message.
v
Forward:
You can forward the
selected message to another party.
v
Return call:
You can call back to
the sender.
v
Save number:
You can save the
sender’s phone number in the
contacts.
v
Information:
You can view
information about received
messages.
v
Multi delete:
After selecting the
messages you want to remove, you
can delete the selected messages.
v
Delete all read:
You can delete all
messages read.
v
Delete all:
You can delete all
messages.
Messaging

54
Messaging
Drafts Menu 5.3
Using this menu, you can preset
multimedia messages that you use
most frequently. This menu shows the
preset multimedia message list.
The following options are available.
v
View:
You can see the multimedia
messages.
v
Edit:
Modifies the message you
choose.
v
Delete:
Deletes the message you
choose.
v
Information:
You can view
information about the message you
choose.
v
Multi delete:
After selecting the
messages you want to remove,
press the OK key and you can delete
the selected messages.
v
Delete all:
Deletes all of the
messages in the folder.
Outbox Menu 5.4
You can view the list and contents of
sending/resending/waiting/send fail
in this menu and can also verify if the
transmission was successful.
After sending the message
successfully, the message will be
moved to sent box.
The following options are available.
v
View:
You can view the message.
v
Delete:
You can delete the
message.
v
Resend:
You can resend the
selected message.
v
Edit:
Modifies the message you
choose.
v
Information:
You can check
information of each message.
v
Multi delete:
Select and delete the
selected messages.
v
Delete all:
You can delete all
messages in the folder.
Messaging

55
Messaging
Sent Menu 5.5
This menu allows you to view the
messages which are already sent. You
can check the time and the contents
of message.
Listen to voicemail
Menu 5.6
This menu provides you with a quick
way of accessing your voice mailbox
(if provided by your network). Before
using this feature, you must enter the
voice server number obtained from
your network operator.
Once this menu has been selected,
simply press the left soft key [OK] to
listen to voice mail. You can also hold
down the key in standby mode
to listen to voicemail.
Note
When you receive a voicemail, your
phone displays the icon and you
hear an alert. Please check with your
network provider for details of their
service in order to configure the
handset correctly.
Info message Menu 5.7
(Dep
endent to network and
subscription)
Info service messages are text
messages delivered by the network
to GSM. They provide general
information such as weather reports,
traffic news, taxis, pharmacies, and
stock prices.
each type of Info message has a
number; therefore, you can contact
service provider as long as you have
input the certain number for the
information.

56
Messaging
Messaging
When you have received an info
service message, you can see the
popup message to show you that you
have received a message or the info
service message is directly displayed.
To view the message again or not in
standby mode, follow the sequence
shown below;
Read (Menu 5.7.1)
1. When you have received an info
service message and select
Read
to view the message, it will be
displayed on the screen. You can
read another message by scrolling
the left or right navigation key.
2. The message will be shown until
another message is reached.
Topics (Menu 5.7.2)
(Dependent to network and
subscription)
You can see info service message
numbers which you added. If you
press the left soft key [Options], you
can edit and delete info message
category which you added.
You can select info service message
numbers in the active list. if you
activate an info service number, you
can receive messages sent from the
number.
Templates Menu 5.8
Text templates (Menu 5.8.1)
You have 6 text templates as below;

57
• Please, call me back .
• I’m late. I will be there at
• Where are you now?
• I am on the way.
• Urgent! Please, contact.
• I love you!
The following options are available.
v
View:
You can see selected
templates.
v
Edit:
Use this to write a new
message or edit the selected
template message from the text
template list.
v
Send via
-
Message:
Use this to send the
selected template message by
message.
v
Delete:
Deletes the template.
v
New template:
Use this to create a
new template.
v
Delete all:
Allows you to delete all
template messages.
Multimedia templates
(Menu 5.8.2)
You can save a new multimedia
template and edit the saved
multimedia templates.
After saving new template, you can
use the following options.
v
View:
You can see multimedia
templates.
v
Edit:
Use this to write a new
message or edit the selected
multimedia template message from
the multimedia template list.
v
Send:
Use this to send the
multimedia template message by
MMS.
Messaging

58
v
Delete:
Deletes the multimedia
template.
v
New template:
Use this to create a
new template.
v
Delete all:
Allows you to delete all
multimedia messages.
Settings Menu 5.9
Text message (Menu 5.9.1)
v
Message types:
Text, Voice, Fax, Paging, X.400,
ERMES
Usually, the type of message is set
to Text. You can convert your text
into alternative formats. Contact
your service provider for the
availability of this function.
v
Validity period:
This network
service allows you to set how long
your messages will be stored at the
message centre.
v
Delivery report:
If you set to
ON, you can check whether your
message is sent successfully.
v
Reply charging:
When a message is
sent, it allows the recipients to reply
and charge the cost of the reply to
your telephone bill.
v
Message center number:
you
should enter the SMS Centre
number. Normally the SMS Centre
number is read from the SIM card.
Multimedia message
(Menu 5.9.2)
v
Slide duration:
Displays the
duration of each page when writing
the message.
v
Delivery time:
Deliver your
message at a specific time.
v
Priority:
You can set the priority of
the message you choose.
v
Validity period:
This network
service allows you to set how long
your messages will be stored at the
message centre.
Messaging
Messaging

59
v
Delivery reports:
You can set
ON/OFF in these menus.
- Request report:
Request reports
to check out whether your
messages are sent to the recipients
successfully.
- Allow report:
When the senders
request delivery reports, you can
decide the report to be delivered
or not.
v
Read report:
You can set ON/OFF in
these menus.
- Request report:
Request
reports to check out whether
your messages are read by the
recipients
- Allow report:
When the senders
request read reports, you can
decide the report to be delivered
or not.
v
Auto download:
You can receive
multimedia messages automatically
from Home network / Roaming
network when you select
‘Automatic’ in this menu. But when
you select ‘Manual’, you receive only
notification messages in the inbox
and then you can decide to receive
multimedia messages in the option
menu of Notifications.
v
Network profiles:
If you select
multimedia message server,
you can set URL for multimedia
message server.
v
Permitted message types
-
Personal:
Personal message.
-
Advertisements:
Commercial
message.
-
Information:
Necessary
information.
Messaging

60
Voicemail number (Menu 5.9.3)
You can receive voicemail if your
network service provider supports
this feature. When a new voicemail is
arrived, the symbol will be displayed
on the screen. Please check with your
network service provider for details of
their service in order to configure the
phone accordingly.
Service message (Menu 5.9.4)
You can set the option whether you
will receive the message or not.
Info message (Menu 5.9.5)
v
Receive
-
On:
If you select this menu, your
phone will receive Info service
messages.
-
Off:
If you select this menu,
your phone will not receive Info
se68rvice messages any more.
v
Alerts
-
On:
Your phone will beep when
you have received Info service
message numbers.
-
Off:
Your phone will not beep
even though you have received
info service messages.
v
Languages
You can select the language you
want by pressing the OK key. Then,
the info service message will be
shown in the language that you
selected.
Messaging
Messaging

61
Images Menu 6.1
The Images folder consists of
embedded links for downloading
pictures through the internet and
default images. To view the image in
details, press the OK key.
When a file is selected, the following
options will be displayed by pressing
the left soft key [Options].
v
View:
You can see the selected file.
v
Delete:
Delete a selected file.
v
Set as
-
Wallpaper:
Currently selected
image can be set as a
Wallpaper
.
-
Picture ID:
Currently selected
image can be set as a
Picture ID
.
v
Send via:
Send the selected file
to another device via
Message,
Bluetooth
.
v
File
-
Rename:
Change the file name of
selected file. You cannot change
the extension of file.
-
Move to folder:
Move the
selected file to the folder.
-
Move to external memory
/ Move to phone memory:
Move the selected file to the
external memory (if inserted)
or multimedia memory in your
phone.
-
Copy to external memory
/ Copy to phone memory:
Copy the selected file to the
external memory or multimedia
memory in your phone.
-
Information:
Show the file
information.
My stuff
My stuff

62
My stuff
v
Print via Bluetooth:
Most pictures
that you have taken in the camera
mode and downloaded through
WAP can be transmitted via
Bluetooth to a printer.
v
Slide show:
You can view a slide
show of the files you stored.
v
New folder:
You can create a new
folder.
v
Multi delete:
You can remove a
number of files you selected.
v
Delete all:
Delete all files in the list.
v
Sort by:
You can arrange the files
by as
Date, Type
and
Name
.
v
Thumbnail view/List view:
Allows
you to set the view type.
Sounds Menu 6.2
When a file is selected, the following
options will be displayed by pressing
the left soft key [Options].
v
Play:
You can play the selected file.
v
Delete:
Delete a selected file.
v
Set as:
Currently selected sound
can be set as a
Ringtone/ Ringtone
ID/Message tones
.
v
Send via:
Send the selected file
to another device via
Message,
Bluetooth
.
v
File
-
Rename:
Changes the file name
of the selected file.
-
Move to folder:
Move the
selected file to the folder.
-
Move to external memory
/ Move to phone memory:
Move the selected file to the
external memory (if inserted)
or multimedia memory in your
phone.
My stuff

63
-
Copy to external memory
/ Copy to phone memory:
Copy the selected file to the
external memory (if inserted)
or multimedia memory in your
phone.
-
Information:
Show the selected
file information.
v
New folder:
You can create a new
folder.
v
Multi delete:
You can remove a
number of files you selected.
v
Delete all:
Delete all files in the list.
v
Sort by:
You can arrange the files as
Date, Type
and
Name
.
Videos Menu 6.3
Show the list of 3GP, 3G2 files at My
media/Videos in Multimedia memory.
Supported only .3gp files, that are
encoded with MPEG4 and h.263
videocodecs and AMR audio-codec.
Here you can manage or send saved
video clips. When a file is selected, the
following options will be displayed by
pressing the left soft key [Options].
v
Open:
You can open the selected
file.
v
Delete:
Delete a selected file.
v
Send via:
Send the selected file
to another device via
Message,
Bluetooth
.
v
File
-
Rename:
Change the file name of
selected file. The maximum length
of characters is 59.
My stuff

64
Warning!
You can‘t use the following
characters: \ / : * ? < > |
-
Move to folder:
Move the
selected file to the folder.
-
Move to external memory
/ Move to phone memory:
Move the selected file to the
external memory (if inserted)
or multimedia memory in your
phone.
-
Copy to external memory
/ Copy to phone memory:
Copy the selected file to the
external memory (if inserted)
or multimedia memory in your
phone.
-
Information:
Show the file
information.
v
New folder:
You can create a new
folder.
v
Multi delete:
You can remove a
number of files you selected.
v
Delete all:
Delete all files in the list.
v
Sort by:
You can arrange the files as
Date, Type
and
Name
.
Others Menu 6.4
Other files except images, sounds,
videos are stored in this folder.
My stuff
My stuff

65
In Profiles, you can adjust and
customise the phone tones and
volume.
There are five preset profiles:
General
,
Silent
,
Vibrate
only
,
Outdoor
and
Headset
.
Each profile can be personalised. Press
the left soft key [Menu] and select
Profiles using up/down navigation
keys.
Activate (Menu 7.X.1)
1. A list of profiles is displayed.
2. In the Profiles list, scroll to the
profile you want to activate and
press the left soft key [OK] or the
OK key.
3. Then, select
Activate
.
Personalize (Menu 7.X.2)
Scroll to the desired profile in the
Profiles list(other than silent and
vibrate only). After pressing the
left soft key or the OK key, select
Personalize
.
The profile setting option opens. Set
the option as required.
v
Call alert type:
Set the alert type
for incoming calls.
v
Ring tones:
Select the desired ring
tone from the list.
v
Ring volume:
Set the volume of the
ringing tone.
v
Message alert type:
Set the alert
type for messages.
v
Message tones:
Select the alert
tone for messages.
Profiles
Profiles

66
v
Message volume:
Set the volume
of Message tone.
v
Keypad tones:
Select the desired
keypad tone.
v
Keypad volume:
Set the volume of
keypad tone.
v
Flip tones:
Allows to set the flip
tone for adjusting environment.
v
Effect sound volume:
Set the
volume of effect sound.
v
Power on/off volume:
Set the
volume of the ringing tone when
switching the phone on/off.
Note
All profiles cannot be renamed.
Profiles
Profiles

67
Contacts
Conta ct s
Search Menu 8.1
1. Select
Search
and enter the name
that you want to search.
Note
v You can access the Contacts
directly by pressing the right soft
key [Contacts] in standby mode.
v Instant searching is available by
inputting the initial letter of the
name.
2. After finding the desired contact,
you can make a call to the number
by pressing the send key.
3. If you want to edit, delete, copy
an entry select the left soft key
[Options].
The following menu will be displayed.
v
View:
You can view each entry in
details.
v
Edit:
You can edit the selected
contact.
v
New message:
After you have
found the number you want,
you can send a
messages
to the
selected number.
v
Send via:
You can send the data
of the contacts via
messages/
Bluetooth
.
v
Delete:
You can delete an entry.
v
New Contact:
After selecting the
place (SIM/Phone) you want to save,
you can add to the contacts.
v
Add to speed dial:
Allows you to
set the selected number to add a
speed dial list.
v
Multi delete:
Allows you to remove
a number of files selected.
v
Copy to SIM / Copy to phone:
You
can copy an entry from phone to
SIM or from SIM to phone.
v
Main number:
If a contact has
more than one number stored,
select the one that you use most
often. This main number will be
displayed first.

68
Contacts
Conta ct s
New contact Menu 8.2
You can add or save a new contact.
You can enter the name, different
phone numbers and email addresses
of a new contact. You can also assign
the contact to groups, include a
picture, assign a specific ringtone and
enter the anniversary for the contact.
You can enter and manage contact
addresses depending on the memory
usage.
Note
v The contact entry fields may differ
when you add or save a contact in
the SIM address in the SIM.
v Maximum stored name and
number length depends on SIM
card type.
Speed dials Menu 8.3
Using this menu you can manage
speed dials.
You can assign any of the keys to
with a name list entry. You can
call directly by pressing this key.
1. Open the
Contacts
first by pressing
the right soft key [Contacts] in
standby mode.
2. Scroll to
Speed
dial
, then press the
left soft key [OK].
3. If you want to add speed dial, select
<Empty> by pressing the left soft
key [Assign]. Then, you can search
the name in the contacts.
4. After assigning the number as
speed dial, you can change and
delete the entry. You can also make
a call or send a message by this
number.

69
Groups Menu 8.4
You can list up to the members per
each group. In the handset memory,
there are 7 default groups:
Family
,
Friends
,
Colleagues
,
VIP
,
Group
1
,
Group
2
, and
Group
3
.
Select the group name that you want
to manage by pressing the left soft
key [Option]. The following submenus
will be displayed.
v
View members:
Shows the group
members you have selected.
v
Group ringtone:
Allows you to
specify ring tone for the group
members call.
v
Group icon:
Allows you to select
the icon dependent on group.
v
Add member:
You can add group
members.
v
Remove member:
You can remove
the member from the group
member list. But the name and the
number will be remained in the
Contacts
.
v
Rename:
You can change a group
name.
v
Reset all:
Allows you to reset all
contacts.
Copy all Menu 8.5
You can copy entries from SIM card
memory to phone memory and vice
versa.
v
SIM to phone:
You can copy the
entry from SIM card to phone
memory.
v
Phone to SIM:
You can copy the
entry from phone memory to SIM
card.
Delete all Menu 8.6
You can delete all entries from SIM
card or phone memory. This function
requires the security code.
Conta ct s

70
Settings Menu 8.7
View options (Menu 8.7.1)
You can set the contact display
option.
v
Name only:
Set the contact
information with only name.
v
Name & Number:
Set the contact
information with name and
number.
v
With picture:
Set the contact
information with picture.
Backup Contacts (Menu 8.7.2)
(External Memory dependent)
You can save Contacts data to the
others folder in external memory.
Restore Contacts (Menu 8.7.3)
(External Memory dependent)
You can save Vcard format(*.vcf)
existd in My stuff ->External memory
-> Others to the Contacts.
Information Menu 8.8
Service dial number (Menu 8.8.1)
You can view the list of Service
Dialling Numbers (SDN) assigned by
your service provider (if supported by
the SIM card).
Own number (Menu 8.8.2)
(SIM dependent)
You can save and check your own
number in SIM card.
My business card (Menu 8.8.3)
This option allows you to create
your own business card featuring
name, any numbers. To create a new
business card, press the left soft key
[New] and enter the information into
the fields. If you want to edit, delete or
to send a business card, select the left
soft key [Options].
Conta ct s
Contacts

71
Alarm clock Menu 9.1
You can set the alarm clock to go on
at a specified time.
1. If there is no alarm, press the left
soft key [New] to add a new alarm.
2. Set or cancel the alarm using the
options for specifying whether
the alarm is on or by choosing the
alarm time.
3. Select the repeat period:
Once
,
Daily
,
Mon
~
Fri
,
Mon
~
Sat
,
Sat
~
Sun
.
4. Select the alarm tone by using
Options
o
Sounds
. You can press
the up/down navigation keys and
select the sound you want, then
press the left soft key [OK].
5. Edit the title and press the left soft
key [Save].
Calculator Menu 9.2
The calculator module allows you to
perform basic arithmetic functions
such as addition, subtraction,
multiplication, and division as well as
some scientific functions.
1. You can enter numbers by using the
number keys, and the operators by
using navigation key.
Note
v To erase any mistake or clear the
display, use the key.
v To include a decimal point, press
the key.
v To include parentheses, press the
key.
2. To calculate the result, press the
OK key.
3. After calculation, press the right soft
key to return to the initial state.
Tools
Tools

72
Tools
Tools
Stopwatch Menu 9.3
This menu allows you to record the
elapsed time of an event.
1. Press the left soft key [Start] to take
time and record the lap time by
pressing the right soft key [Lap].
2. Press the left soft key [Stop] to
ascertain the record of lap time.
3. Press the right soft key [Reset] to
default condition.
Unit converter Menu 9.4
This converts any measurement into
a unit you want. There are 7 types
that can be converted into units:
Currency
,
Area
,
Length
,
Weight
,
Temperature
,
Volume
and
Velocity
.
World clock Menu 9.5
The World clock function provides
time information on major cities
worldwide.
You can select the following options
by pressing the left soft key [Options].
v
Change time zone:
You can
change the time zone by selecting
city.
v
New city:
You can add a desired
city.
v
Daylight saving:
You can apply to
daylight saving time.
WINE + Menu 9.6
Using the wine function built in your
phone, you can search for information
about wine .

73
WINE SEARCH
To search Type , Flavor, Region, Cost
and Food which is related to Wine,
Select the desired fuction with
/ and confirm the
selection with .
WINE DICTIONARY
Using Wine dictionary module, you
can search for Wine terms.
WINE MAP
Using WINE MAP module, you can
get information about Wine producer
and learn how to read the wine label.
SIM services Menu 9.7
(SIM dependent)
With the SIM services menu your
phone is future-proof and will support
additions to your service provider’s
service. For more information contact
your service provider.
Tools
74
You can access various WAP (Wireless
Application Protocol) services such as
banking, news, weather reports and
flight information. These services are
specially designed for mobile phones
and they are maintained by WAP
service providers.
Check the availability of WAP services,
pricing and tariffs with your network
operator or the service provider
whose service you wish to use.
Service providers will also give you
instructions on how to use their
services.
Once connected, the homepage
is displayed. The content depends
on the service provider. To exit the
browser at any time, press the
key. The phone will return to the idle
menu.
Navigating with the WAP browser
You can surf the Internet using either
the phone keys or the WAP browser
menu.
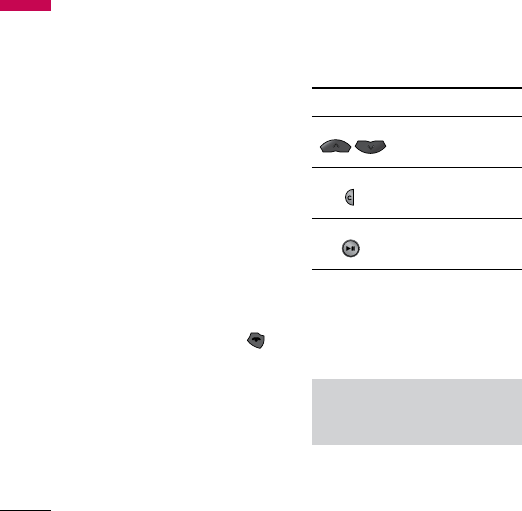
Using the phone keys
When surfing the Internet, the phone
keys function differently to phone
mode.
Icon Description
Scrolls each line of the
content area
Returns to the
previous page
Select options and
confirm actions
Using the WAP browser menu
There are various menu options
available when surfing the Mobile
Web.
Note
The WAP browser menus may vary,
depending on your browser version.
Brows e r
Browser

75
Home Menu *.1
Connects to a homepage. The
homepage will be the site which is
defined in the activated profile. It will
be defined by the service provider
if you have not defined it in the
activated profile.
Yahoo ! Menu *.2
You can access Yahoo Mobile Internet
Service.
v
oneSearch:
You can search for
instant answers.
Note
Some of countries are unable to
access Yahoo! service because of
network service.
Bookmarks Menu *.3
This menu allows you to store the URL
of favourite web pages for easy access
at a later time.
To create a bookmark
1. Press the left soft key [Options].
2. Select
New
bookmark
and press
the OK key.
3. After entering the desired name
and URL, press the OK key.
After selecting a desired bookmark,
the following options are available.
v
Connect:
Connects to the selected
bookmark.
v
View:
You can see the selected
bookmark.
v
Edit:
You can edit the selected
bookmark.
v
Delete:
You can delete the selected
bookmark.
v
New bookmark:
Select this to
create a new bookmark.
Brows e r

76
Brows e r
v
New folder:
Select this to create a
new folder.
v
Move:
You can move the selected
bookmark to sub folder.
v
Copy:
You can copy the selected
bookmark.
v
Send URL via:
Sends the selected
bookmark via
message
.
v
Multi delete:
Allows you to select
and delete saved bookmarks.
v
Delete all:
Deletes all the
bookmarks.
Enter address Menu *.4
You can connect directly to the site
you want. After entering a specific
URL, press the left soft key [Options]
and select the
Connect
.
History Menu *.5
This menu shows the recently
browsed pages.
Saved pages Menu *.6
The phone can save the page on
display as an offline file.
Settings Menu *.7
You can set the profile, cache and
security related to internet service.
Network proles (Menu *.7.1)
A profile is the network information
used to connect to the Internet.
There are default profiles for some
operators, stored in phone memory.
It s impossible to rename default
profiles.
Browser

77
Each profile has submenus as follows:
v
Activate:
Activates the selected
profile.
v
View:
You can see the selected
profile.
v
Edit:
You can edit the selected
profile.
v
New profile:
You can add a new
profile.
v
Delete:
Deletes the selected profile
from the list.
Rendering mode (Menu *.7.2)
You can adjust the size of URL page
when the page is larger than phone
screen.
Cache (Menu *.7.3)
The information or services you have
accessed are saved in the cache
memory of the phone.
Note
A cache is a buffer memory, which is
used to save data temporarily.
Cookies (Menu *.7.4)
Enabling cookies allows you to
store cookies sent from the server.
Disabling this function will prevent
cookies from being stored on your
phone.
Security certicates (Menu *.7.5)
You can see the list of personal
certificates that have been stored in
your phone.
Brows e r

78
Show image (Menu *.7.6)
You can select to display image or not
during WAP browsing.
Java script (Menu *.7.7)
Select whether to turn Java script
on or off.
Memory in use (Menu *.7.8)
You can choose phone or external.
Information Menu *.8
You can view the information of WAP
browser version.
Brows e r
Browser

79
Bluetooth Menu 0.1
Bluetooth enables compatible mobile
devices, peripherals and computers
that are in close proximity to
communicate directly with each other
without wires.
This handset supports built-in
Bluetooth connectivity, which
makes it possible to connect it. With
compatible Bluetooth headsets,
computer applications and so on.
Note
v If you use LG PC Sync via
Bluetooth, you can exchange the
data only within phonebook
v When you receive data from
another Bluetooth device, the
phone requests confirmation.
After confirming the transfer,
the file will be copied on to your
phone.
v Depending on the file type, it will
be stored in the following folders:
-
Video (.3gp, mp4):
Videos folder
-
Image (.bmp, gif, jpg, png):
Images folder
-
Sound (.amr, wav, aac):
Sounds
folder
-
MP3 (.mp3):
Sounds/MP3 folder
-
Other files (.txt, html):
Others
folder
Connectivity
Connectivity

80
Connectivity
v
Bluetooth on/off
You can activate or cancel the
Bluetooth function.
v
Device list
You can view all devices which your
GM210 is already paired to. If you
enter Paired devices, you access
the options
-
Connect /Disconnect:
After
pairing with headset or stereo
headset, you should connect with
those devices. Then you can use
those devices.
-
New:
Allows to search new
Bluetooth devices and add them
to your phone’s list of paired
devices. When you select New
your handset will start to search
for Bluetooth devices within
range. Once the device you wish
to pair appears on the list press
the Right soft key [Stop]. Scroll to
the desired device and press the
left soft key [ok]. You will then be
asked to enter a passcode.
The passcode can be any code you
wish to use (the same passcode
must be used by both devices) or
is one that is pre-determined by
the manufacturer of the device you
are trying to pair with. Please check
the User Manual of the device you
are initiating the pair with to see
if it already has a predetermined
passcode in place.
-
Set as authorized /Set as
unauthorized:
Allows you to
set an unauthorized connection
between each Bluetooth device.
For example if you regularly use
a Bluetooth headset with your
phone then setting the connection
as unauthorized will mean the
headset will automatically connect
to the handset each time the
headset is powered on.
-
All services:
Allows to view all
services which are supported by
Bluetooth device.
-
Delete:
Allows to delete a paired
Bluetooth device.
Connectivity

81
-
Rename:
Allows you to change
the name of the paired Bluetooth
device and how it is displayed on
the handset.
-
Delete all:
Allows to delete all the
paired Bluetooth devices.
v
Bluetooth settings
-
My visibility:
This indicates
whether or not your handset
will be visible to other Bluetooth
devices.
-
My name:
You can set the name
of Bluetooth device. The default
name is LG GM210.
-
My address:
You can view the
address of your Bluetooth device.
-
Primary storage:
You can choose
phone or memory card.
Network Menu 0.2
You can select a network which will
be registered either automatically or
manually.
Network selection (Menu 0.2.1)
Usually, the network selection is set to
Automatic
.
v
Automatic:
If you select
Automatic
mode, the phone will automatically
search for and select a network
for you. Once you have selected
Automatic
, the phone will be set to
Automatic
even though the power
is off and on.
v
Manual:
The phone will find the
list of available networks and show
you them. Then you can select
the network which you want to
use if this network has a roaming
agreement with your home
network operator. The phone let
you select another network if the
phone fails to access the selected
network.
Connectivity

82
v
Preferred:
You can set a list of
preferred networks and the phone
attempts to register with first,
before attempting to register to
any other networks. This list is set
from the phone’s predefined list of
known networks.
GPRS attach (Menu 0.2.2)
You can set GPRS service depending
on various situations.
v
Power on
If you select this menu, the phone
is automatically registered to a
GPRS network when you switch
the phone on. Starting a WAP or
PC dial-up application created
the connection between phone
and network and data transfer
is possible. When you end the
application, GPRS connection is
ended but the registration to the
GPRS network remains.
v
When needed
If you select this menu, the GPRS
connection is established when
you connect a WAP or application
service and closed when you end
the WAP or applicaion connection.
Access Point (Menu 0.2.3)
v
View:
You can see the selected
profile.
v
Edit:
You can edit the selected
profile.
v
New access point
•
Name:
You can type the network
name.
•
Bearer setting:
You can set the
bearer data service. Data/GPRS.
Connectivity
Connectivity

83
<Data settings>
Appears only if you select Data
Settings as a Bearer/service.
- Dial number:
Enter the telephone
number to dial to access your WAP
gateway.
- User ID:
The users identity for your
dial-up server (and NOT the WAP
gateway).
- Password:
The password required
by your dial-up server (and NOT the
WAP gateway) to identify you.
- Call type:
Select the type of data
call, Analog or Digital (ISDN)
- Linger time:
You need to enter
timeout period.
After entering that, the WAP
navigation service will be unavailable
if any data is not input or transferred.
- Primary server:
Input the IP address
of the primary DNS server you
access.
- Secondary Server:
Input the IP
address of the secondary DNS server
you access.
The service settings are only available
when GPRS is chosen as a bearer
service.
-
APN:
Input the APN of the GPRS.
-
User ID:
The users identify for your
APN server.
-
Password:
The password required
by your APN server.
-
Primary Server:
Input the IP address
of the primary DNS server you
access.
-
Secondary:
Input the IP address
of the secondary DNS server you
access.
Connectivity

84
USB connection mode
Menu 0.3
You can choose one mode of Data
service and USB Mass storage.
v
Mass storage
You can connect your phone to
your PC, as a USB storage device,
using the cable in three ways.
1. Connect the phone to the PC when
the idle screen is displayed.
2. Connect the phone while it is
performing an operation or menu
function, and then move to the idle
screen.
3. Connect the phone while it is
performing an operation or menu
function, and then select the
USB
Mass Storage
menu.
When you have finished using the the
microSD memory, click Exit and take
the following steps.
Caution!
Before you remove the cable, it is
necessary that you click Exit. Or, the
integrity of transferred data is not
guaranteed.
1. Click on the notification area.
[Unplug or Eject Hardware]
2. Select
USB mass Storage Device
,
click on
Stop
. The following
message will appear: The
USB mass
Storage Device
can now be safely
removed from the system.
3. Then remove the cable.
v
Data service
Select the
Data service
menu to
use the LG Mobile Sync program.
Connectivity
Connectivity

85
Date & Time Menu #.1
You can set functions relating to the
date and time.
Set date (Menu #.1.1)
You can enter the current date.
Date format (Menu #.1.2)
You can set the Date format such as
YYYY/MM/DD, DD/MM/YYYY, MM/
DD/YYYY. (D: Day / M: Month / Y: Year)
Set time (Menu #.1.3)
You can enter the current time.
Time format (Menu #.1.4)
Your can set the time format between
24 hours and 12 hours.
Auto update (Menu #.1.5)
Select
On
, the phone will
automatically update the data and
time.
Languages Menu #.2
You can change the language for
the display texts in your phone. This
change will also affect the language
Input mode.
Display Menu #.3
Wallpaper (Menu #.3.1)
You can select the background
pictures in standby mode.
Clock (Menu #.3.2)
You can select the clock format to
display the clock on the Internal/
External Phone screen.
Backlight timer (Menu #.3.3)
You can set the light-up duration of
the display.
Brightness (Menu #.3.4)
You can set the brightness of LCD.
Settings
Settings

86
Home screen shortcut
(Menu #.3.5)
If you select on, functionality of 4
navigation keys will be displayed on
idle screen
Font size (Menu #.3.6)
You can change the font size for
display text in your phone.
Theme (Menu #.3.7)
You can set the screen theme to be
displayed on the main screen.
Menu style (Menu #.3.8)
Your phone provides you with
Grid
view
and
List view
menu themes.
Set the menu style by scrolling and
pressing the left soft key [OK].
Dialing (Menu #.3.9)
You can set the font style/font size
of the numbers which appear in the
home screen when you make a call.
Standby text (Menu #.3.0)
If you select
On
, you can edit the text
which is displayed in standby mode.
Network name (Menu #.3.*)
If this function is activated, network
name will be displayed on LCD.
Shortcut Menu #.4
You can set the functions of 4
navigation keys for using shortcut in
the idle mode.
Call Menu #.5
You can set the menu relevant to
a call by pressing the left soft key
[Select] in the
Setting
menu.
Call divert (Menu #.5.1)
The
Call divert
service allows you to
divert incoming voice calls, fax calls,
and data calls to another number. For
details, contact your service provider.
Settings
Settings

87
v
All voice calls:
Diverts voice calls
unconditionally.
v
If busy:
Diverts voice calls when the
phone is in use.
v
If no reply:
Diverts voice calls
which you do not answer.
v
If out of reach:
Diverts voice calls
when the phone is switched off or
out of coverage.
v
All data calls:
Diverts to a
number with a PC connection
unconditionally.
v
All fax calls:
Diverts to a
number with a fax connection
unconditionally.
v
Cancel all:
Cancels all call divert
service.
The submenus
Call divert menus have the submenus
shown below.
-
Activate:
Activate the
corresponding service.
To voicemail number:
Forwards to
message centre. This function is not
shown at
All data calls
and
All fax
calls
menus.
To other number
: Inputs the
number for diverting.
To favourite number
: You can check
recent 5 diverted numbers.
-
Cancel:
Deactivate the
corresponding service.
-
View status:
View the status of the
corresponding service.
Call barring (Menu #.5.2)
The Call barring service prevents
your phone from making or receiving
certain category of calls. This function
requires the call barring password.
You can view the following submenus.
v
All outgoing
The barring service for all outgoing
calls.
Settings

88
v
Outgoing international
The barring service for all outgoing
international calls.
v
O/G international expect home
country
The barring service for all
international outgoing calls when
roaming
v
All incoming
The barring service for all incoming
calls.
v
Incoming when abroad
The barring service for all incoming
calls when roaming.
v
Cancel all barrings
You can cancel all barring services.
v
Change password
You can change the password for
Call Barring Service.
The submenus:
- Activate
Allows to request the network to set
call restriction on.
- Cancel
Set the selected call restriction off.
- View status
View the status whether the calls are
barred or not.
Fixed dial number (Menu #.5.3)
(SIM dependent)
v You can restrict your outgoing calls
to selected phone numbers. The
numbers are protected by your
PIN2 code.
v
On
You can restrict your outgoing calls
to selected phone numbers.
v
Off
You can cancel fixed dialling
function.
Settings
Settings

89
v
Number list
You can view the number list saved
as Fixed dial number
Answer mode (Menu #.5.4)
v
Flip open:
If you select this menu,
you can receive an incoming call
when you open the flip.
v
Any key:
If you select this menu,
you can receive a call by pressing
any key except the end key and the
right soft key.
v
Send key only:
If you select this
menu, you can receive a call by only
pressing the send key.
Send my number (Menu #.5.5)
(network and subscription
dependent)
v
Set by network:
If you select this,
you can send your phone number
depending on two line service such
as line 1 or line 2.
v
On:
You can send your phone
number to another party. Your
phone number will be shown on
the receiver’s phone.
v
Off:
Your phone number will not
be shown.
Call waiting (Menu #.5.6)
(network dependent)
v
Activate:
If you select
Activate
, you
can accept a waiting (receiving) call.
v
Cancel:
If you select
Cancel
, you
cannot recognize the waiting
(receiving) call.
v
View status:
Shows the status of
Call waiting
.
Minute minder (Menu #.5.7)
If you select
On
, you can check the
call duration by a beep sound given
every minute during a call.
Settings

90
Settings
Auto redial (Menu #.5.8)
v
On:
When this function is activated,
the phone will automatically try
to redial in the case of failure to
connect a call.
v
Off:
Your phone will not make any
attempts to redial when the original
call has not connected.
Select line (Menu #.5.9)
(SIM dependent)
Depending on the support or not of 2
line services on your SIM card, you can
select the line you wants.
Send DTMF tones (Menu #.5.0)
You can send touch tones during
an active call to control your voice
mailbox or other automated phone
services.
Security Menu #.6
PIN code request (Menu #.6.1)
In this menu, you can set the phone to
ask for the PIN code of your SIM card
when the phone is switched on.
If this function is activated, you ll be
requested to enter the PIN code.
1. Select PIN code request in the
security settings menu, and then
press the left soft key [OK].
2. Set
On/Off
.
3. If you want to change the setting,
you need to enter PIN code when
you switch on the phone.
4. If you enter wrong PIN code more
than 3 times, the phone will lock
out. If the PIN is blocked, you will
need to key in PUK code.
5. You can enter your PUK code up to
10 times. If you put wrong PUK code
more than 10 times, you can not
unlock your phone. You will need to
contact your service provider.
Settings

91
Settings
Phone lock (Menu #.6.2)
You can use a security code to avoid
unauthorized use of the phone.
Whenever you switch on the phone,
the phone will request security code
if you set phone lock to
When switch
on
.
If you set phone lock to
When SIM
changed
, your phone will request
security code only when you change
your SIM card.
Anti Theft Mobile Tracker
(Menu #.6.3)
The ATMT feature of this phone
provides you with the ability to have
a tracking system in place for your
mobile in case you loose or misplace
it. The moment an unauthorized user
uses your phone, a SMS is triggered
from your phone and the message is
send to your pre-defined number. The
SMS will be sent to your predefined
numbers without the notice of the
un-authorized user.
Change codes (Menu #.6.4)
PIN is an abbreviation of Personal
Identification Number to prevent use
by unauthorized person.
You can change the access codes:
Security code
,
PIN2 code, ATMT
code
.
1. If you want to change the Security
code/PIN2 code/ATMT Code, input
your original code, and then press
the left soft key [OK].
2. Input new Security code/PIN2
code/ATMT code and verify them.
Note
You can also change PIN code only if
Pin code request option is ON.

92
Settings
Flight mode Menu #.7
This allows you to use only the phone
features that do not require the use
of the wireless network when you are
in an airplane or in places where the
wireless network is prevented.
If you set the flight mode on, the
icon will be displayed on the screen
instead of the network signal icon.
v
On:
You cannot make (or receive)
any calls, including emergency calls,
or use other features that require
network coverage.
v
Off:
You can deactivate the flight
mode and restart your handset to
access the network.
Power save Menu #.8
Choose to switch the factory set
power saving settings on or off.
Reset Menu #.9
You can initialize all factory defaults.
You need
Security code
to activate
this function.
Memory status Menu #.0
You can check free space and memory
usage of phone, SIM card and external
memory (if inserted).
Settings