LG Electronics USA GM730 Cellular/PCS GSM/EDGE/WCDMA Phone with WLAN and Bluetooth User Manual
LG Electronics USA Cellular/PCS GSM/EDGE/WCDMA Phone with WLAN and Bluetooth Users Manual
UserManual.wiki
>
LG Electronics USA
>
GM730 User Manual
Users Manual
Navigation menu
Upload a User Manual
Namespaces
Wiki Guide
HTML
PDF
Info
Views
User Manual
Discussion / Help
Navigation

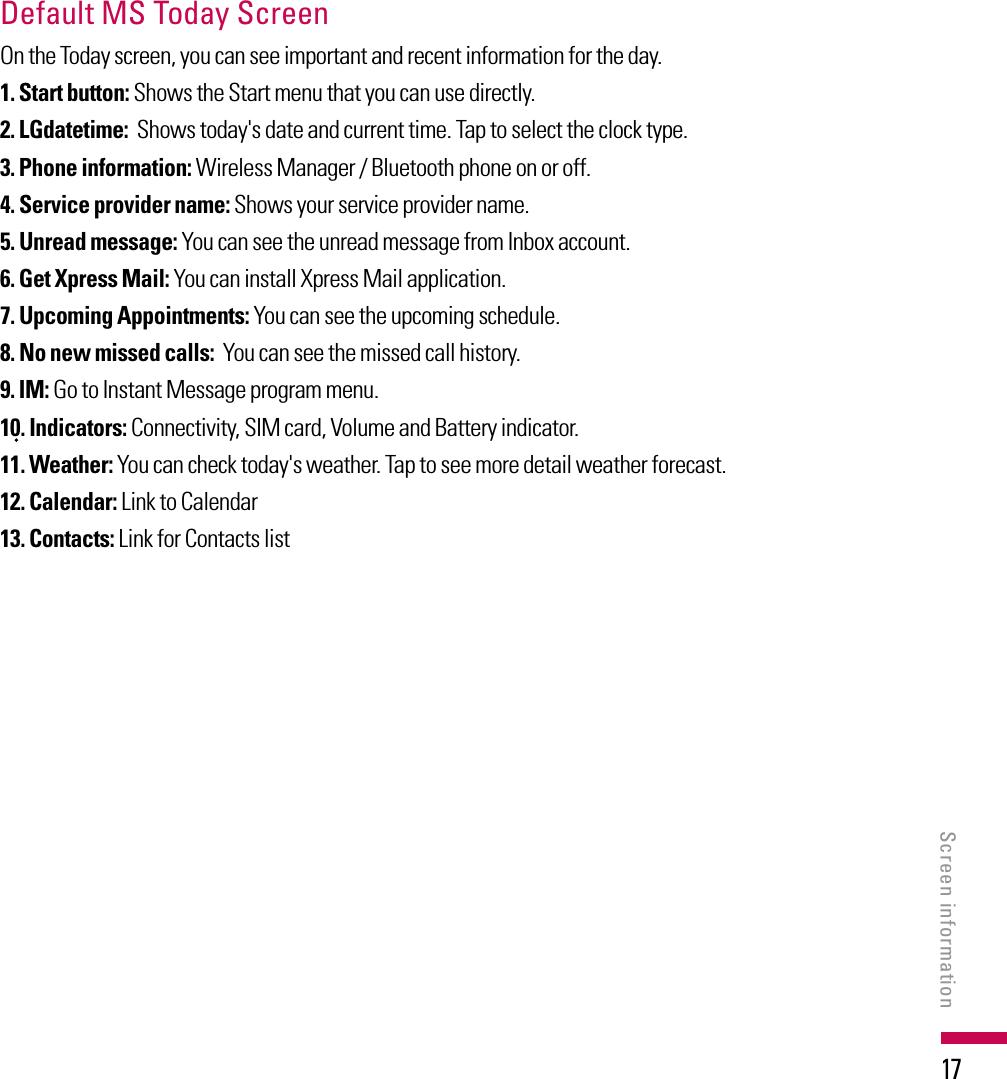


![124SettingsSettingsPhone You can edit the general settings related to making and receiving calls.PhoneSoundsv Ring type: This option determines the incoming call notification mode. You can select from [Ring], [Increasing ring], [Ring once], [Vibrate], [Vibrate and ring], [Vibrate then ring], [None].v Ring tone: You can select the ringtone for incoming voice calls.v Keypad: You can set the key tone to be played when pressing the keys.(Long tones/Short tones/Off)SecurityWhen this is set to On, you are requested to enter your PIN each time you switch the phone on. ServicesTo access settings for a service, select it from the following list and tap "Get Settings".v Call BarringYou can restric the calls : Block incoming calls: All calls/When roaming/Off.Block outgoing calls: All calls/International/International except to home country/OffTo edit mobile call barring settings, you need a password. You obtain the barring password from your service provider upon subscription to this network service.Call barring affects all voice and data calls, except emergency calls.](https://usermanual.wiki/LG-Electronics-USA/GM730/User-Guide-1108615-Page-119.png)