LG Electronics USA GS390 Cellular/PCS GSM/EDGE Phone with Bluetooth User Manual GS390 Open Eng Cover indd
LG Electronics USA Cellular/PCS GSM/EDGE Phone with Bluetooth GS390 Open Eng Cover indd
UserManual.wiki
>
LG Electronics USA
>
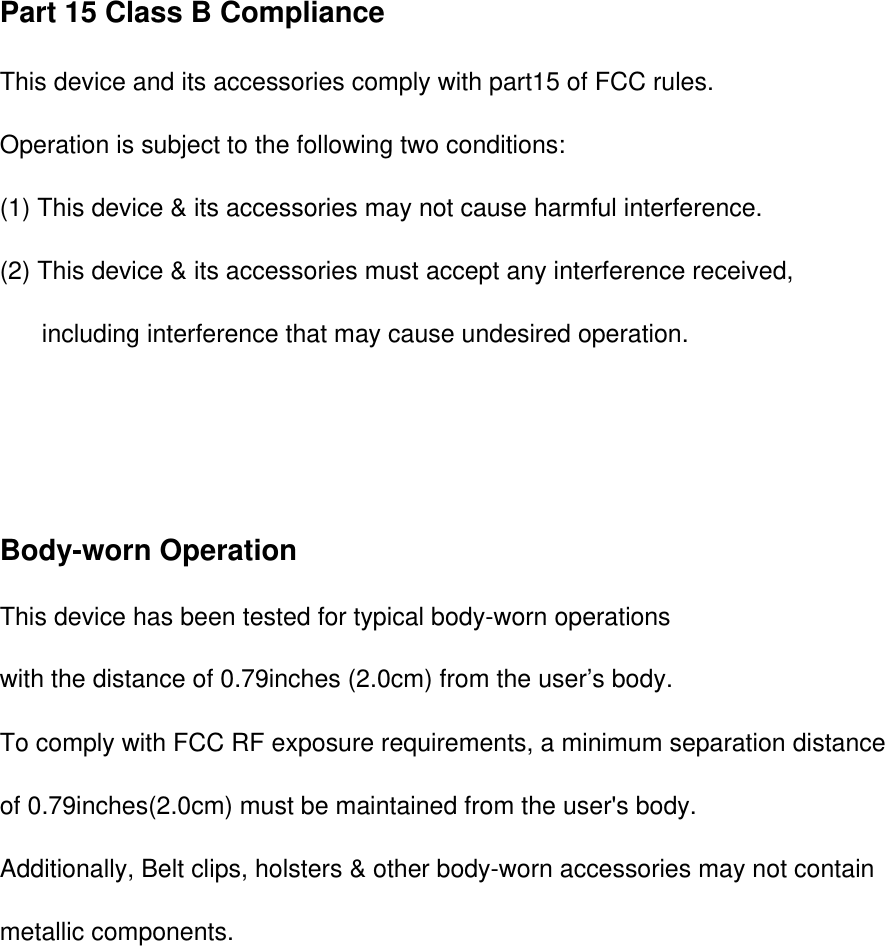
GS390 User Manual
Users Manual
Navigation menu
Upload a User Manual
Namespaces
Wiki Guide
HTML
PDF
Info
Views
User Manual
Discussion / Help
Navigation
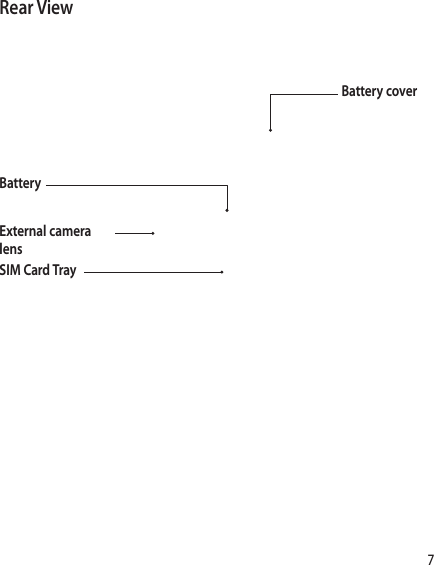
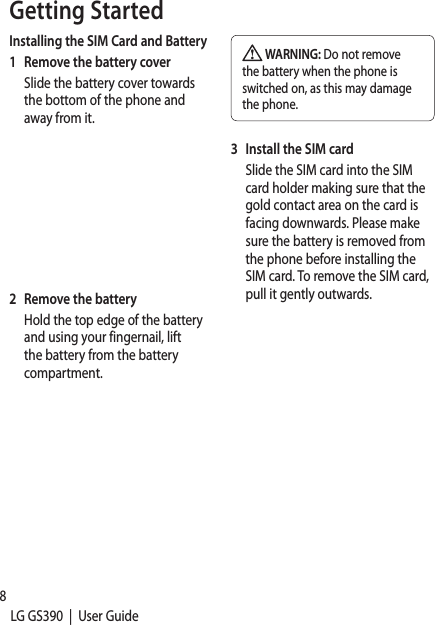
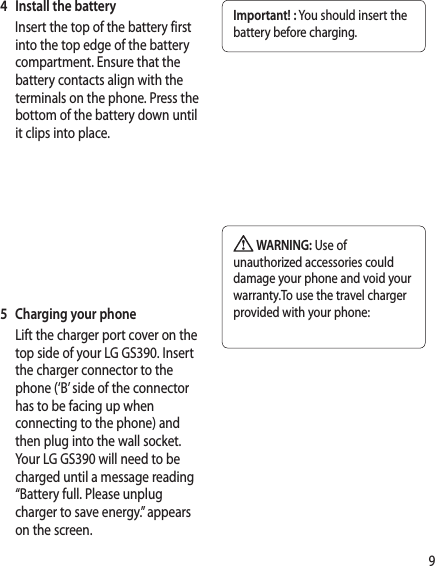
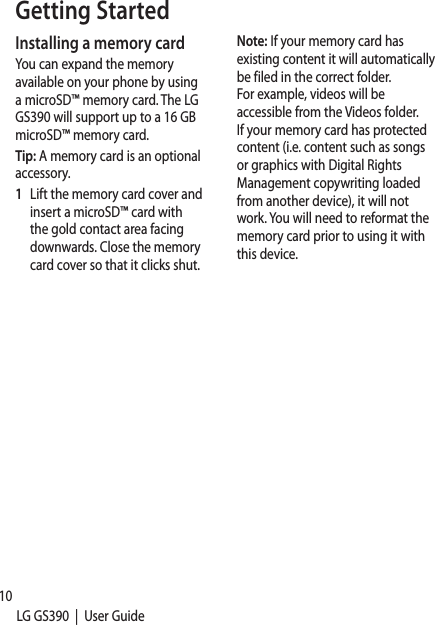
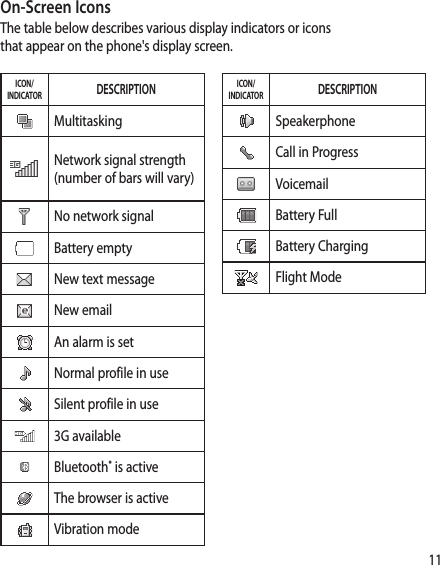
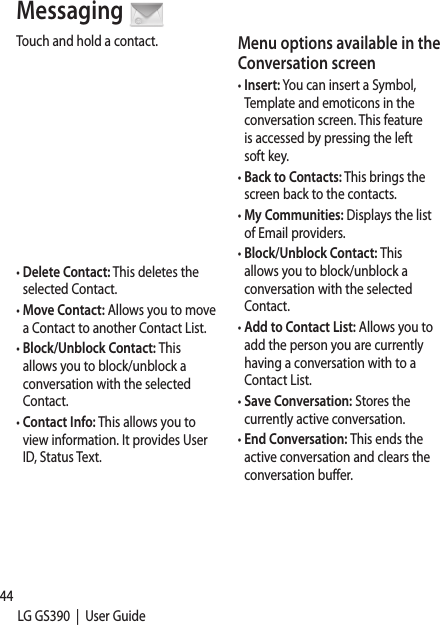
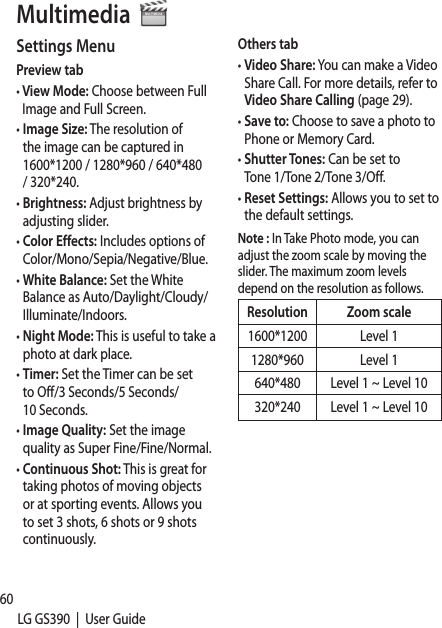
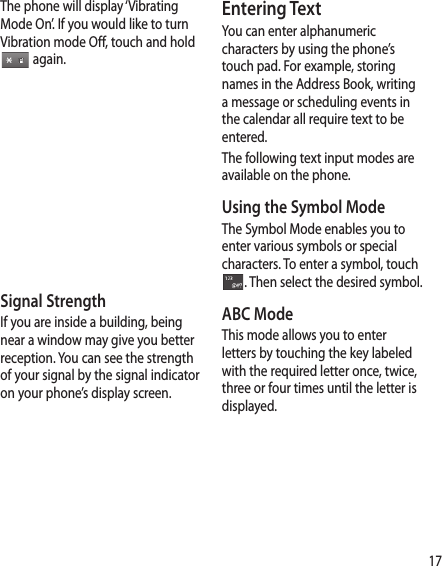
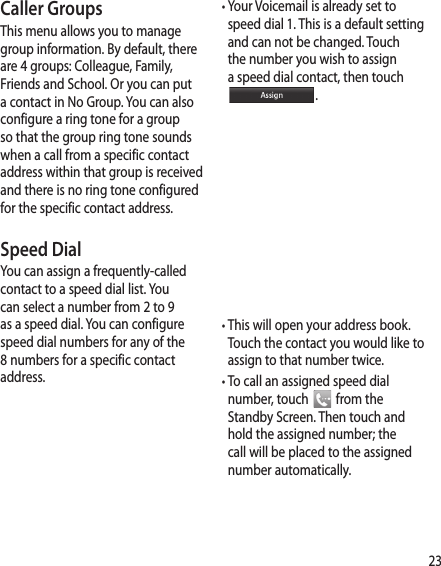
![14LG GS390 | User GuideGeneral Functions Making a Call1. Make sure your phone is powered on.2. Touch and enter a phone number using the touch pad or slide open the qwerty pad and enter a phone number using the qwerty keys. To edit a number on the display screen, simply press the key to erase one digit at a time. • Press and hold the key to erase the entire number.3. Press the [SEND] key to call the number. Or touch on the touch pad.Making a Call with the Send Key1. Press the [SEND] key, and the most recent missed, dialed and received phone numbers will be displayed.2. Select the desired number.3. Press the [SEND] key or touch .Making International Calls1. When entering a phone number, press the key and the international access character ‘+’ will appear. When using the touch pad to dial, touch and hold .2. Enter the country code, area code and the phone number.3. Press the [SEND] key to call the number. Or touch on the pad.Ending a CallWhen you have finished a call, press the [END] key.Making a Call from the ContactsYou can store frequently called names and phone numbers in the SIM card as well as in the phone memory known as the Contacts.You can dial a number by simply selecting a name in the contacts and pressing the [SEND] key. AnsWheringson thiden(or nBook1. PrunIf Aan[E2. En[ENoteusingfeatu](https://usermanual.wiki/LG-Electronics-USA/GS390/User-Guide-1220776-Page-12.png)
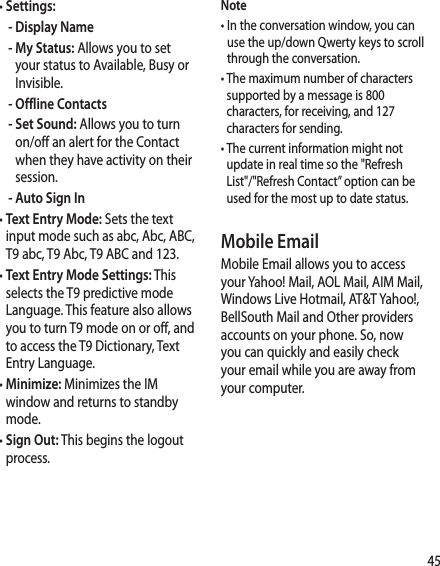
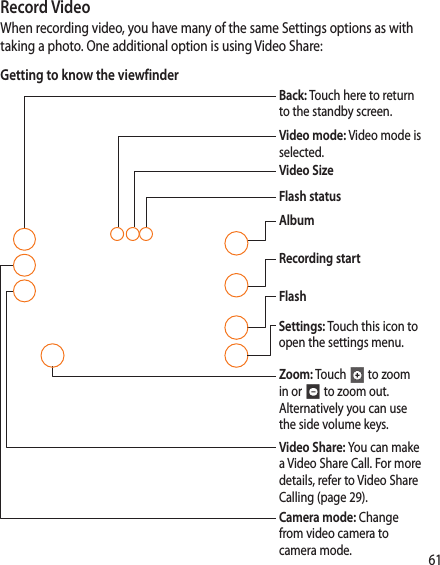
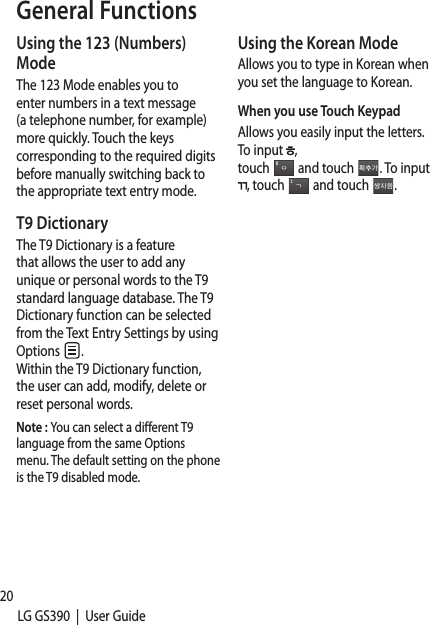
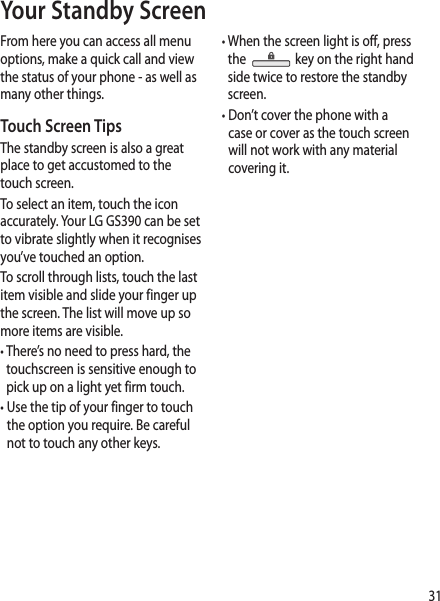
![15ber, ‘+’ ouch .ode call on ess e and Answering a CallWhen you receive a call, the phone rings and the phone icon appears on the screen. If the caller can be identified, the caller’s phone number (or name if stored in your Address Book) is displayed.1. Press the [SEND] or unlock the screen and touch . If Any Key has been set as the Answer Mode, any key press will answer a call except for the [END] key, , and .2. End the call by pressing the [END] key.Note : You can answer a call while using the Address Book or other menu features.Adjusting the VolumeDuring a call, if you want to adjust the earpiece volume, use the side volume keys of the phone.In the Standby screen, you can adjust the ring volume using the side volume keys.Setting Pro lesPress either of the side volume keys. You can set your Ringtone to Vibrate All, Alarm Only or Silent All.](https://usermanual.wiki/LG-Electronics-USA/GS390/User-Guide-1220776-Page-13.png)

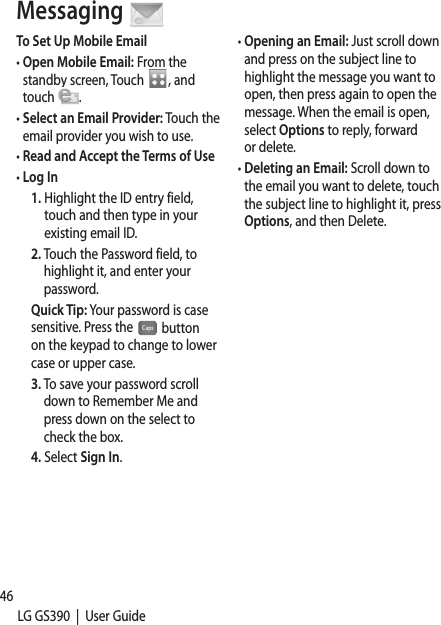
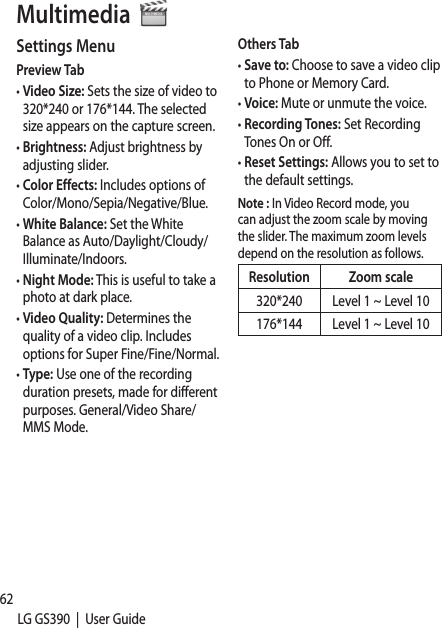
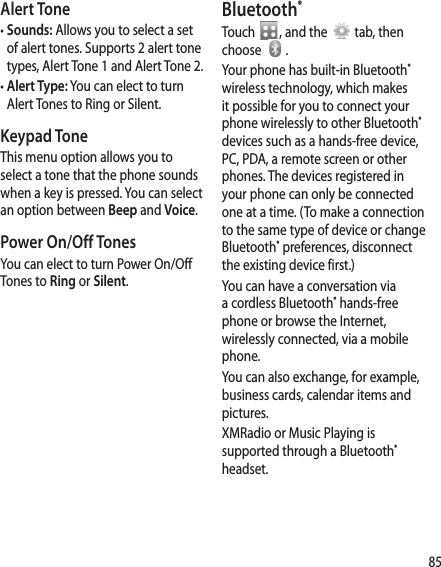
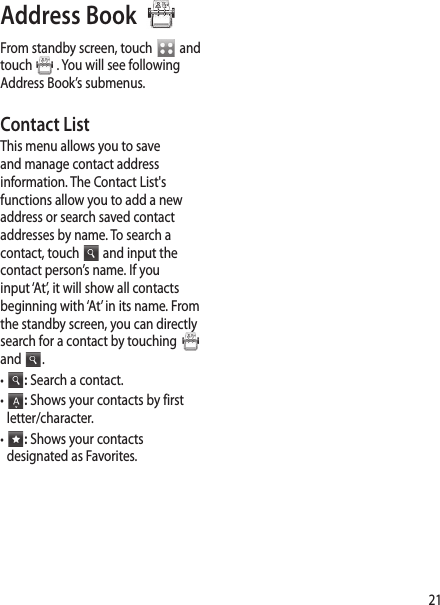
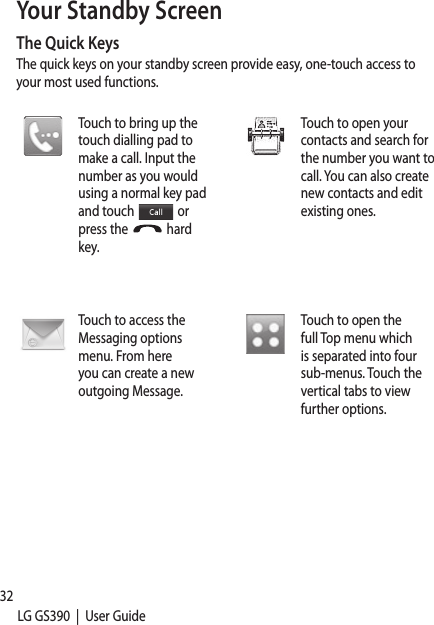
![19ys are yed is ter he d dd ng w lt-in pace To delete letters, touch . Touch and hold down to erase the entire text entry.Note : Pressing the [END] key will save your unsaved message in the Drafts folder. Using the ABC ModeUse the touch pad keys to enter your text.1. Touch the touch key labeled with the required letter: • Once for the first letter • Twice for the second letter • And so on2. To insert a space, touch . To delete letters, touch . Touch and hold down to erase the entire text entry. Note : Refer to the table below for more information on the characters available using the keys. Touch to input a Upper Case letter. To change text entry mode from Lower Case to Upper Case, touch twice and the key will turn to orange color - indicating that Caps Lock has been activated.KeyCharacters in the Order DisplayUpper Case Lower Case1 . , ' @ ? ! - : / 1 . , ' @ ? ! - : / 12 A B C 2 a b c 23 D E F 3 d e f 34 G H I 4 g h i 45 J K L 5 j k l 56 M N O 6 m n o 67 P Q R S 7 p q r s 78 T U V 8 t u v 89 W X Y Z 9 w x y z 90Space Key, 0 (Long press)Space Key, 0 (Long press)](https://usermanual.wiki/LG-Electronics-USA/GS390/User-Guide-1220776-Page-17.png)
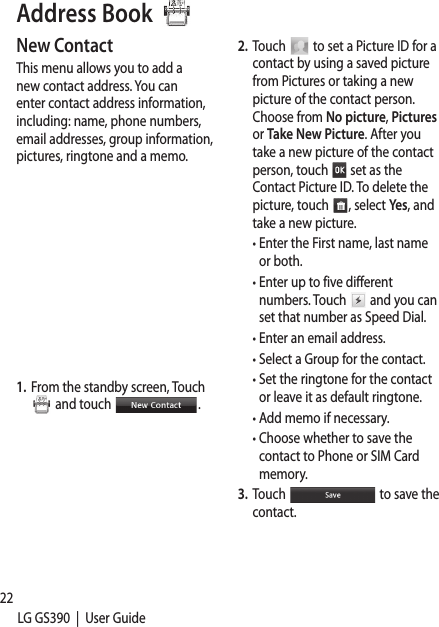
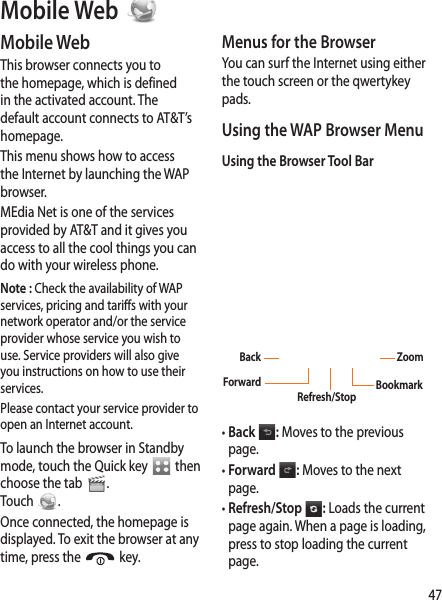
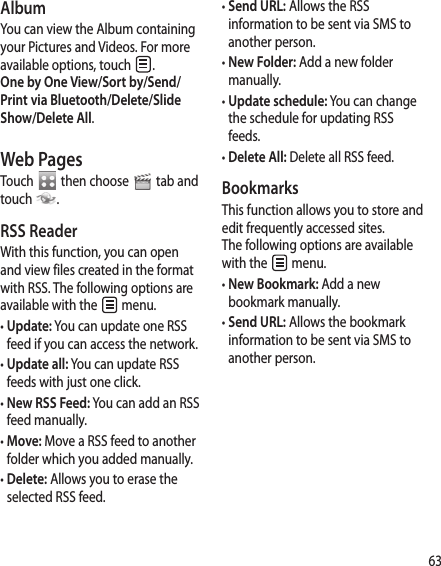
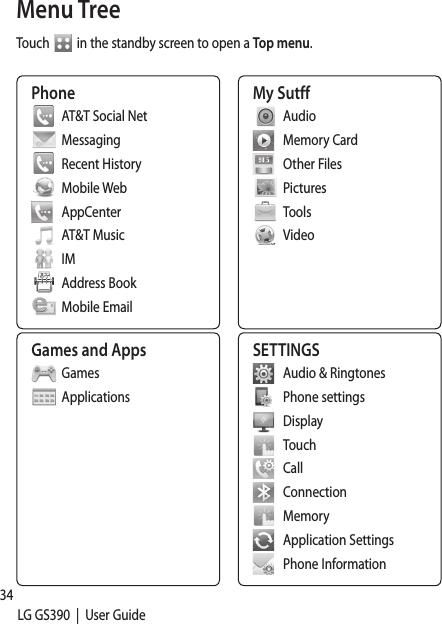
![24LG GS390 | User GuideManagementThis menu allows you to copy information from your SIM card, e.g. name, handset number, etc. to your handset. If a name is duplicated during the copying operation, the information is also duplicated.You can also copy entries from the SIM card to the phone memory and entries from the handset memory to the SIM card (not all the data will be copied).From this menu, you are also able to delete entries in the SIM card and the Handset. Service NumbersYou can view the list of Service Dialing Numbers (SDN) assigned by your network provider. Such numbers could include the emergency services, directory assistance and voice mail numbers.1. Select the Service dial number option.2. The names of the available services will be shown.3. Touch a service number. Press the [SEND] key. My NumbersThis displays your own phone numbers stored in your phone/SIM card. You can edit its name and number by touching or you can choose and delete the information.In-Yourof couse dfuncand DurThe screethe dwhethesMakYou dial, 1. Uan2. Prnu or Prfropr Address Book](https://usermanual.wiki/LG-Electronics-USA/GS390/User-Guide-1220776-Page-22.png)
![25r the IM you he In-Call MenuYour phone provides a number of control functions that you can use during a call. To access these functions during a call, touch to unlock the screen and then touch . During a CallThe menu displayed on the handset screen during a call is different from the default main menu displayed when in the Standby screen, and these options are described below.Making a Second CallYou can select a number you wish to dial, to make a second call. 1. Unlock the Screen. During a call, an In-Call menu will available.2. Press , enter the 2nd phone number and press . or Press to select a contact from your Address Book and then press the Call button .Swapping Between Two CallsBy using one of the two methods below, you can switch between two on-going calls.1. Press [SEND] key.2. Touch and select “Swap Calls.”Answering an Incoming CallTo answer an incoming call when the handset is ringing, simply press the [SEND] key or touch . The handset is also able to warn you of an incoming call while you are already on a call. A tone will sounds in the earpiece, and the display will show that a second call is waiting. This feature, known as Call Waiting, is only available if your network supports it.If Call Waiting is turned on, you can put the first call on hold and answer the second call by pressing the [SEND] key.](https://usermanual.wiki/LG-Electronics-USA/GS390/User-Guide-1220776-Page-23.png)
![26LG GS390 | User GuideRejecting an Incoming CallYou can reject an incoming call without answering by simply pressing the [END] key or touching .Muting the MicrophoneYou can mute the microphone during a call by touching . The handset can be unmuted by touching again. When the handset is muted, the caller cannot hear you, but you can still hear the caller.Using the SpeakerphoneYou can use the integrated Speakerphone during a call by touching . The loudspeaker is automatically deactivated when you end the call.Warning : Due to increased volume levels, do not place the phone near your ear while the speakerphone is enabled. Video Share CallingMaking a Video Share CallYou can make or answer a Video Share call with other 3G video phones. In order to start a Video Share call, both sides must have a 3G Video Share capable phone and both must be in a 3G coverage area. Note : Before you start a Video Share Call you must check the following:• Phone must be in an AT&T 3G service area.To initiate Video Share follow these steps:1. Make a phone call by dialing a number, or selecting a number from the Address book. Or directly you can make a video share call directly from the Recent Call or Contact List by selecting > [Video Share Call] and selecting Video Type (Live or Recorded). In this case skip steps 2-3.2. A few seconds after the connection is established, a "Video Share Ready" prompt will appear on the screen once the other party is ready to use the Vial(Sw3. TotoCa(LiNoteautoSharefree dhead• Livewith• Recvidethat1764. If ViShacseShIn-Call Menu](https://usermanual.wiki/LG-Electronics-USA/GS390/User-Guide-1220776-Page-24.png)
![27a 3G both re vice ese r he all] will e Video Share service. If the Audio alert in the Video Share setting (See Application Setting) is set to , audio alert will sound along with the prompt.3. To Share Video with another party, touch the Video icon or press the Camera key and select Video Type (Live or Recorded).Note : The Speakerphone will be automatically activated when a Video Share session begins, unless a hands-free device (Bluetooth® or stereo headset) is connected.• Live: Share a real-time video stream with the other party.• Recorded: Share a pre-recorded video clip with the other party. (Note that H.263 & Mpeg4 video formats in 176x144 size is supported)4. If the other party accepts the Video Share invitation, the Video Share session will begin. (After accepting, it may take several seconds before the actual Video Share starts.) During a Video Share call, you can do the following by touching the icons below:• : You can turn on/off the Speakerphone.• : You can mute/unmute the microphone.• : You can stop a Video Share Call and proceed to a Voice Call.You can choose from the following:• Brightness: You can adjust the brightness of the screen by selecting Brightness.• Zoom: You can zoom in/out the video by selecting Zoom.• Audio to Bluetooth®/Audio to Phone: When Audio to Bluetooth® is selected, you can have a conversation using Bluetooth®. When Audio to Phone is selected, you can have a conversation using either speakerphone or headset.• Record Video Share/Stop Recording: You can start recording the live video by selecting ‘Record Video Share’. Once you are recording the video, you can stop recording by selecting ‘Stop Recording’.](https://usermanual.wiki/LG-Electronics-USA/GS390/User-Guide-1220776-Page-25.png)
![28LG GS390 | User Guide• End Call: You can end the phone call by selecting ‘End Call’. (Note: Video Share will stop as well)• Hold Call: You can hold the phone call by selecting ‘Hold Call’. (Note: Video Share will stop when you select ‘Hold Call’)During the Video Share session, turn the speakerphone on/off using the ‘Spk. off’ / ‘Spk. on’ key.Note : Recorded video clip will be saved in [My stuff ] - [More].5.1. Stop a Video Share call and proceed to a voice call by1. Touching [Stop] Icon5.2. End a voice call along with the Video Share call by1. Pressing [END] Key2. Selecting > [End Call•Note1. A Video Share Call will be terminated in the following cases: • When trying to make a conference call/second call during a Video Share Call. • When the voice call is placed on hold. • When the voice call is disconnected. • When moving out of an AT&T 3G service area. • When the network connection is poor.2. A Video Share Call will be unavailable in the following cases (“Video Share Ready” message will not appear). • When trying to make a conference call/second call during a Video Share Call. • When the voice call is placed on hold. • When moving out of an AT&T 3G service area.Answering a Video Share Call1. Touch [Accept• when you receive a prompt asking “The other party wants to share Video Share with you” appears, to start the Video Share Call. Touch [Decline• to decline the Video Share call. (Note that after accepting the call, it may take several seconds before the Video Share session starts.) You can choose from the following:• Landscape mode: When Landscape mode is selected you can watch shared video in landscape mode.• AudPhois seconWhyoueithNoteautoSharereverwhenMakfromModWhecan ea pe1. St • I • IcNote3G cocapaNoteVideoordinIn-Call Menu](https://usermanual.wiki/LG-Electronics-USA/GS390/User-Guide-1220776-Page-26.png)
![293G is able are .ence n 3G Callve rty h o ote may e ng:cape h e.• Audio to Bluetooth®/Audio to Phone: When Audio to Bluetooth® is selected, you can have a conversation using Bluetooth®. When Audio to Phone is selected, you can have a conversation using either speakerphone or headset.Note : The speakerphone will be automatically turned on when a Video Share Call begins, and automatically reverts back to the previous mode when a Video Share Call ends.Making a Video Share Call from the Video Recording Mode or VideoWhen you are Recording Video, you can easily make a Video Share Call to a person in your Contact List.1. Start Video Share call as follows: • In Record Video Mode, Touch . • In Video Gallery, touch and choose Video Share Call.Note : This menu item is active only in 3G coverage areas and on Video Share capable devices.Note : If the other party is not ready for Video Share, the call will proceed to an ordinary voice call.Saving your Video ShareThe sender can record video during the Video Share session by1. Selecting [Option] > [Record Video Share] during a live Video Share call.2. Setting Auto Record to ‘ON’ (See Application Settings).Sender can save the recorded video by1. Selecting [Option] > [Stop Recording] during a live Video Share call.2. Ending Video Share call.Recorded video will be saved in [My Stuff] > [Videos] folder in the phone.Conference CallsThe conference service provides you with the ability to have a simultaneous conversation with more than one caller. The conference call feature can be used only if your network service provider supports this feature.Once a conference call is set up, calls may be added, disconnected or separated (that is, removed from the conference call but still connected to](https://usermanual.wiki/LG-Electronics-USA/GS390/User-Guide-1220776-Page-27.png)
![30LG GS390 | User Guideyou) by the person who set up the conference call. These options are all available from the In-Call menu.The maximum number of callers in a conference call is five. Once started, you are in control of the conference call, and only you can add calls to the conference call.Making a Second CallYou can make a second call while currently on a call simply by accessing the Dial Pad, from the In-Call Menu, entering the second number and pressing the [SEND] key. When the second call is connected, the first call is automatically placed on hold. You can swap between calls by pressing the [SEND] key.Setting Up a Conference CallTo set up a conference call, place the first call. Once that is connected, follow the steps above to make a second call. You can then join the two separate calls by touching and select the Join Calls from the Conference Call menu.Activate the Conference Call on HoldTo activate a conference call on hold, press the key.Adding Calls to the Conference CallTo add a call to an existing conference call, touch and then select the Join Calls from the Conference Call option.Private Call in a Conference CallTo have a private call with one caller from a conference call, touch and select Private Call from the Conference Call option. When the numbers of the callers are displayed, select the one you wish to speak in private with. Only the person who initiates the Conference Call can initiate a Private Call.Ending a Conference CallThe currently active conference call can be disconnected by pressing the key.In-Call Menu YoFromoptiothe smanTouThe placetoucTo seaccuto viyou’vTo scitemthe smore• Thetoupick• Usethenot](https://usermanual.wiki/LG-Electronics-USA/GS390/User-Guide-1220776-Page-28.png)

![35 Messaging This menu includes functions related to SMS (Short Message Service), MMS (Multimedia Message Service), voice mail as well as the network's service messages.New Message1. In the standby screen, select . 2. Touch Create Message. Note : If you attach a graphic or an audio file while writing a multimedia message, the file loading time can take up to 5 seconds. You will not be able to activate any key during the file loading time. When the file loading is complete, you will be able to write a multimedia message.Editing a messageThe following options are available when Editing a Message.• Symbol: You can insert symbols ranging from sentence notes to emoticons. Touching the twice, and you can select the symbols you want. You can use and to scroll through the various pages of symbols.Inserting Multimedia files in outgoing messages is easy. Press the button and select an option from below:• Picture: You can preview the selected picture. Touch to insert the selected picture.• Audio: You can insert from your saved Audio files.• Video: You can insert from your saved Video clips.• New Picture: You can insert a new image taken from the camera by touching [Capture]. Note : Refer to page 77 for camera options.](https://usermanual.wiki/LG-Electronics-USA/GS390/User-Guide-1220776-Page-33.png)
![39oice ct or ct, ble and o es can d as uch dby OutboxOutbox is a temporary storage place for messages waiting to be sent. When you press the [SEND] key, you can make a call to the number of the recipient number of the selected message.If the message is not sent from the Outbox, you will receive a sound alert along with a Message Sending Failure notice on the screen. Another attempt will be made to send the failed message and after two unsuccessful attempts, the message will no longer be sent automatically. In order to send the message that has failed, you must touch to resend the message.After the maximum number of Send attempts has been reached, the Send function has failed. If you were trying to send a text message, open the message and check that the Sending options are correct.Outbox list will display messages in sending failed, sending or waiting, sent order. Touch to use options available from Outbox list.• Delete: Deletes a message you choose.• Sort by: Sorts by name, title and date.• Delete All: Delete all messages.Those options are available when you choose a message in Outbox.• View Status: Shows message status as failed, sent or error.• Edit: Allows you to edit the selected message.• Select slide: If the multimedia message has more than one slide, you can select and move to the desired slide.• View Attachment: View attachment of the message.• Message Details: Allows you to view the information on the message. VoicemailThis menu provides you with a quick way of accessing your voice mailbox (if provided by your network).Note : Please check with your network service provider for details of their service in order to configure the handset accordingly.](https://usermanual.wiki/LG-Electronics-USA/GS390/User-Guide-1220776-Page-37.png)