LG Electronics USA KF300D Cellular/PCS GSM Phone with Bluetooth User Manual KF300 ENG 1019
LG Electronics USA Cellular/PCS GSM Phone with Bluetooth KF300 ENG 1019
UserManual.wiki
>
LG Electronics USA
>
KF300D User Manual
Users Manual
Navigation menu
Upload a User Manual
Namespaces
Wiki Guide
HTML
PDF
Info
Views
User Manual
Discussion / Help
Navigation
![8For Your SafetyImportant InformationThis user guide contains important information on the use andoperation of this phone. Please read all the informationcarefully for optimal performance and to prevent any damageto or misuse of the phone. Any changes or modifications notexpressly approved in this user guide could void your warrantyfor this equipment.Before You StartSafety InstructionsWARNING! To reduce the possibility of electric shock, do notexpose your phone to high humidity areas, such as thebathroom, swimming pool, etc.Always store your phone away from heat. Never store yourphone in settings that may expose it to temperatures less than32°F or greater than 104°F, such as outside during extremeweather conditions or in your car on a hot day. Exposure toexcessive cold or heat will result in malfunction, damageand/or catastrophic failure.Be careful when using your phone near other electronicdevices. RF emissions from your mobile phone may affectnearby in adequately shielded electronic equipment. Youshould consult with manufacturers of any personal medicaldevices such as pacemakers and hearing aides to determine ifthey are susceptible to interference from your mobile phone.Turn off your phone in a medical facility or at a gas station.Never place your phone in a microwave oven as this willcause the battery to explode.IMPORTANT! Please read the TIA SAFETY INFORMATION onpage 78 before using your phone.Safety InformationRead these simple guidelines. Breaking the rules may bedangerous or illegal. Further detailed information is given in thisuser guide.]Never use an unapproved battery since this could damagethe phone and/or battery and could cause the battery toexplode.]Never place your phone in a microwave oven as it willcause the battery to explode.]Do not dispose of your battery by fire or with hazardous orflammable materials.]Make sure that no sharp-edged items come into contactwith the battery. There is a risk of this causing a fire.]Store the battery in a place out of reach of children.]Be careful that children do not swallow any parts such asrubber plugs (earphone, connection parts of the phone,etc.). This could cause asphyxiation or suffocation.](https://usermanual.wiki/LG-Electronics-USA/KF300D/User-Guide-880638-Page-3.png)
![9For Your Safety]Unplug the power cord and charger during lightning stormsto avoid electric shock or fire.]When riding in a car, do not leave your phone or set up thehands-free kit near to the air bag. If wireless equipment isimproperly installed and the air bag is activated, you may beseriously injured.]Do not use a hand-held phone while driving.]Do not use the phone in areas where its use is prohibited.(For example: aircraft).]Do not expose the battery charger or adapter to directsunlight or use it in places with high humidity, such as abathroom.]Never store your phone in temperatures less than- 4°F orgreater than 122°F.]Do not use harsh chemicals (such as alcohol, benzene,thinners, etc.) or detergents to clean your phone. There is arisk of this causing a fire.]Do not drop, strike, or shake your phone severely. Suchactions may harm the internal circuit boards of the phone.]Do not use your phone in high explosive areas as the phonemay generate sparks.]Do not damage the power cord by bending, twisting, pulling,or heating. Do not use the plug if it is loose as it may causea fire or electric shock.]Do not place any heavy items on the power cord. Do notallow the power cord to be crimped as it may cause fire orelectric shock.]Do not handle the phone with wet hands while it is beingcharged. It may cause an electric shock or seriouslydamage your phone.]Do not disassemble the phone.]Do not place or answer calls while charging the phone as itmay short-circuit the phone and/or cause electric shock orfire.]Only use the batteries, antennas, and chargers provided byLG. The warranty will not be applied to products provided byother suppliers.]Only authorized personnel should service the phone and itsaccessories. Faulty installation or service may result inaccidents and consequently invalidate the warranty.]Do not hold or let the antenna come in contact with yourbody during a call.]An emergency call can be made only within a service area.For an emergency call, make sure that you are within aservice area and that the phone is turned on.](https://usermanual.wiki/LG-Electronics-USA/KF300D/User-Guide-880638-Page-4.png)
![11For Your SafetyVehicle Mounted External Antenna(optional, if available)A minimum separation distance of 8 inches (20cm) must bemaintained between the user/bystander and the vehiclemounted external antenna to satisfy FCC RF exposurerequirements. For more information about RF exposure, visitthe FCC website at www.fcc.govFCC Part 15 Class B ComplianceThis device and its accessories comply with part 15 of FCCrules. Operation is subject to the following two conditions: (1) This device and its accessories may not cause harmfulinterference, and (2) this device and its accessories mustaccept any interference received, including interference thatmay cause undesired operation.Cautions for Battery]Do not disassemble.]Do not short-circuit.]Do not expose to high temperature: 60°C (140°F).]]Do not incinerate.Battery Disposal]Please dispose of your battery properly or bring to yourlocal wireless carrier for recycling.]Do not dispose in fire or with hazardous or flammablematerials.Adapter (Charger) Cautions]Using the wrong battery charger could damage your phoneand void your warranty.]The adapter or battery charger is intended for indoor useonly.Do not expose the adapter or battery charger to direct sunlightor use it in places with high humidity, such as the bathroom.](https://usermanual.wiki/LG-Electronics-USA/KF300D/User-Guide-880638-Page-6.png)
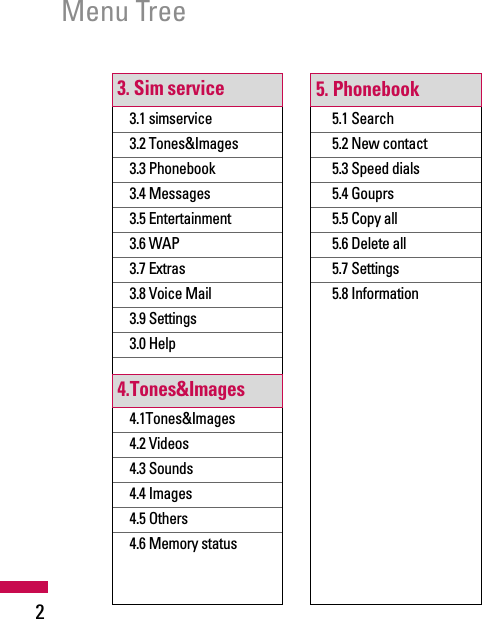
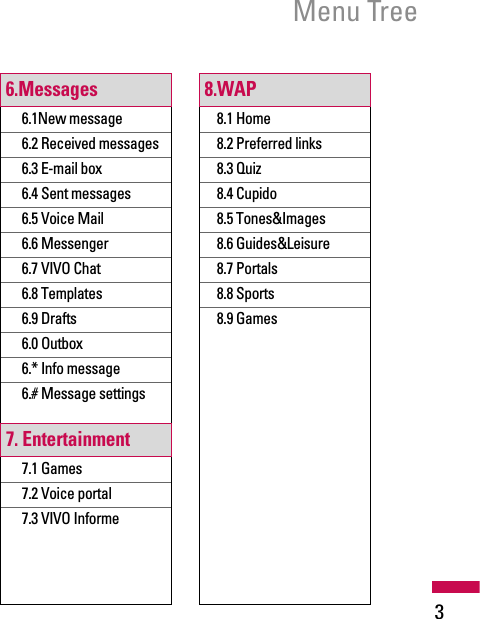
![1The menu in this phone can be displayed in 2 ways. One is by list type orsecondly in grid format. Please note that menu number options are different ineach view. The default setting on the phone is set to show the menu in listtype, so therefore all the menu number selections throughout the manual areshown according to that setting. The following illustration shows the availablemenu structure and indicates the:]Number assigned to each menu option.]Page where you can find the feature description.You can go to the desired menu using the left soft key [Menu], navigation keysand the [OK] key. And you can also take a shortcut by pressing thecorresponding number key of desired menu after pressing the left soft key[Menu].Menu Tree1.1 All calls1.2 Missed calls1.3 Last received calls1.4 Sent calls1.5 Call settings1.6 Calls time1.7 Data information1. Calls2.1 Downloads2.2 Games&Apps2.Downloads](https://usermanual.wiki/LG-Electronics-USA/KF300D/User-Guide-880638-Page-7.png)
![6You can check the record of missed,received, and dialled calls only if thenetwork supports the Calling LineIdentification (CLI) within the servicearea.The number and name (if available)are displayed together with the dateand time at which the call wasmade. You can also view call times.All calls Menu 1.1You can view all lists of outgoing orincoming calls.Missed calls Menu 1.2This option lets you view the last 50unanswered calls. You can also:]View the number if available andcall it, or save it in the AddressBook]Enter a new name for the numberand save both in the AddressBook]Send a message by this number]Delete the call from the listLast received callsMenu 1.3This option lets you view the last 50incoming calls. You can also:]View the number if available andcall it or save it in the AddressBook]Enter new name for the numberand save both in the AddressBook]Send a message by this number]Delete the call from the listCalls](https://usermanual.wiki/LG-Electronics-USA/KF300D/User-Guide-880638-Page-12.png)
![7CallsSent calls Menu 1.4This option lets you view the last 50outgoing calls (called or attempted).You can also:]View the number if available andcall it or save it in the AddressBook]Enter new name for the numberand save both in the AddressBook]Send a message by this number]Delete the call from the listCall settings Menu 1.5You can set the menu relevant to acall by pressing [Select] in theSetting menu.Call divert (Menu 1.5.1)The Call divert service allows you todivert incoming voice calls, fax calls,and data calls to another number.For details, contact your serviceprovider.]All voice callsDiverts voice callsunconditionally.]If busyDiverts voice calls when thephone is in use.]If no replyDiverts voice calls which you donot answer.]If out of reachDiverts voice calls when thephone is switched off or out ofcoverage.]All data callsDiverts to a number with a PCconnection unconditionally.MENU](https://usermanual.wiki/LG-Electronics-USA/KF300D/User-Guide-880638-Page-13.png)
![Calls8]All fax callsDiverts to a number with a faxconnection unconditionally.]Cancel allCancels all call divert service.The submenusCall divert menus have thesubmenus shown below.- ActivateActivate the correspondingservice.To voice mailboxForwards to message centre. Thisfunction is not shown at All datacalls and All fax calls menus.To other numberInputs the number for diverting.To favourite numberYou can check recent 5 divertednumbers.- CancelDeactivate the correspondingservice.- View statusView the status of thecorresponding service.Answer mode (Menu 1.5.2)]Slide openIf you select this menu, you canreceive an incoming call whenyou open the slide.]Any keyIf you select this menu, you canreceive a call by pressing any keyexcept [End] key.]Accept key onlyIf you select this menu, you canreceive a call by only pressing[Send] key.](https://usermanual.wiki/LG-Electronics-USA/KF300D/User-Guide-880638-Page-14.png)
![Calls9Send my number (Menu 1.5.3)(network and subscription dependent)]Set by networkIf you select this, you can sendyour phone number depending ontwo line service such as line 1 orline 2.]OnYou can send your phone numberto another party. Your phone number will be shownon the receiver’s phone.]OffYour phone number will not beshown.Call waiting (Menu 1.5.4)(network dependent)]ActivateIf you select Activate, you canaccept a waiting (receiving) call.]CancelIf you select Cancel, you cannotrecognize the waiting (receiving)call.]View statusShows the status of Call waiting.Minute minder (Menu 1.5.5)If you select On, you can check thecall duration by a beep sound givenevery minute during a call.Auto redial (Menu 1.5.6)]OnWhen this function is activated,the phone will automatically try toredial in the case of failure toconnect a call.]OffYour phone will not make anyattempts to redial when theoriginal call has not connected.](https://usermanual.wiki/LG-Electronics-USA/KF300D/User-Guide-880638-Page-15.png)
![10CallsSend DTMF tones (Menu 1.5.7)You can send touch tones during anactive call to control your voicemailbox or other automated phoneservices.Calls time Menu 1.6Allows you to view the duration ofyour incoming and outgoing calls.You can also reset the call times.The following timers are available:]Last call: Length of the last call.]Dialled calls: Length of theoutgoing calls.]Received calls: Length of theincoming calls.]All calls: Total length of all callsmade and incoming calls sincethe timer was last reset.Data information Menu 1.7You can check the amount of datatransferred over the networkthrough the GPRS informationoption.In addition, you can also view howmuch time you are online.Web data (Menu 1.7.1)Data call (Menu 1.7.2)Total data (Menu 1.7.3)](https://usermanual.wiki/LG-Electronics-USA/KF300D/User-Guide-880638-Page-16.png)
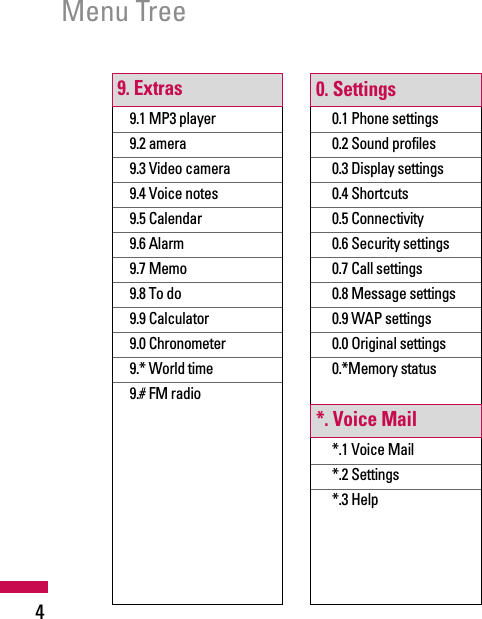
![Sim service12simservice Menu 3.1Tones&Images Menu 3.2Phonebook Menu 3.3Messages Menu 3.4Entertainment Menu 3.5Games (Menu 3.5.1)Voice portal (Menu 3.5.2)VIVO Infoma (Menu 3.5.3)WAP Menu 3.6Extras Menu 3.7Voice Mail Menu 3.8Once this menu has been selected,simply press the left soft key [OK] to listen to voice mail. You canalso hold down the key instandby mode to listen to voice mail.Note]When you receive a voicemail, your phone displaysthe icon and you hear analert. Please check withyour network provider fordetails of their service inorder to configure thehandset correctly.MENU](https://usermanual.wiki/LG-Electronics-USA/KF300D/User-Guide-880638-Page-18.png)
![13Sim serviceSettings Menu 3.9You can set the profile, cache andsecurity related to internet service.Network profile (Menu 3.9.1)A profile is the network informationused to connect to the Internet.There are default profiles for someoperators, stored in phone memory.It’s impossible to rename defaultprofiles.Each profile has submenus asfollows:]Activate: Activates the selectedprofile.]View: You can see the selectedprofile.]Edit: You can edit the selectedprofile.]New profile: You can add a newprofile.]Delete: Deletes the selectedprofile from the list.]Delete all: Deletes all profilefrom the list.]Reset all: Allows you to reset allprofiles.View style (Menu 3.9.2)Cache (Menu 3.9.3)The information or services you haveaccessed are saved in the cachememory of the phone.Note]A cache is a buffermemory, which is used tosave data temporarily.](https://usermanual.wiki/LG-Electronics-USA/KF300D/User-Guide-880638-Page-19.png)
![14Cookie (Menu 3.9.4)Check whether a cookie is used ornot.Security certifications (Menu 3.9.5)You can see the list of personal.Certificates that have been stored inyour phone.Show image (Menu 3.9.6)Javascript (Menu 53.9.7)Memory in use (Menu 3.9.8)Help Menu 3.0Sound profiles (Menu 3.0.1)In Profiles, you can adjust andcustomise the phone tones fordifferent events, environments, orcaller groups.There are five preset profiles:General, Silent, Vibrate only,Outdoor and Headset.Each profile can be personalised.Press the left soft key [Menu] andselect Profiles using up/downnavigation keys.Activate (Menu 3.X.1)1. A list of profiles is displayed.2. In the Profiles list, scroll to theprofile you want to activate andpress the left soft key [OK] orOK key.MENUSim service](https://usermanual.wiki/LG-Electronics-USA/KF300D/User-Guide-880638-Page-20.png)
![15Sim service3. Then, select Activate.Personalise (Menu 3.X.2)Scroll to the desired profile in theProfile list. After pressing the leftsoft key or the OK key, selectPersonalise.The profile setting option opens. Setthe option as required.]Call alert type: Set the alert typefor incoming calls.]Ring tones: Select the desiredring tone from the list.]Ring volume: Set the volume ofthe ringing tone.]Message alert type: Set thealert type for messages.]Message tones: Select the alerttone for messages.]Keypad tones: Select thedesired keypad tone.]Keypad volume: Set the volumeof keypad tone.]Slide tones: Allows to set theflip tone for adjustingenvironment.]Effect sound volume: Set thevolume of effect sound.]Power on/off volume: Set thevolume of the ringing tone whenswitching the phone on/off.]Auto answer: This function willbe activated only when yourphone is connected to thehandsfree kit.• Off: The phone will not answerautomatically.• After 5 secs: After 5 seconds,the phone will answerautomatically.• After 10 secs: After 10seconds, the phone will answerautomatically.MENU](https://usermanual.wiki/LG-Electronics-USA/KF300D/User-Guide-880638-Page-21.png)
![Display settings (Menu 3.0.2)]Wallpaper: You can select thebackground pictures in standbymode.]Backlight timer: You can set thelight-up duration of the display.(Off/10 secs/20 secs/30 secs/60secs)]Brightness: You can set thebrightness of LCD: 100%, 80%,60%, 40%]Home screen shortcut:Selecting On displays thefunctionalities of 4 Navigationkeys and Menu key as pictures onthe middle of the idle window.(Profiles/Messaging/Favourites/Contacts)]Theme:]Menu style: Your phoneprovides you with Grid and Listmenu themes. Set the menu styleby scrolling and pressing the leftsoft key [OK].]Main font style]Dialing font style: Your phoneprovides you with four dialingstyles. (Color style/Beadsstyle/Digital style/Sketchbookstyle)]Standby text: If you select On,you can edit the text which isdisplayed in standby mode.]Network name: If this functionis activated, network name willbe displayed on LCD.]Touchpaf calibration:MENUNote]All profiles cannot berenamed.Sim service16](https://usermanual.wiki/LG-Electronics-USA/KF300D/User-Guide-880638-Page-22.png)
![17Sim serviceConnectivity (Menu 3.0.3)]Bluetooth: Bluetooth enablescompatible mobile devices,peripherals and computers thatare in close proximity tocommunicate directly with eachother without wires. This handsetsupports built-in Bluetoothconnectivity, which makes itpossible to connect them withcompatible Bluetooth headsets,computer applications and so on.]When you receive datafrom another Bluetoothdevice, the phone requestsconfirmation. Afterconfirming the transfer, thefile will be copied on toyour phone.]Depending on the file type,it will be stored in thefollowing folders:- Video (.3gp, mp4):Videosfolder- Image (.bmp, gif, jpg,png):Images folder- Sound (.amr, wav, aac):Sounds folder- MP3 (.mp3):Sounds/MP3folder- Other files (.txt, html):Others folderNote]If you use LG PC Sync viaBluetooth, you canexchange the data onlywithin phonebook](https://usermanual.wiki/LG-Electronics-USA/KF300D/User-Guide-880638-Page-23.png)
![18Sim service• Bluetooth on/offYou can activate or cancel theBluetooth function.• Device listYou can view all devices whichyour KE970 is already paired to.If you enter Paired devices, youaccess the options- Connect / Disconnect: Afterpairing with headset or stereoheadset, you should connectwith those devices. Then youcan use those devices.- Add new: Allows to searchnew Bluetooth devices and addthem to your phone’s list ofpaired devices. When youselect Add new your handsetwill start to search forBluetooth devices within range.Once the device you wish topair appears on the list pressthe right soft key [Stop]. Scroll to the desired device andpress the left soft key [Pair].You will then be asked to entera passcode. The passcode canbe any code you wish to use(the same passcode must beused by both devices) or is onethat is pre-determined by themanufacturer of the device youare trying to pair with. Pleasecheck the User Manual of thedevice you are initiating thepair with to see if it already hasa predetermined passcode inplace.- Rename: Allows you to changethe name of the pairedBluetooth device and how it isdisplayed on the handset.- Set as authorised/Set asunauthorised: Allows you toset an authorised connectionbetween each Bluetoothdevice. For example if youregularly use a Bluetooth](https://usermanual.wiki/LG-Electronics-USA/KF300D/User-Guide-880638-Page-24.png)
![19Sim serviceheadset with your phone thensetting the connection asauthorised will mean theheadset will automaticallyconnect to the handset eachtime the headset is poweredon.- Remove: Allows to delete apaired Bluetooth device.- Remove all: Allows to deleteall a paired Bluetooth devices.• Bluetooth settings- My visibility: This indicateswhether or not your handsetwill be visible to otherBluetooth devices.- My name: You can set thename of Bluetooth device. Thedefault name is LG KE970.- My address: You can view theaddress of your Bluetoothdevice.]Network: You can select anetwork which will be registeredeither automatically or manually.• Network selectionUsually, the network selection isset to Automatic.- Automatic: If you selectAutomatic mode, the phonewill automatically search forand select a network for you.Once you have selected“Automatic”, the phone will beset to “Automatic” even thoughthe power is off and on.- Manual: The phone will findthe list of available networksand show you them. Then youcan select the network whichyou want to use if this networkhas a roaming agreement withyour home network operator.The phone let you selectanother network if the phonefails to access the selectednetwork.](https://usermanual.wiki/LG-Electronics-USA/KF300D/User-Guide-880638-Page-25.png)
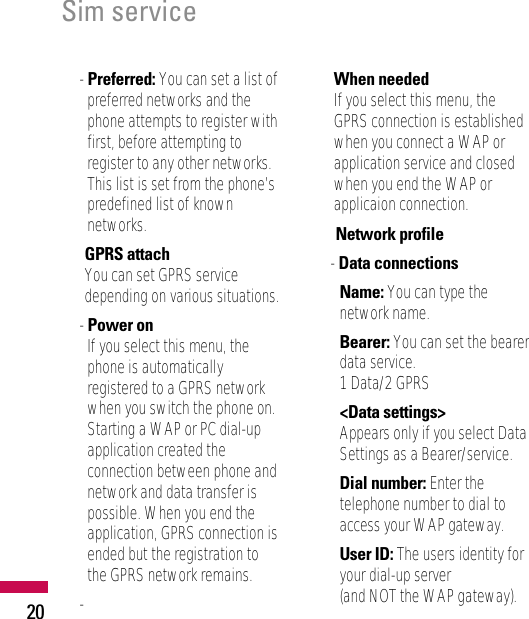
![Sim service21Password: The passwordrequired by your dial-up server(and NOT the WAP gateway) toidentify you.Call type: Select the type ofdata call; Analogue or Digital(ISDN).Call speed: The speed of yourdata connection; 9600 or 14400(Depends on Operator)Linger time: You need to entertimeout period. After entering that, the WAPnavigation service will beunavailable if any data is notinput or transferred.Primary server: Input the IPaddress of the primary DNSserver you access.Secondary server: Input theIP address of the secondaryDNS server you access.<GPRS settings>The service settings are onlyavailable when GPRS is chosenas a bearer service.APN: Input the APN of theGPRS.User ID: The users identify foryour APN server.Password: The passwordrequired by your APN server.Primary server: Input the IPaddress of the primary DNSserver you access.Secondary server: Input theIP address of the secondaryDNS server you access.]USB connection: You canchoose one mode of Data serviceand Mass storage. When you have finished using thephone memory, click Exit and takethe following steps.](https://usermanual.wiki/LG-Electronics-USA/KF300D/User-Guide-880638-Page-27.png)
![22Sim service1. Click on the notification area.[Unplug or Eject Hardware]2. Select USB Mass Storage Device,click on Stop. The following message willappear: “The ‘USB Mass StorageDevice’ device can now be safelyremoved from the system”3. Then remove the cable.Security settings (Menu 3.0.4)]PIN code request: In this menu,you can set the phone to ask forthe PIN code of your SIM cardwhen the phone is switched on.If this function is activated, you’llbe requested to enter the PINcode.1. Select PIN code request in thesecurity settings menu, andthen press [OK].2. Set On/Off.3. If you want to change thesetting, you need to enter PINcode when you switch on thephone.4. If you enter wrong PIN codemore than 3 times, the phonewill lock out. If the PIN isblocked, you will need to key inPUK code.MENUCaution]Before you remove thecable, it is necessary thatyou click Exit. Or, theintegrity of transferred datais not guaranteed.](https://usermanual.wiki/LG-Electronics-USA/KF300D/User-Guide-880638-Page-28.png)
![23Sim service5. You can enter your PUK codeup to 10 times. If you put wrongPUK code more than 10 times,you can not unlock your phone.You will need to contact yourservice provider.]Phone lock: You can use asecurity code to avoidunauthorized use of the phone.Whenever you switch on thephone, the phone will requestsecurity code if you set phonelock to When switch on.If you set phone lock to WhenSIM changed, your phone willrequest security code only whenyou change your SIM card.]Touchpad lock:]Call barring: The Call barringservice prevents your phone frommaking or receiving certaincategory of calls. This functionrequires the call barringpassword. You can view thefollowing submenus.• All outgoing : The barringservice for all outgoing calls.• Outgoing international:The barring service for alloutgoing international calls.• O/G international excepthome country: The barringservice for all internationaloutgoing calls except homenetwork.• All incoming: The barringservice for all incoming calls.• Incoming when abroad: Thebarring service for all incomingcalls when roaming.• Cancel all barrings: You cancancel all barring services.• Change password: You canchange the password for CallBarring Service.](https://usermanual.wiki/LG-Electronics-USA/KF300D/User-Guide-880638-Page-29.png)
![24Sim serviceThe submenus:- Activate: Allows to request thenetwork to set call restriction on.- Cancel: Set the selected callrestriction off.- View status: View the statuswhether the calls are barred or not.]Fixed dial number: You canrestrict your outgoing calls toselected phone numbers. Thenumbers are protected by yourPIN2 code.• On: You can restrict youroutgoing calls to selected phonenumbers.• Off: You can cancel fixeddialling function.• List view: You can view thenumber list saved as Fixed dialnumber.]Change codes: PIN is anabbreviation of PersonalIdentification Number to preventuse by unauthorized person.You can change the access codes:Security code, PIN1 code,PIN2 code.1. If you want to change theSecurity code/PIN1/ PIN2 codeinput your original code, andthen press [OK].2. Input new Securitycode/PIN/PIN2 code and verifythem.Call settings (Menu 3.0.5)You can set the menu relevant to acall by pressing [Select] in theSetting menu.]Call divert: The Call divertservice allows you to divertincoming voice calls, fax calls,and data calls to another number.For details, contact your serviceprovider.MENUMENU](https://usermanual.wiki/LG-Electronics-USA/KF300D/User-Guide-880638-Page-30.png)
![25Sim service• All voice calls: Diverts voicecalls unconditionally.• If busy: Diverts voice callswhen the phone is in use.• If no reply: Diverts voice callswhich you do not answer.• If out of reach: Diverts voicecalls when the phone isswitched off or out of coverage.• All data calls: Diverts to anumber with a PC connectionunconditionally.• All fax calls: Diverts to anumber with a fax connectionunconditionally.• Cancel all: Cancels all calldivert service.The submenusCall divert menus have thesubmenus shown below.- Activate: Activate thecorresponding service.To voice mailboxForwards to message centre.This function is not shown at Alldata calls and All fax callsmenus.To other numberInputs the number for diverting.To favourite numberYou can check recent 5 divertednumbers.- Cancel: Deactivate thecorresponding service.- View status: View the statusof the corresponding service.]Answer mode• Slide open: If you select thismenu, you can receive anincoming call when you openthe slide.• Any key: If you select thismenu, you can receive a call bypressing any key except [End] key.](https://usermanual.wiki/LG-Electronics-USA/KF300D/User-Guide-880638-Page-31.png)
![26• Accept key only: If you selectthis menu, you can receive a callby only pressing [Send]key.]Send my number(network and subscriptiondependent)• Set by network: If you selectthis, you can send your phonenumber depending on two lineservice such as line 1 or line 2.• On: You can send your phonenumber to another party. Your phone number will beshown on the receiver’s phone.• Off: Your phone number will notbe shown.]Call waiting(network dependent)• Activate: If you select Activate,you can accept a waiting(receiving) call.• Cancel: If you select Cancel,you cannot recognize thewaiting (receiving) call.• View status: Shows the statusof Call waiting.]Minute minder: If you select On,you can check the call duration bya beep sound given every minuteduring a call.]Auto redial: If y• On: When this function isactivated, the phone willautomatically try to redial in thecase of failure to connect a call.• Off: Your phone will not makeany attempts to redial when theoriginal call has not connected.]Send DTMF tones: You cansend touch tones during an activecall to control your voice mailboxor other automated phoneservices.Sim service](https://usermanual.wiki/LG-Electronics-USA/KF300D/User-Guide-880638-Page-32.png)
![27Sim serviceMessage settings (Menu 3.0.6)]Text message• Message types:Text, Voice, Fax, Paging,X.400, Email, ERMESUsually, the type of message isset to Text. You can convertyour text into alternativeformats. Contact your serviceprovider for the availability ofthis function.• Validity period: This networkservice allows you to set howlong your messages will bestored at the message centre.• Delivery report: If you set toYes, you can check whetheryour message is sentsuccessfully.• Reply charging: When amessage is sent, it allows therecipients to reply and chargethe cost of the reply to yourtelephone bill.• Message centre number: Ifyou want to send the textmessage, you can receive theaddress of SMS centre throughthis menu.• Bearer setting: You can setthe bearer setting such as GSM,GPRS.]Multimedia message• Subject: You can entermultimedia messages subjectwhen this menu is on.• Slide duration: Display theduration of each page whenwriting the message.• Priority: You can set thepriority of the message youchoose.• Validity period: This networkservice allows you to set howlong your text messages will bestored at the message centre.](https://usermanual.wiki/LG-Electronics-USA/KF300D/User-Guide-880638-Page-33.png)
![28• Delivery report: If it is set toYes in this menu, you can checkwhether your message is sentsuccessfully.• Read report: You can receivethe report whether the receiverread the message or not.• Auto download: If you selectOn, you receive multimediamessages automatically. If youselect Off, you receive onlynotification message in theinbox and then you can checkthis notification. If you selectHome network only, you receivemultimedia messages dependson Homenetwork.• Network profile: If you selectmultimedia message server, youcan set URL for multimediamessage server.• Permitted message typePersonal: Personal message.Advertisement: Commercialmessage.Information: Necessaryinformation.]E-mail• Email account:This menu allows you to edit,delete or add an email account.- View: You can see the Email.- Set as default- EditAccount name: Accountname.Email address: Enter theemail address given to you byyour service provider.My name: You can makeyour nickname.Sim service](https://usermanual.wiki/LG-Electronics-USA/KF300D/User-Guide-880638-Page-34.png)
![30- New account: You can setup to 5 email accounts byselecting New account menu.Using the Edit menu, you canset the following values.- Delete: Deletes the selectedaccount from the list.- Delete all: You can delete allaccount lists.• Network profile: A profile isthe network information used toconnect to the Internet. Thereare default profiles for someoperators, stored in phonememory. It’s impossible torename default profiles.• Signature: You can make yoursignature.]Voicemail number: You canreceive the voicemail if yournetwork service provider supportsthis feature. When a newvoicemail is arrived, the symbolwill be displayed on the screen.Please check with your networkservice provider for details of theirservice in order to configure thephone accordingly.]Push message: You can set theoption whether you will receivethe message or not.]Info message• ReceiveYes: If you select this menu,your phone will receive Infoservice messages.No: If you select this menu, yourphone will not receive Infoservice messages any more.Sim service](https://usermanual.wiki/LG-Electronics-USA/KF300D/User-Guide-880638-Page-36.png)
![31Sim service• AlertsYes: Your phone will beepwhen you have received Infoservice message numbers.No: Your phone will not beepeven though you have receivedinfo service messages.• Language: You can select thelanguage you want by pressingOK key. Then, the info servicemessage will be shown in thelanguage that you selected.WAP settings (Menu 3.0.7)]Network profile: A profile is thenetwork information used toconnect to the Internet.There are default profiles forsome operators, stored in phonememory. It’s impossible torename default profiles.Each profile has submenus asfollows:• Activate: Activates theselected profile.• View: You can see the selectedprofile.• Edit: You can edit the selectedprofile.• New profile: You can add anew profile.• Delete: Deletes the selectedprofile from the list.• Delete all: Deletes all profilefrom the list.• Reset all: Allows you to resetall profiles.]View style: ]Cache: The information orservices you have accessed aresaved in the cache memory of thephone.](https://usermanual.wiki/LG-Electronics-USA/KF300D/User-Guide-880638-Page-37.png)
![32]Cookie: Check whether a cookieis used or not.]Security certifications: Youcan see the list of personal.Certificates that have been storedin your phone.]Show image:]Javascript:]Memory in use:Original settings (Menu 3.0.8)]Reset settings]Reset phone memory]Reset allOriginal settings (Menu 3.0.9)]Common]Reserved]SIM card]External memoryNote]A cache is a buffermemory, which is used tosave data temporarily.Sim service](https://usermanual.wiki/LG-Electronics-USA/KF300D/User-Guide-880638-Page-38.png)
![33Tones&ImagesTones&Images Menu 4.1Videos Menu 4.2Shows the list of 3GP, 3G2 files atMy media\Videos in Multimediamemory. Supported file types are3gp files, that are encoded withMPEG4 and h.263 video-codecs andAMR audio-codec.]Play: You can play the video filewhen pressing OK key orselecting Play menu of Optionmenus.]Delete: Delete a file.]Send via: Send the selected fileto another device via Multimediamessage, Bluetooth or Email.]File: You can save/move/copythe folder or external memory.- Rename: Change the file nameof selected file. The maximum length ofcharacters is 36. And you cannot change the extension of file.- Move to folder: Move theselected file to the folder.Warning!You can’t use the followingcharacters \ / : * ? “ < > |Note]You may send files viaBluetooth only if they arestored in phone memory,not on memory card. Tosend file from externalmemory, please, firstly copyit to internal phonememory.](https://usermanual.wiki/LG-Electronics-USA/KF300D/User-Guide-880638-Page-39.png)
![34- Move to external memory:Move the selected file to theMultimedia memory\externalmemory- Copy to external memory:Copy the selected file to theMultimedia memory\externalmemory.- Information: Shows the fileinformation.]New folder: You can create anew folder.]Multi delete: You can remove anumber of files you have selected.]Delete all: Delete all the files inthe list.Sounds Menu 4.3Show the list of MP3, MP4, AAC,M4A files at My media\Music inMultimedia memory.]Play: You can play the MP3 filewhen pressing OK key orselecting Play menu of Optionmenu.]Set as: Currently selected soundcan be set as aRingtone/Ringtone ID.]File info: Show the fileinformation.Warning!If you remove the external memoryduring data transfer it will causeserious damage to your phone.Tones&Images](https://usermanual.wiki/LG-Electronics-USA/KF300D/User-Guide-880638-Page-40.png)
![35Tones&ImagesImages Menu 4.4Show the list of JPG files at Mymedia\Photos in Multimediamemory.]View: You can see the JPG filewhen pressing OK key orselecting View menu of Optionmenus.]Delete: Delete a file.]Set as- Full image wallpaper:Currently selected image can beset as a wallpaper.- Landscape wallpaper:Currently selected image can bedisplayed horizontally as awallpaper.- Picture ID: Currently selectedimage can be set as a Picture ID.]Send via: Allows you to send aimage throughMMS/Bluetooth/Email.]File - Rename: Change the file nameof selected file. You can notchange the extension of file.- Move to folder: Move theselected file to the folder.- Move to external memory:Move the selected file to theMultimedia memory/externalmemory.- Copy to external memory:Copy the selected file to theMultimedia memory/externalmemory.Warning!If you remove the external memoryduring data transfer, it can seriouslydamage the phone.Note]You can’t use the followingcharacters \ / : * ? ” < > |](https://usermanual.wiki/LG-Electronics-USA/KF300D/User-Guide-880638-Page-41.png)
![36- Information: Show the fileinformation.]Print via Bluetooth: Mostpictures that you’ve taken in thecamera mode and downloadedthrough WAP can be transmittedvia Bluetooth to a printer.]Slide showYou can view a slide show of thefiles you stored.]New folder: You can create anew folder.]Multi delete: You can remove anumber of files you selected.]Delete all: Delete all files in thelist.]List view: Allows you to set theview type.Others Menu 4.5Show the list of files in Mymedia\Others in the Multimediamemory.Note]You may send files viaBluetooth only if they arestored in the phonememory, not on the memorycard. To send files from theexternal memory you mustfirst copy it to the internalphone memory. Warning!If you remove the external memoryduring data transfer, it can seriouslydamage the phone.Tones&Images](https://usermanual.wiki/LG-Electronics-USA/KF300D/User-Guide-880638-Page-42.png)
![37Tones&ImagesMemory status Menu 4.6You can check free space andmemory usage of each repository,Internal memory and Multimediamemory. You can go to eachrepository menu.Note]When you connect thephone with a PC viaBluetooth, you can bothsend and receive files tothe Music and Videofolders. You can copy anyfile type to the Others. Youcan only receive files fromthe Photos, Sounds, andImages folders. You canonly view or play files in theOthers folder if the filetypes are supported. Whenconnecting with a PC viaUSB cable you will only seethe following folders in theinternal memory: Images,Sounds, Videos, andOthers. You can see allfolders in the externalmemory.](https://usermanual.wiki/LG-Electronics-USA/KF300D/User-Guide-880638-Page-43.png)
![38Search Menu 5.11. Select Search by press the leftsoft key [OK].2. Enter the name that you want tosearch.3. If you want to edit, delete, copyan entry, or to add the voice toone, select left soft key [Options].The following menu will bedisplayed.]View: You can view each entry indetails.]Edit: You can edit the name,number, group, ringtone andpicture by using the navigationkey.]New message: After you havefound the number you want, youcan send amessage(Text/Multimedia/Email)to the selected number.]Send via: You can send the dataof phone book via Text message,Multimedia message, Bluetoothor Email.]Delete: You can delete an entry.]New contact: After selectingthe place (SIM/Phone) you wantto save, you can add to thephonebook list.]Multi delete: Allows you toremove a number of filesselected.]Copy to handset/SIM: You cancopy an entry from SIM to phoneor from phone to SIM.]Main number: If a contact hasmore than one number stored,select the one that you use mostoften. This main number will bedisplayed first.MENUNote]Instant searching isavailable by inputting theinitial letter of the name.MENUPhonebook](https://usermanual.wiki/LG-Electronics-USA/KF300D/User-Guide-880638-Page-44.png)
![39PhonebookNew contact Menu 5.2You can add phonebook entry byusing this function. Phone memorycapacity is 1000 entries. SIM cardmemory capacity depends on thecellular service provider. Thenumber of character is SIMdependent feature.1. Select New contact by press leftsoft key [OK].2. Input a name.3. Press , then you can input anumber.4. You can set a group for the entryby pressing , .5. You can set a ringtone and aphoto for the entry by press leftsoft key [Options].Speed dials Menu 5.3You can assign any of the keys to with a Name list entry. Youcan call directly by pressing this key.1. Open the phonebook first bypressing the right soft key [Contacts] in standby mode.2. Scroll to Speed dial, then pressthe left soft key [OK].3. If you want to add speed dial,select <empty> by pressing theleft soft key [Assign]. Then,you can search the name inphonebook.MENUMENUMENUMENUNote]Maximum stored name andnumber length depends onSIM-card type.](https://usermanual.wiki/LG-Electronics-USA/KF300D/User-Guide-880638-Page-45.png)
![404. After assigning the number asspeed dial, you can change anddelete the entry. You can alsomake a call or send a message bythis number.Gouprs Menu 5.4You can list up to the members pereach group. There are 7 groups youcan make lists to.]View members: Shows thegroup members you haveselected.]Group ringtone: Allows you tospecify ring tone for the groupmembers’ call.]Group icon: Allows you to selectthe icon dependent on Group.]Add member: You can add groupmembers.]Remove member: You canremove the member from theGroup member list. But the nameand the number will be remainedin phonebook.]Remove all members: Allowsyou to delete all the members inthe group.]Rename: You can change agroup name.Copy all Menu 5.5You can copy entries from SIM cardmemory to Phone memory and viceversa.]SIM to phone: You can copy theentry from SIM Card to Phonememory.]Phone to SIM: You can copy theentry from Phone memory to SIMCard.Phonebook](https://usermanual.wiki/LG-Electronics-USA/KF300D/User-Guide-880638-Page-46.png)
![41PhonebookDelete all Menu 5.6You can delete all entries from SIMor Phone.Settings Menu 5.71. Press the right soft [Contacts] in standby mode.2. Scroll to Settings, then press theleft soft key [OK].View options (Menu 5.7.1)Scroll to highlight View options, andthen press the left soft key [OK].]Name and number: Set thephonebook list with displayingonly name.]With picture: Set the phonebooklist with the information ofcharacter and picture.Information Menu 5.8Service dial numbers (Menu 5.8.1)Use this function to access aparticular list of services provided byyour network operator (if supportedby the SIM card).Own numbers (SIM dependent)(Menu 5.8.2)You can save and check your ownnumber in SIM card.Business card (Menu 5.8.3)This option allows you to createyour own business card featuringName and an mobile phone number.To create a new business card,press the left soft key [New]and enter the information into thefields. If you want to edit, delete orto send a business card, select leftsoft key [options].MENUMENUMENU](https://usermanual.wiki/LG-Electronics-USA/KF300D/User-Guide-880638-Page-47.png)
![New message Menu 6.1This menu includes functions relatedto SMS (Short Message Service),MMS (Multimedia MessageService), Email, voice mail, as wellas the network’s service messages.Text (Menu 6.1.1)You can write and edit textmessage.1. Enter the New messages menu bypressing the left soft key [OK].2. If you want to write a newmessage, select Text.3. To make text input easier, use T9.4. Press [Options] to attach thefollowings.Options]Send to: Sends text messages.1. Enter numbers of recipient.2. Press key to add morerecipients.3. You can add phone numbers inthe address book.4. Press the [Option] and thenpress send after enteringnumbers. ]Insert- Symbol: You add specialcharacters.- Image: You can insert theDefault graphics or graphics inMy pictures that are availablefor short messages.- Sound: You can insert soundsthat are available for shortmessages.- Default images: You can insertAnimations stored.- Default sounds: You can insertSounds stored.MENUMENUMessages42](https://usermanual.wiki/LG-Electronics-USA/KF300D/User-Guide-880638-Page-48.png)
![- Text template: You can useText templates already set in thephone.- Contacts: You can add phonenumbers or e-mail addresses inaddress book.- My business card: You canadd your Business card to themessage.]Save to drafts: Stores messagesin Drafts.]T9 languages: Select thelanguage for T9 input mode. Youcan also deactivate T9 input modeby selecting ‘T9 off’.]New T9 word: Select the NewT9 word for inputting New wordinto the dictionary. ]Clear text: You can clear textwhile writing SMS.]Exit: If you press Exit whilewriting a message, you can endthe writing message and back tothe Message menu. The messageyou have written is not saved.Multimedia (Menu 6.1.2)You can write and edit multimediamessages, checking message size.1. Enter the New message menu bypressing the left soft key [OK].2. If you want to write a newmessage, select Multimedia.3. You can create a new message orchoose one of the multimediamessage templates alreadymade.Maximum available file size, thatcan be inserted to MMS-message,is 300 kb.MENUMessages43](https://usermanual.wiki/LG-Electronics-USA/KF300D/User-Guide-880638-Page-49.png)
![Options]Send to: You can sendmultimedia messages to multiplerecipients, priorities yourmessage, and make it sent lateras well.]Insert: You can add Symbol,Image, Video, Sound, New slide,Text template, Contact, Businesscard, Others.]Preview: You can previewmultimedia messages you havecreated.]Save: You can save multimediamessages To drafts or Astemplates]Edit subject: Allows you tomodify the multimedia messageyou have chosen.]Slide duration: You can set theduration of slide of multimediamessage.]T9 languages: Select thelanguage for T9 input mode. Youcan also deactivate T9 inputmode by selecting ‘T9 off’.]New T9 word: Select the NewT9 word for inputting New wordinto the dictionary.]Exit: You can get back to theMessage menu.Note]All messages will beautomatically saved in theoutbox folder, even after asending failure.Messages44](https://usermanual.wiki/LG-Electronics-USA/KF300D/User-Guide-880638-Page-50.png)
![Email (Menu 6.1.3)To send/receive an email, youshould set up the email account.1. You can input up to 20 emailaddresses in the To and Cc field.Tip: To input “@”, press theand select “@”.2. Key in the subject of the mail andpress OK.3. After writing an email message,press the left soft key [Options]. You can access thefollowing option menus.]Send to: You can edit recipients.]Insert: You can add Symbol, Texttemplate, Contact and Signature.]Attachment: You can attach filewith this menu.]Preview: You can preview thewriting mail.]Save to drafts: Select this tosave the message in Drafts.]Edit subject: You can edit thesubject.]T9 languages: Select thelanguage for T9 input mode. Youcan also deactivate the T9 inputmode by selecting ‘T9 off’.MENUNote]If you select a picture with alarge file size (200K forexample) on writingmultimedia message, theloading duration will takearound 10 seconds.Furthermore, you can’tactivate any keys during theloading time. After about 10seconds, you should be ableto write the message. Messages45](https://usermanual.wiki/LG-Electronics-USA/KF300D/User-Guide-880638-Page-51.png)
![]New T9 word: Select the NewT9 word menu for inputting a newword into the dictionary.]Clear text: You can clear textwhile writing the message.]Exit: If you select this whilewriting the message, you can exitfrom writing message and goback to the previous screen. Themessage you have written is notstored.In case Drafts Outbox orSent folder is full, and youtry to save new message toone of this folders, firstsaved message will beautomatically deleted.]Maximum size for one sentmessage is 300 kb withattachments, andmaximum size for onereceived message is 300kb. In case you havereceived message withmore than 5 attachments,only 5 of them will bereceived. Some attachmentmay display incorrectly.Note]For each e-mail account youmay save up to 40messages (totally 200 forfive accounts). In Inboxfolder you may save notmore than 20 messages, inDrafts and Outbox folders -5 messages, and in Sentfolder up to 10 messages.Messages46](https://usermanual.wiki/LG-Electronics-USA/KF300D/User-Guide-880638-Page-52.png)
![Received messagesMenu 6.2You will be alerted when you havereceived messages. They will bestored in Inbox.If the phone shows ‘No space forSIM message’, you have to deleteonly SIM messages from Inbox. Ifthe phone displays ‘No space formessage’, you can make space ofeach repository as deletingmessages, media and applications.* SIM messageSIM message means the messageexceptionally stored in SIM card.You can move this message to thephone.For notified multimedia message,you have to wait for downloadingand processing of the message.To read a message, select one ofthe messages by pressing the leftsoft key .]View: You can view the receivedmessages.]Delete: You can delete thecurrent message.]Reply: You can reply to thesender.]Reply to all: You can reply to allof the sender.]Forward: You can forward theselected message to anotherparty.]Return call: You can call back tothe sender.]Information: You can viewinformation about receivedmessages; Sender’s address,Subject (only for Multimediamessage), Message date & time,Message type, Message size.]Multi delete: After selecting themessages you want to remove,you can delete the selectedmessages.MENUMessages47](https://usermanual.wiki/LG-Electronics-USA/KF300D/User-Guide-880638-Page-53.png)
![]Delete all read: You can deleteall messages read.]Delete all: You can delete allmessages.E-mail box Menu 6.3When you access this menu, youcan either connect to your remotemailbox to retrieve your new emailmessages, or you can view thepreviously retrieved email messageswithout logging in to the emailserver.You can check the saved emails,drafts, outbox, and sent emails. Inthe Inbox, up to 20 emails arestored. (Outbox stores up to 5, Draftes storeup to 5, Sent stores up to 10)Sent messages Menu 6.4This menu allows you to view themessages which are already sent.You can check the time and thecontents of message.Voice Mail Menu 6.5Once this menu has been selected,simply press the left soft key [OK] to listen to voice mail. You canalso hold down the key instandby mode to listen to voice mail.Note]When you receive a voicemail, your phone displaysthe icon and you hear analert. Please check withyour network provider fordetails of their service inorder to configure thehandset correctly.MENUMessages48](https://usermanual.wiki/LG-Electronics-USA/KF300D/User-Guide-880638-Page-54.png)
![Messenger Menu 6.6VIVO Chat Menu 6.7Templates Menu 6.8SMS (Menu 6.8.1)You have 6 text templates as below;• Please call me back.• I’m late. I will be there at• Where are you now?• I’m on the way• Urgent! Please contact.• I love youThe following options are available.]View: You can see multimediatemplates.]Edit: Use this to write a newmessage or edit the selectedtemplate message from the texttemplate list.]Send via- Text message: Use this tosend the selected templatemessage by SMS.- Multimedia message: Usethis to send the selectedtemplate message by MMS.- Email: This menu allows you toedit, delete or add an emailaccount.]Delete: Deletes the template.]New template: Use this tocreate new template.]Delete all: Allows you to deleteall multimedia messages.Messages49](https://usermanual.wiki/LG-Electronics-USA/KF300D/User-Guide-880638-Page-55.png)
![Messages50MMS (Menu 6.8.2)After saving new template, you canuse the following options.]Save: Allows you to save newmultimedia templates youcreated.]Insert: You can add Symbol,Image, Video, Sound, New slide,Text template, Contact, Businesscard and Others.]Preview: You can previewmultimedia templates you wrote.]Edit subject: Allows you tomodify the multimedia messageyou have chosen.]Slide duration: You can set theduration of slide of multimediamessage.]T9 languages: Select thedesired language for T9 inputmode. You can also deactivate T9input mode by selecting ‘T9 off’.]Exit: Will take you back to theMessage menu.Drafts Menu 6.9Using this menu, you can presetmultimedia messages that you usemost frequently. This menu showsthe preset multimedia message list.The following options are available.]View: You can see themultimedia messages.]Edit: Modifies the message youchoose.]Delete: Deletes the message youchoose.]Information: You can viewinformation about the messageyou choose.](https://usermanual.wiki/LG-Electronics-USA/KF300D/User-Guide-880638-Page-56.png)
![Messages51]Multi delete: After selecting themessages you want to remove,press OK and you can delete theselected messages.]Delete all: Deletes all of themessages in the folder.Outbox Menu 6.10This menu allows to view themessage which is about to send oris failed sending.After sending the messagesuccessfully, the message will bemoved to sent box.]View: You can view themessage.]Delete: You can delete themessage.]Resend: You can resend theselected message.]Edit: Modifies the massage youchoose.]Information: You can checkinformation of each message.]Multi delete: Select and deletethe selected messages.]Delete all: You can delete allmessages in outbox.Info message Menu 6.11(Dependent to networkand subscription)Info service messages are textmessages delivered by the networkto GSM. They provide generalinformation such as weatherreports, traffic news, taxis,pharmacies, and stock prices.Each type of has the number;therefore, you can contact serviceprovider as long as you have inputthe certain number for theinformation.](https://usermanual.wiki/LG-Electronics-USA/KF300D/User-Guide-880638-Page-57.png)
![52MessagesWhen you have received an infoservice message, you can see thepopup message to show you thatyou have received a message or theinfo service message is directlydisplayed.To view the message again or not instandby mode, follow the sequenceshown below;Read (Menu 6.11.1)1. When you have received an infoservice message and select Readto view the message, it will bedisplayed on the screen. You canread another message by scrolling, or [Next].2. The message will be shown untilanother message is reached.Topics (Menu 6.11.2)(Dependent to network andsubscription)]View list: You can see Infoservice message numbers whichyou added. If you press [Options], you can edit and deleteinfo message category which youadded.]Active list: You can select infoservice message numbers in theactive list. if you activate an infoservice number, you can receivemessages sent from the number.MENUMENU](https://usermanual.wiki/LG-Electronics-USA/KF300D/User-Guide-880638-Page-58.png)
![53MessagesMessage settingsMenu 6.12Text message (Menu 6.12.1)]Message types:Text, Voice, Fax, Paging,X.400, Email, ERMESUsually, the type of message isset to Text. You can convert yourtext into alternative formats.Contact your service provider forthe availability of this function.]Validity period: This networkservice allows you to set howlong your messages will be storedat the message centre.]Delivery report: If you set toYes, you can check whether yourmessage is sent successfully.]Reply charging: When amessage is sent, it allows therecipients to reply and charge thecost of the reply to your telephonebill.]Message centre number: If youwant to send the text message,you can receive the address ofSMS centre through this menu.]Bearer setting: You can set thebearer setting such as GSM,GPRS.Multimedia message (Menu 6.12.2)]Subject: You can entermultimedia messages subjectwhen this menu is on.]Slide duration: Display theduration of each page whenwriting the message.]Priority: You can set the priorityof the message you choose.]Validity period: This networkservice allows you to set how](https://usermanual.wiki/LG-Electronics-USA/KF300D/User-Guide-880638-Page-59.png)
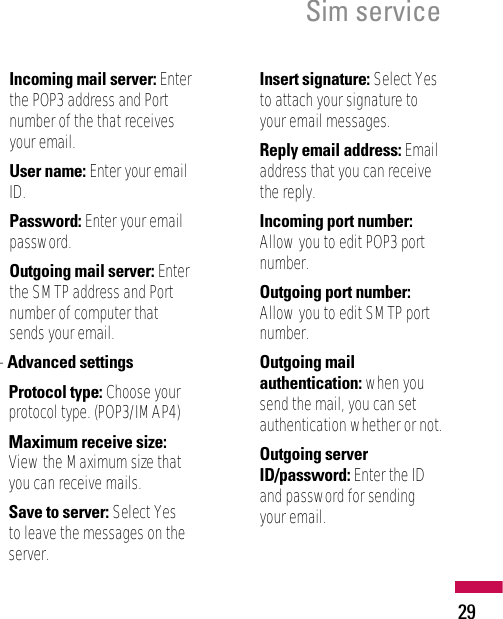
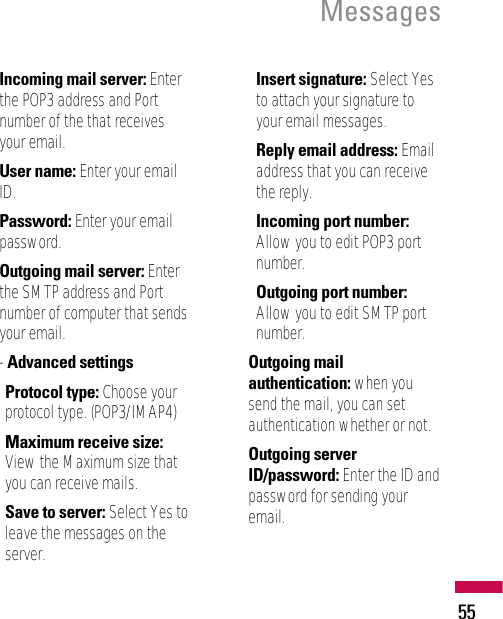
![long your text messages will bestored at the message centre.]Delivery report: If it is set to Yesin this menu, you can checkwhether your message is sentsuccessfully.]Read report: You can receive thereport whether the receiver readthe message or not.]Auto download: If you selectOn, you receive multimediamessages automatically. If youselect Off, you receive onlynotification message in the inboxand then you can check thisnotification. If you select Homenetwork only, you receivemultimedia messages depends onHomenetwork.]Network profile: If you selectmultimedia message server, youcan set URL for multimediamessage server.]Permitted message typePersonal: Personal message.Advertisement: Commercialmessage.Information: Necessaryinformation.E-mail (Menu 6.12.3)]Email accountThis menu allows you to edit,delete or add an email account.• View: You can see the Email.• Set as default• EditAccount name: Accountname.Email address: Enter theemail address given to you byyour service provider.My name: You can make yournickname.Messages54](https://usermanual.wiki/LG-Electronics-USA/KF300D/User-Guide-880638-Page-60.png)
![56Messages• New account: You can set upto 5 email accounts byselecting New account menu.Using the Edit menu, you canset the following values.• Delete: Deletes the selectedaccount from the list.• Delete all: You can delete allaccount lists.]Network profileA profile is the networkinformation used to connect tothe Internet. There are defaultprofiles for some operators,stored in phone memory. It’simpossible to rename defaultprofiles.]SignatureYou can make your signature.Voicemail number (Menu 6.12.4)You can receive the voicemail if yournetwork service provider supportsthis feature. When a new voicemailis arrived, the symbol will bedisplayed on the screen. Pleasecheck with your network serviceprovider for details of their service inorder to configure the phoneaccordingly.Push message (Menu 6.12.5)You can set the option whether youwill receive the message or not.Info message (Menu 6.12.6)]ReceiveYes: If you select this menu, yourphone will receive Info servicemessages.No: If you select this menu, yourphone will not receive Info servicemessages any more.](https://usermanual.wiki/LG-Electronics-USA/KF300D/User-Guide-880638-Page-62.png)
![57Messages]AlertsYes: Your phone will beep whenyou have received Info servicemessage numbers.No: Your phone will not beepeven though you have receivedinfo service messages.]LanguageYou can select the language youwant by pressing OK key. Then,the info service message will beshown in the language that youselected.](https://usermanual.wiki/LG-Electronics-USA/KF300D/User-Guide-880638-Page-63.png)
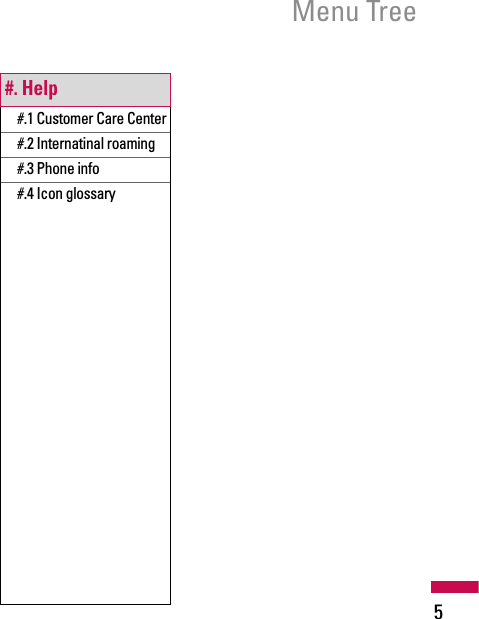
![Home Menu 8.1Connects to a homepage. Thehomepage will be the site which isdefined in the activated profile. Itwill be defined by the serviceprovider if you have not defined it inthe activated profile.Preferred links Menu 8.2Quiz Menu 8.3Cupido Menu 8.4Tones&Images Menu 8.5Guides&Leisure Menu 8.6Portals Menu 8.7Sports Menu 8.8Games Menu 8.9Note]The WAP browser menusmay vary, depending onyour browser version.WAP60](https://usermanual.wiki/LG-Electronics-USA/KF300D/User-Guide-880638-Page-66.png)
![MP3 player Menu 4.1The KE970 has an integrated MP3player built-in. You can enjoylistening to MP3 music files on yourphone using a compatible headsetor via the internal loudspeaker.The music player supports:• MPEG-2 Layer III, MPEG-2.5Layer III: Sampling frequency upfrom 8KHz to 48KHz. Bit rate up to320Kbps, stereo.• AAC: ADIF, ADTS formats(Sampling frequency from 8KHz to48KHz)• AAC+: V1: (Bit rate 16~128Kbps)V2 : (Bit rate 16~48Kbps)(Sampling frequency from8KHz to 48KHz) You can transfer MP3 files from acompatible PC to the memory inyour phone using the Mass Storage.Note]KE970 doesn’t support thevariable bit rate of allmentioned file types.Therefore, you can’t changethe file from MP3 format toAAC.Note]Because of the smalldimension of the speaker,in some cases the audiocould be distorted,especially at maximumvolume and when there arelots of bass sounds.Therefore, we recommendyou to use the stereoheadset in order toappreciate the high qualityof your music.Extras61](https://usermanual.wiki/LG-Electronics-USA/KF300D/User-Guide-880638-Page-67.png)
![When you connect the phone to aPC using the USB cable(supplied inthe same package), this will bedisplayed as a removable diskthrough Windows Explorer. If youare using Win98 SE, you will have toinstall the Mass storage driver forWindows 98 on CD-ROM.RepeatPlay allRepeat allRepeat one1. Press Multimedia menu, and thenselect MP3 player.2. Press the left soft key [Options] to access the followingmenus.]Pause: You can pause theplaying MP3 file.MENUNote]In case that any invalid fileis included in the playlist,an error message will popand go back to the priorscreen.Note]You should copy MP3 toSounds/MP3 folder. If youcopy to another folder, youwill not be able to view theMP3 files.]The PC should runWindows 98 SE, WindowsME, Windows 2000,Windows XP operatingsystem.Extras62](https://usermanual.wiki/LG-Electronics-USA/KF300D/User-Guide-880638-Page-68.png)
![]View playlist: You can selectanother file on the MP3 list.]Set as ringtone: You can set thecurrent music on playing MP3 fileas a ringtone]Settings- Equalizer: This menu helps youto adjust to a variety ofenvironments when listening tomusic.- Play mode: This menu allowsto set the play mode: Repeatone, Repeat all,Play all.- Set shuffle: It you select On,you can listen to the music atrandom.- Visual effect: You can selectthe visual effect menus: Realspectrum, Fake. This menuallows to change thebackground of main LCD onplaying MP3 file.Note]Music is copyrightprotected in internationaltreaties and nationalcopyright laws. It may benecessary to obtainpermission or a license toreproduce or copy music. Insome countries nationallaw prohibits privatecopying of copyrightedmaterial. Please check thenational legislation of theapplicable countryconcerning the use of suchmaterial.Extras63](https://usermanual.wiki/LG-Electronics-USA/KF300D/User-Guide-880638-Page-69.png)
![Camera Menu 9.2Using the camera module built inyour phone, you can take pictures orrecord videos. Additionally, you cansend photos to other people andselect photos as wallpaper.For your convenience, rotate phoneas shown below when takingpicture.1/2Zoom in/Zoom out 3CameraShutter sound or video recordingsound is omitted even when settingmode, including manner mode .• To take a pictureHold down the camera button.The camera will be ready to use andyou may want to rotate the screeninto a horizontal position.- To take clear pictures, press thecamera button while holdingthe camera without anymovement.Note]When using the camera,power consumptionincreases. If this iconappears on the wallpaper,indicating low battery,recharge the battery beforeuse.Extras6412 3AlbumOptionsAlbumOptions](https://usermanual.wiki/LG-Electronics-USA/KF300D/User-Guide-880638-Page-70.png)
![- Appropriately adjust distance tothe object that you want take apicture of (more than 50 cm).- Handle carefully since the camerais vunerable to shock and use asoft cloth when cleaning thecamera lens.- Do not disassemble or modify thecamera as this may lead to fire ormalfunctioning.Auto Focus function is enabledwhen taking a picture or stickershot. Press the camera buttonhalf way to adjust focus.1. Hold down the in standbymode. 2. Focus on the subject to capturethe image, and then press thekey.3. If you want to save it, press thekey.]Shot mode [ ]: Allows you toset the shot mode from Marco,Auto focus On and Off.]Resolution [ ]: Allows you toset the image size.(1600x1200),(1280x960) (640x480) and(320x240). Multishot is onlyavailable with the (320x240),(640x480) pixel resolution.]Quality [ ]: Allows you to setthe image quality from Normal,Fine and Super fine.]Flash [ ]: Allow you to setthe flash when you take a photoin dark place.Note]You can adjust thebrightness by using the ,.OKOKExtras65](https://usermanual.wiki/LG-Electronics-USA/KF300D/User-Guide-880638-Page-71.png)
![]Self timer [ ]: Allows you toselect the delay time (Off, 3seconds, 5 seconds, 10 seconds).Then the phone takes a photoafter the specified time.]Save to [ ]: You can set thespace after taking a picture.(External/Phone)]Multi shot [ ]: Allows to takemultishot photos successively.]Metering [ ]: Determines thelighting based on a little part ofthe subject. You can select theCentred and Combined which isto be exposed correctly.]Colour effect [ ]: 4 settingsare available.(Negation/Mono/Sepia/Colour)]White balance [ ]: Allowsyou to change the settingsaccording to the enviroment.(Fluorescent/Cloudy/Incandescent/Daylight/Auto)]Shutter tone [ ]: You can setthe sound when taking a picture.]Reset settings [ ] : Allowsyou to reset the settings. Video camera Menu 9.31. Select Video camera menu.2. Video camera settings menu isthe same with Photo camerasettings, except following items:]Mode [ ]: Allows you to setto send a video file through MMSor General. ]Resolution [ ]: You mayselect the following resolution:128x96, 176x144 .Extras66](https://usermanual.wiki/LG-Electronics-USA/KF300D/User-Guide-880638-Page-72.png)
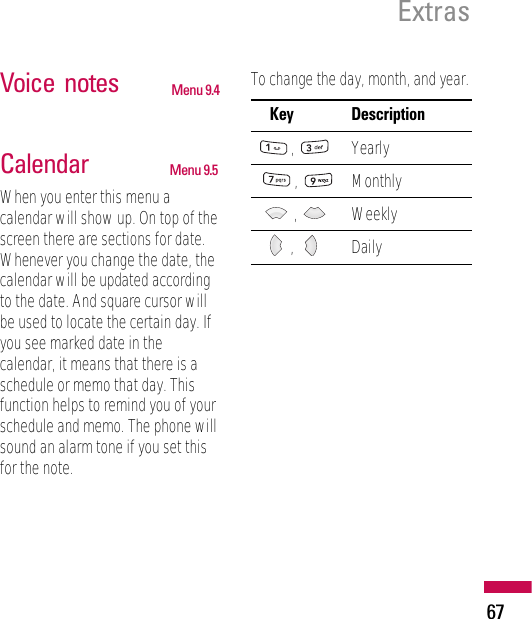
![Alarm Menu 9.6You can set the alarm clock to go offat a specified time.1. Select On and enter the alarmtime you want.2. Select the repeat period: Once,Mon-Fri, Mon-Sat, Sat-Wed, Sat-Thu, Everyday.3. Select the alarm tone you wantand press [Set].Memo Menu 9.71. Select the Memo by pressing theleft soft key [OK].2. If the entry is empty, press the leftsoft key [New].3. Input the memo and then pressleft soft key [Options] >[Save].To do Menu 9.8Note]If you want to change thetext input mode, press thein order.MENUMENUMENUMENUExtras68](https://usermanual.wiki/LG-Electronics-USA/KF300D/User-Guide-880638-Page-74.png)
![Calculator Menu 9.9This contains the standard functionssuch as +, -, x, ÷ : Addition,Subtraction, Multiplication, andDivision.Furthermore, you can use thevarious function of calculator suchas +/-, sin, cos, tan, log, ln, exp, sqrt,deg, rad.1. Input the numbers by pressingnumeric keys.2. Use a navigation key to select asign for calculation.3. Then input the numbers.4. Press key to view the result.5. To input the decimal number,press key.6. To end Calculator, press the rightsoft key [Back].Chronometer Menu 9.01. Press [Start] to take time andrecord the lap time by pressing[Lap].2. Press [Stop] to ascertain therecord of lap time.3. Press [Reset] to default condition.Extras69](https://usermanual.wiki/LG-Electronics-USA/KF300D/User-Guide-880638-Page-75.png)
![World time Menu 9.*You can check the current time ofGreenwich Mean Time (GMT) andmajor cities around the world, usingthe left/right navigation keys andleft soft key [Zoom in].The screen shows the city name,current date and time.To select the time zone in which youare located, proceed as follows:1. Select the city corresponding toyour time zone by pressing theleft/right navigation keys and leftsoft key [Zoom in] one or moretimes. The local date and time aredisplayed.2. If you want to change the timedisplay in standby mode to theselected time, press [OK] key.FM radio Menu 9.#You can search radio stations andenjoy listening to theradio. Connect the FM Radioheadset into headset jackon the right side of the phone toactivate this menu.1. Press the corresponding numberkey of a channel to store thecurrently selected radio stationinto.2. After presetting radio channels,you can listen to other channel bypressing the correspondingnumber key (short press).Extras70](https://usermanual.wiki/LG-Electronics-USA/KF300D/User-Guide-880638-Page-76.png)
![3. You can access the followingoption menus by pressing the leftsoft key [Options].]Edit : You can adjust frequencyand change the radio station inthe selected channel. You canchange the frequency 0.1 MHz ata time with Left/Right navigationkeys and number keys.]Auto scan: If you select “AutoScan Now?” On, automaticallyset the radio channel. And When“Save this Station?” message willbe popped up, if you select Yes,the selected frequency will bestored.]Reset all channels: You candelete all channels you saved.]Listen via speaker: Select thisto listen to the radio through thebuilt-in speaker. To turn off thespeaker, select “Listen viaheadset” in the [Options].Extras71](https://usermanual.wiki/LG-Electronics-USA/KF300D/User-Guide-880638-Page-77.png)
![Phone settings Menu 0.1]Data & Time:You can setfunctions relating to the date andtime.• Set date: You can enter thecurrent date.• Date format: You can set theDate format such asYYYY/MM/DD, DD/MM/YYYY,MM/DD/YYYY.(D: Day / M: Month / Y: Year)• Set time: You can enter thecurrent time.• Time format: Your can set thetime format between 24 hoursand 12 hours.• Auto update: Select On, thephone will automaticallyupdate the data and time.]Languages: You can change thelanguage for the display texts inyour phone. This change will alsoaffect the Language Input mode.]Flight mode: This allows you touse only the phone’s features thatdo not require the use of thewireless network when you are inan airplane or in places where thewireless network is prevented.If you set the flight mode on, theicon will be displayed on the screeninstead of the network signal icon.• On: You cannot make (orreceive) any calls, includingemergency calls, or use otherfeatures that require networkcoverage• Off: You can deactivate theflight mode and restart yourhandset to access the network.]Power save: If you set On, youcan save the power when youdon’t use the phone.Settings72](https://usermanual.wiki/LG-Electronics-USA/KF300D/User-Guide-880638-Page-78.png)
![Phone settings Menu 0.2In Profiles, you can adjust andcustomise the phone tones fordifferent events, environments, orcaller groups.There are five preset profiles:General, Silent, Vibrate only,Outdoor and Headset.Each profile can be personalised.Press the left soft key [Menu] andselect Profiles using up/downnavigation keys.Display settings Menu 0.3]Wallpaper: You can select thebackground pictures in standbymode.]Backlight timer: You can set thelight-up duration of the display.(Off/10 secs/20 secs/30 secs/60secs)]Brightness: You can set thebrightness of LCD: 100%, 80%,60%, 40%]Home screen shortcut:Selecting On displays thefunctionalities of 4 Navigationkeys and Menu key as pictures onthe middle of the idle window.(Profiles/Messaging/Favourites/Contacts)]Theme:]Menu style: Your phoneprovides you with Grid and Listmenu themes. Set the menu styleby scrolling and pressing the leftsoft key [OK].]Main font style]Dialing font style: Your phoneprovides you with four dialingstyles. (Color style/Beadsstyle/Digital style/Sketchbookstyle)MENUSettings73](https://usermanual.wiki/LG-Electronics-USA/KF300D/User-Guide-880638-Page-79.png)
![]Standby text: If you select On,you can edit the text which isdisplayed in standby mode.]Network name: If this functionis activated, network name willbe displayed on LCD.]Touchpaf calibration:Shortcuts Menu 0.4Selecting On displays thefunctionalities of 4 Navigation keysand Menu key as pictures on themiddle of the idle window.(Profiles/Messaging/ Favourites/Contacts)Connectivity Menu 0.5]Bluetooth: Bluetooth enablescompatible mobile devices,peripherals and computers thatare in close proximity tocommunicate directly with eachother without wires. This handsetsupports built-in Bluetoothconnectivity, which makes itpossible to connect them withcompatible Bluetooth headsets,computer applications and so on.Note]If you use LG PC Sync viaBluetooth, you canexchange the data onlywithin phonebookSettings74](https://usermanual.wiki/LG-Electronics-USA/KF300D/User-Guide-880638-Page-80.png)
![• Bluetooth on/offYou can activate or cancel theBluetooth function.• Device listYou can view all devices whichyour KE970 is already paired to.If you enter Paired devices, youaccess the options- Connect / Disconnect: Afterpairing with headset or stereoheadset, you should connectwith those devices. Then youcan use those devices.- Add new: Allows to searchnew Bluetooth devices and addthem to your phone’s list ofpaired devices. When youselect Add new your handsetwill start to search forBluetooth devices within range.Once the device you wish topair appears on the list pressthe right soft key [Stop]. Scroll to the desired device and]When you receive datafrom another Bluetoothdevice, the phone requestsconfirmation. Afterconfirming the transfer, thefile will be copied on toyour phone.]Depending on the file type,it will be stored in thefollowing folders:- Video (.3gp, mp4):Videosfolder- Image (.bmp, gif, jpg,png):Images folder- Sound (.amr, wav, aac):Sounds folder- MP3 (.mp3):Sounds/MP3folder- Other files (.txt, html):Others folderSettings75](https://usermanual.wiki/LG-Electronics-USA/KF300D/User-Guide-880638-Page-81.png)
![press the left soft key [Pair].You will then be asked to entera passcode. The passcode canbe any code you wish to use(the same passcode must beused by both devices) or is onethat is pre-determined by themanufacturer of the device youare trying to pair with. Pleasecheck the User Manual of thedevice you are initiating thepair with to see if it already hasa predetermined passcode inplace.- Rename: Allows you to changethe name of the pairedBluetooth device and how it isdisplayed on the handset.- Set as authorised/Set asunauthorised: Allows you toset an authorised connectionbetween each Bluetoothdevice. For example if youregularly use a Bluetoothheadset with your phone thensetting the connection asauthorised will mean theheadset will automaticallyconnect to the handset eachtime the headset is poweredon.- Remove: Allows to delete apaired Bluetooth device.- Remove all: Allows to deleteall a paired Bluetooth devices.• Bluetooth settings- My visibility: This indicateswhether or not your handsetwill be visible to otherBluetooth devices.- My name: You can set thename of Bluetooth device. Thedefault name is LG KE970.- My address: You can view theaddress of your Bluetoothdevice.Settings76](https://usermanual.wiki/LG-Electronics-USA/KF300D/User-Guide-880638-Page-82.png)
![]Network: You can select anetwork which will be registeredeither automatically or manually.• Network selectionUsually, the network selection isset to Automatic.- Automatic: If you selectAutomatic mode, the phonewill automatically search forand select a network for you.Once you have selected“Automatic”, the phone will beset to “Automatic” even thoughthe power is off and on.- Manual: The phone will findthe list of available networksand show you them. Then youcan select the network whichyou want to use if this networkhas a roaming agreement withyour home network operator.The phone let you selectanother network if the phonefails to access the selectednetwork.- Preferred: You can set a list ofpreferred networks and thephone attempts to register withfirst, before attempting toregister to any other networks.This list is set from the phone’spredefined list of knownnetworks.• GPRS attachYou can set GPRS servicedepending on various situations.- Power onIf you select this menu, thephone is automaticallyregistered to a GPRS networkwhen you switch the phone on.Starting a WAP or PC dial-upapplication created theconnection between phone andnetwork and data transfer ispossible. When you end theapplication, GPRS connection isended but the registration tothe GPRS network remains.Settings77](https://usermanual.wiki/LG-Electronics-USA/KF300D/User-Guide-880638-Page-83.png)
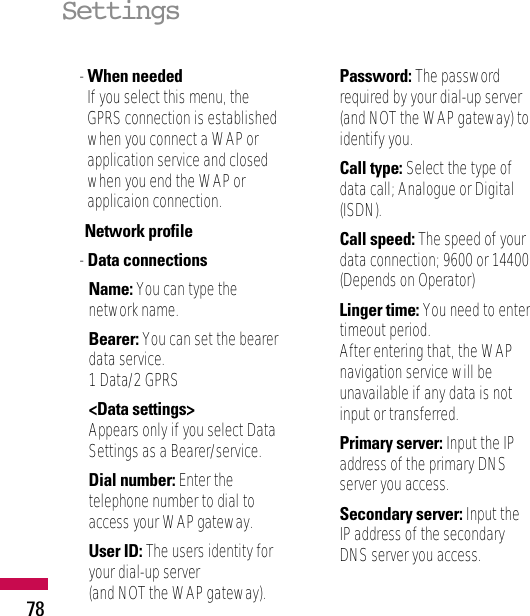
![<GPRS settings>The service settings are onlyavailable when GPRS is chosenas a bearer service.APN: Input the APN of theGPRS.User ID: The users identify foryour APN server.Password: The passwordrequired by your APN server.Primary server: Input the IPaddress of the primary DNSserver you access.Secondary server: Input theIP address of the secondaryDNS server you access.]USB connection: You canchoose one mode of Data serviceand Mass storage. When you have finished using thephone memory, click Exit and takethe following steps.1. Click on the notification area.[Unplug or Eject Hardware]2. Select USB Mass Storage Device,click on Stop. The following message willappear: “The ‘USB Mass StorageDevice’ device can now be safelyremoved from the system”3. Then remove the cable.Caution]Before you remove thecable, it is necessary thatyou click Exit. Or, theintegrity of transferred datais not guaranteed.Settings79](https://usermanual.wiki/LG-Electronics-USA/KF300D/User-Guide-880638-Page-85.png)
![Security settings Menu 0.6]PIN code request: In this menu,you can set the phone to ask forthe PIN code of your SIM cardwhen the phone is switched on.If this function is activated, you’llbe requested to enter the PINcode.1. Select PIN code request in thesecurity settings menu, andthen press [OK].2. Set On/Off.3. If you want to change thesetting, you need to enter PINcode when you switch on thephone.4. If you enter wrong PIN codemore than 3 times, the phonewill lock out. If the PIN isblocked, you will need to key inPUK code.5. You can enter your PUK codeup to 10 times. If you put wrongPUK code more than 10 times,you can not unlock your phone.You will need to contact yourservice provider.]Phone lock: You can use asecurity code to avoidunauthorized use of the phone.Whenever you switch on thephone, the phone will requestsecurity code if you set phonelock to When switch on.If you set phone lock to WhenSIM changed, your phone willrequest security code only whenyou change your SIM card.]Touchpad lock:]Call barring: The Call barringservice prevents your phone frommaking or receiving certaincategory of calls. This functionrequires the call barringpassword. You can view theMENUSettings80](https://usermanual.wiki/LG-Electronics-USA/KF300D/User-Guide-880638-Page-86.png)
![following submenus.• All outgoing : The barringservice for all outgoing calls.• Outgoing international:The barring service for alloutgoing international calls.• O/G international excepthome country: The barringservice for all internationaloutgoing calls except homenetwork.• All incoming: The barringservice for all incoming calls.• Incoming when abroad: Thebarring service for all incomingcalls when roaming.• Cancel all barrings: You cancancel all barring services.• Change password: You canchange the password for CallBarring Service.The submenus:- Activate: Allows to request thenetwork to set call restriction on.- Cancel: Set the selected callrestriction off.- View status: View the statuswhether the calls are barred or not.]Fixed dial number: You canrestrict your outgoing calls toselected phone numbers. Thenumbers are protected by yourPIN2 code.• On: You can restrict youroutgoing calls to selected phonenumbers.• Off: You can cancel fixeddialling function.• List view: You can view thenumber list saved as Fixed dialnumber.Settings81](https://usermanual.wiki/LG-Electronics-USA/KF300D/User-Guide-880638-Page-87.png)
![]Change codes: PIN is anabbreviation of PersonalIdentification Number to preventuse by unauthorized person.You can change the access codes:Security code, PIN1 code,PIN2 code.1. If you want to change theSecurity code/PIN1/ PIN2 codeinput your original code, andthen press [OK].2. Input new Securitycode/PIN/PIN2 code and verifythem.Call settings Menu 0.7You can set the menu relevant to acall by pressing [Select] in theSetting menu.]Call divert: The Call divertservice allows you to divertincoming voice calls, fax calls,and data calls to another number.For details, contact your serviceprovider.• All voice calls: Diverts voicecalls unconditionally.• If busy: Diverts voice callswhen the phone is in use.• If no reply: Diverts voice callswhich you do not answer.• If out of reach: Diverts voicecalls when the phone isswitched off or out of coverage.• All data calls: Diverts to anumber with a PC connectionunconditionally.MENUMENUSettings82](https://usermanual.wiki/LG-Electronics-USA/KF300D/User-Guide-880638-Page-88.png)
![• All fax calls: Diverts to anumber with a fax connectionunconditionally.• Cancel all: Cancels all calldivert service.The submenusCall divert menus have thesubmenus shown below.- Activate: Activate thecorresponding service.To voice mailboxForwards to message centre.This function is not shown at Alldata calls and All fax callsmenus.To other numberInputs the number for diverting.To favourite numberYou can check recent 5 divertednumbers.- Cancel: Deactivate thecorresponding service.- View status: View the statusof the corresponding service.]Answer mode• Slide open: If you select thismenu, you can receive anincoming call when you openthe slide.• Any key: If you select thismenu, you can receive a call bypressing any key except [End] key.• Accept key only: If you selectthis menu, you can receive a callby only pressing [Send]key.]Send my number(network and subscriptiondependent)• Set by network: If you selectthis, you can send your phonenumber depending on two lineservice such as line 1 or line 2.Settings83](https://usermanual.wiki/LG-Electronics-USA/KF300D/User-Guide-880638-Page-89.png)
![• On: You can send your phonenumber to another party. Your phone number will beshown on the receiver’s phone.• Off: Your phone number will notbe shown.]Call waiting(network dependent)• Activate: If you select Activate,you can accept a waiting(receiving) call.• Cancel: If you select Cancel,you cannot recognize thewaiting (receiving) call.• View status: Shows the statusof Call waiting.]Minute minder: If you select On,you can check the call duration bya beep sound given every minuteduring a call.]Auto redial: If y• On: When this function isactivated, the phone willautomatically try to redial in thecase of failure to connect a call.• Off: Your phone will not makeany attempts to redial when theoriginal call has not connected.]Send DTMF tones: You cansend touch tones during an activecall to control your voice mailboxor other automated phoneservices.Settings84](https://usermanual.wiki/LG-Electronics-USA/KF300D/User-Guide-880638-Page-90.png)
![Message settingsMenu 0.8]Text message• Message types:Text, Voice, Fax, Paging,X.400, Email, ERMESUsually, the type of message isset to Text. You can convertyour text into alternativeformats. Contact your serviceprovider for the availability ofthis function.• Validity period: This networkservice allows you to set howlong your messages will bestored at the message centre.• Delivery report: If you set toYes, you can check whetheryour message is sentsuccessfully.• Reply charging: When amessage is sent, it allows therecipients to reply and chargethe cost of the reply to yourtelephone bill.• Message centre number: Ifyou want to send the textmessage, you can receive theaddress of SMS centre throughthis menu.• Bearer setting: You can setthe bearer setting such as GSM,GPRS.]Multimedia message• Subject: You can entermultimedia messages subjectwhen this menu is on.• Slide duration: Display theduration of each page whenwriting the message.• Priority: You can set thepriority of the message youchoose.• Validity period: This networkSettings85](https://usermanual.wiki/LG-Electronics-USA/KF300D/User-Guide-880638-Page-91.png)
![service allows you to set howlong your text messages will bestored at the message centre.• Delivery report: If it is set toYes in this menu, you can checkwhether your message is sentsuccessfully.• Read report: You can receivethe report whether the receiverread the message or not.• Auto download: If you selectOn, you receive multimediamessages automatically. If youselect Off, you receive onlynotification message in theinbox and then you can checkthis notification. If you selectHome network only, you receivemultimedia messages dependson Homenetwork.• Network profile: If you selectmultimedia message server, youcan set URL for multimediamessage server.• Permitted message typePersonal: Personal message.Advertisement: Commercialmessage.Information: Necessaryinformation.]E-mail• Email account:This menu allows you to edit,delete or add an email account.- View: You can see the Email.- Set as default- EditAccount name: Accountname.Email address: Enter theemail address given to you byyour service provider.My name: You can makeyour nickname.Settings86](https://usermanual.wiki/LG-Electronics-USA/KF300D/User-Guide-880638-Page-92.png)
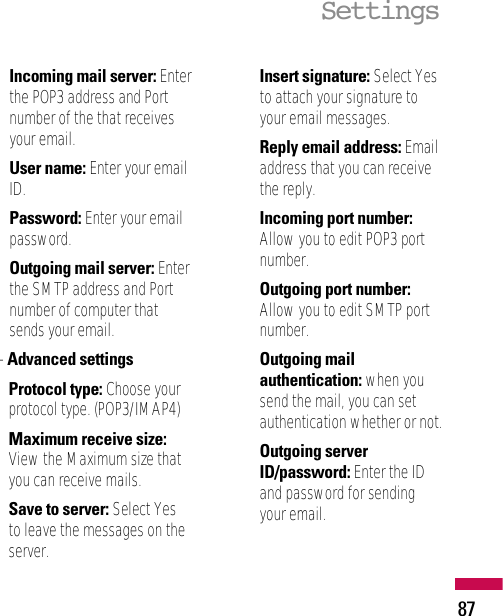
![- New account: You can setup to 5 email accounts byselecting New account menu.Using the Edit menu, you canset the following values.- Delete: Deletes the selectedaccount from the list.- Delete all: You can delete allaccount lists.• Network profile: A profile isthe network information used toconnect to the Internet. Thereare default profiles for someoperators, stored in phonememory. It’s impossible torename default profiles.• Signature: You can make yoursignature.]Voicemail number: You canreceive the voicemail if yournetwork service provider supportsthis feature. When a newvoicemail is arrived, the symbolwill be displayed on the screen.Please check with your networkservice provider for details of theirservice in order to configure thephone accordingly.]Push message: You can set theoption whether you will receivethe message or not.]Info message• ReceiveYes: If you select this menu,your phone will receive Infoservice messages.No: If you select this menu, yourphone will not receive Infoservice messages any more.Settings88](https://usermanual.wiki/LG-Electronics-USA/KF300D/User-Guide-880638-Page-94.png)
![• AlertsYes: Your phone will beepwhen you have received Infoservice message numbers.No: Your phone will not beepeven though you have receivedinfo service messages.• Language: You can select thelanguage you want by pressingOK key. Then, the info servicemessage will be shown in thelanguage that you selected.WAP settings Menu 0.9]Network profile: A profile is thenetwork information used toconnect to the Internet.There are default profiles forsome operators, stored in phonememory. It’s impossible torename default profiles.Each profile has submenus asfollows:• Activate: Activates theselected profile.• View: You can see the selectedprofile.• Edit: You can edit the selectedprofile.• New profile: You can add anew profile.• Delete: Deletes the selectedprofile from the list.• Delete all: Deletes all profilefrom the list.• Reset all: Allows you to resetall profiles.]View style: ]Cache: The information orservices you have accessed aresaved in the cache memory of thephone.Settings89](https://usermanual.wiki/LG-Electronics-USA/KF300D/User-Guide-880638-Page-95.png)
![]Cookie: Check whether a cookieis used or not.]Security certifications: Youcan see the list of personal.Certificates that have been storedin your phone.]Show image:]Javascript:]Memory in use:Original settings Menu 0.0]Reset settings]Reset phone memory]Reset allMemory status Menu 0.*You can check free space andmemory usage of each repository,Internal memory and Multimediamemory. You can go to eachrepository menu.Note]A cache is a buffermemory, which is used tosave data temporarily.Settings90](https://usermanual.wiki/LG-Electronics-USA/KF300D/User-Guide-880638-Page-96.png)
![Memory status Menu *.1Settings Menu *.2Once this menu has been selected,simply press the left soft key [OK] to listen to voice mail. You canalso hold down the key instandby mode to listen to voice mail.Help Menu *.3Note]When you receive a voicemail, your phone displaysthe icon and you hear analert. Please check withyour network provider fordetails of their service inorder to configure thehandset correctly.MENUVoice Mail91](https://usermanual.wiki/LG-Electronics-USA/KF300D/User-Guide-880638-Page-97.png)
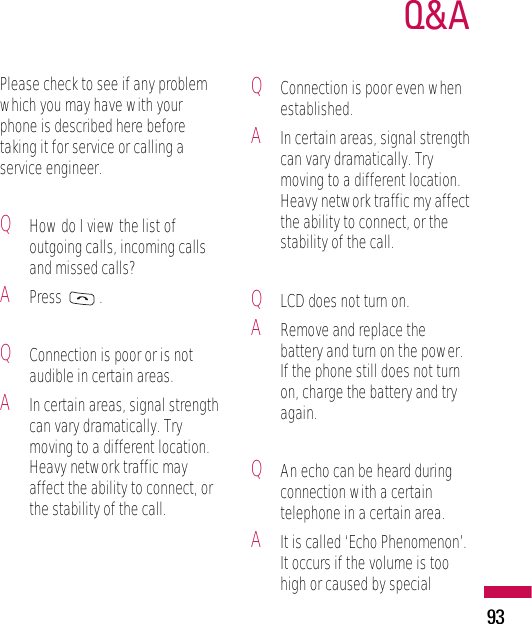
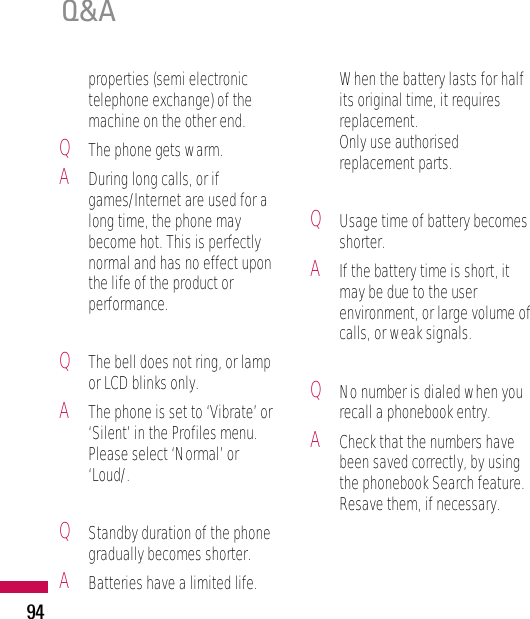
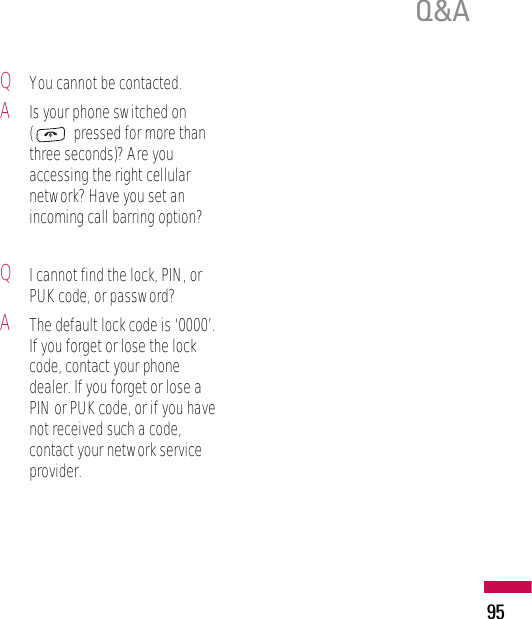
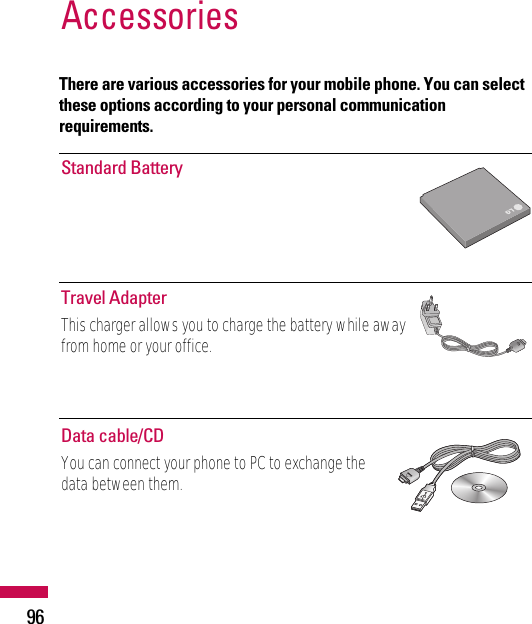
![Accessories97Hands free earmicrophone and musicplayer controller combo]Stereo headset]Controller: Answer & End button, music playercontrol, volume control, Hold button andmicrophone.Note]Always use genuine LG accessories.]Failure to do this may invalidate your warranty.]Accessories may be different in different regions; please check withour regional service company or agent for further inquires.](https://usermanual.wiki/LG-Electronics-USA/KF300D/User-Guide-880638-Page-103.png)