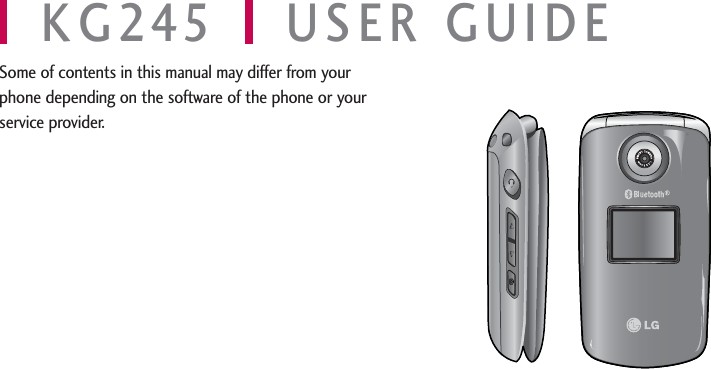
LG Electronics USA KG245 GSM 900/1800/1900 PCS phone with Bluetooth User Manual KG245 Eng 0109
LG Electronics USA GSM 900/1800/1900 PCS phone with Bluetooth KG245 Eng 0109
UserManual.wiki
>
LG Electronics USA
>
KG245 User Manual
Manual
Navigation menu
Upload a User Manual
Namespaces
Wiki Guide
HTML
PDF
Info
Views
User Manual
Discussion / Help
Navigation
![GUIDELINES FOR SAFE AND EFFICIENT USE8]Do not subject this unit to mechanical vibration orshock.]The coating of the phone may be damaged ifcovered with wrap or vinyl wrapper.]Use dry cloth to clean the exterior of the unit. (Donot use solvent such as benzene, thinner or alcohol.)]Do not subject this unit to excessive smoke or dust.]Do not keep the phone next to credit cards ortransport tickets; it can affect the information on themagnetic strips.]Do not tap the screen with a sharp object;otherwise, it may damage the phone.]Do not expose the phone to liquid or moisture.]Use the accessories like an earphone cautiously. Donot touch the antenna unnecessarily.ELECTRONICS DEVICESAll mobile phones may get interference, whichcould affect performance.]Do not use your mobile phone near medicalequipment without requesting permission. Avoidplacing the phone over the pacemaker, i.e. in yourbreast pocket.]Some hearing aids might be disturbed by mobilephones.]Minor interference may affect TVs, radios, PCs, etc.ROAD SAFETYCheck the laws and regulations on the use ofmobile phones in the areas when you drive.]Do not use a hand-held phone while driving.]Give full attention to driving.]Use a hands-free kit, if available.]Pull off the road and park before making oranswering a call if driving conditions so require.GUIDELINES FOR SAFE AND EFFICIENT USE](https://usermanual.wiki/LG-Electronics-USA/KG245/User-Guide-625068-Page-8.png)
![9]RF energy may affect some electronic systems inyour motor vehicle such as car stereo, safetyequipment.]When your vehicle is equipped with an air bag, donot obstruct with installed or portable wirelessequipment. It can cause serious injury due toimproper performance.BLASTING AREADo not use the phone where blasting is in progress.Observe restrictions, and follow any regulations orrules.POTENTIALLY EXPLOSIVE ATMOSPHERES]Do not use the phone at a refueling point. Don’t usenear fuel or chemicals.]Do not transport or store flammable gas, liquid, orexplosives in the compartment of your vehicle, whichcontains your mobile phone and accessories.IN AIRCRAFTWireless devices can cause interference in aircraft.]Turn off your mobile phone before boarding anyaircraft.]Do not use it on the ground without crewpermission.CHILDRENKeep the phone in a safe place out of small children’sreach. It includes small parts which if detached maycause a choking hazard.EMERGENCY CALLSEmergency calls may not be available under all cellularnetworks. Therefore, you should never depend solelyon the phone for emergency calls. Check with yourlocal service provider.GUIDELINES FOR SAFE AND EFFICIENT USE](https://usermanual.wiki/LG-Electronics-USA/KG245/User-Guide-625068-Page-9.png)
![GUIDELINES FOR SAFE AND EFFICIENT USE10BATTERY INFORMATION ANDCARE]You do not need to completely discharge the batterybefore recharging. Unlike other battery systems,there is no memory effect that could compromisethe battery’s performance.]Use only LG batteries and chargers. LG chargers aredesigned to maximize the battery life.]Do not disassemble or short-circuit the battery pack.]Keep the metal contacts of the battery pack clean.]Replace the battery when it no longer providesacceptable performance. The battery pack may berecharged hundreds of times until it needs replacing.]Recharge the battery if it has not been used for along time to maximize usability.]Do not expose the battery charger to direct sunlightor use it in high humidity, such as the bathroom.]Do not leave the battery in hot or cold places, thismay deteriorate the battery performance.GUIDELINES FOR SAFE AND EFFICIENT USE](https://usermanual.wiki/LG-Electronics-USA/KG245/User-Guide-625068-Page-10.png)
![KG245 FEATURES11PART OF THE PHONEKG245 FEATURES!#%@#Camera lensSide keys$Sidecamera keyFlash$Side camera keySub LCDSide keys]In standby mode (opened):Volume of key tone]In standby mode (closed):Backlight on (long press)]In menu:scroll up & down]During a call:volume of the earpieceHoles for acarrying strapSIM cardsocketBattery terminalsBattery latchSIM card terminalsBattery pack Battery coverCharger connector/Cable connector](https://usermanual.wiki/LG-Electronics-USA/KG245/User-Guide-625068-Page-11.png)
![KG245 FEATURES12KG245 FEATURES!@#$Menu ContactsAlpha numeric keys]In standby mode:Input numbersto dial Hold down– International calls– Activate Voice mail centre menuto – Speed dials– Activate Timer in Takepicture mode]In editing mode:Enter numbers& charactersEarpieceMicrophoneMain LCD]To pSignal strength, battery level and various function]BottomSoft key indications](https://usermanual.wiki/LG-Electronics-USA/KG245/User-Guide-625068-Page-12.png)
![13KG245 FEATURESRear view!$^*@Confirm keyEnd key]Switched on/off (hold down)]End or reject a call.Send key]Dial a phone number and answer a call.]In standby mode: shows recently dialled, received and missed call.Clear key#&Navigation key]In standby mode:Briefly: List of FavoritesBriefly: List of Auto answerBriefly: List of MessagesBriefly: List of ProfilesHold down: Activate/Deactivate Vibrate mode]In menu: scroll up & downScheduler hot key]Activate the Scheduler menu directly.%Soft keys]These keys perform the function Indicated in the bottom of the display.Camera hot key](https://usermanual.wiki/LG-Electronics-USA/KG245/User-Guide-625068-Page-13.png)

![15KG245 FEATURESIcon DescriptionTells you the status of the battery.You have received a text message.You have received a voice message.You can view your schedule.Vibrate only menu in profile.General menu in profile.Loud menu in profile.Silent menu in profile. Headset menu in profile.You can divert a call.Indicates that the phone isaccessing the WAP.Indicates that you are using GPRS.Note]*The quality of the conversation may changedepending on network coverage. When the signalstrength is below 2 bars, you may experiencemuting, call drop and bad audio. Please take thenetwork bars as indicator for your calls. Whenthere are no bars, that means that there is nonetwork coverage: in this case, you won’t be ableto access the network for any service (call,messages and so on).](https://usermanual.wiki/LG-Electronics-USA/KG245/User-Guide-625068-Page-15.png)
![INSTALLING THE SIM CARDAND THE HANDSET BATTERYMake sure the power is off before you remove thebattery.1. Remove the battery cover.Press the battery release latch and slide the batterycover toward the bottom of the phone. And removethe battery cover.2. Remove the battery.Hold the top edge of the battery and lift the batteryfrom the battery compartment.3. Install the SIM cardInsert the SIM card into the holder. Slide the SIMcard into the SIM card holder. Make sure that theSIM card is inserted properly and that the goldcontact area on the card is facing downwards. Toremove the SIM card, press down lightly and pull itin the reverse direction.GETTING STARTED16GETTING STARTEDNote]Removing the battery from the phone when thepower is on may cause the phone to malfunction.To insert the SIM card To remove the SIM card](https://usermanual.wiki/LG-Electronics-USA/KG245/User-Guide-625068-Page-16.png)
![17GETTING STARTED4. Install the battery.Insert the bottom of the battery first into thebottom edge of the battery compartment. Pushdown the top of the battery until it snaps intospace.5. Replace the battery cover.Lay the battery cover in place of the phone andslide it until the latch clicks.CHARGING THE BATTERYTo connect the mains adapter to the phone, you musthave installed the battery.Caution]The metal contact of the SIM card can be easilydamaged by scratches. Pay special attention tothe SIM card while handling. Follow the instructions supplied with the SIMcard.](https://usermanual.wiki/LG-Electronics-USA/KG245/User-Guide-625068-Page-17.png)
![GETTING STARTED181. With the arrow facing you as shown in the diagrampush the plug on the battery adapter into thesocket on the bottom of the phone until it clicksinto place.2. Connect the other end of the mains adapter to themains socket. Use only the included packing charger.3. The moving bars of battery icon will stop aftercharging is complete.DISCONNECTING THE ADAPTER1. When charging is finished, the moving bars of thebattery icon stop and ‘Full’ is displayed on thescreen.2. Unplug the adapter from the power outlet.Disconnect the adapter from the phone by pressingthe grey tabs on both sides of the connector andpull the connector out.GETTING STARTEDCaution!]Do not force the connector as this may damagethe phone and/or the travel adapter.]Insert the battery pack charger vertically to wallpower outlet.]If you use the battery pack charger out of yourown country, use an attachment plug adapter forthe proper configuration.]Do not remove your battery or the SIM card whilecharging.Warning!]Unplug the power cord and charger duringlightning storms to avoid electric shock or fire.]Make sure that no sharp-edged items such asanimal teeth, nails, come into contact with thebattery. There is a risk of this causing a fire.]Do not place or answer calls while charging thephone as it may short-circuit the phone and/orcause electric shock or fire.](https://usermanual.wiki/LG-Electronics-USA/KG245/User-Guide-625068-Page-18.png)
![19GETTING STARTEDNote]Ensure the battery is fully charged before firstusing the phone.]Do not remove the battery or SIM card whilecharging.]In the case the battery is not properly charged,please turn the phone off and on using the powerkey, then recharge the battery. After detachingand reattaching the battery, please recharge thebattery.](https://usermanual.wiki/LG-Electronics-USA/KG245/User-Guide-625068-Page-19.png)
![21ACCESS CODESYou can use the access codes described in this sectionto avoid unauthorised use of your phone. The accesscodes (except PUK and PUK2 codes) can be changedby using the Change codes feature [Menu 3-5-5].See page 49.PIN code (4 to 8 digits)The PIN (Personal Identification Number) codeprotects your SIM card against unauthorised use. ThePIN code is usually supplied with the SIM card. Whenthe PIN code request is set to Enable, your phonewill request the PIN code every time the phone isswitched on. When the PIN code request is set toDisable, your phone connects to the network directlywithout the PIN code.PIN2 code (4 to 8 digits)The PIN2 code, supplied with some SIM cards, isrequired to access functions such as Advice of CallCharge and Fixed dial number. These functions areonly available if supported by your SIM card. Checkwith your network for further information.PUK code (4 to 8 digits)The PUK (PIN Unblocking Key) code is required tochange a blocked PIN code. The PUK code may besupplied with the SIM card. If not, contact yournetwork operator for the code. If you lose the code,also contact your network operator.PUK2 code (4 to 8 digits)The PUK2 code, supplied with some SIM cards, isrequired to change a blocked PIN2 code. If you losethe code, also contact your network operator.Security code (4 to 8 digits)The security code protects the unauthorised use ofyour phone. The default security code is set to ‘0000’and the security code is required to delete all phoneentries and to activate the Reset settings menu. Also,the security code is required to enable or disable thephone lock function to prevent unauthorised use ofthe phone. The security code default setting can bemodified from the Security settings menu.GETTING STARTED](https://usermanual.wiki/LG-Electronics-USA/KG245/User-Guide-625068-Page-21.png)
![GETTING STARTED22BARRING PASSWORDThe barring password is required when you use Callbarring [Menu 3-5-3] function. You obtain thepassword from your network operator when yousubscribe to this function. See page 48 for furtherdetails.GETTING STARTED](https://usermanual.wiki/LG-Electronics-USA/KG245/User-Guide-625068-Page-22.png)
![GENERAL FUNCTIONS23MAKING AND ANSWERINGCALLSMaking a call1. Make sure your phone is switched on.2. Enter a phone number, including the area code.]Press and hold the clear key ( ) to erase theentire number.3. Press the send key ( ) to call the number.4. To end the call, press the end key ( ) or theright soft key.Making a call using the send key1. In standby mode, press the send key ( ), andthe latest incoming, outgoing and missed phonenumbers will be displayed.2. Select the desired number by using the up/downnavigation key.3. Press .Making an international call1. Press and hold the key for the internationalprefix. The ‘+’ character automatically selects theinternational access code.2. Enter the country code, area code, and the phonenumber.3. Press .Ending a callWhen you have finished your call, press the end ( ) key.Making a call from the address bookYou can save the names and phone numbers dialledregularly in the SIM card and/or phone memory, whichis address book You can dial a number by simplylooking up the desired name in the address book.GENERAL FUNCTIONS](https://usermanual.wiki/LG-Electronics-USA/KG245/User-Guide-625068-Page-23.png)
![24Adjusting the volumeIf you want to adjust the earpiece volume during a call,use the side keys ( ) . Press the up side key toincrease and down side key to decrease the volume.Answering a callWhen you receive a call, the phone rings and theflashing phone icon appears on the screen. If the callercan be identified, the caller’s phone number (or name ifsaved in the phonebook) is displayed.1. To answer an incoming call, open the phone. (WhenFlip open has been set as the answer mode. Seepage 47 [Menu 3-4-2].)]To reject an incoming call, press and hold one ofthe side keys on the left side of the phonewithout opening the phone.]You can answer a call while using the addressbook or other menu features.2. To end the call, close the phone or press the key.Manner mode (Quick)You can activate the manner mode by pressing andholding down the key after opening the phone.Signal strengthYou can check the strength of your signal by the signalindicator ( ) on the LCD screen of your phone.Signal strength can vary, particularly inside buildings.Moving near to a window may improve reception. Entering textYou can enter alphanumeric characters by using thephone’s keypad. For example, storing names in thephonebook, writing a message, creating a personalNote]If Press any key has been set as the answer mode(see page 47), any key press will answer a callexcept for the or the right soft key.Note]In standby mode with the phone open, pressingthe side keys adjusts the key tone volume.GENERAL FUNCTIONS](https://usermanual.wiki/LG-Electronics-USA/KG245/User-Guide-625068-Page-24.png)
![GENERAL FUNCTIONS26. Press one key per letter.]The word changes as letters are typed. Ignorewhat’s on the screen until the word is typedcompletely.]If the word is still incorrect after typingcompletely, press the down navigation key once ormore to cycle through the other word options.Example: Press to type GoodPress [Downnavigation key] to type Home]If the desired word is missing from the wordchoice list, add it using the ABC mode.]You can select the language of the T9 mode.Press the left soft key [Option], then select T9languages. Select the desired language of T9mode. You can also turn off the T9 mode byselecting T9 off. The default setting on the phoneis T9 enabled mode.2. Enter the whole word before editing or deleting anykeystrokes. 3. Complete each word with a space by pressing thekey. To delete letters, press . Press andhold down to erase entire words.Using the ABC modeUse the to keys to enter your text.1. Press the key labelled with the required letter:]Once for the first letter]Twice for the second letter]And so on2. To insert a space, press the key once. To deleteletters, press the key. Press and hold downthe key to clear the whole display.GENERAL FUNCTIONSNote]To exit from the text input mode without savingyour input, press . The phone goes back tostandby mode.](https://usermanual.wiki/LG-Electronics-USA/KG245/User-Guide-625068-Page-26.png)
![27Using the 123 (Number) modeThe 123 mode enables you to enter numbers in a textmessage (a telephone number, for example). Press thekeys corresponding to the required digits beforemanually switching back to the appropriate text entrymode.CONTACTSYou can store phone numbers and their correspondingnames in the memory of your SIM card.In addition, you can store up to 200 numbers andnames in the phone memory.The SIM card and phone are both used in the sameway in the Contacts menu.IN-CALL MENUYour phone provides a number of control functionsthat you can use during a call. To access thesefunctions during a call, press the left soft key[Options].GENERAL FUNCTIONSNote]Refer to the table below for more information onthe characters available using the alphanumerickeys.Key Upper Case Lower Case. , / ? ! - : ' '' 1 @ . , / ? ! - : ' '' 1 @AB C 2 Ä À Á Â Ã Å Æ Ç a b c 2 ä à á â ã å æ çD E F 3 Ë È É Ê d e f 3 ë è é êG H I 4 Ï Ì Í Î ˝g h i 4 ï ì í î ©J K L 5 j k l 5M N O 6 Ñ Ö Ø Ò Ó Ô Õ Œ m n o 6 ñ ö ø ò ó ô õ œP Q R S 7 ß Íp q r s 7 ß ßT U V 8 Ü Ù Ú Û t u v 8 ü ù ú ûW X Y Z 9 w x y z 9Space 0 Space 0Characters in the order display](https://usermanual.wiki/LG-Electronics-USA/KG245/User-Guide-625068-Page-27.png)
![28During a callThe menu displayed on the handset screen during acall is different to the default main menu displayedwhen in standby mode, and the options are describedbelow.Making a second callYou can get a number you wish to dial from thephonebook to make a second call. Press the right softkey then select Search. To save the dialled number intothe phonebook during a call, press the right soft keythen select Add new.Making a second callYou can get a number you wish to dial from thephonebook to make a second call. Press the right softkey then select Search. To save the dialled number intothe phonebook during a call, press the right soft keythen select Add new.Switching between two callsTo switch between two calls, press the left soft keythen select Swap.Answering an incoming callTo answer an incoming call when the handset is ringing,simply press the key. The handset is also able towarn you of an incoming call while you are already on acall. A tone sounds in the earpiece, and the display willshow that a second call is waiting. This feature, known as Call waiting, is only available ifyour network supports it. For details of how to activateand deactivate it see Call waiting [Menu 3-4-4] onpage 47.If Call waiting is activated, you can put the first call onhold and answer the second, by pressing or byselecting left soft key, then Hold & Answer. You canend the current call and answer the waiting call byselecting left soft key and then End & Answer.Rejecting an incoming callYou can reject an incoming call without answering bysimply pressing the key.During a call, you can reject an incoming call bypressing the left soft key [Menu] key and selecting theConference/Reject or by pressing the .GENERAL FUNCTIONSGENERAL FUNCTIONS](https://usermanual.wiki/LG-Electronics-USA/KG245/User-Guide-625068-Page-28.png)
![29Muting the microphoneYou can mute the microphone during a call by pressingthe [Menu] key then selecting Mute on. The handsetcan be unmuted by selecting Mute off. When thehandset is muted, the caller cannot hear you, but youcan still hear them.Switching DTMF tones on during a callTo turn DTMF tones on during a call, press the left softkey, and then select DTMF on. DTMF tones can beturned off the same way. DTMF tones allow your phoneto make use of an automated switchboard.MULTIPARTY OR CONFERENCECALLSThe multiparty or conference service provides you withthe ability to have a simultaneous conversation withmore than one caller, if your network operator supportsthis feature. A multiparty call can only be set up whenyou have one active call and one call on hold, bothcalls having been answered. Once a multiparty call isset up, calls can be added, disconnected or separated(that is, removed from the multiparty call but stillconnected to you) by the person who set up themultiparty call. These options are all available from theIn-Call menu. The maximum callers in a multiparty callare five. Once started, you are in control of themultiparty call, and only you can add callers to themultiparty call.Making a second callYou can make a second call while currently on a call.Enter the second number and press the key.When the second call is connected, the first call isautomatically placed on hold. You can swap betweencalls by pressing the left soft key then selecting Swap.Setting up a conference callPlace one call on hold and while the active call is on,press the left soft key and then select theConference/Join all.Putting a conference call on holdPress the left soft key, then select theConference/Hold all.Activate the conference call on holdGENERAL FUNCTIONS](https://usermanual.wiki/LG-Electronics-USA/KG245/User-Guide-625068-Page-29.png)
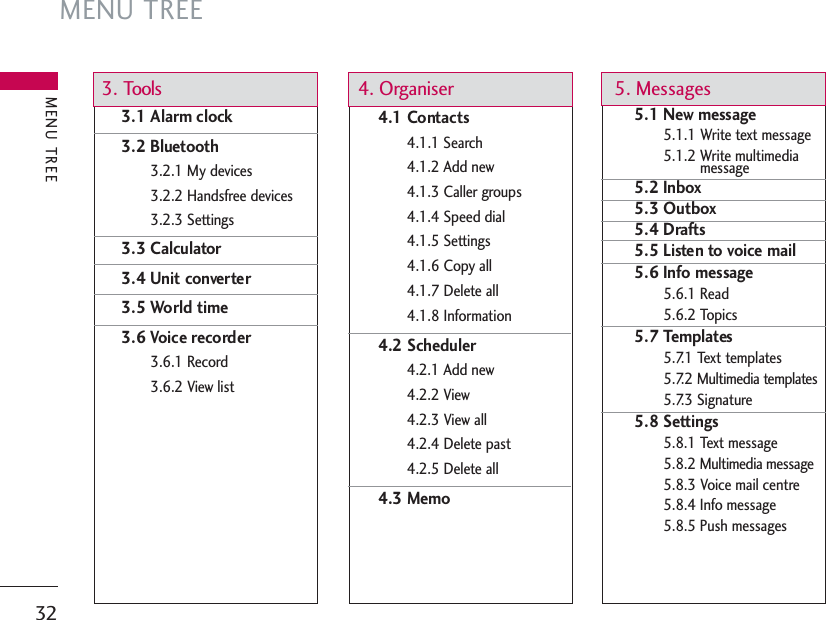
![MENU TREE31MENU TREE1. Profiles 1.1 Vibrate only1.2 Silent1.3 General1.4 Loud1.5 Headset2. Call register 2.1 Missed calls2.2 Received calls2.3 Dialled calls2.4 Delete recent calls2.5 Call charges2.5.1 Call duration2.5.2 Call costs2.5.3 Settings2.6 GPRS information2.6.1 Call duration2.6.2 Data volumesThe following illustration shows the available menustructure and indicates the:]Number assigned to each menu option.]Page where you can find the feature description.You can go to the desired menu using the left soft key[Menu], navigation keys and the [OK] key. And you canalso take a shortcut by pressing the correspondingnumber key of desired menu after pressing the left soft key[Menu].](https://usermanual.wiki/LG-Electronics-USA/KG245/User-Guide-625068-Page-31.png)

![35SELECTING FUNCTIONS AND OPTIONSYour phone offers a set of functions that allow you tocustomise the phone. These functions are arranged inmenus and sub-menus, accessed via the two soft keysmarked [ ] and [ ]. Each menu and sub-menulets you view and alter the settings of a particularfunction.The roles of the soft keys vary according to the currentcontext; the label on the bottom line of the screen justabove each key indicates its current role.SELECTING FUNCTIONS AND OPTIONSPress the left soft keyto access the availablemenu.Press the right softkey to access theshotcut menus.Menu Shortcut](https://usermanual.wiki/LG-Electronics-USA/KG245/User-Guide-625068-Page-35.png)
![CONTACTS36SEARCH MENU 1.11. Select Search by press the left soft key [Select] or [OK].2. Enter the name that you want to search or selectleft soft key [List] to view all the phonebooklist.3. If you want to edit, delete, copy an entry, or to addthe voice to one, select left soft key [Options].The following menu will be displayed.]Edit: You can edit the name, number, group,character and picture by using the navigation key.]Write text/multimediamessage: After you havefound the number you want, you can send a text/multimedia message to the selected number.] Send via Bluetooth:You can send the data ofphone book to devices which is compatible withbluetooth through bluetooth.] Copy: You can copy an entry from SIM to phone orfrom phone to SIM.] Main number: You can select the one out ofmobile, home, office that you often use. After youset this, the main number will be displayed first,when you search.] Delete:You can delete an entry.ADD NEW MENU 1.2You can add phonebook entry by using this function.Phone memory capacity is 200 entries. SIM cardmemory capacity depends on the cellular serviceprovider. You can also save 20 characters of name inThe Phone memory, and save characters in the SIMcard. The number of character is SIM dependentfeature.1. Select Add new by press left soft key [Select]or [OK].2. Select the memory you want to save: SIM or Phone.If you set to Phone, you need to select whichnumber you want as Main number.a. Press [OK] to input a name.CONTACTSNote]Instant searching is available by inputting theinitial letter of the name or number you want tosearch.](https://usermanual.wiki/LG-Electronics-USA/KG245/User-Guide-625068-Page-36.png)
![37b. Press [OK], then you can input a number.c. Press [OK].d. You can set a group for the entry by pressing ,:e. You can set a character and a picture for theentry by pressing , , , .CALLER GROUPS MENU 1.3You can list up to 20 members per one group. Thereare 7 groups you can make lists to.]Member list: Shows the group members you haveselected.]Group ring tone:Allows you to specify ring tonefor the group members’ call.]Group icon: Allows you to select the icondependent on Group.]Add member: You can add group members. Eachgroup member shouldn’t be exceeded 20.]Remove member: You can remove the memberfrom the Group member list. But the name and thenumber still remain in phonebook.]Rename: You can change a group name.SPEED DIAL MENU 1.4You can assign any of the keys , to with aName list entry. You can call directly by pressing thiskey.1. Open the phonebook first by pressing the Right softkey [Contacts] in standby mode.2. Scroll to Speed dials, press the left soft key [Select]. 3. If you want to add Speed dial, select (empty). Then,you can search the name in phonebook.4. Select allocated a name by speed dial, and chooseChange or Delete to edit the name.OWN NUMBER(SIM DEPENDENT) MENU 1.5You can save and check your own number in SIM card.MY BUSINESS CARD MENU 1.6This option allows you to create your own businesscard featuring Name and an mobile phone number. ToCONTACTS](https://usermanual.wiki/LG-Electronics-USA/KG245/User-Guide-625068-Page-37.png)
![CONTACTS38create a new business card, press the left soft key[Edit] and enter the information into the fields.SETTINGS MENU 1.71. Press the right soft [Contacts] in standbymode.2. Scroll to Settings, then press the left soft key [Select]. ]Default memoryScroll to highlight Default memory, and then pressthe left soft key [Select]. - If you select Always ask, when adding entry, thephone will ask where to store.- If you select SIM or Phone, the phone will store anentry to SIM or phone.]View optionsScroll to highlight View options, and then press theleft soft key [Select]. - Name only: Set the phonebook list with displayingonly name.- With pictures: Set the phonebook list with theinformation of character and picture.- Name & number: Set the phonebook list withdisplaying name and number.]Copy/Move allYou can copy/move entries from SIM card memoryto Phone memory and vice versa.1. Open the Phonebook first by pressing the rightsoft key [Contacts] in standby mode.2. Scroll to Copy all, and then press the left softkey [Select]to enter this menu.]Memory in useThis feature allows you to see how many entries arein use, or free in your phonebook.]Clear contactsYou can delete all the entries in the SIM and Phone.This function requires the Security code.1. Scroll to highlight Clear contacts, and then pressthe left soft key [Select].2. Highlight the memory you wish to erase, andthen press the left soft key [Select].CONTACTS](https://usermanual.wiki/LG-Electronics-USA/KG245/User-Guide-625068-Page-38.png)
![393. Enter security code and Press the left soft key[OK] or the right soft key [Back].]Service dial numberUse this function to access a particular list ofservices provided by your network operator (ifsupported by the SIM card).CONTACTS](https://usermanual.wiki/LG-Electronics-USA/KG245/User-Guide-625068-Page-39.png)
![CALL REGISTER40You can check the record of missed, received, anddialled calls only if the network supports the CallingLine Identification (CLI) within the service area.The number and name (if available) are displayedtogether with the date and time at which the call wasmade. You can also view call times.MISSED CALLS MENU 2.1This option lets you view the last 10 unanswered calls.You can also:]View the number if available and call it or save it inthe phonebook.] Enter a new name for the number and save both inAddress book.] Send a message to this number.] Delete the call from the list.RECEIVED CALLS MENU 2.2This option lets you view the last 10 incoming calls.You can also:]View the number if available and call it, or save it inAddress Book]Enter a new name for the number and save both inAddress Book.]Send a message to this number.]Delete the call from the list.DIALLED CALLS MENU 2.3This option lets you view the last 10 outgoing calls(called or attempted). You can also:]View the number if available and call it or save it inAddress Book] Enter new name for the number and save both inAddress Book.] Send a message to this number.] Delete the call from the list.ALL CALLS MENU 2.4You can view all lists of outgoing or incoming calls.CALL REGISTER](https://usermanual.wiki/LG-Electronics-USA/KG245/User-Guide-625068-Page-40.png)
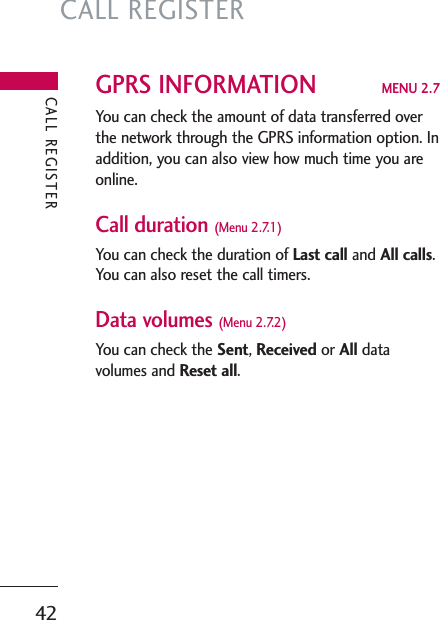
![41DELETE RECENT CALLS MENU 2.5Allows you to delete Missed calls and Received callslists. You can delete Dialled calls and All calls lists atone time.CALL CHARGES MENU 2.6Call duration (Menu 2.6.1)Allows you to view the duration of your incoming andoutgoing calls. You can also reset the call times. Thefollowing timers are available:] Last call: Length of the last call.] All calls: Total length of all calls made andincoming calls since the timer was last reset.] Received calls: Length of the incoming calls.] Dialled calls: Length of the outgoing calls.] Reset all: Allows you to clear the length of all callsby pressing the left soft key [Yes ].Call costs (Menu 2.6.2)Allows you to check the cost of your last call, all calls,remaining and reset the cost. To reset the cost, youneed to PIN2 code.Settings (Menu 2.6.3)] Set tariff: You can set the currency type and theunit price. Contact your service providers to obtaincharging unit prices. To select the currency or unitin this menu, you need the PIN2 code.] Set credit: This network allows you to limit thecost of your calls by selected charging units.If youselect Read, the number of remaining unit isshown. If you select Change, you can change yourchange limit.]Auto display: This network service allows you tosee automatically the cost of your last calls. If setto On, you can see the last cost when the call isreleased.CALL REGISTER](https://usermanual.wiki/LG-Electronics-USA/KG245/User-Guide-625068-Page-41.png)
![FUN43FAVOURITES MENU 3.1This option allows you to add your own favourites tothe list already provided. Once you create your ownmenu, you can access the desired function quickly inthe idle screen by pressing the up navigation key.ALARM CLOCK MENU 3.2You can set up to 5 alarm clocks to go off at aspecified time.1. Select On and enter the alarm time you want.2. Select the repeat period: Once, Mon~Fri, Mon~Sat,Everyday.3. Select the alarm tone you want and press [OK].BLUETOOTH MENU 3.3Bluetooth enables compatible mobile devices,peripherals and computers that are in close proximityto communicate directly with each other without wires.This handset supports built-in Bluetooth connectivity,which makes it possible to connect them withcompatible Bluetooth headsets, computer applicationsand so on.TOOLSNote]The menu of SMS, MMS and MP3 is alreadyprovided in your own favourites.Note]If you use a pcsync via Bluetooth, you canexchange the data within only the phonebook.]When you receive data from another Bluetoothdevice, the phone requests for a confirmation.After confirming the transfer, the file will be copiedin your phone.]Depending on the file type, it will be stored in thefollowing folders:- MP3 (.mp3, mp4, aac, m4a, wma): Musicfolder.- Video (.3GP): video folder.- Phonebook contacts (.VCF): Phonebook.- Text (.txt): Text folder.- Other files (.*.*): File storage folder.]Supported Bluetooth software (Bluetooth stacks)for DUN: WIDCOMM Bluetooth for Windows 1.4and 3.0](https://usermanual.wiki/LG-Electronics-USA/KG245/User-Guide-625068-Page-43.png)
![TOOLS44Paired devices (Menu 3.3.1)You can view all devices which are compatible withBluetooth phone.Handsfree devices (Menu 3.3.2)You can view the list of handsfree devices which arecompatible with bluetooth phone.If you have entered Paired devices or Handsfreedevices, you will see the following options in boththose menus.] Connect/Disconnect: Allows you to connect toother Bluetooth devices.] Add new: Allows you to search for new Bluetoothdevice.] Assign name: Allows you to change the name ofBluetooth device and how its displayed on thehandset.] Set as authorised/Set as unauthorised: Allows youto set the authorised connection between eachBluetooth devices.] All service: Allows you to view all services which aresupported by a Bluetooth device.] Delete: Allows you to delete the Bluetooth device.] Delete all: Allows you to delete all Bluetoothdevices.Settings (Menu 3.3.3)You can register a new device which is compatible withBluetooth. If you already have added the device, youcan search it after entering a password.] Set BluetoothYou can activate or cancel bluetooth function.] My handset's visibilityYou can set the function that your phone is visibleon the other Bluetooth devices.] My handset's nameYou can set the name of bluetooth device. Thedefault name is KG245.TOOLSNote]Due to a compatibility problem, some devicesmay not support this function.](https://usermanual.wiki/LG-Electronics-USA/KG245/User-Guide-625068-Page-44.png)
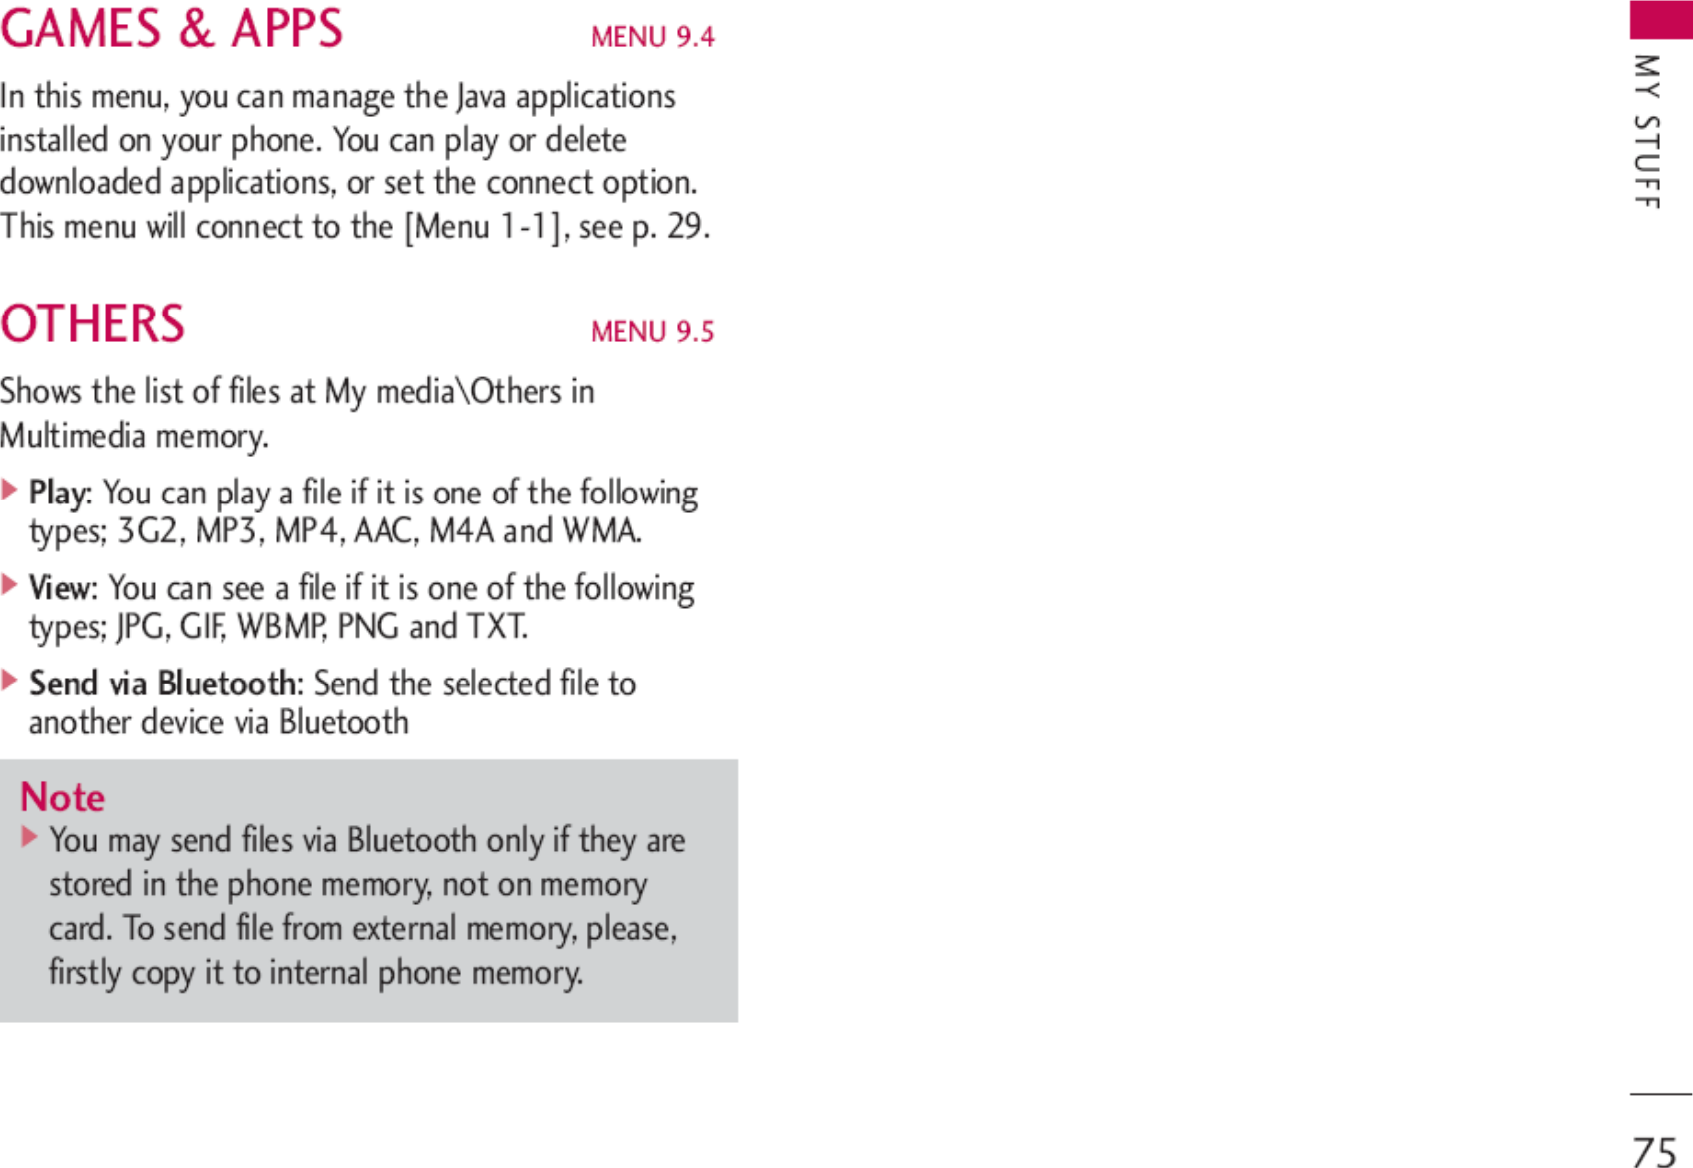
![45TOOLSGAMES & APPS MENU 3.4• Default Games: In this menu, you can manage theJava applications installed in your phone.You can play or delete downloaded applications, orset the connect option. The downloaded applicationsare organised in folders.Press the left soft key [Select] to open theselected folder or launch the selected midlet.After selecting a folder, press [Options] and then submenus available to several options are displayed.]Open: You can see the stored games.]New folder: Create a new folder.CALCULATOR MENU 3.5This contains the standard functions such as +, –, x, ÷: Addition, Subtraction, Multiplication, and Division.Furthermore, you can use the various function ofcalculator such as +/-, sin, cos, tan, log, in, exp, sqrt.1. Input the numbers by pressing numeric keys.2. Use a navigation key to select a sign for calculation.3. Then input the numbers.4. Press key to view the result.5. To input the decimal number, press key. If youpress key, you can enter ( ).6. To end Calculator, press the right soft key [Back].UNIT CONVERTER MENU 3.6This converts any measurement into a unit you want.There are 9 types that can be converted into units:Currency,Surface,Length,Weight,Te m p e r a t u re ,Volume,Velocity, Shoes and Clothes.1. You can select one of four unit types by pressing[Select] key.2. Select the unit you want to convert by pressing and . It's impossible to input "-" symbol inunit converter.3. Select the standard value by using , .WORLD TIME MENU 3.7You can view clocks of the world’s major cities.1. Select the city belonged to the time zone by](https://usermanual.wiki/LG-Electronics-USA/KG245/User-Guide-625068-Page-45.png)
![TOOLS46pressing , key.2. You can set the current time to the city time youselect by pressing the left soft key [Set].VOICE RECORDER MENU 3.8The voice memo feature you to record up to 10 voicemessages and each memo is up to 20 Seconds.Record (Menu 3.8.1)You can record voice memo in Voice recorder menu.1. Once recording is started, the message Recordingand the remaining time is displayed.2. If you want to finish recording, press the left softkey [Save].3. Key in Voice memo title, press the left soft key [OK].View list (Menu 3.8.2)The phone shows voice memo list. You can Playbackand Delete the recorded voice memo.SIM SERVICES MENU 3.9This menu depends on SIM and the network services.TOOLSNote]In case the SIM card support SAT(i.e. SIMApplication Toolkit) services, this menu will be theoperator specific service name stored on the SIMcard.]In case the SIM card does not support SATservices, this menu will be Profiles.](https://usermanual.wiki/LG-Electronics-USA/KG245/User-Guide-625068-Page-46.png)
![ORGANISER47CALENDAR MENU 4.1When you enter this menu a calendar will be displayed.The month and year are shown at the top of thescreen. Whenever you the change the date under theSettings menu, the calender will update automatically.The current date will be highlighted in green and anyschedule or memos will be indicated with a red triangleat the top left hand corner of the correspondingsquare. An audible alarm can be set for memo's andreminders.To change the day, month, and year.In the scheduler mode, press left soft key [Options] as follows;Add new (Menu 4.1.1)Allows you to add new schedule and memo for thechosen day. You can store up to 20 notes.Input the subject and then press left soft key [OK]. You enter the appropriate information in thefollow section; Time, Repeat and Alarm.View daily schedules (Menu 4.1.2)View all schedules and memo for the chosen day. Use, to browse through the note lists. If you setalarm for the note, the alarm icon is displayed.If you want to view the note in detail, press left softkey [Select]. Press left soft key [Options] todelete, edit the note you selected.Delete past (Menu 4.1.3)You can delete the past schedule that you have alreadybeen notified of. Delete all (Menu 4.1.4)You can delete all the notes.ORGANISERKey DescriptionYearlyMonthlyWeeklyDaily](https://usermanual.wiki/LG-Electronics-USA/KG245/User-Guide-625068-Page-47.png)
![ORGANISER48Go to date (Menu 4.1.5)You can go the chosen date directly.Set alarm tone (Menu 4.1.6)You can set the alarm tone of each chosen date.MEMO MENU 4.21. Select the Memo by pressing the left soft key [Select].2. If the entry is empty, press the left soft key [Write].3. Input the memo and then press left soft key [Ok].ORGANISERNote]If you want to change the text input mode, pressthe in order.](https://usermanual.wiki/LG-Electronics-USA/KG245/User-Guide-625068-Page-48.png)
![MESSAGES49NEW MESSAGE MENU 5.1This menu includes functions related to SMS (ShortMessage Service), MMS (Multimedia Message Service),Email, voice mail, as well as the network’s servicemessages.Write text message (Menu 5.1.1)You can write and edit text message, checking thenumber of message pages.1. Enter the New messages menu by pressing the leftsoft key [Select].2. If you want to write a new message, select Write textmessage.3. To make text input easier, use T9.4. Press [Insert] to attach the following ;Insert]Images: You can insert the Default graphics orgraphics in My pictures that are available for shortmessages.]Sounds: You can insert sounds that are available forshort messages.]Text templates: You can use Text templates alreadyset in the phone.]Contacts: You can add phone numbers or e-mailaddresses in the address book.]Symbol: You can add special characters.]My business card: You can add your Business cardto the message.5. After you complete the message, to select therequired option, press the left soft key [Options].Options]Send:Sends text messages.1. Enter numbers of recipient.2. Press key to add more recipients.3. You can add phone numbers in the address book.4. Once the numbers have been entered, press the leftsoft key to send the message.All messages will automatically be saved in theoutbox folder, even after a sending failure.]Save to drafts:Stores messages in the Drafts folder.MESSAGES](https://usermanual.wiki/LG-Electronics-USA/KG245/User-Guide-625068-Page-49.png)
![50]Font & Alignment:You can select the Size andStyle of font, and the alignment of text.]Colour:You can also set the Colour of the text(foreground) and the background.]Add T9 dictionary:You can add your own words.This menu will only be shown when the edit modehas been set to T9ABC/T9Abc/T9abc.]T9 languages:Select the desired language for T9input mode. You can also deactivate the T9 inputmode by selecting ‘T9 off’.]Exit:If you press Exit whilst writing a message, youwill be taken back to the message menu. Also thewritten message will not have been saved.Write multimedia message (Menu 5.1.2)A multimedia message can contain text, images, and/orsound clips. This feature can be used only if it issupported by your network operator or serviceprovider. Only devices that offer compatible multimediamessage or e-mail features can receive and sendmultimedia messages.1. Enter the New message menu by pressing the leftsoft key [Select].2. If you want to write a new message, select Writemultimedia message.3. You can create a new message or choose one of themultimedia message templates already made.4. Press Insert to add Image, Sound, External memory,Contacts, Symbol, New photo, New sound, Texttemplates, My business card.Maximum available file size, that can be inserted toMMS-message, is 100 kb.Options]Send:You can send multimedia messages to multiplerecipients, as well as save it to send at a later time.MESSAGESNote]This phone supports EMS release 5, so isavailable to send colour pictures, sounds, textstyles, etc.. If the other parties handsets do notsupport such options, the pictures, sounds ortexts sent may not be displayed correctly on theirphones.](https://usermanual.wiki/LG-Electronics-USA/KG245/User-Guide-625068-Page-50.png)
![51]Preview:You can preview multimedia messages youhave created.]Save:You can save multimedia messages To d ra ft sor As template.]Edit subject:Allows you to modify the multimediamessage you have chosen.]Add slide:You can add a slide before or aftercurrent slide.]Move to slide:You can move to previous or nextslide.]Delete slide:You can delete current slides.]Set slide format- Set timer:You can set a timer for slide, text,picture and sound.]Add T9 dictionary:You can add your own words.This menu will only be shown when the edit modehas been set to T9ABC/T9Abc/T9abc.]T9 languages:Select the desired language for T9input mode. You can also deactivate T9 input modeby selecting ‘T9 off’.]Exit:Will take you back to the Message menu.Write email message (Menu 5.1.3)To send/receive an email, you should set up the emailaccount. Refer to Email on page 49 first.1. You can input up to 12 email addresses in the Toand Cc field.Tip: To input "@", press the and select "@".2. Key in the subject of the mail and press OK.3. After writing an email message, press the left softkey [Options]. You can access the followingoption menus.]Send:Sends the email message.MESSAGESNote]All messages will be automatically saved in theoutbox folder, even after a sending failure.Note]When creating a multimedia message, if youupload a picture (50K) you may find that whilstthe picture is loading you will not be able to carryout any other actions until the picture hascompeted loading.](https://usermanual.wiki/LG-Electronics-USA/KG245/User-Guide-625068-Page-51.png)
![MESSAGES52]Edit recipients:You can edit recipients.]Edit subject:You can edit the subject.]Save to drafts:Select this to save the message inDrafts.]T9 languages:Select the language for T9 inputmode. You can also deactivate the T9 input mode byselecting 'T9 off'.]Exit:If you select Exit whilst writing a message, youwill be taken back to the message menu. Also thewritten message will not have been saved.4. You can attach files by pressing the right soft key[Attach].INBOX MENU 5.2You will be alerted when you have received a message.They will be stored in the Inbox.In the Inbox, you can identify each message by icons.For detail, see the icon directive.MESSAGESIcon Icon directiveMultimedia messageShort messageSIM messageRead multimedia messageRead text messagePush messageNotified multimedia messageNote]For each e-mail account you may save up to 50messages (totally 150 for three accounts). InInbox folder you may save not more than 30messages, in Drafts and Outbox folders - 5messages, and in Sent folder up to 10 messages.In case Drafts Outbox or Sent folder is full, andyou try to save new message to one of thisfolders, first saved message will be automaticallydeleted.]Maximum size for one sent message is 300 kbwith attachments, and maximum size for onereceived message is 100 kb. In case you havereceived message with more than 5 attachments,only 5 of them will be received. Some attachmentmay display incorrectly.](https://usermanual.wiki/LG-Electronics-USA/KG245/User-Guide-625068-Page-52.png)
![53If the phone shows ‘No space for SIM message’, youonly have to delete the SIM messages from the Inbox.If the phone displays ‘No space for message’, you willthen need to delete messages, media or applications tofree up space.❇SIM messageSIM message means that the message isexceptionally stored in the SIM card. You can movethis message to the phone.When you are notified that you have received amultimedia message, you have to wait for the messageto be downloaded before you can view it.To read a message, select one of the messages bypressing the left soft key .]View:You can view the received messages.]Delete:You can delete the current message.]Reply:You can reply to the sender.]Forward:You can forward the selected message toanother party.]Return call: You can call back the sender.]Information: You can view information aboutreceived messages; Sender’s address, Subject (onlyfor Multimedia message), Message date & time,Message type, Message size.]Delete all: You can delete all messages.MAILBOX MENU 5.3When you access this menu, you can either connect toyour remote mailbox to retrieve your new emailmessages, or you can view the previously retrievedemail messages without logging in to the email server.You can check the saved emails, drafts, outbox, andsent emails. In the Inbox, up to 30 emails are stored.DRAFTS MENU 5.4Using this menu, you can preset up to five multimediamessages that you use most frequently. This menushows the preset multimedia message list.The following options are available.]View:You can see the multimedia messages.]Edit: Allows you to modify the chosen message.]Delete:Deletes the message you choose.MESSAGES](https://usermanual.wiki/LG-Electronics-USA/KG245/User-Guide-625068-Page-53.png)
![MESSAGES54]Information:To view the information of themessage.]Delete all:Deletes all of the messages in the folder.OUTBOX MENU 5.5This menu allows you to view the messages which youhave sent, those that are currently sending ormessages that have failed sending previously.]View:You can view the message.]Forward:You can forward the selected message toanother party.]Delete: You can delete the message.]Information:You can check the information of eachmessage.]Delete all: You can delete all the messages in theoutbox.LISTEN TO VOICE MAIL MENU 5.6Once this menu has been selected, simply press theleft soft key [OK] to listen to voice mail. You canalso hold down the key in standby mode to listento voice mail.INFO MESSAGE MENU 5.7(Dependent to network and subscription)Info service messages are text messages delivered bythe network to your handset. They provide generalinformation such as weather reports, traffic news, taxis,pharmacies, and stock prices. When you receive an infoservice message, you will see a popup message showyou that or the info service message is directlyMESSAGESIcon Icon directiveMMS UnsentMMS delivery confirmedSMS unsentSMS delivery confirmedNote]When you receive a voice mail, your phone willdisplay an icon and you will hear an alert. Pleasecheck with your network provider for details oftheir service in order to configure the handsetcorrectly.](https://usermanual.wiki/LG-Electronics-USA/KG245/User-Guide-625068-Page-54.png)
![55displayed. To view the message again follow thesequence shown below;Read (Menu 5.7.1)1. When you have received an info service message andselect Read to view the message, it will be displayedon the screen. You can read another message byscrolling , or [Next].2. The message will be shown until another message isselected.Topics (Menu 5.7.2)(Dependent to network and subscription)]Add new: You can add Info service message numbersin the Phone memory with its nickname.]View list: You can see Info service message numberswhich you have added. If you press [Options], youcan edit and delete info message categories whichyou have added.]Active list: You can select info service messagenumbers in the active list. if you activate an infoservice number, you can receive messages sent fromthe number.TEMPLATES MENU 5.8Text templates (Menu 5.8.1)You have 6 text templates as below;Multimedia templates (Menu 5.8.2)After you have saved a new template, you can use thefollowing options.]View:You can see multimedia templates.]Delete: You can delete multimedia templates.]Add new: Allows you to add new multimediatemplates.]Write messages: You can write and send multimediamessages.MESSAGES• Please call me back.• I’m late. I will be there at...• Where are you now?• I’m on the way.• Top urgent. Please contact.• I love you.](https://usermanual.wiki/LG-Electronics-USA/KG245/User-Guide-625068-Page-55.png)
![MESSAGES56]Edit: You can edit multimedia templates.]Delete all: Allows you to delete all multimediamessages.Signature (Menu 5.8.3)This option helps you to make your own name card.Key in the name, mobile phone number, office number,Fax number, and E-mail address.SETTINGS MENU 5.9Text message (Menu 5.9.1)]Message types:Text, Voice, Fax, Natl. paging, X.400, E-mail,ERMESUsually, the type of message is set to Tex t . You canconvert your text into alternative formats. Contactyour service provider for the availability of thisfunction.]Validity period:This network service allows you toset how long your text messages will be stored at themessage centre.]Delivery report:If you set to Yes , you can checkwhether your message is sent successfully.]Reply charging:When a message is sent, it allowsthe recipients to reply and charge the cost of thereply to your telephone bill.]SMS centre:If you want to send the text message,you can receive the address of SMS centre throughthis menu.Mulitimedia message (Menu 5.9.2)]Priority:You can set the priority of the messageyou choose.]Validity period:This network service allows you toset how long your text messages will be stored at themessage centre.]Delivery report:If it is set to Yes in this menu, youcan check whether your message is sent successfully.]Auto retrieve: If you select On, you receivemultimedia messages automatically. If you select Off,you receive only notification message in the inboxand then you can check this notification. If youselect Home network only, you receive multimediamessages depends on Homenetwork.MESSAGES](https://usermanual.wiki/LG-Electronics-USA/KG245/User-Guide-625068-Page-56.png)
![57]Network settings:If you select multimedia messageserver, you can set URL for multimedia messageserver.]Permitted message typesPersonal: Personal message.Advertisements: Commercial message.Information: Necessary information.Email (Menu 5.9.3)This menu allows you to edit, delete or add and emailaccount.]AccountYou can set up to 3 email accounts by selecting Addnew. Using the Edit menu, you can set the followingvalues.]Set as default]Edit- Secure settings: Account name.- User ID: Enter your email ID.- Password: Enter your email password.- Email address: Enter the email address given toyou by your service provider.- Outgoing server: Enter the SMTP address andPort number of computer that sends your email.- Incoming server: Enter the POP3 address and Portnumber of the that receives your email.- Leave msg on server: Select Yes to leave themessages on the server.- Insert signature: Select Yes to attach yoursignature to your email messages.- Access point: Allow you to select the access pointfrom the list.- SMTP port number: Allow you to edit SMTP portnumber.- POP3 port number: Allow you to edit POP3 portnumber.- Outgoing server ID/PW: Enter the ID andpassword for sending your email.]Delete: Deletes the selected account from the list.]Access pointYou can edit the access points. There are defaultaccess points for some operators, stored in phonememory.]Title: Access point name.MESSAGES](https://usermanual.wiki/LG-Electronics-USA/KG245/User-Guide-625068-Page-57.png)
![MESSAGES58]APN: Input the APN of Access point.]User ID: Enter the User ID of your access point.]Password: Enter the Password of your access point.]SignatureYou can make your signature.Voice mail centre (Menu 5.9.4)You can receive the voicemail if your network serviceprovider supports this feature. When a new voicemailhas arrived, the symbol will be displayed on the screen.Please check with your network service provider fordetails of their service in order to configure the phoneaccordingly.]Home:You can listen to voice mails by selectingHome.]Roaming:Even when you are in abroad, you canlisten to voice mails if roaming service is supported.Info message (Menu 5.9.5)]ReceiveYes :If you select this menu, your phone will receiveInfo service messages.No: If you select this menu, your phone will notreceive Info service messages any more.]AlertYes :Your phone will beep when you have receivedInfo service message numbers.No: Your phone will not beep even though you havereceived info service messages.]LanguagesYou can select the language you want by pressing[On/Off]. Then, the info service message will beshown in the language that you selected.Push messages (Menu 5.9.6)You can set the option whether you will receive themessage or not.MESSAGES](https://usermanual.wiki/LG-Electronics-USA/KG245/User-Guide-625068-Page-58.png)
![CAMERA59To take a picture with phone opened1. Press the Menu key and then navigate andselect Multimedia. Select Camera and the screen willnow become the viewfinder. If you want to reach thismenu directly, press for a few seconds.2. Focus on the subject to capture the image, and thenpress the key.3. If you want to save it, press the left soft key orthe key.]Mode [ ]:Allows to take multishot photossuccessively.• Multi shot: 320x240• Still shot: 72x72, 176x220, 320x240, 640x480,1280x720, 1280x960, 1600x1200• Frame shot: 176 x 22 0]Size [ ] ettings are available: Color, Sepia,Black/White• Still shot: 4 8 x 48 , 12 8 x 16 0 , 6 40 x 4 8 0• Multi shot: 128x160, 320x240• Frame shot: 128x160, 320x240]Quality [ ]:Allows you to set the image qualityfrom Normal/Basic/Fine.]Auto save (On/Off):]Album [ ]:Allow you to see photos saved inyour phone.]Exit [ ]:Back to the screen mode to takephotos.]Zoom [ ]: Allowing you to set the zooming valuefrom x1, x2, x3 and x4 depending on the resolution.]Effect [ ]:4 settings are available: Color/Black& White/SephiaCAMERANote]You can control the image size, brightness, colourand zooming by going into the camera settings. Then use the , , to navigate andchange the various settings. ( or ).Note]In My album you may only view pictures taken bythe handset's camera.](https://usermanual.wiki/LG-Electronics-USA/KG245/User-Guide-625068-Page-59.png)
![CAMERA60]Brightness [ ]:Use the right/left navigationkeys to adjust lighting. 5 lighting levels are available:]Timer [ ]:Allows you to select the time delay(Off, 3 Seconds, 5 Seconds or 10 seconds). Thenthe phone takes a photo after the specified time.]Flash [ ]:Allows you to set the flash when youtake a photo in dark surroundings.To take a picture with phone closed1. Press and hold [ ] for a few seconds.2. A list will be displayed on the sub LCD.• MP3: Activates the MP3 mode.• Ta ke p i c t u r e: Activates the Take photo mode.• Slide show: View the pictures in Album as a slideshow.Digital Camera ModeTo enter the Digital Camera Mode you should swiveland close the flip whilst the handset is in idle mode.Now the handset will automatically enter DigitalCamera Mode.- To enter the camera’s main menu, press and hold theside camera button.- With side up/down buttons you may scroll throughthe settings items. After the necessary item isselected, press the side camera button, and you willaccess the detailed settings of this selected feature.By using the side up/down buttons select the desiredsetting and press the side camera button forconfirmation.- To exit to camera capture mode you should press theand hold side camera button.- A short press of the camera key is all that is requiredto take a photo.• To r c h : Activates the flash light.• Back: Goes back to the previous menu.CAMERA](https://usermanual.wiki/LG-Electronics-USA/KG245/User-Guide-625068-Page-60.png)
![SETTINGS61You can set the following menus for your convenienceand preferences.1. Press [Menu] in standby mode.2. Press for direct access to enter Settings.PROFILES MENU 7.1In Profiles, you can adjust and customise the phonetones for different events, environments, or callergroups.There are five preset profiles: Vibrate only, Silent,General, Loud and Headset. Each profile can bepersonalised. Press the left soft key [Menu] and selectProfiles using up/down navigation keys.Activate (Menu 7.X.1)Use this to enter the day, month and year. You canchange the date format via the Date format menuoption.1. A list of profiles is displayed.2. In the Profiles list, scroll to the profile you want toactivate and press the left soft key [Select] orOK key.3. Then, select Activate.Personalise (Menu 7.X.2)Scroll to the desired profile in the Profile list. Afterpressing the left soft key or the OK key, selectPersonalise. The profile setting option opens. Set theoption as required.]Call alert type: Set the alert type for incoming calls.]Ring tone: Select the desired ring tone from the list.]Ring volume: Set the volume of the ringing tone.]Message alert type: Set the alert type for messages.]Message tone: Select the alert tone for messages.]Keypad tone: Select the desired keypad tone.]Keypad volume: Set the volume of keypad tone.]Flip tone: Allows you to set the flip tone.]Effect sound volume: Set the volume of effectsound.]Power on/off volume: Set the volume of the ringingtone when switching the phone on/off.SETTINGS](https://usermanual.wiki/LG-Electronics-USA/KG245/User-Guide-625068-Page-61.png)
![SETTINGS62]Auto answer: This function will be activated onlywhen your phone is connected to the handsfree kit.• Off: The phone will not answer automatically.• After 5 secs: After 5 seconds, the phone willanswer automatically.• After 10 secs: After 10 seconds, the phone willanswer automatically.Rename (Menu 7.X.3)You can rename a profile and give it any name youchoose to.1. To change the name of a profile, scroll to the profilein the profile list and after pressing the left soft keyor the OK key, select Rename.2. Key in the desired name and press the OK key orthe left soft key [OK].DATE & TIME MENU 7.2You can set functions relating to the date and time.Set date (Menu 7.2.1)]Set dateYou can enter the current date.]Date formatYou can set the Date format such as DD/MM/YYYY,MM/DD/YYYY, YYYY/MM/DD.(D: Day / M: Month / Y: Year)Set time (Menu 7.2.2)]Set timeYou can enter the current time.]Time formatYour can set the time format between 24-hour and12 - h o u r.SETTINGSNote]Vibrate only, Silent and Headset profiles cannotbe renamed.](https://usermanual.wiki/LG-Electronics-USA/KG245/User-Guide-625068-Page-62.png)
![63PHONE SETTINGS MENU 7.3You can set functions relating to the phone.Display settings (Menu 7.3.1)]Wallpaper: You can select the background picturesin standby mode.- Main LCD- Sub LCDDefaultYou can select a picture or an animation of wallpaperby pressing or .My folderYou can select a picture or an animation aswallpaper.]Handset scheme: You can choose 4 kind of colorschemes, Clean, Clear, Paper and Metalic style.]Greeting note: If you select On, you can edit thetext which is displayed in standby mode.]Backlight: You can set the light-up duration of thedisplay.]Information window: You can preview the currentstate of the selected menu before open the menu.The state is shown at bottom of the display.]Network name: If you set ON, Network name (thename of service provider) will be appeared inInternal LCD.Language (Menu 7.3.2)You can change the language for the display texts inyour phone. This change will also affect the LanguageInput mode.CALLING MENU 7.4You can set the menu relevant to a call by pressing[Select] in the Setting menu.Call divert (Menu 7.4.1)The Call divert service allows you to divert incomingvoice calls, fax calls, and data calls to another number.For details, contact your service provider.]All voice calls: Diverts all voice calls unconditionally.SETTINGS](https://usermanual.wiki/LG-Electronics-USA/KG245/User-Guide-625068-Page-63.png)
![SETTINGS64]If busy: Diverts voice calls when the phone is in use.]If no reply: Diverts voice calls which you do notanswer.]If out of reach: Diverts voice calls when the phoneis switched off or out of coverage.]All data calls: Diverts to a number with a PCconnection unconditionally.]All fax calls: Diverts to a number with a faxconnection unconditionally.]Cancel all: Cancels all call divert service.The submenusCCaallll ddiivveerrttmenus have the submenus shown below.]Activate:Activates the corresponding service.- To voice mail centre: Forwards to message centre.This function does not apply to All data calls andAll fax calls menus.- To other number: Input the number for calldiverting.- To favourite number: You can check recent fivediverted numbers.]Cancel:Deactivate the corresponding service.]View status:View the status of the correspondingservice.Answer mode (Menu 7.4.2)]Flip open: If you select this menu, you can receivean incoming call when only opening flip.]Press any key: If you select this menu, you canreceive a call by pressing any key except [End]key.]Send only: If you select this menu, you can receivea call by only pressing [Send] key.Send my number (Menu 7.4.3)(network and subscription dependent)]On: You can send your phone number to anotherparty. Your phone number will be shown on thereceiver’s phone.]Off: Your phone number will not be shown.]Set by network: If you select this, you can sendyour phone number depending on two line servicesuch as line 1 or line 2.SETTINGS](https://usermanual.wiki/LG-Electronics-USA/KG245/User-Guide-625068-Page-64.png)
![65Call waiting (Menu 7.4.4)(Network Service)]Activate:If you select Activate, you can accept awaiting (receiving) call.]Cancel:If you select Cancel, you cannot recognizethe waiting (receiving) call.]View status:Shows the status of Call waiting.Minute minder (Menu 7.4.5)If you select On, you can check the call duration bydeep sound every minute during a call.Auto redial (Menu 7.4.6)]On: When this function is activated, the phone willautomatically try to redial in the case of failure toconnect a call.]Off: Your phone will not make any attempts to redialwhen the original call has not connected.SECURITY SETTINGS MENU 7.5PIN code request (Menu 7.5.1)In this menu, you can set the phone to ask for the PINcode of your SIM card when the phone is switched on.If this function is activated, you’ll be requested to enterthe PIN code.1. Select PIN code request in the security settingsmenu, and then press [Select].2. Set On/Off.3. If you want to change the setting, you need to enterPIN code when you switch on the phone.4. If you enter wrong PIN code more than 3 times, thephone will lock out. If the PIN is blocked, you willneed to key in PUK code.5. You can enter your PUK code up to 10 times. If youput wrong PUK code more than 10 times, you cannot unlock your phone. You will need to contactyour service provider.SETTINGS](https://usermanual.wiki/LG-Electronics-USA/KG245/User-Guide-625068-Page-65.png)
![SETTINGS66Phone lock (Menu 7.5.2)You can use security code to avoid unauthorized use ofthe phone. Whenever you switch on the phone, thephone will request security code if you set phone lockto On. If you set phone lock to Automatic, yourphone will request security code only when you changeyour SIM card.Call barring (Menu 7.5.3)The Call barring service prevents your phone frommaking or receiving certain category of calls. Thisfunction requires the call barring password. You canview the following submenus.]All outgoing: The barring service for all outgoingcalls.]International:The barring service for all outgoinginternational calls.]International when roam:The barring service forall international outgoing calls except home network.]All incoming:The barring service for all incomingcalls.]Incoming when abroad:The barring service for allincoming calls when roaming.]Cancel all:You can cancel all barring services.]Change password:You can change the passwordor Call Barring Service.The submenus:• ActivateAllows to request the network to set call restrictionon.• CancelSet the selected call restriction off.• View statusView the status whether the calls are barred or not.Fixed dial number (FDN) (Menu 7.5.4)(SIM dependent)You can restrict your outgoing calls to selected phonenumbers.The numbers are protected by your PIN2 code.]Activate: You can restrict your outgoing calls toselected phone numbers.SETTINGS](https://usermanual.wiki/LG-Electronics-USA/KG245/User-Guide-625068-Page-66.png)
![67]Cancel: You can cancel fixed dialling function.]Number list: You can view the number list saved asFixed dial number.Change codes (Menu 7.5.5)PIN is an abbreviation of Personal IdentificationNumber to prevent use by unauthorized person.You can change the access codes: PIN2 code,Security Code1. If you want to change the Security code/PIN/PIN2code input your original code, and then press [OK].2. Input new Security code/PIN/PIN2 code and verifythem.NETWORK SETTINGS MENU 7.5You can select a network which will be registered eitherautomatically or manually. Usually, the networkselection is set to Automatic.Automatic (Menu 7.5.1)If you select Automatic mode, the phone willautomatically search for and select a network for you.Once you have selected “Automatic”, the phone will beset to “Automatic” even though the power is off andon.Manual (Menu 7.5.2)The phone will find the list of available networks andshow you them. Then you can select the network whichyou want to use if this network has a roamingagreement with your home network operator. Thephone let you select another network if the phone failsto access the selected network.Preferred (Menu 7.5.3)You can set a list of preferred networks the handsetshould attempt to register with first, before attemptingto register to any other networks. This list is createdfrom the handset’s predefined list of known networks.GPRS SETTINGS MENU 7.6You can set GPRS service depending on varioussituations.SETTINGS](https://usermanual.wiki/LG-Electronics-USA/KG245/User-Guide-625068-Page-67.png)
![SETTINGS68Switch on (Menu 7.6.1)If you select this menu, the phone is automaticallyregistered to a GPRS network when you switch thephone on. Starting a WAP or PC dial-up applicationcreated the connection between phone and networkand data transfer is possible. When you end theapplication, GPRS connection is ended but theregistration to the GPRS network remains.When needed (Menu 7.6.2)If you select this menu, the GPRS connection isestablished when you connect a WAP service andclosed when you end the WAP connection.MEMORY STATUS MENU 7.7You can check free space and memory usage of eachrepository, Internal memory, Multimedia memory andExternal memory. You can go to each repository menu.RESET SETTINGS MENU 7.8You can initialize all factory defaults. You need Securitycode to activate this function.]Restore default settings: Allows you to restoredefault settings.]Clear multimedia memory: Allows you to formatthe multimedia memory and create a defaultdirectory.]Clear external memory: Allows you to format theexternal memory and create default directory.SETTINGS](https://usermanual.wiki/LG-Electronics-USA/KG245/User-Guide-625068-Page-68.png)
![SERVICE69You can access various WAP (Wireless ApplicationProtocol) services such as banking, news, weatherreports and flight information. These services arespecially designed for mobile phones and they aremaintained by WAP service providers.Check the availability of WAP services, pricing andtariffs with your network operator and/or the serviceprovider whose service you wish to use. Serviceproviders will also give you instructions on how touse their services.Once connected, the homepage is displayed. Thecontent depends on the service provider. To exit thebrowser at any time, press the ( ) key. The phonewill return to the previous menu.Navigating with the WAP browserYou can surf the Internet using either the phone keysor the WAP browser menu.Using the phone keysWhen surfing the Internet, the phone keys functiondifferently to phone mode.Using the WAP browser menuThere are various menu options available whensurfing the Mobile Web.Home Menu 8.1Connects to a homepage. The homepage will be thesite which is defined in the activated profile. It will bedefined by the service provider if you have notdefined it in the activated profile.SERVICEKey DescriptionScrolls each line of the contentareaReturns to the previous pageSelects options and confirmsactionsNote]The WAP browser menus may vary, dependingon your browser version.](https://usermanual.wiki/LG-Electronics-USA/KG245/User-Guide-625068-Page-69.png)
![SERVICE70BOOKMARKS MENU 8.2This menu allows you to store the URL of favouriteweb pages for easy access at a later time. Your phonehas several pre-installed bookmarks. These pre-installed bookmarks cannot be deleted.To create a bookmark1. Press the left soft key [Options].2. Select Add new and press the OK key.3. After entering the desired URL and title, press theOK key.✽Tip: Use the “ ” key and key to entersymbols. To enter “.”, press “ ”. After selecting a desired bookmark, the followingoptions are available.]Connect: Connects to the selected bookmark.]Add new: Select this to create a new bookmark.]Edit: You can edit the URL and/or the title of theselected bookmark.]Delete: Deletes the selected bookmark.]Delete all: Deletes all the bookmarks.GO TO URL MENU 8.3You can connect directly to the site you want. Afterentering a specific URL, press the OK key.SETTINGS MENU 8.4You can set the profile, cache, cookie and securityrelated to internet service.Profiles (Menu 8.4.1)A profile is the network information used to connectto the Internet.Each profile has submenus as follows:]Activate: Activates the selected profile.]Settings: Use this to edit and change WAP settingsfor the selected profile.- Homepage: This setting allows you to enter theaddress (URL) of a site you want to use ashomepage. You do not need to type http:// atthe front of each URL as the WAP Browser willautomatically add it.- Bearer: You can set the bearer data service.SERVICE](https://usermanual.wiki/LG-Electronics-USA/KG245/User-Guide-625068-Page-70.png)
![711 Data2 GPRS- Data settings: Appears only if you select DataSettings as a Bearer / service.Dial number: Enter the telephone number todial to access your WAP gateway.User ID: The users identity for your dial-upserver (and NOT the WAP gateway).Password: The password required by your dial-up server (and NOT the WAP gateway) toidentify you.Call type: Select the type of data call : Analogueof Digital (ISDN)Linger time: You need to enter timeout period.After entering that, the WAP navigation servicewill be unavailable if any data is not input ortransferred.Call speed: The speed of your data connection ;9600 or 14400- GPRS settings: The service settings are onlyavailable when GPRS is chosen as a bearerservice.APN: Input the APN of the GPRS.User ID: The users identify for your APN server.Password: The password required by your APNserver.- Proxy settingsProxy: Activates or cancels proxy.IP address: Input the IP address of the Proxyserver you access.Port number: Input the Proxy Port- DNS settingsPrimary server: Input the IP address of theprimary DNS server you accessSecondary server: Input the IP address of thesecondary DNS server you access]Rename: You can change the profile name.]Add new: You can add a new profile.]Delete: Deletes the selected profile from the list.SERVICE](https://usermanual.wiki/LG-Electronics-USA/KG245/User-Guide-625068-Page-71.png)
![SERVICE72Cache (Menu 8.4.2)The information or services you have accessed aresaved in the cache memory of the phone.Cookie (Menu 8.4.3)The information or services you have accessed aresaved in the cache memory of the phone.Clear cache (Menu 8.4.4)Removes all context saved in cache.Clear cookie (Menu 8.4.5)Removes all context saved in cookie.Security (Menu 8.4.6)A list of the available certification is shown.]Authority: You can see the list of authoritycertificates that have been stored in your phone.]Personal: You can see the list of personalcertificates that have been stored in your phone.SERVICENote]A cache is a buffer memory, which is used tosave data temporarily.](https://usermanual.wiki/LG-Electronics-USA/KG245/User-Guide-625068-Page-72.png)
![MY STUFF73PHOTOS MENU 9.1Shows the list of JPG files at My media\Photos inMultimedia memory.]View: You can see the JPG file by pressing the OKkey or selecting View from the Option menu.]Send via email: Send the selected file to anotherdevice via email if the file size is less than300Kbytes.]Send via Bluetooth: Send the selected file toanother device via Bluetooth.]Copy to External memory: Copy the selected fileto the same folder at Multimedia memory/Externalmemory.]Move to External memory: Move the selected fileto the same folder at Multimedia memory/Externalmemory.]Rename: Change the file name of selected file. Themaximum length of characters is 200. And You cannot change the extension of file.]Delete: Delete a file.]Delete all: Deletes all the files in the list]Information: Shows the file information.MY STUFFNote]You may send files via Bluetooth only if they arestored in phone memory, not on memory card. Tosend files from the external memory, please, firstlycopy it to internal phone memory.]In Photos folder in internal and in externalmemory only .JPG (.JPEG) files can be stored. InImages folder in internal and in external memoryyou may store .GIF, .JPG (.JPEG) and other imageformat files.]To setup .JPG (.JPEG) file from Photo folder aswallpaper, go to Menu-Multimedia-Photo albumand then please select Set as wallpaper inOptions menu.Note]The maximum size of JPG file you can see is460Kbytes.](https://usermanual.wiki/LG-Electronics-USA/KG245/User-Guide-625068-Page-73.png)
![MY STUFF74IMAGES MENU 9.2After selecting a image, press the left key [View]and then you can check the options as follow:]Set as wallpaper: Currently selected image can beset as a wallpaper.]Write messages: The images downloaded from thenetwork can be sent by Multimedia or Email service.Maximum message size is 100 kb for MMS messageand 300 kb for E-mail message.]Send via Bluetooth: The sound downloaded fromnetwork can be sent by Bluetooth.]Copy to External memory: Copy the selected fileto the same folder at Multimedia memory/Externalmemory.SOUNDS MENU 9.3After selecting a sound, press the left key [Options].You can check the options as follow:]Set as ringtone:Currently selected sound can beset as a ringtone.]Write messages:The sound downloaded fromnetwork can be sent by SMS or MMS, Email service.Maximum MMS message is 100 kb, and for e-mail is300 kb.]Send via Bluetooth:The sound downloaded fromnetwork can be sent by Bluetooth.\]Copy to External memory:Copy the selected fileto the same folder at Multimedia memory/Externalmemory.MY STUFFNote]You may send files via Bluetooth only if they arestored in the phone memory, not on memorycard. To send file from external memory, please,firstly copy it to internal phone memory.]Maximum .GIF supporting size is 100 Kb.Note]You may send files via Bluetooth only if they arestored in the phone memory, not on memorycard. To send file from external memory, please,firstly copy it to internal phone memory. Whenyou send .MMF or .MIDI sound file from anotherphone via Bluetooth, it will be saves to Othersfolder. But if you will setup this file as ring tone, itwill be copied to Sounds folder.](https://usermanual.wiki/LG-Electronics-USA/KG245/User-Guide-625068-Page-74.png)