LG Electronics USA L01G Cellular/PCS GSM and Cellular WCDMA Wireless Router with WLAN User Manual
LG Electronics MobileComm USA, Inc. Cellular/PCS GSM and Cellular WCDMA Wireless Router with WLAN Users Manual
UserManual.wiki
>
LG Electronics USA
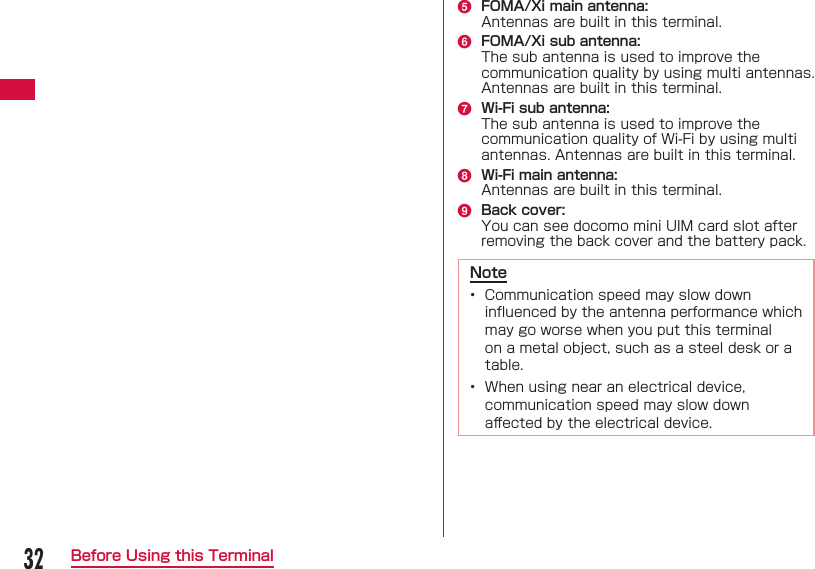
>
L01G User Manual
Users Manual
Navigation menu
Upload a User Manual
Namespaces
Wiki Guide
HTML
PDF
Info
Views
User Manual
Discussion / Help
Navigation


![48Before Using this Terminalg Space keyEnter a space.h Input switch keySwitch number/alphabet input.i Input switch keySwitch number/symbol input.a Tap keyboard area to input characters.The selected characters are input in the text box.• Select character type from alphabet/number/symbol and tap the character to input.• When entering letters which are assigned to the same key consecutively, wait for one to two seconds before entering the next letter. Example: When entering "bc"a Tap "abc" key twiceb After waiting for 1 to 2 seconds, tap "abc" key three times.b After fi nishing input, tap "OK"Note• In this terminal, only alphanumeric characters and part of the symbols can be input (~!@#$%^&*()-_+={}[]|\:;"'<>.?/,`).](https://usermanual.wiki/LG-Electronics-USA/L01G/User-Guide-2479507-Page-50.png)
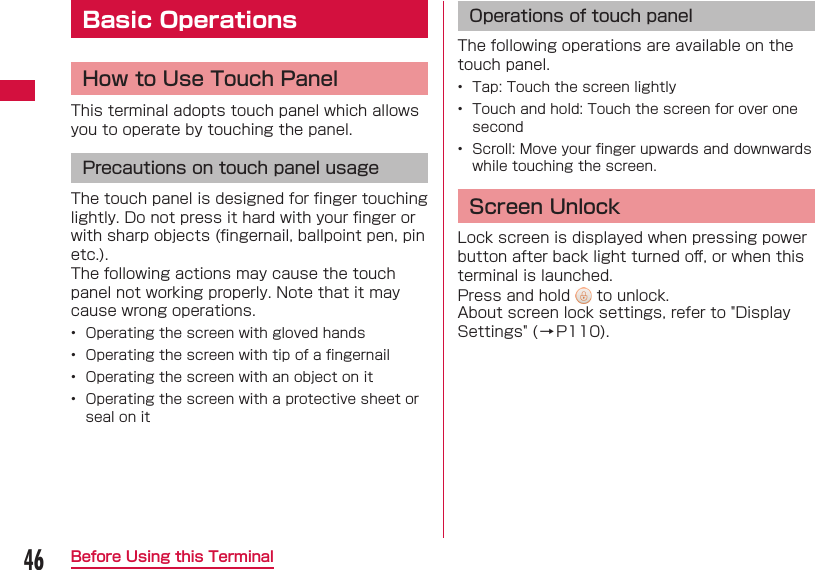
![82Settings (Web browser) Setting Provider Adding Access PointRegister, edit and delete an access point. Up to 10 access points can be registered.• The settings for connecting to mopera U preset at the time of purchase cannot be deleted. When using mopera U. the following settings are not necessary.a Click "PROVIDER" on the top menub When registering a new access point, click "Add New"c Set up each item in setting screen Profi le nameEnter a name of the access point within the following range.• Up to 15 characters of single byte alphanumeric characters and single byte space Access point nameEnter a name of APN within the following range.• Up to 99 characters of single byte alphanumeric characters and symbol (~!@#$%^&*-_:,./;|()<>{}[]+=`"'?\) and single byte space UsernameEnter a user name specifi ed by provider within the following range.• Up to 64 characters of single byte alphanumeric characters and symbol (~!@#$%^&*-_:,./;|()<>{}[]+=`"'?\) and single byte space PasswordEnter a password specifi ed by provider within the following range.• Up to 32 characters of single byte alphanumeric characters and symbol (~!@#$%^&*-_:,./;|()<>{}[]+=`"'?\) and single byte space](https://usermanual.wiki/LG-Electronics-USA/L01G/User-Guide-2479507-Page-84.png)
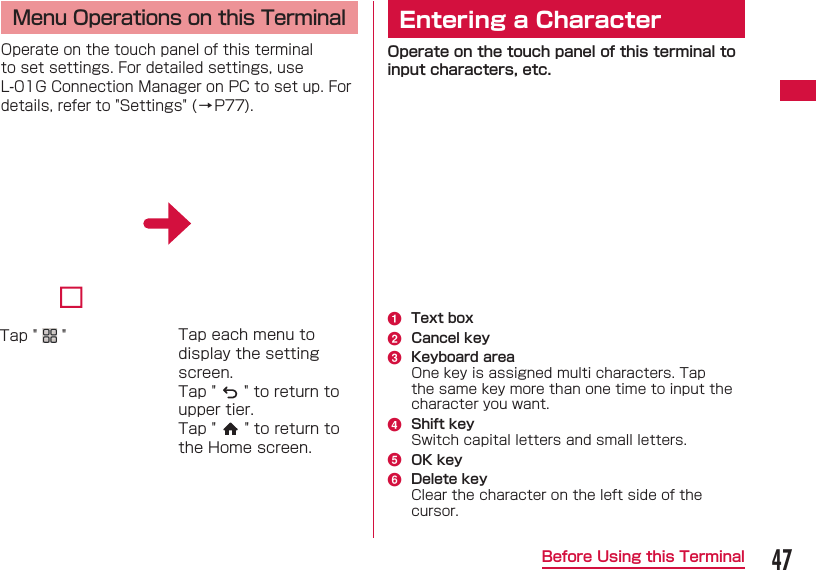
![85Settings (Web browser)Searching resultClick "Scan" to display the available access points in list.• : Connect to an access point.• : Disconnect the access point being connected.• : Up to 10 access points can be registered as the AP specifi ed by user. Connection historyUp to 10 connection histories to the access point are displayed.• : Delete an access point.• : Change the settings of an access point.• / : Change the priority order when connecting to an access point.Add networkAdd an access point. Set "AP name" and "Security", click "Save". ■ When setting to WEPPasswordEnter security key for WEP.5, 10, 13 and 26 single byte alphameric characters can be input as a key.• For 5 characters or 13 characters, single byte alphanumeric characters (0 to 9, a to z, A to Z)• For 10 characters or 26 characters, hex number (0 to 9, a to f, A to F) ■ When setting WPA/WPA2-PSKPasswordEnter a 8 to 64 characters for security key of WPA/WPA2.• For key of 8 to 63 characters, single byte alphanumeric characters (0 to 9, a to z, A to Z) and symbol (~!@#$%^&*-_:,./;|()<>{}[]+=`"'?\)• For key of 64 characters, hex number (0 to 9, a to f, A to F) ■ When setting EAP-SIMAuto authentication, no specifi c settings. ■ When setting EAP-AKAAuto authentication, no specifi c settings.c When selecting an access point from "Searching result", enter the security keyd Click "Apply" to save the settings](https://usermanual.wiki/LG-Electronics-USA/L01G/User-Guide-2479507-Page-87.png)
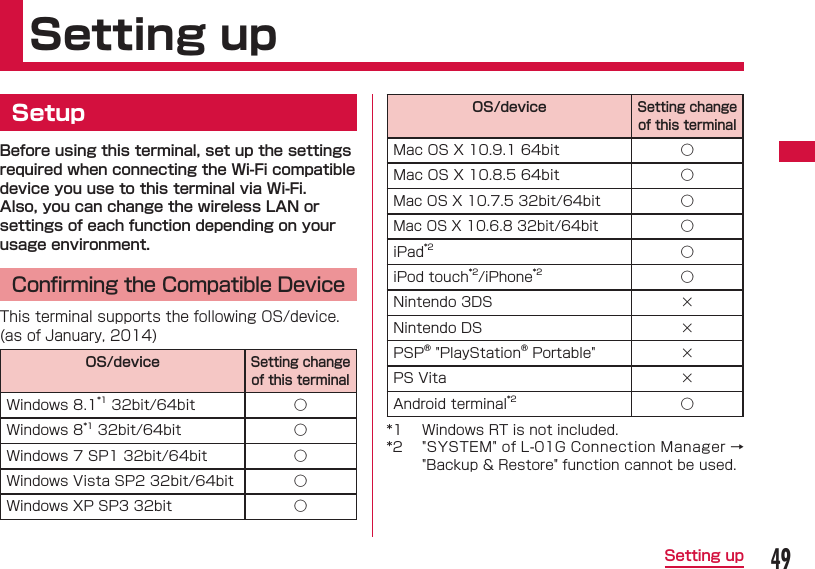
![90Settings (Web browser) Setting Security Mode of Wireless LANa Click "Wi-Fi" of the top menub Click "SSID setting " of the sub menuc Set each item of primary SSID in setting screen SSIDEnter SSID name within the following range.• Up to 32 characters, single byte alphanumeric characters (0 to 9, a to z, A to Z) and symbol (~!@#$%^&*-_:,./;|()<>{}[]+=`"'?\) SecuritySetting security mode of wireless LAN.• Open• WEP• WPA-PSK• WPA2-PSK• WPA/WPA2-PSK mixedThe setting items are diff erent depending on the settings of security mode. ■ When setting to OpenNo special settings. ■ When setting to WEPPASSWORDSEnter security key for WEP.5, 10, 13 and 26 single byte alphameric characters can be input as a key.• For 5 characters or 13 characters, single byte alphanumeric characters (0 to 9, a to z, A to Z)• For 10 characters or 26 characters, hex number (0 to 9, a to f, A to F) ■ When setting to WPA-PSKEncryption typeSelect an Encryption type.• TKIP/AES• AES• TKIP](https://usermanual.wiki/LG-Electronics-USA/L01G/User-Guide-2479507-Page-92.png)
![91Settings (Web browser)PasswordEnter a 8 to 64 characters for security key of WPA.• For key of 8 to 63 characters, single byte alphanumeric characters (0 to 9, a to z, A to Z) and symbol (~!@#$%^&*-_:,./;|()<>{}[]+=`"'?\)• For key of 64 characters, hex number (0 to 9, a to f, A to F)Key update cycle(sec)Set Key update cycle of encryption key (password). ■ When setting to WPA2-PSKEncryption typeSelect an Encryption type.• TKIP/AES• AES• TKIPPasswordEnter a 8 to 64 characters for security key of WPA2.• For key of 8 to 63 characters, single byte alphanumeric characters (0 to 9, a to z, A to Z) and symbol (~!@#$%^&*-_:,./;|()<>{}[]+=`"'?\)• For key of 64 characters, hex number (0 to 9, a to f, A to F)Key update cycle(sec)Set Key update cycle of encryption key (password). ■ When setting to WPA/WPA2-PSK mixedEncryption typeSelect an Encryption type.• TKIP/AES• AES• TKIPPasswordEnter a 8 to 64 characters for security key of WPA/WPA2.• For key of 8 to 63 characters, single byte alphanumeric characters (0 to 9, a to z, A to Z) and symbol (~!@#$%^&*-_:,./;|()<>{}[]+=`"'?\)• For key of 64 characters, hex number (0 to 9, a to f, A to F) Key update cycle(sec)Set Key update cycle of encryption key (password). Max number of clientsSelect the number of devices connected to this terminal. AP isolationSet whether to allow the communication between devices connected to the same SSID. SSID StealthSet SSID to not be detected by other devices.](https://usermanual.wiki/LG-Electronics-USA/L01G/User-Guide-2479507-Page-93.png)

![104Settings (Web browser)Confi rm PIN1 codeEnter the same PIN1 code as you entered in "New PIN1 code" to confi rm.Remaining timesThe number of available input times of PIN1 code is displayed. (→P35)d Click "Apply" to save the settingsPIN1 code is changed. Changing Login passwordThe login password of the setting page can be changed. Set password using 4 to 32-digit single byte alphanumeric characters and symbol (~!@#$%^&*-_:、。/;|()<>{}[]+=`?‘“\).a Click "SYSTEM" of the top menub Click "Modify password" of the sub menuc Set up each item in setting screenCurrent passwordEnter the password you set currently.New passwordEnter a new one.Confi rm passwordEnter the same password as you entered in "Confi rm password" to confi rm.](https://usermanual.wiki/LG-Electronics-USA/L01G/User-Guide-2479507-Page-106.png)


![117Overseas UseOverseas Use Overview of International Roaming (WORLD WING)With International roaming (WORLD WING), you can use this terminal in the service areas conducted by overseas operators affi liated with DOCOMO. ■ Available networkThis terminal is placed in class 4. You can use it in 3G network and GSM/GPRS network service areas. You can also use it in countries/regions supporting 3G 850 MHz/GSM 850 MHz networks. Check out the information of the available areas. ■ Before using this terminal overseas, check out the following items. - "Mobile Phone User's Guide [International Services]" - DOCOMO "International Services website" ■ Since overseas is outside of Xi area, please use a 3G network or GSM/GPRS network. Available ServicesSERVICES DescriptionData communicationData communication via pack communication is able to use.Note• For available communication service during international roaming, refer to "Mobile Phone User's Guide [International Services]" or the DOCOMO "International Services website".](https://usermanual.wiki/LG-Electronics-USA/L01G/User-Guide-2479507-Page-119.png)
![118Overseas Use Confi rming before UsingConfi rming before DepartureBefore using this terminal overseas, check the items below in Japan. ■ ContractCheck whether you have applied for WORLD WING. For more details, contact "General Inquiries" on the back cover of this manual. ■ ChargesFor overseas use, fees are charged diff erently (packet communication fee) from the charge in Japan. ■ Using the Internet• When using the Internet overseas, for information about access point at overseas and its setting method, contact the Internet service provider you use.• For users of mopera U, refer to the mopera U website. http://www.mopera.net/ (in Japanese only)Confi rming OverseasWhen you arrive overseas, this terminal automatically connects to an available network operator if it is powered on. ■ About connections• When using this terminal inside Japan, you cannot select the network you want to connect to manually. To select a network overseas, you need to set up the network after arriving at overseas. (→P120)• At the time of purchase, this terminal is preset to detect available networks automatically at overseas to enable the connection.On "Setting Network Search" (→P120) screen, connect the network of the operator compatible with the fl at-rate service to enable the overseas use based on fl at-rate (per day) packet communication fee. Also the subscriptions of packet fl at-rate service, fl at-rate data plan or Xi data communication dedicated plan is required. For details, refer to "Mobile Phone User's Guide [International Services]" or DOCOMO "International service website".](https://usermanual.wiki/LG-Electronics-USA/L01G/User-Guide-2479507-Page-120.png)
![125Appendix/TroubleshootingAppendix/TroubleshootingL-01G Connection Manager menu item setting item listMenu item/setting item Default value Setting rangeProviderProfi le selectionmopera U -Profi le name mopera U Up to 15 characters of single byte alphanumeric characters and single byte space, symbols (~ ! @#$%^&*-_:、。/;|()<>{}[]+=` ? `"\) Menu item/setting item Default value Setting rangeAccess point namemopera.net Up to 99 characters of single byte alphanumeric characters and single byte space, symbols (~!@#$%^&*-_:、。/;|()<>{}[]+=`?‘“\)Username (None) Up to 64 characters of single byte alphanumeric characters and single byte space, symbols (~!@#$%^&*-_:、。/;|()<>{}[]+=`?‘“\)](https://usermanual.wiki/LG-Electronics-USA/L01G/User-Guide-2479507-Page-127.png)
![126Appendix/TroubleshootingMenu item/setting item Default value Setting rangePassword (None) Up to 32 characters of single byte alphanumeric characters and single byte space, symbols (~!@#$%^&*-_:、。/;|()<>{}[]+=`?‘“\)Authentic methodCHAP CHAP, PAP, NonePublic WLANPublic WLAN Off On, Off Display mode Used networks Used networks, Registered networksNetwork notifi cationOff On, Off Menu item/setting item Default value Setting rangeAdd new WLAN access pointAP name (None) Up to 32 characters of single byte alphanumeric characters and symbols (~!@#$%^&*-_:、。/;|()<>{}[]+=`?‘“\)Security Open Open, WEP, WPA/WPA2-PSK, EAP-SIM, EAP-AKAPassword (None) Able to change depending on security settingMOBILE NETWORKSearching networkSearching modeAuto Auto, ManualNetwork modeNetwork mode3G/GSM 3G/GSM, 3G, GSM](https://usermanual.wiki/LG-Electronics-USA/L01G/User-Guide-2479507-Page-128.png)
![128Appendix/TroubleshootingMenu item/setting item Default value Setting rangeSSID settingPrimary SSIDSSID L01G_XXXXXXXX_AUp to 32 characters of single byte alphanumeric characters and symbols (~`!@#$%^&*()- _+={}[]|\:;"'<>,.?/)Security WPA/WPA2-PSK mixedOpen, WEP, WPA-PSK, WPA2-PSK, WPA/WPA2-PSK mixedEncryption typeTKIP/AES TKIP/AES, AES, TKIPPassword XXXXXXXX -Key update cycle(sec)86400 0 to 86400Max number of clients9 1, 2, 3, 4, 5, 6, 7, 8, 9, 10AP isolationOff On, Off Menu item/setting item Default value Setting rangeSSID StealthOff On, Off Secondary SSIDSecondary SSIDOff On, Off Wi-Fi Protected Setup (WPS)WPS On On, Off WPS type Button Button, PIN (From AP), PIN (From client)PIN (None) (enter the issued PIN on Wi-Fi compatible device side)MAC address fi lterRestrict modeOff Off , Allow, DenyMAC addresses(None) (MAC address)DHCPIP address192.168.225.1IP address available to setSubnet mask255.255.255.0255.255.255.0 to255.255.255.254](https://usermanual.wiki/LG-Electronics-USA/L01G/User-Guide-2479507-Page-130.png)
![130Appendix/TroubleshootingMenu item/setting item Default value Setting rangeModifyCurrent PIN1 code(None) Single byte numbers of 4 digits to 8 digitsNew PIN1 code(None) Single byte numbers of 4 digits to 8 digitsConfi rm PIN1 code(None) Single byte numbers of 4 digits to 8 digitsModify passwordCurrent password(None) Up to 4 to 32 characters of single byte alphanumeric characters and symbols (~!@#$%^&*-_:、。/;|()<>{}[]+=`?‘“\)Menu item/setting item Default value Setting rangePort mappingPort mappingOff On, Off FromPort numberTCP TCP, UDP(None) 1 to 65535ToIP address(None)0.0.0.1 ∼255.255.255.254Port numberTCP -(None) 1 to 65535Universal Plug and Play (UPnP)UPnP On On, Off SYSTEMPIN1 lockPIN1 code to set lock(None) Single byte numbers of 4 digits to 8 digitsPIN1 code to set unlock(None) Single byte numbers of 4 digits to 8 digits](https://usermanual.wiki/LG-Electronics-USA/L01G/User-Guide-2479507-Page-132.png)
![131Appendix/TroubleshootingMenu item/setting item Default value Setting rangeNew password(None) Up to 4 to 32 characters of single byte alphanumeric characters and symbols (~!@#$%^&*-_:、。/;|()<>{}[]+=`?‘“\)Confi rm password(None) Up to 4 to 32 characters of single byte alphanumeric characters and symbols (~!@#$%^&*-_:、。/;|()<>{}[]+=`?‘“\)Wi-Fi Power controlAuto off timer(min)10 Never, 10, 30, 60DTIM period (100ms)1 1, 2, 3, 4, 5, 6, 7, 8, 9, 10Transmit strength100% 100%, 75%, 50%, 35%, 15%Menu item/setting item Default value Setting rangeAP operation modeAP operation modeRouter Router, Bridge](https://usermanual.wiki/LG-Electronics-USA/L01G/User-Guide-2479507-Page-133.png)
![138Appendix/TroubleshootingSymptom Check itemCannot connect to Wi-Fi compatible deviceWhen this terminal is set to a security mode other than WPA/WPA2-PSK mixed, the same setting is necessary on the Wi-Fi compatible device to be connected. For details, refer to the instruction manual of the Wi-Fi compatible device you use. ■ Example when security mode is WEP (for Windows 8.1)On the desktop screen, → "Control Panel" → "Network and Internet" → "Network and Sharing Center" → click the name of this terminal in "Connections:" of "View your active networks" → "Wireless Properties" → "Security" tab → set as follows• Security type: No authentication (Open)• Encryption type: WEP• Network security key: the WEP key set in this terminal by the number selected in [Key index]Symptom Check itemCannot connect to Wi-Fi compatible device ■ Example when security mode is WEP (for Mac OS X 10.9.1)"Apple" menu → "System Preferences" → "Network" → select "Wi-Fi" on the left of the screen → "Edit Locations..." in "Locations" → "+" → enter any name in "Untitled" → "Done" → mark "Show Wi-Fi status in menu bar" → "Advanced..." → select "Wi-Fi" on the top of the screen → "+" → enter network name → select "WEP" in "Security" → enter the WEP key set in this terminal in "Password" → "OK" → "OK" → when "Off " is displayed, mark "Turn Wi-Fi On", "Apply"When it cannot be connected via WPS function, refer to the instruction manual of the Wi-Fi compatible device you use and confi rm the settings of the WPS function on this terminal (→P93 "Setting WPS function"), then connect again.](https://usermanual.wiki/LG-Electronics-USA/L01G/User-Guide-2479507-Page-140.png)
![140Appendix/Troubleshooting ■ Overseas usage relatedSymptom Check itemCannot communicate overseas(Antenna mark appears)Have you applied for WORLD WING?Check whether you have applied for WORLD WING.Cannot communicate overseas(Icon indicates out-of-service area appears)Are you at a location outside of the international roaming service area, or a place where the signal is weak?Use "Mobile Phone User's Guide [International Services]" or DOCOMO "International Services website" to check whether a service area or network operator is available.Change the settings of network or overseas network operator.• Set "Searching mode" to "Manual". (→P120)• Confi rm the setting of "PROVIDER". (→P82)It may recover after turning off this terminal and then turning it on again.Symptom Check itemCommunication becomes unusable suddenly while using overseasHas the approximate limit of usage fee been exceeded?For "International roaming service (WORLD WING)", the approximate limit of usage fee is set in advance. If the limit is exceeded, all services are stopped. Pay off the usage fee to resume services. ■ OtherSymptom Check itemStop operating all of suddenIs docomo mini UIM card inserted correctly into this terminal? (→P33)Back cover is off Align the back cover with the main unit, press the arrow parts one by one to close the back cover fi rmly. (→P37)](https://usermanual.wiki/LG-Electronics-USA/L01G/User-Guide-2479507-Page-142.png)