LG Electronics USA L172WA 17" LCD Monitor with TV Tuner User Manual users manual
LG Electronics USA 17" LCD Monitor with TV Tuner users manual
UserManual.wiki
>
LG Electronics USA
>
L172WA User Manual
users manual
Navigation menu
Upload a User Manual
Namespaces
Wiki Guide
HTML
PDF
Info
Views
User Manual
Discussion / Help
Navigation


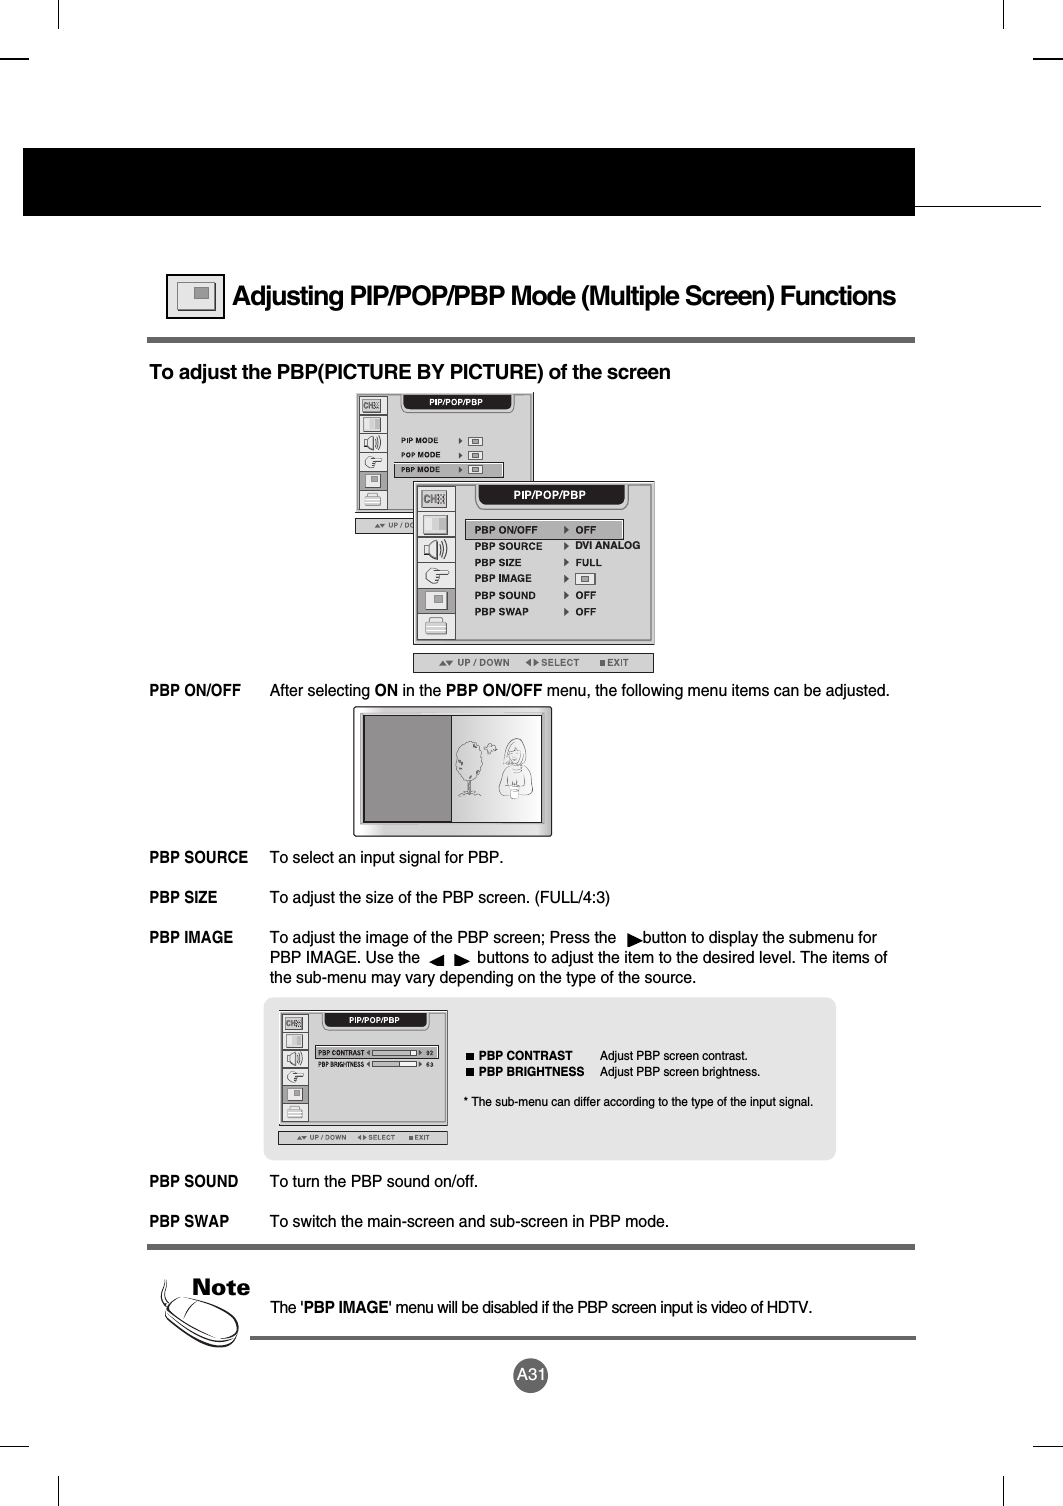
![A17Name of the Buttons in the Screen Adjustment Unit[For DVI-ANALOG signal]•Select the icon to adjust on the OSD screen.•If you press the [AUTO/SELECT] button, automatic screenadjustment will be started.[Other signals that DVI-ANALOG]•The current signal and mode information will be displayed.AUTO/SELECT Button• OSD is locked • OSD is unlocked.Use this button to lock/unlock OSD screen adjustment.(Activated when pressed together longer than 5 seconds.)DVI DIGITAL DVI digital signalDVI ANALOG DVI analog signalVIDEO1(CVBS) Composite videoVIDEO2(S-Video) S-VideoHDTV(Y, Pb, Pr) HD televisionTV Television• Select the input signal SOURCE ButtonOSD Lock/Unlock ButtonMenu button +•The unit that receives the signal from the remote controller.DVI Under the CAPTION & VCHIP menu, it is also possible to lock/unlock the OSD screenadjustment with the 'KEY LOCK' tab.](https://usermanual.wiki/LG-Electronics-USA/L172WA/User-Guide-379438-Page-24.png)


![A32ENGLISHSelecting and Adjusting the ScreenTo adjust the CAPTION&VCHIP functionUse the buttons to select caption mode.Text services give a wide variety of information on all kind ofsubjects(ex. captioned program lists, weather forecasts, stockexchange topics, news for hearing-impaired....) on up to halfof the TV screen. But not all stations offer text services, eventhough they might offer captioning.In the event you are receiving a poor signal, an empty blackbox may appear and disappear, even when the text mode isselected. This is a normal when receiving a poor signal.This TV is programmed to remember the CAPTION/TEXTmode it was last set to, when you turn the power off.Use the buttons to select captions. * CC EZ MUTE : If sound is on, the caption will be off. On the contrary, if sound is off, the caption will be on.CAPTION/TEXTCAPTIONUse the buttons to select ON or OFF. The TV can be set up so that it can only be usedwith the remote control. This feature can prevent unauthorized viewing.In order to lock the OSD screen adjustment, set the KEY LOCK tab to the 'on' position.In order to unlock it, do the following :1) Push the menu button on the remote control and set KEY LOCK to the 'off' position. 2) Simultaenously push the menu button on the bottom of the monitor and the button for 5seconds. KEY LOCKThis Function is used to block program viewing based on the ratings sent by the broadcaststation. The default setting is to allow all programs to be viewed. Viewing can be blocked bythe type of program and by the categories chosen to be blocked. It is also possible to block allprogram viewing for a time period.PARENTAL[Remote Control]Press the CAPTION button repeatedly to display the caption option as shown below.Prees the ENTER button to select the caption option.Select the PARENTAL menu and click button. The 'ENTER CODE' window will appear.Once the correct four-digit password is entered, sub-menu that allows a user to controlvarious blocks will be enabled. The initial password is set for '7777' and it can be changedthrough 'SET PASSWORD' menu.](https://usermanual.wiki/LG-Electronics-USA/L172WA/User-Guide-379438-Page-39.png)