LG Electronics USA L600I Single-Band PCS GSM Phone User Manual L600i 0729
LG Electronics USA Single-Band PCS GSM Phone L600i 0729
UserManual.wiki
>
LG Electronics USA
>
L600I User Manual
Manual
Navigation menu
Upload a User Manual
Namespaces
Wiki Guide
HTML
PDF
Info
Views
User Manual
Discussion / Help
Navigation


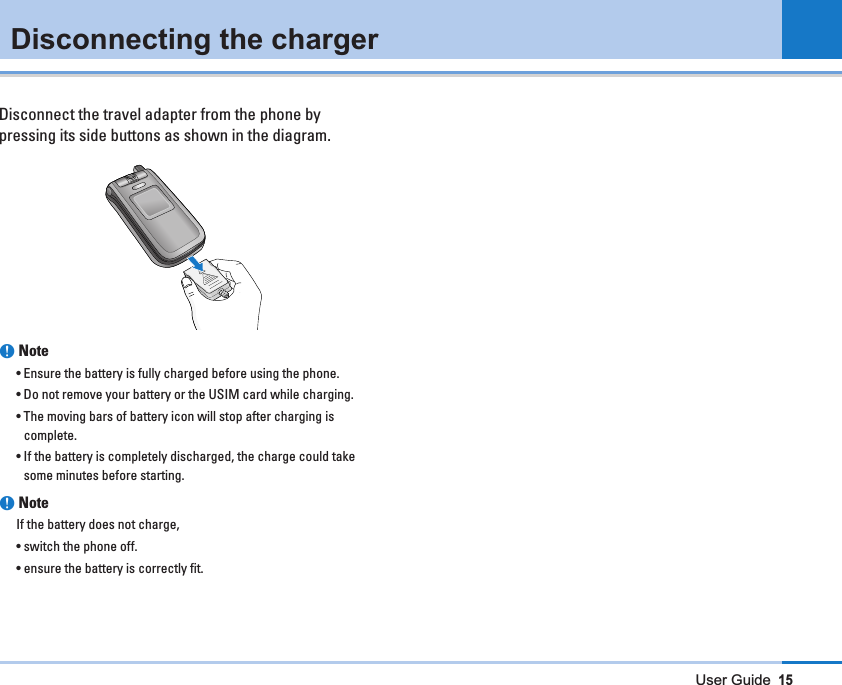
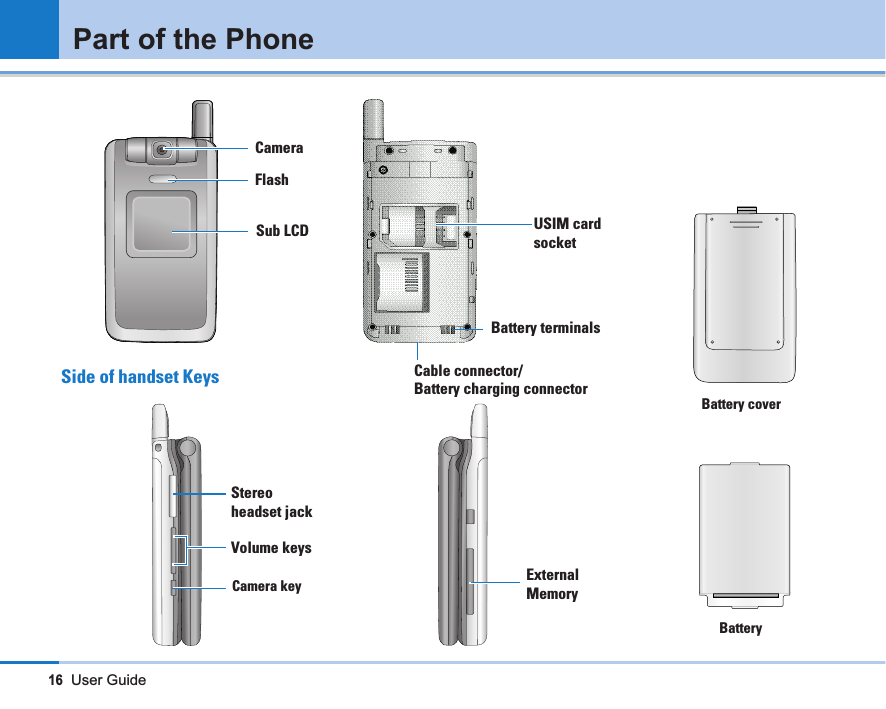
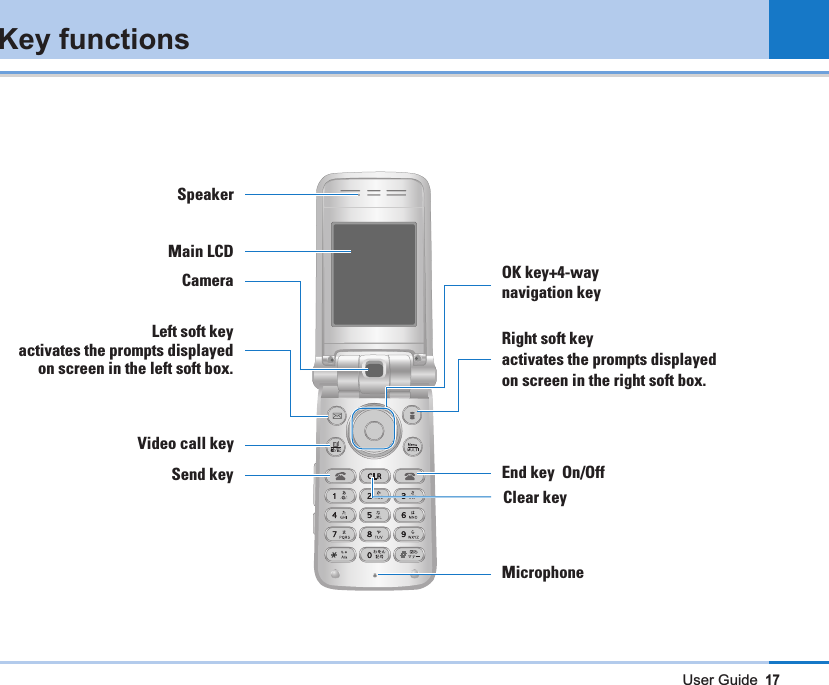
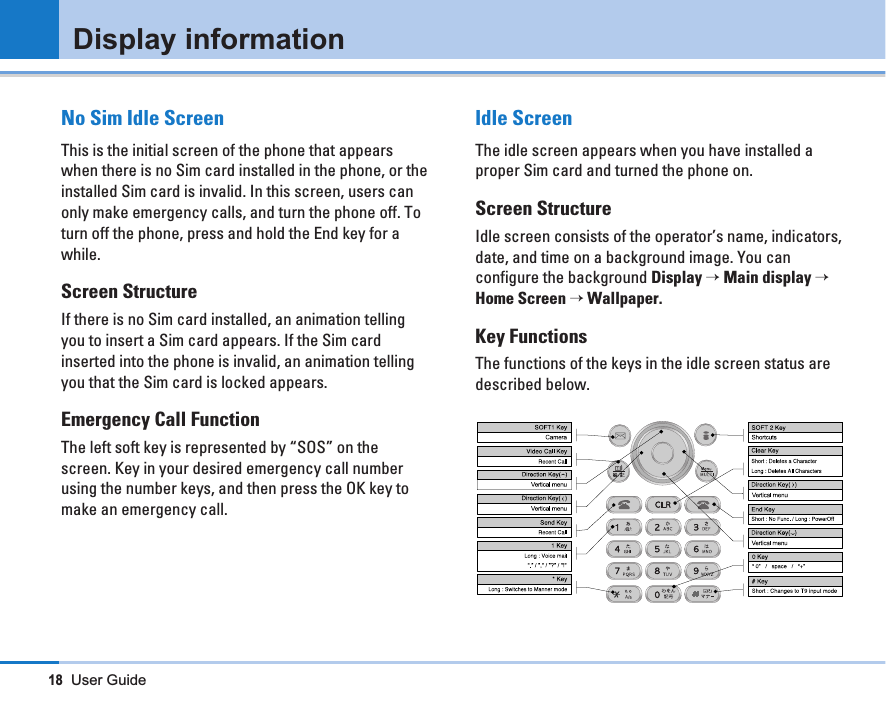
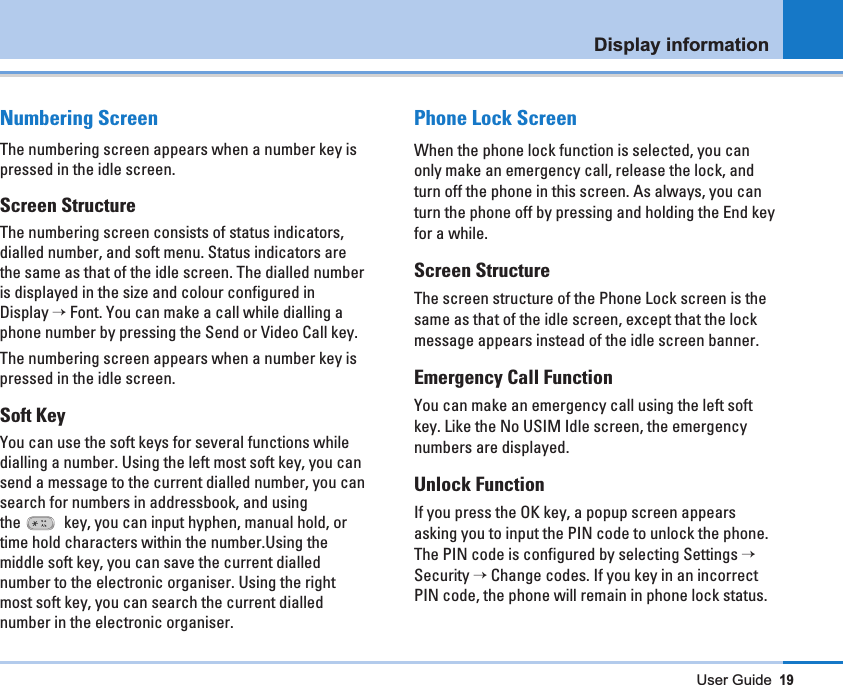
![20User GuideIf you key in the correct PIN code, the phone will beunlocked, and the idle screen will be displayed. If youhave turned the phone off in the phone lock status, youwill find the phone remains in phone lock status whenyou turn it on.Turning your handset onEnsure that your USIM card is in your handset and thebattery is charged.Press and hold the key until power is on.Enter the USIM PIN code that was supplied with yourUSIM card if PIN code setting is on.After a few seconds you will be registered on thenetwork.Turning your handset offPress and hold the key until power is off.There may be some delay while the handset powersdown.Do not re-power the handset during this time.Access CodesYou can use the access codes described in thissection to avoid unauthorized use of your phone. The access codes (except PUK and PUK2 codes) canbe changed by using the Change codes feature [Menu 12.4.3].PIN code (4 to 8 digits)The PIN (Personal Identification Number) codeprotects your USIM card against unauthorized use.The PIN code is usually supplied with the USIM card.When the PIN Code Request is set to Enable, yourphone will request the PIN code every time it isswitched on. When the PIN Code Request is set toDisable, your phone connects to the network directlywithout the PIN code.PIN2 code (4 to 8 digits)The PIN2 code, supplied with some USIM cards, isrequired to access functions such as Fixed DialNumber. These functions are only available ifsupported by your USIM card.Display information](https://usermanual.wiki/LG-Electronics-USA/L600I/User-Guide-579046-Page-20.png)
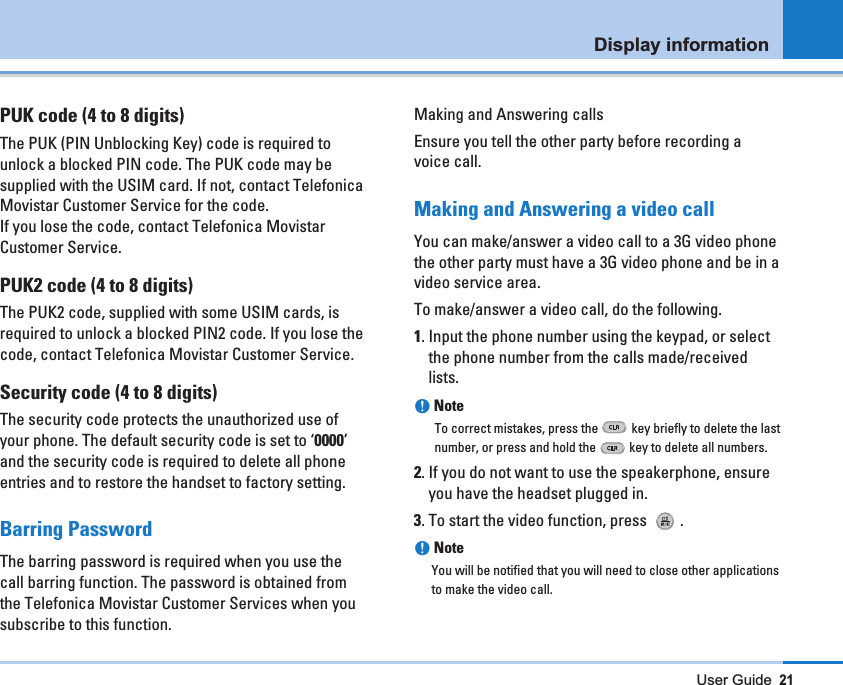
![22User GuidenNote The video call may take some time to connect. Please bepatient. The connection time will also depend on how quicklythe other party answers the call. While the video call isconnecting, you will see your own images; after the other partyhas answered, their image will be displayed on screen.4. Adjust the camera position if necessary.5. Press the end key to finish the call, or close thehandset.Making a voice call 1. Make sure your handset is powered on.2. Enter the number including the full area code.]To delete a digit press the key. To delete all digits press and hold the key.3. Press the key to make the call.4. Press the key to finish the call, or close thehandset.nNote To activate the speakerphone during a call, you have to pressand hold the key for at least 2 secs.Making a voice/video call from ContactsIt is easy to call anyone whose number you havestored in your Contacts.Press the down navigation key to access contact list.Scroll to your chosen contact and press the key.To make a voice call press the key.To make a video call press the key. Press thekey to finish the call.Making International Calls1. Press and hold the key for the internationalprefix. The ‘+’ character can be replaced with theinternational access code.2. Enter the country code, area code, and the phonenumber.3. Press the key.Adjusting the VolumeDuring a call, if you want to adjust the earpiecevolume, use the side keys of the handset. In idle modewith the flip cover open, you can adjust the key volumeusing the side keys.Display information](https://usermanual.wiki/LG-Electronics-USA/L600I/User-Guide-579046-Page-22.png)
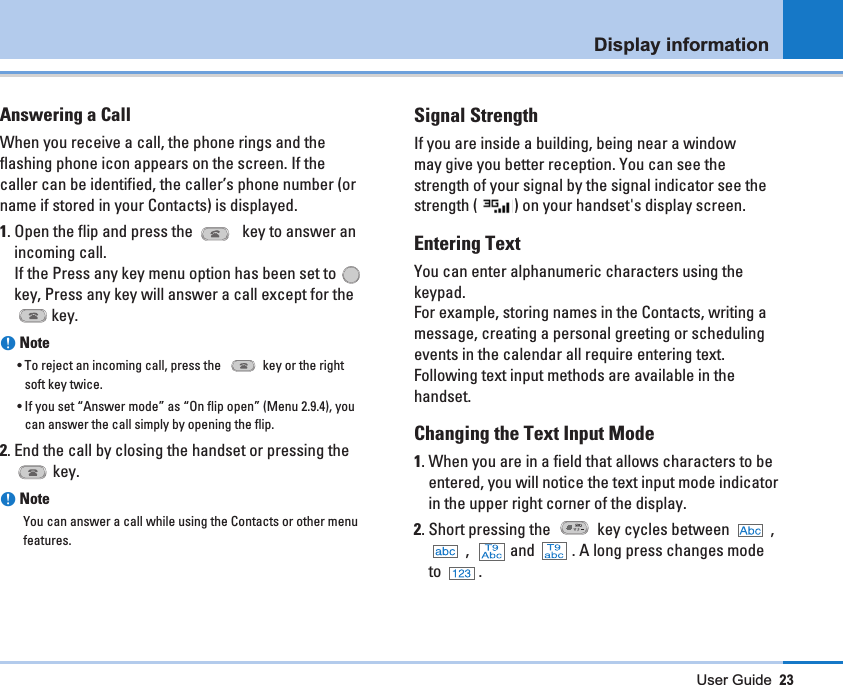
![24User GuideUsing the T9 ModeThe T9 predictive text input mode allows you to enterwords easily with a minimum number of key presses.As you press each key, the handset begins to displaythe characters that it thinks you are typing based on abuilt-in dictionary. As new letters are added, the wordchanges to reflect the most likely candidate from thedictionary.1. When you are in the T9 predictive text input mode,start entering a word by pressing keys to. Press one key per letter.]The word changes as letters are typed - ignorewhat’s on the screen until the word is typedcompletely.]If the word is still incorrect after typing completely,press the key once or more to cycle throughthe other word options.Using the ABC ModeUse the to keys to enter your text.1. Press the key labeled with the required letter:]Once for the first letter]Twice for the second letter]And so on2. To insert a space, press the key once.To deleteletters, press the key. Press and hold downthe key to clear the display.Using the 123 (Number) ModeThe 123 Mode enables you to enter numbers in a textmessage (a telephone number, for example).Press the keys corresponding to the required digitsbefore manually switching back to the appropriate textentry mode.Using the Symbol ModeThe symbol mode enables you to enter varioussymbols or special characters.To enter a symbol, press the center soft key [Symbol].Use the navigation and numeric keys to select thedesired symbol and press the key.Display information](https://usermanual.wiki/LG-Electronics-USA/L600I/User-Guide-579046-Page-24.png)
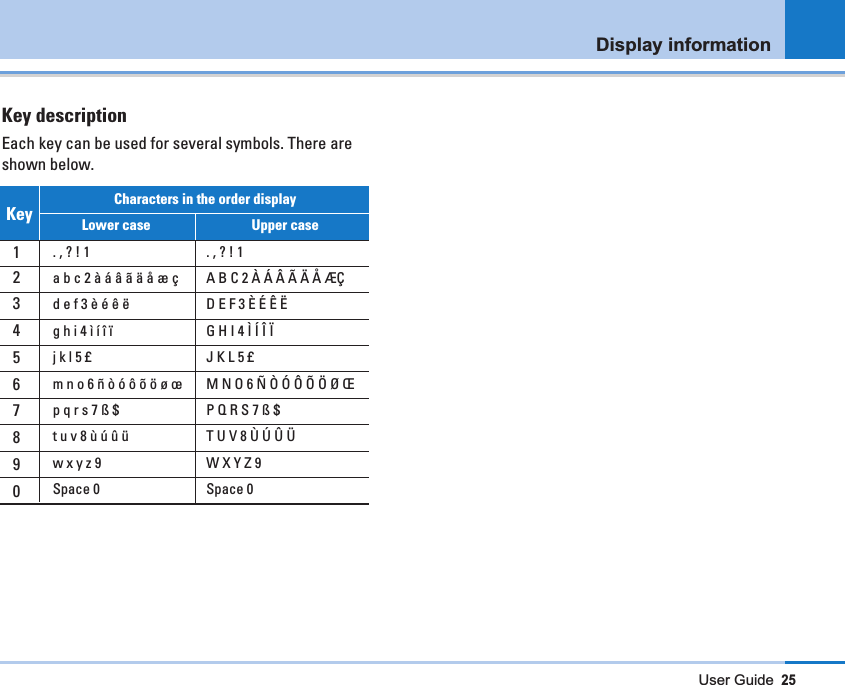
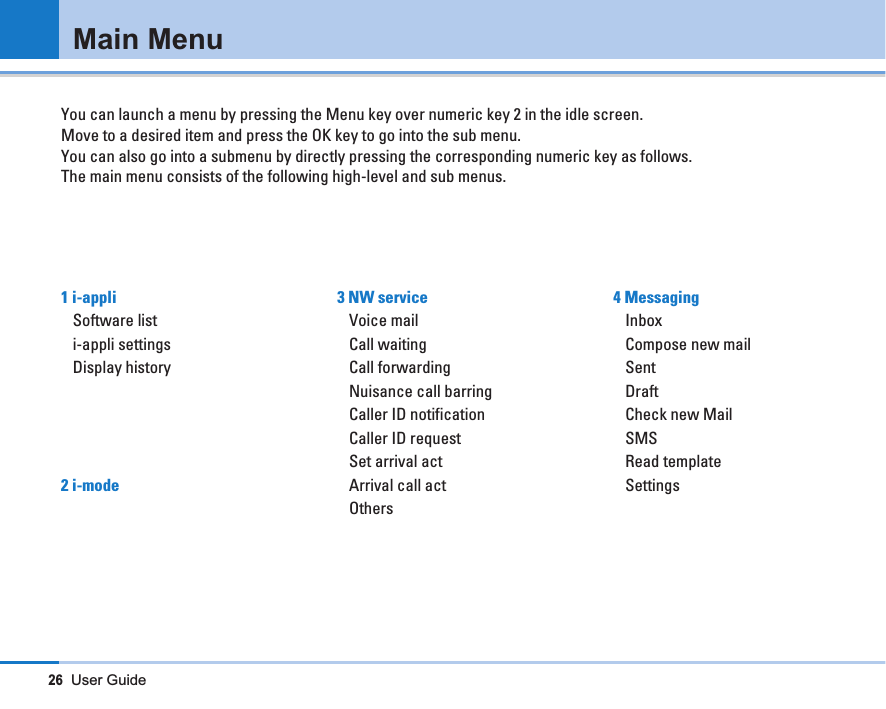
![User Guide29i-appli [Menu 1]You can check the latest weather information, stockprices, and the games without conneting network. Youcan dowmload all sorts of software applications fromsites and saving them on your i-mode handset. Pleaserefer to FOMA i-mode user's manual.Software list [Menu 1-1]If you select My folder menu, you can check thedownloaded software list.i-appli settings [Menu 1-2]i-appli can be set as a standby mode, and you canreceive mail and make calls while the i-appli isavtivated. You can make your standby mode even moreusuful by displaying the latest news and weather, or bysetting favorite characters to inform you of incomingmail and appointments.Display history [Menu 1-3]You can view the list of connecting i-appli.](https://usermanual.wiki/LG-Electronics-USA/L600I/User-Guide-579046-Page-29.png)
![30User Guidei-mode offers various sites, enabling you to viewinformation you need by accessing your favrite sites.i-mode [Menu 2]](https://usermanual.wiki/LG-Electronics-USA/L600I/User-Guide-579046-Page-30.png)
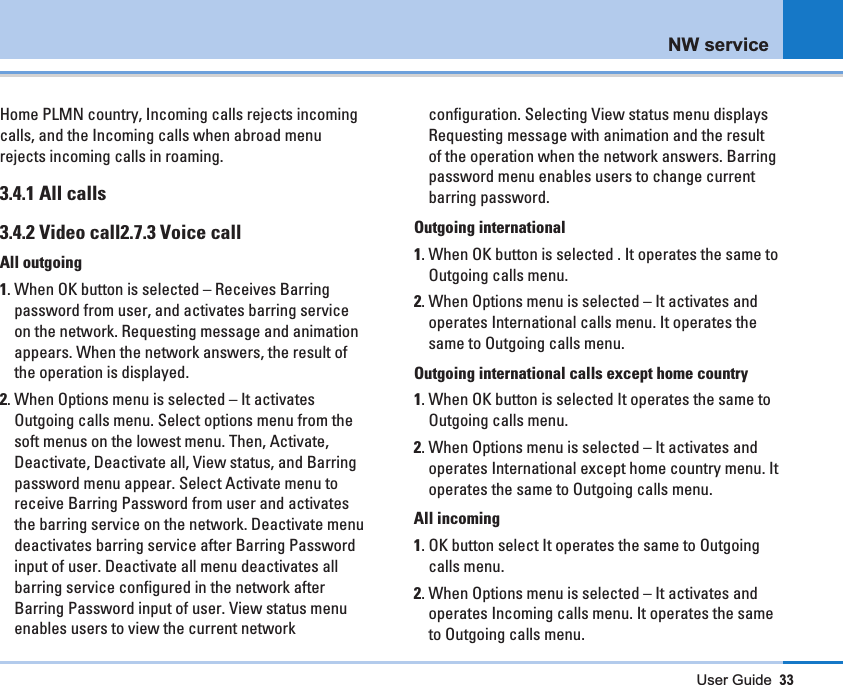
![User Guide31NW service [Menu 3]Voice mail [Menu 3-1]Once this menu has been selected, simply press theleft soft key [OK] to listen to voice mail. You can alsohold down key in standby mode to listen to voicemail.Call waiting [Menu 3-2]This menu consists of All calls, Video call, Voice call. If you select one, activate/deactivate/view statusmenu list appears.1. Activate Call waiting: Activates waiting service.Selecting this item, displays requesting messageand animation. When the network answers, theresult of the operation is displayed.2. Deactivate Call waiting: Deactivates Call waitingservice. Selecting this item displays requestingmessage and animation. When the networkanswers, the result of the operation is displayed.3. Call waiting status request: Displays activated Callwaiting service group item of the network. Selectingthis item displays requesting message andanimation. When the network answers, the result ofthe operation is displayed.Call forwarding [Menu 3-3]The Call divert service allows you to divert incomingvoice calls, fax calls, and data calls to another number.For details, contact your service provider.All voice callsDiverts voice calls unconditionally.If busyDiverts voice calls when the phone is in use.If no replyDiverts voice calls which you do not answer.If out of reachDiverts voice calls when the phone is switched off orout of coverage.All data callsDiverts to a number with a PC connectionunconditionally.All fax callsDiverts to a number with a fax connectionunconditionally.Cancel allCancels all call divert service.](https://usermanual.wiki/LG-Electronics-USA/L600I/User-Guide-579046-Page-31.png)
![32User GuideThe submenusCall divert menus have the submenus shown below.• ActivateActivate the corresponding service.To voice mail centreForwards to message centre. This function is notshown at All data calls and All fax calls menus.To other numberInputs the number for diverting.To favourite numberYou can check recent 5 diverted numbers.• CancelDeactivate the corresponding service.• View statusView the status of the corresponding service.Nuisance call barring [Menu 3-4]Call barring menus for All calls ,video, voice areprovided.However, available menus are determined by the SIMsupporting CPHS.The menu consists of All calls ,Video, Voice.The All calls menu provides menus to barring all callsand the Video menu provides menus to barring videocalls. the Voice menu provides menus to barring voicecalls. The All call,Video and Voice menus have thefollowing submenus.If you select All calls, Outgoing calls, Internationalcalls, International except home country, Incomingcalls, and Incoming calls when abroad submenus.menu list appears.The Call barring menu consists of Outgoing calls,International calls, International except home country,Incoming calls, and Incoming calls when abroadsubmenus. However, the menus available depend onwhether the SIM suppors CPHS. The Outgoing callsmenu bars dialing outgoing calls, the Internationalcalls menu bars dialing outgoing international calls,the International except home country menu barsdialing outgoing international calls except for theNW service](https://usermanual.wiki/LG-Electronics-USA/L600I/User-Guide-579046-Page-32.png)
![34User GuideIncoming calls when roaming1. OK button select. It operates the same to Outgoingcalls menu.2. When Options menu is selected – It activates andoperates Incoming calls when abroad menu. Itoperates the same to Outgoing calls menu.Caller ID notification [Menu 3-5]OnYou can send your phone number to another party.Your phone number will be shown on the receiver’sphone.OffYour phone number will not be shown.Set by networkIf you select this, you can send your phone numberdepending on two line service such as line 1 or line 2.Caller ID request [Menu 3-6]When you receive a call, you can check the number ofthe other party. Set arrival act [Menu 3-7]During a call, you can receive or reject a calldepending on setting. Arrival call act [Menu 3-8]When you select this menu, you can forward or rejecta call during a call or making a data call. Others [Menu 3-9]You can use various supplementary services as below:USSD, Record reply message, English guideline,Service Dialing Number.NW service](https://usermanual.wiki/LG-Electronics-USA/L600I/User-Guide-579046-Page-34.png)
![User Guide35Inbox [Menu 4-1]1. You can view saved messages. Select a messageand then press the OK key to view the message.2. You can view the previous or next message by usingthe left and right keys.3. To view an MMS Noti message, select Retrieve inthe message view screen. Then the file istransmitted, and you can view the file when thetransmission is complete.4. You can use the following functions by using[Option] key.[For a normal message]1. Reply: You can create a reply to the selectedmessage.2. Forward: Forwards the selected message. (Notsupported for MMSNoti message)3. Open: You can view the message.4. New message: You can write a new message.5. Mark / Unmark: You can delete more than selectedmessage or all messages.6. Filter: Displays messages by desired message types.7. Delete: Deletes a selected message.8. Info: Shows message info. . (Not supported for textmessage)[For WAP push message]1. Open: Opens a selected message.2. Mark/Unmark: Using the Mark function, you candelete multiple files.3. Filter: Displays messages by desired message types.4. Delete: Deletes the marked messages.5. Memory info: Shows how much memory the phonehas left.Compose new mail [Menu 4-2]You can send the text of up to 10,000 half-sizecharacters for the main text as well as attach melodyand image files. In addition, when sending mail to oani-mode handset, you only need to enter the part of theaddress before. The maximum number of charactersdepends on the data volume of melody or imageattachments.Sent [Menu 4-3]Show the messages you sent (Text message / PictureMessaging [Menu 4]](https://usermanual.wiki/LG-Electronics-USA/L600I/User-Guide-579046-Page-35.png)
![36User Guidemessage / Email)[Options]- Forward: Forwards the selected message. (Textmessage / Picture message / Email)- Open: Open the selected message.- Edit: Edits the selected message. - New message: Creates a new message. (Textmessage / Picture message / Email) - Mark / Unmark: (Un)Mark / (Un)Mark all- Filter : All messages / Text messages / Picturemessages / Email / Service messages- Delete: you can delete the selected messageDraft [Menu 4-4]1. You can edit saved messages. Select a message andthen press the OK key to edit the message.2. You can use the following functions by using the[Option] key.- Edit: You can edit selected message- New message: You can write a new message.- Mark / Unmark: You can delete more than selectedmessage or all messages.- Filter: Displays messages by desired message types.- Delete: Deletes a selected message.Check new mail [Menu 4-5]4.5.1 Allow reply emailYou can choose whether or not you allow reply email.4.5.2 Auto retrieveYou can configure Auto retrieve to retrieve e-mailsautomatically from the incoming mail server. When anew mail arrives, an icon appears at the top of the idlescreen. You can select that auto receiving time slothave None, 1, 3, 6 and 12 hours.4.5.3 Text signatureYou can configure a signature text to be attached tothe end of an e-mail. The configured signature text isautomatically attached to the end the e-mail when it issent.4.5.4 Email accounts1. You can create or configure an e-mail accountincluding the e-mail server and user ID.Messaging](https://usermanual.wiki/LG-Electronics-USA/L600I/User-Guide-579046-Page-36.png)
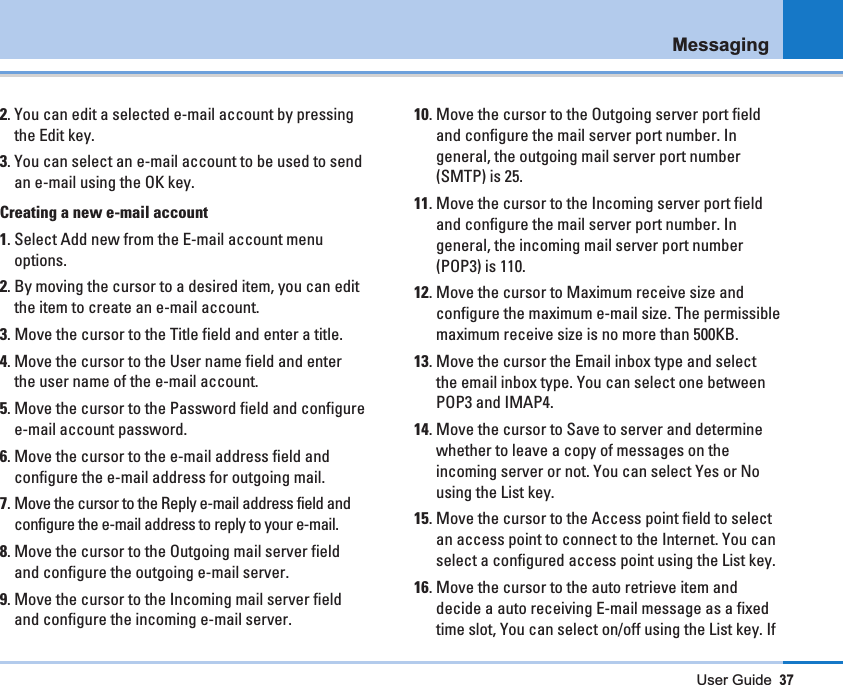
![38User Guideyou want to utilize this function, there is selectedauto retrieve in E-mail setting. But auto retrieve isnot selected, you can select auto retrieve in Option.17. Move the cursor to the SMTP authentication fieldand decide whether the outgoing mail serverrequires authentication. You can select Yes or No using the List key.Editing an e-mail account1. Select a desired e-mail account from the e-mailaccount list and press the Edit key.2. You can edit desired fields by moving the cursor upand down.3. When configuration is complete, press the Save keyto complete the e-mail account configuration.SMS [Menu 4-6]Compose SMSYou can create new message.Received SMSYou can check the received message.Sent SMSYou can check the sent message.SMS SettingsYou can set the font type, the status of delivery, theduration for message in SMS center, SMSC, addressand type of number.Read template [Menu 4-7]You can add, edit, and delete frequently-used usefulphrases. You can save frequently-used phrases in theinput window in advance. You can save these usefulphrases using the Options menu.- Depending on your service provider, the usefulphrases such asthe following examples are saved asa default.• I'm at home. Please call.Messaging](https://usermanual.wiki/LG-Electronics-USA/L600I/User-Guide-579046-Page-38.png)
![User Guide39• I'm at work. Please call.• I'm in a meeting, please call me later. • I'm in a meeting, I'll call you later. • I'm running late. I'll be there at.• I love you. • Hi. How are you?• Sorry, I can't help you on this. • Good to see you. My phone number is• Call me. I'm ready for you.Settings [Menu 4-8]4.8.1 General4.8.1.1 Message display• Display after confirm: When new message arrived,you can choose to read now or later on the popup.• Only notification: When new message arrived, showyou only indicate image on the indicator area.4.8.1.2 Message alert• None / Once / Every 1 min / Every 2 mins / Every 5 mins / Every 10 minsYou can select how often alert new message.4.8.1.3 Message tone• If you set your phone to Vibration or silent, it’s notavailable.Melody 1 ~ Melody 104.8.1.4 Save sent messages• You can select whether save sent messages or not.4.8.2 Text message4.8.2.1 Text message centre• Select text message centre• Add new / Edit / Set as default centre / Delete4.8.2.2 Character encoding• Auto / Default alphabet / Unicode4.8.2.3 Delivery report• Yes / NoMessaging](https://usermanual.wiki/LG-Electronics-USA/L600I/User-Guide-579046-Page-39.png)

![42User GuideIn this menu, you can manage graphics, i-motion, andtones which are downloaded from network. These filesare arranged in folders. You can create, edit the deletethe folder. Furthermore, you can copy, move anddelete the file in folder.Image [Menu 5-1]i-motion [Menu 5-2]Melody [Menu 5-3]External memory [Menu 5-4]My stuff [Menu5]](https://usermanual.wiki/LG-Electronics-USA/L600I/User-Guide-579046-Page-42.png)
![User Guide43Camera [Menu 6-1]Taking a Picture (Still picture)1. Select Camera or press the numeric key (#1) fromthe Media album menu.2. Environment Setting.- Select the [Options] key.- Size: Select ‘Size’ and choose one from 1280x1024,640x480, 320x240, Wallpaper size and Address booksize.- Quality: You can select the desired quality ofpicture by selecting either Super fine, Fine orNormal.- Flash: Select either Auto(around brightness),Always on(always use flash), When taking(onlywhen taking a picture) or Off (do not use flash).- Multishot: You can take 3/6/9 photos consecutively(the Picture size is fixed to 320x240).- Zoom: You can select zoom level according to thepicture size And preview size, and the range ofzoom level is 1 to 10. For pictures with 1280x1024,only zoom level 1(1:1) is supported.- Brightness: You can select a level from –2.0 to 2.0with step size 0.5. The higher the level, the morebrighter the screen.- White balance: Using this function you can adjustthe tone of the background picture according tothe weather by selecting either Auto, Daylight,Cloudy, Shade or Fluorescent.- Night mode: You can take better pictures at night.- Frame shot: You can apply 10 kinds of frame effectswhen taking a picture.- Delay timer: Using this function you can delay thecamera shutter time by selecting either None, 3seconds, 5 seconds or 10 seconds.- Effect: Using this menu you can select specialcamera effect by selecting either None, Black & White, Negative, Sepia.- Shutter sound: You can select the camera shuttersound by selecting either No sound, Sound1 orSound2.- Memory In use: You can choose the internal(Phone) flash memory or the external flashmemory.My stuff](https://usermanual.wiki/LG-Electronics-USA/L600I/User-Guide-579046-Page-43.png)
![3. Taking a Picture- Adjust the camera position so that object is in thecenter of the screen, and then press the Take keyto take a picture of the object. A taken picturesaved in the internal (phone)flash memory or theexternal flash memory. To view existing takenpictures, select album soft menu. Then the Picturealbum is launched, and displays existing picturesas thumbnails. Move to a desired picture to view,and select [View: View] to view the picture. Youcan also send a selected picture to the other partythrough the MMS or Email service by pressing theSend key in the thumbnail list screen.Camcorder [Menu 6-2]1. This function is selected when you select 2.Camcorder from the Multimedia album keys in 1Camera mode.2. Environment Settings- Press the [Options] key.- Quality: You can select the desired quality of video byselecting either Super fine, Fine or Normal (just as youcan in Camera)- Flash: Select either Always on (always use flash), Whenrecording (only when recording a picture) and Off (donot use flash).- Zoom: Same as Camera- Brightness: Same as Camera- White balance: Using this function you can adjust thetone of the background picture according to the weatherby selecting either Auto, Daylight, Cloudy, Shade orFluorescent.- Night mode: You can take better video images at night.- Effect: Same as Camera- Recording time: You can select recording times of 30seconds, 1 minute, 2 minutes, 5 minutes, Unlimited.- Memory In use: You can choose the internal (Phone)flash memory or the external flash memory.3. Recording a videoPut the camcorder where you want it and press the“Rec.” key to start recording. Press the “Stop” keyagain to stop recording. The recorded video is saved in the gallery. To viewthe recorded video, select [List], select a desiredvideo thumbnail from the video list and press “Play”.44User GuideMultimedia [Menu 6]](https://usermanual.wiki/LG-Electronics-USA/L600I/User-Guide-579046-Page-44.png)
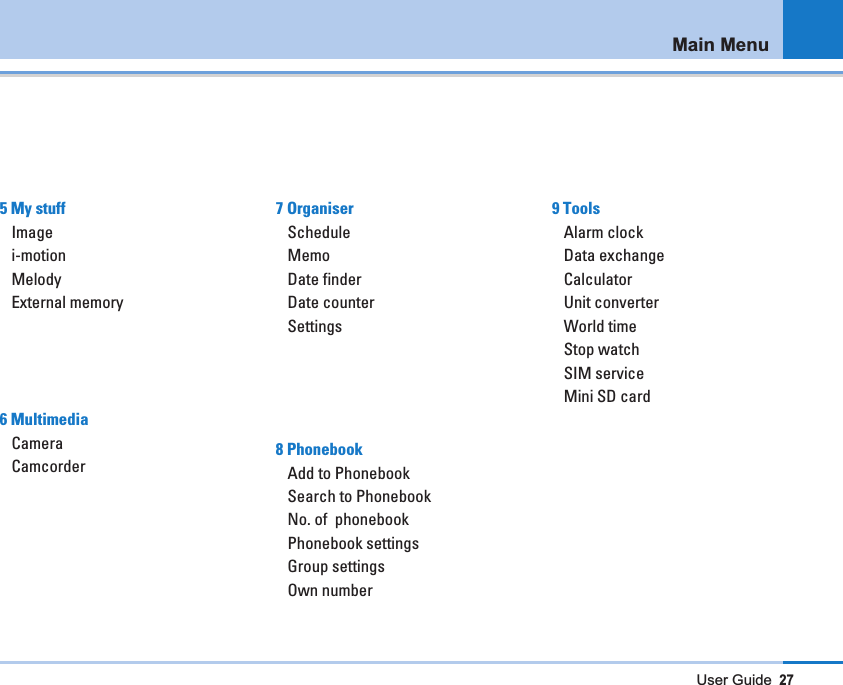
![User Guide45Schedule [Menu 7-1]Memo [Menu 7-2]Date finder [Menu 7-3]Date counter [Menu 7-4]Settings [Menu 7-5]Organiser [Menu 7]](https://usermanual.wiki/LG-Electronics-USA/L600I/User-Guide-579046-Page-45.png)
![This is a addressbook function to record and managecontact addresses. Using the AddressbookManagement menu, you can register new contactaddresses, or can search for desired addresses byname, phone number, or groups.Add to Phonebook [Menu 8-1]You can register a new contact address. You can input the name, phone numbers, Emailaddresses, assign it to groups, include memo,company / party, position / occupation, home address,office address, home page URL, ring tone, and avataror image (photograph) in the contact addressinformation. You can input and manage contactaddresses depending on the memory usage.Search to Phonebook [Menu 8-2]Performs the contact address search function. Thesearch operation is performed based on a name as adefault. The current search method and results foundare displayed in the Search window. On the right sideof the screen, an image or avatar registered to theselected contact address appears. You can make aphone call or send a message to the selected phonenumber. An address search can be performed basedon the phone number, the Email address or groupinformation.No. of phonebook [Menu 8-3]Phonebook settings [Menu 8-4]8.4.1 Display dataDetermines where phone book data is stored. You canselect mobile phone memory, USIM (SIM) card, or bothof them. Handset & SIM is the default setting. You canchange the setting by using the up and down keys.8.4.2 Copy allYou can copy contact address information from thephone memory to the USIM (SIM) or from USIM (SIM)to the phone memory. You can copy just selected itemsor all of them.46User GuidePhonebook [Menu 8]](https://usermanual.wiki/LG-Electronics-USA/L600I/User-Guide-579046-Page-46.png)
![User Guide478.4.3 Move allYou can move contact address information from thephone memory to the USIM (SIM) or from the USIM(SIM) to the phone memory. You can move justselected items or all of them.8.4.4 Clear all address bookClears contact address information. You can delete acontact address saved in the mobile phone memory aswell as in the USIM (SIM) card.8.4.5 Show image/avatarYou can select whether checking only name or namewith image on the list of search or contacts.- On: name with image on the list of search or contacts- Off: only name on the list of search or contactsGroup settings [Menu 8-5]Using this menu you can manage group information.There are 4 default groups: Family, Friends,Colleagues and School. You can add, edit and delete groups. You can alsoassign an image and a ring tone for each group. When a bell for a number is not specified, a call fromthe number sounds the group ring tone assigned to thenumber for the group.Own number [Menu 8-6]You can save up to 3 own numbers being used in theUSIM card, and send the number to another personthrough Card.Phonebook](https://usermanual.wiki/LG-Electronics-USA/L600I/User-Guide-579046-Page-47.png)
![48User GuideAlarm clock [Menu 9-1]If you set up alarm, [Alarm icon] appears on theIndicator bar. The specified alarm sounds at thescheduled time. Press the [OK] key to stop the alarm,and the alarm is released. Press the [Right key] or[Snooze], choose the snooze interval, the alarm soundis stopped and resumed after selected Snoozeduration. You can configure up to 5 alarms.1. Select your desired alarm to configure in the alarmlist. If there is no alarm, press the right soft key [Add]to add a new alarm.2. Set/Cancel alarm: Set or cancel the alarm using theoptions for specifying the alarm off or by choosingthe alarm time.3. Input alarm time: Input your desired alarm time byspecifying Hour and Minute. Choose either ‘AM’ or‘PM’ visible if 12 hour format is specified for thephone. 4. Select repeat mode: Select desired repeat modeusing the left and right direction keys or from the listpressing the center key.5. Select bell: Select the bell to ring at the alarm time,using the left addright direction keys or from thepressing the center key.6. Input memo: Input alarm name.7. Select the Power off: Select the Power off option toenable or disable the alarm at Phone Power off.When you have completed configuration, press the[ ] key [Done] to save the changed alarmconfiguration.Data exchange [Menu 9-2]Calculator [Menu 9-3]You have a calculator function that provides 4calculations of addition, subtraction, multiplication anddivision.You can input numbers using the number keys, andoperators using the up, down, left, and right directionkey. You can input a decimal point by pressing the leftsoft key. Whenever you press the Clear key,characters are sequentially deleted in reversedirection.When calculation is completed and the result isdisplayed on the screen, pressing a number or decimalpoint (.) clears the previous result and the calculatorTools [Menu 9]](https://usermanual.wiki/LG-Electronics-USA/L600I/User-Guide-579046-Page-48.png)
![User Guide49waits for new input, even though you did not press ACkey. When calculation is completed and the result isdisplayed on the screen, pressing a symbol saves theresult into the symbol, and continues calculation.Unit converter [Menu 9-4]Using this menu, users can convert the unit of 7weights and measures of currency, surface, length,weight, temperature, volume and velocity.9.4.1 Currency1. Select the Currency menu.2. Users can set a currency exchange rate using[Rate].3. Input currency rates for upto 5 currencies equivalentto USD and then press [Save]. Then you can convertto one currency to another.4. You can view the value of between 5 currency units5. Press [Reset] to clear the current input filed.6. To exit currency conversion function, press the[Back] key.9.4.2 Surface1. Select Surface menu.2. Select desired unit to convert using [Unit].3. Input standard unit and view converted value.4. Press [Reset] to clear the current input filed, andlocate the cursor in the input field.5. To exit Surface conversion function, press [Back]key.9.4.3 Length1. Select length menu.2. Select the desired unit to convert using [Unit].3. Input the standard unit and view your convertedvalue.4. Press [Input again] to clear the current input filed.5. To exit length conversion function, press [Back] key.9.4.4 Weight1. Select Weight menu.2. Select desired unit to convert using [Unit].3. Input standard unit and view converted value.Tools](https://usermanual.wiki/LG-Electronics-USA/L600I/User-Guide-579046-Page-49.png)
![50User Guide4. Press [Reset] to clear the current input filed, andlocate the cursor in the input field.5. To exit Weight conversion function, press [Back]key.9.4.5 Temperature1. Select Temperature menu.2. Position the cursor in desired unit by using up ordown arrow key.3. Input standard unit and view converted value.4. Press [Reset] to clear the current input field.5. To exit Temperature conversion function, press[Back] key.9.4.6 Volume1. Select Volume menu.2. Select desired unit to convert using [Unit].3. Input standard unit and view converted value.4. Press [Reset] to clear the current input filed.5. To exit volume conversion function, press [Back]key.9.4.7 Velocity1. Select Velocity menu.2. Select desired unit to convert using [Unit]3. Input standard unit and view converted value.4. Press [Reset] to clear the current input field5. To exit Velocity conversion function, press [Back]key.World time [Menu 9-5]The World time function provides time information onmajor cities worldwide.1. You can view the time of desired country or cityusing the left and right key.2. You can select a desired city as a base using[Home].3. The home city selected in world time is the base fordaylight saving calculation for time.Tools](https://usermanual.wiki/LG-Electronics-USA/L600I/User-Guide-579046-Page-50.png)
![User Guide51Stop watch [Menu 9-6]StopWatch allows to count the no of seconds elapsedafter an event started.1. Press [Go] to start the stopwatch.2. Press [Stop] to stop the stopwatch and view themeasured duration of time. 3. Press [Go] to resume the stopwatch. 4. Press [Lap] during operation to record the durationof time at the moment, and continue the stopwatch. 5. Users can save up to 20 time records by pressing[Lap]. If the number of recorded time exceeds 20, theoldest one is deleted. 6. Press Details to see recorded Lap timings. Press[Reset] to initialise the stopwatch. SIM service [Menu 9-7]This menu depends on SIM and the network service. Mini SD card [Menu 9-8]This menu allows you to view Photos, Pictures, Soundsand Music in the SD card. If the external memory is notavailable, a pop up message “Please insert externalmemory” is dis-played.Tools](https://usermanual.wiki/LG-Electronics-USA/L600I/User-Guide-579046-Page-51.png)
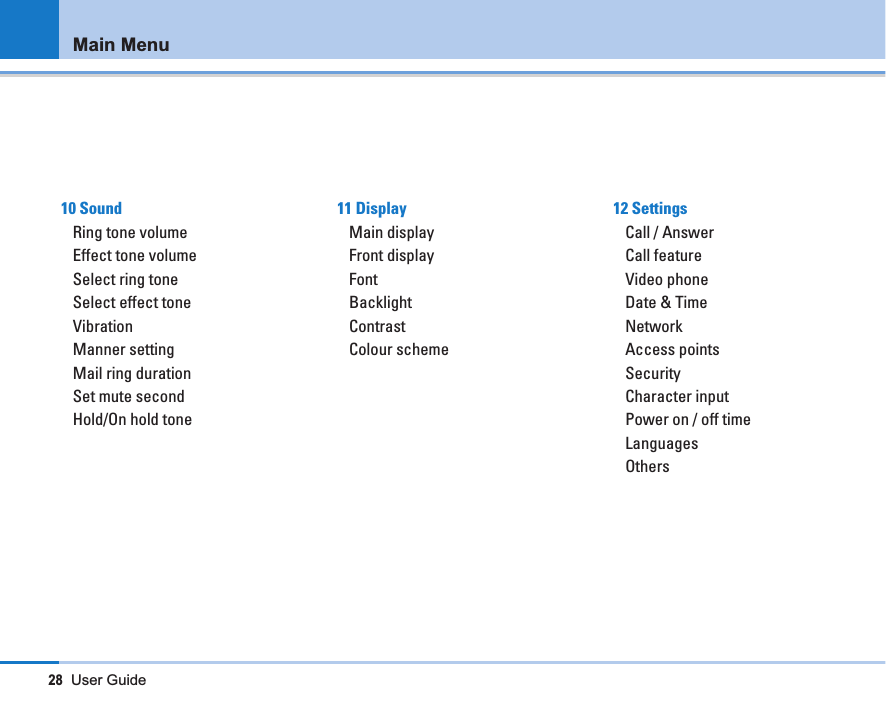
![52User GuideIn Sound menu, you can adjust and customise the ringtone for different events, situations or caller groups.Ring tone volume [Menu 10-1]This menu allows to select the desired ring tone fromthe list. You can set the various ring tone depending oncall and message types. Effect tone volume [Menu 10-2]This menu allows to set the volume of effect tone.Select ring tone [Menu 10-3]This menu allows to select the desired ring tone fromthe list. You can set the various ring tone depending oncall and message types. Select effect tone [Menu 10-4]This menu allows to select the desired effect tone fromthe list. You can adjust the tone when you switch on/off the phone, press the keypad, or open/ close the flip.Vibration [Menu 10-5]This menu allows to set the vibration mode when youreceive a call or a message.Manner setting [Menu 10-6]This menu allows to set manner mode.Mail ring duration [Menu 10-7]This menu allows to set the ring tone duration whenyou receive the mail.Set mute second [Menu 10-8]Hold/On hold tone [Menu 10-9]Sound [Menu 10]](https://usermanual.wiki/LG-Electronics-USA/L600I/User-Guide-579046-Page-52.png)
![User Guide53In this menu, you can configure screen display optionsincluding LCD settings andtheme.Main display [Menu 11-1]You can configure the Main LCD background by themeselection.11.1.1 Home screenYou can select an Main LCD background to display inidle mode. You can also select the clock and calendartype to appear in idle mode.You can also configure thefont size and color of the clock displayed on the MainLCD idle screen.11.1.2 Incoming callYou can select an Main LCD background to displaywhen an incoming call arrives. The configuration isapplied to both voice and video calls. 11.1.3 Outgoing callYou can select an Main LCD background to displaywhen dialling a call. The configuration is applied toboth voice and video calls.Front display [Menu 11-2]You can select an Front LCD background to displaywhen an incoming call arrives. The configuration isapplied to both voice and video calls.11.2.1 Home screenYou can select an Front LCD background to display inidle mode. 11.2.2 Incoming callYou can select an Front LCD background to displaywhen an incoming call arrives. The configuration isapplied to both voice and video calls.Font [Menu 11-3]When number keys are pressed for call connection inidle state, the size and color of displayed number canbe configured.Display [Menu 11]](https://usermanual.wiki/LG-Electronics-USA/L600I/User-Guide-579046-Page-53.png)
![54User GuideBacklight [Menu 11-4]It allows the user to configure the backlight durationsettings for Main LCD, Sub LCD and Keypad.Defaultsettings: - Main LCD duration 10 seconds - Sub LCD duration 10 seconds- Keypad backlight duration 10 secondsContrast [Menu 11-5]This menu allows to set the LCD contrast.Colour scheme [Menu 11-6]1. It allows the user to configure the handset colortheme like menus, list , soft menu, Input boxes. 2. User can also preview the colour theme.Display](https://usermanual.wiki/LG-Electronics-USA/L600I/User-Guide-579046-Page-54.png)
![User Guide55Call / Answer [Menu 12-1]12.1.1 Call historyYou can check the record of missed, received, anddialled calls only if the network supports the CallingLine Identification (CLI) within the service area.The number and name (if available) are displayedtogether with the date and time at which the call wasmade. You can also view call times.12.1.1.1 Missed callsThis option lets you view the last 10 unanswered calls.You can also:• View the number if available and call it, or save it inthe Address Book• Enter a new name for the number and save both inthe Address Book• Send a message by this number• Delete the call from the list12.1.1.2 Received callsThis option lets you view the last 10 incoming calls.You can also:• View the number if available and call it, or save it inthe Address Book• Enter a new name for the number and save both inthe Address Book• Send a message by this number• Delete the call from the list12.1.1.3 Dialled callsThis option lets you view the last 20 outgoing calls(called or attempted).You can also:• View the number if available and call it or save it inthe Address Book• Enter new name for the number and save both in theAddress Book• Send a message by this number• Delete the call from the list12.1.1.4 Delete recent callsAllows you to delete Missed calls and Received callslists. You can delete Dialled calls and All calls lists atone time.Settings [Menu 12]](https://usermanual.wiki/LG-Electronics-USA/L600I/User-Guide-579046-Page-55.png)
![56User Guide12.1.2 Call durationAllows you to view the duration of your incoming andoutgoing calls. You can also reset the call times. Thefollowing timers are available:• Last call: Length of the last call.• All calls: Total length of all calls made and incomingcalls since the timer was last reset.• Received calls: Length of the incoming calls.• Dialled calls: Length of the outgoing calls.• Reset all: Allows you to clear the length of all calls bypressing the left soft key [Yes].12.1.3 Anonymous caller12.1.4 Auto answerThis function will be activated only when your phone isconnected to the headset.• Off: The phone will not answer automatically.• After 5 secs: After 5 seconds, the phone will answerautomatically.• After 10 secs: After 10 seconds, the phone willanswer automatically.12.1.5 Reject / Accept callThis menu allows to accept or reject a call dependingon the condition.12.1.6 Memory reject callThis menu allows to reject a call numbers which arenot saved in phonebook memory.12.1.7 Answer mode settingYou can set the anwer mode when you try to receive acall.12.1.8 Auto redialOnWhen this function is activated, the phone willautomatically try to redial in the case of failure toconnect a call.OffYour phone will not make any attempts to redial whenthe original call has not connected.Settings](https://usermanual.wiki/LG-Electronics-USA/L600I/User-Guide-579046-Page-56.png)
![User Guide57Call feature [Menu 12-2]12.2.1 Reconnect alarm12.2.2 Quality alarm12.2.3 Minute minderIf you select On, you can check the call duration bydeep sound every minute during a call.12.2.4 Prefix dialingYou can restrict your outgoing calls to selected phonenumbers. The numbers are protected by your PIN2code.• ActivateYou can restrict your outgoing calls to selected phonenumbers.• CancelYou can cancel fixed dialling function.• Number listYou can view the number list saved as Fixed dialnumber.12.2.5 Auto assist setting[Menu 12-2-5]This menu is related to World call of NTT DoCoMo. Ifyou activate this function, you can make a world call ofNTT DoCoMo without inputting +. Video phone [Menu 12-3]Date & Time [Menu 12-4]Although the current time is automatically configuredwhen the phone is registered to the network, userscan configure time and date directly using ‘Date &Time’ menu. The time configured by user is valid onlywhile the phone is turned on.12.4.1 TimeScroll down to select the hour indication format Off,Cuckoo clock or Chime bell.Settings](https://usermanual.wiki/LG-Electronics-USA/L600I/User-Guide-579046-Page-57.png)
![1. Select the ‘Time’ item from the Date & Time list, andthen press [OK] [Select].2. Move to your desired field, ‘Hour’, ‘Minute’,'Second', or ‘AM’/‘PM’ field using the navigationkeys.3. Input ‘Hour’, ‘Minutes’ and 'Second' using thenumber keys.4. Press the [OK] or [Confirm] key to set the time withthe specified value.12.4.2 Date1. Select ‘Date’ item from the Date & Time list, and thenpress [OK] [Select].2. Select date format using Left and Right navigationkeys.3. Input ‘Year’, ‘Month’, and ‘Day’ using the numberkeys.4. Press [Done] [Confirm] to set the date with thespecified value.12.4.3 Auto update data/timeWhen Auto Update is configured to On, the time anddate are automatically updated according to thecurrent location. If Confirm first is selected, time anddate update are confirmed before the automaticupdate. When Auto update is Off, the option selected indaylight saving will not make any effect.12.4.4 Daylight savingConfiguring Daylight saving to On Applies daylightsaving time for the currently selected home city inworld time. If the home city does not support summertime, Daylight saving can not be set to On.Network [Menu 12-5]12.5.1 Network selection1. If you select Network selection you can select eitherAutomatic or Manual.2. If you select Automatic, connection continuesaccording to the Automatic network selectionprocedures.3. If you configure the Network mode to GSM-preferred, UMTS-preferred or Automatic, all thecurrently available PLMN lists are found, and youcan select one item from the list for registration.If you configure the Network mode to GSM only, the58User GuideSettings](https://usermanual.wiki/LG-Electronics-USA/L600I/User-Guide-579046-Page-58.png)
![User Guide59currently available UMTS PLMN list is found, andyou can select one item from the list for registration.If you configure the Network mode to UMTS only,the currently available GSM PLMN list is found, andyou can select one item 12.5.2 Preferred lists1. Select Preferred lists to display the preferred listsaved in the current SIM card.2. You can edit and save a preferred list in the SIMcard by selecting the menu when the preferred list isdisplayed. - Add new: Adds an item selected from the popup list tothe preferred list. - Delete: Deletes the value of the preferred list item.- Move down: Moves the preferred list item down. Access points [Menu 12-6]This menu shows the access point list. You canregister, delete and edit by using the Option Menu.However, you cannot delete or edit defaultconfigurations provided by Telefonica Movistar . You can edit the following configuration items byselecting the right soft key.Connection title Access Point profile name Bearer Choose the bearer from the list. (Default is “Packet Switching”)Authentication Choose the authentication from thelist. (Default is “No auth”)Username Information provided by ServiceProvider.Password Information provided by ServiceProvider.APN APN name to access network.Information provided by serviceprovider.Traffic Class Choose the Traffic Class from thelist. (Default is “Subscribed”)Connection title Access Point profile name Settings](https://usermanual.wiki/LG-Electronics-USA/L600I/User-Guide-579046-Page-59.png)
![60User Guide- Press “Save” key to save any configuration changes.Security [Menu 12-7]You can activate a PIN code. When it is activated, awindow asking you to enter the PIN code appearswhen you turn on the phone so as to preventunauthorized use of the phone.12.7.1 PIN code requestYou can activate a PIN (Personal IdentificationNumeric). You can check the current status ofconfiguration from the status bar.PIN request and release procedures1. Select ‘PIN request’ item from the list, and press[OK]. Then a window allowing you to select ‘On’ or‘Off’ appears.- Select ‘On’/‘Off’ from the list, press [OK], and input thecurrent PIN code to set the PIN request. If ‘PIN request’is already On/Off, an “Already activated”/“Alreadycancelled” message will be displayed.2. 3 incorrect PIN code entries in the PIN code inputwindow would invalidate the PIN code. In this case,you have to input the PUK (PIN Unblock Key) code toconfigure the PIN code again.3. The maximum allowed numeric of attempts of PUKinput is 10 times. 10 occasions of incorrect PUKentries would limit the mobile phone use. Press the Back key in the PIN code input window toreturn to the previous step.12.7.2 Handset lockYou can lock your mobile phone to prevent it beingused by other people. The following 4 lock functionsare provided.- When switching on: Whenever the mobile phone isturned on.Req. Max UL Bitrate Choose the Request MaximumUpload Bitrate from the list. (Defaultis “Subscribed”) Req. Max DL Bitrate Choose the Request MaximumDownload Bitrate from thelist.(Default is “Subscribed”)Item DescriptionEnable PIN Request You have to input the PIN code eachtime the mobile phone is turned on.Disable PIN Request You do not have to input the PIN codewhen the mobile phone is turned on.Settings](https://usermanual.wiki/LG-Electronics-USA/L600I/User-Guide-579046-Page-60.png)
![User Guide61- If SIM Changed: When the mobile phone’s SIM cardhas been changed.- Immediate: Locks the phone immediately.- None: Cancels lock function.12.7.3 Change codesYou can change PIN, PIN2, the mobile phonepassword and the call barring password.12.7.3.1 PIN codePIN is the abbreviation of Personal IdentificationNumeric, and is used to restrict the use of anunauthenticated user.PIN Password Change Procedure1. Select ‘PIN’ from the ‘Change code’ list and thenpress [Select].2. Input the current PIN,and press [Select].3. Input the new PIN,and press [Select].4. Input the new PIN once again,and press [Select ].- If the PIN is different from that of step 3, the procedure isrestarted from step 3.5. When the PIN is properly changed, a “SuccessfullyChanged” message as well as new PIN codeappears. With an incorrect PIN input in step 2, theprocedure is restarted from step 2, and theremaining allowed numeric of input attempts isdecreased by 1.6. Press the Back key in the PIN code input window toreturn to the previous step.* 3 incorrect PIN code entries in the PIN code inputwindow would invalidate the PIN code. In this case,you have to input the PUK (PIN Unblock Key) code toconfigure the PIN code again. The maximum allowednumeric of attempts of PUK input is 10 times. 10occasions of incorrect PUK entries would limit themobile phone use.12.7.3.2 PIN2 codePIN2 is the abbreviation of Personal IdentificationNumeric 2, and is used to restrict the use ofunauthenticated users like PIN. PIN2 numeric changeprocedure is the same to that of PIN. 3 incorrect PIN2code entries would invalidate the PIN2 code. In thiscase, you have to input PUK2 to use the PIN2 codeagain. The maximum allowed numeric of attempts ofPUK2 input is 10 times, like PUK1. 10 incorrect PUK2entries would invalidate the PUK2.12.7.3.3 Security codeSettings](https://usermanual.wiki/LG-Electronics-USA/L600I/User-Guide-579046-Page-61.png)
![62User GuideCharacter input [Menu 12-8]Power on / off time [Menu 12-9]If you set this menu, the phone will switch on/ offautomatically depending on setting the time.Languages [Menu 12-10]This function changes the language used in the phone.AutomaticEnglishFrançaisNederlandsDeutschItalianoEspañolOthers [Menu 12-11]Settings](https://usermanual.wiki/LG-Electronics-USA/L600I/User-Guide-579046-Page-62.png)