LG Electronics USA LG70LY390C LED TV User Manual MFL68027111 eng 0304 indd
LG Electronics USA LED TV MFL68027111 eng 0304 indd
UserManual.wiki
>
LG Electronics USA
>
LG70LY390C User Manual
user manual
Navigation menu
Upload a User Manual
Namespaces
Wiki Guide
HTML
PDF
Info
Views
User Manual
Discussion / Help
Navigation


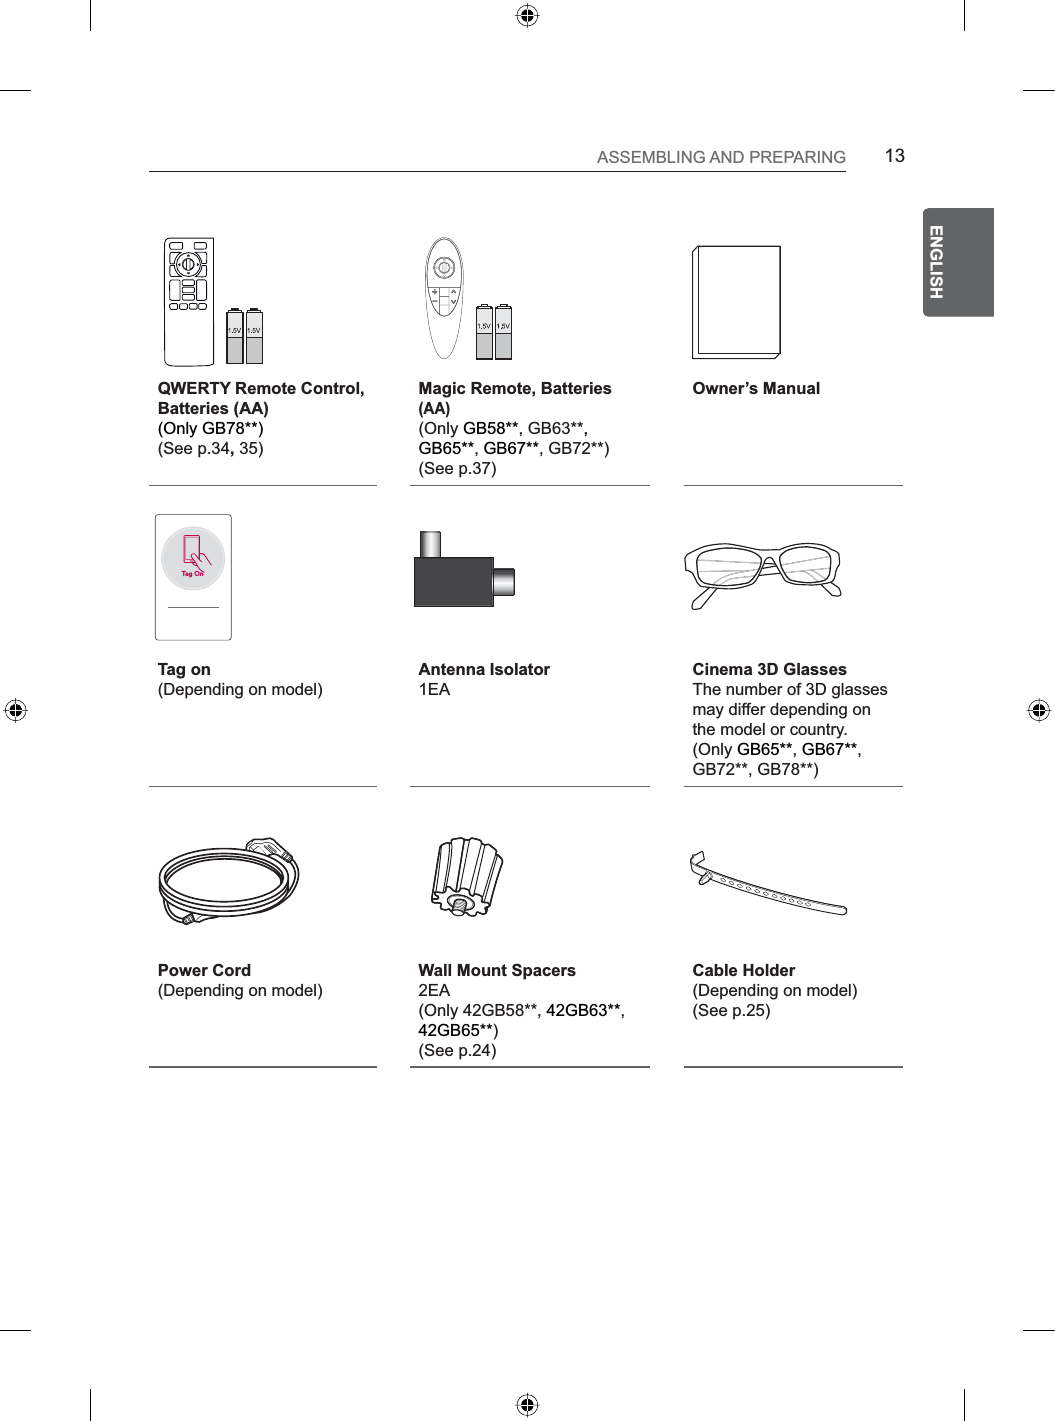
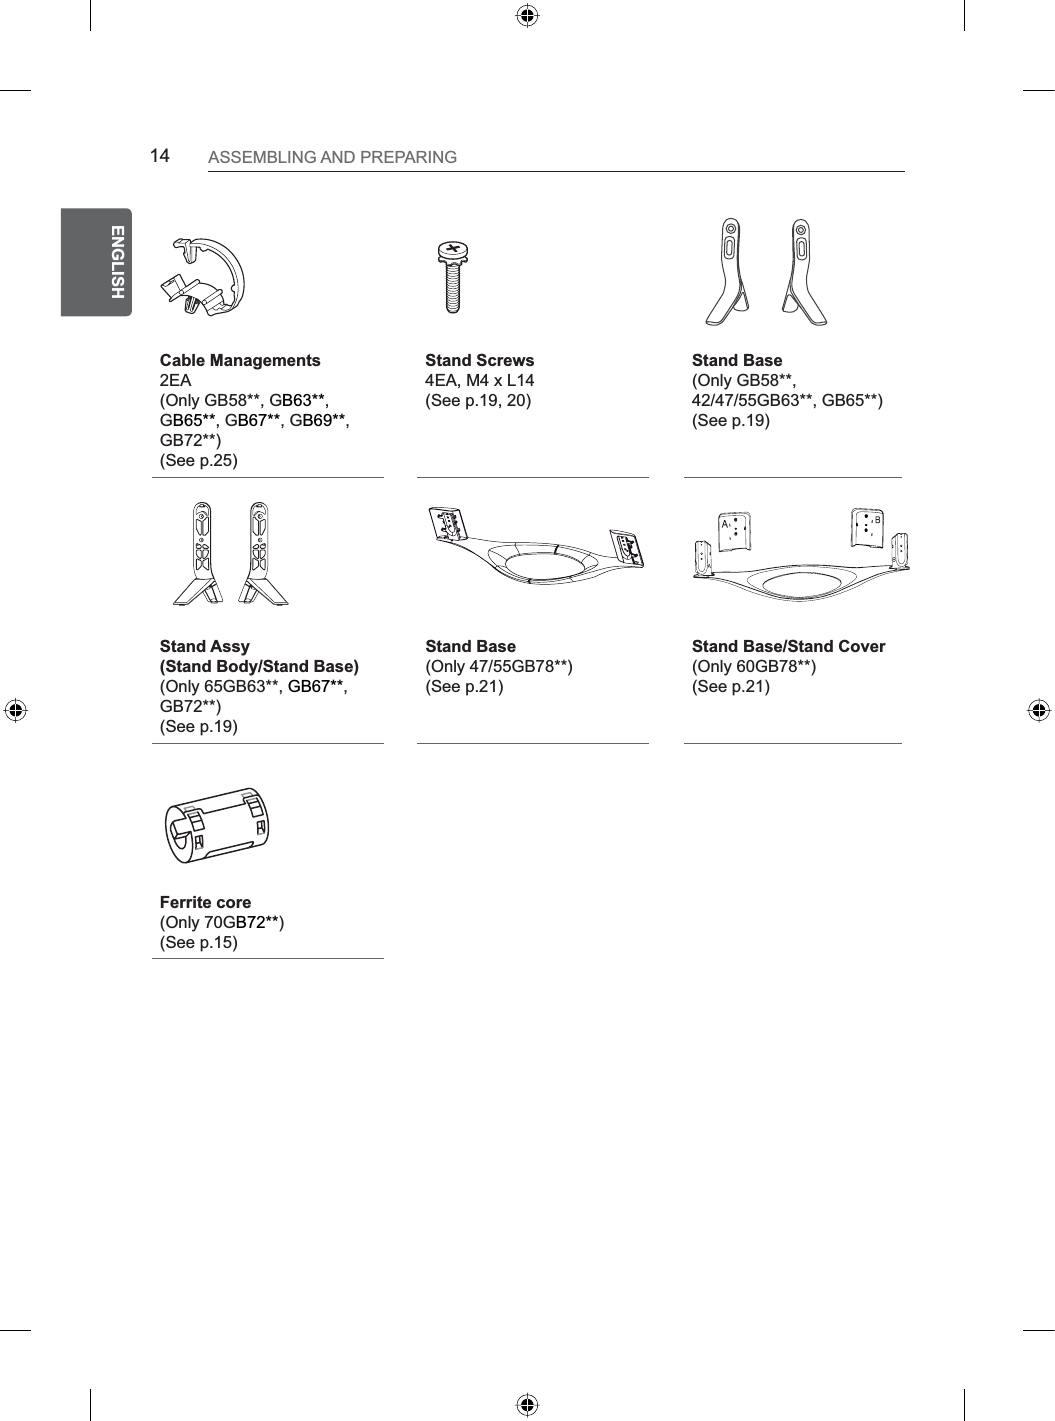
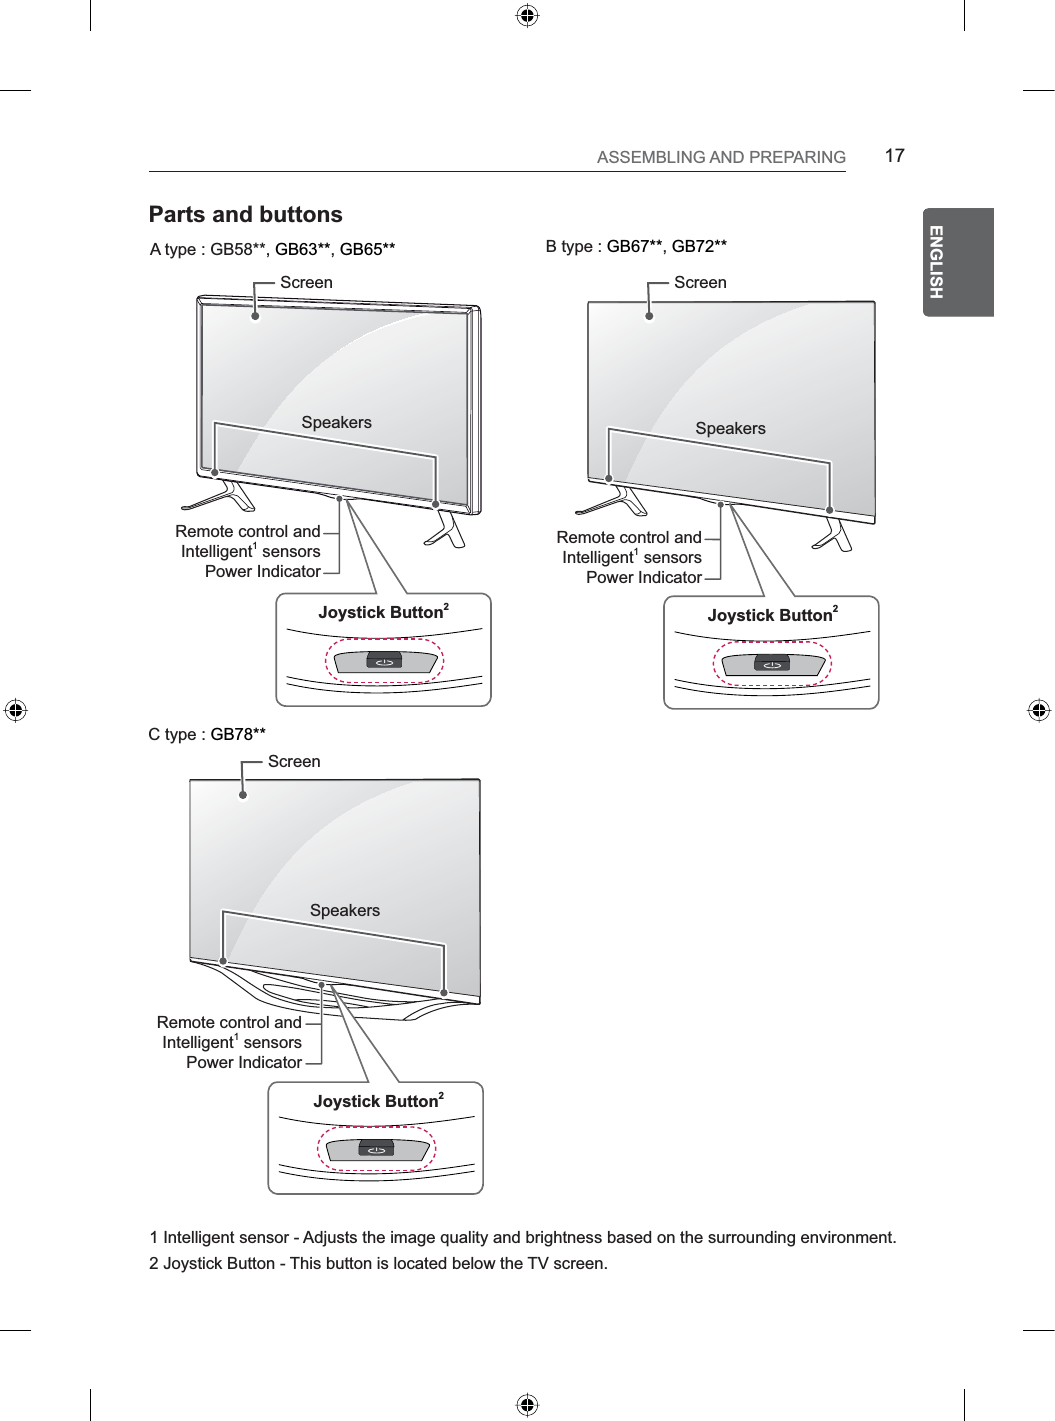
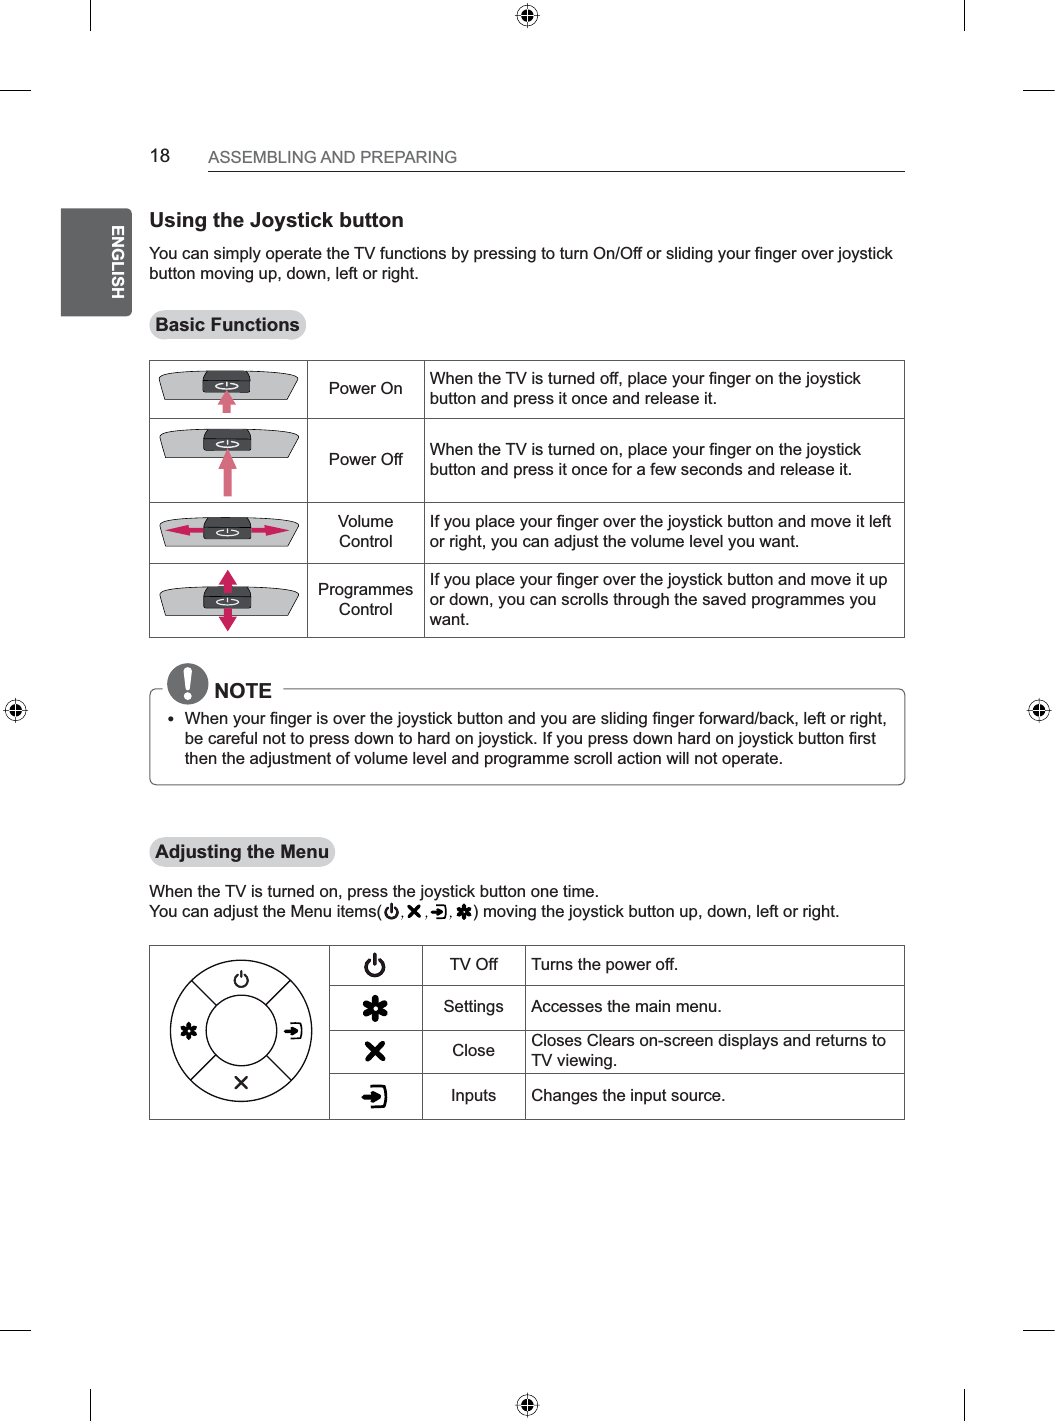
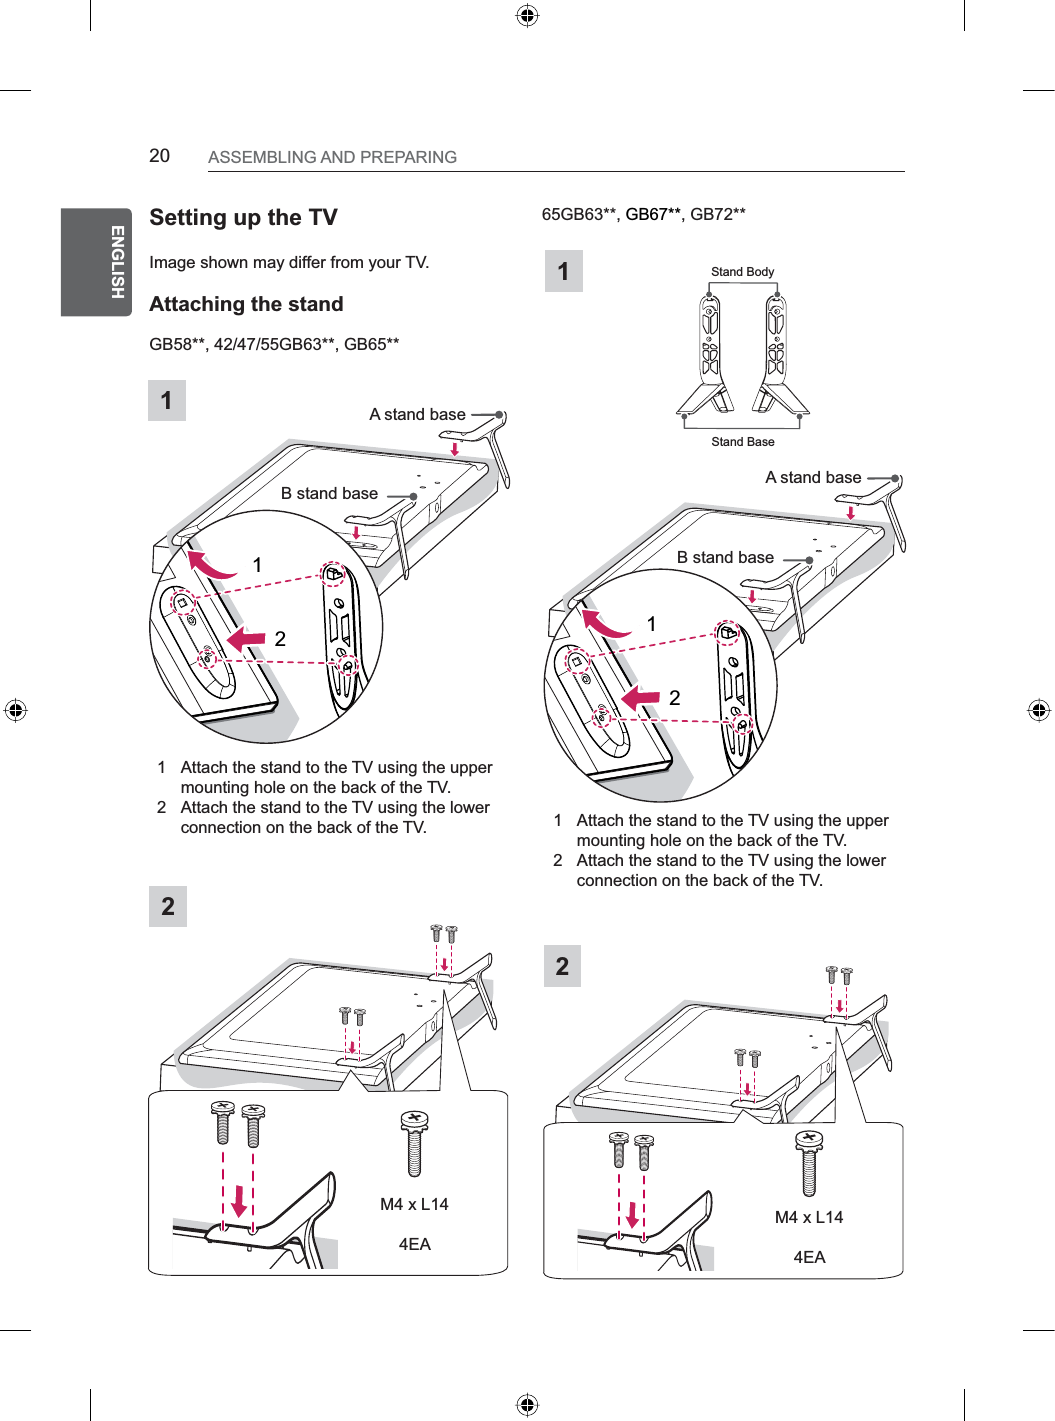
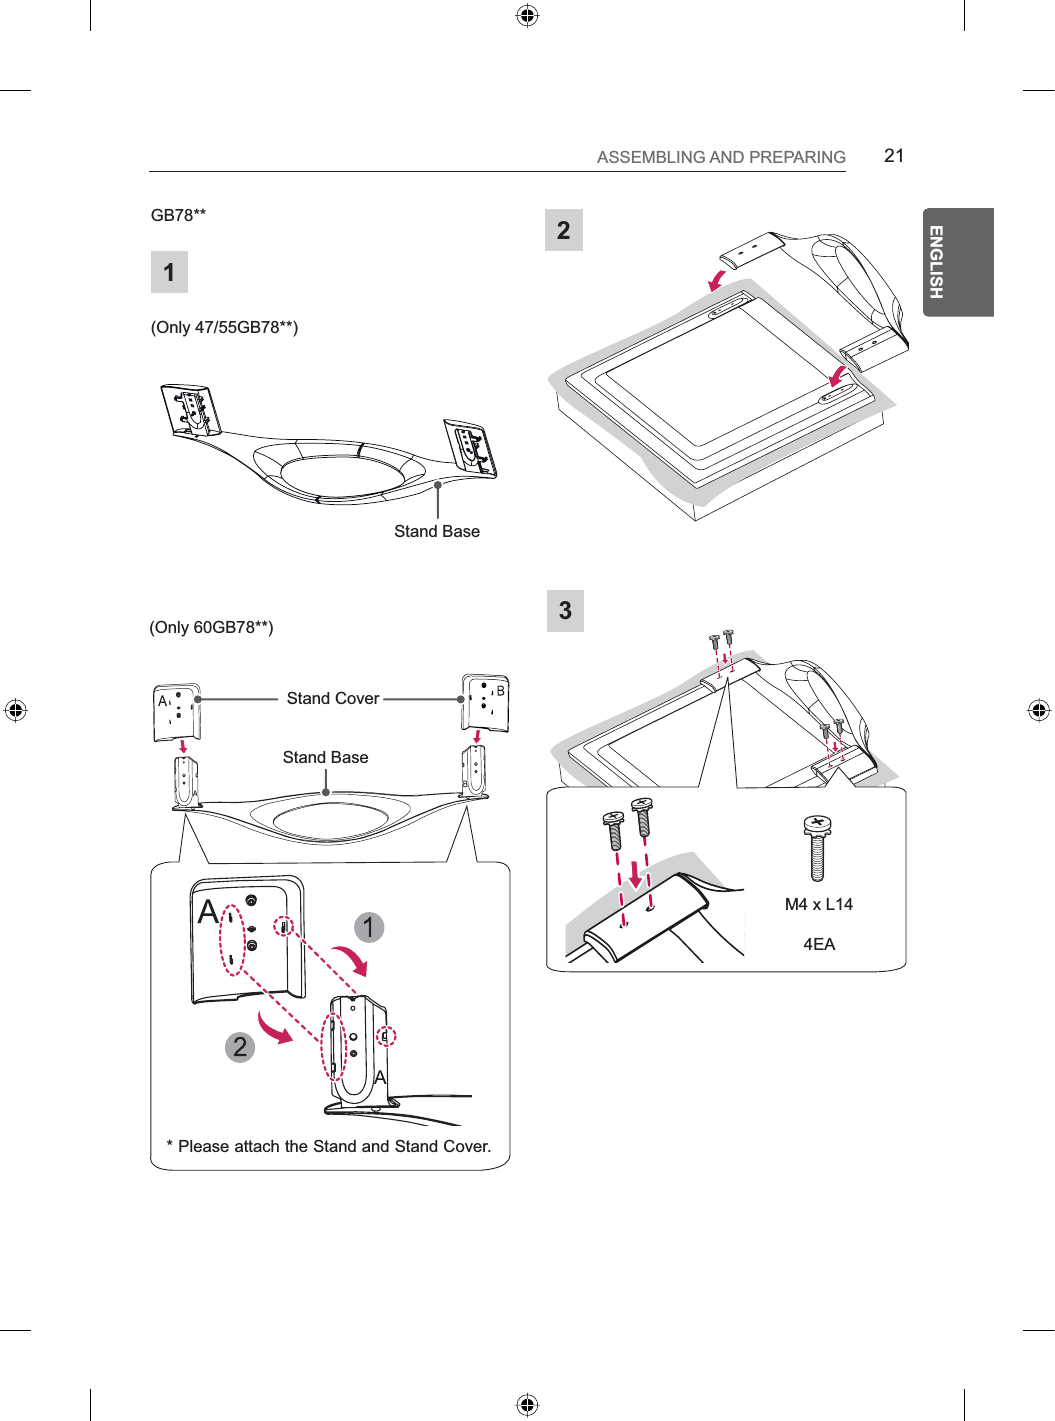
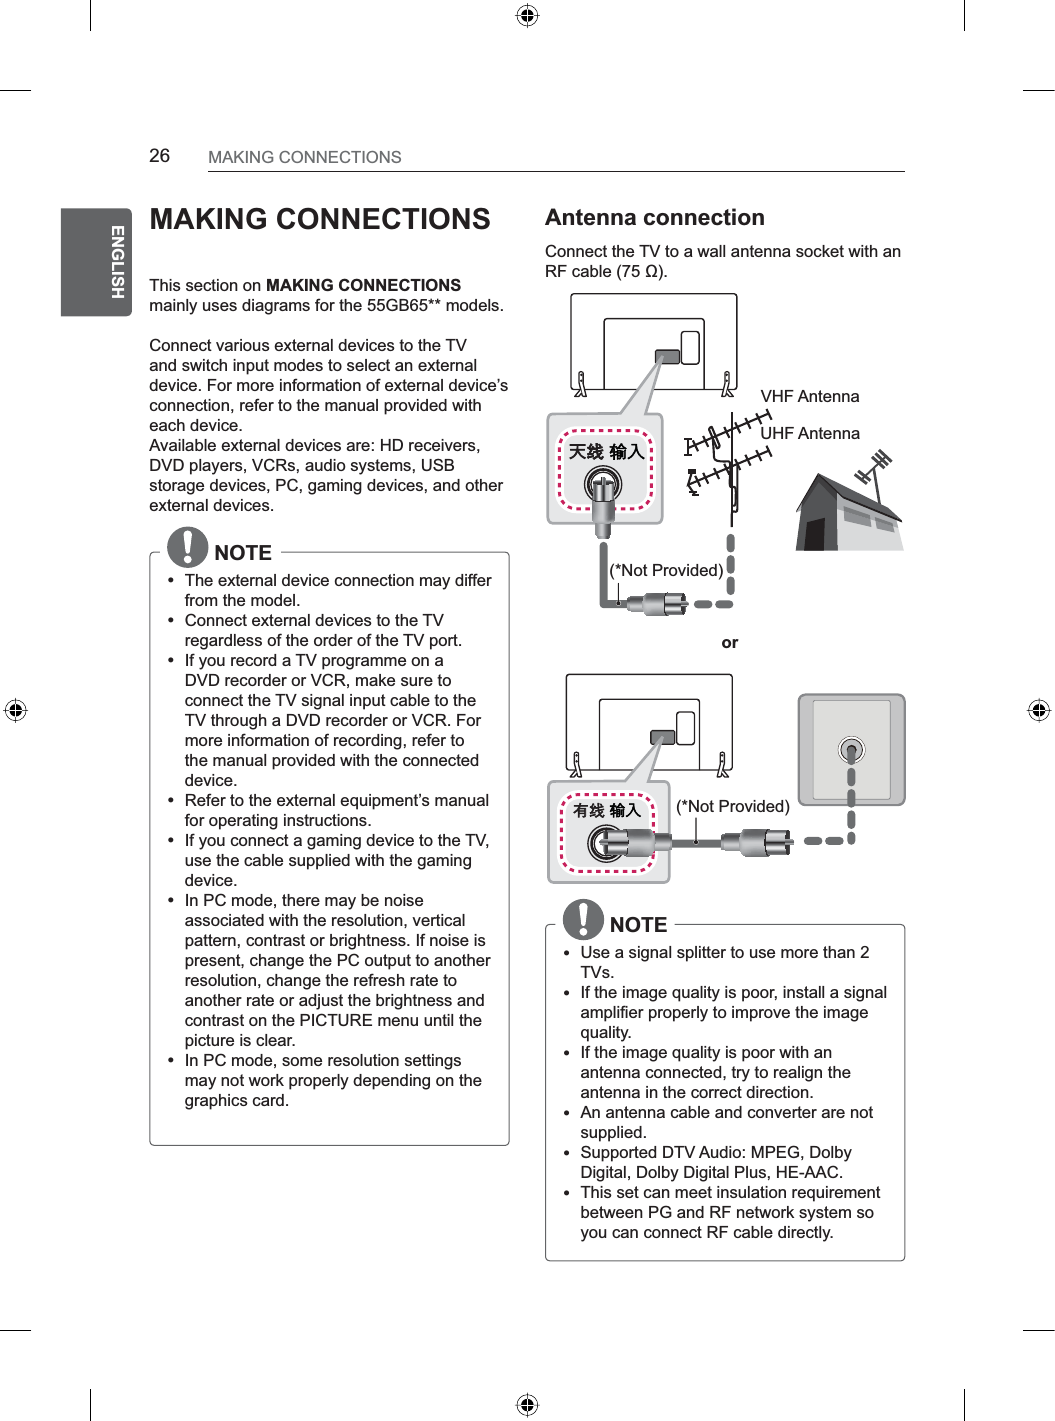
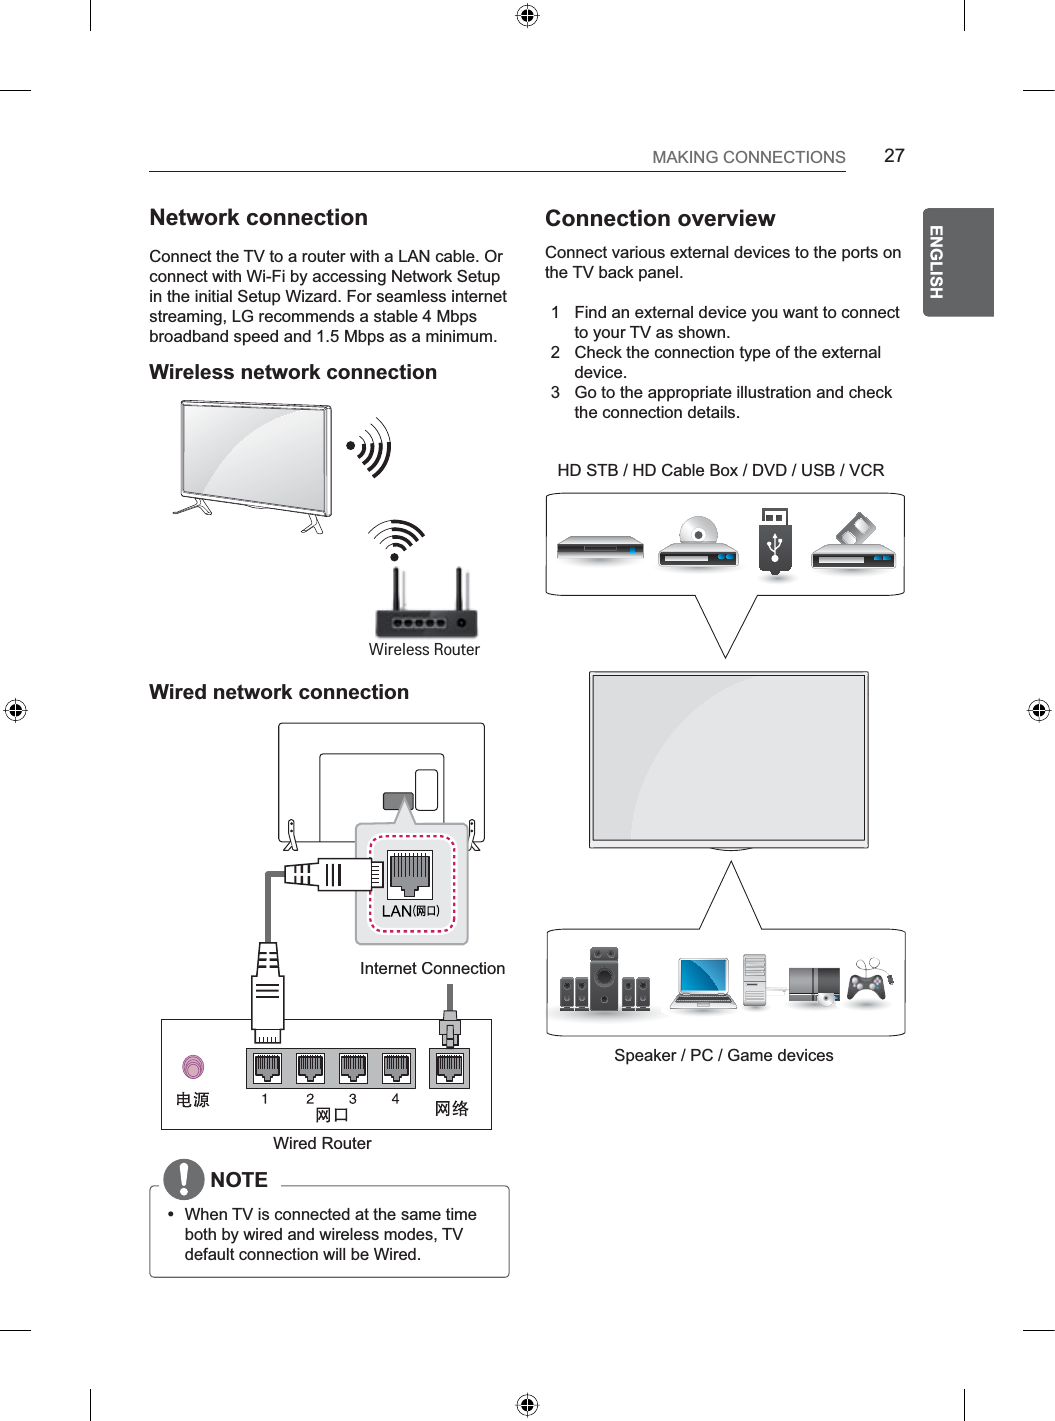
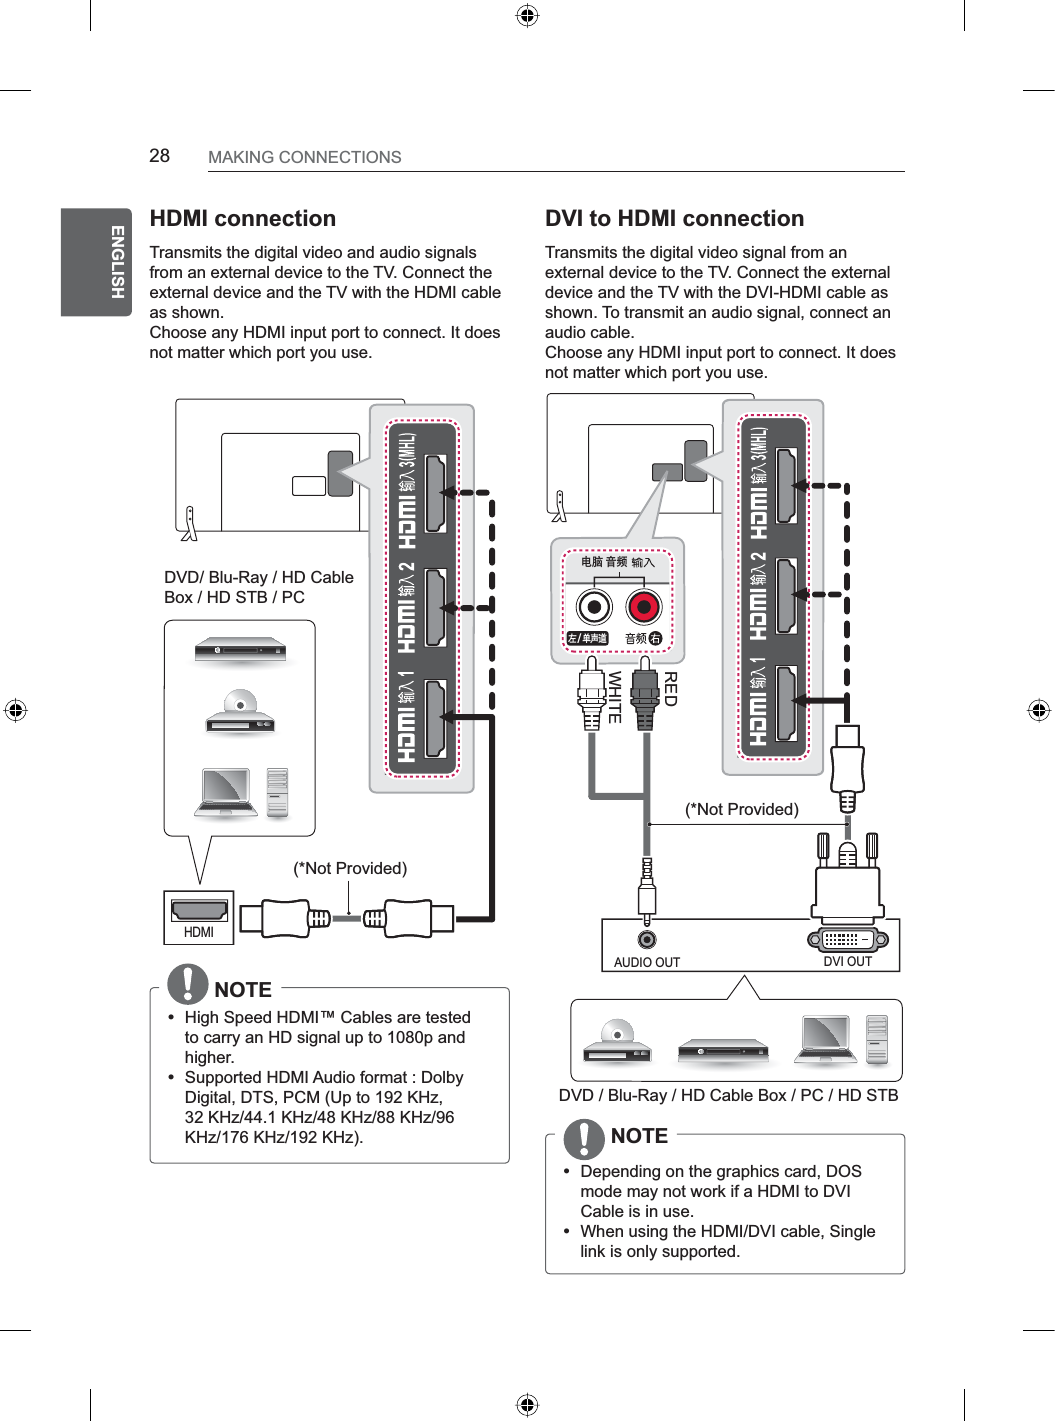
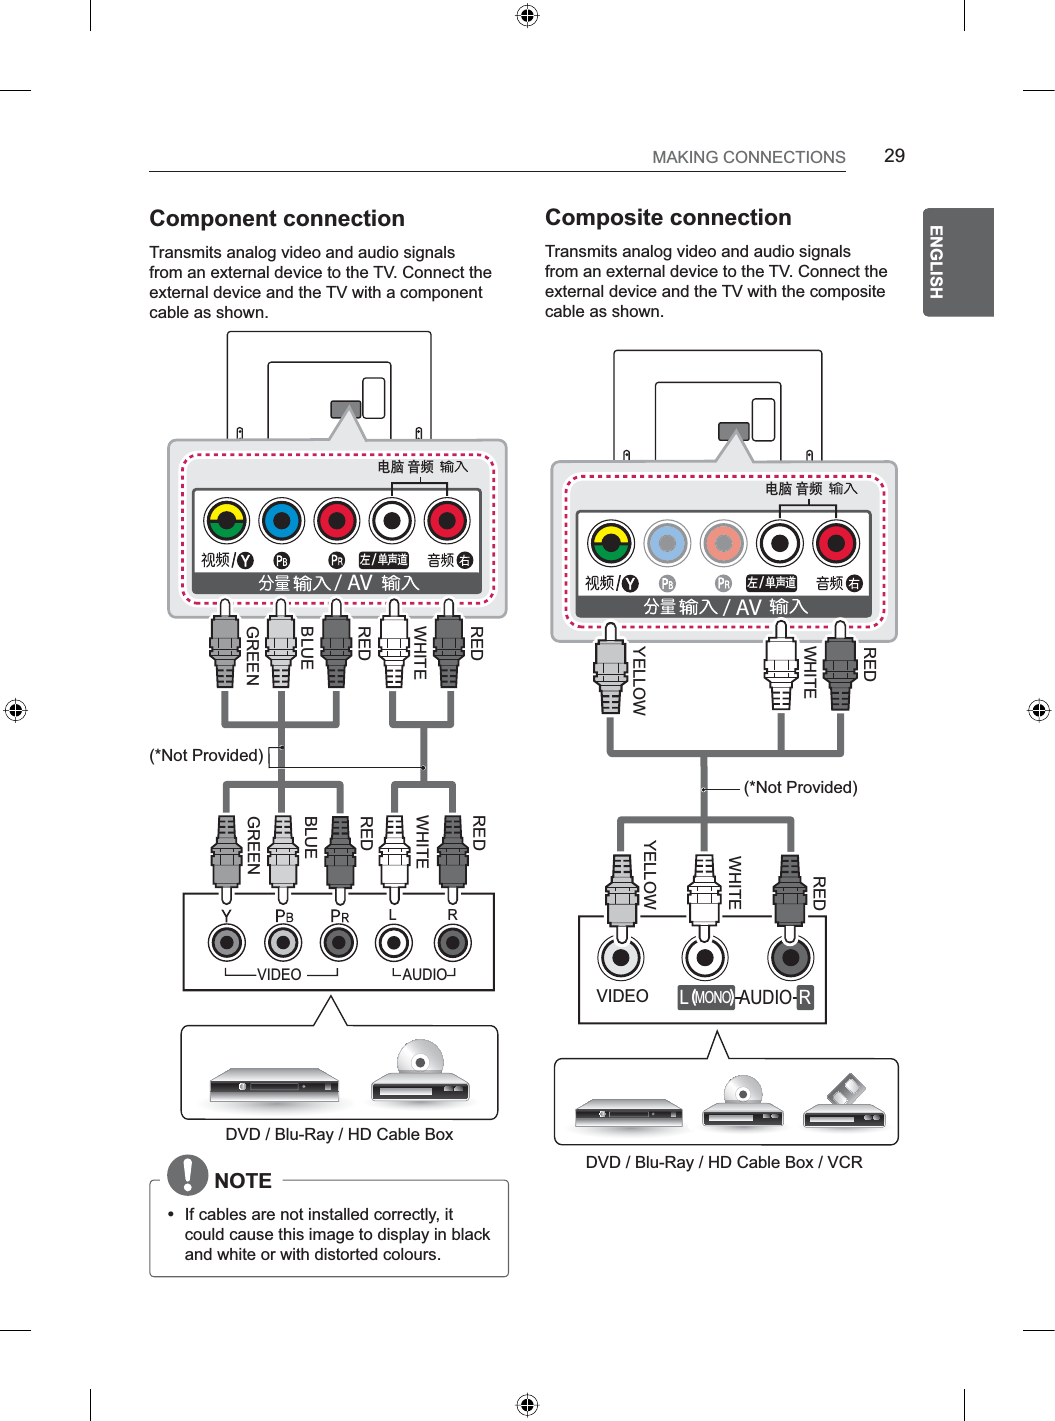
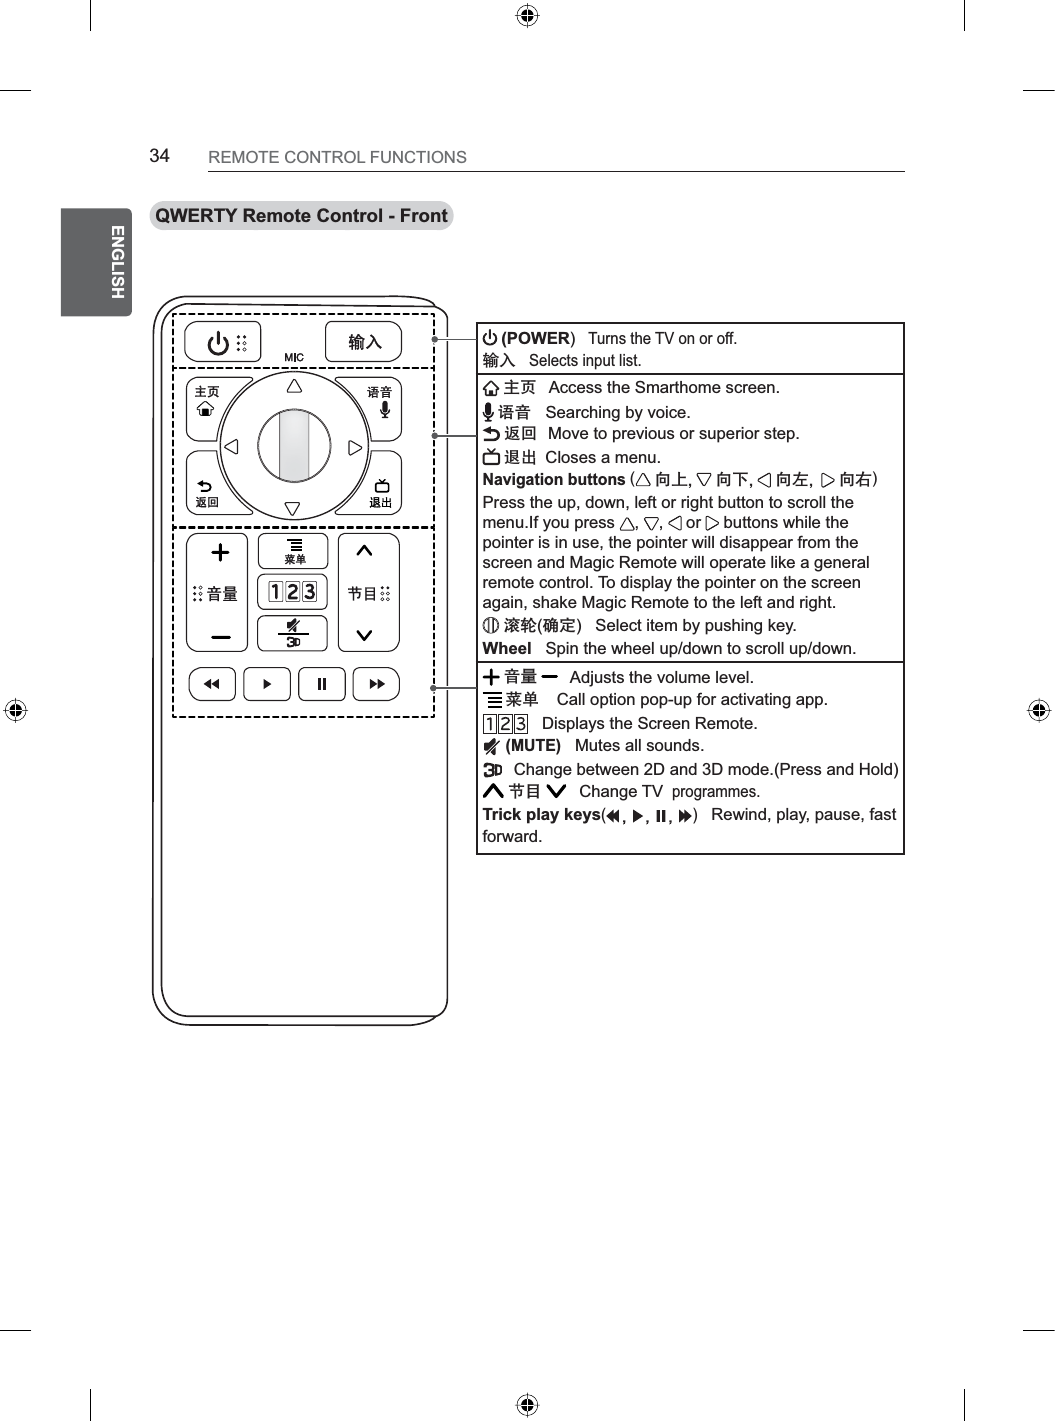
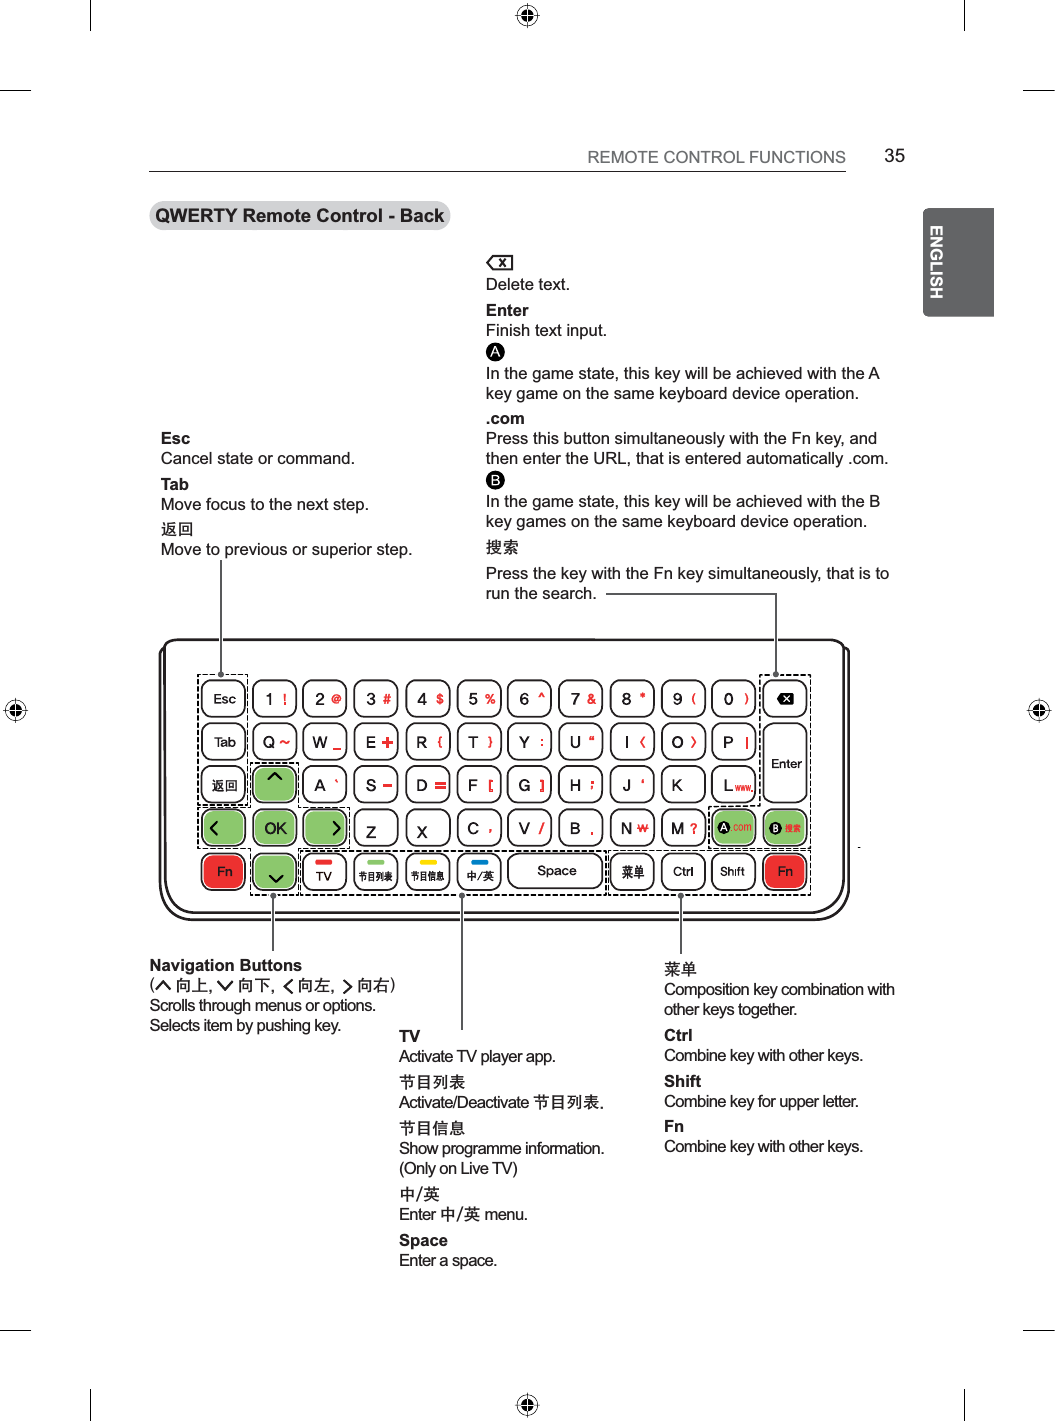
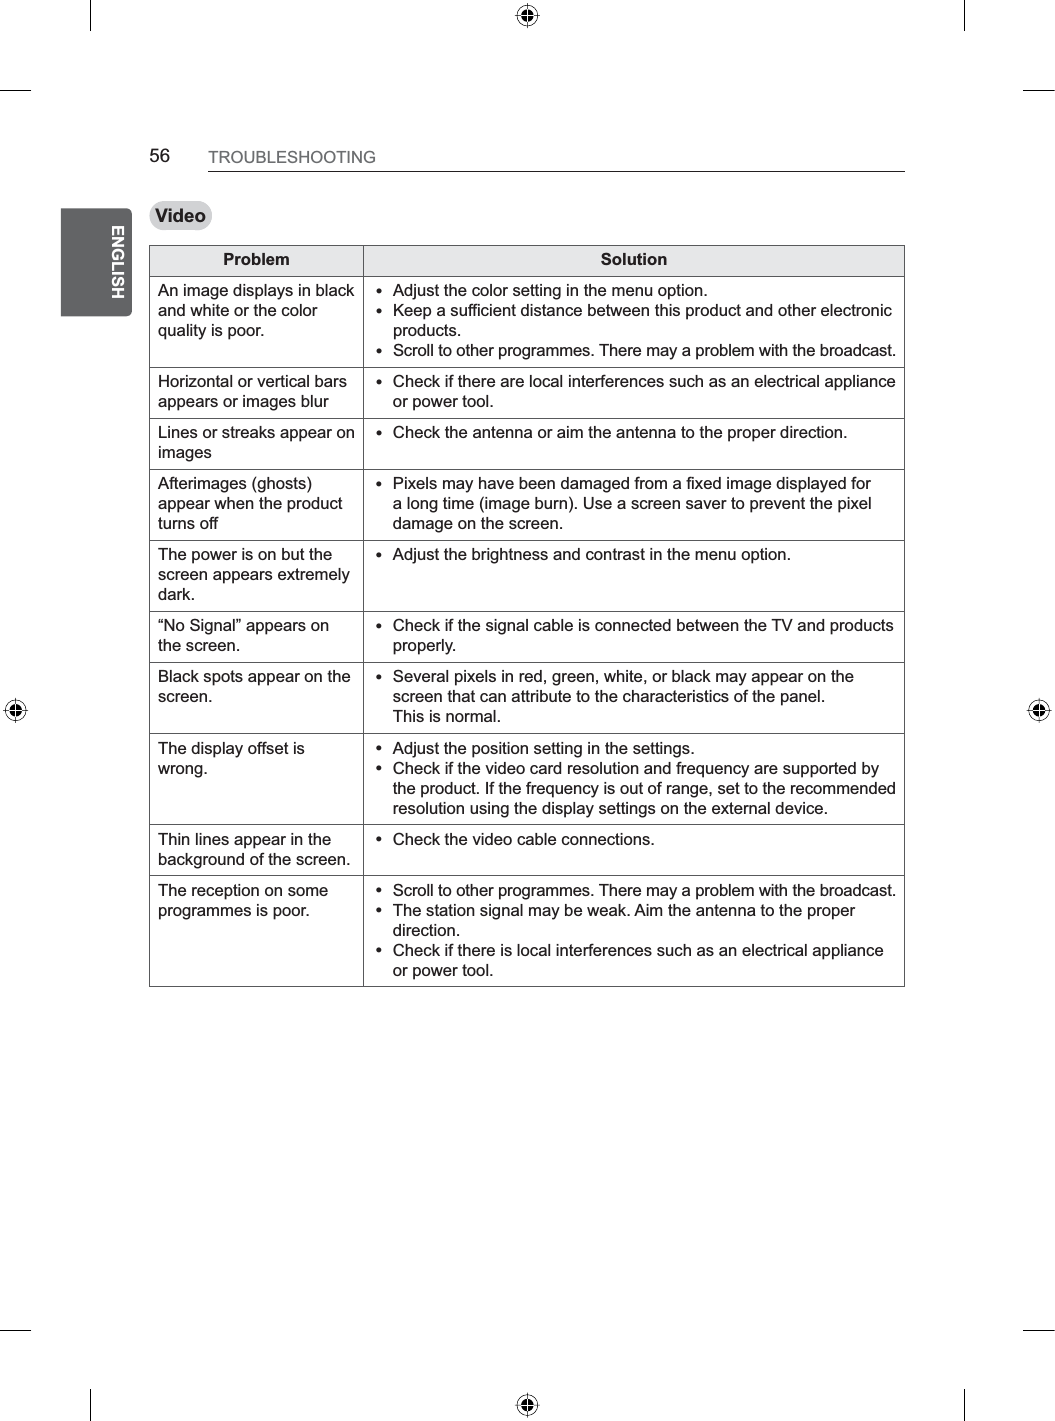
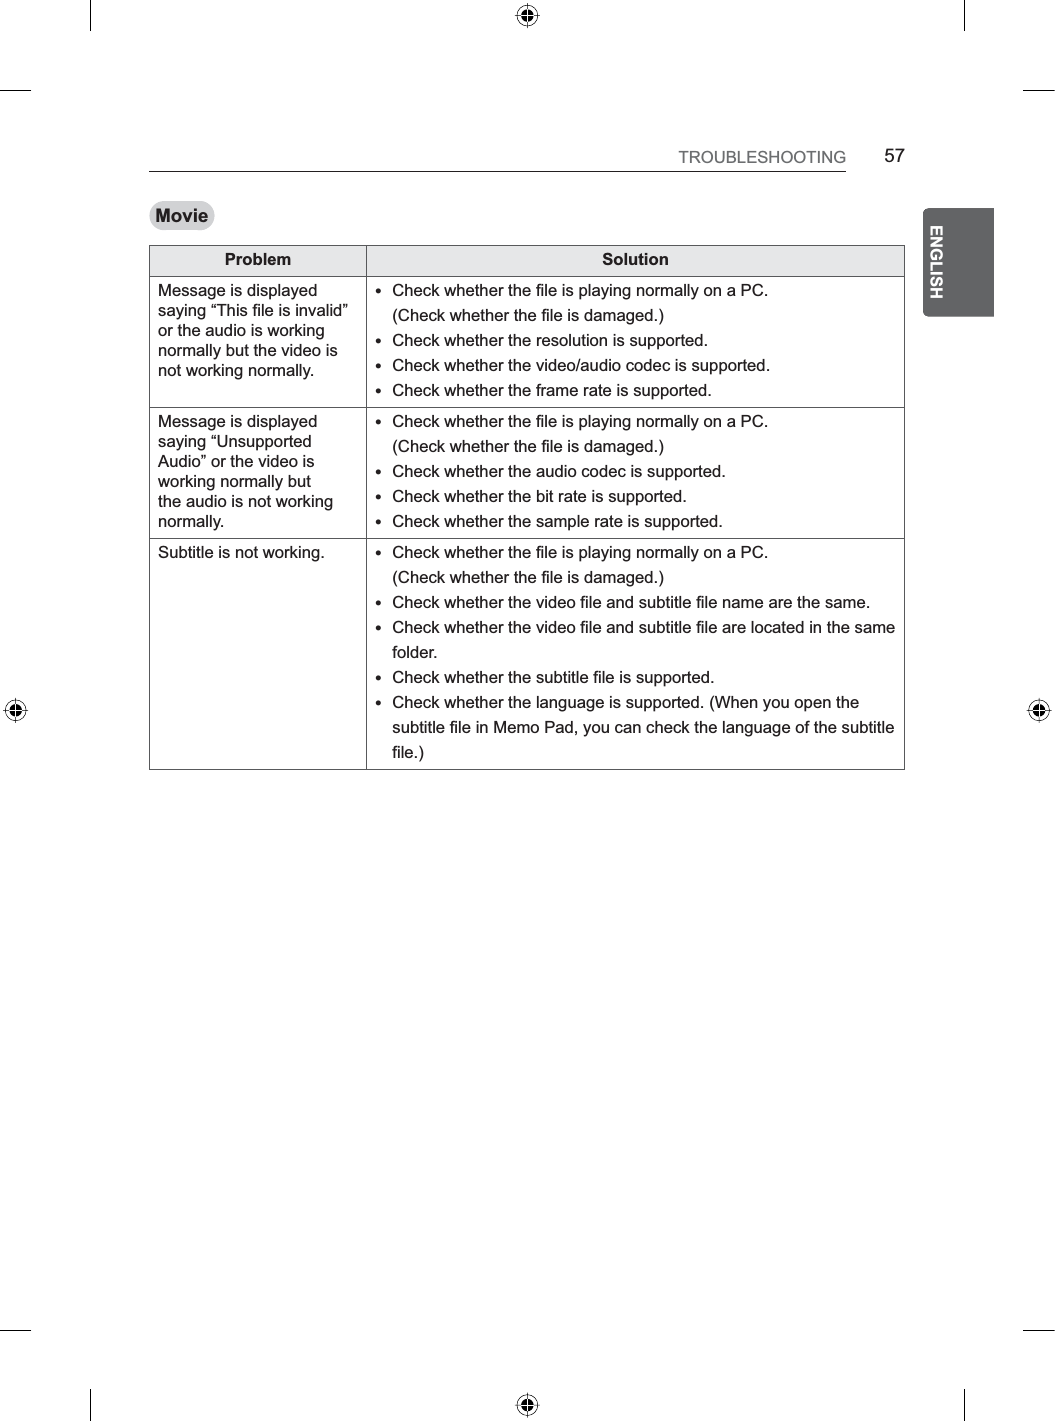
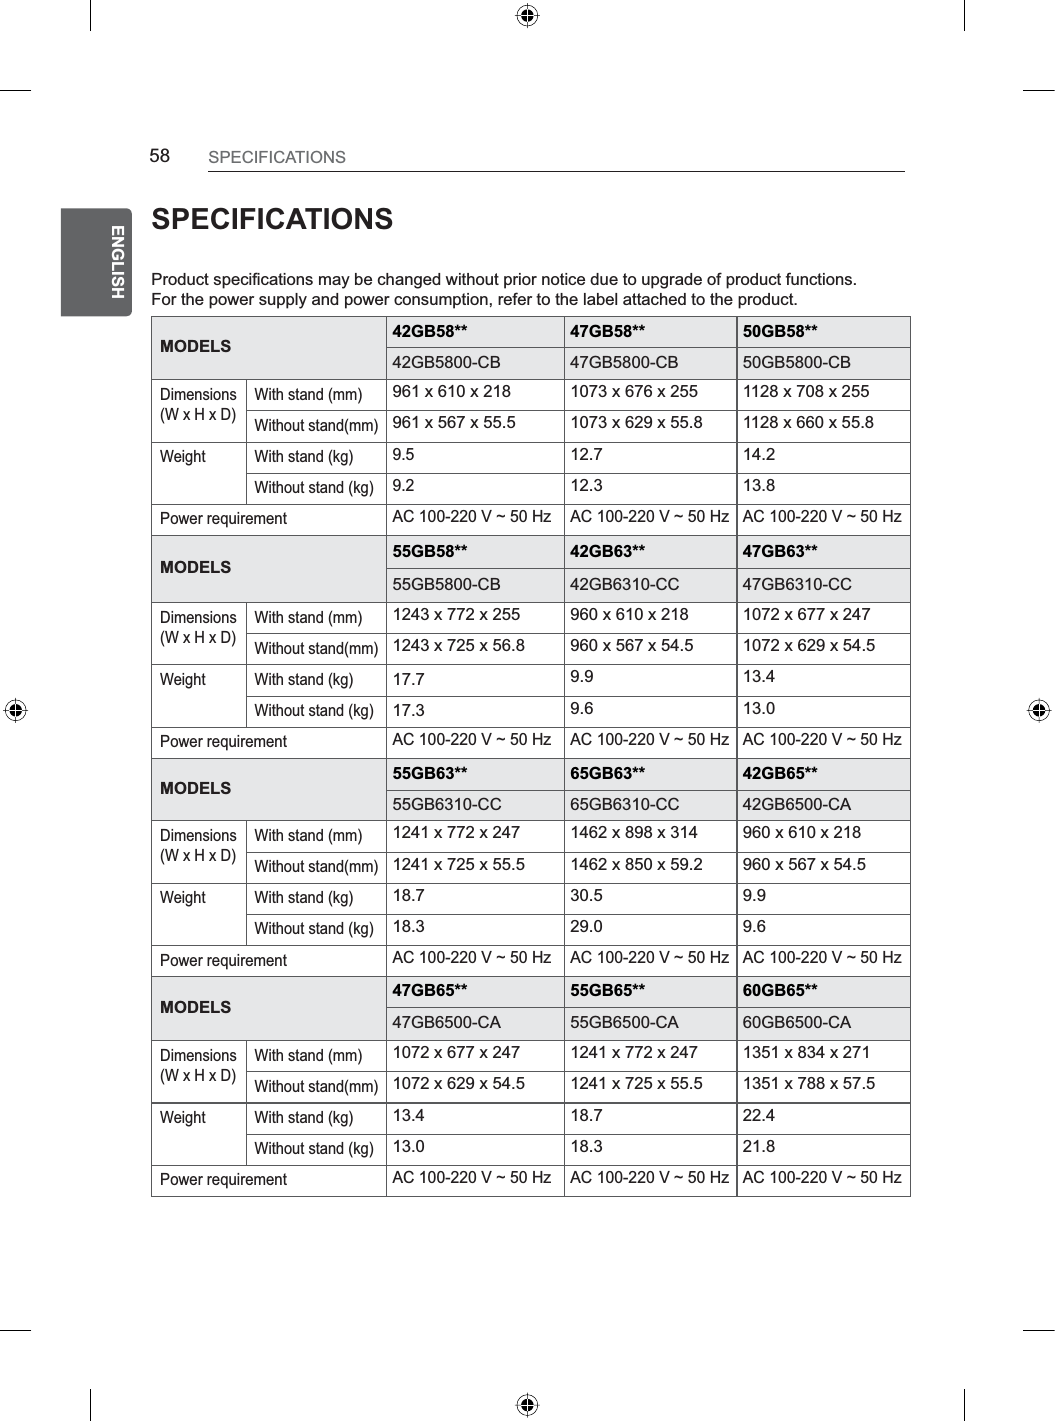
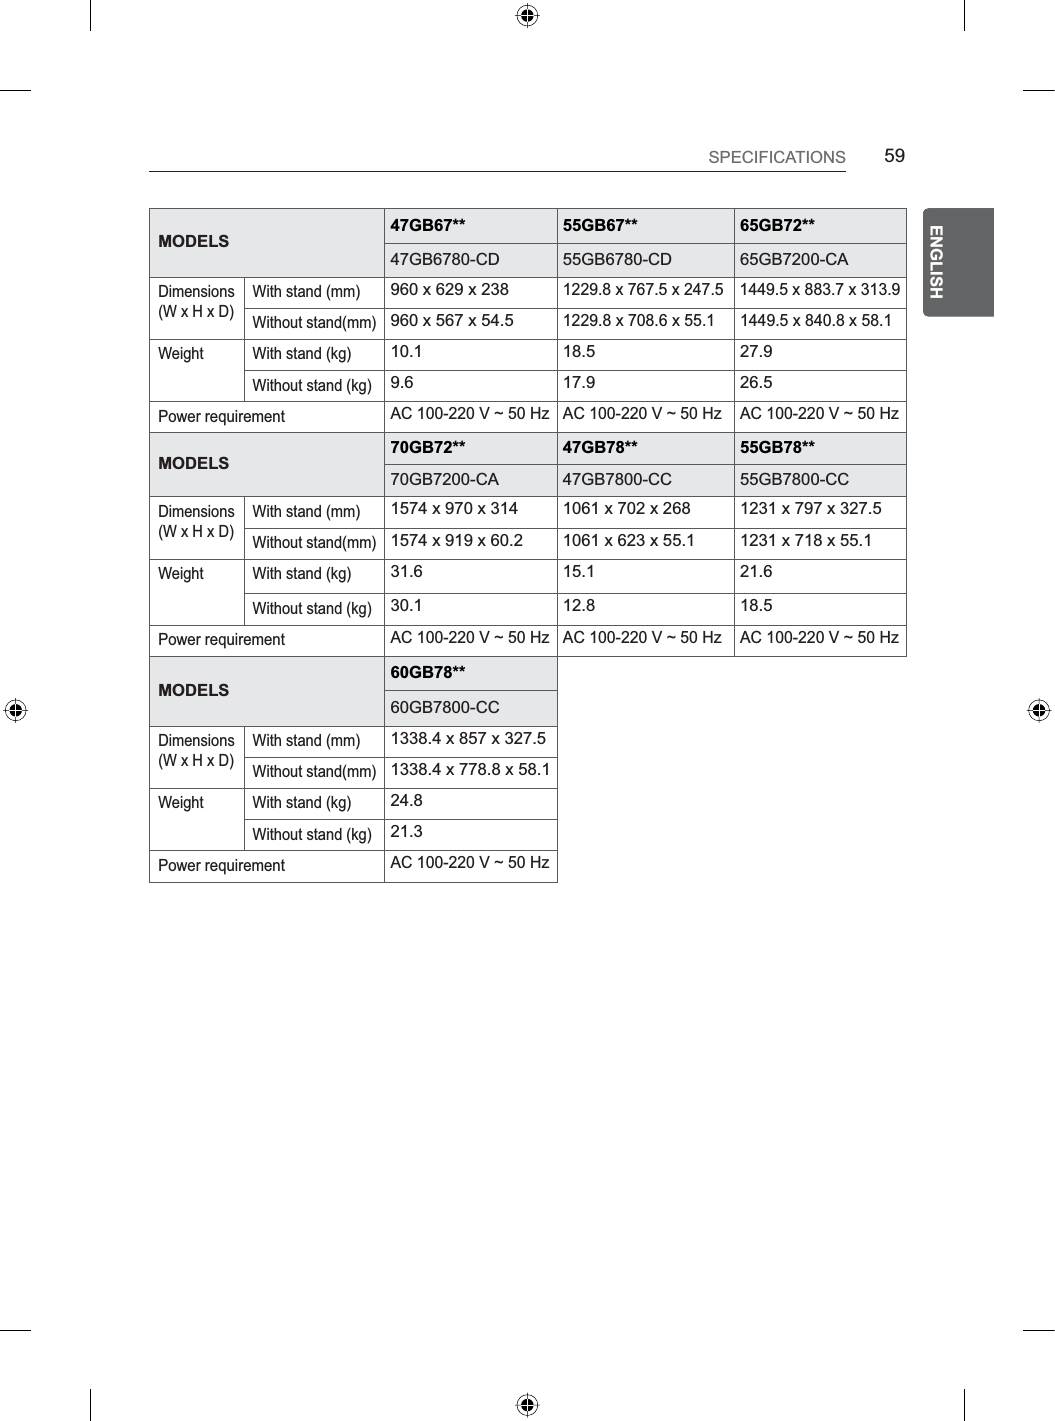
![15ENGENGLISHASSEMBLING AND PREPARING NOTEyThe items supplied with your product may vary depending on the model.yProduct specifications or contents of this manual may be changed without prior notice due to upgrade of product functions.yFor an optimal connection, HDMI cables and USB devices should have bezels less than 10 mm thick and 18 mm width. Use an extension cable that supports USB 2.0 if the USB cable or USB memory stick does not fit into your TV’s USB port.ABAB *A ≤ 10 mm *B ≤ 18 mmHow to use the ferrite core (Only 70GB72**)yUse the ferrite core to reduce the electromagnetic interference in the power cable. Wind the power cable once on the ferrite core. Place the ferrite core close to the TV. [to a wall plug][to the TV][Cross Section of Ferrite Core]](https://usermanual.wiki/LG-Electronics-USA/LG70LY390C/User-Guide-2451248-Page-15.png)