LG Electronics USA LS620 Cellular/PCS CDMA Phone with WLAN and Bluetooth User Manual
LG Electronics MobileComm USA, Inc. Cellular/PCS CDMA Phone with WLAN and Bluetooth Users Manual
UserManual.wiki
>
LG Electronics USA
>
LS620 User Manual
Users Manual
Navigation menu
Upload a User Manual
Namespaces
Wiki Guide
HTML
PDF
Info
Views
User Manual
Discussion / Help
Navigation


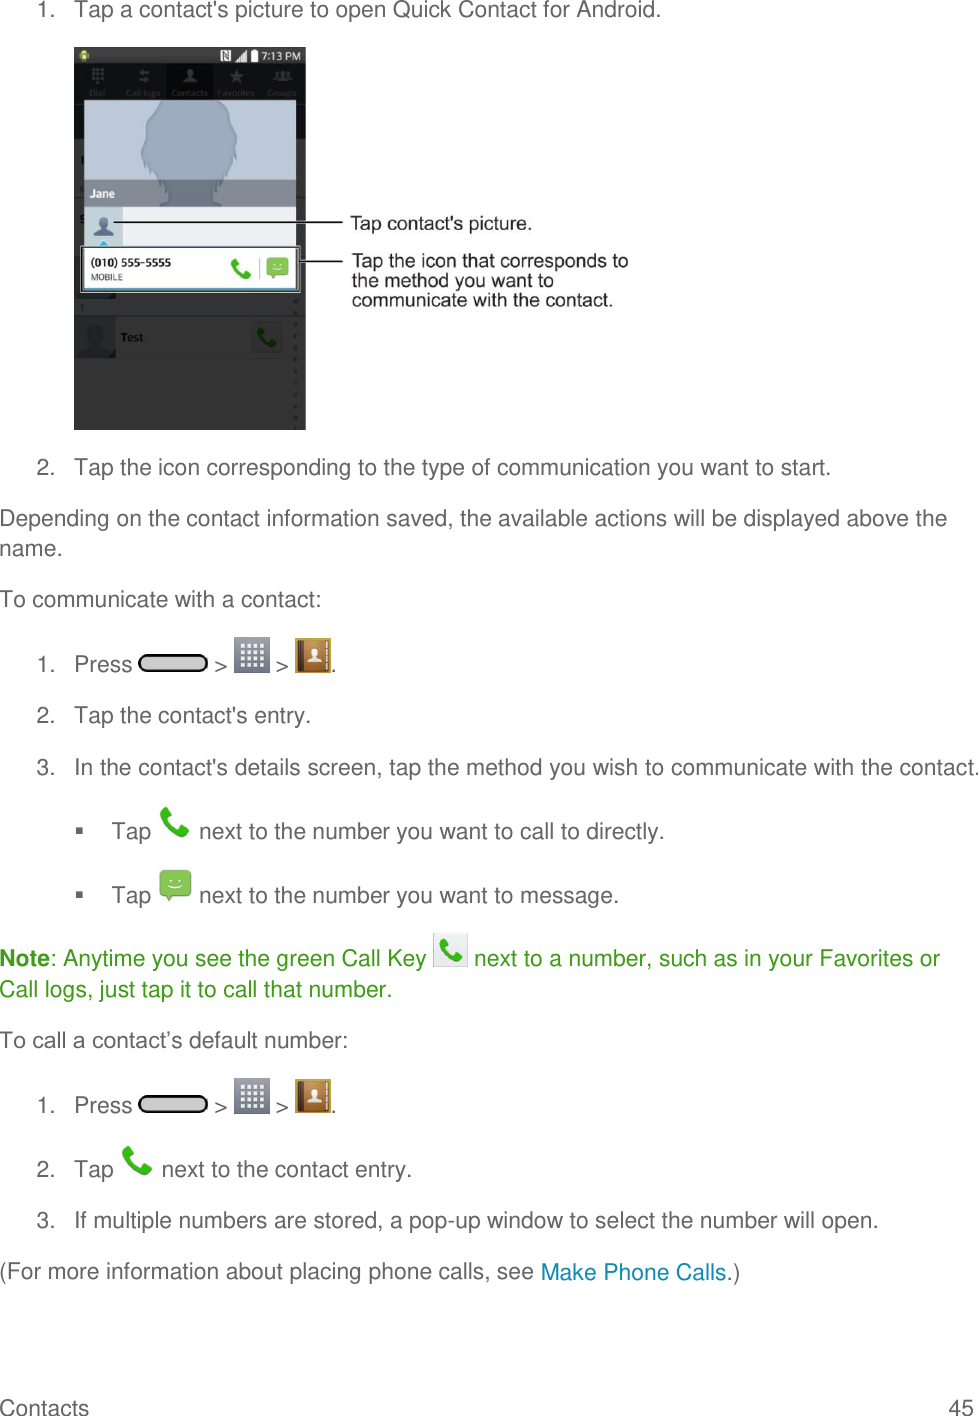

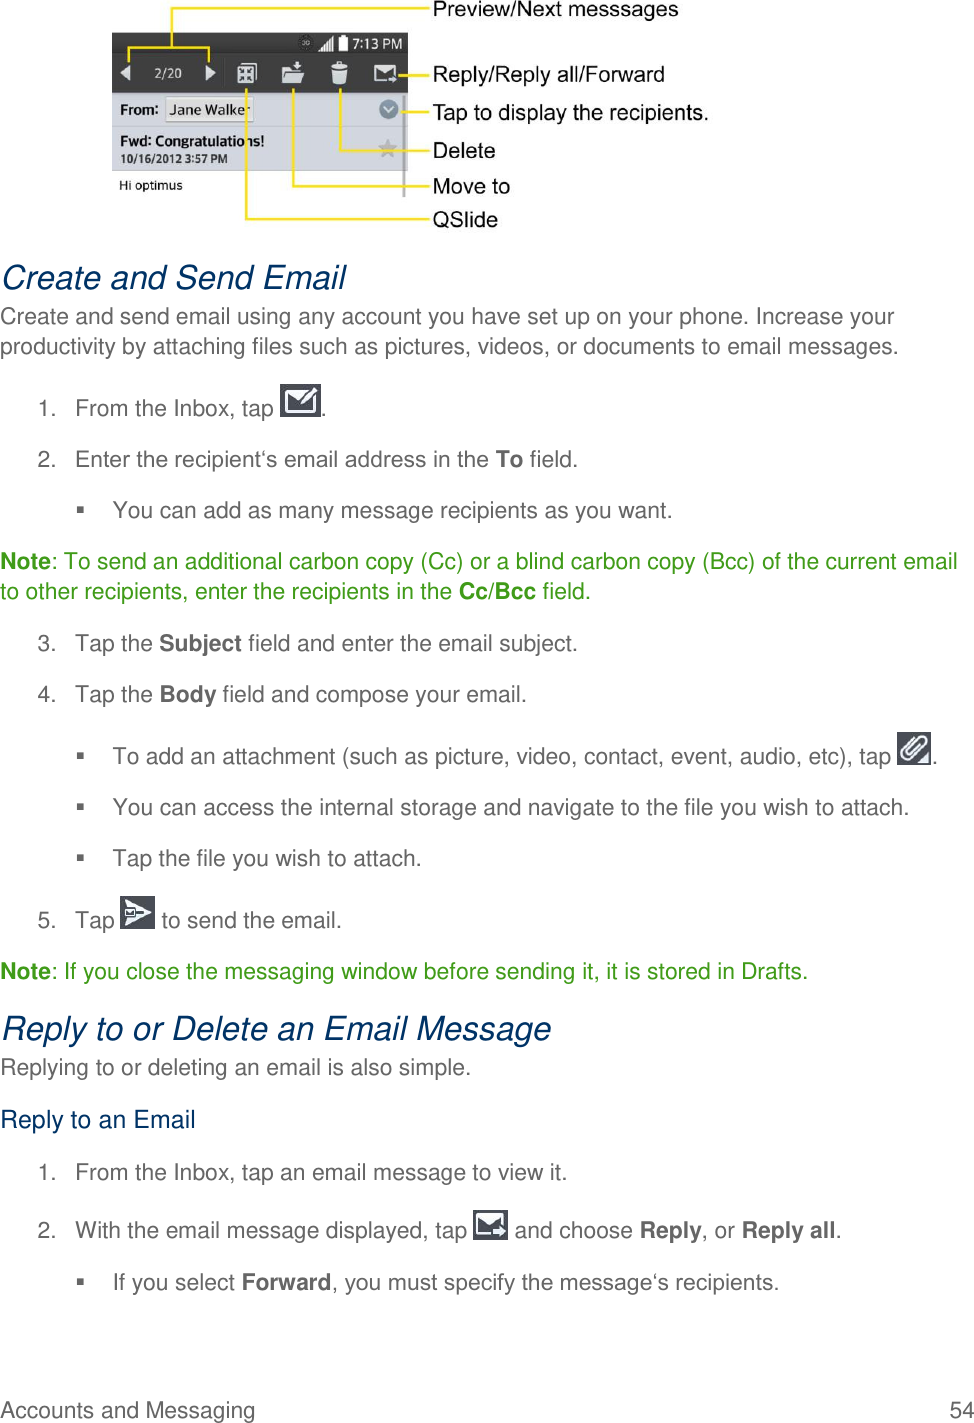


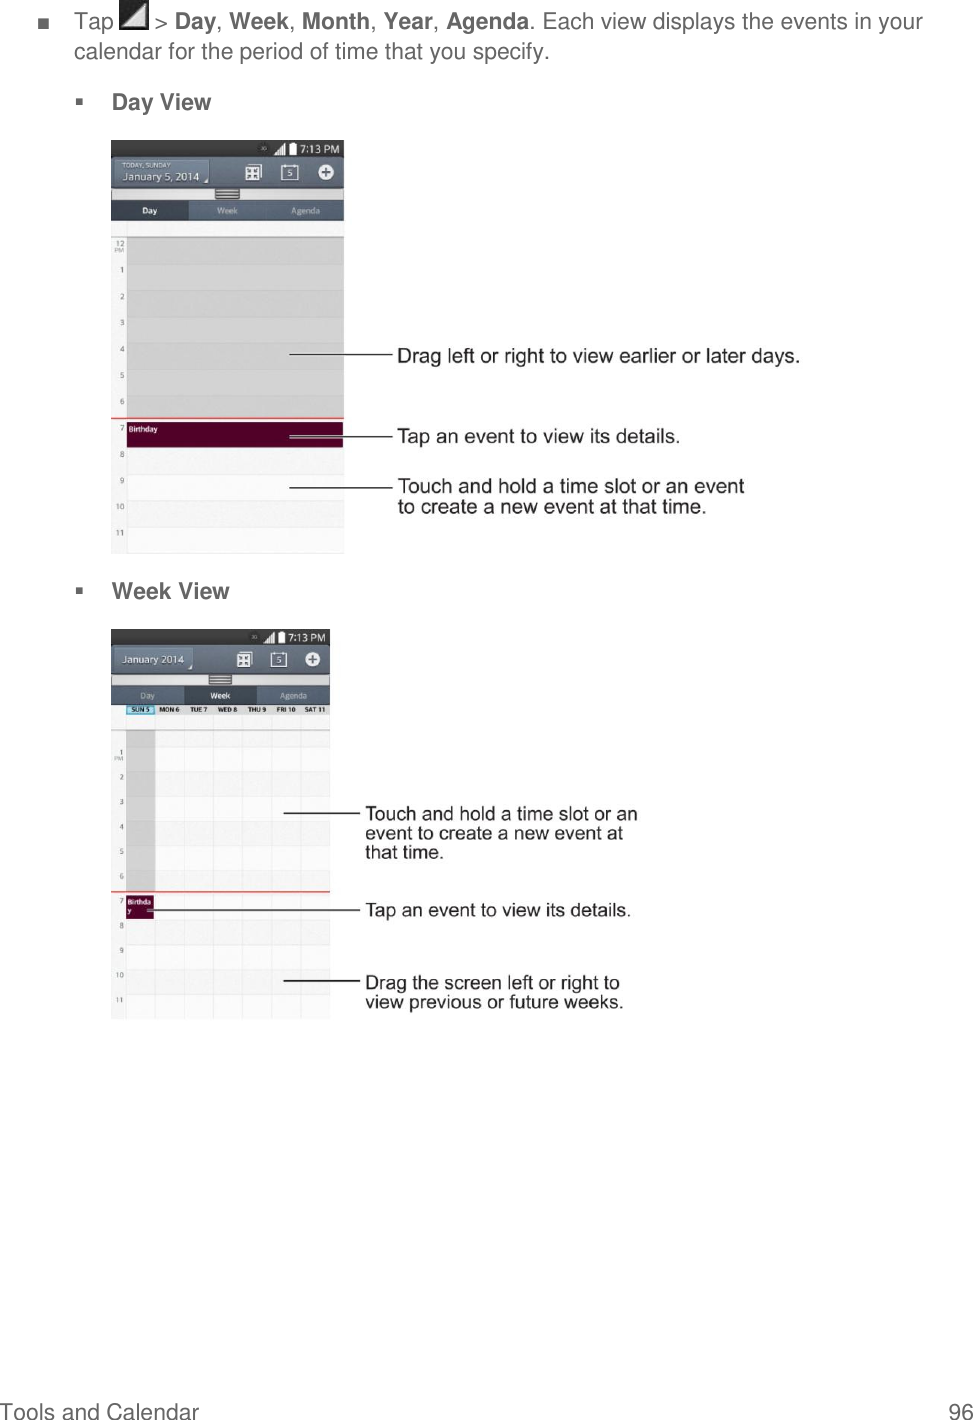
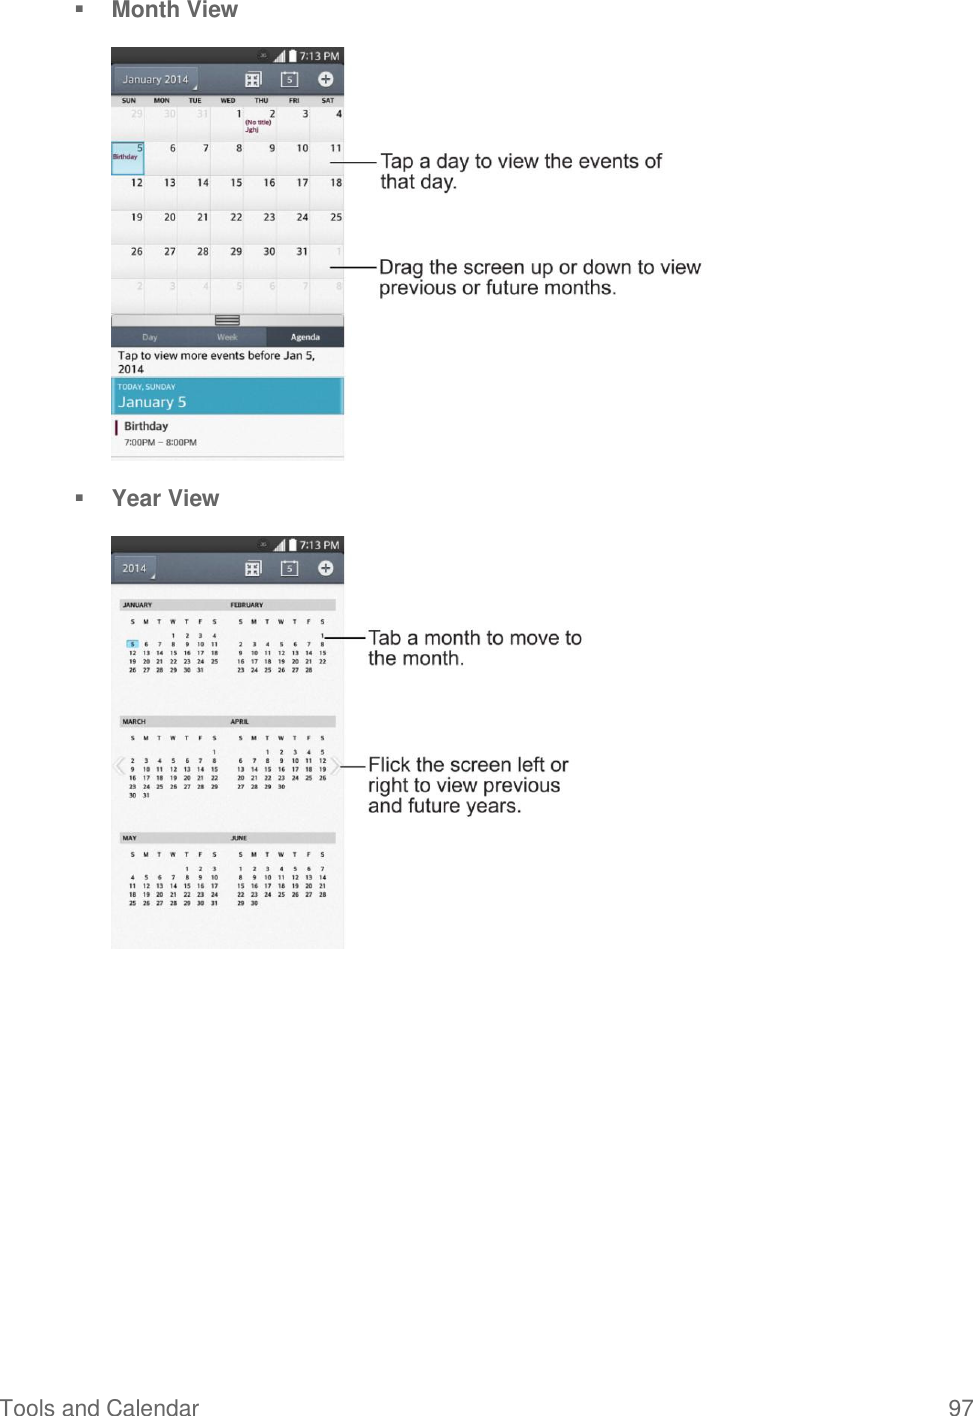
![Tools and Calendar 95 Call [Name or Phone Number] Send Text [Name or Phone Number] Redial [Latest number] Open [App Name] Play Music [Music name] Check [Item] 3. If Voice Command finds a match, it performs the requested action, otherwise, it will display options. Calendar With the Calendar application you can view the events you have scheduled in the coming days, weeks, or months. Open the Calendar ■ Press > > Calendar . If you have created or subscribed to more than one calendar through Google CalendarTM on the web, events from each calendar are displayed in a different color. (For information about which calendars are displayed on your phone, see Display and Synchronize Calendars.) Note: To go to any day in any Calendar view, tap > Go to date. Change Calendar View You can change the calendar view.](https://usermanual.wiki/LG-Electronics-USA/LS620/User-Guide-2242257-Page-106.png)

![IMPORTANT INFORMATION FOR THE LG LS620 157 In the above example, if a hearing aid meets the M2 level rating and the wireless phone meets the M3 level rating, the sum of the two values equal M5. This should provide the hearing aid user with “normal usage‖ while using their hearing aid with the particular wireless phone. ―Normal usage‖ in this context is defined as a signal quality that‘s acceptable for normal operation. The M mark is intended to be synonymous with the U mark. The T mark is intended to be synonymous with the UT mark. The M and T marks are recommended by the Alliance for Telecommunications Industries Solutions (ATIS). The U and UT marks are referenced in Section 20.19 of the FCC Rules. The HAC rating and measurement procedure are described in the American National Standards Institute (ANSI) C63.19 standard. To ensure that the Hearing Aid Compatibility rating for your phone is maintained, secondary transmitters such as Bluetooth and WLAN components must be disabled during a call. For information about hearing aids and digital wireless phones, visit: Wireless Phones and Hearing Aid Accessibility http://www.accesswireless.org/ Gallaudet University, RERC http://tap.gallaudet.edu/Voice/ FCC Hearing Aid Compatibility and Volume Control http://www.fcc.gov/cgb/dro/hearing.html The Hearing Aid Compatibility FCC Order http://hraunfoss.fcc.gov/edocs_public/attachmatch/FCC-03-168A1.pdf Hearing Loss Association of America [HLAA] http://hearingloss.org/content/telephones-andmobile-devices Note: HAC statement This phone has been tested and rated for use with hearing aids for some of the wireless technologies that it uses. However, there may be some newer wireless technologies used in this phone that have not been tested yet for use with hearing aids. It is important to try the different features of this phone thoroughly and in different locations, using your hearing aid or cochlear implant, to determine if you hear any interfering noise. Consult your service provider or the manufacturer of this phone for information on hearing aid compatibility. If you have questions about return or exchange policies, consult your service provider or phone retailer.](https://usermanual.wiki/LG-Electronics-USA/LS620/User-Guide-2242257-Page-168.png)