LG Electronics USA LS995 Multi-Band CDMA/WCDMA/GSM/EDGE/LTE Phone with WLAN, Bluetooth and RFID User Manual
LG Electronics MobileComm USA, Inc. Multi-Band CDMA/WCDMA/GSM/EDGE/LTE Phone with WLAN, Bluetooth and RFID Users Manual
UserManual.wiki
>
LG Electronics USA
>
LS995 User Manual
Users Manual
Navigation menu
Upload a User Manual
Namespaces
Wiki Guide
HTML
PDF
Info
Views
User Manual
Discussion / Help
Navigation


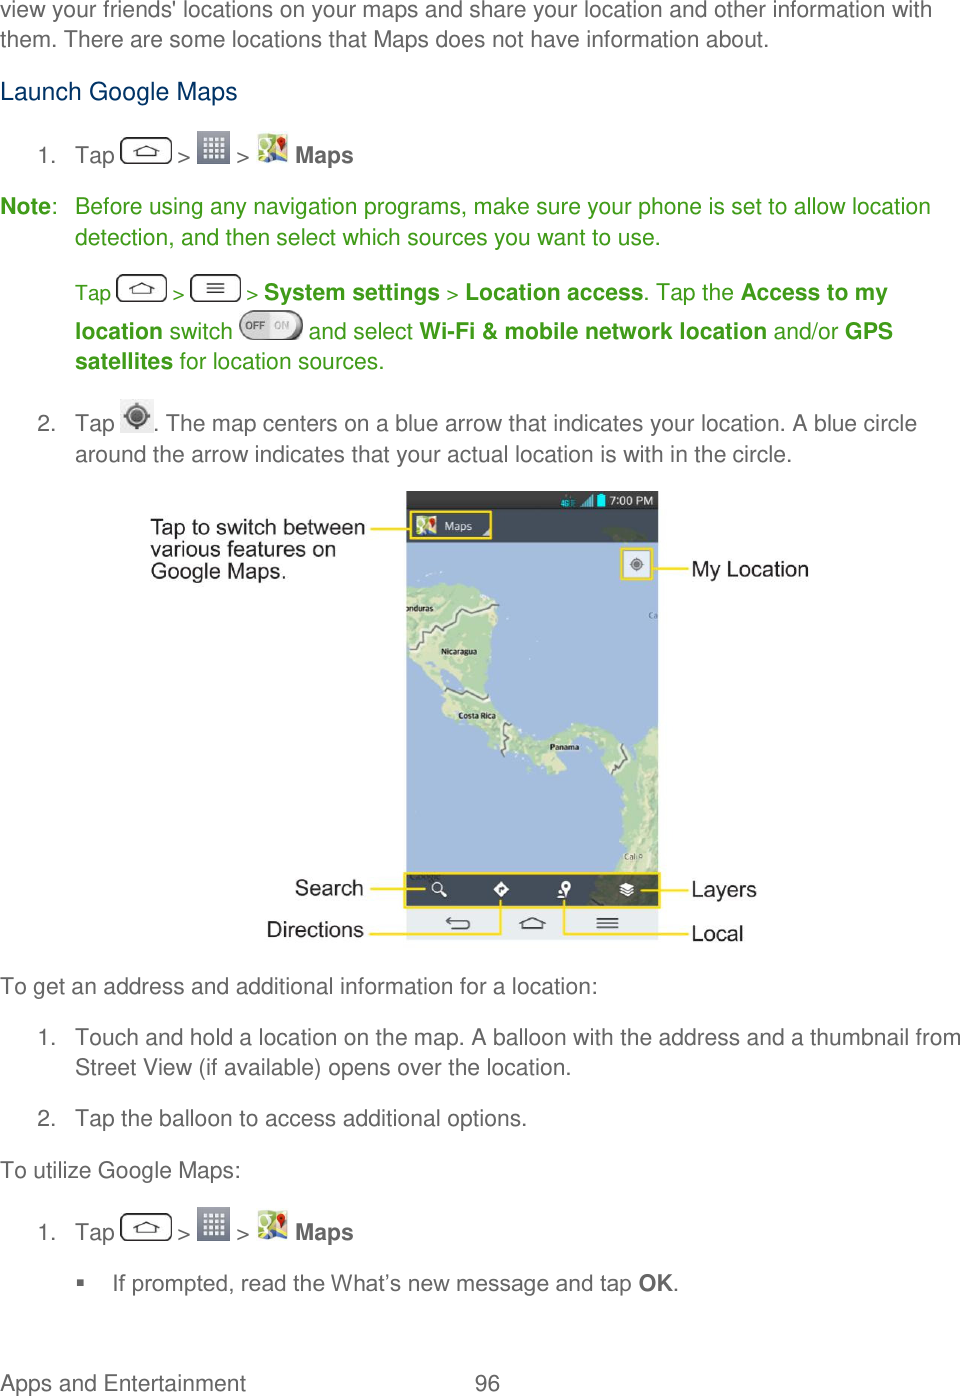
![Apps and Entertainment 93 Note: Once you download and install one of the Sprint ID packs, various Sprint applications will appear on your Applications screen. When you switch from the Sprint pack to another ID pack, or choose a new ID pack, the Sprint applications will remain installed and visible on your Applications screen. To download and install Sprint apps: 1. Tap > > [application name]. The application will then be downloaded. 2. Follow the instructions to customize your application (such as selecting a favorite team or driver) or tap to explore your options. Note: Important Privacy Message – Sprint‘s policies often do not apply to third-party applications. Third-party applications may access your personal information or require Sprint to disclose your customer information to the third-party application provider. To find out how a third-party application will collect, access, use, or disclose your personal information, check the application provider‘s policies, which can usually be found on their website. If you aren‘t comfortable with the third-party application‘s policies, don‘t use the application. Music You can play audio files that are stored in your phone's internal storage. Copy audio files from your computer onto your phone before you open the Music application. The Music Player application supports audio files in numerous formats. Google Play Music Google Play Music lets you browse, shop, and play back songs purchased from the Google Play Store app, as well as songs you have loaded from your own music library. The music you choose is automatically stored in your Google Music library and instantly ready to play or download. 1. Tap > > Play Music. Note: Learn more about Google Play Music at music.google.com. Music Player You can play music and set as ringtone. 1. Tap > > Music. 2. You can select music tracks from the following tabs: Songs: To browse through your downloaded music library. Albums: To display your music library sorted by album.](https://usermanual.wiki/LG-Electronics-USA/LS995/User-Guide-2119451-Page-106.png)


![Important Information for the LS995 215 Other Important Terms Subject to federal law or unless the Agreement specifically provides otherwise, this Agreement is governed solely by the laws of the state encompassing the billing address of the Device, without regard to the conflicts of law rules of that state. If either of us waives or doesn‘t enforce a requirement under this Agreement in an instance, we don‘t waive our right to later enforce that requirement. Except as the Agreement specifically provides otherwise, if any part of the Agreement is held invalid or unenforceable, the rest of this Agreement remains in full force and effect. This Agreement isn‘t for the benefit of any third party except our corporate parents, affiliates, subsidiaries, agents, and predecessors and successors in interest. You can‘t assign the Agreement or any of your rights or duties under it, unless we agree to the assignment. We can assign the Agreement without notice. You cannot in any manner resell the Services to another party. The Agreement and the documents it incorporates make up the entire agreement between us and replaces all prior written or spoken agreements—you can‘t rely on any contradictory documents or statements by sales or service representatives. The rights, obligations, and commitments in the Agreement that—by their nature—would logically continue beyond the termination of Services (for example, those relating to billing, payment, 911, dispute resolution, no class action, no jury trial) survive termination of Services. [End General Terms and Conditions of Service] Important Message from Sprint Important Information about this device’s ―open‖ architecture. This device is an ―open‖ device. What that means is that you are free to use it to access the Internet as you see fit. You may go to websites you like and you may download or use applications or software that you choose. Please take care to visit only trusted websites and download applications only from trusted entities. Sprint has no control over websites you visit or applications and software you download, and Sprint‘s policies do not apply to those websites, applications or software. The websites you visit may place ―cookies‖ or other files on your device when you visit them. Downloaded applications or software may access, use or share information on your device, like your contacts or your location. Although Sprint is excited to allow our customers to make their own choices about the Internet sites you wish to visit or the applications or software you‘d like to use, we do want to remind you that Sprint is not able to help you troubleshoot issues connected with your use of non-Sprint applications or software (such as the ones you may select and download to your device). Sprint also will not be able to provide you credits for applications or software that you download from sources other than Sprint. And, Sprint is not liable for the websites you visit or anything you download or cause to be downloaded to your device. Damage related to websites visited or downloads to your device may not be covered by Sprint‘s Service and Repair policy, or your device insurance policy. For more information about Sprint‘s policies, products or services, please visit us at sprint.com.](https://usermanual.wiki/LG-Electronics-USA/LS995/User-Guide-2119451-Page-228.png)