LG Electronics USA LSM2150HU LCD Monitor User Manual Mx02C ENG1
LG Electronics USA LCD Monitor Mx02C ENG1
UserManual.wiki
>
LG Electronics USA
>
LSM2150HU User Manual
LSM2150HU user manual Version 2
Navigation menu
Upload a User Manual
Namespaces
Wiki Guide
HTML
PDF
Info
Views
User Manual
Discussion / Help
Navigation
![A13Connecting to External DevicesConnect the HDMI cable as shown in the below figure and then connect the powercord. When watching HDMI from the DVD/Set-top BoxSelect an input signal.Press the input source button on the remote control to select the input signal. Or, press the INPUT button at the top side of the product.2.1.HDMI OUTPUTHDMIDVI OUTPUTAUDIORLAUDIO IN(RGB/DVI)HDMI[Rear side of the Product][Rear side of the Product][Set-top Box/DVD][Set-top Box/DVD]HDMI cable(not included)HDMI to DVI cable(not included)RCA Stereo cable(not included)• Select HDMI• HDMI Input does not support PC mode.If it is connected PC,the screen may not be displayed properly.NoteInput VIDEO1VIDEO2RGB PCDVIHDMIOKEach time you press the Input button it will change to VIDEO1 VIDEO2 RGB PC DVI HDMI.If nothing is inputted for several seconds the screen will automatically move to the selected menu.](https://usermanual.wiki/LG-Electronics-USA/LSM2150HU/User-Guide-1173136-Page-15.png)
![A17RETURNHow to adjust the OSD (On Screen Display) screenOK OK OK OK OK OK• Use the remote control to adjust the OSD screen.How to adjust the screen automaticallyPress the OK button (OK button on a remote Control) twice in the PC analog signal. Then optimal screen settings will be selected that fit into the current mode. If adjustment is not satisfactory, you can adjust the screen manually.Press the MENU Button, then the main menu of the OSD appears.To access a control, use the Buttons. When the icon you want becomes highlighted, press the OK Button.Use the Buttons to adjust the item to the desired level.Accept the changes by pressing the OK Button.Exit the OSD by pressing the RETURN Button.123456Pops upthe menuscreenMove whereyou want toadjustMove whereyou want toadjustSelect amenu iconSelect amenu icon Adjust the status SaveadjustmentReturn to last step.Adjusting the ScreenAuto in progressFor opimal display changeresolution to 1360 X 768Auto in progressFor opimal display changeresolution to 1920 X 1080[For PC Analog signal]LSM1850 LSM2150](https://usermanual.wiki/LG-Electronics-USA/LSM2150HU/User-Guide-1173136-Page-19.png)
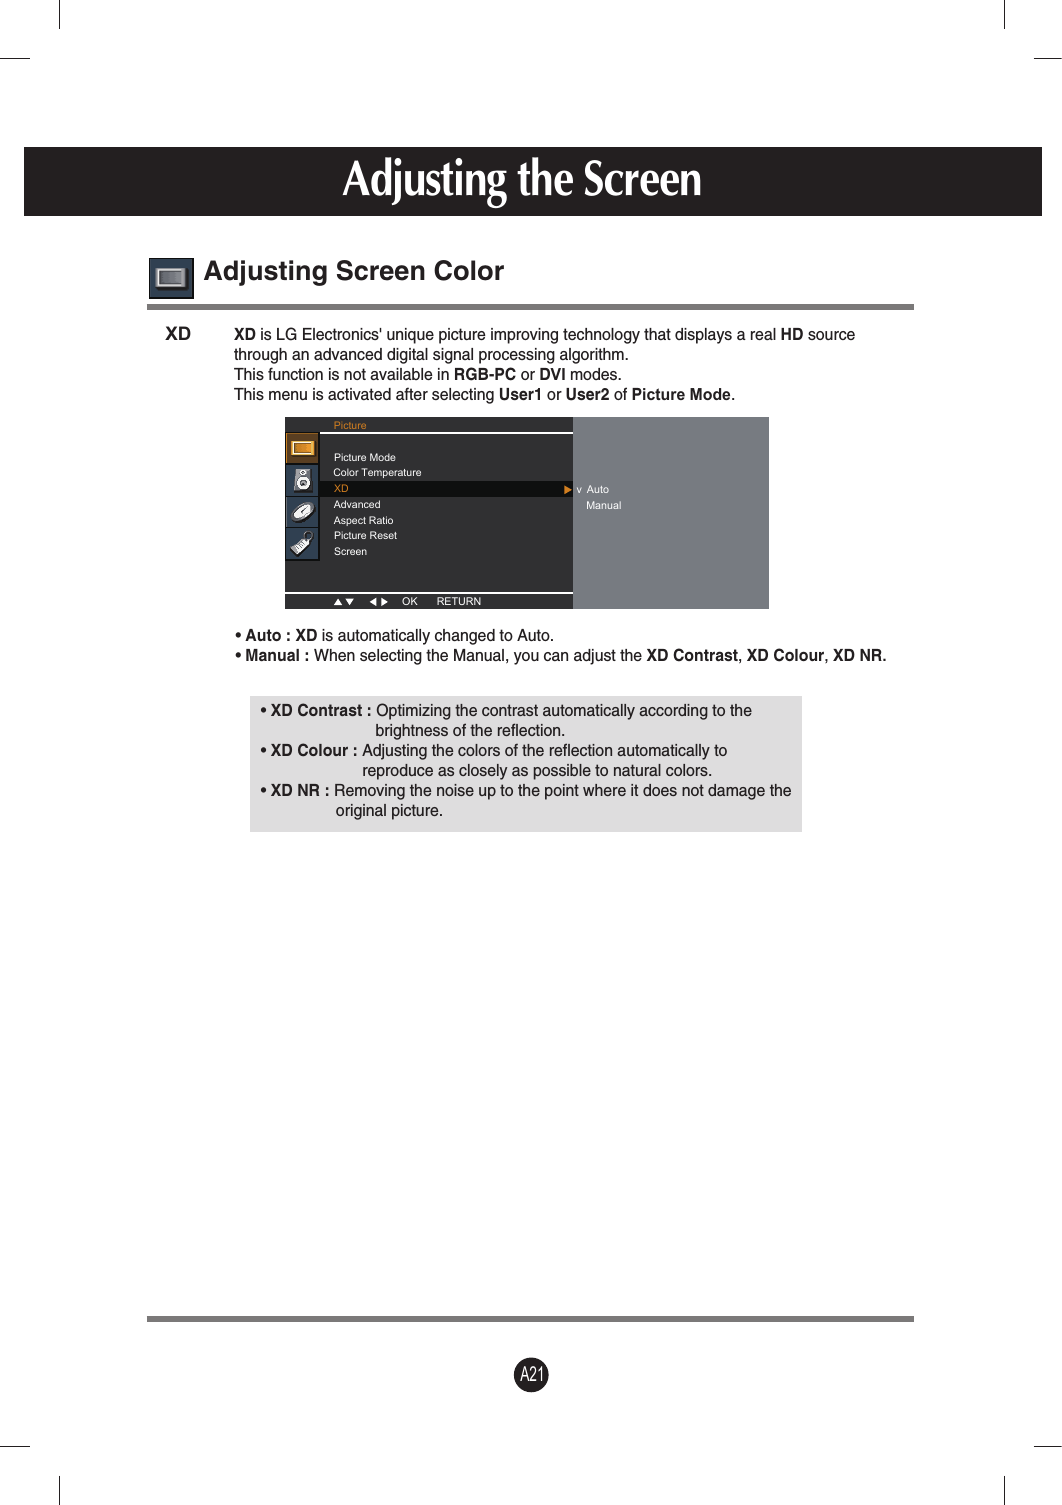
![A20Red / Green / Blue Set your own color levels.Color Settings• Cool : Slightly purplish white.• Medium : Slightly bluish white.• Warm : Slightly reddish white. • User : Select this option to use the user-defined settings.ColorTemperatureAdjusting Screen ColorOK RETURNUserRed 0Green 0Blue 0Adjusting the ScreenPicturePicture ModeColor Temperature v CoolXD MediumAdvanced WarmAspect Ratio UserPicture ResetScreen▲▼ OK RETURN▼▼PicturePicture ModeColor Temperature v9300KXD 6500KAdvanced sRGBAspect Ratio UserPicture ResetScreen▲▼ OK RETURN▼▼• 9300KSlightly purplish white.• 6500KSlightly bluish white.• sRGBSlightly lower brightness. [VIDEO][RGB PC]](https://usermanual.wiki/LG-Electronics-USA/LSM2150HU/User-Guide-1173136-Page-22.png)