LG Electronics USA LSP345 CDMA Fixed Wireless Telephone User Manual
LG Electronics USA CDMA Fixed Wireless Telephone
UserManual.wiki
>
LG Electronics USA
>
LSP345 User Manual
Users Manual
Navigation menu
Upload a User Manual
Namespaces
Wiki Guide
HTML
PDF
Info
Views
User Manual
Discussion / Help
Navigation

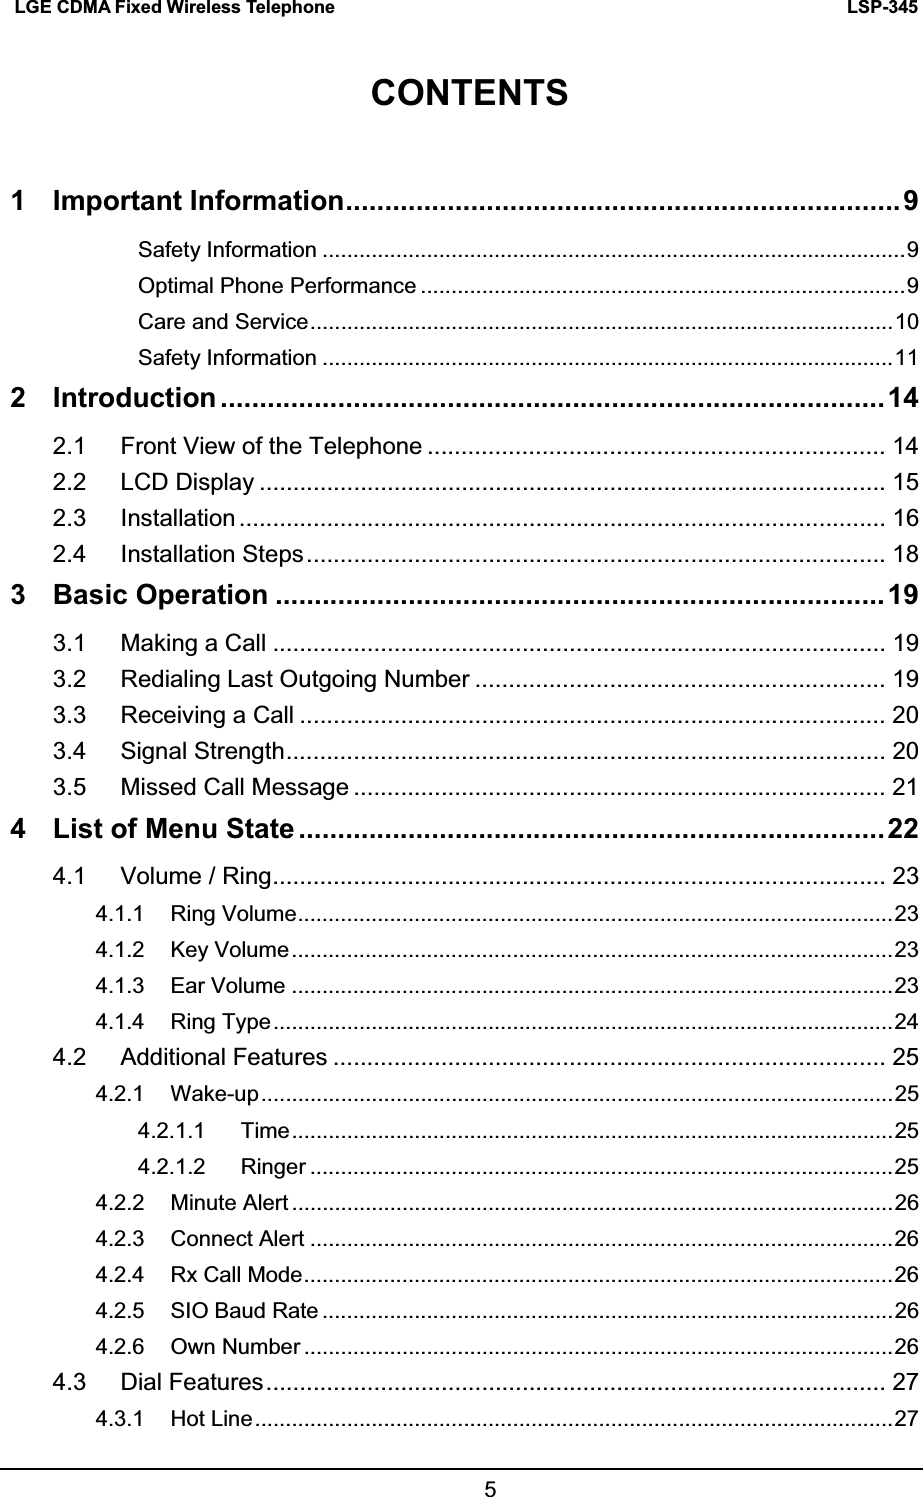

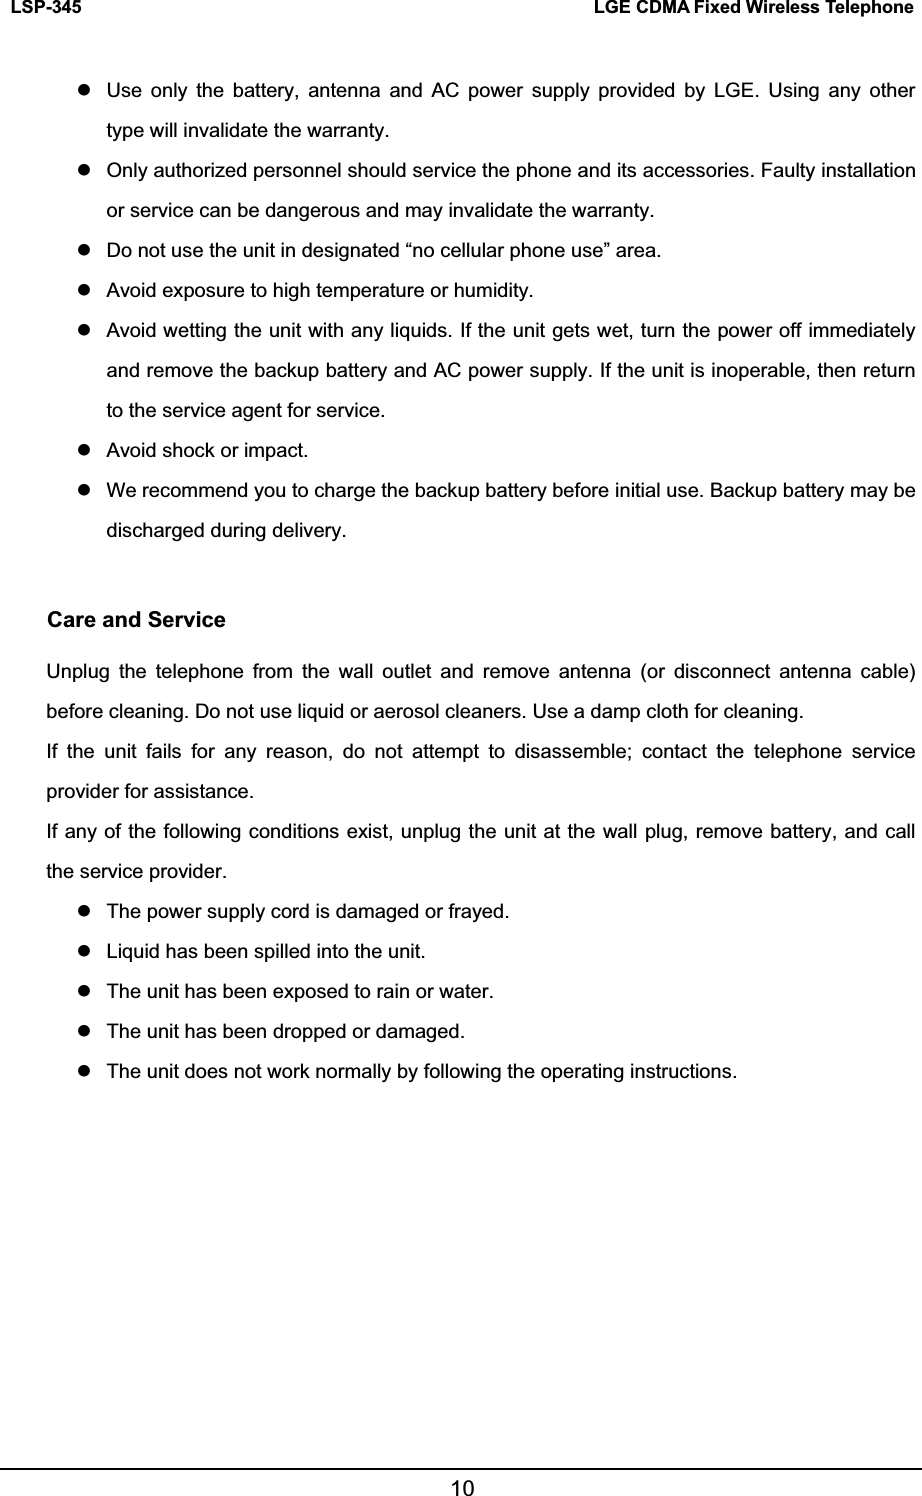

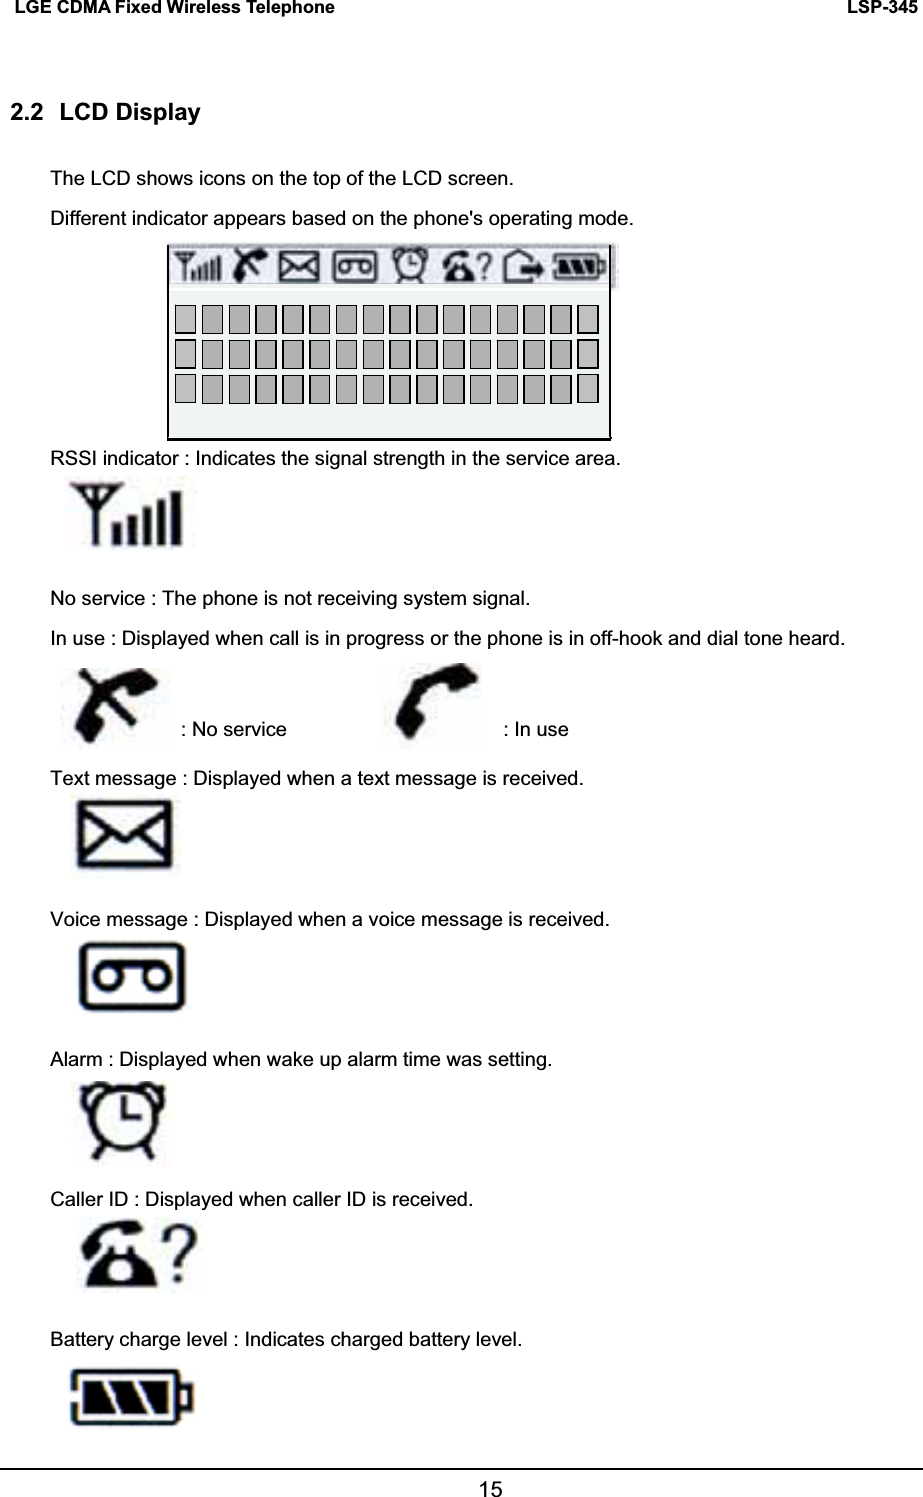
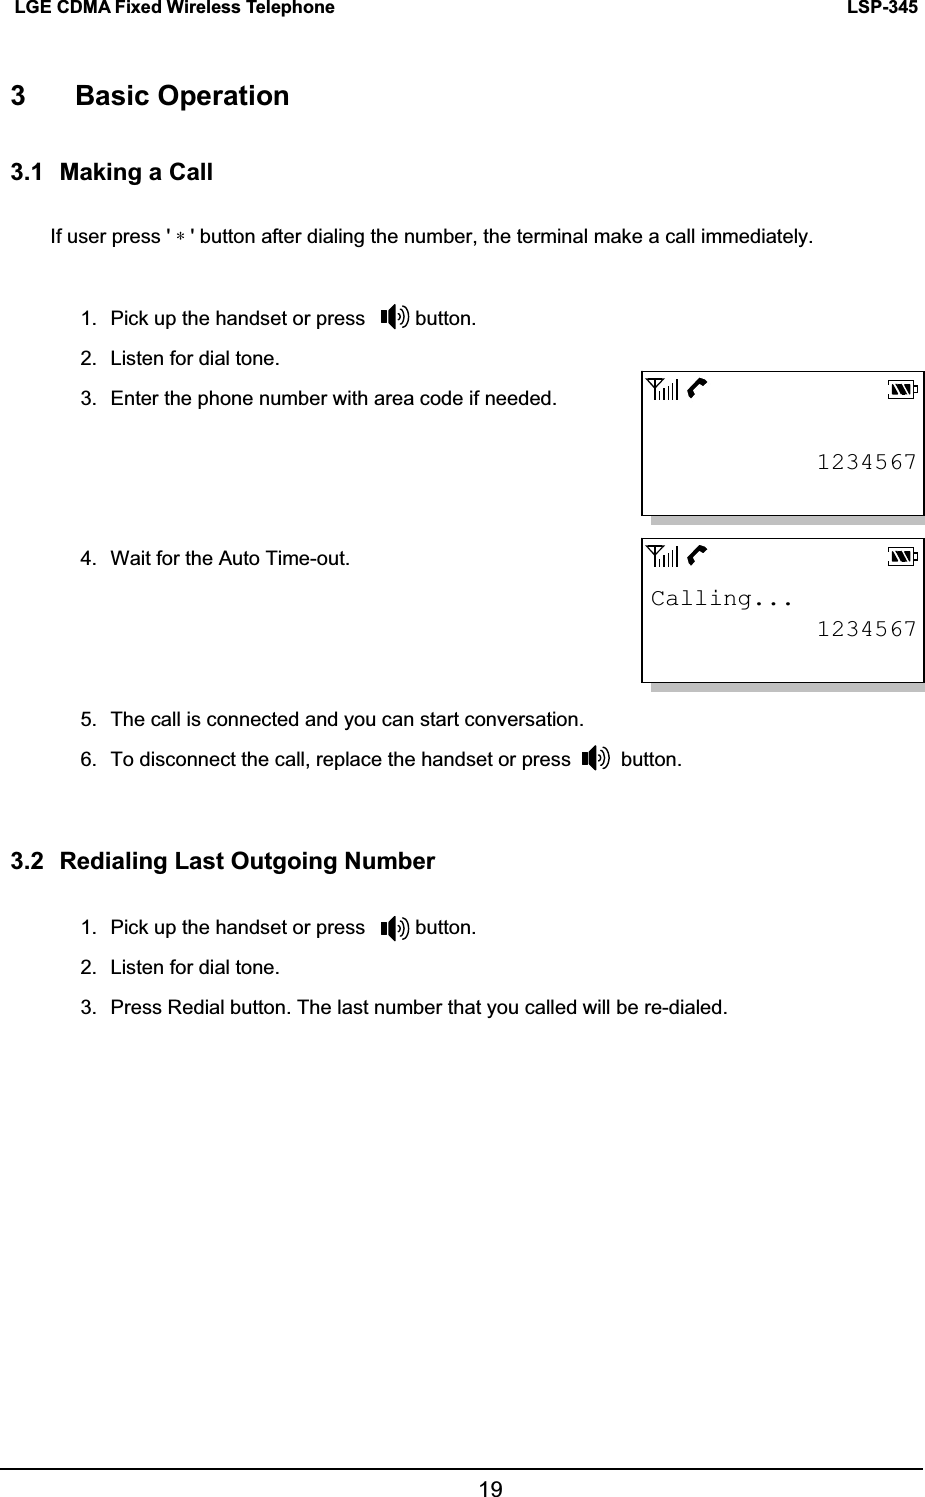
![LSP-345 LGE CDMA Fixed Wireless Telephone203.3 Receiving a Call 1. When bell rings, pick up the handset. 2. Start conversation. 3. To disconnect the call, replace the handset. 3.4 Signal Strength The quality of calls depends on the signal strength in your area. The stronger the signal, the better the call quality. The signal strength icon indicates the current strength as a number of bars. You can see the antenna and bars according to the strength of received signal in the upper-left part. zCorrecting dialing mistakes1. Press Clear button shortly to erase the most recent digit. 2. Press and hold Clear button for at least one second. z If the phone is locked, enter the Lock Code z If the call did not go through, press the hook switch and dial again. zFlashing / Hook Switch1. While in the middle of a call, pressing the hook switch for less than 1 second will be treated as a flash. After 1 second, the call will be terminated. 2. Very briefly pressing the hook switch will be ignored. z Battery icon is displayed only when the terminal is operating by battery without AC power. Incoming Call! 10:23 AM 08 May, Sat[MENU][RECALL]Time: 0:23 1234567[MENU[MUTE]](https://usermanual.wiki/LG-Electronics-USA/LSP345/User-Guide-709945-Page-18.png)
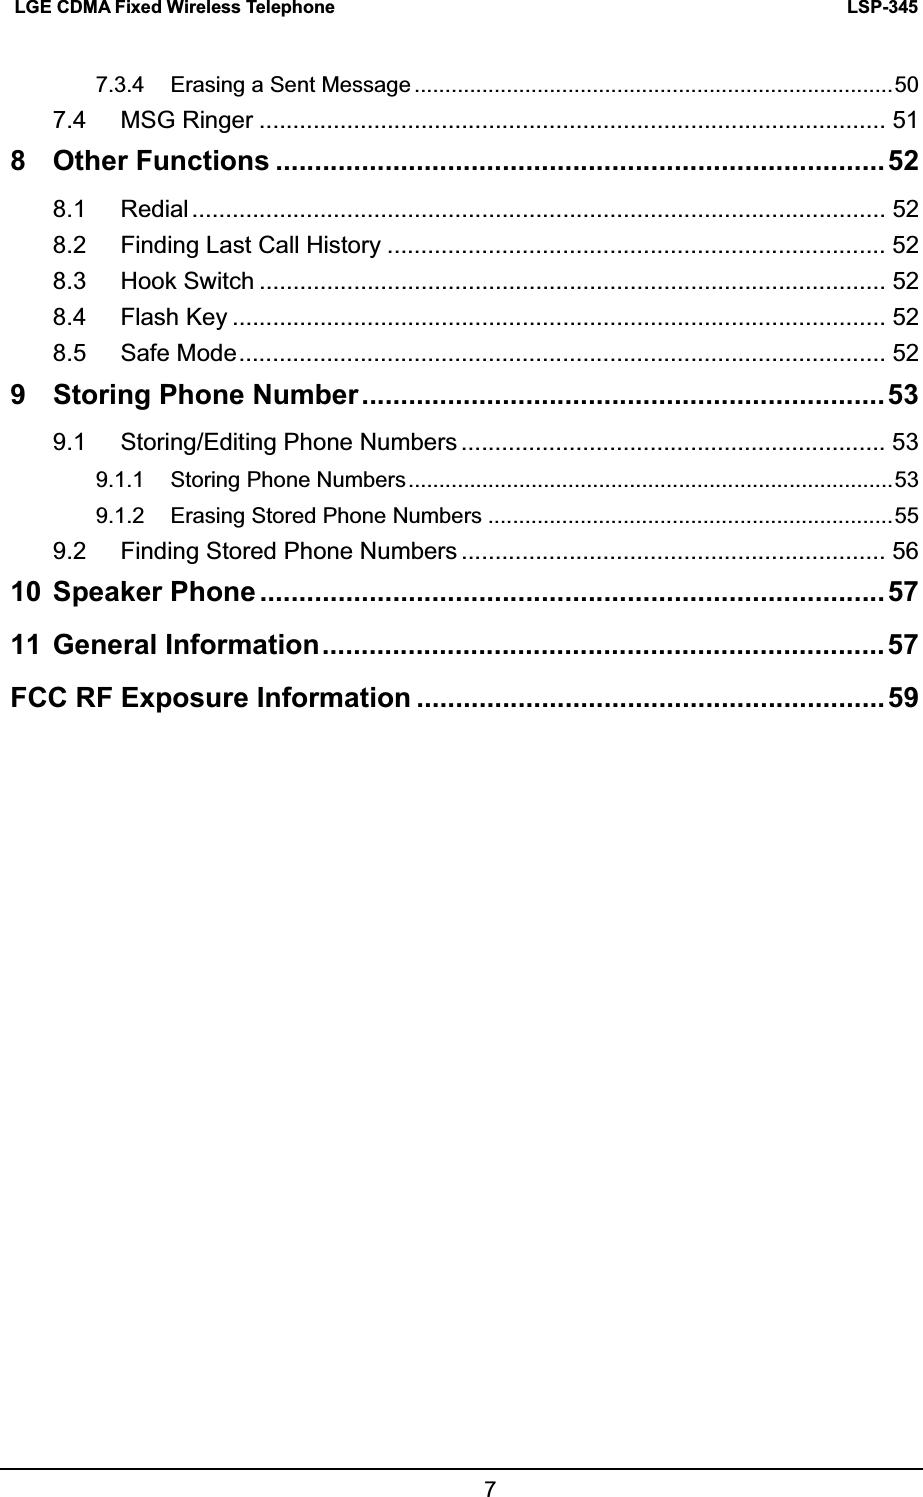
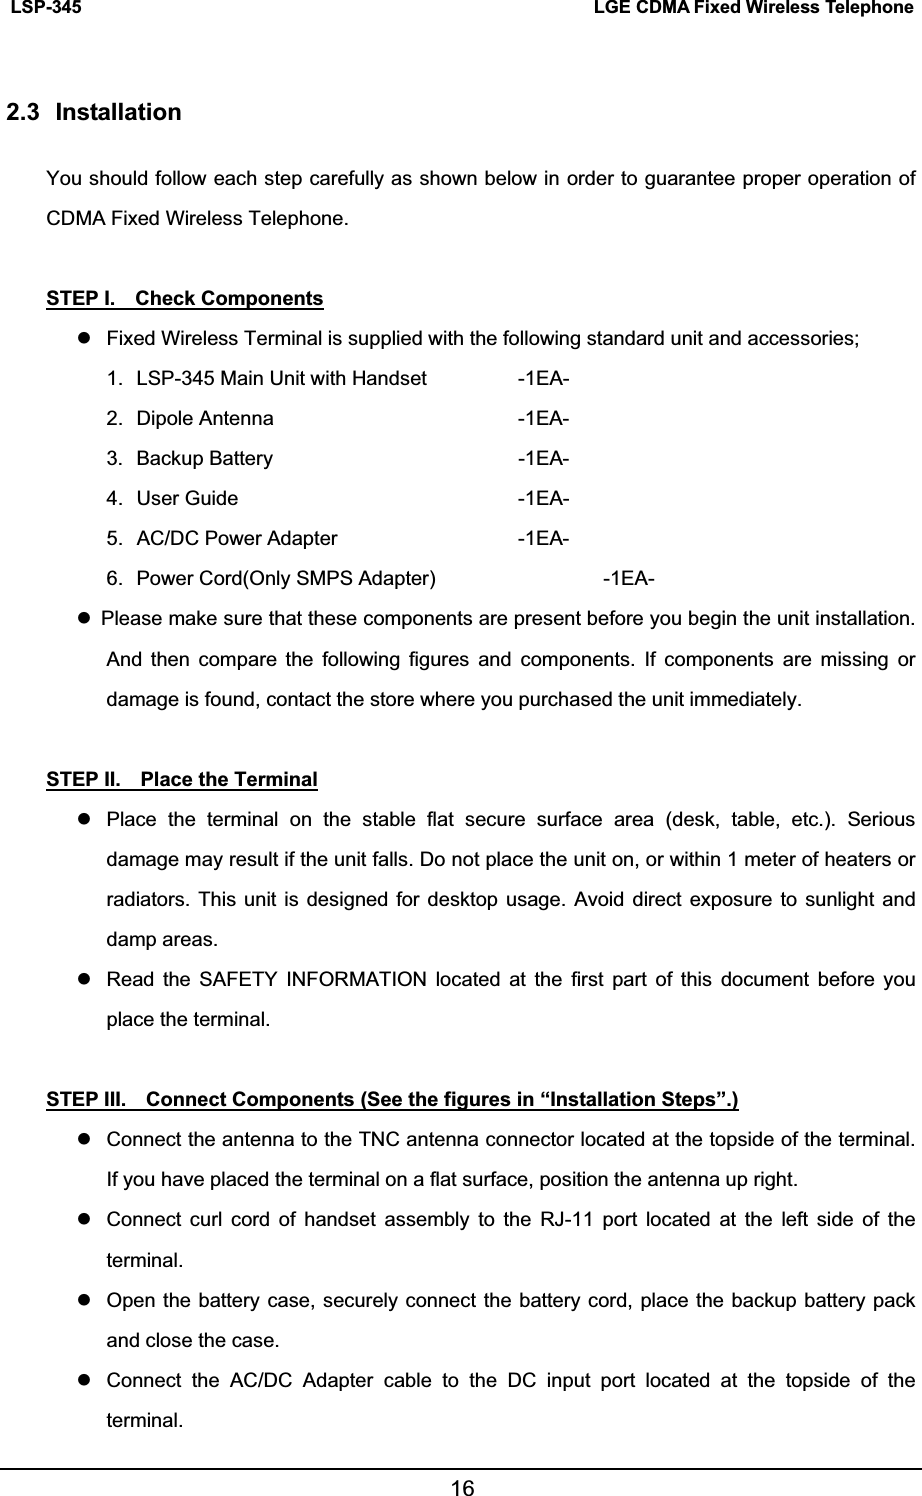
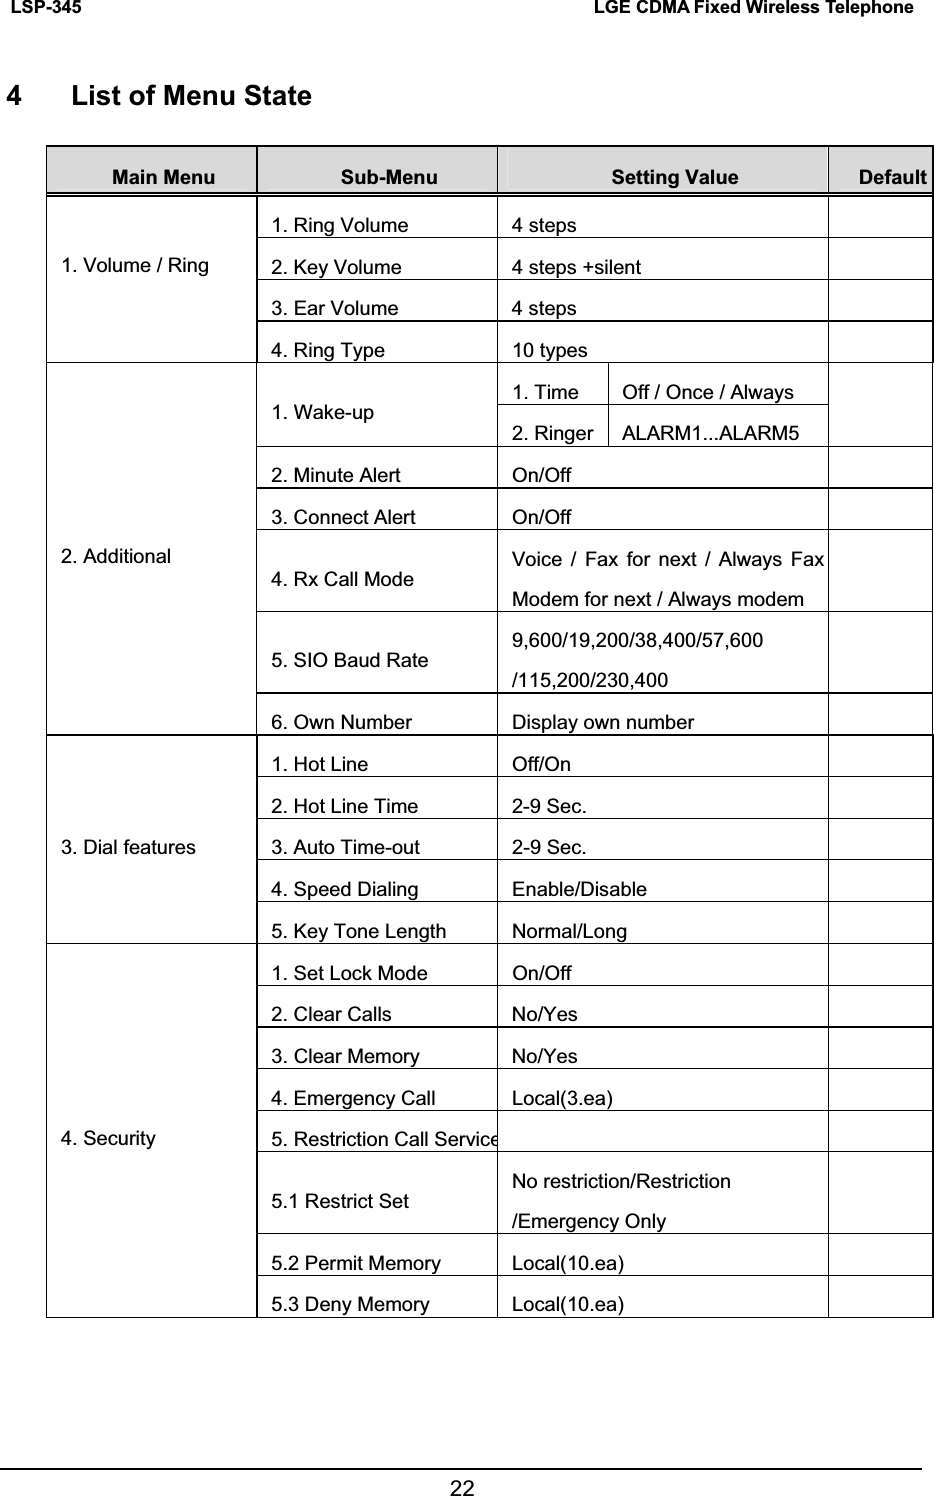
![LSP-345LGE CDMA Fixed Wireless Telephone 213.5 Missed Call Message If a call is received and not answered for user’s absence, you are informed that you have missed a call. The latest missed call time and number of missed call is displayed. Press [OK] to erase “Missed call” message. 10:51 AM Missed 1 call[OK]](https://usermanual.wiki/LG-Electronics-USA/LSP345/User-Guide-709945-Page-19.png)
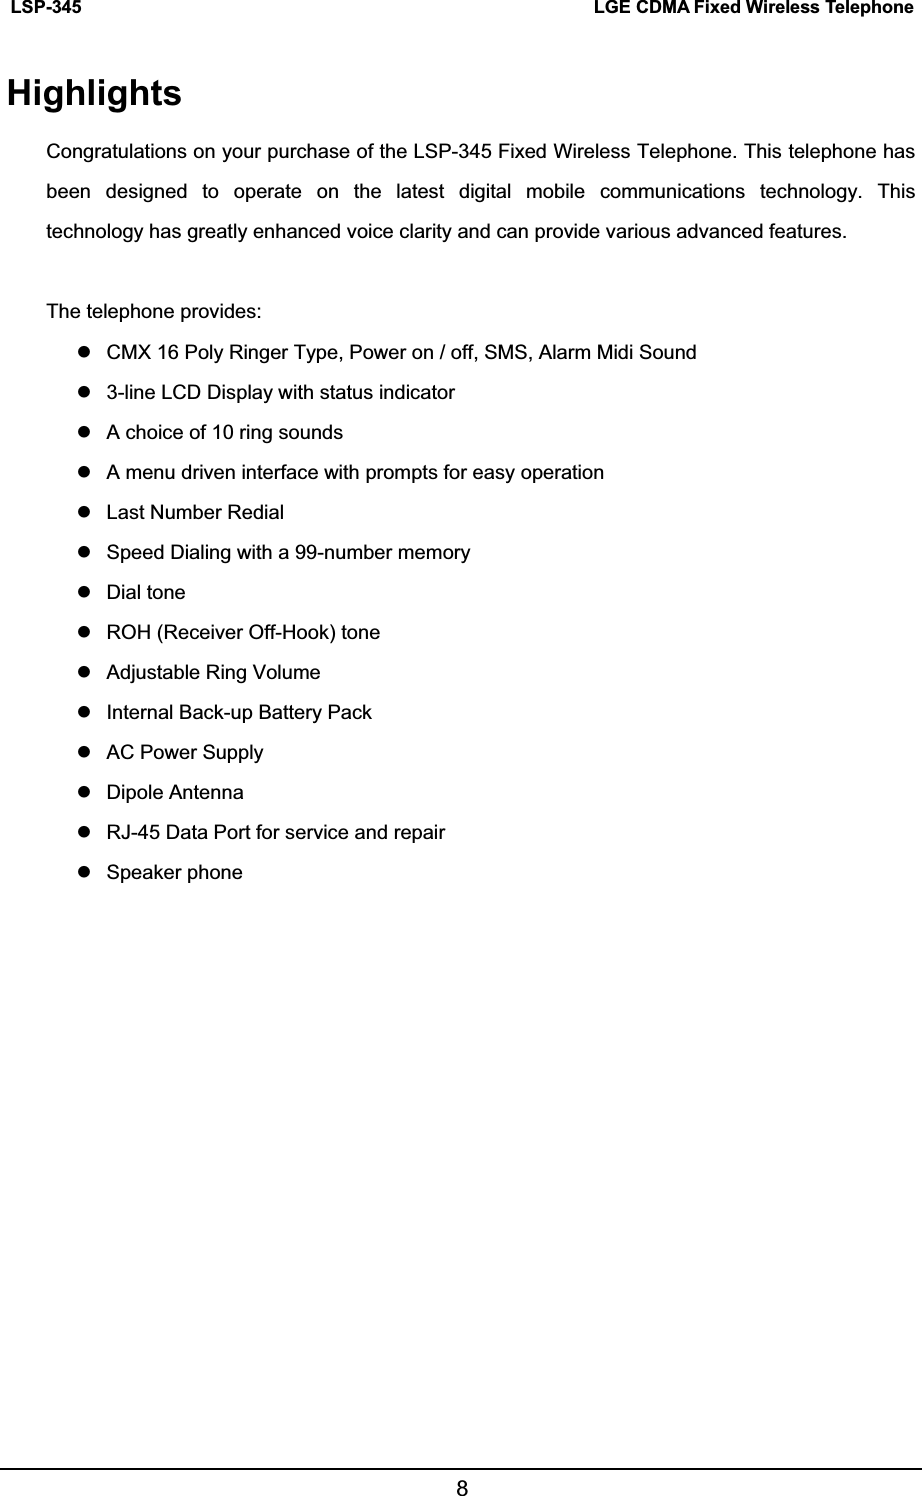
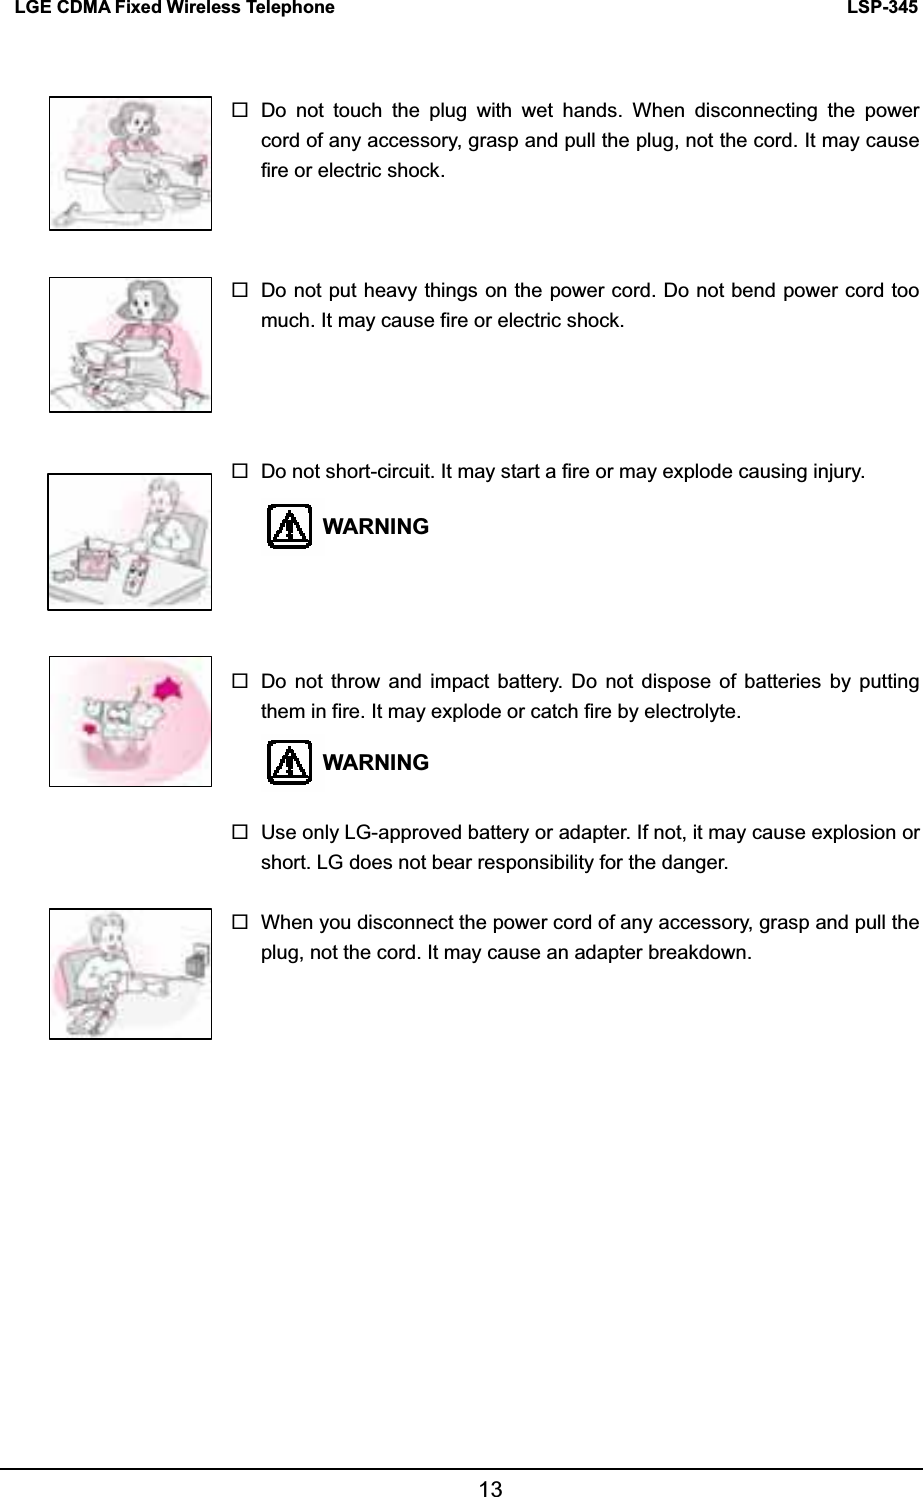
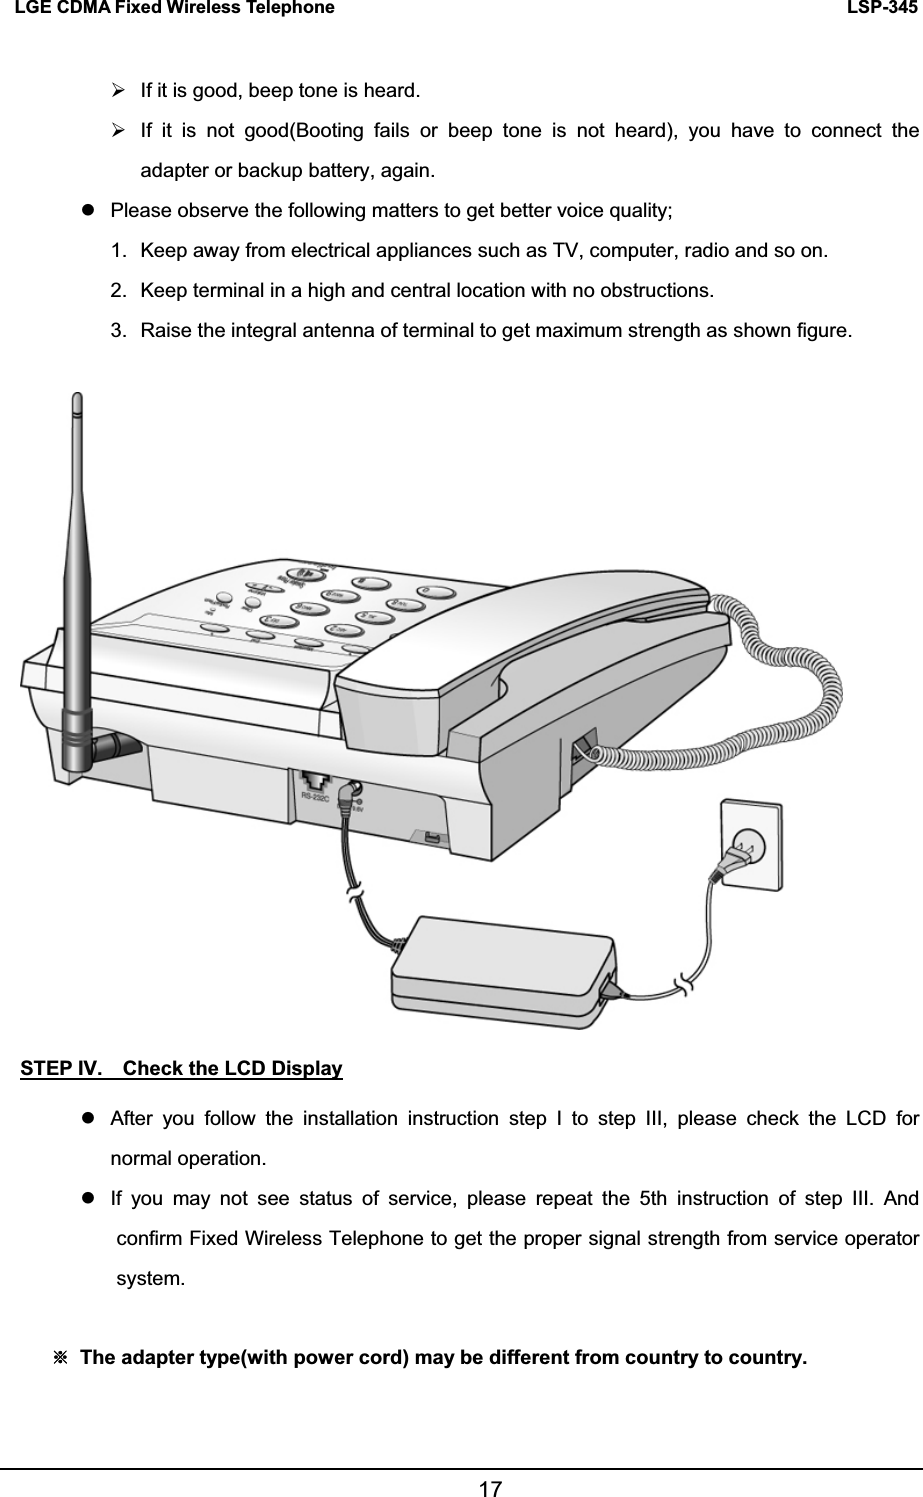
![LSP-345LGE CDMA Fixed Wireless Telephone 234.1 Volume / Ring This menu allows you to adjust the various different volumes. 4.1.1 Ring Volume The received tone when you receive a call can be adjusted. z From the MENU 1. Press [MENU] + 1(VOLUME/RING)+ 1(Ring Volume) In on-hook state. 2. Press Volume left/right button or [NEXT] to adjust ring volume. 3. Press [OK]. z By the Volume left/right button 1. Press Volume left/right button to adjust ring volume in on-hook state. 4.1.2 Key Volume The tone when you press a key can be adjusted. 1. Press [MENU] + 1(VOLUME/RING) + 2(Key Volume) in on- hook state. 2. Press Volume left/right button or [NEXT] to adjust key volume. 3. Press [OK]. 4.1.3 Ear Volume The voice of the other party can be adjusted in on-hook state. 1. Press [MENU] + 1(VOLUME/RING) + 3(Ear Volume) in on- hook state. 2. Press Volume left/right button or [NEXT] to adjust ear piece volume. 3. Press [OK]. 3 Press Volume left/right button to adjust volume during conversation. RING VOLUME[OK][NEXT]KEY VOLUME[NEXT][OK]EAR VOLUMENEXTOK MAIN MENU 2:ADDITIONAL 1:VOLUME / RING](https://usermanual.wiki/LG-Electronics-USA/LSP345/User-Guide-709945-Page-21.png)
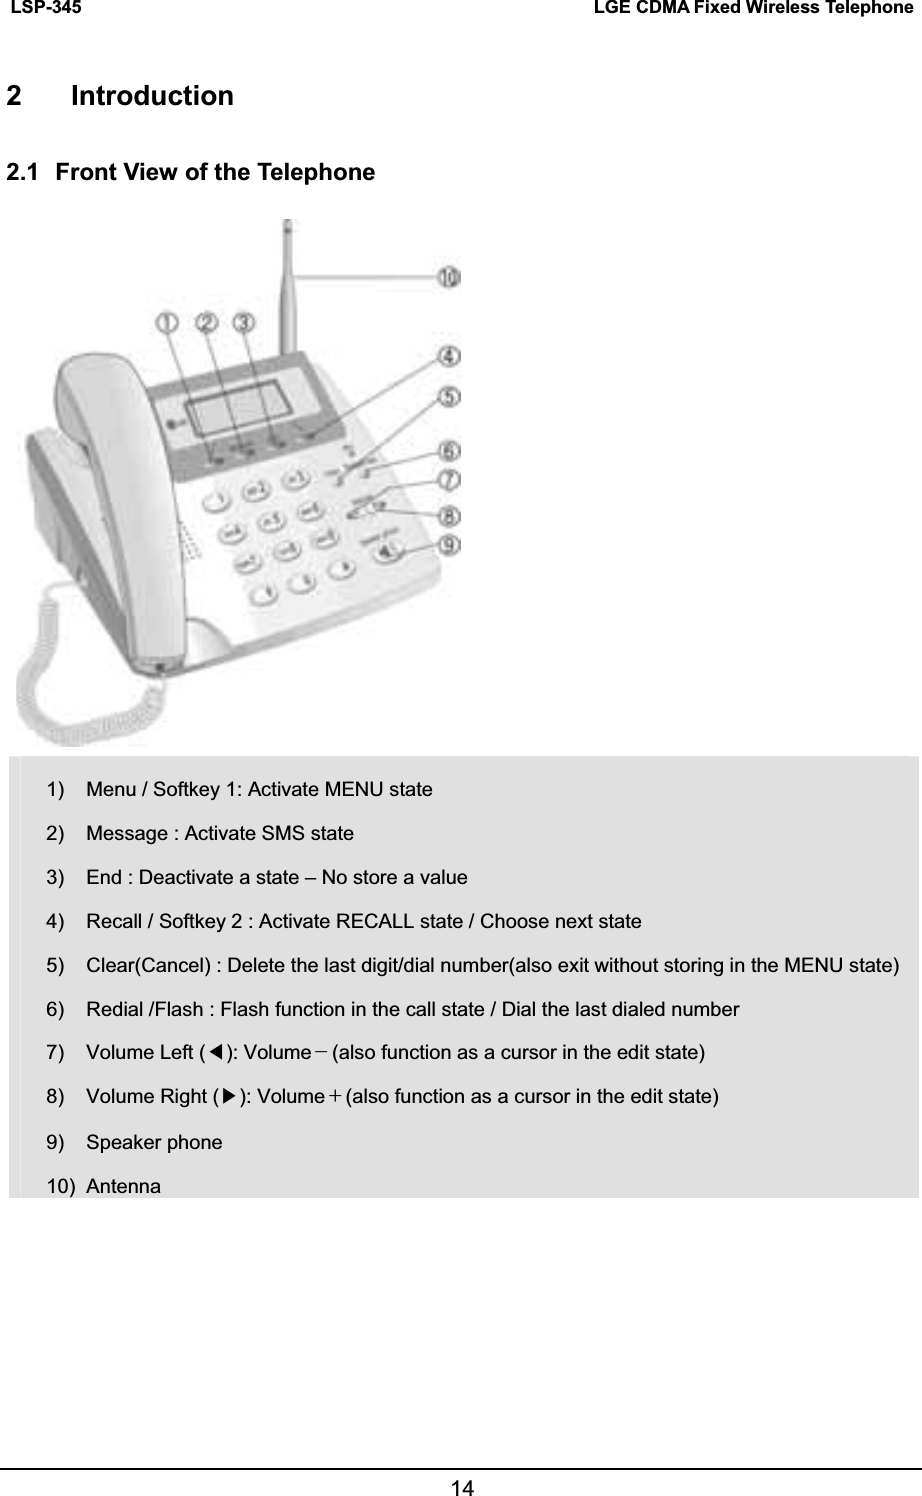
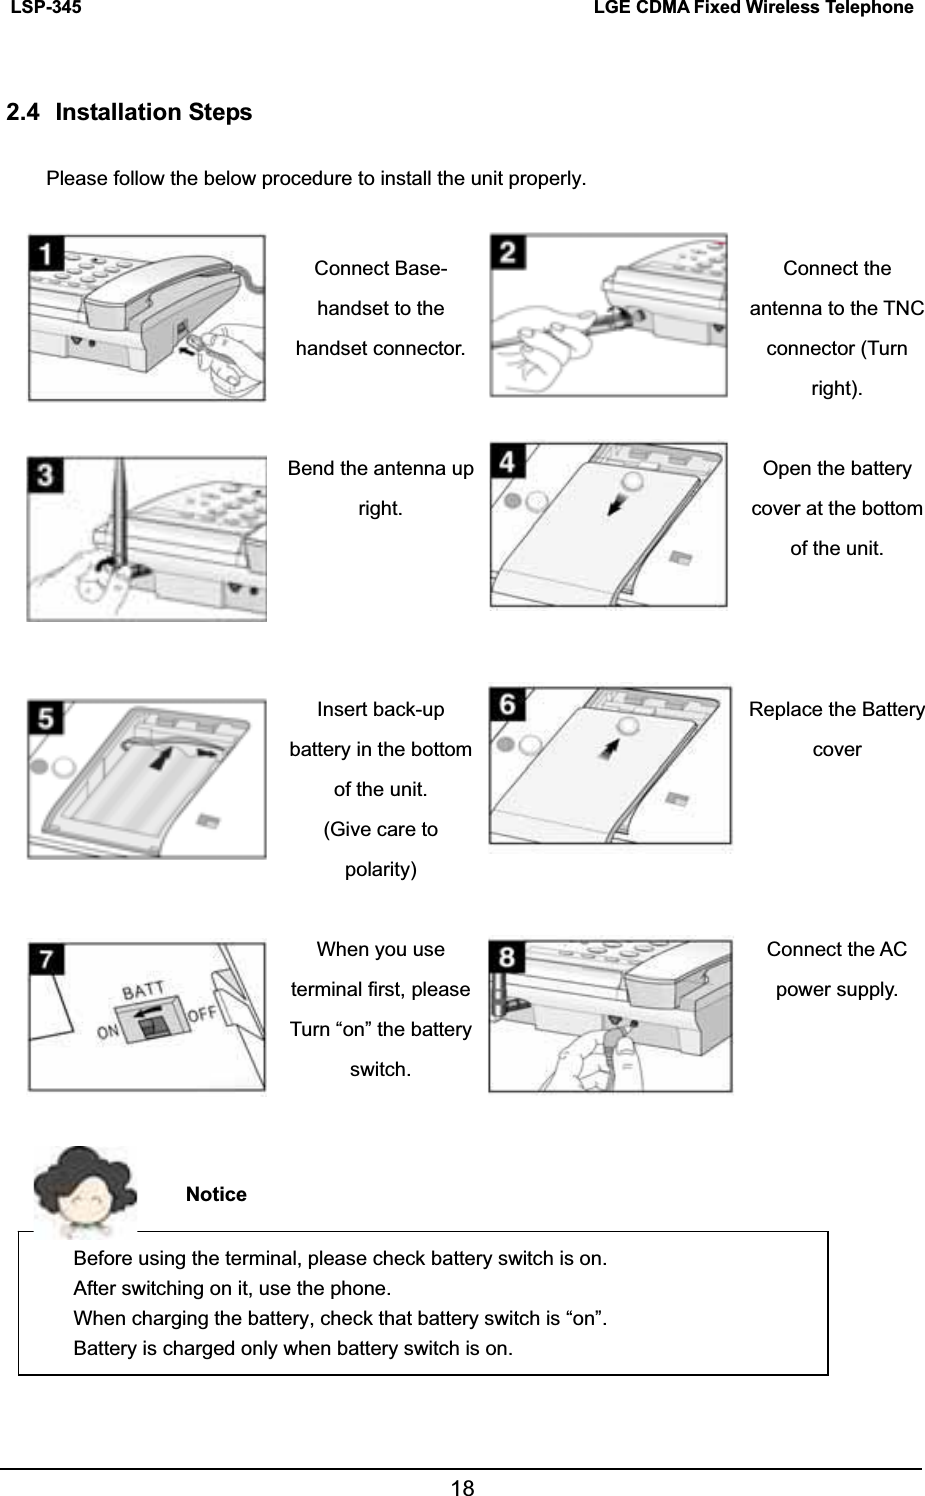
![LSP-345 LGE CDMA Fixed Wireless Telephone244.1.4 Ring Type You can select the various ring types. 1. Press [MENU] + 1(VOLUME/RING) + 4(Ring Type) in on- hook state. 2. Select a desired ring type with Volume left/right button or [NEXT]. 3 There are 10 different ring types. 3. Press [OK] to save and exit. RING TYPE[NEXT][OK¥Sare Jahan Se](https://usermanual.wiki/LG-Electronics-USA/LSP345/User-Guide-709945-Page-22.png)
![LSP-345LGE CDMA Fixed Wireless Telephone 254.2 Additional Features 4.2.1 Wake-up 4.2.1.1 Time This function allows you to adjust Wake-up. 1. Press [MENU] + 2(ADDITIONAL) + 1(Wake-up ) + 1 (Time) in the on - hook state. 2. Select Off, Once or Always by [NEXT] and press [OK]. 3. Press [EDIT] and set the time. 4. Select A.M. or P.M. by [AM/PM]. 5. If you want to modify the wrong time, press Clear button and set again. 6. Press [OK] to save and exit. 4.2.1.2 Ringer You can select the various ring types. 1. Press [MENU] + 2(ADDITIONAL) + 1(Wake-up) + 2(Ringer) in the on - hook state. 2. Select a desired ring type with [OK] or [NEXT] 3. There are 5 different ring types. Those are ALARM1, ALARM2, ALARM3, ALARM4, ALARM5 Wake-up Time _1:23 AMOKAM/PMRinger¥ALARM1[OK][NEXT] MAIN MENU 2:ADDITIONAL 1:VOLUME / RINGWake-up1:Time 2:Ringer[OK][NEXT]Alarm Time ¥AlwaysOK[NEXT][OK][NEXT]Wake-up1:Time 2:Ringer](https://usermanual.wiki/LG-Electronics-USA/LSP345/User-Guide-709945-Page-23.png)
![LSP-345 LGE CDMA Fixed Wireless Telephone264.2.2 Minute Alert Alerts you every minute during a call. 1. Press [MENU] + 2(ADDITIONAL) + 2(Minute Alert) in on – hook State. 2. Select On or Off by [NEXT] or Volume left/right button. 3. Press [OK] to save and exit. 4.2.3 Connect Alert This function allows you to select the call connect tone. 1. Press [MENU] + 2(ADDITIONAL) + 3(Connect Alert) in on – hook State. 2. Select On or Off by [NEXT] or Volume left/right button. 3. Press [OK] to save and exit. 4.2.4 Rx Call Mode 1. Press [MENU] + 2(ADDITIONAL) + 4(RX Call Mode) in on – hook State. 2. Select Voice, Fax for next, Always Fax, Modem for next, always Modem by Volume or [NEXT] button. 3. Press [OK] to save and exit. 4.2.5 SIO Baud Rate 1. Press [MENU] + 2(ADDITIONAL) + 5(SIO Baud Rate) in on – hook State. 2. Select 9,600/19,200/ 38,400/ 57,600/ 115,200/ 230,400 by Volume or [NEXT] button. 3. Press [OK] to save and exit. 4.2.6 Own Number 1. Press [MENU] + 2(ADDITIONAL) + 6(Own Number) in on – hook State. 2. Press [OK] to exit. MINUTE ALERT[NEXT][OK]OnDATA BAUDRATENEXTOK19,200OWN NUMBEROK000-000-0000RX CALL MODENEXTOKVoiceCONNECT ALERT[NEXT][OK]On](https://usermanual.wiki/LG-Electronics-USA/LSP345/User-Guide-709945-Page-24.png)
![LSP-345LGE CDMA Fixed Wireless Telephone 274.3 Dial Features 4.3.1 Hot Line 1. Press [MENU] + 3 (DIAL FEATURES) + 1(Hot Line) in on – hook state. 2. Select On or Off by [NEXT] or Volume left/right button and press [OK] to select. 3. Press [EDIT] to input Hot Line phone number. 4. Enter the Hot Line phone number. 5. Press [OK] to save and exit. 4.3.2 Hot Line Time 1. Press [MENU] + 3 (DIAL FEATURES) + 2(Hot Line time) in on – hook State. 2. Select hot line connection time(2~9 sec.) by [NEXT] or Volume left/right button. 3. Press [OK] to select. 4.3.3 Auto Time-out Setting the length of time the phone waits before automatically dialing a number. You can select this time between 2 and 9 second. 1. Press [MENU] + 3(DIAL FEATURES) + 3(Auto Timeout) in on – hook State. 2. Select Auto time-out second between 2 and 9 by [NEXT] or Volume left/right button. 3. Press [OK] to select. DIAL FEATURES 2:Hot Line time 1:Hot Line[OK][QUIT] 119Hot Line Time[NEXT][OK]5 secAuto Time-out[NEXT][OK]5 secHot Line[NEXT][OK]On](https://usermanual.wiki/LG-Electronics-USA/LSP345/User-Guide-709945-Page-25.png)
![LSP-345 LGE CDMA Fixed Wireless Telephone284.3.4 Speed Dial (enable / disable) 1. Press [MENU] + 3 (DIAL FEATURES) + 4(Speed Dialing) in on – hook State. 2. Select Enable or Disable by [NEXT] or Volume left/right button and press [OK] to save and exit. This function can be used when the Speed Dial is set to Yes. z Speed Dial Function 1. You can store phone numbers in memory locations (1~99) and place a call. 2. Press the memory number (1 through 99) corresponding to the appropriate memory location, and hold for a few seconds. 4.3.5 Key-tone Length Setting key beep playback length. Possible settings are Normal and Long. 1. Press [MENU] + 3(DIAL FEATURES) + 5(KeyTone Length) in on – hook State. 2. Select Normal or Long by [NEXT] or Volume left/right button and press [OK] to select. SPEED DIALING[NEXT][OK]EnableDIAL FEATURES5:KeyTone LengthKEY TONE LENGTHNormal[OK][NEXT]](https://usermanual.wiki/LG-Electronics-USA/LSP345/User-Guide-709945-Page-26.png)
![LSP-345LGE CDMA Fixed Wireless Telephone 294.4 Security Features 4.4.1 Set Lock Mode This function prevents your phone from being used without permission. Possible settings are ON/OFF. The OFF means that the phone is not locked. ON sets the phone locked immediately. LOCK code will always be the last 4 digits of the phone number. 1. Press [MENU] + 4 (SECURITY). 2. Enter your own 4 digit lock code. 3. Press 1(Set Lock Mode) 4. Select Off, On by [NEXT] or Volume left/right button. 5. Press [OK] to save and exit. 4.4.2 Clear Calls When a previous outgoing or incoming call history is stored in a memory location, you can erase the all call history. 1. Do the above 1 and 2 steps of 4.4.1. 2. Press 2(Clear Calls). 3. Select “Yes” and press [OK] using [NEXT] or Volume left/right button. EnterLock CodeSECURITY1:Set Lock Mode2:Clear CallsSET LOCK[NEXT][OK]OffCLEAR CALL STACK[NEXT][OK]Yes](https://usermanual.wiki/LG-Electronics-USA/LSP345/User-Guide-709945-Page-27.png)
![LSP-345 LGE CDMA Fixed Wireless Telephone304.4.3 Clear Memory When you want to delete phonebook memory, you can erase all phonebook memory. 1. Do the above step1 and 2 of 4.4.1. 2. Press 3(Clear Memory). 3. Select “Yes” and press [OK] using [NEXT] or Volume left/right button. 4.4.4 Emergency Call Even if your phone is locked, you can make calls to 3 emergency numbers. 1. Do the above step1 and 2 of 4.4.1. 2. Press 4(Emergency Call) 3. Press [NEXT] or Volume left/right button to choose the number from 1 to 3. 4. Press [EDIT]. 5. Enter the emergency phone number. 6. Press [OK] to save the number. 7. Press [NEXT] or Volume left/right button to edit others or Press End button to exit emergency call process. EMERGENCY 1[NEXT][EDIT] 100100[OK][QUIT]CLEAR WHOLE BOOK[NEXT][OK]YesEMERGENCY 1[NEXT][EDIT] 100](https://usermanual.wiki/LG-Electronics-USA/LSP345/User-Guide-709945-Page-28.png)
![LSP-345LGE CDMA Fixed Wireless Telephone 314.4.5 Restriction Call Service This function is a convenient feature which enables user to restrict using any phone number. To forbid using any phone number, user must set the number in deny edit. Can’t use any phone number(max 32digits) started with the number saved in deny edit. If user set the phone number in permit edit, can use any phone number (max 32digits) started with the number even if the phone number is set in deny edit. Ex) example to restrict using the phone number started with “700” . 1. Set “Restriction” in Restrict set menu (Menu 4.5.1) 2. Set “700” in deny edit. (Menu 4.5.3) 3. Set “700-1234” in permit edit.(Menu 4.5.2) Result : user can use the phone number started with “700-1234”. 4.4.5.1 Restrict Set z No restriction This is a general function which has no any restrictions z Restriction This is a function that you can set permitted phone number and denied phone number. z Emergency only This is a function which enable you to call only emergency numbers. 1. Press [MENU] and 4(SECURITY). 2. Enter a lock code using key pad. 3LOCK code will always be the last 4 digits of the phone number. 3. Press 5(Restrict Call) and 1(Restrict Set). MAIN MENU 4:SECURITY 3:DIAL FEATURESEnterLock Code _--- ** RESTRICT CALL 1: Restrict Set 2: Permit Memory](https://usermanual.wiki/LG-Electronics-USA/LSP345/User-Guide-709945-Page-29.png)
![LSP-345 LGE CDMA Fixed Wireless Telephone324. Select “No restriction” ,” Restriction” or “Emergency Only ” using [NEXT] or Volume left/right button and press [OK]. i Below 4.4.5.2 and 4.4.5.3 function can be used when the Restrict set is set to “Restriction”. 4.4.5.2 Permit Memory You can call it if the phone numbers saved in permit edit though they were saved in deny edit. You can save 10 permit phone numbers. 1. Do the above step 1~2 of 4.4.5.1. 2. Press 5(Restrict Call) and 2(Permit Memory). 3. Press [EDIT] to edit permit phone number. 4. Enter the permit phone number. 5. Press [OK] to save and exit. 7001234[NEXT][EDIT]Restrict Set Restriction[OK][NEXT] RESTRICT CALL 1: Restrict Set 2: Permit Memory](https://usermanual.wiki/LG-Electronics-USA/LSP345/User-Guide-709945-Page-30.png)
![LSP-345LGE CDMA Fixed Wireless Telephone 334.4.5.3 Deny Memory You couldn’t call any phone numbers saved in deny edit. You can save 10 deny phone numbers. 1. Do the above step 1~2 of 4.4.5.1. 2. Press 5(Restrict Call) and 3(Deny Memory). 3. Press [EDIT] to edit deny number. 4. Enter the deny phone number. 5. Press [OK] to save and exit. RESTRICT CALL 3: Deny MemoryRestrict 700[NEXT][EDIT]](https://usermanual.wiki/LG-Electronics-USA/LSP345/User-Guide-709945-Page-31.png)
![LSP-345 LGE CDMA Fixed Wireless Telephone345 Functions while in a call 5.1 Ear Volume You may adjust ear volume while you are in a call. The Volume left/right button on the right side of the phone can be used to adjust ear volume. 5.2 Mute This function prevents your voice from being transmitted but you can call still hear other side. 1. Press [MUTE] button while in a call. 2. You could see “MUTE” message blinking on the right side of the LCD. 3. To release Mute, Press [UNMUTE] button. 1234567Time: 0:23[MENU][MUTE]EAR VOLUME[OK][NEXT]1234567Time: 0:23[MENU][MUTE]1234567Time: 0:23[MENU][UNMUTE]MUTE](https://usermanual.wiki/LG-Electronics-USA/LSP345/User-Guide-709945-Page-32.png)
![LSP-345LGE CDMA Fixed Wireless Telephone 355.3 Memo You can save numbers while in a call. 1. Press [MENU] and 1(MEMO) while in a call. 2. Enter a number using keypad. 3. Press [ADD] to save and exit. Or press [QUIT] to exit. 5.4 MIC Volume Adjusting MIC volume while in a call. 1. Press [MENU] and 2(MIC LEVEL) while in a call. 2. Select Low or High by [NEXT] or Volume left/right button. 3. Press [OK] to save and exit. IN_CALL MENU 2:MIC LEVEL 1:MEMOMIC LEVELHigh[OK][NEXT] IN_CALL MENU 2:MIC LEVEL 1:MEMO Number Stored in Call List 114QUITADD](https://usermanual.wiki/LG-Electronics-USA/LSP345/User-Guide-709945-Page-33.png)
![LSP-345 LGE CDMA Fixed Wireless Telephone365.5 Transmitting your own number This function is a convenient feature which enables you to transmit your own phone number while in a call through press one key. (For example, sending your phone number when you pages.) 1. Press [MENU] and 3(SEND OWNER #) button while in a call. IN-CALL MENU 3:SEND OWNER #](https://usermanual.wiki/LG-Electronics-USA/LSP345/User-Guide-709945-Page-34.png)
![LSP-345LGE CDMA Fixed Wireless Telephone 376 Searching, Editing & Dialing 6.1 Retrieving Last Call History 1. Press [RECALL] and 1(FROM LAST CALL). 2. Select a number or a name in the last call list by Volume left/right button and press [VIEW]. 3. To see more information, press [TIME] and press [SAVE] to save a number in the memory. 3Pick up the handset or Press button to make a call with the displayed number. z By pressing [TIME] 3Press [OK] to exit. z To save a number 3Press [SAVE] in step 3. 3Enter the name in text mode and press [OK] to save. Press [ABC] to change upper or lower case character. ¾ To store without name, just press [OK]. ¾ Refer to “To enter a character”. RECALL2:FROM MEMORIES1:FROM LAST CALLCALL TO 028507618SAVE TIME 6/9 10:14am 0Min 5Sec[OK] 028507618OK ABC 1234567 028507618VIEW](https://usermanual.wiki/LG-Electronics-USA/LSP345/User-Guide-709945-Page-35.png)
![LSP-345 LGE CDMA Fixed Wireless Telephone383Enter a desired memory location (01~99: 2 digits) or press [NEXT] to choose a desired memory location and press [OK]. ¾ The phone number is stored in the displayed memory location. 3The phone will display a message asking to keep your number as secret or not. Select “No” or “Yes” using [NEXT]. Then press [OK]. ¾ You can see a confirming message. ¾ Also you can see a condition of used memory. ABCAuto=01 ??OK NEXTABCwas stored in 01- MEMORY -empty : 98used : 01Make Secret? NoOK NEXT](https://usermanual.wiki/LG-Electronics-USA/LSP345/User-Guide-709945-Page-36.png)
![LSP-345LGE CDMA Fixed Wireless Telephone 396.2 Retrieving Phone Number by Name 1. Press [RECALL] and 2(From Memories). 2. Press 1 button to retrieve phone number by name. 3. Enter the name that you want to look for and press [FIND]. 3At least two letters are recommended for quick search. 3Press [NEXT] or Volume left/right button to scroll through the list of matches. 4. Press [VIEW] to see information in that location. 3Pick up handset to make a call. 3You can edit the phone number by pressing [EDIT] button. Lookup name?[FIND][ABC]01:ABC 028507618[ERASE][EDIT]01:ABC[ERASE][VIEW]02:ACGFROM MEMORIES2:By Address1:By Name](https://usermanual.wiki/LG-Electronics-USA/LSP345/User-Guide-709945-Page-37.png)
![LSP-345 LGE CDMA Fixed Wireless Telephone406.3 Retrieving Phone Number by Address 1. Press [RECALL] and 2(FROM MEMORIES) 2. Press 2 button to retrieve a phone number by address. 3. Enter a memory address to retrieve phone number. (ex: If you enter a memory address, 01.) 3If there is no stored phone number in the memory location, “Empty Location” is displayed. 3If you press [FIND] button without entering number you see the whole phone number list in the memory location and you can find the number by scrolling the list. 4. Pick up the handset or press button to call to displayed number, press [EDIT] to edit stored information or press [ERASE] to delete displayed information. z Edit process 3Modify the phone number by Clear button and keypad. And Press [OK] to edit a related name. ཛ Delete the phone number by Clear button. ཛྷ Enter the modified phone number. ཝ Press [OK]. ཞ To move cursor, use Volume left/right button. ཟ Enter the name. འ Press [OK]. 3Enter a new memory address to store new information or choose the new memory address by [NEXT] and press [OK]. 3Press [OK] to no secret. Lookup Location? ??[FIND]01:ABC 028507618[ERASE][EDIT]01:ABC[ERASE][VIEW]02:ACGMake Secret? No[OK][NEXT]](https://usermanual.wiki/LG-Electronics-USA/LSP345/User-Guide-709945-Page-38.png)
![LSP-345LGE CDMA Fixed Wireless Telephone 41z Erasing process 3You might press [ERASE] at the above step 3. 3Select “Yes” using [NEXT] or Volume key. 3Press [OK] to delete. 6.4 Retrieving Phone Number by Number 1. Press [RECALL] and 2(FROM MEMORIES). 2. Press 3 button to retrieve a phone number by number. 3. Enter the phone number that you want to find and press [FIND] button. 3If there is no stored phone number in the memory location, “No number matches” is displayed. 4. Pick up the handset or press button to call to displayed number, press [EDIT] to edit stored information or press [ERASE] to delete displayed information. z Edit process. z Erasing process 3Do the above step of 6.2 Lookup Number?FIND01:ABC[ERASE][VIEW]02:ACGERASE ? #01[NEXT][OK] Yes](https://usermanual.wiki/LG-Electronics-USA/LSP345/User-Guide-709945-Page-39.png)
![LSP-345 LGE CDMA Fixed Wireless Telephone426.5 Fast Searching 1. Press [RECALL] button. 2. Press [RECALL] button again. 3You see the whole phone number list in the memory location and you can find the number by scrolling the list. RECALL2:FROM MEMORIES1:FROM LAST CALL01:ABC[ERASE][VIEW]02:ACG](https://usermanual.wiki/LG-Electronics-USA/LSP345/User-Guide-709945-Page-40.png)
![LSP-345LGE CDMA Fixed Wireless Telephone 437 SMS (Short Message Service) Messaging, Paging, and Voice mail features are available when your phone is turned on. Using Message button allows you to access messages for viewing on the LCD screen or to send a message. While viewing a message, you can call back to the number displayed in the message by picking up handset. Check with your WLL service provider regarding the availability of this feature. The information in a message depends on the mode the WLL is operating in and the service’s capabilities. 7.1 Checking & Deleting Received Message 7.1.1 Text Message 1. Press MESSAGE button and 1(MSG RECEIVED). 2. Press 1(Text MSG) to see a received text message list. 3Locate to the desired message in the list. 3Mark “ “means already a checked message. 3. Press [VIEW] to see the content of desired message. 3You can see the message with received time and caller’s phone number. 3You can read all messages. Note) CB#(Call Back Number) is the call back number. FR#(FROM) is the origination number. * According to the system, from number may not be available. ! 01 Hello 02 Good Morning[ERASE][VIEW] 5/21 2:20 PM< MESSAGE >[QUIT]CB#:1234[ERASE]SMS MENU2:MSG SENDING1:MSG RECEIVEDMSG RECEIVED2:Voice MSG 01:Text MSG 1/2](https://usermanual.wiki/LG-Electronics-USA/LSP345/User-Guide-709945-Page-41.png)
![LSP-345 LGE CDMA Fixed Wireless Telephone444. Press [ERASE] to erase a message. 3Press [OK] to complete erasing process. z When you scroll received MSGs, you can use Volume left/right key. In other words, if you push Volume left key, the arrow will be placed upward. 7.1.2 Voice Message Voice mail notifications indicate the number of new voice mail message in your mailbox. Only the most recent voice mail notification will be stored in the WLL phone; previous messages will be overwritten. When a voice mail messages left for you, the WLL phone will alert and display “Voice Mail “. You must call your voice mail service to retrieve these messages. 1. Press MESSAGE button and 1(Received MSG) in idle state. 2. Press 2(Voice MSG) to check the voice message. 3If there is no voice message, “No Voice Mail was received” is displayed. 3Press [ERASE] to delete the voice message. * According to the system, right LCD contents may be different. 3. Pick up the phone to make a call-to-call back your voice mailbox if the number of the voice mailbox is provided by system. z When you scroll received MSGs, you can use Volume left/right button. In other words, if you push Volume left button, the arrow will be placed upward. < VOICE MAIL > 1 New Message 5/21 2:32 PMERASE ?[OK][NEXT]YesFR#:5678Hello[ERASE][OK]](https://usermanual.wiki/LG-Electronics-USA/LSP345/User-Guide-709945-Page-42.png)
![LSP-345LGE CDMA Fixed Wireless Telephone 457.1.3 Erasing all Received Message 1. Press MESSAGE button and 1(MSG RECEIVED). 2. Press 3(Clear All). 3. Select “No” or “Yes” using [NEXT] or Volume key. Press [OK] to delete. 7.2 MSG Notification Type Select 1. Press Message button and 3(MSG NOTIF). 2. Select Off, Once, Every 2 Min by pressing [NEXT] or Volume left/right button. 3. Press [OK] to save and exit. MSG RECEIVED3:Clear AllMSG NOTIFOff[OK][NEXT]ERASE All?[OK][NEXT]Yes](https://usermanual.wiki/LG-Electronics-USA/LSP345/User-Guide-709945-Page-43.png)
![LSP-345 LGE CDMA Fixed Wireless Telephone467.3 Message Sending When sending message, you can select set priority among Normal, Emergency and Urgent. 7.3.1 Sending a New Message 1. Press MESSAGE button and 2(MSG SENDING). 2. Press 1(New Message) to send a new message. 3. Enter the called number and press [OK]. 3You can find the called number in the memory by [FIND] button. 4. Input a message and press [OK] to send. Press [ABC] to change upper or lower case character. 5. Select Yes/No the Set Delivery Ack. Press [OK] to send. 6. Select Yes/No to store the message. Press [OK]. Store Message ?[NEXT][OK]YesSMS MENU2:MSG SENDING1:MSG RECEIVEDCalled Number[OK]1234[FIND] 028503333ok A/aABCDE<MSG Input>[OK][ABC]MSG SENDING2:Sent Message1:New MessageDelivery Ack?[OK]NO[NEXT]](https://usermanual.wiki/LG-Electronics-USA/LSP345/User-Guide-709945-Page-44.png)
![LSP-345LGE CDMA Fixed Wireless Telephone 477. Select type for setting priority among Normal/Emergency /Urgent. Set the priority. Press [OK] to send the message. 7.3.2 Sending the sent Message or Message after editing the Sent Message 1. Press MESSAGE button and 2(MSG SENDING) 2. Press 2(Sent Message) to see a sent text message list. 3Locate to the desired message in the list. 3. Press [EDIT] to edit the content of the selected message. 3You can see the selected sent message. 3Edit the message. Press [ABC] to change upper or lower case character. 4. Press [OK] Button. 5. Enter the called Number and press [OK]. 6. Select Yes/No the Set Delivery Ack. Press [OK] to send. MSG SENDING2:Sent Message1:New Message 01 Hello 02 Good Morning[ERASE][EDIT]Called Number[OK]1234[FIND] Hello<MSG Input>[OK][ABC]Set Priority ?[NEXT][OK]NormalDelivery Ack?[OK]NO[NEXT]](https://usermanual.wiki/LG-Electronics-USA/LSP345/User-Guide-709945-Page-45.png)
![LSP-345 LGE CDMA Fixed Wireless Telephone487. Select Yes/No to store Message. Press [OK]. 8. Select type for setting priority among Normal / Emergency /Urgent. Set the priority. Press [OK] to send the message. Store Message?[NEXT][OK]YesSet Priority ?[NEXT][OK]Normal](https://usermanual.wiki/LG-Electronics-USA/LSP345/User-Guide-709945-Page-46.png)
![LSP-345LGE CDMA Fixed Wireless Telephone 497.3.3 Sending the Received Message or Message after editing the Received Message 1. Press MESSAGE button and 2(MSG SENDING). 2. Press 3(Received MSG) to see a received text message list. 3Locate to the desired message in the list. 3. Press [EDIT] to edit the content of the selected message. 3You can see the selected received message. 3Edit the message. Press [ABC] to change upper or lower case character. 4. Press [OK] Button. 5. Enter the called Number and press [OK]. 6. Select Yes/No the Set Delivery Ack. Press [OK] to send. 028503333ok A/a Hello<MSG Input>[OK][ABC]MSG SENDING4:Clear All3:Received MSG901 Hello902 Good Morning[EDIT]Called Number[OK]1234[FIND]Delivery Ack?[OK]NO[NEXT]](https://usermanual.wiki/LG-Electronics-USA/LSP345/User-Guide-709945-Page-47.png)
![LSP-345 LGE CDMA Fixed Wireless Telephone507. Select Yes/No to store Message. Press [OK]. 8. Select type for setting priority among Normal/Emergency Urgent. Set the priority. Press [OK] to send the message. 7.3.4 Erasing a Sent Message 1. Press MESSAGE button and 2(MSG SENDING). 2. Press 4(Clear All) to clear text message list. 3. Select “No” or “Yes” using [NEXT] or Volume button. Press [OK] to erase a message. ERASE ALL ?[OK][NEXT]YesMSG Sending2:Sent Message1:New MessageStore Message?[NEXT][OK]YesMSG SENDING3:Received MSG4:Clear AllSet Priority ?[NEXT][OK]Normal](https://usermanual.wiki/LG-Electronics-USA/LSP345/User-Guide-709945-Page-48.png)
![LSP-345LGE CDMA Fixed Wireless Telephone 517.4 MSG Ringer You can select the various ring types. 1. Press [Message] + 4(MSG RINGER) in the idle state. Select a desired ring type with [NEXT] or Volume button. Press [OK] button. 2. There are 5 different ring types. Those are RING1, RING2, RING3, RING4 and RING5. GMSG RINGER[NEXT][OK]¥ RING1](https://usermanual.wiki/LG-Electronics-USA/LSP345/User-Guide-709945-Page-49.png)
![LSP-345 LGE CDMA Fixed Wireless Telephone528 Other Functions 8.1 Redial Pick up the handset or press button and Redial button to redial last outgoing number. 8.2 Finding Last Call History Press Redial button in on-hook state to see your last telephone numbers. 8.3 Hook Switch 1. While in the middle of a call, pressing the hook switch for a while (100~600ms) will be treated as a flash. After that, the call will be terminated. 2. Very briefly pressing the hook switch will be ignored. 8.4 Flash Key 3During a call, flash key is used for call transfer, 3-way conference calls and call waiting.(As a system function, it may not be available according to the system.) 8.5 Safe Mode Even if you misplaced the handset for a long time, the phone returns to the normal state. After the ROH tone, the phone returns to the IDLE state as the picture and the phone is able to receive a call. 1234567 028507618[VIEW]LSP-345[MENU][RECALL]](https://usermanual.wiki/LG-Electronics-USA/LSP345/User-Guide-709945-Page-50.png)
![LSP-345LGE CDMA Fixed Wireless Telephone 539 Storing Phone Number 9.1 Storing/Editing Phone Numbers 9.1.1 Storing Phone Numbers Frequently used phone numbers can be stored on the memory locations (01~99: 2 digits) and you can make a call by pressing memory location number in off-hook state. 1. Enter the area code and phone number in on-hook state (Max. 32 digits) 2. Press [SAVE]. 3. Enter the name in text mode and press [OK] to save. Press [ABC] to change upper or lower case characters. 3To store without name, just press [OK]. 3Refer to “To enter a character”. 4. Enter the desired memory location. 3The phone number is stored in the displayed memory location. 5. The phone will display a message asking to keep your number as secret or not. Select “No” or “Yes” using [NEXT] or Volume button. Then press [OK]. 028507618[FIND][SAVE] 028507618[OK][ABC]Make Secret? No[OK][NEXT]Auto=01 ??[OK][NEXT]ABC](https://usermanual.wiki/LG-Electronics-USA/LSP345/User-Guide-709945-Page-51.png)

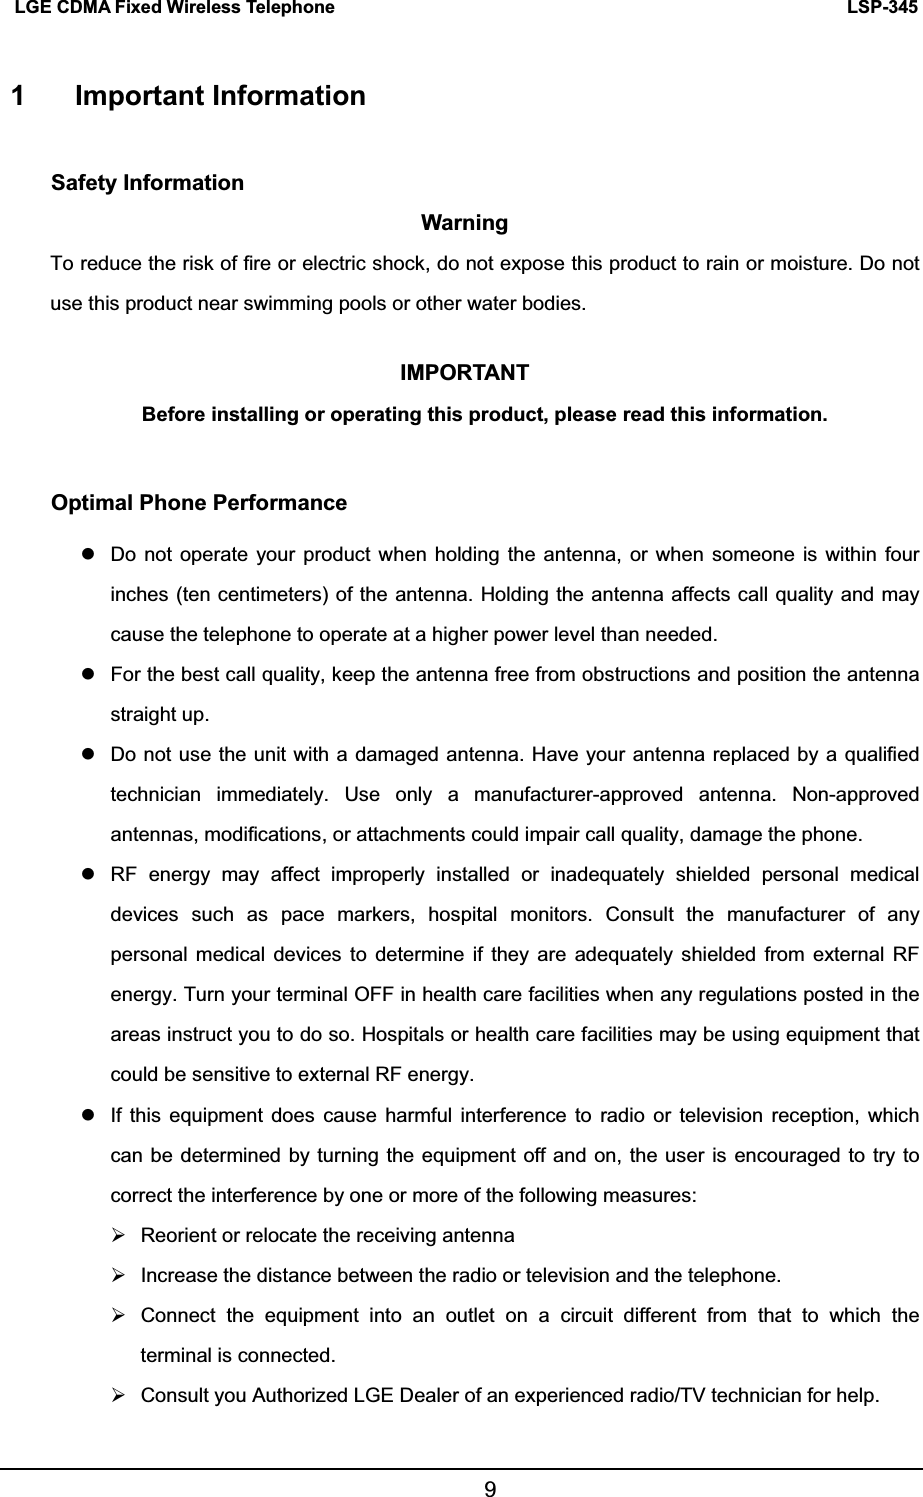
![LSP-345LGE CDMA Fixed Wireless Telephone 559.1.2 Erasing Stored Phone Numbers When a phone number is stored in a memory location, you can erase the stored phone number. 1. Press [RECALL] + 2(FROM MEMORIES) + 3 (By Number) and enter a number of the desired memory location to erase. 3If there is no stored phone number in the memory location, “No number matches” is displayed. 3If you do not remember the memory location to erase, press [FIND] to search phone number by memory location. 2. Erasing process 3Select “No” or “Yes” using [NEXT] or Volume key. 3Press [OK] to complete erasing process. Lookup Number?[FIND]ERASE? #01 Yes[OK][NEXT][ERASE][VIEW]01:02850761802:123123 - ERASED !-](https://usermanual.wiki/LG-Electronics-USA/LSP345/User-Guide-709945-Page-53.png)
![LSP-345 LGE CDMA Fixed Wireless Telephone569.2 Finding Stored Phone Numbers You can see all the list of stored phone numbers in memory list and if you forgot the memory location, can find it in sequence. And You can place a call with the phone number. 1. Press [RECALL] + 2(FROM MEMORIES) +3(By Number) in on-hook state. 2. Press [FIND] button to find the desired phone number. 3Locate in the desired name or address to find. 3If not entered any name, phone number is displayed. 3. Press [VIEW] to see the stored number. 4. To make a call with the phone number in the state of step 2 or step 3, pick up the handset or press button and wait for Auto Time-out. Lookup Number?[FIND][ERASE][VIEW]01:02850761802:12312301:ABC 028507618[ERASE]][EDIT]](https://usermanual.wiki/LG-Electronics-USA/LSP345/User-Guide-709945-Page-54.png)