LG Electronics USA LST250 User Manual LST250 User Guide 0711
LG Electronics USA LST250 User Guide 0711
UserManual.wiki
>
LG Electronics USA
>
LST250 User Manual
>
Users Manual
Contents
1.
Users Manual
2.
Users Manual per CRN 20753
Users Manual
Navigation menu
Upload a User Manual
Namespaces
Wiki Guide
HTML
PDF
Info
Views
User Manual
Discussion / Help
Navigation
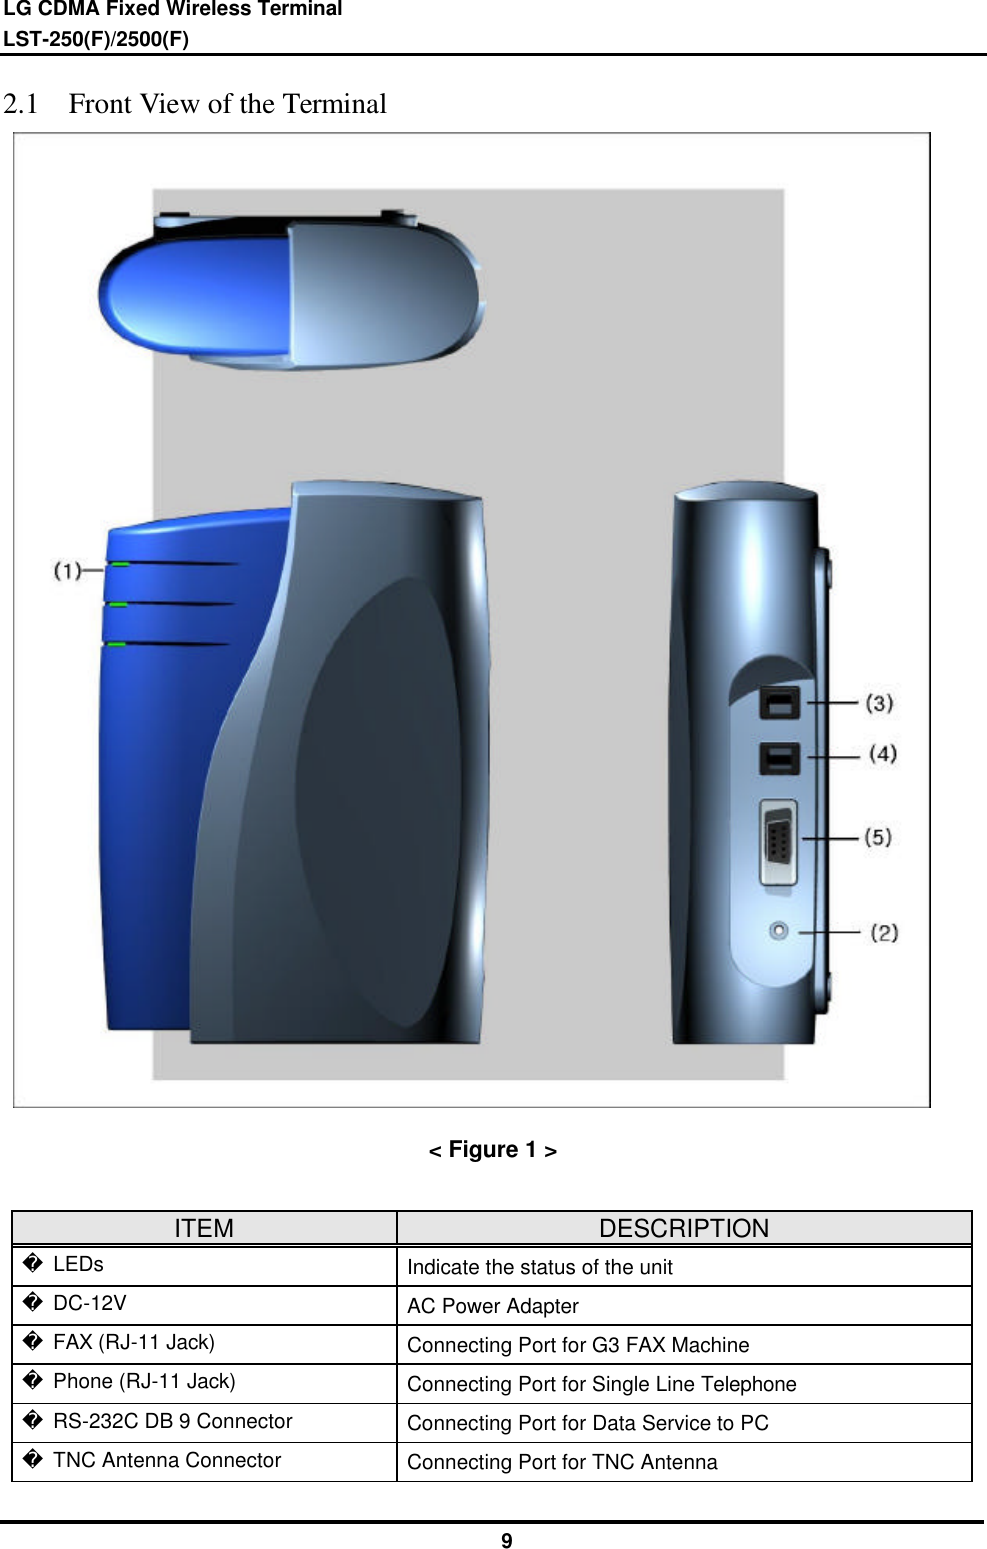
![LG CDMA Fixed Wireless Terminal LST-250(F)/2500(F) 12 [LST-250F] * Note : - G3 Fax can not connected to your LST-250 terminal. - Length between LST-250(F) and Telephone : over 1m. The adapter type(with power cord) may be different by country adaptation. TELEPHONE G3 Analog Fax 3 PC RJ-11 RJ-11](https://usermanual.wiki/LG-Electronics-USA/LST250.Users-Manual/User-Guide-163619-Page-13.png)
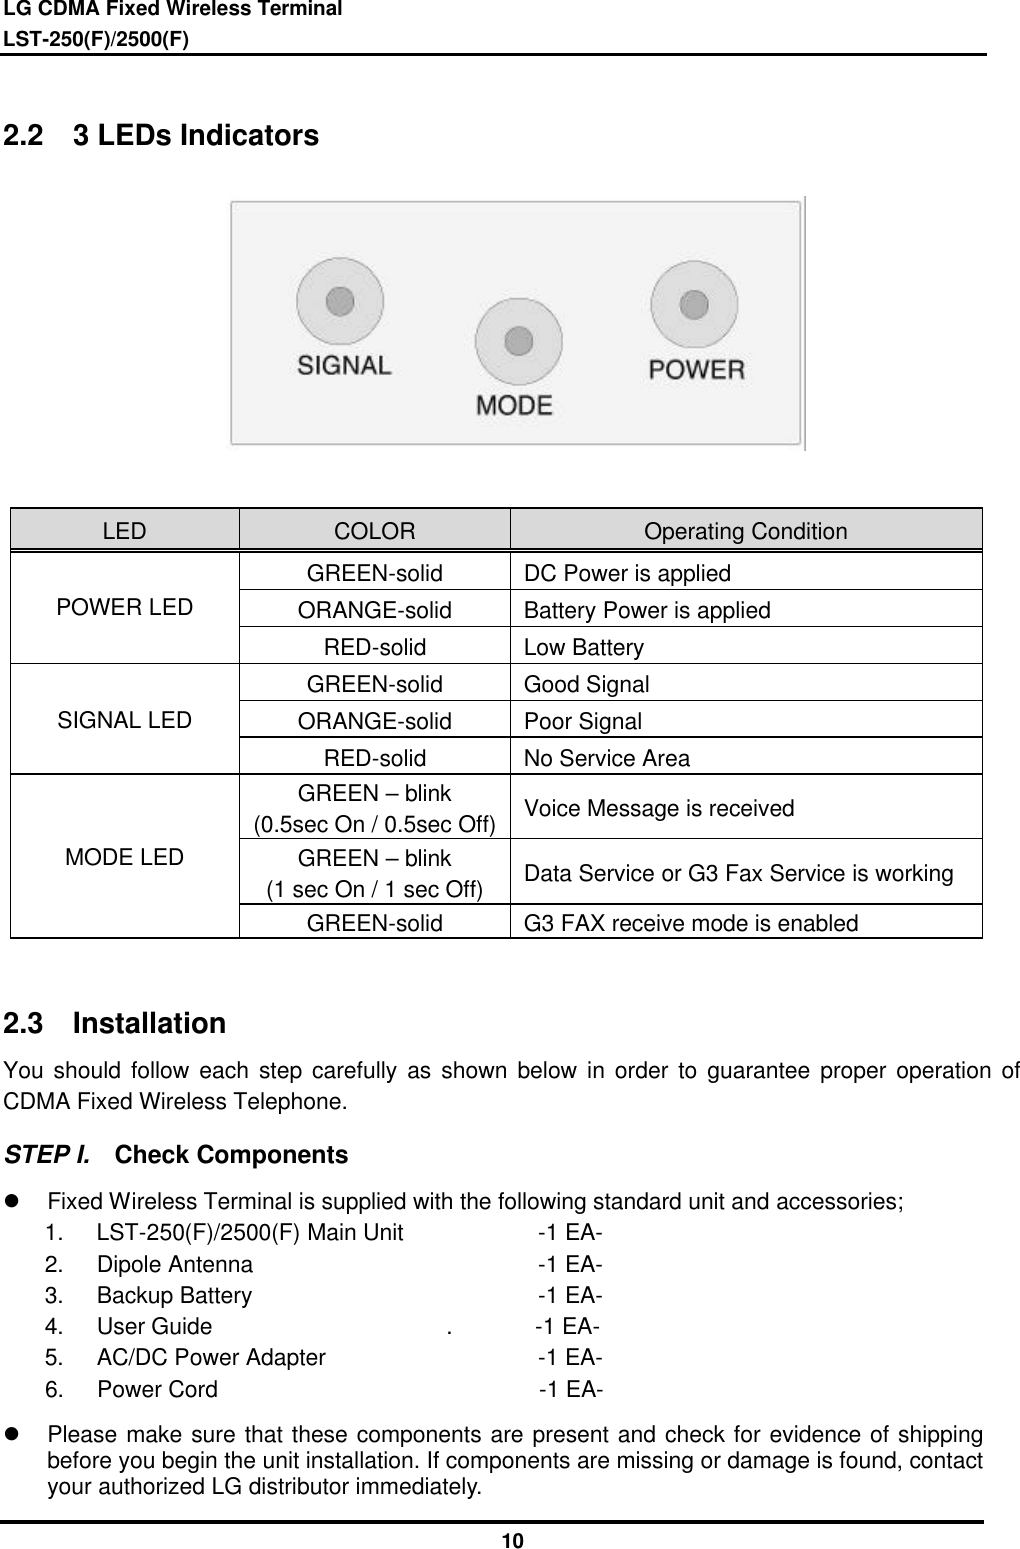
![LG CDMA Fixed Wireless Terminal LST-250(F)/2500(F) 13 [LST-2500F] * Note : - G3 Fax can not connected to your LST-2500 terminal. - Length between LST-2500(F) and Telephone : over 1m. < Figure 2. Connection Diagram with External Equipment > 2.4 Installation Steps Please follow the below procedure to install the unit properly. Connect the antenna to the TNC connector (Turn right). Bend the antenna up right. Connect your phone Cord. Connect the AC power supply. 213 TELEPHONE G3 Analog Fax PC RJ-11 RJ-11](https://usermanual.wiki/LG-Electronics-USA/LST250.Users-Manual/User-Guide-163619-Page-14.png)