LG Electronics USA M4210CE 42" LCD MONITOR User Manual User s Manual H ok
LG Electronics USA 42" LCD MONITOR User s Manual H ok
UserManual.wiki
>
LG Electronics USA
>
M4210CE User Manual
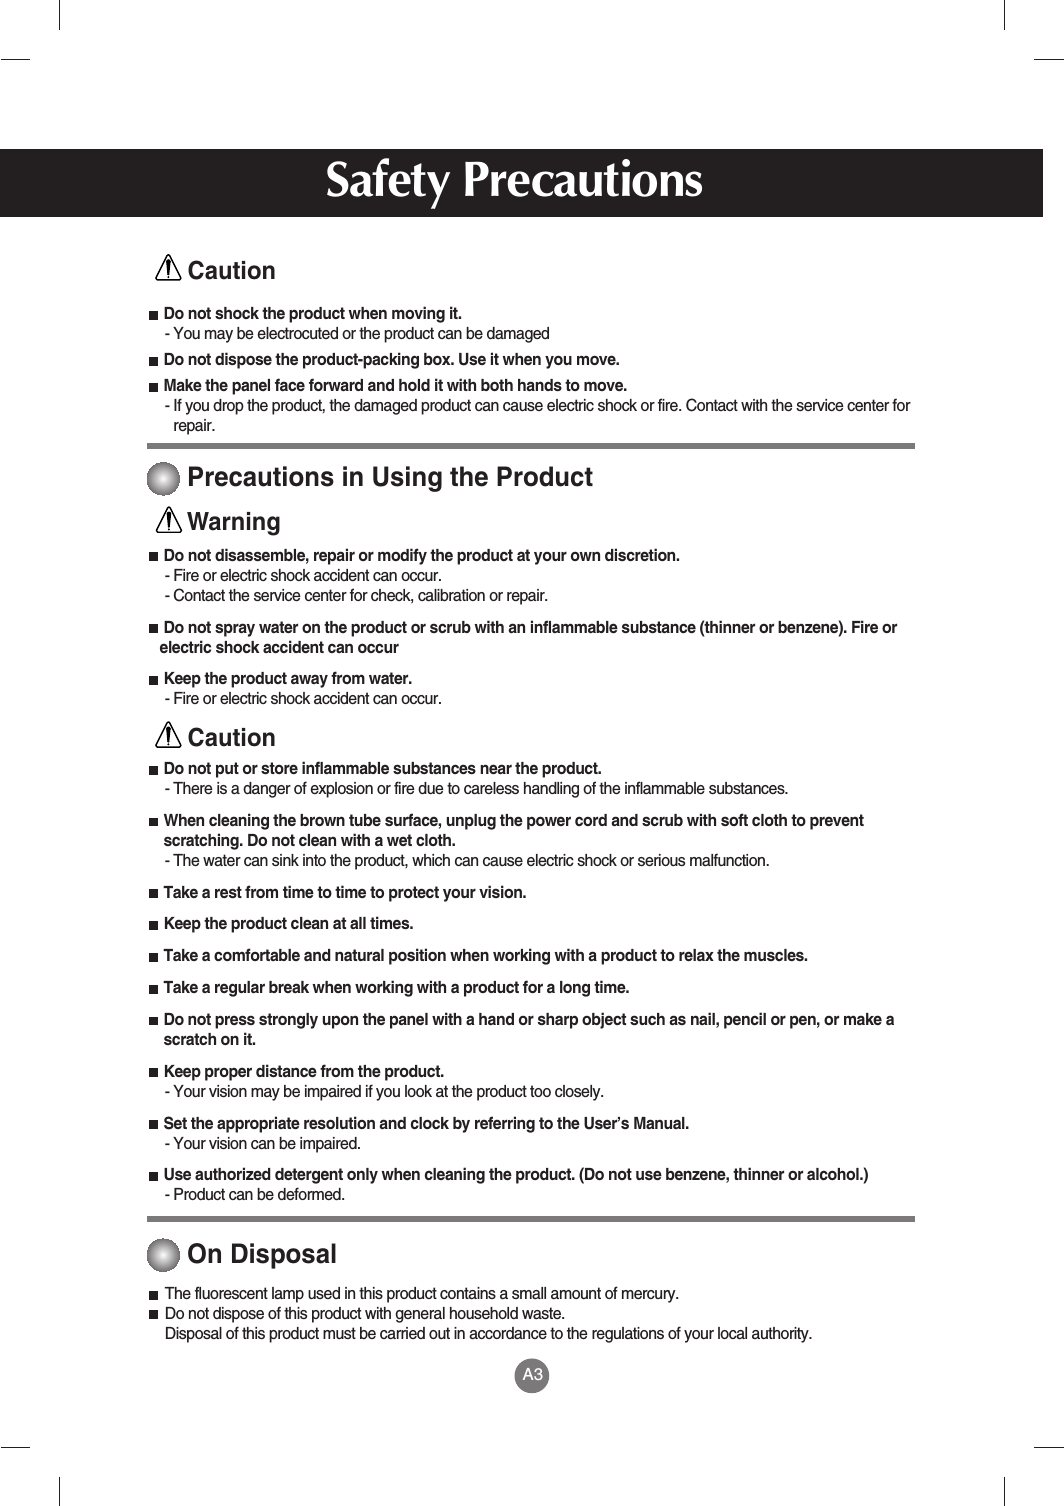
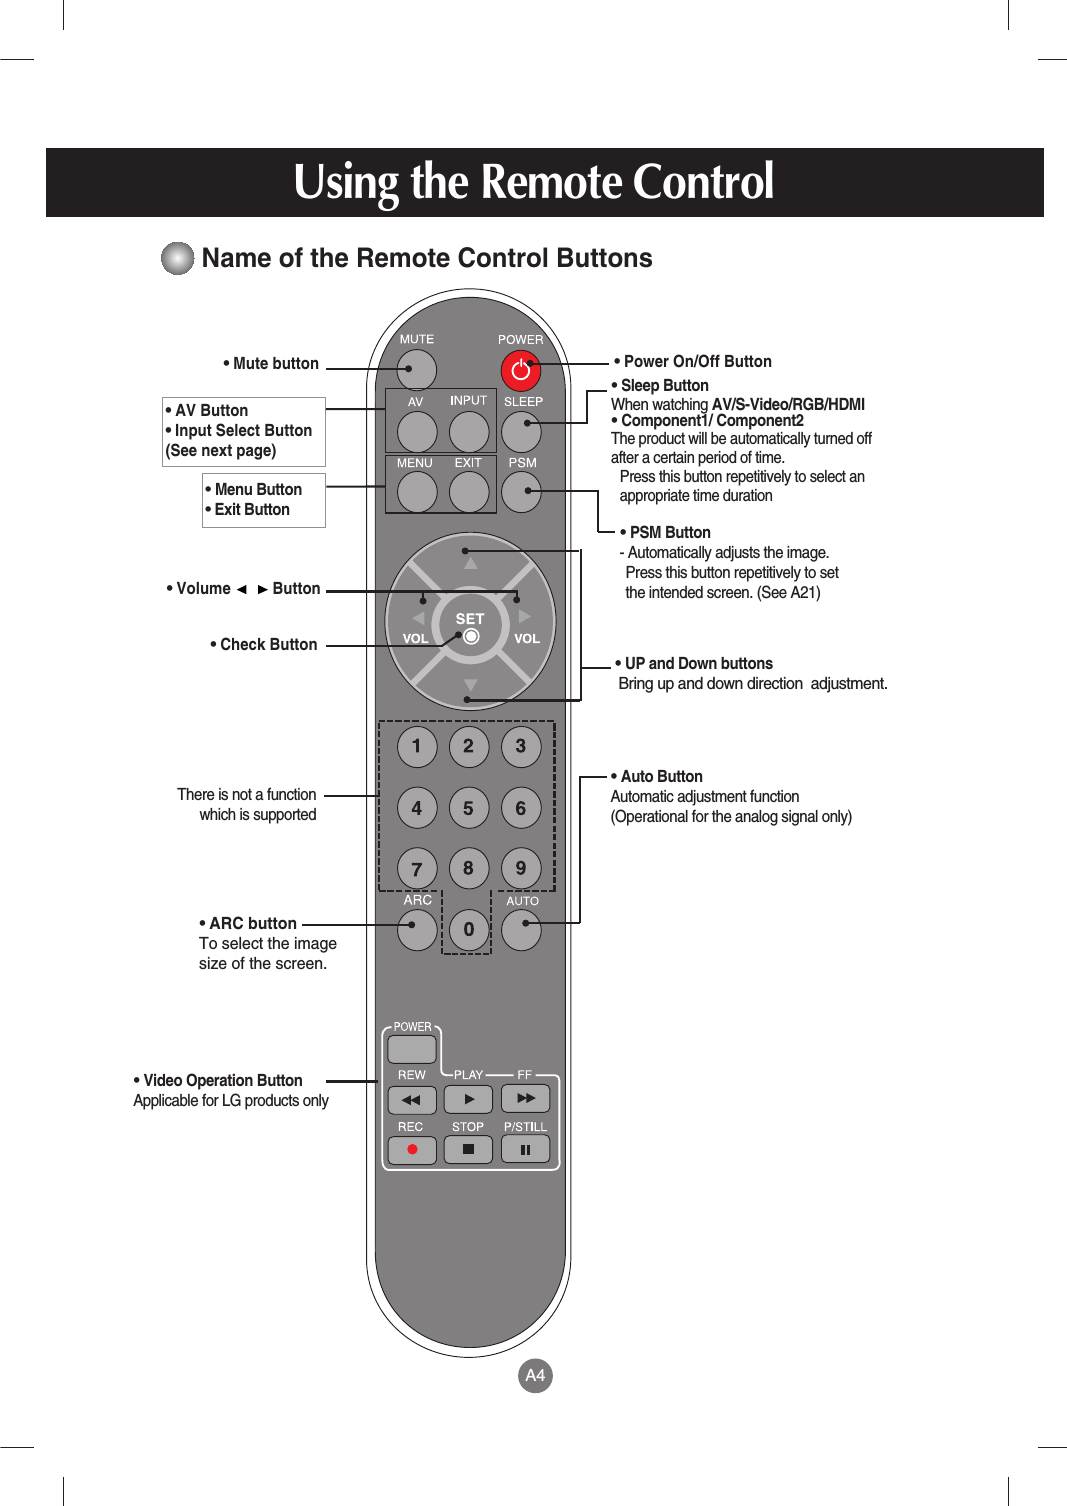
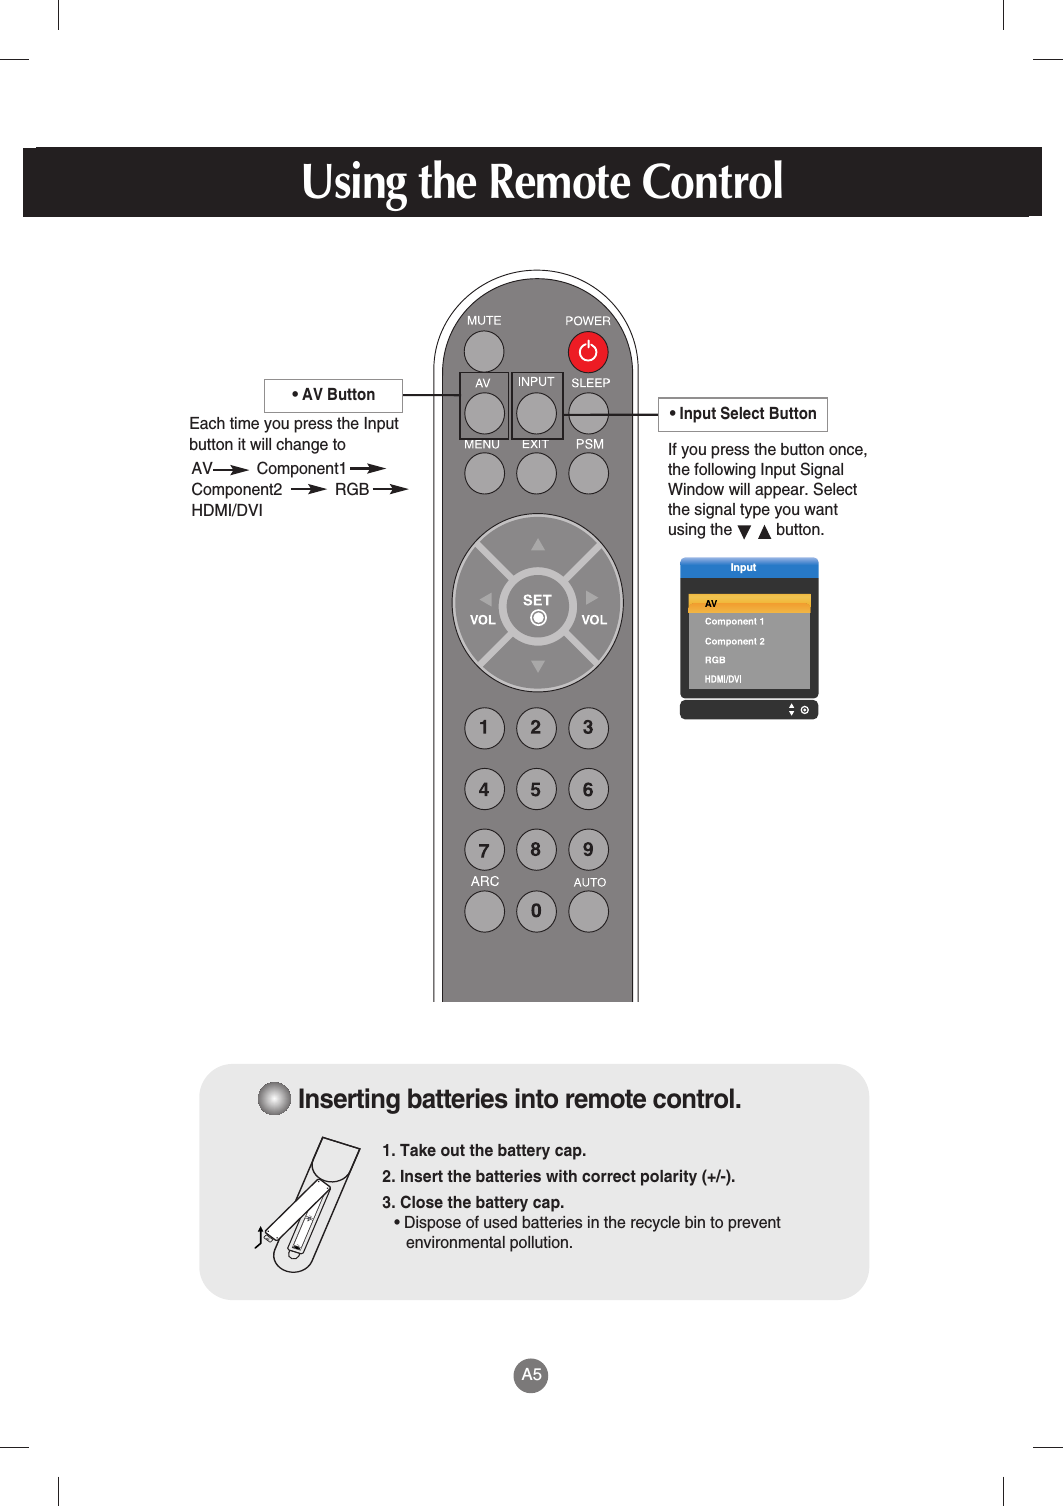
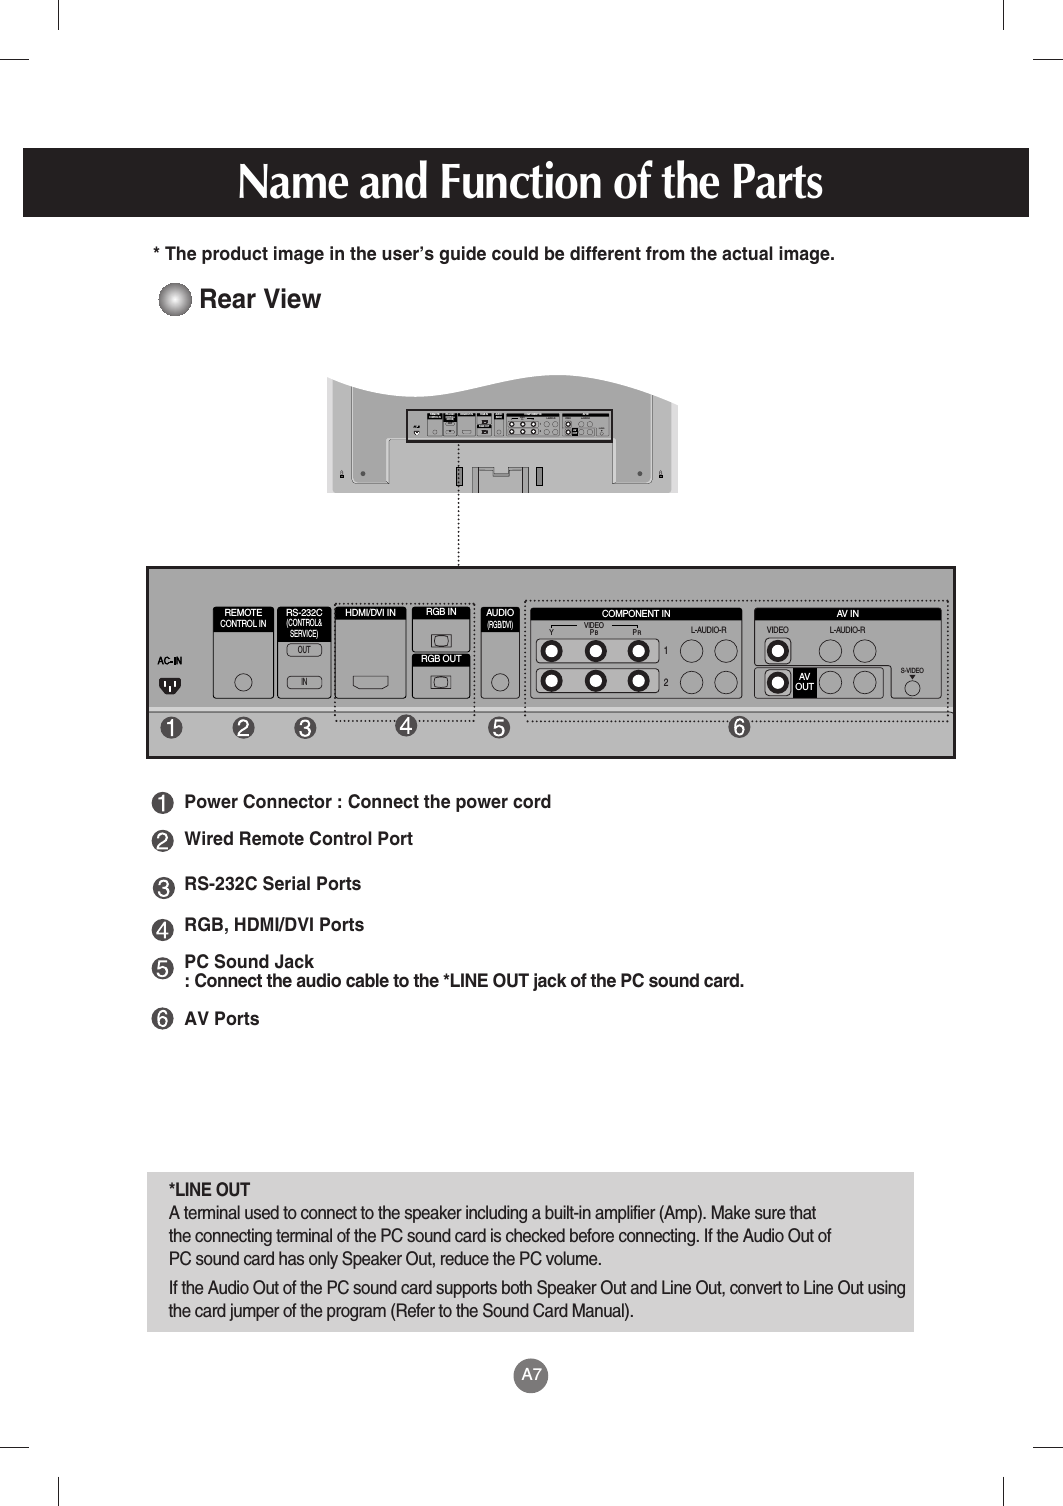
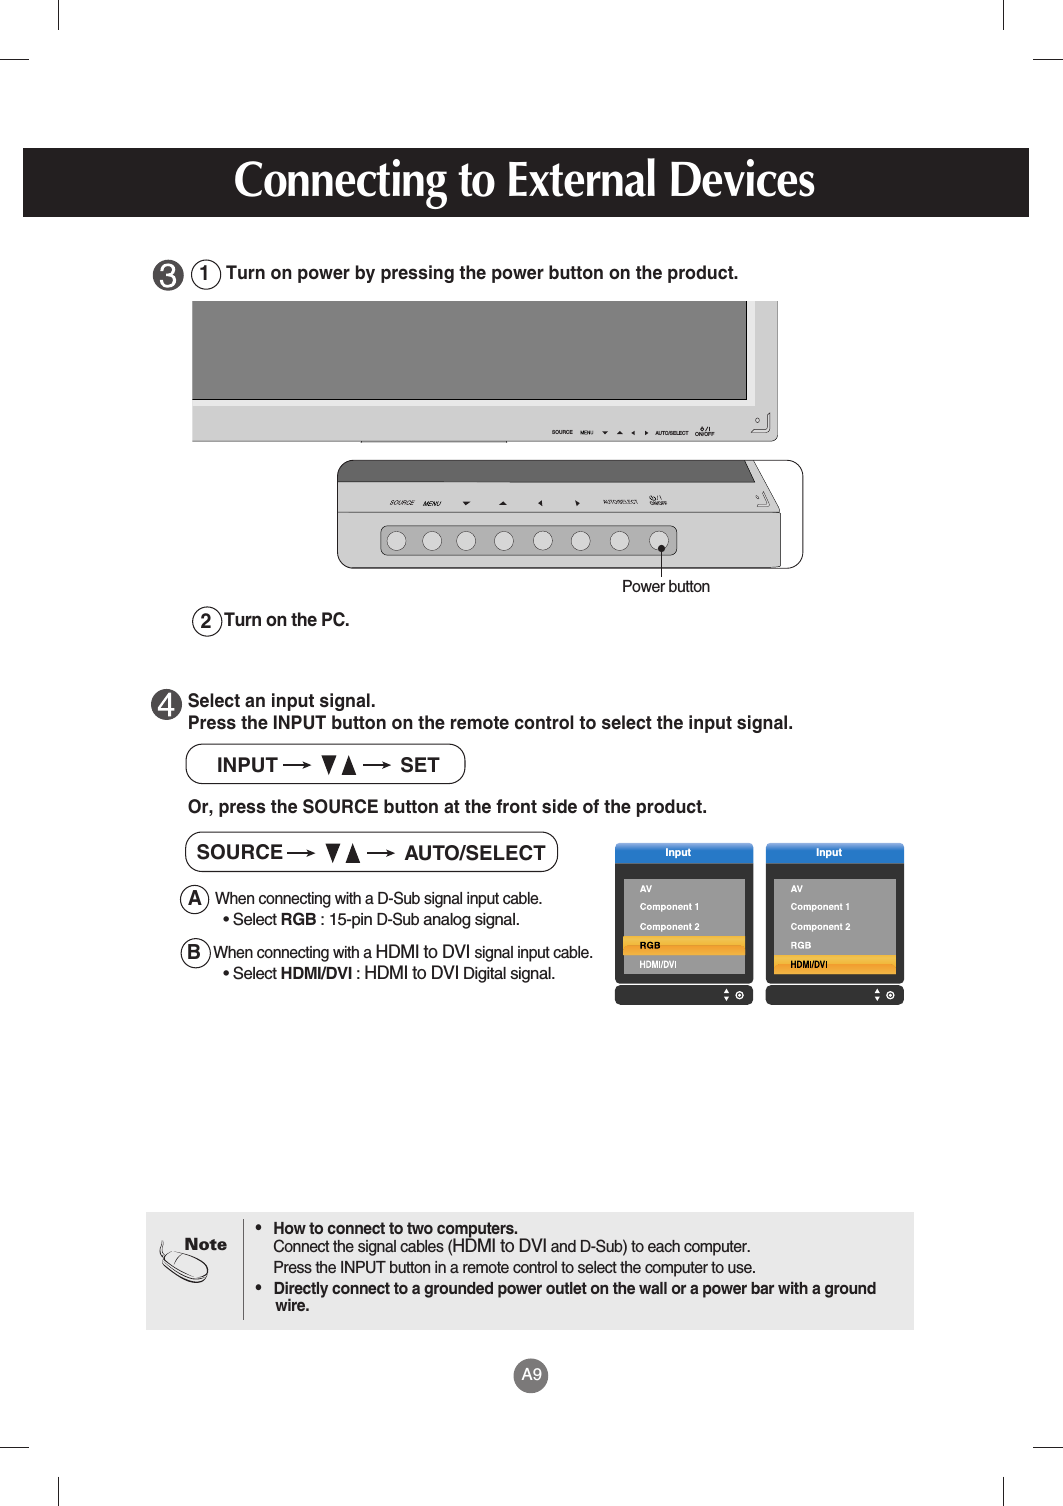
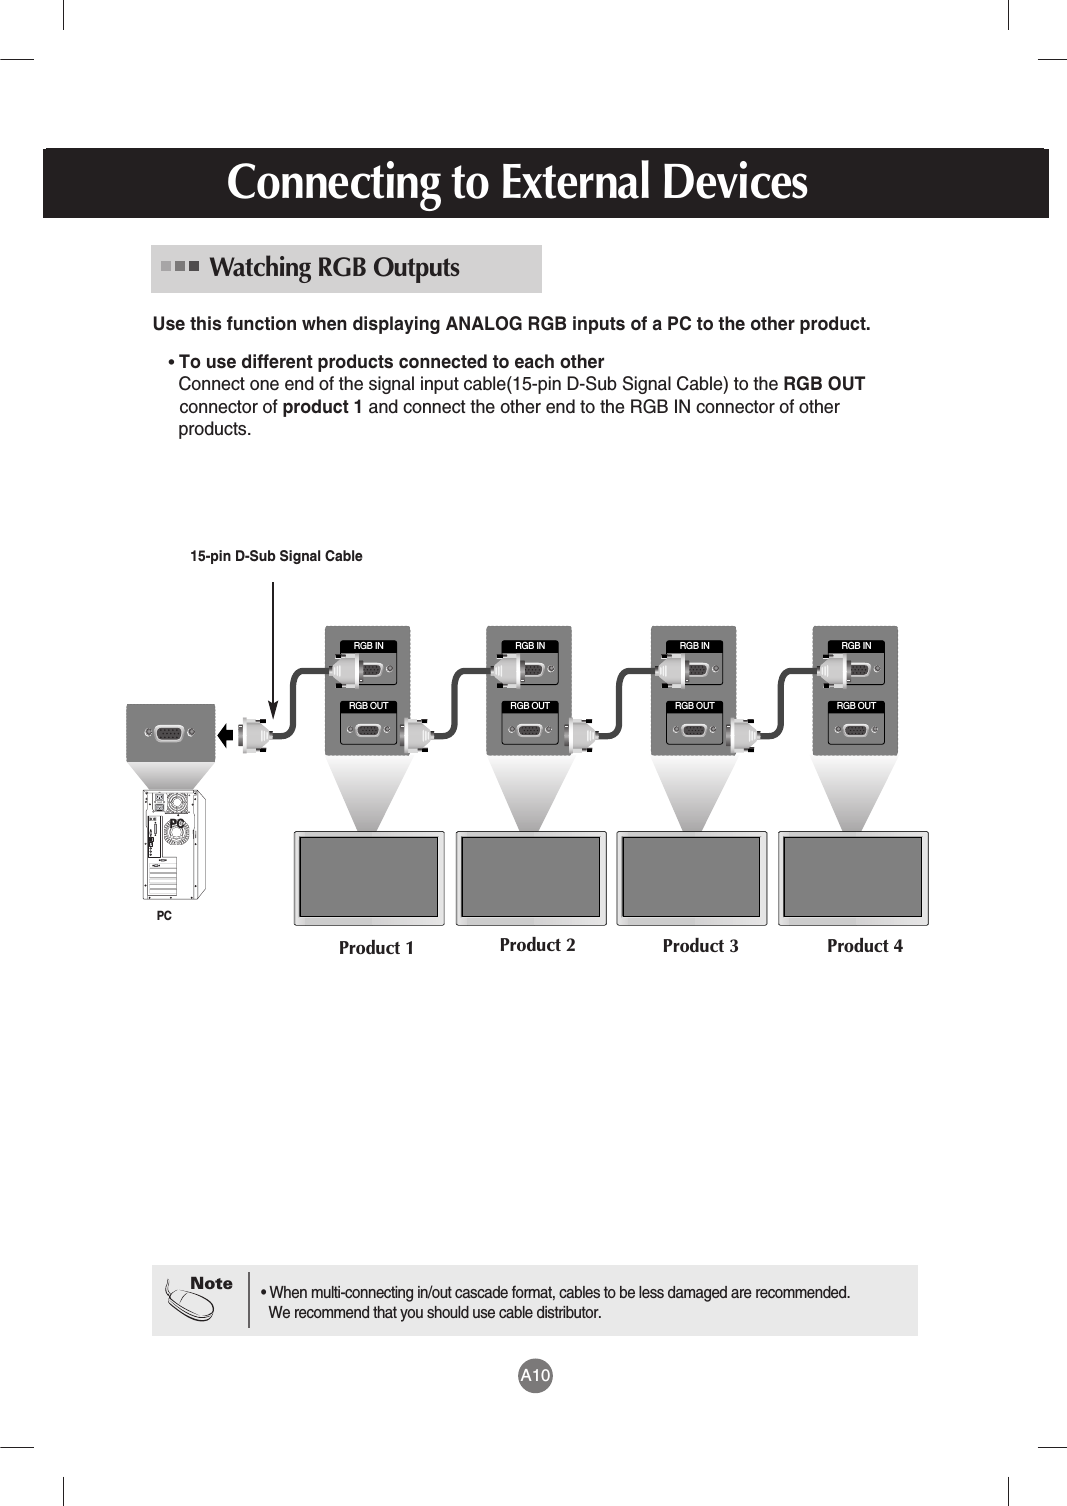
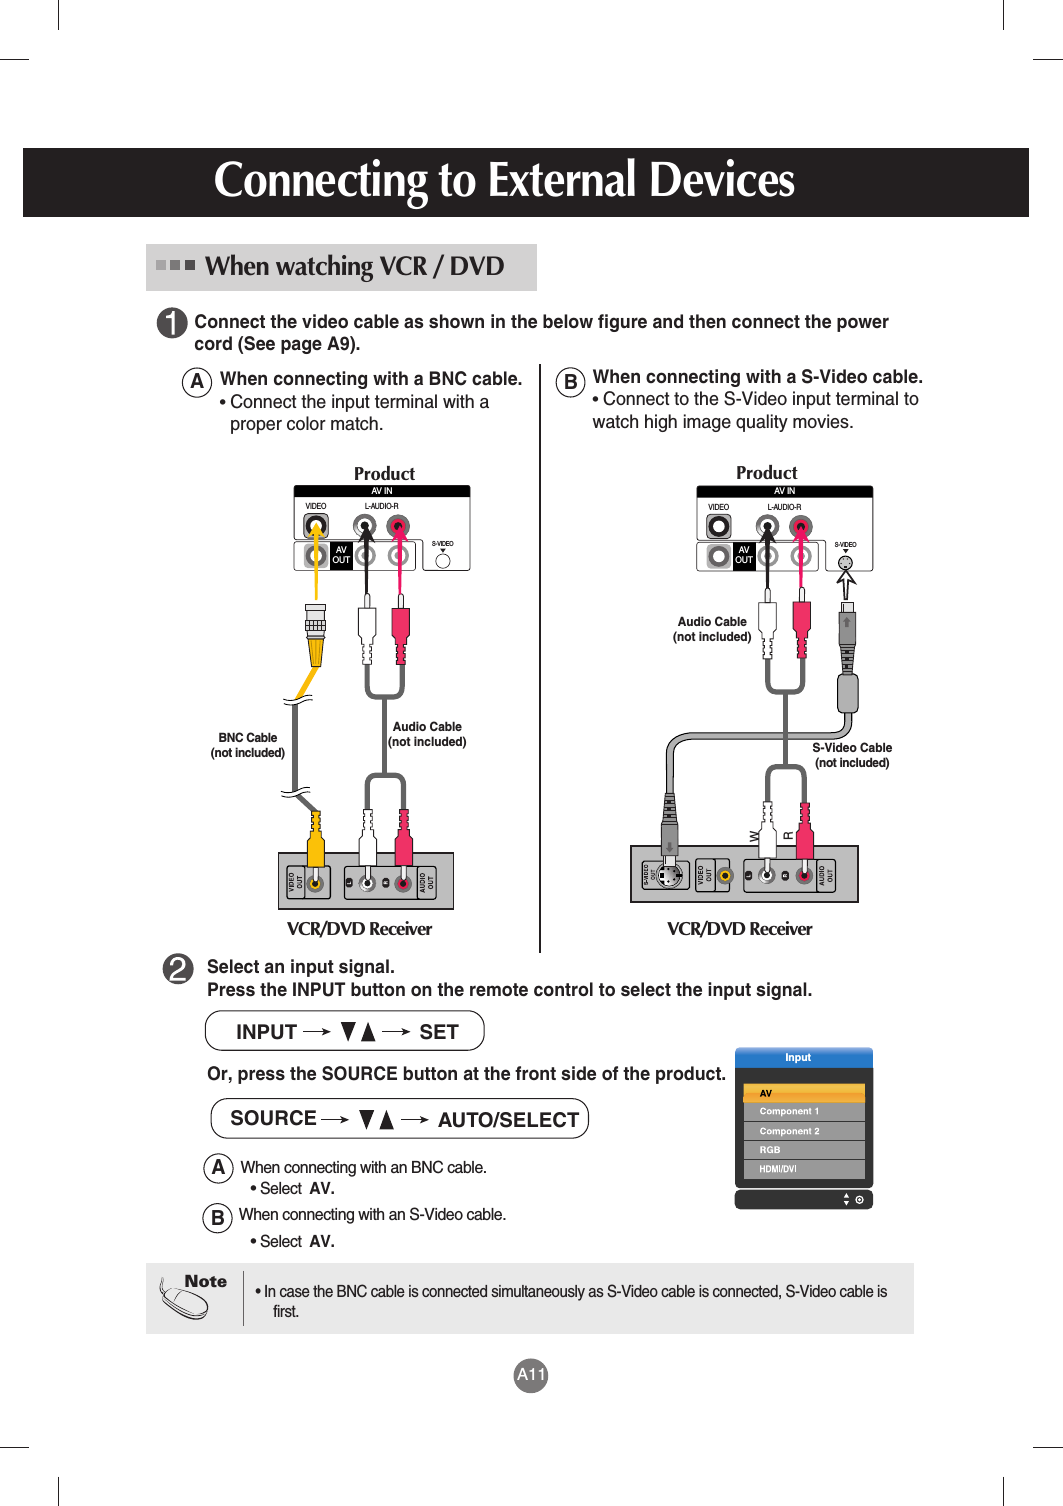
USERS MANUAL
Navigation menu
Upload a User Manual
Namespaces
Wiki Guide
HTML
PDF
Info
Views
User Manual
Discussion / Help
Navigation

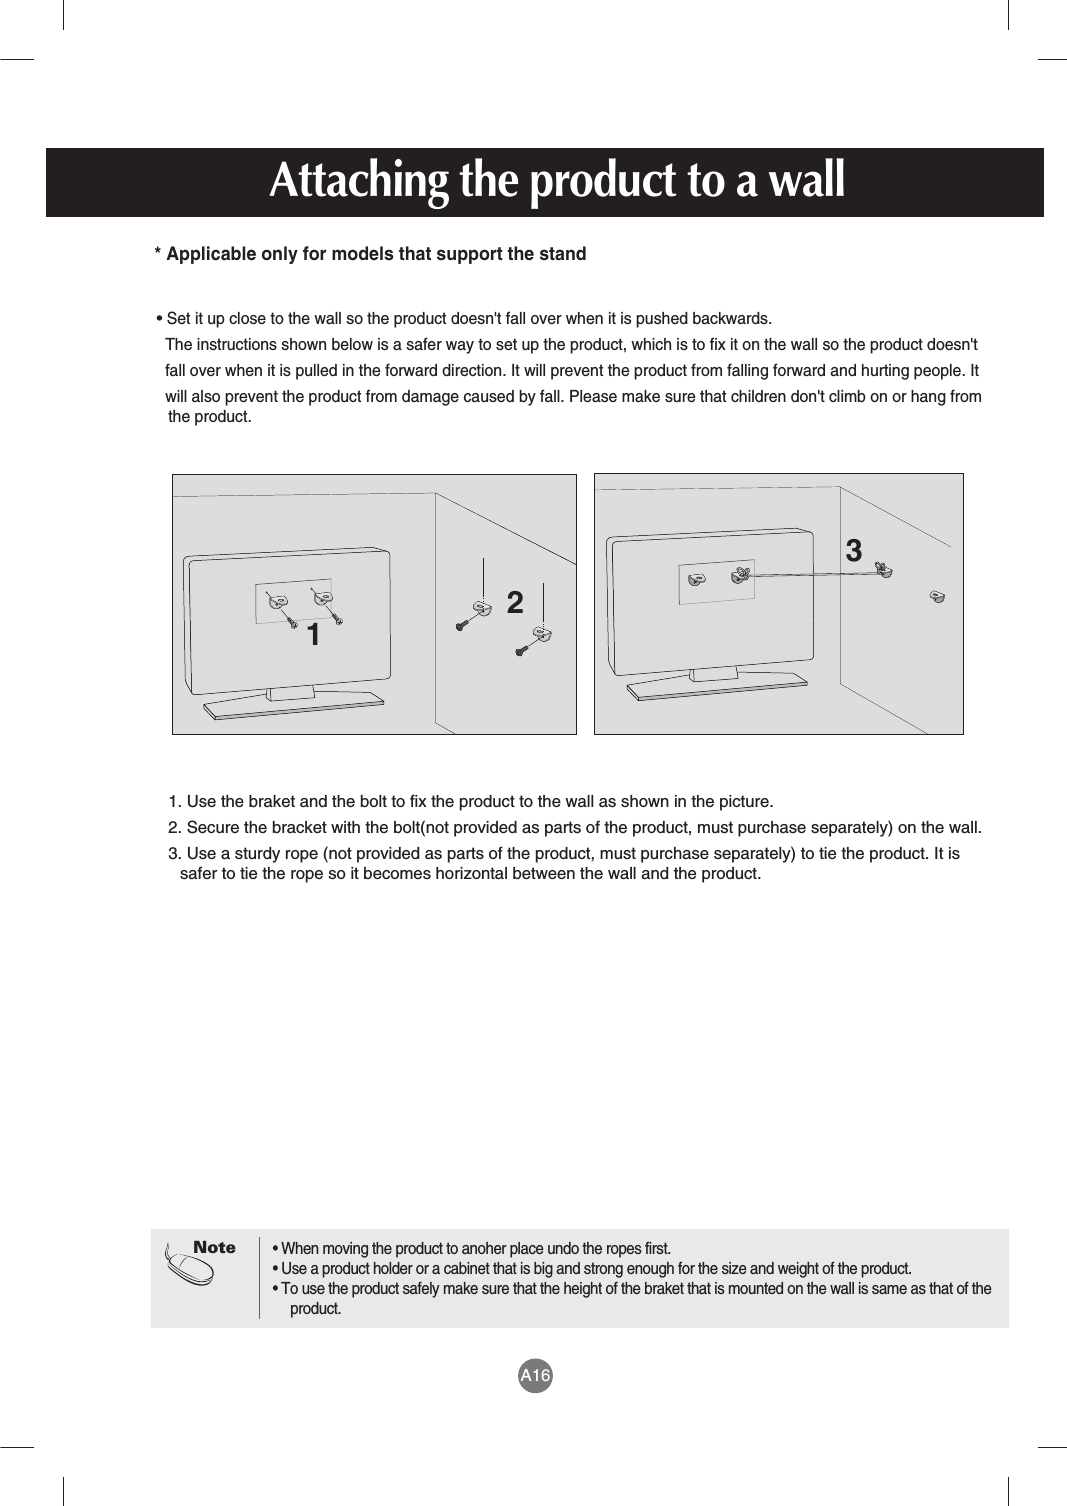
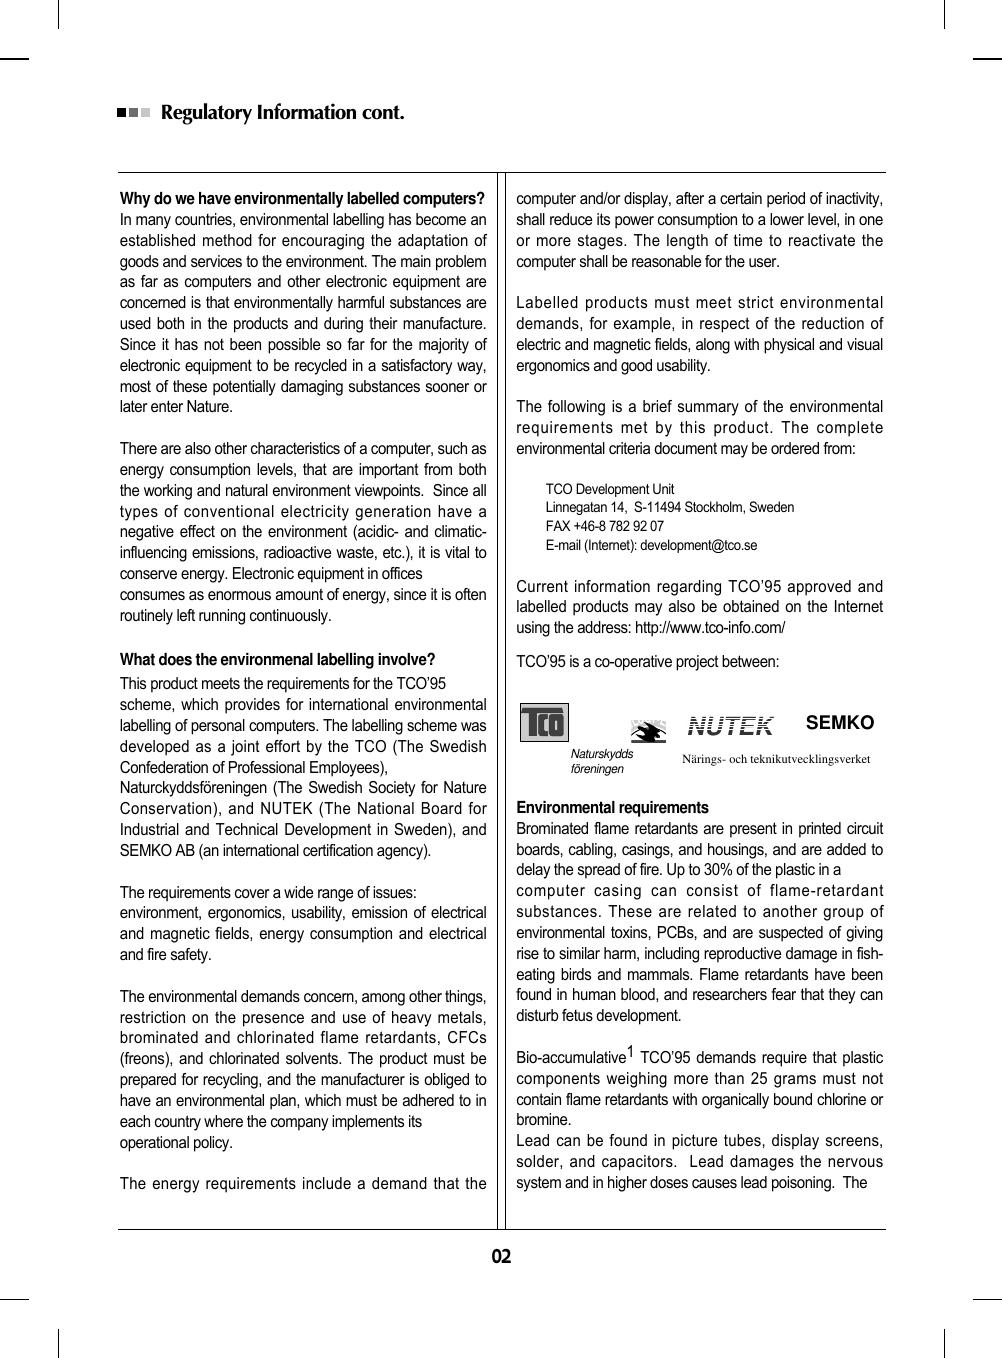
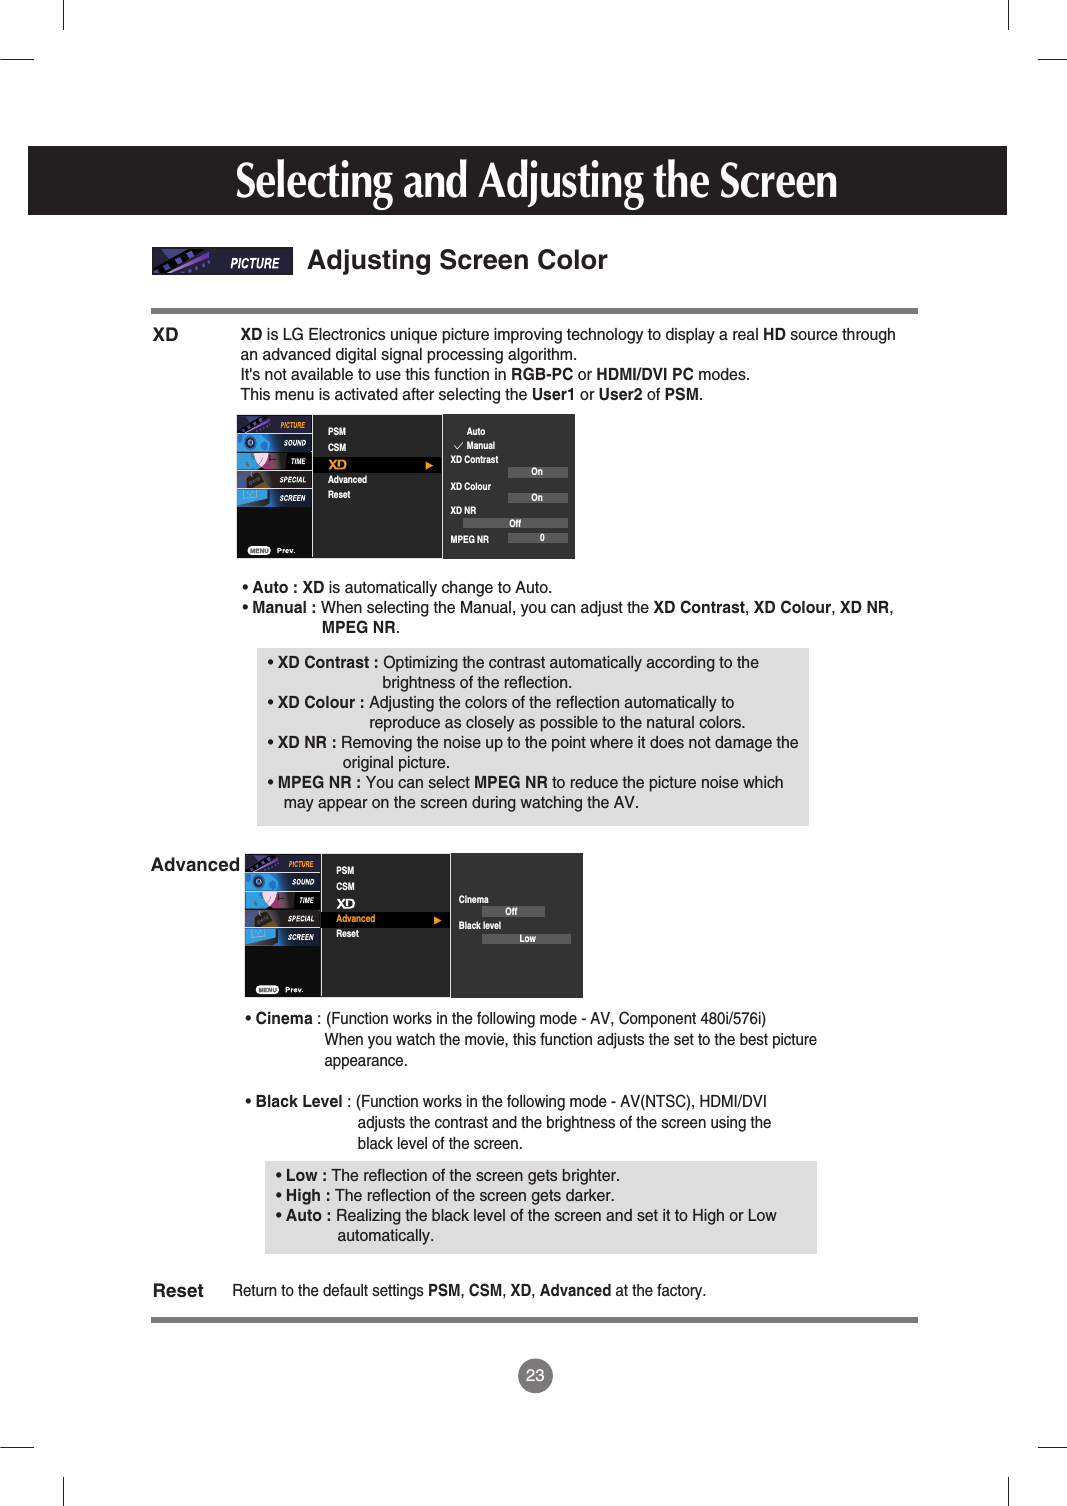
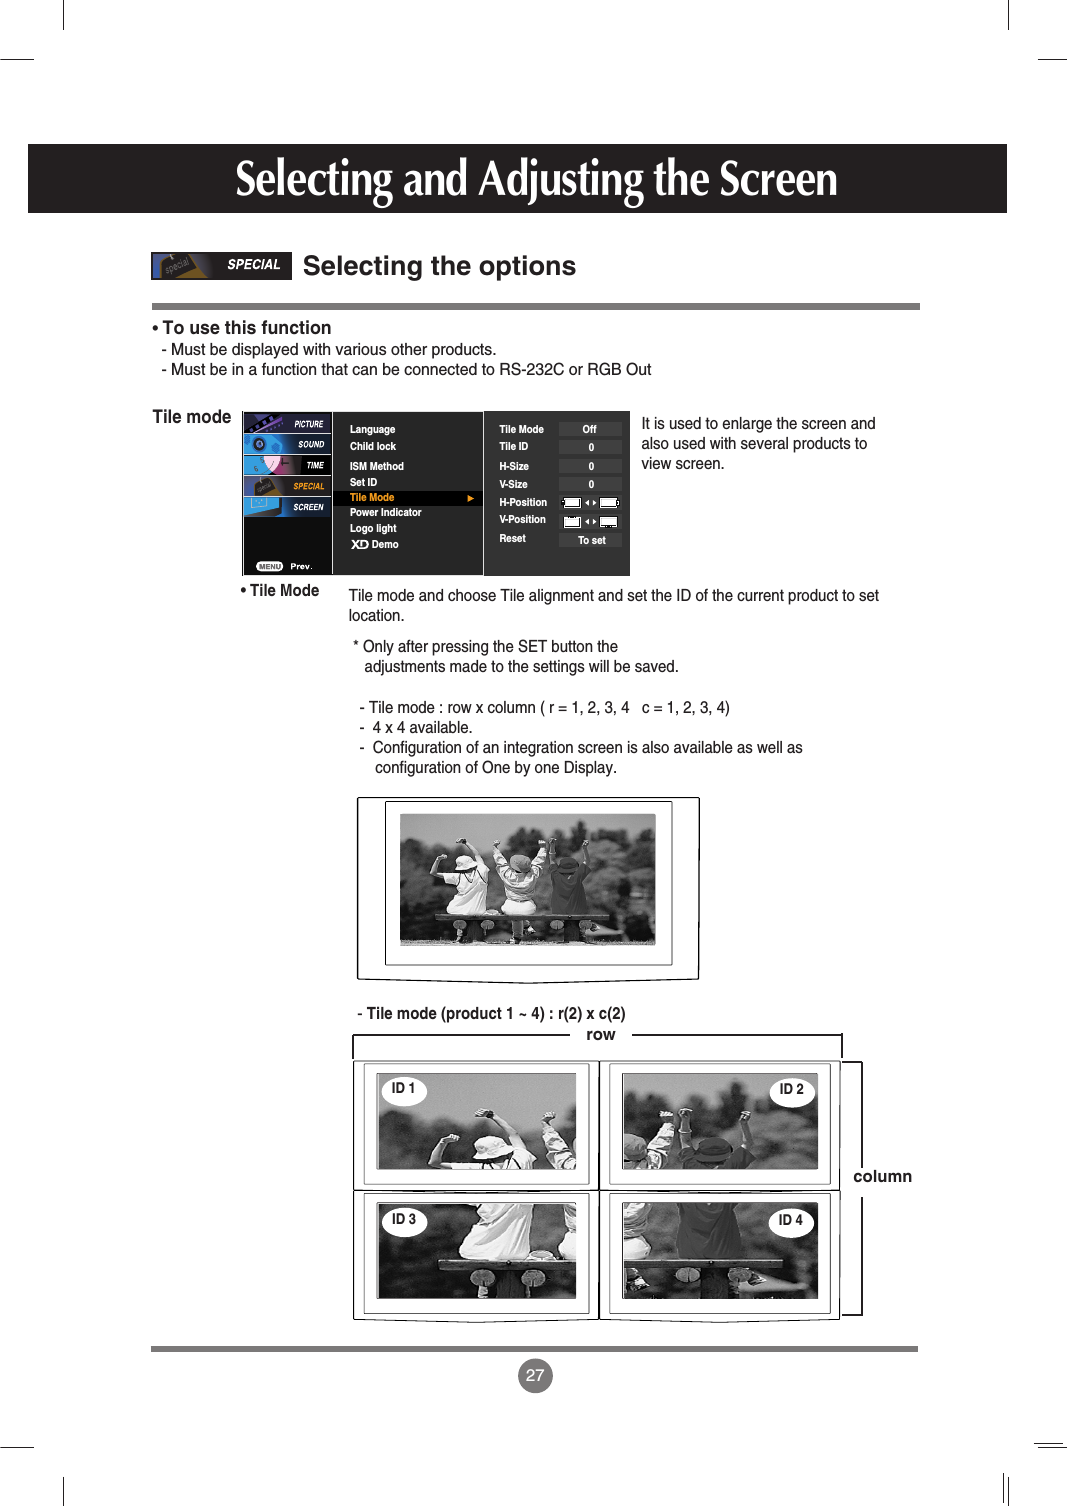
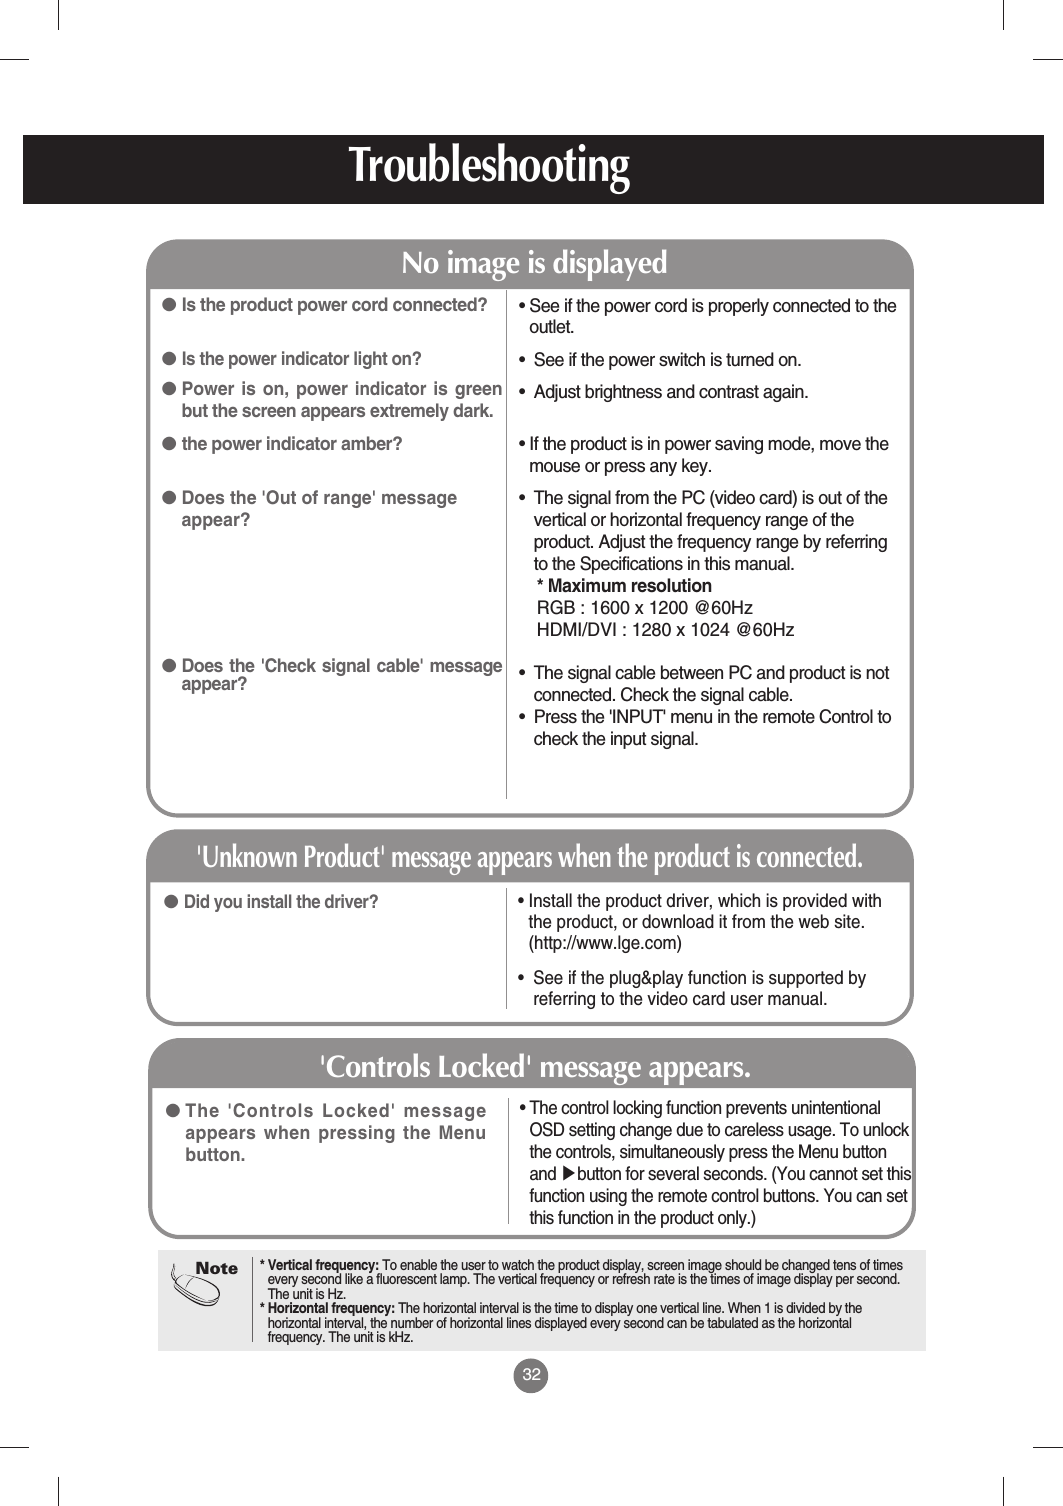
![19•The unit that receives the signal from the remote control.Name of the Buttons in the Screen Adjustment Unit[For PC Analog signal]AUTO/SELECT ButtonAV Composite Video, Separate VideoComponent 1 HDTV, DVDComponent 2 HDTV, DVDRGB 15-pin D-Sub analog signalHDMI/DVI Digital signal• Select the input signal SOURCE ButtonInputSOURCE AUTO/SELECTAuto in progressFor opimal display changeresolution to 1360 X 768IR ReceiverSelecting and Adjusting the Screen[When XGA Mode is active and1360 X768 is selected]](https://usermanual.wiki/LG-Electronics-USA/M4210CE/User-Guide-756577-Page-20.png)
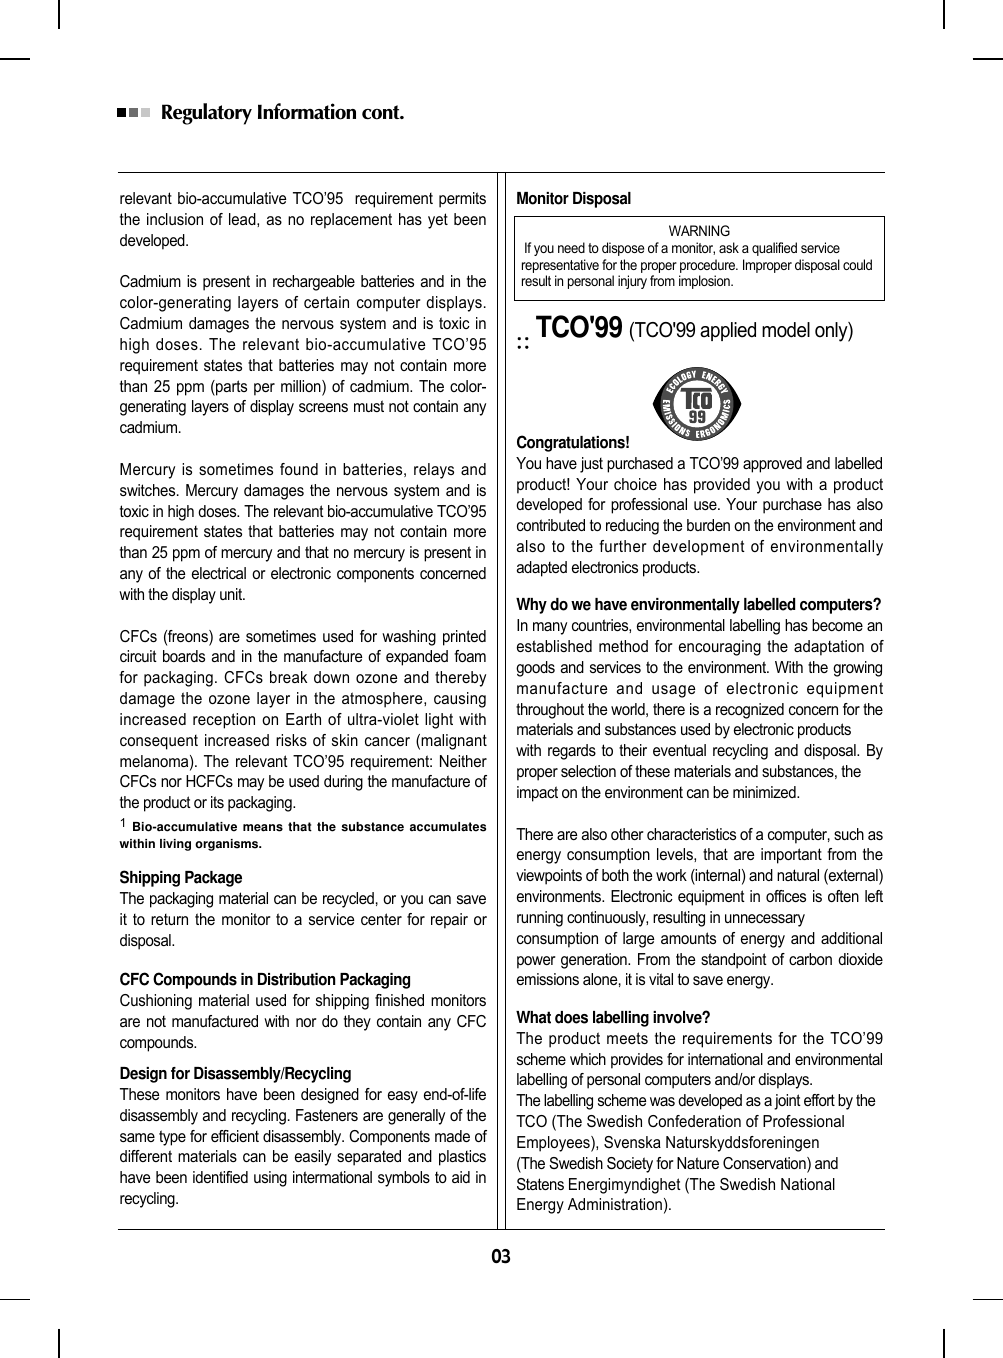
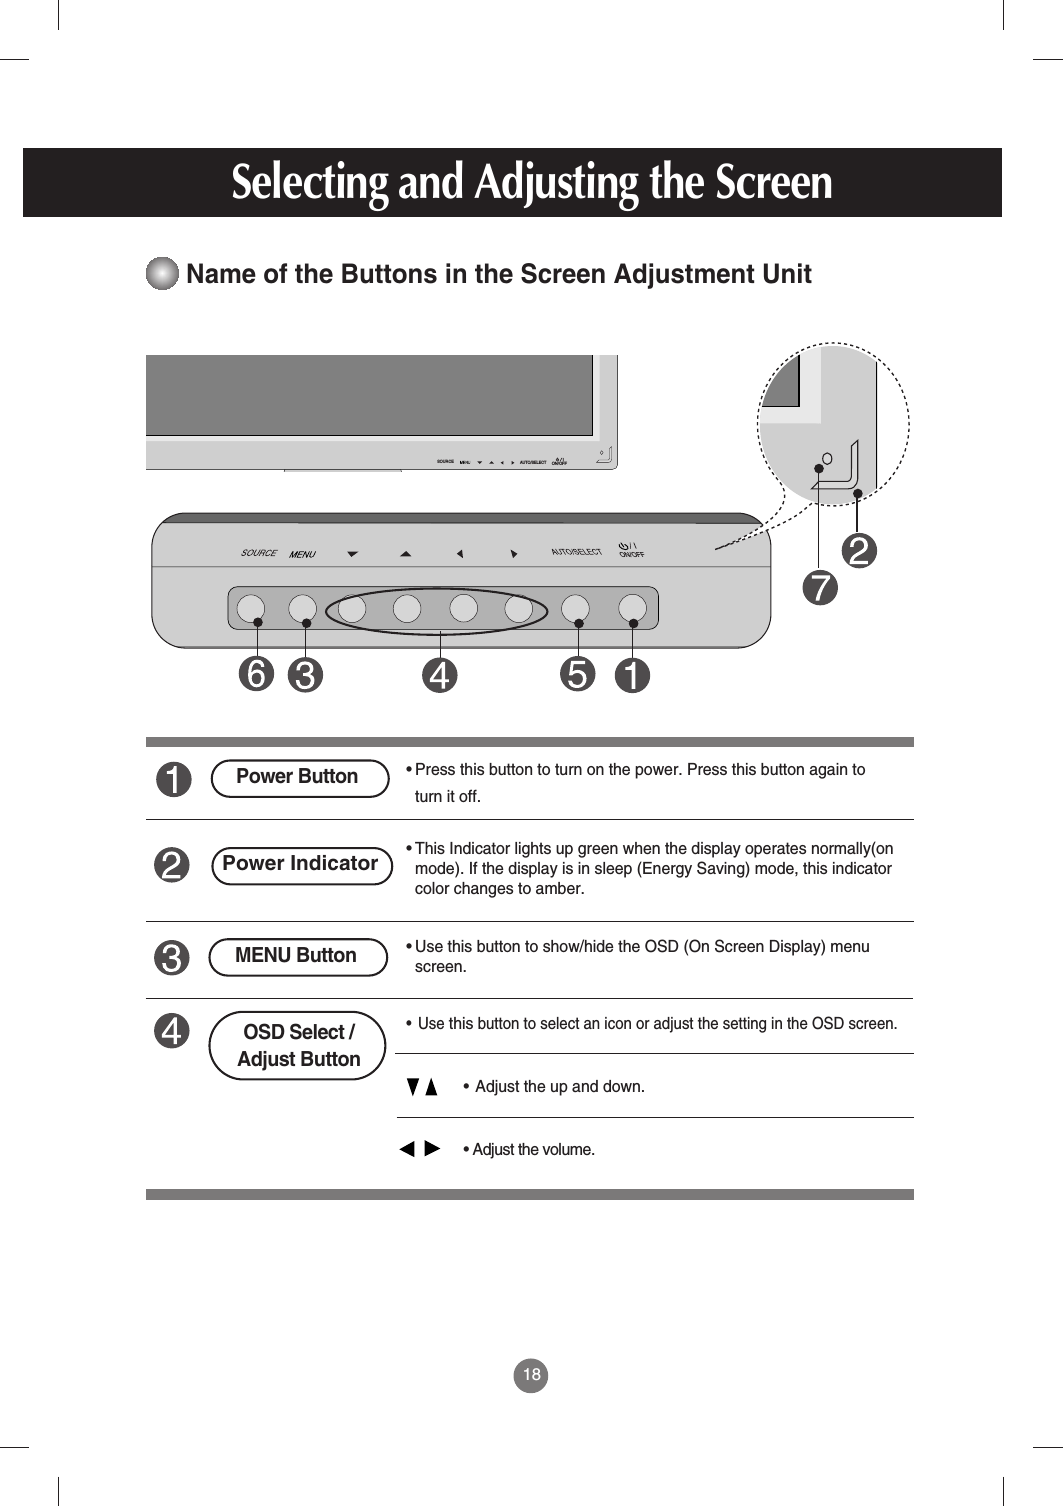
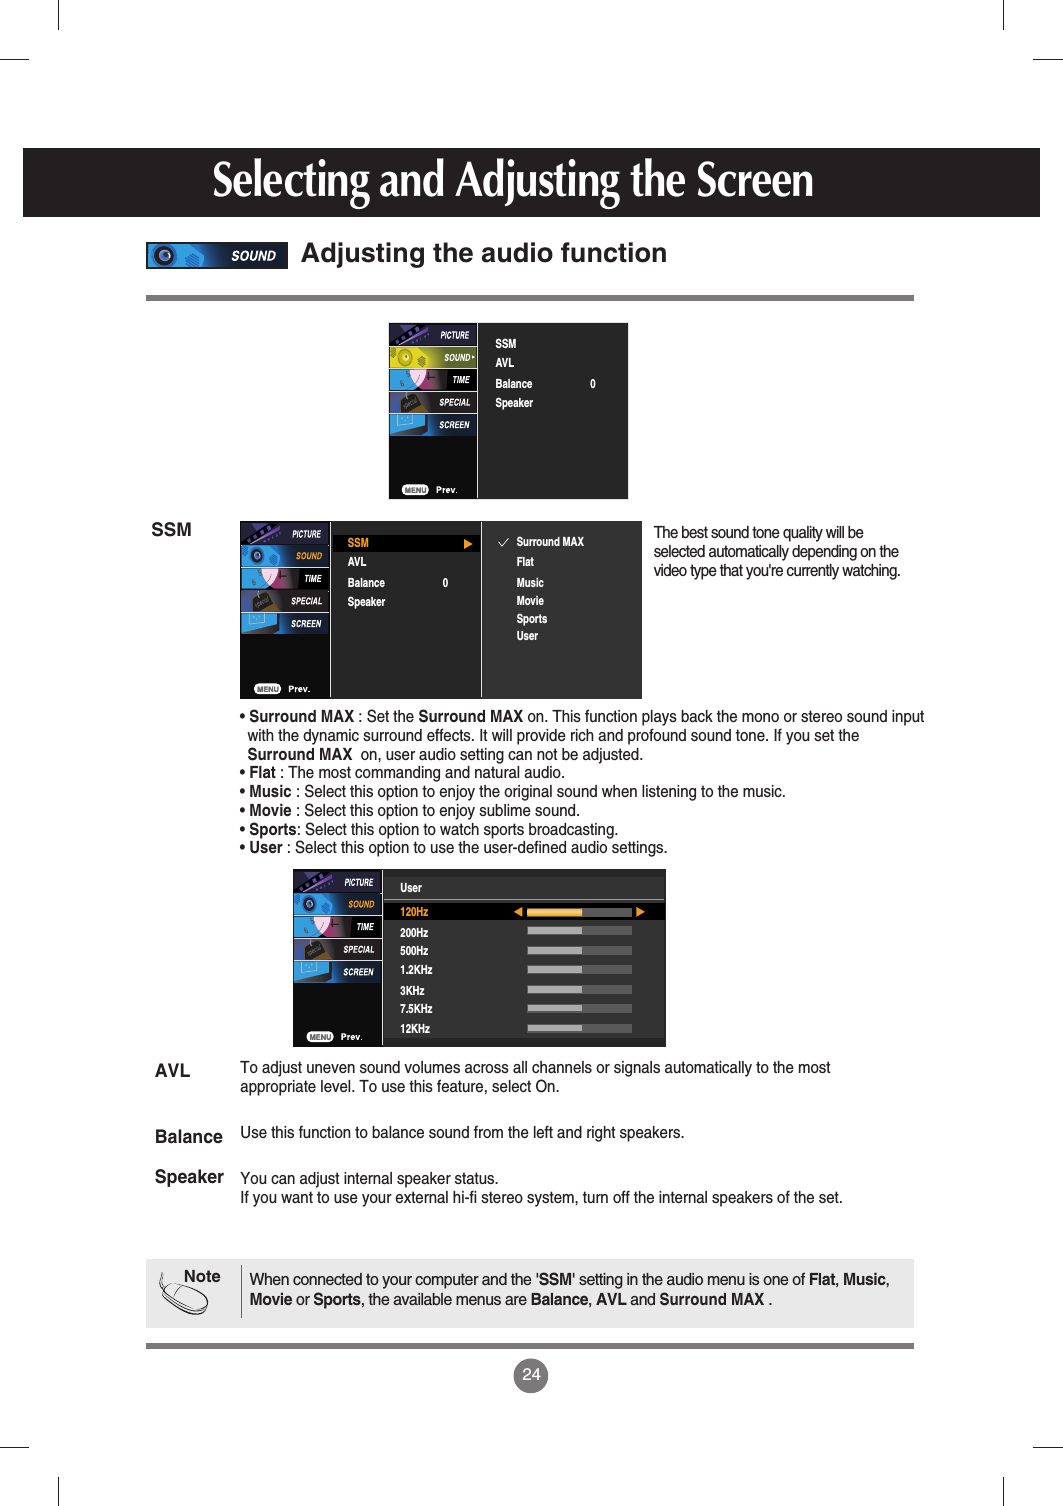
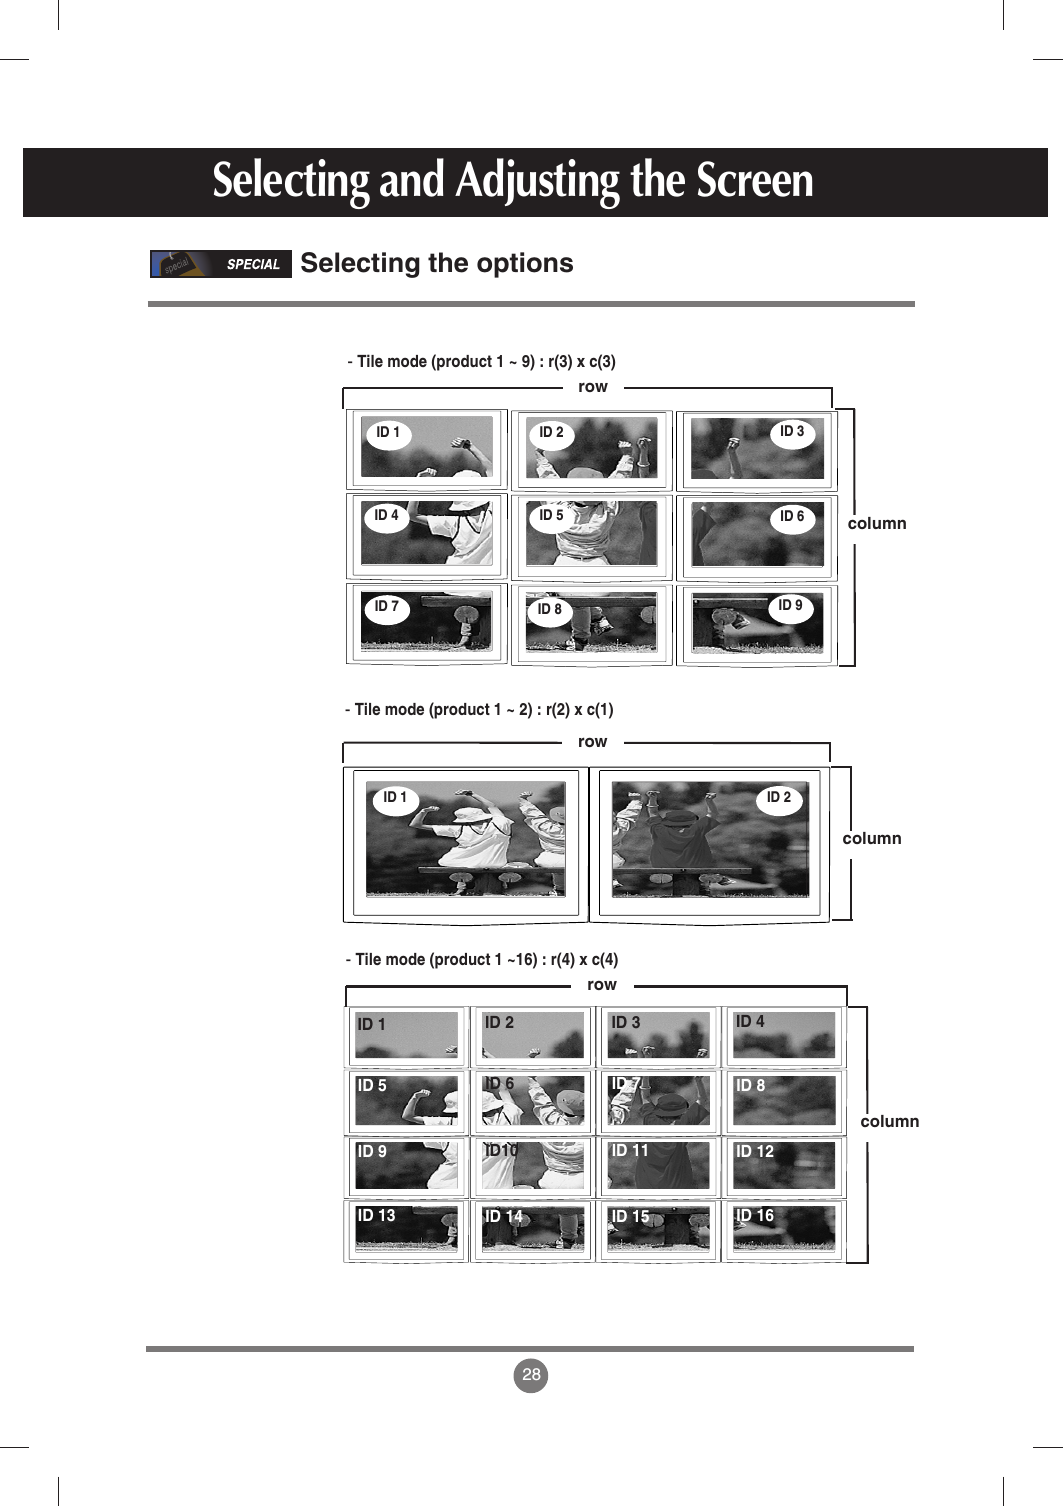
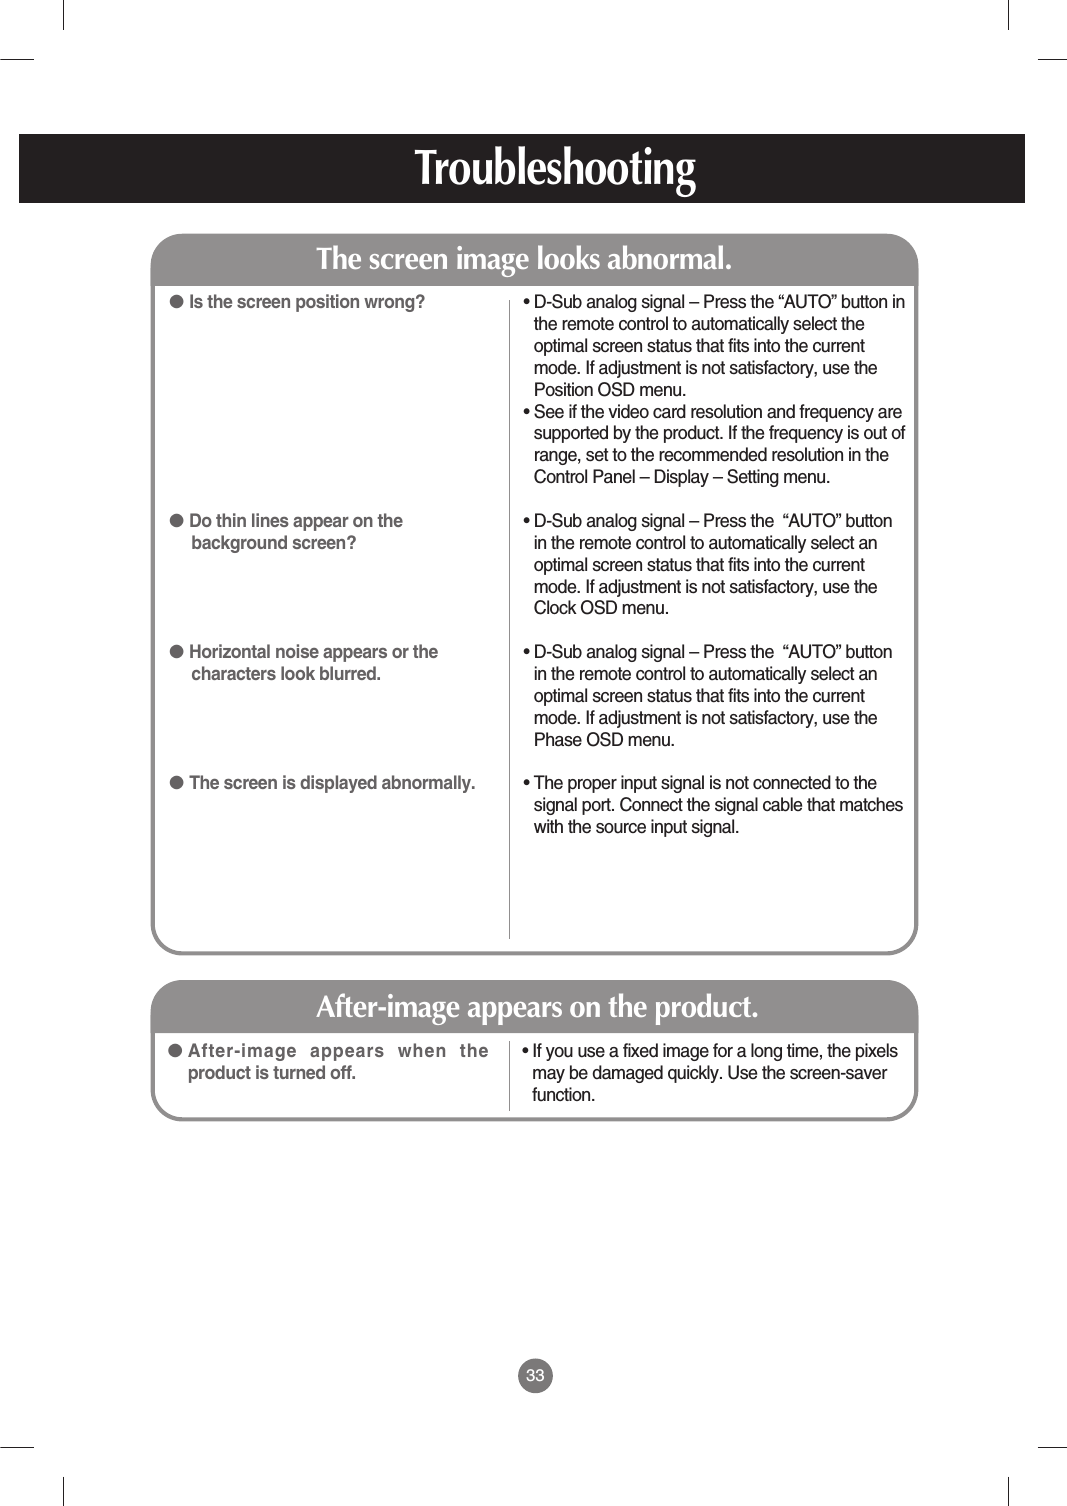
![21How to adjust the OSD (On Screen Display) screen• Use the remote control to adjust the OSD screen.How to adjust the screen automaticallyYou need to adjust the screen display when connecting the product toa new computer or changing the mode. Refer to the following section toset an optimal product screen.Press the AUTO/SET button (AUTO button in a remote Control) in thePC analog signal. Then, an optimal screen status will be selected thatfits into the current mode.If adjustment is not satisfactory, you need to adjust screen position,clock and phase in the OSD menu.Press the MENU Button, then the main menu of the OSD appears.To access a control, use the Buttons. When the icon you want becomes highlighted, press the SET Button.Use the Buttons to adjust the item to the desired level.Accept the changes by pressing the SET Button.Exit the OSD by pressing the EXIT Button.123456Pops upthe menuscreenMove whereyou want toadjustMove whereyou want toadjustSelect amenu iconSelect amenu icon Adjust the status SaveadjustmentExit from themenu screen.Selecting and Adjusting the Screen[When XGA Mode is active and1360 X768 is selected]](https://usermanual.wiki/LG-Electronics-USA/M4210CE/User-Guide-756577-Page-22.png)
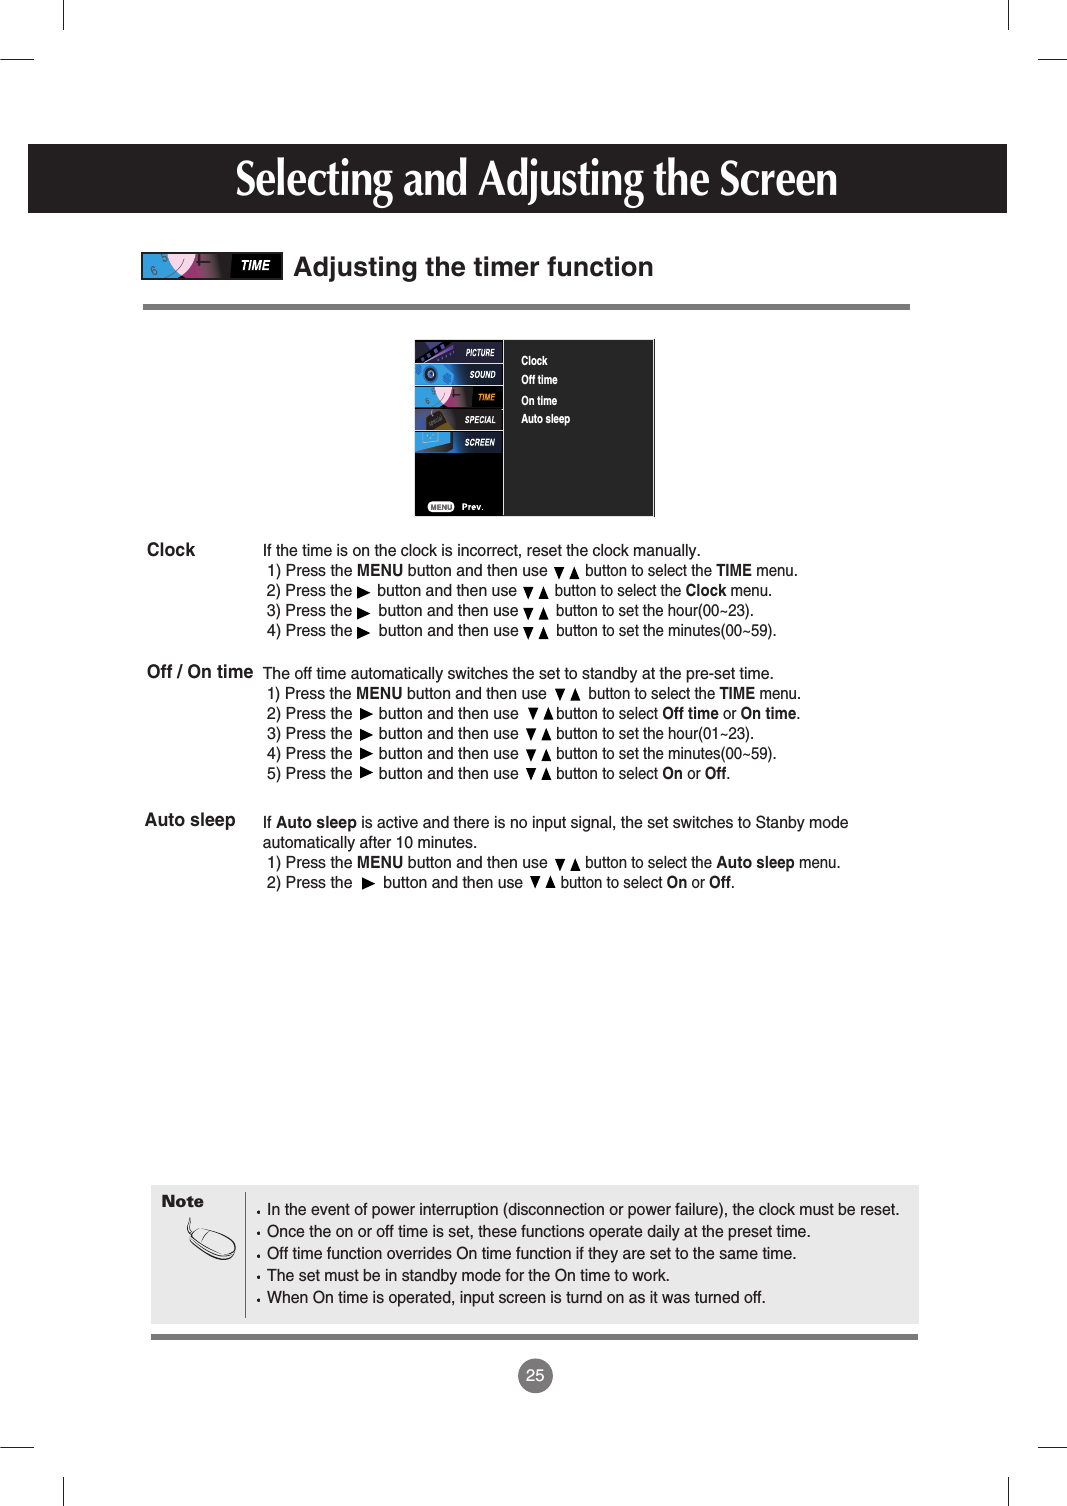
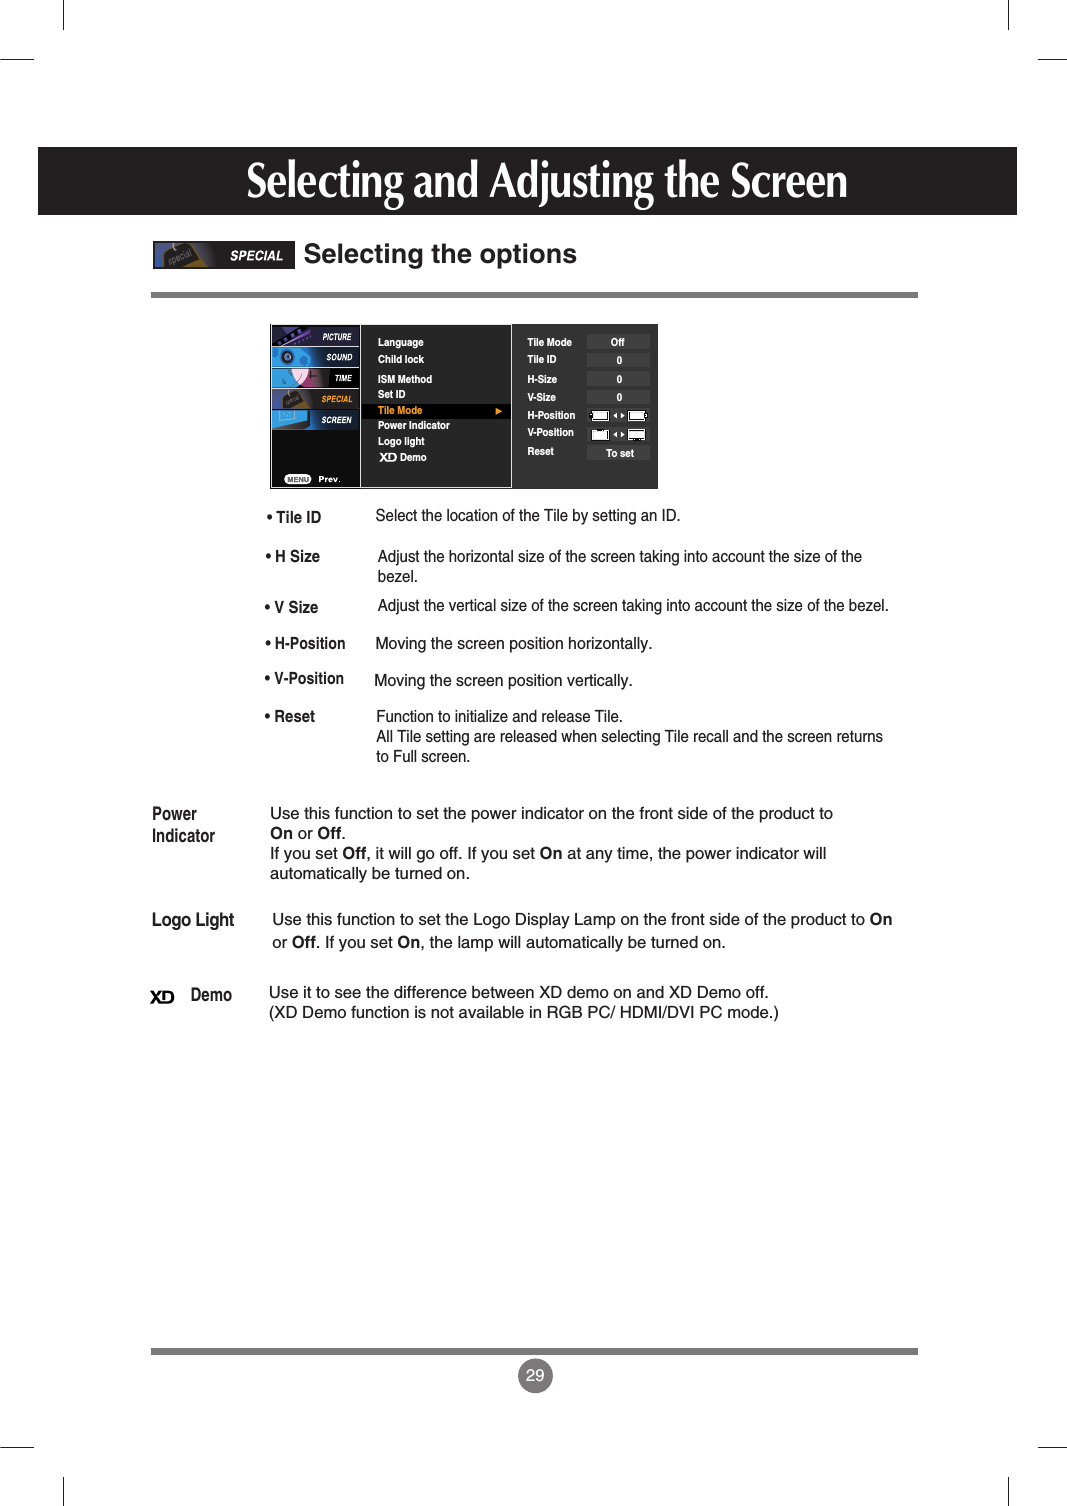

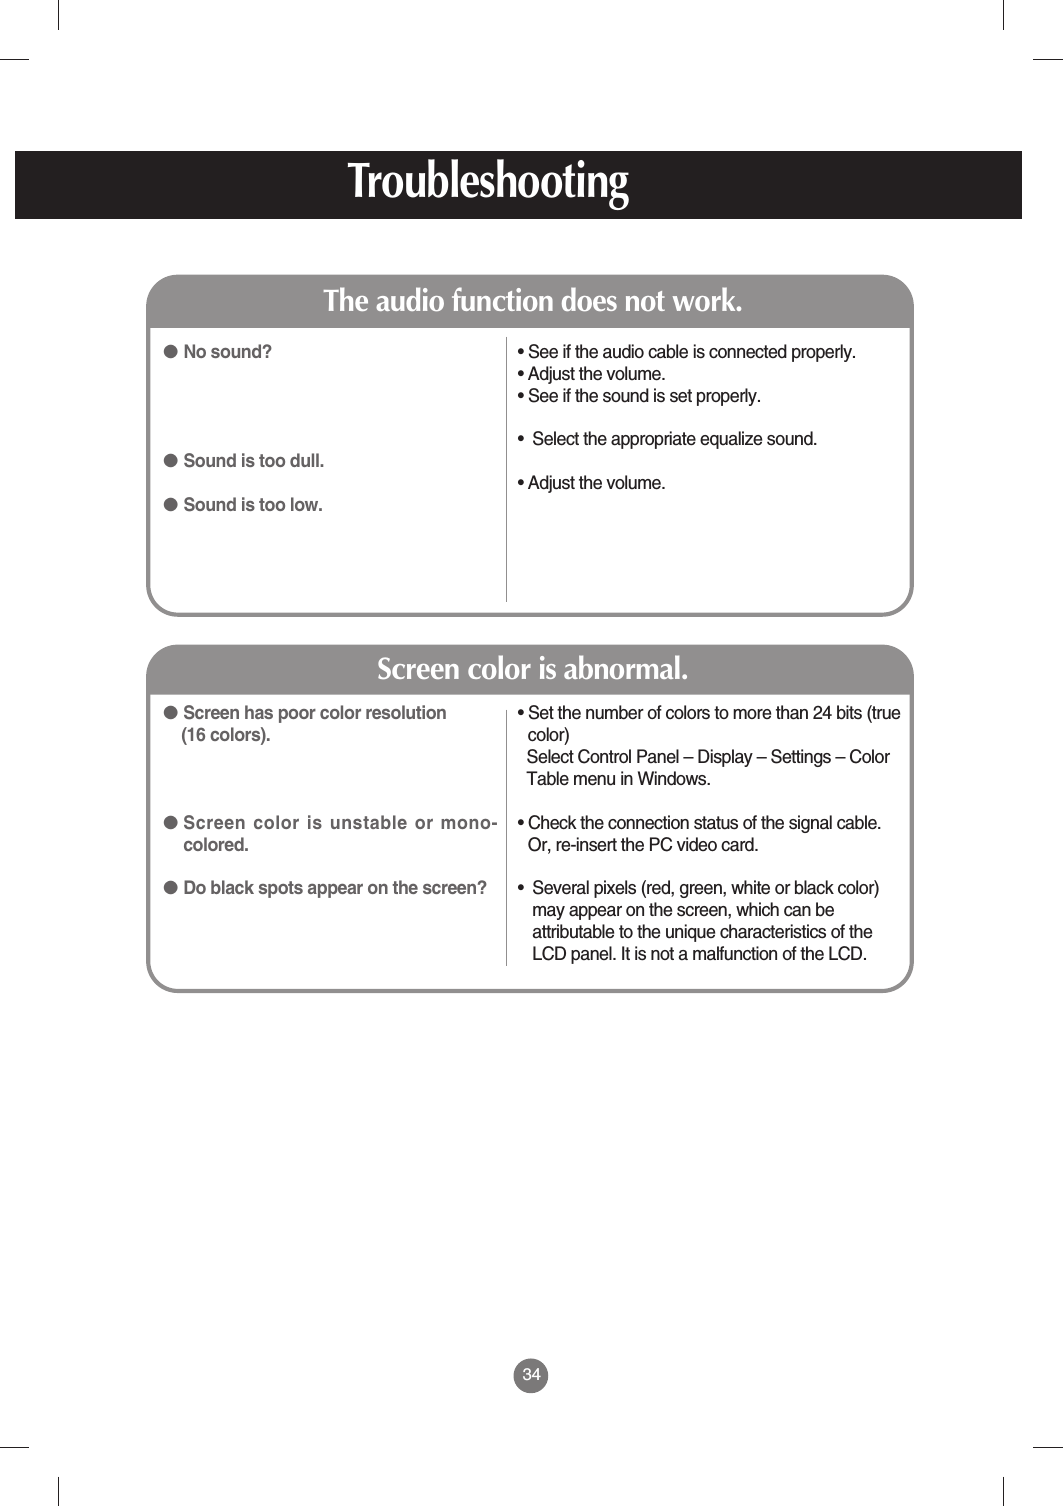
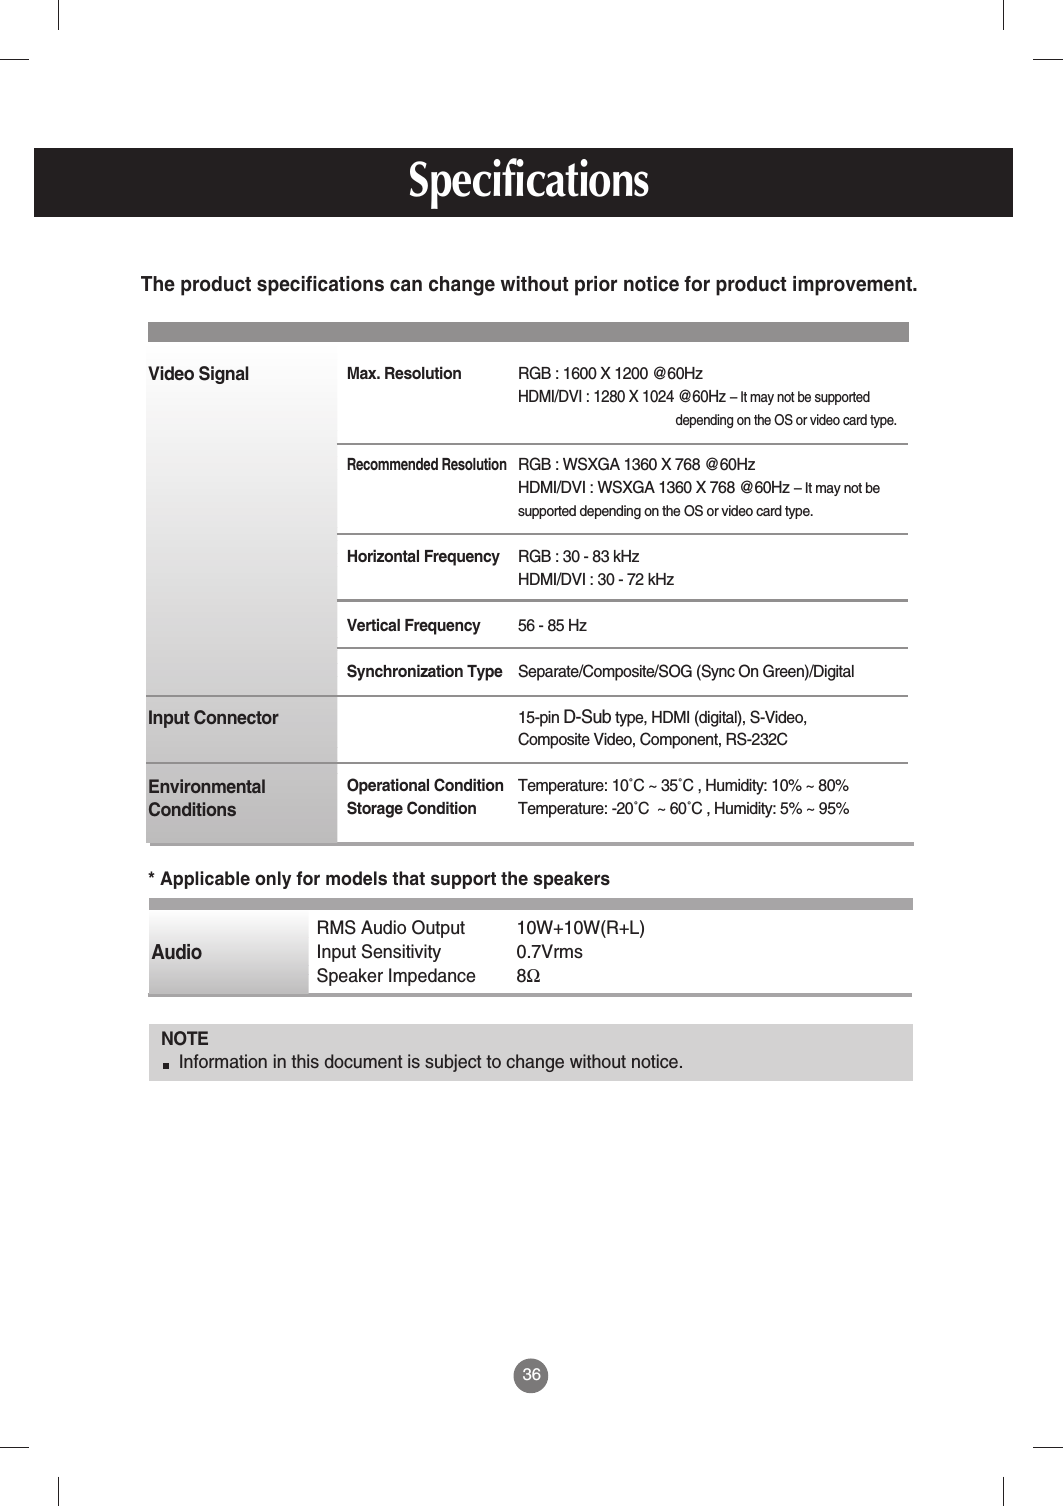
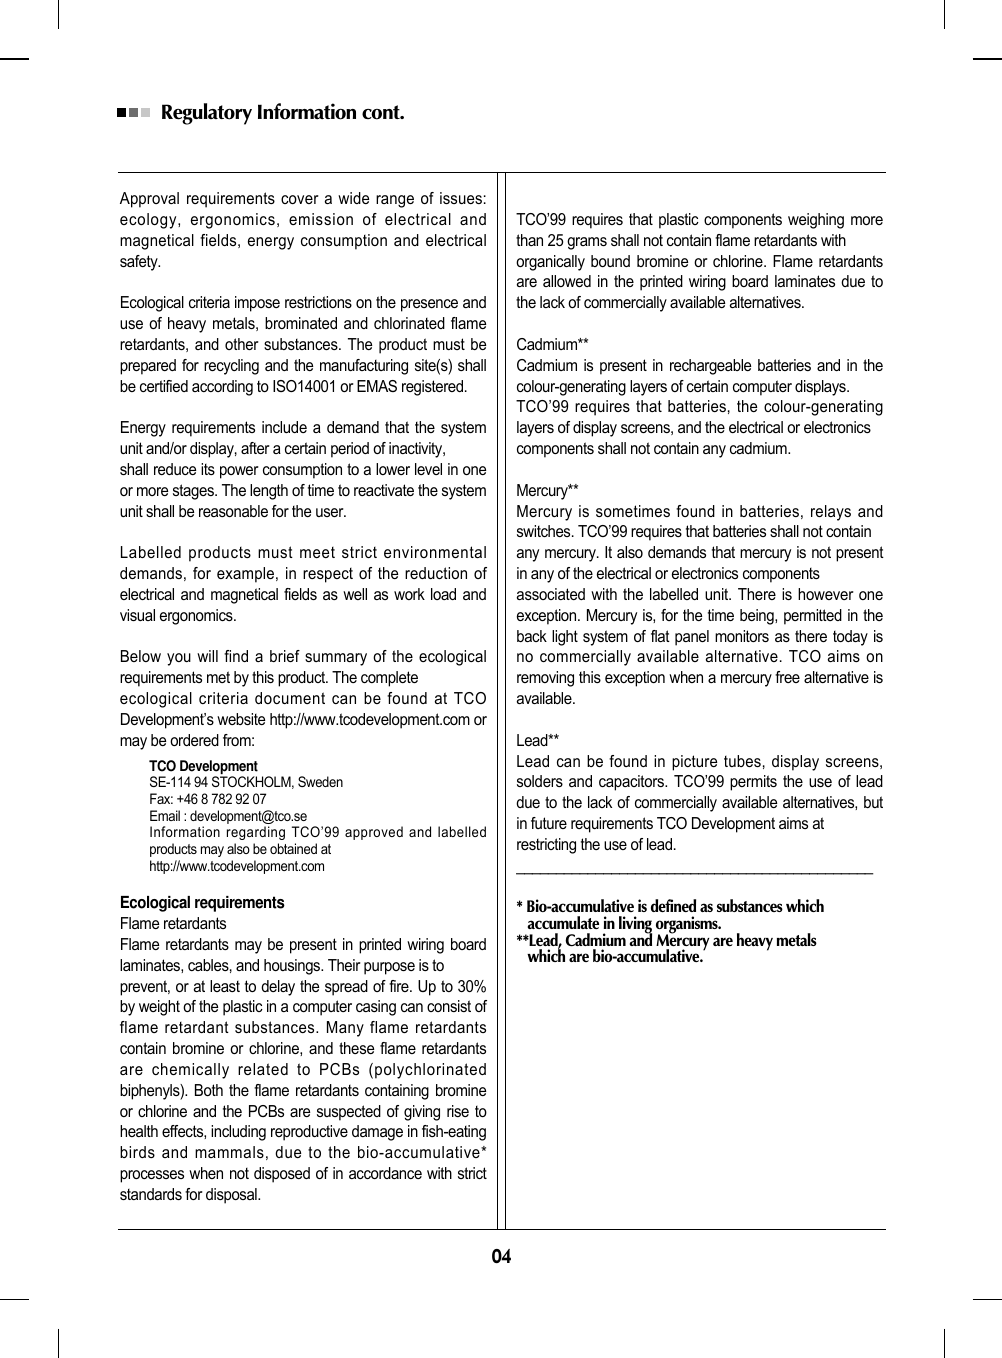
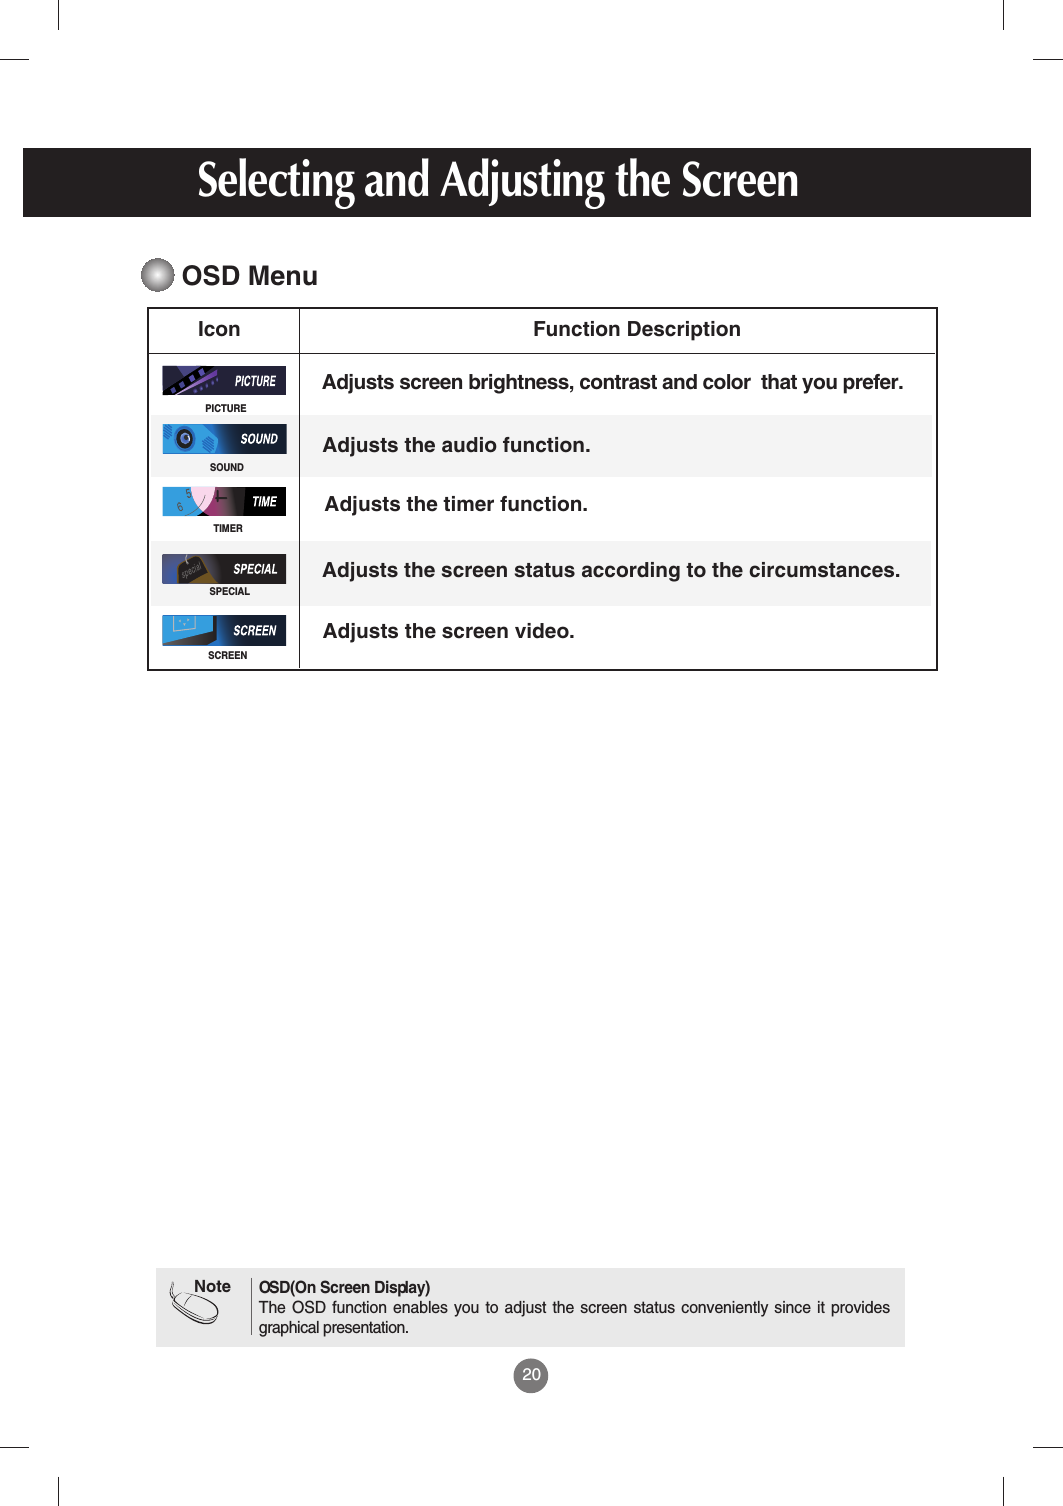
![LCD PanelPower Dimensions&WeightDimensions&Weight35NOTEInformation in this document is subject to change without notice.42 inches (106.73 cm) TFT (Thin Film Transistor) LCD (Liquid Crystal Display) PanelAnti-Glare coatingVisible diagonal size: 106.73 cm0.681 mm (Pixel Pitch)Rated Voltage AC 100-240V~ 50/60Hz 2.5APower Consumption On Mode : 240WSleep Mode : ≤1W (RGB) / 4W(HDMI/DVI)Off Mode : ≤1W The product specifications can change without prior notice for product improvement.SpecificationsWidth x Height x Depth[1] 99.60 cm (39.21 inches) x 67.50 cm (26.57 inches) x 29.30 cm (11.54 inches)[2] 99.60 cm (39.21 inches) x 58.80 cm (23.15 inches) x 11.40 cm (4.49 inches)[3] 112.80 cm (44.41 inches) x 67.50 cm (26.57 inches) x 29.30 cm (11.54 inches)[4] 112.80 cm (44.41 inches) x 58.80 cm (23.15 inches) x 11.40 cm (4.49 inches)[1] WH[2] WH[3] WHDDDD[4] WHNet[1] 27.54 kg (60.71 lbs) [2] 24.32 kg (53.62 lbs)[3] 31.14 kg (68.65 lbs) [4] 26.93 kg (59.37 lbs)](https://usermanual.wiki/LG-Electronics-USA/M4210CE/User-Guide-756577-Page-36.png)