LG Electronics USA MG105 Single-Band GSM Phone User Manual FG105
LG Electronics USA Single-Band GSM Phone FG105
UserManual.wiki
>
LG Electronics USA
>
MG105 User Manual
Users Manual
Navigation menu
Upload a User Manual
Namespaces
Wiki Guide
HTML
PDF
Info
Views
User Manual
Discussion / Help
Navigation
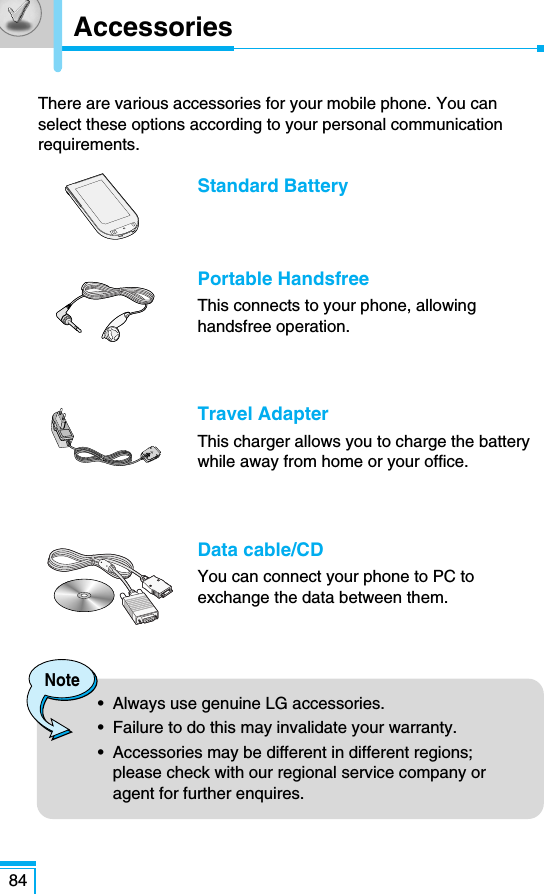
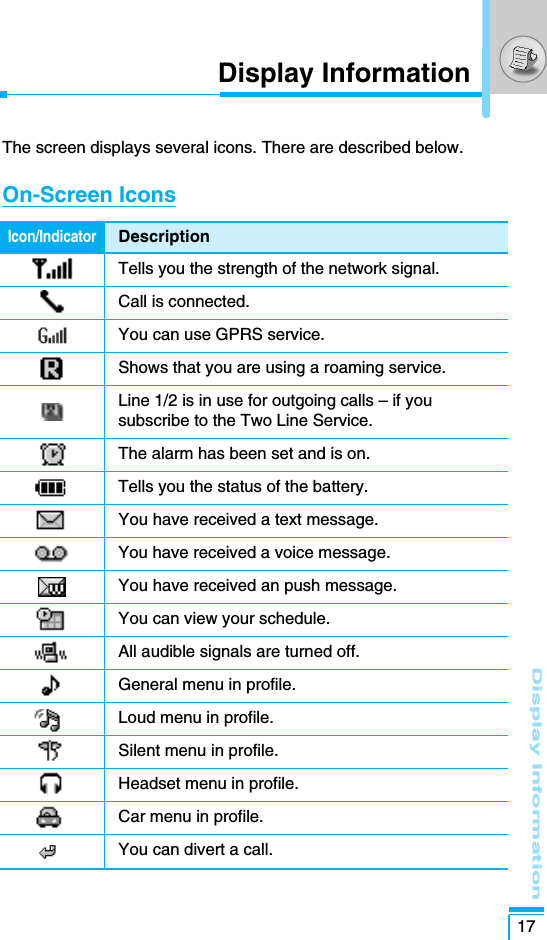
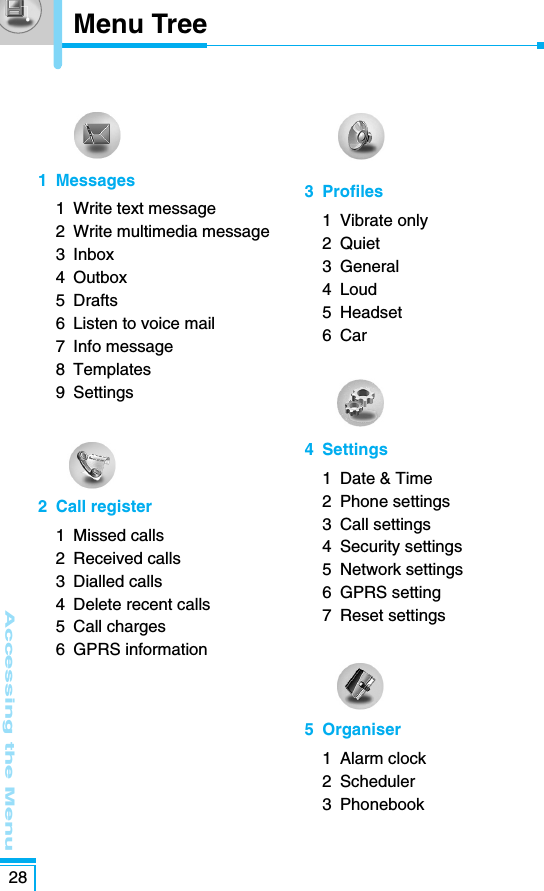
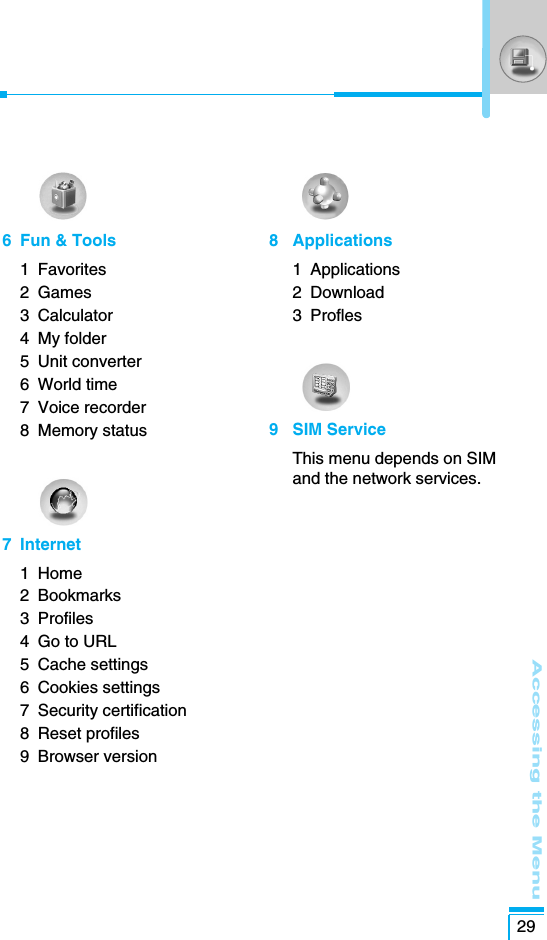
![9Access Codes ......................................................................... 27• PIN code (4 to 8 digits) .......................................................... 27• PIN2 code (4 to 8 digits) ........................................................ 27• PUK code (4 to 8 digits) ........................................................ 27• PUK2 code (4 to 8 digits) ...................................................... 27• Security code (4 to 8 digits) ................................................... 27Accessing the MenuMenu Tree ................................................................................ 28Messages [Menu 1] ................................................................. 30• Write text message [Menu 1-1] ............................................. 30• Write multimedia message [Menu 1-2] .................................. 32• Inbox [Menu 1-3] ................................................................... 37• Outbox [Menu 1-4] ................................................................ 38• Drafts [Menu 1-5] .................................................................. 40• Listen to voice mail [Menu 1-6] ............................................. 41• Info message [Menu 1-7] ...................................................... 41• Templates [Menu 1-8] ........................................................... 42• Settings [Menu 1-9] ............................................................... 43Call register [Menu 2] ..............................................................48• Missed calls [Menu 2-1] ........................................................ 48• Received calls [Menu 2-2] ..................................................... 48• Dialled calls [Menu 2-3] ......................................................... 48• Delete recent calls [Menu 2-4] ...............................................48• Call charges [Menu 2-5] ........................................................ 48• GPRS information [Menu 2-6] ............................................... 51Profiles [Menu 3] ..................................................................... 52• Vibrate only [Menu 3-1] ......................................................... 52• Quiet [Menu 3-2] ................................................................... 52](https://usermanual.wiki/LG-Electronics-USA/MG105/User-Guide-580170-Page-9.png)
![Contents10• General [Menu 3-3] ............................................................... 52• Loud [Menu 3-4] .................................................................... 52• Headset [Menu 3-5] ............................................................... 52• Car [Menu 3-6] ...................................................................... 52Settings [Menu 4] .................................................................... 55• Date & Time [Menu 4-1] ........................................................ 55• Phone settings [Menu 4-2] .................................................... 55• Call settings [Menu 4-3] ........................................................ 57• Security settings [Menu 4-4] .................................................. 60• Network settings [Menu 4-5] ................................................. 63• GPRS setting [Menu 4-6] ...................................................... 64• Reset settings [Menu 4-7] ..................................................... 64Organiser [Menu 5] ................................................................. 65• Alarm clock [Menu 5-1] ......................................................... 65• Scheduler [Menu 5-2] ............................................................ 65• Phonebook [Menu 5-3] .......................................................... 67Fun & Tools [Menu 6] ............................................................. 73• Favorites [Menu 6-1] ............................................................. 73• Games [Menu 6-2] ................................................................ 73• Calculator [Menu 6-3] ............................................................ 74• My folder [Menu 6-4] ............................................................. 74• Unit converter [Menu 6-5] ...................................................... 75• World time [Menu 6-6] ........................................................... 75• Voice recorder [Menu 6-7] ..................................................... 76• Memory status [Menu 6-8] .................................................... 76Internet [Menu 7] ..................................................................... 77• Home [Menu 7-1] .................................................................. 77• Bookmarks [Menu 7-2] .......................................................... 77• Profiles [Menu 7-3] ................................................................ 77](https://usermanual.wiki/LG-Electronics-USA/MG105/User-Guide-580170-Page-10.png)
![11• Go to URL [Menu 7-4] ........................................................... 80• Cache settings [Menu 7-5] .................................................... 80• Cookies settings [Menu 7-6]................................................... 80• Security certification [Menu 7-7] ............................................ 80• Reset profiles [Menu 7-8] ...................................................... 80• Browser version [Menu 7-9] .................................................. 80On browsing menu ................................................................. 81Applications [Menu 8] ............................................................. 82• Applications [Menu 8-1] ......................................................... 82• Download [Menu 8-2] ............................................................ 82• Profiles [Menu 8-3] ................................................................ 83Accessories ............................................................................. 84Care and Maintenance ............................................................ 85Technical Data ......................................................................... 87](https://usermanual.wiki/LG-Electronics-USA/MG105/User-Guide-580170-Page-11.png)
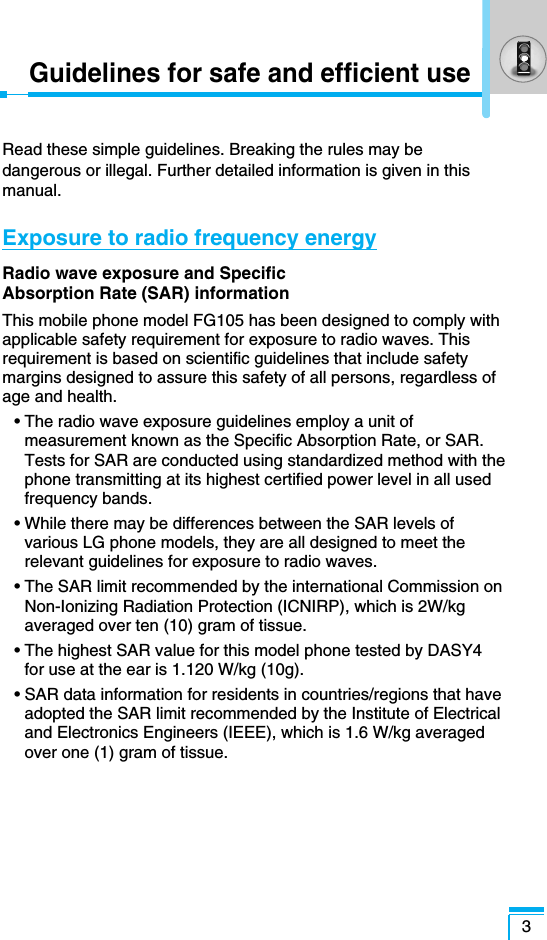
![Overview16Letter KeysEach key can be used for several symbols. There are shown below.Key Description1. , / ? ! - : ' " 12A B C 2 Ä À Á Â Ã Å Æ Ç a b c ä à á â ã å æ ç 3D E F 3 Ë È É Ê d e f ë è é ê 4G H I 4 Ï Ì Í Î ˝g h i ï ì í î ©5J K L 5 j k l 6M N O 6 Ñ Ö Ø Ò Ó Ô Õ Œ m n o ñ ö ø ò ó ô õ œ7P Q R S 7 ß ™p q r s ß ∫8T U V 8 Ü Ù Ú Û t u v ü ù ú û 9W X Y Z 9 w x y z 0[space] 0Key Description](https://usermanual.wiki/LG-Electronics-USA/MG105/User-Guide-580170-Page-16.png)
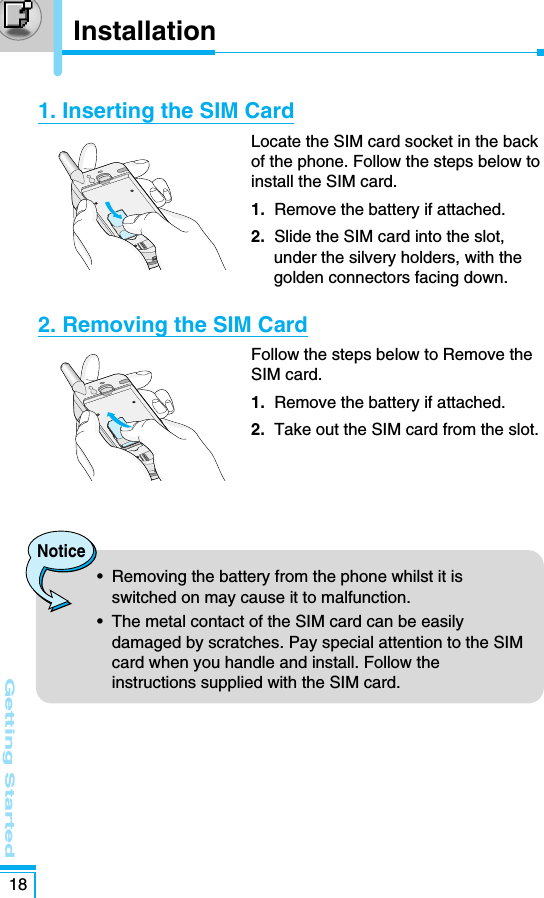

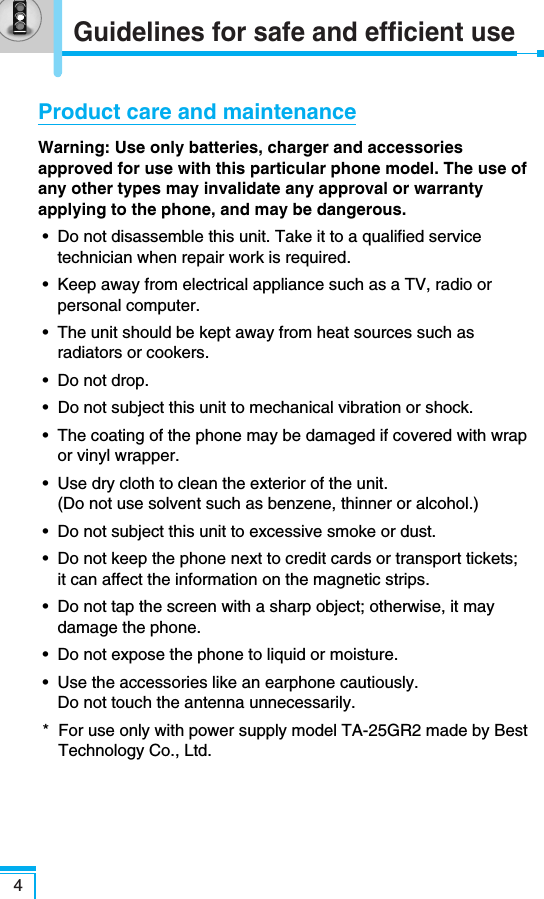
![Getting Started21Making and Answering CallsMaking a call 1. Key in phone number including the area code. If you want todelete number, press .2. Press to call the number.3. Press to end the call.International Calls1. Press and hold the key for the international prefix. “+” character may replace with the international access code.2. Enter the country code, area code, and the phone number.3. Press .Making a call using the Phonebook1. In standby mode, press [Names].2. When the menu is displayed, you select Search by pressing .3. If you find out the desired item through searching by a name or anumber, press to call.](https://usermanual.wiki/LG-Electronics-USA/MG105/User-Guide-580170-Page-21.png)
![Additional Functions22The menu displayed on the handset screen during a call is differentto the default main menu reached from the idle screen, and theoptions are described here. 1 During a call1-1 Putting a Call on HoldWhen a call is made or answered, press the S[Send] to place it onhold. When a call is held, press the S[Send] to make it active.1-2 Making a Second CallYou can get a dial number from phonebook to make a second call. Press [Names] then select Search. To save the dial number intophonebook during call, press [Names] then select Add new.1-3 Swapping Between Two CallsTo switch between two calls, select [Options], then select Swapor just press [Send] key.You can make one of two calls focused by pressing up/down arrowkey. If you want to end one of two calls, make the call you want toend focused, then press [End] key when the call you want toend is focused.In call Menu](https://usermanual.wiki/LG-Electronics-USA/MG105/User-Guide-580170-Page-22.png)
![Additional Functions231-4 Answering an Incoming CallTo answer an incoming call when the handset is ringing, simplypress the [Send] key.The handset is also able to warn you of an incoming call while youare already in a call. A tone sounds in the earpiece, and the displaywill show that a second call is waiting. This feature, known as CallWaiting, is only available if your network supports it. For details ofhow to activate and deactivate it see Call waiting [Menu 4-3-4].If Call Waiting is on, you can put the first call on hold and answerthe second, by pressing [Send] or by selecting [Answer],then Hold & Answer.You can end the current call and answer the waiting call byselecting [Menu], then End & Answer. 1-5 Rejecting an Incoming CallWhen not in a call you can reject an incoming call without answeringit by simply pressing the [End] or for a long time when the flipis closed.When in a call you can reject an incoming call by pressing the[Menu] key and selecting Multiparty / Reject or by pressing[End] key.1-6 Muting the MicrophoneYou can mute the microphone during a call by pressing the[Options] key then selecting Mute. The handset can be unmuted bypressing the [Unmute].When the handset is muted, the caller cannot hear you, but you canstill hear them.](https://usermanual.wiki/LG-Electronics-USA/MG105/User-Guide-580170-Page-23.png)
![Additional Functions241-7 Switching DTMF Tones on During a CallTo turn DTMF tones on during a call, for example, to allow yourhandset to make use of an automated switchboard, select[Options], then DTMF On. DTMF tones can be turned off the sameway.1-8 Calling up Messages and SIM Tool kit main menuThe Messages and SIM Tool kit main menu options can be reachedfrom the in-call menu by selecting [Options]. SIM Tool kit menuis shown only when SIM in the handset supports SIM Tool kitservice.2 Multiparty or Conference CallsThe multiparty or conference service provides you with the ability tohave a simultaneous conversation with more than one caller, if yournetwork service provider supports this feature.A multiparty call can only be set up when you have one active calland one call on hold, both calls having been answered. Once amultiparty call is set up, calls may be added, disconnected orseparated (that is, removed from the multiparty call but stillconnected to you) by the person who set up the multiparty call.The maximum callers in a multiparty call is five. Once started, youare in control of the multiparty call, and only you can add calls to themultiparty call.In call Menu](https://usermanual.wiki/LG-Electronics-USA/MG105/User-Guide-580170-Page-24.png)
![Additional Functions252-1 Making a Second CallYou can make a second call while you are already in a call. To dothis, enter the second number and press S [Send]. When you getsecond call the first call is automatically put on hold. You can swapbetween calls by selecting [Options] then Swap.2-2 Setting up a Multiparty CallYou can connect a call on hold to the currently active call to form amultiparty call by selecting [Options] then Multiparty / Join all.2-3 Putting the Multiparty Call on HoldTo put a multiparty call on hold, select [Options] then Multiparty / Hold all.2-4 Activate the Multiparty Call on HoldTo make a multiparty call on hold active, select [Options] thenMultiparty / Join all.2-5 Adding Calls to the Multiparty CallTo join an active call to the held multiparty call, select [Options]then Multiparty / Join all.2-6 Displaying Callers in a Multiparty CallTo scroll though the numbers of the callers who make up amultiparty call on the handset screen, press and keys.](https://usermanual.wiki/LG-Electronics-USA/MG105/User-Guide-580170-Page-25.png)
![Additional Functions262-7 Putting a Member of a Multiparty Call on HoldTo place one selected caller (whose number is currently displayedon-screen) of a multiparty call on hold, select [Options] thenMultiparty / Exclude.2-8 A Private Call in a Multiparty CallTo have a private call with one caller of a multiparty call, display thenumber of the caller you wish to talk to on the screen, then select[Options] and Multiparty / Private to put all the other callers onhold.2-9 Ending a Multiparty CallThe currently displayed caller of a multiparty call can bedisconnected by pressing the [End] key. To end a multipartycall, press [Options] then select Multiparty / End multiparty.Selecting [Options] then Multiparty / End all, will end all theactive and held calls.In call Menu](https://usermanual.wiki/LG-Electronics-USA/MG105/User-Guide-580170-Page-26.png)
![Additional Functions27Access CodesYou can use the access codes described in this section to avoidunauthorized use of your phone. The access codes (except PUKand PUK2 codes) can be changed by using [Menu 4-4-5]. PIN code (4 to 8 digits)The PIN (Personal Identification Number) code protects your SIMcard against unauthorized use. The PIN code is usually suppliedwith the SIM card. When PIN code is set On, your phone willrequest the PIN code every time it is switched on. On the contrary,when PIN code is set Off, your phone connects to the networkdirectly without the request PIN code.PIN2 code (4 to 8 digits)The PIN2 code, supplied with some SIM cards, is required toaccess some functions such as Advice of call charge, Fixed Dialnumber. These functions are only available if supported by your SIMcard.PUK code (4 to 8 digits)The PUK (PIN Unblocking Key) code is required to change ablocked PIN code. The PUK code may be supplied with the SIMcard. If not, contact your local service provider for the code. If youlose the code, also contact your service provider.PUK2 code (4 to 8 digits)The PUK2 code, supplied with some SIM cards, is required tochange a blocked PIN2 code. If you lose the code, also contact yourservice provider.Security code (4 to 8 digits)The security code protects the unauthorized use of your phone. It isusually supplied with the phone. This code is required to delete allphone entries and to activate “Reset settings” menu. The defaultnumber is “0000”.](https://usermanual.wiki/LG-Electronics-USA/MG105/User-Guide-580170-Page-27.png)
![Accessing the Menu30This menu includes functions related to SMS (Short MessageService), MMS (Multimedia Message Service), voice mail, as well asthe network’s service messages.Write text message [Menu 1-1]You can write and edit text message, checking the number ofmessage pages.1. Enter the Messages menu by pressing [Select].2. If you want to write a new message, select Write text message.3. To make text input easier, use T9. For details, see How to UseT9 (Page 35).4. Press [Insert] to attach the followings.5. If you want to set option for your text, or to finish your writing,press [Options].Options• SendSends text messages.1. Enter numbers of recipient.2. Press Dkey to add more recipients.3. You can add phone numbers in the phone book.4. Press <after entering numbers.Note• The phone which supports EMS release 5 is availableto send colour pictures, sounds, text styles, etc.. Theother party may not receive pictures, sounds or textstyles you sent properly if the phone does not supportsuch options.Messages [Menu 1]](https://usermanual.wiki/LG-Electronics-USA/MG105/User-Guide-580170-Page-30.png)
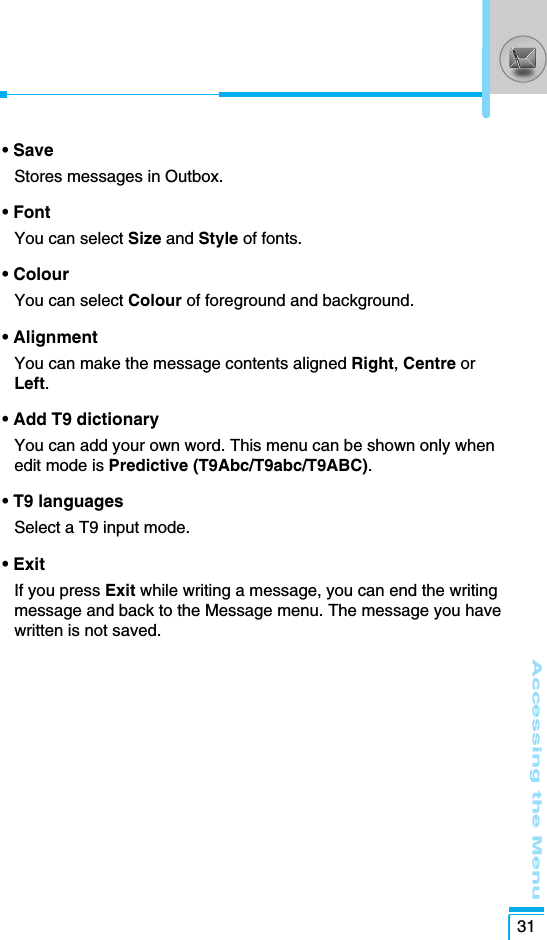
![Messages [Menu 1]Accessing the Menu32Insert• SymbolYou can add special characters.• PictureYou can insert the Default pictures or pictures in My folder thatare available for short messages.• SoundYou can insert sounds that are available for short messages.• Text templatesYou can use Text templates already set in the phone.• PhonebookYou can add phone numbers or e-mail addresses in Phonebook.• SignatureYou can add your contact information to the message.Write multimedia message [Menu 1-2]You can write and edit multimedia messages, checking messagesize.1. Enter the Messages menu by pressing [Select].2. If you want to write a new message, select Write multimediamessage.3. You can create a new message or choose one of the multimediamessage templates already made.4. Press Insert to add Symbol, Picture, Sound, Text templates,Phonebook or Signature.](https://usermanual.wiki/LG-Electronics-USA/MG105/User-Guide-580170-Page-32.png)
![Accessing the Menu34• Add T9 dictionaryYou can add your own word. This menu can be shown only whenedit mode is Predictive (T9Abc/T9abc/T9ABC).• T9 languagesSelect a T9 input mode.• ExitYou can back to the Message menu.Messages [Menu 1]Note• If you select the picture (15K) on writing multimediamessage, loading duration will take around 15seconds at least. Furthermore, you can't activate anykey during loading time. After 15 seconds, it isavailable to write multimedia message.](https://usermanual.wiki/LG-Electronics-USA/MG105/User-Guide-580170-Page-34.png)
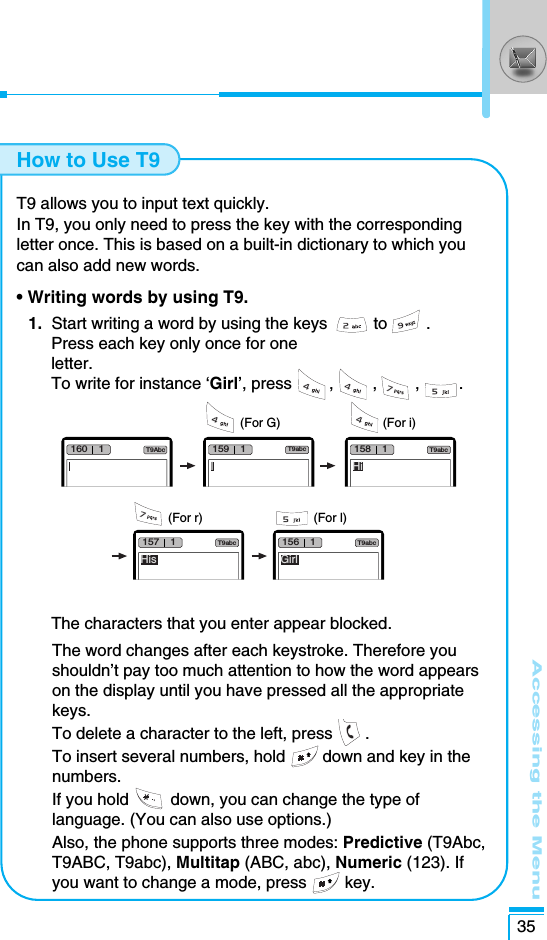
![Accessing the Menu36Alternatively : Press *key and select insert symbols. Selectthe desired character and press Select.2. When you have finished writing a word, check whether theword is correct.If the word is correct: Press 0and write the next word. If the word is not correct: Search by U , D(Previous andNext word).Alternatively : If there is no word you want you can add yourown word. Press < [Options] in the Predictive edit mode.Select Add T9 dictionary Menu. You can seethe following.3. To insert a punctuation mark, press 1repeatedly until thedesired mark appears.ABCWordSave BackABCWordSave BackLGGSMT9 languages • You can select T9 Languages by selecting Menu.In T9 mode, you can also select T9 Off menu.(Default is T9 On)Input your word➮Messages [Menu 1]](https://usermanual.wiki/LG-Electronics-USA/MG105/User-Guide-580170-Page-36.png)
![Accessing the Menu37Icon directive[ ] Multimedia message[ ] Short message[ ] SIM message[ ] Read[ ] Notified multimedia messageInbox [Menu 1-3]You will be alerted when you have received messages. They will bestored in Inbox.In Inbox, you can identify each message by icons. For detail, seethe icon directive.If the phone shows ‘No space for SIM message’, you have to deleteonly SIM messages from Inbox. If the phone displays ‘No space formessage’, you can make space of each repository as deletingmessages, media and applications.❇ SIM messageSIM message means the message exceptionally stored in SIMcard. For notified multimedia message, you have to wait for downloadingand processing of the message. For notification setting, see [Menu1-9-2] for detail.To read a message, select one of the messages by pressing <.ReplyYou can reply to the sender.](https://usermanual.wiki/LG-Electronics-USA/MG105/User-Guide-580170-Page-37.png)
![Accessing the Menu38ForwardYou can forward the selected message to another party.Return callYou can call back to the sender.DeleteYou can delete the current message.ExtractYou can extract picture, sound and text. They will be saved in Myfolder or Phonebook.View informationYou can view information about received messages; Sender'saddress, Subject (only for Multimedia message), Message date &time, Message type, Message size.Replay (applicable to Multimedia message only)You can replay multimedia messages.❇ Receive (In the case of notification message)If Multimedia message is set to Auto download off, you can getonly Notification. To receive a message, you need to select[Receive].Outbox [Menu 1-4]You can see sent and unsent messages here. For sent message,you can see the delivery status. The browsing is same as that for the inbox message.Messages [Menu 1]](https://usermanual.wiki/LG-Electronics-USA/MG105/User-Guide-580170-Page-38.png)
![Accessing the Menu39Icon directive[ ] Sent[ ] Failed[ ] Delivery confirmed[ ] SMS sent❇When you already sent the message: ForwardYou can forward the current message to other recipients.DeleteYou can delete the current message.View informationYou can view information about outbox messages; Recipient’saddress, Subject (only for Multimedia message), Message date &time, Message type, Message size.❇ When you didn’t send the message: ViewYou can view the messaage. SendYou can send the message. DeleteYou can delete the current message.](https://usermanual.wiki/LG-Electronics-USA/MG105/User-Guide-580170-Page-39.png)
![Accessing the Menu40View informationYou can view information about outbox messages.Drafts [Menu 1-5]You can view the messages saved as a draft. The draft messagesare listed with the date and time when they were saved. Scrollthrough the list using up/down navigation keys.Each draft has the following options. Press <[Options].ViewYou can view the selected message.EditYou can edit the selected message.DeleteDeletes the selected message from the drafts folder.View informationYou can view the information of selected message: subject (only formultimedia message), the date and time when saved, message typeand size, the priority (only for multimedia message).Delete allDeletes all the messages from drafts folder.Messages [Menu 1]Icon directive[ ] Multimedia message[ ] Text message[ ] Delivery confirmed](https://usermanual.wiki/LG-Electronics-USA/MG105/User-Guide-580170-Page-40.png)
![Accessing the Menu41Listen to voice mail [Menu 1-6]You can listen to voice mail.Info message [Menu 1-7]Info service messages are text messages delivered by the networkto GSM. They provide general information such as weather reports,traffic news, taxis, pharmacies, and stock prices. Each type ofinformation has the number; therefore, you can contact serviceprovider as long as you have input the certain number for theinformation. When you have received an info service message, youcan see the popup message to show you that you have received amessage or the info service message is directly displayed. To viewthe message again or not in standby mode, follow the sequenceshown below; Read [Menu 1-7-1]1. When you have received an info service message and selectRead to view the message,it will be displayed on the screen. Youcan read another message by scrolling L , Ror < [Next].2. The message will be shown until another message is reached.Topics [Menu 1-7-2]• Add newYou can add Info service message numbers in the Phone memorywith its nickname.• View listYou can see Info service message numbers which you added. Ifyou press < [Options], you can edit and delete info messagecategory which you added.• Active listYou can select Info service message numbers in the active list. If you activate an info service number, you can receive messagessent from the number.](https://usermanual.wiki/LG-Electronics-USA/MG105/User-Guide-580170-Page-41.png)
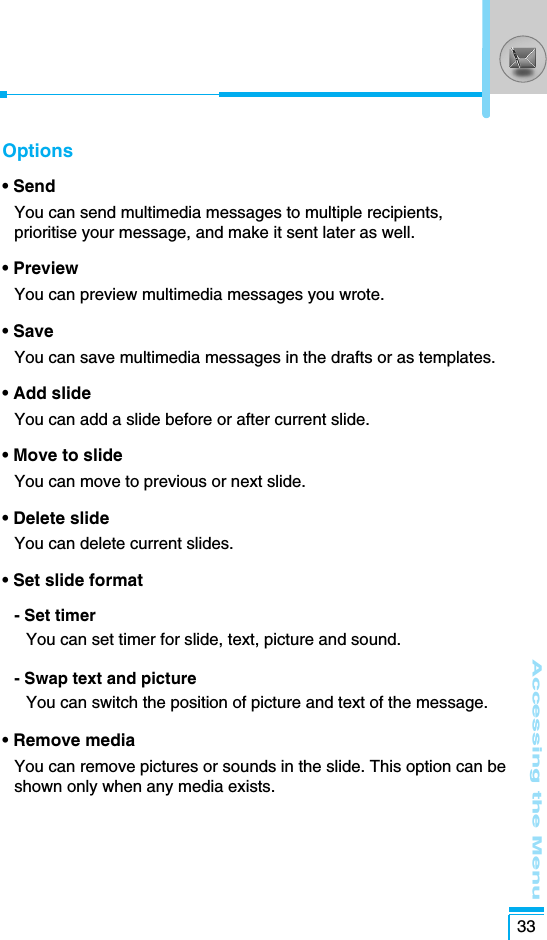
![Accessing the Menu42Templates [Menu 1-8]Text templates [Menu 1-8-1]You have 11 text templates. You can change the predefinedtemplates into your favorite ones or fill the <empty>s.Multimedia templates [Menu 1-8-2]You can use the following options.• PreviewYou can preview multimedia messages you wrote.• SaveYou can save multimedia messages in the outbox or as templates.• Add slideYou can add a slide before or after current slide.• Move to slideYou can move to previous or next slide.• Delete slideYou can delete current slides.• Set slide format- Set timerYou can set timer for slide, text, picture and sound.- Swap text and pictureYou can switch the position of picture and text of the message.• Remove mediaYou can remove pictures or sounds in the slide. This option can beshown only when any media exists.Messages [Menu 1]](https://usermanual.wiki/LG-Electronics-USA/MG105/User-Guide-580170-Page-42.png)
![Accessing the Menu43• Add T9 dictionaryYou can add your own word. This menu can be shown only whenedit mode is Predictive (T9Abc/T9abc/T9ABC).• T9 languagesSelect a T9 input mode.• ExitYou can back to the Message menu.Signature [Menu 1-8-3]You can make your Signature. Key in Name, Phone number, Faxnumber and Email.Settings [Menu 1-9]Text message [Menu 1-9-1]• Message typesText, Voice, Fax, Natl. paging, X.400, E-mail, ERMESUsually, the type of message is set to Text. You can convert yourtext into alternative formats. Contact your service provider for theavailability of this function.• Validity period This network service allows you to set how long your textmessages will be stored at the message centre.• Delivery report If you set to Yes, you can check whether your message is sentsuccessfully.• Reply via same service centreWhen a message is sent, it allows the recipients to reply andcharge the cost of the reply to your telephone bill.](https://usermanual.wiki/LG-Electronics-USA/MG105/User-Guide-580170-Page-43.png)
![Accessing the Menu44• SMS centre If you want to send the text message, you can receive the addressof SMS centre through this menu.Multimedia message [Menu 1-9-2]• PriorityYou can send the message after setting the level of priority: Low,Normal and High.• Validity period This network service allows you to set how long your textmessages will be stored at the message centre.• Delivery report If it is set to Yes in this menu, you can check whether yourmessage is sent successfully.• Auto download On: The messages are downloaded automatically on receipt.Off: Requires to confirm the message which you want todownload.Home network only: In home network, you can activate Autodownload “On” menu, Otherwise, you can activate Auto downloadin roaming network when you set Off.• Network settings In order to download MMS from the server, you need to set up aCSD or GPRS data connection. If you select multimedia messageserver, you can set URL for multimedia message server. You canset over 5 profiles to connect service.- HomepageThis menu allows to connect MMS centre (MMSC).Messages [Menu 1]](https://usermanual.wiki/LG-Electronics-USA/MG105/User-Guide-580170-Page-44.png)
![• Permitted typesPersonal : Personal message.Advertisements: Commercial message.Information : Necessary information.Voice mail centre [Menu 1-9-3]You can receive the voicemail if this feature is supported by yournetwork service provider. When a new voicemail is arrived, thesymbol will be displayed on the screen. Please check with yournetwork service provider for details of their service in order toconfigure the phone accordingly.1. Hold down 1key in standby mode.2. You can check the following submenus.• HomeYou can listen to voice mails by selecting Home.• RoamingEven when you are in abroad, you can listen to voice mails ifroaming service is supported.Info service [Menu 1-9-4](Dependent to network and subscription)• Receive - YesIf you select this menu, your phone will receive Info servicemessages.- NoIf you select this menu, your phone will not receive Info servicemessages any more.Accessing the Menu46Messages [Menu 1]](https://usermanual.wiki/LG-Electronics-USA/MG105/User-Guide-580170-Page-46.png)
![Accessing the Menu47• Alert - YesYour phone will beep when you have received Info servicemessage numbers.- NoYour phone will not beep even though you have received infoservice messages.• Languages You can select the language you want by pressing [On/Off]. Then,the info service message will be shown in the language that youselected.Push messages [Menu 1-9-5]You can set the option whether you will receive the message or not.](https://usermanual.wiki/LG-Electronics-USA/MG105/User-Guide-580170-Page-47.png)
![Accessing the Menu48Missed calls [Menu 2-1]This menu shows recently missed numbers. You can call thesenumbers, save and view the date and the time. Received calls [Menu 2-2]This menu shows recently received numbers. You can call thesenumbers, save and view the date and the time.Dialled calls [Menu 2-3]This menu shows the latest dialled numbers up to 20.Delete recent calls [Menu 2-4]You can delete recent calls of Missed calls, Received calls,Dialled calls or All calls.Call charges [Menu 2-5]Within these submenus, you can view the duration and the call costof your calls.Call register [Menu 2]](https://usermanual.wiki/LG-Electronics-USA/MG105/User-Guide-580170-Page-48.png)
![Accessing the Menu49Call duration [Menu 2-5-1]This function allows you to view the duration of your Last Call, AllCalls, Received calls and Dialled calls in hours, minutes andseconds. You can also reset the call timers.1. Press < [Menu] in standby mode.2. Press 2for direct access or use Land Rto enter Call register,then select Call charges.3. Scroll to highlight Call duration and Press < [Select].The following 5 submenus: Last call, All calls, Received calls,Dialled calls and Reset all.Call costs [Menu 2-5-2] This function allows you to check the cost of your last call, all calls,remaining and reset the cost. To reset the cost, you need the PIN2code.1. Press < [Menu] in standby mode.2. Press 2for direct access or use Land Rto enter Call register,then select Call charges.3. Scroll to highlight Call costs and Press < [Select].The following 4 submenus: Last call, All calls, Remaining andReset all.Note• The actual cost invoiced for calls by your serviceprovider may vary, depending upon network features,rounding-off for billing, tax, and etc.](https://usermanual.wiki/LG-Electronics-USA/MG105/User-Guide-580170-Page-49.png)
![Accessing the Menu50Settings [Menu 2-5-3] (SIM Dependent)• Set tariff You can set the currency type and the unit price. Contact yourservice providers to obtain charging unit prices. To select thecurrency or unit in this menu, you need the PIN2 code. If you want to input @, £, $ symbol, clear all currency strings andthen press *key. If you want to change symbol, press *key again.• Set credit This network service allows you to limit the cost of your calls byselected charging units. If you select Read, the number ofremaining unit is shown. If you select Change, you can changeyour charge limit. • Auto display This network service allows you to see automatically the cost ofyour last calls. If set to On, you can see the last cost when the callis released.Call register [Menu 2]Note• When all units have been used, no calls can be madeexcept emergency calls. Depending on the SIM card,you need the PIN2 code to set a call cost limit.](https://usermanual.wiki/LG-Electronics-USA/MG105/User-Guide-580170-Page-50.png)
![Accessing the Menu51GPRS information [Menu 2-6]You can check the amount of data transferred over the networkthrough GPRS. In addition, you can view how much time you areonline.Call duration [Menu 2-6-1]You can check the duration of Last call and All calls. You can alsoreset the call timers.Data volumes [Menu 2-6-2]You can check the Sent, Received or All data volumes and Resetall.](https://usermanual.wiki/LG-Electronics-USA/MG105/User-Guide-580170-Page-51.png)
![Accessing the Menu52In this menu, you can adjust and customize the phone tones fordifferent events and environments.1. Press < [Menu] in standby mode.2. Press 3for direct access or use Land R.3. You can also enter this menu directly by pressing Lkey instandby mode.Vibrate only [Menu 3-1]You can adjust the profile as Vibrate only if you need vibrationmode. In the mode, all kinds of alert are Vibrate or Silent.Quiet [Menu 3-2]You can adjust the profile as Quiet if you are in quiet place. General [Menu 3-3]You can adjust the profile as General. Loud [Menu 3-4]You can adjust the profile as Loud if you are in a noisyenvironment.Headset [Menu 3-5]You can adjust the profile as Headset when you put on a headset.Car [Menu 3-6]You can adjust the profile as Car when you activate Handsfree kit.Profiles [Menu 3]](https://usermanual.wiki/LG-Electronics-USA/MG105/User-Guide-580170-Page-52.png)
![Accessing the Menu53Activate [Menu 3-x-1]Activates the selected Profile.Personalise [Menu 3-x-2]Each has the submenus as shown below except for Vibrate only.Call alert type Allows to select alert type such as Ring, Vibrate, etc. for theincoming for adjusting environment.Ring tone Allows to set the ring tone for adjusting environment.Ring volume Allows to set the ring volume for adjusting environment. The volumeof Power on/off sound and all the alert sounds set according to Ringvolume.Message alert type Allows to alert when receiving a message for adjusting environment.Message tone Allows to select the alert tone for message reception.Keypad volumeAllows to set the keypad volume for adjusting environment. Note• Headset and Car profiles can be activated only whenHandsfree kit or Ear microphone put on the handset.However, their properties can be personalised.](https://usermanual.wiki/LG-Electronics-USA/MG105/User-Guide-580170-Page-53.png)
![Accessing the Menu54Keypad tone Allows to select the keypad tone for adjusting environment. Flip toneAllows to set the flip tone for adjusting environment.Effect sound volume Allows to set the effect sound volume for adjusting environment.Power on/off volume Allows to set the power on/off volume for adjusting environmentAuto answer This function will be activated only when your phone is connected tothe headset or handsfree kit.• Off : The phone will not answer automatically.• After 5 secs : After 5 seconds, the phone will answerautomatically.• After 10 secs : After 10 seconds, the phone will answerautomatically.Rename [Menu 3-x-3]You can change the default profile name except of Vibrate only,Headset, and Car menus.Note• If you set the Handsfree kit to the phone, you can’tuse the vibrate mode related with Call alert type orMessage alert menu. In car menu, the followingsubmenus are available;- Call alert type : Ring, Lamp- Message alert type : Ring once, Ring periodically,No alertProfiles [Menu 3]](https://usermanual.wiki/LG-Electronics-USA/MG105/User-Guide-580170-Page-54.png)
![Accessing the Menu55Settings [Menu 4]You can set the following menus for your convenience andpreferences.1. Press < [Menu] in standby mode.2. Press 4for direct access to enter Settings.Date & Time [Menu 4-1]You can set functions relating to the date and time.Set date [Menu 4-1-1]You can enter the current date. Date format [Menu 4-1-2]You can set the Date format such as DD/MM/YYYY, MM/DD/YYYY,YYYY/MM/DD. (D: Day / M: Month / Y: Year)Set time [Menu 4-1-3] You can enter the current time.Time format [Menu 4-1-4] Your can set the time format between 24-hour and 12-hour.Phone settings [Menu 4-2]You can set functions relating to the phone.Wallpaper [Menu 4-2-1]You can select the background pictures in standby mode.• Default You can select a picture or an animation of wallpaper by pressingL or R.• MyfolderYou can select a picture or an animation as wallpaper.](https://usermanual.wiki/LG-Electronics-USA/MG105/User-Guide-580170-Page-55.png)
![Accessing the Menu56Greeting note [Menu 4-2-2]If you select On, you can edit the text which is displayed in standbymode.Language [Menu 4-2-3]You can change the language for the display texts in your phone.This change will also affect the Language Input mode.Backlight [Menu 4-2-4]You can set the light-up duration of the internal display.LCD contrast [Menu 4-2-5]You can set the brightness of LCD by pressing L , R.Information window [Menu 4-2-6]You can preview the current state of the selected menu before openthe menu. The state is shown at bottom of the display.Menu colour [Menu 4-2-7]You can select the preferred menu colour among variouscombination.LED indicator [Menu 4-2-8]When the LED indicator is set to On, it flashes when the service isavailable.Network name [Menu 4-2-9]If you select on, you can see the network service provider namewhich is displayed in standby mode.Settings [Menu 4]](https://usermanual.wiki/LG-Electronics-USA/MG105/User-Guide-580170-Page-56.png)
![Accessing the Menu57Call settings [Menu 4-3]You can set the menu relevant to a call by pressing < [Select] in theSetting menu.Call divert [Menu 4-3-1]The Call divert service allows you to divert incoming voice calls, faxcalls, and data calls to another number. For details, contact yourservice provider.• All voice calls Diverts voice calls unconditionally. • If busy Diverts voice calls when the phone is in use.• If no reply Diverts voice calls which you do not answer.• If out of reach Diverts voice calls when the phone is switched off or out ofcoverage.• All data calls Diverts to a number with a PC connection unconditionally. • All fax calls Diverts to a number with a fax connection unconditionally.• Cancel all Cancels all call divert service.](https://usermanual.wiki/LG-Electronics-USA/MG105/User-Guide-580170-Page-57.png)
![Accessing the Menu58The submenus Call divert menus have the submenus shown below.- Activate Activate the corresponding service.To voice mail centre Forwards to message centre. This function is not shown at All datacalls and All fax calls menus.To other number Inputs the number for diverting.To favourite number You can check recent 5 diverted numbers.- Cancel Deactivate the corresponding service.- View status View the status of the corresponding service.Answer mode [Menu 4-3-2]• Flip open If you select this menu, you can receive an incoming call by onlyopening the flip. • Press any key If you select this menu, you can receive a call by pressing any keyexcept E[End] key.• Send onlyIf you select this menu, you can receive a call by only pressing S [Send] key.Settings [Menu 4]](https://usermanual.wiki/LG-Electronics-USA/MG105/User-Guide-580170-Page-58.png)
• OnYou can send your phone number to another party. Your phonenumber will be shown on the receiver’s phone. • Off Your phone number will not be shown.• Set by network If you select this, you can send your phone number depending ontwo line service such as line 1 or line 2.Call waiting [Menu 4-3-4](network dependent)• Activate If you select Activate, you can accept a waiting (receiving) call.• Cancel If you select Cancel, you cannot recognize the waiting (receiving)call.• View status Shows the status of Call waiting.Minute minder [Menu 4-3-5]If you select On, you can check the call duration by deep soundevery minute during a call.](https://usermanual.wiki/LG-Electronics-USA/MG105/User-Guide-580170-Page-59.png)
![Accessing the Menu60Auto redial [Menu 4-3-6]• On When this function is activated, the phone will automatically try toredial in the case of failure to connect a call.• Off Your phone will not make any attempts to redial when the originalcall has not connected.Closed user group [Menu 4-3-7](network dependent)Restricts usage of the phone with numbers that belong to certainuser groups. When this function is used, every outgoing call isassociated with a group index. If a group index is specified, it isused for all outgoing calls. If no group index is specified, thenetwork will use the preferential index (a specific index that is storedin the network).Default : Activate the default group agreed on with the networkoperator.Set : Setting the selected CUG Index.Edit : Editing the CUG name and CUG Index.Delete : Deleting the selected CUG.Delete all: Deleting All CUG.Security settings [Menu 4-4] PIN code request [Menu 4-4-1]In this menu, you can set the phone to ask for the PIN code of yourSIM card when the phone is switched on. If this function isactivated, you’ll be requested to enter the PIN code.1. Select PIN code request in the security settings menu, and thenpress < [Select].Settings [Menu 4]](https://usermanual.wiki/LG-Electronics-USA/MG105/User-Guide-580170-Page-60.png)
![Accessing the Menu612. Set On/Off.3. If you want to change the setting, you need to enter PIN codewhen you switch on the phone.4. If you enter wrong PIN code more than 3 times, the phone willlock out. If the PIN is blocked, you will need to key in PUK code.5. You can enter your PUK code up to 10 times. If you put wrongPUK code more than 10 times, you can not unlock your phone.You will need to contact your service provider.Phone lock [Menu 4-4-2]You can use security code to avoid unauthorized use of the phone.Whenever you switch on the phone, the phone will request securitycode if you set phone lock to On. If you set phone lock toAutomatic, your phone will request security code only when youchange your SIM card.Call barring [Menu 4-4-3]The Call barring service prevents your phone from making orreceiving certain category of calls. This function requires the callbarring password. You can view the following submenus. • All outgoingThe barring service for all outgoing calls.• Outgoing internationalThe barring service for all outgoing international calls.• Outgoing international except home countryThe barring service for all international outgoing calls except homenetwork.• All incomingThe barring service for all incoming calls](https://usermanual.wiki/LG-Electronics-USA/MG105/User-Guide-580170-Page-61.png)
![Accessing the Menu62• Incoming when abroadThe barring service for all incoming calls when roaming• Cancel allYou can cancel all barring services.• Change passwordYou can change the password for Call Barring Service. Each call barring menu has following submenus: • ActivateAllows to request the network to set call restriction on.• CancelSet the selected call restriction off.• View statusView the status whether the calls are barred or not.Fixed dial number [Menu 4-4-4] (SIM dependent)You can restrict your outgoing calls to selected phone numbers. Thenumbers are protected by your PIN2 code.• Activate You can restrict your outgoing calls to selected phone numbers.• Cancel You can cancel fixed dialling function.• Number list You can view the number list saved as Fixed dial number. Settings [Menu 4]](https://usermanual.wiki/LG-Electronics-USA/MG105/User-Guide-580170-Page-62.png)
![Accessing the Menu63Change codes [Menu 4-4-5]PIN is an abbreviation of Personal Identification Number used toprevent use by only unauthorized person.You can change the access codes: PIN2 code, Security code.1. If you want to change the Security code/PIN/PIN2 code inputyour original code, and then press < [OK].2. Input new Security code/PIN/PIN2 code and verify them.Network settings [Menu 4-5]You can select a network which will be registered eitherautomatically or manually. Usually, the network selection is set toAutomatic. Automatic [Menu 4-5-1]If you select Automatic mode, the phone will automatically searchfor and select a network for you. Once you have selected“Automatic”, the phone will be set to “Automatic” even though thepower is off and on.Manual [Menu 4-5-2]The phone will find the list of available networks and show youthem. Then you can select the network which you want to use if thisnetwork has a roaming agreement with your home networkoperator. The phone let you select another network if the phone failsto access the selected network. Preferred [Menu 4-5-3]You can set a list of preferred networks and the phone attempts toregister with first, before attempting to register to any othernetworks. This list is set from the phone’s predefined list of knownnetworks.](https://usermanual.wiki/LG-Electronics-USA/MG105/User-Guide-580170-Page-63.png)
![Accessing the Menu64GPRS setting [Menu 4-6]You can set GPRS service depending on various situation.Power on [Menu 4-6-1]If you select this menu, the phone is automatically registered to aGPRS network when you switch the phone on. Starting a WAP orPC dial-up application created the connection between phone andnetwork and data transfer is possible. When you end theapplication, GPRS connection is ended but the registration to theGPRS network remains.When needed [Menu 4-6-2]If you select this menu, the GPRS connection is established whenyou connect a WAP service and closed when you end the WAPconnection.Reset settings [Menu 4-7]You can initialize all factory defaults. You need Security code toactivate this function.Settings [Menu 4]](https://usermanual.wiki/LG-Electronics-USA/MG105/User-Guide-580170-Page-64.png)
![Accessing the Menu65Organiser [Menu 5]Alarm clock [Menu 5-1]You can set up to 5 alarm clocks to go off at a specified time.1. Select On and enter the alarm time you want.2. Select the repeat period : Once, Mon~Fri, Mon~Sat, Everyday.3. Select the alarm tone you want and press < [OK].4. Edit the alarm name and press < [OK].Scheduler [Menu 5-2]When you enter this menu a Calendar will show up. On top of thescreen there are sections for date. Also on bottom of the screenthere are sections for icons (schedule, memo). Whenever youchange the date, the calendar will be updated according to the date.And square cursor will be used to locate the certain day. If you seeunder bar on the calendar, it means that there is a schedule ormemo that day. This function helps to remind you of your scheduleand memo. The phone will sound an alarm tone if you set this forthe note.To change the day, month, and year.13*#UDLRKey Description Key DescriptionYearlyMonthlyWeeklyDailyNote• Your phone should be switched on to use this function.](https://usermanual.wiki/LG-Electronics-USA/MG105/User-Guide-580170-Page-65.png)
![Add new [Menu 5-2-1]You can edit maximum 39 characters and take up to 20 notes.• Schedule Input the subject, the schedule time, the repeat, the alarm bypressing allowed keys.• Memo 1. Select Add new by pressing < [Select].2. Press Memo.3. Input the memo and then press < [OK].View [Menu 5-2-2]Shows the note for the chosen day. Use U , Dto browse through thenote lists. If you set alarm for the note, Alarm watch is displayed. Atthat time, if you press < [Select], you can see the note in detail.Press < [Options] to delete, edit the note you selected. View all [Menu 5-2-3]Shows the notes that are set for all days. Use U , Dto browsethrough the note lists. You can use the same menu as “View” bypressing < [Options].Delete past [Menu 5-2-4]You can delete the past schedule that has been already notifiedyou.Delete all [Menu 5-2-5]You can delete for the all note(s).Accessing the Menu66Organiser [Menu 5]](https://usermanual.wiki/LG-Electronics-USA/MG105/User-Guide-580170-Page-66.png)
![Accessing the Menu67Phonebook [Menu 5-3]1. To use Phonebook, press > [Names] in standby mode.2. To use Phonebook, press < [Menu] in standby mode and selectOrganiser.Search [Menu 5-3-1](Calling from phonebook) 1. In standby mode, press > [Names].2. Search by pressing < [Select].3. Enter the name whose phone numbers or e-mail address youwant to search or Select ‘List’ to view phonebook. 4. Instant searching is available by inputting the initial letter of thename or number you want to search.5. If you want to edit, delete, copy an entry, or to add the voice toone, select < [Options]. The following menu will be displayed.• Edit : You can edit the name, number, E-mail and faxby pressing < [OK].• Write message: After you have found the number you want, youcan send a message to the selected number.• Copy : You can copy an entry from SIM to phone or from phone to SIM.• Main number : You can select the one out of mobile, home,office that you often use. The main number willbe displayed first, if you set this.• Delete : You can delete an entry.](https://usermanual.wiki/LG-Electronics-USA/MG105/User-Guide-580170-Page-67.png)
![Accessing the Menu68Add new [Menu 5-3-2]You can add phonebook entry by using this function. Phone memory capacity is 200 entries. SIM card memory capacitydepends on the cellular service provider. You can also save 20 characters of name in The Phone memory,and save characters in the SIM card. The number of character isSIM dependent feature.1. Open the phonebook first by pressing > [Names] in standbymode.2. Scroll to highlight Add new, and press < [Select].3. Select the memory you want to save: SIM or Phone. If set toPhone, you need to select which number you want as Mainnumber.a. Press < [OK] to input a name.b. Press < [OK], then you can input a number.c. Press < [OK].d.You can set a group for the entry by pressing L , R:e. You can set a character and a picture for the entry by pressingU , D ,L , R.Caller groups [Menu 5-3-3]You can list up to 20 members per one group. There are 7 groupsyou can make lists to.1. In standby mode, press > [Names].2. Scroll to Caller groups item then press <[Select], and everyGroup list will be displayed.3. Select Group name you want by pressing <[Select].• Member listShows the group members you have selected.Organiser [Menu 5]](https://usermanual.wiki/LG-Electronics-USA/MG105/User-Guide-580170-Page-68.png)
![Accessing the Menu69• Group ring toneAllows you to specify ring tone for the group members' call.• Group iconAllows you to select the icon dependent on Group.• Add memberYou can add group members. Each group member souldn’t beexceeded 20.• Remove memberYou can remove the member from the Group member list. Butthe name and the number still remain in phonebook.• RenameYou can change a group name.Speed dial [Menu 5-3-4]You can assign any of the keys, 2to 9with a Name list entry. Youcan call directly by pressing this key for 2-3 seconds. 1. Open the phonebook first by pressing > [Names] in standbymode.2. Scroll to Speed dial, then press < [Select].3. If you want to add Speed dial, select (Empty). Then, you cansearch the name in phonebook.4. Select allocated a name by speed dial, and choose Change orDelete to edit the name.• ChangeYou can allocate a new phone number to the dial key.• DeleteYou can remove the allocated phone number from the dial key.](https://usermanual.wiki/LG-Electronics-USA/MG105/User-Guide-580170-Page-69.png)
![Settings [Menu 5-3-5]1. Press > [Names] in standby mode.2. Scroll to Settings, then press < [Select].• Set memory Scroll to highlight Set memory, then press <[Select].- If you select Variable, when adding entry, the phone will askwhere to store.- If you select SIM or Phone, the phone will store an entry toSIM or phone.• Search byScroll to highlight Search by, then press <[Select].- If you select Variable, the phone will ask how to search.- If you select Name or Number, the phone will search anentry by Name or Number.• View optionsScroll to highlight View options, then press <[Select]- Name only : Set the phonebook list with displaying onlyname.-With pictures: Set the phonebook list with the information ofcharacter and picture. Accessing the Menu70Organiser [Menu 5]](https://usermanual.wiki/LG-Electronics-USA/MG105/User-Guide-580170-Page-70.png)
![Accessing the Menu71Copy all [Menu 5-3-6]You can copy/move entries from SIM card memory to Phonememory and vice versa.1. Open the Phonebook first by pressing > [Names] in standbymode.2. Scroll to Copy all, then press < [Select] to enter this menu.• SIM to Phone : You can copy the entry from SIM Card toPhone memory. • Phone to SIM : You can copy the entry from Phone memoryto SIM Card.3. You can see the following submenus.• Keep original : When copying, Original Dial Number is kept.• Delete original : When copying, Original Dial Number will beerased.Delete all [Menu 5-3-7]You can delete all entries in SIM, Phone, and Voice. This functionrequires Security code except for voice.1. Press> [Names] in standby mode and select Delete all, press <[Select].2. Then select a memory to erase.3. Enter security code and Press < [OK] or > [Back].](https://usermanual.wiki/LG-Electronics-USA/MG105/User-Guide-580170-Page-71.png)
![Accessing the Menu72Information [Menu 5-3-8]• Service dial numberUse this function to access a particular list of services provided byyour network operator (if supported by the SIM card).1. Open the phonebook first by pressing > [Names] in standbymode and select Information.2. Scroll to Service dial number, then press < [Select] to enter.3. The names of the available services will be shown.4. Use Uand Dto select a service. Press S [Send].• Memory statusThis feature allows you to see how many free and in-use are inyour phonebook.1. Open the phonebook first by pressing > [Names] in standbymode. Select Information by pressing < [Select].2. Scroll to Memory status, then press < [OK].• Own number (SIM dependent)You can check your own number in SIM card.Organiser [Menu 5]](https://usermanual.wiki/LG-Electronics-USA/MG105/User-Guide-580170-Page-72.png)
![Accessing the Menu73Fun & Tools [Menu 6]Favorites [Menu 6-1]You can set up to 9 menus which you have used often in Favorites.You can connect this menu directly by pressing hot key D.If you want to register the menu in favorites, select <Empty> on alist. If the menu is already registered, the options are displayed asfollows:- Select : Activate the registered menu.- Change : Change the menu.- Delete : Delete the registered menu.- Delete all : Delete all menus which are registered in Favorites.- Information: View the information of registered menu. Games [Menu 6-2]The phone offers you the games to play with.Note• The control keys are different depending on a game.However, each one has an introduction to explain themain control keys. The rest ones are as follows.[Common Key Function]<: Game menu>: BackC: Pause or resume a game](https://usermanual.wiki/LG-Electronics-USA/MG105/User-Guide-580170-Page-73.png)
![Accessing the Menu74Calculator [Menu 6-3]This contains the standard functions such as +, –, x, ÷: Addition,Subtraction, Multiplication, and Division.1. Input the numbers by pressing numeric keys.2. Use a navigation key to select a sign for calculation.3. Then input the numbers.4. Press < [Result] to view the result.5. Press [Reset] or enter numbers to repeat the procedure above.6. Use Ckey to erase any numbers or signs.7. If you press *key, you can input a minus number. In addition, If you press #key, you can input a decimal number.8. To end Calculator, press > [Back].My folder [Menu 6-4]Enables you to view the downloaded pictures and sounds. They canbe set as Wallpaper or Ring tone. You can view, listen, delete orrename downloaded data.Pictures [Menu 6-4-1]Sound [Menu 6-4-2]The Submenus for each main one • Edit title You can edit the title for each download contents.• Send messageYou can write Short message/Multimedia message (availabledepending on type of Media) with attachment pictures or sounds.Fun & Tools [Menu 6]](https://usermanual.wiki/LG-Electronics-USA/MG105/User-Guide-580170-Page-74.png)
![Accessing the Menu75• Set as Wallpaper / Set as ring tone You can set downloaded sounds or pictures as wallpaper or Ringtone.• Delete You can delete each downloaded content.• Delete allYou can delete all downloaded contents. Unit converter [Menu 6-5]This converts any measurement into a unit you want. There are 4types that can be converted into units: Length, Area, Weight, andVolume.1. You can select one of four unit types by pressing < [Unit] key.2. Select the standard value by using L , R.3. Select the unit you want to convert by pressing Uand D.4. You can check the converted value for the unit you want. Also,you can input a decimal number by pressing #.World time [Menu 6-6]You can view clocks of the world’s major cities. 1. Select the city belonged to the time zone by pressing L , Rkey.2. You can set the current time to the city time you select bypressing < [Set].](https://usermanual.wiki/LG-Electronics-USA/MG105/User-Guide-580170-Page-75.png)
![Accessing the Menu76Voice recorder [Menu 6-7]The voice memo feature you to record up to 10 voice messages andeach memo is up to 20 Seconds.Record [Menu 6-7-1]1. You can record voice memo in Voice recorder menu and alsoholding down Cin the standby mode.2. Once recording is started, the message Recording and theremaining time is displayed.3. If you want to finish recording, press < [Save].4. Key in Voice memo title, press < [OK].View list [Menu 6-7-2]The phone shows voice memo list. You can Playback and Deletethe recorded voice memo.Memory status [Menu 6-8]You can check the size of free memory and each menu of memorysuch as text/picture message, inbox, outbox.PC SyncPC Sync is a program for data exchange between PC and thephone by data cable. For more information, you can use theguide of PC Sync Help file in CD.Fun & Tools [Menu 6]](https://usermanual.wiki/LG-Electronics-USA/MG105/User-Guide-580170-Page-76.png)
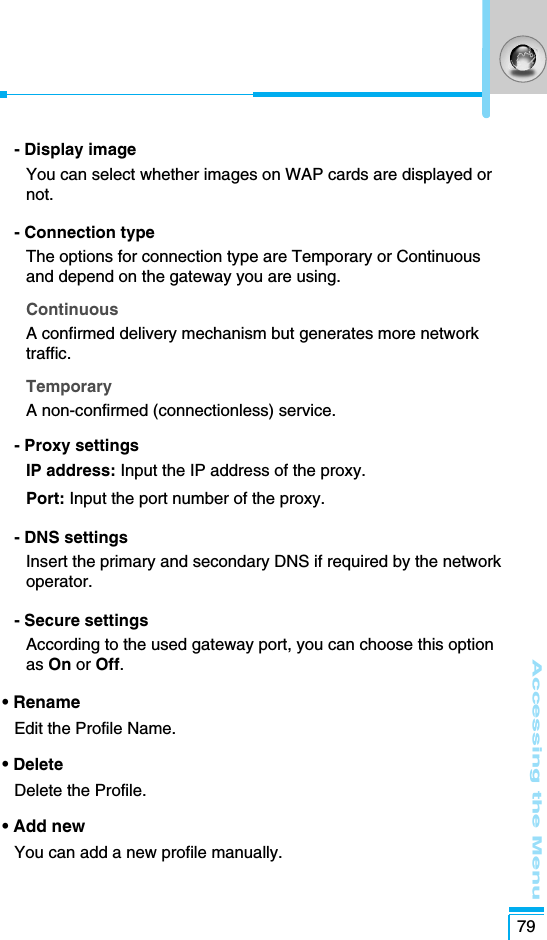
![Accessing the Menu77Internet [Menu 7]The phone supports services based on Wireless ApplicationProtocol (WAP). You can access services supported by yournetwork. The services menu allows you to get the information suchas news, weather reports, and flight times.Home [Menu 7-1]Connect to a homepage. The homepage may be the site which isdefined in the activated profile. It will be defined by Service Providerif you don’t make in activated profile.Bookmarks [Menu 7-2]Press < [Select] to access available options, or press > [Back] toexit.• Connect : Connect to the selected bookmark.• Add new : Add a new bookmark manually.• Edit : Edit the title and the address of the selected bookmark.• Delete : Delete the selected bookmark from the bookmark list.Profiles [Menu 7-3]You can make up to 10 profiles and activate only one out of them.Scroll to the desired profile and press <to access available options.• Activate You can activate the profile you want.• Settings You can edit and change WAP settings of the selected profile.- Homepage This setting allows you to enter the address (URL) of a site youwant to use as homepage. You do not need to type “http://” at thefront of each URL as the WAP Browser will automatically add it.](https://usermanual.wiki/LG-Electronics-USA/MG105/User-Guide-580170-Page-77.png)
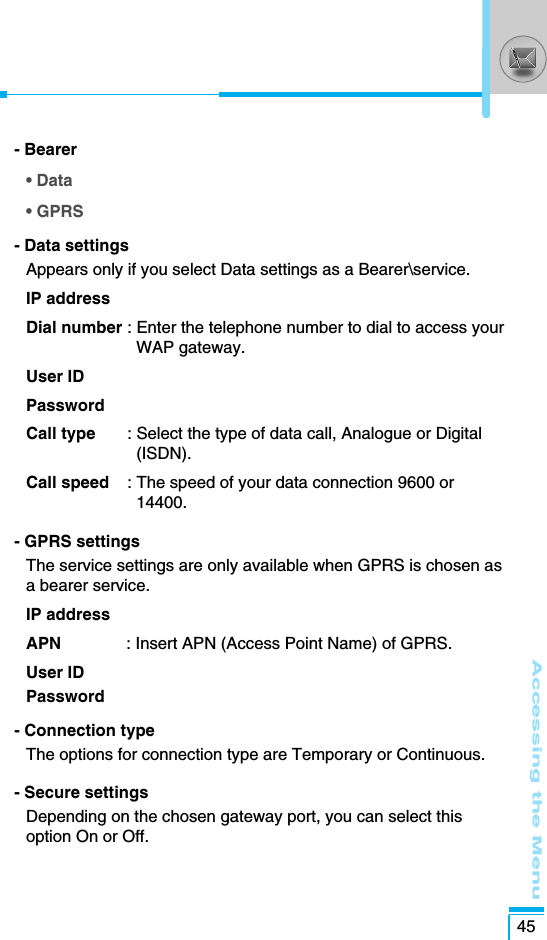
![- Bearer You can set the bearer data service.• Data• GPRS- Data settings Appeares only if you select Data settings as a Bearer\service.IP address : Enter the IP address of the WAP gateway youwant. Dial number : Enter the telephone number to dial to accessyour WAP gateway.User ID : The users identity for your dial-up server (andNOT the WAP gateway). Password : The password required by your dial-up server(and NOT the WAP gateway) to identify you. Call type : Select the type of data call: Analogue or Digital(ISDN).Call speed : The speed of your data connection; 9600 or14400.Linger time : You need to enter timeout period. After enteringthat, the WAP navigation service will beunavailable if any data is not input ortransferred.- GPRS settings The service settings are only available when GPRS is chosen asa bearer service. IP address : Input the IP address of the WAP gateway youaccess.APN : Input the APN of the GPRS.User ID : The users identify for your APN server.Password : The password required by your APN server.Accessing the Menu78Internet [Menu 7]](https://usermanual.wiki/LG-Electronics-USA/MG105/User-Guide-580170-Page-78.png)
![Accessing the Menu80Go to URL [Menu 7-4]You can directly connect to the site you want. You need to enter aspecific URL.Cache settings [Menu 7-5]You can remove the contents of Cache memory or change theCache mode.Clear cache [Menu 7-5-1]The contents of Cache memory will be removed.Check cache [Menu 7-5-2]You can set the option whether you will check the cache memory ornot.Cookies settings [Menu 7-6]The information or services you have accessed are saved in thecache memory of the phone.Clear cookies [Menu 7-6-1]Removes all context saved in cookie.Check cookies [Menu 7-6-2]Check whether a cookie is used or not.Security certification [Menu 7-7]A list of the available certificates is shown.Reset profiles [Menu 7-8]You can reset profiles to return to original settings.Browser version [Menu 7-9]The WAP Browser version is displayed.Internet [Menu 7]](https://usermanual.wiki/LG-Electronics-USA/MG105/User-Guide-580170-Page-80.png)
![If you are on line, you can view the following menus.■ HomeRefer to [Menu 7-1].■ ReloadReloads the current page.■ BookmarksSee [Menu 7-2].■ Save as bookmarkYou can save a site as bookmark.■ MessagesDuring Wap connection, you can see the Short messages.■ Go to URLYou can move to the site you want. In this menu, you can alsoedit the site address.■ Go to email serverYou can move to the E-mail server that you configured.■ Set as email serverYou can set the address of current site as E-mail server. ■ Clear cacheThe contents of cache memory will be removed.■ Save ImagesYou can save the image which is provided by the WAP.Accessing the Menu81On browsing menu](https://usermanual.wiki/LG-Electronics-USA/MG105/User-Guide-580170-Page-81.png)
![Applications [Menu 8-1]Java Menu OptionsScroll to an application and select Options.1. New : You can create new folder.2. Move : You can select a folder which you want.3. About : Shows Java MIDP information.4. Info : Displays information about the selected MIDlet.5. Remove : Deletes the selected MIDlet.6. Update : Accesses the server and updates the selectedMIDlet.7. Options : Some Java applications may require a dataconnection to be made. Select this to set theconnecting options.- Always : The connection is created immediately without anotification.- Prompt : You will be asked before the application makes theconnection.- Never : No connection is allowed.8. Rename : You can rename the application.9. Exit : Exits from Applications.Download [Menu 8-2]You can edit and set MIDlet server address. Download MIDletsusing WAP Browser and store them in the phone. You can alsoview the list of MIDlets stored on the Applicatons screen.Accessing the Menu82Applications [Menu 8]](https://usermanual.wiki/LG-Electronics-USA/MG105/User-Guide-580170-Page-82.png)
![Profiles [Menu 8-3]Some Java applications may require a network connection tooperate, for example, multiplayer games. You can set up to 5profiles and activate the desired one. This is similar to wap profilesetting. Refer to wap profiles when you set this.JAVA™is a trademark of Sun Microsystems, Inc.Accessing the Menu83](https://usermanual.wiki/LG-Electronics-USA/MG105/User-Guide-580170-Page-83.png)