LG Electronics USA NT-LGX14 NOTEBOOK PC User Manual Golf X140 Win7 UG ENG 100209
LG Electronics USA NOTEBOOK PC Golf X140 Win7 UG ENG 100209
Contents
- 1. Users Manual 1
- 2. Users Manual 2
- 3. Users Manual 3
Users Manual 2
44
Using the system
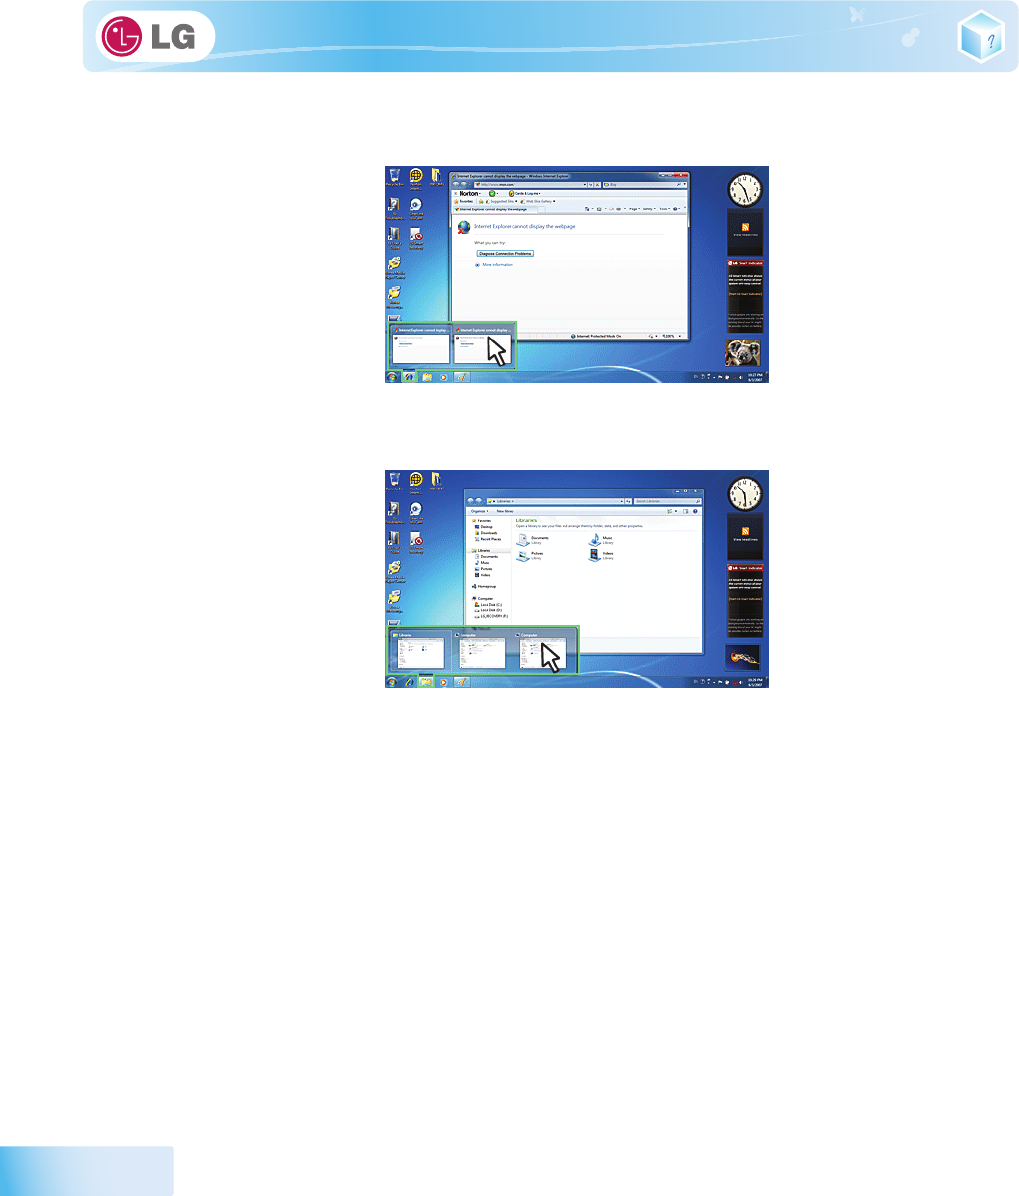
corresponding windows are displayed on the desktop. Click a window in the Preview to open the window.
2. Preview My Computer/Windows Explorer
▶ Convenient Features of
Windows
7
Windows
7 is designed to help you use frequently used functions more easily. Utilize the following
features to use your system more efficiently.
1.
Minimize Unnecessary Windows
(
Aero Shake
): Click and shake the title bar of the window you want to
use to minimize other windows to the task bar.

Using the system
45
※ If you want to display the windows again, click and shake the title bar of the open window again.
2.
Switch Window Mode Quickly
: Click the title bar of a window and drag it to the top of the screen to
maximize it. Click the title bar of a window and drag it to the bottom of the screen to minimize it.
3.
Auto-align Two Windows
: Click the title bar of one of the two windows you want to use and drag it
to the rightmost or leftmost side of the screen to make the window occupy one half of the screen.
46
Using the system
▶ Changing
User Account Control
Settings
User Account Control
prevents any unauthorized alteration to system configurations. When someone
tries to change settings or install a program that could affect others' system use,
User Account
Control
confirms his or her authority first.
We recommend that
User Account Control
not be disabled. If this feature is disabled, enable it
immediately to protect the system.
1. Select
Start
>
Control Panel
>
View by
>
Small icons
>
User Accounts
>
Change User Account Control
Settings
.
2. After changing User Account Control settings, click
[OK]
.
※ It is recommended to use the default settings for the security and safety of your system.
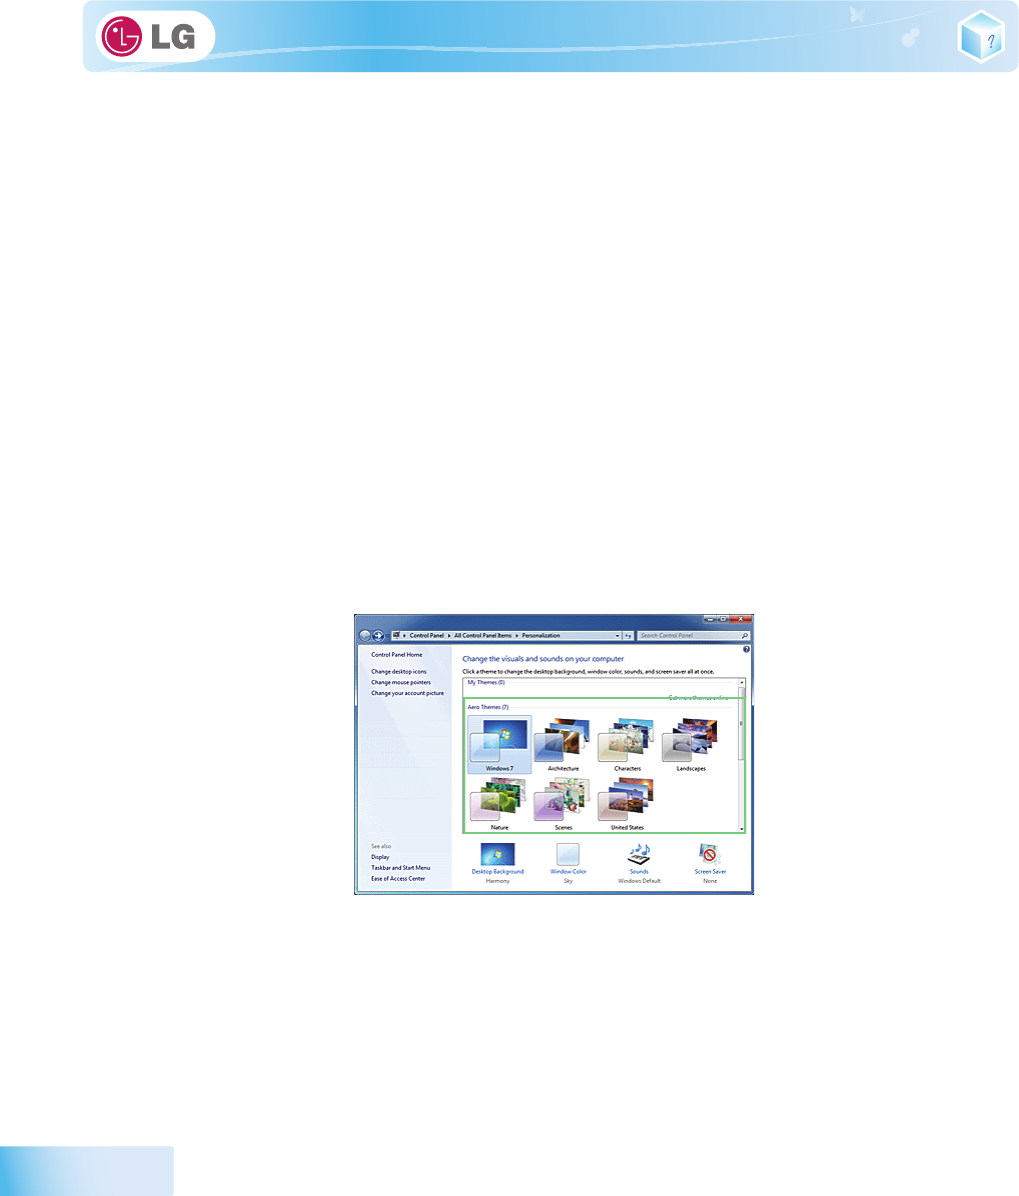
▶Enable
Windows
Aero
Windows
Aero
delivers the exquisite visual effects of
Windows
7. It presents window animations in
new transparent and delicate visualization.
※
Windows
Aero
may be enabled by default depending on model type and software version.
1. Right-click the desktop to display a popup window. Then click
[Personalize]
.
2. Once the
[Change Visual Effect and Sound]
screen appears, select the
Aero
theme you want to use.
3. The
Aero
theme where the transparence feature is applied becomes enabled.
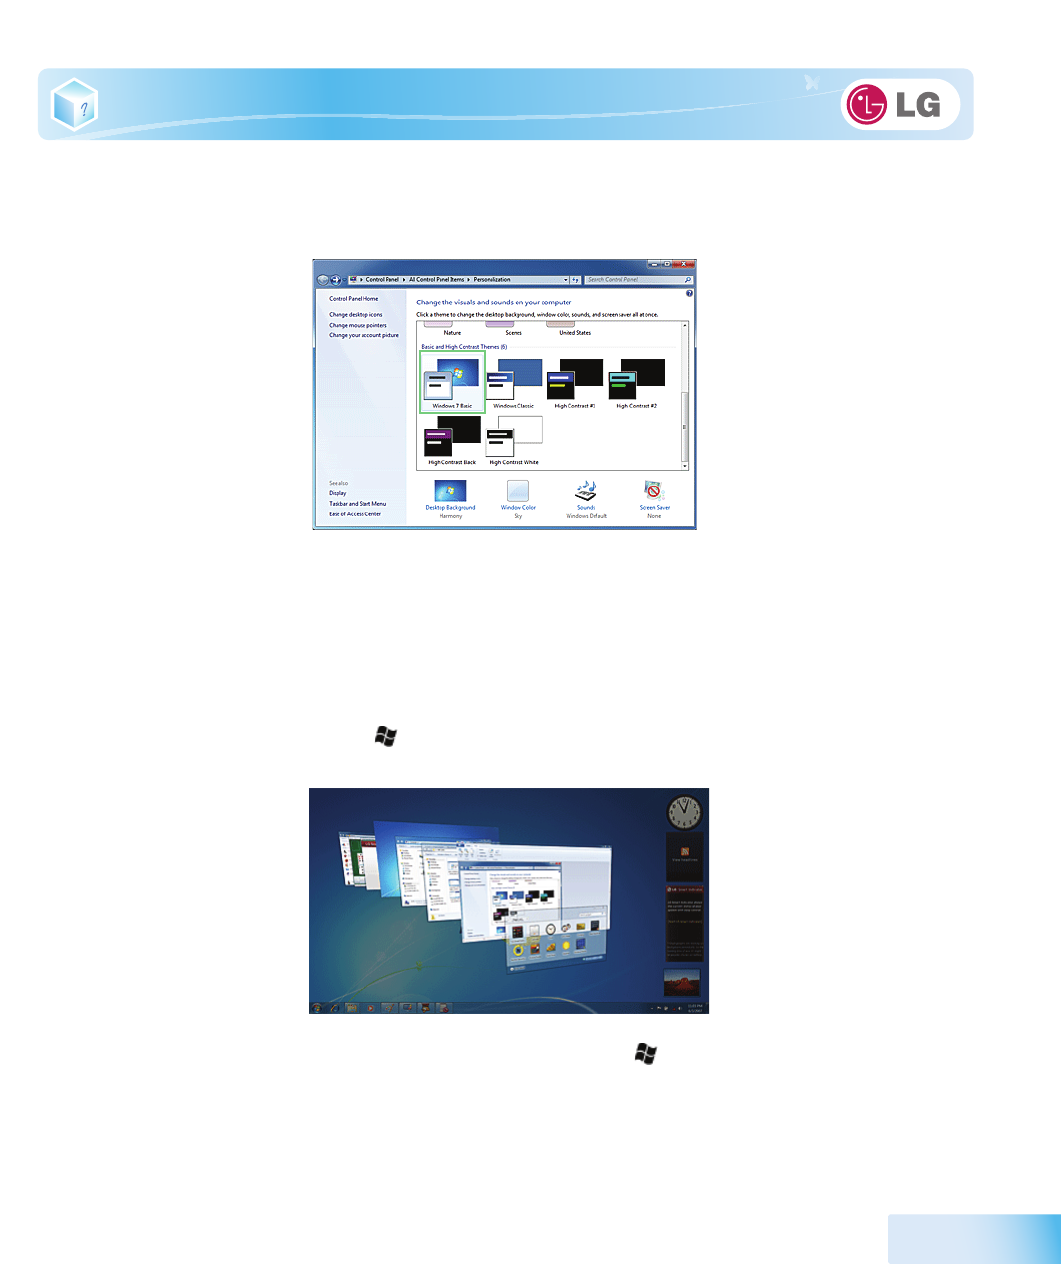
▶Disable
Windows
Aero
1. Right-click the desktop to display a popup window. Then click
[Personalize]
.
Using the system
47
2. When the Change Visual Effect and Sound window appears, select
[Windows 7 Basic ]
in the
[Basic
and High Contrast Theme]
menu.
3. The Aero theme is disabled.
▶Using
Windows
Flip 3D
Windows
Flip 3D
allows you to view all the open windows on the Desktop on one screen.
Flip 3D
displays all the open windows in 3D, stacked view.
※ To use
Windows
Flip 3D
, the
Windows
Aero
feature must be enabled.
1. Press the
Windows logo
key ( ) +
Tab
to enable or disable
Flip 3D
.
2. To flip through the open windows, hold down the
Windows logo
( ) key, and press
Tab
key or
simply rotate the mouse wheel. To flip over the windows clockwise or anti-clockwise one by one,
hold down the Windows logo key and press the Left or Right arrow key.
48
Using the system
3. When the intended window is displayed at the top, release the
Windows logo
( ) key. To display a
window without flipping through the stack, hold down the Windows logo key and click the intended
window.
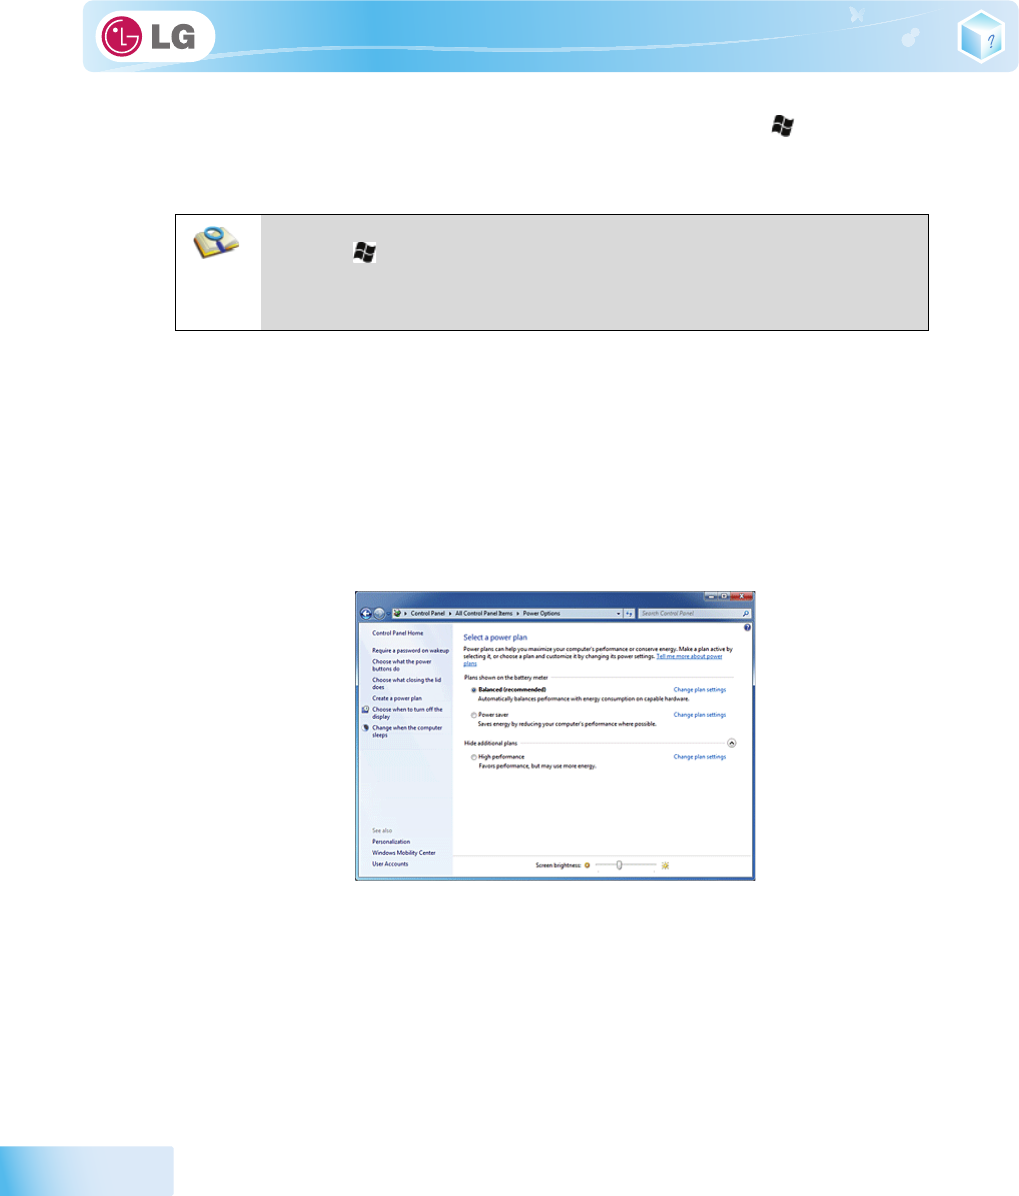
▶
Windows
7 Power Management
Windows
7 provides a more simple and reliable power management environment than that of
previous
Windows
. With that, you can make Notebook PC consume power more effectively.
1. Select
Start
>
Control Panel
>
View by
>
Small icons
>
Power Options
.
2. When the
[Select a power plan]
window appears, select one of the items displayed under
Battery
Meter Plans
.
※ If the
High Performance
Settings tab is not displayed, click the down arrow on the right of
[Display More Power
Plans]
to display it.
-
Balanced
: Ensures the maximum performance when needed and saves power when the system is not used.
-
Power saver
: Reduces system performance to save power. This plan maximizes battery life.
-
High performance
: Increases system performance and response time to their maximum. In this plan, the battery does not
last long.
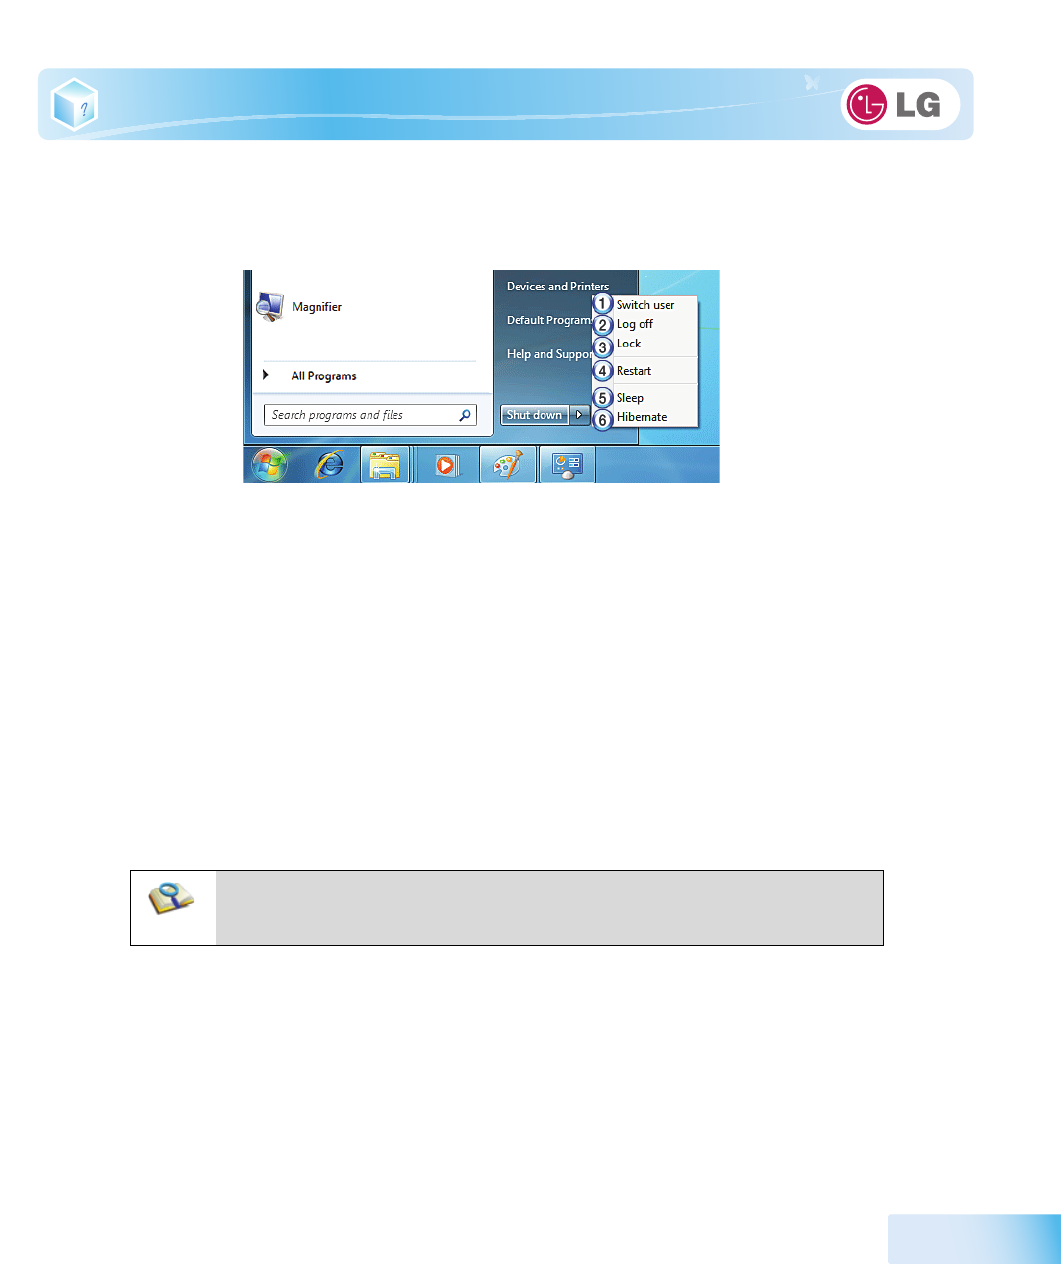
▶ System Termination Options
In
Windows
7, you can use the shortcut menu to log off from user account, lock or restart the system
■ If you want to display windows in the Flip 3D state constantly, press Ctrl + Windows
logo ( ) + Tab keys. In this state, to flip over the windows one by one, press Tab.
In this state, to flip over the windows clockwise or anti-clockwise one by one, press
the Left/Down or Right/Up arrow key. Press Enter to end the Flip 3D state and open
the selected window.
Using the system
49
and switch users fast without logging off.
Click the arrow button on the right of the [Shutdown] button to display more shutdown options.
1. Switch User
- Logs on using another user account registered in the system.
2. Log Off
- Exits all programs and logs off from the user account.
3. Lock
- Locks the user account.
4. Start Again
- Exits all programs and reboots the system.
5. Sleep
- Turns off the devices you are not using to minimize the power consumption.
6. Hibernate
- Stores the user programs and turns off the system.
■ The sleep mode reduces the power consumption. If you use the sleep mode, you
can go back to your work quickly. It is recommended to save all the data in all open
programs before using this mode.
50
Using the system
3-4. LG Smart Care
LG Smart Care
is an application that allows you to diagnose and optimize the system conveniently.
※ The figures herein are subject to change without prior notice.
※ You can download and install
LG Smart Care
using the online update feature of
LG Intelligent Update
.
※
LG Smart Care
may not be available depending on the model.
※ "
Diagnostics and Repair
" function of
LG Smart Care
needs network connection or
LG Intelligent Update
.
※ Before using
LG Smart Care
, make sure to connect the system to the network or install
LG Intelligent Update
.
▶Using
LG Smart Care
1. Double-click the
LG Smart Care
icon on the Desktop to run the program.
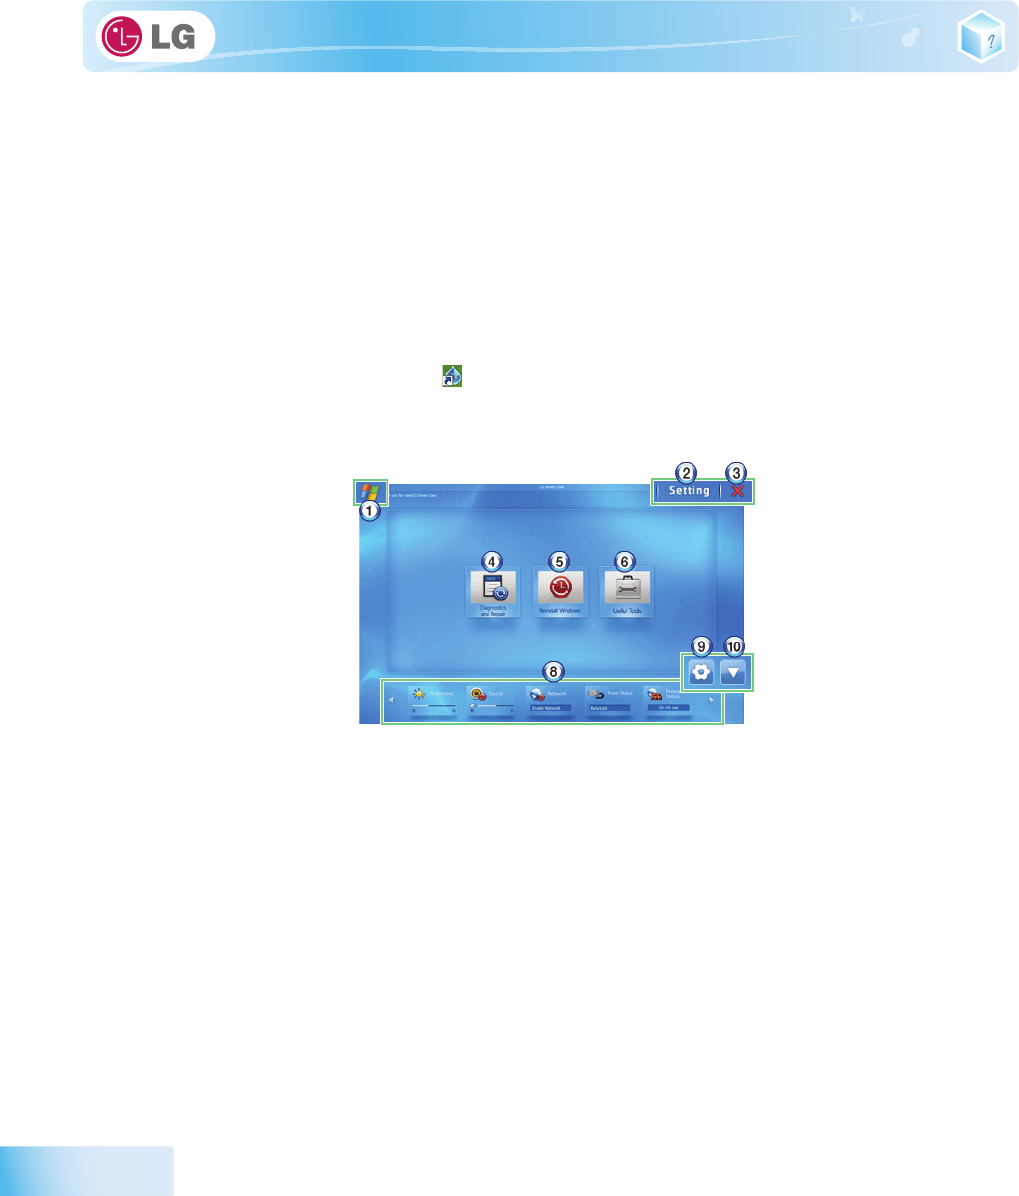
2.
LG Smart Care
Home Page appears as follows.
1.
Windows Button
: Switches to
Windows
.
2.
Setting Button
: Allows you to change the settings of the
LG Smart Care
program.
3.
Exit Button
: Exits the
LG Smart Care
program.
4.
Diagnostics and Repair
: Diagnoses the system and solves the problems diagnosed.
5.
Reinstall Windows
: Restores the system to the restoration point set by
LG Smart Recovery
or
Windows
.
6.
Useful Tools
: Provides various utilities (Internet connection, HDD defragmentor, system cleanup, etc.) that are needed
for the system management.
7.
Indicator
: Displays the system preferences (display brightness, sound, power status, firewall, updates, etc.) and allows
you to change the settings.
8.
Indicator
Environment configuration: Allows you to edit the indicator components displayed on the screen.
9. Hide/Show
Indicator
Button: Hides or shows the indicator window.
Using the system
51
3-5. CyberLink YouCam
Cyberlink YouCam
is the program that can take picture or moving images through the
Web Camera
.
※ The figures herein are subject to change without prior notice.
※
Web Camera
is optional, and so it may not be installed in some models.
※ For more information about its operations, refer to the Help of
CyberLink YouCam
.
▶Using
Cyberlink YouCam
1. Double-click the
CyberLink YouCam
Icon on the Desktop to run the program.
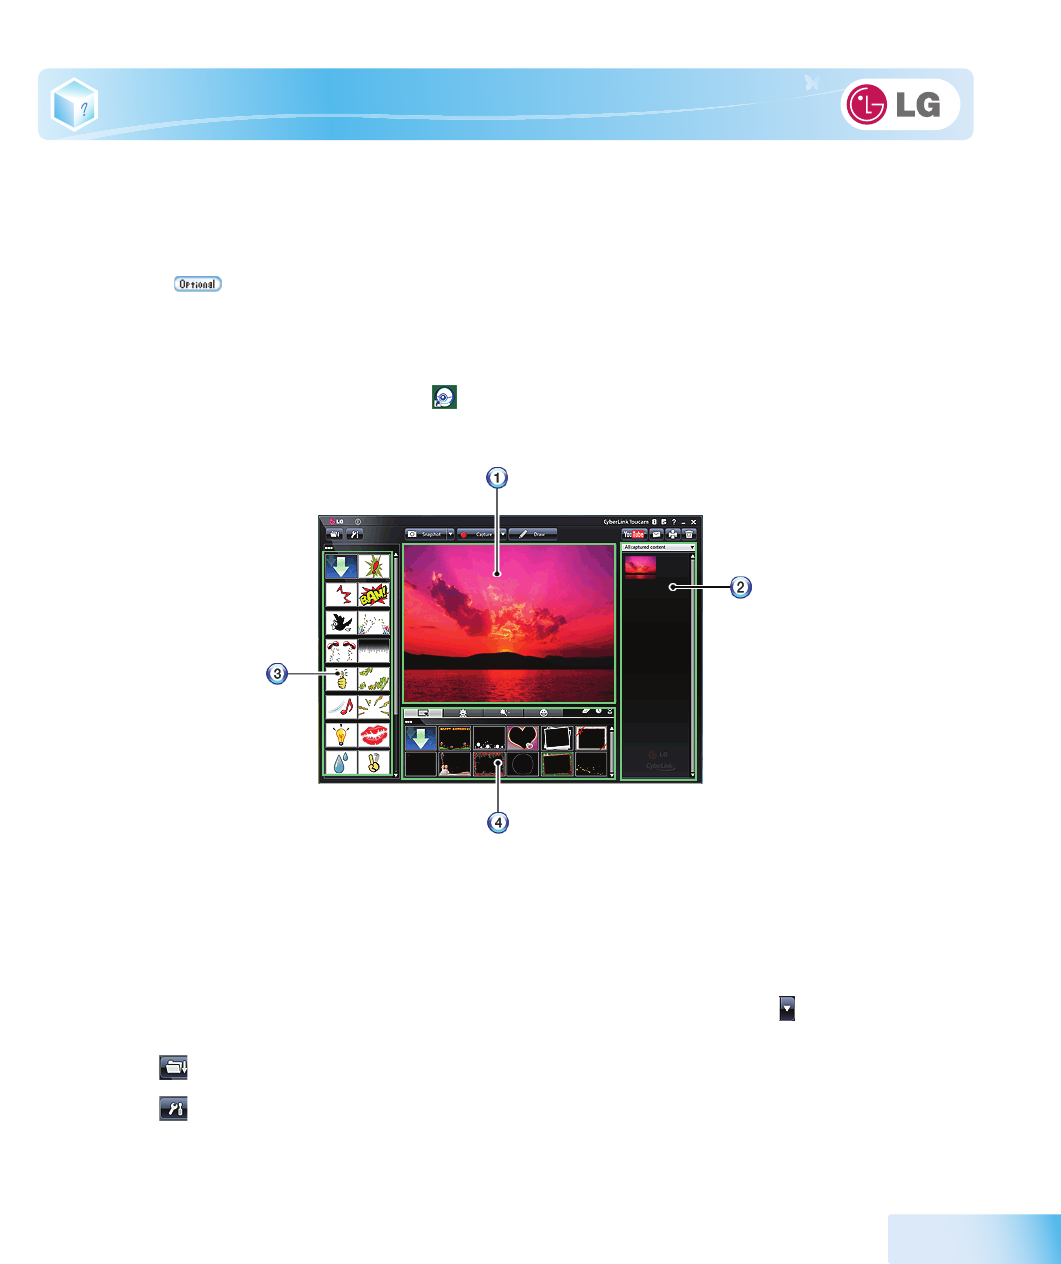
2.
CyberLink YouCam
Home Page appears as follows.
1.
Viewer
: Displays the
Webcam
screen.
2.
Image Gallery
: Use to record pictures and moving images, play back or delete those images.
3.
Animation Effect menu
: Can add a frame and animation effect on the screen.
4.
Frame / Animation Effect menu
: Can add a frame and animation effect on the screen.
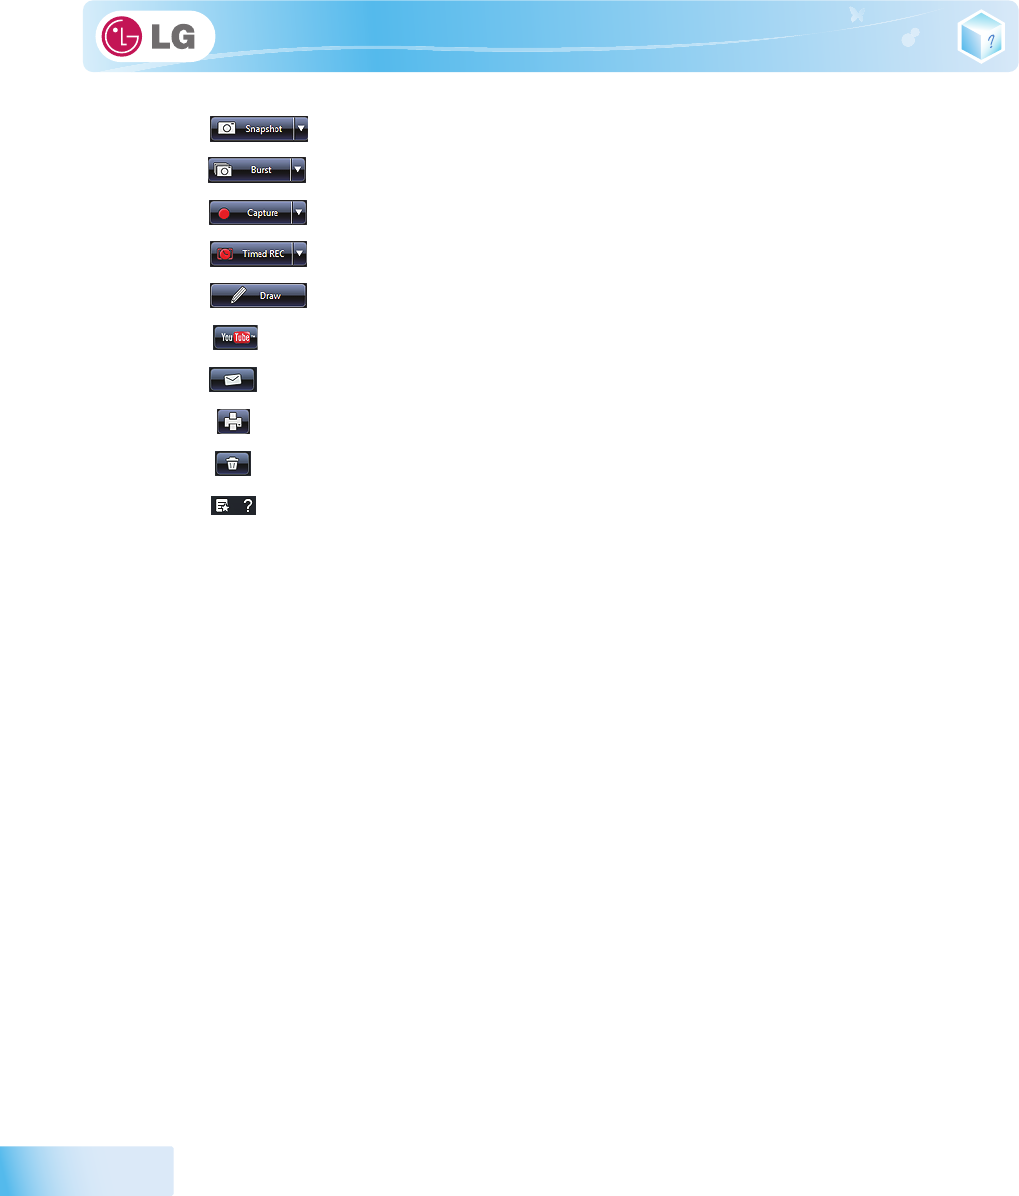
▶ Major Buttons
Snapshot
/
Burst
and
Capture
/
Timed Recording
functions can be toggled by pressing on the right
of the corresponding menu icon.
1.
Import Downloaded Emotion File
: Opens a downloaded emotion file.
2. Configure
CyberLink YouCam
Settings: Configures the environment for
CyberLink YouCam
.
52
Using the system
3.
Snapshot
: Takes pictures.
4.
Burst
: Takes pictures continuously.
5.
Capture
: Records movie clips.
6.
Timed Recording
: Records a movie clip at the date and time set by the user.
7.
Draw
: Enables you to edit the pictures using a pen or stamp.
8. Upload Movie Clip to
Yo u T u b e
: Uploads movie clips to
Yo u T u b e
.
9.
Send Media File Using E-mail
: Sends the taken pictures or moving images through E-mail.
10.
Print
: Prints the selected picture.
11.
Recycle Bin
: Deletes the selected picture or movie clip.
12.
Help
: Displays the help window for
CyberLink YouCam
.

Chapter4.Input/Output Device
54
Input/Output Device
4-1. Using the Keyboard
The keyboard allows the user to input data or give commands.
※ The keyboard may look different depending on model type.
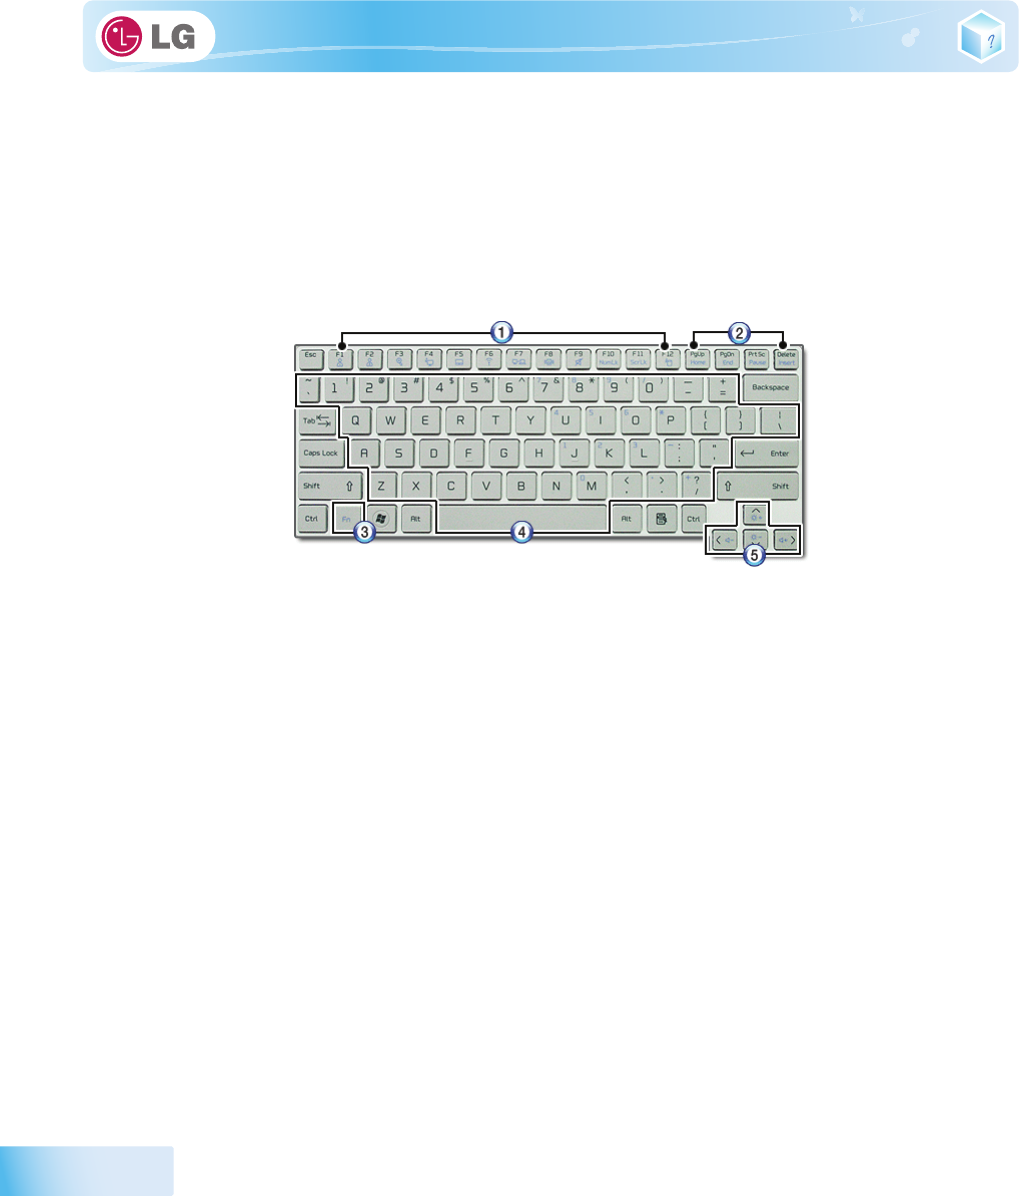
▶ Keyboard Overview
The keyboard consists of character and numeric keys as well as function keys.
1. Function keys (F1 - F12)
- The usage may differ by OS or applications types.
2. Pg Up and Pg Dn keys:
- Moves a screened page up or down.
3. Fn key
- Works as part of hot keys if used with function keys.
4. Character and Numeric Keys
- Consists of keys, spacebar, numeric keys (0 - 9), and special symbol keys.
-
Spacebar
: Inserts a white space per hit while you type.
5. Arrow keys
- Moves the cursor and others in their respective directions.
Input/Output Device
55
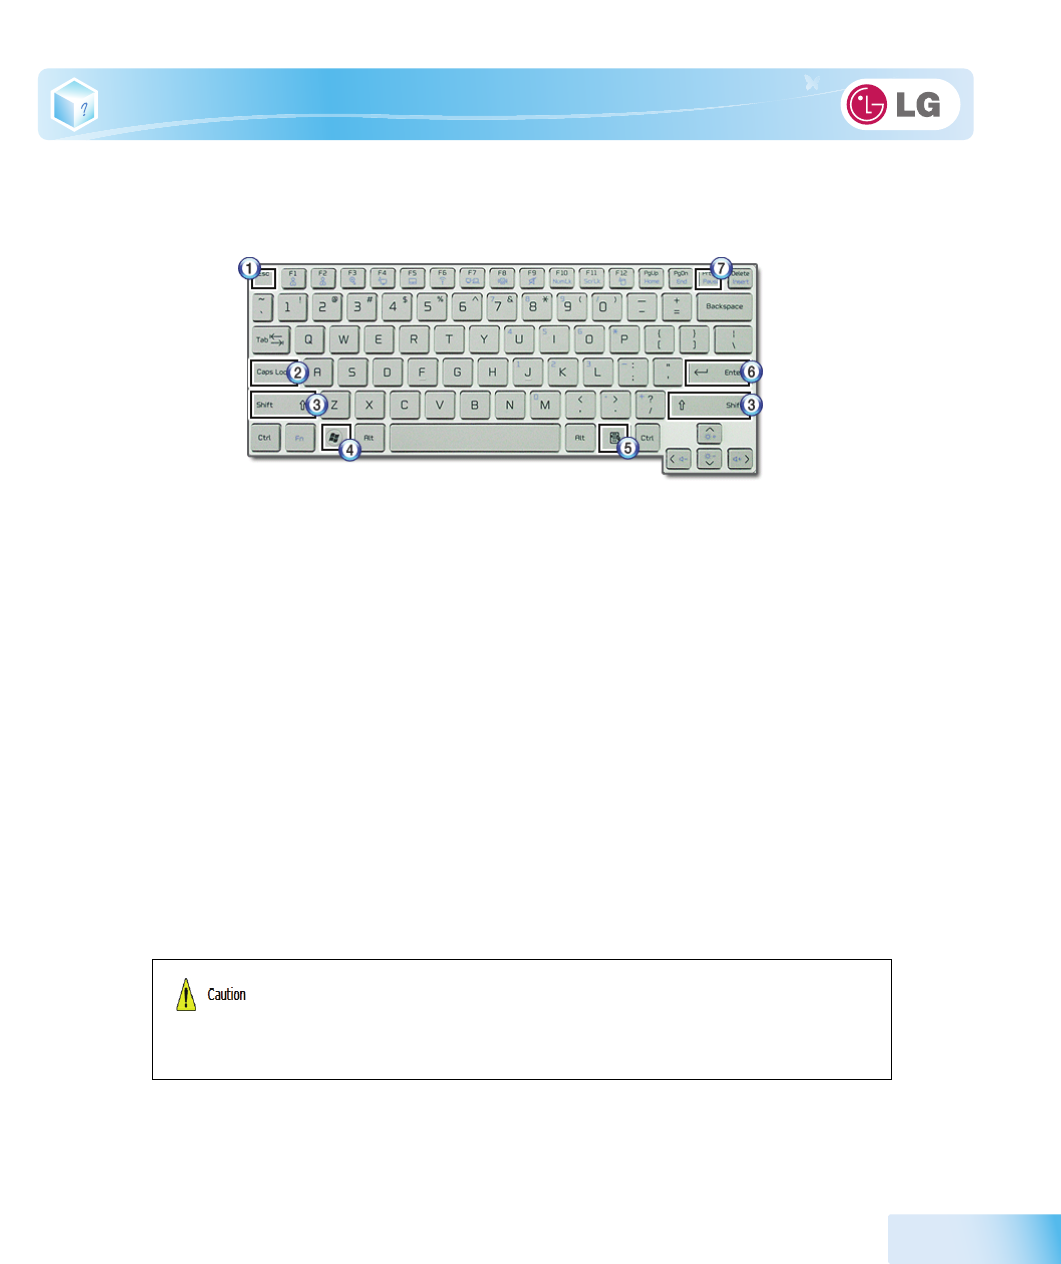
▶ Using Special Keys
1.
Esc
key
- Terminates or stops a program.
2.
Caps Lock
key
- You can enter capital letters using the keyboard when this key is pressed. To type lowercase letters, press this key again.
3.
Shift
key
- used to type uppercase letters or as part of hot keys.
4.
Windows
key
- Allows you to select the
Windows
Start button and open the Start menu.
5. Shortcut Menu Key
- Allows you to open the
Windows
shortcut menus. (The shortcut menus are the same as those you can see when right-
clicking a file or folder.)
6.
Enter
key
- Used to inform the computer of the completion of one command or to change the line.
7.
Prt Sc
key (
Print Screen
)
- Prints or temporarily saves the current screen display.
■ Spilling a watery substance like coffee or juice on the keyboard may cause a fault,
malfunction, or electric shock.
■ The keys may not work properly when you use several keys at the same time while
playing a PC game. (Please change the key combination settings according to the
combinations necessary for the game play.
56
Input/Output Device
▶ Hot Keys
By pressing the following key combinations at the same time, you can immediately start the
designated features (such as adjusting the screen brightness).
■ Toggle Caps Lock key to turn the Caps Lock lamp ON or OFF. The on/off status is
displayed through the lamp on the notebook PC body.
■ To change the input mode temporarily, you can press the Shift key together with the
letter you wan to enter. By doing so, you can enter an uppercase letter when the
Caps Lock key is not pressed and a lowercase letter when the Caps Lock key is
pressed.
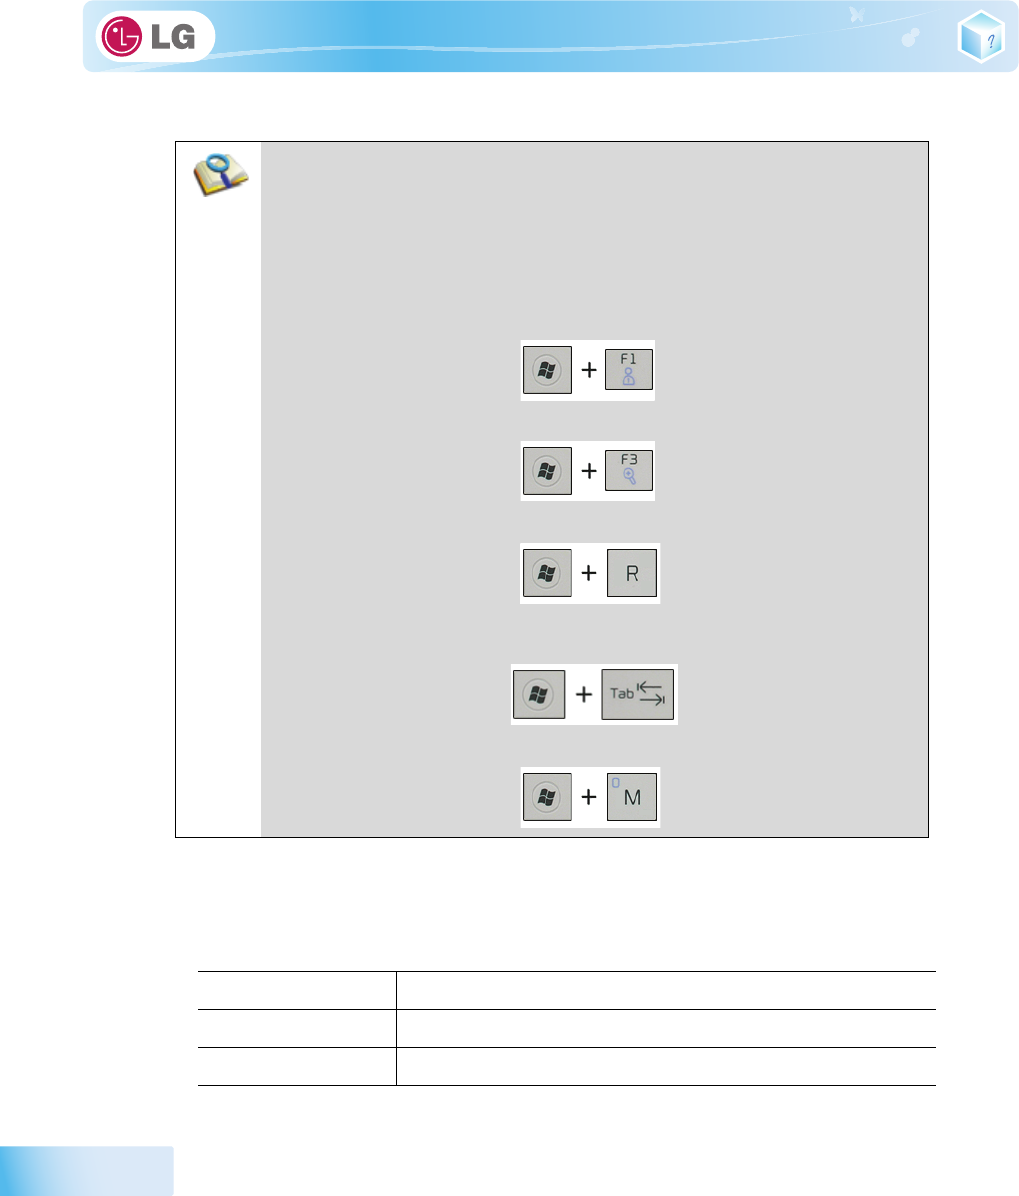
For more convenient use of Windows, remember the following Windows key combinations:
■Displays Windows Help.
■ Displays "Search Result" window.
■ Displays an input window for program execution.
■ Starts Flip 3D if Windows 7 Aero is running. Flip 3D is not executed if Aero is not
running.
■ Minimizes the current window.
Fn
+
F1
Customizable hot keys. (Configurable through OSD settings)
Fn
+
F2
Customizable hot keys. (Configurable through OSD settings)
Fn
+
F3
Magnifying hot keys
Input/Output Device
57
Fn
+
F4 Windows
Executes the mode defined in the
Power Save Mode
. (Example: Standby
Mode, Maximum Power Saving Mode)
Fn
+
F5
When the user presses
Fn
+
F5
keys, the touchpad mode toggles from
Touchpad
Disable
, to
Touchpad Auto-Disable
(upon connection of external USB mouse), to
Touchpad Enable
in order. (Initialization takes 1 - 2 seconds. It is recommended to
use after the initialization.)
Fn
+
F6
Turns the wireless devices (incl. Wireless LAN and Bluetooth) on and off
( Bluetooth is optional, and so it may not be installed in some models.)
Through hot key settings in the OSD Tray menu, the user can customize [
Fn
]+[
F6
]
features. Default setting is, for all wireless devices (incl. Wireless LAN and Bluetooth),
ON/Off.
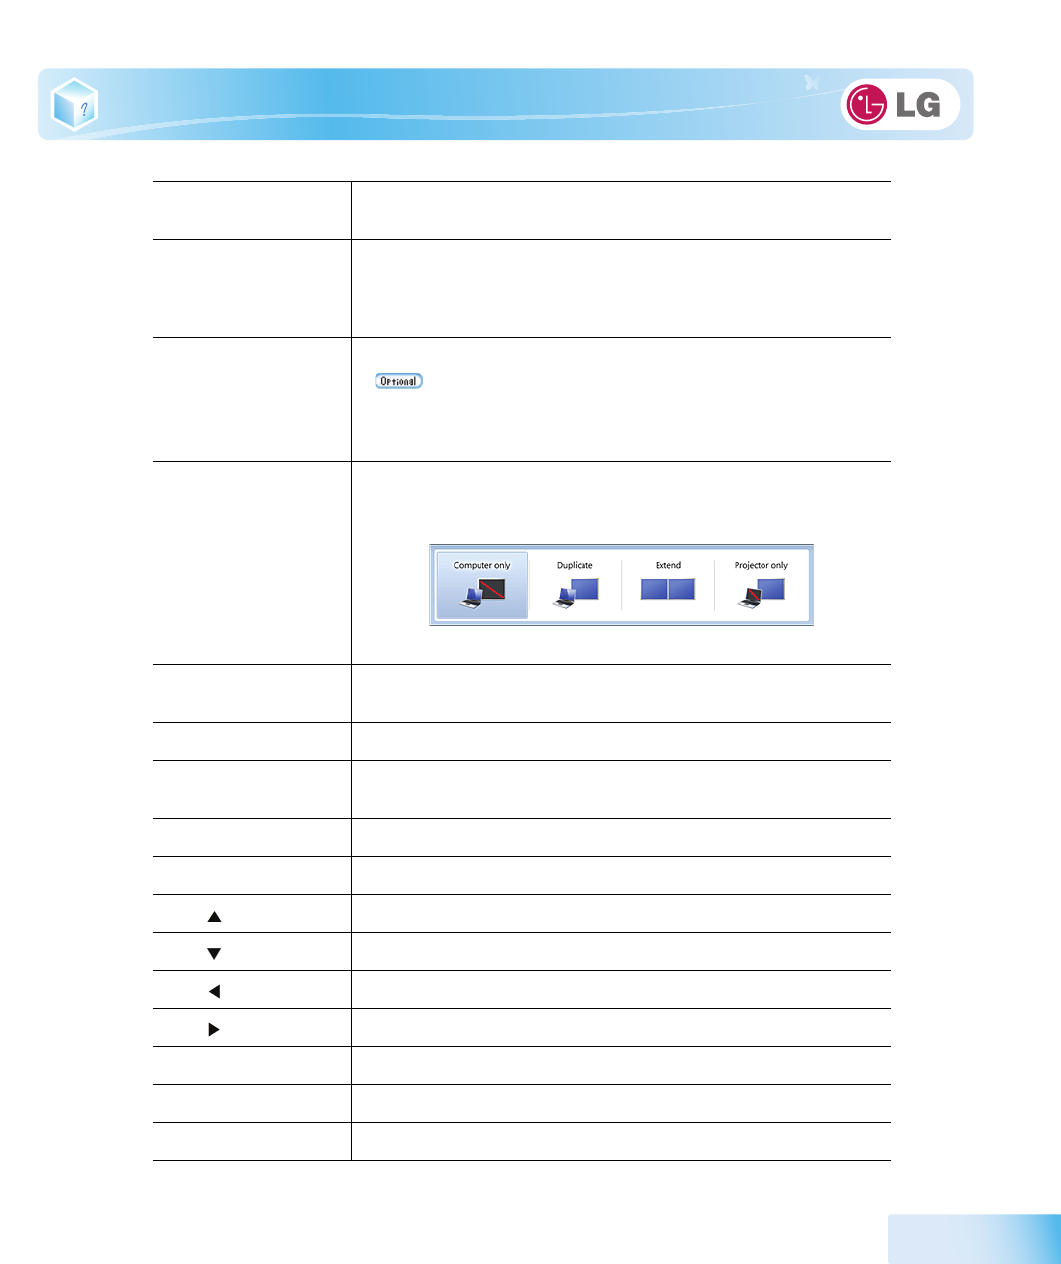
Fn
+
F7
The following screen appears when you press Fn + F7 keys. (
Windows
7
Starter
does
not support the Monitor Extension mode)
Select the mode you want to use and press [Enter] to switch the monitor.
Fn
+
F8
Switches between the SRS Off, SRS WOW HD, SRS TruSurround HD modes for each
pressing the
Fn
+
F8
keys.
Fn
+
F9 Mute
(Sound ON / Sound OFF)
Fn
+
F10
indicating the embedded numeric keys are available. If you press
[Fn]
+
[Num Lk]
again, you can enter text characters.
Fn
+
F11
Works as [Scroll Lock].
Fn
+
F12
Hibernate mode (When OSD is installed)
Fn
+ Increases LCD brightness, which can have eight different levels.
Fn
+ Decreases LCD brightness, which can have eight different levels.
Fn
+ Turns down the volume.
Fn
+ Turns up the volume.
Fn
+
PgUp
Works as
Home
.
Fn
+
PgDn
Works as
End
.
Fn
+
Prt Sc
Works as
Pause
.

58
Input/Output Device
Fn
+
Delete
Works as
Insert
.
Input/Output Device
59
4-2. Using the Touchpad (and Mouse)
The touch pad is equipped with the scroll feature and can function as a wheel mouse. The touchpad
is compatible with the USB-type mouse in software. The touchpad functions same as the USB-type
mouse and is very useful for a program supporting mouse use like the
Windows
.
※ The touchpad and a USB-type mouse can be used together on the same system.
※ The touchpad scroll function is not supported in the model that supports the gesture function.
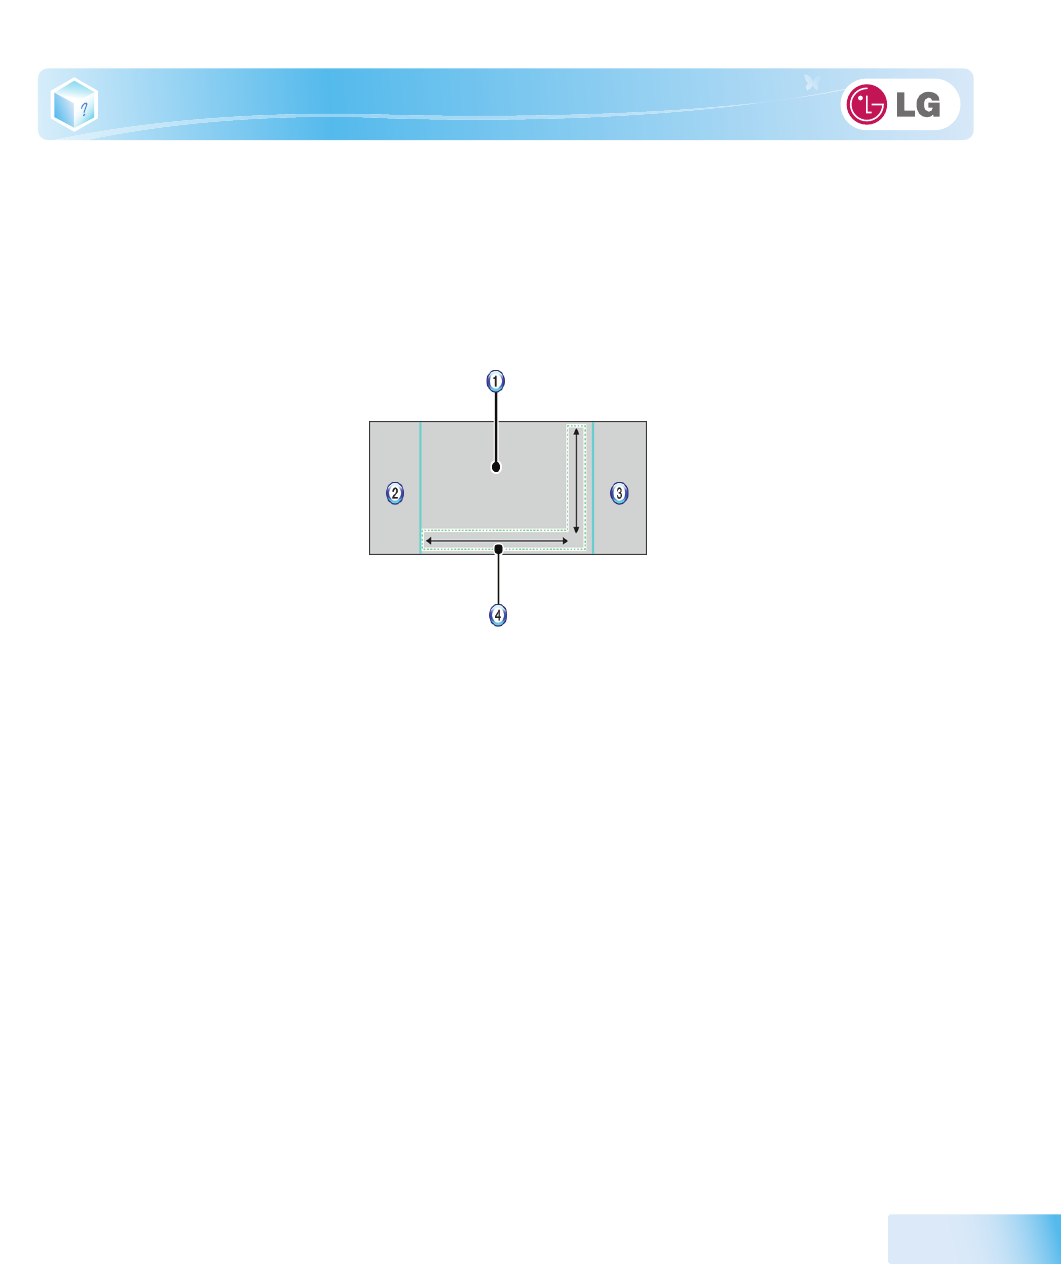
1. Touchpad
- Moves the cursor.
2. Left button
- Used to select or execute programs.
3. Right button
- Functions as the right button of a mouse in most cases. However, the usage may differ depending on programs.
4. Scrolling area

60
Input/Output Device
▶ Moving the Cursor (Pointer) on the Screen
Place a finger on the touchpad and glide the finger.
▶ Click (Select)
Press and release the left button swiftly. (Or tap the touchpad once.)
Do this, for example, to select a menu or icon and to place the cursor to type on a word processor
file.
▶ Double-click (Execute)
Press and release the left button twice swiftly in a series. (Or tap the touchpad twice.)
Do this, for example, to run a program after selecting its execution file (or icon).
Notes on Using the Touchpad
■ Do not use a sharp object such as a pen on the pad nor peel the cover. It may cause
an impairment.
■ Do not place more than one finger, and do not use while wearing a glove or when the
hand is wet. The Touchpad will not work properly. Oil or dirt at the finger tip can also
cause an impairment.
■ The touchpad is sensitive. Do not give excessive load or maintain an uncomfortable
position. Otherwise, a finger or wrist injury may be resulted in.
Input/Output Device
61
▶Drag & Drop
To drag, click and hold an icon, for example, and move it to another location.
To drop, release the dragged icon in the location you want.
To move a file icon, for example, to another folder or to
Recycle Bin
, place the cursor (or the pointer)
on the icon, press and hold the left button, and glide another finger on the touchpad until the icon
reaches the aimed location. After reaching the destination, release the left button.
1. Drag
- Glide one finger on the pad with another finger pressing and holding the left button.
2. Drop
- Release the left button to drop. (By doing this, you could drop a file into
Recycle Bin
, if you want to.)
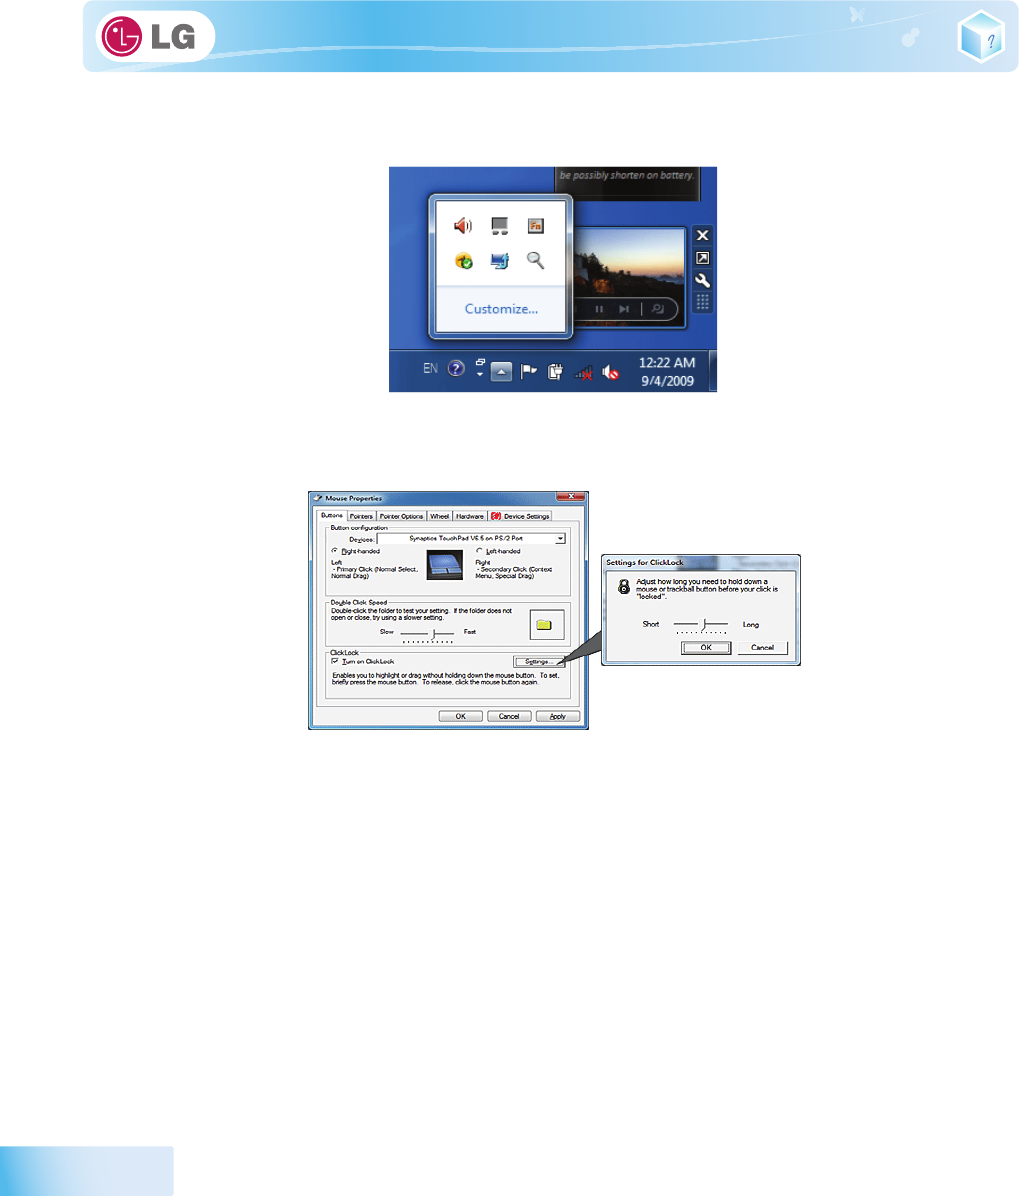
▶ Click-free Dragging
When activated, this feature allows you to drag an icon without pressing and holding the left button.
Do the following to activate the click-free dragging feature. If it has been done, pressing the left
button for an extensive time replaces pressing and constant holding so that you can drag without
holding the left button.
62
Input/Output Device
1. Click [Mouse Properties] icon in Notification Area.
2. Select Activate click-free dragging (T) and click [Setup] button to adjust the time span for which
you should press the left button to execute the feature.
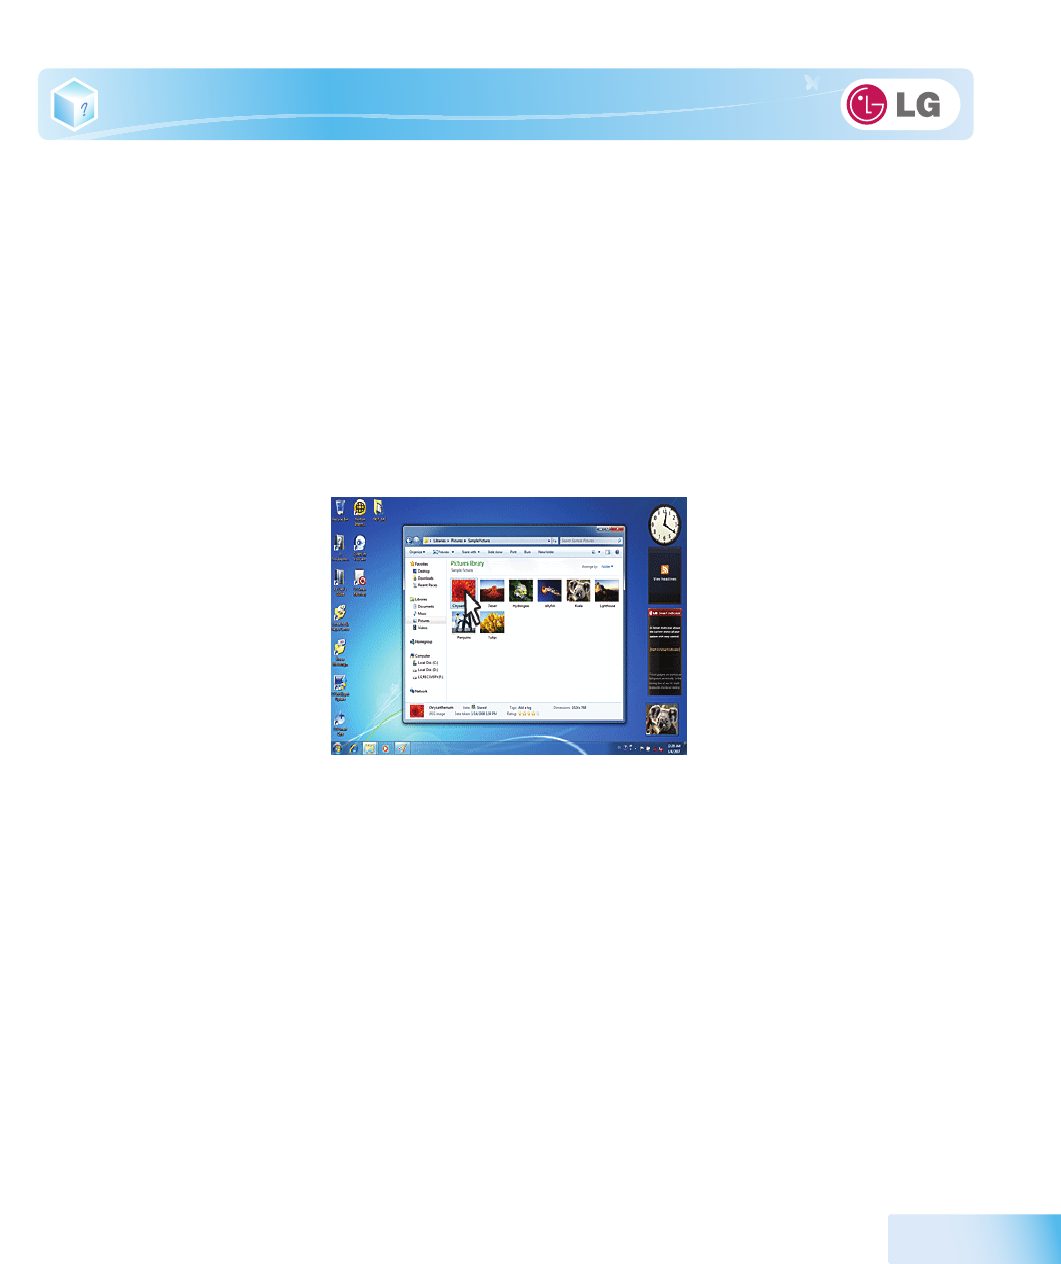
▶ Scrolling
The touch pad supports the scrolling feature.
To scroll vertically or horizontally, glide your finger along the right or bottom edge. Now the screen
follows your finger movements if there is a scroll bar on either edge.
Input/Output Device
63
※ Scroll area may differ by model type.
64
Input/Output Device
4-3. Using Touchpad Gesture
The touchpad gesture function allows you to use Windows programs more easily by utilizing different
touching methods.
※ The touchpad gesture function may not work in some applications that are not provided by Windows.
※ The touchpad gesture function may not work in some models.
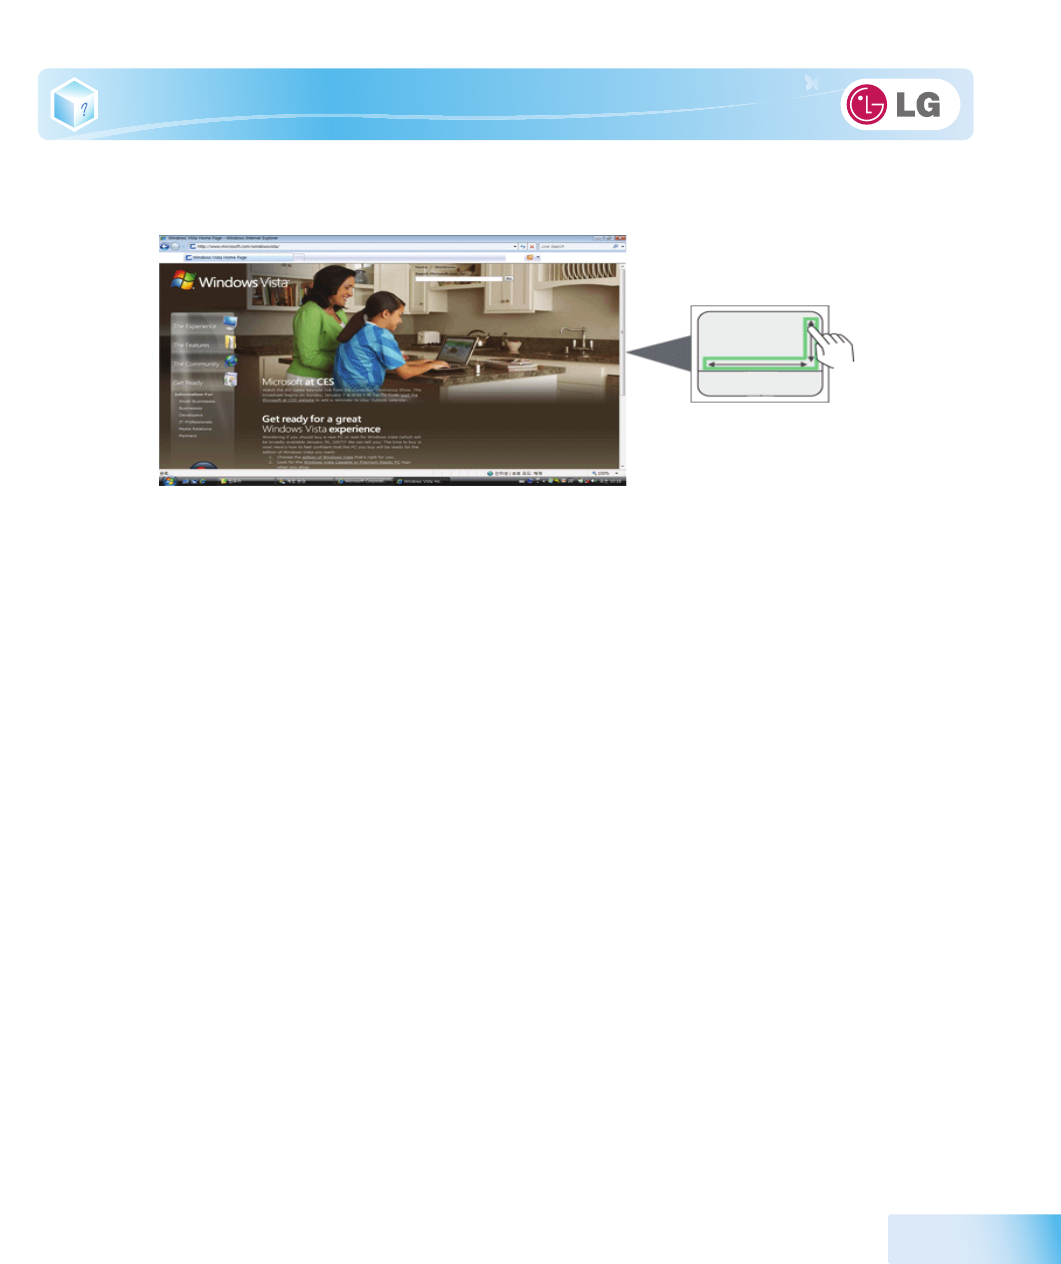
▶ Using Image Slide Show/
Internet Explorer
Select Start > My Computer and open the image file saved in the notebook PC or USB memory.
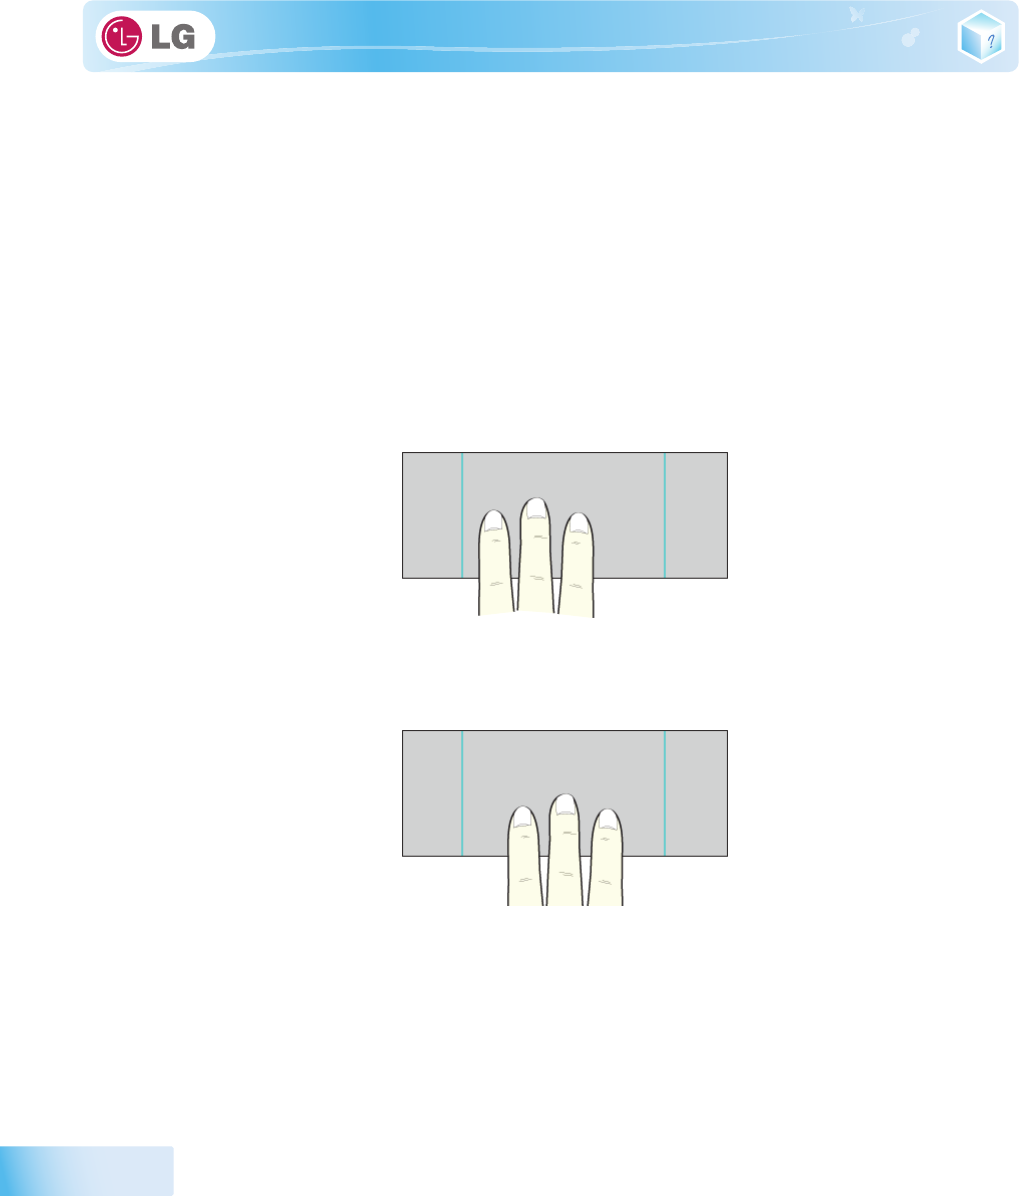
1.
Go to Next/Previous Image
: Place three fingers on the touchpad and move to the left or right to go
to the previous or next image respectively. (In
Internet Explorer
, the previous or next page is
displayed respectively).
2.
Switch to Full Screen
: Place three fingers on the touchpad and move to the top or down to maximize
the slide window or return to its original size respectively.
Input/Output Device
65
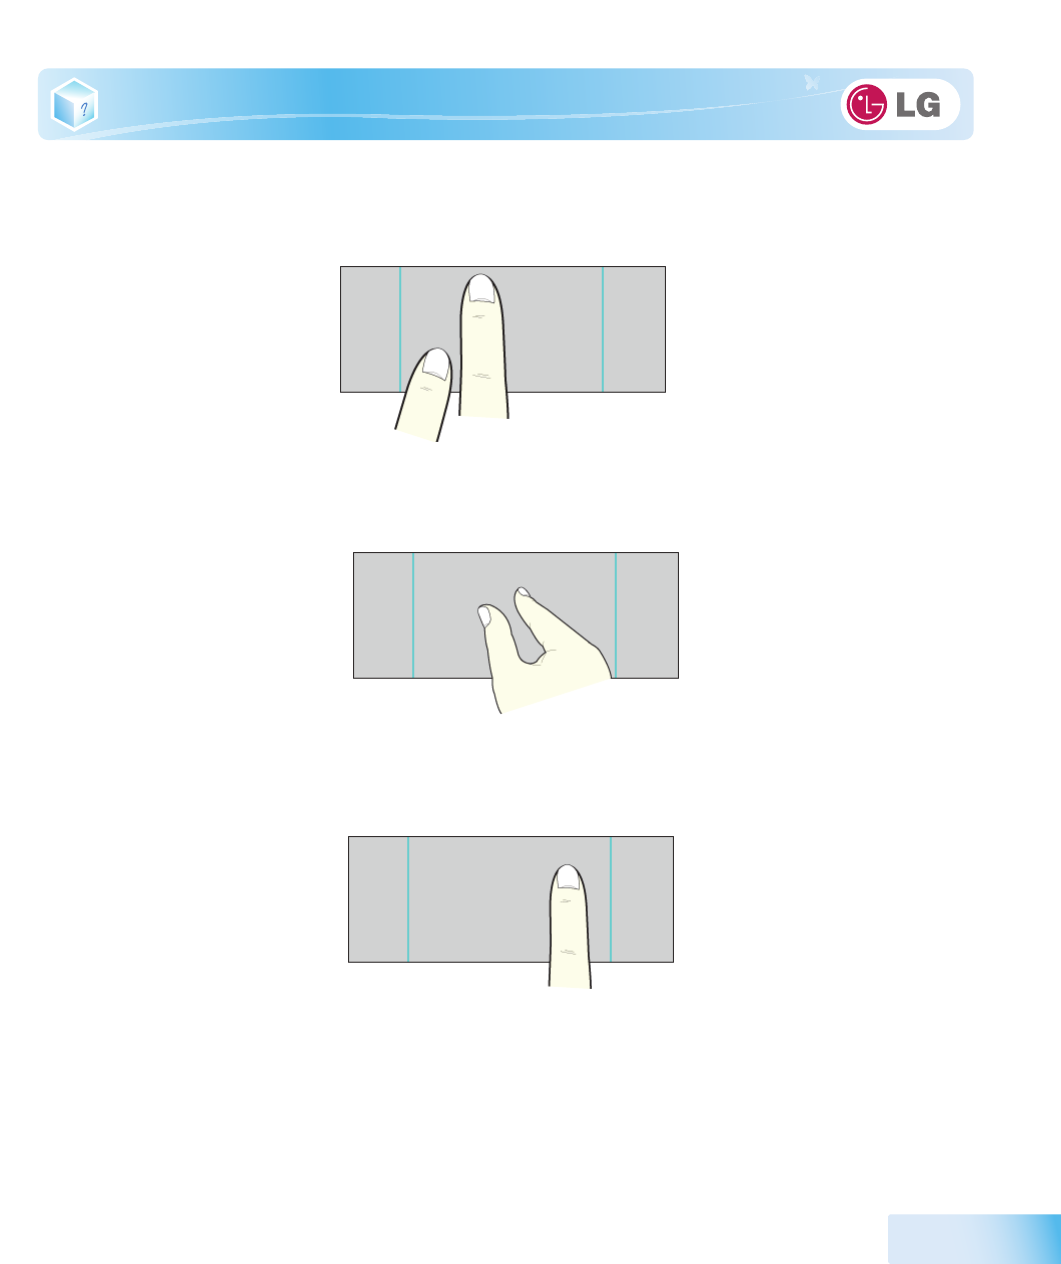
3.
Rotate Image
: Place the thumb on the bottom right of the touchpad and move another finger in a
spiral pattern on the touchpad to rotate the slide.
4.
Zoom an Image
: Place the thumb and index finger on the touchpad and increase or decrease the
distance between the fingers to enlarge or reduce the image respectively, as shown in the figure.
5.
Scroll Using One Finger
: Place the index finger on the top right of the touchpad and move to the left
or right in a circular pattern to scroll the screen down or up respectively.
66
Input/Output Device
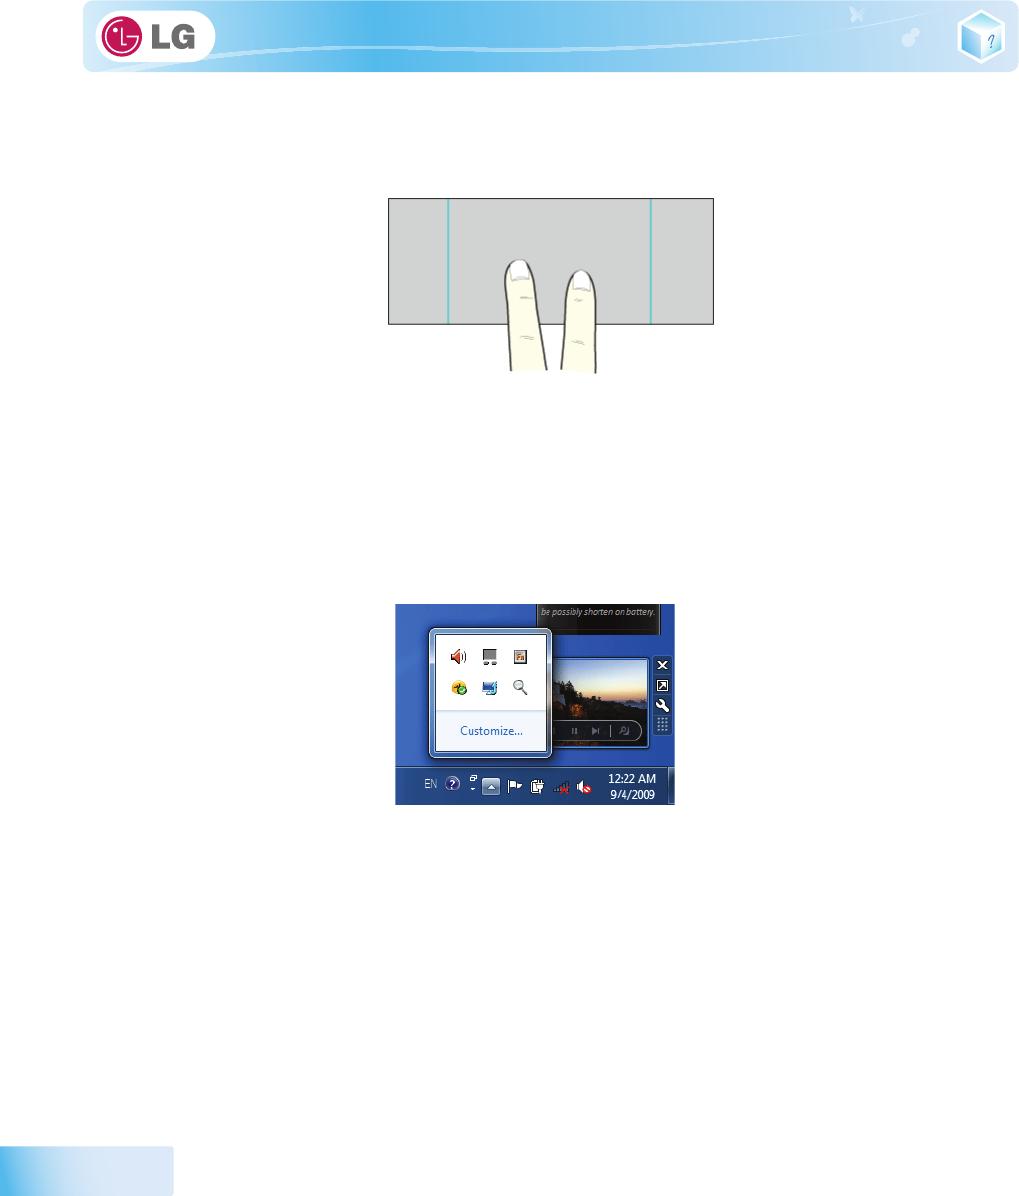
6.
Scroll Using Two Fingers
: Place two fingers on the touchpad and move up/down/left/right to scroll
the screen.
▶ Setting Touchpad Functions
You can change the touchpad functions or enable/disable the gesture function.
※ The figures herein may differ by language selection and be subject to change without prior notice.
1. Click
[Mouse Properties]
icon in Notification Area.
※ If you cannot find the Mouse Properties icon in Notification Area, Select
Start
>
Control Panel
>
View by
>
Small
icons
>
Mouse
menu.
Input/Output Device
67
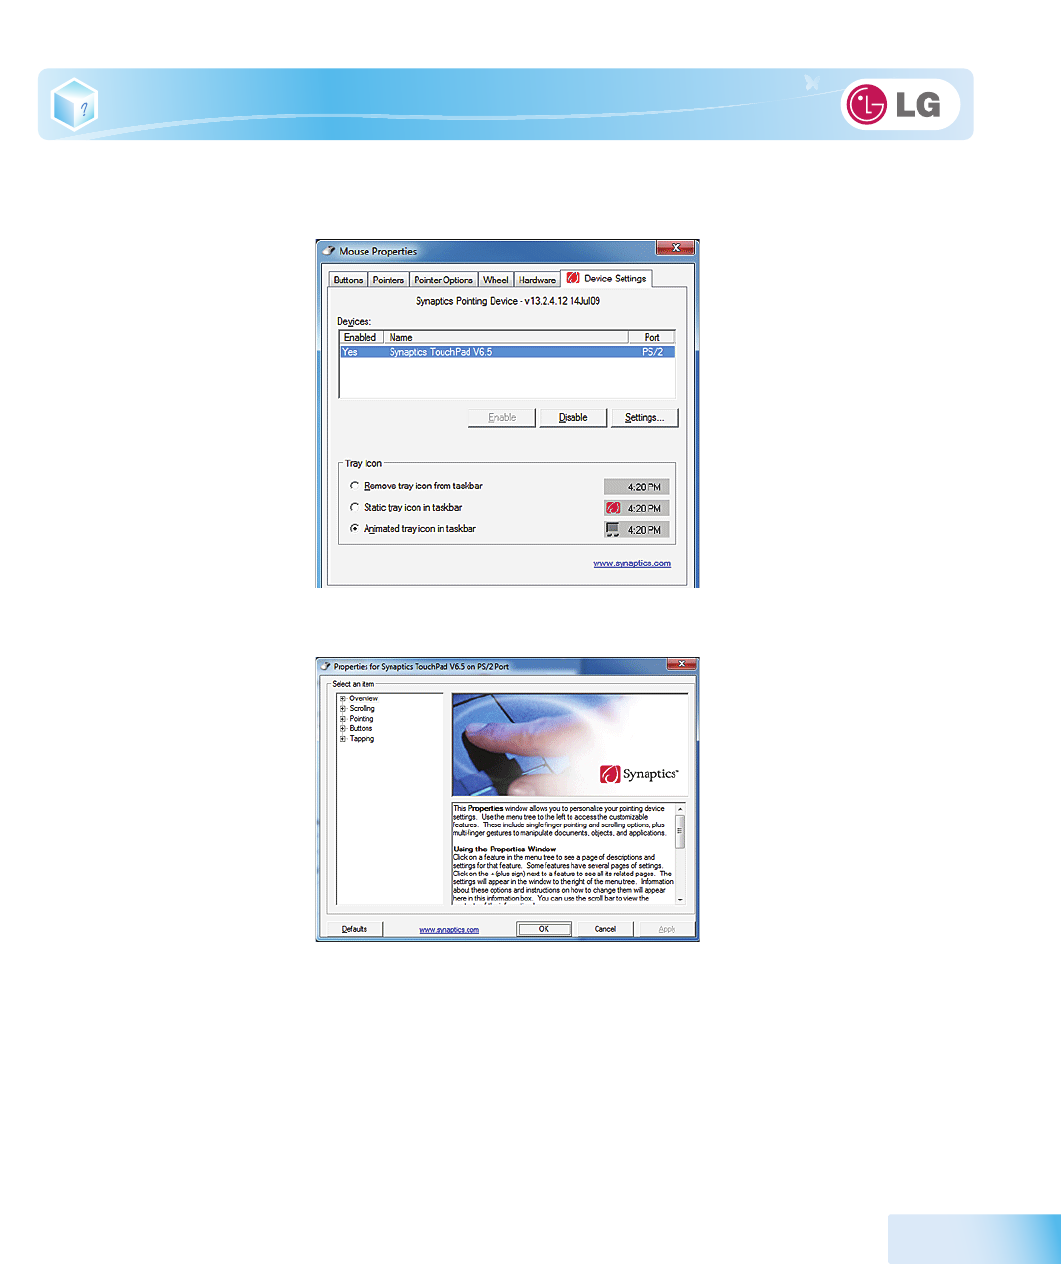
2. When the following screen appears, select the
[Device Settings]
tab and click
[Settings...]
.
3. When the following screen appears, change the settings as required and click
[OK]
.

68
Input/Output Device

Chapter5.Connecting Peripherals
70
Connecting Peripherals
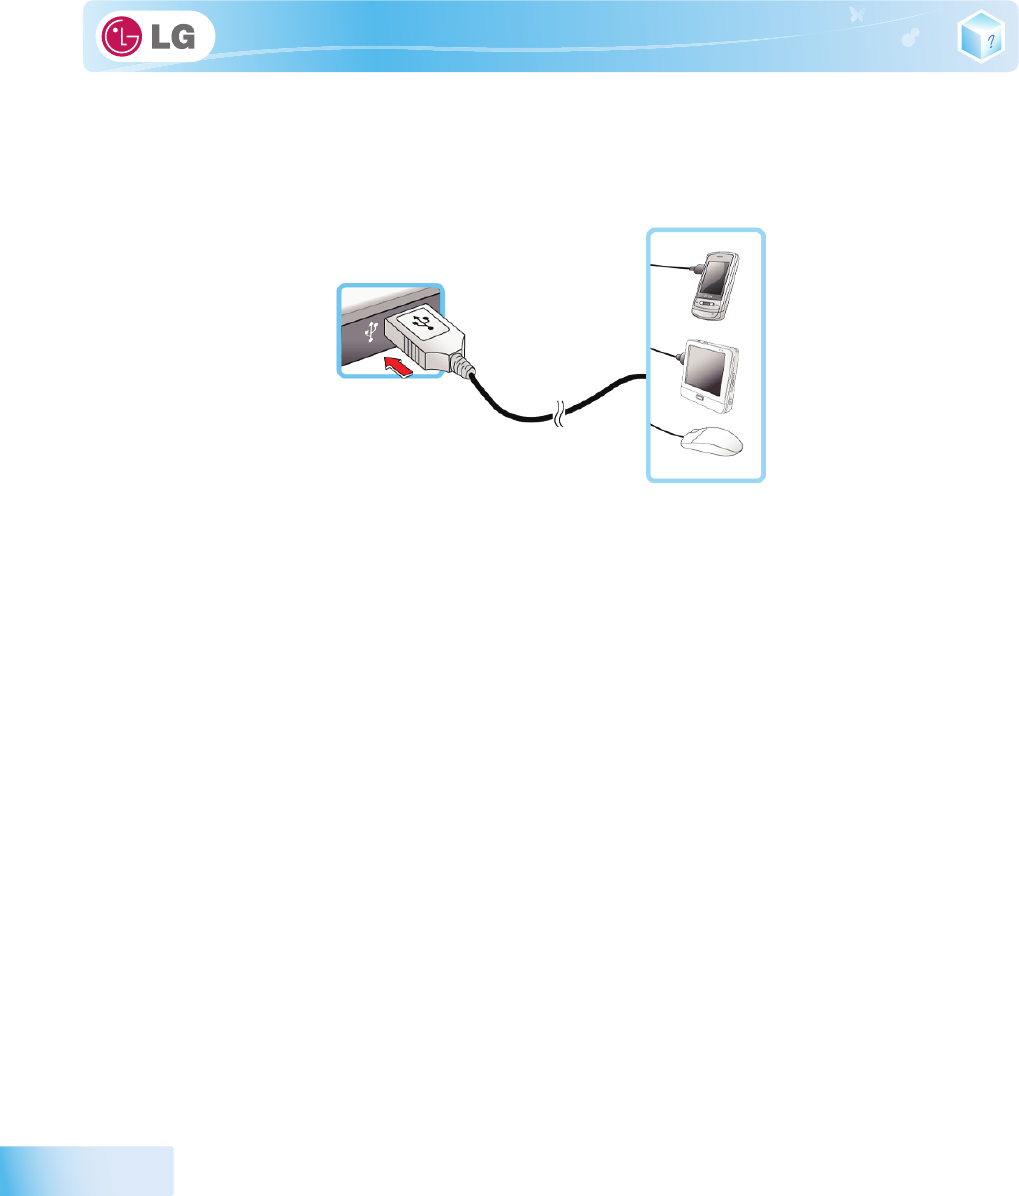
5-1. Connecting USB 2.0
Following peripherals can be connected to the Notebook PC.
※ Those peripherals need to be purchased separately.
The notebook PC can be connected with other USB supporting devices such as USB keyboard, Hub,
digital camera, etc.
Connecting Peripherals
71
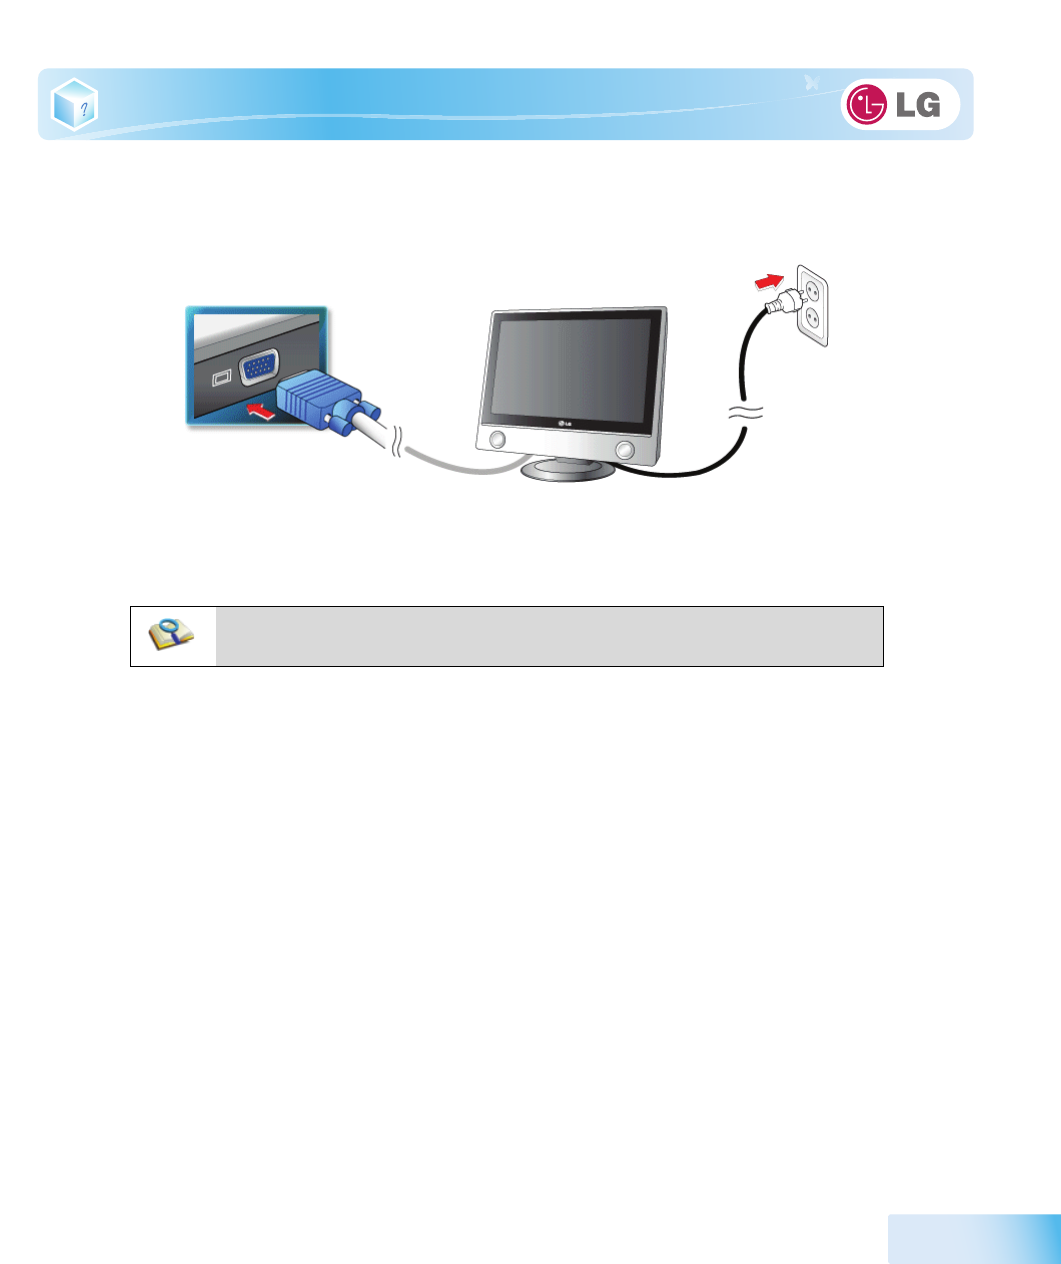
5-2. Connecting Monitor
Monitor Toggle Features (Converting the Screen Using the Shortcut Key)
※ If you have an external monitor connected to the computer, press the Fn + F7 keys to rotate the display mode
between LCD only, Monitor only, and LCD + Monitor both in order.
■ Ensure the monitor power is off before connect external monitor to the notebook pc.

72
Connecting Peripherals
5-3. Using IVT BlueSoleil
IVT BlueSoleil
is a
Windows
-based IVT software which establishes wireless connection between
Bluetooth
-enabled desktop or notebook PC and other
Bluetooth
-enabled devices.
IVT BlueSoleil
allows the user to access various Bluetooth-enabled digital devices such as camera, cell phone,
headset, printer, GPS receiver, etc. It can also establish network and exchange data with other
Bluetooth
-enabled computer or PDA.
※
Bluetooth
is optional, and so it may not be installed in some models.
※ The figures herein may differ by language selection and be subject to change without prior notice.
※ For more details about how to use
Bluesoleil
, refer to the corresponding help.
▶
Bluesoleil
1. Double-click the icon on the right bottom of the taskbar.
2.
Bluesoleil
screen appears.
※ If Bluetooth is turned on, it searches the Bluetooth devices in the area and displays them on the screen.
※ If a Bluetooth device is not displayed on the screen, press
[F5]
or
[Fn]
+
[F6]
to see if
Bluetooth
is turned on.
1.
Bluesoleil
Menu Button: Provides menus such as Find Device, Sorting Criteria, My Device and Help.

Connecting Peripherals
73
2. Minimize/Exit Button: Minimizes the
Bluesoleil
window or exits the program.
3. Available Services: Displays the list of services available for a
Bluetooth
device.
4.
Bluetooth
Device Status: Displays the
Bluetooth
device information and their status for the current notebook PC.

74
Connecting Peripherals

Chapter6.System Setup
76
System Setup
6-1. Starting System Setup
System setup means storing the hardware configuration information of the computer in the
CMOS
RAM
. Through system setup, the computer retrieves various information including current date and
time, memory capacity, and hard disk capacity and type.
You setup the system when you set passwords, change the booting order, and add new peripheral
devices to the machine.
※ Items displayed on the Setup screen may differ by model type and spec.
■ Refer to [Setting the Password].
■ Refer to [Changing or Deleting the Password].
■ Refer to [Restore the Default Settings].
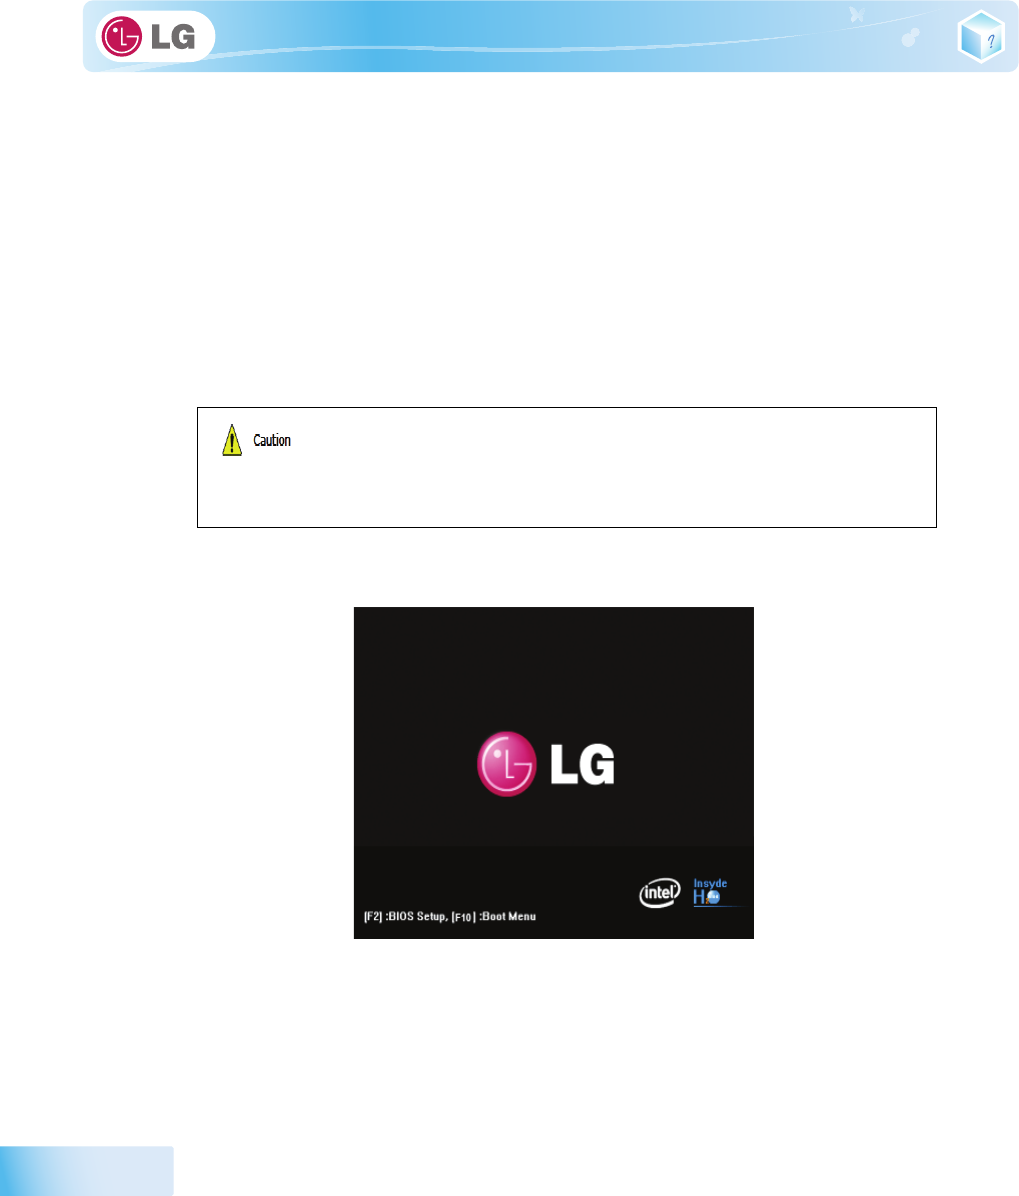
1. Turn on the notebook PC.
2. Press
[F2]
while "
[F2]: BIOS Setup
,
[F12]: Boot Menu
" appears on the bottom of the LG logo screen.
■ Do not change the system setup unless necessary. Incorrect system setup may cause
errors during system operation. Take caution when changing the system setup.
■ For performance improvement, CMOS setup menu configuration and the initial setup
status may be changed and may become different from images included in the user
manual.
System Setup
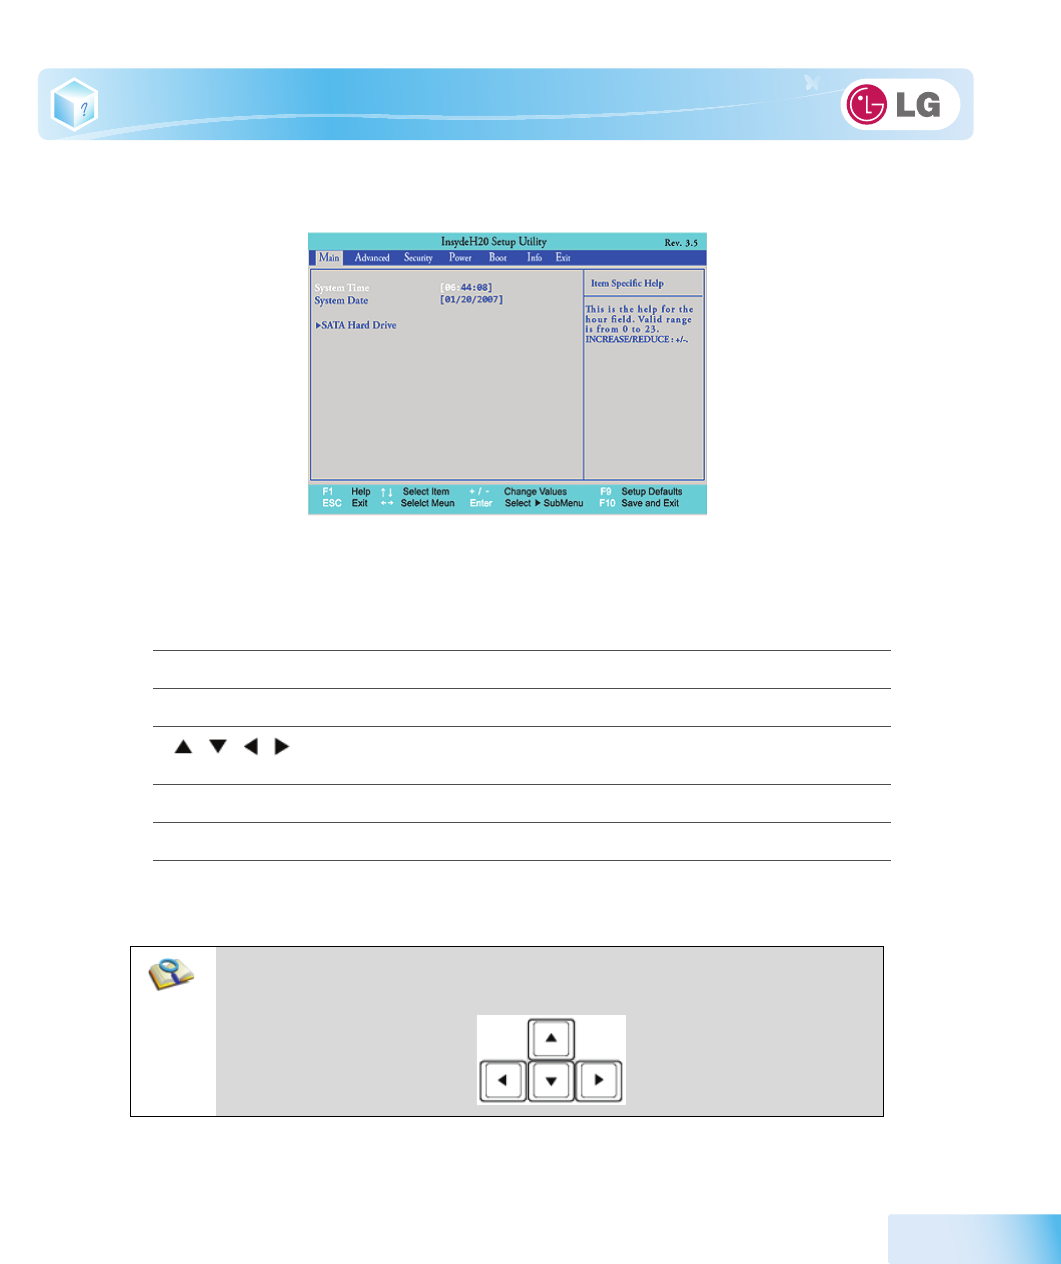
77
3. A while later, the system setup home screen appears.
▶ Keys Used in System Setup
Keys Function
Enter
Selects the current item.
Esc
To deselect the current item or to move to the previous screen.
, , , (Arrow
keys)
Moves the cursor up, down, left, and right.
+
,
-
Increases or decreases the item value.
F9
Recovers the default system settings.
F10
Stores new contents or ends the system setup.
Cursor Keypad
■ These keys are used to move the cursors up, down, right, and left.
78
System Setup
6-2. Setting the Password
This process is to set a password so that other people cannot use the notebook PC or change the
settings.
The user can set a password while booting the system or setting up the system.
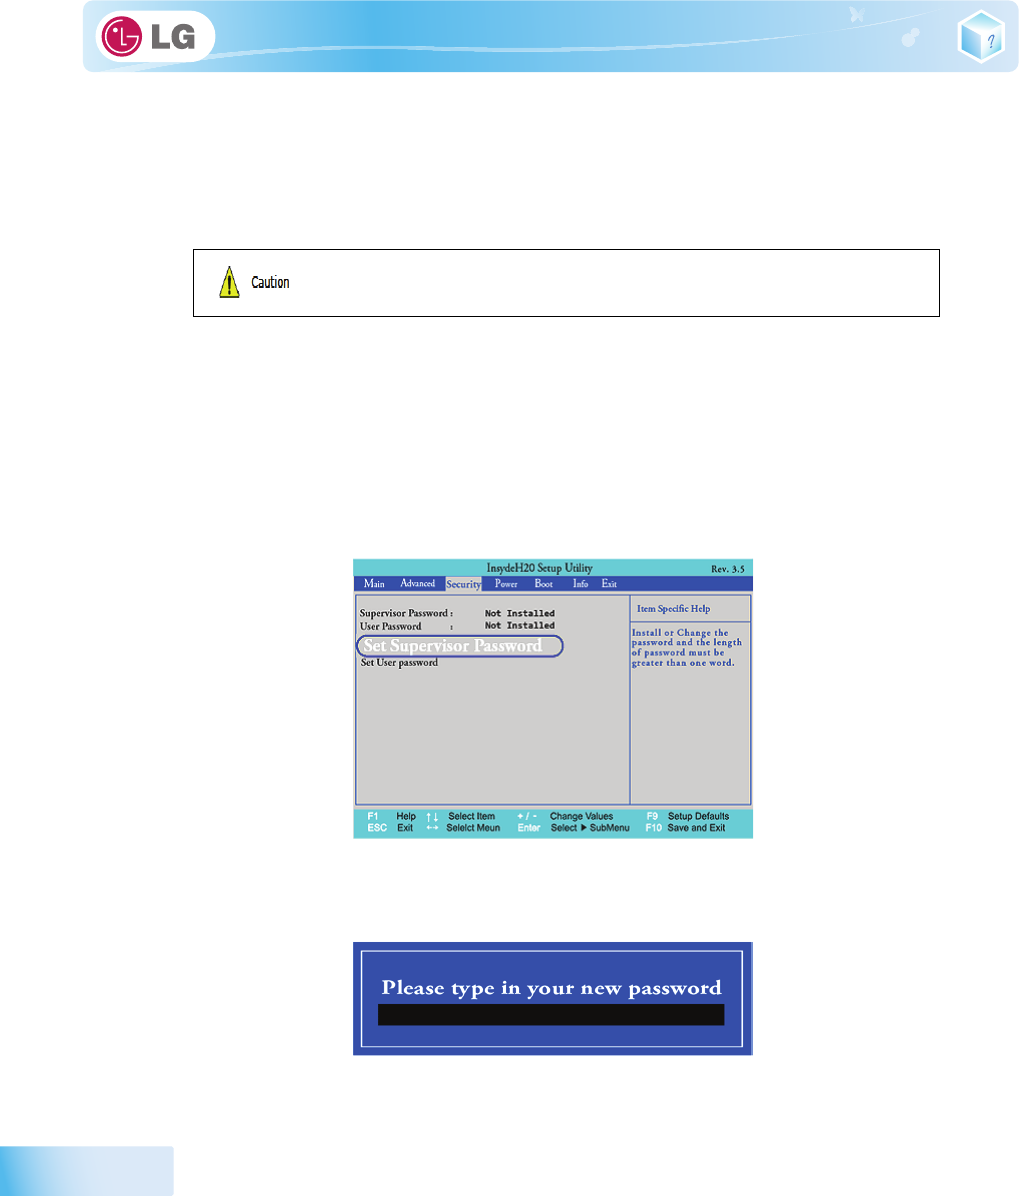
▶
Set Supervisor Password
The password prevents unauthorized people from accessing the notebook PC. By default, no
password is set for the machine. If an unauthorized person changes the password in the
CMOS
Setup, you will be unable to access the system.
1. After opening the system setup screen, use the arrow keys to move to
[Security]
.
2. When the following screen appears, select
[Set Supervisor Password]
with the arrow keys and press
[Enter]
.
3. When the following message appears, input the password and press
[Enter]
. The password must not
exceed 8 characters of letter (A - Z), number (0 - 9) or their combination.
■ Without the registered password, if any, access to the system will be denied. Write down
and keep the password in a safe place.
System Setup
79
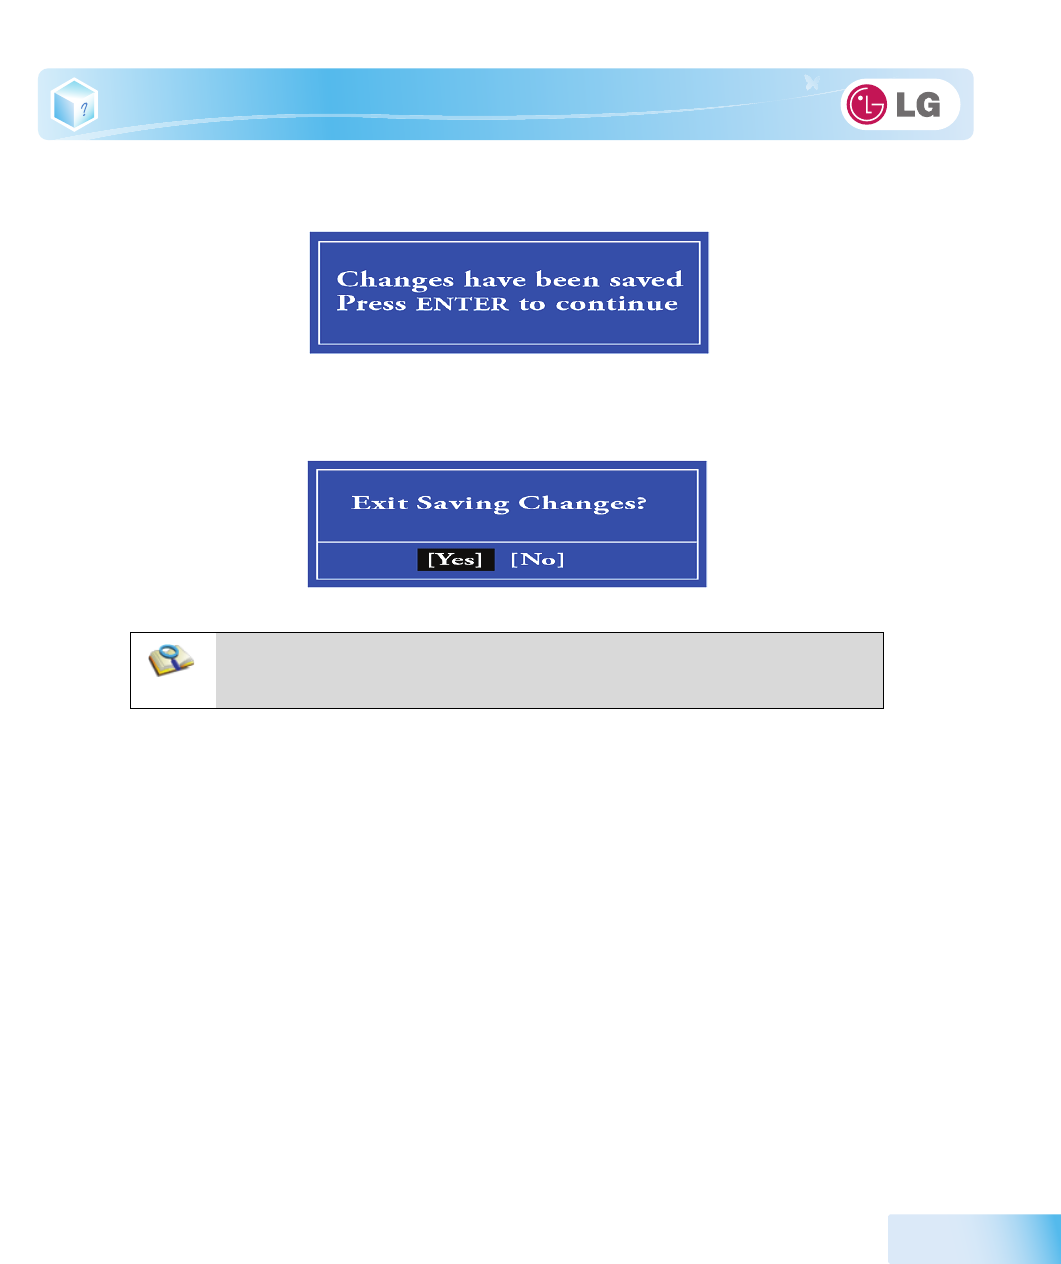
4. When the following message appears, press
[Enter]
.
5. To save the changes in system setup, press
[F10]
.
6. When the following message appears, select
[Yes]
and press
[Enter]
. The notebook PC will restart.
▶
Set User Password
The password set by the
Set User Password
process is lower than that set by the
Set Supervisor
Password
process, and so the user can use the
Set User Password
only after setting a password in
the
Set Supervisor Password
menu.
1. After opening the system setup screen, use the arrow keys to move to
Security
.
■With Supervisor Password, the user will be authorized to set all items in the CMOS
setup menu. In case other people also use the notebook PC, it is recommended to
set the User Password.
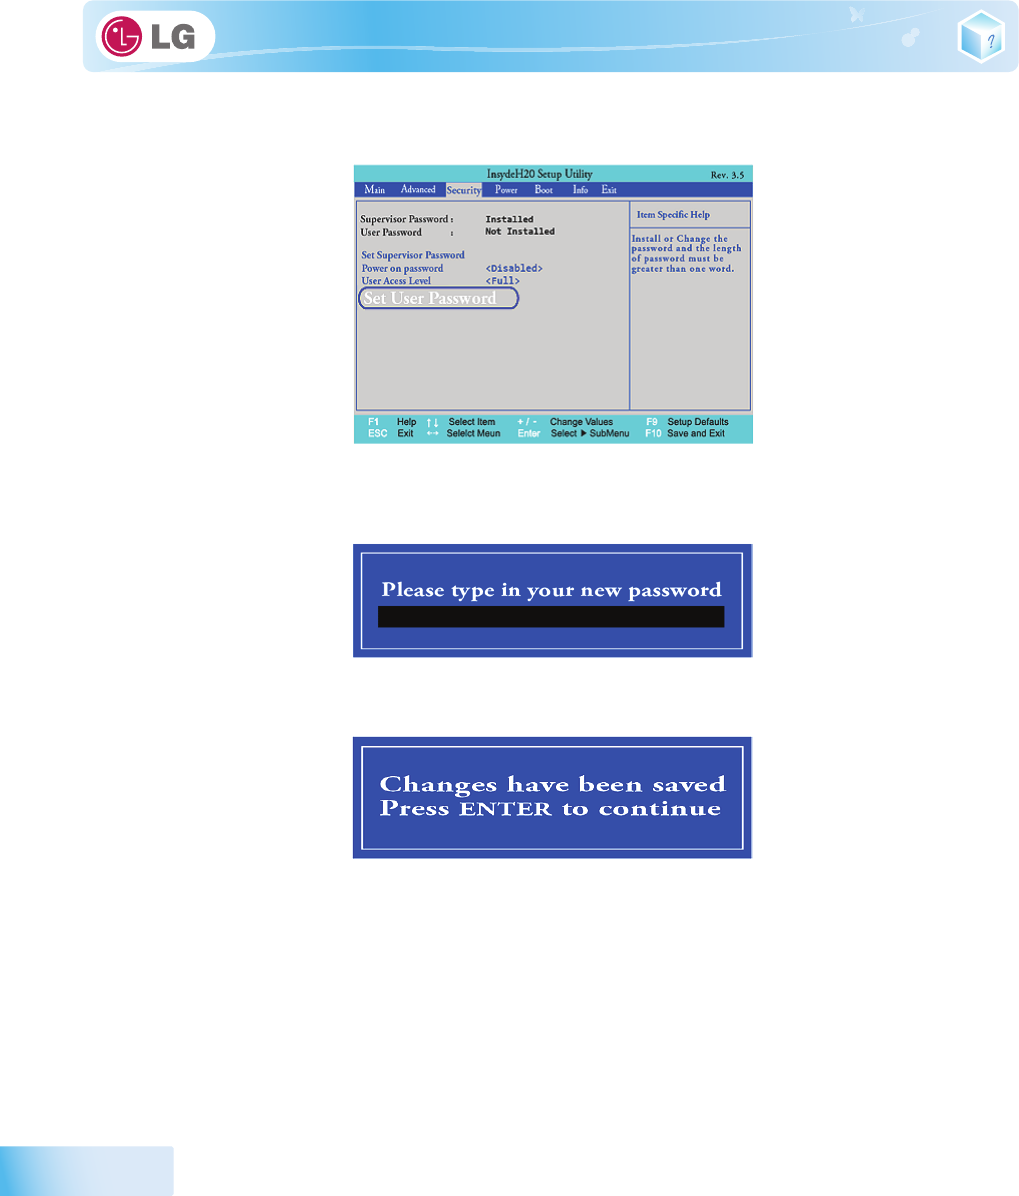
80
System Setup
2. When the following screen appears, select
Set User Password
with the arrow keys and press
[Enter]
.
3. When the following message appears, input the password and press
[Enter]
. The password must not
exceed 8 characters of letter (A - Z), number (0 - 9) or their combination.
4. When the following message appears, press
[Enter]
.
5. To save the changes in system setup, press
[F10]
.
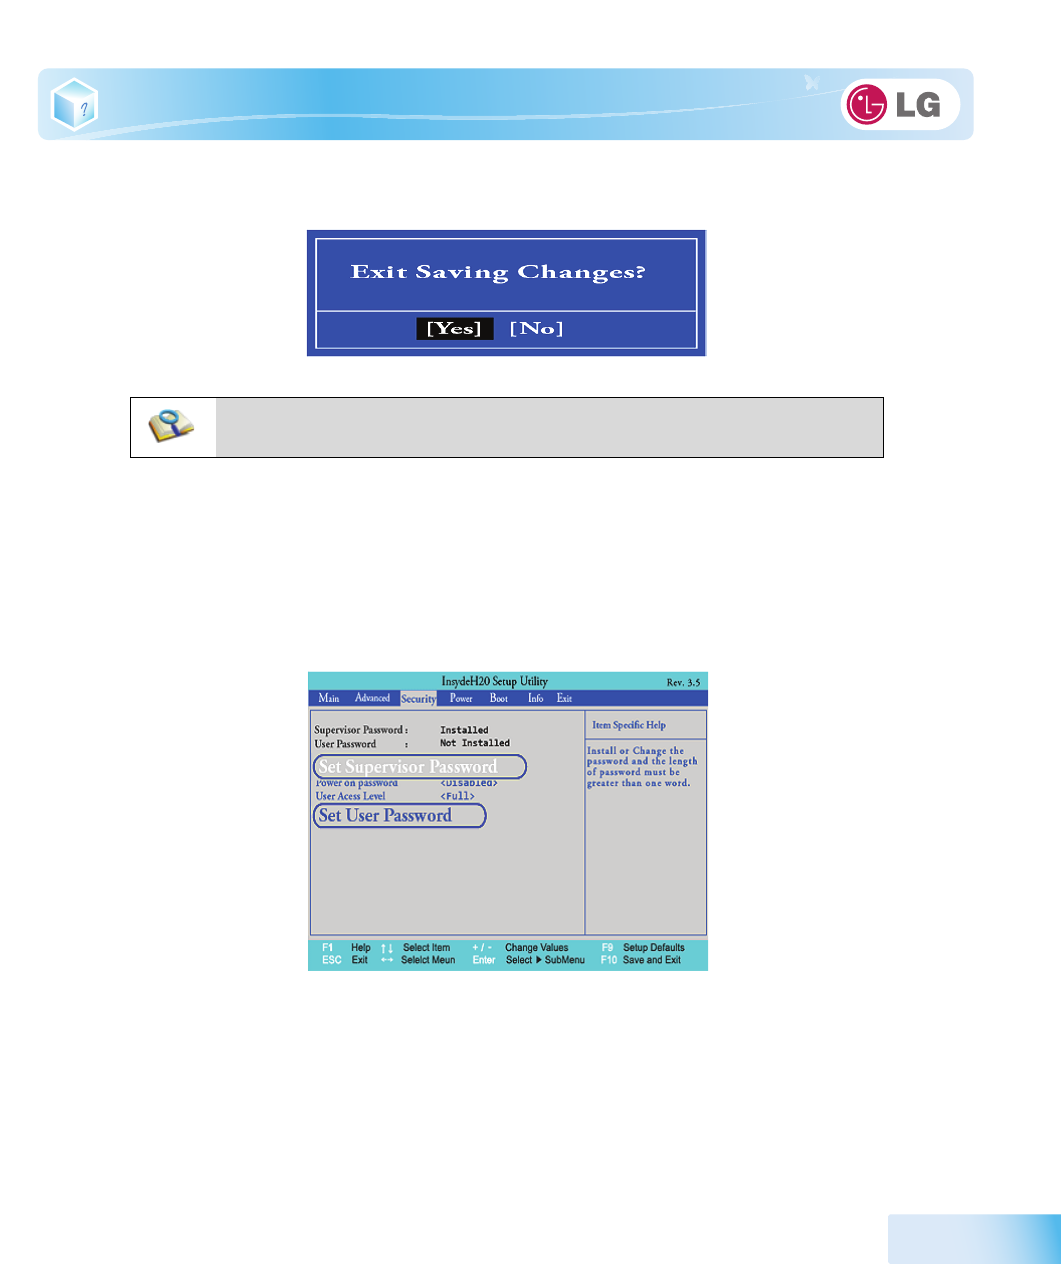
System Setup
81
6. When the following message appears, select
[Yes]
and press
[Enter]
. The notebook PC will restart.
▶
Power on Password
Power on password
feature protects the system by requesting
Set Supervisor Password
or
Set User
Password
during boot up.
1. After opening the system setup screen, use the arrow keys to move to
Security
.
2. When the following screen appears, set
Set Supervisor Password
only or both
Set Supervisor
Password
and
Set User Password
.
■UserPassword allows limited access to the items in CMOS setup compared to the
Supervisor Password item.
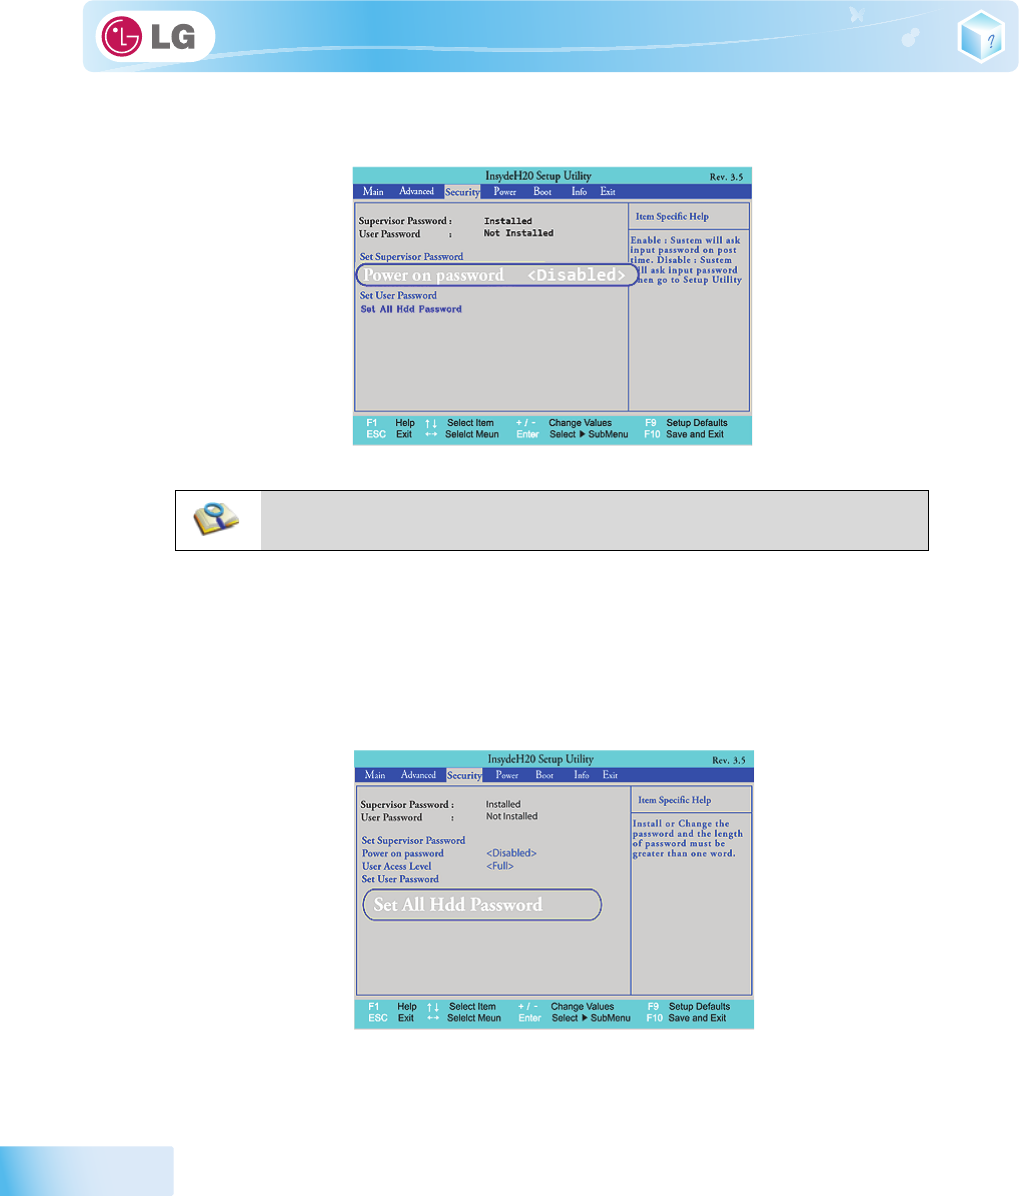
82
System Setup
3. Select
Power on passwrod
, and change
Disable
into
Enable
using + and - keys.
▶
Set All Hdd Password
Set All Hdd Password
is to set a password in the
HDD
separately from the
Supervisor Password
.
1. After opening the system setup screen, use the arrow keys to move to Security.
2. When the following screen appears, select Set All Hdd Password with the arrow keys and press
[Enter].
■ If the user presses both [Shift] and [+], he/she can select between [Enabled] and
[Disabled].
System Setup
83
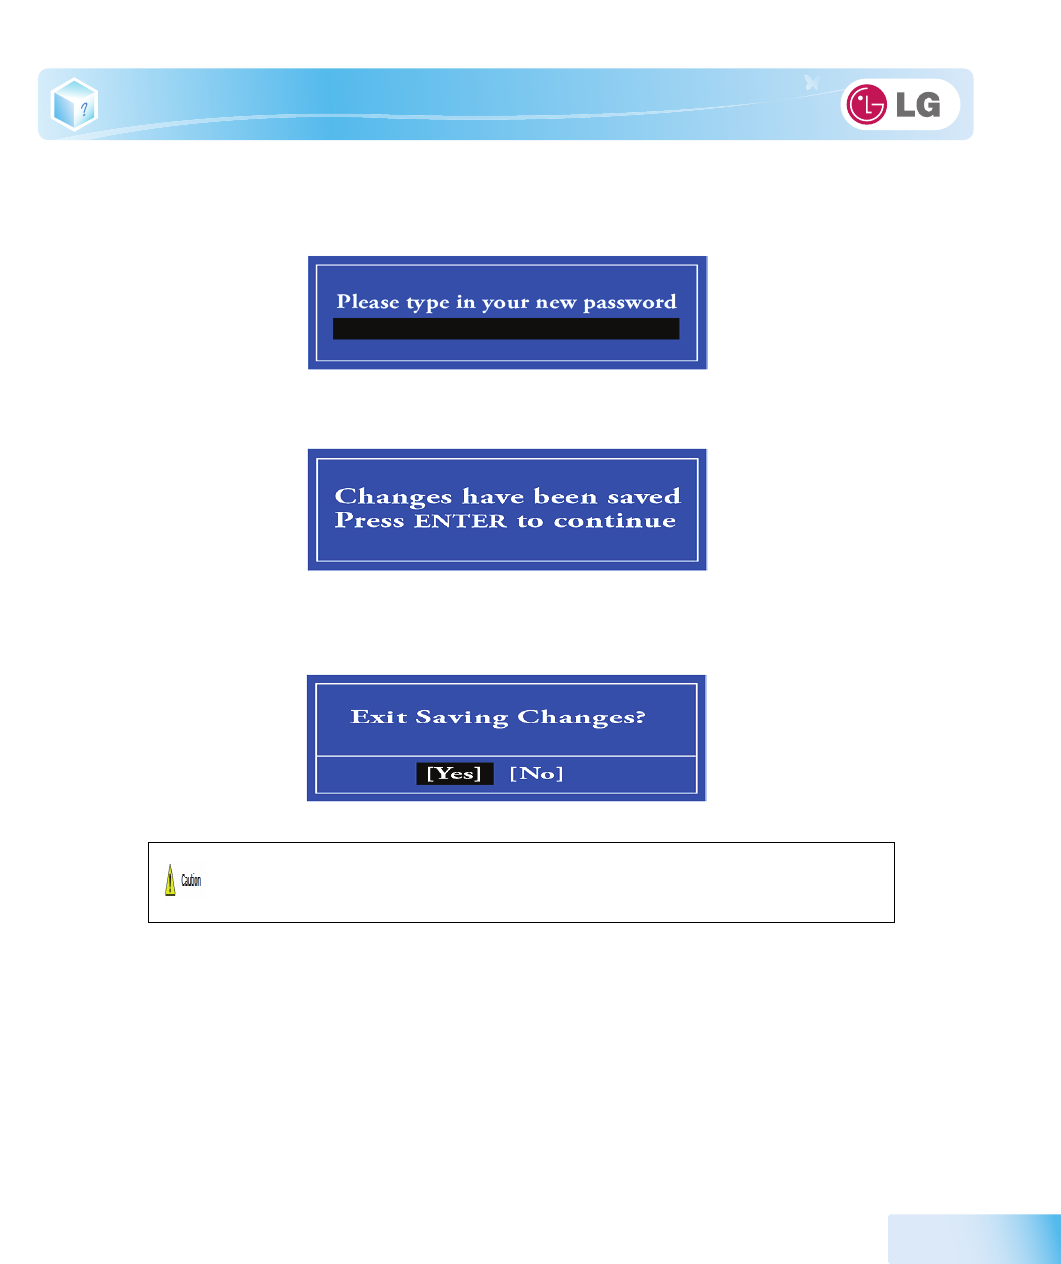
3. When the following message appears, input the password and press
[Enter]
. The password must not
exceed 8 characters of letter (A - Z), number (0 - 9) or their combination.
4. When the following message appears, press
[Enter]
.
5. To save the changes in system setup, press
[F10]
.
6. When the following message appears, select
[Yes]
and press
[Enter]
. The notebook PC will restart.
Without the HDD password, it is impossible to recover the HDD.
■ The replacement of the HDD due to missing of the HDD Password is not covered by the
warranty.
84
System Setup
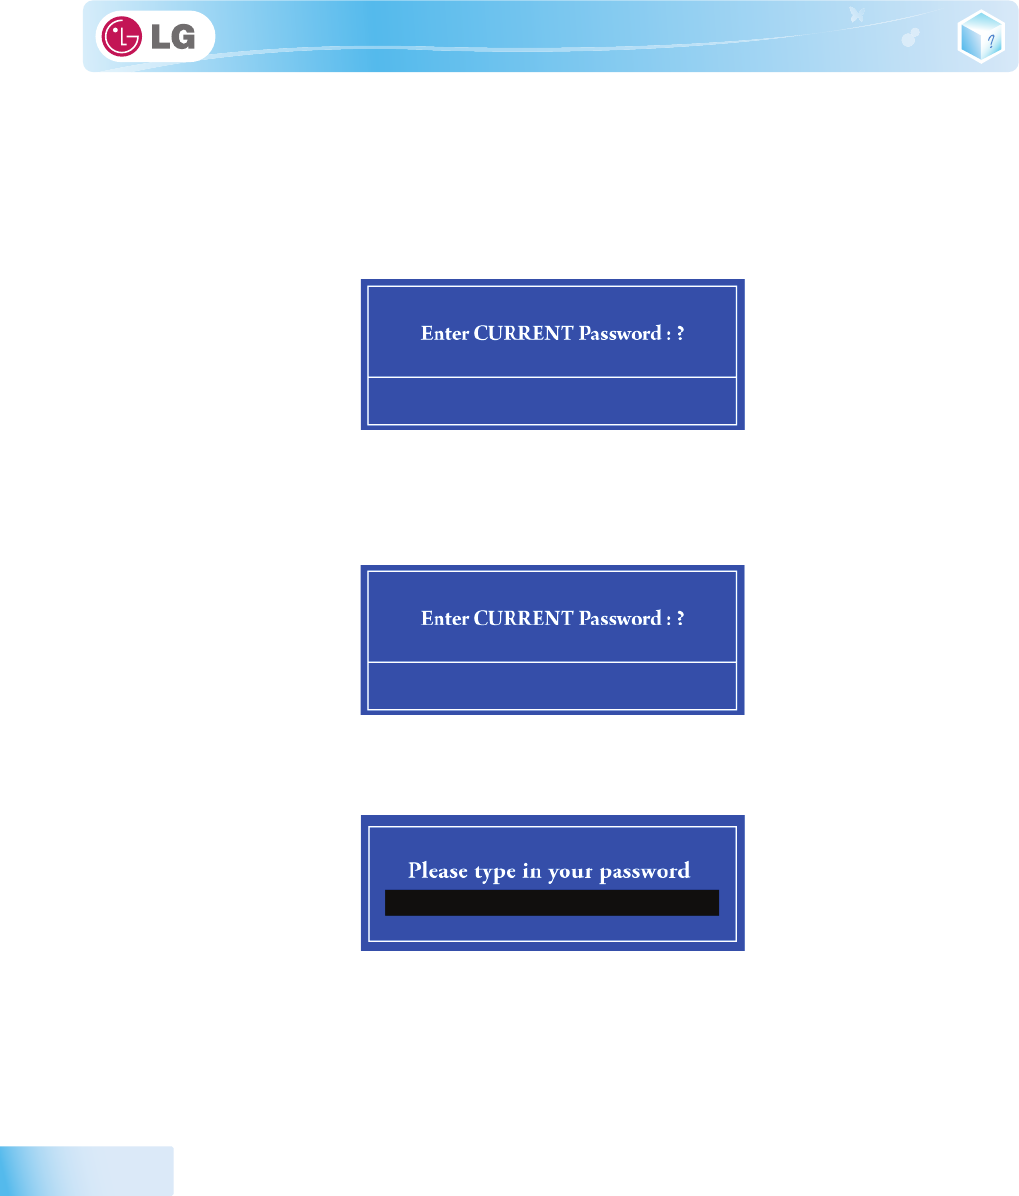
6-3. Changing or Deleting the Password
You can delete or change the password only after inputting the current password.
▶ Changing the Password
1. Execute the System Setup, enter the password, and press
[Enter]
.
2. Change the password in the same way as setting one.
▶ Deleting the Password
1. Execute the System Setup, enter the password, and press
[Enter]
.
2. After opening the system setup screen, use the arrow keys to move to
Security
.
3. Select a password to change, press
[Enter]
, and enter the current password.
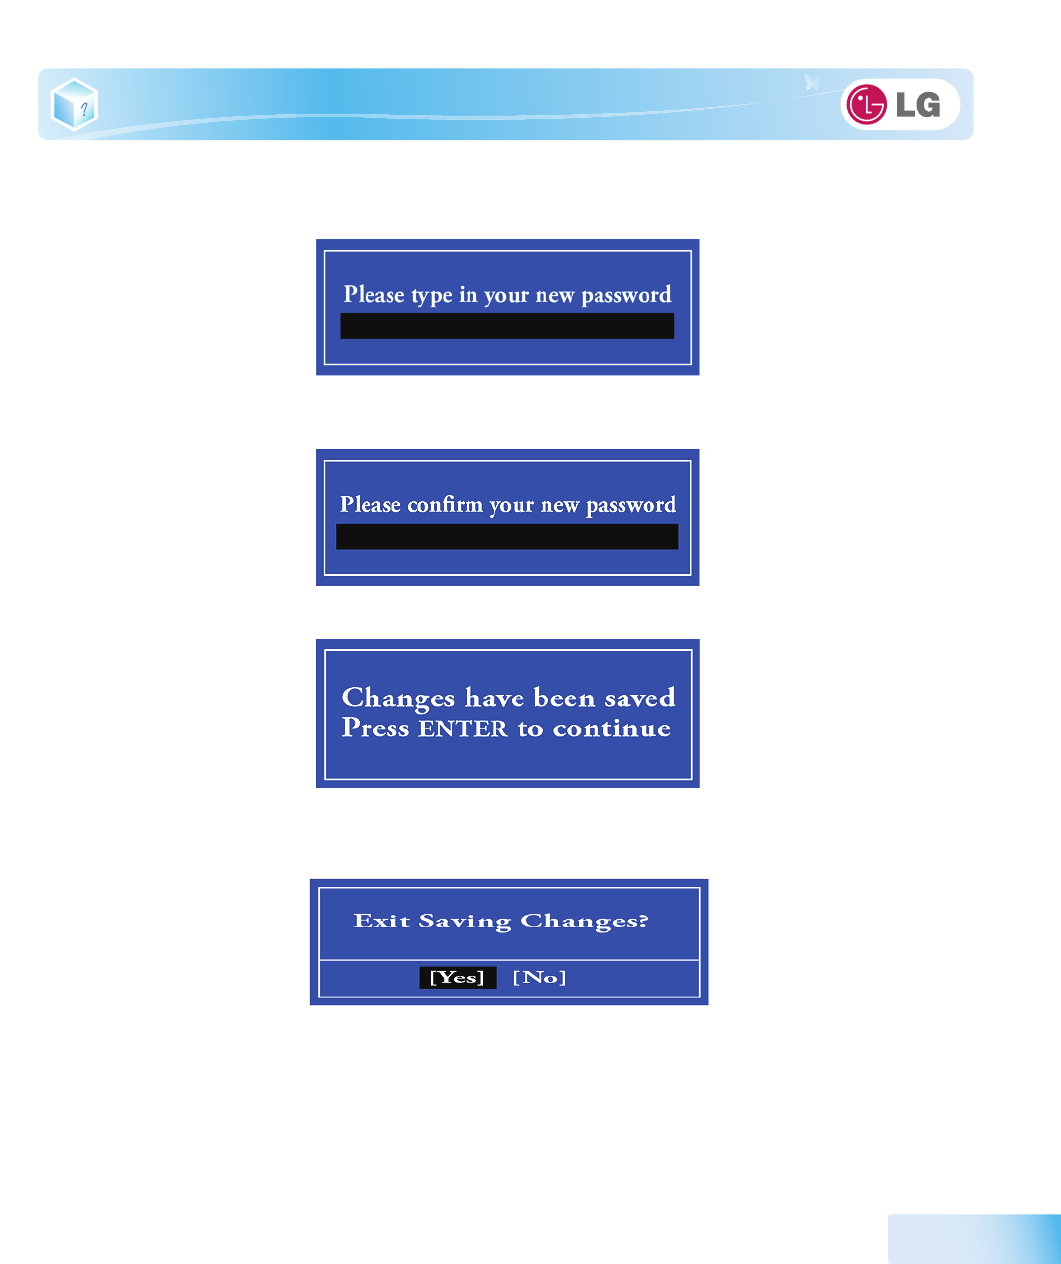
System Setup
85
4. When the following screen appears, press
[Enter]
.
5. When the following screen appears, press
[Enter]
.
6. When the following screen appears, check the settings and press
[Enter]
.
7. To save the changes in system setup, press
[F10]
.
8. When the following message appears, select
[Yes]
and press
[Enter]
. The notebook PC will restart.