LG Electronics USA P705F Cellular/PCS GSM and PCS WCDMA Phone with WLAN and Bluetooth User Manual
LG Electronics MobileComm USA, Inc. Cellular/PCS GSM and PCS WCDMA Phone with WLAN and Bluetooth Users Manual
UserManual.wiki
>
LG Electronics USA
>
P705F User Manual
Users Manual
Navigation menu
Upload a User Manual
Namespaces
Wiki Guide
HTML
PDF
Info
Views
User Manual
Discussion / Help
Navigation
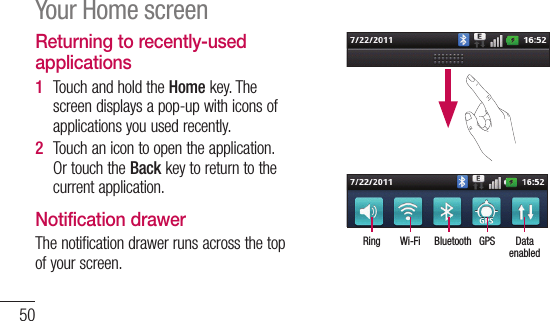
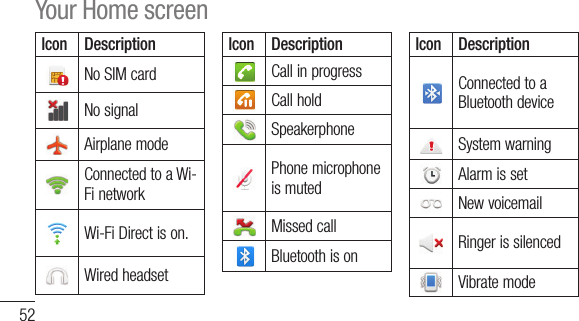
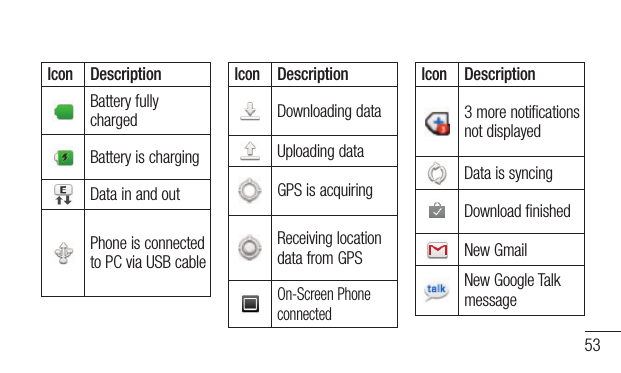
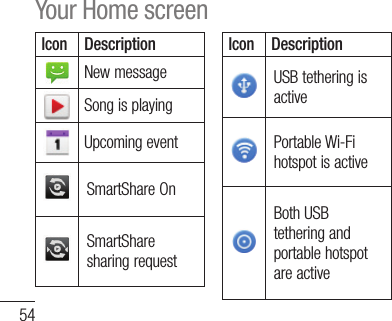
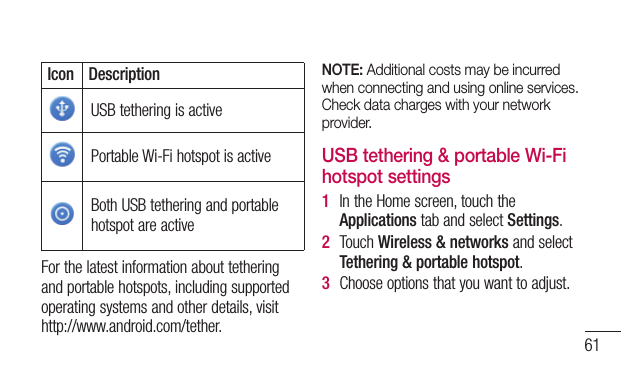
![51Touchandslidethenotificationdrawerdownwithyourfinger.Or,intheHomescreen,presstheMenukeyandselectNotifications.Hereyoucancheckandmanagesound,Wi-Fi,BluetoothandGPSaswellasothernotifications.Viewing the status barThestatusbarusesdifferenticonstodisplayphoneinformationsuchassignalstrength,newmessages,batterylifeandactiveBluetoothanddataconnections.Belowisatableexplainingthemeaningoficonsyou’relikelytoseeinthestatusbar.[Status bar]](https://usermanual.wiki/LG-Electronics-USA/P705F/User-Guide-1673015-Page-18.png)


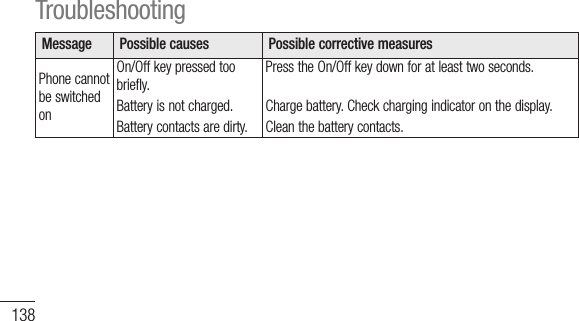
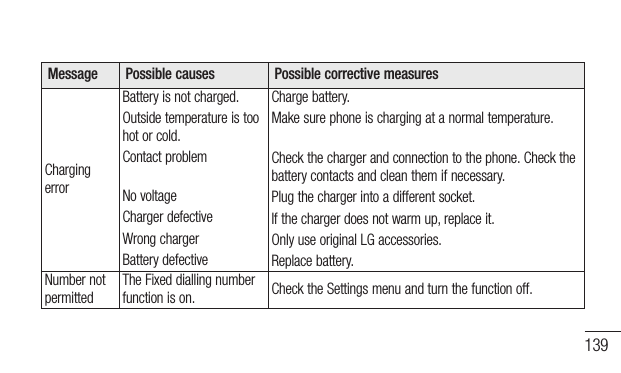
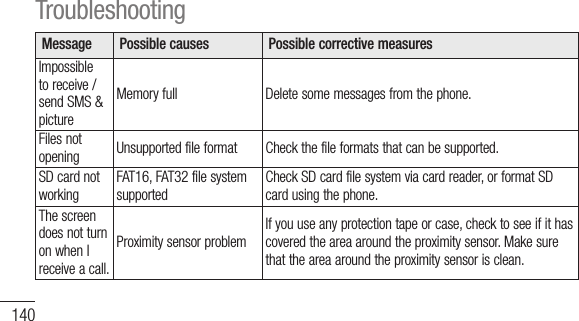
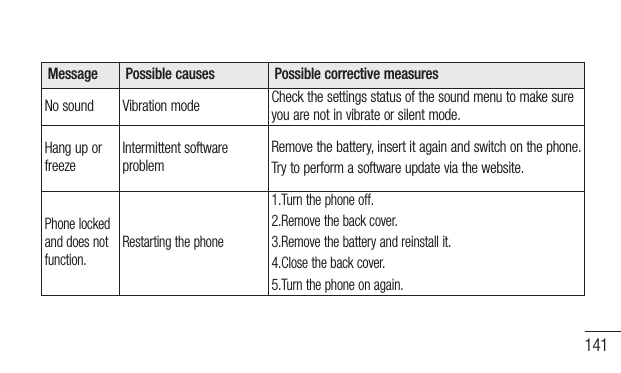
![137Message Possible causes Possible corrective measuresCodesdonotmatchTochangeasecuritycode,youwillneedtoconfirmthenewcodebyre-enteringit.Thetwocodesyouhaveentereddonotmatch.Thedefaultcodeis[0000].Ifyouforgetthecode,contactyourserviceprovider.AnyapplicationcannotbesetNotsupportedbyserviceproviderorregistrationrequired.Contactyourserviceprovider.CallsnotavailableDiallingerrorNewSIMcardinserted.Pre-paidchargelimitreached.Newnetworknotauthorised.Checkfornewrestrictions.ContactserviceproviderorresetlimitwithPIN2.](https://usermanual.wiki/LG-Electronics-USA/P705F/User-Guide-1673015-Page-104.png)