LG Electronics USA P7200 Single-Band PCS GSM Phone with Bluetooth User Manual P7200 Eng 0728
LG Electronics USA Single-Band PCS GSM Phone with Bluetooth P7200 Eng 0728
UserManual.wiki
>
LG Electronics USA
>
P7200 User Manual
>
Manual 1
Contents
1.
Manual 1
2.
Manual 2
Manual 1
Navigation menu
Upload a User Manual
Namespaces
Wiki Guide
HTML
PDF
Info
Views
User Manual
Discussion / Help
Navigation
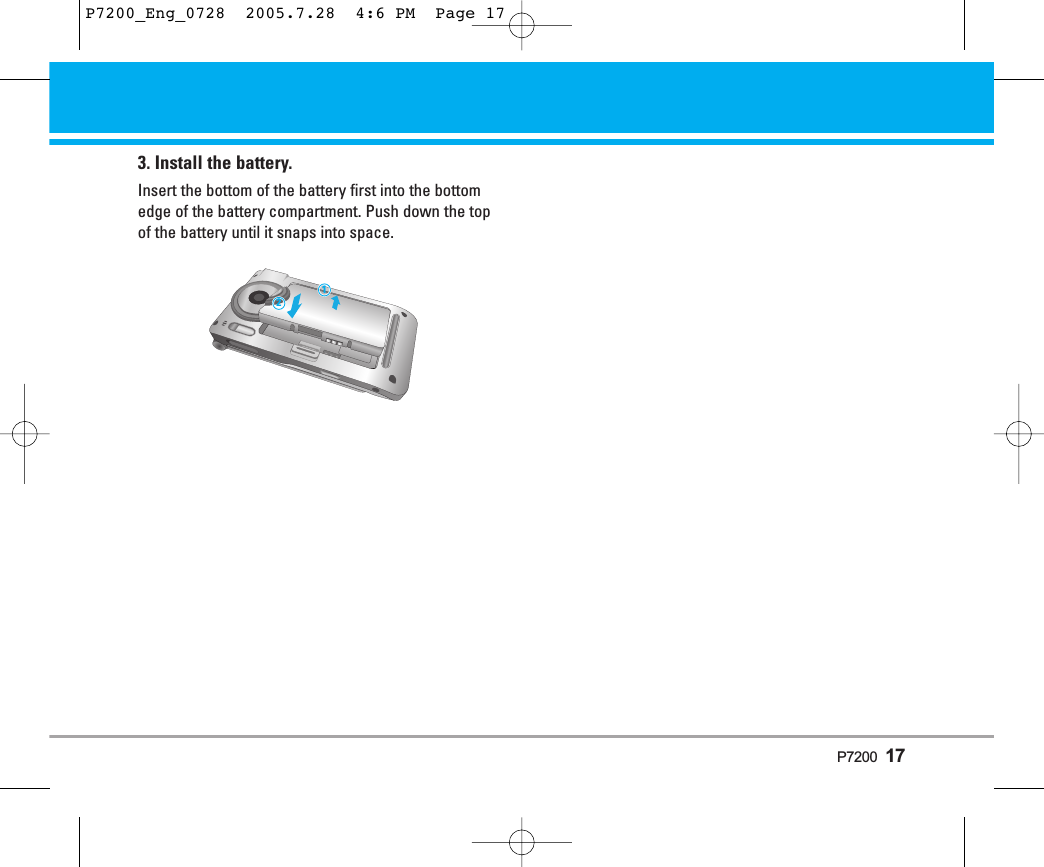
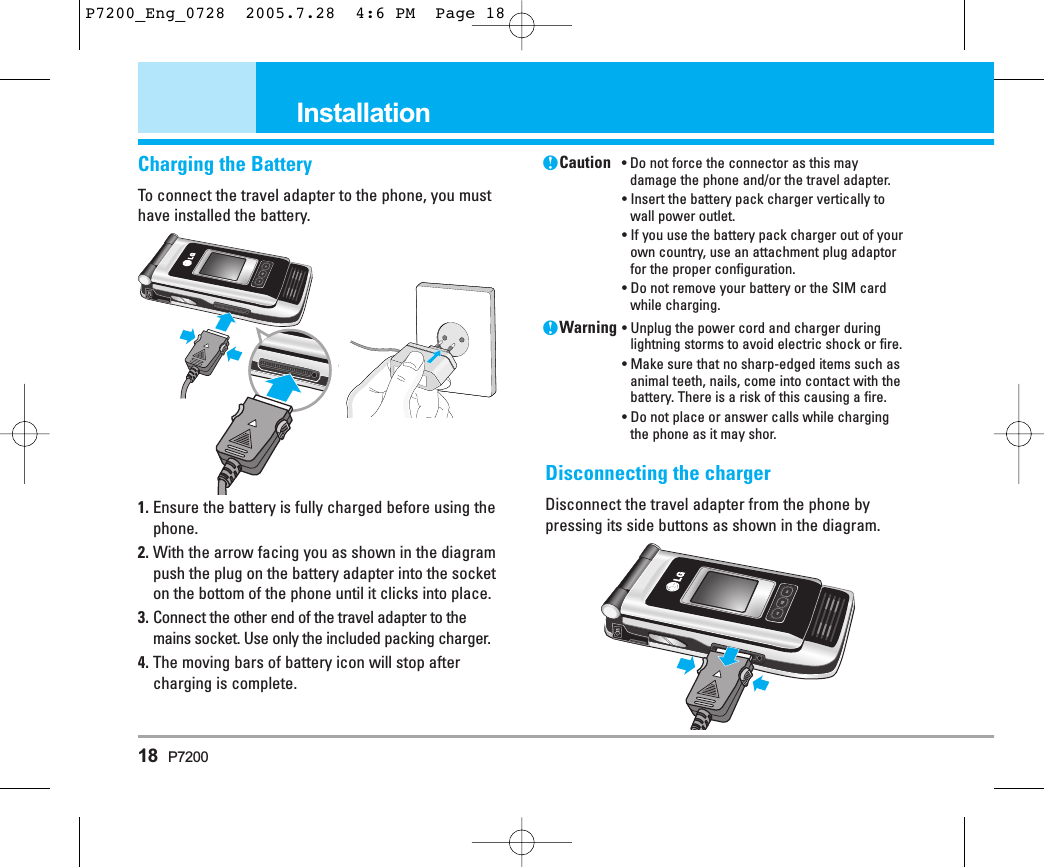
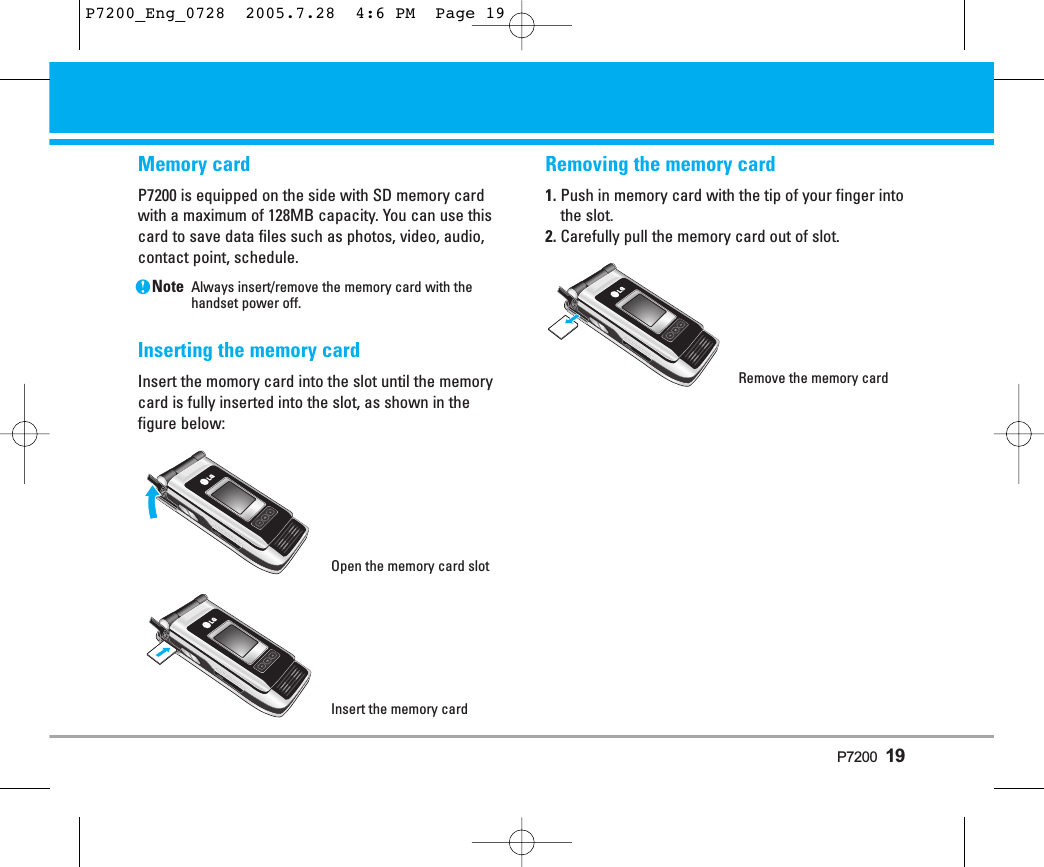
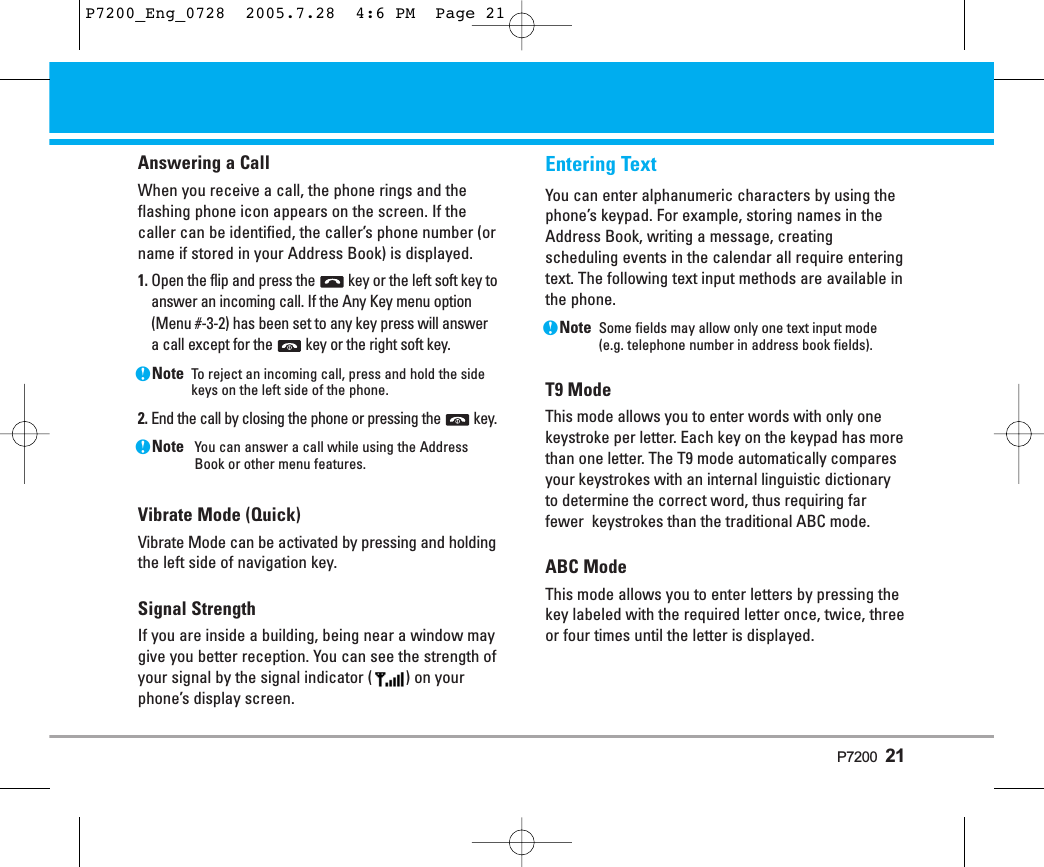
![Making a Call1. Make sure your phone is powered on.2. Enter a phone number including the area code. To edit a number on the display screen, simplypress the key to erase one digit at a time.]Press and hold the key to erase the entire number.3. Press the key to call.4. When you want to finish, press the key.Making a Call by Send Key1. Press the key, and the most recent incoming,outgoing and missed phone numbers will be displayed.2. Select the desired number by using the navigationkey.3. Press the key.Making International Calls1. Press and hold the key for the internationalprefix. The ‘+’ character can be replaced with theinternational access code.2. Enter the country code, area code, and the phonenumber.3. Press the key.Ending a CallWhen you have finished a call, press the key.Making a Call From the Contact listYou can store names and phone numbers dialled frequently in the SIM card as well as the phone memory known as the Contact list.You can dial a number by simply looking up a name inthe contact list. For more details on the Contacts feature, please refer to page 30.Adjusting the VolumeDuring a call, if you want to adjust the earpiece volume, use the side keys of the phone. In idle mode, you can adjust the key volume using theside keys.20 P7200General FunctionsP7200_Eng_0728 2005.7.28 4:6 PM Page 20](https://usermanual.wiki/LG-Electronics-USA/P7200.Manual-1/User-Guide-584792-Page-20.png)
![123 Mode (Numbers Mode) Type numbers using one keystroke per number. Tochange to 123 mode in a text entry field, presskey until 123 mode is displayed.Symbolic Mode This mode allows you to enter special characters.Changing the Text Input Mode1. When you are in a field that allows characters tobe entered, you will notice the text input mode indicator in the upper right corner of the display.2. If you want to change modes, press . The available modes are changed.Using the T9 ModeThe T9 predictive text input mode allows you to enterwords easily with a minimum number of key presses.As you press each key, the phone begins to displaythe characters that it thinks you are typing based ona built-in dictionary. As new letters are added, theword changes to reflect the most likely candidatefrom the dictionary.nNoteYou can select a different T9 language from the menuoption or press hold down the key . The defaultsetting on the phone is T9 disable mode. 1. When you are in the T9 predictive text input mode,start entering a word by pressing keys toPress one key per letter.]The word changes as letters are typed - ignorewhat’s on the screen until the word is typed completely.]If the word is still incorrect after typing completely,press the down navigation key once or more tocycle through the other word options.Example: Press to type Good.]If the desired word is missing from the word choiceslist, add it by using the ABC mode.2. Enter the whole word before editing or deleting anykeystrokes.3. Complete each word with a space by pressing thekey or key.To delete letters, press . Press and hold downto erase the letters continuously.nNoteTo exit the text input mode without saving your input,press . The phone returns to the idel screen.22 P7200General FunctionsP7200_Eng_0728 2005.7.28 4:6 PM Page 22](https://usermanual.wiki/LG-Electronics-USA/P7200.Manual-1/User-Guide-584792-Page-22.png)
![Using the ABC ModeUse the to keys to enter your text.1. Press the key labeled with the required letter:]Once for the first letter.]Twice for the second letter.]And so on.2. To insert a space, press the key once. To deleteletters, press the key. Press and hold down thekey to erase the letters continuously.nNote Refer to the table below for more information on thecharacters available using the keys.Using the 123 (Numbers) ModeThe 123 Mode enables you to enter numbers in a textmessage (a telephone number, for example).Press the keys corresponding to the required digitsbefore manually switching back to the appropriatetext entry mode.Using the Symbol ModeThe Symbol Mode enables you to enter various sym-bols or special characters.To enter a symbol, press the key. Use the navigation keys to select the desired symbol andpress the [OK] key.P7200 23Key Characters in the Order DisplayUpper Case Lower Case. , / ? ! - : ' " 1 . , / ? ! - : ' " 1KA B C 2 a b c 2D E F 3 d e f 3G H I 4 g h i 4J K L 5 j k l 5 M N O 6 m n o 6P Q R S 7 p q r s 7T U V 8 t u v 8W X Z Y 9 w x y z 9Space 0 Space 0P7200_Eng_0728 2005.7.28 4:6 PM Page 23](https://usermanual.wiki/LG-Electronics-USA/P7200.Manual-1/User-Guide-584792-Page-23.png)
![Your phone provides a number of control functionsthat you can use during a call. To access these functions during a call, press the left soft key[Options].During a CallThe menu displayed on the handset screen during acall is different than the default main menu displayedwhen in idle screen, and the options are describedbelow.Making a Second Call (Network Dependent)You can get a number you wish to dial from theAddress Book to make a second call. Press the Rightsoft key then select Contacts.Swapping Between Two CallsTo switch between two calls, press key or theleft soft key, and then select Swap. Answering an Incoming Call To answer an incoming call when the handset is ring-ing, simply press the key. The handset is alsoable to warn you of an incoming call while you arealready on a call. A tone sounds in the earpiece, andthe display will show that a second call is waiting.This feature, known as Call Waiting, is only availableif your network supports it. For details of how to activate and deactivate it seeCall Waiting (Menu #-3-4).If Call Waiting is on, you can put the first call on holdand answer the second, by pressing .Rejecting an Incoming CallYou can reject an incoming call without answering bysimply pressing the key.During a call, you can reject an incoming call bypressing the key.Muting the MicrophoneYou can mute the microphone during a call by pressing the [Options] key then selecting [Mute]. Thehandset can be unmuted by pressing the [Unmute].When the handset is muted, the caller cannot hearyou, but you can still hear them.DTMF tones while callingTo switch on DTMF tones while calling (e.g. to usethe phone with an automatic switchboard) press thekey [Options] followed by Send DTMF – DTMF on.Select DTMF off to disable DTMF tones. DTMF tonesare normally on.P7200 25In-Call MenuP7200_Eng_0728 2005.7.28 4:6 PM Page 25](https://usermanual.wiki/LG-Electronics-USA/P7200.Manual-1/User-Guide-584792-Page-25.png)
![Conference CallsThe conference service provides you with the abilityto have a simultaneous conversation with more thanone caller, if your network service provider supportsthis feature. A conference call can only be set upwhen you have one active call and one call on hold,both calls having been answered. Once a conferencecall is set up, calls may be added, disconnected orseparated (that is, removed from the conference callbut still connected to you) by the person who set upthe conference call. These options are all availablefrom the In-Call menu. The maximum callers in a conference call are five. Once started, you are incontrol of the conference call, and only you can addcalls to the conference call.Making a Second CallYou can make a second call while currently on a call.Enter the second number and press the . Whenthe second call is connected, the first call is automatically placed on hold. You can swap betweencalls, by pressing the key.Setting Up a Conference CallTo set up a conference call, place one call on holdand while the active call is on, press the left soft keyand then select the Join menu of Conference call.Activate the Conference Call on HoldTo activate a conference call on hold, press thekey. Alternatively press the left soft key [Options] andselect Conference/Hold all calls. Other users on holdwill stay connected. To return to conference callmode, press the left soft key [Options] followed byConference call.Adding Calls to the Conference CallTo add a call to an existing conference call, press theleft soft key, and then select the Join menu ofConference call.Private Call in a Conference CallTo have a private call with one caller from a conference call, display the number of the caller youwish to talk to on the screen, then press the left softkey. Select the Private menu of Conference call to putall the other callers on hold.Ending a Conference CallCurrently displayed caller from a conference call canbe disconnected by pressing the key.26 P7200In-Call MenuP7200_Eng_0728 2005.7.28 4:6 PM Page 26](https://usermanual.wiki/LG-Electronics-USA/P7200.Manual-1/User-Guide-584792-Page-26.png)
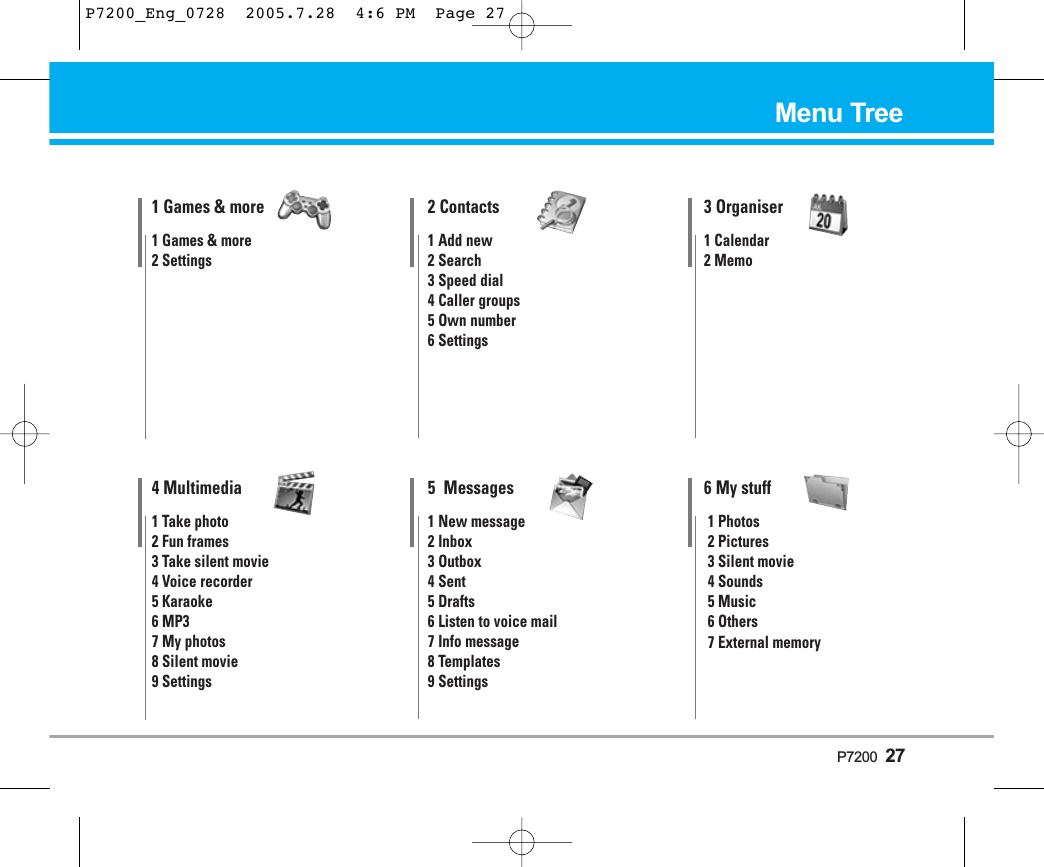
![Games & more [Menu 1-1]• Default Games: In this menu, you can manage theJava applications installed in your phone. You canplay or delete downloaded applications, or set theconnect option. The downloaded applications areorganised in folders. Press the left soft key[Menu] to open the selected folder or launch theselected midlet. ]Launch: Start the selected application.]Info: Shows the information of the application.]Options: Some Java applications may require adata connection to be made. nNote You cannot remove or rename the preinstalledfolder or a game in the folder.Settings [Menu 1-2]You can set the network settings to download the game.]Activate: You can activate the selected internet.]Settings: You can set the value of bearer, proxy andDNS.]Rename: You can chage the name of internet. P7200 29Games & more [Menu 1]JavaTM‚ is a technology developed by Sun Microsystems. Similar to the way you would download the Java Applet usingthe standard Netscape or MS Internet Explorer browsers,Java MIDlet can be downloaded using the WAP enabledphone. Depending on the service provider, all Java based programs such as Java games can be downloaded and runon a phone. Once downloaded, the Java program can beviewed in the My games & more menu where you can select,execute, or delete. The Java program files saved in the phoneare in .JAD or .JAR format.nNote• The JAR file is a compressed format of the Javaprogram and the JAD file is a description file thatincludes all detailed information. From the network, prior to download, you can view alldetailed file descriptions from the JAD file.• While being based on a standard language(J2ME), not all Java applications are compatiblewith all handsets on sale insofar as specificlibraries may be used for a telephone model. Thesoftware may be blocked or switch itself on whenJava applications not specifically developed forthe phone this manual refers to are downloaded,making it necessary to “restart” the handset. Wewould like to point out that these problems arecaused by incompatible applications and are nota product fault.nCautionOnly J2ME(Java 2 Micro Edition) based programswill run in a phone environment. The J2SE(Java 2Standard Edition) based programs will only run ina PC environment.P7200_Eng_0728 2005.7.28 4:6 PM Page 29](https://usermanual.wiki/LG-Electronics-USA/P7200.Manual-1/User-Guide-584792-Page-29.png)
![Add new [Menu 2-1]You can add phonebook entry by using this function.Phone memory capacity is 250 entries. SIM card memory capacity depends on the cellular serviceprovider. You can also save 20 characters of name inThe Phone memory, and save characters in the SIMcard. The number of character is SIM dependent feature.1. Select Add new by press left soft key [Select]or [OK].2. Select the memory you want to save: SIM orPhone. If you set to Phone, you need to selectwhich number you want as a main number.a. Press [Save] to input a name.b. Press [Save], then you can input a number.c. Press [Save] to input e-mail address.d. You can set a group for the entry by pressing , .e. You can set a character and a picture for theentry by pressing , .Search [Menu 2-2]1. Select Search by press the left soft key [Select]or [OK].2. Enter the name that you want to search.nNote Instant searching is available by inputting the initialletter of the name or number you want to search.3. If you want to edit, delete, copy an entry, or to addthe voice to one, select left soft key [Options]. Thefollowing menu will be displayed.]View detail: You can view the entry saved in SIMor phone memory in details.]Delete: You can delete an entry.]Write messages: After you have found the numberyou want, you can send a text/multimedia messageto the selected number.]Send via bluetooth: After setting On in bluetooth,you can send the phonebook list via bluetooth.]Edit: You can edit the name, number, group, character and picture by using the navigation key.]Copy to handset/ SIM: You can move the entry fromSIM to phone or phone to SIM.]Assign speed dial: You can assign the entry as aspeed dial.]View caller groups: You can view the entry whichis assigned in each caller group.30 P7200Contacts [Menu 2]P7200_Eng_0728 2005.7.28 4:6 PM Page 30](https://usermanual.wiki/LG-Electronics-USA/P7200.Manual-1/User-Guide-584792-Page-30.png)
![Speed dial [Menu 2-3]You can assign any of the keys tÓ with a Namelist entry. You can call directly by pressing this key.1. Open the phonebook first by pressing the right softkey [Contacts] in standby mode.2. Scroll to Speed dial, then press the left soft key[Select].3. If you want to add speed dial, select (empty). Then,you can search the name in phonebook.4. After assigning the number as speed dial, you canchange and delete the entry. You can also make acall or send a message by this number.Caller groups [Menu 2-4]You can list up to the members per each group. Thereare 7 groups you can make lists to.]Member list: Shows the group members you haveselected.]Group ring tone: Allows you to specify ring tone forthe group members’ call.]Group icon: Allows you to select the icon dependent on Group.]Add member: You can add group members. Eachgroup member shouldn’t be exceeded 20.]Remove member: You can remove the member fromthe Group member list. But the name and the number will be remained in phonebook.]Rename: You can change a group name.]Remove all: You can remove all entries from thephonebook.Own number (SIM dependent) [Menu 2-5]You can save and check your own number in SIM card.P7200 31P7200_Eng_0728 2005.7.28 4:6 PM Page 31](https://usermanual.wiki/LG-Electronics-USA/P7200.Manual-1/User-Guide-584792-Page-31.png)
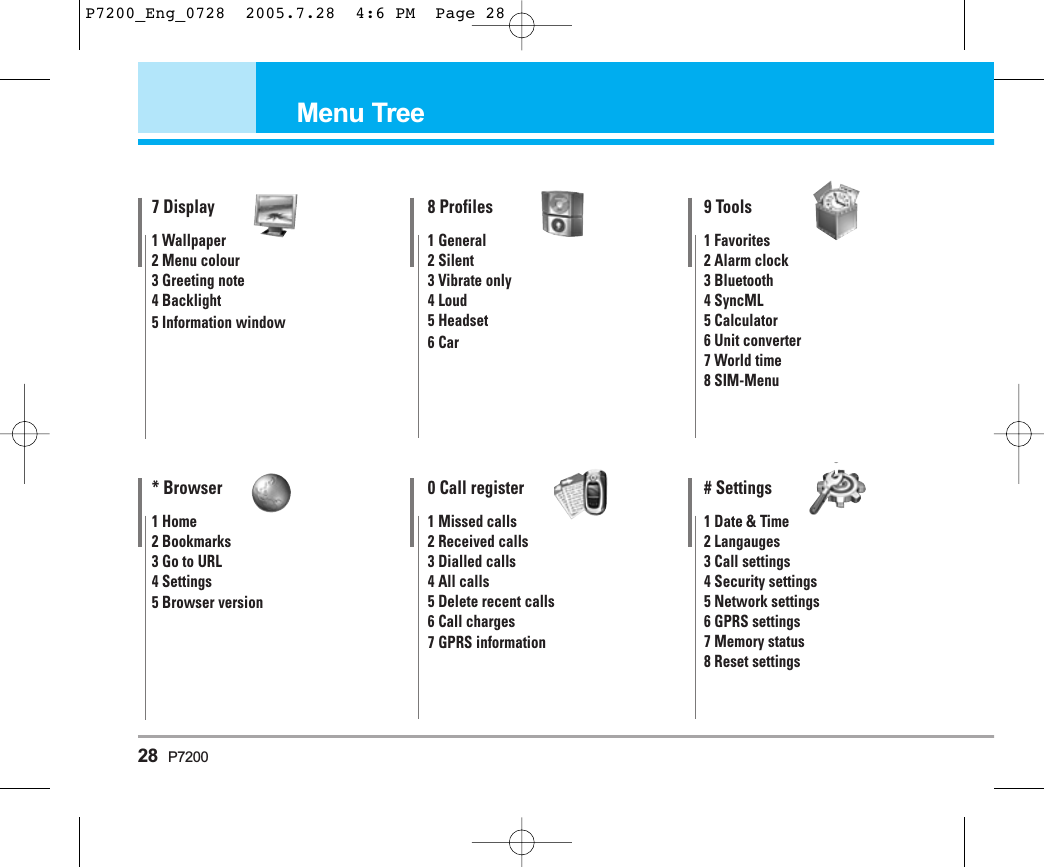
![Settings [Menu 2-6]1. Press the right soft key [Contacts] in standby mode.2. Scroll to Settings, then press the left soft key[Select].]View optionsScroll to highlight View options, and then press theleft soft key- Name only: Set the phonebook list with displayingonly name.- Name and number: Set the phonebook list withdisplaying name and number.- With picture: Set the phonebook list with theinformation of character and picture.]Copy allYou can copy/move entries from SIM card memoryto Phone memory and vice versa.1. Open the Phonebook first by pressing the right softkey [Contacts] in standby mode.2. Scroll to Copy all, and then press the left soft key[Select] to enter this menu.•SIM to handset: You can copy the entry from SIMCard to Phone memory.•Handset to SIM: You can copy the entry fromPhone memory to SIM Card.]Move all: You can move all entries from SIM tophone or phone to SIM.]Default memory Scroll to highlight Default memory, and then pressthe left soft key [Select]. If you select SIM orPhone, the phone will store an entry to SIM orphone.]Memory in use This feature allows you to see how many free andin-use are in your phonebook.1. Open the phonebook first by pressing the right softkey [Contacts] in standby mode. 2. Scroll to Memory in use, then press the left softkey [OK].]Clear contactsYou can delete all entries in SIM and Handset. Thisfunction requires Security code.- Press the right soft key [Contacts] in standby modand select Clear contacts, press [Select].- Then select a memory to erase.- Enter security code and press the left soft key[OK] or the right soft key [Back].]Business card: You can create business card.32 P7200Contacts [Menu 2]P7200_Eng_0728 2005.7.28 4:6 PM Page 32](https://usermanual.wiki/LG-Electronics-USA/P7200.Manual-1/User-Guide-584792-Page-32.png)
![]Service dial numberUse this function to access a particular list of services provided by your network operator (if supported by the SIM card).1. Open the phonebook first by pressing the right softkey [Contacts] in standby mode and selectSettings.2. Scroll to Service dial number, then press the leftsoft key [Select] to enter.3. The names of the available services will be shown.4. Use and to select a service. Press[Send].P7200 33P7200_Eng_0728 2005.7.28 4:6 PM Page 33](https://usermanual.wiki/LG-Electronics-USA/P7200.Manual-1/User-Guide-584792-Page-33.png)
![Calendar [Menu 3-1]When you enter this menu a calendar will show up.On top of the screen there are sections for date.Whenever you change the date, the calendar will beupdated according to the date.And square cursor will be used to locate the certainday. If you see under bar on the calendar, it meansthat there is a schedule or memo that day. This function helps to remind you of your schedule andmemo. The phone will sound an alarm tone if you setthis for the note.To change the day, month, and year.In the scheduler mode, press left soft key [Options]as follows;Add new [Menu 3-1-1]Allows you to add new schedule and memo for thechosen day. You can store up to 20 notes.Input the subject and then press left soft key [OK].You enter the appropriate information in the followsection; Time, Repeat and Alarm. View daily schedules [Menu 3-1-2]View all schedules and memo for the chosen day. Use, to browse through the note lists. If youset alarm for the note, the alarm icon is displayed.If you want to view the note in detail, press left softkey [Select]. Press left soft key [Options] todelete, edit the note you selected.Delete past [Menu 3-1-3]You can delete the past schedule that has beenalready notified you.Delete all [Menu 3-1-4]You can delete for the all notes.Go to date [Menu 3-1-5]You can go the chosen date directly.34 P7200Organiser [Menu 3]Key DescriptionYearlyMonthlyWeeklyDailyKey DescriptionP7200_Eng_0728 2005.7.28 4:6 PM Page 34](https://usermanual.wiki/LG-Electronics-USA/P7200.Manual-1/User-Guide-584792-Page-34.png)
![Set alarm tone [Menu 3-1-6]You can set the alarm tone of each chosen date.Memo [Menu 3-2]1. Select the Memo by pressing the left soft key[Select].2. If the entry is empty, press the left soft key[Write].3. Input the memo and then press left soft key [OK].nNote If you want to change the text input mode, pressthe in order.P7200 35P7200_Eng_0728 2005.7.28 4:6 PM Page 35](https://usermanual.wiki/LG-Electronics-USA/P7200.Manual-1/User-Guide-584792-Page-35.png)