LG Electronics USA P720H Cellular/PCS GSM/EDGE/WCDMA Phone with WLAN and Bluetooth User Manual
LG Electronics MobileComm USA, Inc. Cellular/PCS GSM/EDGE/WCDMA Phone with WLAN and Bluetooth Users Manual
Users Manual
• Someofthecontentsofthismanualmaynotapplytoyourphone,
dependingonthesoftwareandyourserviceprovider.
• Thishandsetisnotsuitableforpeoplewhohaveavisualimpairment
duetothetouchscreenkeyboard.
• Copyright©2012LGElectronics,Inc.Allrightsreserved.LGand
theLGlogoareregisteredtrademarksofLGGroupanditsrelated
entities.Allothertrademarksarethepropertyoftheirrespective
owners.
• Google™,GoogleMaps™,Gmail™,YouTube™,GoogleTalk™and
AndroidMarket™aretrademarksofGoogle,Inc.
LG-P720hUserGuide
English
This model is not intended for sale in the USA.

Part 15.21 statement
" Change or Modifications that are not expressly approved by the manufacturer could void
the user's authority to operate the equipment. “
Part 15.105 statement
This equipment has been tested and found to comply with the limits for a class B digital
device, pursuant to Part 15 of the FCC Rules.
These limits are designed to provide reasonable protection against harmful interference in
a residential installation. This equipment generates uses and can radiate radio frequency
energy and, if not installed and used in accordance with the instructions, may cause harmful
interference to radio communications. However, there is no guarantee that interference will
not occur in a particular installation. If this equipment does cause harmful interference or
television reception, which can be determined by turning the equipment off and on, the user
is encouraged to try to correct the interference by one or more of the following measures:
- Reorient or relocate the receiving antenna.
- Increase the separation between the equipment and receiver.
- Connect the equipment into an outlet on a circuit different from that to
which the receiver is connected.
- Consult the dealer or an experienced radio/TV technician for help.

Part 15 Class B Compliance
This device and its accessories comply with part15 of FCC rules
and ICES-003 Class B digital apparatus requirements for Industry Canada.
Operation is subject to the following two conditions:
(1) This device & its accessories may not cause harmful interference.
(2) This device & its accessories must accept any interference received,
including interference that may cause undesired operation.
Body-worn Operation
This device was tested for typical use with the back of the phone kept 0.39 inches (1 cm)
from the body. To comply with FCC/IC RF exposure requirements, a minimum separation
distance of 0.39 inches (1 cm) must be maintained between the user’s body and the back
of the phone, including the antenna, whether extended or retracted. Third-party belt-clips,
holsters, and similar accessories containing metallic components may not be used.
Avoid the use of accessories that cannot maintain 0.39 inches (1 cm) distance between
the user’s body and the back of the phone and have not been tested for compliance
with FCC/IC RF exposure limits.

repairorsoftwareupgrade.
Pleasebackupyourimportantphone
numbers(ringtones,textorvoice
messages,images,andvideosmightalso
getdeleted).Themanufacturerisnotliable
fordamagesduetolossofdata.
•Whenusingthephoneinpublicplaces,
youmaysettheringeronvibratetoavoid
disturbingothers.
•Donotswitchthephoneon/offwhileitis
inyourear.
31
Getting to know your phone
Before you start using the
phone, please read this!
Pleasechecktoseewhetheranyproblems
youencounteredwithyourphoneare
describedinthissectionbeforetakingthe
phoneinforserviceorcallingaservice
representative.
1. Phone memory
Whenthereislessthan10%ofspace
availableinyourphonememory,yourphone
cannotreceivenewmessages.Youneedto
checkyourphonememoryanddeletesome
data,suchasapplicationsormessages,to
makemorememoryavailable.
To uninstall applications:
1 Applications>Settings>
Applications>Manage applications.
2 Onceallapplicationsappear,scrollto
andselecttheapplicationyouwantto
uninstall.
3 TouchUninstall.
Safety instructions

33
• TurnoffautomaticsyncingforGmail™,
Calendar,Contactsandotherapplications.
• Someapplicationsyouhavedownloaded
mayreducebatterypower.
To check the battery power level:
• Applications>Settings > About phone
>Status.
Thebatterystatus(chargingornotcharging)
andlevel(percentagecharged)isdisplayed
atthetopofthescreen.
To monitor and control how battery
power is being used:
• Applications > Settings > About phone
>Battery use
Batteryusagetimeisdisplayedatthetopof
thescreen.Ittellsyouhowlongithasbeen
sinceyoulastconnectedyourphonetoa
powersourceor,ifcurrentlyconnected,how
longthephonewaslastrunningonbattery
power.Thescreenshowstheapplicationsor
servicesusingbatterypower,listedinorder
fromthegreatesttosmallestamountused.
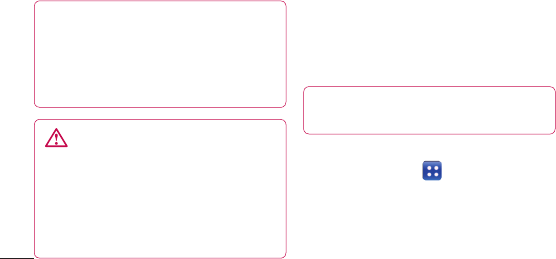
3. Before installing an open
source application and OS
WARNING
IfyouinstallanduseanOSotherthan
theoneprovidedbythemanufacturerit
maycauseyourphonetomalfunction.
Inaddition,yourphonewillnolongerbe
coveredbythewarranty.
Getting to know your phone

34
WARNING
Toprotectyourphoneandpersonal
data,onlydownloadapplicationsfrom
trustedsources,suchasAndroid
Market™.Ifthereareimproperly
installedapplicationsonyourphone,it
maynotworknormallyoraseriouserror
mayoccur.Youmustuninstallthose
applicationsandallassociateddataand
settingsfromthephone.
4. Using the hard reset (Factory
reset)
Ifyourphonedoesnotrestoretotheoriginal
condition,useaHardReset(FactoryReset)
toinitialiseit.
1 Turnthepoweroff.
2 Pressandholdthe3D key+Volume
Down keysimultaneouslyandpressthe
Power/Lockkey.
3 OnceLGLogoappearsonthescreen,
releaseallKeys.
4 Aftersomeseconds,allowyoutoselect
factoryresetfuctionintheAndroid
systemrecoveryutility.
5 ScrollthelistbyVolume keysand
selectitby3D key.
WARNING
IfyouperformaHardReset,alluser
applications,userdataandDRMlicenses
willbedeleted.Pleaseremembertoback
upanyimportantdatabeforeperforming
aHardReset.
Getting to know your phone

35
4. Using the hard reset (Factory
reset)
Ifyourphonedoesnotrestoretotheoriginal
condition,useaHardReset(FactoryReset)
toinitialiseit.
1 Turnthepoweroff.
2 Pressandholdthe3D key+Volume
Down keysimultaneouslyandpressthe
Power/Lockkey.
3 OnceLGLogoappearsonthescreen,
releaseallKeys.
4 Aftersomeseconds,allowyoutoselect
factoryresetfuctionintheAndroid
systemrecoveryutility.
5 ScrollthelistbyVolume keysand
selectitby3D key.
WARNING
IfyouperformaHardReset,alluser
applications,userdataandDRMlicenses
willbedeleted.Pleaseremembertoback
upanyimportantdatabeforeperforming
aHardReset.
5. Opening and switching
applications
MultitaskingiseasywithAndroidbecause
youcankeepmorethanoneapplication
runningatthesametime.There'sno
needtoquitanapplicationbeforeopening
another.Useandswitchbetweenseveral
openapplications.Androidmanageseach
application,stoppingandstartingthemas
neededtoensurethatidleapplicationsdon't
consumeresourcesunnecessarily.
Getting to know your phone

36
To stop applications:
1 Applications>Settings>
Applications>Running services
2 Scrolltothedesiredapplicationand
touchStoptostopit.
TIP! Toreturntorecentapplication,press
andholdtheHomekey.Thescreenthen
displaysalistofapplicationsyouhave
recentlyused.
6. Installing PC Software(LG PC
Suite)
"LGPCSuite"PCSoftwareisaprogramthat
helpsyouconnectyourdevicetoaPCviaa
USBcableandWi-Fi.Onceconnected,you
canusethefunctionsofyourdevicefrom
yourPC.
With your "LG PC Suite" PC Software,
You Can...
• Manageandplayyourmediacontents
(music,movie,pictures)onyourPC.
• Sendmultimediacontentstoyourdevice.
• Synchronisesdata(schedules,contacts,
bookmarks)inyourdeviceandPC.
• Backuptheapplicationsinyourdevice.
• Updatethesoftwaresinyourdevice.
• Backupandrestorethedevice.
• PlaymultimediacontentsofyourPCfrom
otherdevice.
TIP! YoucanusetheHelpmenufromthe
applicationtofindouthowtouseyour
"LGPCSuite"PCsoftware.
Getting to know your phone

37
6. Installing PC Software(LG PC
Suite)
"LGPCSuite"PCSoftwareisaprogramthat
helpsyouconnectyourdevicetoaPCviaa
USBcableandWi-Fi.Onceconnected,you
canusethefunctionsofyourdevicefrom
yourPC.
With your "LG PC Suite" PC Software,
You Can...
• Manageandplayyourmediacontents
(music,movie,pictures)onyourPC.
• Sendmultimediacontentstoyourdevice.
• Synchronisesdata(schedules,contacts,
bookmarks)inyourdeviceandPC.
• Backuptheapplicationsinyourdevice.
• Updatethesoftwaresinyourdevice.
• Backupandrestorethedevice.
• PlaymultimediacontentsofyourPCfrom
otherdevice.
TIP! YoucanusetheHelpmenufromthe
applicationtofindouthowtouseyour
"LGPCSuite"PCsoftware.
Installing "LG PC Suite" PC Software
"LGPCSuite"PCsoftwarecanbe
downloadedfromthewebpageofLG.
1 Gotowww.lg.comandselectacountry
ofyourchoice.
2 GotoSupport>Mobile Phone
Support>SelecttheModel
(LG-P720h).
3 ClickPC SyncfromDownloads,and
clickWINDOW PC Sync Downloadto
download“LG PC Suite”PCsoftware.
Getting to know your phone

38
System Requirements for “LG PC Suite”
PC software
• OS:WindowsXP32bit(Servicepack2),
WindowsVista32bit/64bit,Windows7
32bit/64bit
• CPU:1GHzorhigherprocessor
• Memory:512MBorhigherRAM
• Graphiccard:1024x768resolution,32
bitcolororhigher
• HDD:100MBormorefreeharddisk
space(Morefreeharddiskspacemay
beneededdependingonthevolumeof
datastored.)
• Requiredsoftware:LGintegrateddrivers.
NOTE: LG Integrated USB Driver
LGintegratedUSBdriverisrequired
toconnectanLGdeviceandPCand
installedautomaticallywhenyouinstall
“LGPCSuite”PCsoftware.
7. Synchronising your phone to a
Computer
DataofyourdeviceandPCcanbe
synchronisedeasilywith"LGPCSuite"PC
softwareforyourconvenience.Contacts,
schedules,andbookmarkscanbe
synchronised.
Theprocedureisasfollows:
1 ConnectyourdevicetoPC.(UseaUSB
cableorWi-Ficonnection.)
2 Afterconnection,runtheprogram
andselectthedevicesectionfromthe
Getting to know your phone

39
datastored.)
• Requiredsoftware:LGintegrateddrivers.
NOTE: LG Integrated USB Driver
LGintegratedUSBdriverisrequired
toconnectanLGdeviceandPCand
installedautomaticallywhenyouinstall
“LGPCSuite”PCsoftware.
7. Synchronising your phone to a
Computer
DataofyourdeviceandPCcanbe
synchronisedeasilywith"LGPCSuite"PC
softwareforyourconvenience.Contacts,
schedules,andbookmarkscanbe
synchronised.
Theprocedureisasfollows:
1 ConnectyourdevicetoPC.(UseaUSB
cableorWi-Ficonnection.)
2 Afterconnection,runtheprogram
andselectthedevicesectionfromthe
categoryontheleftsideofthescreen.
3 Click[Personalinformation]toselect.
4 Selectthecheckboxofcontentsto
synchroniseandclicktheSyncbutton.
Getting to know your phone

40
8. Transferring music, photos
and videos using USB mass
storage devices
NOTE: LG Integrated USB Driver
LGintegratedUSBdriverisrequired
toconnectanLGdeviceandPCand
installedautomaticallywhenyouinstall
“LGPCSuite”PCsoftware.
1 Applications>Settings>Storage
tocheckoutthestoragemedia.(If
youwanttotransferfilesfromortoa
memorycard,insertamemorycardinto
thephone.)
2 ConnectthephonetoyourPCusingthe
USBcable.
3 USBconnectionmodelistwillappear,
andselectMass storageoption.
4 Opentheremovablememoryfolderon
yourPC.Youcanviewthemassstorage
contentonyourPCandtransferthe
files.
5 CopythefilesfromyourPCtothedrive
folder.
6 Whenyouarefinished,selectCharge
onlyoptiontodisconnectthephone.
9. Hold your phone upright
Holdyourmobilephonevertically,asyou
wouldaregularphone.TheLG-P720hhas
aninternalantenna.Alsomentionnotto
scratchordamagetheinsideoftheback
coverasthisistheNFCantenna.
Whilemaking/receivingcallsorsending/
receivingdata,avoidholdingthelowerpart
ofthephonewheretheantennaislocated.
Doingsomayaffectcallquality.
Getting to know your phone
42
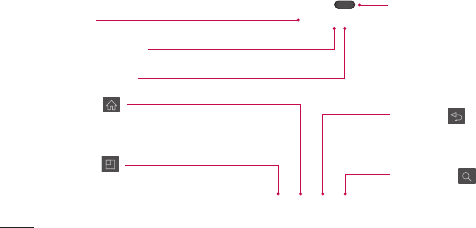
Device components
Earpiece
Front camera lens
Proximity sensor
Home key
ReturntotheHomescreenfromany
screen.
Menu key
Checkwhatoptionsareavailable.
Power/Lock key
•Switchyourphoneon/offby
pressingandholdingthiskey.
•Shortpresstolock/unlockthe
screen.
Back key
Returntothepreviousscreen.
Search key
NOTE: Proximity sensor
Whenreceivingandmakingcalls,the
proximitysensorautomaticallyturns
thebacklightoffandlocksthetouch
screenbysensingwhenthephoneis
nearyourear.Thisextendsbatterylife
andpreventsyoufromunintentionally
activatingthetouchscreenduringcalls.
Getting to know your phone

43
Device components
Power/Lock key
•Switchyourphoneon/offby
pressingandholdingthiskey.
•Shortpresstolock/unlockthe
screen.
Back key
Returntothepreviousscreen.
Search key
NOTE: Proximity sensor
Whenreceivingandmakingcalls,the
proximitysensorautomaticallyturns
thebacklightoffandlocksthetouch
screenbysensingwhenthephoneis
nearyourear.Thisextendsbatterylife
andpreventsyoufromunintentionally
activatingthetouchscreenduringcalls.
WARNING
Placingaheavyobjectonthephoneor
sittingonitcandamagetheLCDand
touchscreenfunctions.Donotcover
theLCDproximitysensorwithprotective
film.Thiscouldcausethesensorto
malfunction.
Getting to know your phone

44
Volume keys
•IntheHomescreen:Controlringervolume.
•Duringacall:Controlyourearpiecevolume.
•Whenplayingatrack:Controlvolume
continuously.
Headset Jack
Power/Lock key
Microphone
Charger, micro USB cable
connector
3D key
•IntheHomescreen:access3DSpacedirectlybyholdingthiskeydown.
•IntheCameramode:takeaphotobypressingthiskey.
•ViewingfilesinGallery:Switchbetween2Dand3Dmodeof
viewingbyshortpressingthiskey.
Rear camera lens
microSD Card slot
SIM card slot
Getting to know your phone

45
3D key
•IntheHomescreen:access3DSpacedirectlybyholdingthiskeydown.
•IntheCameramode:takeaphotobypressingthiskey.
•ViewingfilesinGallery:Switchbetween2Dand3Dmodeof
viewingbyshortpressingthiskey.
Rear camera lens
Back cover
Battery
microSD Card slot
Speaker
SIM card slot
Getting to know your phone

46
Installing the SIM card and
battery
Beforeyoucanstartexploringyournew
phone,you'llneedtosetitup.Toinsertthe
SIMcardandbattery:
1 Toremovethebackcover,holdthe
phonefirmlyinonehand.Withyour
otherhand,pulloffthebackcoverwith
yourthumbasshowninfigure.
2 SlidetheSIMcardintotheSIMcard
slot.Makesurethegoldcontactareaon
thecardisfacingdownwards.
Getting to know your phone

47
2 SlidetheSIMcardintotheSIMcard
slot.Makesurethegoldcontactareaon
thecardisfacingdownwards.
3 Insertthebatteryintoplacebyaligning
thegoldcontactsonthephoneandthe
battery(1)andpressingitdownuntilit
clicksintoplace(2).
Getting to know your phone

48
4 Alignthebackcoveroverthebattery
compartment(1)andpressitdownuntil
itclicksintoplace(2).
Charging your phone
Slideandopenthecoverofthecharger
connectorontheside.Insertthechargerand
plugitintoanelectricaloutlet.
NOTE: Thebatterymustbefullycharged
initiallytoimprovebatterylifetime.
Using the memory card
YourphonesupportstheuseofmicroSD
TM
ormicroSDHC
TM
memorycardsofupto
32GBcapacity.Thesememorycardsare
specificallydesignedformobilephones
andotherultra-smalldevices,andareideal
forstoringmedia-richfilessuchasmusic,
programs,videos,andphotographsforuse
withyourphone.
Getting to know your phone

49
Charging your phone
Slideandopenthecoverofthecharger
connectorontheside.Insertthechargerand
plugitintoanelectricaloutlet.
NOTE: Thebatterymustbefullycharged
initiallytoimprovebatterylifetime.
Using the memory card
YourphonesupportstheuseofmicroSD
TM
ormicroSDHC
TM
memorycardsofupto
32GBcapacity.Thesememorycardsare
specificallydesignedformobilephones
andotherultra-smalldevices,andareideal
forstoringmedia-richfilessuchasmusic,
programs,videos,andphotographsforuse
withyourphone.
To insert a memory card:
Insertthememorycardintotheslot.
Makesurethegoldcontactareaisfacing
downwards.
To remove the memory card safely:
Applications>Settings>Storage>
Unmount SD card.
Getting to know your phone
50
NOTE: Useonlycompatiblememory
cardswithyourphone.Using
incompatiblememorycardsmay
damagethecardanddatastoredonthe
card,aswellasthephone.
WARNING:Donotinsertorremove
thememorycardwhenthephoneis
on.Doingsomaydamagethememory
cardaswellasyourphone,andthe
datastoredonthememorycardmay
getcorrupted.
To format the memory card:
Yourmemorycardmayalreadybe
formatted.Ifitisn't,youmustformatit
beforeyoucanuseit.
NOTE: Allfilesonyourmemorycardare
deletedwhenitisformatted.
1 OntheHomescreen,touchthe
Applicationstab toopenthe
applicationsmenu.
2 ScrollandtouchSettings>Storage.
3 TouchUnmount SD card.
4 TouchFormat SD card > Format SD
card>Erase everything
5 Ifyouhavesetapatternlock,input
thepatternlockthenselectErase
everything.
NOTE: Ifthereiscontentonyourmemory
card,thefolderstructuremaybedifferent
afterformattingasallthefileswillbe
deleted.
Locking and unlocking the
screen
Ifyoudonotusethephoneforawhile,the
Getting to know your phone

51
To format the memory card:
Yourmemorycardmayalreadybe
formatted.Ifitisn't,youmustformatit
beforeyoucanuseit.
NOTE: Allfilesonyourmemorycardare
deletedwhenitisformatted.
1 OntheHomescreen,touchthe
Applicationstab toopenthe
applicationsmenu.
2 ScrollandtouchSettings>Storage.
3 TouchUnmount SD card.
4 TouchFormat SD card > Format SD
card>Erase everything
5 Ifyouhavesetapatternlock,input
thepatternlockthenselectErase
everything.
NOTE: Ifthereiscontentonyourmemory
card,thefolderstructuremaybedifferent
afterformattingasallthefileswillbe
deleted.
Locking and unlocking the
screen
Ifyoudonotusethephoneforawhile,the
screenisturnedoffandlockedautomatically.
Thishelpstopreventaccidentaltouchesand
savesbatterypower.
WhenyouarenotusingtheLG-P720h,
pressthePower/Lockkey tolock
yourphone.
Ifthereareanyprogramsrunningwhenyou
setlockscreen,theymaybestillrunningin
Lockmode.Itisrecommendedthatyouexit
allprogramsbeforeenteringLockmodeto
avoidunnecessarycharges(e.g.phonecalls,
webaccessanddatacommunications).
Getting to know your phone

52
Towakeupyourphone,pressthePower/
Lockkey .Thelockscreenwillappear.
Touchandslidethelockscreenupwardsto
unlockyourhomescreen.Thelastscreen
youviewedwillopen.
TIP!
Towakeupyourphone,youcan
alternativelyusethevolumedownkey
whilethescreenisturnedoff.
Secure your lock screen
Youcanlockyourscreensothatonlyyou
canunlockittoaccessyourphone.
To set an Unlock Pattern, PIN or
Password for the first time:
• Applications>Settings > Location
& security > Set up screen lock >
Pattern, PIN or Password
Onceitisset,youcanchangeitonthe
Change screen lockmenu.
NOTE:
Precautions to take when using
Screen lock.
Itisveryimportanttorememberthe
unlockPattern,Pin&Passwordyou
set.Youwillnotbeabletoaccessyour
phoneifyouuseanincorrectPattern,
Pin&Password5times.Youhave
5opportunitiestoenteryourunlock
Pattern,PINorPassword.Ifyouhave
usedall5opportunities,youcantry
againafter30seconds.
Getting to know your phone

53
Secure your lock screen
Youcanlockyourscreensothatonlyyou
canunlockittoaccessyourphone.
To set an Unlock Pattern, PIN or
Password for the first time:
• Applications>Settings > Location
& security > Set up screen lock >
Pattern, PIN or Password
Onceitisset,youcanchangeitonthe
Change screen lockmenu.
NOTE:
Precautions to take when using
Screen lock.
Itisveryimportanttorememberthe
unlockPattern,Pin&Passwordyou
set.Youwillnotbeabletoaccessyour
phoneifyouuseanincorrectPattern,
Pin&Password5times.Youhave
5opportunitiestoenteryourunlock
Pattern,PINorPassword.Ifyouhave
usedall5opportunities,youcantry
againafter30seconds.
When you cannot recall your unlock
Pattern,PIN or Password:
• If you have forgotten Pattern :
IfyouloggedintoyourGoogleaccount
onthephonebutfailedtoenterthe
correctpattern5times,taptheForgotten
patternbutton.Youarethenrequiredto
loginwithyourGoogleaccounttounlock
yourphone.
IfyouhavenotcreatedaGoogleaccount
onthephoneoryouforgotit,youhaveto
performahardreset.
Getting to know your phone

54
• If you have forgotten PIN or Password:
IfyouforgotyourPINorPassword,you
needtodoHardreset.
Touch screen tips
Herearesometipsonhowtonavigate
aroundyourphone.
Touch–Tochooseamenu/optionoropen
anapplication,touchit.
Touch and hold–Toopenanoptionsmenu
orgrabanobjectyouwanttomove,touch
andholdit.
Drag–Toscrollthroughalistormove
slowly,dragacrossthetouchscreen.
Flick–Toscrollthroughalistormove
quickly,flickacrossthetouchscreen(drag
quicklyandrelease).
Your Home screenGetting to know your phone

55
Touch screen tips
Herearesometipsonhowtonavigate
aroundyourphone.
Touch–Tochooseamenu/optionoropen
anapplication,touchit.
Touch and hold–Toopenanoptionsmenu
orgrabanobjectyouwanttomove,touch
andholdit.
Drag–Toscrollthroughalistormove
slowly,dragacrossthetouchscreen.
Flick–Toscrollthroughalistormove
quickly,flickacrossthetouchscreen(drag
quicklyandrelease).
NOTE:
•Toselectanitem,touchthecentreof
theicon.
•Donotpresstoohard;thetouch
screenissensitiveenoughtopickup
alight,firmtouch.
•Usethetipofyourfingertotouchthe
optionyouwant.Becarefulnotto
touchanyotherkeys.
Your Home screenGetting to know your phone

56
Home screen
Simplyswipeyourfingertotheleftorright
toviewthepanels.Youcancustomise
eachpanelwithwidgets,shortcuts(toyour
favouriteapplications),foldersandwallpaper.
NOTE:Somescreenimagesmaybe
differentdependingonyourphoneprovider.
OnyourHomescreen,youcanviewquick
keysatthebottomofthescreen.Quick
keysprovideeasy,one-touchaccesstothe
functionsyouusethemost.
TouchthePhoneicontobringupthe
touchscreendialpadtomakeacall.
TouchtheContactsicontoopenyour
contacts.
TouchtheMessagingicontoaccess
themessagingmenu.Thisiswhereyoucan
createanewmessage.
TouchtheApplicationstabatthe
bottomofthescreen.Youcanthenview
Your Home screen

57
NOTE:Somescreenimagesmaybe
differentdependingonyourphoneprovider.
OnyourHomescreen,youcanviewquick
keysatthebottomofthescreen.Quick
keysprovideeasy,one-touchaccesstothe
functionsyouusethemost.
TouchthePhoneicontobringupthe
touchscreendialpadtomakeacall.
TouchtheContactsicontoopenyour
contacts.
TouchtheMessagingicontoaccess
themessagingmenu.Thisiswhereyoucan
createanewmessage.
TouchtheApplicationstabatthe
bottomofthescreen.Youcanthenview
allyourinstalledapplications.Toopenany
application,simplytouchtheiconinthe
applicationslist.
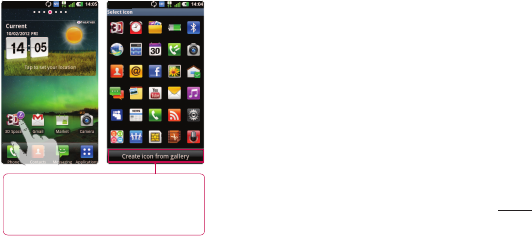
Customising the Home screen
YoucancustomiseyourHomescreen
byaddingwidgets,shortcuts,foldersor
wallpapers.Formoreconvenienceusing
yourphone,addyourfavouritewidgetsto
theHomescreen.
To add items on your Home screen:
1 Home screen>Menu >Add
OR
Your Home screen

58
Touchandholdtheemptypartofthe
Homescreen.
2 IntheEdit modemenu,selectitems
youwanttoadd.Youwillthenseeadded
itemsontheHomescreen.
3 Dragittothelocationyouwantandlift
yourfinger.
To remove an item from the Home
screen:
• Home screen>touchandholdtheicon
youwanttoremove>dragitto
TIP! Toaddanapplicationicontothe
HomescreenfromtheApplications
menu,touchandholdtheapplication
youwanttoadd.
Customising the Application
design from Home screen
Your Home screen
59
To remove an item from the Home
screen:
• Home screen>touchandholdtheicon
youwanttoremove>dragitto
TIP! Toaddanapplicationicontothe
HomescreenfromtheApplications
menu,touchandholdtheapplication
youwanttoadd.
Customising the Application
design from Home screen
NOTE:
Allowyoutomakeanduseaiconby
picturesinyourGallery.
Accordingtoyourpreferenceyoucanfurther
editapplicationiconsontheHomescreen.
1 Tapandholdanapplicationtocustomise
forawhile,thentheeditingiconappears
attheupperrightsideoftheapplication
icon.
2 Taptheeditingiconandselectthe
desiredicondesign.
Your Home screen
63
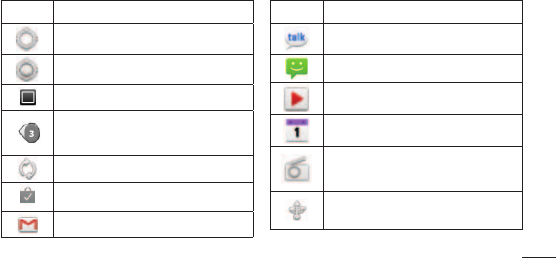
Icon
Description
Vibratemode
Batteryfullycharged
Batteryischarging
Datainandout
PhoneisconnectedtoPCvia
USBcable
Downloadingdata
Uploadingdata
Icon
Description
GPSisacquiring
ReceivinglocationdatafromGPS
On-ScreenPhoneconnected
3morenotificationsnot
displayed
Dataissyncing
Downloadfinished
NewGmail
Icon
Description
NewGoogleTalkmessage
Newmessage
Songisplaying
Upcomingevent
FMradioturnedoninthe
background
USBtetheringisactive
Your Home screen
64
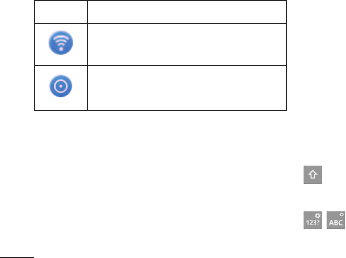
Icon
Description
PortableWi-Fihotspotisactive
BothUSBtetheringandportable
hotspotareactive
Onscreen keyboard
Youcanentertextusingtheonscreen
keyboard.Theonscreenkeyboardappears
automaticallyonthescreenwhenyou
needtoentertext.Tomanuallydisplaythe
keyboard,simplytouchatextfieldwhere
youwanttoentertext.
Using the keypad & entering text
Taponcetocapitalisethenextletteryou
type.Doubletapforallcaps.
Taptoswitchtothenumbersand
symbolskeyboard.Youcanalsotouchand
holdthistabtoviewtheSettingsmenu.
EN Taptoviewortouchandholdto
changethewritinglanguage.
Tap,ortouchandholdtoinsertan
emoticonwhenwritingamessage.
Taptoenteraspace.
Taptocreateanewlineinthemessage
field.
Taptodeletethepreviouscharacter.
Taptohidetheonscreenkeyboard.
Your Home screen

65
Onscreen keyboard
Youcanentertextusingtheonscreen
keyboard.Theonscreenkeyboardappears
automaticallyonthescreenwhenyou
needtoentertext.Tomanuallydisplaythe
keyboard,simplytouchatextfieldwhere
youwanttoentertext.
Using the keypad & entering text
Taponcetocapitalisethenextletteryou
type.Doubletapforallcaps.
Taptoswitchtothenumbersand
symbolskeyboard.Youcanalsotouchand
holdthistabtoviewtheSettingsmenu.
EN Taptoviewortouchandholdto
changethewritinglanguage.
Tap,ortouchandholdtoinsertan
emoticonwhenwritingamessage.
Taptoenteraspace.
Taptocreateanewlineinthemessage
field.
Taptodeletethepreviouscharacter.
Taptohidetheonscreenkeyboard.
Entering accented letters
WhenyouselectFrenchorSpanishasthe
textentrylanguage,youcanenterspecial
FrenchorSpanishcharacters(e.g."á").
Forexample,toinput"á",touchandhold
the"a"keyuntilthezoom-inkeygrows
biggeranddisplayscharactersfromdifferent
languages.
Thenselectthespecialcharacteryouwant.
Your Home screen

66
Whenyoufirstturnonyourphone,youhave
theopportunitytoactivatethenetwork,to
signintoyourGoogleAccountandhowyou
wanttousesomeGoogleservices.
To set up your Google account:
• SignintoaGoogleAccountfromthe
promptedsetupscreen.
OR
• Applications>selectaGoogle
application,suchasGmail>select
Createtocreateanewaccount.
IfyouhaveaGoogleaccount,enteryour
emailaddressandpassword,thentouch
Sign in.
OnceyouhavesetupyourGoogleaccount
onyourphone,yourphoneautomatically
synchroniseswithyourGoogleaccounton
theweb.
Yourcontacts,Gmailmessages,Calendar
eventsandotherinformationfromthese
applicationsandservicesonthewebare
synchronisedwithyourphone.(Thisdepends
onyoursynchronisationsettings)
Google account set up
Aftersigningin,youcanuseGmail™and
takeadvantageofGoogleservicesonyour
phone.

67
IfyouhaveaGoogleaccount,enteryour
emailaddressandpassword,thentouch
Sign in.
OnceyouhavesetupyourGoogleaccount
onyourphone,yourphoneautomatically
synchroniseswithyourGoogleaccounton
theweb.
Yourcontacts,Gmailmessages,Calendar
eventsandotherinformationfromthese
applicationsandservicesonthewebare
synchronisedwithyourphone.(Thisdepends
onyoursynchronisationsettings)
Google account set up
Aftersigningin,youcanuseGmail™and
takeadvantageofGoogleservicesonyour
phone.

68
3D Space
Pressandholdthe3Dkeyontherightside
ofthephonetoaccess
3DSpace.Itwill
showyou3DcontentsuchasYouTube3D,
3DGallery,3DCameraand3Dguide.
3D Guide
The3DGuidecontaininstructionsthat
makes3Dcontenteasiertousewiththis
phone.Itwilladviseyouhowtocreate3D
pictures,connectto3DTVviaHDMI,view
3Dcontentandsharethem.
3D Gallery
1 Touchthe 3DGallery.The3D
imageswillthenbelisted.
2 Chooseoneyouwanttosee.
NOTE
• 3Dcontentisbestviewedwiththescreen
30~40cminfrontofyou.
• Toenjoythe3Deffect,thecontentneedsto
besetintheright3Dformat.Ifthecontent
isnotshownin3D,changetheformatusing
the3Dformatter.
3D Games & Apps
1 Touch 3DGame&Appsandany
3DGamesandApplicationsyouhave
downloadedfromMarketwillbelisted.
Fourapplications,suchasAsphalt6,
Let'sGolf2,Nova,Gulliver'sTravels,are
providedasdefaultapplications.
3D Converter
Youcanenjoypopular2Dgamesin3Dby
using3DConverterpoweredbyHRZengine.
TheGamesyouhaveaddedto3Dconverter

69
3D Space
3D Gallery
1 Touchthe 3DGallery.The3D
imageswillthenbelisted.
2 Chooseoneyouwanttosee.
NOTE
• 3Dcontentisbestviewedwiththescreen
30~40cminfrontofyou.
• Toenjoythe3Deffect,thecontentneedsto
besetintheright3Dformat.Ifthecontent
isnotshownin3D,changetheformatusing
the3Dformatter.
3D Games & Apps
1 Touch 3DGame&Appsandany
3DGamesandApplicationsyouhave
downloadedfromMarketwillbelisted.
Fourapplications,suchasAsphalt6,
Let'sGolf2,Nova,Gulliver'sTravels,are
providedasdefaultapplications.
3D Converter
Youcanenjoypopular2Dgamesin3Dby
using3DConverterpoweredbyHRZengine.
TheGamesyouhaveaddedto3Dconverter
listwillbetransformedto3Dinrealtime
whenyousimplypress3Dhotkeyonthe
right-handsideofthephone.
1 TouchtheApplicationstab,thenselect
3D Converter.
2 Touch
92
Touch and select games you would like to
choose.
You can play games on 3D game converter list, in
3D.
In case you have registered customizable game,
you can set Quality, 3D depth, Depth scale in 3D
settings.
Touch on games list.
Save the settings after setting up.
Notice
3D game converter works on only 2D OpenGL-based
games.
NOTE: 3D converting does not cost you.
2
3
•
1
2
Editing videos
Use Video editor to edit the videos you have captured.
On the homescreen, touch the Applications tab.
Touch Video editor. When you have no project going
on, only New and Help is available. Tap the Menu
key to see the Help.
Touch New and select Add to add videos,images or
Musics you’d like to insert. You can drag files down
to where you want to place.
NOTE: If you select 3D video at first, you can only
add 3D videos having same resolution with audio.
Also you can add only 2D videos If you select 2D
video at first.
1
2
3
Utilities
Y
4
5
6
andselectgamesyouwould
liketochoose.
3 Youcanplaygameson3Dgame
converterlist,in3D.
Incaseyouhaveregisteredcustomizable
game,youcansetQuality, 3D depth,
Depth Scalein3Dsettings.
1 Touch
ongameslist.

70
2 Savethesettingsaftersettingup.
Notice
3Dconverterworksononly2DOpenGL-
basedgames.
NOTE:3Dconvertingdoesnotcostyou.
3D Camera
1 Touchthe 3DCameraandthe
screenwillswitchto3Dcameramode.
Tocreate3Dphotosand3Drecordings,
seethe3Dphotosandvideoson
previouspages.
YouTube 3D
1 TouchYouTube3Dtolaunch.Asthe
screenswitchestoYouTube3Dweb,
various3Dvideosappear.
2 Selectavideoyouwanttowatch.The
videowillbeshowninsidebyside
formatinportraitmode.
3 Rotatetolandscapeand3Dmodewill
turnonautomatically.
3D Space Backup
About backing up and restoring
smart phone data
Itrecommendsthatyouregularlycreate
andsaveabackupfileontheStoragecard,
especiallybeforeyouupdateanysoftware.
MaintainingacurrentbackupfileonStorage
memorymightallowyoutorecoversmart
phonedataifyoursmartphoneislost,
stolen,orcorruptedbyanunforeseenissue.
ThisBackupapplicationsupportbetweenLG
smartphones,otherS/WversionorOS.And
so,whenyoubuythenewLGsmartphone,
youcanbackupthecurrentLG-P720h

71
YouTube 3D
1 TouchYouTube3Dtolaunch.Asthe
screenswitchestoYouTube3Dweb,
various3Dvideosappear.
2 Selectavideoyouwanttowatch.The
videowillbeshowninsidebyside
formatinportraitmode.
3 Rotatetolandscapeand3Dmodewill
turnonautomatically.
3D Space Backup
About backing up and restoring
smart phone data
Itrecommendsthatyouregularlycreate
andsaveabackupfileontheStoragecard,
especiallybeforeyouupdateanysoftware.
MaintainingacurrentbackupfileonStorage
memorymightallowyoutorecoversmart
phonedataifyoursmartphoneislost,
stolen,orcorruptedbyanunforeseenissue.
ThisBackupapplicationsupportbetweenLG
smartphones,otherS/WversionorOS.And
so,whenyoubuythenewLGsmartphone,
youcanbackupthecurrentLG-P720h
smartphonedataonyournewone.
IfyouhavepreloadedapplicationBackup&
Restoreonyoursmartphone,youcanback
upandrestoremostofyoursmartphone
data,Applicationsincludingunprotected
applications,theirsettings,Bookmarks,
Calendar,Call log,Contacts,Downloaded
Applications, Home screen, Messages,
andSystem settings usingthisapplication.
• Toperformamanualbackupofyour
smartphonedata.

72
• Toscheduleautomaticbackupsofyour
smartphonedata.
• Torestoreyoursmartphonedata.
Back up your smart phone data
1 Inserttothememorycardintotheslot
andcheckoutthestoragestatus.
2 TouchtheApplicationtab ,andthen
selectBackup>Backup >Storage
CardorInternal Memory.
3 TouchtheAdd newtoenteraname
foryourbackupfile,andthenselect
Continue.
4 Selectthecheckboxnexttotheitem
youwanttobackup,andthenselect
Continuetobackup.
5 Whenallselectedfilesbackedup,you
willseethemessage‘Done’andselect
Continuetofinishbackingupdata.
Scheduling automatic backups
Youcanalsoenableautomaticbackupsof
thedataonyoursmartphoneaccordingto
yourschedulesetting.Todothis,complete
thefollowingsteps:
Backup
1 Inserttothememorycardintotheslot
andcheckoutthestoragestatus.
2 TouchtheApplicationtab ,andthen
selectBackup>Schedule.
3 OntheScheduled Backup Location
screen,touchStorage Card orInternal
Memory.
4 Fromthelist,selecthowoftenyou
wanttobackupyourdevicedataand
settings,andselectContinue.
5 Selectthecheckboxnexttothedata
youwanttobackup,andthenselect

73
4 Selectthecheckboxnexttotheitem
youwanttobackup,andthenselect
Continuetobackup.
5 Whenallselectedfilesbackedup,you
willseethemessage‘Done’andselect
Continuetofinishbackingupdata.
Scheduling automatic backups
Youcanalsoenableautomaticbackupsof
thedataonyoursmartphoneaccordingto
yourschedulesetting.Todothis,complete
thefollowingsteps:
Backup
1 Inserttothememorycardintotheslot
andcheckoutthestoragestatus.
2 TouchtheApplicationtab ,andthen
selectBackup>Schedule.
3 OntheScheduled Backup Location
screen,touchStorage Card orInternal
Memory.
4 Fromthelist,selecthowoftenyou
wanttobackupyourdevicedataand
settings,andselectContinue.
5 Selectthecheckboxnexttothedata
youwanttobackup,andthenselect
Continuetofinishthescheduleset.
Restoring smart phone data
Torestoredatathatisinyouron-board
devicememory,massstoragemodemust
beturnedoff.
NOTE:Allfilesthatarestoredonyour
smartphonearedeletedbeforethe
backupfileisrestored.
1 Inserttothememorycardintotheslot
andcheckoutthestoragestatus.

74
2 TouchtheApplicationtab ,andthen
selectBackup>Restore>Storage
Card orInternal Memory.
3 OntheRestore screen,selectabackup
filethatcontainsthedatayouwantto
restore.
4 Selectthecheckboxnexttotheitem
youwanttorestore,andthenselect
Continuetorestoretophone.
NOTE:Pleasenotethatyourphonedata
willbeoverwrittenwiththecontentsof
yourbackup.
5 Ifthebackupfileisencrypted,typethe
passwordthatyousettoencrypt.
6 Whenallselectedfilesrestored,youwill
seethemessage‘Done’andselectYes
torestartthephone.
Backup
NOTE:
•WhileinMassstoragemode,this
Back&RestoreApplicationcannotbe
functioned.SelectChargeonlyoption
whentheUSBcableisconnected.
•YoucansetEnableencryptionto
encryptyourbackupfilesforextra
protection.
PresstheMenu fromtheBackup
screen,andselectSettings>Securityand
selectthecheckbox.Andafterenabling

75
NOTE:Pleasenotethatyourphonedata
willbeoverwrittenwiththecontentsof
yourbackup.
5 Ifthebackupfileisencrypted,typethe
passwordthatyousettoencrypt.
6 Whenallselectedfilesrestored,youwill
seethemessage‘Done’andselectYes
torestartthephone.
Backup
NOTE:
•WhileinMassstoragemode,this
Back&RestoreApplicationcannotbe
functioned.SelectChargeonlyoption
whentheUSBcableisconnected.
•YoucansetEnableencryptionto
encryptyourbackupfilesforextra
protection.
PresstheMenu fromtheBackup
screen,andselectSettings>Securityand
selectthecheckbox.Andafterenabling
encryption,Torestoresynchronisedorganizer
data,youmusthaveanactivationpassword.
NOTE:
Youcanalsoenableautomaticdeleteold
backupsandonlykeepthemostrecent
backup.PresstheMenufromthe
Backupscreen,andselectSettings
> Scheduled backup > Auto delete
old backupstoselectthenumberof
scheduledbackupstokeep.
76
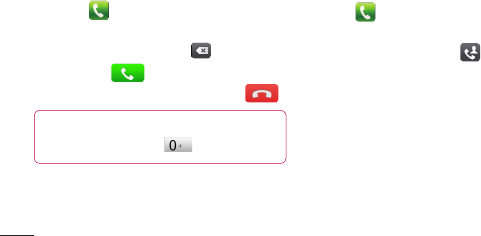
Making a call
1 Touch toopenthekeypad.
2 Enterthenumberusingthekeypad.To
deleteadigit,touchthe .
3 Touchthe tomakeacall.
4 Toendacall,touchtheEndicon .
TIP!
Toenter"+"tomakeinternational
calls,touchandhold .
Making a video call
1 Touchtoopenthekeypad.
2 Enterthephonenumberasbefore.
3 TouchtheVideo callicontomakea
videocall.
4 Ifyoudonotwanttousethespeaker
phone,touchSpeakerandmakesureyou
haveyourheadsetpluggedin.
5 Whilethevideocallisconnecting,youwill
seeyourownimage:aftertheotherparty
answers,youwillseetheirimageonthe
screen.Adjusttheinnercamerapositionif
necessary.
Calls
6 Toendavideocall,touchEnd.
Private:Youcanchangetheimageinstead
ofshowingtheliveimage.
Dialpad:Typeinanumber.
Hold:Mutethemicrophoneandpausethe
video.
Mute:Mutethemicrophone.
Speaker:Speakeronoroff.
In Video call Menu
Capture -Youcancaptureanimageofthe
otherpartyoryourown.

77
Making a video call
1 Touchtoopenthekeypad.
2 Enterthephonenumberasbefore.
3 TouchtheVideo callicontomakea
videocall.
4 Ifyoudonotwanttousethespeaker
phone,touchSpeakerandmakesureyou
haveyourheadsetpluggedin.
5 Whilethevideocallisconnecting,youwill
seeyourownimage:aftertheotherparty
answers,youwillseetheirimageonthe
screen.Adjusttheinnercamerapositionif
necessary.
Calls
6 Toendavideocall,touchEnd.
Private:Youcanchangetheimageinstead
ofshowingtheliveimage.
Dialpad:Typeinanumber.
Hold:Mutethemicrophoneandpausethe
video.
Mute:Mutethemicrophone.
Speaker:Speakeronoroff.
In Video call Menu
Capture -Youcancaptureanimageofthe
otherpartyoryourown.
Use back/front camera -Switchcameras.
Calling your contacts
1 Touch toopenyourcontacts.
2 Scrollthroughthecontactlistorenter
thefirstfewlettersofthecontactyou
wanttocallbytouchingSearch.
3 Inthelist,touchthecontactyouwant
tocall.

78
Answering and rejecting a call
WhenyoureceiveacallinLockstate,drag
the totherighttoanswerincomingcall.
Dragthe tothelefttorejectanincoming
call.
DragtheExcuse msgbarfromthebottom
ifyouwanttosendone.
TIP! Excuse messages
Youcansendamessagequicklyusing
thisfunction.Thisisusefulifyouneed
toreplythemessageduringameeting.
Adjusting call volume
Toadjustthein-callvolumeduringacall,
usetheVolumeupanddownkeysonthe
left-handsideofthephone.
Making a second call
1 Duringyourfirstcall,touchDialpad
anddialthenumber.Also,you
cansearchyourcontactsbytouching
Contacts andselectthenumberyou
wanttocall.
2 Touchthe tomakethecall.
Calls
3 Bothcallsaredisplayedonthecall
screen.Yourinitialcallislockedandput
onhold.
4 Touchthedisplayednumbertotoggle
betweencalls.Ortouch Merge call
tomakeaconferencecall.
5 Toendactivecall,touchEnd orpress
HomeKeyandslidethenotificationbar
downandselectEnd call.
NOTE: Youarechargedforeachcall
youmake.

79
Adjusting call volume
Toadjustthein-callvolumeduringacall,
usetheVolumeupanddownkeysonthe
left-handsideofthephone.
Making a second call
1 Duringyourfirstcall,touchDialpad
anddialthenumber.Also,you
cansearchyourcontactsbytouching
Contacts andselectthenumberyou
wanttocall.
2 Touchthe tomakethecall.
Calls
3 Bothcallsaredisplayedonthecall
screen.Yourinitialcallislockedandput
onhold.
4 Touchthedisplayednumbertotoggle
betweencalls.Ortouch Merge call
tomakeaconferencecall.
5 Toendactivecall,touchEnd orpress
HomeKeyandslidethenotificationbar
downandselectEnd call.
NOTE: Youarechargedforeachcall
youmake.
Viewing your call logs
OntheHomescreen,touch andchoose
theCall logtab.
Viewacompletelistofalldialled,received
andmissedvoicecalls.
TIP!
•Touchanycalllogentrytoviewthe
date,timeanddurationofthecall.
•PresstheMenukey,thentouch
Delete all todeletealltherecorded
items.

80
Call settings
Youcanconfigurephonecallsettingssuch
ascallforwardingandotherspecialfeatures
offeredbyyourcarrier.
1 OntheHomescreen,touchthe
Applicationstab toopenthe
applicationsmenu.
2 ScrollandtouchSettings.
3 TapCall andchoosetheoptionsthat
youwanttoadjust.
Addcontactstoyourphoneandsynchronise
themwiththecontactsinyourGoogle
accountorotheraccountsthatsupport
contactsyncing.
Searching for a contact
In the Home screen
1 Touch toopenyourcontacts.
2 TouchSearchandenterthecontact
nameusingthekeyboard.
Adding a new contact
1 Touch ,enterthenewcontact's
number,thenpresstheMenukey.Touch
ContactsCalls

81
Addcontactstoyourphoneandsynchronise
themwiththecontactsinyourGoogle
accountorotheraccountsthatsupport
contactsyncing.
Searching for a contact
In the Home screen
1 Touch toopenyourcontacts.
2 TouchSearchandenterthecontact
nameusingthekeyboard.
Adding a new contact
1 Touch ,enterthenewcontact's
number,thenpresstheMenukey.Touch
Add to contacts tabandthenCreate
new contact.
2 Ifyouwanttoaddapicturetothenew
contact,touchtheimagearea.
ChoosefromCapture pictureorPick
from Gallery.
3 Selectthecontacttypebytouching
.
4 Touchacategoryofcontactinformation
andenterthedetailsaboutyourcontact.
5 TouchSave.
Favourite contacts
Youcanclassifyfrequentlycalledcontacts
asfavourites.
ContactsCalls

82
Adding a contact to your favourites
1 Touch toopenyourcontacts.
2 Touchacontacttoviewtheirdetails.
3 Touchthestartotherightofthe
contact'sname.Theoutlineofstaricon
turnsinwhite.
Removing a contact from your favourites
list
1 Touch toopenyourcontacts.
2 TouchtheGroupstab,select
Favouritesatthetopofthelistand
chooseacontacttoviewitsdetails.
3 Touchthewhiteoutlinedstartotheright
ofthecontact'sname.Thestarturns
greyandthecontactisremovedfrom
yourfavourites.
Import or export contacts
Toimport/exportcontactfiles(invcfformat)
fromastoragememory(Internalstorage/
memorycard)orSIMorUSIMcardtoyour
deviceorviceversa.
1 Touch toopenyourcontacts.
2 PressMenu >More>Import/
Export.
Contacts
3 Selectandesiredoptionforimporting/
exporting.
Ifyouhavemorethanoneaccount,
selectanaccounttowhichyouwantto
addthecontact.
4 Selectcontactfilestoimport/exportand
selectOKtoconfirm.
Moving Contacts from your Old
Device to your New Device
ExportyourcontactsasaCSVfilefrom
yourolddevicetoyourPCusingaPCsync
program.

83
3 Touchthewhiteoutlinedstartotheright
ofthecontact'sname.Thestarturns
greyandthecontactisremovedfrom
yourfavourites.
Import or export contacts
Toimport/exportcontactfiles(invcfformat)
fromastoragememory(Internalstorage/
memorycard)orSIMorUSIMcardtoyour
deviceorviceversa.
1 Touch toopenyourcontacts.
2 PressMenu >More>Import/
Export.
Contacts
3 Selectandesiredoptionforimporting/
exporting.
Ifyouhavemorethanoneaccount,
selectanaccounttowhichyouwantto
addthecontact.
4 Selectcontactfilestoimport/exportand
selectOKtoconfirm.
Moving Contacts from your Old
Device to your New Device
ExportyourcontactsasaCSVfilefrom
yourolddevicetoyourPCusingaPCsync
program.
1 Install"LGPCSuite"PCsoftwareonthe
PC.Runtheprogramandconnectyour
devicetothePCusingaUSBcable.
2 Fromthetopofthescreen,select
Device>Import personal information
>Import contacts.
3 Apop-uptoopenacontactsfilewill
appear.
4 SelectacontactsfileandclickOpen.
5 Apop-uptoimportanewcontactfrom
PCtothecontactsinthedevicewill
appear.

84
6 Ifthecontactsinthedeviceandnew
contactsfromPCaredifferent,selecta
contactyouwanttoimportfromPC.
7 Clickthe[OK]buttontoimportanew
contactfromPCtothedevice.
YourLG-P720hcombinesSMSandMMS
intooneintuitive,easy-to-usemenu.
Sending a message
1 Touch icononthehomescreen,and
touchNew messagetoopenablank
message.
2 Enteracontactnameorcontactnumber
intheTofield.
Asyouenterthecontactname,
matchingcontactsappear.Youcan
touchasuggestedrecipient.Youcan
addmultiplecontacts.
MessagingContacts

85
YourLG-P720hcombinesSMSandMMS
intooneintuitive,easy-to-usemenu.
Sending a message
1 Touch icononthehomescreen,and
touchNew messagetoopenablank
message.
2 Enteracontactnameorcontactnumber
intheTofield.
Asyouenterthecontactname,
matchingcontactsappear.Youcan
touchasuggestedrecipient.Youcan
addmultiplecontacts.
NOTE: Youwillbechargedforatext
messageforeverypersonyousendthe
messageto.
3 TouchEnter messagefieldandstartto
composeyourmessage.
4 PresstheMenukey toopenthe
Optionsmenu.ChoosefromAdd
subject, Discard, Add Cc/Bcc, Attach,
Insert smileyandsoon.
5 TouchSendtosendyourmessage.
6 Themessagescreenopens,withyour
MessagingContacts

86
messageafterRecipientName/Number.
Responsesappearonthescreen.Asyou
viewandsendadditionalmessages,a
messagethreadiscreated.
Warning:
The160-characterlimitmayvaryfrom
countrytocountrydependingonthe
languageandhowtheSMSiscoded.
Warning:
Ifanimage,videooraudiofileisadded
toanSMSmessage,itisautomatically
convertedintoanMMSmessageand
youarechargedaccordingly.
Threaded box
Messages(SMS,MMS)exchanged
withanotherpartycanbedisplayed
inchronologicalordersothatyoucan
convenientlyseeanoverviewofyour
conversation.
Using Smilies
LivenupyourmessagesusingSmilies.
Whenwritinganewmessage,pressthe
Menukey ,thenchooseInsert smiley
inthe More.
Messaging

87
Warning:
Ifanimage,videooraudiofileisadded
toanSMSmessage,itisautomatically
convertedintoanMMSmessageand
youarechargedaccordingly.
Threaded box
Messages(SMS,MMS)exchanged
withanotherpartycanbedisplayed
inchronologicalordersothatyoucan
convenientlyseeanoverviewofyour
conversation.
Using Smilies
LivenupyourmessagesusingSmilies.
Whenwritinganewmessage,pressthe
Menukey ,thenchooseInsert smiley
inthe More.
Changing your message settings
YourLG-P720hmessagesettingsare
predefined,soyoucansendmessages
immediately.Youcanchangethesettings
basedonyourpreferences.
TouchMessagingicon onthehome
screenandtouchtheMenukey ,then
tapSettings.
Messaging

88
YoucanusetheEmailapplicationtoread
emailsfromservicesotherthanGmail.The
Emailapplicationsupportsthefollowing
accounttypes:POP3,IMAPandExchange.
Yourserviceproviderorsystemadministrator
canprovidetheaccountsettingsyouneed.
Managing an email account
ThefirsttimeyouopentheE-mail
application,asetupwizardopenstohelpyou
tosetupanemailaccount.
To add another email account:
1 Applications>E-mail>inthe
accountscreen,touchMenu>Add
account.
Aftertheinitialsetup,Emaildisplays
thecontentsofyourinbox.Ifyouhave
addedmorethanoneaccount,youcan
switchamongaccounts.
To change an email account's setting:
1 Applications>E-mail>inthe
accountscreen,touchMenu>
Settings.
E-mail
To delete an email account:
1 Applications>E-mail>inthe
accountscreen,touchMenu>Settings
>touchanaccountyouwanttodelete
>Remove account.
2 TouchtheRemovebuttoninthedialog
boxtoconfirmthatyouwanttodelete
theaccount.
Email account screen
YoucantouchanaccounttoviewitsInbox.
Theaccountfromwhichyousendemailby
defaultisindicatedwithatick.

89
accountscreen,touchMenu>Add
account.
Aftertheinitialsetup,Emaildisplays
thecontentsofyourinbox.Ifyouhave
addedmorethanoneaccount,youcan
switchamongaccounts.
To change an email account's setting:
1 Applications>E-mail>inthe
accountscreen,touchMenu>
Settings.
E-mail
To delete an email account:
1 Applications>E-mail>inthe
accountscreen,touchMenu>Settings
>touchanaccountyouwanttodelete
>Remove account.
2 TouchtheRemovebuttoninthedialog
boxtoconfirmthatyouwanttodelete
theaccount.
Email account screen
YoucantouchanaccounttoviewitsInbox.
Theaccountfromwhichyousendemailby
defaultisindicatedwithatick.
–TouchtoopenyourCombinedInbox,
withmessagessenttoallofyouraccounts.
MessagesintheCombinedInboxarecolour
codedontheleft,byaccount,usingthe
samecoloursusedforyouraccountsinthe
Accountsscreen.
–Touchthefoldericontoopenthe
accountfolders.
Onlythemostrecentemailsinyouraccount
aredownloadedtoyourphone.Todownload
more(earlier)emailmessages,touchLoad
more emails(Exchangeaccountisnot
supported)atthebottomoftheemailslist.

90
Working with account folders
EachaccounthasanInbox,Outbox,Sent
andDraftsfolder.Dependingonthefeatures
supportedbyyouraccount'sserviceprovider,
youmayhaveadditionalfolders.
Composing and sending email
To compose and send a message
1 WhileintheE-mailapplication,touch
toCompose.
2 Enteranaddressforthemessage's
intendedrecipient.Asyouentertext,
matchingaddressesareofferedfrom
yourContacts.Separatemultiple
addresseswithsemicolon.
3 AddCc/Bccandaddattachmentfilesif
required.
4 Enterthetextofthemessage.
5 TouchtheSendbutton.
Ifyouaren'tconnectedtoanetwork,for
example,ifyou'reworkinginairplane
mode,themessagesthatyousendare
storedinyourOutboxfolderuntilyou're
connectedtoanetworkagain.
Ifitcontainsanypendingmessages,
theOutboxisdisplayedontheAccounts
screen.
TIP! Whenanewemailarrivesinthe
inbox,youwillreceiveanotificationby
soundorvibration.
E-mail

91
matchingaddressesareofferedfrom
yourContacts.Separatemultiple
addresseswithsemicolon.
3 AddCc/Bccandaddattachmentfilesif
required.
4 Enterthetextofthemessage.
5 TouchtheSendbutton.
Ifyouaren'tconnectedtoanetwork,for
example,ifyou'reworkinginairplane
mode,themessagesthatyousendare
storedinyourOutboxfolderuntilyou're
connectedtoanetworkagain.
Ifitcontainsanypendingmessages,
theOutboxisdisplayedontheAccounts
screen.
TIP! Whenanewemailarrivesinthe
inbox,youwillreceiveanotificationby
soundorvibration.
E-mail
92
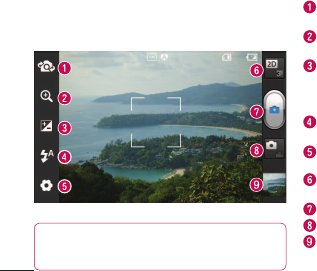
Switch camera-Youcanmovetotheinternalcamera
fromtheexternalone.
Zoom -Zoominorout.Alternatively,youcanusethe
sidevolumekeys.
Brightness -Thisdefinesandcontrolstheamount
ofsunlightenteringtheimage.Slidethebrightness
indicatoralongthebartowards“-”tolowertheimage
brightnessortowards“+”toincreaseit.
Flash -Allowsyoutoturnontheflashwhentakinga
photoinadarkplace.
Settings -Touchthisicontoopenthesettingsmenu.
SeeUsingtheadvancedsettings.
Transition between 2D - 3D modes-Touchto
switchphotoshootmodebetween2Dand3D.
Taking a photo
Video mode-Touchthisicontoswitchtovideomode.
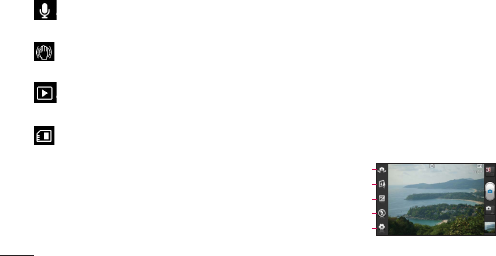
Gallery -Touchthelastphotoyoutooktoview.This
enablesyoutoaccessyourgalleryandviewsaved
photoswithincameramode.
NOTE: Thememorycapacitymaydifferdepending
ontheshootingsceneorshootingconditions.
Camera
Getting to know the viewfinder Taking a quick photo
1 OpentheCameraapplication.
2 Holdthephone,pointthelenstowards
thesubjectyouwanttophotograph.
3 Touchyourfingeronthesubjectfrom
thescreenandafocusboxwillappear.
4 Whenthefocusboxturnsgreen,the
camerahasfocusedonyoursubject.
5 TouchtheCaptureicon totakethe
picture.

93
Switch camera-Youcanmovetotheinternalcamera
fromtheexternalone.
Zoom -Zoominorout.Alternatively,youcanusethe
sidevolumekeys.
Brightness -Thisdefinesandcontrolstheamount
ofsunlightenteringtheimage.Slidethebrightness
indicatoralongthebartowards“-”tolowertheimage
brightnessortowards“+”toincreaseit.
Flash -Allowsyoutoturnontheflashwhentakinga
photoinadarkplace.
Settings -Touchthisicontoopenthesettingsmenu.
SeeUsingtheadvancedsettings.
Transition between 2D - 3D modes-Touchto
switchphotoshootmodebetween2Dand3D.
Taking a photo
Video mode-Touchthisicontoswitchtovideomode.
Gallery -Touchthelastphotoyoutooktoview.This
enablesyoutoaccessyourgalleryandviewsaved
photoswithincameramode.
Camera
Taking a quick photo
1 OpentheCameraapplication.
2 Holdthephone,pointthelenstowards
thesubjectyouwanttophotograph.
3 Touchyourfingeronthesubjectfrom
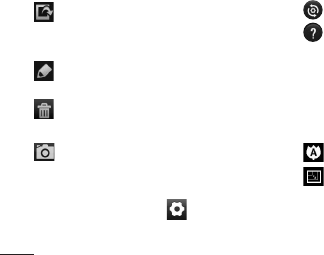
thescreenandafocusboxwillappear.
4 Whenthefocusboxturnsgreen,the
camerahasfocusedonyoursubject.
5 TouchtheCaptureicon totakethe
picture.
Once you've taken the photo
Touch toviewthelastphotoyou
captured.
TouchMenu>Sharetoshareyour
photousingMessaging, Social+,
Bluetooth, Picasa, Google+, Gmail,
E-mail orSmartShare.
TIP! IfyouhaveanSNSaccountandset
ituponyourphone,youcanshareyour
photowiththeSNScommunity.
94
TouchMenu>More>Set asto
usetheimageasaContact iconor
Wallpaper.
TouchMenu>More>Edittoedit
thepicture.
TouchMenu >Delete>Confirm
deletetodeletethepicture.
Touchtogototheviewfinderscreen.
Using the advanced settings
Intheviewfinder,touch toopenall
advancedoptions.
–Restoreallcameradefaultsettings.
–Touchwheneveryouwanttoknow
howthisfunctionoperates.Thisprovidesyou
withaquickguide.
Changecamerasettingsbyscrollingthrough
thelist.Afterselectingtheoption,touchthe
Backkey.
–Focusesonthespecificspot.
–Selecttheimageresolution.Ifyou
choosethehighresolution,thefilesizewill
increase,whichmeansyouwillbeableto
storefewerphotosinthememory.
–Findsthecolorandlightsettings
appropriateforthecurrentenvironment.
ChoosefromNormal, Portrait, Landscape,
SunsetandNight.
–Improvescolourqualitiesindifferent
lightingconditions.
–Chooseacolourtoneforyournew
photo.ChoosebetweenNone, Black&white,
Sepia, Negative.
–Takespicturesafewsecondsafter
clickingtheshutter.Thisoptionisidealifyou
wanttobeinthepicture.
Camera

95
–Restoreallcameradefaultsettings.
–Touchwheneveryouwanttoknow
howthisfunctionoperates.Thisprovidesyou
withaquickguide.
Changecamerasettingsbyscrollingthrough
thelist.Afterselectingtheoption,touchthe
Backkey.
–Focusesonthespecificspot.
–Selecttheimageresolution.Ifyou
choosethehighresolution,thefilesizewill
increase,whichmeansyouwillbeableto
storefewerphotosinthememory.
–Findsthecolorandlightsettings
appropriateforthecurrentenvironment.
ChoosefromNormal, Portrait, Landscape,
SunsetandNight.
–Improvescolourqualitiesindifferent
lightingconditions.
–Chooseacolourtoneforyournew
photo.ChoosebetweenNone, Black&white,
Sepia, Negative.
–Takespicturesafewsecondsafter
clickingtheshutter.Thisoptionisidealifyou
wanttobeinthepicture.
–Selectthedesiredshotmode.
–Allowsyoutoreviewimagesafter
takingpictures.
–Selectoneofthefourshuttersounds.
–Activatetouseyourphone'slocation-
basedservices.Takepictureswherever
youareandtagthemwiththelocation.
Ifyouuploadtaggedpicturestoablog
thatsupportsgeotagging,youcanseethe
picturesdisplayedonamap.
Camera

96
NOTE: Thisfunctionisonlyavailable
whenGPSisactive.
–Selectstoragetosaveimages.
TIP! Whenyouexitthecamera,some
settingsreturntotheirdefaults,suchas
whitebalance,timerandscenemode.
Checkthesebeforeyoutakeyournext
photo.
TIP! TheSettingsmenuissuperimposed
overtheviewfinderso,whenyouchange
elementsoftheimagecolourorquality,
youseeapreviewoftheimagechange
behindtheSettingsmenu.
Getting to know the viewfinder
Video camera
NOTE: Thezoomfunctioncannotbeavailable
whilevideorecording.
Camera

97
TIP! TheSettingsmenuissuperimposed
overtheviewfinderso,whenyouchange
elementsoftheimagecolourorquality,
youseeapreviewoftheimagechange
behindtheSettingsmenu.
Switch camera -Youcanmovetotheinternalcamera
fromtheexternalone.
Zoom-Zoominorout.Alternatively,youcanusethe
sidevolumekeys.
Brightness -Thisdefinesandcontrolstheamount
ofsunlightenteringtheimage.Slidethebrightness
indicatoralongthebartowards“-”tolowertheimage
brightnessortowards“+”toincreaseit.
Flash -Allowsyoutoturnontheflashwhentakinga
photoinadarkplace.
Settings -Touchthisicontoopenthesettingsmenu.
SeeUsingtheadvancedsettings.
Transition between 2D - 3D modes -Touchto
switchphotoshootmodebetween2Dand3D.
Start recording
Camera mode-Touchthisicontoswitchtocamera
mode.
Gallery -Touchtoviewthevideoyourecordedlast.
Thisenablesyoutoaccessyourgalleryandviewyour
savedvideosfromwithinthevideomode.
Getting to know the viewfinder
Video camera
NOTE: Thezoomfunctioncannotbeavailable
whilevideorecording.
Camera

98
Shooting a quick video
1 TouchtheCameramodebuttondown
andtheiconchangesto .
2 Thevideocameraviewfinderappearson
thescreen.
3 Holdingthephone,pointthelens
towardsthesubjectyouwanttocapture
inyourvideo.
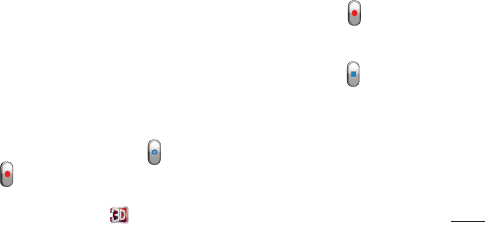
4 PresstheRecord buttononcetostart
recording.
5 Aredlightblinksatthebottomofthe
viewfinder,alongwithatimershowingthe
lengthofthevideo.
6 Touch onthescreentostop
recording.
After shooting a video
Yourcapturedvideowillappearonthe
Gallery.Touch toviewthelastvideoyou
captured.
Touchtoplaythevideo.
TouchMenu>SharetoshareVideo
usingMessaging, Bluetooth, YouTube,
Gmail, E-mail orSmartShare.
TouchMenu >Delete >Confirm
deletetodeletethevideo.
TouchtoGototheviewfinderscreen.
Using the advanced settings
Usingtheviewfinder,touch toopenall
theadvancedoptions.
–Restoreallvideocameradefault
settings.
–Touchifyouwanttoknowhowthis
functionoperates.Thisprovidesyouwitha
quickguide.
Video camera

99
lengthofthevideo.
6 Touch onthescreentostop
recording.
After shooting a video
Yourcapturedvideowillappearonthe
Gallery.Touch toviewthelastvideoyou
captured.
Touchtoplaythevideo.
TouchMenu>SharetoshareVideo
usingMessaging, Bluetooth, YouTube,
Gmail, E-mail orSmartShare.
TouchMenu >Delete >Confirm
deletetodeletethevideo.
TouchtoGototheviewfinderscreen.
Using the advanced settings
Usingtheviewfinder,touch toopenall
theadvancedoptions.
–Restoreallvideocameradefault
settings.
–Touchifyouwanttoknowhowthis
functionoperates.Thisprovidesyouwitha
quickguide.
Adjustthevideocamerasettingbyscrolling
throughthelist.Afterselectingtheoption,
touchtheBackkey.
–Touchtosetthesize(inpixels)ofthe
videoyouarerecording.
–Improvescolourqualitiesindifferent
lightingconditions.
-Chooseacolourtoneforyournew
photo.ChoosebetweenNone, Black&white,
Sepia, Negative.
-Setatimelimitforyourvideo.Choose
betweenNormal andMMS tolimitthe
maximumsizetosendasanMMSmessage.
Video camera
100
–ChooseMutetorecordavideo
withoutsound.
–Selecttotakeavideowithoutthe
camerawobblingorshaking.
–Autoreviewautomaticallyshowsyou
thevideoyoujustrecorded.
–Selectstoragetosavevideos.
Adjusting the volume when
viewing a video
Toadjustthevolumeofavideowhileitis
playing,usethevolumekeysontheleft-
handsideofthephone.
3D photos and videos
Taking a 3D Photo
a
b
c
d
e
a
Switch camera -Youcanmovetotheinternalcamera
fromtheexternalone.
b
3D focus-Youcanmanuallyfine-tune3Dfocusby
adjustingtheamountofoverlappingwithabarthat
appearsatthebottom.Beforestartingtotakea3D
picture,youcanusethisfunction.
c
Brightness -Thisdefinesandcontrolstheamount
ofsunlightenteringthevideo.Slidethebrightness
indicatoralongthebartowards“-”tolowerthevideo
brightnessor“+”toincreaseit.
d
Flash - Allowsyoutoturnontheflashwhencapturing
avideoindarkplace.
Video camera

101
Adjusting the volume when
viewing a video
Toadjustthevolumeofavideowhileitis
playing,usethevolumekeysontheleft-
handsideofthephone.
3D photos and videos
Taking a 3D Photo
a
Switch camera -Youcanmovetotheinternalcamera
fromtheexternalone.
b
3D focus-Youcanmanuallyfine-tune3Dfocusby
adjustingtheamountofoverlappingwithabarthat
appearsatthebottom.Beforestartingtotakea3D
picture,youcanusethisfunction.
c
Brightness -Thisdefinesandcontrolstheamount
ofsunlightenteringthevideo.Slidethebrightness
indicatoralongthebartowards“-”tolowerthevideo
brightnessor“+”toincreaseit.
d
Flash - Allowsyoutoturnontheflashwhencapturing
avideoindarkplace.
e
Settings -Touchthisicontoopenthesettingsmenu.
SeeUsingtheadvancedsettings.
3D focus mode-Selecttheauto3Dfocusoption
fromBorder,Center.Borderusesaborderarea
foroptimizingtheamountofoverlapping.Center
usesacenterareaforit.Youcanalsofind-tune
manuallywith3Dfocusfunctionofviewfinder.
1 OpentheCameraapplication.
2 Touchthe3Dbutton ontheviewfinder.
3 Holdingthephone,pointthelenstowardsthe
subjectyouwanttophotograph.
4 TouchtheCaptureicon
.
Video camera

102
5 Thecamerabringstheimageintofocus.Whenthe
imageisinfocus,thefocusindicatorsineachcorner
turngreenandthecameratakesapicture.
Recording a 3D Video
a
b
c
d
e
a
Switch camera -Youcanmovetotheinternalcamera
fromtheexternalone.
b
3D focus -Youcanmanuallyfine-tune3Dfocusby
adjustingtheamountofoverlappingwithabarthat
appearsatthebottom.Beforestartingtotakea3D
video,youcanusethisfunction.Youcan'tadjustthis
functionwhilerecording.
c
Brightness -Thisdefinesandcontrolstheamount
ofsunlightenteringthevideo.Slidethebrightness
indicatoralongthebartowards“-”tolowerthevideo
brightnessor“+”toincreaseit.
d
Flash - Allowsyoutoturnontheflashwhencapturing
avideoindarkplace.
e
Settings -Touchthisicontoopenthesettingsmenu.
SeeUsingtheadvancedsettings.
3D focus mode -Selecttheauto3Dfocusoption
fromBorder,Center.Borderusesaborderarea
foroptimizingtheamountofoverlapping.Center
usesacenterareaforit.Youcanalsofind-tune
manuallywith3Dfocusfunctionofviewfinder.
Stabilization -SetOntocompensateunsteady
hand.
1 OpentheCameraapplicationandtouchthe
cameramodebutton.Thecaptureiconwill
changeto.
2 Thevideocameraviewfinderwillappearon
thescreen:touchthe3Dbutton .
Video camera
103
b
3D focus -Youcanmanuallyfine-tune3Dfocusby
adjustingtheamountofoverlappingwithabarthat
appearsatthebottom.Beforestartingtotakea3D
video,youcanusethisfunction.Youcan'tadjustthis
functionwhilerecording.
c
Brightness -Thisdefinesandcontrolstheamount
ofsunlightenteringthevideo.Slidethebrightness
indicatoralongthebartowards“-”tolowerthevideo
brightnessor“+”toincreaseit.
d
Flash - Allowsyoutoturnontheflashwhencapturing
avideoindarkplace.
e
Settings -Touchthisicontoopenthesettingsmenu.
SeeUsingtheadvancedsettings.
3D focus mode -Selecttheauto3Dfocusoption
fromBorder,Center.Borderusesaborderarea
foroptimizingtheamountofoverlapping.Center
usesacenterareaforit.Youcanalsofind-tune
manuallywith3Dfocusfunctionofviewfinder.
Stabilization -SetOntocompensateunsteady
hand.
1 OpentheCameraapplicationandtouchthe
cameramodebutton.Thecaptureiconwill
changeto.
2 Thevideocameraviewfinderwillappearon
thescreen:touchthe3Dbutton .
3 Holdingthephoneinlandscapeview,pointthe
lenstowardsthevideosubject.
4 Touchthestartvideoicon.Aredlightblinks
atthebottomoftheviewfinder,alongwitha
timershowingthelengthofthevideo.
5 Touchthestopvideoicon tostoprecording.
NOTE
• 3Dcameramodeisonlyallowedinlandscape
view.
• Keepthedistancebetweenthecameraandthe
objectmorethan0.5m.
• Fortheoptimal3Dviewingexperience,holdthe
device30~40cmawayfromyoureyes.
Video camera

104
Youcanstoremultimediafilesonamemory
cardforeasyaccesstoallyourimageand
videofiles.
Gallery
TouchtheApplicationstab ,thenselect
Gallery.Openalistofcataloguebarsthat
storeallyourmultimediafiles.
Timeline view
LG-P720hGalleryprovidesatimelineview
ofyourphotosandvideos.Ingridview
mode,drag totherightand
thedateyoutookyourphotosisdisplayed,
startingwiththemostrecent.Ifyouselecta
specificdate,allthephotosyoutookonthat
dayaregrouped.
Music
YourLG-P720hhasabuilt-inmusicplayer
thatletsyouplayallyourfavouritetracks.
Toaccessthemusicplayer.Touchthe
Applicationstab ,thenselectMusic.
Multimedia
Playing a song
1 IntheHomescreen,touchthe
Applicationstab andselectMusic.
2 TouchSongs.
3 Selectthesongyouwanttoplay.
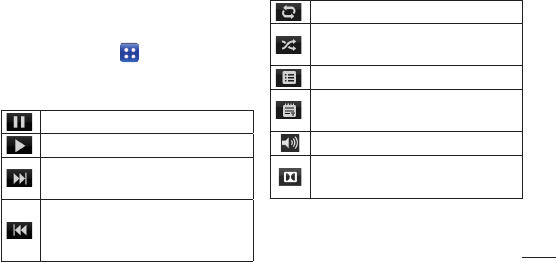
Touchtopauseplayback.
Touchtoresumeplayback.
Touchtoskiptothenexttrackin
thealbum,playlistorshuffle.
Touchoncetogobacktothe
beginningofthesong.Touchtwice
toreturntotheprevioussong.
105
thedateyoutookyourphotosisdisplayed,
startingwiththemostrecent.Ifyouselecta
specificdate,allthephotosyoutookonthat
dayaregrouped.
Music
YourLG-P720hhasabuilt-inmusicplayer
thatletsyouplayallyourfavouritetracks.
Toaccessthemusicplayer.Touchthe
Applicationstab ,thenselectMusic.
Multimedia
Playing a song
1 IntheHomescreen,touchthe
Applicationstab andselectMusic.
2 TouchSongs.
3 Selectthesongyouwanttoplay.
Touchtopauseplayback.
Touchtoresumeplayback.
Touchtoskiptothenexttrackin
thealbum,playlistorshuffle.
Touchoncetogobacktothe
beginningofthesong.Touchtwice
toreturntotheprevioussong.
Touchtosetrepeatmode.
Touchtoplaythecurrentplaylistin
shufflemode.
Touchtoseethecurrentplaylist.
Touchtoseelyrics.Thisoptionison
onlyifthesongincludesthelyrics.
Touchtochangethevolume.
TouchtosetDolbyaudioeffect
whenconnectedwithheadsetjack.

106
Tochangethevolumewhilelisteningto
music,presstheupanddownvolumekeys
ontheleft-handsideofthephone.
Touchandholdanysonginthelist.It
displaysPlay,Add to playlist,Use as
ringtone,Delete,Share,Searchand
Detailsasoptions.
NOTE: Musicfilecopyrightsmaybe
protectedbyinternationaltreatiesand
nationalcopyrightlaws.
Therefore,itmaybenecessarytoobtain
permissionoralicencetoreproduceor
copymusic.
Insomecountries,nationallawsprohibit
privatecopyingofcopyrightedmaterial.
Beforedownloadingorcopyingthefile,
checkthenationallawsoftherelevant
countryconcerningtheuseofsuch
material.
FM Radio
YourLG-P720hhasabuilt-inFMRadioso
youcantuneintoyourfavouritestations
andlistenonthego.
NOTE: Youneedtouseyourheadsetto
listentotheradio.Insertthemintothe
headsetjack.
Searching for stations
Youcantuneintoradiostations
bysearchingforthemmanuallyor
automatically.Theyarethensavedto
Multimedia

107
NOTE: Musicfilecopyrightsmaybe
protectedbyinternationaltreatiesand
nationalcopyrightlaws.
Therefore,itmaybenecessarytoobtain
permissionoralicencetoreproduceor
copymusic.
Insomecountries,nationallawsprohibit
privatecopyingofcopyrightedmaterial.
Beforedownloadingorcopyingthefile,
checkthenationallawsoftherelevant
countryconcerningtheuseofsuch
material.
FM Radio
YourLG-P720hhasabuilt-inFMRadioso
youcantuneintoyourfavouritestations
andlistenonthego.
NOTE: Youneedtouseyourheadsetto
listentotheradio.Insertthemintothe
headsetjack.
Searching for stations
Youcantuneintoradiostations
bysearchingforthemmanuallyor
automatically.Theyarethensavedto
specificchannelnumbers,soyoudon'thave
tofindthemagain.
Youcanstoreupto48channelsonyour
phone.
Tuning in automatically
1 IntheHomescreen,touchthe
Applicationstab andselectFM
Radio.
2 PresstheMenukey,thentouchAuto
scan.
3 Iftherearepresetchannels,youwill
seeapop-upasking"Resetallchannels
Multimedia

108
andstartAutoscan?".IfyouchooseOK,
allthepresetchannelsaredeletedand
Auto scanstarts.
4 Duringautoscanning,touchStopifyou
wanttostopscanning.Onlyscanned
channelsaresavedbeforeyoustop
scanning.
NOTE: Youcanalsomanuallytuneinto
astationusingtheon-screenwheel.
TIP! Toimproveradioreception,extend
theheadsetcordasthisalsofunctions
astheradioantenna.
Ifyouconnectaheadsetnotspecifically
madeforradioreception,radioreception
maybepoor.
Browser
Browsergivesyouafast,full-colourworld
ofgames,music,news,sport,entertainment
andmuchmore,rightonyourmobilephone.
Whereveryouareandwhateveryouenjoy.
NOTE:Additionalchargesapplywhen
connectingtotheseservicesand
downloadingcontent.Checkdata
chargeswithyournetworkprovider.
Using the web toolbar
Touchtogobackapage.
The webMultimedia

109
TIP! Toimproveradioreception,extend
theheadsetcordasthisalsofunctions
astheradioantenna.
Ifyouconnectaheadsetnotspecifically
madeforradioreception,radioreception
maybepoor.
Browser
Browsergivesyouafast,full-colourworld
ofgames,music,news,sport,entertainment
andmuchmore,rightonyourmobilephone.
Whereveryouareandwhateveryouenjoy.
NOTE:Additionalchargesapplywhen
connectingtotheseservicesand
downloadingcontent.Checkdata
chargeswithyournetworkprovider.
Using the web toolbar
Touchtogobackapage.
Touchtogoforwardsapage,tothe
pageyouconnectedtoafterthecurrent
one.Thisistheoppositeofwhat
happenswhenyoupresstheBackkey,
whichgoestothepreviouspage.
Touchtoshowallyouropenwindows.
Touchtoaddanewwindow.
Using options
PresstheMenukeytoviewoptions.
Read it later–Addthecurrentweb
pageinReaditlater.
The webMultimedia

110
Add RSS Feed–Addthecurrentweb
pagetotheRSSfeed.
Share page–Allowsyoutosharethe
webpagewithothers.
111
Using options
Press the Menu key to view options.
Read it later – Add the current web
page as a bookmark.
Add RSS Feed – Add the current web
page to the RSS feed.
Share page – Allows you to share the
web page with others.
Find on page – Allows you to find
letters or words on the current web
page.
Select text – allows you to copy any
text from the web page.
More
Home page: Go to the Home page.
Set Home page: Set the current web
page as your Home page.
Add shortcut to Home: Add the shortcut
of the current web page to the Home
screen.
Page info: Displays the web page
information.
•
•
•
•
Find on page–Allowsyoutofind
lettersorwordsonthecurrentweb
page.
111
Using options
Press the Menu key to view options.
Read it later – Add the current web
page as a bookmark.
Add RSS Feed – Add the current web
page to the RSS feed.
Share page – Allows you to share the
web page with others.
Find on page – Allows you to find
letters or words on the current web
page.
Select text – allows you to copy any
text from the web page.
More
Home page: Go to the Home page.
Set Home page: Set the current web
page as your Home page.
Add shortcut to Home: Add the shortcut
of the current web page to the Home
screen.
Page info: Displays the web page
information.
•
•
•
•
Select text –Allowsyoutocopyany
textfromthewebpage.
111
Using options
Press the Menu key to view options.
Read it later – Add the current web
page as a bookmark.
Add RSS Feed – Add the current web
page to the RSS feed.
Share page – Allows you to share the
web page with others.
Find on page – Allows you to find
letters or words on the current web
page.
Select text – allows you to copy any
text from the web page.
More
Home page: Go to the Home page.
Set Home page: Set the current web
page as your Home page.
Add shortcut to Home: Add the shortcut
of the current web page to the Home
screen.
Page info: Displays the web page
information.
•
•
•
•
More
• Home page:GototheHomepage.
• Set as homepage:Setthecurrentweb
pageasyourHomepage.
• Add shortcut to home:Addtheshortcut
of.thecurrentwebpagetotheHome
screen.
• Page info:Displaysthewebpage
information.
• Downloads:Displaysyourdownload
history.
• Settings:DisplaysBrowsersettings.
The web
Setting your alarm
1 Applications>Alarm/Clock>New
alarm.
2 Setthetime, Repeat, Snooze duration,
Vibration,Alarm toneandPuzzle lock
thenaddalabeltonamethealarm.
TouchSave.
3 Afteryousavethealarm,theLG-P720h
letsyouknowhowmuchtimeisleft
beforethealarmwillsound.
Utilities

111
More
• Home page:GototheHomepage.
• Set as homepage:Setthecurrentweb
pageasyourHomepage.
• Add shortcut to home:Addtheshortcut
of.thecurrentwebpagetotheHome
screen.
• Page info:Displaysthewebpage
information.
• Downloads:Displaysyourdownload
history.
• Settings:DisplaysBrowsersettings.
The web
Setting your alarm
1 Applications>Alarm/Clock>New
alarm.
2 Setthetime, Repeat, Snooze duration,
Vibration,Alarm toneandPuzzle lock
thenaddalabeltonamethealarm.
TouchSave.
3 Afteryousavethealarm,theLG-P720h
letsyouknowhowmuchtimeisleft
beforethealarmwillsound.
Using your calculator
1 Applications>Calculator.
2 Touchthenumberkeystoenter
numbers.
3 Forsimplecalculations,touchthe
functionyouwant(+,–,xor÷)followed
by=.
4 Formorecomplexcalculations,press
theMenukey,touchtheAdvanced
panel,thenchoosesin,cos,tan,log
andsoon.
Utilities

112
Adding an event to your
calendar
1 Applications>Calendar.
2 Tochecktheevent,touchthedate.
TouchtheMenukeyifyouwanttoadd
anewevent.TouchNew event.
3 TouchWhatthenentertheeventname.
Checkthedateandenterthetimeyou
wantyoureventtostartandfinish.
4 AlsotouchWherethenenterthe
location.
5 Ifyouwanttoaddanotetoyourevent,
touchDescriptionandenterthedetails.
6 Ifyouwanttorepeatthealarm,set
Repetition,andsetReminders,if
necessary.
7 TouchSavetosavetheeventinthe
calendar.
Changing your calendar view
1 Applications>Calendar.
2 Onthetopofthescreen,youcanfind
thedifferentviewtypesoftheCalendar
(Day,Week,Month,Agenda).
Utilities
Polaris Office
PolarisOfficeisaprofessionalmobileoffice
solutionthatletsusersconvenientlyview
varioustypesofofficedocuments,including
Word,ExcelandPowerPointfiles,anywhere,
anytime,usingtheirmobiledevices.
Managing files
PolarisOfficeprovidesmobileuserswith
convenientfilemanagementfeatures,
includingcopying,pasting,renamingand
deletingfilesandfoldersrightonthedevice.

113
6 Ifyouwanttorepeatthealarm,set
Repetition,andsetReminders,if
necessary.
7 TouchSavetosavetheeventinthe
calendar.
Changing your calendar view
1 Applications>Calendar.
2 Onthetopofthescreen,youcanfind
thedifferentviewtypesoftheCalendar
(Day,Week,Month,Agenda).
Utilities
Polaris Office
PolarisOfficeisaprofessionalmobileoffice
solutionthatletsusersconvenientlyview
varioustypesofofficedocuments,including
Word,ExcelandPowerPointfiles,anywhere,
anytime,usingtheirmobiledevices.
Managing files
PolarisOfficeprovidesmobileuserswith
convenientfilemanagementfeatures,
includingcopying,pasting,renamingand
deletingfilesandfoldersrightonthedevice.
Viewing files
Mobileuserscannoweasilyviewawide
varietyoffiletypes,includingMicrosoft
OfficedocumentsandAdobePDF,right
ontheirmobiledevices.Whenviewing
documentsusingPolarisOffice,theobjects
andlayoutremainthesameasintheir
originaldocuments.

114
Video Editor
UseVideoeditortoeditthevideosyouhave
captured.
1
Applications>Video Editor.
2 TouchNewandselectAddtoadd
videos,imagesoraudioclipsyou’dliketo
insert.Youcandragfilesdowntowhereyou
wanttoplace.
NOTE:
•Thisfeaturemaynotavailableifvideo
wasnotcreatedbythisdevice.
•Thisfeaturenotsupportedvideo
withFullHD(1920x1080)andmore
resolution.
•If3Dvideoisaddedfirst,only3D
videoswithsameresolutionand3D
imagesareavailable.
•If2Dvideoisaddedfirst,only2D
videoswithsameresolutionand2D
imagesareavailable.
Utilities
3 TouchTrimtoeditthelengthofvideo
draggingtheTrimbar.Youcancontrolin
detailwithusingDetail view.
4 Ifyouarefinishedwithyourproject,touch
Exportonmainscreentomakecomplete
file.Makesuresavethechangesyouhave
madebeforeexittomainmenu.

115
NOTE:
•Thisfeaturemaynotavailableifvideo
wasnotcreatedbythisdevice.
•Thisfeaturenotsupportedvideo
withFullHD(1920x1080)andmore
resolution.
•If3Dvideoisaddedfirst,only3D
videoswithsameresolutionand3D
imagesareavailable.
•If2Dvideoisaddedfirst,only2D
videoswithsameresolutionand2D
imagesareavailable.
Utilities
3 TouchTrimtoeditthelengthofvideo
draggingtheTrimbar.Youcancontrolin
detailwithusingDetail view.
4 Ifyouarefinishedwithyourproject,touch
Exportonmainscreentomakecomplete
file.Makesuresavethechangesyouhave
madebeforeexittomainmenu.

116
LGSmartWorldoffersanassortmentof
excitingcontent-games,applications,
wallpaperandringtones-givingLGphone
usersthechancetoenjoyricher“Mobile
Life”experiences.
How to Get to LG SmartWorld
from Your Phone
1 Tapthe icontoaccessLGSmartWorld.
2 TapSigninandenterID/PWforLG
SmartWorld.Ifyouhavenotyetsigned
up,tapRegisterandgetaLGSmartWorld
membership.
3 Downloadthecontentyouwant.
NOTE: What if there is no icon?
1 UsingamobileWebbrowser,accessLG
SmartWorld(www.lgsmartworld.com)
andselectyourcountry.
2 DownloadLGSmartWorldApp.
3 Executeandinstallthedownloadedfile.
4 AccessLGSmartWorldbytappingthe
icon.
LG SmartWorld
How to use LG SmartWorld
• ParticipateinmonthlyLGSmartWorld
promotions.
• Findanddownloadexciting3Dcontentfrom
the‘3Dzone’.
• Trytheeasy“Menu”buttonstofindwhat
you’relookingforfast.
•
Categories:Findcontentsbycategory
(e.g.Education,Entertainment,Games,
etc).
•
My Apps:Listofdownloaded/to-be-
updatedcontents.
•
Apps for you:Recommendedcontent

117
3 Downloadthecontentyouwant.
NOTE: What if there is no icon?
1 UsingamobileWebbrowser,accessLG
SmartWorld(www.lgsmartworld.com)
andselectyourcountry.
2 DownloadLGSmartWorldApp.
3 Executeandinstallthedownloadedfile.
4 AccessLGSmartWorldbytappingthe
icon.
LG SmartWorld
How to use LG SmartWorld
• ParticipateinmonthlyLGSmartWorld
promotions.
• Findanddownloadexciting3Dcontentfrom
the‘3Dzone’.
• Trytheeasy“Menu”buttonstofindwhat
you’relookingforfast.
•
Categories:Findcontentsbycategory
(e.g.Education,Entertainment,Games,
etc).
•
My Apps:Listofdownloaded/to-be-
updatedcontents.
•
Apps for you:Recommendedcontent
basedonyourpreviouschoices.
•
Search:SearchContent.
•
Settings:SetProfileandDisplay.
• Tryotherusefulfunctionsaswell.(Content
Detailscreen)
•
Wish List:Savethecontentyou're
interestedin.
NOTE:LGSmartWorldmaynotbeavailablein
allcarriersorcountries.

118
Connectivity
Bluetooth
YoucanuseBluetoothtosenddataby
runningacorrespondingapplication,not
fromtheBluetoothmenuasonmostother
mobilephones.
TIP! WithLG-P720h,youcanenjoy
Bluetoothhighspeed.Ifthedeviceyou
wanttosharefileswithalsosupports
highspeedBluetooth,thefileswill
automaticallybetransferredviathe
high-speednetwork.TouseBluetooth
highspeeddatatransfer,pleasemake
suretheWi-FiisOFFonyourdevices
beforeuse.ThesettingsforBluetooth
highspeedmaybedifferentdepends
onthedevice.Pleasecheckthedevice’s
settingswiththeirserviceprovider.
NOTE:
•LGisnotresponsiblefortheloss,
interception,ormisuseofdatasent
orreceivedviatheBluetoothwireless
feature.
•Alwaysensurethatyoushareandreceive
datawithdevicesthataretrustedand
properlysecured.Ifthereareobstacles
betweenthedevices,theoperating
distancemaybereduced.
•Somedevices,especiallythosethatare
nottestedorapprovedbyBluetoothSIG,
maybeincompatiblewithyourdevice.

119
Connectivity
TIP! WithLG-P720h,youcanenjoy
Bluetoothhighspeed.Ifthedeviceyou
wanttosharefileswithalsosupports
highspeedBluetooth,thefileswill
automaticallybetransferredviathe
high-speednetwork.TouseBluetooth
highspeeddatatransfer,pleasemake
suretheWi-FiisOFFonyourdevices
beforeuse.ThesettingsforBluetooth
highspeedmaybedifferentdepends
onthedevice.Pleasecheckthedevice’s
settingswiththeirserviceprovider.
NOTE:
•LGisnotresponsiblefortheloss,
interception,ormisuseofdatasent
orreceivedviatheBluetoothwireless
feature.
•Alwaysensurethatyoushareandreceive
datawithdevicesthataretrustedand
properlysecured.Ifthereareobstacles
betweenthedevices,theoperating
distancemaybereduced.
•Somedevices,especiallythosethatare
nottestedorapprovedbyBluetoothSIG,
maybeincompatiblewithyourdevice.
Turning on Bluetooth and pairing up your
phone with a Bluetooth device
1 Applications>Settings>Wireless
& networks>TouchBluetooth toturn
iton.
2 GotoBluetooth settings>Scan for
devices
3 Choosethedeviceyouwanttopairup
withfromthelist.
Oncetheparingissuccessful,yourdevice
willconnecttothedevice.Ifthedevice
youwanttopairupwithisnotonthelist,
makesurethattargetdeviceissettobe
Discoverable,thenscanagain.

120
Send data using the Bluetooth wireless
feature
1 Selectafileoritem,suchasacontact
ormediafile,fromanappropriate
applicationorMy files.
2 Selectanoptionforsendingdatavia
Bluetooth.
NOTE: Themethodforselectingan
optionmayvarybydatatype.
3 SearchforandpairwithaBluetooth-
enableddevice.
Receive data using the Bluetooth
wireless feature
1 InIdlemode,opentheapplication
listandselectSettings>Wireless
& networks>Bluetooth settings
>Discoverable.Yourdeviceis
discoverabletootherBluetoothdevices
for120seconds.
2 Whenprompted,enterthePINforthe
BluetoothwirelessfeatureandselectOK
(ifnecessary).
Connectivity
3 SelectAccepttoconfirmthatyouare
willingtoreceivedatafromthedevice.
Receiveddataissavedtothebluetooth
folder.
NOTE: Ifyoureceiveacontact,youcan
savethecontactsintothephonebookas
following:TouchContacts >Press
>More>Import/Export.

121
Receive data using the Bluetooth
wireless feature
1 InIdlemode,opentheapplication
listandselectSettings>Wireless
& networks>Bluetooth settings
>Discoverable.Yourdeviceis
discoverabletootherBluetoothdevices
for120seconds.
2 Whenprompted,enterthePINforthe
BluetoothwirelessfeatureandselectOK
(ifnecessary).
Connectivity
3 SelectAccepttoconfirmthatyouare
willingtoreceivedatafromthedevice.
Receiveddataissavedtothebluetooth
folder.
NOTE: Ifyoureceiveacontact,youcan
savethecontactsintothephonebookas
following:TouchContacts>Press
>More>Import/Export.
Wi-Fi
Learntouseyourdevice’swireless
networkingcapabilitiestoactivateand
connecttoanywirelesslocalareanetwork
(WLAN)compatiblewiththeIEEE802.11
b/g/nstandards.Youcanconnecttothe
internetorothernetworkdevicesanywhere
anaccesspointorwirelesshotspotis
available.
Activate the WLAN feature
InIdlemode,opentheapplicationlistand
selectSettings>Wireless & networks>
Wi-Fi settings>Wi-Fi.

122
NOTE: AnactiveWLANrunninginthe
backgroundwillconsumebatterypower.
Topreservebatterypower,activatethe
WLANonlywhenneeded.
Find and connect to a WLAN
InIdlemode,opentheapplicationlistand
selectSettings>Wireless & networks >
Wi-Fi settings. Thedevicewillautomatically
searchforavailableWLANs.
1 SelectanetworkunderWi-Fi networks.
2 Enterapasswordforthenetwork(if
necessary).
3 SelectConnect.
Add a WLAN manually
1 InIdlemode,opentheapplicationlist
andselectSettings>Wireless &
networks>Wi-Fi settings>Add Wi-
Fi network.
2 EntertheSSIDforthenetworkand
selectthesecuritytype.
3 Setthesecuritysettingsdependingon
theselectedsecuritytype.
4 SelectSave.
Connectivity
Connect to a WLAN using a Wi-Fi
Protected Setup (WPS)
UsingWPS,youcanconnecttoasecured
network.
ToconnecttoaWLANwithaWPSbutton,
1 InIdlemode,opentheapplicationlist
andselectSettings>Wireless &
networks>Wi-Fi settings.
2 SelectWPS push button request.
3 PressaWPSbuttonontheaccesspoint
within2minutes.

123
necessary).
3 SelectConnect.
Add a WLAN manually
1 InIdlemode,opentheapplicationlist
andselectSettings>Wireless &
networks>Wi-Fi settings>Add Wi-
Fi network.
2 EntertheSSIDforthenetworkand
selectthesecuritytype.
3 Setthesecuritysettingsdependingon
theselectedsecuritytype.
4 SelectSave.
Connectivity
Connect to a WLAN using a Wi-Fi
Protected Setup (WPS)
UsingWPS,youcanconnecttoasecured
network.
ToconnecttoaWLANwithaWPSbutton,
1 InIdlemode,opentheapplicationlist
andselectSettings>Wireless &
networks>Wi-Fi settings.
2 SelectWPS push button request.
3 PressaWPSbuttonontheaccesspoint
within2minutes.
ToconnecttoaWLANwithaWPSbutton,
1 InIdlemode,opentheapplicationlist
andselectSettings>Wireless &
networks>Wi-Fi settings.
2 SelectanetworkindicatedbytheWPS
iconandselectWPS PIN.
3 Ontheaccesspoint,enterthePINand
pressthestartbutton.
Using SmartShare
SmartShareusesDLNA(DigitalLiving
NetworkAlliance)technologytosharedigital
contentthroughawirelessnetwork.

124
BothdevicesmustbeDLNAcertifiedto
supportthisfeature.
To turn SmartShare on and allow sharing
contents
1 TouchApplicationstab andselect
SmartShare.
2 PresstheMenukeyandselect
Settings.
3 TouchAlways accept requestifyou
wouldliketoautomaticallyaccept
sharingrequestsfromotherdevices.
4 TouchReceive filesifyouwouldliketo
automaticallyallowuploadfilestomy
phonefromotherdevices.
5 TouchDiscoverablecheckboxtoturn
on.
6 UndertheSharingcontentssection,
touchtocheckmarkthetypesofcontent
youwouldliketoshare.Choosefrom
Pictures,VideosandMusic.
7 SmartShareisnowactivatedand
readytosharecontents.
Connectivity
To share contents from remote content
library to other devices
Letyourrendererdevice(e.g.TV)play
multimediacontentsfromyourremote
contentlibrary(e.g.PC).
NOTE: MakesurethattheDLNA
functionalityofyourdevicesisproperly
configured(e.g.TVandPC).
1 TouchApplicationtab andselect
SmartShare.
2 Touchthetoprightbuttontoorselect

125
automaticallyallowuploadfilestomy
phonefromotherdevices.
5 TouchDiscoverablecheckboxtoturn
on.
6 UndertheSharingcontentssection,
touchtocheckmarkthetypesofcontent
youwouldliketoshare.Choosefrom
Pictures,VideosandMusic.
7 SmartShareisnowactivatedand
readytosharecontents.
Connectivity
To share contents from remote content
library to other devices
Letyourrendererdevice(e.g.TV)play
multimediacontentsfromyourremote
contentlibrary(e.g.PC).
NOTE: MakesurethattheDLNA
functionalityofyourdevicesisproperly
configured(e.g.TVandPC).
1 TouchApplicationtab andselect
SmartShare.
2 Touchthetoprightbuttontoorselect
thedevicefromrendererlists.
3 Touchthetopleftbuttonandselectthe
deviceoftheremotecontentlibrary.
4 Youcanbrowsethecontentlibrary.
5 Touchacontentthumbnailorpressthe
Menukeyandselect Playbutton.
To share contents from your phone to
your renderer device(e.g. TV)
NOTE: Makesurethatyourrenderer
deviceisproperlyconfigured.

126
1 Whilebrowsingyourpicturesorvideos
usingtheGalleryapplication,touchand
holdtoselectfiles.Thenyouwillbeable
toselectmultiplefilestobeshared.
2 TouchShareonthemenuandselect
theSmartShare.
3
SmartShareisautomaticallylaunched
withtheselectedfiles.
4 Selectthedevicefromrendererliststo
playthefiles.
NOTE: Followthesimilarstepstouse
theMusicplayer,CameraandVideo
playertosharecontents.
Notice: Checkthatyourdeviceisconnected
withyourhomenetworkusingWi-Fi
connectiontousethisapplication.Some
DLNAenableddevices(e.g.TV)support
onlytheDMPfeatureofDLNAandwill
notappearintherendererdevicelist.Your
devicemightnotbeabletoplaysome
contents.
Connectivity
To download contents from remote
content library
1 TouchApplicationstab andselect
SmartShare.
2 Touchthetopleftbuttonandselectthe
deviceoftheremotecontentlibrary.
3 Youcanbrowsethecontentlibrary.
4 Touchacontentthumbnailthentouch
Download menu key.
Notice: Afewtypesofcontentsarenot
supported.

127
NOTE: Followthesimilarstepstouse
theMusicplayer,CameraandVideo
playertosharecontents.
Notice: Checkthatyourdeviceisconnected
withyourhomenetworkusingWi-Fi
connectiontousethisapplication.Some
DLNAenableddevices(e.g.TV)support
onlytheDMPfeatureofDLNAandwill
notappearintherendererdevicelist.Your
devicemightnotbeabletoplaysome
contents.
Connectivity
To download contents from remote
content library
1 TouchApplicationstab andselect
SmartShare.
2 Touchthetopleftbuttonandselectthe
deviceoftheremotecontentlibrary.
3 Youcanbrowsethecontentlibrary.
4 Touchacontentthumbnailthentouch
Download menu key.
Notice: Afewtypesofcontentsarenot
supported.
To upload contents from my phone to
remote content library
NOTE: MakesurethatSDcardis
correctlymountedandtheReceivefiles
insettingsmenuischecked.
1 TouchApplicationstab andselect
SmartShare.
2 TouchthetopleftbuttonandselectMy
phone.
3 Youcanbrowsethecontentlibrary.

128
4 Touchandholdacontentthumbnailand
thentouchtheUpload menukey.
5 Selectadeviceofremotecontentlibrary
tobeuploaded.
Notice:SomeDLNAenableddevicesdonot
supportDMSuploadfunctionalityandwill
notbeuploaded.Afewtypesofcontentsare
notsupported.
To play contents from remote content
library on your phone
1 TouchApplicationtab andselect
SmartShare.
2 TouchthetoprightbuttonandselectMy
phonefromrendererlists.
3 Touchthetopleftbuttonandselectthe
deviceoftheremotecontentlibrary.
4 Youcanbrowsethecontentlibrary.
5 Touchacontentthumbnailorpressthe
MenukeyandselectPlaybutton.
6 Toucha or buttontoswitch
between2D–3Dmodes.
Notice:Somecontentscouldbecorrupted
under3Dmode.
Connectivity
Mobile network sharing
Learntosetyourdeviceasawireless
modemorwirelessaccesspointforPCs
orotherdevices,andshareyourdevice’s
mobilenetworkconnection.
Share your device’s mobile network via
WLAN
1 InIdlemode,opentheapplicationlist
andselectSettings>Wireless &
networks>Portable hotspot.
2 SelectPortable Wi-Fi hotspotto
activatetheWLANhotspot.

129
2 TouchthetoprightbuttonandselectMy
phonefromrendererlists.
3 Touchthetopleftbuttonandselectthe
deviceoftheremotecontentlibrary.
4 Youcanbrowsethecontentlibrary.
5 Touchacontentthumbnailorpressthe
MenukeyandselectPlaybutton.
6 Toucha or buttontoswitch
between2D–3Dmodes.
Notice:Somecontentscouldbecorrupted
under3Dmode.
Connectivity
Mobile network sharing
Learntosetyourdeviceasawireless
modemorwirelessaccesspointforPCs
orotherdevices,andshareyourdevice’s
mobilenetworkconnection.
Share your device’s mobile network via
WLAN
1 InIdlemode,opentheapplicationlist
andselectSettings>Wireless &
networks>Portable hotspot.
2 SelectPortable Wi-Fi hotspotto
activatetheWLANhotspot.
3 SelectPortable Wi-Fi hotspot settings.
4 SelectConfigure Wi-Fi hotspotto
customisetheWLANhotspot:
Network SSID -Viewandeditthedevice
namethatwillbeshowntoexternal
devices.
Security -Selectthesecuritytype.
Share your device’s mobile network via
USB
1 ConnectthephonetoyourPCusingthe
USBcable.
2
USB connection modelistwillappear.

130
3 SelectUSB tetheringtoactivatethe
USBtetheringfeature.Yourdevice
sharesthemobilenetworkconnection
onyourPC.Tostopsharingthenetwork
connection,clearthecheckboxnext
toUSB tethering.(SelectCharge only
optiontodisconnectthephone.)
NOTE: Thesharingmethodfor
thenetworkconnectionmaydiffer
dependingonthePC’soperating
system.
GPS
Yourdeviceisequippedwithaglobal
positioningsystem(GPS)receiver.Learnto
activatelocationservices.Toreceivebetter
GPSsignals,avoidusingyourdeviceinthe
followingconditions:
• Betweenbuildings,intunnelsor
undergroundpassages,orinsidebuildings
inpoorweatheraroundhighvoltageor
electromagneticfields.
• Donottouchtheinternalantennaareaor
coverthisareawithyourhandsorother
objectswhileusingtheGPSfunctions.
Connectivity
• Thisfeaturemaybeunavailable
dependingonyourregionorservice
provider.
Activate location services
Youmustactivatelocationservicesto
receivelocationinformationandsearchthe
map.
1 InIdlemode,opentheapplicationlist
andselectSettings>Location &
security.
2 Adjustthefollowingsettingstoactivate
locationservices:
Use wireless networks -Settouse

131
GPS
Yourdeviceisequippedwithaglobal
positioningsystem(GPS)receiver.Learnto
activatelocationservices.Toreceivebetter
GPSsignals,avoidusingyourdeviceinthe
followingconditions:
• Betweenbuildings,intunnelsor
undergroundpassages,orinsidebuildings
inpoorweatheraroundhighvoltageor
electromagneticfields.
• Donottouchtheinternalantennaareaor
coverthisareawithyourhandsorother
objectswhileusingtheGPSfunctions.
Connectivity
• Thisfeaturemaybeunavailable
dependingonyourregionorservice
provider.
Activate location services
Youmustactivatelocationservicesto
receivelocationinformationandsearchthe
map.
1 InIdlemode,opentheapplicationlist
andselectSettings>Location &
security.
2 Adjustthefollowingsettingstoactivate
locationservices:
Use wireless networks -Settouse
WLANand/ormobilenetworksforfinding
yourlocation.
Use GPS satellites-SettousetheGPS
satelliteforfindingyourlocation.
PC connections with a PC data
cable
LearntoconnectyourdevicetoaPCwith
aPCdatacableinUSBconnectionmodes.
ByconnectingthedevicetoaPC,youcan
transferdatatoandfromyourdevicedirectly
andusethePCsoftwareprogram(LGPC
Suite).

132
Sync your phone with your computer
TosynchroniseyourphonewithyourPC
usingtheUSBcable,youneedtoinstall
PCsoftware(LGPCSuite)ontoyourPC.
DownloadtheprogramfromtheLGwebsite
(www.lg.com).
1 UsetheUSBdatacabletoconnectyour
phonetothePC.
2
USB connection modelistwillappear,
andselectPC software.
3 RuntheLGPCSuiteprogramfrom
yourPC.
RefertothePCsoftware(LGPCSuite)
helpformoreinformation.
NOTE: LG Integrated USB Driver
•LGintegratedUSBdriverisrequired
toconnectanLGdeviceandPCand
installedautomaticallywhenyou
install“LGPCSuite”PCsoftware.
Connect as a mass storage device
YoucanconnectyourdevicetoaPCasa
removablediskandaccessthefiledirectory.
Ifyouinsertamemorycardinthedevice,
youcanaccessthefiledirectoryofthe
memorycardbyusingthedeviceasa
memorycardreader.
Connectivity
1
Applications>Settings>Storageto
checkoutthestoragemedia.
(Ifyouwanttotransferfilesfromortoa
memorycard,insertamemorycardinto
thephone.)
2 ConnectthephonetoyourPCusingthe
USBcable.
3
USB connection modelistwillappear,
andselectMass storageoption.
4 Opentheremovablememoryfolderon
yourPC.Youcanviewthemassstorage
contentonyourPCandtransferthe
files.

133
NOTE: LG Integrated USB Driver
•LGintegratedUSBdriverisrequired
toconnectanLGdeviceandPCand
installedautomaticallywhenyou
install“LGPCSuite”PCsoftware.
Connect as a mass storage device
YoucanconnectyourdevicetoaPCasa
removablediskandaccessthefiledirectory.
Ifyouinsertamemorycardinthedevice,
youcanaccessthefiledirectoryofthe
memorycardbyusingthedeviceasa
memorycardreader.
Connectivity
1
Applications>Settings>Storageto
checkoutthestoragemedia.
(Ifyouwanttotransferfilesfromortoa
memorycard,insertamemorycardinto
thephone.)
2 ConnectthephonetoyourPCusingthe
USBcable.
3
USB connection modelistwillappear,
andselectMass storageoption.
4 Opentheremovablememoryfolderon
yourPC.Youcanviewthemassstorage
contentonyourPCandtransferthe
files.
5 CopythefilesfromyourPCtothedrive
folder.
6 SelectCharge onlyoptiontodisconnect
thephone.
Transferring music, photos and videos
using USB mass storage mode
1
Applications>Settings>Storageto
checkoutthestoragemedia.
(Ifyouwanttotransferfilesfromortoa
memorycard,insertamemorycardinto
thephone.)
2 ConnectthephonetoyourPCusingthe
USBcable.

134
3
USB connection modelistwillappear,
andselectMass storageoption.
4 Opentheremovablememoryfolderon
yourPC.Youcanviewthemassstorage
contentonyourPCandtransferthe
files.
5 CopythefilesfromyourPCtothedrive
folder.
6 Whenyouarefinished,selectCharge
onlyoptiontodisconnectthephone.
NOTE: Todisconnectthedevicefrom
thePC,clicktheUSBdeviceicononthe
Windowstaskbarandclicktheoptionto
safelyremovethemassstoragedevice.
ThenremovethePCdatacablefromthe
PC.Otherwise,youmaylosedatastored
onthememorycardordamagethe
memorycard.
VPN connections
Youcancreatevirtualprivatenetworks
(VPN)andconnecttoyourprivatenetwork
securelythroughapublicnetwork,suchas
theinternet.
Connectivity
NOTE: Yourdeviceshouldalreadybe
configuredwithinternetaccess.Ifyou
havetroubleaccessingtheinternet,you
needtoeditconnections.Ifyouarenot
sureabouttheconnectioninformationto
enter,askyourserviceprovider.
Set up VPN connections
1 InIdlemode,opentheapplicationlist
andselectSettings>Wireless &
networks >VPN settings>Add VPN.
2 SelectaVPNtype.

135
NOTE: Todisconnectthedevicefrom
thePC,clicktheUSBdeviceicononthe
Windowstaskbarandclicktheoptionto
safelyremovethemassstoragedevice.
ThenremovethePCdatacablefromthe
PC.Otherwise,youmaylosedatastored
onthememorycardordamagethe
memorycard.
VPN connections
Youcancreatevirtualprivatenetworks
(VPN)andconnecttoyourprivatenetwork
securelythroughapublicnetwork,suchas
theinternet.
Connectivity
NOTE: Yourdeviceshouldalreadybe
configuredwithinternetaccess.Ifyou
havetroubleaccessingtheinternet,you
needtoeditconnections.Ifyouarenot
sureabouttheconnectioninformationto
enter,askyourserviceprovider.
Set up VPN connections
1 InIdlemode,opentheapplicationlist
andselectSettings>Wireless &
networks >VPN settings>Add VPN.
2 SelectaVPNtype.
3 Customisetheconnectioninformation.
NOTE: Availableoptionsmayvary
dependingontheVPNtype.
• VPN name-EnteranameoftheVPN
server.
• Set VPN server-EntertheIPaddress
oftheVPNserver.
• Enable encryption-Settoencryptthe
VPNserver.
• Set IPSec pre-shared key-Entera
presharedkey.

136
• Enable L2TP secret-Settousethe
L2TPsecretpassword.
• Set L2TP secret-EntertheL2TP
secretpassword.
• Set user certificate-Selectauser
certificatethattheVPNserverusesto
identifyyou.Youcanimportcertificates
fromtheVPNserverordownloadfrom
theweb.
• Set CA certificate-Selectacertificate
authority(CA)certificatethattheVPN
serverusestoidentifyyou.Youcan
importcertificatesfromtheVPNserver
ordownloadfromtheweb.
• DNS search domains-Enterthe
domainnameserver(DNS)address.
4 Whenyouarefinished,pressMenu
>Save.
Connect to a private network
1 InIdlemode,opentheapplicationlist
andselectSettings>Wireless &
networks >VPN settings.
2 Selectaprivatenetworktoconnect.
3 Entertheusernameandpasswordand
selectConnect.
Connectivity
IntheHomescreen,touchtheApplications
tab thenscrollandtouchSettings.
Wireless & networks
Here,youcanmanageWi-FiandBluetooth.
Youcanalsosetupmobilenetworksand
switchtoairplanemode.
Airplane mode–Afterswitchingtoairplane
mode,allwirelessconnectionsaredisabled.
Wi-Fi–TurnsonWi-Fitoconnectto
availableWi-Finetworks.
Wi-Fi settings–Allowsyoutosetupand
managewirelessaccesspoints.Setnetwork
notificationoraddaWi-Finetwork.The
Settings

137
• DNS search domains-Enterthe
domainnameserver(DNS)address.
4 Whenyouarefinished,pressMenu
>Save.
Connect to a private network
1 InIdlemode,opentheapplicationlist
andselectSettings>Wireless &
networks >VPN settings.
2 Selectaprivatenetworktoconnect.
3 Entertheusernameandpasswordand
selectConnect.
Connectivity
IntheHomescreen,touchtheApplications
tab thenscrollandtouchSettings.
Wireless & networks
Here,youcanmanageWi-FiandBluetooth.
Youcanalsosetupmobilenetworksand
switchtoairplanemode.
Airplane mode–Afterswitchingtoairplane
mode,allwirelessconnectionsaredisabled.
Wi-Fi–TurnsonWi-Fitoconnectto
availableWi-Finetworks.
Wi-Fi settings–Allowsyoutosetupand
managewirelessaccesspoints.Setnetwork
notificationoraddaWi-Finetwork.The
advancedWi-Fisettingsscreenisaccessed
fromtheWi-Fisettingsscreen.Pressthe
MenukeyandtouchAdvanced.
Bluetooth–TurntheBluetoothwireless
featureonoroff.
Bluetooth settings
-Device name:SetaBluetoothnamefor
yourdevice.
-Discoverable:Setyourdevicetobe
visibletootherBluetoothdevices.
-Scan for devices:Setyourdevice
tosearchforotherbluetoothenabled
devices.
Settings

139
Portable hotspot–Youcanconfigurethe
portableWi-Fihotspotsettings.
VPN settings–DisplaysthelistofVirtual
PrivateNetworks(VPNs)thatyou've
previouslyconfigured.Allowsyoutoadd
differenttypesofVPN.
NFC settings
-NFC:TurnonNFCtouseNFCfeature.
-Direct share :SetoptionstoshareURL,
Contact,Eventinfotootherdevice.
Mobile networks–Setoptionsfordata
roaming,networkmode&operators,access
pointnames(APNs)andsoon.
Settings
On-Screen Phone settings–Selectto
changetheOn-ScreenPhonepassword.
Call
< Fixed Dialing Numbers >
SelectFixed Dialing Numberstoturnon
andcompilealistofnumbersthatcanbe
calledfromyourphone.You'llneedyour
PIN2,whichisavailablefromyouroperator.
Onlynumberswithinthefixeddiallistcanbe
calledfromyourphone.
< Voicemail >
Voicemail service–Allowsyoutoselect
yourcarrier'svoicemailservice.
Voicemail settings–Ifyouareusingyour
carrier'svoicemailservice,thisoptionallows
youtoenterthephonenumbertousefor
listeningtoandmanagingyourvoicemail.
< Other call settings >
Call reject–Allowsyoutosetthecallreject
function.ChoosefromOff,Reject on listor
Reject all calls.
Call forwarding–Choosewhethertodivert
allcalls,whenthelineisbusy,whenthereis
noanswerorwhenyouhavenosignal.

140
Additional settings–Thisletsyouchange
thefollowingsettings:
•CallerID:Choosewhethertodisplayyour
numberonanoutgoingcall(dependingon
yournetworkprovider).
•Callwaiting:Ifcallwaitingisactivated,
thehandsetwillnotifyyouofanincoming
callwhileyouareinanothercall
(dependingonyournetworkprovider).
Call barring–Selectwhenyouwouldlike
callstobebarred.Enterthecallbarring
password.Pleasecheckwithyournetwork
operatoraboutthisservice.
Call costs–Viewthechargesapplied
toyourcalls.(Thisserviceisnetwork
dependent;someoperatorsdonotsupport
thisfunction).
Call duration–Viewthedurationofcalls
includinglastcall,allcalls,dialledcallsand
receivedcalls.
Excuse messages –Whenyouwantto
rejectacall,youcansendaquickmessage
usingthisfunction.Thisisusefulifyouneed
torejectacallduringameeting.
Video call settings –Changeyourvideo
callsettings.
Settings
Sound
< General >
Sound profile–Allowsyoutoselectsound
modewhatyouwant.
Volume–Allowsyoutosetthevolume
forringtone,media,alarm,notificatoinand
system.Ifyouunchecktheoption"Use
ringtonevolumefornotifications"youcan
setthevolumeforincomingcallsand
notificationsseparately.

141
Call costs–Viewthechargesapplied
toyourcalls.(Thisserviceisnetwork
dependent;someoperatorsdonotsupport
thisfunction).
Call duration–Viewthedurationofcalls
includinglastcall,allcalls,dialledcallsand
receivedcalls.
Excuse messages –Whenyouwantto
rejectacall,youcansendaquickmessage
usingthisfunction.Thisisusefulifyouneed
torejectacallduringameeting.
Video call settings –Changeyourvideo
callsettings.
Settings
Sound
< General >
Sound profile–Allowsyoutoselectsound
modewhatyouwant.
Volume–Allowsyoutosetthevolume
forringtone,media,alarm,notificatoinand
system.Ifyouunchecktheoption"Use
ringtonevolumefornotifications"youcan
setthevolumeforincomingcallsand
notificationsseparately.
< Ringtones >
Phone ringtone–Allowsyoutosetyour
defaultincomingcallringtone.
Notification ringtone–Allowsyoutoset
yourdefaultnotificationringtone.
Ringtone with vibration-Vibration
feedbackforcallsandnotifications.
< Feedback >
Audible touch tones–Allowsyoutosetthe
phonetoplaytoneswhenusingthedialpad
todialnumbers.

142
Audible selection–Allowsyoutosetyour
phonetoplayasoundwhenyoutouch
buttons,iconsandotheronscreenitemsthat
reacttoyourtouch.
Screen lock sounds–Allowsyoutoset
yourphonetoplayasoundwhenlocking
andunlockingthescreen.
Haptic feedback–Allowsyoutosetyour
phonetovibratebrieflywhenyoutouchthe
softkeysandoncertainUIinteractions.
Display
Brightness–Adjustthescreenbrightness.
Auto-rotate screen–Settoswitch
orientationautomaticallywhenyourotate
thephone.
Animation–Settodisplayananimation.
Screen timeout–Setthetimeforscreen
timeout.
Display font–Changethedisplayfont.
Warning popup–Settoswitchtoshow
warningpopup.
Settings
Power Saver
Activate Power Saver-Allowyoutosetan
activatingtimewhenstartingpowersaver
mode.
<Power saving items>
Settoswitchtoturnoffdesireditems:
Wi-Fi, Auto-sync, Bluetooth, GPS, NFC,
Animation effect, Brightness.
Brightness adjustment-Ifyouselect
Brightness,setthebrightnesspercentage.
<Battery>

144
Reset gesture sensor–Calibratethe
motionsensorwiththephoneplacedona
flatsurface.
Location & security
<My location>
Use wireless networks–IfyouselectUse
wireless networks,yourphonedetermines
yourapproximatelocationusingWi-Fiand
mobilenetworks.Whenyouselectthis
option,you'reaskedwhetheryouconsentto
allowingGoogletouseyourlocationwhen
providingtheseservices.
Use GPS satellites–IfyouselectUse
GPS satellites,yourphonedeterminesyour
locationtostreetlevelaccuracy.
<Screen unlock>
Set up screen lock–Setanunlock
patterntosecureyourphone.Opensaset
ofscreensthatguideyouthroughdrawing
ascreenunlockpattern.YoucansetaPIN
orPasswordinsteadofaPatternorleave
itasNone.
Whenyouturnonyourphoneorwakeup
thescreen,you'reaskedtodrawyourunlock
patterntounlockthescreen.
Settings
<SIM card lock>
Set up SIM card lock–SetupSIMcard
lockorchangetheSIMPIN.
<Passwords>
Visible passwords–Selecttoshow
passwordsasyoutypethemordeselectto
hidepasswordsasyoutypethem.
<Device administration>
Select device administrators–Addoneor
moreadministrators.

145
Use GPS satellites–IfyouselectUse
GPS satellites,yourphonedeterminesyour
locationtostreetlevelaccuracy.
<Screen unlock>
Set up screen lock–Setanunlock
patterntosecureyourphone.Opensaset
ofscreensthatguideyouthroughdrawing
ascreenunlockpattern.YoucansetaPIN
orPasswordinsteadofaPatternorleave
itasNone.
Whenyouturnonyourphoneorwakeup
thescreen,you'reaskedtodrawyourunlock
patterntounlockthescreen.
Settings
<SIM card lock>
Set up SIM card lock–SetupSIMcard
lockorchangetheSIMPIN.
<Passwords>
Visible passwords–Selecttoshow
passwordsasyoutypethemordeselectto
hidepasswordsasyoutypethem.
<Device administration>
Select device administrators–Addoneor
moreadministrators.
<Credential storage>
Use secure credentials–Allowsyouto
accesssecurecertificates.
Install from SD card–Choosetoinstall
encryptedcertificatesfromyourSDcard.
Set password–Setorchangethe
credentialstoragepassword.
Clear storage–Clearcredentialsforall
contentandresetpassword.
Applications
Youcanviewandmanagetheapplications.

146
Unknown sources–Defaultsettingto
installnon-Marketapplications.
Warning:
Dependingontheapplicationsyou
install,themobilephonemaynotoperate
correctlyandcouldbeillegallyusedto
establishyourlocationandgainaccess
topersonalinformationviatheInternet.
Toprotectyourphoneandpersonaldata,
onlydownloadapplicationsfromtrusted
sourcessuchasAndroidMarket.
Manage applications–Manageand
removeinstalledapplications.
Running services–Checkservicesthatare
currentlyrunning.
Storage use–Viewstorageusedby
applications.
Battery use–Seewhathasbeenusing
thebattery.
Development–Setoptionsforapplication
development.
Settings
Accounts & sync
< General sync settings >
Background data–Permitsapplicationsto
synchronisedatainthebackground,whether
ornotyouareactivelyworkinginthem.
Deselectingthissettingcansavebattery
powerandlowers(butdoesnoteliminate)
datausage.
Auto-sync–Permitsapplicationsto
synchronise,sendandreceivedatatotheir
ownschedule.
< Social+ update settings >

147
Manage applications–Manageand
removeinstalledapplications.
Running services–Checkservicesthatare
currentlyrunning.
Storage use–Viewstorageusedby
applications.
Battery use–Seewhathasbeenusing
thebattery.
Development–Setoptionsforapplication
development.
Settings
Accounts & sync
< General sync settings >
Background data–Permitsapplicationsto
synchronisedatainthebackground,whether
ornotyouareactivelyworkinginthem.
Deselectingthissettingcansavebattery
powerandlowers(butdoesnoteliminate)
datausage.
Auto-sync–Permitsapplicationsto
synchronise,sendandreceivedatatotheir
ownschedule.
< Social+ update settings >
Social+ settings–Permitstoset
upoptimisedsocialnetworkwidget
environment.
< Manage accounts >
ListofallGoogleaccountsandother
accountsyouhaveaddedtoyourphone.
Ifyoutouchanaccountinthisscreen,its
accountsyncsettingsscreenopens.
Privacy
Changethesettingsformanagingyour
settingsanddata.

148
• Back up my data:Settobackupyour
settingsandapplicationdatatothe
Googleserver.
• Automatic restore:Settorestoreyour
settingsandapplicationdatawhenthe
applicationsarereinstalledonyourdevice.
• Factory data reset:Resetyoursettings
tothefactorydefaultvaluesanddelete
allyourdata.Ifyouresetthephonein
thisway,youarepromptedtoreenter
thesameinformationaswhenyoufirst
startedAndroid.
NOTE:
• IfyouselectFactorydatareset,it
willeraseallofyourpersonaldata
fromyourphone’ssystemmemory,
includinginformationaboutyour
Googleaccount,anyotheraccounts,
yoursystem/applicationdataand
settingsaswellasanydownloaded
applicationsandDRMlicense.
Settings
• Resettingthephonedoesnoterase
anysystemsoftwareupdatesyou
havedownloadedoranyfilesonyour
microSDcardorinternalmemory,
suchasmusicorphotos.Andso,if
youwanttoeraseallthedataonthe
internalmemorywhileresettingthe
phone,selectthecheckboxofErase
internalmemory.

149
NOTE:
• IfyouselectFactorydatareset,it
willeraseallofyourpersonaldata
fromyourphone’ssystemmemory,
includinginformationaboutyour
Googleaccount,anyotheraccounts,
yoursystem/applicationdataand
settingsaswellasanydownloaded
applicationsandDRMlicense.
Settings
• Resettingthephonedoesnoterase
anysystemsoftwareupdatesyou
havedownloadedoranyfilesonyour
microSDcardorinternalmemory,
suchasmusicorphotos.Andso,if
youwanttoeraseallthedataonthe
internalmemorywhileresettingthe
phone,selectthecheckboxofErase
internalmemory.
Storage
Checkmemoryinformationofmemorycards
andyourdeviceandformattheexternalor
internalmemory.
Youcanalsounmountthememorycard(SD
card)tosafelyremoveitorformatit.
Language & keyboard
UsetheLanguage&keyboardsettingsto
selectthelanguageforthetextonyour
phoneandforconfiguringtheon-screen
keyboard,includingwordsyou'veaddedto
itsdictionary.

150
Voice input & output
SetVoicerecognisersettingsandusethe
Text-to-Speechsettingstoconfigurethe
Androidtext-to-speechsynthesiser,for
applicationsthatcantakeadvantageofit.
< Voice input >
Voice recogniser settings–Usethe
Voice recogniser settingstoconfigurethe
Androidvoiceinputfeature.
• Language:Opensascreenwhereyou
cansetthelanguageyouusespeechto
entertext.
• SafeSearch:Opensadialogboxwhere
youcansetwhetheryouwanttheGoogle
SafeSearchfiltertoblockcertainresults.
• Block offensive words:When
deselected,Googlevoicerecognitionwill
recogniseandtranscribewordsmany
peopleconsideroffensive,whenyouuse
speechtoentertext.Whenselected,
Googlevoicerecognitionreplacesthose
wordsintranscriptionswithaplaceholder
comprisedofstarsymbols(*).
Settings
< Voice output >
Text-to-speech settings–UsetheText-
to-speech settingstoconfiguretheAndroid
text-to-speechsynthesiserforapplications
thatcanusethisfeature.
NOTE:Ifyoudon'thavespeech
synthesiserdatainstalled,onlythe Install
voice data settingisavailable.
• Listen to an example:Playsabrief
sampleofthespeechsynthesiser,using
yourcurrentsettings.

151
• SafeSearch:Opensadialogboxwhere
youcansetwhetheryouwanttheGoogle
SafeSearchfiltertoblockcertainresults.
• Block offensive words:When
deselected,Googlevoicerecognitionwill
recogniseandtranscribewordsmany
peopleconsideroffensive,whenyouuse
speechtoentertext.Whenselected,
Googlevoicerecognitionreplacesthose
wordsintranscriptionswithaplaceholder
comprisedofstarsymbols(*).
Settings
< Voice output >
Text-to-speech settings–UsetheText-
to-speech settingstoconfiguretheAndroid
text-to-speechsynthesiserforapplications
thatcanusethisfeature.
NOTE:Ifyoudon'thavespeech
synthesiserdatainstalled,onlythe Install
voice data settingisavailable.
• Listen to an example:Playsabrief
sampleofthespeechsynthesiser,using
yourcurrentsettings.
• Always use my settings:Checktouse
thesettingsonthisscreenratherthanthe
speechsynthesisersettingsavailablein
otherapplications.
• Default engine:Opensadialogwhere
youcansetthetext-to-speechapplication
youwanttouse,ifyouhavemorethan
oneinstalled.
• Install voice data:Ifyourphonedoes
nothavespeechsynthesiserdata
installed,thisconnectstoAndroidMarket
andguidesyouthroughtheprocess
ofdownloadingandinstallingthedata.

152
Thissettingisnotavailableifthedatais
alreadyinstalled.
• Speech rate:Opensadialogwhere
youcanselecthowquicklyyouwantthe
synthesisertospeak.
• Language:Opensadialogwhereyoucan
selectthelanguageofthetextyouwant
thesynthesisertoread.Thisisparticularly
usefulwhencombinedwithAlways use
my settingstoensuretextisspoken
correctlyacrossavarietyofapplications.
• Pico TTS:ConfigurethePico TTS
settings.
Accessibility
UsetheAccessibilitysettingstoconfigure
accessibilityplug-insyouhaveinstalledon
yourphone.
NOTE:Requiresadditionalplug-insto
becomeavailable.
Connectivity
<USB connection mode>
Default connection mode-Youcansetthe
desiredmode(Charge only, Mass storage,
PC software andUSB tethering).
Settings
Always ask -Checkmarkthistoselect
theUSBconnectionmodewheneveryou
connectyourphonetoaPC.
<PC Suite>
Wi-Fi connection-Checkmarkthistouse
LG PC SuitewithWi-Ficonnection.
PleasenotethatWi-Finetworkshould
beconnectedforLGPCSuiteviaWi-Fi
connectioninWireless & networks
settings.

153
Accessibility
UsetheAccessibilitysettingstoconfigure
accessibilityplug-insyouhaveinstalledon
yourphone.
NOTE:Requiresadditionalplug-insto
becomeavailable.
Connectivity
<USB connection mode>
Default connection mode-Youcansetthe
desiredmode(Charge only, Mass storage,
PC software andUSB tethering).
Settings
Always ask -Checkmarkthistoselect
theUSBconnectionmodewheneveryou
connectyourphonetoaPC.
<PC Suite>
Wi-Fi connection-Checkmarkthistouse
LG PC SuitewithWi-Ficonnection.
PleasenotethatWi-Finetworkshould
beconnectedforLGPCSuiteviaWi-Fi
connectioninWireless & networks
settings.
Date & time
UseDate & timesettingstosethowdates
aredisplayed.Youcanalsousethese
settingstosetyourowntimeandtimezone
ratherthanobtainingthecurrenttimefrom
themobilenetwork.
About phone
Viewlegalinformationandcheckphone
statusandsoftwareversion.
154
On-ScreenPhoneallowsyoutoviewyour
mobilephonescreenfromaPCviaaUSBor
Bluetoothconnection.Youcanalsocontrol
yourmobilephonefromyourPC,usingthe
mouseorkeyboard.
On-Screen Phone icons
ConnectsyourmobilephonetoyourPC,
ordisconnectsit.
RotatestheOn-ScreenPhonewindow
(onlyavailablewithapplicationsthat
supportrotation).
ChangestheOn-ScreenPhone
preferences.
ExitstheOn-ScreenPhoneprogramme.
minimizetheOn-ScreenPhonewindow.
On-Screen Phone features
• Real-timetransferandcontrol:displaysand
controlsyourmobilephonescreenwhen
connectedtoyourPC.
• Mousecontrol:allowsyoutocontrolyour
mobilephonebyusingthemousetoclick
anddragonyourPCscreen.
• Textinputwithkeyboard:allowsyouto
composeatextmessageornoteusingyour
LG On-Screen Phone
computerkeyboard.
• Filetransfer(mobilephonetoPC):sendsfiles
fromyourmobilephone(e.g.photos,videos,
musicandPolarisOfficefiles)toyourPC.
Simplyright-clickonthefilewhichyouwant
tosendtoPCandclickon"SavetoPC".
• Filetransfer(PCtomobilephone):sends
filesfromyourPCtoyourmobilephone.Just
selectthefilesyouwishtotransferanddrag
anddropthemintotheOn-ScreenPhone
window.Thefilessentarestoredininternal
SDcard.
• Real-timeeventnotifications:promptsapop-
uptoinformyouofanyincomingcallsor

155
preferences.
ExitstheOn-ScreenPhoneprogramme.
minimizetheOn-ScreenPhonewindow.
On-Screen Phone features
• Real-timetransferandcontrol:displaysand
controlsyourmobilephonescreenwhen
connectedtoyourPC.
• Mousecontrol:allowsyoutocontrolyour
mobilephonebyusingthemousetoclick
anddragonyourPCscreen.
• Textinputwithkeyboard:allowsyouto
composeatextmessageornoteusingyour
LG On-Screen Phone
computerkeyboard.
• Filetransfer(mobilephonetoPC):sendsfiles
fromyourmobilephone(e.g.photos,videos,
musicandPolarisOfficefiles)toyourPC.
Simplyright-clickonthefilewhichyouwant
tosendtoPCandclickon"SavetoPC".
• Filetransfer(PCtomobilephone):sends
filesfromyourPCtoyourmobilephone.Just
selectthefilesyouwishtotransferanddrag
anddropthemintotheOn-ScreenPhone
window.Thefilessentarestoredininternal
SDcard.
• Real-timeeventnotifications:promptsapop-
uptoinformyouofanyincomingcallsor
text/multimediamessages.
Notice: TheCamerapreview,
videosandcontentsfrom3Dmode(3D
Game&Apps,3DGuide,YouTube3D,
3DGallery)arenotsupportedinOSP,so
theyarenotavailableonthePC.

156
How to install On-Screen Phone
on your PC
1 VisitLGHome(www.lg.com)andselect
acountryofyourchoice.
2 GotoSupport >Mobile Phone
Support>SelecttheModel(LG-P720h)
>ClickOSP(On-ScreenPhone)to
download.YoucaninstalltheOn-Screen
PhoneonyourPC.
How to connect your mobile
phone to your PC
USB connection:
1 OpenConnectionWizard,select"USBCable
connection"andclick"Next".
2 ConnectyourmobilephonetothePCusinga
USBcableandclick"Next".
3 EntertheOn-ScreenPhonepassword
andclick"Next".Thedefaultpassword
is"0000".Youcanchangethepassword
inSettings > Wireless & networks >
On-Screen Phone settings.
4 Click"OK"toexitthewindow.
LG On-Screen Phone
Wireless connection with Bluetooth:
1 Onyourmobilephone,gotoSettings
> Wireless & networks > Bluetooth
settings.SelectTurn on Bluetoothand
thenselectDiscoverable.
2 Ifyouhavepreviouslyconnectedusinga
cable,runtheNewConnectionWizardto
createanewconnection.
3 RuntheConnectionWizardonthecomputer,
select"Bluetoothconnection",then"Next".
4 ThewizardwillstartsearchingforBluetooth-
enabledmobilephones.Whenthemobile
phoneyouwanttoconnecttoappears,click
"Stop"tostopsearching.

157
How to connect your mobile
phone to your PC
USB connection:
1 OpenConnectionWizard,select"USBCable
connection"andclick"Next".
2 ConnectyourmobilephonetothePCusinga
USBcableandclick"Next".
3 EntertheOn-ScreenPhonepassword
andclick"Next".Thedefaultpassword
is"0000".Youcanchangethepassword
inSettings > Wireless & networks >
On-Screen Phone settings.
4 Click"OK"toexitthewindow.
LG On-Screen Phone
Wireless connection with Bluetooth:
1 Onyourmobilephone,gotoSettings
> Wireless & networks > Bluetooth
settings.SelectTurn on Bluetoothand
thenselectDiscoverable.
2 Ifyouhavepreviouslyconnectedusinga
cable,runtheNewConnectionWizardto
createanewconnection.
3 RuntheConnectionWizardonthecomputer,
select"Bluetoothconnection",then"Next".
4 ThewizardwillstartsearchingforBluetooth-
enabledmobilephones.Whenthemobile
phoneyouwanttoconnecttoappears,click
"Stop"tostopsearching.
5 Select"LG-P720h"fromthedevicelistand
click"Next".Youcanrenamethedeviceif
youwish.
6 Acceptthepairingrequestinyourphone
andselect"Next"inPC.
7 EntertheOn-ScreenPhonepassword
andclick"Next".(Thedefaultpasswordis
"0000").
8 Touch"OK"toexit.

158
To check the phone-to-PC
connection
Oncethedeviceshavebeenconnected,drag
downthenotificationbaratthetopofthe
homescreentochecktheOn-ScreenPhone
connectionstatus.
To disconnect your phone from
your PC
Click inthetopleftoftheOn-Screen
Phonewindow.Alternatively,dragdownthe
notificationbaratthetopofthehomescreen
andselect"On-ScreenPhone".Touch"Yes"
intheDisconnectwindow.
NOTE: Youmustrestartyour
phoneaftershuttingdowntheOn-Screen
Phoneservice.
LG On-Screen Phone
“LGPCSuite”PCsoftwareisaprogramthat
helpsyouconnectyourdevicetoaPCviaa
USB,orWi-Ficonnection.Onceconnected,
youcanusethefunctionsofyourdevice
fromyourPC.
With your “LG PC Suite” PC software,
You Can...
• Manageandplayyourmediacontents
(music,movie,pictures)onyourPC.
• Sendmultimediacontentstoyourdevice.
• Synchronisesdata(schedules,contacts,
bookmarks)inyourdeviceandPC.
PC software(LG PC Suite)

159
To disconnect your phone from
your PC
Click inthetopleftoftheOn-Screen
Phonewindow.Alternatively,dragdownthe
notificationbaratthetopofthehomescreen
andselect"On-ScreenPhone".Touch"Yes"
intheDisconnectwindow.
NOTE: Youmustrestartyour
phoneaftershuttingdowntheOn-Screen
Phoneservice.
LG On-Screen Phone
“LGPCSuite”PCsoftwareisaprogramthat
helpsyouconnectyourdevicetoaPCviaa
USB,orWi-Ficonnection.Onceconnected,
youcanusethefunctionsofyourdevice
fromyourPC.
With your “LG PC Suite” PC software,
You Can...
• Manageandplayyourmediacontents
(music,movie,pictures)onyourPC.
• Sendmultimediacontentstoyourdevice.
• Synchronisesdata(schedules,contacts,
bookmarks)inyourdeviceandPC.
• Backuptheapplicationsinyourdevice.
• Updatethesoftwaresinyourdevice.
• Backupandrestorethedevice.
• PlaymultimediacontentsofyourPCfrom
otherdevice.
TIP! YoucanusetheHelpmenu
fromtheapplicationtofindouthowto
useyour"LGPCSuite"PCsoftware.
Installing “LG PC Suite” PC software
“LGPCSuite”PCsoftwarecanbe
downloadedfromthewebpageofLG.
PC software(LG PC Suite)

160
1 Gotowww.lg.comandselectacountry
ofyourchoice.
2 GotoSupport>Mobile Phone
Support>SelecttheModel
(LG-P720h).
3 ClickPC SyncfromDownloads,and
clickWINDOW PC Sync Downloadto
download“LG PC Suite”PCsoftware.
System Requirements for “LG PC Suite”
PC software
• OS:WindowsXP32bit(Servicepack2),
WindowsVista32bit/64bit,Windows7
32bit/64bit
• CPU:1GHzorhigherprocessor
• Memory:512MBorhigherRAM
• Graphiccard:1024x768resolution,32
bitcolororhigher
• HDD:100MBormorefreeharddisk
space(Morefreeharddiskspacemay
beneededdependingonthevolumeof
datastored.)
• Requiredsoftware:LGintegrateddrivers.
PC software(LG PC Suite)
NOTE: LG Integrated USB Driver
•LGintegratedUSBdriverisrequired
toconnectanLGdeviceandPCand
installedautomaticallywhenyouinstall
“LGPCSuite”PCsoftware.
Connecting your Device to your
PC
“LGPCSuite”PCsoftwarecanconnecta
devicewithaUSBcableorWi-Fi.
How to connect a device with USB cable
1 Click onthetopofthescreen.

161
32bit/64bit
• CPU:1GHzorhigherprocessor
• Memory:512MBorhigherRAM
• Graphiccard:1024x768resolution,32
bitcolororhigher
• HDD:100MBormorefreeharddisk
space(Morefreeharddiskspacemay
beneededdependingonthevolumeof
datastored.)
• Requiredsoftware:LGintegrateddrivers.
PC software(LG PC Suite)
NOTE: LG Integrated USB Driver
•LGintegratedUSBdriverisrequired
toconnectanLGdeviceandPCand
installedautomaticallywhenyouinstall
“LGPCSuite”PCsoftware.
Connecting your Device to your
PC
“LGPCSuite”PCsoftwarecanconnecta
devicewithaUSBcableorWi-Fi.
How to connect a device with USB cable
1 Click onthetopofthescreen.
2 Devicestoragesectionwillbecreatedin
thelibrarysectionontheleftsideofthe
screenandthedevicewillbeconnected.
NOTE: Whenyouselectthe
connectionmodefromthedevice,
choose‘PCSoftware’toconnect.
How to establish wireless connection
with Wi-Fi
Wi-Ficonnectionfordevice,Ethernet
connectionforPCwithsamewirelessrouter:

162
• Deviceconfiguration
1 Fromyourdevice,selectSettings
> Wireless & networks > Wi-Fi
settings andenabletheWi-Fi.
2 FromthelistofWi-Finetwork
searched,selectanetworkto
connect.
3 Youmayneedtoenterthepassword
ifthenetworkissecured.
4 Fromyourdevice,selectSettings
>Connectivity>enabletheWi-Fi
Connection.
• PCconfiguration
1 GotoNetwork Configuration.
2 MakesurethatthePCisconnected
tothesamenetworktowhichthe
deviceisconnected.
Wi-FiconnectionforbothdeviceandPC,
withsamewirelessrouter:
• Deviceconfiguration
1 Fromyourdevice,selectSettings
> Wireless & networks > Wi-Fi
settings andenabletheWi-Fi.
2 FromthelistofWi-Finetwork
PC software(LG PC Suite)
searched,selectanetworkto
connect.
3 Youmayneedtoenterthepassword
ifthenetworkissecured.
4 Fromyourdevice,selectSettings
>Connectivity>enabletheWi-Fi
Connection.
• PCconfiguration
1 GotoNetwork Configuration.
2 MakesurethatthePCisconnected
tothesamenetworktowhichthe
deviceisconnected.
HowtoconnectwithHotspot:

163
• PCconfiguration
1 GotoNetwork Configuration.
2 MakesurethatthePCisconnected
tothesamenetworktowhichthe
deviceisconnected.
Wi-FiconnectionforbothdeviceandPC,
withsamewirelessrouter:
• Deviceconfiguration
1 Fromyourdevice,selectSettings
> Wireless & networks > Wi-Fi
settings andenabletheWi-Fi.
2 FromthelistofWi-Finetwork
PC software(LG PC Suite)
searched,selectanetworkto
connect.
3 Youmayneedtoenterthepassword
ifthenetworkissecured.
4 Fromyourdevice,selectSettings
>Connectivity>enabletheWi-Fi
Connection.
• PCconfiguration
1 GotoNetwork Configuration.
2 MakesurethatthePCisconnected
tothesamenetworktowhichthe
deviceisconnected.
HowtoconnectwithHotspot:
• Deviceconfiguration
1 SelectSettings>Wireless &
networks>Portable hotspotto
configuretheWi-FiHotspot.
2 Fromthestep1,selectPortable Wi-
Fi hotspot>Portable Wi-Fi hotspot
settings>Configure Wi-Fi hotspot
remembertheSSIDinformationof
thenetwork.
• PCconfiguration
1 GotoNetwork Configuration.
2 MakesurethatthePCisconnected
tothesameportablehotspot.

164
Please read the above and follow the
procedures below.
1 Click onthetopofthescreen.
2 ThenselectWi-Ficonnection.
3 Pleasefollowtheinstructionon
ConnectionWizard.
4 Devicestoragesectionwillbecreatedin
thelibrarysectionontheleftsideofthe
screenandthedevicewillbeconnected.
NOTE:
• Ifyoucannotfindthedeviceto
connect,Fromthedeviceselect
Settings>Connectivity>Enable
Wi-Fi connectionandclickRetry
inPC.
• YoumayexperiencebadWi-Fi
connectiondependingonnetwork
configurationandnetworkstatus.
PC software(LG PC Suite)
• IfyouconnectthedeviceandPCwith
HotspotandusetheInternetonyour
PC,youmayincurdatachargesin
connectionwithHotspotdependingon
yourpaymentplan.
• Thebatteryofyourdevicemayrun
lowquicklyifyouuseWi-Fi.
Synchronising your Device to a
Computer
DataofyourdeviceandPCcanbe
synchronisedeasilywith"LGPCSuite"PC

165
NOTE:
• Ifyoucannotfindthedeviceto
connect,Fromthedeviceselect
Settings>Connectivity>Enable
Wi-Fi connectionandclickRetry
inPC.
• YoumayexperiencebadWi-Fi
connectiondependingonnetwork
configurationandnetworkstatus.
PC software(LG PC Suite)
• IfyouconnectthedeviceandPCwith
HotspotandusetheInternetonyour
PC,youmayincurdatachargesin
connectionwithHotspotdependingon
yourpaymentplan.
• Thebatteryofyourdevicemayrun
lowquicklyifyouuseWi-Fi.
Synchronising your Device to a
Computer
DataofyourdeviceandPCcanbe
synchronisedeasilywith"LGPCSuite"PC
softwareforyourconvenience.Contacts,
schedules,andbookmarkscanbe
synchronised.
Theprocedureisasfollows:
1 ConnectyourdevicetoPC.(UseaUSB
cableorWi-Ficonnection.)
2 Afterconnection,runtheprogram
andselectthedevicesectionfromthe
categoryontheleftsideofthescreen.
3 Click[Personalinformation]toselect.
4 Selectthecheckboxofcontentsto
synchroniseandclicktheSyncbutton.

166
Moving Contacts from your Old
Device to your New Device
ExportyourcontactsasaCSVfilefrom
yourolddevicetoyourPCusingaPCsync
program.
1 Install"LGPCSuite"PCsoftwareonthe
PC.Runtheprogramandconnectyour
devicetothePCusingaUSBcable.
2 Fromthetopofthescreen,select
Device>Import personal information
>Import contacts.
3 Apop-uptoopenacontactsfilewill
appear.
4 SelectacontactsfileandclickOpen.
5 Apop-uptoimportanewcontactfrom
PCtothecontactsinthedevicewill
appear.
6 Ifthecontactsinthedeviceandnew
contactsfromPCaredifferent,selecta
contactyouwanttoimportfromPC.
7 Clickthe[OK]buttontoimportanew
contactfromPCtothedevice.
PC software(LG PC Suite)
Sending Multimedia contents
from Device to PC
1 ConnectthedeviceandPCwithaUSB
cable.
2 Run"LGPCSuite"PCsoftware.
3 Afterconnection,selectthedevice
sectionfromthecategoryontheleft
sideofthescreen.
4 SelectMultimedia.
5 Selectthecheckboxofthecontentsto
send.

167
3 Apop-uptoopenacontactsfilewill
appear.
4 SelectacontactsfileandclickOpen.
5 Apop-uptoimportanewcontactfrom
PCtothecontactsinthedevicewill
appear.
6 Ifthecontactsinthedeviceandnew
contactsfromPCaredifferent,selecta
contactyouwanttoimportfromPC.
7 Clickthe[OK]buttontoimportanew
contactfromPCtothedevice.
PC software(LG PC Suite)
Sending Multimedia contents
from Device to PC
1 ConnectthedeviceandPCwithaUSB
cable.
2 Run"LGPCSuite"PCsoftware.
3 Afterconnection,selectthedevice
sectionfromthecategoryontheleft
sideofthescreen.
4 SelectMultimedia.
5 Selectthecheckboxofthecontentsto
send.
6 ClickStarttotransfercontentsfromthe
devicetoPC.

168
LG Mobile phone software update from
the Internet
Formoreinformationaboutusingthis
function,pleasevisithttp://update.lgmobile.
comorhttp://www.lg.com/common/index.
jsp selectcountryandlanguage.
Thisfeatureallowsyoutoupdatethe
firmwareonyourphonetoanewerversion
convenientlyfromtheInternetwithout
needingtovisitaservicecentre.Thisfeature
willonlybeavailableifandwhenLGmakes
anewerfirmwareversionavailableforyour
device.
Asthemobilephonefirmwareupdate
requirestheuser'sfullattentionforthe
durationoftheupdateprocess,pleasemake
sureyoucheckallinstructionsandnotes
thatappearateachstepbeforeproceeding.
PleasenotethatremovingtheUSBdata
cableorbatteryduringtheupgrademay
seriouslydamageyourmobilephone.
Phone software update
NOTE: LGreservestherightto
makefirmwareupdatesavailableonly
forselectedmodelsatitsowndiscretion
anddoesnotguaranteetheavailabilityof
thenewerversionofthefirmwareforall
handsetmodels.
LG Mobile Phone software update via
Over-the-Air (OTA)
Thisfeatureallowsyoutoupdateyour
phone'ssoftwaretoanewerversion
convenientlyviaOTA,withoutconnecting
withaUSBdatacable.Thisfeaturewillonly

169
Asthemobilephonefirmwareupdate
requirestheuser'sfullattentionforthe
durationoftheupdateprocess,pleasemake
sureyoucheckallinstructionsandnotes
thatappearateachstepbeforeproceeding.
PleasenotethatremovingtheUSBdata
cableorbatteryduringtheupgrademay
seriouslydamageyourmobilephone.
Phone software update
NOTE: LGreservestherightto
makefirmwareupdatesavailableonly
forselectedmodelsatitsowndiscretion
anddoesnotguaranteetheavailabilityof
thenewerversionofthefirmwareforall
handsetmodels.
LG Mobile Phone software update via
Over-the-Air (OTA)
Thisfeatureallowsyoutoupdateyour
phone'ssoftwaretoanewerversion
convenientlyviaOTA,withoutconnecting
withaUSBdatacable.Thisfeaturewillonly
beavailableifandwhenLGmakesanewer
firmwareversionavailableforyourdevice.
First,youcancheckthesoftwareversion
onyourmobilephone:Settings>About
phone>Software update>Check now
for update.
Youcanalsodelaytheupdateby1hour,4
hours,8hours,orOneday.Inthiscase,the
applicationwillnotifyyoutoupdatewhenthe
timeisup.Youcanalsorearrangeanupdate
manually.

170
NOTE: Thisfeatureisdependent
onyournetworkserviceprovider,region
andcountry.
Phone software update
• Copyright2012LGElectronics,Inc.All
rightsreserved.LGandtheLGlogoare
registeredtrademarksofLGGroupandits
relatedentities.
• Bluetooth
®
isaregisteredtrademarkof
theBluetoothSIG,Inc.worldwide.
• Wi-Fi
®
,theWi-FiCERTIFIEDlogo,andthe
Wi-Filogoareregisteredtrademarksof
theWi-FiAlliance.
• Allothertrademarksandcopyrightsare
thepropertyoftheirrespectiveowners.
Trademarks

171
Phone software update
• Copyright2012LGElectronics,Inc.All
rightsreserved.LGandtheLGlogoare
registeredtrademarksofLGGroupandits
relatedentities.
• Bluetooth
®
isaregisteredtrademarkof
theBluetoothSIG,Inc.worldwide.
• Wi-Fi
®
,theWi-FiCERTIFIEDlogo,andthe
Wi-Filogoareregisteredtrademarksof
theWi-FiAlliance.
• Allothertrademarksandcopyrightsare
thepropertyoftheirrespectiveowners.
DivX Mobile
ABOUTDIVXVIDEO:DivX
®
isadigitalvideo
formatcreatedbyDivX,LLC,asubsidiary
ofRoviCorporation.ThisisanofficialDivX
Certified
®
devicethatplaysDivXvideo.
Visitdivx.comformoreinformationand
softwaretoolstoconvertyourfilesinto
DivXvideos.
Trademarks

172
ABOUTDIVXVIDEO-ON-DEMAND:This
DivXCertified
®
devicemustberegistered
inordertoplaypurchasedDivXVideo-
on-Demand(VOD)movies.Toobtainyour
registrationcode,locatetheDivXVOD
sectioninyourdevicesetupmenu.Goto
vod.divx.comformoreinformationonhow
tocompleteyourregistration.
DivX Certified
®
to play DivX
®
video
up to HD 720p, including premium
content.
DivX
®
, DivX Certified
®
and associated
logos are trademarks of Rovi
Corporation or its subsidiaries and are
used under license.
Covered by one or more of the
following U.S. patents: 7,295,673;
7,460,668; 7,515,710; 7,519,274
Notice: Open Source Software
Toobtainthecorrespondingsource
codeunderGPL,LGPL,MPLandother
opensourcelicences,pleasevisithttp://
opensource.lge.com/
Allreferredlicenceterms,disclaimers
andnoticesareavailablefordownload
withthesourcecode.
• Wi-Fi
®
andWi-FiProtectedAccess
®
areregisteredtrademarksoftheWi-Fi
Alliance.
Trademarks

173
Corporation or its subsidiaries and are
used under license.
Covered by one or more of the
following U.S. patents: 7,295,673;
7,460,668; 7,515,710; 7,519,274
Notice: Open Source Software
Toobtainthecorrespondingsource
codeunderGPL,LGPL,MPLandother
opensourcelicences,pleasevisithttp://
opensource.lge.com/
Allreferredlicenceterms,disclaimers
andnoticesareavailablefordownload
withthesourcecode.
• Wi-Fi
®
andWi-FiProtectedAccess
®
areregisteredtrademarksoftheWi-Fi
Alliance.
DTS
ManufacturedunderlicensefromDTS
LicensingLimited.DTSandtheSymbolare
registeredtrademarks,&DTS2.0Channel
andtheDTSlogosaretrademarksofDTS,
Inc.Productincludessoftware.©DTS,Inc.
AllRightsReserved.
Dolby Mobile
ManufacturedunderlicensefromDolby
Laboratories.Dolbyandthedouble-Dsymbol
aretrademarksofDolbyLaboratories.
Trademarks
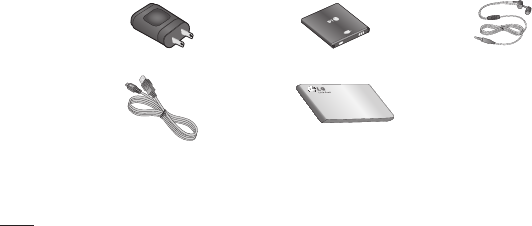
174
TheseaccessoriesareavailableforusewiththeLG-P720h.(Items described below may be optional.)
Travel adaptor Battery Stereo headset
Data cable
Connectyour
LG-P720hand
PC.
User Guide
Learnmore
aboutyour
LG-P720h.
NOTE:
-AlwaysusegenuineLGaccessories.Failuretodothismayinvalidateyourwarranty.
-Accessoriesmayvaryindifferentregions.
Accessories
Ambient Temperatures
Max:+50°C(discharging),+45°C(charging)
Min:-10°C
Technical data
DECLARATION OF CONFORMITY
Hereby,LGElectronicsdeclaresthatthis
LG-P720hproductisincompliancewiththe
essentialrequirementsandotherrelevant
provisionsofDirective1999/5/EC.Acopyof
theDeclarationofConformitycanbefound
athttp://www.lg.com/global/support/
cedoc/RetrieveProductCeDOC.jsp.

175
TheseaccessoriesareavailableforusewiththeLG-P720h.(Items described below may be optional.)
Travel adaptor Battery Stereo headset
Data cable
Connectyour
LG-P720hand
PC.
User Guide
Learnmore
aboutyour
LG-P720h.
NOTE:
-AlwaysusegenuineLGaccessories.Failuretodothismayinvalidateyourwarranty.
-Accessoriesmayvaryindifferentregions.
Accessories
Ambient Temperatures
Max:+50°C(discharging),+45°C(charging)
Min:-10°C
Technical data
DECLARATION OF CONFORMITY
Hereby,LGElectronicsdeclaresthatthis
LG-P720hproductisincompliancewiththe
essentialrequirementsandotherrelevant
provisionsofDirective1999/5/EC.Acopyof
theDeclarationofConformitycanbefound
athttp://www.lg.com/global/support/
cedoc/RetrieveProductCeDOC.jsp.

176
Thischapterlistssomeproblemsyoumightencounterwhileusingyourphone.Some
problemsrequireyoutocallyourserviceprovider,butmostareeasytofixyourself.
Message Possible causes Possible corrective measures
SIMerror
ThereisnoSIMcardin
thephoneoritisinserted
incorrectly.
MakesurethattheSIMcardiscorrectly
inserted.
Nonetwork
connection/Losing
network
Signalisweakoryou're
outsidethecarriernetwork.
Operatorappliednew
services.
Movetowardsawindoworintoanopenarea.
Checkthenetworkoperatorcoveragemap.
CheckwhethertheSIMcardismorethan
6~12monthsold.Ifso,changeyourSIM
atyournetworkprovider'snearestbranch.
Contactyourserviceprovider.
Troubleshooting
Message Possible causes Possible corrective measures
Codesdonotmatch
Tochangeasecuritycode,
youwillneedtoconfirmthe
newcodebyre-enteringit.
Thetwocodesyouhave
entereddonotmatch.
Ifyouforgetthecode,contactyourservice
provider.
Anyapplication
cannotbeset
Notsupportedbyservice
providerorregistration
required.
Contactyourserviceprovider.

177
Thischapterlistssomeproblemsyoumightencounterwhileusingyourphone.Some
problemsrequireyoutocallyourserviceprovider,butmostareeasytofixyourself.
Message Possible causes Possible corrective measures
SIMerror
ThereisnoSIMcardin
thephoneoritisinserted
incorrectly.
MakesurethattheSIMcardiscorrectly
inserted.
Nonetwork
connection/Losing
network
Signalisweakoryou're
outsidethecarriernetwork.
Operatorappliednew
services.
Movetowardsawindoworintoanopenarea.
Checkthenetworkoperatorcoveragemap.
CheckwhethertheSIMcardismorethan
6~12monthsold.Ifso,changeyourSIM
atyournetworkprovider'snearestbranch.
Contactyourserviceprovider.
Troubleshooting
Message Possible causes Possible corrective measures
Codesdonotmatch
Tochangeasecuritycode,
youwillneedtoconfirmthe
newcodebyre-enteringit.
Thetwocodesyouhave
entereddonotmatch.
Ifyouforgetthecode,contactyourservice
provider.
Anyapplication
cannotbeset
Notsupportedbyservice
providerorregistration
required.
Contactyourserviceprovider.

178
Message Possible causes Possible corrective measures
Callsnotavailable
Diallingerror
NewSIMcardinserted.
Pre-paidchargelimitreached.
Newnetworknotauthorised.
Checkfornewrestrictions.
Contactserviceproviderorresetlimitwith
PIN2.
Phonecannotbe
switchedon
On/Offkeypressedtoobriefly.
Batteryisnotcharged.
Batterycontactsaredirty.
PresstheOn/Offkeydownforatleasttwo
seconds.
Chargebattery.Checkchargingindicatoron
thedisplay.
Cleanthebatterycontacts.
Troubleshooting
Message Possible causes Possible corrective measures
Chargingerror
Batteryisnotcharged.
Outsidetemperatureistoo
hotorcold.
Contactproblem
Novoltage
Chargerdefective
Wrongcharger
Batterydefective
Chargebattery.
Makesurephoneischargingatanormal
temperature.
Checkthechargerandconnectiontothe
phone.Checkthebatterycontactsandclean
themifnecessary.
Plugthechargerintoadifferentsocket.
Ifthechargerdoesnotwarmup,replaceit.
OnlyuseoriginalLGaccessories.
Replacebattery.

179
Message Possible causes Possible corrective measures
Callsnotavailable
Diallingerror
NewSIMcardinserted.
Pre-paidchargelimitreached.
Newnetworknotauthorised.
Checkfornewrestrictions.
Contactserviceproviderorresetlimitwith
PIN2.
Phonecannotbe
switchedon
On/Offkeypressedtoobriefly.
Batteryisnotcharged.
Batterycontactsaredirty.
PresstheOn/Offkeydownforatleasttwo
seconds.
Chargebattery.Checkchargingindicatoron
thedisplay.
Cleanthebatterycontacts.
Troubleshooting
Message Possible causes Possible corrective measures
Chargingerror
Batteryisnotcharged.
Outsidetemperatureistoo
hotorcold.
Contactproblem
Novoltage
Chargerdefective
Wrongcharger
Batterydefective
Chargebattery.
Makesurephoneischargingatanormal
temperature.
Checkthechargerandconnectiontothe
phone.Checkthebatterycontactsandclean
themifnecessary.
Plugthechargerintoadifferentsocket.
Ifthechargerdoesnotwarmup,replaceit.
OnlyuseoriginalLGaccessories.
Replacebattery.

180
Message Possible causes Possible corrective measures
Numbernot
permitted
TheFixeddiallingnumber
functionison.
ChecktheSettingsmenuandturnthefunction
off.
Impossibleto
receive/sendSMS
&picture
Memoryfull Deletesomemessagesfromthephone.
Filesnotopening Unsupportedfileformat Checkthefileformatsthatcanbesupported.
SDcardnotworking FAT16,FAT32filesystem
supported
CheckSDcardfilesystemviacardreader,or
formatSDcardusingthephone.
Troubleshooting
Message Possible causes Possible corrective measures
Thescreendoes
notturnonwhenI
receiveacall.
Proximitysensorproblem
Ifyouuseanyprotectiontapeorcase,check
toseeifithascoveredtheareaaroundthe
proximitysensor.Makesurethatthearea
aroundtheproximitysensorisclean.
Nosound Vibrationmode
Checkthesettingsstatusofthesoundmenu
tomakesureyouarenotinvibrateorsilent
mode.
Hanguporfreeze Intermittentsoftwareproblem
Removeandre-insertbattery.
Turnonthephone.
Trytodoasoftwareupdateserviceviathe
website.

181
Message Possible causes Possible corrective measures
Numbernot
permitted
TheFixeddiallingnumber
functionison.
ChecktheSettingsmenuandturnthefunction
off.
Impossibleto
receive/sendSMS
&picture
Memoryfull Deletesomemessagesfromthephone.
Filesnotopening Unsupportedfileformat Checkthefileformatsthatcanbesupported.
SDcardnotworking FAT16,FAT32filesystem
supported
CheckSDcardfilesystemviacardreader,or
formatSDcardusingthephone.
Troubleshooting
Message Possible causes Possible corrective measures
Thescreendoes
notturnonwhenI
receiveacall.
Proximitysensorproblem
Ifyouuseanyprotectiontapeorcase,check
toseeifithascoveredtheareaaroundthe
proximitysensor.Makesurethatthearea
aroundtheproximitysensorisclean.
Nosound Vibrationmode
Checkthesettingsstatusofthesoundmenu
tomakesureyouarenotinvibrateorsilent
mode.
Hanguporfreeze Intermittentsoftwareproblem
Removeandre-insertbattery.
Turnonthephone.
Trytodoasoftwareupdateserviceviathe
website.