LG Electronics USA P768G Cellular/ PCS GSM/ EDGE/ WCDMA Phone with WLAN and Bluetooth User Manual LG P760 ENG ADDC ACA9 C6A9 120806 indd
LG Electronics MobileComm USA, Inc. Cellular/ PCS GSM/ EDGE/ WCDMA Phone with WLAN and Bluetooth LG P760 ENG ADDC ACA9 C6A9 120806 indd
Users Manual
![2CTVUVCVGOGPV&KDQJHRU0RGLILFDWLRQVWKDWDUHQRWH[SUHVVO\DSSURYHGE\WKHPDQXIDFWXUHUFRXOGYRLGWKHXVHUVDXWKRULW\WRRSHUDWHWKHHTXLSPHQW2CTVUVCVGOGPV7KLVHTXLSPHQWKDVEHHQWHVWHGDQGIRXQGWRFRPSO\ZLWKWKHOLPLWVIRUDFODVV%GLJLWDOGHYLFHSXUVXDQWWR3DUWRIWKH)&&5XOHV7KHVHOLPLWVDUHGHVLJQHGWRSURYLGHUHDVRQDEOHSURWHFWLRQDJDLQVWKDUPIXOLQWHUIHUHQFHLQDUHVLGHQWLDOLQVWDOODWLRQ7KLVHTXLSPHQWJHQHUDWHVXVHVDQGFDQUDGLDWHUDGLRIUHTXHQF\HQHUJ\DQGLIQRWLQVWDOOHGDQGXVHGLQDFFRUGDQFHZLWKWKHLQVWUXFWLRQVPD\FDXVHKDUPIXOLQWHUIHUHQFHWRUDGLRFRPPXQLFDWLRQV+RZHYHUWKHUHLVQRJXDUDQWHHWKDWLQWHUIHUHQFHZLOOQRWRFFXULQDSDUWLFXODULQVWDOODWLRQ,IWKLVHTXLSPHQWGRHVFDXVHKDUPIXOLQWHUIHUHQFHRUWHOHYLVLRQUHFHSWLRQZKLFKFDQEHGHWHUPLQHGE\WXUQLQJWKHHTXLSPHQWRIIDQGRQWKHXVHULVHQFRXUDJHGWRWU\WRFRUUHFWWKHLQWHUIHUHQFHE\RQHRUPRUHRIWKHIROORZLQJPHDVXUHV5HRULHQWRUUHORFDWHWKHUHFHLYLQJDQWHQQD,QFUHDVHWKHVHSDUDWLRQEHWZHHQWKHHTXLSPHQWDQGUHFHLYHU&RQQHFWWKHHTXLSPHQWLQWRDQRXWOHWRQDFLUFXLWGLIIHUHQWIURPWKDWWRZKLFKWKHUHFHLYHULVFRQQHFWHG&RQVXOWWKHGHDOHURUDQH[SHULHQFHGUDGLR79WHFKQLFLDQIRUKHOS(%%2CTV%NCUU$%QORNKCPEG7KLVGHYLFHDQGLWVDFFHVVRULHVFRPSO\ZLWKSDUWRI)&&UXOHVDQG,&(6&ODVV%GLJLWDODSSDUDWXVUHTXLUHPHQWVIRU,QGXVWU\&DQDGD2SHUDWLRQLVVXEMHFWWRWKHIROORZLQJWZRFRQGLWLRQV7KLVGHYLFHDQGLWVDFFHVVRULHVPD\QRWFDXVHKDUPIXOLQWHUIHUHQFHDQGWKLVGHYLFHDQGLWVDFFHVVRULHVPXVWDFFHSWDQ\LQWHUIHUHQFHUHFHLYHGLQFOXGLQJLQWHUIHUHQFHWKDWPD\FDXVHXQGHVLUHGRSHUDWLRQ$QF[YQTP1RGTCVKQP7KLVGHYLFHKDVEHHQWHVWHGIRUERG\ZRUQRSHUDWLRQVZLWKWKHGLVWDQFHRIFPLQFKHVEHWZHHQWKHXVHUĜVERG\DQGWKHSKRQH7RFRPSO\ZLWK)&&5)H[SRVXUHUHTXLUHPHQWVDPLQLPXPVHSDUDWLRQGLVWDQFHRIFPLQFKHVPXVWEHPDLQWDLQHGIURPWKHXVHUVERG\7KLUGSDUW\EHOWFOLSVKROVWHUVDQGVLPLODUDFFHVVRULHVFRQWDLQLQJPHWDOOLFFRPSRQHQWVPD\QRWEHXVHG%RG\ZRUQDFFHVVRULHVWKDWFDQQRWPDLQWDLQFPLQFKHVVHSDUDWLRQGLVWDQFHEHWZHHQWKHXVHUVERG\DQGWKHSKRQHDQGKDYHQRWEHHQWHVWHGIRUW\SLFDOERG\ZRUQRSHUDWLRQVPD\QRWFRPSO\ZLWK)&&5)H[SRVXUHOLPLWVDQGVKRXOGEHDYRLGHG9+(+%CWVKQP7KLVGHYLFHLVFDSDEOHRIRSHUDWLQJLQDQPRGH)RUDQGHYLFHVRSHUDWLQJLQWKHIUHTXHQF\UDQJHRI *+]WKH\DUHUHVWULFWHGIRULQGRRURSHUDWLRQVWRUHGXFHDQ\SRWHQWLDOKDUPIXOLQWHUIHUHQFHIRU0RELOH6DWHOOLWH6HUYLFHV066LQWKH86:,),$FFHVV3RLQWVWKDWDUHFDSDEOHRIDOORZLQJ\RXUGHYLFHWRRSHUDWHLQDQPRGH *+]EDQGDUHRSWLPL]HGIRULQGRRUXVHRQO\,I\RXU:,),QHWZRUNLVFDSDEOHRIRSHUDWLQJLQWKLVPRGHSOHDVHUHVWULFW\RXU:,),XVHLQGRRUVWRQRWYLRODWHIHGHUDOUHJXODWLRQVWRSURWHFW0RELOH6DWHOOLWH6HUYLFHV7KLV GHYLFHLVQRWLQWHQGHGIRUVDOHLQWKH86$](https://usermanual.wiki/LG-Electronics-USA/P768G/User-Guide-1800290-Page-2.png)
![15phone is on file with the FCC and can be found under the Display Grant section of http://www.fcc.gov/oet/ea/fccid/ after searching on FCC ID BEJC729.For more information about SARs, see the FCC’s OET Bulletins 56 and 65 at http://www.fcc.gov/Bureaus/Engineering_Technology/Documents/bulletins or visit the Cellular Telecommunications Industry Association website at http://www.ctia.org/consumer_info/index.cfm/AID/10371. You may also wish to contact the manufacturer of your phone.Can I minimize my RF exposure? If you are concerned about RF, there are several simple steps you can take to minimize your RF exposure. You can, of course, reduce your talk time. You can place more distance between your body and the source of the RF, as the exposure level drops off dramatically with distance. The FDA/FCC website states that “hands-free kits can be used with wireless phones for convenience and comfort. These systems reduce the absorption of RF energy in the head because the phone, which is the source of the RF emissions, will not be placed against the head. On the other hand, if the phone is mounted against the waist or other part of the body during use, then that part of the body will absorb more RF energy. Wireless phones marketed in the U.S. are required to meet safety requirements regardless of whether they are used against the head or against the body. Either configuration should result in compliance with the safety limit.” Also, if you use your wireless phone while in a car, you can use a phone with an antenna on the outside of the vehicle. You should also read and follow your wireless phone manufacturer’s instructions for the safe operation of your phone. Do wireless phones pose any special risks to children?The FDA/FCC website states that “the scientific evidence does not show a danger to users of wireless communication devices, including children.” The FDA/FCC website further states that “some groups sponsored by other national governments have advised that children be discouraged from using wireless phones at all”. For example, the Stewart Report from the United Kingdom [“UK”] made such a recommendation in December 2000. In ZNFP768g](https://usermanual.wiki/LG-Electronics-USA/P768G/User-Guide-1800290-Page-4.png)

![1710. Installing PC Software(LG PC Suite)“LG PC Suite” PC Application is a program that helps you connect your device to a PC via a USB cable and Wi-Fi. Once connected, you can use the functions of your device from your PC.With your “LG PC Suite” PC Application, You Can...• Manage and play your media contents (music, movie, pictures) on your PC.• Send multimedia contents to your device.• Synchronises data (schedules, contacts, bookmarks) in your device and PC.• Backup the applications in your device.• Update the software in your device.• Backup and restore the device.• Play multimedia content in your PC from another device.NOTE You can use the Help menu from the application to fi nd out how to use your “LG PC Suite” PC application.Installing “LG PC Suite” PC Application“LG PC Suite” PC application can be downloaded from the LG website.1 Go to www.lg.com and select a country of your choice.2 Go to Support > MOBILE SUPPORT > LG Mobile Phones > Select the Model (LG-P760) or Go to Support > Mobile Phone Support > Select the Model (LG-P760).3 Click PC Sync from MANUALS & DOWNLOAD, and click DOWNLOAD to download “LG PC Suite” PC software or Click PC Sync from Downloads, and click WINDOW PC Sync Download to download “LG PC Suite” PC software.System Requirements for “LG PC Suite” PC software• OS: Windows XP 32 bit(Service pack 2), Windows Vista 32 bit/64 bit, Windows 7 32 bit/64 bit• CPU: 1GHz or higher processor• Memory: 512MB or higher RAM• Graphic card: 1024 x 768 resolution, 32 bit color or higher• HDD: 100 MB or more free hard disk space (More free hard disk space may be needed depending on the volume of w^]_Pw^]_](https://usermanual.wiki/LG-Electronics-USA/P768G/User-Guide-1800290-Page-14.png)


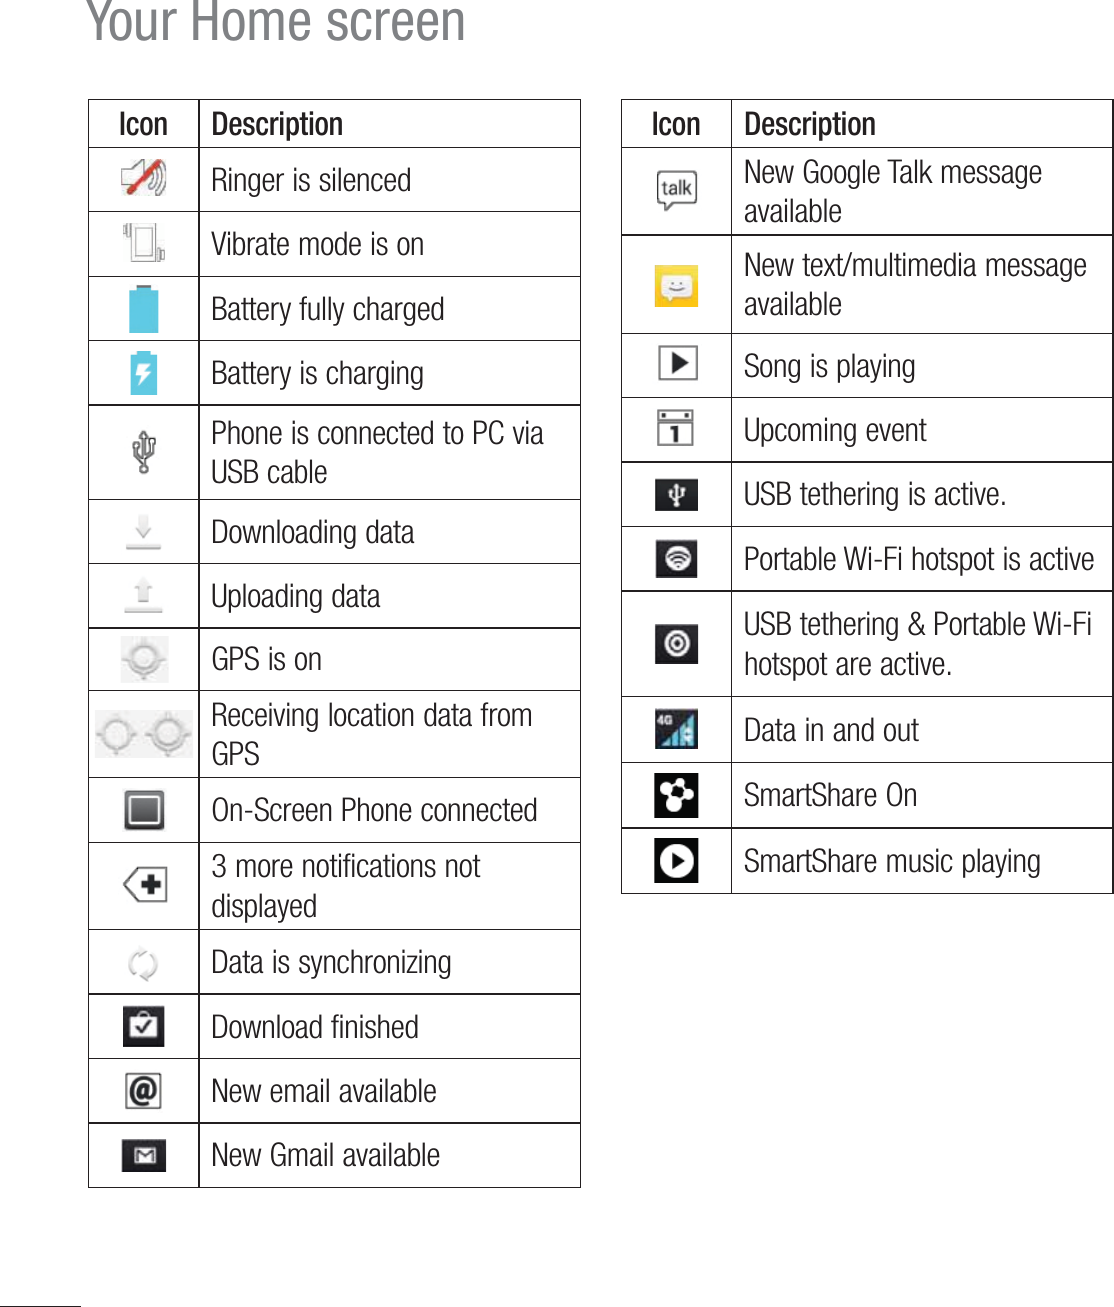
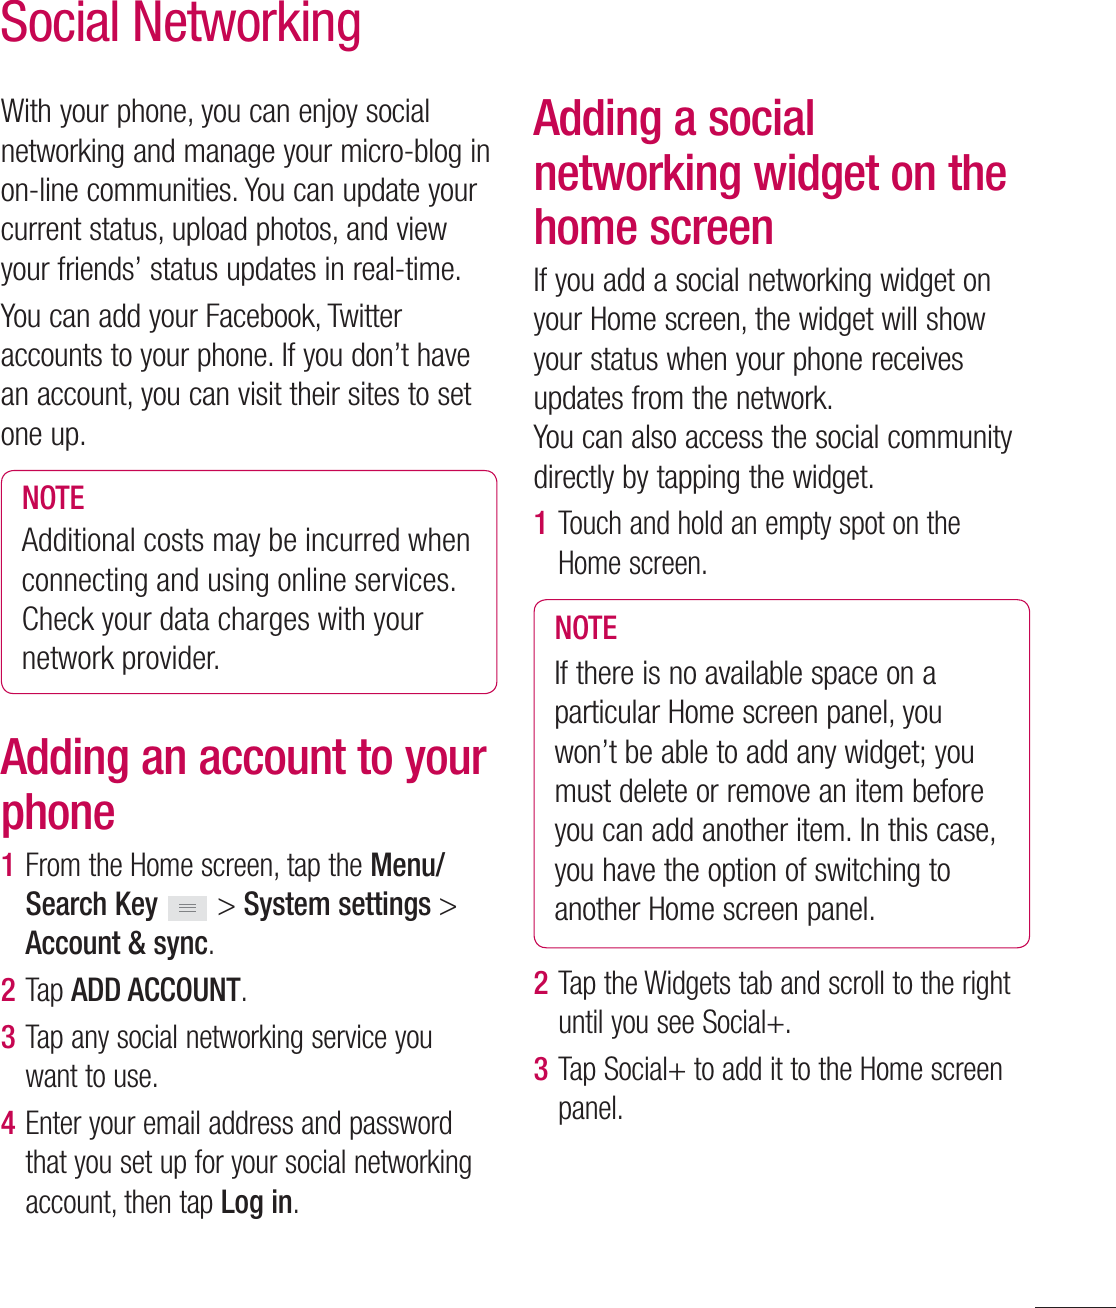
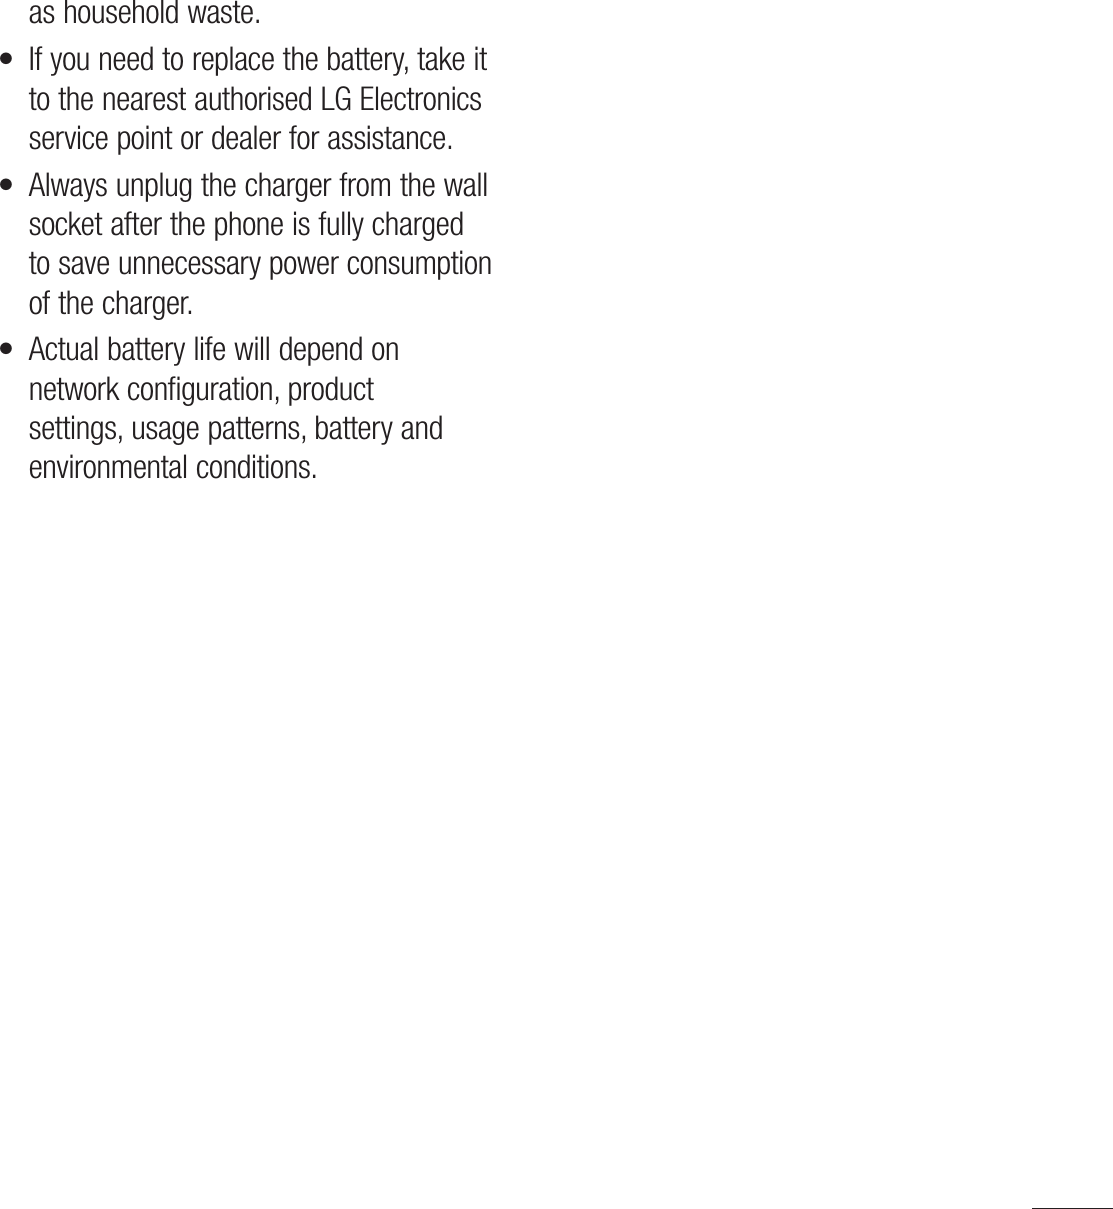
![37Touch and hold the Status Bar and slide it down with your finger to open the Notifications Panel. From here, you can check and quickly turn on and off Sound mode, QuickMemo, Wi-Fi, Bluetooth, and any other options you add.Viewing the Status barThe Status bar uses different icons to display phone information, such as signal strength, new messages, battery life, and active Bluetooth and data connections.Below is a table explaining the meaning of icons you are likely to see in the Status bar.[Status bar]Icon DescriptionNo SIM card insertedNo network signal availableAirplane mode is onConnected to a Wi-Fi networkWired headset connectedCall in progressCall on holdSpeakerphone is onPhone microphone is mutedMissed callBluetooth is onConnected to a Bluetooth deviceAlarm is setNew voicemail available](https://usermanual.wiki/LG-Electronics-USA/P768G/User-Guide-1800290-Page-29.png)