LG Electronics USA P768G Cellular/ PCS GSM/ EDGE/ WCDMA Phone with WLAN and Bluetooth User Manual LG P760 ENG ADDC ACA9 C6A9 120806 indd
LG Electronics MobileComm USA, Inc. Cellular/ PCS GSM/ EDGE/ WCDMA Phone with WLAN and Bluetooth LG P760 ENG ADDC ACA9 C6A9 120806 indd
Users Manual
English
LG-P760
LG-P760 User Guide
This guide helps you get started using your phone.
If you need more information, please visit www.lg.com.
• Some of the contents of this manual may not apply to
your phone. This depends on your phone’s software
and your service provider.
• This handset is not recommended for the visually
impaired because of its touch screen keyboard.
• Copyright ©2012 LG Electronics, Inc. All rights
reserved. LG and the LG logo are registered
trademarks of LG Group and its related entities. All
other trademarks are the property of their respective
owners.
• Google™, Maps™, Gmail™, YouTube™, Google
Talk™ and Play Store™ are trademarks of Google,
Inc.
LG-P768g

2CTVUVCVGOGPV
&KDQJHRU0RGLILFDWLRQVWKDWDUHQRWH[SUHVVO\DSSURYHGE\WKHPDQXIDFWXUHUFRXOGYRLG
WKHXVHUVDXWKRULW\WRRSHUDWHWKHHTXLSPHQW
2CTVUVCVGOGPV
7KLVHTXLSPHQWKDVEHHQWHVWHGDQGIRXQGWRFRPSO\ZLWKWKHOLPLWVIRUDFODVV%GLJLWDO
GHYLFHSXUVXDQWWR3DUWRIWKH)&&5XOHV7KHVHOLPLWVDUHGHVLJQHGWRSURYLGH
UHDVRQDEOHSURWHFWLRQDJDLQVWKDUPIXOLQWHUIHUHQFHLQDUHVLGHQWLDOLQVWDOODWLRQ7KLV
HTXLSPHQWJHQHUDWHVXVHVDQGFDQUDGLDWHUDGLRIUHTXHQF\HQHUJ\DQGLIQRWLQVWDOOHGDQG
XVHGLQDFFRUGDQFHZLWKWKHLQVWUXFWLRQVPD\FDXVHKDUPIXOLQWHUIHUHQFHWRUDGLR
FRPPXQLFDWLRQV+RZHYHUWKHUHLVQRJXDUDQWHHWKDWLQWHUIHUHQFHZLOOQRWRFFXULQD
SDUWLFXODULQVWDOODWLRQ,IWKLVHTXLSPHQWGRHVFDXVHKDUPIXOLQWHUIHUHQFHRUWHOHYLVLRQ
UHFHSWLRQZKLFKFDQEHGHWHUPLQHGE\WXUQLQJWKHHTXLSPHQWRIIDQGRQWKHXVHULV
HQFRXUDJHGWRWU\WRFRUUHFWWKHLQWHUIHUHQFHE\RQHRUPRUHRIWKHIROORZLQJPHDVXUHV
5HRULHQWRUUHORFDWHWKHUHFHLYLQJDQWHQQD
,QFUHDVHWKHVHSDUDWLRQEHWZHHQWKHHTXLSPHQWDQGUHFHLYHU
&RQQHFWWKHHTXLSPHQWLQWRDQRXWOHWRQDFLUFXLWGLIIHUHQWIURPWKDWWRZKLFKWKH
UHFHLYHULVFRQQHFWHG
&RQVXOWWKHGHDOHURUDQH[SHULHQFHGUDGLR79WHFKQLFLDQIRUKHOS
(%%2CTV%NCUU$%QORNKCPEG
7KLVGHYLFHDQGLWVDFFHVVRULHVFRPSO\ZLWKSDUWRI)&&UXOHVDQG,&(6&ODVV%
GLJLWDODSSDUDWXVUHTXLUHPHQWVIRU,QGXVWU\&DQDGD2SHUDWLRQLVVXEMHFWWRWKHIROORZLQJ
WZRFRQGLWLRQV7KLVGHYLFHDQGLWVDFFHVVRULHVPD\QRWFDXVHKDUPIXOLQWHUIHUHQFHDQG
WKLVGHYLFHDQGLWVDFFHVVRULHVPXVWDFFHSWDQ\LQWHUIHUHQFHUHFHLYHGLQFOXGLQJ
LQWHUIHUHQFHWKDWPD\FDXVHXQGHVLUHGRSHUDWLRQ
$QF[YQTP1RGTCVKQP
7KLVGHYLFHKDVEHHQWHVWHGIRUERG\ZRUQRSHUDWLRQVZLWKWKHGLVWDQFHRIFP
LQFKHVEHWZHHQWKHXVHUĜVERG\DQGWKHSKRQH7RFRPSO\ZLWK)&&5)H[SRVXUH
UHTXLUHPHQWVDPLQLPXPVHSDUDWLRQGLVWDQFHRIFPLQFKHVPXVWEHPDLQWDLQHG
IURPWKHXVHUVERG\7KLUGSDUW\EHOWFOLSVKROVWHUVDQGVLPLODUDFFHVVRULHVFRQWDLQLQJ
PHWDOOLFFRPSRQHQWVPD\QRWEHXVHG%RG\ZRUQDFFHVVRULHVWKDWFDQQRWPDLQWDLQFP
LQFKHVVHSDUDWLRQGLVWDQFHEHWZHHQWKHXVHUVERG\DQGWKHSKRQHDQGKDYHQRW
EHHQWHVWHGIRUW\SLFDOERG\ZRUQRSHUDWLRQVPD\QRWFRPSO\ZLWK)&&5)H[SRVXUHOLPLWV
DQGVKRXOGEHDYRLGHG
9+(+%CWVKQP
7KLVGHYLFHLVFDSDEOHRIRSHUDWLQJLQDQPRGH)RUDQGHYLFHVRSHUDWLQJ
LQWKHIUHTXHQF\UDQJHRI *+]WKH\DUHUHVWULFWHGIRULQGRRURSHUDWLRQVWR
UHGXFHDQ\SRWHQWLDOKDUPIXOLQWHUIHUHQFHIRU0RELOH6DWHOOLWH6HUYLFHV066LQWKH86
:,),$FFHVV3RLQWVWKDWDUHFDSDEOHRIDOORZLQJ\RXUGHYLFHWRRSHUDWHLQDQ
PRGH *+]EDQGDUHRSWLPL]HGIRULQGRRUXVHRQO\
,I\RXU:,),QHWZRUNLVFDSDEOHRIRSHUDWLQJLQWKLVPRGHSOHDVHUHVWULFW\RXU:,),XVH
LQGRRUVWRQRWYLRODWHIHGHUDOUHJXODWLRQVWRSURWHFW0RELOH6DWHOOLWH6HUYLFHV
7KLV GHYLFHLVQRWLQWHQGHGIRUVDOHLQWKH86$

14
For Your Safety
This publication is available at http://www.
fcc.gov/oet/rfsafety or through the FCC at
(888) 225-5322 or (888) CALL-FCC.
What does “SAR” mean?
In 1996, the FCC, working with the FDA,
the U.S. Environmental Protection Agency,
and other agencies, established RF
exposure safety guidelines for wireless
phones in the United States. Before a
wireless phone model is available for sale
to the public, it must be tested by the
manufacturer and certified to the FCC that
it does not exceed limits established by
the FCC. One of these limits is expressed
as a Specific Absorption Rate, or “SAR.”
SAR is a measure of the rate of absorption
of RF energy in the body. Tests for SAR
are conducted with the phone transmitting
at its highest power level in all tested
frequency bands. Since 1996, the FCC has
required that the SAR of handheld wireless
phones not exceed 1.6 watts per kilogram,
averaged over one gram of tissue.
Although the SAR is determined at the
highest power level, the actual SAR value
of a wireless phone while operating can
be less than the reported SAR value. This
is because the SAR value may vary from
call to call, depending on factors such as
proximity to a cell site, the proximity of the
phone to the body while in use, and the
use of hands-free devices. Before a phone
model is available for sale to the public,
it must be tested and certified to the FCC
that it does not exceed the limit established
by the government-adopted requirement
for safe exposure. The tests are performed
in positions and locations (e.g., at the ear
and worn on the body) as required by the
FCC for each model.
The highest SAR value for this model
phone when tested for use at the ear is
0.XX W/kg and when worn on the body, as
described in this user guide, is X.XX W/kg
(body-worn measurements differ among
phone models, depending upon available
accessories and FCC requirements).
While there may be differences between
SAR levels of various phones and at various
positions, they all meet the government
requirement for safe exposure.
The FCC has granted an Equipment
Authorization for this model phone with
all reported SAR levels evaluated as in
compliance with the FCC RF emission
guidelines. SAR information on this model
0.55
1.18

15
phone is on file with the FCC and can be
found under the Display Grant section
of http://www.fcc.gov/oet/ea/fccid/ after
searching on FCC ID BEJC729.
For more information about SARs, see
the FCC’s OET Bulletins 56 and 65 at
http://www.fcc.gov/Bureaus/Engineering_
Technology/Documents/bulletins or visit
the Cellular Telecommunications Industry
Association website at http://www.ctia.org/
consumer_info/index.cfm/AID/10371. You
may also wish to contact the manufacturer
of your phone.
Can I minimize my RF exposure?
If you are concerned about RF, there
are several simple steps you can take
to minimize your RF exposure. You can,
of course, reduce your talk time. You
can place more distance between your
body and the source of the RF, as the
exposure level drops off dramatically with
distance. The FDA/FCC website states that
“hands-free kits can be used with wireless
phones for convenience and comfort.
These systems reduce the absorption of
RF energy in the head because the phone,
which is the source of the RF emissions,
will not be placed against the head. On
the other hand, if the phone is mounted
against the waist or other part of the body
during use, then that part of the body will
absorb more RF energy. Wireless phones
marketed in the U.S. are required to meet
safety requirements regardless of whether
they are used against the head or against
the body. Either configuration should result
in compliance with the safety limit.” Also,
if you use your wireless phone while in a
car, you can use a phone with an antenna
on the outside of the vehicle. You should
also read and follow your wireless phone
manufacturer’s instructions for the safe
operation of your phone.
Do wireless phones pose any
special risks to children?
The FDA/FCC website states that “the
scientific evidence does not show a
danger to users of wireless communication
devices, including children.” The FDA/FCC
website further states that “some groups
sponsored by other national governments
have advised that children be discouraged
from using wireless phones at all”. For
example, the Stewart Report from the
United Kingdom [“UK”] made such a
recommendation in December 2000. In
ZNFP768g

8
For Your Safety
• Do not expose the phone to liquid or
moisture.
• Use the accessories like earphones
cautiously. Do not touch the antenna
unnecessarily.
• Do not use, touch or attempt to remove
or fix broken, chipped or cracked glass.
Damage to the glass display due to
abuse or misuse is not covered under
the warranty.
• Your phone is an electronic device that
generates heat during normal operation.
Extremely prolonged, direct skin contact
in the absence of adequate ventilation
may result in discomfort or minor burns.
Therefore, use care when handling
your phone during or immediately after
operation.
Efficient phone operation
Electronics devices
All mobile phones may get interference,
which could affect performance.
• Do not use your mobile phone near
medical equipment without requesting
permission. Avoid placing the phone
over pacemakers, for example, in your
breast pocket.
• Some hearing aids might be disturbed
by mobile phones.
• Minor interference may affect TVs,
radios, PCs, etc.
• Road safety
• Check the laws and regulations on the
use of mobile phones in the area when
you drive.
• Do not use a hand-held phone while
driving.
• Give full attention to driving.
• Pull off the road and park before making
or answering a call if driving conditions
so require.
• RF energy may affect some electronic
systems in your vehicle such as car
stereos and safety equipment.
• When your vehicle is equipped with an
air bag, do not obstruct with installed
or portable wireless equipment. It can
cause the air bag to fail or cause serious
injury due to improper performance.

9
• If you are listening to music whilst
out and about, please ensure that the
volume is at a reasonable level so that
you are aware of your surroundings.
This is particularly imperative when
near roads.
Avoid damage to your
hearing
Damage to your hearing can occur if you
are exposed to loud sound for long periods
of time. We therefore recommend that you
do not turn the handset on or off when
close to your ear. We also recommend
that music and call volumes are set to a
reasonable level.
• When using headphones, turn the
volume down if you cannot hear the
people speaking near you, or if the
person sitting next to you can hear what
you are listening to.
NOTE:
Excessive sound pressure from
earphones can cause hearing loss.
Glass Parts
Some parts of your mobile device are
made of glass. This glass could break if
your mobile device is dropped on a hard
surface or receives a substantial impact. If
the glass breaks, do not touch or attempt
to remove. Stop using your mobile device
until the glass is replaced by an authorised
service provider.
Blasting area
Do not use the phone where blasting is in
progress. Observe restrictions, and follow
any regulations or rules.
Potentially explosive
atmospheres
• Do not use the phone at a refuelling
point.
• Do not use near fuel or chemicals.
• Do not transport or store flammable
gas, liquid, or explosives in the same
compartment of your vehicle as your
mobile phone and accessories.

10
For Your Safety
In aircraft
Wireless devices can cause interference
in aircraft.
• Turn your mobile phone off before
boarding any aircraft.
• Do not use it on the ground without
permission from the crew.
Children
Keep the phone in a safe place out of the
reach of small children. It contains small
parts which may cause a choking hazard
if detached.
Emergency calls
Emergency calls may not be available
under all mobile networks. Therefore, you
should never depend solely on the phone
for emergency calls. Check with your local
service provider.
Battery information and
care
• You do not need to completely discharge
the battery before recharging. Unlike
other battery systems, there is no
memory effect that could compromise
the battery’s performance.
• Use only LG batteries and chargers. LG
chargers are designed to maximise the
battery life.
• Do not disassemble or short-circuit the
battery pack.
• Keep the metal contacts of the battery
pack clean.
• Replace the battery when it no longer
provides acceptable performance.
The battery pack may be recharged
hundreds of times until it needs
replacing.
• Recharge the battery if it has not been
used for a long time to maximise
usability.
• Do not expose the battery charger to
direct sunlight or use it in high humidity,
such as in the bathroom.
• Do not leave the battery in hot or cold
places as this may deteriorate the
battery performance.
• There is risk of explosion if the battery is
replaced by an incorrect type.
• Dispose of used batteries according to
the manufacturer’s instructions. Please
recycle when possible. Do not dispose

11
as household waste.
• If you need to replace the battery, take it
to the nearest authorised LG Electronics
service point or dealer for assistance.
• Always unplug the charger from the wall
socket after the phone is fully charged
to save unnecessary power consumption
of the charger.
• Actual battery life will depend on
network configuration, product
settings, usage patterns, battery and
environmental conditions.

12
Before you start using the
phone, please read this!
Please check to see if any problems you
have encountered with your phone are
described in this section before taking the
phone in for service or calling a service
representative.
1. Phone Memory
In order to make more memory available,
you will have to manage your applications
and delete some data, such as applications
or messages.
Managing Applications
1 From the Home screen, tap the Menu/
Search Key and tap App settings.
2 When the list of applications appears, scroll
and tap the application you want to disable.
3 Tap Uninstall and then tap OK to confirm
that you want to uninstall the desired
application.
2. Optimizing Battery Life
You can extend your battery’s life
between charges by turning off features
that you don’t need to run constantly in
the background. You can also monitor
how applications and system resources
consume battery power.
To extend the life of your battery
- Turn off radio communications that you
aren’t using, such as Wi-Fi, Bluetooth,
or GPS.
- Lower screen brightness and set a
shorter screen timeout.
- Turn off automatic syncing for
Gmail™, Calendar, Contacts, and other
applications.
- Some applications you have downloaded
may cause your battery power to be
reduced.
- While using downloaded applications,
check the battery charged level.
To view the battery charge level
1 From the Home screen, tap the Menu/
Search Key and tap System settings
> About phone > Battery.
2 The battery status (charging or not
charging) and level are displayed on the
Getting to know your phone

13
top menu of the screen.
To monitor and control what uses the
battery
1 From the Home screen, tap the Menu/
Search Key and tap System settings
> Power Saver > Battery use.
2 The bottom of the screen displays battery
usage time. Either how long since last
connected to a power source, or if
connected to a power source, how long
you were last running on battery power.
The screen also lists applications or
services using battery power from greatest
amount to least.
3. Installing an Open
Source Operating
System
Installing an open source operating system
on your phone and not using the operating
system provided by the manufacturer can
cause your phone to malfunction.
Warning
• If you install and use an OS other
than the one provided by the
manufacturer, your phone is no
longer covered by the warranty.
• To protect your phone and personal
data, download applications only
from trusted sources, such as Play
Store. If some applications are not
properly installed on your phone,
your phone may not work properly-
or serious errors may occur. You will
need to uninstall those applications
and all of its data and settings from
the phone.
4. Using the Swipe, Face
Unlock, Pattern, PIN, or
Password
Set the Face unlock, or an unlock Pattern,
PIN, or Password to secure your phone.
To set the screen lock, follow the process
below.
From the Home screen, tap the
Menu/
Search Key
, tap
System settings
>
Lock screen
>
Select screen lock
and

14
Getting to know your phone
select among
None, Swipe, Pattern, PIN
or
Password
.
NOTE
In case that you would have trouble
with Face Unlock, you can unlock the
screen with the unlock pattern and/or
PIN as a backup.
Warning
Take precautions when using an
Unlock Pattern, PIN, or Password. It is
very important that you remember the
screen unlock information you set. You
are allowed 5 attempts to enter your
screen unlock information. If you used
up all 5 opportunities, you will have to
wait 30 seconds to attempt unlocking
the phone again.
When you can’t recall your Unlock
Pattern, PIN, or Password:
If you logged into a Google account on
the phone and failed to use the correct
pattern 5 times, tap
Forgot pattern?
You
will be required to sign in with your Google
account and prompted to create a new
unlock pattern.
If you have set a backup PIN, you can
unlock the screen with keying in the
backup PIN.
If you haven’t created a Google account
on the phone or you forgot your PIN or
Password, you need to perform a hard
reset. Or, you can unlock the phone with
the Backup pin.
5. Using Hard Reset
(Factory Reset)
If your phone needs to be restored to its
original condition, use a
Hard Reset
to
initialize your phone.
1 Turn the power off.
2 Press and hold the following keys at the
same time for 8 seconds: Power/Lock
Key + Up Volume Key.
3 When FACTORY HARD RESET screen is
displayed, release the keys.
4 Press the Power/Lock Key to confirm --
delete all user data, and press the Volume
Keys to cancel.
15
Warning
If you perform a Hard Reset, all user
applications and user data will be
deleted. Please remember to back up
any important data before performing
a
Hard Reset
.
6. Using Safe Mode
To recover your phone when
malfunctioning.
1 Turn off your phone and reboot. When you
see the booting animation press and hold
the Menu/Search Key . Your main
screen will then be displayed with the
words “Safe mode” in lower left corner.
2 From the Home screen, tap the Menu/
Search Key and tap App settings.
3 Tap one of the available tabs at the top of
the screen and select the application you
wish to uninstall.
4 Tap Uninstall and OK to confirm.
5 After uninstalling the application, turn off
and reboot your phone.
7. Using a micro SD Card
Pictures, Music and Video files, can be
saved to external memory. Before saving
these files to external memory, you need
to insert a micro SD card. If you have not
inserted a micro SD card, you will not
be able to save these items on external
memory.
Warning
Do not remove the micro SD card
without unmounting it fi
rst. Otherwise,
it may damage the micro SD card
as well as your phone, and the data
stored on the micro SD card may be
corrupted. To remove the micro SD
card safely, from the Home screen,
tap the
Menu/Search Key
and
tap
System settings
>
Storage
>
Unmount SD card > OK
.
16
Getting to know your phone
8. Connecting your phone
to a computer via USB
1 Use the USB cable that was provided with
your phone to connect the phone to a USB
port on your computer. You’ll receive a
notification that the USB is connected and
can see USB connection mode popup.
2 Tap Media sync (MTP) to confirm that you
want to transfer files between your phone’s
micro SD card and the computer.
When the phone is connected as USB
storage, you receive a notification. Your
phone’s micro SD card is installed as a
drive on your computer. You can now copy
files to and from the micro SD card.
TIP
You cannot access the micro SD card
from your phone while connected
as USB storage. So you cannot use
applications that rely on the micro SD
card, such as Music.
9. Opening and switching
applications
Multitasking is easy with Android because
you can keep more than one application
running at the same time. There’s no
need to quit an application before opening
another. Use and switch between several
open applications. Android manages each
application, stopping and starting them
as needed to ensure that idle applications
don’t consume resources unnecessarily.
To stop applications:
1 Touch Apps Key > Settings > Apps
> Running tab.
2 Scroll to the desired application
and touch
Stop
to stop it.
TIP
To return to a recent application, press
and hold the
Home Key
.
The screen then displays a list of
applications you have recently used.

17
10. Installing PC
Software(LG PC Suite)
“LG PC Suite” PC Application is a program
that helps you connect your device to
a PC via a USB cable and Wi-Fi. Once
connected, you can use the functions of
your device from your PC.
With your “LG PC Suite” PC Application,
You Can...
• Manage and play your media contents
(music, movie, pictures) on your PC.
• Send multimedia contents to your
device.
• Synchronises data (schedules, contacts,
bookmarks) in your device and PC.
• Backup the applications in your device.
• Update the software in your device.
• Backup and restore the device.
• Play multimedia content in your PC from
another device.
NOTE
You can use the Help menu from the
application to fi nd out how to use your
“LG PC Suite” PC application.
Installing “LG PC Suite” PC Application
“LG PC Suite” PC application can be
downloaded from the LG website.
1 Go to www.lg.com and select a country of
your choice.
2 Go to Support > MOBILE SUPPORT > LG
Mobile Phones > Select the Model (LG-
P760) or Go to Support > Mobile Phone
Support > Select the Model (LG-P760).
3 Click PC Sync from MANUALS &
DOWNLOAD, and click DOWNLOAD to
download “LG PC Suite” PC software or
Click PC Sync from Downloads, and click
WINDOW PC Sync Download to download
“LG PC Suite” PC software.
System Requirements for “LG PC Suite”
PC software
• OS: Windows XP 32 bit(Service pack 2),
Windows Vista 32 bit/64 bit, Windows 7
32 bit/64 bit
• CPU: 1GHz or higher processor
• Memory: 512MB or higher RAM
• Graphic card: 1024 x 768 resolution, 32
bit color or higher
• HDD: 100 MB or more free hard disk
space (More free hard disk space may
be needed depending on the volume of
w^]_P
w^]_
18
Getting to know your phone
data stored.)
• Required software: LG integrated drivers.
NOTE
LG Integrated USB Driver
LG integrated USB driver is required
to connect an LG device and PC and
installed automatically when you install
“LG PC Suite” PC software.
11. Unlock screen when
using data connection
Your screen will go dark if untouched
for a period of time when using a data
connection. To turn on your LCD screen,
press the
Power/Lock Key
.
12. Hold the phone
straight up
Please hold the mobile phone
straight up as a regular phone.
While making/receiving calls or sending/
receiving data, try to avoid holding the
lower part of the phone where the antenna
is located. It may affect call quality.
13. When the screen
freezes
If the phone does not respond
to user input or the screen
freezes:
Press and hold the
Power/Lock Key
for
12 seconds to turn it off. Then, press and
hold the
Power/Lock Key
again for 3
seconds to reboot the phone.
14. Do not connect your
phone when you
power on/off your PC
Make sure to disconnect your phone from
the PC when powering your PC on or off as
it might result in PC errors.
19
To turn on the phone, press and hold the Power/Lock Key for 3 seconds.
To turn off the phone, press the Power/Lock Key for 3 seconds and tap
Power off
and
OK
to confirm.
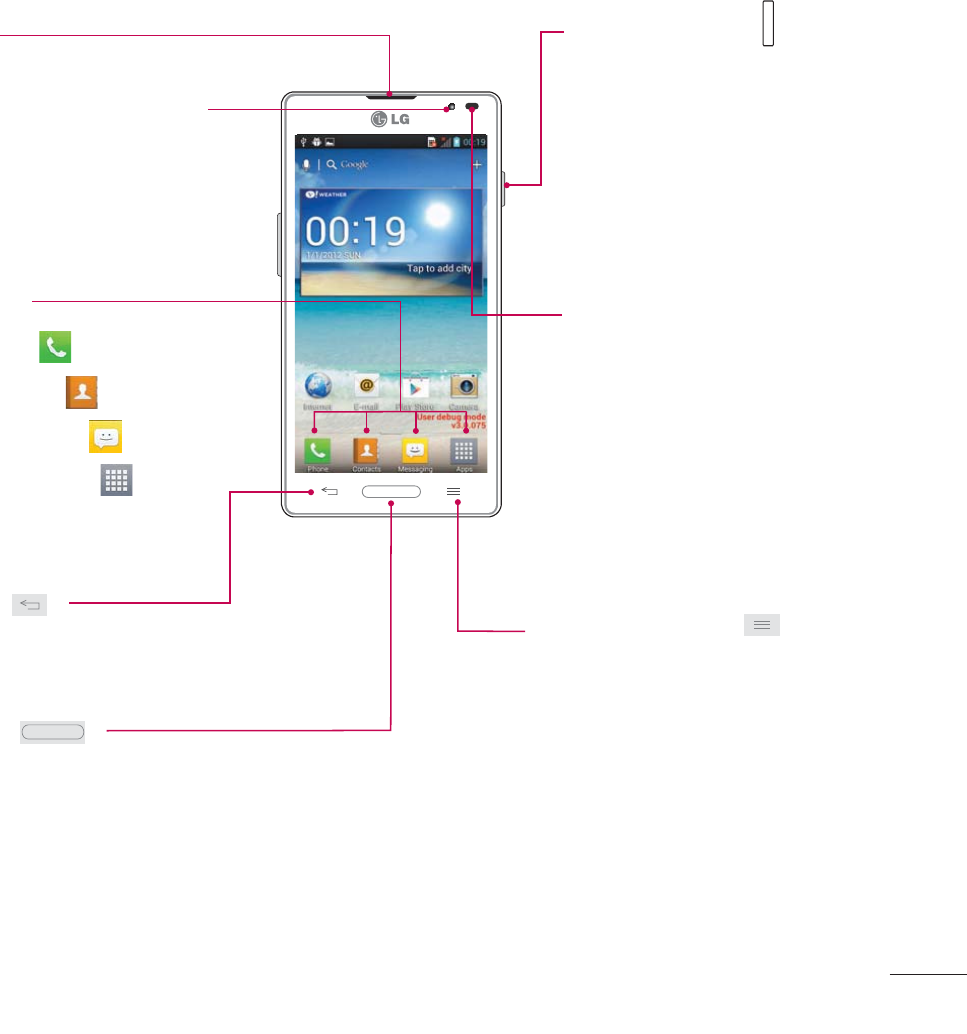
Front view
Back Key
- Returns to the previous screen.
- Closes pop-up menus and dialog boxes.
Home Key
- Returns to the Home screen from any
screen.
Earpiece
Menu/Search Key
- Displays available options for
the current screen.
- Touch and hold to activate
the search function.
Power/Lock Key
- Powers your phone on/off
by pressing and holding
the key.
- Turns your screen on and
off and locks it.
Proximity Sensors
- Senses proximity toward
other objects, such
as your head during a
call, so that you do not
accidentally activate
unwanted features.
Front-Facing Camera Lens
- Use to take a picture of
yourself or to video chat on
supported applications.
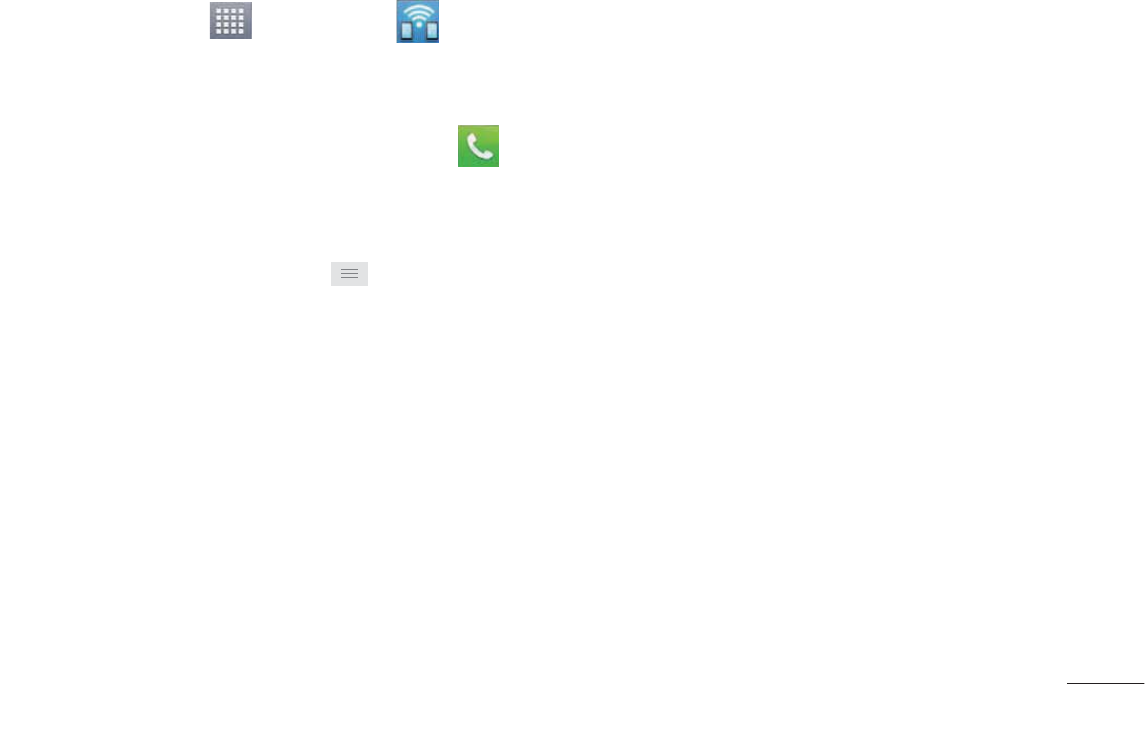
Quick Keys
- Phone Key
- Contacts Key
- Messaging Key
- Applications Key
Your Phone
21
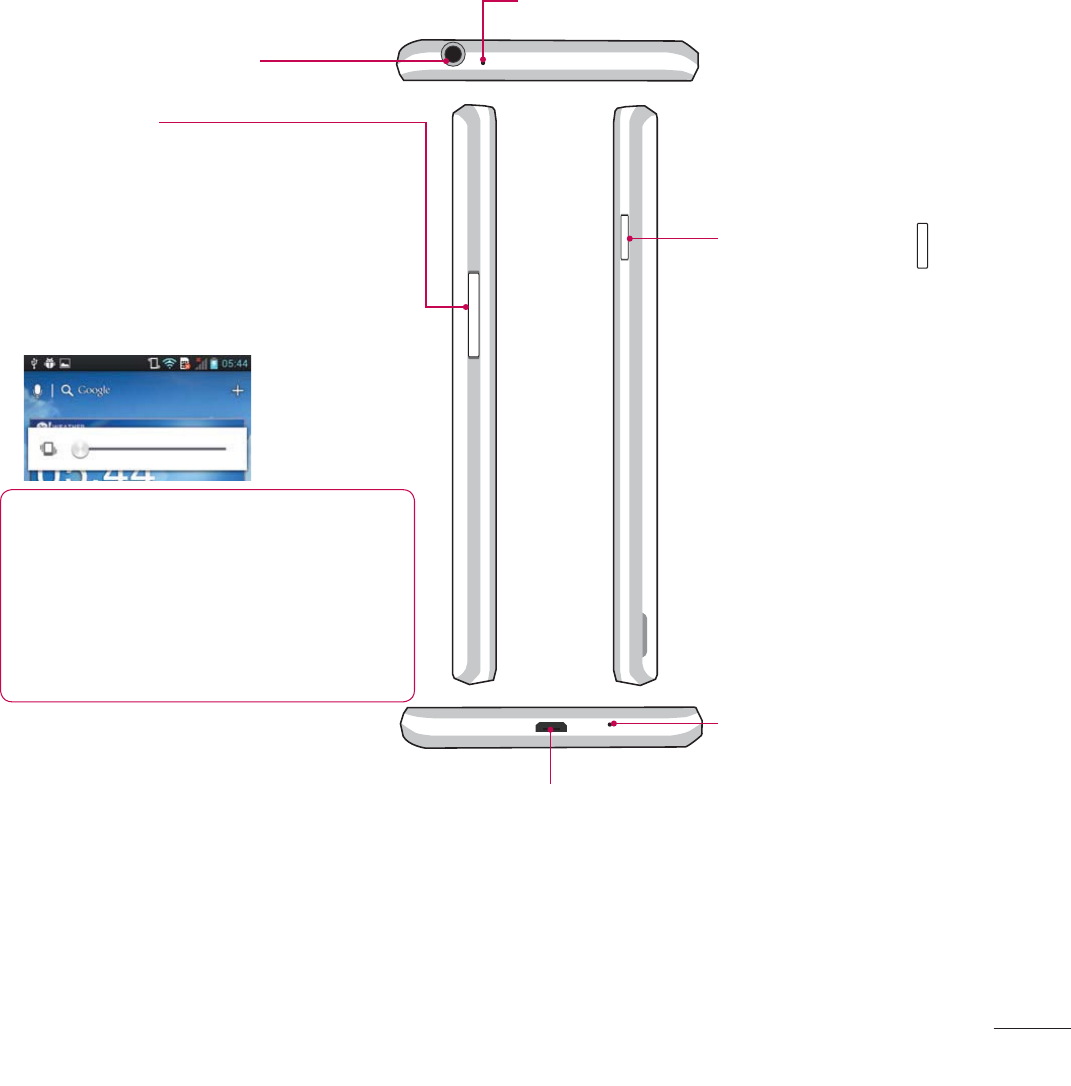
Side view
Power/Lock Key
Microphone(Main)
Microphone(Sub)
Charger/Accessory Port
3.5mm Headset Jack
Volume Keys
- Allows you to adjust the ringer
and media volumes, or to adjust
the in-call volume during a call.
- Press and hold the volume down
key to switch to the silent mode.
TIP
Press and hold the Volume Up
and Volume Down Keys for one
second to use the QuickMemo
function (See on page 43).
22
Your Phone
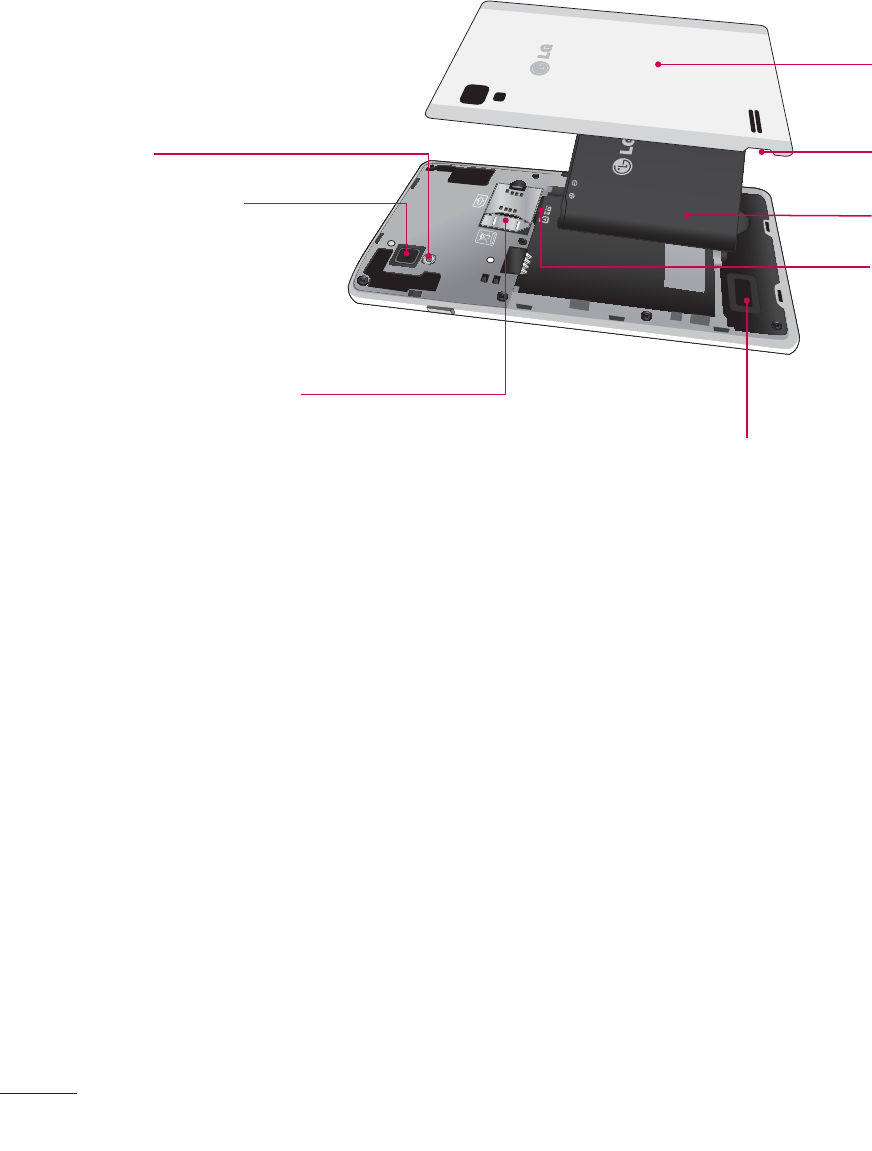
Rear view
SIM Card Slot
Camera Lens
Flash
micro SD Card Slot
- Accommodates the pre-
installed 16GB micro SD™
card (expandable up to 32GB).
Battery
External speaker
- Allows you to listen to sounds
on your phone such as ringtones
and music.
Back Cover
Fingertip cutout

23
Getting Started
Installing the Micro SIM
card and battery
Before you can start exploring your new
phone, you’ll need to set it up. To insert the
Micro SIM card and battery:
1 Hold the phone on your hand firmly. With
the other hand, lift the back cover using the
fingertip cutout located on the bottom of
the cover and remove it.
Release Latch
2 Slide the Micro SIM card into the Micro
SIM card slot. Make sure the gold contact
area on the card is facing downwards.
3 Insert the battery into place by aligning the
gold contacts on the phone and the battery
and press the battery down until it
clicks into place .
4 Replace the back cover of the phone
(as demonstrated below). Apply a steady
downward pressure until the battery cover
clicks into place.

24
Charging your phone
A rechargeable Li-ion battery is used
to power your phone. In addition, A wall
charger, which is included with your phone
can be used to charge the battery. Ask your
local LG dealer for further details regarding
approved batteries and chargers.
Before first time use of your phone, make
sure the battery is fully charged.
An uncharged battery will fully recharge
after 4 hours.
Charging Head
USB Cable
NOTE
Make sure the battery is installed
before connecting the wall charger. If
the battery is not installed and the wall
charger is connected, the phone will
not operate properly due to prolonged
power cycling. If you do not unplug
the wall charger before removing the
battery, the device may get damaged
as a result.
Important!
It is best to charge the battery fully
before using the phone for the fi rst
time.
1. Connect the USB cable to the
charger usb input.
2. Find the Charger/accompanying
jack (1).
3. Insert the USB cable into the device’s
Charger/accompanying jack (2).
4. Plug the charger into a regular
AC power outlet. The phone will
automatically turn on with the screen
showing as locked. Both the phone’s
charge state and percent of charge will
be displayed.
5. When charging is completed, fi rst
disconnect the charger plug from the
AC wall outlet, then disconnect the
charger cable
Getting Started
25
Warning!
If the touch screen does not function
while the phone’s in the process
of charging, this may be due to an
unstable power supply. As a result,
disconnect the USB cable from the
device or unplug the USB power
adapter from the power outlet.
1 Connect the cables wall adapter and USB
cable.
2 Plug the USB cable (as shown below) into
the phone’s charger/accessory port. Make
sure the USB symbol is facing upwards.
NOTE
The battery must be fully charged
initially to improve battery lifetime.
NOTE
Your phone has an internal antenna.
Be careful not to scratch or damage
this rear area, as that will cause loss of
performance.
If the phone is turned off as the battery
is fully discharged, the battery is called
a weak battery. In this case when the
phone connect to the charger(TA or
USB) cable, the keypad LED at the
bottom of the phone will be blinking.
This is normal operation in the weak
battery to prevent over-current fl owing
because the phone is designed
to provide reasonable protection
algorithm for against damage of
battery. And after a few minutes, the
LCD is turned on normally.

30
Your Home screen
Touch screen tips
With the touch of your finger, you can
access available applications, make menu
selections, and access data saved to your
phone. The following terms are used for
describing the different available actions
using the touchscreen:
Tap -
A single finger tap selects items,
links, shortcuts and letters on the
on-screen keyboard.
Touch and hold -
Touch and hold an item
on the screen by touching it and not lifting
your finger until an action occurs. For
example, to open a contact’s available
options, touch and hold the contact in the
Contacts list until the context menu opens.
Drag -
Touch and hold an item for a
moment and then, without lifting your
finger, move your finger on the screen until
you reach the target position. You can drag
items on the Home screen to reposition
them.
Swipe or slide -
To swipe or slide, quickly
move your finger across the surface of
the screen, without pausing when you first
touch it (so you don’t drag an item instead).
For example, you can slide the screen up
or down to scroll through a list, or browse
through the different Home screens by
swiping from left to right (and vice versa).
Double-tap -
Double-tap to zoom on a
Web page or a map. For example, quickly
double-tap a section of a Web page to
adjust that section to fit the width of the
screen. You can also double-tap to zoom
in and out when taking a picture (using the
Camera), and when using Maps.
Pinch-to-Zoom -
Use your index finger and
thumb in a pinch or spread motion to zoom
in or out when using the browser, Maps, or
browsing pictures. You can also double-tap
to zoom in and out when taking a picture
(using the Camera).
Pull in (Zoom Out)
Push (Zoom In)
31
Rotate the screen -
From many
applications and menus, the orientation of
the screen adjusts to the device’s physical
orientation.
Rotate
NOTE
• To select an item, tap the centre of
the icon.
• Do not to press too hard; the touch
screen is sensitive enough to pick up
a light, fi rm touch.
• Use the tip of your fi nger to tap the
option you want. Be careful not to
tap any other keys or icons.
Proximity sensors
When receiving and making calls, this
sensor automatically turns the backlight
off and locks the touch keypad by sensing
when the phone is near your ear. This
extends battery life and prevents the touch
keypad from activating unintentionally
during calls.
Lock your phone
When you are not using the LG-P760 press
the
Power/Lock Key
to lock your phone.
This helps prevent accidental presses and
saves battery power.
Also, if you do not use the phone for a
while, the Home screen or other screen
you are viewing, is automatically replaced
with the lock screen after 30 seconds
of inactivity to conserve the battery and
prevent pocket dialling.
To wake up your phone, press the
Power/
Lock Key
. The lock screen will appear.
Slide the lock screen up. The last screen
you were working on opens.
LG-P768g
32
NOTE
• The automatic screen timeout can be
confi gured manually in Settings.
• If there are any programs running
when you lock the phone, they
may still be running in lock mode.
It is recommended that you exit all
programs before entering the lock
mode to avoid unnecessary charges
(e.g., phone call, web access and
data communications).
Setting Swipe, Face Unlock,
Pattern, PIN, Password to
unlock your phone
You can slide the screen without entering
any information, utilize facial recognition,
draw your own unlock Pattern or enter a
PIN or Password to add more security to
your device. To set Swipe, Face Unlock,
Pattern, PIN, or Password, from the Home
screen tap the
Menu/Search Key
>
System settings > Lock screen > Select
screen lock
. Then choose from
Swipe,
Pattern, PIN
, or
Password
and enter the
desired information.
Caution
You are allowed 5 attempts to enter
your screen unlock information. If you
used up all 5 opportunities, you will
have to wait 30 seconds to attempt
unlocking the phone again.
Quick Switch to Silent
Mode
To quickly set your phone to silent mode,
press and hold the
Volume Down Key
until
you see on the screen.
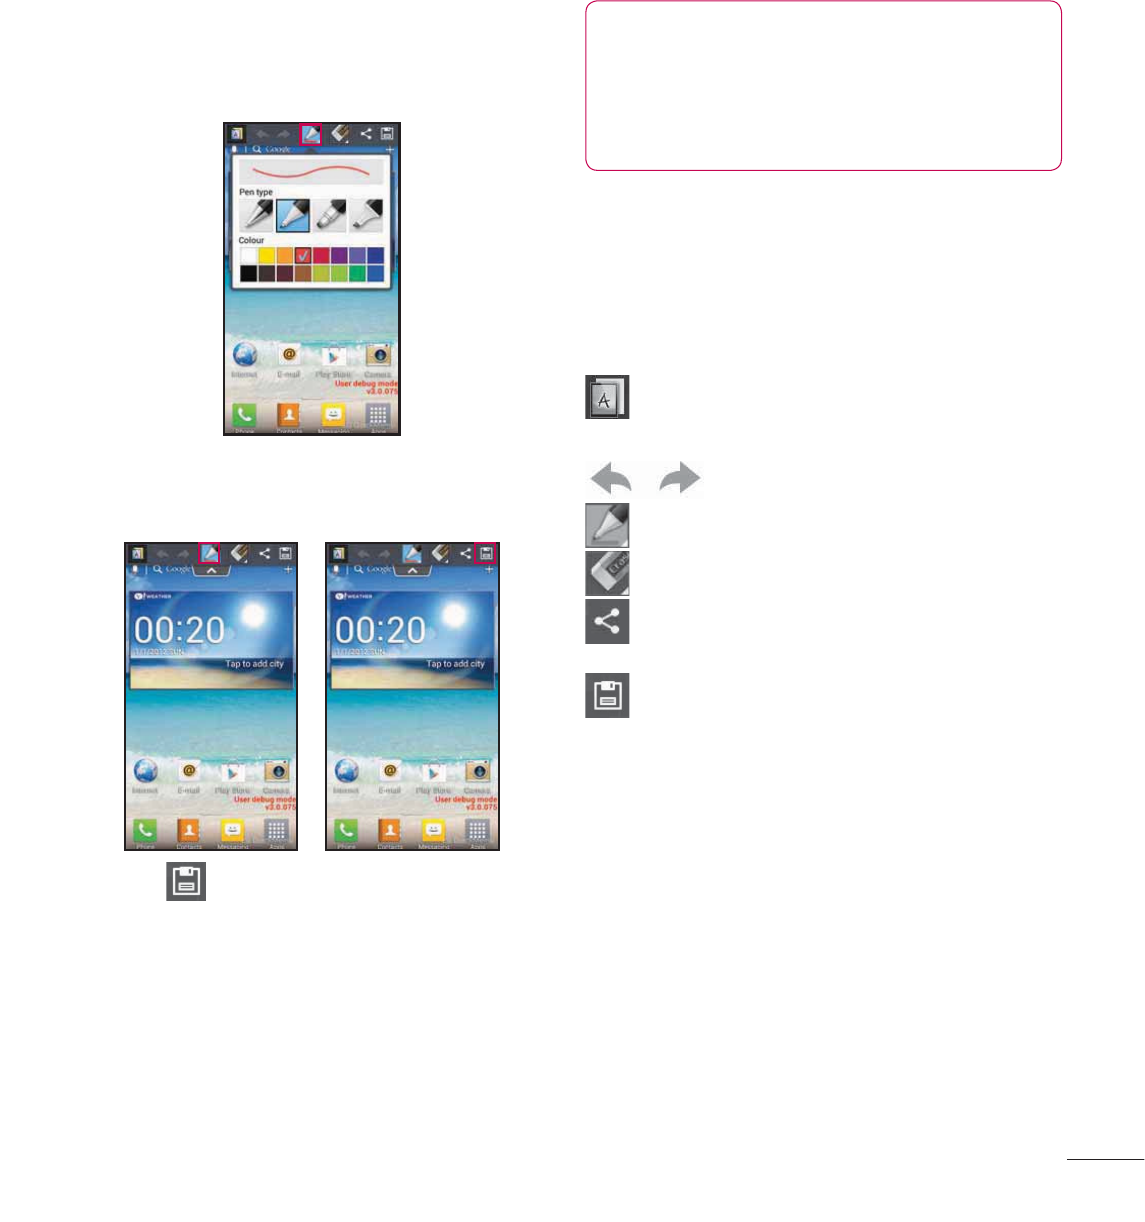
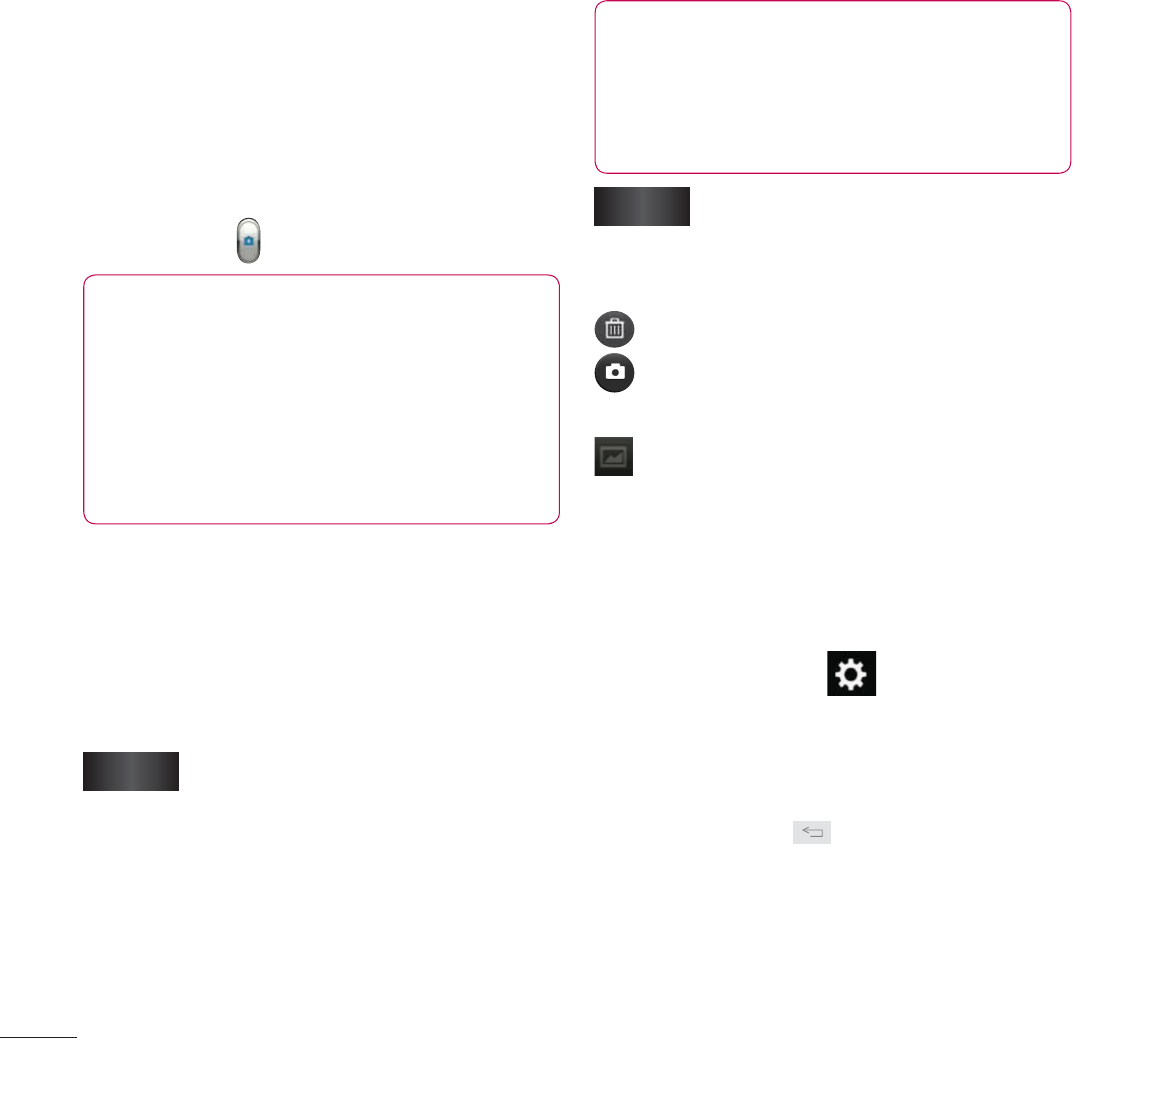
QuickMemo
Use QuickMemo to practically and efficiently
create memos during a call, with a saved
picture or on the current phone screen.
Your Home screen
33
1 Push and hold in the Volume Up and Volume
Down buttons for one second to use the
QuickMemo function (See on page 22).
2 Select the desired menu option from Pen
type, Color, Eraser, and create a memo.
3 Touch to save the memo with the
current screen.
NOTE
Please use a fi ngertip while using the
QuickMemo function. Do not use your
fi ngernail.
Using the QuickMemo
options
While using the QuickMemo function, you
can easily use the QuickMenu options.
– Select if you want to use the
background screen or not.
– Undo or Redo.
– Select the pen type and the colour.
– Erase the memo that you created.
– Send or share the current
QuickMemo to others.
– Save the memo with the current
screen.
Viewing the saved
QuickMemo
Touch Gallery and select the QuickMemo
album.
34
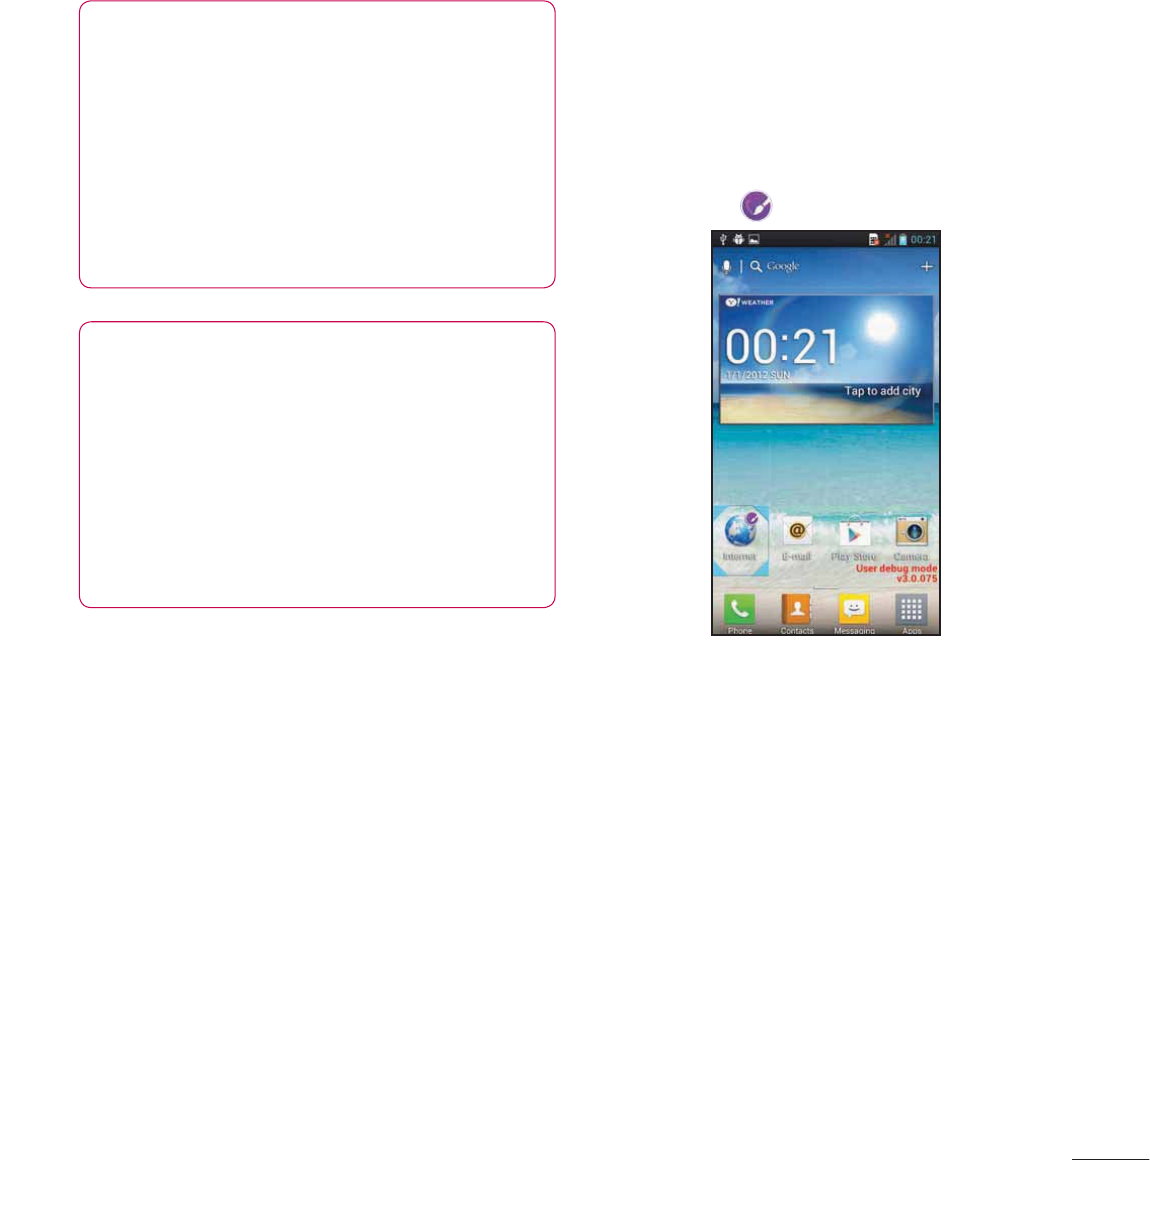
Your Home screen
Home
Simply swipe your finger to the left or right
to view the different panels.
You can also customize each panel with
shortcuts, and folders. You can also
customize each panel with widgets, which
are shortcuts to your Favourite applications.
NOTE
On the Home screen, you can view
quick keys at the bottom of the screen.
The quick keys provide easy, one-tap
access to the functions you use the
most.
Customizing your Home
screen
You can customize your Home screen
by adding quick access elements, such
as shortcuts, widgets, folders to it, or
changing the wallpaper.
•
Apps
: Add shortcuts to applications on
the Home screen.
•
Downloads
: Add shortcuts to
downloaded applications on the Home
screen.
•
Widgets
: Add dynamically updating
widgets to your Home screen to allow
quick access to applications without
opening the full application.
•
Wallpapers
: Change the Home screen
wallpaper.
To add shortcuts to
Apps or Widgets
on
the Home screen:
1 Select a location (Home screen panels) to
add an item by swiping the Home screen
from left to right or vice versa.
2 Tap the (on the top right of the
screen) and click an item. Or, touch and
hold an empty part of the Home screen.
3 Tap the type of item you want to add on
the screen: Apps, Downloads, Widgets,
or Wallpapers.
4 Tap an available apps, downloads, or
widget.
5 You will see a new icon on the Home
screen. To place it on a different panel,
touch and hold it to drag it to the desired
location on the desired panel and release
your finger from the screen.
35
TIP
To add a preloaded application or an
application you have downloaded from
Play Store to the Home screen, simply
touch and hold the icon you want in
the Applications Screen to add to the
Home screen.
NOTE
If there is no available space on a
particular Home screen panel, you
must delete or remove an item before
you can add another item. In this case,
you have the option of switching to
another Home screen panel.
To delete an application icon from the
Home screen, touch and hold the shortcut
icon you want to delete and drag to the
Remove
icon at the top of the screen.
You cannot delete the preloaded
applications. (Only their icons can be
deleted from the screen).
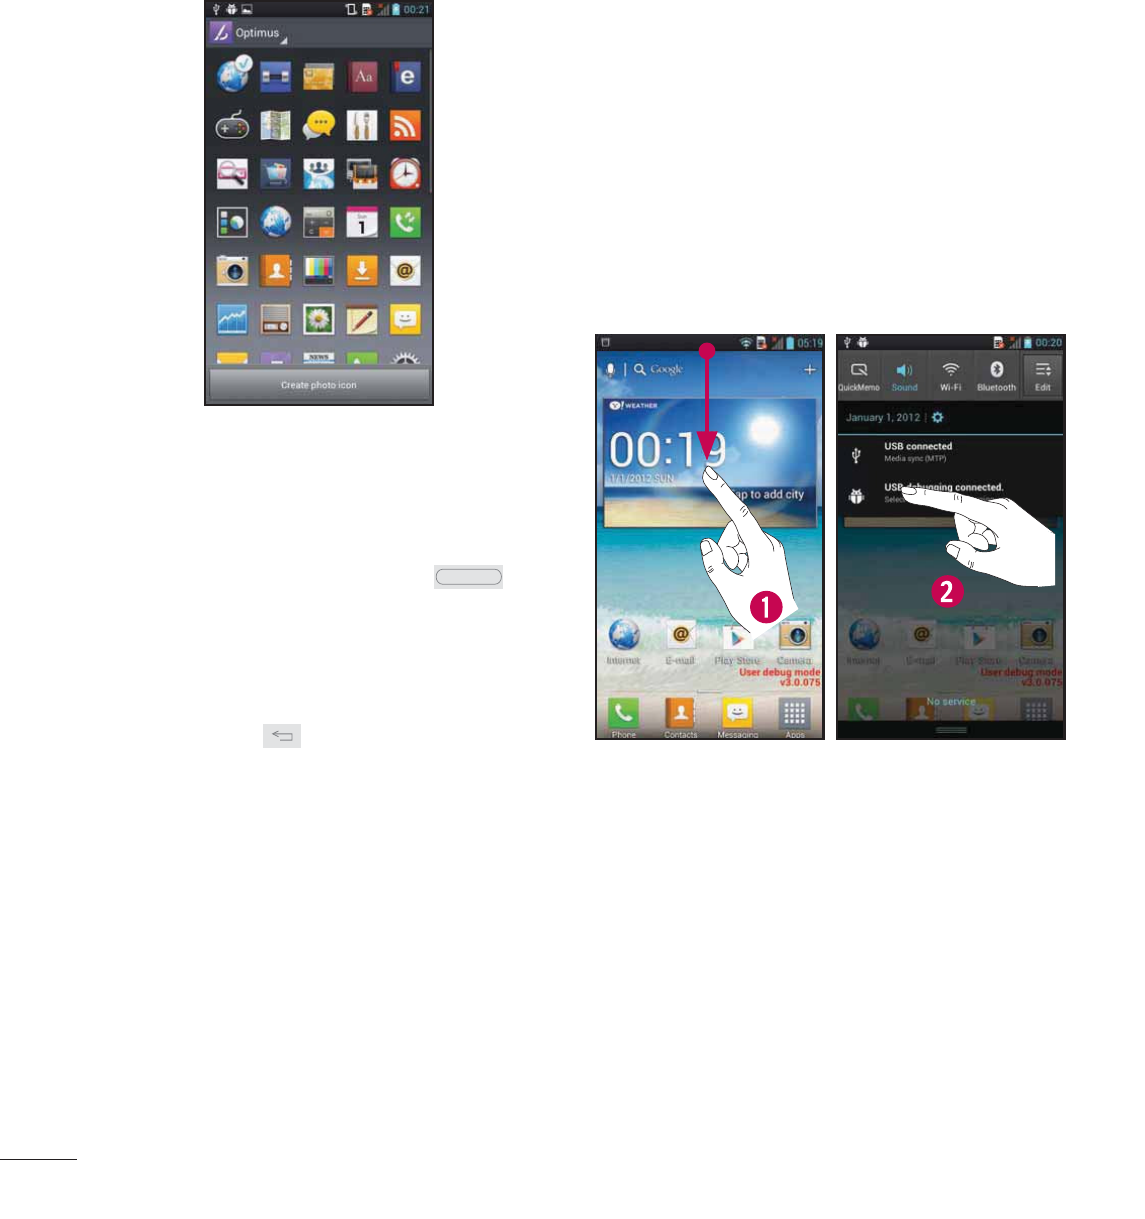
Customizing Apps Icons
on Home screen
You can customize each application icon.
1 Touch and hold an app icon until the
editing icon .
2 Tap the app again and select the a desired
icon design. Or tap Create photo icon
to take a new picture or select a picture
from the Gallery.
36
Your Home screen
Getting back to a recently
used application
1 Touch and hold the Home Key . The
screen will display the icons of applications
that you have used recently.
2 Tap an icon to open its application or tap
the Back Key to return to the current
application.
Notifications panel
Notification icons on the Status Bar report
the arrival of new messages, calendar
events, alarms, as well as ongoing
events, such as when you are in a call.
You can view and edit a list of all recent
notifications. The Notifications panel runs
across the top of your screen.
1 Touch the status bar to show the
Notifications tab, then drag the tab to
the bottom of the screen to open the
Notifications panel.
2 Touch Clear. The notifications will be
erased from the panel.
37
Touch and hold the Status Bar and slide
it down with your finger to open the
Notifications Panel. From here, you can
check and quickly turn on and off Sound
mode, QuickMemo, Wi-Fi, Bluetooth, and
any other options you add.
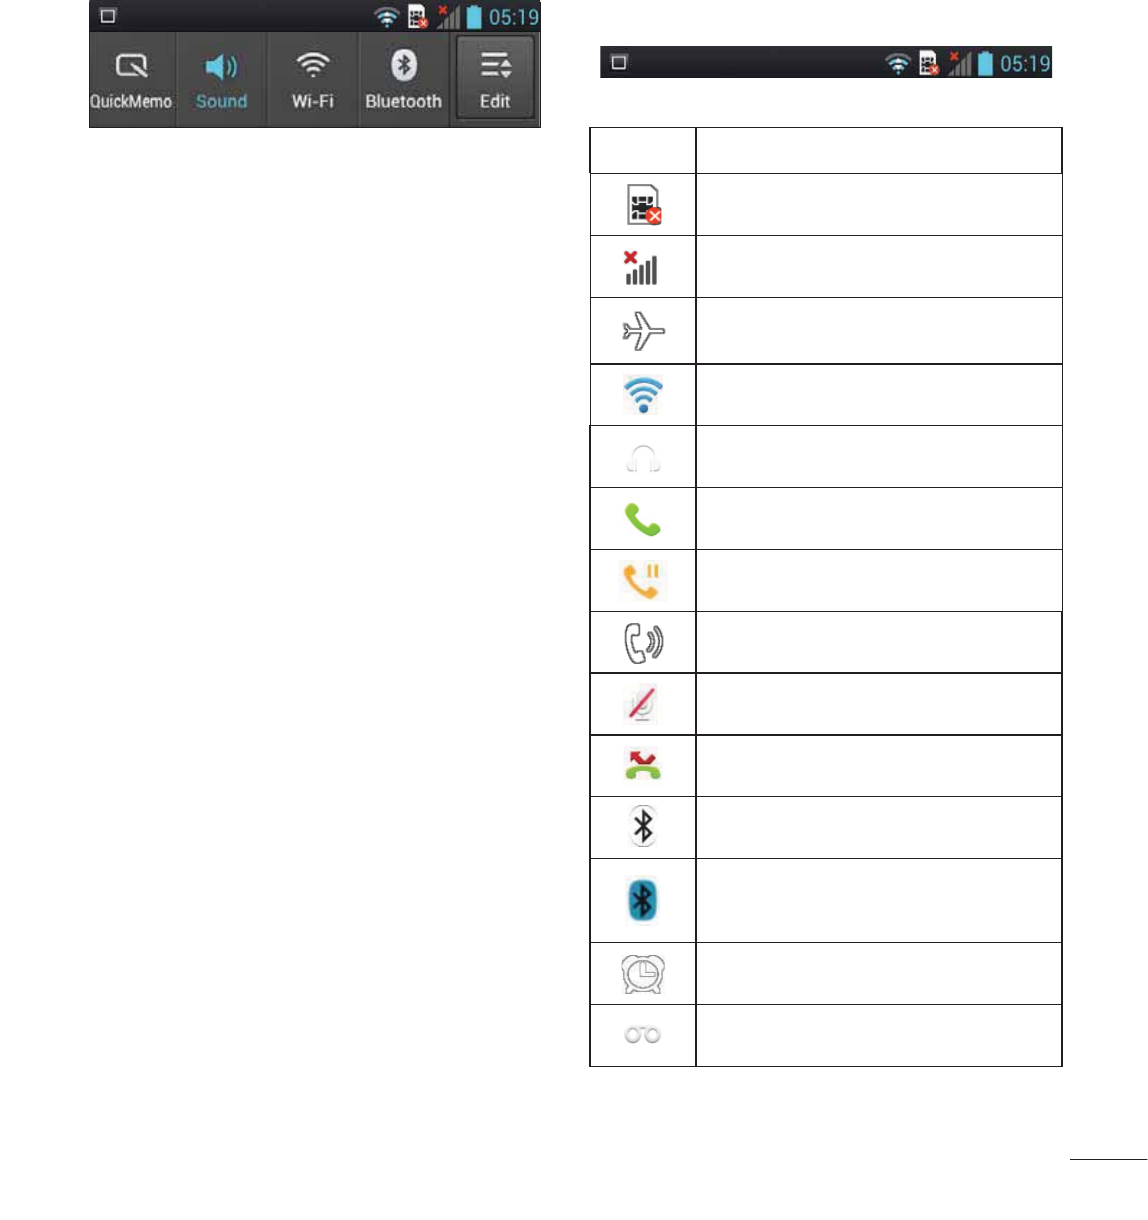
Viewing the Status bar
The Status bar uses different icons to
display phone information, such as signal
strength, new messages, battery life, and
active Bluetooth and data connections.
Below is a table explaining the meaning of
icons you are likely to see in the Status bar.
[Status bar]
Icon Description
No SIM card inserted
No network signal available
Airplane mode is on
Connected to a Wi-Fi network
Wired headset connected
Call in progress
Call on hold
Speakerphone is on
Phone microphone is muted
Missed call
Bluetooth is on
Connected to a Bluetooth
device
Alarm is set
New voicemail available
38
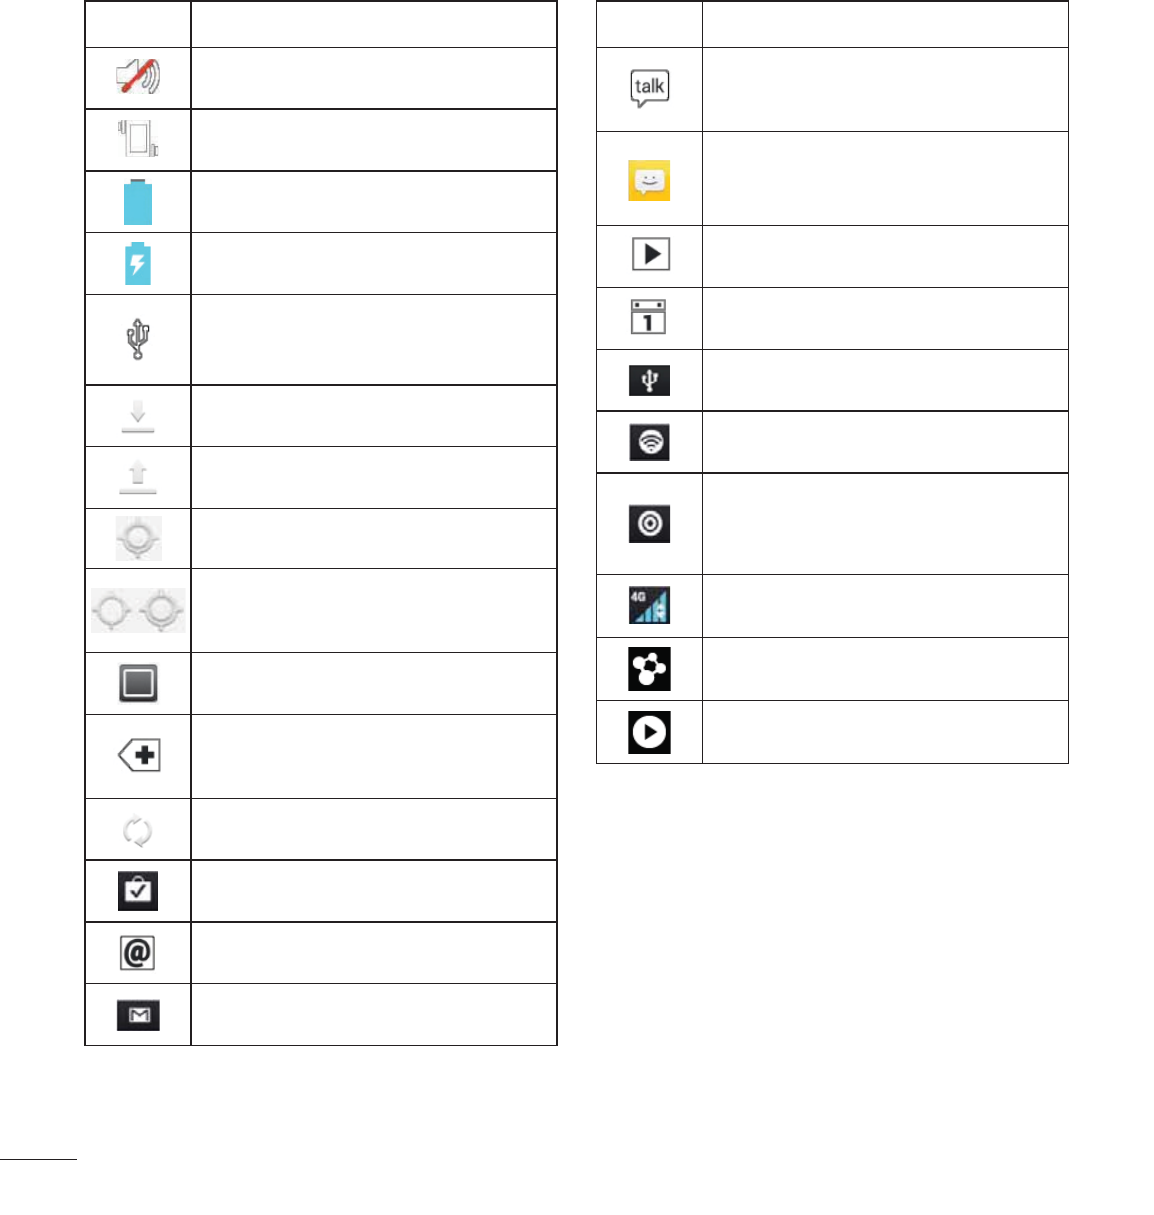
Your Home screen
Icon Description
Ringer is silenced
Vibrate mode is on
Battery fully charged
Battery is charging
Phone is connected to PC via
USB cable
Downloading data
Uploading data
GPS is on
Receiving location data from
GPS
On-Screen Phone connected
3 more notifications not
displayed
Data is synchronizing
Download finished
New email available
New Gmail available
Icon Description
New Google Talk message
available
New text/multimedia message
available
Song is playing
Upcoming event
USB tethering is active.
Portable Wi-Fi hotspot is active
USB tethering & Portable Wi-Fi
hotspot are active.
Data in and out
SmartShare On
SmartShare music playing
39
On-screen Keyboard
You can enter text using the on-screen
keyboard. The on-screen keyboard displays
automatically on the screen when you
need to enter text. To manually display the
keyboard, simply tap a text field where you
want to enter text.
There are two types of keypads that you
can use: Google voice typing and LG
keyboard.
To select the keyboard:
1 Tap the Menu/Search Key > System
settings > Language & input > Default
(Under KEYBOARD & INPUT METHODS)
.
2 Select the default keyboard between
Google voice typing and LG Keyboard.
OR
1 While entering text, drag the Status Bar
down
and tap
Select input method
.
2 Select the desired input method from
Google voice typing, or LG Keyboard.
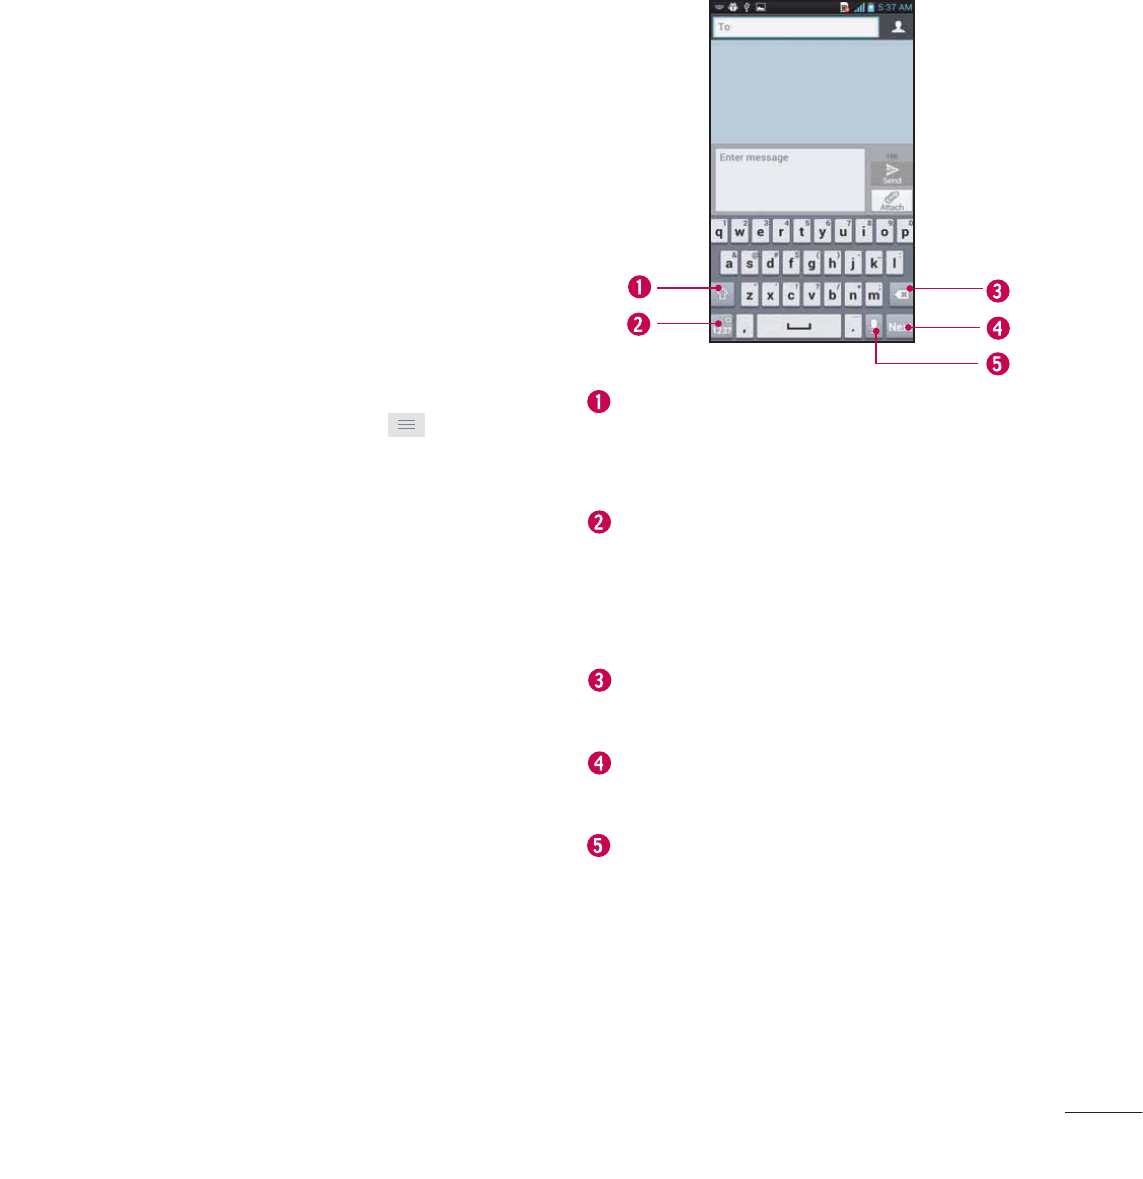
LG keyboard - QWERTY - Letters Entry
Shift Key
- Tap once to capitalize the
next letter you type. Double-tap for all
caps.
Number and Symbols/ Settings Key
- Tap to change input to number and
symbol entry. Touch and hold to set
various LG keyboard settings.
Delete Key
- Tap to delete characters to
the left of the cursor.
Next Key
- Tap to move the cursor to
the next field.
Voice to Text Key
- Tap to use the voice
input function.
40
Your Home screen
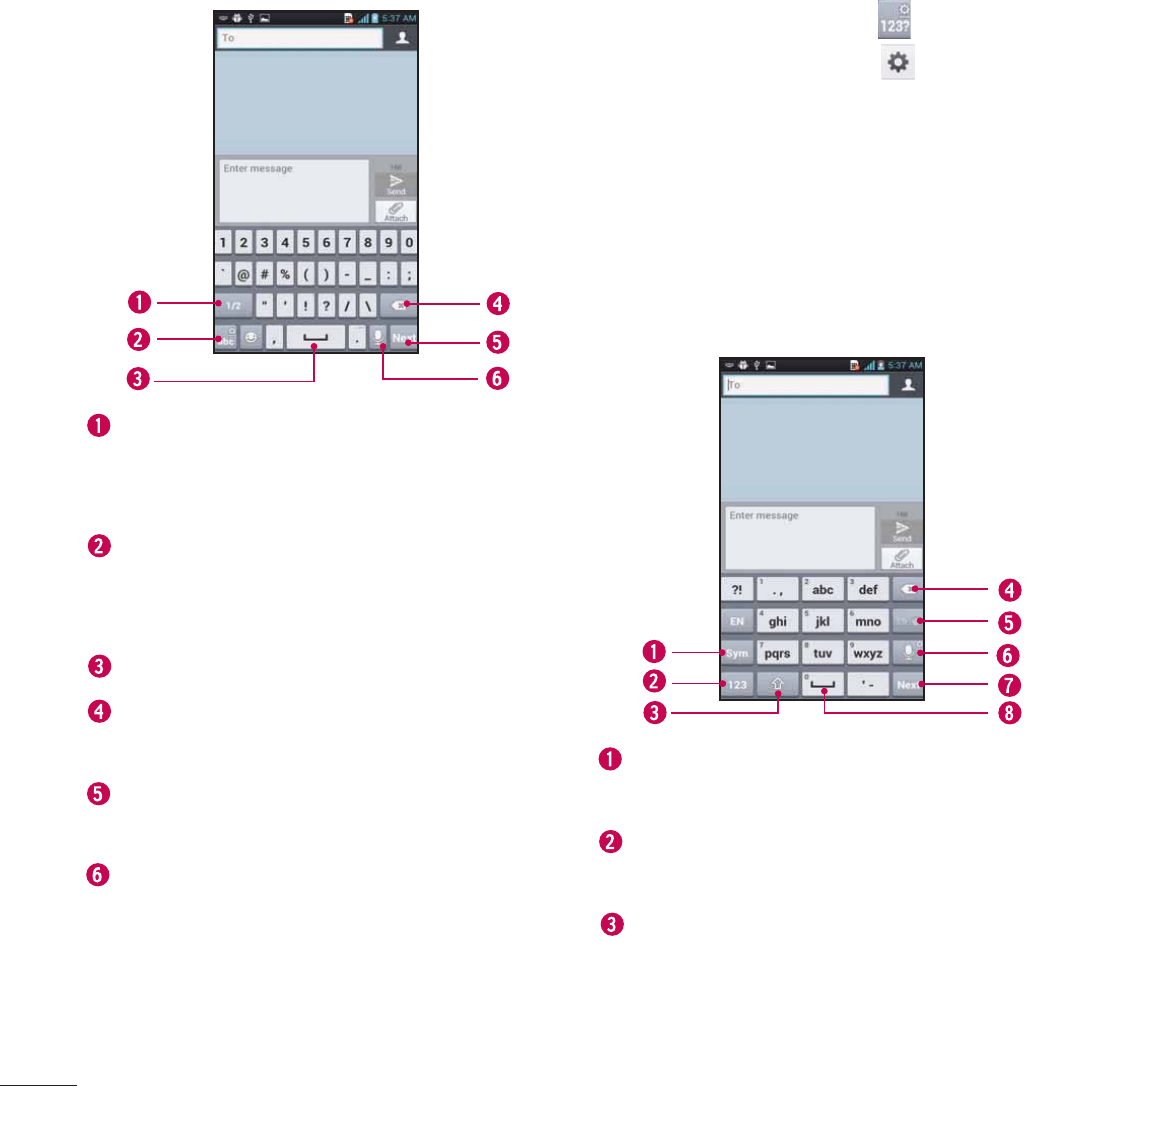
LG keyboard - QWERTY
- Numbers and Symbols Entry
Alt Key
- Tap to enter additional
symbols. The keyboard will change to
alternate characters.
Letters/ Settings Key
- Tap to change
input to letters entry. Touch and hold to
set various LG keyboard settings.
Space Key
- Tap to enter space.
Delete Key
- Tap to delete characters to
the left of the cursor.
Next Key
- Tap to move the cursor to
the next field.
Voice to Text Key
- Tap to use the voice
input function.
LG keyboard – Phone keypad
To switch to the phone keypad on LG
keyboard, touch and hold . Tap
Input
language & type > touch
for setting
,
then tap
Phone keyboard
. The Phone
keyboard allows you to enter letters by
tapping the key labelled with the desired
letters, similar to how you would on a
traditional 12 key phone. You may have
to tap a key up to four times to type the
desired letter or number.
Symbol Key
- Tap to change input to
symbol.
Number Key
- Tap to change input to
number.
Shift Key
- Tap once to capitalize the
next letter you type. Double-tap for all
caps.
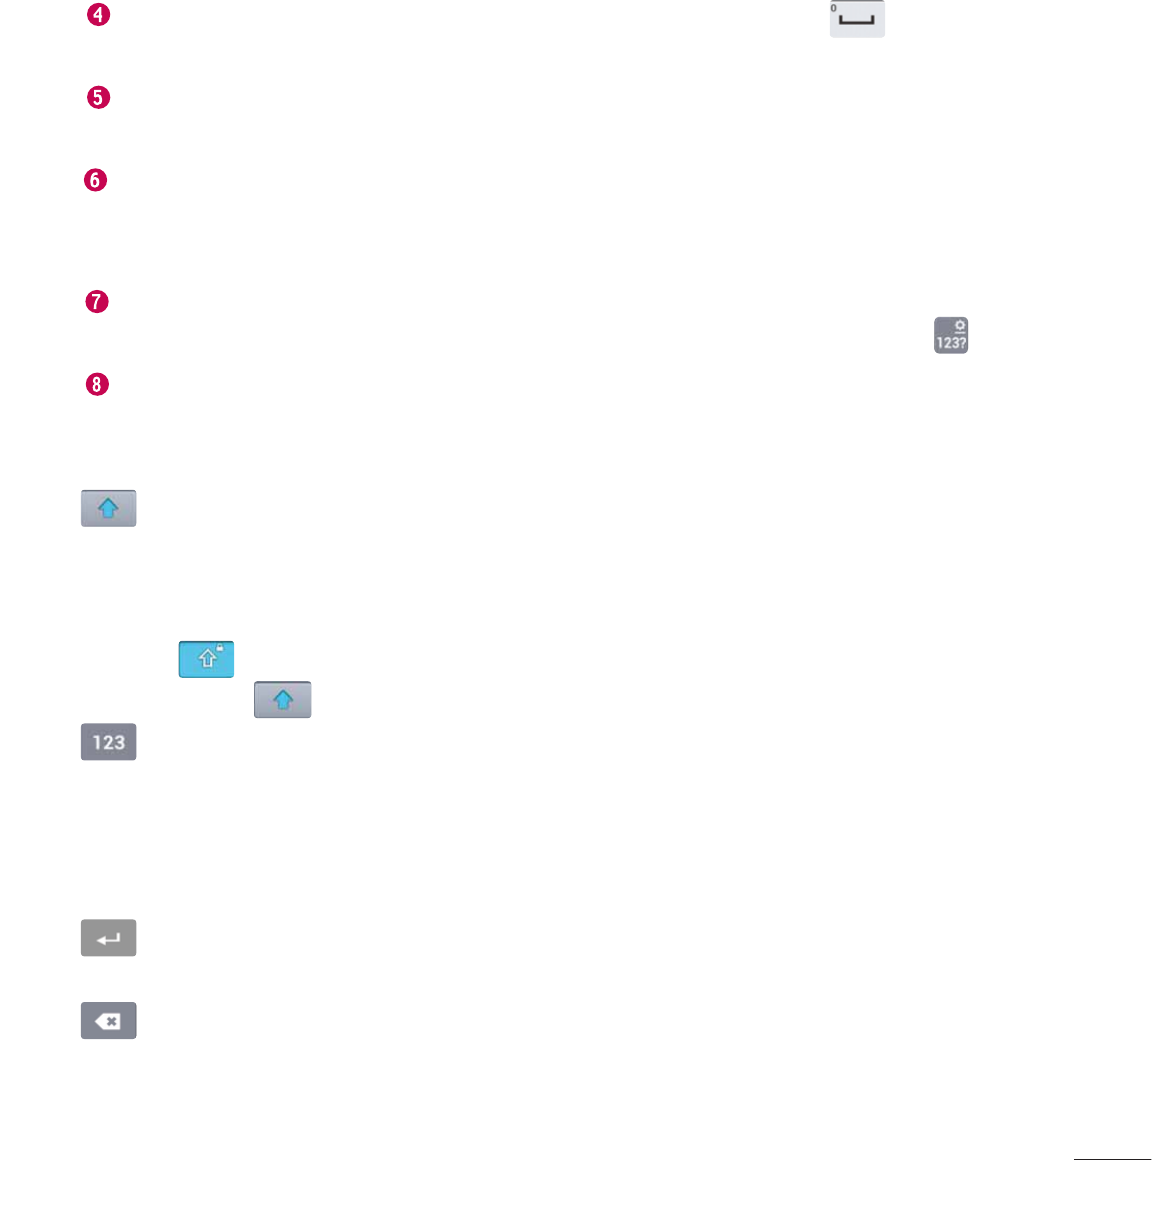
41
Delete Key
- Tap to delete characters to
the left of the cursor.
T9 Key
- Tap to turn on the T9 entry
mode.
Voice to Text/ Settings Key
- Tap to use
the voice input function. Touch and hold
to set various LG keyboard settings.
Next Key
- Tap to move the cursor to
the next field.
Space Key
- Tap to enter space.
Entering text
Shift Key -
Tap once to capitalize the
next letter you type. Double-tap for
all caps.The coloured circle on the
button tells you if uppercase is locked
on or if it is just on for one
character .
Number and Symbols/ Settings Key
-
Tap to change to 123 Mode and
enter numbers and symbols. Touch
and hold to set various LG keyboard
settings.
Enter Key-
Adds another line when
entering text.
Delete Key-
Deletes any text you
have entered.
To enter a space, tap .
123 Mode
This mode allows you to enter numbers
in a text message (a telephone number,
for example) more quickly. Tap the keys
corresponding to the required digits before
manually switching back to the appropriate
text entry mode by tapping the key.
Entering accented letters
The on-screen keyboard allows you to
enter special characters (e.g., “á”).
From Phone Keypad (LG
Keyboard)
Tap the key that corresponds to the desired
character repeatedly until you see the
special character you want.
From Qwerty keyboard
To input the accent, press and hold the
desired key (press the “a” key for example).
After the accented character appears, slide
your finger over it and lift it off it to enter it.

49
The first time you open a Google
application on your phone, you will be
required to sign in with your existing
Google account. If you do not have a
Google account, you will be prompted to
create one.
Creating your Google
account
1 From the Home screen, tap Apps Key .
2 Tap Gmail > Next to start the Gmail™
setup wizard.
3 Tap a text field to open the keyboard and
enter your name and tap Next.
4 Enter your username and tap Next. Your
phone will communicate with Google
servers and check for username availability.
5 Enter and re-enter your password. Then
follow the instructions and enter the
required and optional information about
the account. Wait while the server creates
your account.
Signing into your Google
account
1 Enter your email address and password,
then tap Sign in (If accessing Gmail for the
first time, tap Existing prior to this step).
2 Enter your username and password and
tap Sign in.
3 After signing in, you can use Gmail™ and
take advantages of Google services on
your phone.
4 Once you have set up your Google
account, your phone will be automatically
synchronized with your Google account
on the web. (Depending on your
synchronization settings.)
After signing in, your phone will sync with
your Google services, such as GmailTM,
Contacts, Google Calendar, and Picasa
photo albums. You can also use Google
MapsTM, download applications from Play
Store™, back up your settings to Google
servers, and take advantage of other
Google services on your phone.
Google Account Set-up

50
Google Account Set-up
IMPORTANT
• Some applications, such as Calendar,
work only with the first Google Account
you add. If you plan to use more than
one Google Account with your phone,
be sure to sign into the one you want
to use with such applications first.
When you sign in, your contacts, Gmail
messages, Calendar events, and other
information from these applications and
services on the web are synchronized
with your phone. If you don’t sign into
a Google Account during setup, you will
be prompted to sign in or to create a
Google Account the first time you start
an application that requires one, such as
Gmail or Play Store™.
• If you have an enterprise account
through your company or other
organization, your IT department may
have special instructions on how to sign
into that account.

51
Wi-Fi
To use Wi-Fi on your phone, you need
access to a wireless access point, or
“hotspot.” Some access points are open
and you can simply connect to them.
Others are hidden or implement other
security features, so you must configure
your phone in order to connect to them.
Turn on Wi-Fi
From the Home Screen, Touch and hold
the Status Bar And slide it down with your
finger open and tap to turn Wi-Fi on.
OR
Tap the
Menu/Search Key
and tap
System settings
>
Wi-Fi
.
To connect to a Wi-Fi
Network
Turn off Wi-Fi when you’re not using it to
extend the life of your battery.
1 From the Home screen, tap the Menu/
Search Key and tap System settings
> Wi-Fi.
2 Tap Wi-Fi to turn it on and begin scanning
for available Wi-Fi networks.
- A list of available Wi-Fi networks will
be displayed. Secured networks are
indicated by a lock icon.
3 Tap a network to connect to it.
- If the network is secured, you are
prompted to enter a password or
other credentials. (Ask your network
administrator for details).
4 The Status Bar at the top of your screen
will display an icon that indicates your
Wi-Fi status.
TIP
If you are not in range of a Wi-Fi
network and use a network connection.
Additional data charges may apply.
Connecting to Networks and Devices
52
Connecting to Networks and Devices
NOTE
This device supports WEP, WPA/WPA2-
PSK, WPA PSK, WPA2 Only PSK and
802.1x EAP. (Some EAP methods are
not supported.) If your Wi-Fi service
provider or network administrator
sets encryption for network security,
enter the key in the pop-up window.
If encryption is not set, this pop-up
window will not be shown. You can
obtain the key from your Wi-Fi service
provider or network administrator.
Bluetooth
Using Bluetooth
1 From the Home screen, tap the Menu/
Search Key and tap System settings
> Bluetooth to turn on the Bluetooth
setting.
2 Tap Bluetooth icon > Search for
devices.
3 Tap the name of the device you wish to
pair with and connect.
TIP
Please consult documentation included
with Bluetooth device for information
on pairing mode and passcode
(typically 0 0 0 0 – four zeroes).
How to send data from your phone via
Bluetooth
You can send data via Bluetooth by running
a corresponding application, not from
Bluetooth menu, unlike regular mobile
phones.
*
Sending pictures:
Open the Gallery
application and tap a picture. Then
tap the share icon at the top >
Bluetooth
. Check if Bluetooth is turned
on and tap
Search for devices
. Then
tap the device you want to send data to
from the list.
*
Exporting contacts:
Open the Contacts
application. Tap the contact you want to
share, tap the
Menu/Search Key
and tap
Share
>
Bluetooth
. Check if
Bluetooth is turned on and tap
Search for
devices
. Then tap the device you want to
send data to from the list.
53
*
Sending multi-selected contacts:
Open
the Contacts application. To select more
than one contact, tap the
Menu/Search
Key
and tap
Share
. Tap the contacts
you want to send or tap
Select all
,
done.
Then tap
Bluetooth.
Check if Bluetooth
is turned on and tap
Search for devices
.
Then tap the device you want to send
data to from the list.
*
Connecting to FTP (Only the FTP server
is supported on this handset):
From
the Home screen, tap the
Menu/Search
Key
and tap
System settings
>
Bluetooth
. Make sure Bluetooth is turned
on. Tap make phone visible. Then search
for other devices. Find the service you
want and connect to the FTP server.
TIP
The supported Bluetooth version
is Bluetooth 3.0 and certifi ed by
Bluetooth SIG. It is compatible with
other Bluetooth SIG certifi ed devices.
- If you want to search for this phone
from other devices, from the Home
screen, tap the
Menu/Search Key
and tap
System settings
>
Bluetooth
. Make sure Bluetooth is
turned on. Tap Make phone visible
to other Bluetooth devices for 120
seconds.
- Supported profi les are HFP/HSP,
A2DP, AVRCP, OPP, FTP(Server) and
PBAP.
Data Tethering
You can use your phone to provide a data
connection to a computer by activating
data tethering and connecting them with
a USB cable.
To tether your phone with your computer
using the USB
1 Connect your phone to your computer with
a USB cable.
54
Connecting to Networks and Devices
2 You can see USB connection mode popup
and tap USB tethering and OK to confirm
then tap USB tethering.
3 A blue check mark will appear, indicating
that the function is activated.
NOTE
- Data Tethering requires an
appropriate DataPro data plan.
Devices connected by tethering use
data from your DataPro plan. Plans
are not unlimited and signifi cant
charges may be incurred if the
included data allowance is exceeded.
Performance may vary depending
on the number of devices connected
and other factors.
- You cannot access your phone's
micro SD card on your computer
when using USB tethering.
- From the Home screen, tap the
Menu/Search Key
and tap
System settings
>
More
>
Portable
Wi-Fi hotspot
.
Check to turn on.
Mobile Hotspots
You can also use your phone to provide a
mobile broadband connection for up to 8
other devices. Create a hotspot and share
your connection.
To create a portable hotspot, tap the
Menu/
Search Key
>
System settings
>
Portable Wi-Fi hotspot
>
Configure Wi-Fi
hotspot
. Set a password upon first use.
NOTE
Performance may vary depending
on the number of devices connected
and other factors. If you do not use a
password, others will be able to use
your Mobile Hotspot connection.
Wi-Fi Direct
Learn to use the WLAN Direct feature to
connect two devices via a WLAN without
requiring an access point.
Connect your device to another WLAN
device
1 System settings > More > Wi-Fi Direct.
2 Press Search.
3 Select a device and then select Connect.
When the owner of the other device
55
accepts the connection, pairing is
complete.
4 To deactivate the WLAN Direct feature,
select Disconnect Wi-Fi Direct.
FileShare
Fileshare in file sharing application which
is provided auto connection based on Wi-Fi
Direct. Choose the types of content you
would like to share. Choose from Pictures,
Videos, Music and Document.
Send data
1 Apps Key > FileShare .
2 Select one of images, videos, music or
documents category to send.
3 Finish sending files by tapping the
button to send selected files to scanned
devices.
Use
Menu/Search Key
to use more of
its functions.
Receive data
When prompted, select
OK
to confirm that
you are willing to receive data.
56
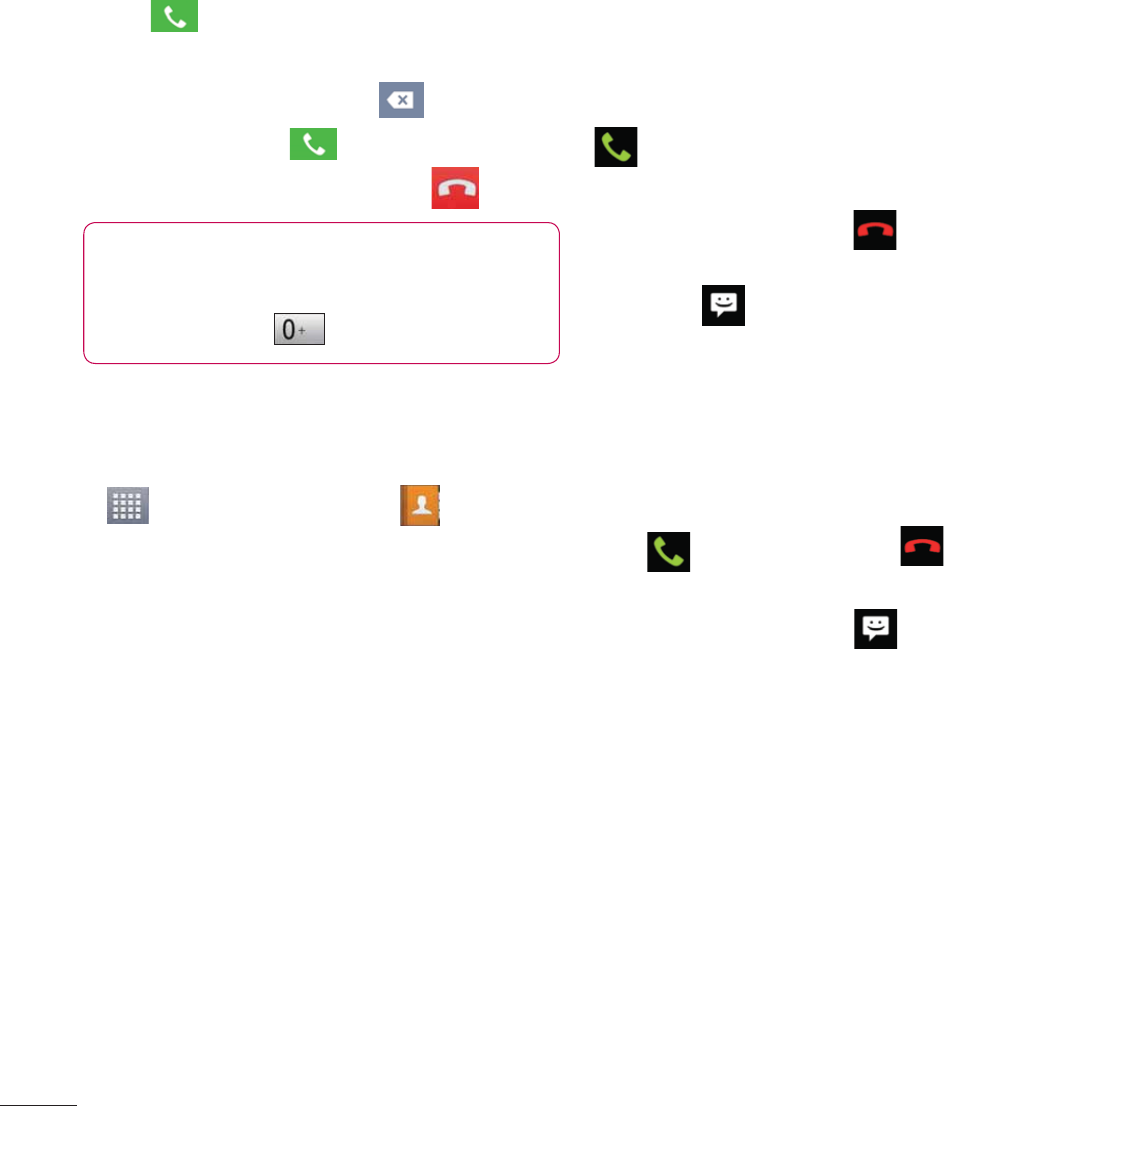
Making a call
1 Tap to open the keypad.
2 Enter the number on the keypad. To delete
a digit, tap the Clear icon .
3 Tap the Call icon to make a call.
4 To end a call, tap the End icon .
TIP
To enter “+” to make international calls,
touch and hold
.
Calling your contacts
1 From the Home screen, tap the Apps Key
and then tap Contacts to open
your contacts.
2 Scroll through the contact list or tap the
Search contacts box and enter the first
letter(s) of the contact you want to call.
3 In the list that is displayed, tap the contact
you want to call.
4 In the Contact Info screen, tap the phone
number you wish to call.
Answering and rejecting
a call
When the screen is locked
When your phone rings, swipe the
Answer
icon in any direction to answer the
incoming call.
Swipe the
Decline
icon in any direction
to reject an incoming call. Swipe the Quick
msg icon in any direction if you want
to send a message to the caller. If the
caller is unknown, the
Quick msg
icon is
not available.
When the screen is unlocked
When your phone rings, tap the
Answer
icon . Tap
Decline
icon to reject
an incoming call.
Tap the Quick msg Key if you want to
send a message to the caller. If the caller
is unknown, the
Quick msg Key
is not
available.
Calls

57
Adjusting the in-call
volume
To adjust the in-call volume during a call,
use the volume up and down keys on the
left side of the phone.
Making a second call
1 During your initial call, tap the Menu/
Search Key and select Add call.
2 Dial the number or search your contacts.
3 Tap the Call icon to connect the call.
4 Both calls will be displayed on the call
screen. Your initial call will be put on hold.
5 Tap the Call entry on the screen to toggle
between active calls or tap Merge call
to merge the calls.
6 To end active calls, tap the End icon
If there is no active call, it will end the call
on Hold.
NOTE
You will be charged for each call you
make.
Ending a Call
Tap the
key to end a call.
NOTE
To redial recent numbers, touch at
the end of the call or find the number
within the Logs list, touch the entry and
touch Call.
If you end the current call screen and
return to the Home screen, You will be
notified that you are still on an active call
by the green phone icon within the Status
bar.
on a Call Notification
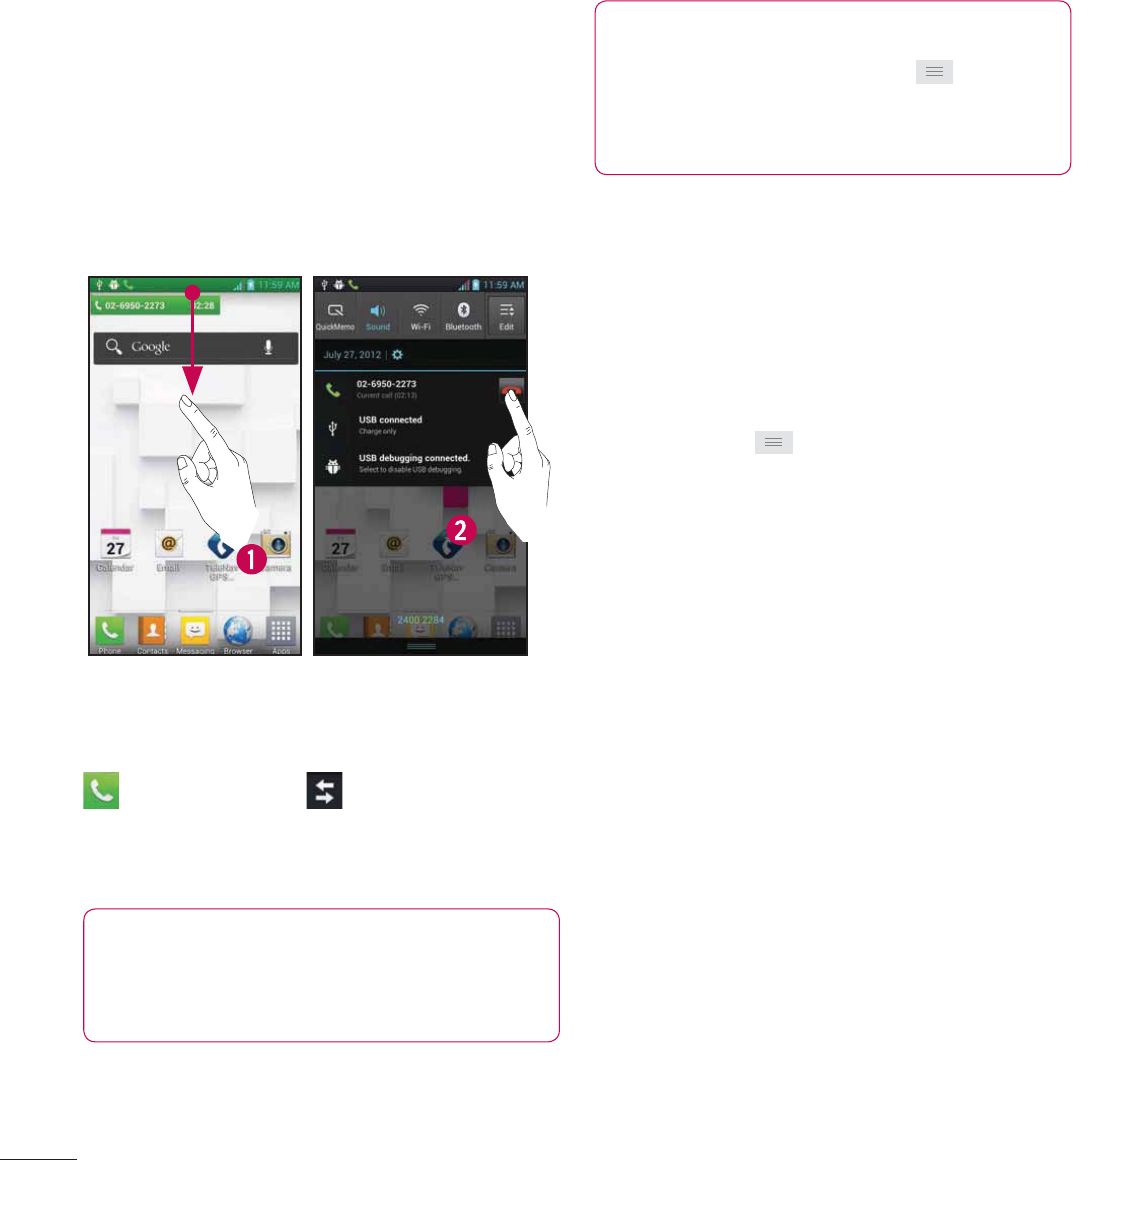
58
Calls
Ending a Call from the
Status Bar
1 Tap the Status bar to show the Notifications
tab, then drag the tab to the bottom of the
screen to open the Notifications panel (1).
2 Tap End to end the currently active call (2).
Viewing your call logs
From the Home screen, tap the
Call icon
and the
Call log
tab.
View a complete list of all dialed, received,
and missed voice calls.
TIP
Tap any single call log entry to view the
date, time, and duration of the call.
TIP
Tap the
Menu/Search Key ,
then
tap
Delete all
to delete all the recorded
items.
Call settings
You can configure phone call settings,
such as call forwarding, and other special
features offered by your carrier.
1 From the Home screen, tap the Menu/
Search Key and tap System
settings.
2 Tap Call.
3 Set any of the available options.
59
Contacts
You can add contacts on your phone and
synchronize them with the contacts in your
Google Account or other accounts that
support syncing contacts.
Searching for a contact
1 From the Home screen, tap Apps Key
and then tap Contacts to open your
contacts.
2 Tap the Search contacts and enter the
contact name using the keypad.
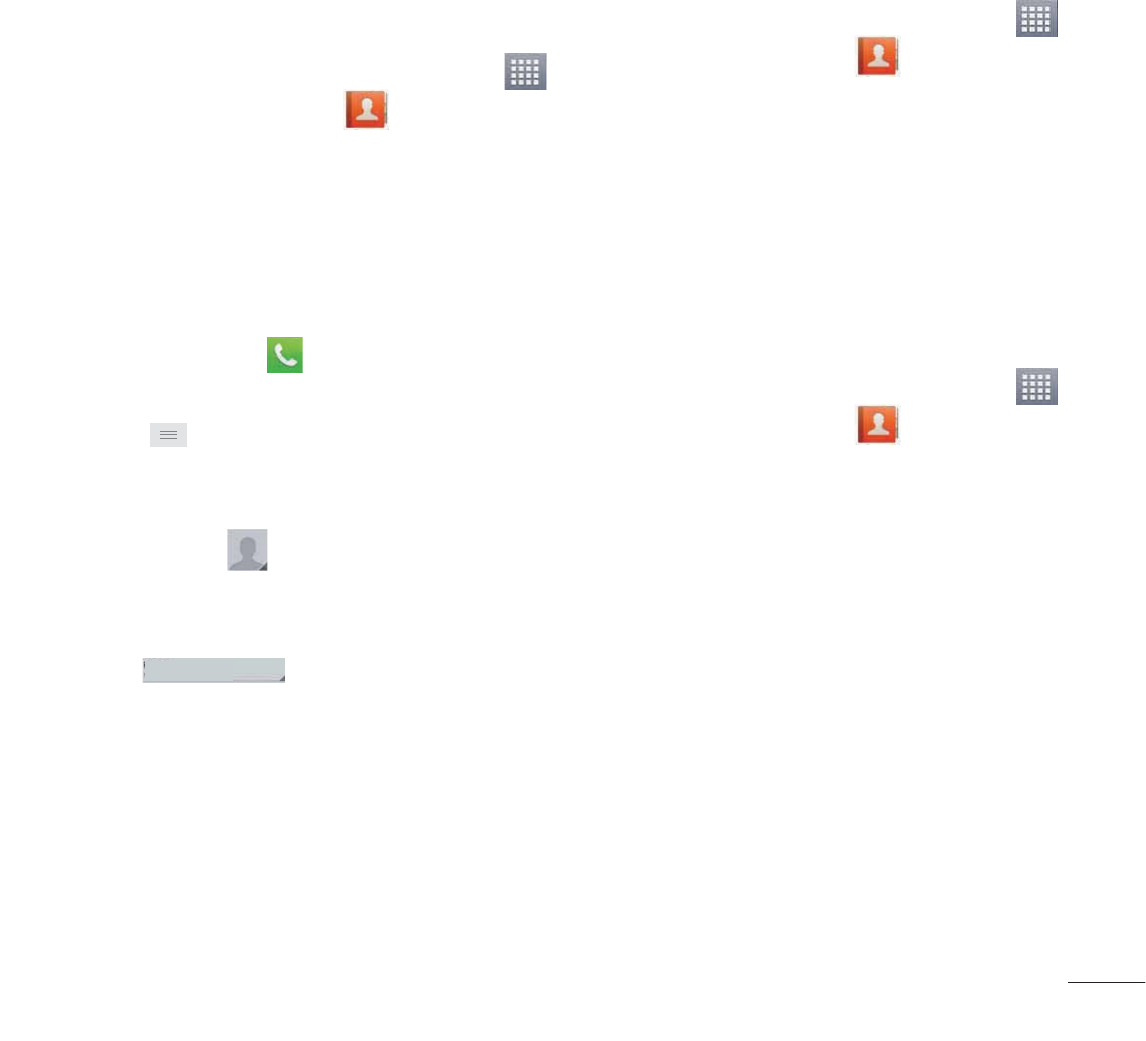
Adding a new contact
1 Tap Phone key and enter the new
contact’s number. Tap the Menu/Search
Key , tap Add to contacts and then
Create new contact.
2 If you want to add a picture to the new
contact, tap . Choose from Take photo
or Select from Gallery. Then browse for
an image and select it.
3 Tap
Phone
Phone
to enter more specific
name information.
4 Enter the details about your contact.
5 Tap Save to save the contact entry.
Favourite Contacts
You can classify frequently called contacts
as favourites.
To add a contact to your favourites
1 From the Home screen, tap Apps Key
and then tap Contacts to open your
contacts.
2 Tap a contact to view its details.
3 Tap the star to the right of the contact’s
name. The star turns gold and the contact
is added to your favourites.
To remove a contact from your favourites
list
1 From the Home screen, tap Apps Key
and then tap Contacts to open your
contacts.
2 Tap the Groups tab and tap favourites.
3 Tap a contact to view its details.
4 Tap the gold star to the right of the
contact’s name. The star turns grey and the
contact is removed from your favourites.
60
Messaging
Your phone combines SMS and MMS into
one intuitive, easy-to-use menu.
Threaded box
Messages (SMS and MMS) exchanged
with another party can be displayed
in chronological order so that you can
conveniently see an overview of your
conversation.
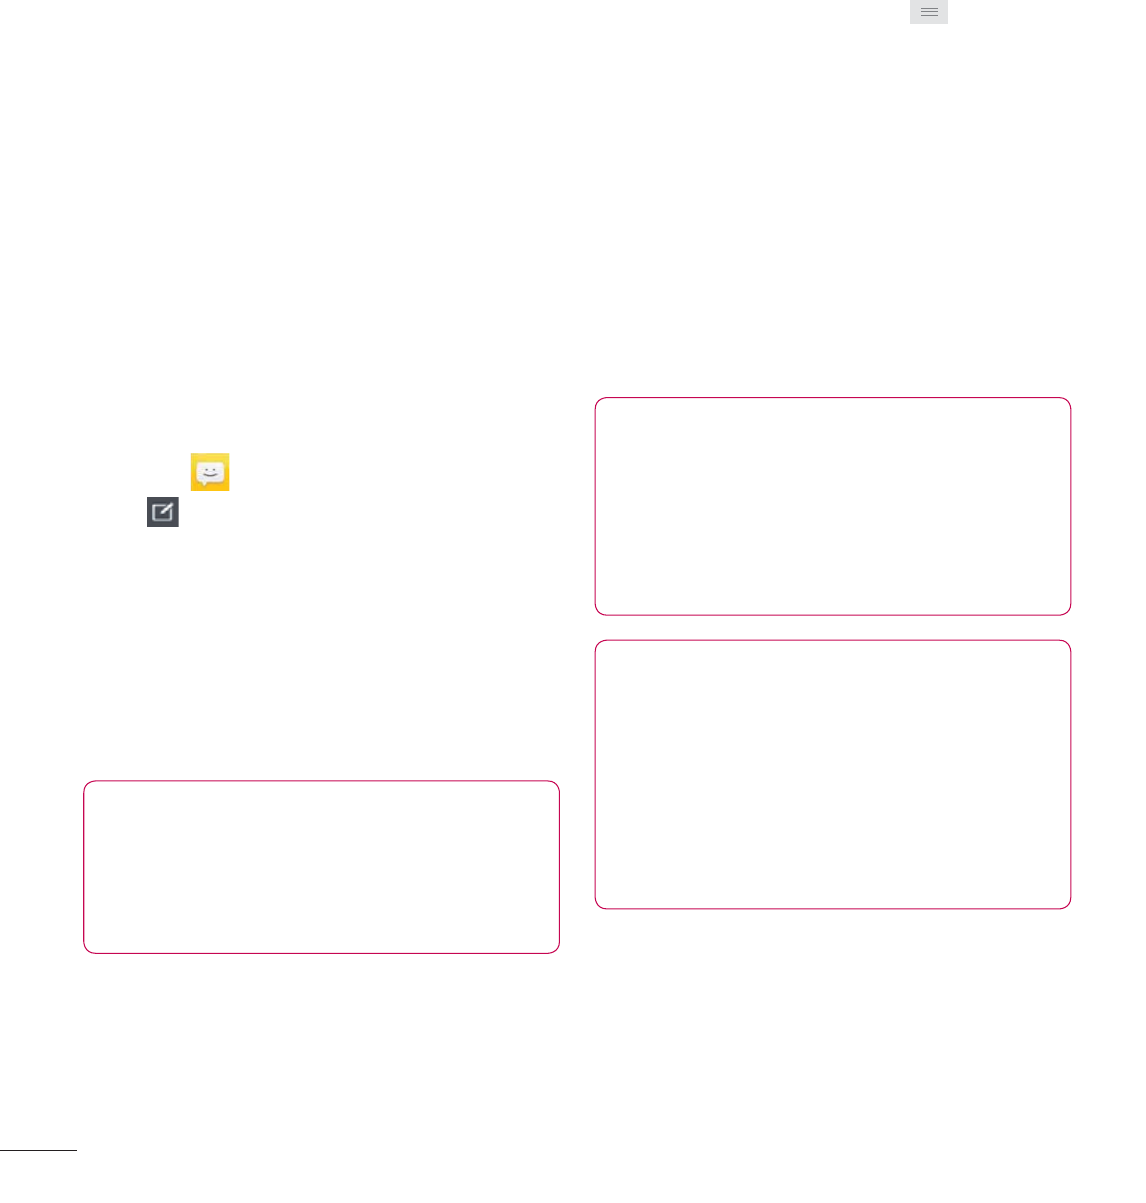
Sending a message
1 Tap the icon on the Home screen, then
tap icon on the top right to create a
new message.
2 Enter a contact name or phone number
in the To field. As you enter the contact
name, matching contacts appear. You can
tap a suggested recipient. You can also add
multiple contacts.
NOTE
You will be charged for a text message
for every person you send the
message to.
3 Tap the text field to start entering your
message.
4 Tap the Menu/Search Key to open
the options menu. Choose from Discard,
Add subject, Insert smiley and All
messages.
5 Tap Send to send your message.
6 The message screen opens, with your
message after recipient name/number.
Responses appear on the screen. As you
view and send additional messages, a
message thread is created.
Warning
The 160-character limit may vary from
country to country depending on how
the SMS is coded and the language
used in the message.
Warning
If an image, video, or audio fi le is
added to an SMS message, it will be
automatically converted into an MMS
message and you will be charged
accordingly.
Messaging/E-mail
61
NOTE
When you get an SMS message
during a call, there will be an audible
notifi cation.
Using smilies
Liven up your messages using smilies.
When writing a new message, tap the
Menu/Search Key ,
then tap
Insert
smiley
.
Changing your message
settings
Your phone’s message settings are
predefined, so you can send messages
immediately. You can change the settings
based on your preferences.
Ź From the Home screen, tap
Messaging
>
Menu/Search Key
>
Settings
.
E-mail
You can use the
E-mail
application to
read E-mail from providers other than
Gmail. The E-mail application supports
the following account types: POP3, IMAP
and Microsoft Exchange ActiveSync (for
Enterprise users).
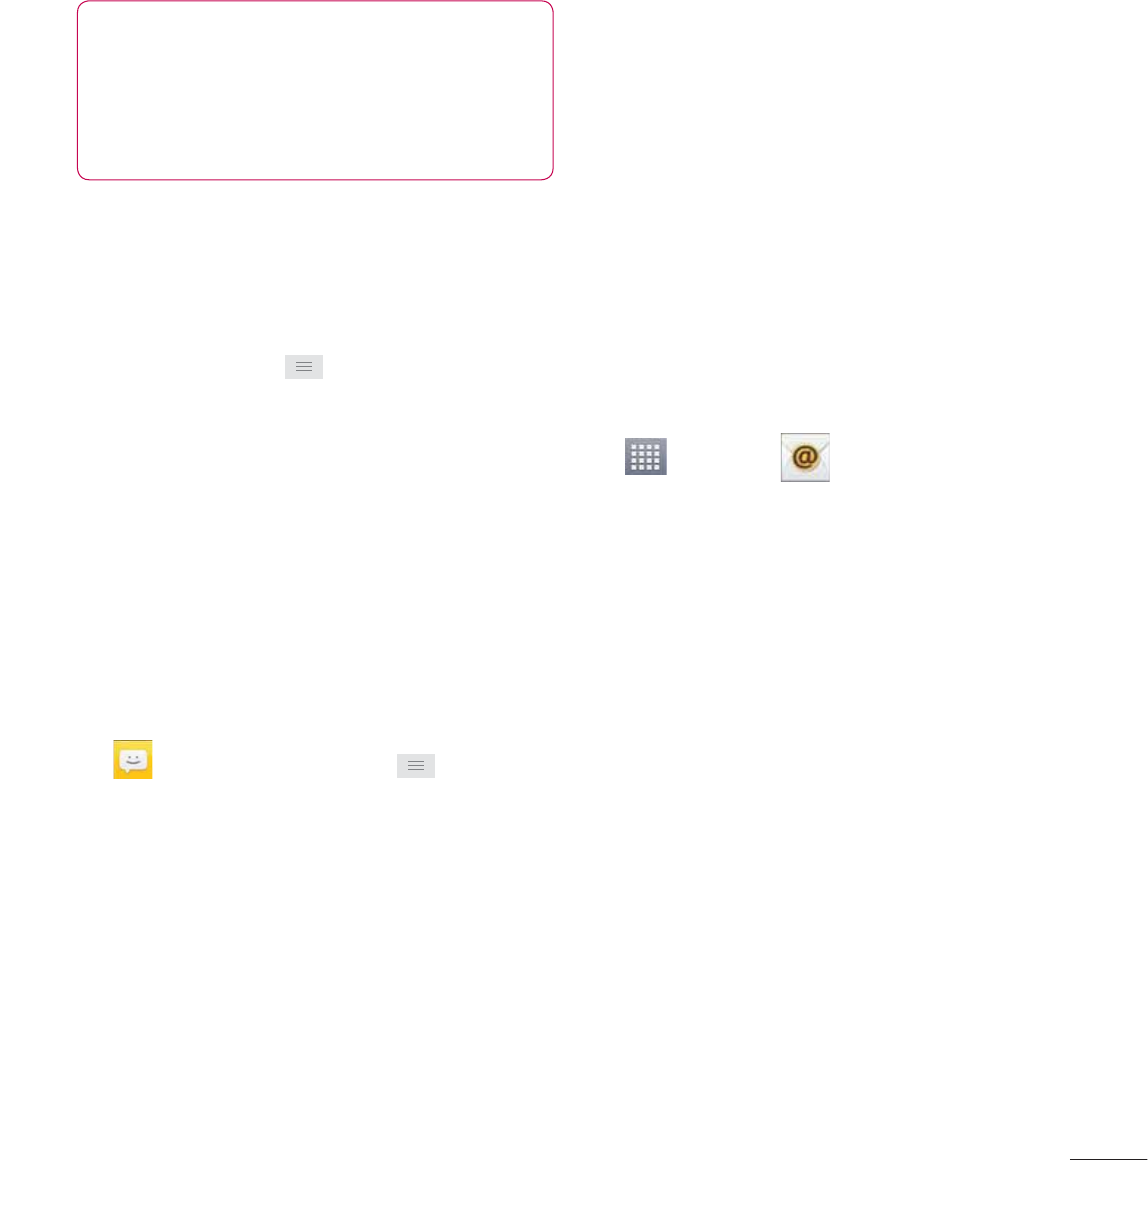
To open the E-mail
application
Ź From the Home screen, tap
Apps Key
>
E-mail
.
The first time you open the
E-mail
application, a setup wizard opens to help
you add an E-mail account.
Microsoft Exchange E-mail
Account
E-mail address
– Enter the account email
address.
User name
– Enter the account username.
Password
– Enter the account password.
Domain
– Enter the account domain
(optional)
Server address
– Enter the server address
Use SSL
– Choose whether or not to use
SSL for Microsoft Exchange.
62
Messaging/E-mail
Other (POP3, IMAP) E-mail
Account
E-mail address
– Enter the account email
address.
Password
– Enter the account password.
Setup complete page will appear and you
will need to enter “name”. The account will
now appear in the list of accounts in your
E-mail folder.
Incoming Server Settings
POP3 / IMAP4
– Select protocol type, either
POP3 or IMAP4.
Incoming server
– Enter the incoming
email server address.
Secure type
– TLS/SSL/Off.
Port number
– Normally each account’s
default number will be displayed.
Advanced Server Settings (Outgoing)
Outgoing server
– Enter the outgoing
email server address.
SMTP secure type
– TLS/SSL/Off.
SMTP Port number
– Normally each
account’s default number will be displayed.
Tap the
Next
button to connect the server.
Setup Completed
page will appear. You will
need to enter “name” for account display
and My name. Then, tap
Done
.
The account will now appear in the list of
accounts in your E-mail folder.
The Accounts Screen
The
Accounts
screen lists your
Combined
Inbox
and each of your email accounts.
Ź Tap
Apps Key
>
E-mail
. The
Account list appears.
TIP
To make a shortcut to the Inbox of an
account:
In the accounts list, touch and hold
an email account. Then, tap
Add to
homescreen
.
You can tap an account to view its
Inbox
.
The default account from which you send
email is indicated with a checkmark.

63
To open your Combined
Inbox
If you have configured email to send and
receive email from more than one account,
you can view all messages sent to all
accounts in your Combined Inbox.
Ź Tap
E-mail
>
Combined Inbox
(on the
Accounts
screen).
Messages in the
Combined Inbox
are
colour coded on the left, by account, using
the same colours used for your accounts in
the
Accounts
screen.
When a new email arrives in the inbox,
there will be sound and vibration
notification. Tap the email notification to
end it.
Composing and Sending
E-mail
1 In the E-mail application, tap the
Compose.
2 Enter an address for the message’s
intended recipient. As you enter text,
matching addresses will be offered from
your contacts.
3 Tap the Cc/Bcc field to copy or blind copy
to other contacts/email addresses.
4 Enter the text of the message.
5 Tap Attach to attach the file you want to
send with your message.
6 Tap Send.
Touch a message in the
Drafts
folder to
resume working on it. Your message will
also be saved as a draft if you touch the
Back
key before sending it.
If you are not connected to a network, for
example if you’re working in airplane mode,
the messages you send are stored in
your
Outbox
folder until you’re connected
to a network. If it contains any pending
messages, the
Outbox
will be displayed on
the
Accounts
screen.
NOTE
The messages sent using an Exchange
account will not be stored on the
phone; they will be stored on the
Exchange server itself. If you want to
see your sent messages in the
Sent
folder (or with the
Sent
label), you may
need to open the
Sent
folder/label and
select
Refresh
from the options menu.

64
Messaging/E-mail
Working with Account
Folders
Each account has
Inbox
,
Outbox
,
Sent
,
Drafts
,
Trash
and
Junk folders
. Depending
on the features your account service
provider supports, you may have additional
folders.
Adding and Editing E-mail
Accounts
To add an email account
1 Tap Apps Key > E-mail .
2 Select Microsoft Exchange or Other.
If an email account is already set up, the
wizard is not activated automatically.
In this case, tap the
Menu/Search Key
>
Add account
.
To change account settings
1 Open the Accounts screen.
2 Tap the Menu/Search Key >
Settings.
To delete an email account
1 Open the Accounts screen.
2 Touch and hold the account you want to
delete.
3 Tap Delete account in the menu that
opens and tap OK in the dialogue box to
confirm.
65
Social Networking
With your phone, you can enjoy social
networking and manage your micro-blog in
on-line communities. You can update your
current status, upload photos, and view
your friends’ status updates in real-time.
You can add your Facebook, Twitter
accounts to your phone. If you don’t have
an account, you can visit their sites to set
one up.
NOTE
Additional costs may be incurred when
connecting and using online services.
Check your data charges with your
network provider.
Adding an account to your
phone
1 From the Home screen, tap the Menu/
Search Key > System settings >
Account & sync.
2 Tap ADD ACCOUNT.
3 Tap any social networking service you
want to use.
4 Enter your email address and password
that you set up for your social networking
account, then tap Log in.
Adding a social
networking widget on the
home screen
If you add a social networking widget on
your Home screen, the widget will show
your status when your phone receives
updates from the network.
You can also access the social community
directly by tapping the widget.
1 Touch and hold an empty spot on the
Home screen.
NOTE
If there is no available space on a
particular Home screen panel, you
won’t be able to add any widget; you
must delete or remove an item before
you can add another item. In this case,
you have the option of switching to
another Home screen panel.
2 Tap the Widgets tab and scroll to the right
until you see Social+.
3 Tap Social+ to add it to the Home screen
panel.
66
Viewing and updating your
status
1 Go to the Home screen panel where the
Social+ widget is. You can see the current
status of social applications you set.
2 You can select each social application
you’d like to view. Tap the arrow (for
example, on the upper left corner of
the widget) and tap the social application
you’d like to display.
3 Tap “What are you doing?” field to update
your status with comments or upload
pictures.
- Check all the social applications you’d
like to update. It will simultaneously
update all.
4 After entering comments with attachment
(if any), tap Post.
TIP
You can use information about friends
only in your social network(s) or sync
all data to Contacts.
Syncing accounts on your
phone
You can sync information from your social
networking accounts with your Contacts
and other functions on your phone, if
applicable.
1 From the Home screen, tap the Menu/
Search Key > System settings >
Accounts & sync. Choose the account
you want to synchronize and enter the
necessary information.
2 Check Update data to sync.
3 Tap the account to sync.
4 Check sync options such as Sync
Contacts.
“” indicates that synchronization has
been enabled.
Removing accounts on
your phone
1 From the Home screen, tap the Menu/
Search Key > System settings >
Accounts & sync.
2 Tap the account(s) you want to delete, then
tap Delete account (twice).
Social Networking
67
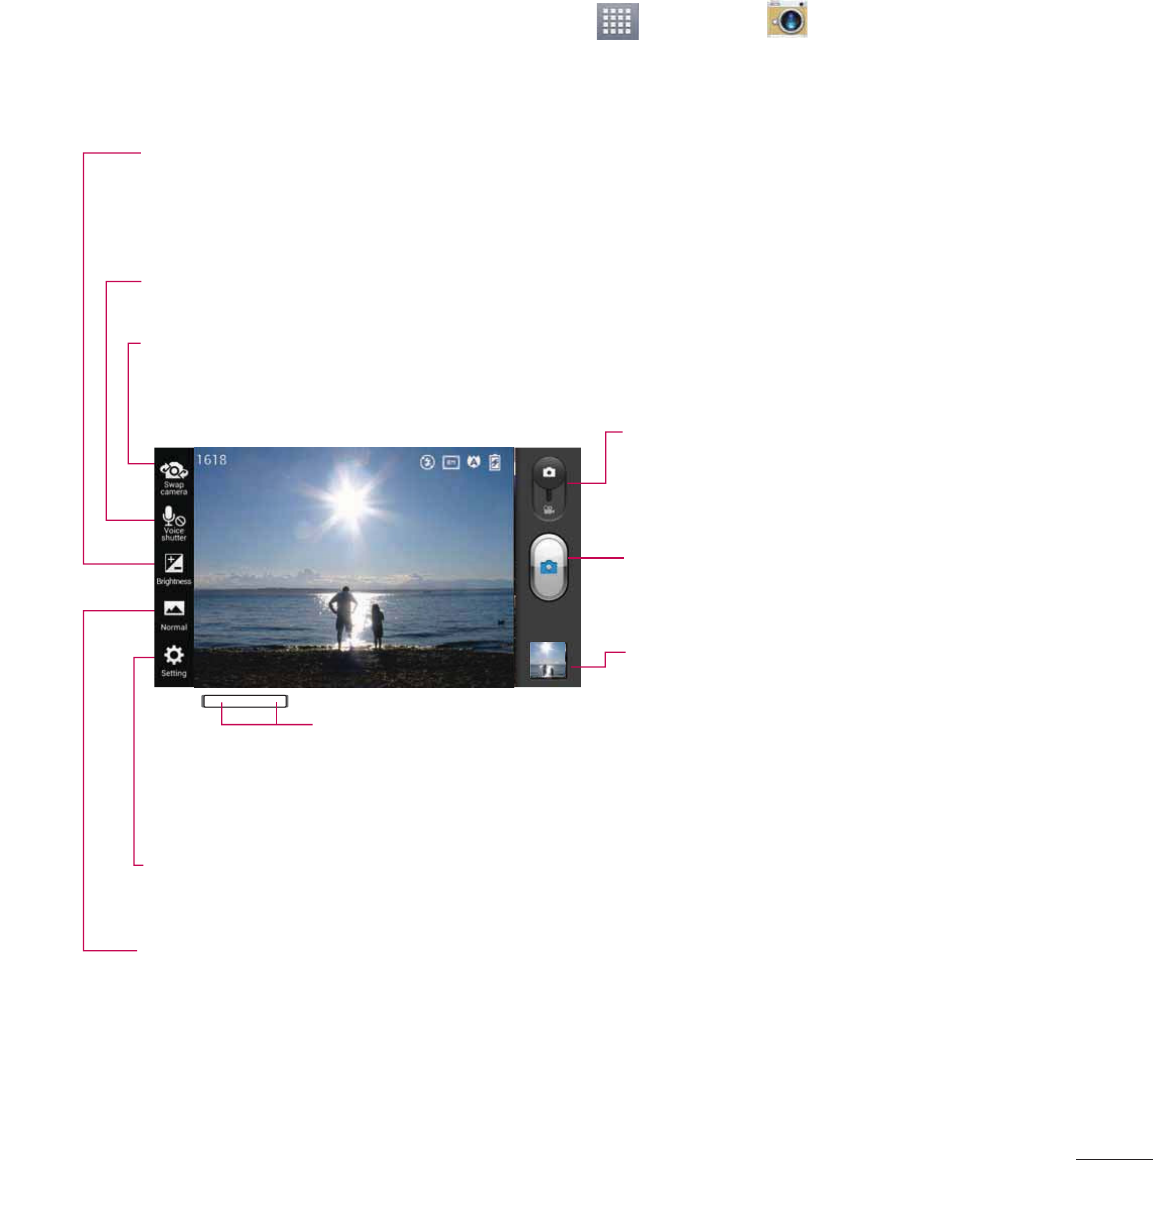
To open the Camera application, tap
Apps Key
>
Camera
.
Getting to know the viewfinder
Camera Switch
- Allows you to switch between the front-facing and back-facing
cameras.
Settings
– Tap this icon to open the settings menu. See
Using the advanced
settings
on page 90.
Shot mode
– Choose from
Normal
,
Panorama
or
Continuous shot
.
Camera mode
– Slide this icon down to
switch to video mode.
Capture
– Allows you to take a photo.
Gallery
– This enables you to access
your saved photos and videos
within the camera mode.
Simply tap and your Gallery
will appear on the screen.
Brightness
– This defines and controls of the amount of sunlight entering the lens.
Slide the brightness indicator along the bar, towards “-” for a lower brightness
image, or towards “+” for a higher brightness image.
Voice Shutter
– Say Cheese when you get ready to take a photo.
Zoom(Volume keys)
–
Zoom in or zoom out.
Camera
68
Taking a photo
1 Open the Camera application.
2 Hold the phone, point the lens towards the
subject you want to photograph.
3 Touch the screen and a focus box will
appear in the viewfinder screen.
4 When the focus box turns green, the
camera has focused on your subject.
5 Click on the to capture the image.
NOTE
A shading issue may occur when you
take a picture indoors, due to the
characteristics of the camera. (Shading
means a colour difference between the
centre and sides.)
Once you’ve taken the
photo
Your captured photo will appear on the
screen if Auto review is set to On.
Share
Tap to share the picture via
various methods such as
Bluetooth, E-mail, Gmail,
Google+, Memo, Messaging,
MobileLife Album, Picasa,
Social+,
or any other
downloaded applications that is
supported.
NOTE
Additional charges may apply when
MMS messages are sent while
roaming.
Set as
Tap to use the image as
Contact
photo, Home screen wallpaper,
Lock screen wallpaper
.
Tap to delete the image.
Tap to take another photo immediately.
Your current photo will be saved.
Tap to view the Gallery of your saved
photos.
Using the advanced
settings
In the viewfinder, tap to open the
advanced options.
You can change the camera settings by
scrolling the list. After selecting the option,
tap the
Back key
.
Flash
– Turn Off / On / Auto.
Camera

69
Focus
–Tap to select the focus mode.
•
Auto
: Allows the camera to focus
automatically. (The camera continuously
focuses on the objects in the photo)
•
Face tracking
: The camera detects and
focuses on human faces automatically.
Image size
– Tap to set the size (in
pixels) of the picture you take. Select a
pixel value from the following options:
5M(2592X1944), 3M(2048X1536),
W3M(2240X1344), 1M(1280X1024),
W1M(1280X768).
Scene mode
– Select the colour and
light settings appropriate for the current
environment.
•
Normal
: Automatically adjusts according
to the environment.
•
Portrait
: It’s good to capture people.
•
Landscape
: It’s good to capture natural
scenery such as trees, flowers and sky.
•
Sunset
: It’s good to capture the sunset
scenery.
ISO -
Control the camera’s sensitivity to
light. Choose from
Auto
,
400
,
200
and
100
.
White balance
– The white balance
ensures any the white areas in your picture
are realistic. To enable your camera to
adjust the white balance correctly, you may
need to determine the light conditions.
Choose from
Auto, Incandescent, Sunny,
Fluorescent
, and
Cloudy
.
Colour effect
– Choose a colour tone for
your new photo.
Timer
– The self-timer allows you to set a
delay after the shutter is pressed. Select
Off
,
3 sec
,
5 sec
or
10 sec.
This is ideal if
you want to be included in a photo.
Geotagging
– Activate to use your phone’s
location-based services. Take pictures
wherever you are and tag them with the
location. If you upload tagged pictures to a
blog that supports geotagging, you can see
the pictures displayed on a map.
NOTE
This function is only available
when GPS is active.
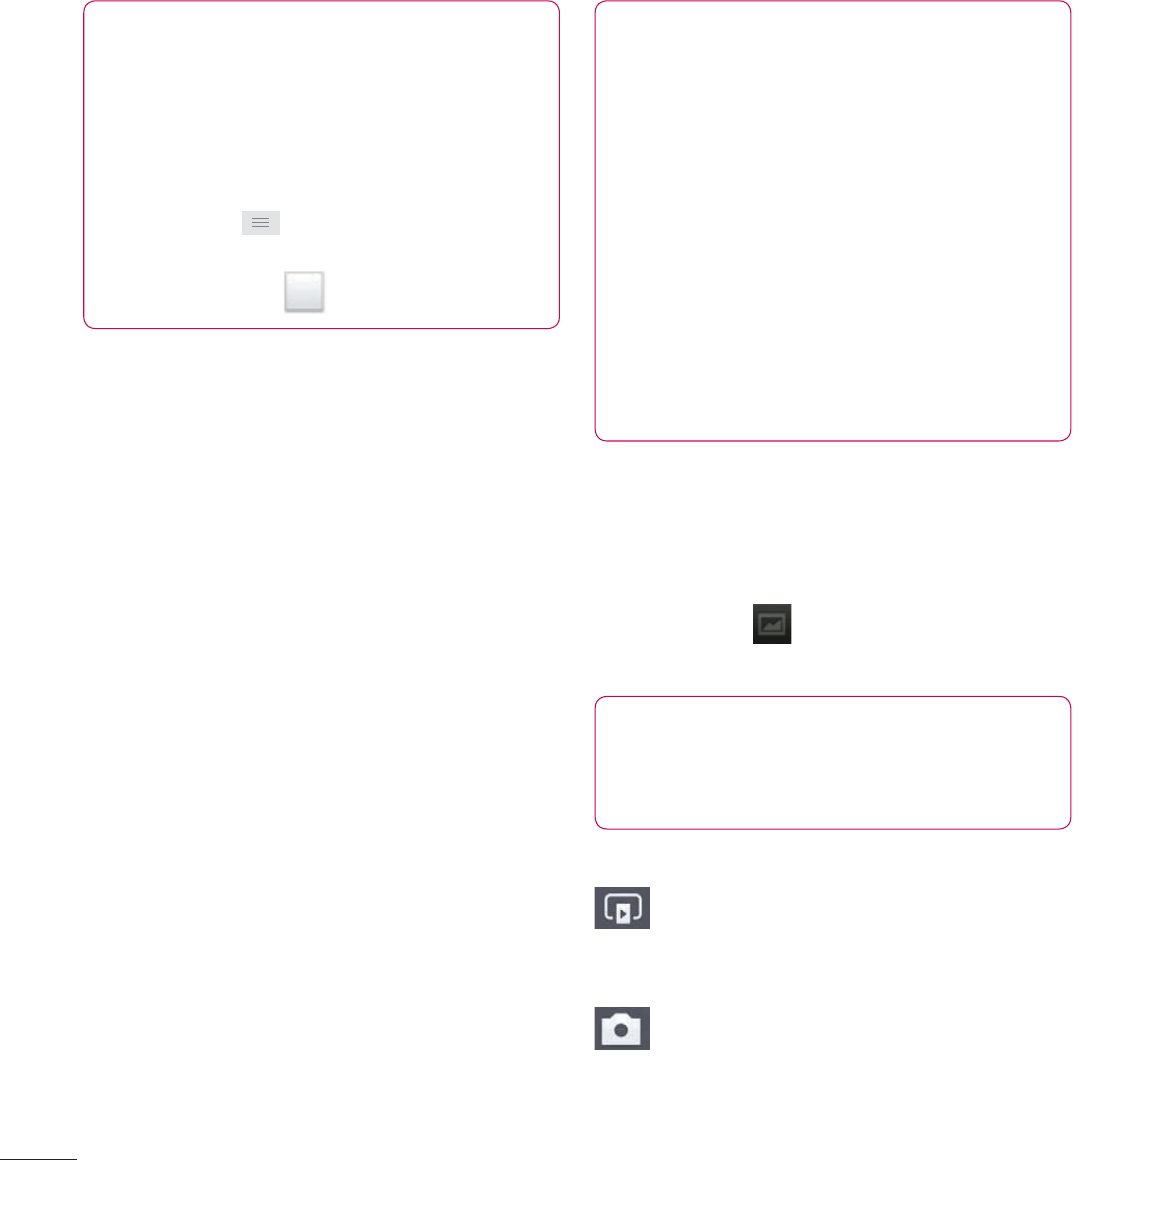
70
Camera
NOTE
This function uses wireless networks.
You need to checkmark Use wireless
networks.
From the Home screen, tap the
Menu/
Search Key
>
System settings
>
Location services.
Check Google’s
location service .
Shutter sound
– Select one of the four
shutter sounds.
Auto review
– If you set
Auto review on
, it
will display the picture that was just taken
automatically.
Storage
– Choose from SD card, Internal
memory.
Reset
– Restore all camera default
settings.
Camera help guide
– Touch whenever you
want to know how some function operates.
This provides you with a quick guide.
NOTE
• When you exit the camera, some
settings will return to their defaults.
Check the camera settings before
you take your next photo.
• The settings menu is superimposed
over the viewfi nder, so when you
change elements of the image colour
or quality, you will see a preview
of the image change behind the
settings menu.
Viewing your saved photos
You can access your saved photos from
within the camera mode. Just tap the
Gallery button and your Gallery will be
displayed.
TIP
Flick left or right to view other photos
or videos.
Tap a photo to display other options menus.
– Tap to see a Smart Share list of
your images (Connecting to other
devices show the photos).
– Tap to take a new photo.

71
– Tap to share the photo via various
methods such as Bluetooth, or
Messaging.
– Tap to delete the photo.
Menu/Search Key
– Tap to access
Set image as, Move, Rename, Rotate left,
Rotate right, Crop, Edit, Slideshow, or
Details.
Setting a photo as
wallpaper
1 Tap the photo you want to set as wallpaper
to open it.
2 Tap the screen to open the options menu.
3 Tap Menu/Search Key
> Set image
as > Home screen wallpaper.
4 Crop the image as desired and tap OK.
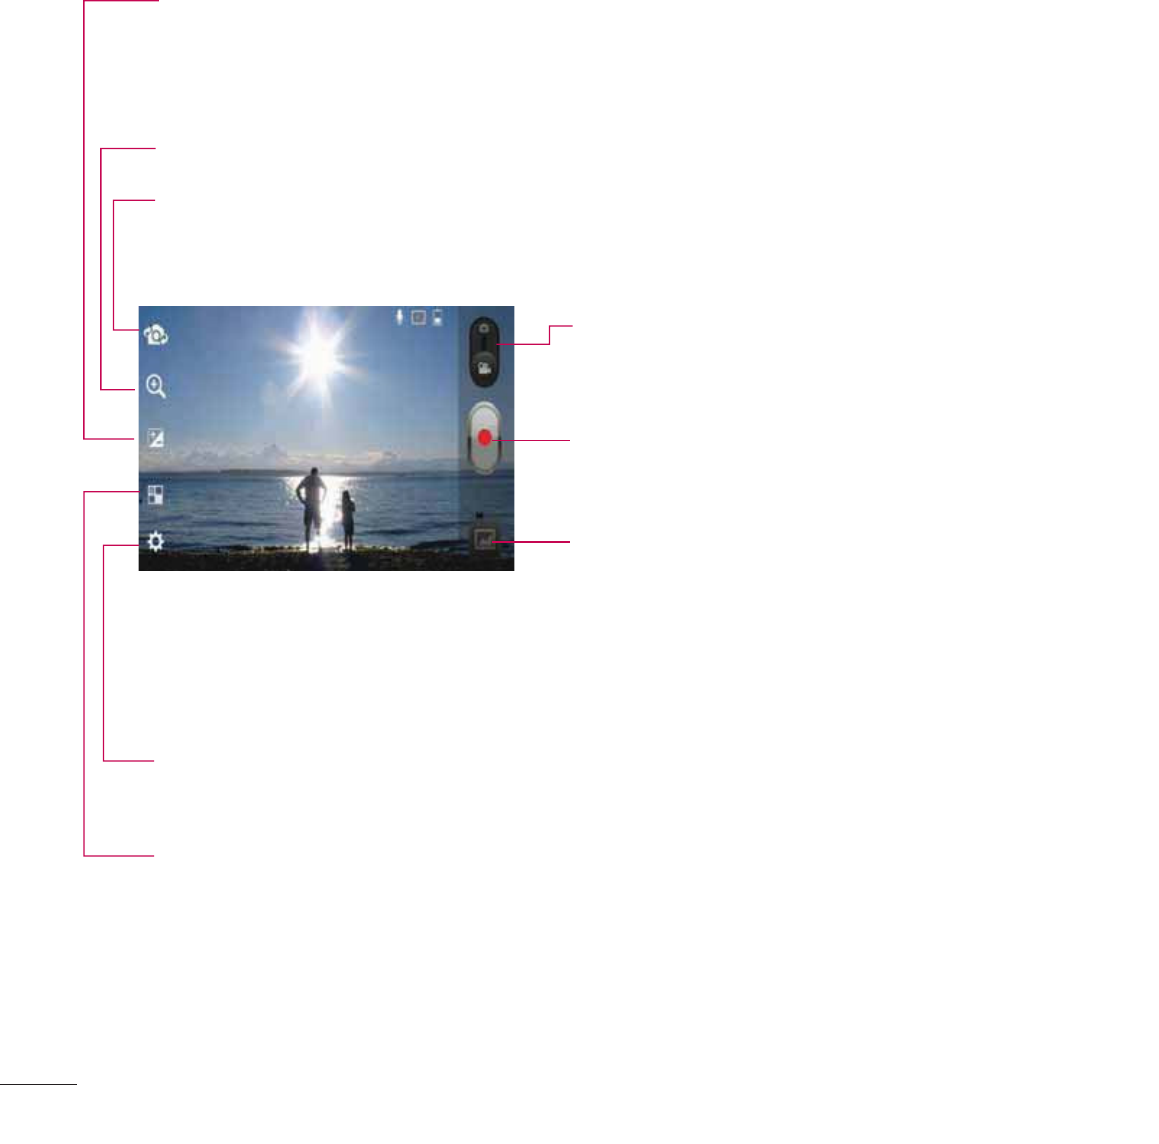
72
Video Camera
Getting to know the viewfinder
Zoom
– Zoom in or zoom out.
Brightness
– This defines and controls of the amount of sunlight entering the lens.
Slide the brightness indicator along the bar, towards “-” for a lower brightness
video, or towards “+” for a higher brightness video.
Camera mode
– Slide this icon up to switch
to camera mode.
Start recording
– Allows you to start
recording.
Gallery
– This enables you to access your
saved photos and videos from
within the video camera mode.
Simply tap and your Gallery will
appear on the screen.
Camera Switch
- Allows you to switch between the front-facing and back-facing
cameras.
Live effect
– Live effect provides various visual effects when taking a video.
Settings
– Tap this icon to open the settings menu. See
Using the advanced
settings
on page 63.
Swap
Swap
camera
ca m e ra
Zoom
Zoom
Live
Live
effect
effect
Setting
Setting
Brightness
Brigh tn ess
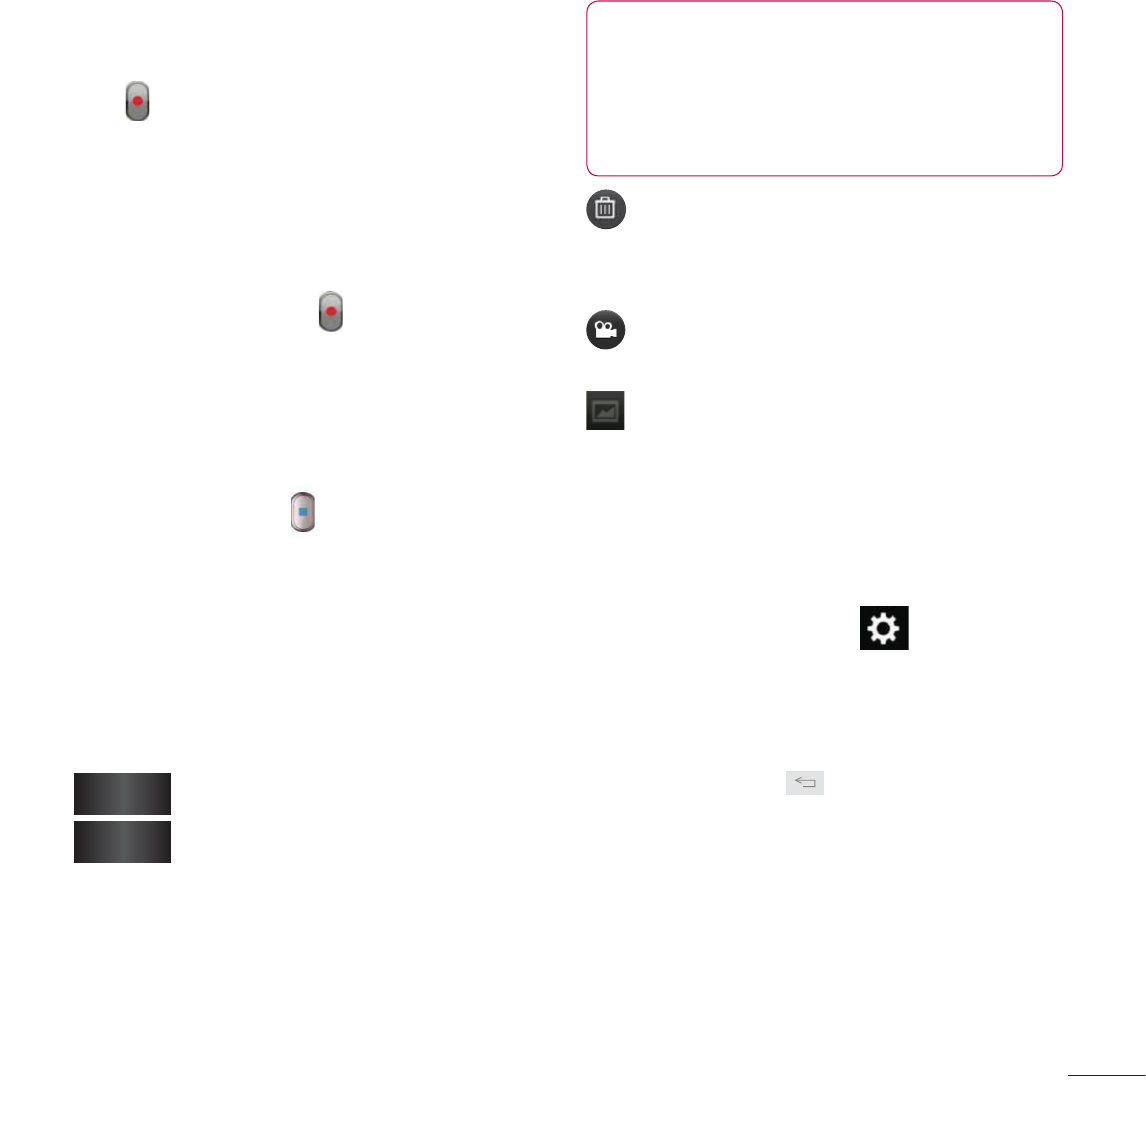
73
Recording a video
1 From the Home screen, tap Camera and
tap the Camera mode button to change to
Video mode. The capture icon will change
to .
2 The video camera’s viewfinder will appear
on the screen.
3 Holding the phone horizontally, point the
lens towards the subject of the video.
4 Tap the Record icon once to start
recording.
5 A timer showing the length of the video
is displayed at the top left corner of the
screen.
6 Tap the Stop icon on the screen to stop
recording.
After recording a video
A still image representing your video will
appear on the screen if Auto review is set
to On.
Play
Tap to play the video.
Share
Tap to share the picture via
various methods such as
Bluetooth, E-mail, Gmail,
Google+, Messaging, MobileLife
Album, YouTube,
or any other
downloaded applications that is
supported.
NOTE
Additional charges may apply when
MMS messages are downloaded while
roaming.
Tap to delete the video you just
recorded. Tap
OK
to confirm it. The
viewfinder will reappear.
Tap to record another video right
away. Your current video will be saved.
Tap to view the Gallery of your saved
videos.
Using the advanced
settings
Using the viewfinder, tap to open the
advanced options.
Adjust the video camera settings by
scrolling the list. After selecting the option,
tap the
Back
key
.
Flash
– Allows you turn on the flash when
recording video in a dark place.

74
Video Camera
Video size
– Tap to set the size (in
pixels) of the video you record. Select
the video size from Full HD(1920x1080),
HD(1280x720), TV(720x480),
VGA(640x480), MMS(QVGA-320x240) and
MMS(QCIF-176x144).
White balance
– The white balance
ensures any the white areas in your video
are realistic. To enable your camera to
adjust the white balance correctly, you may
need to determine the light conditions.
Choose from
Auto
,
Incandescent
,
Sunny
,
Fluorescent
and
Cloudy
.
Colour effect
– Choose a colour tone to
use for your new video.
Geotagging
– Activate to use your phone’s
location-based services. Take videos
wherever you are and tag them with the
location. If you upload tagged videos to a
blog that supports Tag location, you can
see the videos displayed on a map.
Audio recording
– Choose off
to record a
video without sound.
Auto review
– If you turn Auto review on,
it will play back the video you just recorded
automatically.
Storage
– Choose from SD card, Internal
memory.
Reset
– Restore all video camera default
settings.
Video help guide
– Touch if you want to
know how this function operates. This
provides you with a quick guide.
Watching your saved
videos
1 In the viewfinder, tap .
2 Your Gallery will appear on the screen.
3 Tap a video to play it automatically.
Adjusting the volume
when viewing a video
To adjust the volume of a video while it is
playing, use the Volume Keys on the left
side of the phone.
75
Multimedia
You can store multimedia files to a micro
SD card to have easy access to all your
image and video files.
Gallery
Tap
Apps Key
>
Gallery
.
View mode
When you open the Gallery, your photos
will be presented in Folder view. Once you
open a folder, your photos will be in Grid
view. When you tap a photo from Grid view,
it will be displayed in Full view.
Calendar View
In Folder view, tap
Albums
to view
Albums, Locations, Timestamp
.
Gallery menu options
Tap a photo and tap the
Menu/Search Key
to see the following available options:
Set image as
,
Move
,
Rename
,
Rotate
left
,
Rotate right
,
Crop
,
Edit
,
Slideshow
,
Details
.
Sending a photo
1 To send a photo, touch the photo you want.
2 Tap and choose from any of the
available applications.
3 When you choose E-mail, Gmail or
Messaging, your photo will be attached to
a message, which you can then write and
send normally.
TIP
If you have a social networking account
set up on your phone, you can share
your photo with that social networking
community.
Sending a video
1 To send a video, touch and hold the video
you want.
2 Tap Share and choose from any of the
available applications.
3 When you choose E-mail, Gmail or
Messaging your video will be attached to
a message, which you can then write and
send normally.

76
Using an image
Choose images to use as wallpaper or
identify callers.
1 Touch a photo then tap Menu/Search Key
> Set image as.
2 Choose from Contact photo, Home
screen wallpager and Lock screen
wallpaper.
Viewing a slideshow
To view a slideshow of your photos, open
the Gallery and tap a photo. Once the
photo is displayed, tap the screen to see
the menu. Tap
Menu/Search Key
>
Slideshow
to begin the slideshow of all
your photos.
View photo details
You can view a photo’s detailed
information, such as the name, date, time,
size, and type.
While viewing a photo, tap
Menu/Search
Key
>
Details
.
Transferring files using
USB Media sync (MTP)
To transfer files using a USB device:
1 Connect the phone to a PC using a USB
cable.
2 You can see USB connection mode popup.
(From the Home screen, tap the Menu/
Search Key and tap System settings
> Connectivity > USB connection type
> Media sync (MTP).
3 Tap Media sync to confirm.
4 You can view the phone content on your
PC and transfer the files.
NOTE
If you don't want to see USB
connection mode popup, uncheck
Don't ask again on USB connection
mode popup or turn off ask on
connection. (
Menu/Search Key and
tap System settings > Connectivity
settings
>
Ask on connection
).
Multimedia
77
Music Player
Your phone has a music player that lets
you play all your favourite tracks. To access
the music player from the Home screen,
tap
Apps Key
and tap
Music Player
.
How to save music/video
files to the phone
Connect your phone to the
PC using the USB cable
You’ll receive a notification that the USB is
connected and can see USB connection
mode popup. Tap Media sync (MTP) to
confirm. Then open the folder you wish to
view from your computer.
Save music or video files
from the PC to the phone’s
removable storage
- You may copy or move files from the PC
to the phone’s removable storage using
a card reader.
- If there is a video file with a subtitle file
(.smi file with the same name as the
video file), place them in the same folder
to display the subtitle automatically when
playing the video file.
- When downloading music or video files,
copyright must be secured. Please note
that a corrupted file or file with a wrong
extension may cause damage to the
phone.
How to play video files on
the phone
Playing video files
Locate the file you want in the Gallery and
tap it to play it.
Playing a song
1 From the Home screen, tap Apps Key
and tap Music Player.
2 Tap the Songs tab.
3 Tap the song you want to play.
4 Tap to pause the song.
5 Tap to skip to the next song.
6 Tap to go back to the beginning of
the song. Tap twice to go back to the
previous song.

78
Multimedia
To change the volume while listening to
music, press the up and down Volume
Keys on the left side of the phone.
To display the options for a song, touch
and hold any song in the list. You will see
the following options:
Play
,
Add to playlist
,
Set as ringtone
,
Delete
,
Share
,
Search
and
Details
.
Working with Playlists
You can create playlists to organize your
music files into sets of songs, which you
can play in the order you set or in a shuffle.
To create a playlist
1 When viewing the library tap the Playlists
tab.
2 Tap Add to playlist.
3 Tap New playlist.
4 Enter a name for the playlist, then tap
Save.
The new playlist is added to the
Playlists
library.
You can also add the song that is playing
in the Playback screen as the first song
in a playlist by pressing the
Menu/Search
Key ,
then tapping
Add to playlist
or
tapping
Save as playlist
to save all the
songs in an album that you’re playing as
a playlist.
To remove a song from a
playlist
1 Open a playlist.
2 Touch and hold the song you want to
remove, then tap Remove from playlist or
when viewing the currently playing playlist,
tap the Menu/Search Key , then tap
Remove from playlist to remove all the
songs from the current playlist.
To rename or delete a
playlist
1 Open the Playlist library.
2 Touch and hold the playlist to display the
menu, then tap Delete or Rename.
82
About Google applications
Google applications, including mobile
versions of Gmail, Google Talk, Google
Calendar, and Google Maps, are loaded on
your phone.
1 To set up a Google account, tap any Google
application, enter your user name and
password and sign in.
2 After signing in, your contacts, email,
and calendar in your Google account will
automatically synchronize with your phone.
Google Maps™
To open Google Maps and
view your location
1 From the Home screen, tap Apps Key
and tap Maps.
2 Tap the My location icon on the map.
The map centers on a blue dot that
indicates your location. A blue circle around
the dot indicates that your actual location is
within the circle.
To get an address and
additional information for a
location
Ź
Touch and hold a location on the map.
A balloon with the address and a
thumbnail from Street View (if available)
opens over the location.
Ź Tap the balloon to access additional
options.
To view map, satellite, or
traffic layers
Ź
Tap the
Layers
icon on the map and
select a layer option. You can choose
from Traffic, Satellite, Terrain, Latitude
and others.
Searching For Locations
and Places
You can search for a location and view it
on a map. You can also search for places
on the map that you’re viewing.
Google Applications
83
To search for a location
1 While viewing a map, tap at the bottom
of the screen. You can also touch and hold
the Menu/Search Key .
2 In the search box, enter the place you’re
looking for. You can enter an address, a
city, or a type of business or establishment.
For example, “theater in New York”.
3 Tap the Search icon .
Markers with letter labels indicate search
matches on the map.
NOTE
Location information might be
inaccurate if GPS and Wi-Fi is turned
off. Please make sure that GPS and
Wi-Fi is turned on.
Getting Directions
To get directions
1 While viewing a map, tap .
2 Enter a starting point in the top text box
and your destination in the bottom text box.
To reverse directions, tap the Menu/
Search Key and tap Reverse Start
& End.
3 Tap the icon for car, public transit,
bicycling, or walking directions.
4 Tap Get directions. The directions to your
destination appear in a list.
To view turn-by-turn
directions in a list
You can view each turn in your route as a
list of written directions.
When viewing a list of directions, tap the
Navigation
icon to view turn-by-turn
directions in Navigation View.
To search for locations along
your route
You can search for businesses, points of
interest, and other features along your
route. When you search while navigating,
your results include locations along your
route, rather than locations that are near
your current location.
Ź Touch and hold the
Menu/Search Key
and search for locations of interest.
The results are displayed as markers
along your route; the first result is
labeled. You can tap a label for more
information about the marker.
84
Google Applications
Ź When you’re finished, tap the
Navigation
icon to return to Navigation View.
Places
Places
bookmarks your favourite places,
such as addresses or local businesses, to
be able to find them quickly later.
To view My Places
While viewing a map, tap
.
Clear Map
Clear any information, such as routes and
search results, from the map.
To clear a map
While viewing a map, tap the
Menu/Search
Key
and tap
Clear Map
.
Latitude
Finding Your Friends with Google
Latitude
TM
Google Latitude lets you and your friends
view each others’ locations on maps and
get directions to your friends’ locations
using Google Latitude. Your location is not
shared automatically. It is by invitation only.
You must join Latitude and then invite your
friends to view your location or accept
invitations from your friends.
To join Latitude
Ź While viewing a map, tap
and tap
Join Latitude
.
The first time you join Latitude, you’re
prompted to accept or reject the
Google privacy policy. After you’ve
joined Latitude, the Join Latitude option
changes to
Latitude
.
To open Latitude
After you join Latitude, you can open it to
find your friends and view their updates.
Ź While viewing a map, tap
and tap
Join Latitude
.
To invite friends to share their locations
After you join Latitude, you can start
sharing your location with your friends.
Only friends whom you have explicitly
invited or accepted can see your location.
1 Open Latitude and tap
.
2 Tap Select from Contacts or Add via
email address in the menu that opens.
3 Tap Add friends at the bottom of the
screen. If your friends already use Latitude,
they receive an email request and a
notification on Latitude. If they have not
yet joined Latitude, they receive an email
inviting them to sign in to Latitude with
their Google Account.
85
Places
To find places
Tap the
Places
icon while in Google
Maps to find different venues, such as gas
stations, coffee shops, bars, restaurants,
etc.
Once you select a category, you will see
a list of closest matches, including their
distance, compass bearing, description and
even user reviews. You can customize your
own location search categories, and even
add the Places icon to your Home screen.
Tip
While viewing a map, tap the
Menu/
Search Key
for the following
options:
Clear map, Search,
Directions, Layers, Settings
and
Help
.
Play Store™
Play Store™ lets you browse through
and download thousands of fun and
useful applications and games. You can
check other users’ comment regarding
an application or you can post your own
comments. If you install applications and
games from Play Store™, they appear in
the phone’s menu below the preloaded
applications, and you can find them by
scrolling down with your finger. You can
open downloaded applications from the
Play Store by tapping the
Menu/Search
Key
>
My apps
.
To download applications and games
1 From the Play Store home page, tap a
category near the top of the screen.
2 Scroll to view subcategories and tap the
one you want to explore.
3 Tap an application to open its details
screen, or further sort the subcategory by
tapping Top paid, Top free, Top Grossing,
Top New paid, Top New Free, Trending.
4 Tap the application you desire to install.
The descriptions and the prices of the
application will be displayed.
86
Google Applications
5 Tap the price button at the top right of
the screen for paid applications. For free
applications, tap the FREE button. The
applications will then be downloaded and
installed.
NOTE
To purchase a paid app, you’ll need to
set up a payment method with Google
Checkout™. You have the option to
use a credit card or charge to your
carrier bill.
NOTE
When you want to exit a game or
application, use the Home or Back
Key, which will return you to the Home
screen. Or select Menu (or Options)
within the game or application and
select Exit. (Exit option may vary by
game/application). Ending applications
that continue to run in the background
(after going back to the Home screen)
will help conserve battery life and
reduce unwanted data usage.
Gmail™
Gmail™ can be configured when you
first set up your phone. Depending on
your synchronization settings, Gmail™ on
your phone is automatically synchronized
with your Gmail™ account on the web.
The inbox conversations list is your default
Gmail™ view.
Tap the
Menu/Search Key ,
then tap
to send or receive new email and to
synchronize your email with your Gmail™
account on the web. Tap the
Menu/
Search Key
for the following additional
options:
Label settings, Settings, Help,
and
Send feedback
.
Compose
- Allows you to compose a
new message.
Search
- Allows you to search your
account.
Labels
- Allows you to view the
account’s labels.
Refresh
- Allows you to refresh the
account to view new activity.
89
Setting the alarm
1 From the Home screen, tap Apps Key
and tap Alarm/Clock .
2 To add a new alarm, tap the at the
bottom left and set the alarm time.
3 Set any other desired options and tap
Save.
4 Tap the Menu/Search Key to delete
all alarms or adjust the alarm settings.
Using the calculator
1 From the Home screen, tap Apps Key
and tap Calculator .
2 Tap the number keys to enter numbers.
3 For simple calculations, tap the function
you want (+, –, x, or ÷), followed by =.
4 For more complex calculations, tap the
Menu/Search Key , tap the Advanced
panel, then choose an option.
Adding an event to your
calendar
NOTE
You must create a Google account to
use Calendar.
1 From the Home screen, tap Apps Key
and tap Calendar .
2 To view an event, tap the date. The events
occurring on that date are displayed below
the Calendar in Month view. Tap the event
to view its details. If you want to add an
event, tap at the top right corner of
the Calendar.
3 Tap the Phone field and enter the event
name. Check the date and enter the start
and end time you want your event to begin
and finish.
4 Tap the Location field to enter the location.
5 To add a note to your event, tap the
Description field and enter the details.
6 To repeat the event, set Repetition, and
set Reminders, if necessary.
7 Tap Save to save the event in the calendar.
A coloured square in the calendar will
mark all days that have saved events. An
alarm will sound at the event start time if
you set it.
Utilities
90
Utilities
Changing your calendar view
1 From the Home screen, tap Apps Key
and tap Calendar .
2 At the top left of the Calendar, tap which
shows the Day, Week, Agenda or Month.
Downloads
Allows fast access to tabs containing
a list of your recent internet and other
downloaded files.
1 From the Home screen, tap Apps Key
Downloads .
2 Touch an available file category tab
(Internet downloads or Other downloads)
then select the needed file. Polaris
Office can also open compatible format
documents.
File Manager
Enables you to manage in one location
your sounds, images, videos, bluetooth
files, Android files, and other memory card
data. This application enables you to open
associated file types if already on your
phone such as MP4.
• From the Home screen,
tap Apps Key
Files
.
FM Radio
Your LG-P760 has a built-in FM Radio so
you can tune in to your favourite stations
and listen on the go.
NOTE
You need to use your headset to
listen to the radio. Insert them into the
headset jack.
LG-P768g
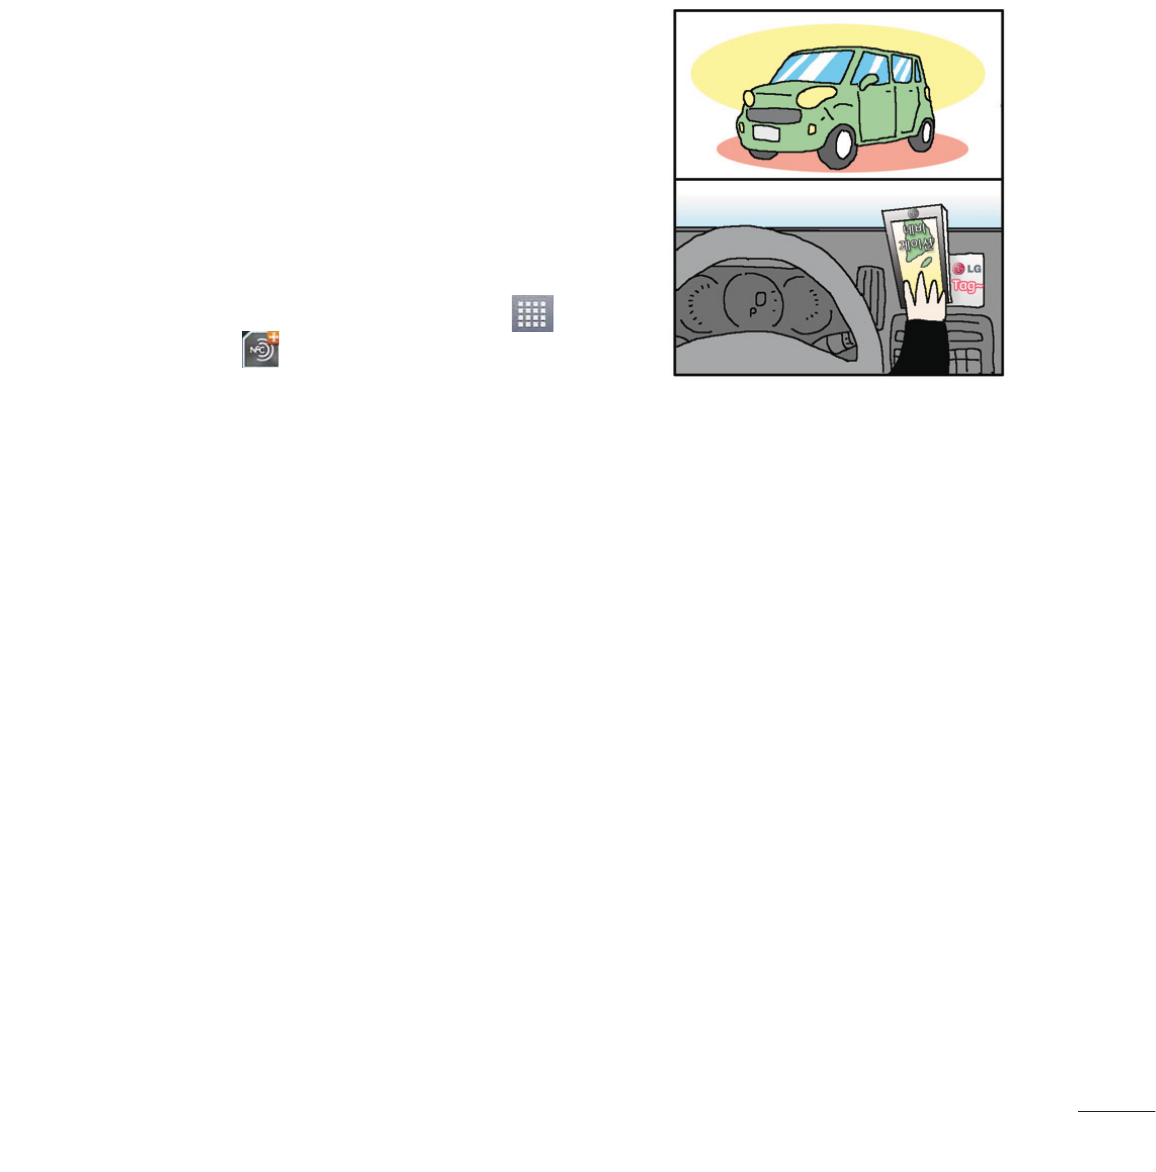
91
LG Tag+
What is LG Tag+
LG Tag+ allows easy saving and loading
to NFC(Near Field Communication) tag,
which can be customized to suit certain
environments.
Using Tag+ writing
1 From the Home screen, tap Apps Key
LG Tag+ .
2 Select the desired mode (Car/Office/
Sleep/User mode) and tap Write on
NFC tag.
3 Touch the back of your device to a tag,
then launching application and changing
settings can be set.
Using Tag+ reading
When touching the set tag, mode will be
activated right away.
LG Tag+ Example
92
Utilities
Polaris Office
With Polaris Office, you can view, create
and edit document files on your device. The
loaded files can be from micro SD cards
of your device, or from downloaded email
attachments. The Polaris Office application
supports the following file formats: txt, doc,
docx, xls, xlsx, ppt, pptx, pdf.
1 From the Home screen, tap Apps Key
> Polaris Office .
2 Register your name and email address on
the User Registration page. If you want to
skip the registration process, tap Later.
3 Tap My Files for folders and documents on
your micro SD card.
4 Tap the Menu/Search Key > New
File to start a new document.
5 Tap a document type.
6 Enter contents in the document using the
tools at the bottom of the screen and the
on-screen keyboard.
7 When you’re done working on the
document, tap the Menu/Search Key
> Save > Save (or Save as to enter a
new document name) to save.
8 Tap the Back Key to exit.
View and edit a document on
your device
1 From the Home screen, tap Apps Key
> Polaris Office .
2 Tap My Folders for folders and documents
on your micro SD card.
3 Move to the folder that contains the file
that you want to open if it is not in the root
directory.
4 Tap the document that you want to view
or edit.
NOTE
You can also open an attachment in
an email by tapping the attachment in
the message.
5 The document opens for you to view. If you
want to edit it, Tap the Menu/Search Key
then select Edit Mode.
Ź To move between pages or pan
through the document, scroll in the
corresponding direction.
93
Ź To change the zoom level, tap the
Menu/Search Key
>
Zoom
, then
tap the zoom level you want or simply
pinch-to zoom to achieve the zoom level
you want.
Ź Use the toolbar at the bottom of the
screen to edit the document (Word,
Excel, or PowerPoint file).
Ź Tap the
Menu/Search Key
for
additional menu options such as
Save,
Read mode, View, Insert, Format,
Customize toolbar, Brightness,
and
Settings.
6 When you’re finished editing, tap Save.
Then, tap the Back Key to exit.
Polaris Office document tools
The Polaris Office application has a toolbar
that appears automatically when you create
a document.
1 To display the toolbar in an existing
document, Tap the Menu/Search Key
then select Edit Mode.
2 Tap a toolbar icon and the corresponding
tool options will be displayed in a pop-up
balloon for you to tap and use.
3 To hide the tool options pop-up balloon,
tap the toolbar icon again. Left and right
arrows on the toolbar indicate that you
can scroll horizontally for more icons. The
tools in the toolbar vary depending on the
document type.
Manage documents online
1 From the Home screen, tap Apps Key
> Polaris Office .
2 Tap Add account > Box.net for access to
your online account.
3 Enter your Email account and password to
access your account then tap Add.
4 View and manage your documents on the
server as desired.
94
LG SmartWorld
LG SmartWorld offers an assortment of
exciting content - games, applications,
wallpaper and ringtones - giving LG phone
users the chance to enjoy richer “Mobile
Life” experiences.
How to Get to LG SmartWorld
from Your Phone
1 From the Home screen, tap Apps Key
> LG SmartWorld .
2 Tap Sign in and enter ID/PW for LG
SmartWorld. If you have not yet signed
up, tap Register and get a LG SmartWorld
membership.
3 Download the content you want.
NOTE: What if there is no icon?
1 Using a mobile Web browser, access
LG SmartWorld (www.lgworld.com) and
select your country.
2 Download LG SmartWorld App.
3 Execute and install the downloaded file.
4 Access LG SmartWorld by tapping the
icon.
How to use LG SmartWorld
• Participate in monthly LG SmartWorld
promotions.
– Search Content.
– Find contents by category(e.g.
Games, Edudation, Entertainment
etc).
– List of downloaded/to-be updated
contents.
• Try the easy “Menu” buttons to find what
you’re looking for fast.
Apps for you – Recommended content
based on your previous choices.
Settings – Set Profile and Display.
Sign in – Set your ID and Password.
• Try other useful functions as well.
(Content Detail screen)
NOTE
LG SmartWorld may not be available in
all carriers or countries.
95
Task Manager
You can manage your programs with Task
Manager.
1 You are allowed to see the currently
using applications by tapping on the
Running tab. The applications with
high consumption of resource will have
descriptions in red. Tap stop icon to
terminate the applications.
2 You are allowed to see the installed
applications by tapping on the Installed
tab.
3 You are allowed to see the capacity of
System memory and SD card by tapping
the Storage tab.
4 You can place the Task Manager widget on
the homescreen.
Video Player
The built-in Video Player application plays
videos directly from files on your SD card.
This application is able to playback DivX
videos.
1 From the Home screen, tap Apps Key
Video Player . A list of sorted
videos on the SD card will be shown in the
Video list.
2 Tap a video file to begin watching.
Voice recorder
Use the voice recorder to record voice
memos or other audio files.
Recording a sound or voice
1 From the Home screen, tap Apps Key
and tap Voice Recorder.
2 Tap to begin recording.
3 Tap to pause recording.
4 Tap to end recording.
NOTE
Tap to access your voice
recordings. You can listen to the saved
recordings.
Sending the voice recording
1 Once you have finished recording, you can
send the audio clip. Tap Share .
2 Choose from Bluetooth, E-mail, Gmail,
Memo and Messaging. When you select
E-mail, Gmail or Messaging the voice
recording will be added to a message that
you can write and send normally.
96
Utilities
YouTube
YouTube is an online public communications
website that allows users to upload and
have available for the public their videos for
viewing. Users can share videos and view
them in MPEG-4 format.
1 From the Home screen, tap Apps Key
YouTube .
2 Tap Accept if you accept the Terms and
Conditions, or tap Exit.
3 When the screen loads you can start
searching and viewing posted videos.
4 Press Settings General
High quality on mobile if you prefer a
higher quality output.
97
The Web
Browser
The Browser gives you a fast, full-colour
world of games, music, news, sports,
entertainment, and much more, right on
your mobile phone.
NOTE
Additional charges apply when
connecting to these services and
downloading content. Check data
charges with your network provider.
< Tool bar >
The icons bar on the screen below makes
it easier to use the browser.
The browser that allows you to look at
webpages similarly to how you would on
a computer.
Back – Moves to the previous web
page.
Forward
– Used in conjunction with the
Back Key. This allows you to go back
and forth between web pages without
opening multiple windows.
Zoom - Use to zoom in and out. To
utilize this feature, touch and hold the
Zoom icon and tilt the phone up to
zoom in or down to zoom out.
New tab
– Opens a new tab.
Bookmarks
- Allows you to view, add,
edit, and delete your bookmarks.
Using options
Tap the
Menu/Search Key
to view the
following options:
Refresh
- Alows you to reload the current
web page.
Save to bookmarks
- Allows you to
bookmark the current web page.
Go to Homepage
- Allows you to open the
home page.
Share page
- Allows you send the web
address (URL) of the web page to others.
Find on page
- Allows you to search for
text on the web page.
Request desktop site
- Allows you to
change the current mobile page to a
desktop page.
Save for offline reading
- Allows you to
save the current page for offline reading.
Brightness
- Allows you to adjust the
brightness.
Settings
- Opens the Browser settings.
Exit
- Allows you to exit the browser.
98
The Web
TIP
To return to the previous web page, tap
the
Back key
.
Adding bookmarks
1 Tap next to the URL field.
• From
Thumbnail view
, tap
Add
, enter a
name and URL, and tap
OK
.
• From
List view
, tap
Add bookmark
,
enter a name and URL, and tap
OK
.
Changing the Browser
settings
Tap and set any desired options.
99
On-Screen Phone
LG SOFTWARE
On-Screen Phone allows you to view your
mobile phone screen from a PC via a USB
or Bluetooth. You can also control your
mobile phone from your PC, using the
mouse or keyboard.
On-Screen Phone 2.0 icons
Launches LG Home Panorama or
changes the On-Screen Phone
preferences.
Connects your mobile phone to your
PC, or disconnects it.
Minimizes the On-Screen Phone
window.
Maximizes the On-Screen Phone
window.
Exits the On-Screen Phone program.
On-Screen Phone features
-
Real-time transfer and control:
displays
and controls your mobile phone screen
when connected to your PC.
-
Mouse control:
allows you to control your
mobile phone by using the mouse to click
and drag on your PC screen.
-
Text input with keyboard:
allows you to
compose a text message or note using
your computer keyboard.
-
File transfer (mobile phone to PC):
sends a file from your mobile phone (e.g.
Gallery, Video Player, Music and Polaris
Office) to your PC. Simply right-click on
the file and drag it to send it to your PC.
-
File transfer (PC to mobile phone):
sends files from your PC to your mobile
phone. Just select the files you wish to
transfer and drag and drop them into the
On-Screen Phone window. The sent files
are stored in the OSP folder.
-
LG Home Panorama:
shows all of the
work spaces of LG Home. You can
easily organize icons or widgets and run
an application by double-clicking the
shortcut.
NOTE
Please make sure that LG Home is the
default launcher. Some widgets may
not work properly on the LG Home
Panorama.
-
Real-time event notifications:
prompts
a pop-up to inform you of any incoming
calls or text messages, as well as alarm
and event notifications.
100
On-Screen Phone
How to install On-Screen
Phone on your PC
Visit
LG.com
(http://www.lg.com/us).
Locate the search box in the upper right
corner and enter the model number. From
the
SUPPORT
list, select your model. Scroll
down and select the
OSP
tab and click on
DOWNLOAD
. When prompted, select
Run
to install On-Screen Phone on your PC.
How to connect your mobile
phone to your PC
On-Screen Phone 2.0 provides USB,
Bluetooth and Wi-Fi connection. Please
follow the instruction on Connection Wizard
of OSP program.
NOTE
Please make sure that On-Screen
Phone check box in
System settings
>
Connectivity
>
On-Screen Phone
>
On-Screen Phone
is selected. Please
make sure that the battery may run
out more quickly due to the current
consumption if On-Screen Phone is
connected via Wi-Fi.
When you connect your mobile phone to
your PC via Mobile Hotspot and access
to the Internet on the PC, additional data
charges may be incurred depending on
your DataPro data plan.
Access to the Internet using Wi-Fi networks
may not work well depending on the
network’s traffic. When you enlarge the
On-Screen Phone window, the display on
the screen might become slow.
To check the phone-to-PC connection
Once the devices have been connected,
drag down the Status Bar at the top of
the Home screen to check the On-Screen
Phone connection status.
To disconnect your phone from your PC
Click in the top left of the On-Screen
Phone window. Alternatively, drag down the
Status Bar at the top of the Home screen
and select
On-Screen Phone connected
>
Disconnect On-Screen Phone
. Tap
Disconnect
in the disconnect dialog.
Developer options
USB debugging
- Checkmark to set Debug
mode when USB is connected.
Development device ID
- Displays the
development device ID.
Stay awake
- If activated, the screen will

101
never sleep while charging.
Allow mock locations
- Checkmark to
allow mock locations.
Desktop backup password
- Allows you to
set a desktop backup password.
USER INTERFACE
Enable strict mode
- Checkmark to flash
the screen when apps operate for a long
time on the main thread.
Show touch data
- Checkmark to make
touch data visible on the screen.
Show touches
- Checkmark to show visual
feedback when the screen is touched.
Show screen updates
- Checkmark
to flash areas of the screen when they
update.
Show CPU usage
- Checkmark to display a
screen overlay showing current CPU usage.
Force GPU rendering
- Checkmark to use
2D hardware acceleration in applications.
Window animation scale
- Select to set
the window animation scale.
Transition animation scale
- Select to set
transition animation scale.
APPS
Don’t keep activities
- Checkmark to quit
every activity as soon as the user leaves it.
Background process limit
- Set the
preferered Background process limit.
Show all ANRs
Checkmark to show App
Not Responding dialog for background
apps.
About phone
View legal information, check phone status
and software versions, and perform the
software update.
102
Settings
The Settings application contains most of
the tools for customizing and configuring
your phone. All of the settings in the
Settings application are described in this
section.
To open the Settings application
- From the Home screen, tap the
Apps Key
>
Settings
.
- From the Home screen, tap the
Menu/
Search Key
>
System settings
.
WIRELESS & NETWORKS
This menu allows you to manage Wi-Fi and
Bluetooth connections, portable hotspot
and data tethering, airplane mode and VPN
connections.
Wi-Fi
To use Wi-Fi on your phone, you need
access to a wireless access point, or
“hotspot.” Some access points are open
and you can simply connect to them.
Others are hidden or implement other
security features, so you must configure
your phone in order to connect to them.
Turn on Wi-Fi
From the Home Screen , open the
Notifications panel and tap to turn
Wi-Fi on. A blue colored icon indicates that
Wi-Fi is on.
OR
Tap the
Menu/Search Key
and tap
System settings
>
Wi-Fi
. Then drag
to the right.
To connect to a Wi-Fi Network
Turn off Wi-Fi when you’re not using it to
extend the life of your battery.
1 From the Home screen, tap the
Menu/
Search Key
and tap
System
settings
>
Wi-Fi
.
2 Drag
to the right to turn it on
and begin scanning for available Wi-Fi
networks.
- A list of available Wi-Fi networks will
be displayed. Secured networks are
indicated by a lock icon.
3 Tap a network to connect to it.
-
If the network is secured, you are
prompted to enter a password or
other credentials. (Ask your network
administrator for details).
103
4 The Status Bar at the top of your screen
will display an icon that indicates your
Wi-Fi status.
TIP
If you are not in range of a Wi-Fi
network and use a network
connection. Additional data charges
may apply.
NOTE
This device supports WEP, WPA/
WPA2-PSK and 802.1x EAP. (Some
EAP methods are not supported.) If
your Wi-Fi service provider or network
administrator sets encryption for
network security, enter the key in the
pop-up window. If encryption is not
set, this pop-up window will not be
shown. You can obtain the key from
your Wi-Fi service provider or network
administrator.
Bluetooth
Using Bluetooth
1 From the WIRELESS & NETWORKS
section, tap Bluetooth, then drag
to the right to turn on the Bluetooth
functionality.
2 Tap Search for devices at the bottom of
the screen.
3 Tap the name of the device you wish to
pair with, and then tap Pair to pair and
connect.
TIP
Please consult documentation
included with Bluetooth device for
information on pairing mode and
passcode (typically 0 0 0 0 – four
zeroes).

104
Settings
How to send data from your phone via
Bluetooth
You can send data via Bluetooth by running
a corresponding application, not from
Bluetooth menu.
*
Sending pictures:
Open the
Gallery
application and tap a picture. Then tap
>
Bluetooth
. Check if Bluetooth is
turned on and tap
Search for devices
.
Then tap the device you want to send
data to from the list.
*
Sending contacts:
Open the Contacts
application. Tap the contact you want
to share, then tap the
Menu/Search
Key
>
Share
>
Bluetooth
. Check if
Bluetooth is turned on and tap
Search for
devices
.Then tap the device you want to
send data to from the list.
*
Sending multi-selected contacts:
Open
the Contacts application. To select more
than one contact, tap the
Menu/Search
Key
>
Share
. Tap the contacts you
want to send or tap
Select all at the top
left corner of the screen
. Tap
Done
>
Bluetooth
. Check if Bluetooth is turned
on and tap
Search for devices
. Then
tap the device you want to send data to
from the list.
*
Connecting to FTP (Only the FTP server
is supported on this handset):
From the
Home screen, tap the
Menu/Search Key
>
System settings
>
Bluetooth
.
Make sure Bluetooth is turned on. Tap
Make phone visible
to make the device
visible to other Bluetooth devices. Then
search for other devices. Find the service
you want and connect to the FTP server.
TIP
The supported Bluetooth version
is Bluetooth 3.0 and certifi ed by
Bluetooth SIG. It is compatible with
other Bluetooth SIG certifi ed devices.
- If you want to search for this phone
from other devices,from the Home
screen, tap the
Menu/Search Key
>
System settings
>
Bluetooth
. Make sure
Bluetooth is turned on. Tap Make phone
visible to make the device visible to other
Bluetooth devices. Being visible for 2
minutes is set by default.
- To change the visibility time length, tap
the
Menu/Search Key
> Visibility
timeout. Choose from 2 minutes, 5
minutes, 1 hour, or Never time out.

105
- Supported profiles are HFP/HSP, A2DP,
AVRCP, OPP, FTP(Server) and PBAP.
Data usage
You can check the current data usage, set
to enable/disable mobile data, or set the
mobile data limit.
Mobile data
- Slide the button to the right
to enable mobile data.
Set mobile data limit
- Checkmark to set
mobile data limit.
Call
You can set
Fixed dialing numbers
,
Voicemail
and
Other call settings
including
Call reject
,
Quick messages
,
TTY mode
,
Hearing aids
,
Call forwarding
,
Wi-Fi
Calling, Call duration and Additional
settings
.
More...
Airplane mode
Airplane mode allows you to quickly turn
off all wireless connections.
1 From the Wireless & networks screen,
tap More then turn Airplane mode on in the
checkbox.(a blue checkmark will appear).
2 Tap again to turn it off.
OR
1 Press and hold the Power/Lock Key
and tap Airplane.
2 Press and hold the Power/Lock Key
and tap Airplane again to turn it off.
Wi-Fi Direct
Tick the check box to make Wi-Fi Direct
active. Set Wi-Fi Direct device name and
scan for other devices.
Wi-Fi Calling
Important!
Wi-Fi Calling requires that you use
the SIM card that is shipped with your
phone.
Also, you must register your address
for 9-1-1. Wi-Fi Calling will not work
until you have registered for 9-1-1 by
logging into your account at
www.T-
Mobile.com
. Go to your profi le and
click
Customer Info
and continue on to
enter your address.

106
Settings
About Wi-Fi Calling
Wi-Fi Calling can improve your coverage
and allows you to make phone calls and
send messages over a Wi-Fi network
(when a Wi-Fi network is available).
Unless your rate plan provides otherwise,
Wi-Fi Calling minutes count the same as
T-Mobile cellular calling minutes on your
phone bill.
- To use Wi-Fi Calling, you must first turn
on Wi-Fi, connect to a Wi-Fi network, and
then turn on Wi-Fi Calling.
- When the Wi-Fi Calling feature is on, your
phone displays the
Wi-Fi Calling
icon on
the
Status
bar.
- To stay on a Wi-Fi call, you must remain
within range of the Wi-Fi network. Your
call will drop as you leave the Wi-Fi
range. When your Wi-Fi signal weakens,
your phone will beep and display a
warning message alerting you that your
call will drop if the signal gets weaker.
Wi-Fi Calling offers three connection
options:
-
Wi-Fi Preferred:
All calls are made over
an available Wi-Fi network. If there are no
available Wi-Fi networks calls are made
over the cellular network.
-
Cellular Preferred:
All calls are made
over the cellular network unless the
cellular network is not available, then
calls are made over an available Wi-Fi
network.
-
Wi-Fi Only:
All calls are made over an
available Wi-Fi network. If there are no
available Wi-Fi networks, your calls will
not connect.
Turn on Wi-Fi Calling
NOTE
Wi-Fi must be turned on before Wi-Fi
Calling can be turned on.
1. From any Home screen, tap the
Menu
key.
2. Tap
Settings
.
3. Tap
More...
.
4. Tap to select or clear the
Wi-Fi
Calling
check box to turn it on
or off.
107
When you see the
Wi-Fi Calling
icon on
your
Status
bar, you are ready to make
phone calls and send messages over the
Wi-Fi network.
If you choose to turn off Wi-Fi Calling, you
can still stay connected to Wi-Fi for data
usage.
Set connection preferences
NOTE
Wi-Fi Calling must be turned on to
change connection preferences.
1. From any Home screen, tap the
Menu
key.
2. Tap
Settings
.
3. Tap
More...
.
4. Tap to select the
Wi-Fi Calling
icon
to turn it on, if necessary.
5. Tap
Wi-Fi Calling Settings
.
6. Tap
Connection Preferences
.
7. Tap
Wi-Fi Preferred, Wi-Fi Only,
or
Cellular Preferred
.
8. Tap
OK
.
Portable Wi-Fi hotspot
You can also use your phone to provide a
mobile broadband connection for up to 8
other devices. Create a hotspot and share
your connection.
To create a portable hotspot, from the
Home screen tap the
Menu/Search
Key
>
System settings
. From the
WIRELESS & NETWORKS
section, tap
More
>
Portable Wi-Fi hotspot
. Then
tap
Portable Wi-Fi hotspot
once more to
activate the feature. A checkmark indicates
that the feature is active. Tap Configure
Wi-Fi hotspot to change the
SSID, security
type
,
and password
.
108
Settings
NOTE
Mobile Hotspots requires an
appropriate DataPro data plan. Devices
connected to your Mobile Hotspot use
data from your DataPro plan. Plans are
not unlimited and signifi cant charges
may be incurred if the included data
allowance is exceeded. Performance
may vary depending on the number of
devices connected and other factors.
If you do not use a password, others
will be able to use your Mobile Hotspot
connection.
Data Tethering
You can use your phone to provide a data
connection to a computer by activating
data tethering and connecting them with
a USB cable.
To tether your phone with your computer
using the USB
1 Connect your phone to your computer with
a USB cable.
2 The USB connection type prompt is
displayed. Tap USB tethering to confirm.
NOTE
- Data Tethering requires an
appropriate DataPro data plan.
Devices connected by tethering use
data from your DataPro plan. Plans
are not unlimited and signifi cant
charges may be incurred if the
included data allowance is exceeded.
Performance may vary depending
on the number of devices connected
and other factors.
- You cannot access your phone’s
microSD card on your computer
when using USB tethering.
VPN
Displays the list of Virtual Private Networks
(VPNs) that you’ve previously configured.
Allows you to add different types of VPN.
Mobile networks
Set options for data roaming, network
mode & operators, access point names
(APNs) and so on.

109
DEVICE
Sound
Adjust sound, notification default settings
and vibrate mode. You can also manage
audible and Haptic feedback.
Sound profile
- Allows you to set the sound
profile to Sound, Vibrate only, or Silent.
Volumes
- Adjust the phone’s volume
settings to suit your needs and your
environment.
RINGTONE & NOTIFICATIONS
Phone ringtone
- Select the ringtone for
incoming calls.
Notification sound
- Select the ringtone for
notifications such as new messages receipt
or calendar events.
Ringtone with vibration
- Checkmark
for vibration feedback for calls and
notifications.
Quiet time
- Slide the button to set times
to turn off all sounds except alarm and
media.
TOUCH FEEDBACK & SYSTEM
Dial pad touch tones
- Select whether to
hear tones when you use the dialpad.
Touch sounds
- Select whether to hear
sound when you tap buttons, icons, and
other onscreen items.
Screen lock sounds
- Select whether to
hear sound when the screen is locked or
unlocked.
Vibrate on touch
– Select whether to
vibrate when touching buttons and keys.
Display
Brightness
– Adjust the brightness of the
screen.
Auto-rotate screen
– Set to switch
orientation automatically when you rotate
the phone.
Screen timeout
– Set the time delay
before the screen automatically turns off.
Font type
- Select the desired font type.
Font size
- Select the desired font size.
Front key light
– Tap to set the Front key
light options.
Turn on front key light:
Checkmark this
to set the the front keys (Menu/Search
Key, Home Key, Back Key) are turned on,
when you use the device.

110
Settings
Front key light duration:
Select how long
the front keys remain backlit while the
screen is turned on.
Home screen
Animation
- Set whether you want to enjoy
animated transitions for all supported
effects (including when navigating from
screen to screen) or to use the phone
without any optional animation effects (this
setting does not control animation in all
applications).
Screen swipe effect
- Allows you to select
the type of effect to display when you
swipe from one Home screen canvas to
the next.
Wallpaper
- Allows you to set the
wallpaper.
Scroll wallpaper
- Checkmark to allow the
wallpaper to scroll with the screen instead
of having it as a static image.
Scroll screens circularly
- Checkmark
to show the first screen after last screen
when scrolling.
Home backup & restore
- Select to backup
and restore app/widget configurations and
the theme.
Lock screen
SCREEN
Select screen lock
- Select the desired
option to secure your phone from the
below.
None
- No lock screen.
Swipe
- Swipe any part of the screen to
unlock screen.
Face Unlock
- Unlocks the screen
through facial recognition. Follow the
prompts. You are asked to select Pattern
and/or PIN as a backup.
Pattern
- Opens a set of screens that
guide you through drawing a screen
unlock pattern. It’s recommended that
you enter backup PIN as well in case
that you might lost the pattern. Then, you
can set the wallpaper on the lock screen,
whether to show the owner information,
the lock timer, vibrate on touch, or
whether to make the pattern visible.
PIN
- Enter a numeric PIN to unlock
screen.
Password
- Enter a password to unlock
screen.

111
Wallpaper
- Select the wallpaper to display
for your lock screen.
Clocks & shortcuts
- Customize clocks and
shortcuts on the lock screen.
Owner info
- Display the owner info on the
lock screen.
LOCK TIME
Lock timer
- While your phone is at sleep
mode, your phone will be locked after the
time you set here has elapsed. But, if None
or Swipe is selected at Select screen lock
menu, your phone will not be locked.
Power button instantly locks
- Regardless
of Lock timer setting, your phone will be
locked immediately when Power button is
pressed. But, if None or Swipe is selected
at Select screen lock menu, your phone will
not be locked.
Storage
INTERNAL STORAGE
You can monitor the used and available
space on the system memory.
Total space
- Lists the total amount of
space on any microSD card installed in
your phone. It is divided by the type of
files stored.
SD CARD
You can monitor the used and available
space on your microSD card.
Unmount SD card
- Tap this to unmount
the microSD card from your phone so that
you can format the card of safely remove.
Erase SD card
- Permanently erases
everything on the microSD card and
prepares it for use with your phone. You
must unmount the microSD card before
you can format it.
Power saver
Turn Power saver on
- Select the level you
want to turn on the Power saver.
Power saver tips
- Touch to access some
tips for Power saver.
POWER SAVING ITEMS
- Select to turn off
features when battery is low.
Auto-sync
- Turn off Auto-sync.
Wi-Fi
- Turn off Wi-Fi if data is not in use.
Bluetooth
- Turn off Bluetooth if not
connected.
Vibrate on touch
- Turn off touch feedback.
Brightness
- Adjust the brightness.
Screen timeout
- Adjust screen timeout
of screen.

112
Settings
Front key light
- Adjust Front key light
timeout.
BATTERY INFORMATION
- View the amount
of power consumed by your device.
Apps
You use the Applications settings menu to
view details about the applications installed
on your phone, manage their data, force
them to stop, and to set whether you want
to permit installation of applications that
you obtain from websites and email. Tap
the Downloaded, On SD card, Running or
All tabs to view information about your
installed apps.
PERSONAL
Accounts & sync
Use the Accounts & sync settings menu to
add, remove, and manage your GoogleTM
and other supported accounts. You also use
these settings to control how and whether
all applications send, receive, and sync
data on their own schedules and whether
all applications can synchronize user data
automatically. GmailTM, Calendar, and
other applications may also have their own
settings to control how they synchronize
data; see the sections on those
applications for details. Slide right to
enable adding account or sync. Touch ADD
ACCOUNT to add new account.
Location services
Use the Location services menu to set your
preferences for using and sharing your
location when you search for information
and use location-based applications, such
as Maps.
Google’s location service
- Checkmark
to use information from Wi-Fi and mobile
networks to determine your approximate
location, used while searching in Google
Maps and other applications. When you
checkmark this option, you’re asked
whether you consent to sharing your
location anonymously with Google’s
location service.
GPS satellites
- Checkmark to enable
your phone’s standalone global positioning
system (GPS) satellite receiver to pinpoint
your location to within an accuracy as close
as several meters (“street level”). Actual
GPS accuracy depends on a clear view of
the sky and other factors.

113
Location & Google search
- Let Google
use your location to improve search results
and other services.
Security
Use the Security settings to configure how
to help secure your phone and its data.
ENCRYPTION
Encrypt device
- Opens a screen that
encrypts data on the device for security.
You will be required to enter a PIN or
password to decrypt your phone each time
you power it on.
SIM CARD LOCK
Set up SIM card lock
- Opens a screen to
set if you want to require a PIN to use or, if
set, allows you to change the PIN.
PASSWORDS
Password typing visible
- Checkmark to
briefly show each character of passwords
as you enter them so that you can see
what you enter.
DEVICE ADMINISTRATION
Device administrators
- Add or remove
device administrators.
Unknown sources
- Allow installation of
non-Play Store applications.
CREDENTIAL STORAGE
Trusted credentials
- Checkmark to
allow applications to access your phone’s
encrypted store of secure certificates and
related passwords and other credentials.
You use credential storage to establish
some kinds of VPN and Wi-Fi connections.
If you have not set a password for the
secure credential storage, this setting is
dimmed.
Install from storage
- Touch to install a
secure certificate from a microSD card.
Clear credentials
- Deletes all secure
certificates and related credentials and
erases the secure storage’s own password,
after prompting you to confirm that you
want to do this.

114
Settings
Language & input
Select the language for the text on your
phone and for configuring the on-screen
keyboard, including words that you’ve
added to its dictionary.
Language
- Choose a language to use on
your phone.
Personal dictionary
- Allows you to view,
edit, and add words to your personal
dictionary.
KEYBOARD & INPUT METHODS
Default
- Shows the default keyboard type.
Checkmark the keyboard you want to use
from Google voice typing, LG Keyboard.
And tap to configure each keyboard’s
settings.
SPEECH
Voice Search
- Touch to configure the
Voice Search settings.
Text-to speech output
- Touch to set the
preferred engine or general settings for
text-to-speech output.
MOUSE/TRACKPAD
Pointer speed
- Adjust the pointer speed.
Backup & reset
BACKUP & RESTORE
Back up my data
- Back up app data,
Wi-Fi passwords, and other settings to
Google servers.
Backup account
- Displays the accounts
that are currently being backed up.
Automatic restore
- When reinstalling an
app, restore backed up settings and data.
PERSONAL DATA
Factory data reset
- Erases all data on
the phone.
SYSTEM
Date & Time
Set your preferences for how the date and
time is displayed.
Accessibility
Use the Accessibility settings to configure
any accessibility plug-ins you have installed
on your phone.

115
NOTE
Requires additional plug-ins to
become selectable.
Connectivity
USB CONNECTION
USB connection type
- Opens a dialog box
to choose the default connection mode
when connecting your phone to a PC via
USB. Choose from
Charge only
,
Mass
storage
,
Media sync (MTP)
,
USB tethering
,
LG software
, or
Camera (PTP)
.
Ask on connection
- Checkmark to have
the phone ask you to choose which USB
connection mode it should connect with
to a PC.
Help
- Touch to get information on the
different types of USB connections.
Developer options
USB debugging
- Checkmark to set Debug
mode when USB is connected.
Development device ID
- Displays the
development device ID.
Stay awake
- If activated, the screen will
never sleep while charging.
Allow mock locations
- Checkmark to allow
mock locations.
HDCP check
Desktop backup password
- Allows you to
set a desktop backup password.
USER INTERFACE
Enable strict mode
- Checkmark to flash
the screen when apps operate for a long
time on the main thread.
Show touch data
- Checkmark to make
touch data visible on the screen.
Show touches
- Checkmark to show visual
feedback when the screen is touched.
Show screen updates
- Checkmark
to flash areas of the screen when they
update.
Show CPU usage
- Checkmark to display a
screen overlay showing current CPU usage.
Force GPU rendering
- Checkmark to use
2D hardware acceleration in applications.
Window animation scale
- Select to set
the window animation scale.
Transition animation scale
- Select to set
transition animation scale.

116
Settings
APPS
Don’t keep activities
- Checkmark to quit
every activity as soon as the user leaves it.
Background process limit
- Set the
preferered Background process limit.
Show all ANRs
- Checkmark to show App
Not Responding dialog for background
apps.
About phone
View legal information, check phone status
and software versions, and perform the
software update.

117
Phone Software Update
This feature allows you to update the
firmware of your phone to the latest version
conveniently from the internet without the
need to visit a service center.
For more information on how to use this
function, please visit:
http://www.lg.com
As the mobile phone firmware update
requires the user’s full attention for the
duration of the update process, please
make sure to check all instructions and
notes that appear at each step before
proceeding. Please note that removing the
USB cable or battery during the upgrade
may seriously damage your mobile phone.
LG Mobile Phone Software
update via Over-the-Air
(OTA)
This feature allows you to update the
firmware of your phone to the newer
version conveniently via OTA without
connecting the USB data cable. This
feature is only available if and when LG
makes the newer version of the firmware
available for your device.
First, you can check the software version
on your mobile phone:
Tap the
Menu/Search Key
>
System
settings
>
About phone
.You can check the
software version at the bottom of the list.
To perform the phone software update,
tap the
Menu/Search Key
>
System
settings
>
About phone
>
Software
update
>
Check now for update.
NOTE
LG reserves the right to fi rmware
updates available only for selected
models at its own discretion and does
not guarantee the availability of the
newer version of the fi rmware for all
handset models.
Software Update

118
Software Update
NOTE
Your personal data—including
information about your Google
account and any other accounts,
your system/application data and
settings, any downloaded applications
and your DRM licence —might be
lost in the process of updating your
phone's software. Therefore, LG
recommends that you back up your
personal data before updating your
phone's software. LG does not take
responsibility for any loss of personal
data.