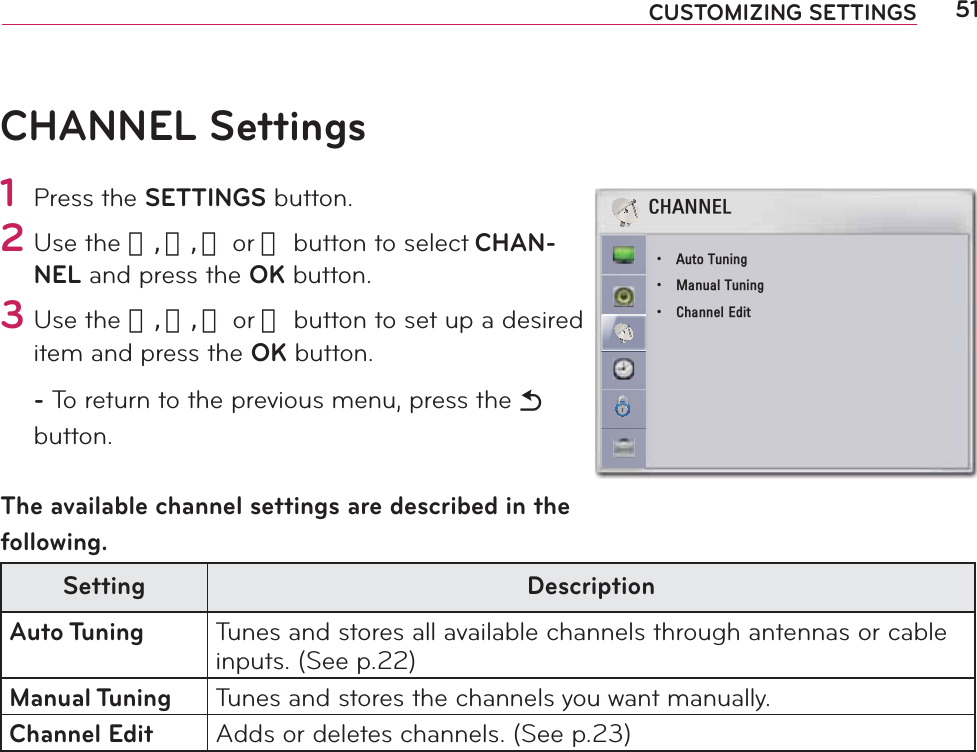
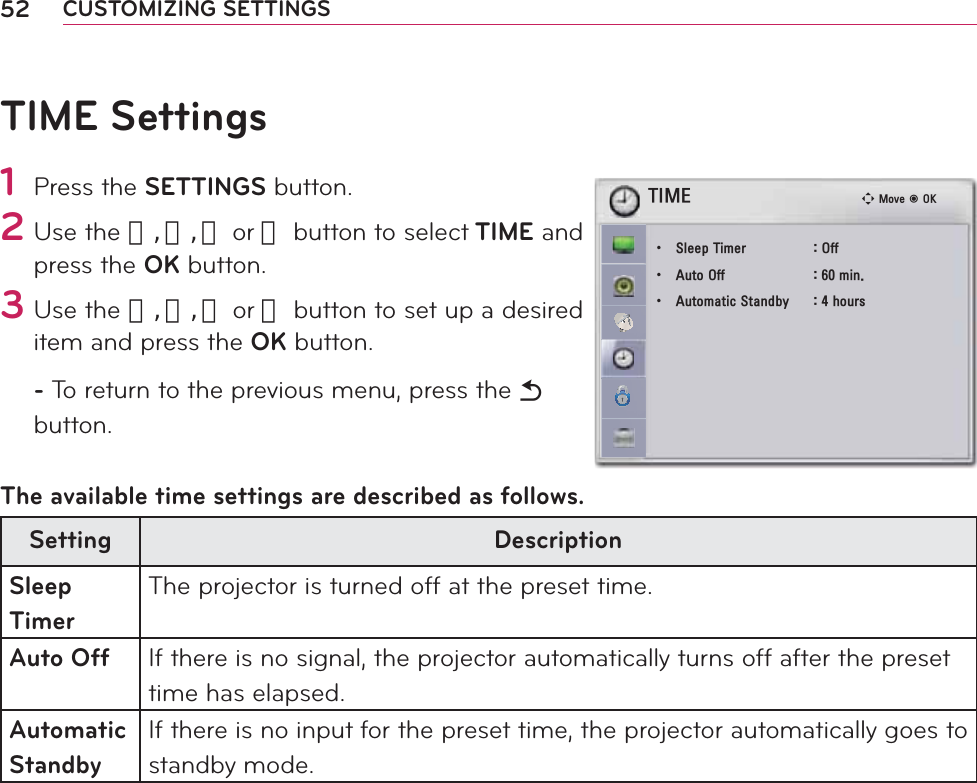
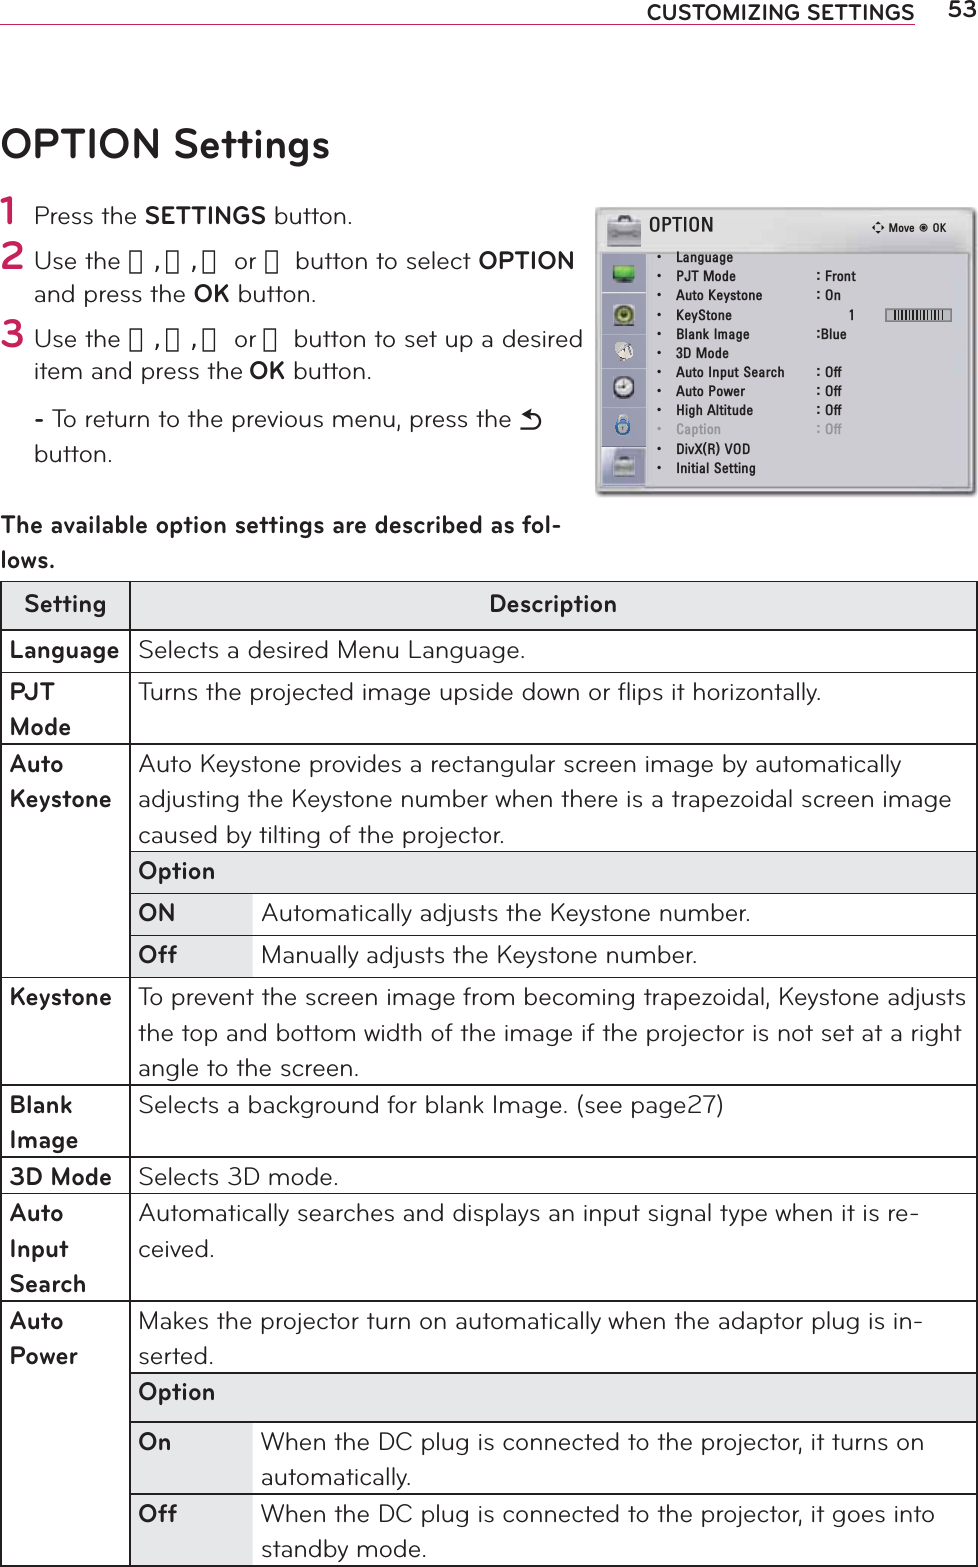
LG Electronics USA PB61UJE DLP PROJECTOR User Manual EMISSION TEST REPORT
LG Electronics USA DLP PROJECTOR EMISSION TEST REPORT
UserManual.wiki
>
LG Electronics USA
>
PB61UJE User Manual
Users Manual
Navigation menu
Upload a User Manual
Namespaces
Wiki Guide
HTML
PDF
Info
Views
User Manual
Discussion / Help
Navigation


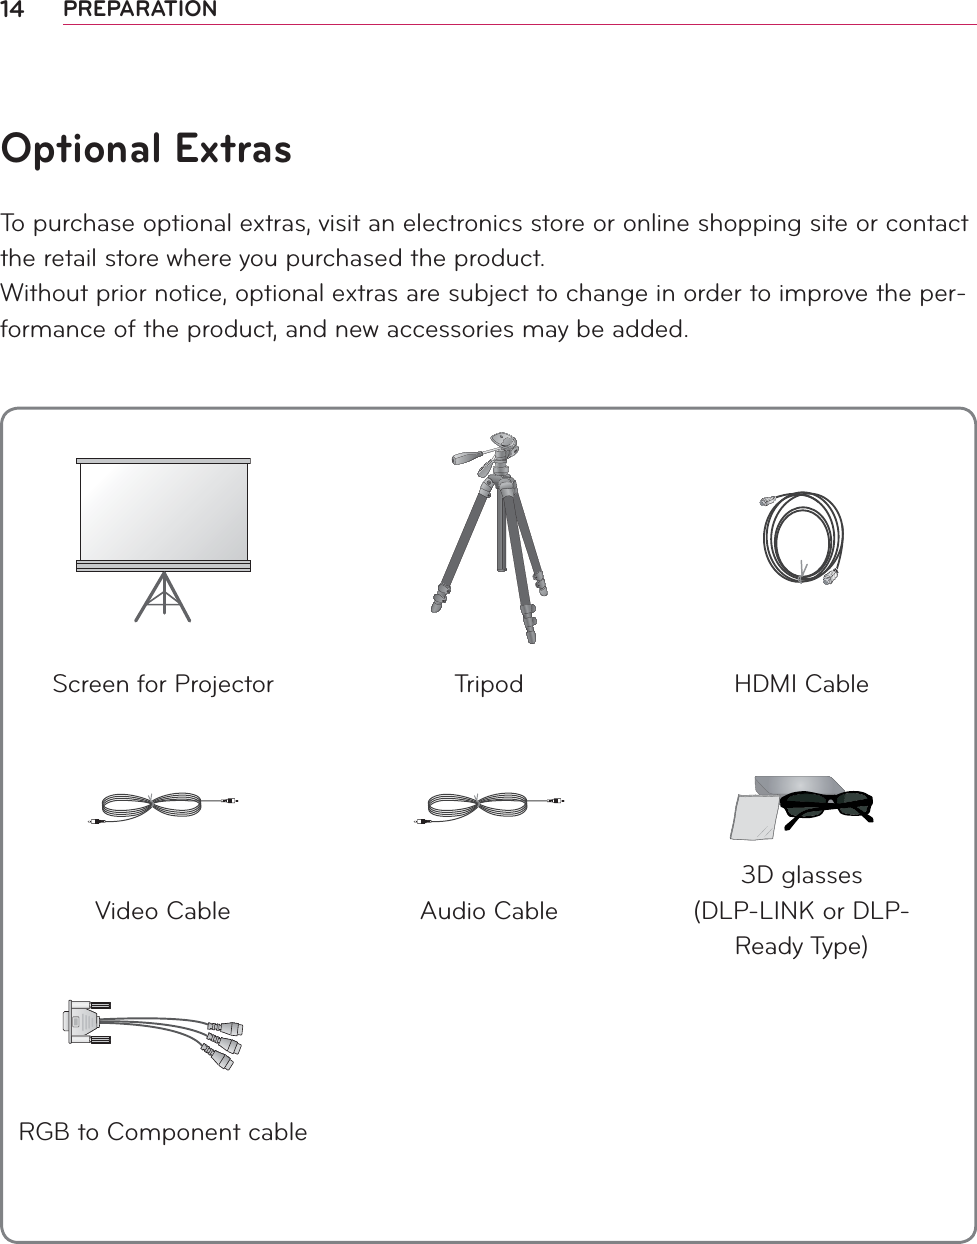
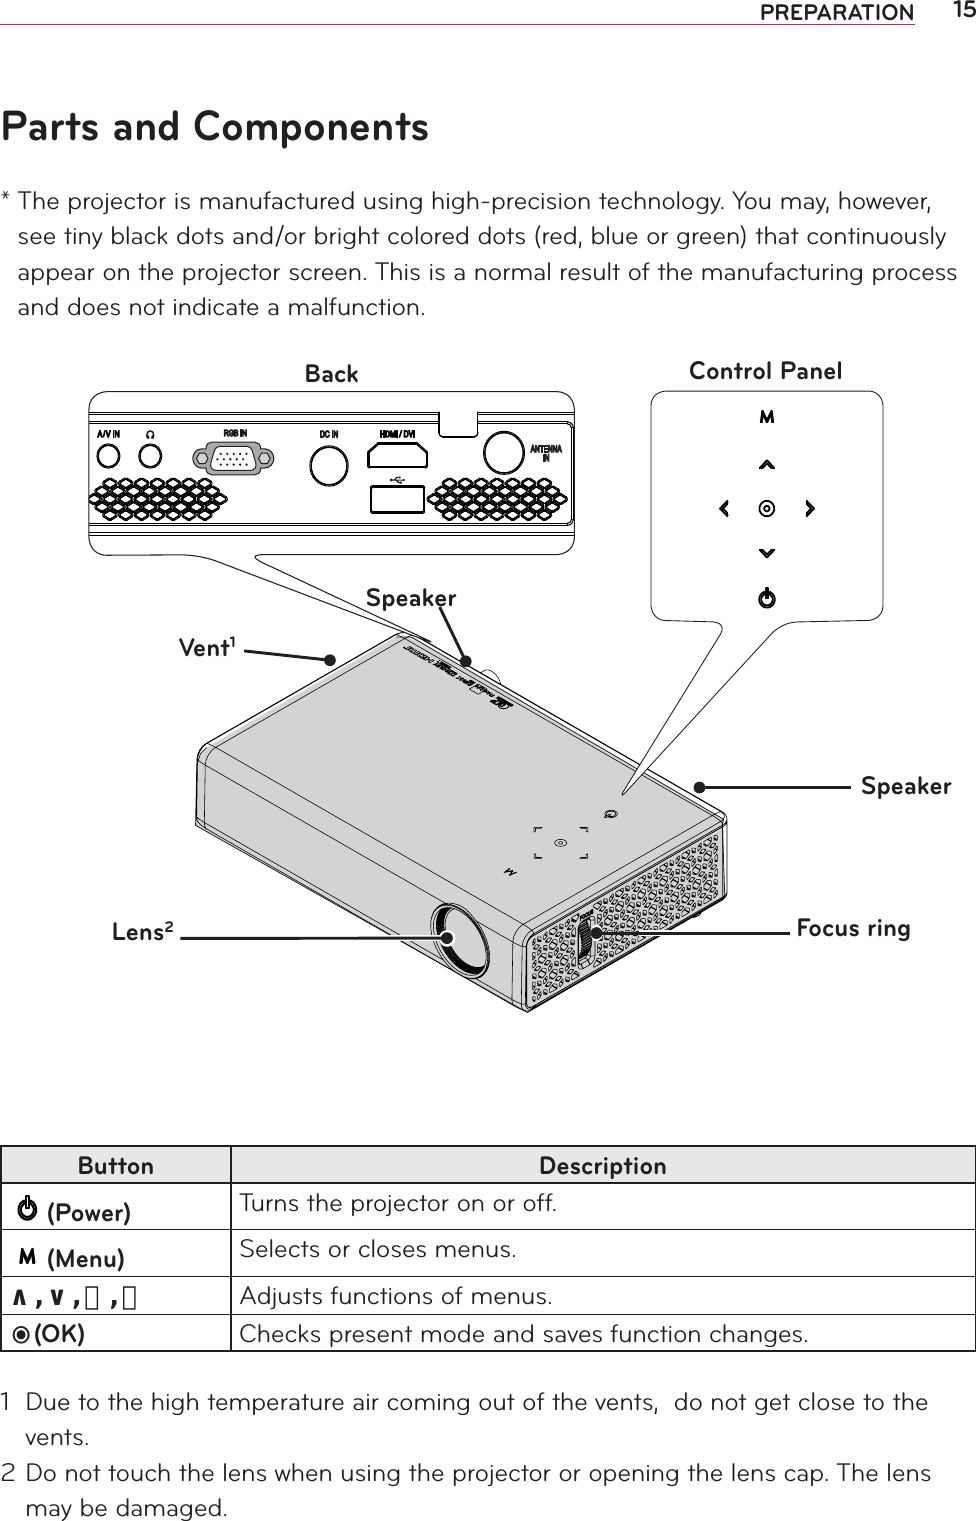

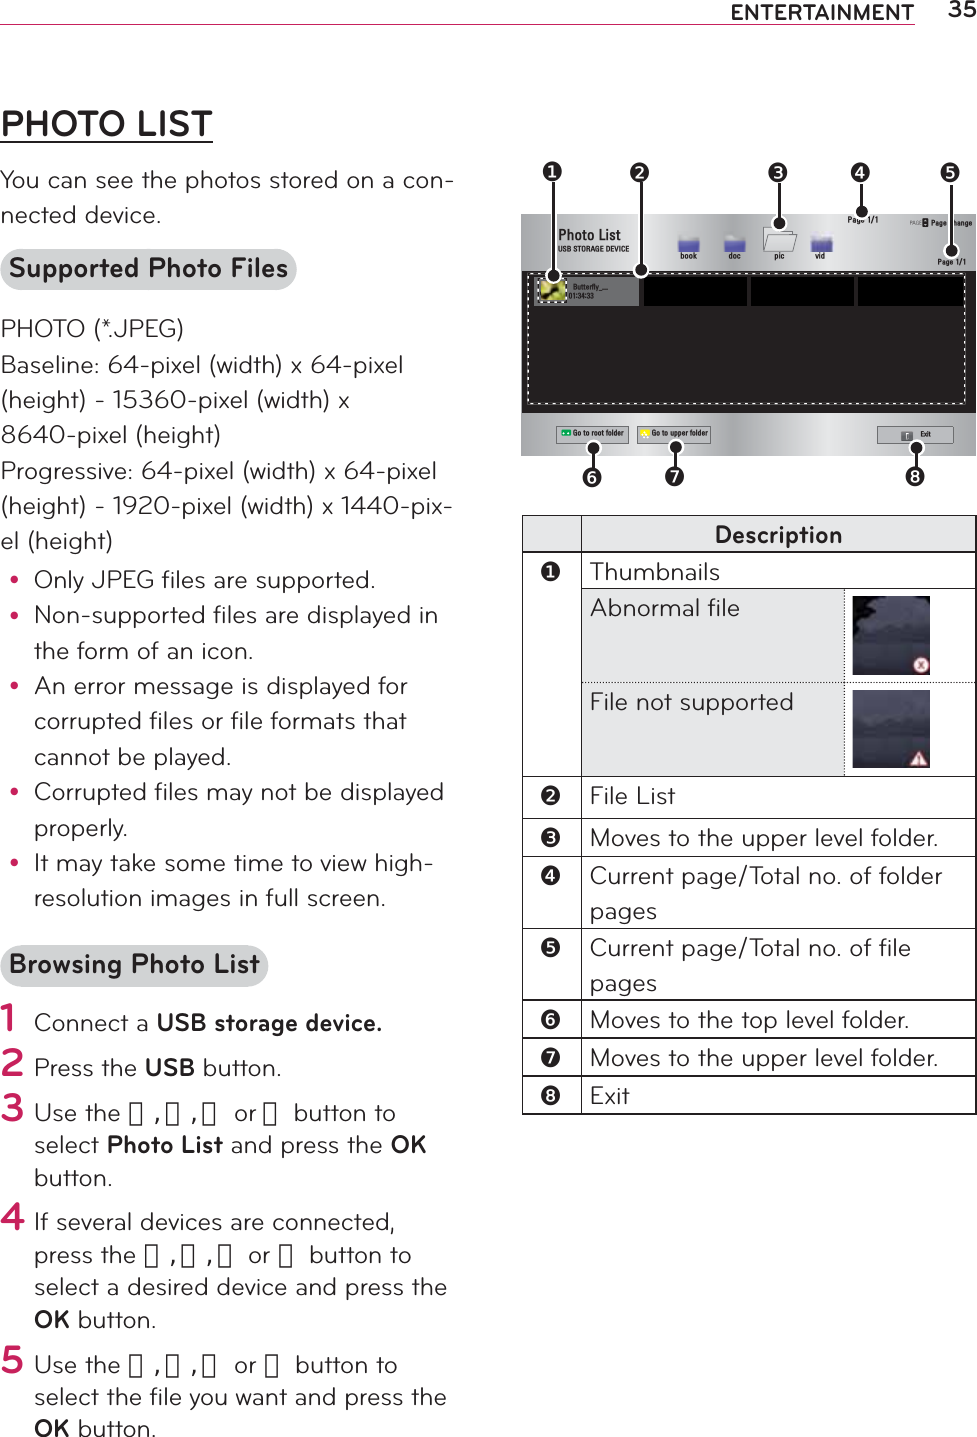
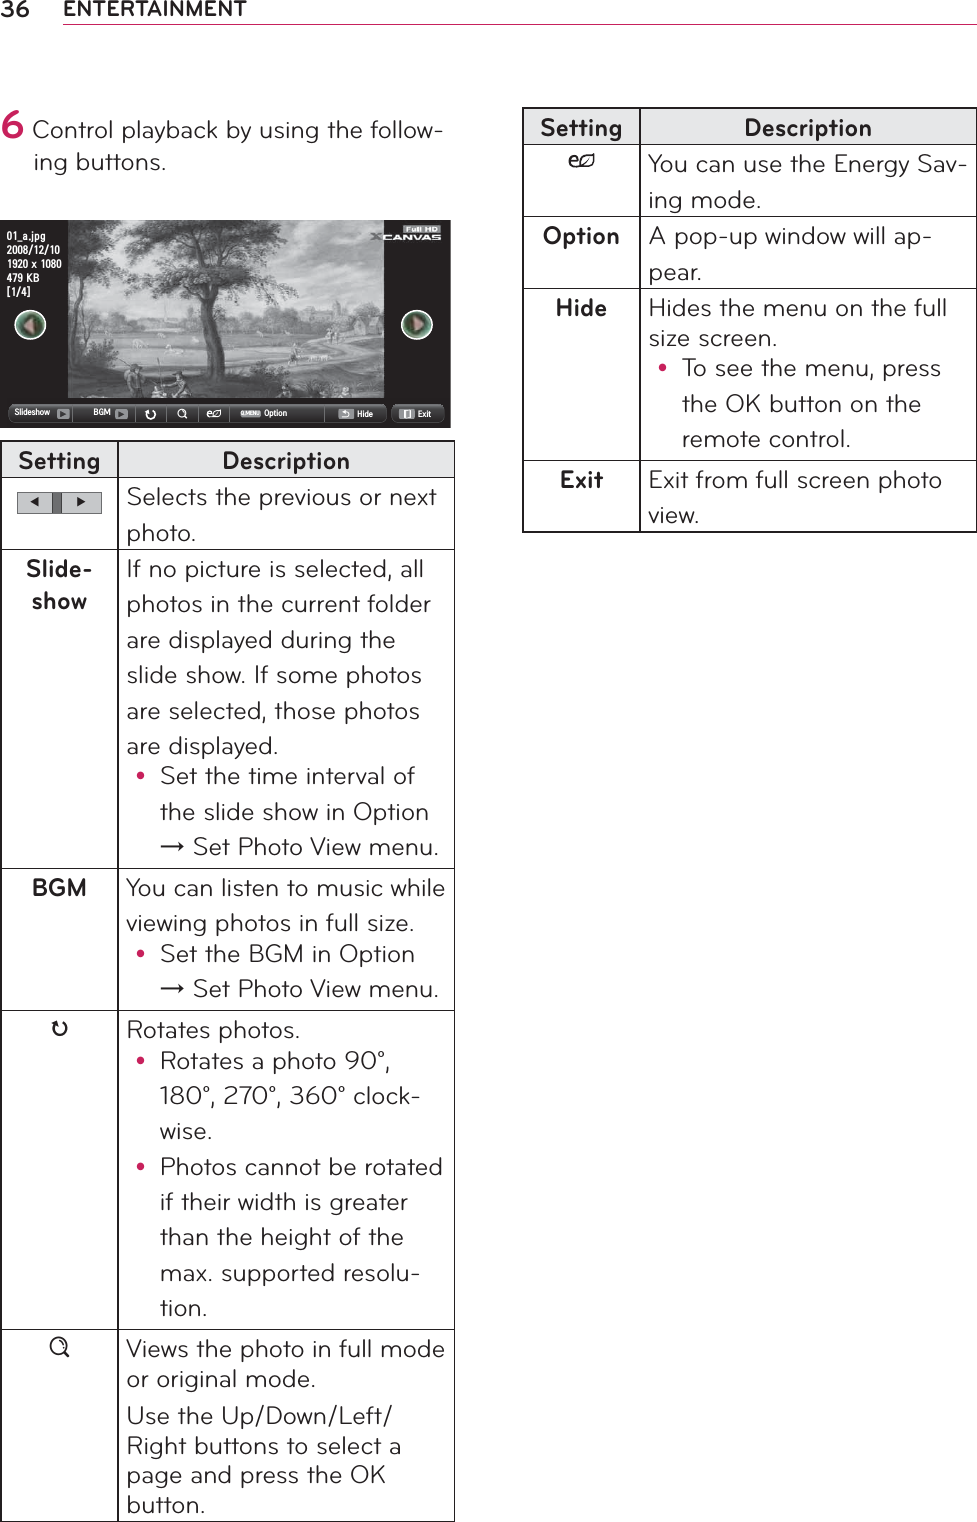
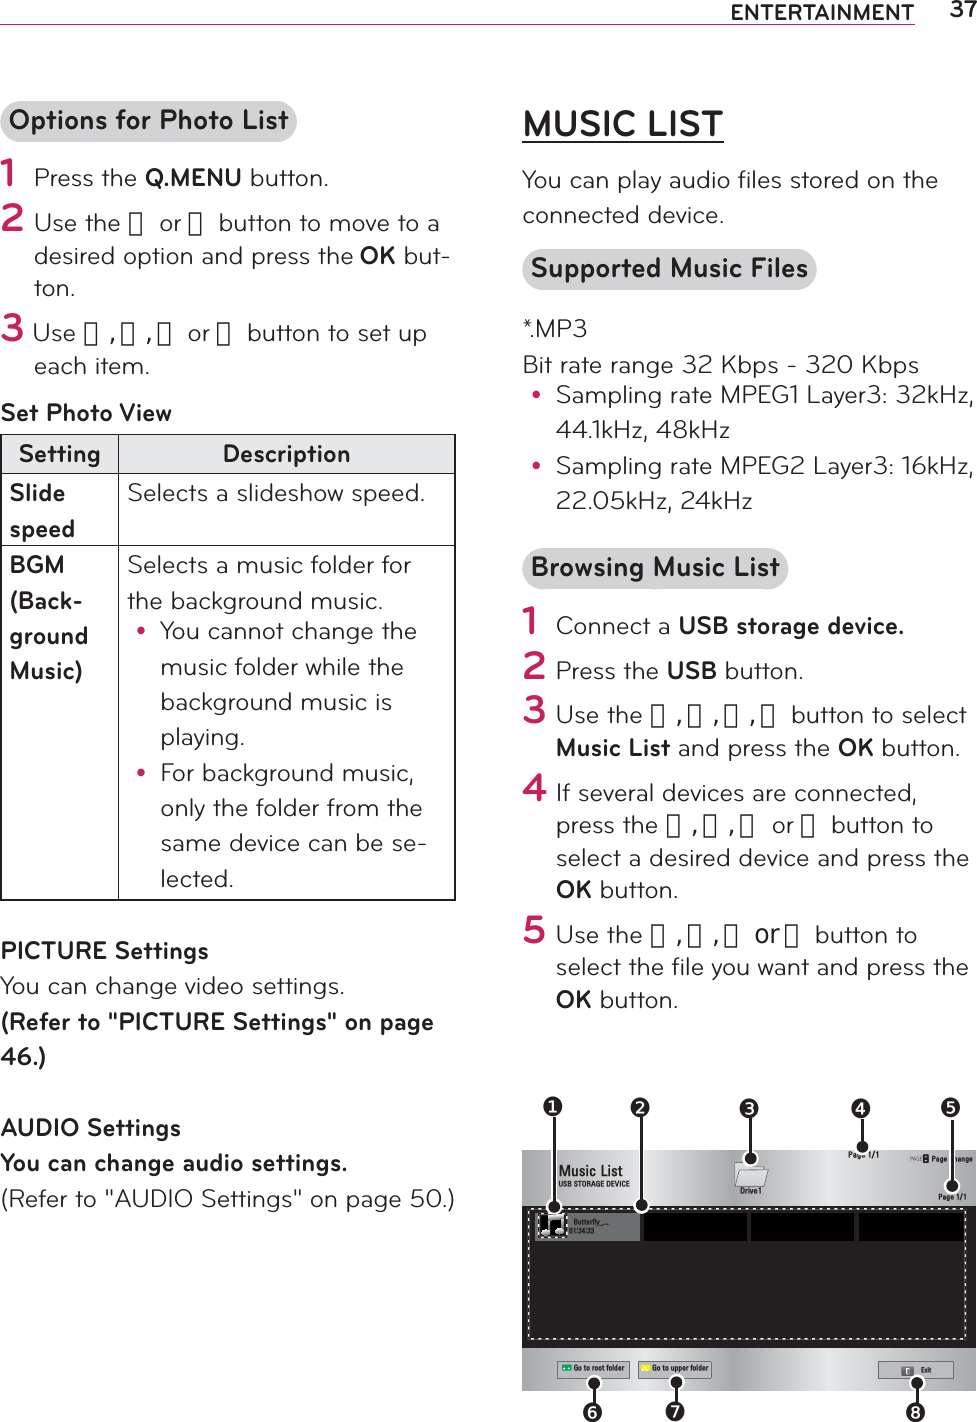
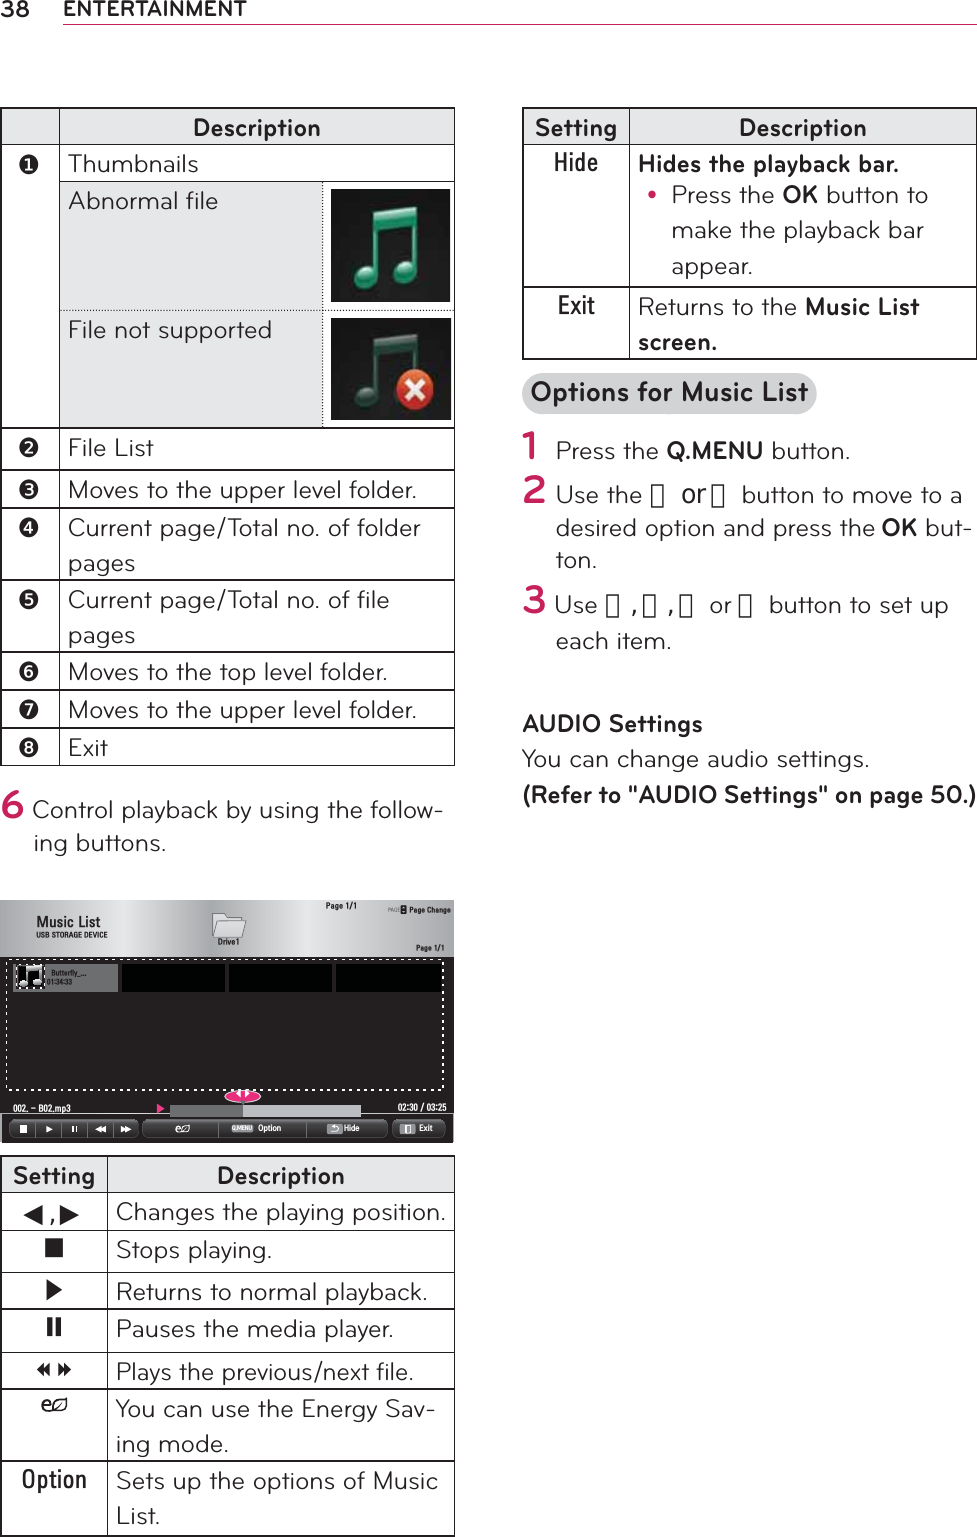
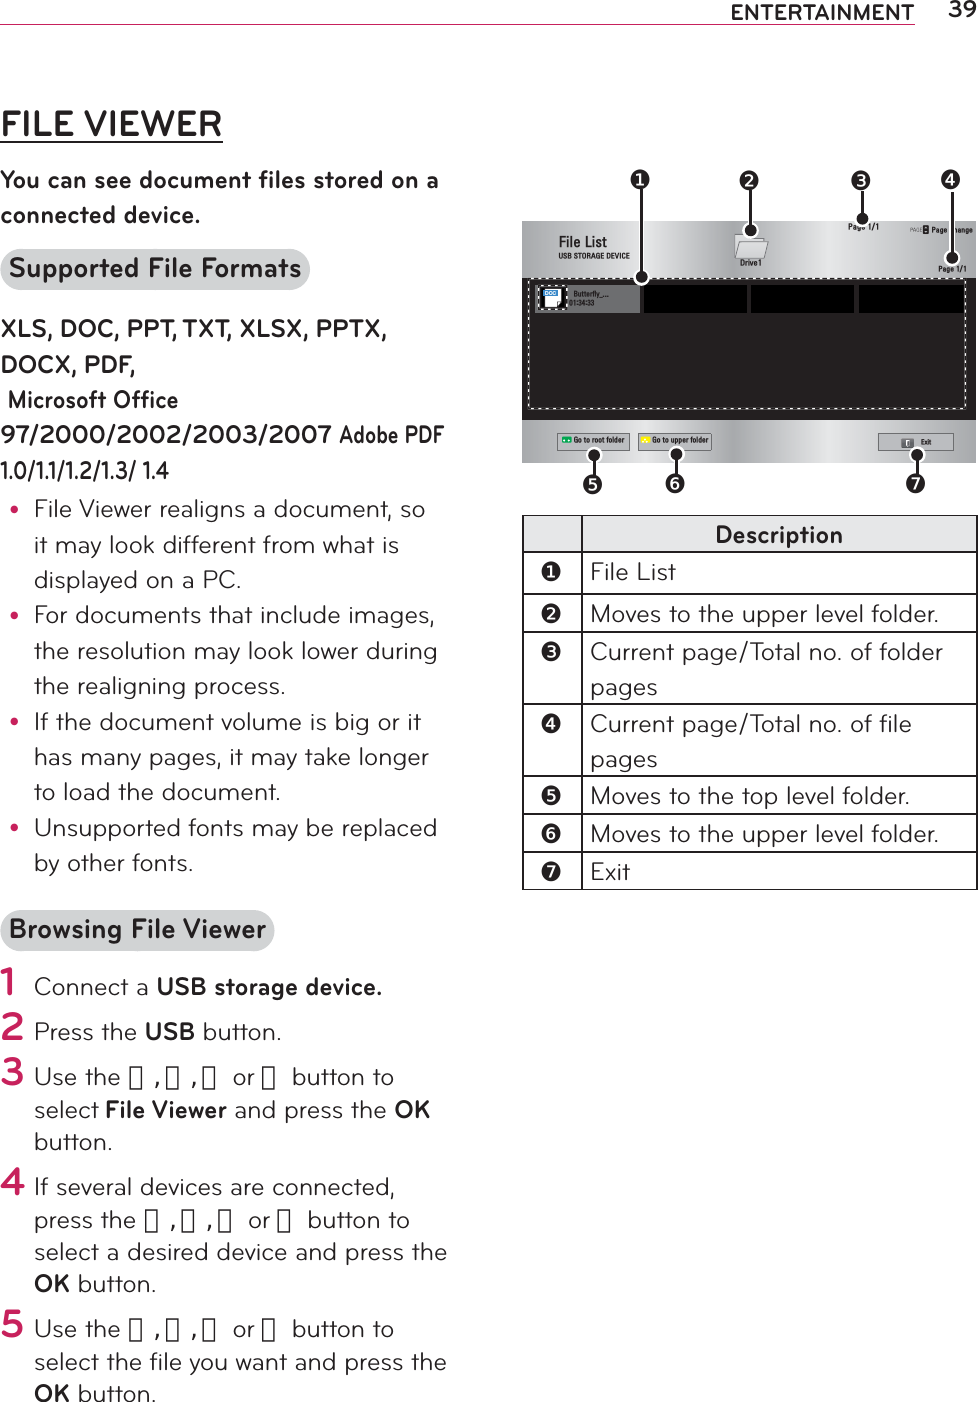
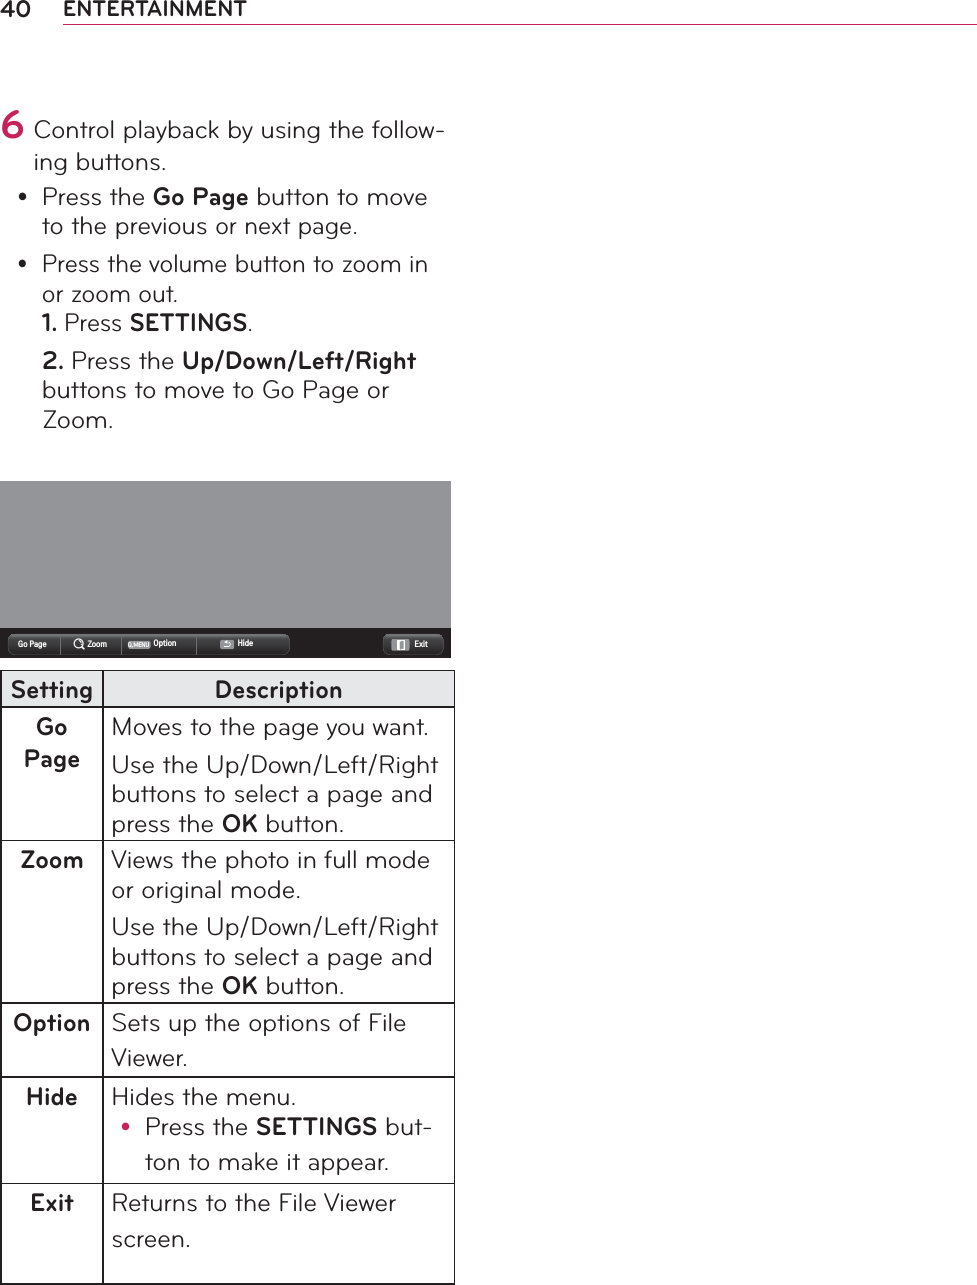
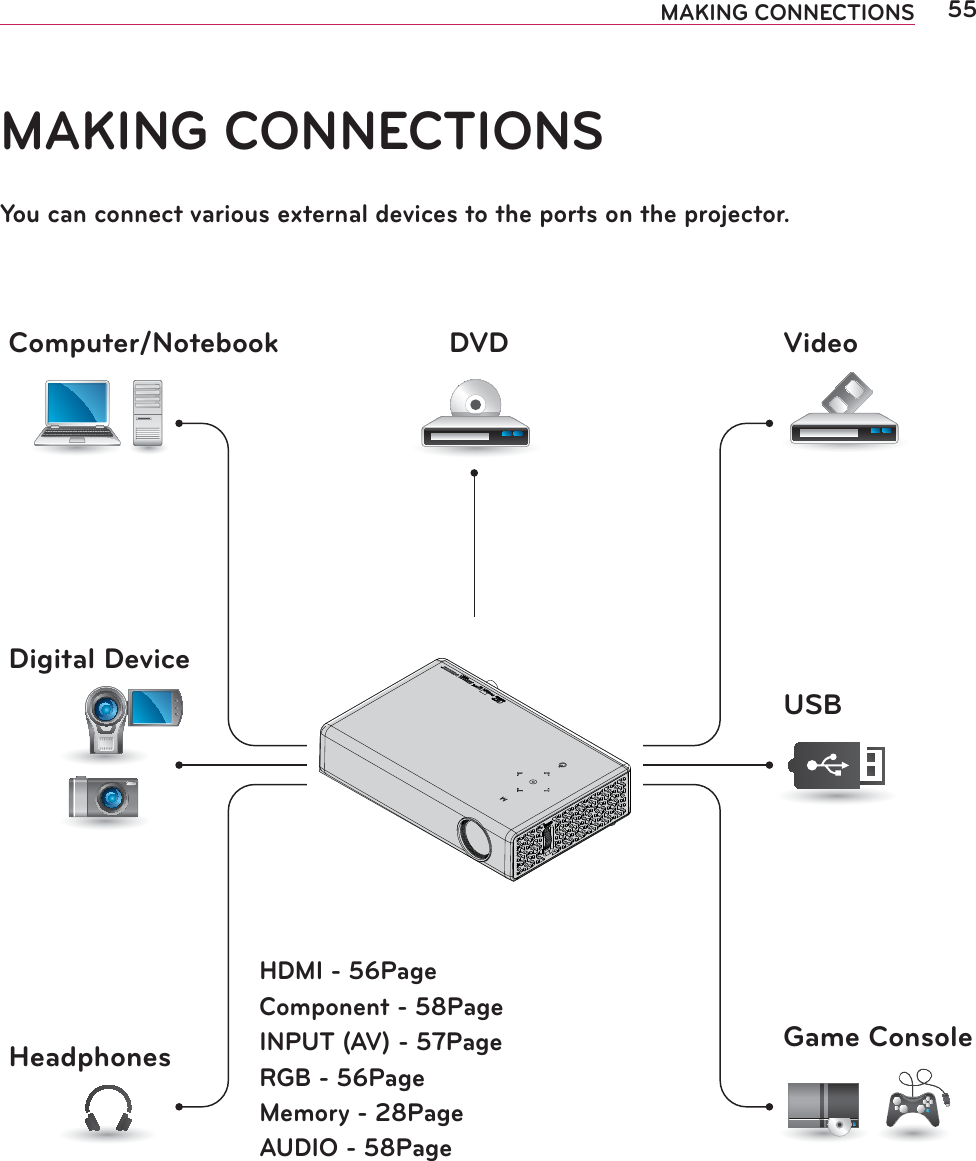
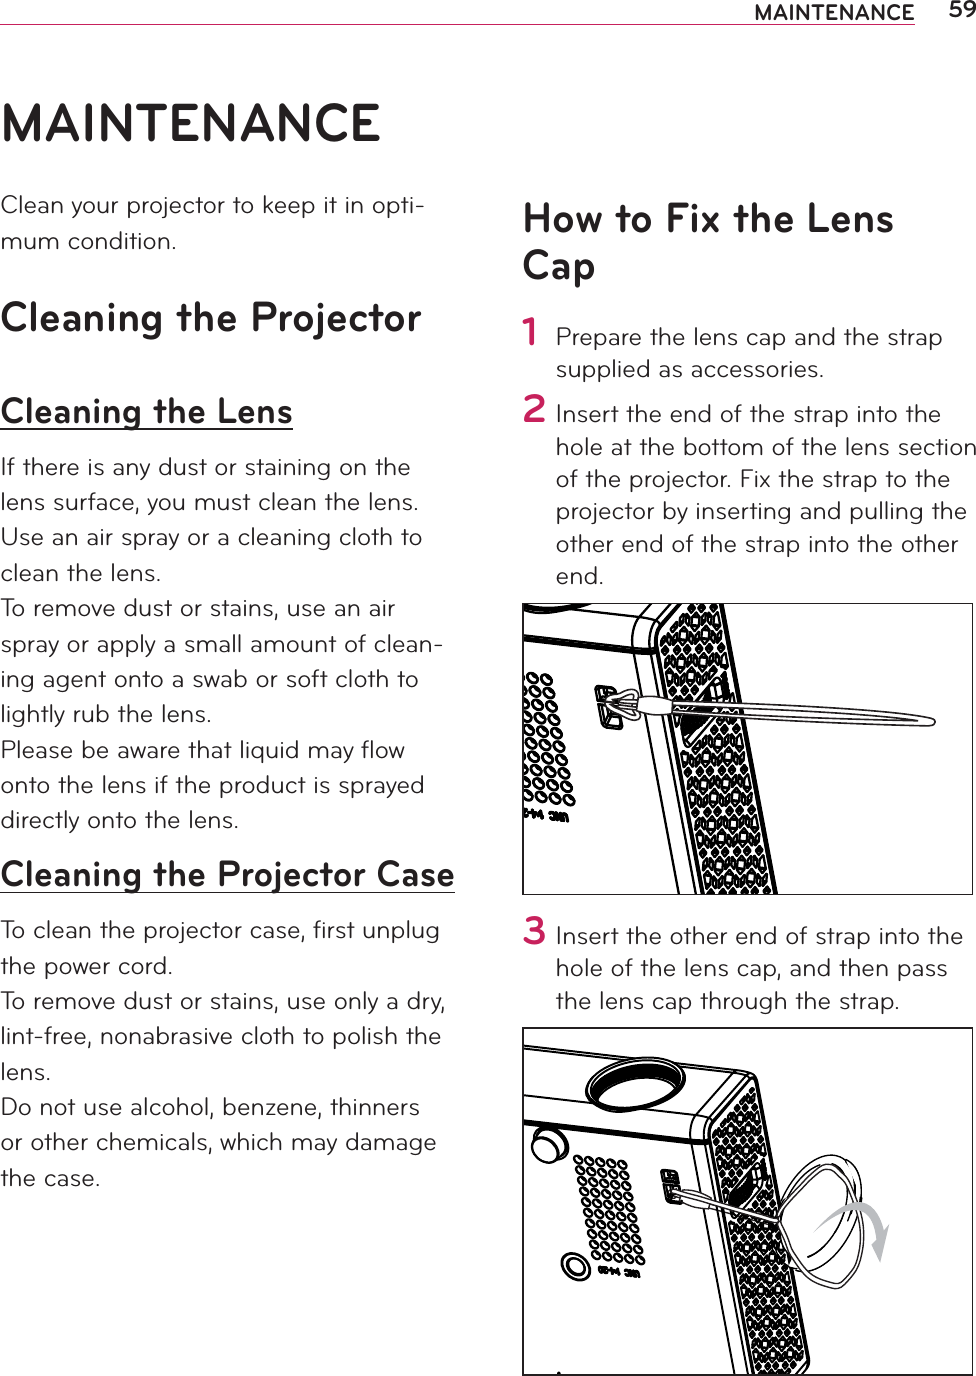
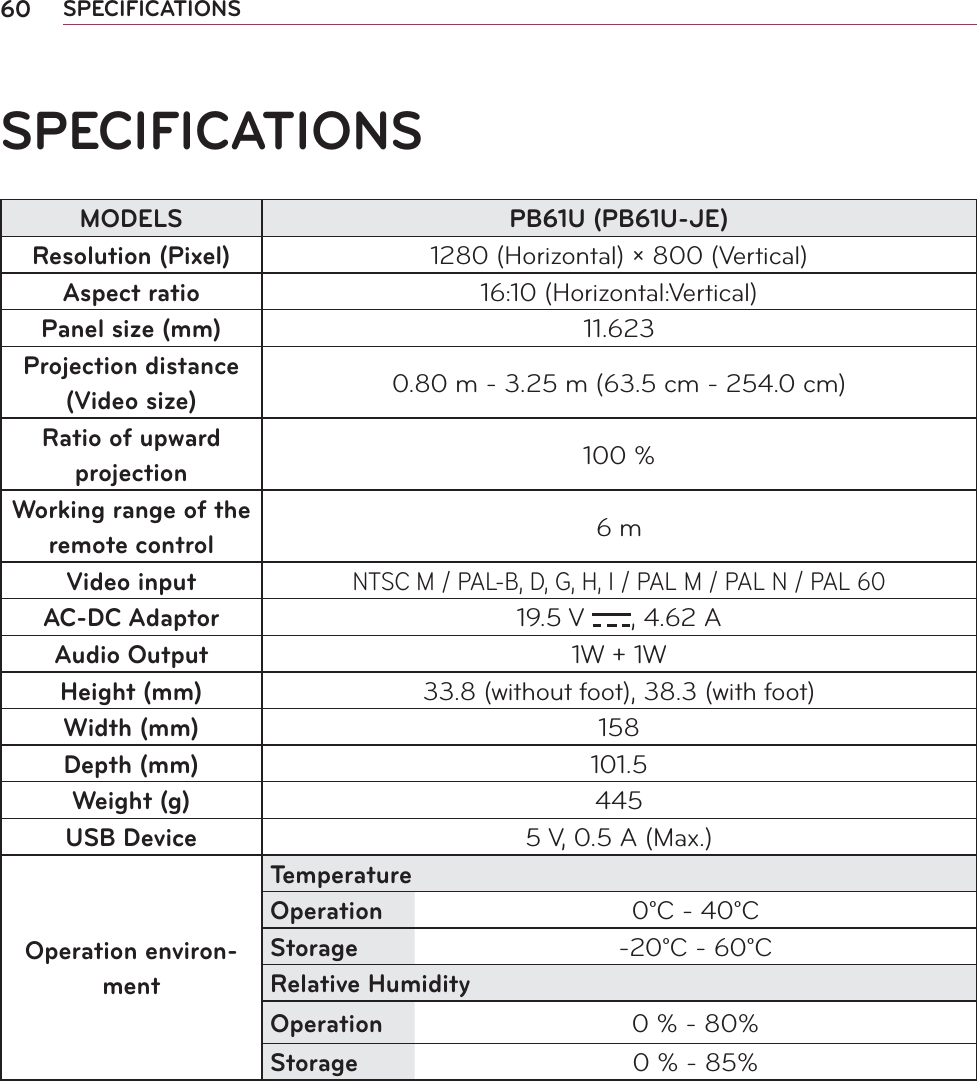
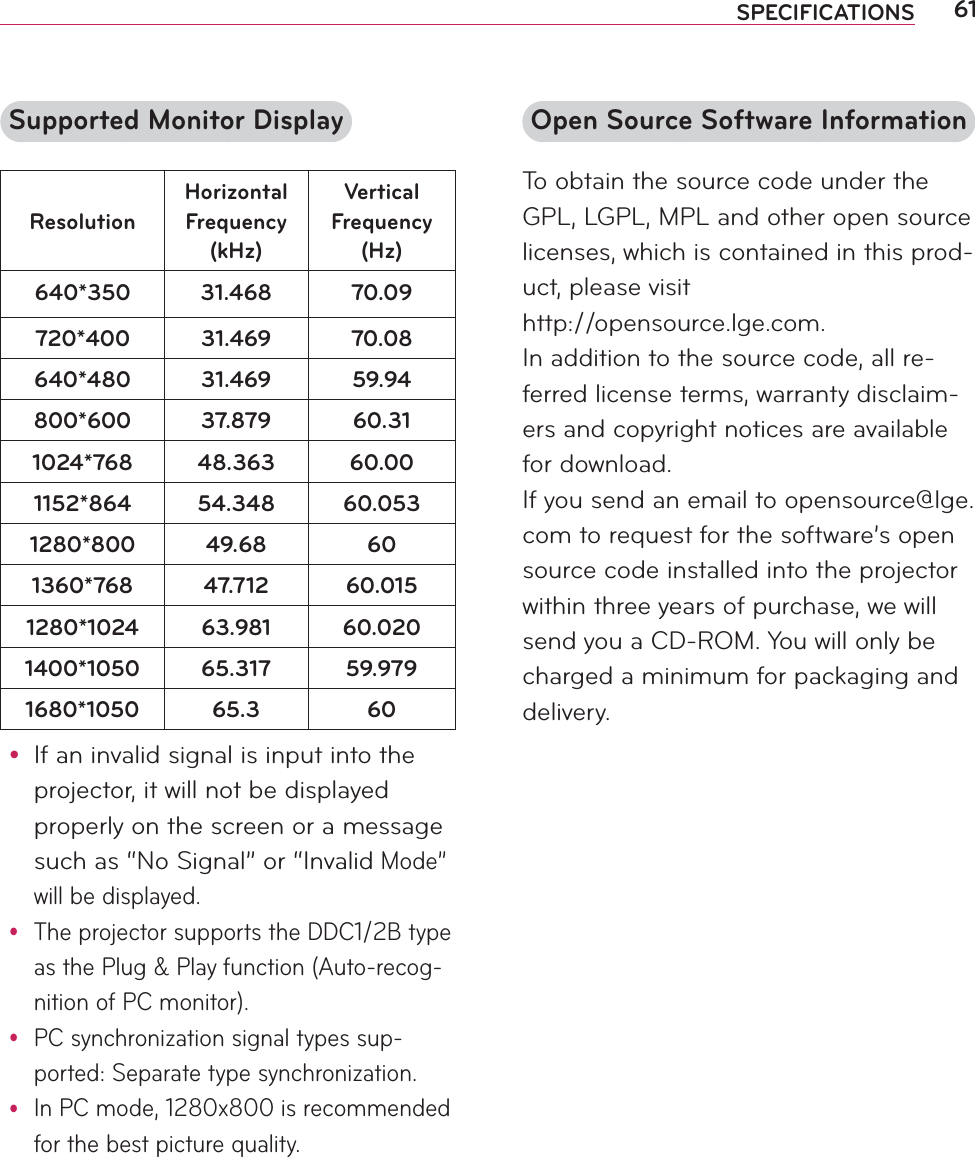
![34 ENTERTAINMENTRegistering the DivX codePlease check your DivX code. For more information on the registration process, visit www.divx.com/vod. After registra-tion, your can enjoy DivX VOD content protected by the DivX DRM code.1 In the Home menu, move to OPTION and press DivX(R) VOD. 5HJLVWUDWLRQ'HUHJLVWUDWLRQ&ORVH2 Press the or button to move to Registration and press the OK but-ton. &ORVH<RXPXVWUHJLVWHU\RXUGHYLFHWRSOD\'LY;5'50SURWHFWHGYLGHRV5HJLVWUDWLRQ&RGH;;;;;;;;;;5HJLVWHUDWKWWSYRGGLY[FRPL3 Check the DivX registration code. NOTEy You cannot use DivX registration codes assigned to other devices. Make sure to use the DivX registra-tion code assigned to your device.y The video or audio files that are not converted by the standard DivX codec may be corrupted or not be played.To deregister the DivX codeUse the DivX deregistration code to deactivate the DivX DRM function.1 In the Home menu, move to OPTION and press DivX(R) VOD.2 Use the or button to go to Deregistration and press the OK button.<HV 1R<RXUGHYLFHLVDOUHDG\UHJLVWHUHG$UH\RXVXUH\RXZLVKWRGHUHJLVWHU"L ➡<HV 1R'HUHJLVWUDWLRQFRGH'HUHJLVWHUDWKWWSYRGGLY[FRP&RQWLQXHZLWKUHJLVWUDWLRQ"L3 Select Yes. NOTEy What is DRM [Digital Rights Management]? This is a technology and service that prevents the illegal use of digital contents to protect the benefits and rights of the copyright owner. Files can be played after the license is veri-fied through an online method, etc.](https://usermanual.wiki/LG-Electronics-USA/PB61UJE/User-Guide-1682943-Page-35.png)