LG Electronics USA PF85UJE DLP PROJECTOR User Manual EMISSION TEST REPORT
LG Electronics USA DLP PROJECTOR EMISSION TEST REPORT
User Manual

G
Order Number
: GETEC-C1-13-185
FCC Part 15 subpart B
Test Report Number
: GETEC-E3-13-041
Page 1 / 1
EUT Type: DLP PROJECTOR
FCC ID.: BEJPF85UJE
APPENDIX G
: USER’S MANUAL

Owner's Manual
DLP PROJECTOR
PF85U
Please read the safety information carefully before using the product.
www.lg.com

5LICENSE
LICENSE
Manufactured under license from Dolby Laboratories. “Dolby “and
the double-D symbol are trademarks of Dolby Laboratories.
ABOUT DIVX VIDEO: DivX® is a digital video format created by
video.
must be registered in order to play purchased DivX Video-on-
Demand (VOD) movies. To obtain your registration code, locate
com for more information on how to complete your registration.
premium content.”
Rovi Corporation or its subsidiaries and are used under license.”
“Covered by one or more of the following U.S. patents :
Manufactured under license under U.S. Patent Nos: 5,956,674;
of DTS, Inc. Product includes software. DTS, Inc. All Rights
Reserved.
NOTE
y Image shown may differ from your projector.
y Your projector’s OSD (On Screen Display) may differ slightly from that shown in
this manual.
This device meets the EMC requirements for home appliances (Class B) and is
intended for home usage. This device can be used in all regions.
6
SAFETY INSTRUCTIONS
SAFETY INSTRUCTIONS
Please take note of the safety instructions to prevent any potential accident or
misuse of the projector.
y Safety precautions are given in two forms, i.e. Warning and Caution as detailed below.
WARNING: Failure to follow the instructions may cause serious injury and even death.
CAUTION: Failure to follow the instructions may cause injury to persons or damage to
the product.
y Read the owner's manual carefully and keep it to hand.
FCC NOTICE
Warning - Class B
(b) For a Class B Digital device or
peripheral, the instructions furnished the
user shall include the following or similar
statement, placed in a prominent location in
NOTE:
This equipment has been tested
and found to comply with the limits for
a Class B digital device, pursuant to
are designed to provide reasonable
protection against harmful interference in
a residential installation. This equipment
generates, uses and can radiate radio
frequency energy and, if not installed and
used in accordance with the instructions,
may cause harmful interference to radio
guarantee that interference will not occur
in a particular installation. If this equipment
does cause harmful interference to radio
or television reception, which can be
determined by turning the equipment off
and on, the user is encouraged to try to
correct the interference by one or more of
the following measures:
- Reorient or relocate the receiving antenna.
- Increase the separation between the
equipment and receiver.
- Connect the equipment into an outlet on
a circuit different from that to which the
receiver is connected.
radio/TV technician for help.
WARNING/CAUTION
RISK OF ELECTRIC SHOCK
DO NOT OPEN
arrowhead symbol, within
an equilateral triangle, is
intended to alert the user to the
presence of uninsulated “dangerous
voltage” within the product’s enclosure
constitute a risk of electric shock to
persons.
an equilateral triangle is
intended to alert the user to
the presence of important
operating and maintenance
(servicing) instructions in the literature
accompanying the appliance.
WARNING/CAUTION
OR MOISTURE.

7SAFETY INSTRUCTIONS
Read these instructions.
Follow all instructions.
Indoor Installation
WARNING
y ↧⡕ᇵᛵ⹜#ⱸᛣ#⼗㴍⸜ᵤ#⤄ᇵᒨ##
Ⲃ#ᖥ㕆#⤲#㼕#↋#ྎ⸼#㺈⹜#
⸜ℳᵤ/#⤺ⴿⲂ✻#⚻㷸ヱ#Ỽ❘ⵟ1
y Do not place the projector in direct
sunlight or near heat sources such as
radiators, fires, stoves, etc
.
- This may result in fire.
y Do not place flammable materials
such as aerosols near the projector.
- This may result in fire.
y Do not allow children to cling to or
climb up to the projector.
- This may cause the projector to fall,
causing injury or death.
y Do not install the product in a place
with no ventilation (e.g., on a book-
shelf or in a closet) or on a carpet or
cushion.
- This may result in fire due to the
increase in internal temperature.
y Do not place the projector close to
sources of steam or oil such as a
humidifier or kitchen counter.
- This may result in fire or electric
shock.
y Do not place the projector where it
- This may result in fire.
y Do not use the projector in a damp
place such as a bathroom where it is
likely to get wet.
- This may result in fire or electric
shock.
y Do not allow a tablecloth or curtain to
block the air vent.
- This may result in fire due to the
increase in the internal temperature.
y Ensure good ventilation around the
projector. The distance between the
projector and the wall should be
at
.
- This will prevent fire due to the
increase in the internal temperature.
CAUTION
y When placing the projector on a table
or shelf, be careful not to put it near
the edge.
- The projector could fall due to bal- The projector could fall due to bal-The projector could fall due to bal-
ance problems, which may cause
personal injury or damage to the
product. Make sure to use the pro-
jector cabinet or stand that fits the
projector.
y When moving the projector
, make
sure to switch it off
and remove the
power plug and cords.
- The power cord may be damaged,
resulting in fire or electric shock.
y Do not place the projector on an
unstable or vibrating surface such as
a wobbly shelf or a slope.
- It may fall and cause injury.
y Be careful not to tip the projector over
the projector.
- This may cause personal injury or
damage to the projector.

8
SAFETY INSTRUCTIONS
Power
WARNING
y The grounding wire should be con-
nected.
- Ensure that you connect the ground-
ing cable to avoid electric shock.
If it is not possible to ground the unit,
separate circuit breaker.
Do not try to ground the projector
by connecting it to telephone wires,
lightning rods or gas pipes.
y The power plug should be inserted
fully into the power outlet.
- An unstable connection may cause
a fire.
y Do not place heavy objects on the
power cord.
- This may result in fire or electric
shock.
y Never touch the power plug with wet
hands.
- This may result in electric shock.
y Do not plug too many devices into
one multi-power outlet.
- This may result in fire due to the
power outlet overheating.
y Prevent dust from collecting on the
power plug pins or outlet.
- This may result in fire.
y To turn off the main power, remove
the power plug, which should be
positioned so it is easy to access for
operation.
CAUTION
y
- A damaged wire may create a fire
hazard.
y Ensure the power cord and plug are
not damaged, modified, severely
bent, twisted, pulled, sandwiched
or hot. Do not use the product if the
power outlet is loose.
- This may result in fire or electric shock.
y
devices.
-
The wire's sheath may melt, which
may result in fire or electric shock
.
y Place the projector where people will
not trip over or tread on the power
cord to protect the power cord and
plug from any damage.
- This may result in fire or electric shock.
y Do not turn the projector on or off
by
plugging in the power plug or unplug-
ging it from the power outlet.
(Do not use the power plug as a switch.)
- This may result in electric shock or
damage to the product.
y Do not insert a conductor into the other
side of the wall outlet while the power
plug is inserted into the wall outlet.
In addition, do not touch the power
plug immediately after it is disconnected
from the wall outlet.
- This may result in electric shock.
y Only use the official power cord pro-
vided by LG Electronics. Do not use
other power cords.
- This may result in fire or electric
shock.

9SAFETY INSTRUCTIONS
When in Use
WARNING
y Do not place anything containing
liquid on top of the projector such as
a vase, flower pot, cup, cosmetics, or
medicine; or ornaments, candles, etc.
- This may result in fire or electric
shock, or cause injury due to falling.
y In the event that there is a heavy
impact or the cabinet is damaged,
switch it off, unplug it from the power
outlet and contact an authorized ser-
vice
center
.
- This may result in electric shock.
y Do not insert pieces of metal such as
coins, hairpins or metal debris, nor
flammable materials such as paper or
matches into the projector.
- This is to prevent electric shock or fire.
y In the event that liquid or a foreign
object falls into the projector, switch it
off and unplug it from the power outlet
and contact our service center.
- This may result in fire or electric
shock.
y Make sure that a child does not swal-
low the batteries when you replace
the old remote control batteries with
of children.
- If a child swallows a battery, consult
a doctor immediately.
y Never open any cover on the projector.
-
There is a high risk of electric shock
.
y Do not look directly into the lens
when the projector is in use.
- The bright light may damage your
eyes.
y When the lamp is on or has just been
turned off, avoid touching the air vent
or lamp, because these will be very hot.
y If there is a gas leak in the room with
the projector, do not touch the projector
or power outlet. Open the windows
for ventilation.
- Sparks may cause fire or burns.
y Unplug the power cord from
the outlet
during a lightning storm.
- This will prevent shock or damage
to the projector.
y Do not use the projector near
electronic devices that generate a
strong magnetic field.
y Do not put the plastic package used
to pack the projector around your
head.
- This may cause suffocation.
y Do not keep your hand on the projector
for a long time when it is running.
y When you play a game by connecting
a game console to a projector, it is
recommended that you maintain
a
distance of more than four times the
diagonal length of the screen.
- Make sure that the connecting cable is
long enough.
Otherwise, the product
may fall causing
personal injury or
damage to the product.
y Do not place the projector or its
remote control with battery in
environment.
- This may result in fire.

:
SAFETY INSTRUCTIONS
CAUTION
y Do not place heavy objects on the
projector.
- It may fall down and cause personal
injury.
y Be careful not to allow any impact to
the lens during transport.
y Do not touch the lens of the projector.
- The lens may be damaged.
y Do not use any sharp tools on the
projector such as a knife or hammer,
because this may damage the casing.
y In the event that no image appears
on the screen or no sound is heard,
stop using the projector. Switch off the
projector, unplug it from the power out-
let
and contact our service center
.
- This may result in fire or electric shock.
y Do not drop anything onto
the projector or allow anything to
bang into the projector.
- This may cause damage to the projector
or personal injury.
y It is recommended that you maintain
a distance of more than 5 - 7 times
the diagonal length of the screen.
- If you watch the screen at a close
distance for a long time, your eye
sight may become worse.
y Do not block the light beam emitted
from the projector using a book or
other object.
beam may result in fire. In addition, the
lens may be overheated and damaged
by the reflected heat. Disable the AV
function to stop projection temporarily
or turn off the power.
y Do not start the projector with the
volume turned up high.
Cleaning
WARNING
y Do not spray the projector with
water when cleaning. Make sure water
does not flow into the projector
.
- This may result in fire or electric
shock.
y When there is smoke or a strange
smell coming out from the projector
or a foreign object falls into the pro-
jector, please switch it off and unplug
it from the power outlet and contact
our service center.
-
Otherwise, this may result in fire or
electric shock.
y Use air spray, a soft cloth or
a cotton swab moistened with a
lens cleaning chemical
or alcohol to
remove dust or stains on the front
projection lens.
CAUTION
y Contact your seller or our service
center once a year to clean the inter-
nal parts of the projector.
- If you do not clean the projector for
a long period of time, dust will
accumulate, which may result in fire
or damage to the projector.
y When cleaning plastic parts such as
the projector case,
unplug the power
first and wipe with a soft cloth.
Do not
spray with water or wipe with a wet
cloth. Never use glass cleaner, auto-
mobile or industrial shiner, abrasives,
can damage the projector.
- This can result in fire, electric
shock or cause damage to the product
(deformation and corrosion).

;SAFETY INSTRUCTIONS
y Remove the plug from the outlet
before cleaning the product.
- Otherwise, this may result in electric
shock.
Others
WARNING
y When you go out, place the projector
out of reach of animals, and remove
the power plug from the wall outlet.
- Using a damaged power cord may
result in short circuit or fire.
y Do not use the projector near high-
precision electronic devices or those
that transmit weak radio signal.
- This may affect the operation of the
product, causing an accident.
y Only a qualified technician can
disassemble or modify the projector.
For diagnosis, adjustment, or repair,
contact your seller or our service
center.
- This may result in fire or electric
shock.
y Do not stare directly into lens when in
operation, eye damage can occure.
y No user serviceable parts inside
shock and even electrocution. Please
see owner's manual for service
specifications.
y Proper ventilation required, do not
block airflow around unit. Doing
so can cause injury and internal
overheating.
y To prevent damage to lamp, unit must
minutes after power down to allow for
proper cool down (not applicable on
LED models).
y Do not touch the lens; doing so can
result in burns or damage to lens.
and immediately after use. Use
caution when handling unit, allowing
for proper cool down.
y Only use a grounded electrical outlet.
y Do not insert anything into or cover
- This may result in fire or electric
shock.
y Follow all maintenance guidelines
for optimal use; service only at an
authorized service center.
y Lamp contains mercury and as such
must be disposed of according to
local, state and federal laws (not
applicable on LED models).

<
SAFETY INSTRUCTIONS
CAUTION
y
ones.
- Burst or leaking batteries may result
in damage or injury.
y Be sure to unplug if the projector is not
to be used for a long
period
.
- Accumulated dust may result in fire or
electric shock
due to overheating, igni-
tion, or poor insulation.
y Only use the specified type of battery.
- Burst or leaking batteries may result in
damage or injury.
y Do not charge the battery using any
devices other than the one provided with
the product.
- This may result in damage to the
battery or fire.
y Dispose of used batteries properly.
-
correct method of disposal may vary
depending on your country or region.
Dispose of the battery pack
as instructed.
y Do not throw or disassemble the battery.
-
to damage to the battery.
y Always use batteries approved and
certified by LG Electronics.
- This will prevent damage or fire.
y Store batteries away from metallic
objects, such as keys and paper clips.
-
increase in temperature, resulting in
fire or burns.
y Do not store the batteries near any
heat source, such as a heater.
- This may result in fire or damage to
the product.
y Do not store batteries at temperatures
y
reach of children.
- This will prevent personal injury or
damage to the product.
y Make sure that the battery is installed
correctly.
y The battery contains lithium-ion, so it
must be handled with care.
y Make sure you use the same type of
batteries for replacement.
y Incorrect battery replacement may
cause fire.
Risk Group 2
CAUTION Possibly hazardous optical
radiation emitted from this product. Do
not
stare at operating lamp. May be
harmful to
the eye.

43 SAFETY INSTRUCTIONS
ANTENNA
Outdoor Antenna Grounding
y If an outdoor antenna is installed,
follow the precautions below. An
outdoor antenna system should not
be located in the vicinity of overhead
power lines or other electric light or
power circuits, or where it can come
in contact with such power lines or
circuits as death or serious injury can
occur. Be sure the antenna system
is grounded so as to provide some
protection against voltage surges and
built-up static charges. Section 810
of the National Electrical Code (NEC)
in the U.S.A. provides information
with respect to proper grounding of
the mast and supporting structure,
grounding of the lead-in wire to
an antenna discharge unit, size of
grounding conductors, location of
antenna discharge unit, connection
to grounding electrodes and
requirements for the grounding
electrode.
Antenna grounding according to the
National Electrical Code, ANSI/NFPA
70
Antenna Lead in Wire
Grounding Conductor
(NEC Section 810-21)
Antenna Discharge Unit
(NEC Section 810-20)
Power Service
GroundingElectrode
System (NEC Art 250,
Part H)
NEC: National Electrical Code
Ground Clamp
Electric Service
Equipment
Ground Clamp
IC (CANADA)
Industry Canada Statement:
This device complies with RSS-210 of
the Industry Canada Rules. Operation
is subject to the
following two conditions:
1) this device may not cause
interference and
2) this device must accept any
interference, including interference
that may cause undesired
operation
of the device.
Avis d’Industrie Canada :
Cet appareil est conforme à la norme
CNR-210 des règlements d’Industrie
Canada. Son fonctionnement
est sujet aux deux conditions
suivantes :
1) Cet appareil ne doit pas provoquer
d’interférences et
2) Cet appareil doit accepter toutes
les interférences, y compris
celles pouvant entraîner son
dysfonctionnement.
IC Radiation Exposure Statement:
This equipment complies with IC
radiation exposure limits set forth for
an uncontrolled environment.
NOTE: THE MANUFACTURER IS NOT
RESPONSIBLE FOR ANY RADIO
OR TV INTERFERENCE CAUSED BY
UNAUTHORIZED MODIFICATIONS
TO THIS EQUIPMENT. SUCH
MODIFICATIONS COULD VOID THE
USER’S AUTHORITY TO OPERATE
THE EQUIPMENT.
44
SAFETY INSTRUCTIONS
Avis d’Industrie Canada sur l’exposition
aux rayonnements
Cet appareil est conforme aux limites
d’exposition aux rayonnements
d’Industrie Canada pour un
environnement non contrôlé.
REMARQUE : LE FABRICANT
N’EST PAS RESPONSABLE DES
INTERFÉRENCES
RADIOÉLECTRIQUES CAUSÉES
PAR DES MODIFICATIONS NON
AUTORISÉES APPORTÉES À
CET APPAREIL. DE TELLES
MODIFICATIONS POURRAIT
ANNULER L’AUTORISATION
ACCORDÉE À L’UTILISATEUR DE
FAIRE FONCTIONNER
L’APPAREIL.
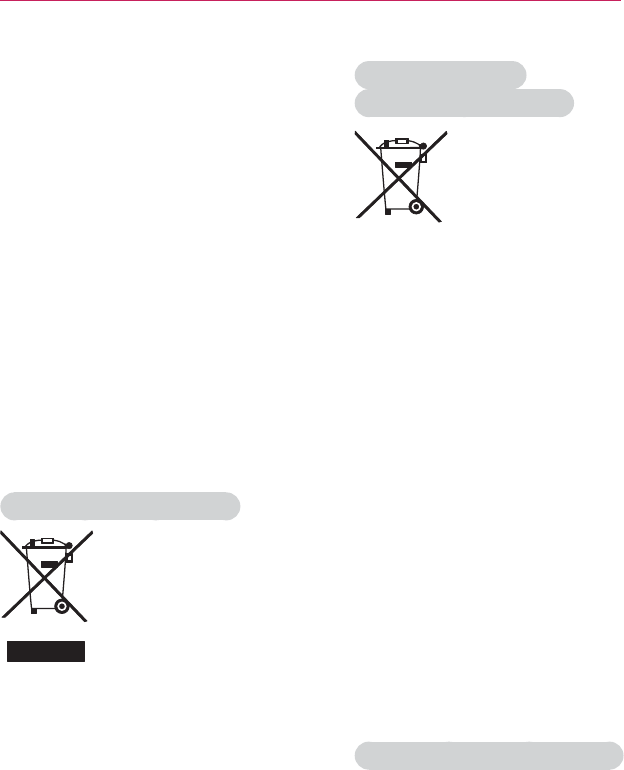
Disposal of your old appliance
1. When this crossed-out wheeled bin
symbol is attached to a product it means
the product is covered by the European
Directive 2002/96/EC.
2. All electrical and electronic products
should be disposed of separately from the
municipal waste stream through designated
collection facilities appointed by your
government or your local authorities.
3. The correct disposal of your old appliance
will help prevent potential negative
consequences for the environment and
human health.
4. For more detailed information about
disposal of your old appliance, please
contact your city office, waste disposal
service or the shop where you purchased
the product.
Disposal of waste
batteries/accumulators
1. When this crossed-out wheeled bin symbol
is attached to batteries/accumulators of
Your product it means they are covered by
European Directive 2006/66/EC.
2. This symbol may be combined with
chemical symbols for mercury(Hg),
cadmium(Cd) or lead(Pb) if the battery
Contains more that 0.0005 % of mercury,
0.002 % of cadmium or 0.004 % of lead.
3. All batteries/accumulators should be
disposed separately from the municipal
waste stream via designated collection
facilities appointed by the government or
the local authorities.
4. The correct disposal of Your old batteries/
accumulators will help to prevent
potential negative consequences for the
environment, animal and human health.
5. For more detailed information about
disposal of Your old batteries/accumulators,
please contact Your city office, waste
disposal service or the shop where You
purchased the product.
For USA
NOTE TO CABLE/TV INSTALLER
This reminder is provided to call the CATV
system installer’s attention to Article
820 - 40 of the National Electric Code
(U.S.A.). The code provides guidelines for
proper grounding and, in particular, specifies
that the cable ground shall be connected
to the grounding system of the building,
as close to the point of the cable entry as
practical.

45 CONTENTS
Additional Options 34
-Adjusting Aspect Ratio 34
-
-Changing input device 35
-
Using the Quick Menu 37
To set Sound 38
-
-Using the Multi Audio 39
ENTERTAINMENT 41
To use Smart features 41
-
-To use MY APPS 42
-To edit items in MY APPS 42
To connect network 43
-One-click network connection 43
-To connect to a network through Set
-To use the Wi-Fi Direct function 44
-To use the Miracast™/Intel’s WiDi
function 44
-Tips for Network Settings 45
Tag On 46
-What is Tag On? 46
-
-To use the Tag On 47
SMARTSHARE 48
Before Using 48
-
-
To use SmartShare™ 49
-
-Viewing the Photos 52
-Listening to Music 53
-Viewing Files 54
-To set SmartShare™ related functions 55
To use the LG Cloud 58
-
-To use LG Cloud 59
LICENSE 2
SAFETY INSTRUCTIONS 3
PREPARATION 15
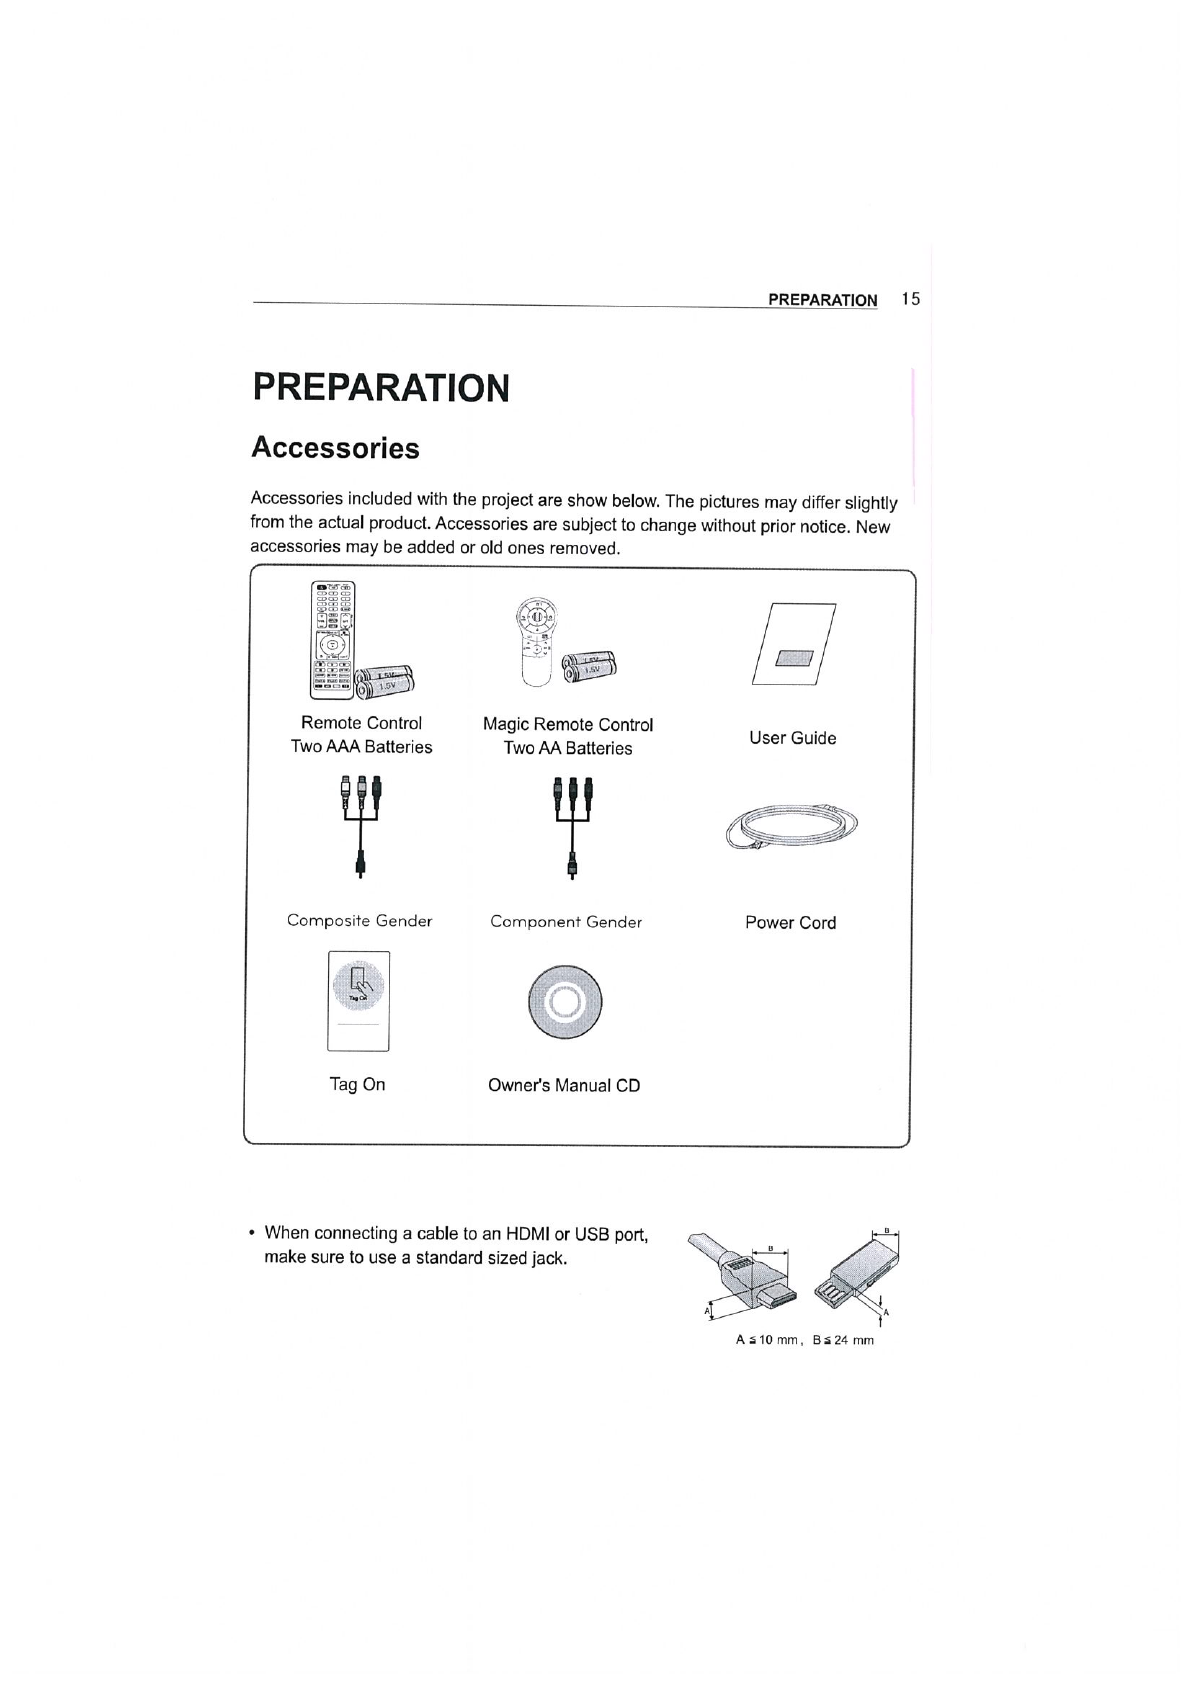
Accessories 15
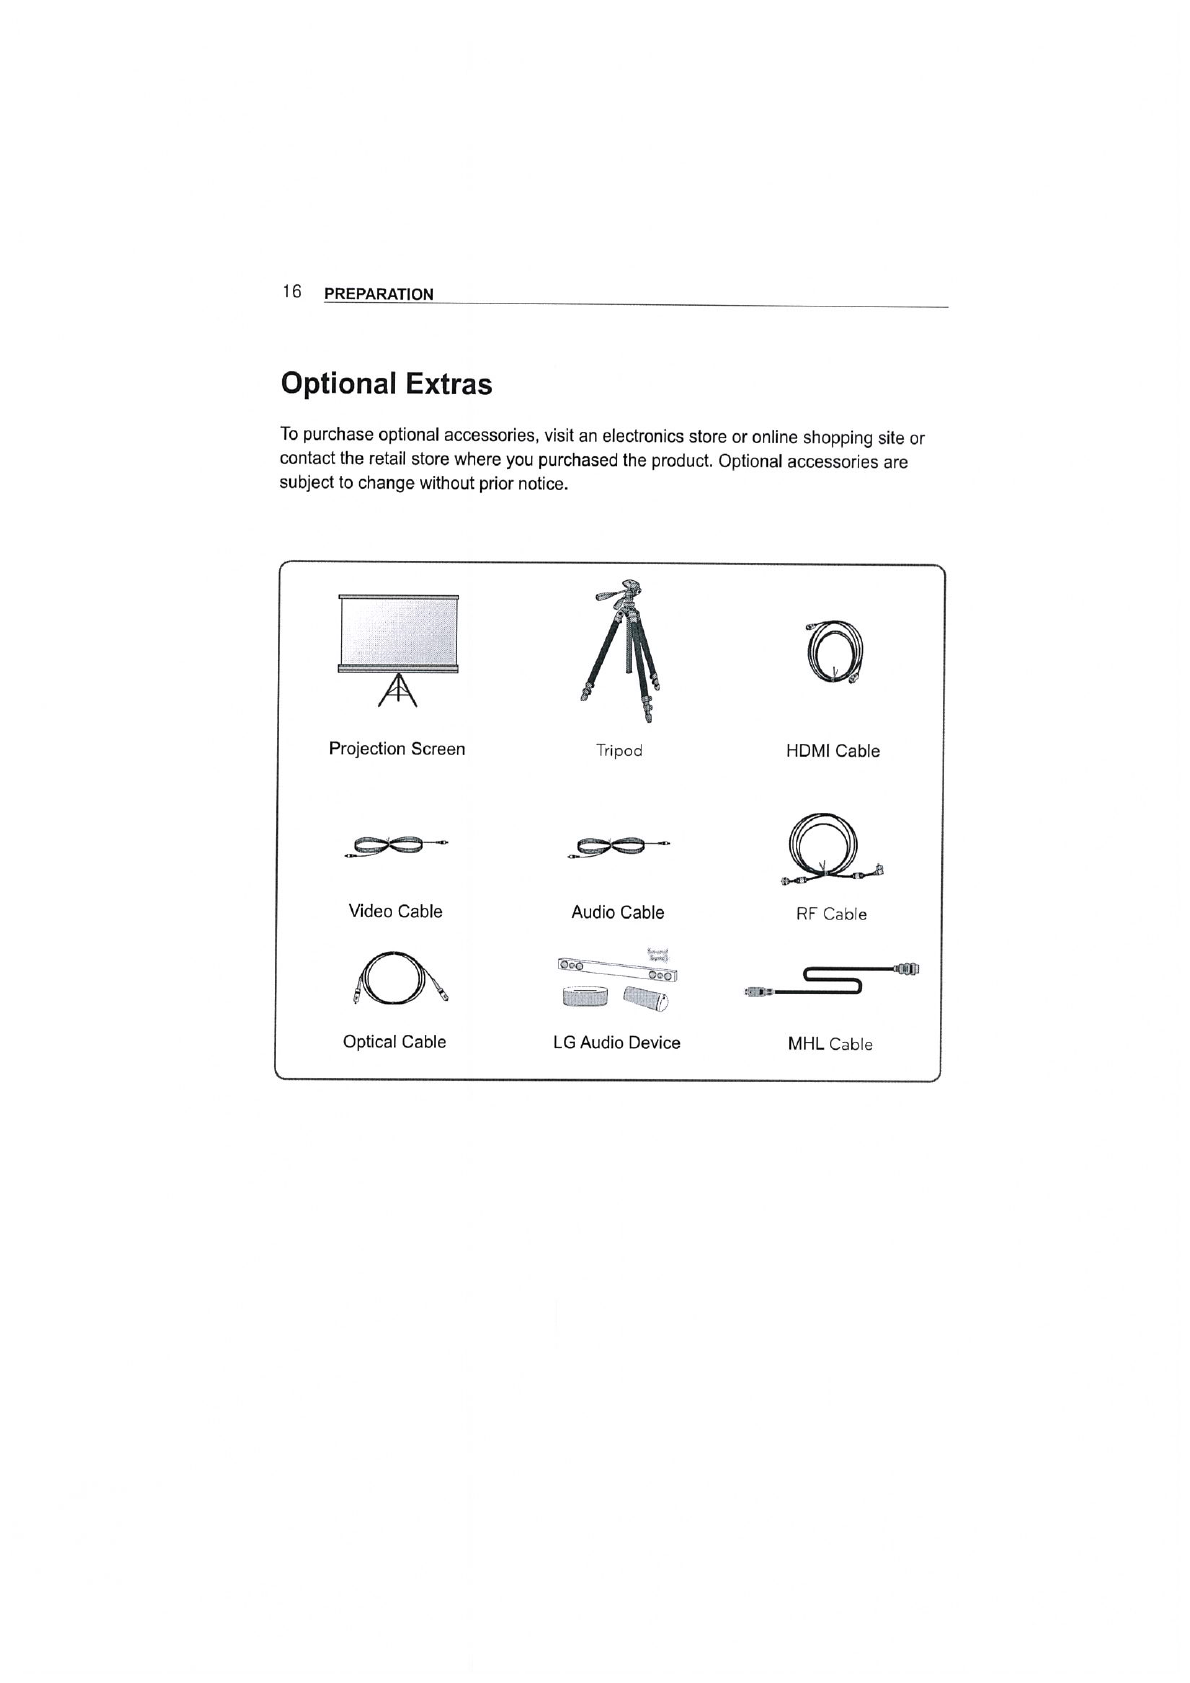
Optional Extras 16
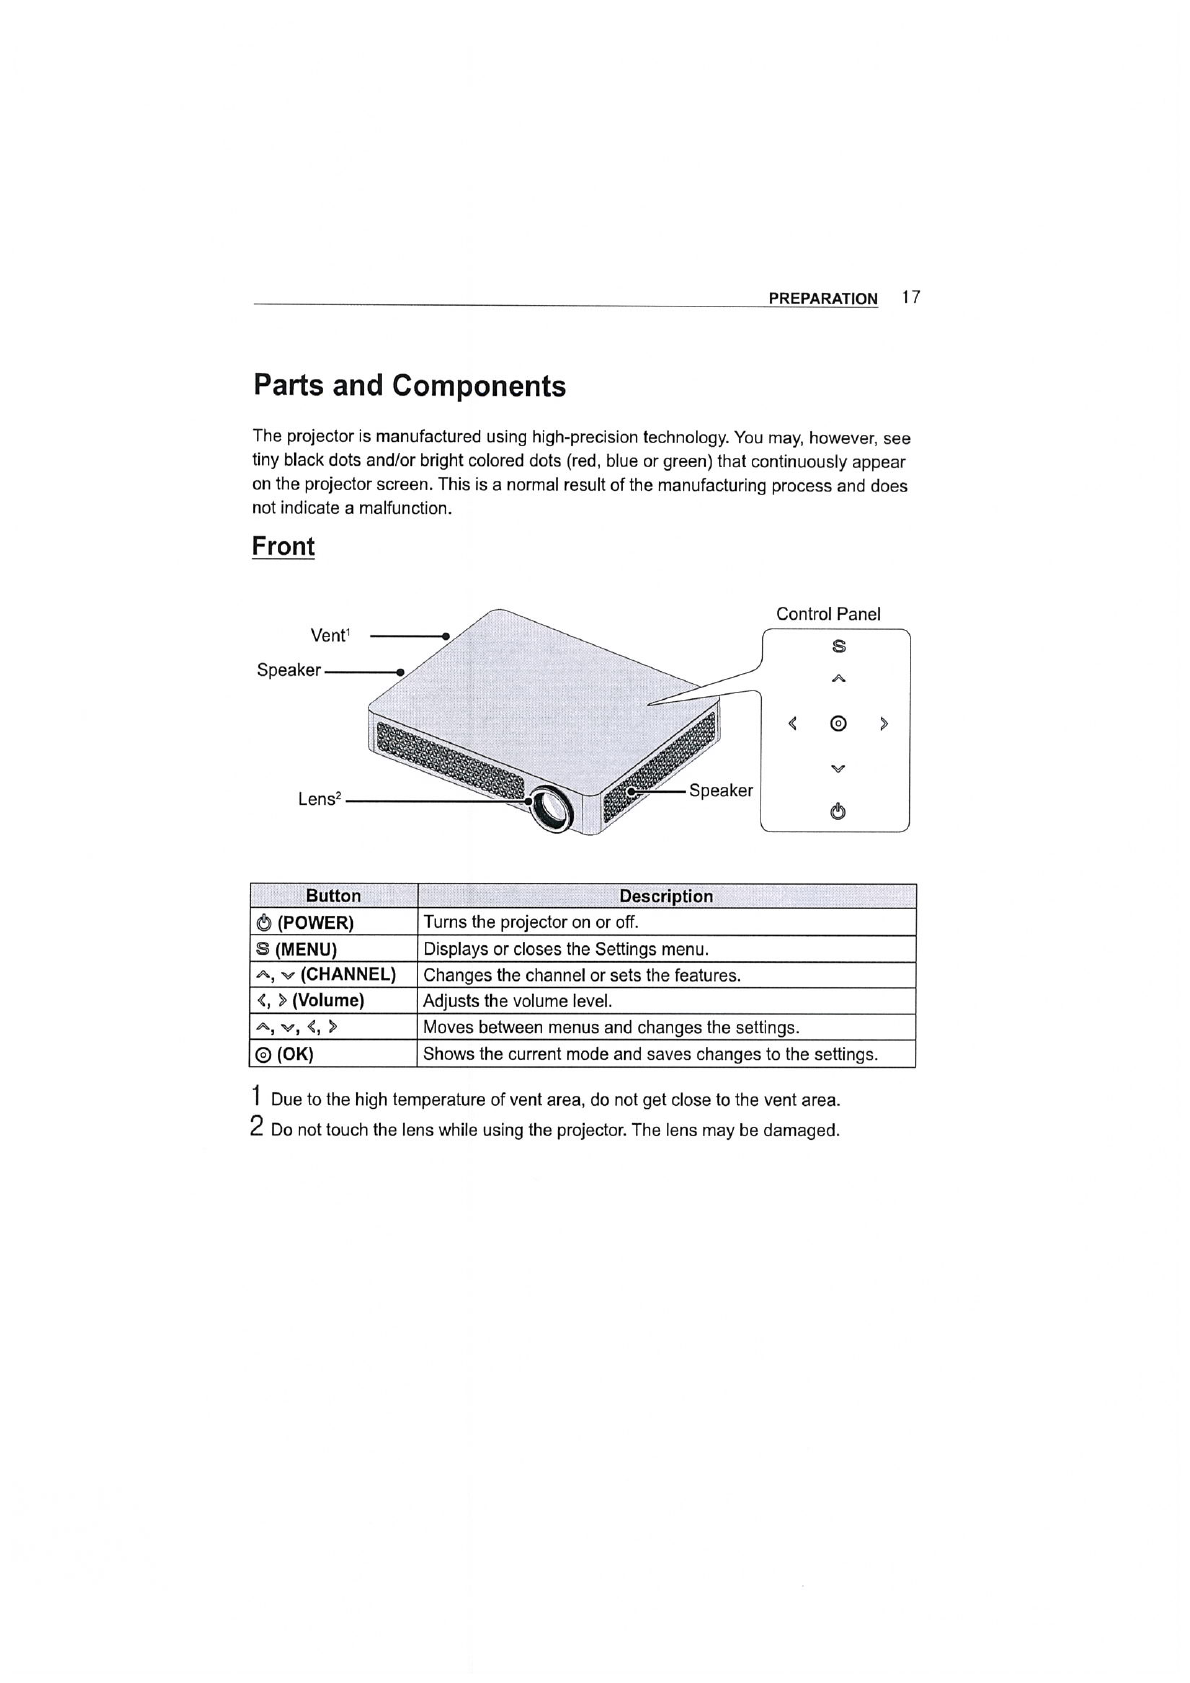
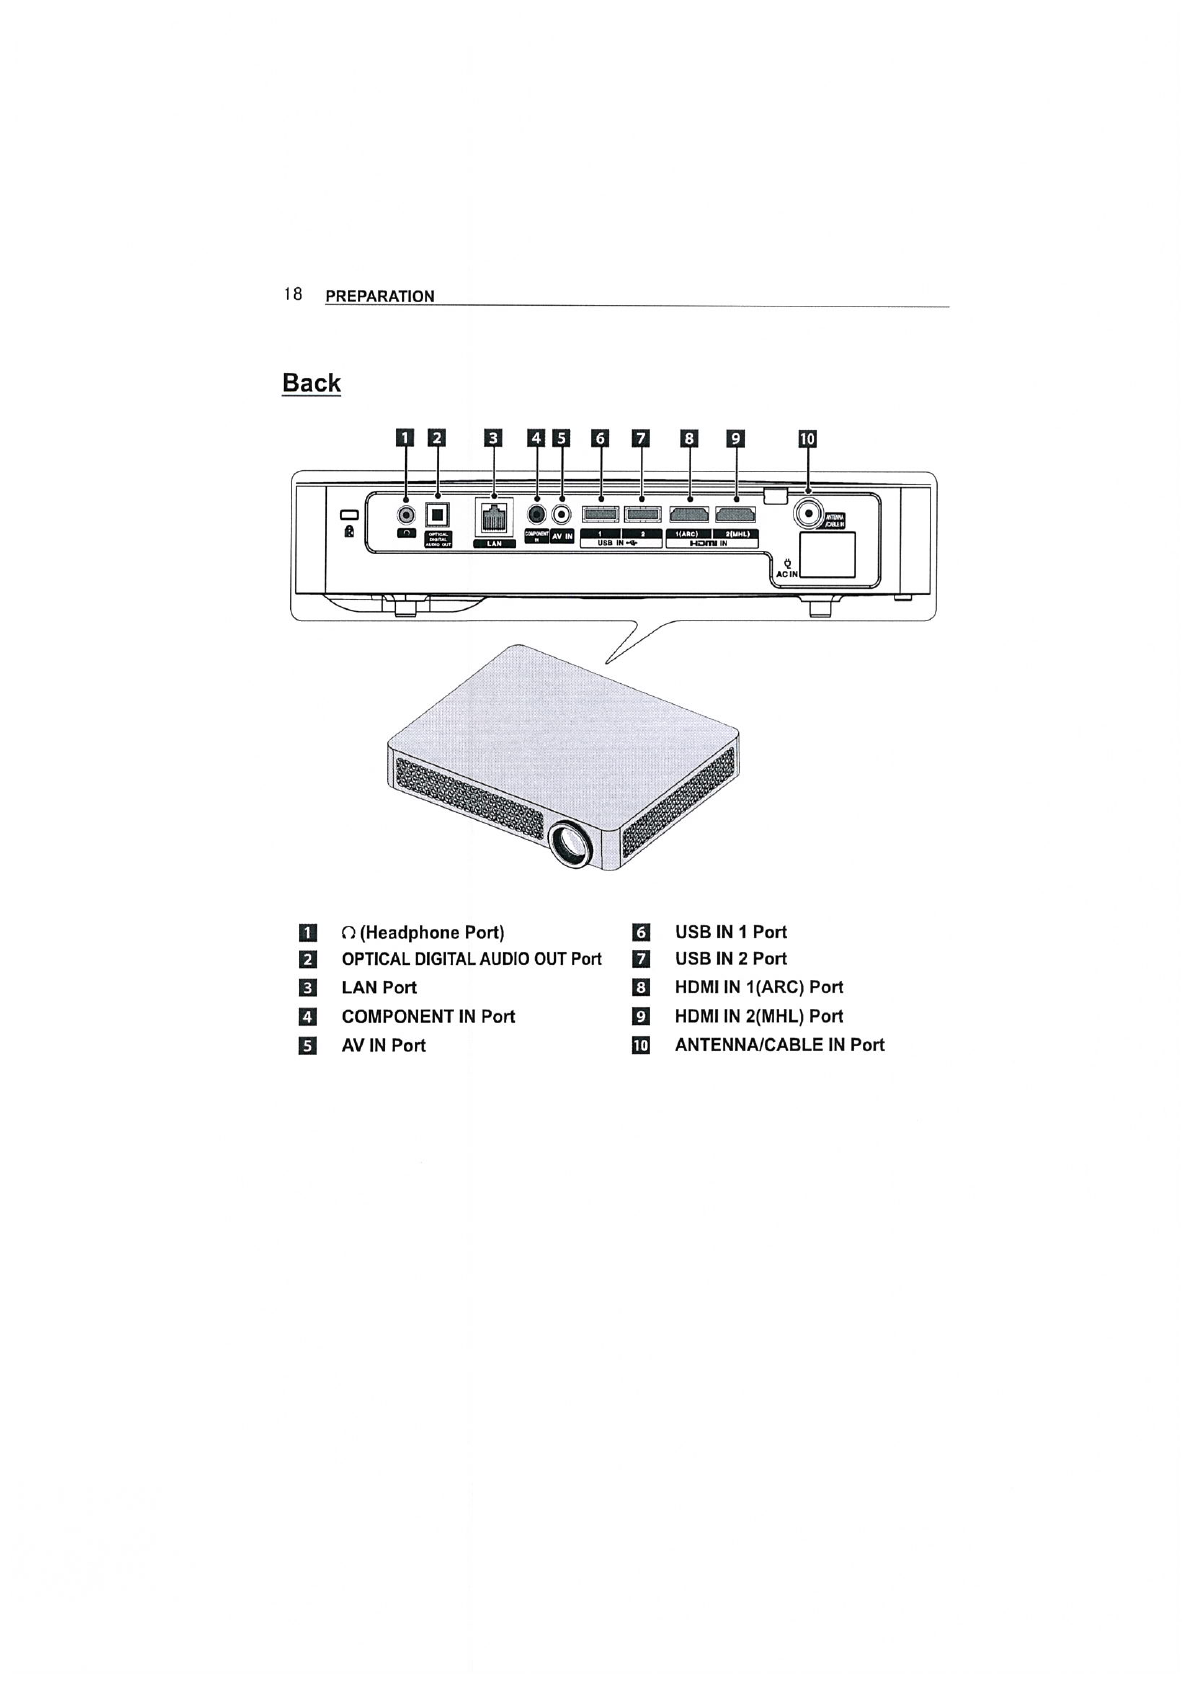
Parts and Components 17
-
-
Installation 19
-
-
-
-
REMOTE CONTROL 22
MAGIC REMOTE CONTROL 24
-To register the Magic Remote Control 26
-To re-register the Magic Remote Control
26
-Using the Magic Remote Control 27
-To use the pattern gesture function 27
USING THE PROJECTOR 28
Connecting to an Antenna or Cable 28
Watching Projector 29
-Initial Setup 29
-Focus and Position of the Screen Image
-
To set channel 32
-To view programme information 32
-To set favourite programmes 32
-To use Favourite 33
-TV Guide 33
CONTENTS

46
CONTENTS
To connect DLNA 60
-To connect a DLNA-authenticated
-To connect DLNA DMR (Digital Media
-To connect DLNA DMP (Digital Media
-
To use Premium service 62
-To use paid content 62
-To reset Premium 63
To use search function 64
To use the voice recognition function 64
-Using this function through search 64
-Using this function on the Internet 65
-Using this function on the Social Center
65
To use Voice Mate function 66
-What is Voice Mate? 66
-
-What are other functions of Voice Mate?
67
What is On Now? 68
-
To use internet 70
To use Social Center 71
Frequently Asked Questions for Smart
Projector 72
USING ADVANCED FUNCTIONS 76
To use Screen Remote 76
-To use Screen Remote 76
-To control a device connected to the TV
using the Screen Remote 76
To use the Universal Control function 77
What is Time Machine II? 78
To record immediately 79
-To use the immediate rec function 79
-
-
-
-
-
USB For Time Machine II 82
-To connect a USB device for Time
To use Timeshift 82
-What is TimeShift (real-time playback)?
-To use the TimeShift (real-time playback)
To set the Time Machine II functions 84
To use Time Machine cloud 84
-
To take advantage of Time Machine 85
-To use Time Machine II in various ways
To control a projector using a smartphone
85
To use a USB input device on a projector
86
-
-
-
CUSTOMIZING SETTINGS 87
SETTINGS 87
PICTURE Settings 88
SOUND Settings 92
CHANNEL Settings 95
TIME Settings 96
LOCK Settings 97
OPTION Settings 98
NETWORK Settings 101
SUPPORT 102

47 CONTENTS
CONNECTING DEVICES 103
Connecting to HD Receiver, DVD, or VCR
Player, External Devices 104
-
-
-
Connecting to Headphones 106
Connecting a digital amp 107
Connecting to PC and Laptop 108
-
Using the mirroring function of a mobile
phone 109
-
MAINTENANCE 110
Cleaning 110
-
-
INFORMATION 111
To update TV software 111
Before reporting a problem, check the
following: 112
-
-
-
-
-Problems replaying movies in My Media
WIRELESS SPECIFICATIONS 116
Wireless LAN module(WN8122E1)
Bluetooth module (BM-LDS401)
SPECIFICATIONS 117

4<
PREPARATION
Installation
Installation Precautions
y Place the projector in a well-ventilated
environment.
- To prevent internal heat build-up,
install the projector in a well-
ventilated place.
Do not place anything near the
projector as this may block its air
vents. If the air vents are blocked,
the internal temperature will
increase.
- Do not place the projector on a
carpet or rug. If the vent is on the
bottom, use the projector on a solid
level surface
and ensure the vent
is
not blocked.
- Be sure to prevent foreign objects
such as paper debris from entering
the projector.
-
more) around the projector.
y Do not place the projector in a hot
or humid environment.
- Do not place the projector in a hot,
cold, or humid environment.
y Do not place the projector in a place
where it will easily attract dust.
- This may result in fire.
y Never open any cover on the
projector. There is a high risk of
electric shock.
y The projector is manufactured using
high-precision technology. You may,
however, see tiny black dots and/
or bright colored dots (red, blue or
green) that continuously appear on
the projector screen. This is a normal
result of the manufacturing process
and does not indicate a malfunction.
y The remote control may not work
in an environment where a lamp
equipped with electronic ballasts or
a three-wavelength fluorescent lamp
is installed. Replace the lamp with an
international standard lamp for the
remote control to work normally.

59 MAGIC REMOTE CONTROL
To register the Magic Remote Control
Register Magic Remote Control as follows before use.
4 button while
pointing the remote control at the projector.
5 The remote control is automatically registered and the registration completion
message appears on the projector screen.
* If you failed to register the Magic Remote Control, turn off the projector and try again.
To re-register the Magic Remote Control
4 Press the SMART and ⹜ buttons together for about 5 seconds.
5 Press the button towards the projector to re-register the Magic Remote Control.
* Press the SMART and ⹜
the Magic Remote Control.
* Press the ⹜
seconds to reset and re-register it.

5:
MAGIC REMOTE CONTROL
Using the Magic Remote Control
4 Shake the Magic remote control lightly when there is no pointer
displayed on the screen. A pointer will be displayed on the
screen.
- The pointer disappears if the remote control is not used for a
certain period of time.
5 When you move the pointer signal transmitter up/down/left/right
while pointing it toward the projector, the pointer moves.
- If the pointer is not working properly, do not move the Magic
6 If you press the Navigation button while moving the pointer on
the screen, the pointer disappears, and the Magic remote control
works as a common remote control.
7
Remote Control from greater distances or when obstructions
block the sight line may cause malfunctions.
8 Electronic devices nearby may cause communication
interference. Devices such as microwave ovens and wireless
Remote Control and may cause interference.
9 Take care not to bang it against other hard objects such as
To use the pattern gesture function
Press the Wheel (OK) button with the normal video screen on and draw a pattern
toward the screen.
Item Description
Previous channel: Moves back to the previous channel.
Recent list: Shows channels recently watched.
Shows channel lists which be related to pattern. Choose the channel.
*It may not work when certain windows are open.
5<
Using the PROJECTOR
Watching Projector
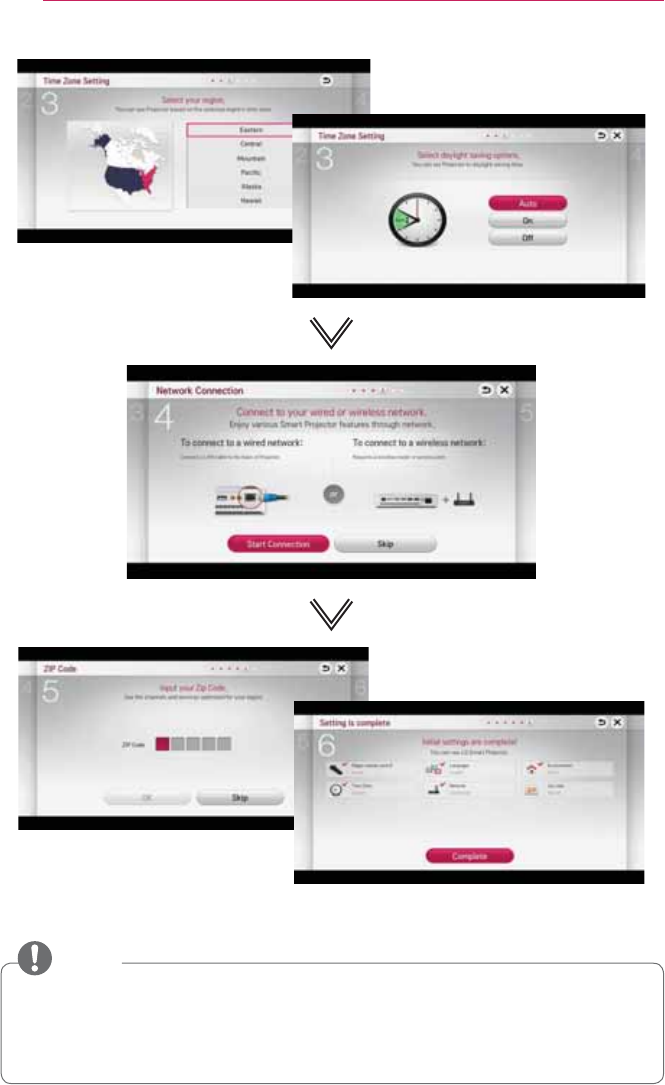
Initial Setup
understand how to operate the product and may look different from the actual screen.
4 Connect the power cord correctly.
5 After waiting for a moment, press the POWER button on the remote control or the
control panel.
6
easily.
* Store mode is used when displaying the product in-store. The picture mode is
automatically reset after a certain period of time. You can select Home to use the
product at home.
63 Using the PROJECTOR
* The initial settings are completed when you select the settings above.
NOTE
y For Auto Tuning while using the projector, go to Quick Menu and select Auto
Tuning.
y To change the mode while using the projector, go to and
select Mode Setting.
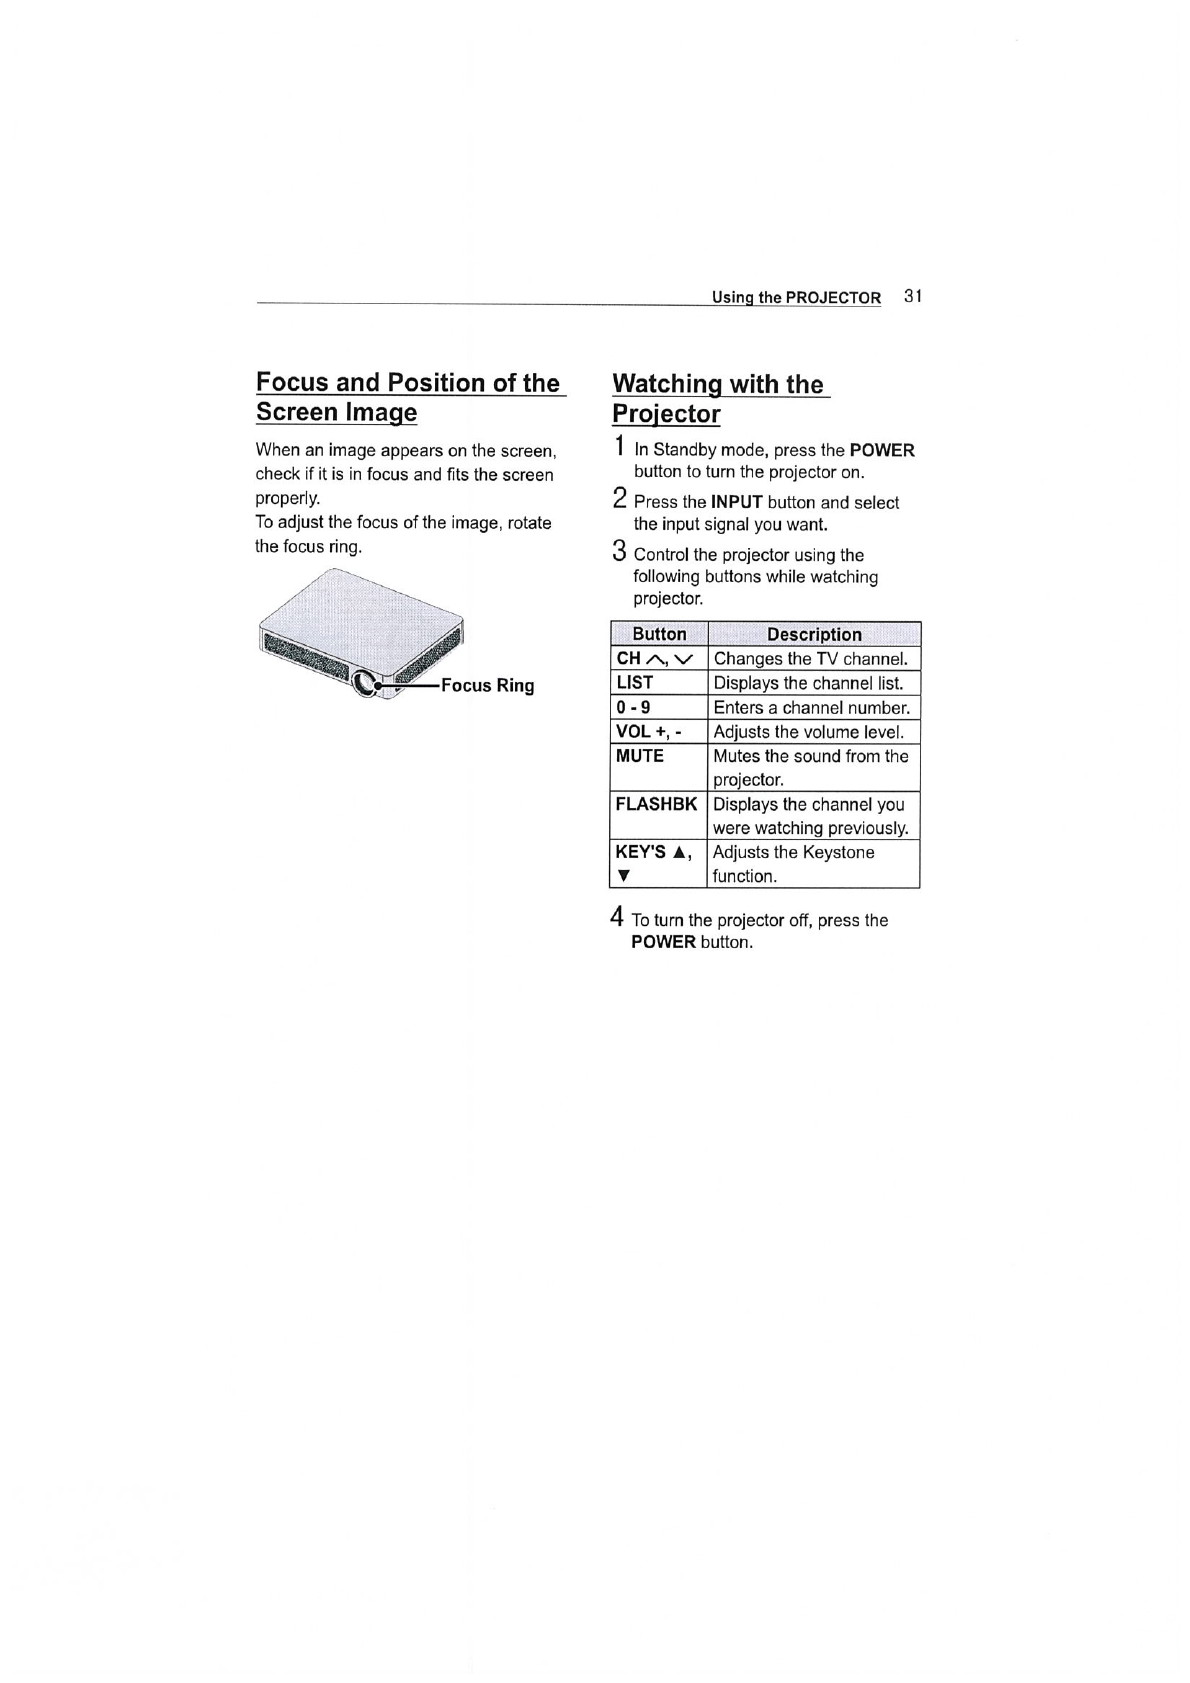

65 Using the PROJECTOR
To set channel
Displays information on current programme or current time, etc.
Image shown may differ from your projector.
To view programme information
4 Move the pointer of the Magic remote control to the top of the projector screen.
5 Click the activated channel banner area.
6 The programme details will be displayed at the bottom of the projector screen.
❶
❷
Description
Current time
Programme name/ Detail information on programme (for digital broadcast)
To set favourite programmes
Select SMART , you can set up your
favorite channels.
4 Move to the desired programme and press Wheel(OK) button. Programme is
selected.
5 Press Set as Favorite.
6 Select the desired Favorite Ch. Group.
7 Select OK. Favorite Ch. is set.
66
Using the PROJECTOR
To use Favourite
y Select SMART to display the channel list. Selects the desired preset
favourite programme from Favourite List A to D.
TV Guide
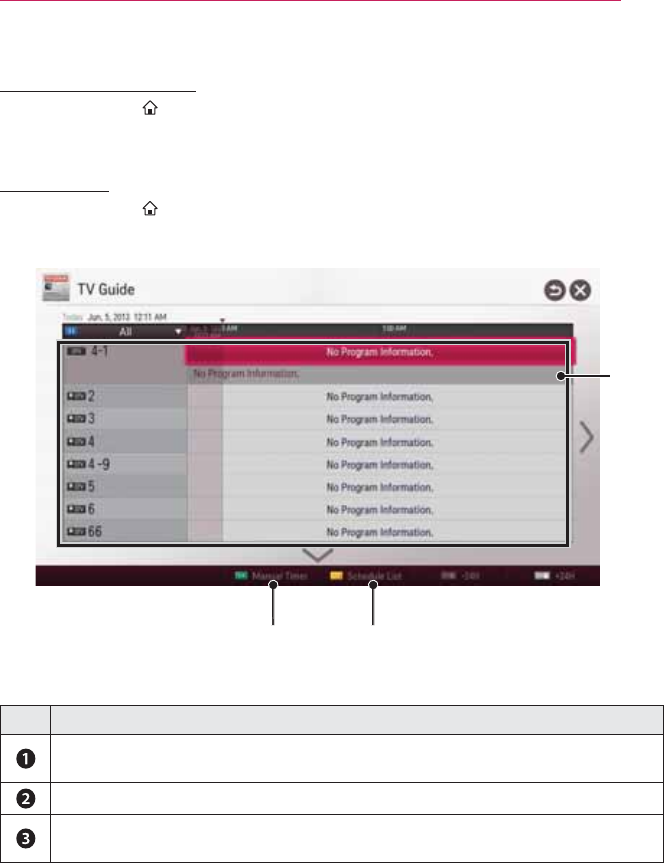
y Select SMART to see program listings for each channel. Obtains
programme information and schedules viewing / recording. (In Digital Mode Only)
❷ ❸
❶
Description
Press Wheel(OK) button after moving to a programme of your choice to view
or view / record.
After viewing the schedule list, makes revisions or deletions.
Makes schedule reservation by selecting date / time / programme. Makes
repeat schedule reservation.
67 Using the PROJECTOR
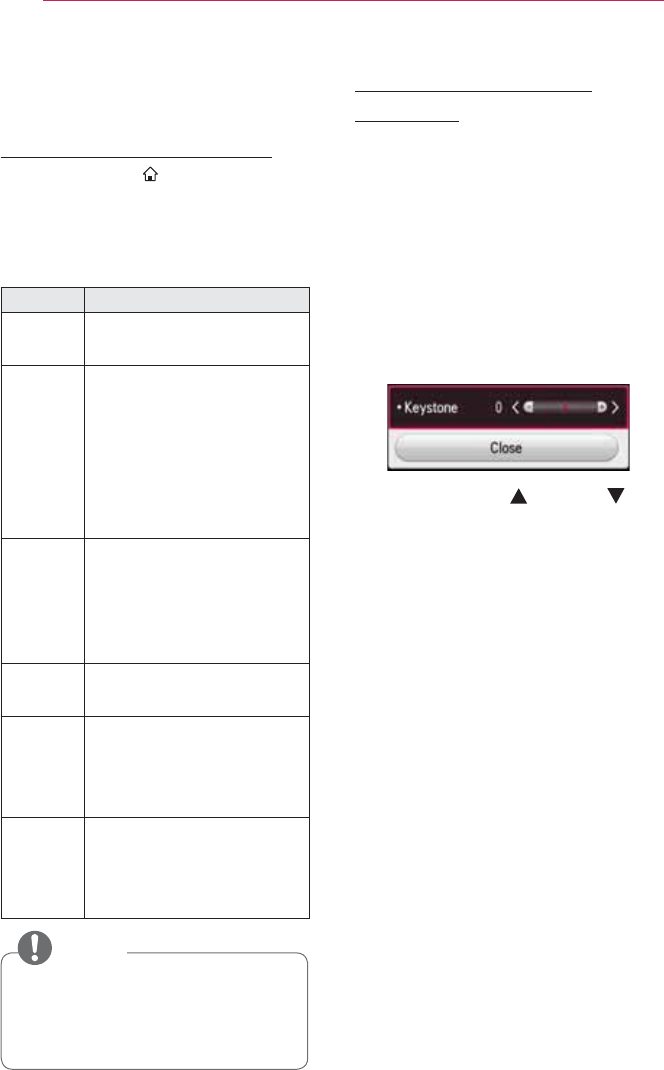
Using the Keystone
Function
To prevent the screen image from
becoming trapezoidal, Keystone adjusts
the top and bottom width of the image
if the projector is not set up at a right
angle to the screen.
Because the Keystone function may
cause inferior screen image quality, use
this function only when it is not possible
to set up the projector at an optimal
angle.
4 Press the KEY'S or KEY'S
button to adjust the picture.
y Keystone#fdq#eh#dgmxvwhg#
iurp#-40#wr#401
5 Press the OK button when done.
Additional Options
Adjusting Aspect Ratio
y Select SMART
to change
the aspect ratio.
y You can also use the Q.MENU,
SETTINGS or RATIO button.
Menu Description
16:9
screen width.
Just
Scan
Displays video images in
the original size without
removing parts of the edge
of the image.
y
Just
Scan is available.
Set By
Program
When your projector
receives a wide screen
signal it will automatically
change to the picture format
broadcasted.
4:3 Resizes images to the
previous standard 4:3.
Zoom
screen width. The top and
bottom parts of the image
may be cut off.
Cinema
Zoom
Choose Cinema Zoom
when you want to enlarge
the picture in correct
proportion.
NOTE
y Available picture size may differ
depending on the input signal.
y
Set SIMPLINK
SIMPLINK Setting
68
Using the PROJECTOR
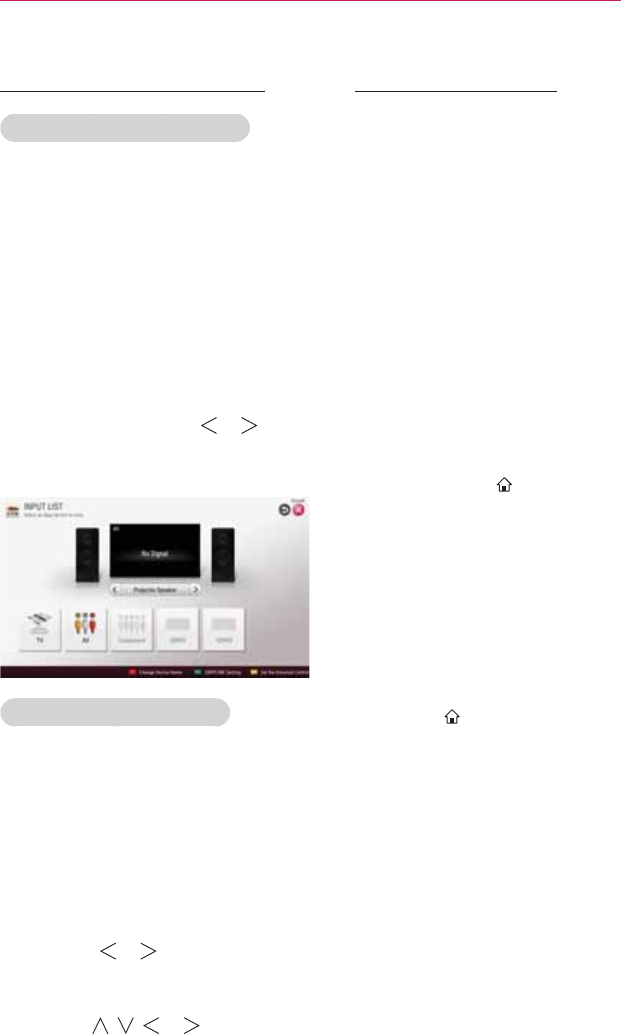
Changing input device
To select an external input
y Select SMARTINPUT LIST or
press the INPUT button on the remote
control to display the input selection
screen.
- Connected inputs are displayed first.
AV is always activated.
y Select an input signal using the
remote control's INPUT button to
connect the projector to the desired
input. You can use the or
button to switch between all the input
modes.
Selecting an Input Label
Displays which devices are connected to
which input ports.
4 Select
or press the INPUT button on the
remote control to display the input
selection screen.
5 Press the red button.
6 Press the or button to go to
the desired input and press the OK
button.
7 User the , , or button to
select a device name.
To use SIMPLINK
you to control and manage various
multimedia devices conveniently using
the projector remote control only via the
4 Connect the projector's HDMI IN
cable. For home theater units with
terminals as above and use an
optical cable to connect Optical
Digital Audio Out from the projector
to Optical Digital Audio In of the
5 Select SMART .
6 Select SIMPLINK Setting on
setup window appears.
7 SIMPLINK Setting to On in
8
9 Select the device to control from
SMART .

69 Using the PROJECTOR
NOTE
y This function only works on devices
).
y
cable (with CEC, or Consumer
Electronics Control, feature added).
y Turn on or select the media of a
device with home theatre features to
Speaker.
y Connect with an Optical cable (sold
y
stop.
y Use of a third-party device with
malfunctions.
Explanation on SIMPLINK features
Menu Description
Direct Play Plays the multimedia
device on the projector
instantly.
Select
multimedia
device.
Selects the desired
menu to control it from
the projector screen
instantly.
Disc
playback
Manages the multimedia
device with the projector
remote control.
Power off
all devices
If the Auto Power
function is set to On in
turning the projector off
will turn the power off on
devices.
Sync
Power on
If the Auto Power
function is set to On in
device will turn the
projector on.
Speaker Selects speaker either
on the home theatre unit
or the projector.

6:
Using the PROJECTOR
Using the Quick Menu
You can customize frequently used
menus.
4 Press the MY APPS button to select
the Quick Menu.
Or press the SMART button and
select Quick Menu.
5 Press the or button to select a
menu and press OK.
Menu Description
Aspect
Ratio
Resizes the picture.
Picture
Mode
Changes the picture mode.
Sound
Mode
Sets the sound mode.
Multi
Audio
Sets MONO or STEREO,
or a language for a bilingual
broadcast.
Sleep
Timer
Sets the projector to be
time.
Energy
Saving
Adjusts the brightness.
Menu Description
AV Mode Sets the genre.
Mode
Off You can watch
using the
settings in the
video/audio
menu.
Cinema Change to
optimal video/
audio settings
for movies.
Game Change to
optimal video/
audio settings
for games.
Del/Add Can delete or add
channels.
Auto
Tuning
Scans the channels
automatically.
USB
Device
Allows you to remove a
connected USB device in
a safe manner.(Displayed
only when a USB device is
connected.)
6 Press the , , or button to
scroll through the following menus.

6; Using the PROJECTOR
To set Sound
To set sound output
To use projector’s speakers
Sound is output through the projector
speaker.
y SMART
To use External Speaker
Sound is output through the speaker
connected to the optical port.
y Select SMART
Speaker (Optical/HDMI ARC) to set
up as follows:
Menu Description
ARC
Mode
can be connected via
audio cable to output
SPDIF. It interfaces with
that supports ARC (Audio
Return Channel), connect
it to the HDMI IN 1(ARC)
port.
Digital
Sound
Out
Sets up Digital Sound
Output.
y SMART
Menu Description
Off Even when the connected
audio device is turned
on, audio output is not
automatically processed
device's speakers.
On
audio device is turned on,
audio output is automatically
processed through the
speakers.
NOTE
y Connect to ARC-only terminal when
y
y Use of a third-party device with
an ARC function may cause
malfunctions.
y SMART
Sound Out
Item Sound Input
Digital Sound
Out
Auto MPEG PCM
Dolby Digital Dolby Digital
Dolby Digital
Plus
Dolby Digital
Dolby Digital
PCM All PCM

6<
Using the PROJECTOR
To connect and use LG audio device
LG audio device allows you to enjoy rich
powerful sound easily.
y Wired Connection:
SMART
Connect LG audio device with the
logo to the OPTICAL DIGITAL
AUDIO OUT port.
y Wireless Connection:
SMART
LG audio device with the logo
can be connected wirelessly.
NOTE
y You can use the projector remote
control to adjust the volume of the
connected device.
y For wireless connection, if the device
fails to connect. Check the device
power to connect and if the LG
Audio device is in a proper operating
condition.
y If you select LG Sound Sync
(Wireless), devices available for
connection are searched and one of
searched devices is automatically
connected. When a device is
connected, its name is shown.
y If two or more devices are detected,
the first detected device is connected
first. To view more detected devices to
connect, press the Show More button.
y If LG Sound Sync (Wireless) is
being selected and you turn on the
projector, it search and try to connect
the device which recently connected.
Using the Multi Audio
Multi Audio means stereo and multiple
language broadcast from the channel
provider.
y SMART
Audio
In the case of digital broadcast
Multiple languages can be selected
depending on the multi-language signals
from the TV station.
y For default language, select at
SMART
NOTE
y Some Multi Audio channels provide
the Descriptive Video Service (DVS)
for visually impaired viewers who
access voice information only. Select
listen to occasional prompts on the
screen. To not use DVS, select Main
sound. (Only a few digital channels
support DVS.)

73 Using the PROJECTOR
In the case of analog broadcast
Item Description
MONO Left and right speakers
produce sound, and the
sound model is mono.
Select this menu to
listen in MONO mode
regardless of broadcast
state. This can be set
for a stereo broadcast
signal. Select MONO
in poor reception areas
(e.g., areas with weak or
erratic signals) or when
multi audio reception is
not clear.
STEREO The sound mode is in
stereo when the sound
comes out of both left
and right speakers.
Main
language/
Sub
language
If the station broadcasts
a multi-language signal,
different languages may
be selected.
Select the Main
language to listen in
74
ENTERTAINMENT
ENTERTAINMENT
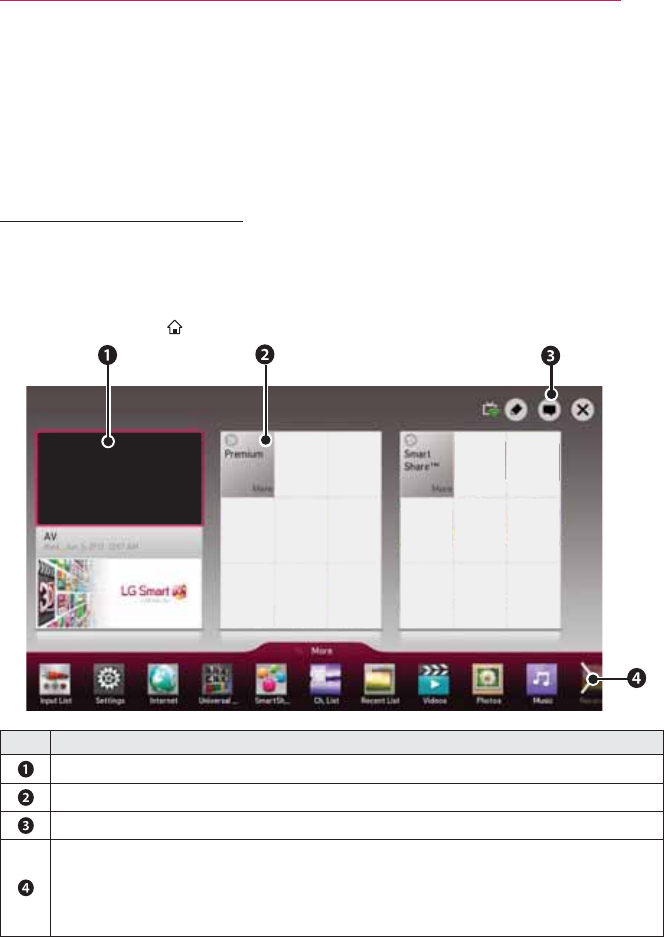
To use Smart features
To use Home Screen
With all Smart projector features on one screen, everyone can access a wealth of
content and applications conveniently via the quick and easy-to-use menu, arranged by
themes such as Live TV, Card, MY APPS, etc.
y Press the SMART button on the remote control.
Movie Weather
News Sports UCC
Picture Map Game
Description
Displays the screen you are currently watching.
Displays the premium menu.
Login button
Displays the list of my apps.
Select More
Select More to check pre-installed and downloaded apps. Select an app to
use.
75 ENTERTAINMENT
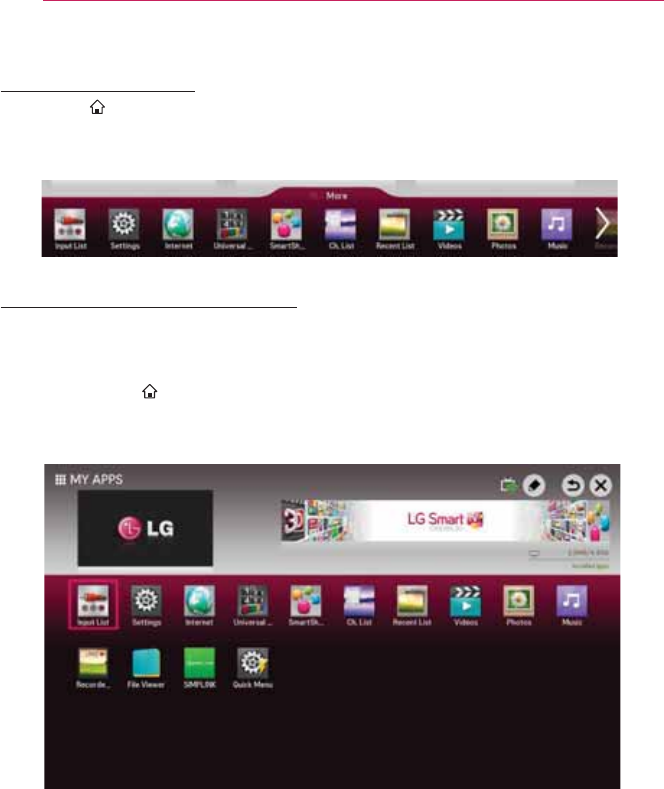
To use MY APPS
y SMART
y Select More at the bottom of the home screen. Select More to check apps pre-
installed apps and apps you have downloaded.
To edit items in MY APPS
On the MY APPS page, select Edit at the top of the screen to move or delete apps.
Please note that system apps can be moved, but cannot be deleted.
y Select SMART .
y Changes orders / deletes items by dragging the app icons if your device has a Magic
Remote Control.

76
ENTERTAINMENT
To connect network
A wireless or wired network connection
is required to use Smart features.
When connected to the network, you
can use Premium content, LG Smart
World, DLNA and more.
One-click network
connection
Connects easily to a wired/wireless
network.
y SMART
to connect to an available network
automatically. Follow the prompts on
the projector.
To connect to a network
through Set Expert
For use in special circumstances such
is used).
y Select SMART
.
4 Select a network connection, either
Wired or Wireless.
5 When connecting via Wi-Fi, use
the one of the following network
connection methods.
Item Description
AP List Connects to the network
selected from the AP List.
Enter the
SSID
Connects to the wireless
AP typed in.
WPS-
PBC
Connects easily when the
button of a wireless AP
supporting PBC is pressed.
WPS-PIN Connects easily when the
PIN of the wireless AP
that you wish to connect
to is entered in to the AP
website.

77 ENTERTAINMENT
To use the Wi-Fi Direct
function
Wi-Fi Direct is a function that allows your
projector to connect with a Wi-Fi Direct
device without Internet connection. With
stored on a device connected via Wi-Fi
Direct.
y Select SMART
.
4 Set Wi-Fi Direct to On. (If you do not
use it, please change it to Off.)
5 Enable the Wi-Fi Direct settings on the
device that you want to connect to.
6 A list of devices that can be
connected to the projector is
displayed.
7 Select a device to connect.
8 Select Yes, when the connection
request message appears.
9 If the device that you want to connect
accepts the request, Wi-Fi Direct is
connected.
To use the Miracast™/
Intel’s WiDi function
You can view the screen of a device with
Miracast™ and Intel’s WiDi technologies
on your projector.
y Select SMART
WiDi.
4 Set Miracast™/Intel’s WiDi to On. (If
you do not use it, please change it to
Off.)
5 Enable the Miracast™/Intel’s WiDi
settings on the device that you want
to connect to.
6 A list of devices that can be
connected to the projector is
displayed.
7 Select a device to connect.
8 Select Yes, when the connection
request message appears.
9 If the device that you want to connect
accepts the request, Miracast™/
Intel’s WiDi is connected.
y When Wi-Fi Direct is set to Off, if
you set Miracast™/Intel’s WiDi to
On, Wi-Fi Direct is automatically set
to On.
y When you set the Miracast™ / Intel’s
WiDi function to Off, Wi-Fi Direct
returns to the previous setting.
NOTE
y It is recommended to connect a
laptop using Intel’s WiDi within close
range.
y Though Intel’s WiDi can be
connected without a wireless router,
it is recommended to connect the
wireless router first for optimal
performance.
y You may not connect your projector
to a non-LG Electronics device even
when it is detected.
y It is recommended you to connect a
y The response rate may vary
depending on the user’s environment.
y For more information on the device
you want to connect to, refer to its
owner’s manual.

78
ENTERTAINMENT
Tips for Network Settings
y Use a standard LAN cable (Cat5
y Resetting your modem can cause
network connection problems. To
resolve the problem, turn the power
off, disconnect and reconnect, and
then turn the power back on.
y LG Electronics is not responsible for
any network connection problems or
any faults, malfunctions and errors
caused by an network connection.
y A network connection may not work
properly depending on the Internet
service provider.
y A DSL modem is required for a DSL
service; a cable modem is required
for a cable service. Only a limited
number of network connections
may be available, and projector
network setting may not be available
depending on your contract with your
Internet Service Provider (ISP). (If
only one device is allowed per line
and the PC is already connected,
other devices cannot be used.)
y Wireless networks can be subject
to interference from other devices
(wireless phones, Bluetooth devices
or microwave ovens). There may also
be interference from devices with a
Wi-Fi devices.
y The surrounding wireless environment
can cause the wireless network
service to run slowly.
y If you do not turn off the entire local
home network, network traffic may
occur on some devices.
y For an AP connection, an access
point device that supports wireless
connection is required and the
wireless connection feature must be
enabled on the device. Contact your
service provider regarding availability
of wireless connection on your access
point.
y Check the SSID and security settings
of the AP for AP connection. Refer
to the appropriate documentation for
SSID and security settings of the AP.
y Invalid settings on network devices
(wired/wireless line sharer, hub) can
cause the projector to run slowly
or not operate properly. Install the
devices correctly according to the
appropriate manual and set the
network.
y Connection method may differ
according to the AP manufacturer.

79 ENTERTAINMENT
Tag On
What is Tag On?
Tag On is a data transmission technology
that can be used on smartphones with
NFC (Near Field Communication).
Simply by tapping your smartphone to
a Tag On sticker, you can share content
between your smartphone and projector.
y To connect your smartphone to the
projector using Tag On, they must be
connected on the same Wi-Fi network
or Miracast™/Intel’s WiDi of the
smart projector is set to On.
NOTE
y Do not attach the sticker to a metal
part of the projector. Otherwise, your
smartphone cannot recognise the Tag
On sticker.
y Do not crumple or fold the Tag On
sticker. Otherwise, the Tag On is not
recognised.
y To purchase a Tag On sticker, please
contact the LG Electronics Service
Centre.
y This function is supported only on a
later.
To start Tag On for the
To connect your smartphone to the
projector using NFC, install the Tag On
app on the smartphone and complete
the authentication process.
4 Make sure that the smart projector
is on the same network as your
smartphone. If Wi-Fi cannot
be enabled, go to SMART
Miracast™/Intel’s WiDi and set to
On.
5 Enable the smartphone's NFC
function and set to Read/Write and
P2P Mode. For more information on
enabling NFC and setting the mode,
refer to the owner's manual of your
smartphone.
6 Tap your smartphone to a Tag On
sticker. Make sure to follow the
instructions on the smartphone
screen and install the Tag On app
and LG TV Remote app.
7 Tap the smartphone to the Tag On
sticker again.
8 Enter the pairing key displayed on the
smart projector into the smartphone.
When two or more projectors are
detected, the pairing key is displayed
only after the projector you want to
connect to is selected in the device
list.
9 When the connection is made
properly, you can use Tag On.
y The information of the connected
projector is saved in the Tag On
sticker. You can change or reset the
information in the Settings menu of
the smartphone Tag On app.

7:
ENTERTAINMENT
To use the Tag On
Follow the steps below to share content
on your NFC-enabled smartphone.
4 Tap the NFC-enabled smartphone to
a Tag On sticker.
5 The Tag On app starts running on the
smartphone to connect to the smart
projector.
- To use a Wi-Fi network, make sure
that the smart projector is on the
same network as your smartphone.
- If the smart projector and the
smartphone are not on the same
network, use Wi-Fi Direct.
y If the Tag On app is not installed,
the installation page appears
automatically.
y For more information on how to share
content between your smartphone
and projector, refer to the Tag On
app's help. Click to run the Tag On
app on your smartphone and select
the Settings menu to view the help.
7; SMARTSHARE
SMARTSHARE
Before Using
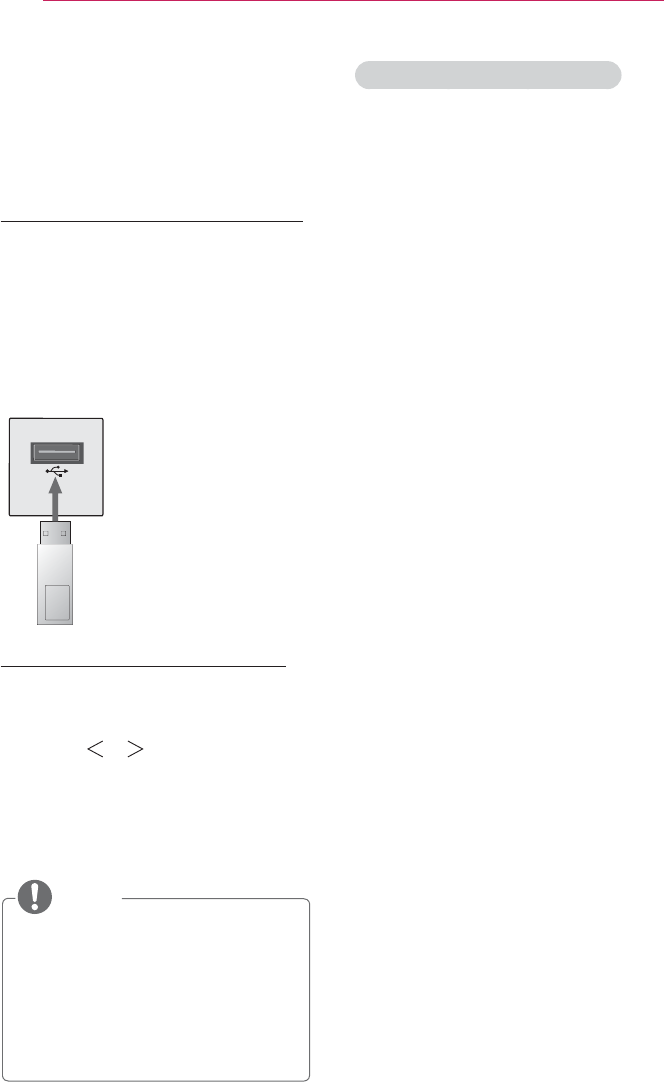
Connecting a USB Device
USB memory) to the USB port of
in the USB device with your projector.
You cannot write or delete data in the
as shown below.
USB Flash Drive
Removing a USB Device
4 Click the MY APPS button.
5 Select Quick Menu.
6 Use the or button to move
to USB Device and press the OK
button.
7 Select a USB to remove. Wait for
stopped before removing the USB.
NOTE
y If detached early, an error may occur
on the projector or the USB storage
device.
y Once a USB device has been
selected for removal, it can no longer
be read. Remove the USB storage
device and then re-connect it.
Tips for Using a USB Device
y If the USB storage device has a built-
in auto recognition program or uses
its own driver, it may not work.
y Some USB storage devices may not
work or may work incorrectly.
y
USB device may not be recognized or
may not work properly.
y Use only USB storage devices
formatted with the Windows FAT32 or
NTFS file system.
y
recommended that you use devices
with a rated voltage of less than 5 V
mA.
y It is recommended to use a USB
hub or hard disk drive with power
supplied. (If the power supplied is not
enough, the USB storage device may
not be detected properly.)
y It is recommended that you use USB
memory sticks of 32 GB or less and
y
function does not work properly,
turn the power off and on. For more
information, refer to the user manual
y Data in USB storage device can
be damaged so be sure to back
up important files to other devices.
Data maintenance is the user's
responsibility and the manufacturer is
not responsible for data loss.
7<
SMARTSHARE
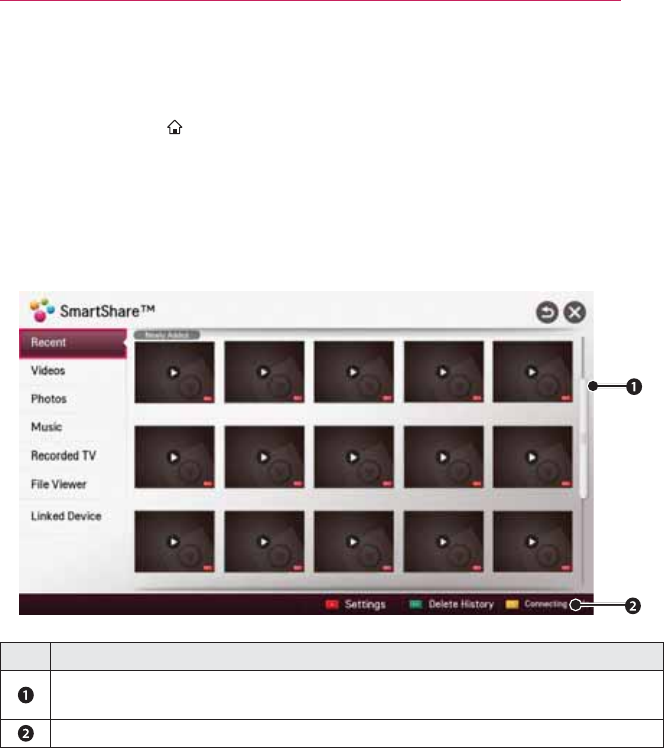
To use SmartShare™
4 Press the SMART button on the remote control.
5 Select SmartShare™.
You can watch the photo, music, video and document on the projector by connecting
the devices connected via USB are displayed.)
333 334 335 336 337
338 339 33: 33; 33<
343 344 345 346 347
Description
projector.
Shows how to connect PC, smartphone/device, and USB.

83 SMARTSHARE
Watching the Videos
In the Movie List, you can watch movies stored on the connected USB device.
Controls playback and sets options while viewing videos.
Playing video - warning
y Some subtitles created by users may not work properly.
y The video and subtitle files should be placed in the same folder. For subtitles to
display correctly, the video and subtitle files must have the same name.
y Subtitles on an NAS (Network Attached Storage) device may not be supported
depending on the manufacturer and model.
y We do not support any stream that contains GMC (Global Motion Compensation) or
Qpel (Quarterpel Motion Estimation).
y
y The file size limit is dependent on the encoding environment.
y It works only the above version of Window Media Audio V2.
y It’s not supported AAC Main Profile.
y Video files created by some encoders may not be played back.
y Video files in formats other than the ones specified here may not be played back.
y
may not work properly.
y
84
SMARTSHARE
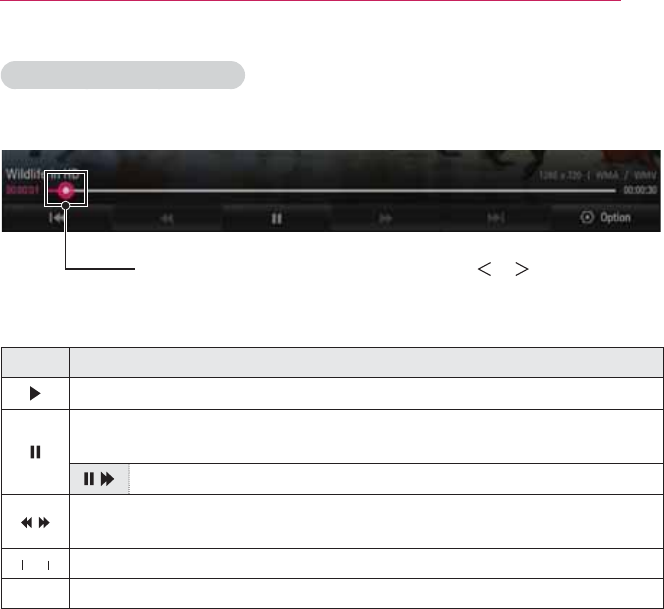
To control video playback
You can control playback using the following buttons.
Shows the current playing position. Use the or button to
move forward or backward.
Item Description
Resumes normal playback.
pausing, playback resumes automatically.
Displays in slow motion.
Whenever this button is pressed, the playback speed is increased or
decreased by one unit.
ᰩ
ᰩ
Option Sets the option.
85 SMARTSHARE
Viewing the Photos
You can view photos stored on a connected device.
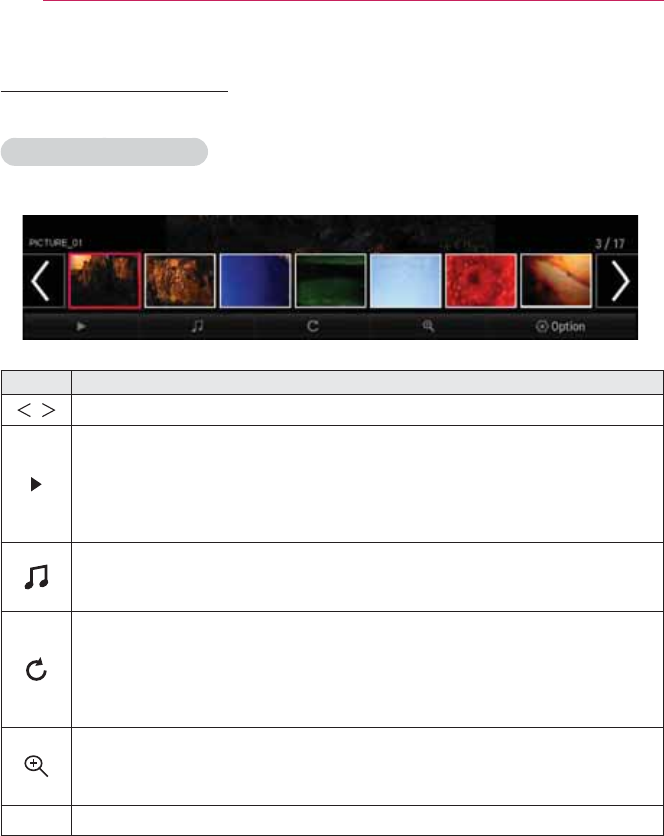
To control photo view
You can control playback using the following buttons.
Item Description
,
If no picture is selected, all photos in the current folder are displayed in a
slide show. If some photos are selected, those photos are displayed in a
slide show.
y Set Slide Speed in the Option
#䮫#
Set Photo View. menu.
You can listen to music while viewing full-size photos.
y Set BGM in the OptionSet Photo View. menu.
Rotates photos.
y
y Photos cannot be rotated if their width is greater than the height of the
Enlarges or reduces the photo.
Use the Up/Down/Left/Right buttons to select a page and press the OK
button.
Option A setting popup window will appear.
86
SMARTSHARE
Listening to Music
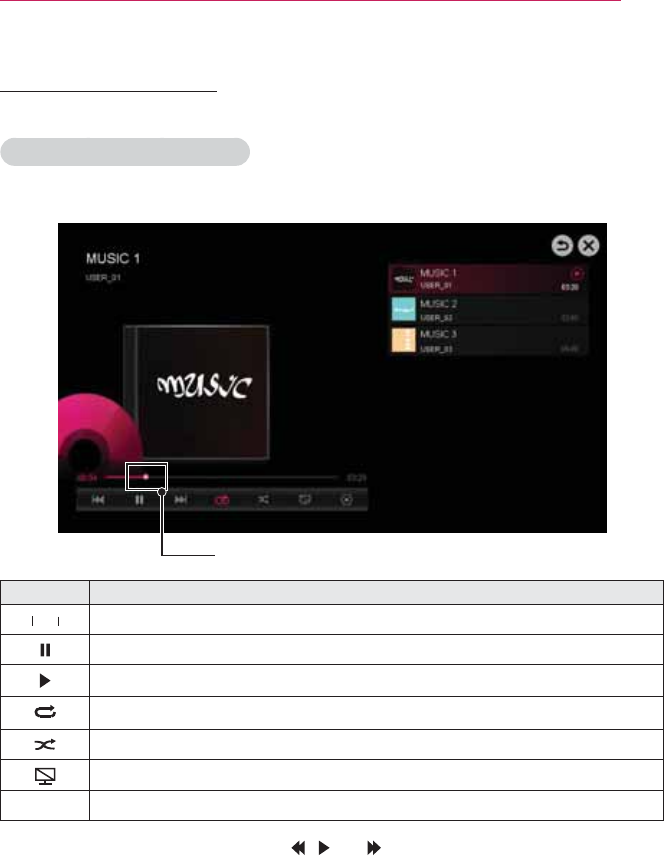
To control music playback
# You can control playback using the following buttons.
Changes the playing position.
Item Description
ᰩ
ᰩ
Pauses the music player.
Resumes normal playback.
Sets the repeat playback.
Sets the random playback.
Plays music with the projector screen turned off.
Option Sets Option for the music list.
y You can control playback using the , and keys on a standard remote control.
y If you use the USB device, time information will be not shown on screen.

87 SMARTSHARE
Viewing Files
Supported File Formats
y File Viewer realigns a document, so it may look different from what is displayed on a
PC.
y For documents that include images, the resolution may look lower during the
realigning process.
y If the document is large or has many pages, it may take longer to load.
y Unsupported fonts may be replaced by other fonts.
y The file viewer may not open for Office documents that contain many high resolution
images. In that case, reduce the image file size, save it on a USB storage device
and run the file viewer again or connect your PC to the projector and open the file on
your PC.
Browsing File Viewer
You can control playback using the following buttons.
y Press the Go Page
y Press the volume button to zoom in or zoom out.
- Press the OK button.
- Press the Up/Down/Left/Right buttons to move to Go Page or Zoom.
Item Description
Go Page Moves to the page you specify.
Zoom Enlarges or reduces the photo.
Option Sets Option for File Viewer.
List Returns to a list.

88
SMARTSHARE
To set SmartShare™ related functions
Select SMART .
Changes settings related to SmartShare™ content playback.
Advanced Setting
Item Description
My Projector Name Changes the name that appears when searching for the
projector from other devices.
Network Status Checks the network connection.
Wi-Fi Direct Allows use of wireless connection functions such as Wi-Fi
Direct and WiDi.
Auto Play on
Receive
Accepts / rejects content transferred from other devices.
DivX(R) VOD Registers or releases DivX.
Checks DivX Registration Code for playing DivX-protected
Uses Registration Code to rent or purchase movies at www.
y Rented/purchased DivX files cannot be played if the DivX
Registration Code of a different device is used. Use only the
DivX Registration Code granted to this device.
y Converted files not conforming to the DivX Codec Standard
may not play or may produce abnormal images and sound.
Delete History
y To delete contents history, press Delete History button.
y Use the contents at Recent menu.
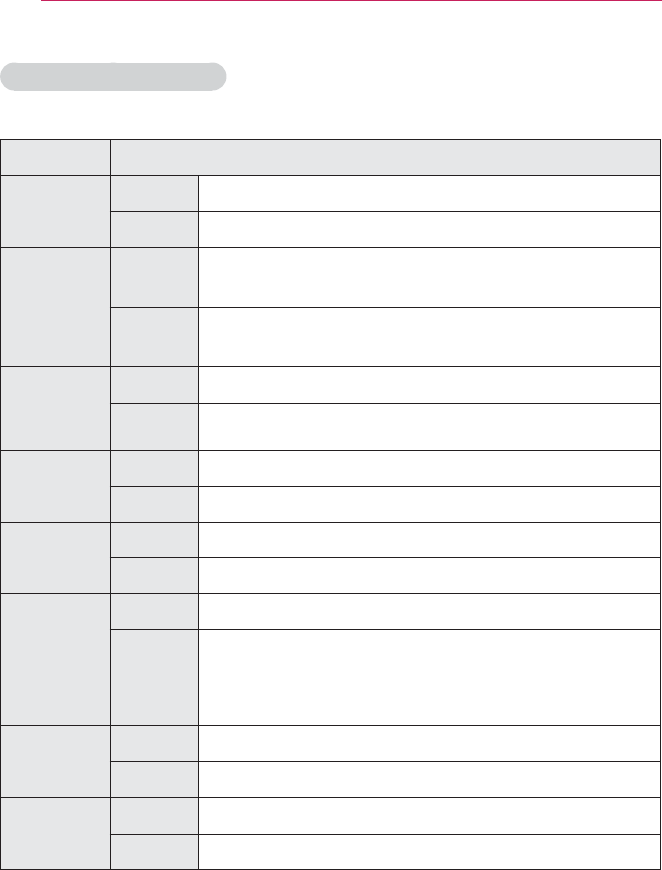
SmartShare™ supporting file
y
y
y Internal subtitle formats supported: XSUB (supports internal subtitles generated from
DivX6)
89 SMARTSHARE
Video Supported Codec
Extension Codec
.asf
.wmv
Video
Audio WMA Standard, WMA 9 Professional
.divx
.avi
Video
Motion Jpeg, MPEG-4 Part 2
Audio
Dolby Digital, Dolby Digital Plus, LPCM, ADPCM, DTS
.mp4
.m4v
.mov
Video
Audio
.3gp
.3g2
Video
Audio AAC, AMR-NB, AMR-WB
.mkv
Video
Audio
.ts
.trp
.tp
.mts
.m2ts
Video
Audio
Dolby Digital, Dolby Digital Plus, AAC
.vob
Video
Audio
.mpg
.mpeg
Video
Audio

8:
SMARTSHARE
Audio File
File type Item Info
mp3
Bit rate
Sample freq.
Support
Available photo file
File type Item
2D
(jpeg, jpg,
jpe)
JPEG
8; SMARTSHARE
To use the LG Cloud
What is LG Cloud?
LG Cloud is a service that allows you to enjoy your contents, such as video, music and
photos on your LG Projector, SmartPhone and LG Website at any time, regardless of
where you are.
y SMART
y Sign up for LG Cloud to use the services.
y You can sign up from your LG Smart projector, SmartPhone or LG Website.
y The service or membership can only be cancelled at the LG Cloud website (http://
www.lgecloud.com).
UCC
8<
SMARTSHARE
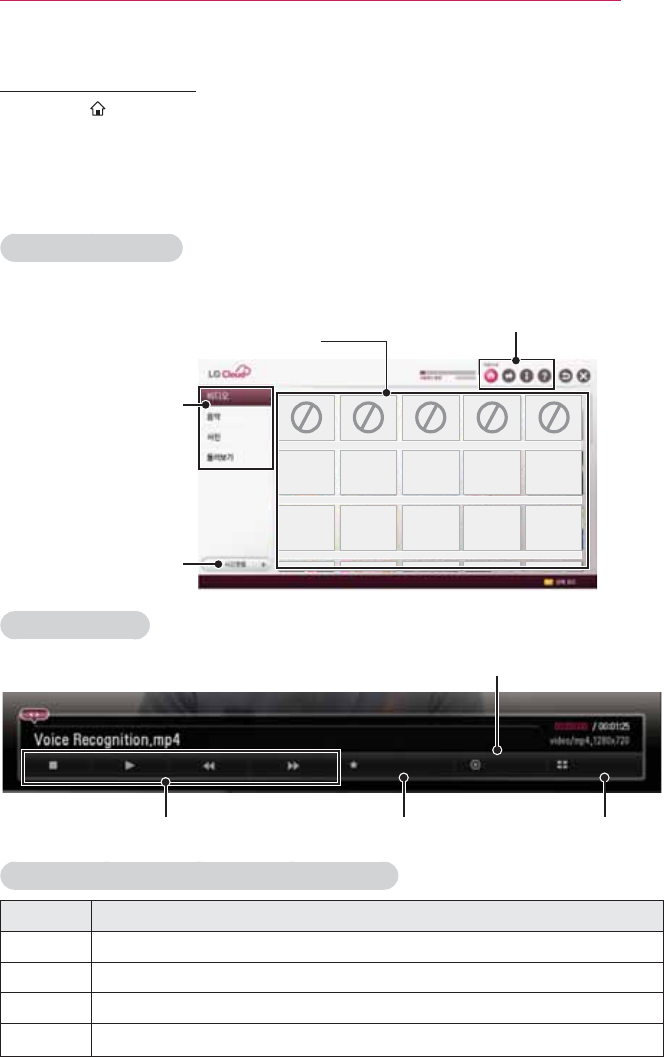
To use LG Cloud
y SMART
y Enter the e-mail and password you provided during the sign-up procedure to sign in
to the service.
y When you sign in for the first time, the CONVERT LG projector ID screen appears. If
Main screen layout
Folder selection tabs
ⵂ⟶⟦ᤆ2Qrwlfh2P|#Dffrxqw22IDT
File display area
Sort criteria selection
NO
IMAGE
NO
IMAGE
NO
IMAGE
NO
IMAGE
NO
IMAGE
Video playback
Playback control
スျ㎻ᇵ#㔾ཾ Rswlrq Ὼᵥཾᇵ
Add or remove favorites Return to the list
Set options
LG Cloud 㐤⸬⸜ᵤ/Notice/My Account/FAQ
Item Description
ㆂⰶⰦᵆ
Displays a default screen.
ᇟ⺪▖㩗
Shows notices about the LG Cloud service.
㭶⮺⳿⇞ Shows the user ID and e-mail address.
IDT Displays the FAQ regarding LG cloud service.

93 SMARTSHARE
To connect DLNA
DLNA stands for Digital Living Network
Alliance, which allows you to enjoy
PC or server on your Projector via home
networking.
To connect a DLNA-
authenticated
Smartphone
The
Projector
and the smartphone should
be on the same network.
4 Ensure that Wi-Fi is enabled on the
smartphone.
5 Install / run the app to share content
on the smartphone.
6 Run “Share my mobile phone
Content”.
7 Select the kind of content (video /
music / photo) you wish to play.
8
to play on the Projector.
9 Select Add to Play List.
: Select Projector model name on the
device you want to play content from.
(Projector model name is on the label
of the device.)
; Play
Projector.
To connect DLNA DMR
(Digital Media Renderer)
If the PC's operating system is Windows
device (e.g. mobile phone) is connected
via a network, you can play music /
videos / photos on Projector without
installing a separate program.
4
network.
5 Right-click the music / video / photo
the “Remote Playback” feature that
comes with Windows 7 or Windows
as a mobile phone, refer to the user
guide for the device.
6 Content will be played on one device
only even if more than one Projector
or device is connected. Play speed
can vary depending on network
speed.

94
SMARTSHARE
To connect DLNA DMP
(Digital Media Player)
With a PC having SmartShare PC
be replayed on the Projector by linking
them via home networking.
4
same network. The Projector and
each device should be connected
through a single access point to
enable DLNA service.
5 Install SmartShare PC Software on
the PC from the website. Before
installation, close all running
virus programs.
6 The sever should be running in order
Projector.
y For the website information, go to
SMART
.
y For how to use the SmartShare PC
software, refer to the software help.
In case of a DLNA
malfunction
y If the DLNA feature does not work
properly, check your network settings.
y
buffering or other problems.
y DLNA may not work properly in the
wireless network. It is recommended
to connect to the wired network.
y When playing video in DLNA mode,
Multi Audio and internal subtitles are
not supported.
y If more than one Projector is
connected to a single server in DLNA
mode, the content may not play
depending on server performance.
y Subtitles may not be supported
depending on the DLNA device.
y DLNA feature may not work
properly depending on the network
environment.
y DLNA feature cannot be used with
some access points that do not
support multicasting. For more
information, refer to the access point
manual or consult the manufacturer.
y Supported file types may differ
depending on DLNA server
environment, even for file types
supported by the Projector.
y Too many sub-folders and files in one
folder may cause malfunction.
y The information about the file from the
DLNA server may not be displayed
correctly.
y When viewing video subtitles on a
DLNA server, we recommend that
you use SmartShare PC Software.
y If subtitle file is added later, turn off
the shared folder and reset.
y DRM file located on a SmartShare PC
Software server cannot be played.
95 SMARTSHARE
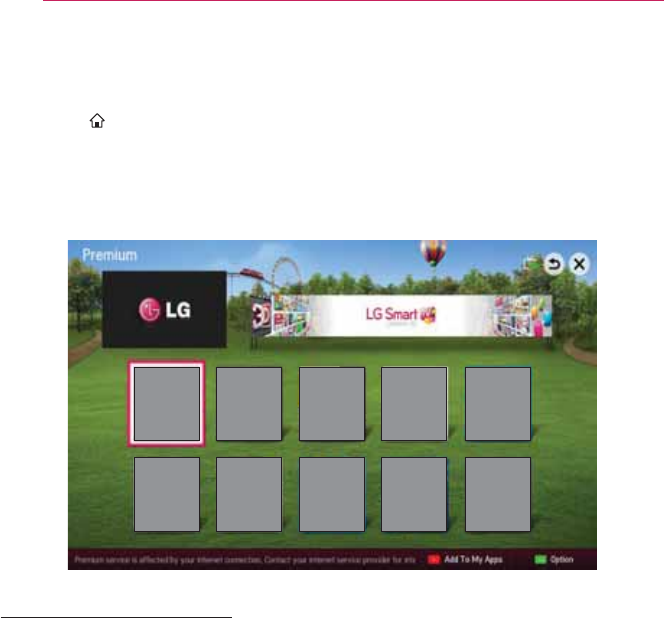
To use Premium service
y SMART
y This service gives you easy access to a wide variety of content, such as video,
news and, UCC, at any time, as long as you are connected to the network.Premium
content includes specialized country-specific services taking regional cultural
sensitivities into account as well as global content.
WEB Movie Map SNS Play
NEWS Comic Entertainment Information TV
To use paid content
y A fee is payable for some Premium content.Fee-paying services are paid for either
through LG Electronics’ proprietary billing system or through that of the relevant
content provider. Before using the LG billing system, you will need to sign up for
membership and register payment information on Projector or the website (www.
lgappstv.com) to purchase paid content.
y You can sign up for membership on the login screen on your TV or our website. You
can then log into both the TV and the website with one ID.
4
5 Moves to the desired Premium service.(For some premium services, separate sign-
in is required after signing up for the premium service.)
6 After reviewing the pricing and service information for the content, click the
Purchase button. (There may be limitations on the available period and number of
times depending on content.)
7 Once the purchasing process is complete, view your purchased content by clicking
the Buy button.
8
from . It is also available on
History of web site (www.lgappstv.com).

96
SMARTSHARE
To reset Premium
y SMART
y Resets Premium list, Premium information, country setting and user sign-in
information.
y Resetting will resolve errors occurring during Premium update.
NOTE
y Content offered by service providers are subject to change or deletion without prior
notice to enhance their service quality. Refer to the website of the relevant content
provider for questions, troubleshooting or the latest information about content.
LG Electronics assumes no legal responsibility for content services and related
information, even when a service is discontinued by the service provider.
y The quality of your Premium service may be affected by your Internet connection.
For any questions related to Internet speed or other service problems, consult your
Internet service provider.
y For best service quality, we recommend that you subscribe to an Internet service
speed problem, contact your Internet service provider.
y Some content providers may provide content that is unsuitable for minors. Parental
discretion is advised.
97 SMARTSHARE
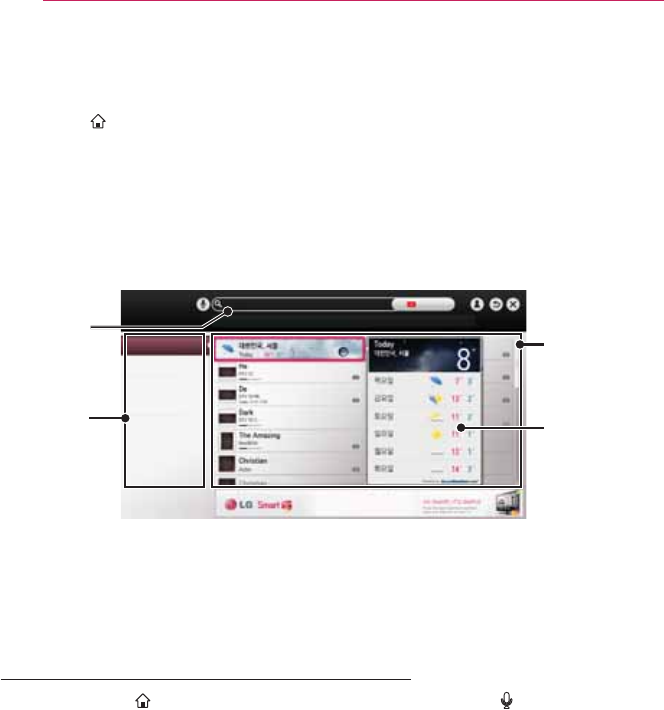
To use search function
y SMART
y You can search apps and contents using the Search function of LG Smart Projector.
When you enter keywords using the input device, such as the remote control, you
can find apps of LG Smart World and some contents of the Premium service. Links
are also provided to go for web search. If you are using SmartShare
TM
, you can also
search contents of SmartShare
TM
. The Search categories and content types vary
depending on the country and will be kept updating.
Detailed
information
about the
search item
Category of
search results
6HDUFK 摥磭
5HODWHG.H\ZRUGV 苅笹窭朙 懵璆 糁忉摥磭 秭苅笹窭朙
恅璎
Search results
Enter
search terms.
All
PREMIUM
LG Smart World
YouTube
Web
To use the voice recognition function
Using this function through search
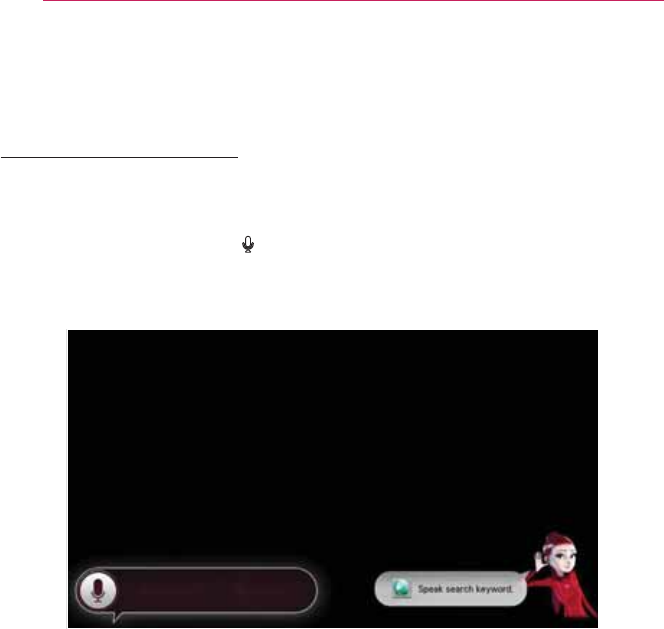
4 Go to SMART . Select the voice recognition icon ( ) on the left of the
5 Speak slowly and clearly after the voice recognition window appears.
6 After the voice recognition is completed, the Similar List window pops up. If the pop-
up window does not have the results you want, press Retry to try again. Select the
to get the result you want.

98
SMARTSHARE
Using this function on the
Internet
4 Go to SMART .
Move the Magic Remote Control
to open the virtual keyboard.
5
Select the voice recognition icon ( )
keyboard.
6 Speak slowly and clearly after the
voice recognition window appears.
7 After the voice recognition is
completed, the Similar List window
pops up. If the pop-up window does
not have the results you want, press
Retry to try again. Select the most
similar result, then it will be displayed
button on the website to get the result
you want.
Using this function on the
Social Center
4 Go to SMART
5 Log in with your LG Smart Projector
(www.lgappstv.com) ID.
6 Select the social network site you
want and log in with your site ID.
7 Select the voice recognition icon ( )
8 Speak slowly and clearly after the
voice recognition window appears.
9 If your voice is recognised, press the
Share button on the right to input the
If it is not recognised, try again or
opening the virtual keyboard with the
Magic Remote Control pointer.
y While the recognised result is in
recognition function, the previous
result will be replaced with the new
one.
y You can use Voice Search when
you press the Voice recognition ( )
on the Magic remote control even if
QWERTY keyboard is shown on your
screen.
y Check the network connection before
using the voice recognition function.
y It is recommended to use the remote
your face.
y The voice recognition may fail if you
speak too fast or too slowly.
y The recognition rate may
vary depending on the user's
characteristics (voice, pronunciation,
intonation, and speed) and the
environment (noise and Projector
volume).
y To change the voice recognition
language, go to
SMART
Language.
y You can set Avatar to On/Off in
SMART
.
99 SMARTSHARE
To use Voice Mate function
What is Voice Mate?
Voice Mate allows you to search desirable programs and content with your voice and
adjust the Projector.
4 Press the Voice recognition ( ) button on the Magic Remote Control.
5 When the Voice Display bar is activated on the left of the screen, say what you want
to watch.
6 Press the Wheel (OK) button with the Voice Search standby to see the supported
language in the voice guide.

9:
SMARTSHARE
How to Use Voice Mate?
y To use all the functions and services
of Voice Mate, you need to set Smart
Wizard and Time. Set up the network,
region, auto tuning, and universal
remote control through the Smart
Wizard.
y In order to use Voice Mate, you must
set up the network, time, region, and
tuning.
y Set the language of your country to
use Voice Mate.
y You can change the language for
Voice Search in
SMART
Language.
y You can turn the avatar On/Off in
SMART
.
y It is recommended you to point the
universal remote control towards the
with it.
y When speaking a command, hold the
y The voice search may fail when you
speak too fast or too slow.
y The recognition rate of Voice Mate
may vary depending on the user’s
characteristics (voice, pronunciation,
intonation and speed) and the
environment (noise and Projector
volume).
y If your voice is not recognized
properly, Voice Mate may function
regardless of your intention.
What are other functions
of Voice Mate?
You can access various Projector
features using Voice Mate.
Item Description
Channel y You can tune TV
channels and search
channel information.
is *** on?”
Time
Machine II
y You can record
programs with Time
Machine.
Recommen-
dation and
Search
y You can recommend
and search TV
programs and content
files.
Information
and Internet
y You can also search
other information such
as today’s weather.
weather today?”
y Available functions may vary
depending on the country.
y
the voice user guide.
9; SMARTSHARE
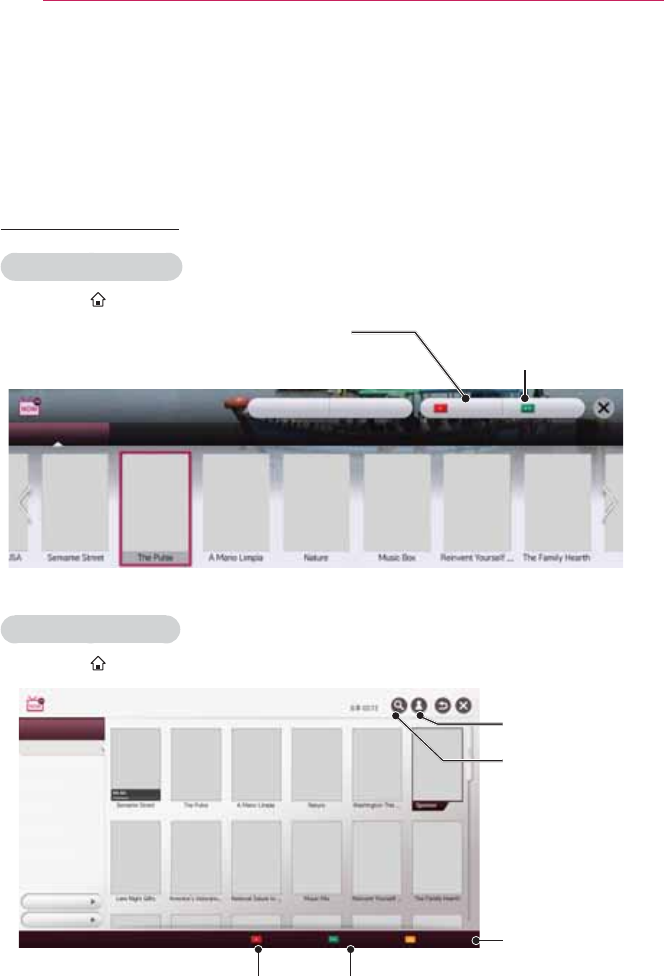
What is On Now?
On Now allows you to select and watch recommended programs currently available
on your Projector. The Favorite function allows you to select and watch recommended
content related to the program you are watching.
To use On Now
To see in Half View
y SMART
Favorite
MoreRefresh
Uhiuhvkhv#doo#olvw#lwhpv#dqg#pryhv#wr##
wkh#ehjlqqlqj#ri#wkh#vfuhhq#vlpxowdqhrxvo|1
Pryhv#wr#Ixoo#Ylhz1
To see in Full View
y SMART
On Now
Sets the options.
Refreshes all the list items and moves
the screen up simultaneously.
Favorite
Refresh
Find
Sign in

9<
SMARTSHARE
y For TV channels, you need to complete Auto Tuning to use this service properly.
y If you move to a different region, you need to set the region to your current location
in order to use this service.
y The digital EPG (Electronic Program Guide) information which the TV receives may
(Electronic Program Guide).
y
y An internet connection is required to use On Now.
y The channels in the On Now TV list are provided from the cable broadcasting service
provider. If the provider changes them without notice, the actual TV channels may
differ.
y The channel names of analog cable broadcasting on the On Now TV list are
cable broadcasting service provider but may not match.
y The program thumbnail image on the On Now TV list is the representative image
of the program, and it may be different from the image of the actual TV program
schedule.
y If the channel information on the On Now TV list is different from the actual TV
Now Settings.
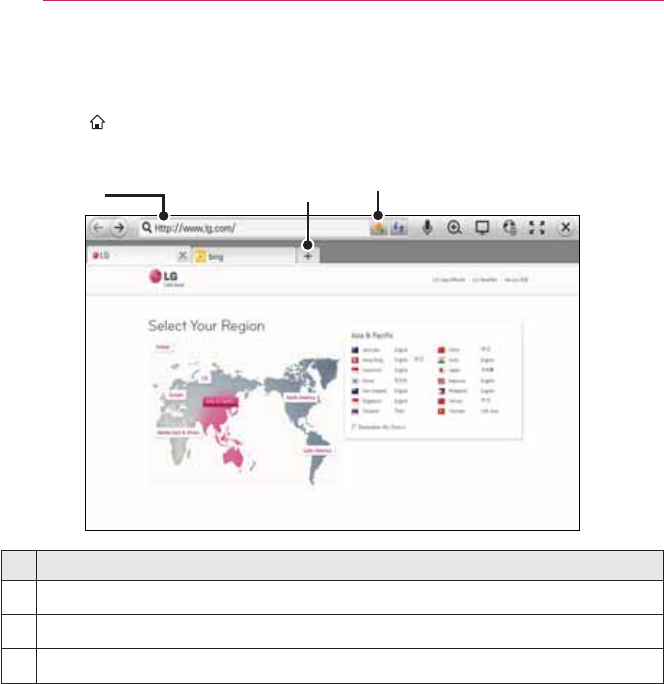
:3 SMARTSHARE
To use internet
y SMART
Types URL manually on Projector or visits websites added to Favourite.
❶❸
❷
Description
❶Types in the web address.
❷Chooses when you open several web browsers.
❸Add the current page to favorites.
y Internet
technology like ActiveX.
y Internet only works with a pre-installed plug-in.
y Internet may not play any media file format other than the following:
JPEG / PNG / GIF
y Internet will be forcibly closed when there is insufficient memory.
y For the Internet, fonts installed on the Projector are used and may not be displayed
normally depending on the content played.
y Internet does not support file and font download.
y Internet is made for Projector so it may have a different function to browsers made
for PC.
y Internet is a Projector browser and may not work properly when playing some
content files.
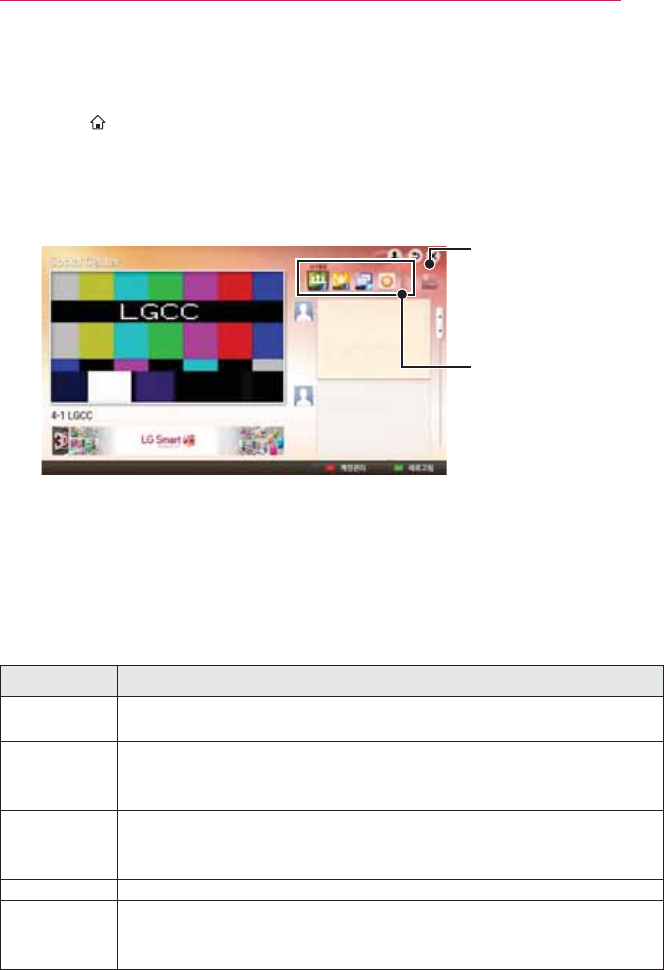
:4
SMARTSHARE
To use Social Center
y SMART
y LG Smart Projector provides the Social Center app that allows you to communicate
via social network services (SNS) such as Facebook and Twitter while watching TV.
y Using Social Center, you can communicate with friends while watching TV and view
comments and pictures posted by your social networking friends at a glance.
Select a tap such as
Facebook / Twitter
/ Activity / Talk to
communicate via social
network services (SNS).
You can edit
the Social
Center tab.
4 You can sign in with your LG Projector account. If you are not a member yet, please
5 Select a tab from Facebook, Twitter, Activity or Talk. Some functions are connected
with other SNS, so you may need the SNS account to sign into the service.
6 Now, you can view content and post comments while watching Projector.Social
Center allows you to write comments while using LG Smart TV services connected
with Facebook or Twitter and to view the comments on the Web or mobile device.
Item Description
Facebook /
Twitter
You can communicate via SNS such as Facebook and Twitter while
watching TV.
Activity With your Facebook account, you can easily see LG Smart Projector’s
great content recommended by other users. Click a recommended
program/show to move to the corresponding LG app.
Popular Now You can check the ranking of TV shows currently on and who
recommended them. You can also look for friends who have the same
interest as you.
Talk
You can see what other twitter users think about the shows currently on.
Connected
with
smartphone
The functions of Social Center, such as Activity, Popular Now, and Talk
are connected with the LG TV Remote app on the smartphone to help
y You can easily type using the LG TV Remote app on your smartphone when
communicating via SNS. The app can be downloaded at the Google Play, App Store.
y The functions of Social Center are subject to change according to Projector software
update.

:5 SMARTSHARE
Frequently Asked Questions for Smart Projector
Sign up is required to use LG Smart World.
You can sign up on either your Projector or the LG website (www.lgappstv.com). Free
apps are available immediately after signing up.
You can purchase paid apps using your credit card registered with the website or
credits. Paid apps can also be purchased through carrier billing.
Problem Solution
When entering menu, the
"Initializing" message always
appears.
y The "Initializing" message shows you how
long it takes to reboot the microprocessor and
hardware, set up network communications, and
communications with SDP (device authentication
and basic information download). It takes about
There is no content shown
on the Premium card.
y Content may not be shown after changing the
country setting on Smart TV. Change to desired
country in SMART
.
While using internet features,
there is a blank space on
some Web pages.
y The internet of the Projector supports up to
other than the following
: JPEG, PNG, GIF
Internet closes automatically
when visiting website.
y If memory is insufficient because of large
volume of image information in the web page,
internet may be forced to close.
I already signed up on
Projector. Do I need to sign
up again at web site
(www.lgappstv.com)?
y If you sign up on your Projector, no additional
sign-up on the LG website (www.lgappstv.com)
is required.
y After signing up on Projector, you can sign into
the website by using the same ID and password
and entering the additional information to
complete the email verification process.

:6
SMARTSHARE
Problem Solution
Can each family member use
a different ID with a single
Projector?
It is possible to register and use more than one ID
on one Projector.
To check the ID registered with Projector from
SMART .
You can check the list of apps purchased by each
each ID in
SMART .
What should I do if I forget
my ID?
After signing up on a PC, use “Forgot ID?” feature
on web site (www.lgappstv.com) when needed.
After signing up on Projector, check it from
SMART
I purchased an app from the
LG web site (www.lgappstv.
com). How can I use it on
Projector?
To check purchased apps from the Projector, sign
in and open the Purchased Apps menu.
Purchased apps.
Can I see history of my
purchased apps?
in .
Sign in to website (www.lgappstv.com) and then
select ᄘᓈⲣ.
I deleted a paid app. Do I
have to purchase again to
download it?
If a purchased app is accidentally deleted, you can
download and reinstall it without having to buy it
again, as long as it is still in service.
apps in .
(Previously owned apps may not be re-downloaded
or run depending on the software version.)
Can I use apps from LG
Smart Projector's LG Smart
World on both a Projector
and a PC?
Please check if the Projector model supports LG
Smart World.
The apps provided from LG Smart Projector's LG
Smart World can only be used on an LG Smart
Projector.
Apps may be purchased from the website (www.
lgappstv.com) but cannot be used on a PC or Mac.
Use care when purchasing.
How can I check the ID
currently signed in on the
Projector?
currently signed-in ID in .

:7 SMARTSHARE
Problem Solution
I installed an app on the
Projector. Where can I check
the installed app?
Select SMART . All paid and free
apps installed on TV are displayed.
There is a difference between
the app size shown on the
screen and the actual app
size installed on Projector.
The app size shown in the screen includes the
additional space needed for installing apps so it
may be different from actually installed app size.
I forgot my password on the
Projector. What should I do?
If you only provide the ID and password when
signing up on your Projector, you cannot recover
your password when it is lost. Create a new ID and
sign up with the ID.
If you provide other information than the ID and
password when signing up on your Projector or the
LG website (www.lgappstv.com), you can recover
your password on the website.
Do I need to store payment
information in web site to
purchase paid apps?
The following payment methods are available to
purchase paid apps on your Projector: credit card,
credits, and carrier billing.
To purchase paid apps using your credit card or
credits, you should have a credit card registered
with the LG website (www.lgappstv.com) or have
enough credits. Paid apps can also be purchased
through carrier billing if your credit card details
are not registered with the website or you do have
enough credits. If you purchase paid apps on
the website, the following payment methods are
available: credit card or credits.
Can I cancel an app that I
have purchased?
As a member you cannot demand refund just
because you changed your mind after purchase.
If there is a defect in the product or a problem of
using the product, which does not caused by your
reason for refund must be provided.
Should I only use an email
address for my ID?
For new sign-up members, the ID format has
changed from a combination of alphanumerics to
your email address.
You can only use an email address for your ID
when signing up.

:8
SMARTSHARE
Problem Solution
Do I need to change my ID
format to the email address?
For new sign-up members, the ID format has
changed from a combination of numbers and
alphabets to the email address.
If you are already a member, you can still use your
What is the LG account? The LG account allows you to sign into all of the
LG Smart service with a single ID and password.
You can use the following services with your LG
account:
LG Smart Projector, LG Cloud, LG Smart World
LG Smart air conditioning, etc.
Additional information may be required depending
on the service.
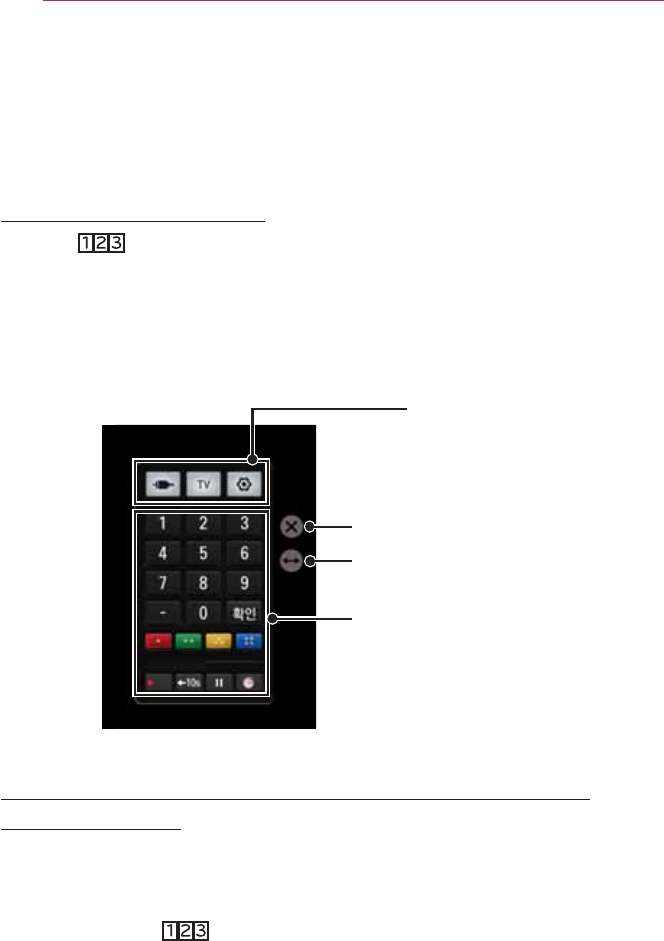
:9 USING ADVANCED FUNCTIONS
USING ADVANCED FUNCTIONS
To use Screen Remote
To use Screen Remote
Press the button on the Magic Remote Control.
Select a button on the Screen Remote displayed on the screen using the Magic
Remote Control.
y The type of buttons on the Screen Remote varies depending on the region or the
type of a connected device.
y Image shown may differ from your Projector.
Change Device tab
Moves the position of the
Screen Remote to left or right
TV operation buttons
Change Device tab
To control a device connected to the TV using the
Screen Remote
4 Check if the device is connected to the Projector.
5 After pressing the button on the Magic Remote Control, select the device you
want to control in the Change Device tab. The Screen Remote that can control the
device appears.
y This may not work with some buttons.

::
USING ADVANCED FUNCTIONS
To use the Universal Control function
[For Magic Remote Control only]
theatre system, etc.
4 Check if a device you want to set is connected to your Projector.
5 After pressing the button on the Magic Remote Control, select the icon of a
device you want in the Change Device tab.
If there is no device you want, press the
device you want. Once the setup is complete, the name of the selected device is
displayed in the Change Device tab.
6 When you select a device you want in the Change Device tab, the Screen Remote
that can control the device appears on the screen.
To change or clear the Universal Control settings
4 After pressing the button on the Magic Remote Control, select the (TV/
input selection) button.
5 Select Change Settings or Cancel Settings at the bottom of the device to be
changed.
y When Change Setting, check if the power of the device to be changed is turned on.
y You can set one device per type.
y With the Screen Remote, you can only control the devices of a brand or
manufacturer that you can select in the setup screen.
y If you connect to a network before setting the universal remote control, update for
the latest manufacturer list is available.
y
y Place the device near the Projector for seamless operation.
y If the device is in a drawer, open the drawer.
y Go to SMART or, SMART
and add, delete, or change a device.
:; USING ADVANCED FUNCTIONS
What is Time Machine II?
It is a function you can use to record a programme you are currently watching or want
to watch and also rewind a programme you are watching in real time.
Item Description
Immediate Rec Immediately records a programme you are watching.
Scheduled Rec Selects a programme you want or sets the time to record.
Play Plays back the recordings.
TimeShift Rewinds a programme you are watching in real time.
y You can also record digital/analogue programmes transmitted over an RF cable and
content played through the AV IN input.
y All broadcasts are protected by copyright; you may need to obtain permission from
the copyright owner prior to reproducing or playing back these broadcasts. If a user
records audio or video using this device, the recordings must be for personal use
only. Selling, transferring or renting recordings protected by copyright is prohibited.

:<
USING ADVANCED FUNCTIONS
To record immediately
To use the immediate rec function
4 To record what you are watching immediately, press the Wheel (OK) button on the
Magic remote control and press the Rec button on the progress bar that appears.
REC Live Schedule
5 The Rec button changes to the Recording stop ( ) button while recording is in
progress.
y You can use various TV functions, such as watching a different programme or
playing another recorded content back while recording.
y You can also record immediately using the Rec button in the Information display
window or the Rec button on the screen remote control.
y
recording, press the Recording stop button and set the Recording end time modify
option.
y The recordable time may vary depending on the capacity of your USB storage
device.
y When no USB device is connected, the recording is stored in the built-in memory.
Connect a USB device to save more recordings.
y Press the Wheel (OK) button while recording to display information about the
recording in the top right of the screen.
y The Wheel (OK) button operation may vary depending on your country.
y If you force your Projector to power off while recording, the programme may not be
saved. Ideally, you should stop the recording and check that the programme has
been recorded before turning the Projector off.
y Some functions may not be available while recording.
To stop recording
Press the Recording stop ( ) button on the progress bar, in the Information window or
on the screen remote control to select Recording stop.
To modify the recording end time
Press the Recording stop ( )button on the progress bar, in the Information window or
on the screen remote control to select Recording end time modify.
y You can set up to 5 hours for Recording end time modify.
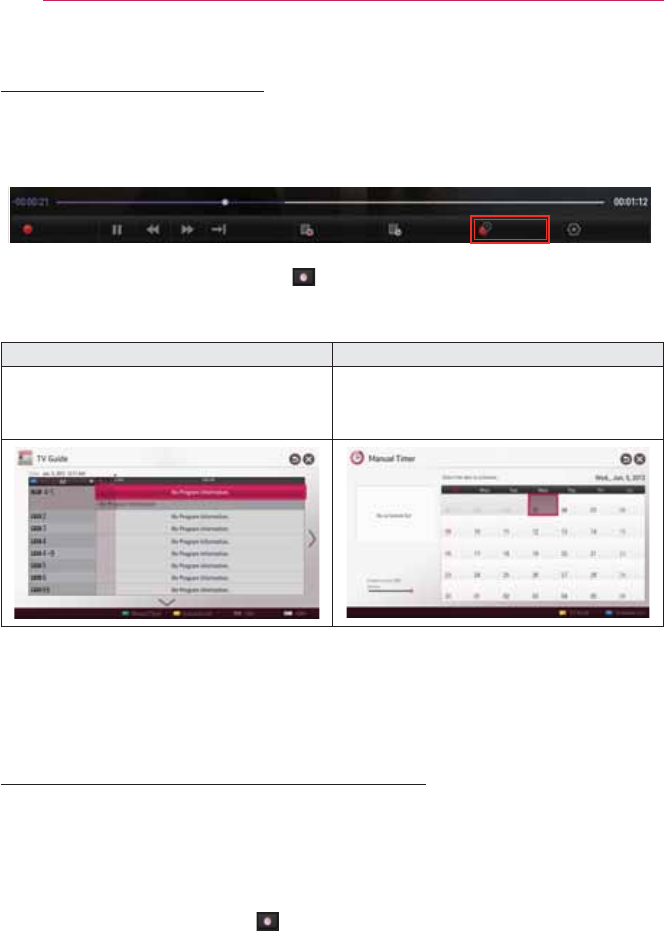
;3 USING ADVANCED FUNCTIONS
To schedule recording
This is a function that allows you to set the date and time to record a programme you
want to watch. Press the Wheel (OK) button on the Magic remote control and then click
Schedule on the progress bar that appears.
REC live Schedule
y You can also use the progress bar ( ) button on the screen remote control to
schedule recording.
TV Guide Manual Timer
You can select a programme you want to
schedule for watching or recording.
You can select a date, time and channel
to schedule the watching or recording
time.
y Image shown may differ from your Projector.
y When no TV Guide is available, only the Manual Timer menus are displayed.
y The length of the scheduled recording should be at least 2 minutes.
To check or modify the schedule list
y
y This is a function you can use to check, modify or delete the watching and recording
schedule you have set.
y The Wheel (OK) button operation may vary depending on your country.
y Schedule List.
y You can use the progress bar ( ) button on the screen remote control to view the
Schedule List.
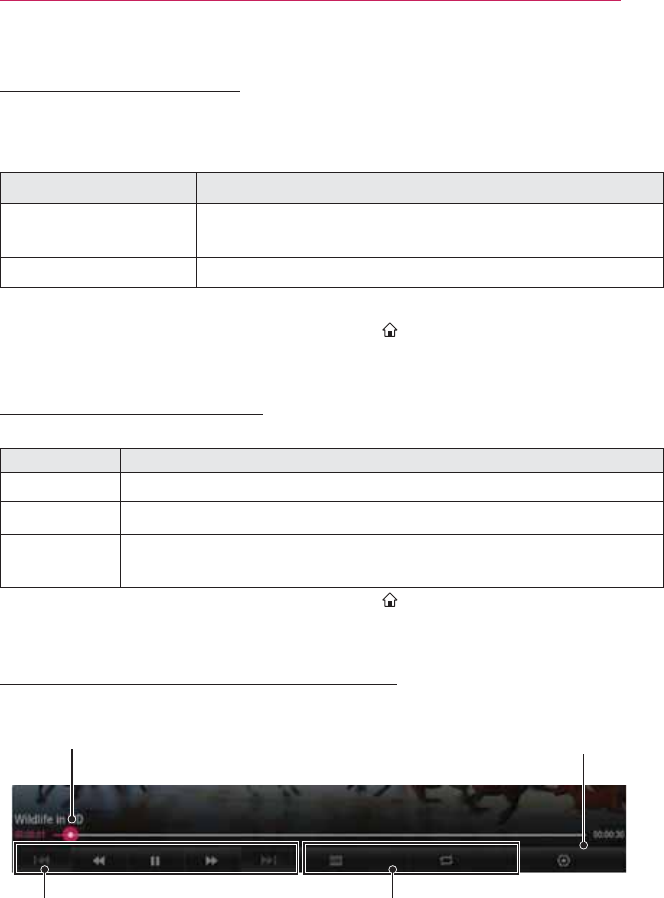
;4
USING ADVANCED FUNCTIONS
To watch recordings
y
y You can view the recordings stored on a USB device. You can select a recording to
play, delete or upload to the Cloud server.
Item Description
Play on previous
playtime.
Resumes play of a recording you have played back before.
Play from the start. Plays back the selected recording from the beginning.
y RECORDED TV.
y You can also view the recordings from SMART
TV.
To manage recordings
y
Item Description
Protection Prevents the selected recording from being automatically deleted.
Delete Prevents the selected recording from being automatically deleted.
Upload to
Cloud
Uploads and saves the selected recording in the cloud server.
y You can also view the recordings from SMART
TV.
To control playback of recordings
Press the Wheel (OK) button on the remote control while playing.
Set recordings playback option
Clip-Edit/Repeat
Adjust picture while playing
Select a point from which to play
Clip-Edit Repeat
y The picture may differ from the screen on the Projector.

;5 USING ADVANCED FUNCTIONS
USB For Time Machine II
To connect a USB device
for Time Machine II
4 Prepare a USB device to be used for
Time Machine II.
5 Connect a USB storage device to the
port with the Time Machine Ready
label at the back of your Projector.
6 To use a USB device only for the
Time Machine II function, you must
initialise the device. Select Wheel
Initialization if you connect a device
that has not been initialised. The USB
Device Initialization screen appears.
7 To complete USB Device
Initialization and use TimeShift, set
the TimeShift mode to ON.
y You can start USB Device
Initialization from SMART
Initialization.
y
or Solid State Drive (SSD) as a USB
device for Time Machine II only.
y It is recommended that you use a
USB device with a capacity between
y For an SSD, there is a limit to the
amount of reading/writing that can be
done. Therefore, it is recommended
y To remove a USB device, select
. Make
sure you receive the confirmation
message that the USB device has
been removed.
y If a USB device is faulty, the Time
Machine II function may not operate
normally.
y
USB device may not be recognized or
may not work properly.
To use Timeshift
What is TimeShift (real-
time playback)?
It is a function you can use to save the
programme you are currently watching
temporarily on a USB device so you can
play back a scene you missed while
watching TV. This function allows you to
continue watching from where you were
previously if you go out for a while.
y You have to set the TimeShift mode
to ON after connecting a USB device
to use the TimeShift function.
y This function works for analogue/
digital programmes and AV input
mode.
y With the TimeShift function, you can
play a programme back for up to two
hours. This time may vary depending
on your region.
y In TimeShift mode, pictures stored by
this function are deleted if you turn off
the TV or projector without recording
them.

;6
USING ADVANCED FUNCTIONS
To use the TimeShift (real-time playback) function
Use the left or right navigation button on the Magic remote control to wind the picture
REC Live Schedule
y You can also operate TimeShift using the left or right navigation button on a standard
remote control.

;7 USING ADVANCED FUNCTIONS
To set the Time Machine II functions
y
You can change the settings for Time Machine II while using the function.
Item Description
Recording
Quality
Sets the picture quality of recordings. You can set it to High
Quality or Normal Quality.
y The recording time may vary depending on the recording
quality.
TimeShift Plays back a scene that you have missed.
y ON: Enables the TimeShift function automatically when you turn
on the TV.
y OFF: Disables the TimeShift function.
USB Device
Initialization
Sets a connected storage device to be used only for Time Machine
II. All data saved on the USB device is deleted.
Settings for
Upload to Cloud
Automatically uploads recordings to the Cloud server.
[Depending on country]
y A storage device on which USB Device initialisation has been performed will not
be detected by a PC.
y Recordings saved on a USB device can be damaged. The manufacturer is not liable
for any damaged recordings since it is the user's responsibility to manage data.
To use Time Machine cloud
To upload from Time Machine to Cloud
y SMART
This function is used to upload recordings to Cloud. You can simply select recordings to
upload to Cloud.
y You must have the appropriate permission to use the Cloud service.
y If there is not enough space on Cloud, you can only upload files that will fit in the free
space.
y You can manage the recordings on Cloud by using the LG Cloud app.
y Smartphone/Tablet PC users can download the LG Cloud app from the Google Play
store.

;8
USING ADVANCED FUNCTIONS
To take advantage of Time Machine
To use Time Machine II in various ways
To use Time Machine II in various ways
Item Description
Cloud Uploads recordings to the Cloud server so that you can watch the
recordings anywhere by accessing Cloud.
y You can use this function on the LG Cloud app on a smartphone or tablet PC.
On Now Still pictures are provided for programme searches.
You can record the programme you searched for immediately or schedule a
recording or watching time for the programme.
Voice
Mate
Recognises a human voice to search for a programme and control the Projector.
You can record immediately or schedule recording using just a programme name.
Search
Searches for a picture you want. You can search for a programme using a
programme name to record immediately or schedule a recording or watching time.
y For a description of each function, refer to the corresponding section.
To control a projector using a smartphone
You can download the LG TV Remote app from Google Play Store or Apple App Store
and use it on any Projector connected with your smartphone.
- Now you can enjoy your favorite Projector shows on your smartphone. (Some
models only)
- You can easily enter your account information to log in.
- You can add your favorite channels on your smartphone.
- You can use the functions such as Premium, MY APPS, SmartShare™, and
Social Center directly on your smartphone.
-
be entered on some screens.)
- Select the app's touch pad to control in the same way the pointer of the Magic
Remote Control works.
- You can control the game app of the Projector by selecting the Game Pad in
the LG TV Remote app.
-
provided. (Some models with specified conditions only.)
- You can set the Projector to the power-saving mode while watching Projector
on your smartphone.
- You can capture the screen you are watching and share it through social
network services such as Twitter and Facebook.
y The supported functions may vary depending on the version of the LG TV Remote
app.

;9 USING ADVANCED FUNCTIONS
To use a USB input device on a projector
To use a USB wired/wireless mouse
Connect your mouse to the USB port. Use the mouse to move the pointer on the
Projector screen and select the menu you want.
Mouse Magic Remote Control
Left Button
Wheel Button Wheel Button on Magic Remote Control
y The right and the special buttons on the mouse do not work.
y The usability of a wireless USB mouse and keyboard may be affected by Radio
Frequency environment and the distance.
To use a USB wired/wireless keyboard
using the search function and the Internet.
y
y It is recommended to use the product which is tested for compatibility with LG
Projector.
y
y You can change the input language by pressing the language switch key (or the right
Alt key) on your keyboard.
To use a gamepad
Connect your gamepad to the USB port on the Projector if the game requires a
gamepad.
y It is recommended to use an authorized gamepad which is tested for compatibility
with LG Projector.
;:
CUSTOMIZING SETTINGS
CUSTOMIZING SETTINGS
SETTINGS
4 Press the SETTINGS button.
(Press the SMART button and select Settings.)
5 Use the or button to select the desired item and press the OK button.
6 Use the , , or button to set up the desired item and press the OK button.
7 Press the EXIT button when completed.
Menu Description
PICTURE Adjusts the image quality for optimal viewing.
SOUND Adjusts the sound quality and volume level.
CHANNEL Sets up or edits a channel.
TIME Sets the time and time-related features.
LOCK Locks or unlocks a channel or a program.
OPTION Customizes the general settings.
NETWORK Sets the network.
SUPPORT Shows the projector information.
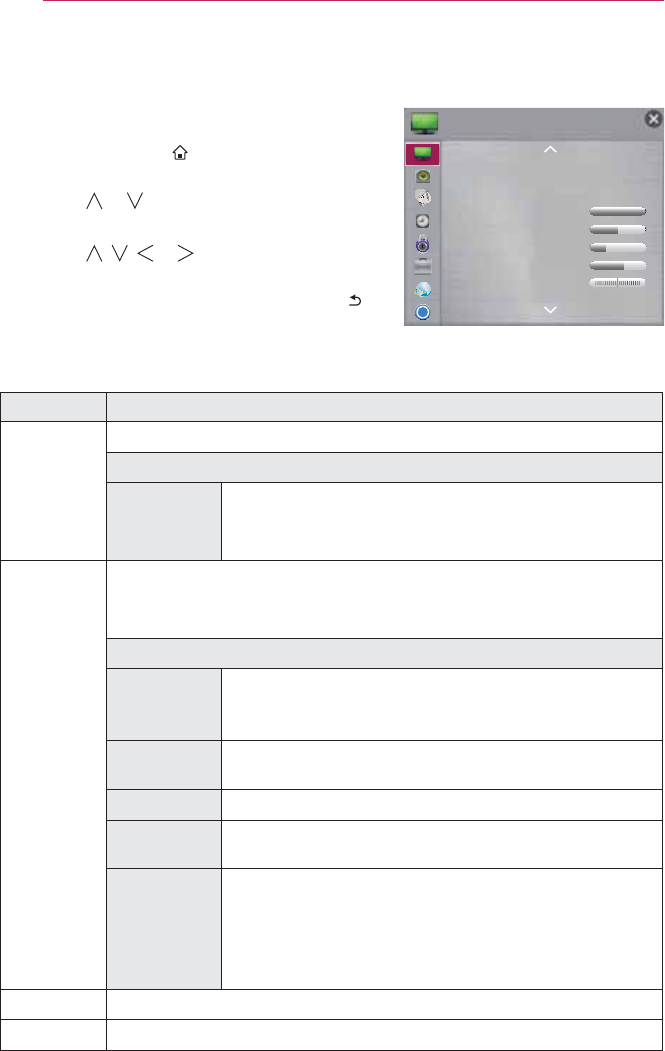
;; CUSTOMIZING SETTINGS
PICTURE Settings
4 Press the SETTINGS button.
(Press the SMART button and select
Settings.)
5 Use the or button to select PICTURE and
press the OK button.
6 Use the , , or button to set up the
desired item and press the OK button.
- To return to the previous menu, press the
button.
The available picture settings are described as follows.
Item Description
Energy
Saving
Reduces power consumption by adjusting screen brightness.
Mode
Minimum/
Medium/
Maximum
Applies the pre-set Energy Saving mode.
Picture
Mode
Selects the picture mode optimized for the viewing environment or the
programme.
You can also customize advanced options for each mode.
Mode
Vivid (User)
vivid images.
Standard Displays images in standard levels of contrast,
brightness and sharpness.
Cinema Optimizes the image for a movie.
Game Optimizes the image for playing games on fast-moving
screens.
Expert1/2
and amateurs to enjoy the best Projector viewing.
normal images, the effects may not be dramatic.
Contrast Adjusts the difference between bright and dark regions of the screen.
Brightness Adjusts the overall screen brightness.
Ͱ
3,&785(
yᰚ(QHUJ\6DYLQJ0LQLPXP
y3LFWXUH0RGH6WDQGDUG
y&RQWUDVW
y%ULJKWQHVV
y6KDUSQHVV
y&RORU
y7LQW
UJ
;<
CUSTOMIZING SETTINGS
Item Description
Sharpness Adjusts the sharpness of the borders between bright and dark.
Color Adjusts the colours on the screen darker or lighter.
Tint Adjusts the red/green colour balance.
Advanced
Control
Customizes the advanced settings.
Picture
Option
Sets optional settings.
Picture
Reset
Resets values customized by the user.
Each picture mode is reset. Select the picture mode you wish to reset.
Aspect
Ratio
Resizes the picture.
Picture
Wizard II
Use the remote control and follow the instructions of the Picture Wizard
pattern devices or help from a specialist. Follow the instructions to
obtain the optimum picture quality.
Advanced Control
Item Description
Dynamic
Contrast
Adjusts contrast and colour to the optimal level according to the
screen’s brightness.
Dynamic
Color
Adjusts colours for more natural-looking colours.
Preferred
Color
Skin Color Skin colour spectrum can be separately set to implement
Grass
Color
Natural colour spectrum (meadows, hills, etc.) can be
separately set.
Sky Color Sky colour is set separately.
Super
Resolution
Provides a crystal-clear picture by improving the details in areas where
the picture is blurry or unclear.
Color
Temperature
Adjusts the overall color of the screen to suit your preference.
You can select Natural, Cool, Medium or Warm.
Gamma Sets the gradation curve according to the output of the picture signal in
relation to the input signal.

<3 CUSTOMIZING SETTINGS
Expert Control
Item Description
Dynamic
Contrast
Adjusts contrast and colour to the optimal level according to the
screen’s brightness.
Super
Resolution
Provides a crystal-clear picture by improving the details in areas
where the picture is blurry or unclear.
Color Gamut
y Standard: Displays the original colors of an input signal
regardless of the display features.
y Wide: Makes use of the display's rich colors.
Edge Enhancer Shows clearer and distinctive yet natural edges of the video.
xvYCC Displays much richer colors.
Color Filter
saturation and hue accurately.
Expert Pattern
Gamma Sets the gradation curve according to the output of the picture
signal in relation to the input signal.
White Balance
Adjusts white balance. Detailed adjustment is possible as shown below.
y Color Temperature: Select Warm, Cool, Medium or Natural.
a. Method: 2 points
- Pattern: Inner, Outer
- Contrast Red/Green/Blue, Brightness Red/Green/Blue:
b. Method: 20 point IRE
- Pattern: Inner, Outer
- Institute of Radio Engineers (IRE) is the unit indicating the size
value satisfying each gamma is automatically

<4
CUSTOMIZING SETTINGS
Item Description
Tint Adjusts Red/Green/Blue/Cyan/Magenta/Yellow colors. Allows an
Blue/Cyan/Magenta/Yellow) can be selectively adjusted without
affecting other colors.
You may not see colors change on a normal picture even after
adjustment.
- Chroma Red/Green/Blue/Yellow/Cyan/Magenta,
Tone Red/Green/Blue/Yellow/Cyan, Magenta:
* Depending on input signal or other picture settings, the range of detailed items for
adjustment may differ.
Picture Option
Item Description
Noise Reduction Reduces screen noise in the video.
MPEG Noise
Reduction
Eliminates noise generated while creating digital picture signals.
Black Level Adjusts the brightness or darkness of the screen to suit the
black level of the picture input using the degree of darkness
(black level) of the screen.
Real Cinema Optimizes the screen for movie viewing.
TruMotion Corrects images to display smoother motion sequences.
Mode
Smooth De-Judder value is set to 3.
Clear De-Judder value is set to 7.
User De-Judder can be set manually.
y De-Judder:
#Wklv#ixqfwlrq#dgmxvwv#mxgghulqj#
ri#wkh#vfuhhq1
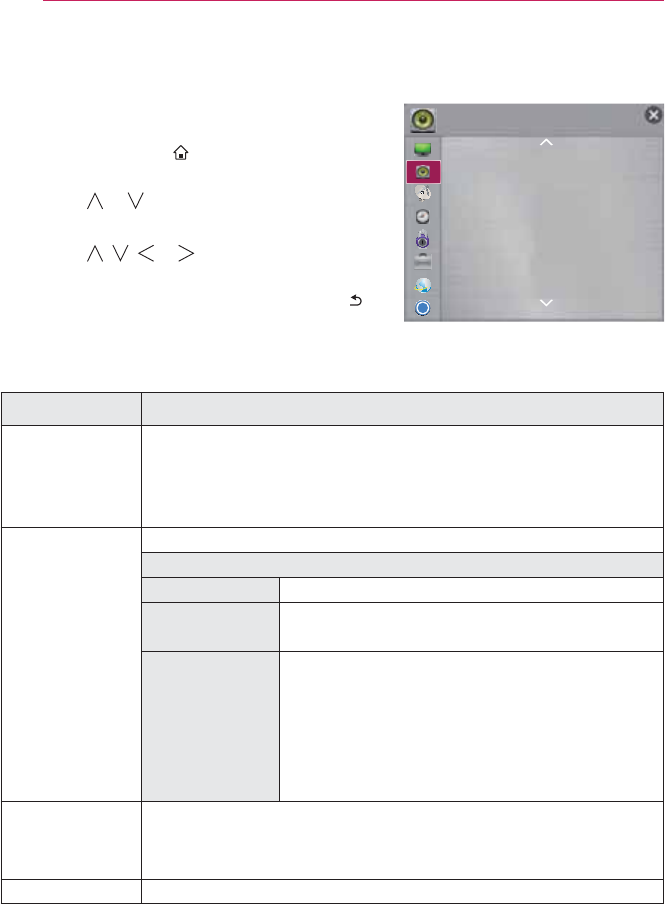
<5 CUSTOMIZING SETTINGS
SOUND Settings
4 Press the SETTINGS button.
(Press the SMART button and select
Settings.)
5 Use the or button to select SOUND and
press the OK button.
6 Use the , , or button to set up the
desired item and press the OK button.
- To return to the previous menu, press the
button.
The available sound settings are described as follows.
Item Description
Smart Sound
Mode
Provides the optimized sound adjusted for each content type.
y If the Smart Sound Mode function is enabled, Sound Mode,
Virtual Surround Plus and Clear Voice ll are automatically
adjusted.
Sound Mode Sets the sound mode.
Mode
Standard Suitable for all types of video.
Music/ Cinema/
Sport/ Game
User Setting Adjusts volume level.
y
Sets EQ by manual adjustment of sound
bands.
y Reset: Resets the equalizer value changed by
the user.
Virtual
Surround Plus
y If Clear Voice ll is set to ON, Virtual Surround plus will not be
chosen.
Clear Voice II Boosts voice clarity.
Ͱ
6281'
y 6PDUW6RXQG0RGHⓃ㿗
y 6RXQG0RGH 䩢㼇
y ㊋䐊㯃㜣ⶃ㲻⫣䬒ⷳ㢫
Ⓝ㿗
y 䙺⾳㮻㋻㵻㢫,,
Ⓝ㿗
y 㵓ⷐク⫣
y 䎢⸬㢫䭂䓪㜧䛣ㇿ⣏㑛79㢫䭂䓪
y 䱚ほ㞓⾳6\QF㹷㸏
Ⓝ㿗

<6
CUSTOMIZING SETTINGS
Item Description
Volume Mode Sets various modes for volume control.
Mode
Auto Volume Sets Auto Volume to On. Different volume
outputs from programme to programme. They
are then automatically adjusted for convenient
TV watching, when clicking through different
programme.
Volume Control Using a single volume curve may result in
an inaudible or loud sound depending on the
environment. Adjusts volume levels depending
on the time of day (day/night).
Sound Out Sets the audio output of the projector.
Mode
Projector
Speaker
Sound is output through the Projector speaker.
External
Speaker
(Optical/HDMI
ARC)
Sound is output through the speaker connected to
the optical port.
y ARC Mode
(Audio Return Channel), connect it to the
HDMI(ARC) port.
y Digital Sound Out: Sets up Digital Sound
Output.
LG Sound
Sync (Optical)
Sound is output through an LG audio device
connected to the optical digital audio output port.
LG Sound Sync
(Wireless)
Sound is output through a wirelessly connected
LG audio device.
Headphone Sound is output through headphones.
y
automatically when the projector is on.
<7 CUSTOMIZING SETTINGS
Item Description
AV Sync.
Adjust
Synchronizes video and audio directly when they do not match.
If you set AV Sync. Adjust to ON, you can adjust the sound output
(Projector speakers or SPDIF) to the screen image.
Mode
Projector
Speaker
Adjusts the synchronization of the sound from
the Projector's internal speakers.
Bypass Outputs broadcasting signals or the audio of an
be output before video as it takes time to process
video input into the Projector.
Sound Option
Setting
Balance: Adjusts left/right audio balance.
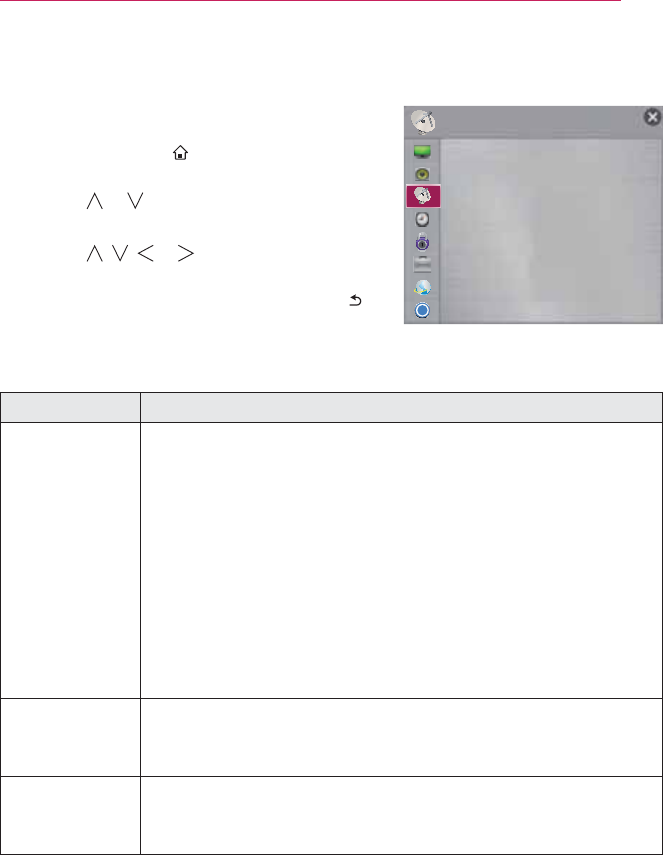
<8
CUSTOMIZING SETTINGS
CHANNEL Settings
4 Press the SETTINGS button.
(Press the SMART button and select
Settings.)
5 Use the or button to select CHANNEL and
press the OK button.
6 Use the , , or button to set up the
desired item and press the OK button.
- To return to the previous menu, press the
button.
The available channel settings are described as follows.
Item Description
Auto Tuning Remembers a channel which is currently broadcasting. You should
use this function when you move to another house or move the
projector to other place. It must be used while the antenna is
connected and there are channel broadcasting signals.
y Channels are not registered properly unless the antenna/cable
is connected correctly.
y Auto Tuning only finds programmes that are currently
broadcasting. only finds programmes that are currently
broadcasting.
y If Lock System is turned on, a pop-up window will appear
asking for password.
Manual Tuning Adjusts programmes manually and saves the results.
For digital broadcasting, signal strength and signal quality can be
checked.
Ch.Edit Edits the saved programmes.
Set as favourite programme, block/unblock programme, skip
programme etc. of the selected programme.
Ͱ
&+$11(/
y $XWR7XQLQJ
y 0DQXDO7XQLQJ
y &K(GLW
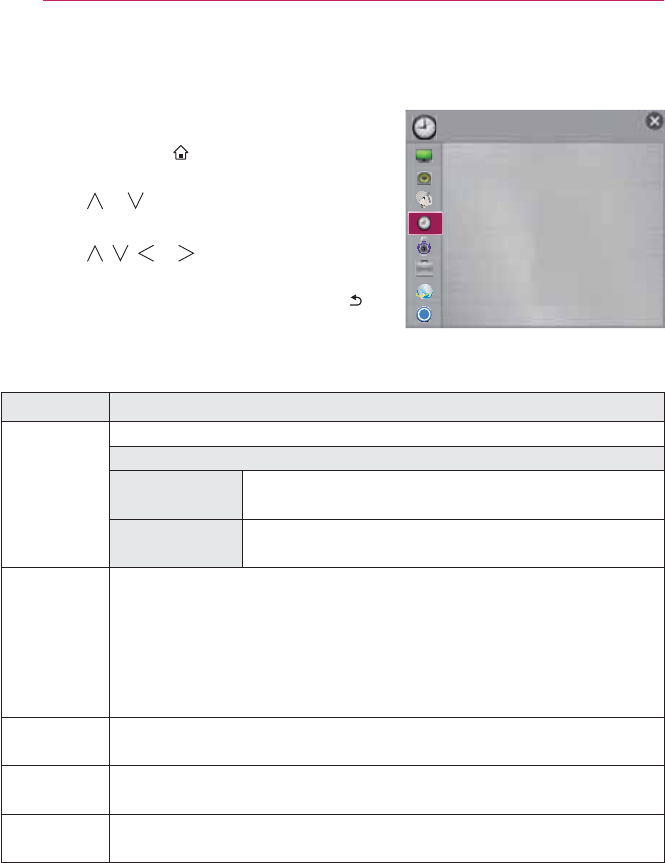
<9 CUSTOMIZING SETTINGS
TIME Settings
4 Press the SETTINGS button.
(Press the SMART button and select
Settings.)
5 Use the or button to select TIME and press
the OK button.
6 Use the , , or button to set up the
desired item and press the OK button.
- To return to the previous menu, press the
button.
The available time settings are described as follows.
Item Description
Clock Checks or changes the time while watching projector.
Mode
Auto Synchronizes the projector clock to the digital time
information sent by the TV station.
Manual Sets the time and date manually if the auto setup
does not correspond to the current time.
Off Time
/On Time
Sets On/Off time. Select Off on Repeat to discontinue On Time/Off
Time.
y To use On Time/Off Time, set the current time correctly.
y Even when the On Time function is on, the projector will turn off
time.
Sleep Timer Turns off the Projector after a preset number of minutes.
To cancel the Sleep Timer, select Off.
Auto Off If there is no signal, the projector automatically turns off after the preset
time has elapsed.
Automatic
Standby
If you do not press any button on the projector or remote control for a
certain period, the projector will automatically switch to standby mode.
Ͱ
7,0(
y &ORFN
y 2II7LPH 2II
y 2Q7LPH 2II
y 6OHHS7LPHU 2II
y $XWR2II PLQ
y $XWRPDWLF6WDQGE\
2II
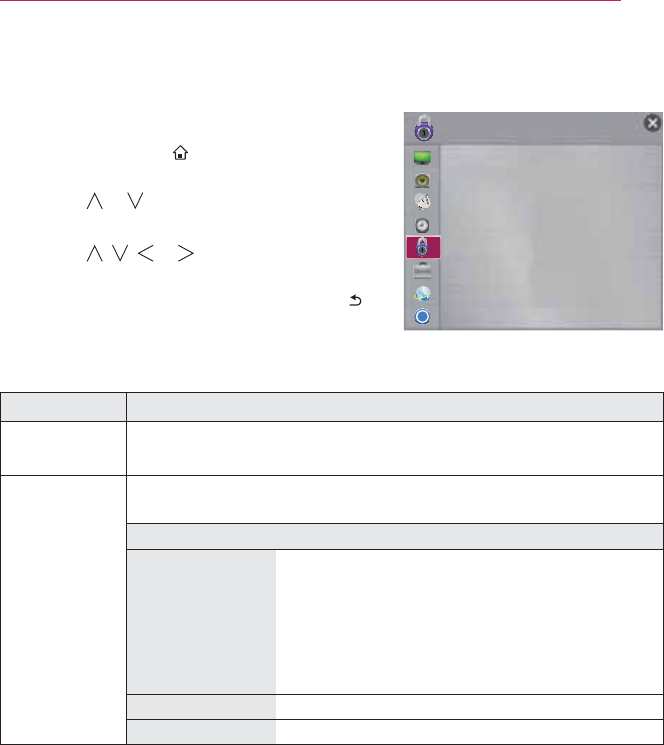
<:
CUSTOMIZING SETTINGS
LOCK Settings
4 Press the SETTINGS button.
(Press the SMART button and select
Settings.)
5 Use the or button to select LOCK and
press the OK button.
6 Use the , , or button to set up the
desired item and press the OK button.
- To return to the previous menu, press the
button.
The available lock settings are described as follows.
Item Description
Set Password Sets or changes projector password.
y The initial password is set as 0000.
Lock System
input. Select the Lock System to On.
Item
Block Channel Blocks the programmes that contain
inappropriate contents for children. The
programmes can be selected but the screen is
blank and the audio is muted.
To watch a locked programme, enter the
password.
Input Block Block the input sources.
Application Lock Lock the Application.
Ͱ
/2&.
y 6HW3DVVZRUG
y /RFN6\VWHP 2II
y%ORFN&KDQQHO
y,QSXW%ORFN
y$SSOLFDWLRQ/RFN
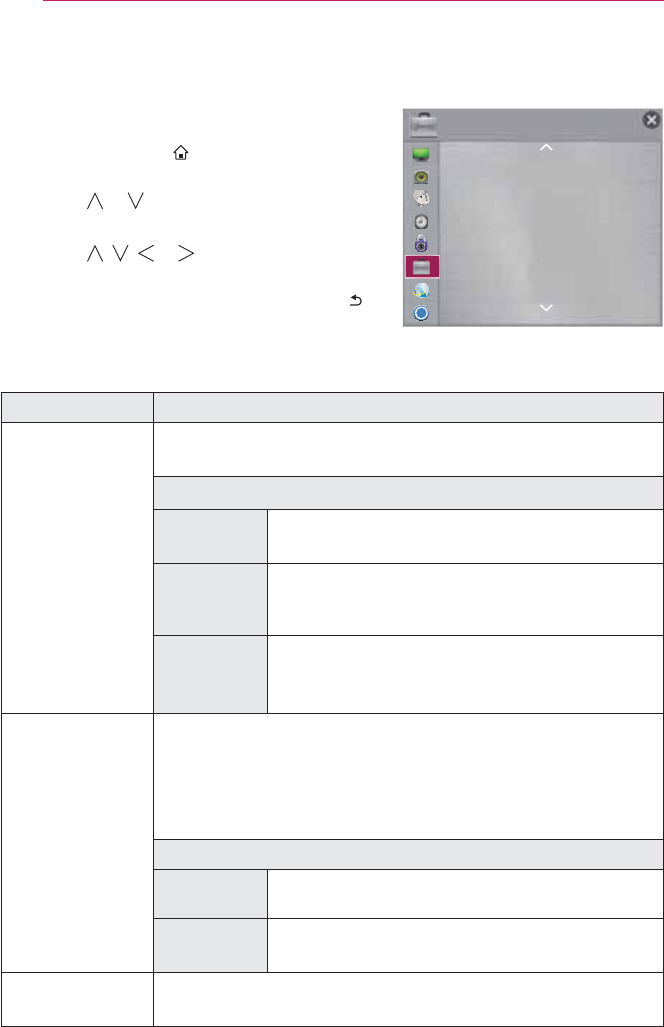
<; CUSTOMIZING SETTINGS
OPTION Settings
4 Press the SETTINGS button.
(Press the SMART button and select
Settings.)
5 Use the or button to select OPTION and
press the OK button.
6 Use the , , or button to set up the
desired item and press the OK button.
- To return to the previous menu, press the
button.
The available option settings are described as follows.
Item Description
Language Selects Menu Language and Audio Language displayed on the
screen.
Item
Menu
Language Selects a screen menu language.
Audio
Language
Selects the desired language when watching
digital broadcasting containing several audio
languages. (In Digital Mode Only)
Voice
Recognition
Language
Select the language to make voice search.
Service Country
Setting
You can change the country setting of your Smart Projector. The
Premium service and LG Smart World that are available for the
country you selected will be provided.
y If a network is disconnected while setting the service country, it
may not be set properly.
Item
Auto Setting A service country is automatically set for your
Smart Projector.
Manual
Setting
A service country can be set manually for your
Smart Projector.
Region Setting You can select your area to use your local channel info and Smart
Projector service.
Ͱ
237,21
y /DQJXDJH
y 6HUYLFH&RXQWU\6HWWLQJ
y 5HJLRQ6HWWLQJ
y &DSWLRQ
2II
y 6WDQGE\/LJKW
2Q
y 6HWWKH8QLYHUVDO&RQWURO
y 3RLQWHU
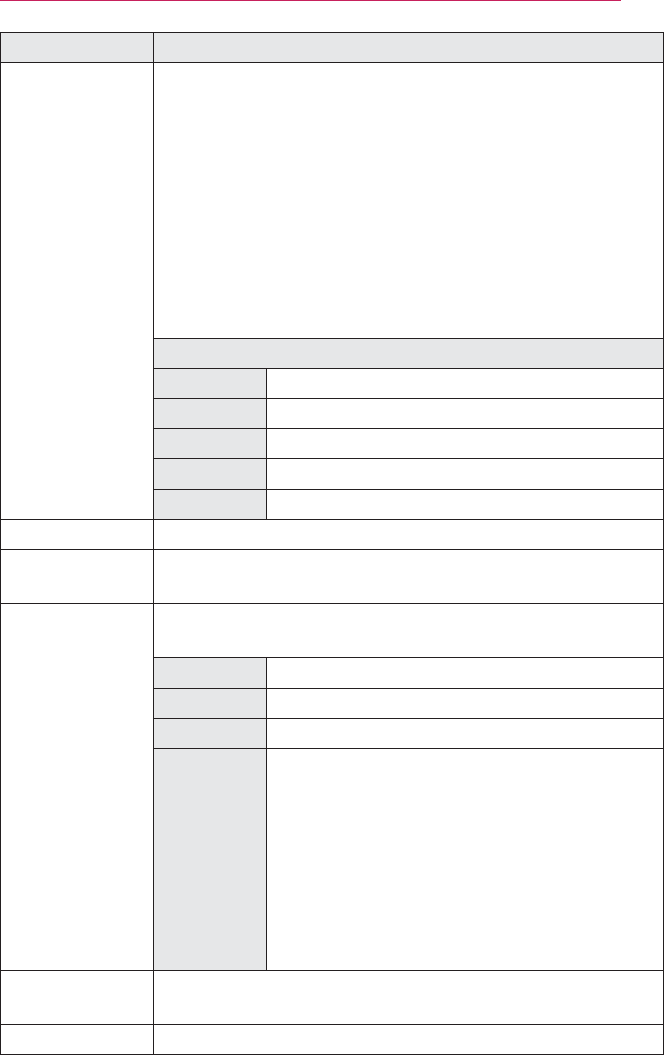
<<
CUSTOMIZING SETTINGS
Item Description
Caption View subtitles when the TV station provides subtitled programing.
Program subtitles work only on digital/analog broadcasts or
Caption to On and select caption settings.
y
y When viewing digital broadcasts, select from Service 1 to
Service 6 on Mode.
y Set up the size and color of the subtitles on Digital Option.
- Select Set by Program or Custom.
- Select Custom to adjust minute options such as the subtitles'
size and color.
Option (For Digital Broadcasting)
Size Selects the wordsize.
Text Color
Text Opacity
Bg Color Selects a color for the background color.
Bg Opacity Adjusts the opacity for the background color.
Standby Light Turns the standby light in the panel of the projector on/off.
Set the Universal
Control
Blu-ray player, home theatre system, etc.
Pointer Sets the speed and shape of the pointer that appears on the
Projector screen.
Speed Sets the moving speed of the pointer.
Shape Selects a pointer shape from various options.
Shape Chooses the size of the pointer.
Alignment Set to On. If there is any misalignment between
the pointer and the actual direction the remote
control indicates, move the Magic Remote
Control left and right to realign. The pointer will
automatically realign to the centre, making it easier
to control.
y If it is set to Off, the Alignment function will not
work even when you move the Magic Remote
Control left and right.
Collection and Use
of Watched List
Selects whether to enable or disable Collection and Use of
Watched List.
PJT Mode
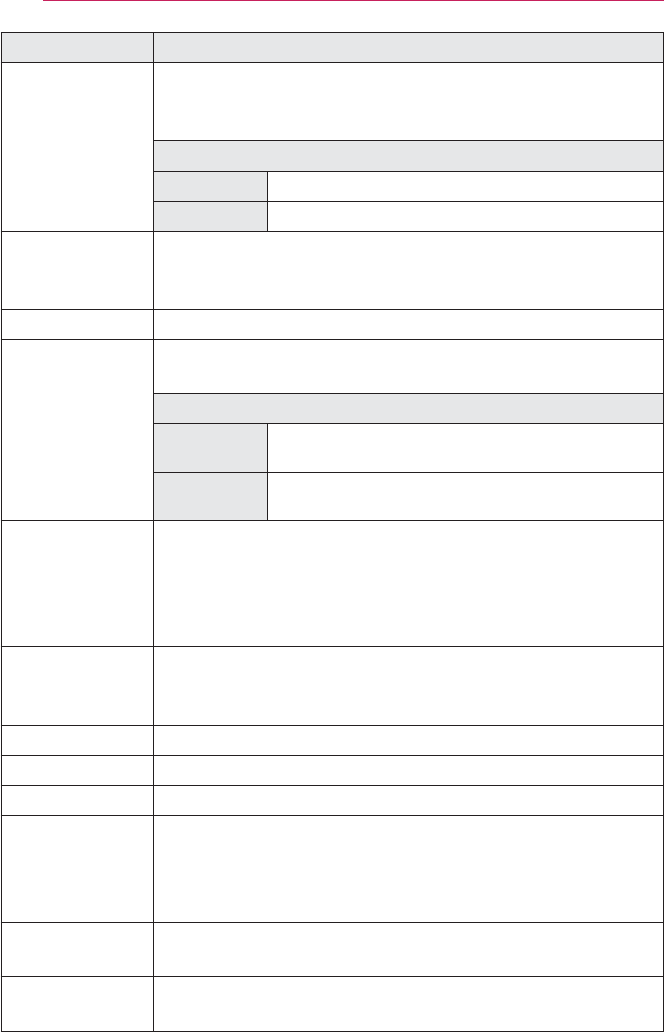
433 CUSTOMIZING SETTINGS
Item Description
Auto Keystone
trapezoidal screen image caused by tilting of the projector.
Item
On
Off
Keystone To prevent the screen image from becoming trapezoidal,
projector is not set at a right angle to the screen.
Blank Image Selects a background for blank Image.
Auto Power Makes the projector turn on automatically When the power code
is connected to the projector.
Item
On When the power code is connected to the
projector, it turns on automatically.
Off When the power code is connected to the
projector, it goes into standby mode.
High Altitude
turn this on.
Otherwise, the projector may overheat or its protection function
may be activated. If this happens, turn the projector off and then
on again after waiting for several minutes.
Auto Input
Search
Automatically searches for and displays the input signal type
Balloon Help Enables/disables the balloon help.
Control Device List
Displays the list of control devices connected to the projector.
See Avatar Turns the Avatar function on or off.
Initial Setting
Deletes all optional settings and returns to initial default mode. Once
initialization is complete, the projector will turn off and on by itself.
y If Lock System is activated, a pop-up password prompt will appear.
y Do not turn off the power during initialization.
Mode Setting Selects Home Use or Store Demo. For use at home, select
Visual Impaired Provides spoken descriptions of the visual elements of a TV
program.
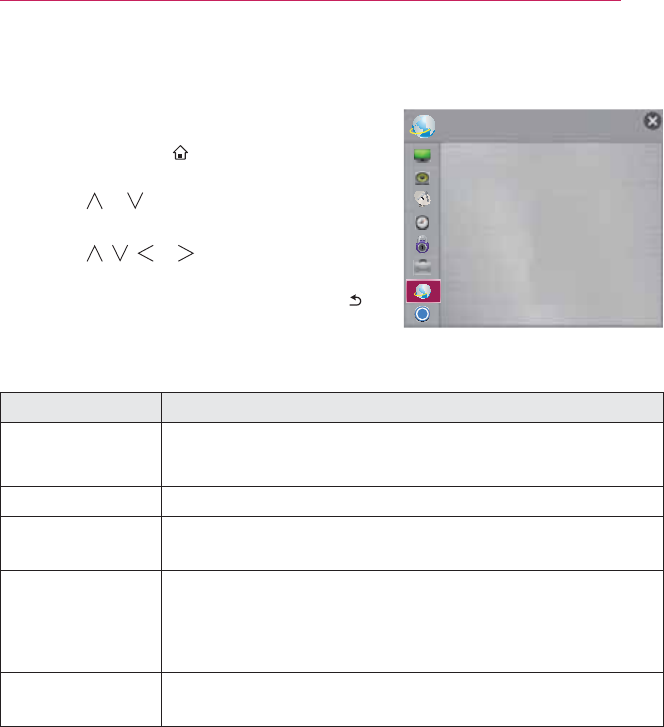
434
CUSTOMIZING SETTINGS
NETWORK Settings
4 Press the SETTINGS button.
(Press the SMART button and select
Settings.)
5 Use the or button to select NETWORK and
press the OK button.
6 Use the , , or button to set up the
desired item and press the OK button.
- To return to the previous menu, press the
button.
The available option settings are described as follows.
Item Description
Network
connection
Connects a network.
Network Status Displays the connection status of the network.
Wi-Fi Direct Wi-Fi Direct is a function that allows your projector to connect
with a Wi-Fi Direct device without Internet connection.
Miracast
TM
/ Intel's
WiDi
The Miracast
TM
allows you to enjoy video and audio from a
portable device through the projector wirelessly. Intel's WiDi
allows you to view a laptop screen through the projector without
a cable.
My Projector
Name
Changes the name that appears when searching for the
projector from other devices.
Ͱ
1(7:25.
y 1HWZRUN&RQQHFWLRQ
y 1HWZRUN6WDWXV
y :L)L'LUHFW
y 0LUDFDVW70,QWHOV:L'L
y 0\3URMHFWRU1DPH3)*-(
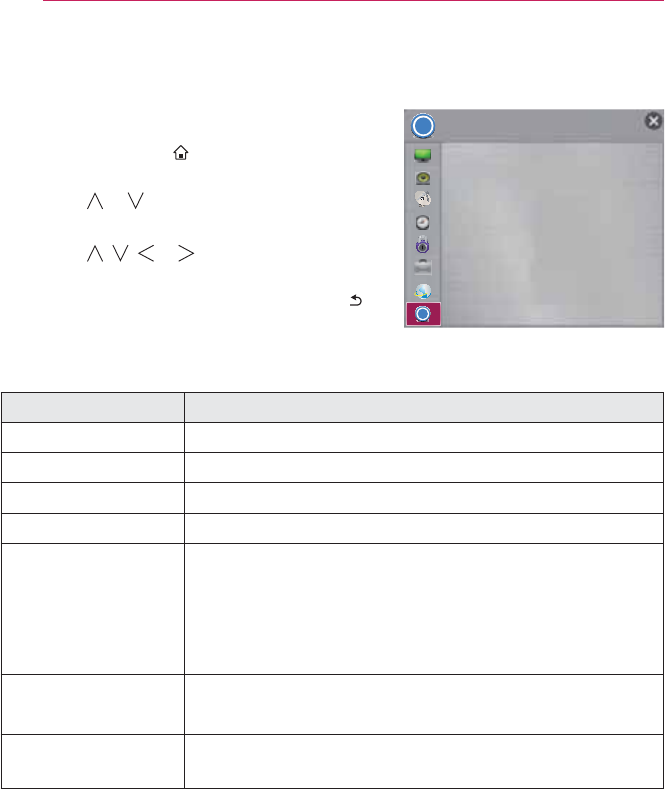
435 CUSTOMIZING SETTINGS
SUPPORT
4 Press the SETTINGS button.
(Press the SMART button and select
Settings.)
5 Use the or button to select SUPPORT and
press the OK button.
6 Use the , , or button to set up the
desired item and press the OK button.
- To return to the previous menu, press the
button.
The available support settings are described as follows.
Item Description
Software Update Updates to the latest software.
Picture Test Check whether a video signal is properly displayed.
Sound Test Check whether an audio signal is properly output.
Product/Service Info. Shows the product/service information.
LG Remote Projector
Service
This function allows you to get remote service for problems
through the LG Remote Projector Service.
y Internet connection is required to use the service.
y Before remote services can be enabled, you'll need to
agree to the Terms of Service.
Problems after
Update
If problems occur after updates, try initializing the system.
y During initialization, the projector will restart automatically.
Self Diagnosis Troubleshoots functional problems that can arise while using
the product.
Ͱ
Ͱ
6833257
y 6RIWZDUH8SGDWH
y 3LFWXUH7HVW
y 6RXQG7HVW
y 3URGXFW6HUYLFH,QIR
y /*5HPRWH3URMHFWRU6HUYLFH
y 3UREOHPVDIWHU8SGDWH
y 6HOI'LDJQRVLV
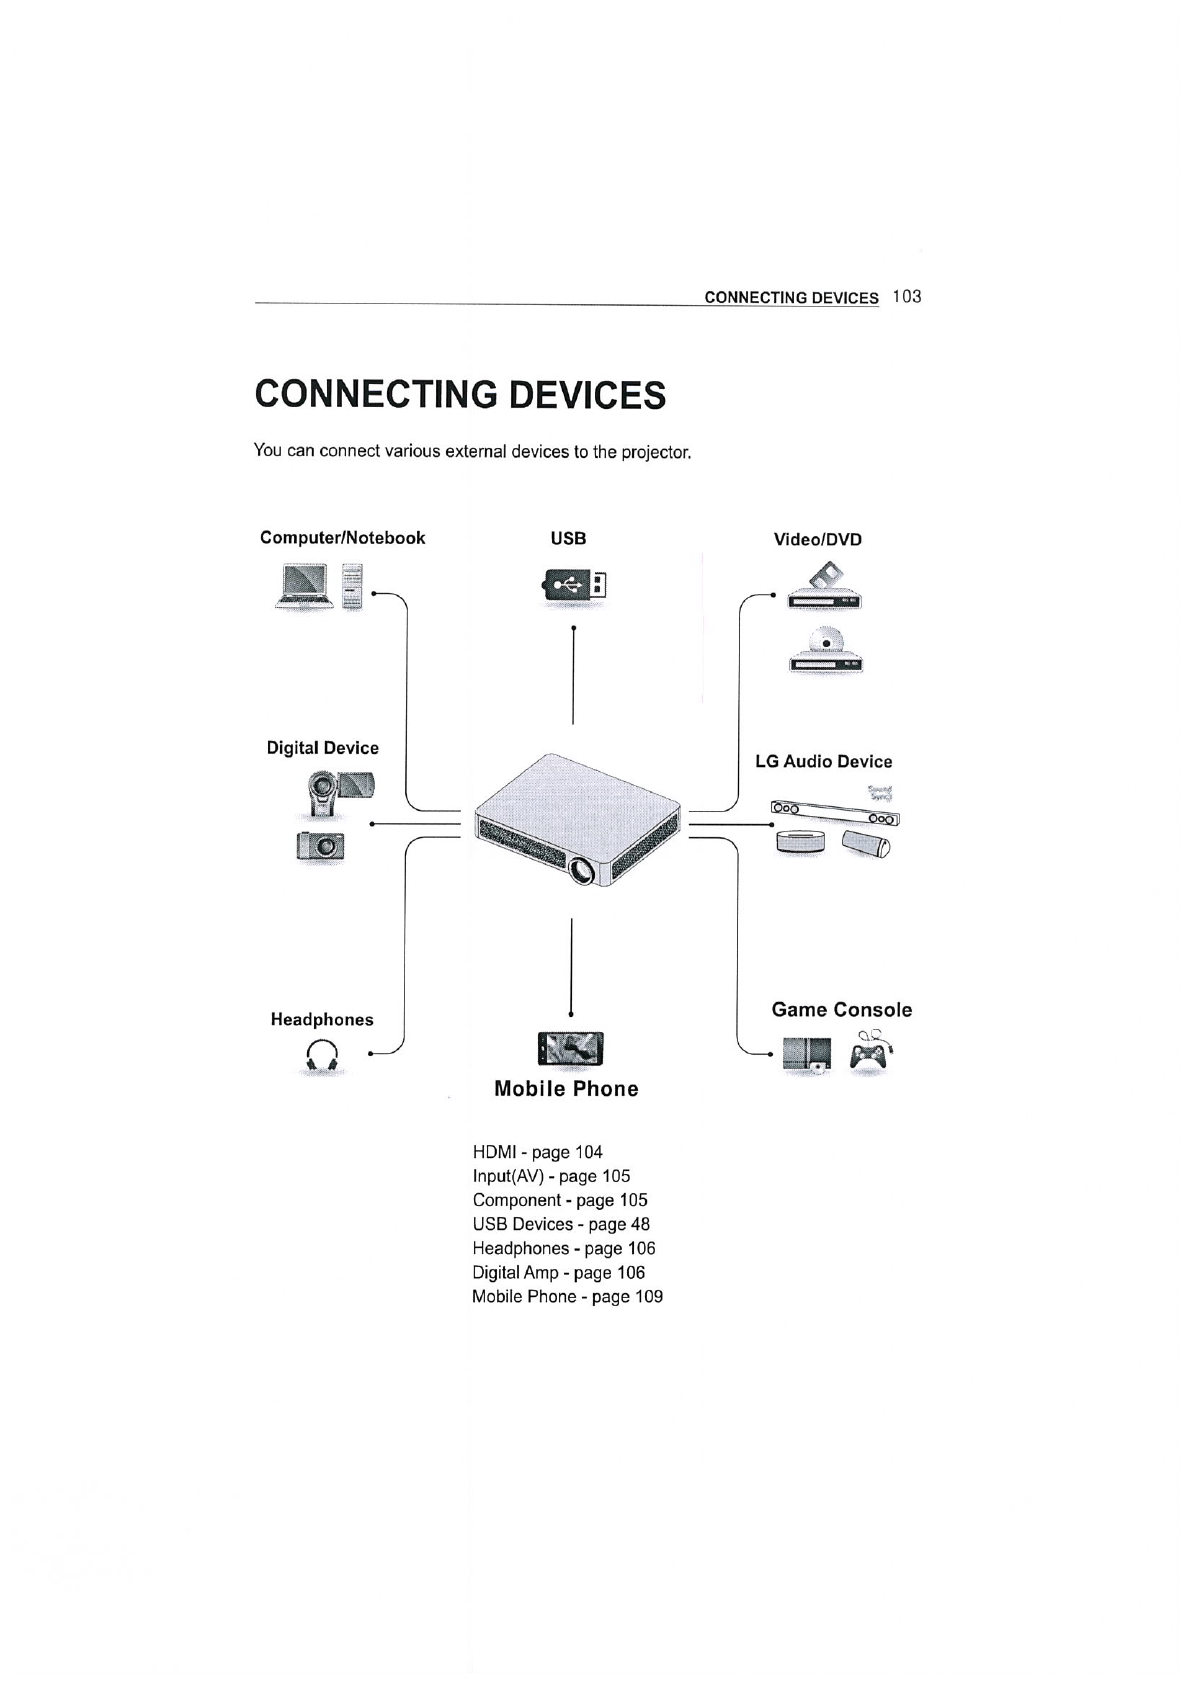
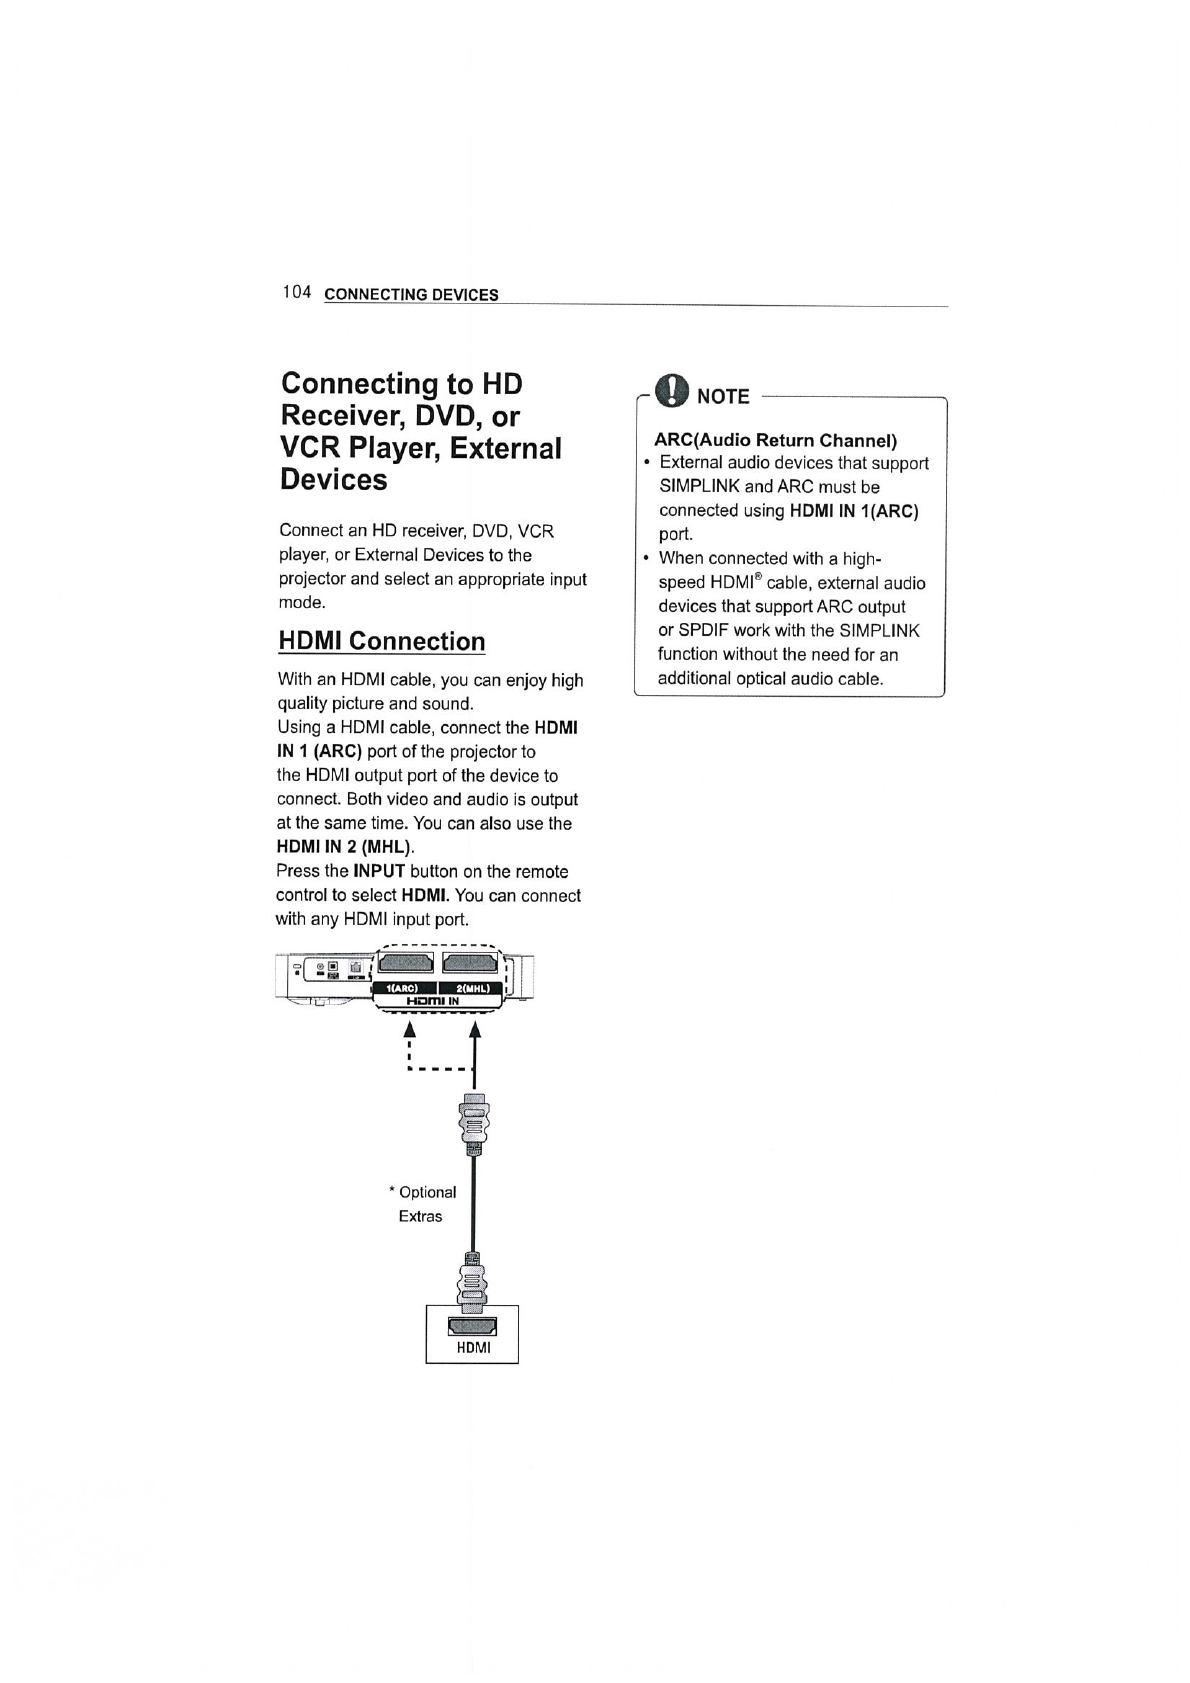
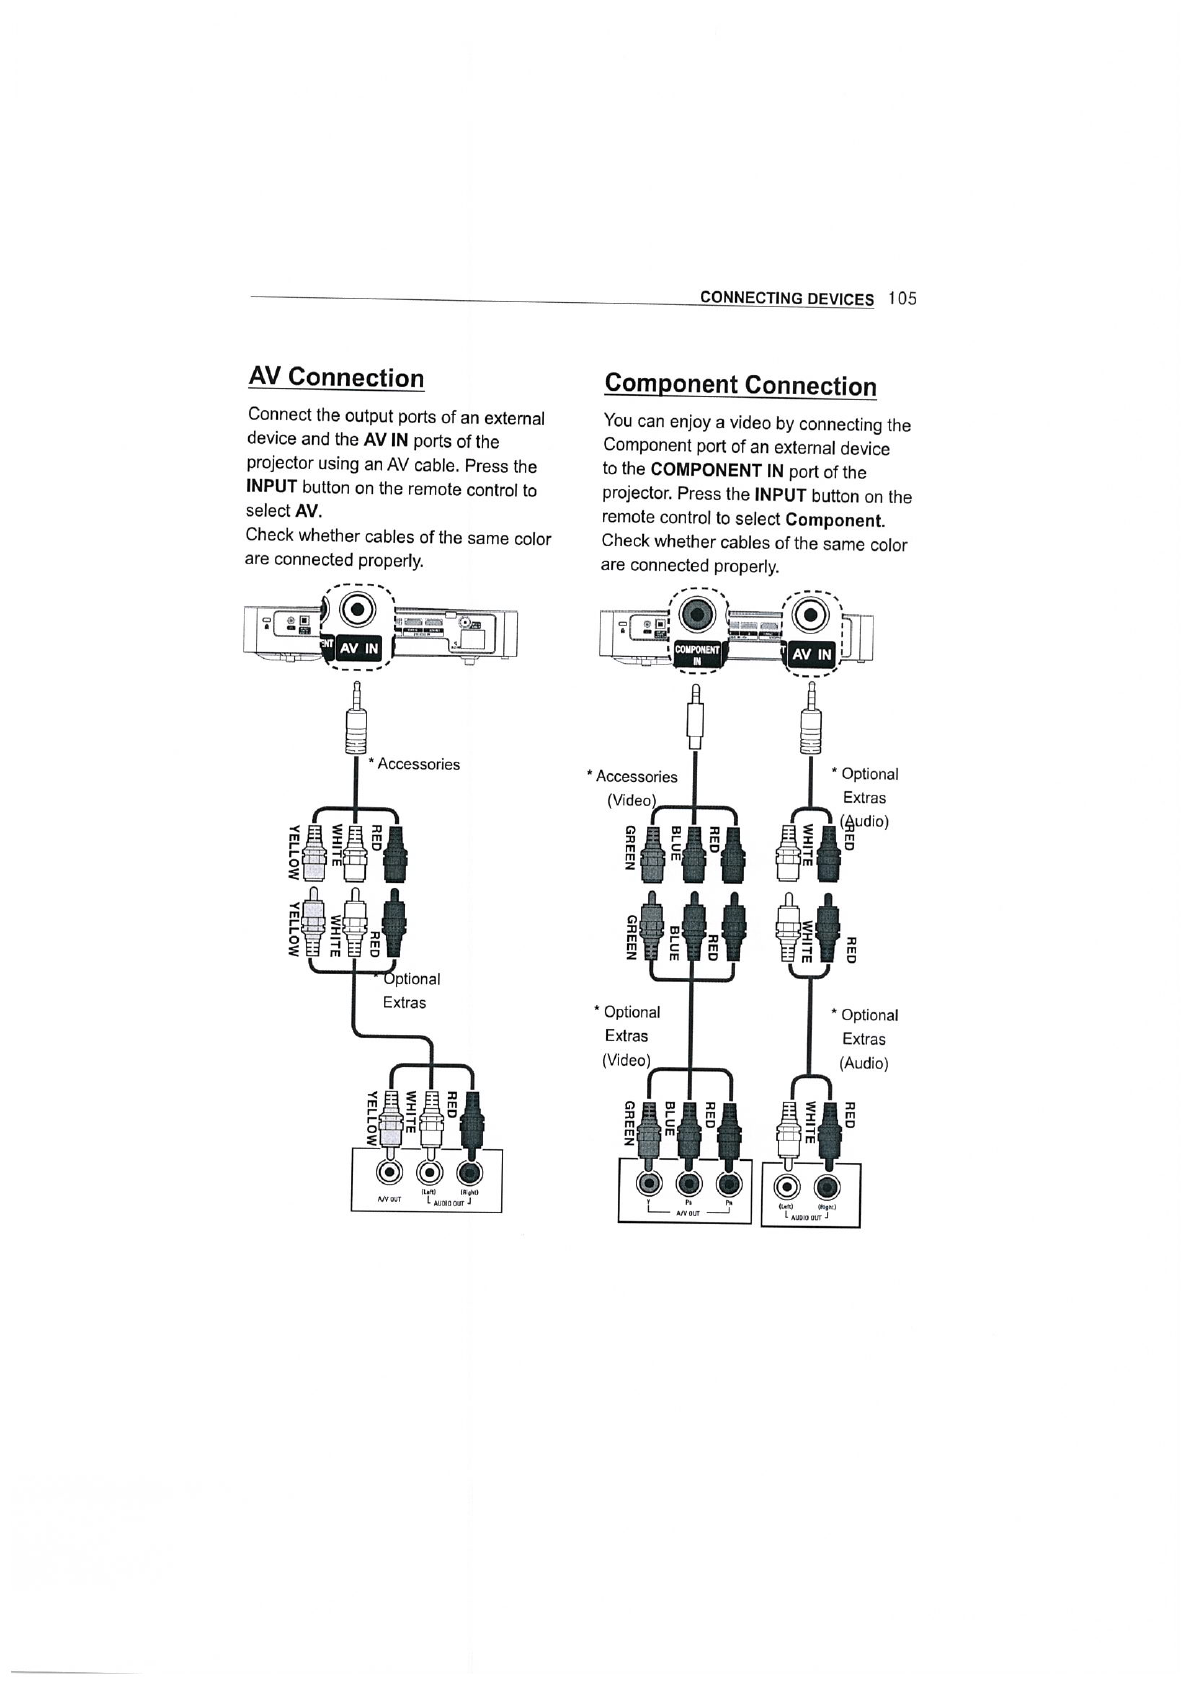
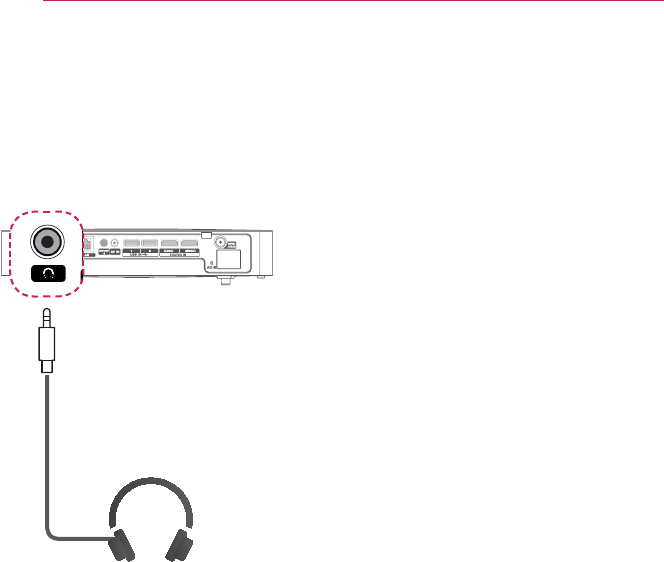
439 CONNECTING DEVICES
Connecting to
Headphones
You can listen to the audio through a
headphone.
* Optional
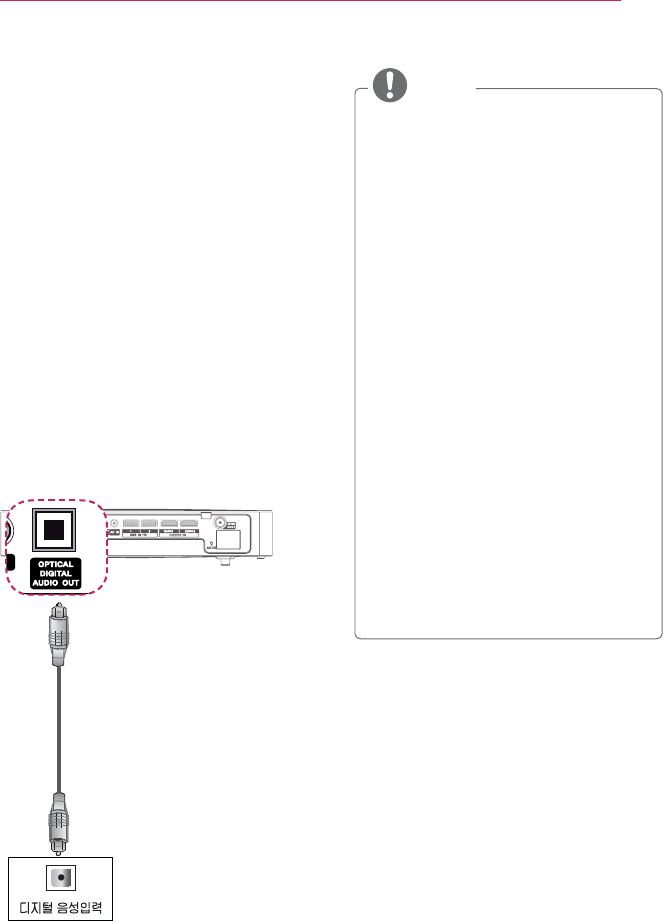
43:
CONNECTING DEVICES
Connecting a digital
amp
Using an optical cable, connect the
digital audio input port of a digital amp
to the OPTICAL DIGITAL AUDIO OUT
port of the projector. The output of an
amp with a digital converter must be set
to the desired audio format. When using
or when connecting an optical output
Sound
Out to External Speaker (Optical/HDMI
ARC) as shown below. If a projector,
home theater, or the speaker of an
same time, there will be an echo.
NOTE
y Also, refer to the user manual of the
audio device to connect.
y When connecting this product to
other devices, make sure to turn off
and unplug all the devices.
y The audio output of this product
has wide-ranging audio bandwidth,
so the receiver volume must be
adjusted properly.
Speakers can be damaged by
y Connecting the OPTICAL DIGITAL
AUDIO OUT port of the projector
to the digital audio input port of a
digital amp and the audio input port
of the projector to the analog audio
output port of the digital amp can
cause sound oscillation due to the
closed loop. Remove one of the two
connections to prevent this.
(This also applies to home theater
devices.)
* Optional
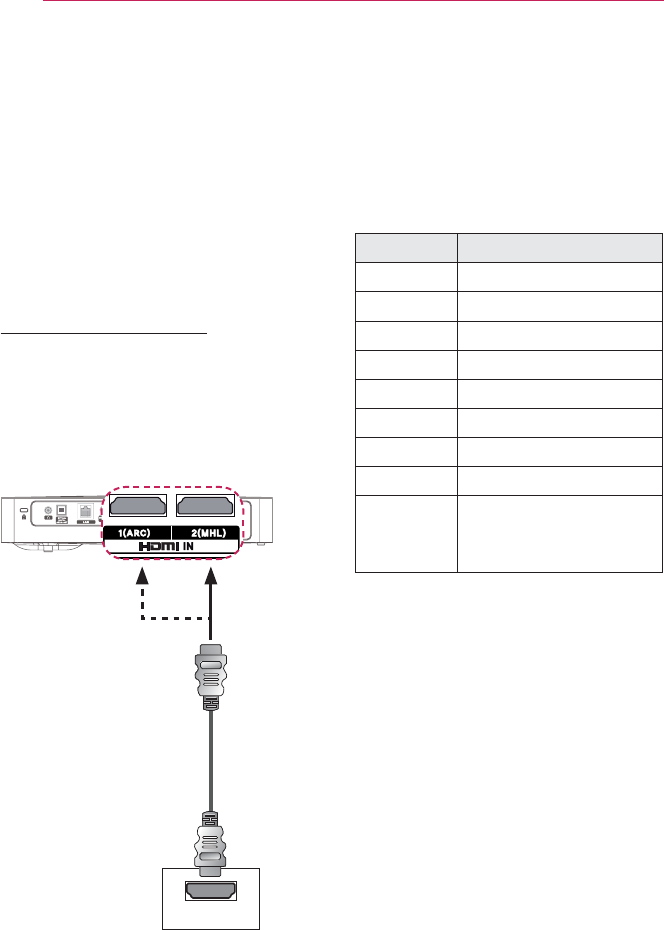
43; CONNECTING DEVICES
Connecting to PC and
Laptop
PC will automatically detect the projector
and requires no driver installation.
You can connect the projector to a
laptop to use various functions.
HDMI Connection
quality picture and sound
.
Press the INPUT button on the remote
control to select HDMI. You can connect
with any HDMI IN port.
+'0,
of switching the output. For more
information, refer to the External
Output, Connecting to an External
Monitor, or similar sections of the
owner's manual of your computer.
Brand Switching Output
NEC
Panasonic
Toshiba
IBM
Sony
Fujitsu
LG
Samsung
Macintosh Adjust the control panel
to enable mirroring after
start-up.
* Optional

443 MAINTENANCE
MAINTENANCE
Clean your Projector to keep it in optimal condition.
Cleaning
Cleaning the Lens
If there is any dust or staining on the lens surface, you must clean the lens.
Use an air spray or a cleaning cloth to clean the lens.
To remove dust or stains, use an air spray or apply a small amount of cleaning agent
onto a swab or soft cloth to lightly rub the lens.
the lens.
Cleaning the projector case
To remove dust or stains, use only a dry, lint-free, nonabrasive cloth to polish the lens.
Do not use alcohol, benzene, thinners, or other chemicals, which may damage the
case.
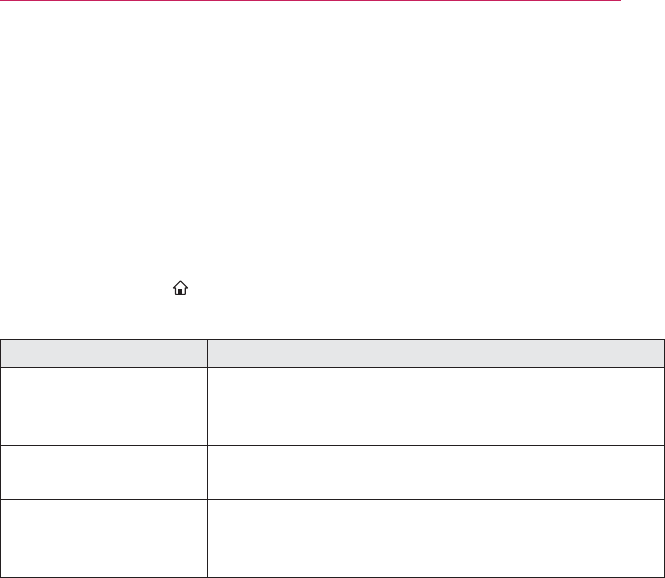
444
INFORMATION
INFORMATION
To update TV software
Uses Software Update to check and obtain the latest version.
It is also possible to check manually for available updates.
4 Press the SETTINGS button.
(Press the SMART button and select Settings.)
5 Select SUPPORT and go to Software Update.
Item Description
Software Update Set it to On.
If an update is available, a prompt will appear to perform
the update.
Automatic update
mode
If an update is available, the update automatically starts
without prompting.
Check Update Version Checks the latest update version installed. When a
new update is available, the download process can be
performed manually.
y When the update starts, the update progress window appears for a short time and
disappears.
y The latest version can be obtained via the digital broadcast signal or an internet
connection.
y If software is not updated, certain functions may not work properly.

445 INFORMATION
Before reporting a problem, check the following:
If the following symptoms occur, please carry out the checks and adjustments
described below. There may be no malfunction.
General
Problem Solution
Cannot view certain
programmes.
y Adjust the location or orientation of the antenna.
y Save the programmes you wish to view later using
Auto Tuning or Ch.Edit.
There is a delay after the
Projector is switched on
before the image is fully
visible.
y This is not a problem. Image noise that may
occur when the Projector is first switched is being
cleaned up.
PICTURE
y SMART
First run a Picture Test to verify that the image signal output is normal.
broadcast signals.
Problem Solution
Images from previous
programme or other
programmess linger or the
screen displays annoying
lines.
y Adjust the orientation of the antenna to the TV
transmitter, or refer to the manual for instructions
on connecting the antenna.
Vibrating horizontal/vertical
appear momentarily.
y Such a problem may happen when there is strong
electronic interference. Turn off other electronic
devices such as mobile phones, power tools and
other small electrical appliances.
The screen display freezes
or does not work properly
during a digital broadcast.
y This may occur in case of a weak signal or
unstable reception. Adjust the antenna orientation
and cable connections.
y If the signal strength or quality is low on Manual
Tuning, check with the TV station or administration
office.
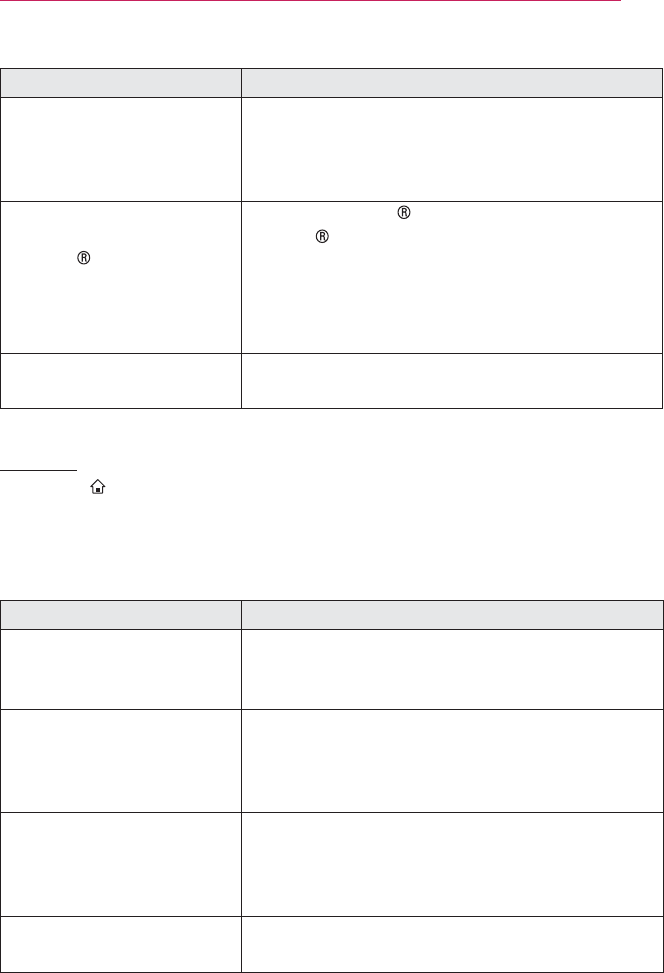
446
INFORMATION
Problem Solution
Digital broadcasting is not
available even though the
cable is connected.
y Check with the cable operator providing your
subscription and/or signal. (Depending on your
subscription, digital broadcasting may not be
supported.)
The display is inactive or
unclear when connected to
an HDMI
source.
y cable specifications. If your
cable is not genuine, images may fade in
and out or not be displayed properly.
y Ensure that all cables are securely connected.
When connections are not secure, images may
not be properly displayed.
Does not work with a USB
storage device.
y
or higher.
Sound
y SMART
First run a Sound Test to verify that the sound signal output is normal.
broadcast signal.
Problem Solution
Screen display is on but
there is no sound.
y Check other TV programmes.
y 㖮ᤆ⣇㇚⠂#⹆ᣏ#⍎㗦⾎#⇊ㆇ♺⇆#⇎⢿⠞#⣆Ꭺᤆ#
ᓂ♞#⠲ጾ⩪#㛿⠢㘂⇢✾1
For an analogue broadcast,
stereo is not clear or sound
comes from one speaker
only.
y In a poor reception area (areas with weak or
unstable signals) or if Multi Audio is not stable,
select Mono on Multi Audio.
y Adjust the balance using the Navigation button.
TV sound is not in
sync with the image or
the sound breaks up
occasionally.
y If the issue affects a specific TV programme only,
it may be caused by problems with the broadcast
signal for the individual station. Check with the TV
station or your cable operator.
The volume changes when
I change programme.
y Volume can vary from programme to programme.
y Set Auto Volume to On.

447 INFORMATION
Problem Solution
On certain programmes,
there is no sound at all, or
only the background music
can be heard
(in case of a programme
created for overseas
viewers).
y In Language, set LanguageAudio Language
to the language of your choice. Even if you change
the language on Multi Audio, you can go back to
the default setup once you turn off the power or
change the programme.
There is no sound when
connected to HDMI / USB.
y cable is high speed.
y
or higher.
y Use only regular music ( mp3) files.
PC connection problem
Problem Solution
The screen display
does not come on
after connecting to the
computer.
y Verify that the computer and the Projector are
securely connected.
y Turn the Projector off and back on using the
remote control.
y Restart the PC with the Projector on.
y Check whether the resolution is correctly set for
PC input.
y
There is no sound after
connecting the computer
with the HDMI cable.
y Check with manufacturer of your video card to
cards in DVI format require connection of a
separate sound cable.)
When connected to the
computer, the display is
partially cut off or shifts to
one side.
y Set the resolution to support PC input. (If this does
not work, reboot the computer.)

448
INFORMATION
Problems replaying movies in My Media
Problem Solution
the Movie List.
y Check whether the file on the USB storage device
can be read on a computer.
y
message appears or the
image display is not normal
even though the sound is
OK.
y Make sure that the file replays normally on the
computer's video player. (Check for damaged
files.)
y Check whether the resolution is supported by the
computer.
y Verify that the video/audio codec is supported.
y Verify that the frame rate is supported.
"Audio not supported."
message appears or the
sound is not normal even
though the image display
is OK.
y Make sure that the file replays normally on the
computer's video player. (Check for damaged
files.)
y Check if the audio codec is supported by the
computer.
y Verify that the bit rate is supported.
y Verify that the sample rate is supported.
Subtitles are not displayed. y Make sure that the file replays normally on the
computer's video player. (Check for damaged
files.)
y Check if the video file has the same name as the
subtitle file.
y Make sure that the video and subtitle files are in
the same folder.
y Verify that the subtitle file format is supported.
y Verify that the subtitle language is supported.
(Subtitle files can be opened in Notepad to check
the language.)
y Image shown may differ from your projector.
y For information on requesting service, refer to the following menu.
SMART

449 WIRELESS SPECIFICATIONS
WIRELESS SPECIFICATIONS
Standard
Frequency Range
Output Power
(Max.)
y Because band channel used by the country could be different, the user can not
change or adjust the operating frequency and this product is set for the regional
frequency table.
y
Standard
Frequency Range
Output Power (Max.)
y
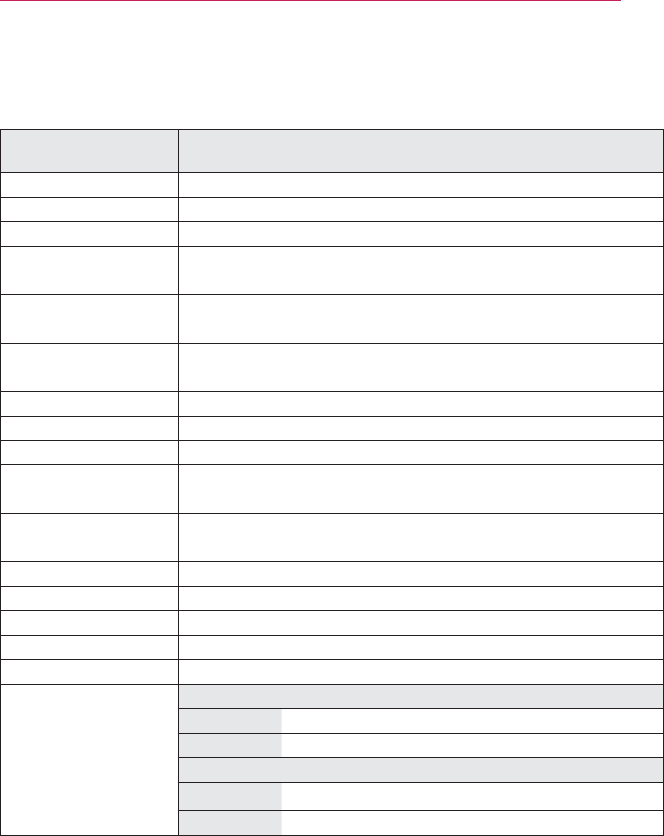
44:
SPECIFICATIONS
SPECIFICATIONS
Model PF85U(PF85U-JE)
Resolution (Pixel)
Aspect ratio
Panel size (mm)
Projection distance
(Video size)
Ratio of upward
projection
Working range of
the remote control 6 m
POWER
Audio output
Reception type NTSC, ATSC
Reception channels
External Antenna
Impedance
Height (mm)
Width (mm)
Depth (mm)
Weight (g)
USB Device
Operation
environment
Temperature
Operation
Storage
Relative humidity
Operation
Storage

44; SPECIFICATIONS
HDMI-PC mode supported
Resolution
Horizontal
Frequency
(kHz)
Vertical
Frequency
(Hz)
:53#{#733 64179< :313;
973#{#7;3 64179< 8<1<7
;33#{#933 6:1;:< 93164
4357#{#:9; 7;1696 93133
4693#{#:9; 7:1:45 931348
45;3#{#4357 961<;4 93135
4<53#{#43;3 9:18 93
Open Source Software Information
To obtain the source code under GPL,
LGPL, MPL and other open source
licenses, that is contained in this product,
please visit http://opensource.lge.com.
In addition to the source code, all
referred license terms, warranty
disclaimers and copyright notices are
available for download.
LG Electronics will also provide open
source code to you on CD-ROM for a
charge covering the cost of perform-
ing such distribution (such as the
cost of media, shipping and handling)
lge.com. This offer is valid for three
(3) years from the date on which you
purchased the product.
Supported Monitor Display
Resolution
Horizontal
Frequency
(kHz)
Vertical
Frequency
(Hz)
:53#{#733 64179<# :313;
973#{#7;3 64179< 8<1<7
;33#{#933 6:1;:< 93164
4357#{#:9;# 7;1696# 93133
4485#{#;97# 87167; 931386
4693#{#:9;# 7:1:45 931348
45;3#{#4357# 961<;4 93135
4<53#{#43;3## 9:18 93
y If an invalid signal is input into the
projector, it will not be displayed
properly on the screen or a message
such as No Signal or Invalid Mode
will be displayed.
y
(Auto-recognition of PC monitor).
y PC sync signals supported: Separate
Sync.
y
be supported depending on the PC
type.
Component Port Connection
Signal Component
o
o
o
o

The model and serial number of the projec-
tor are located on the back or on the side
of the projector. Record them below should
you ever need service.
MODEL
SERIAL