LG Electronics USA SJ2 WIRELESS SOUND BAR User Manual 15 SJ2 UserMan
LG Electronics USA WIRELESS SOUND BAR 15 SJ2 UserMan
UserManual.wiki
>
LG Electronics USA
>
SJ2 User Manual
15_SJ2 UserMan
Navigation menu
Upload a User Manual
Namespaces
Wiki Guide
HTML
PDF
Info
Views
User Manual
Discussion / Help
Navigation
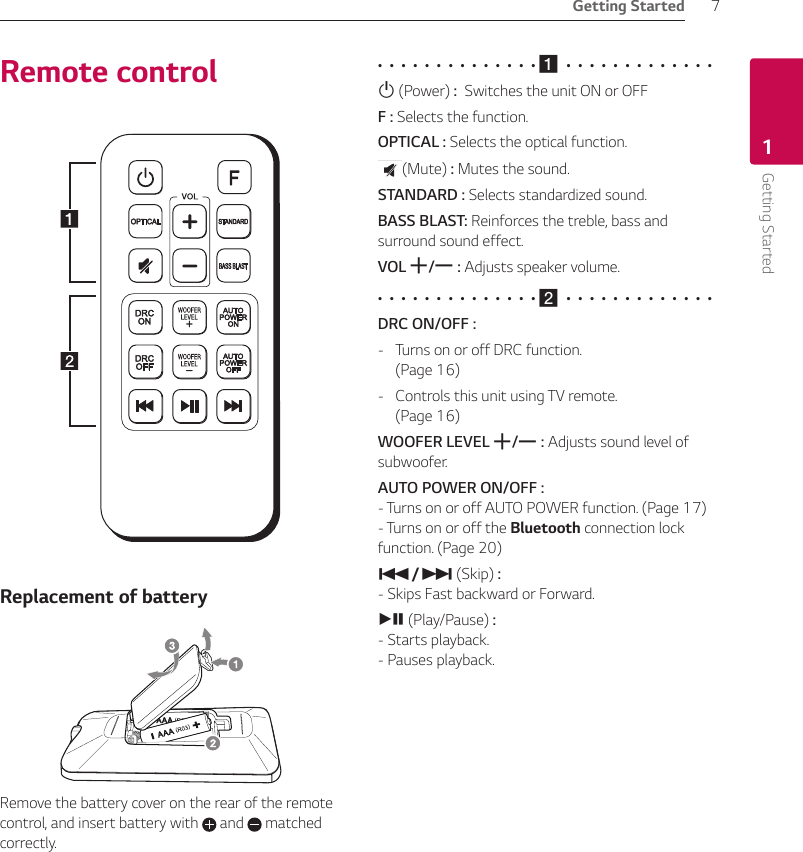
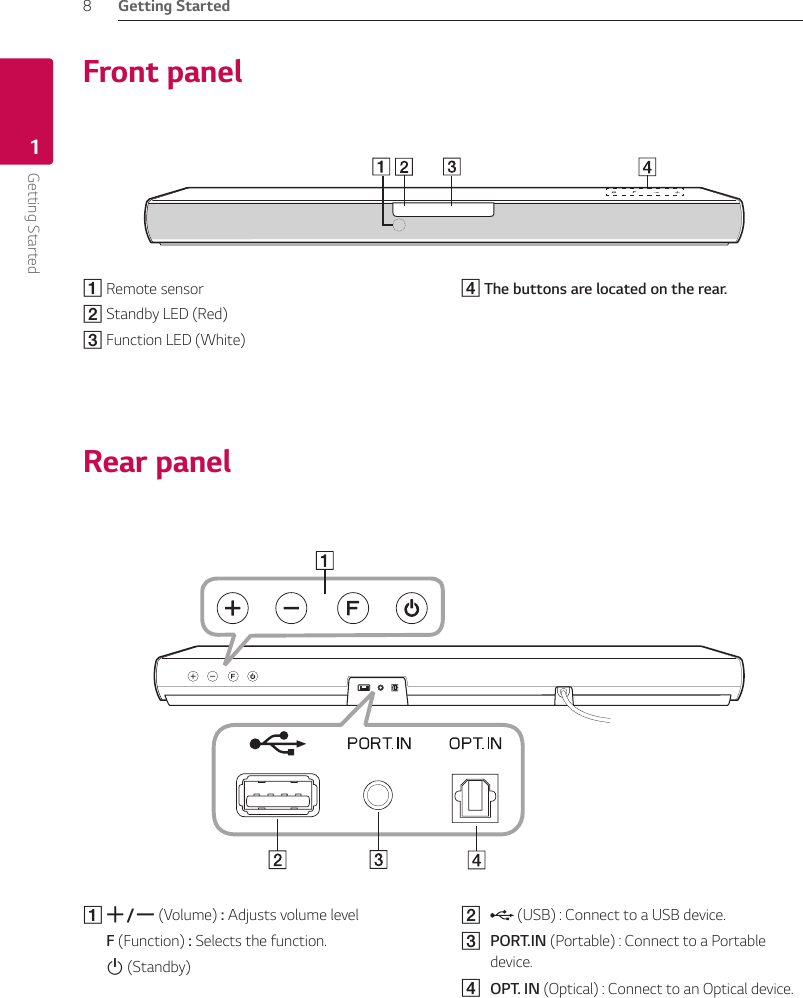
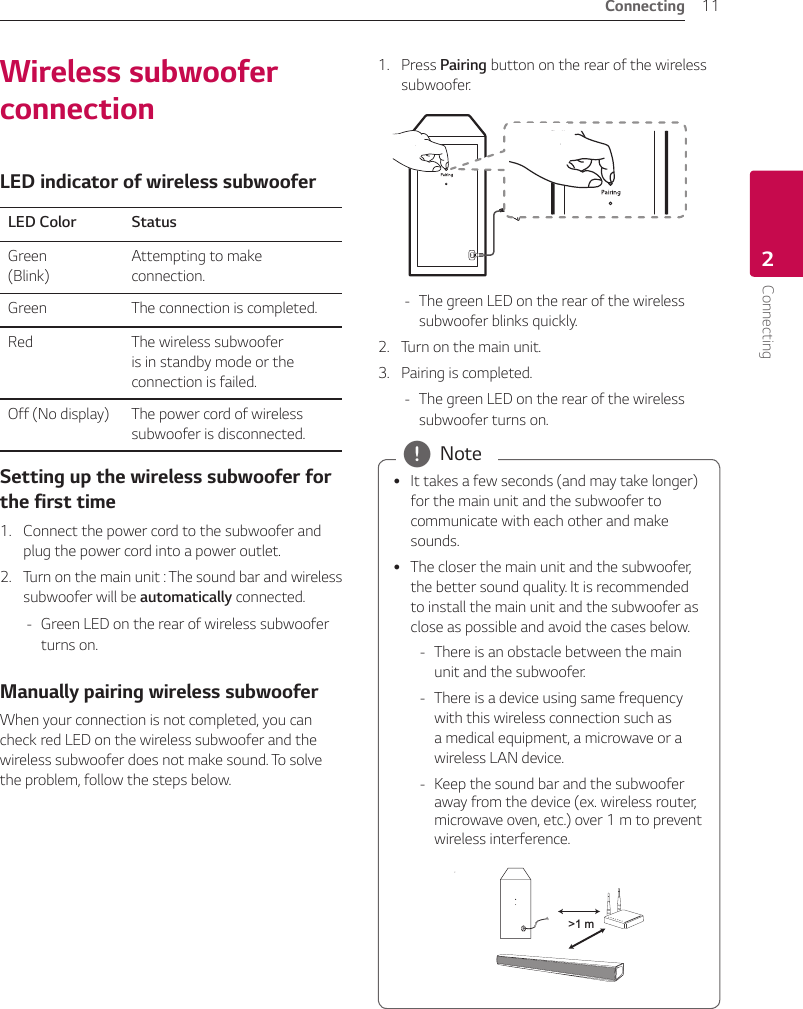
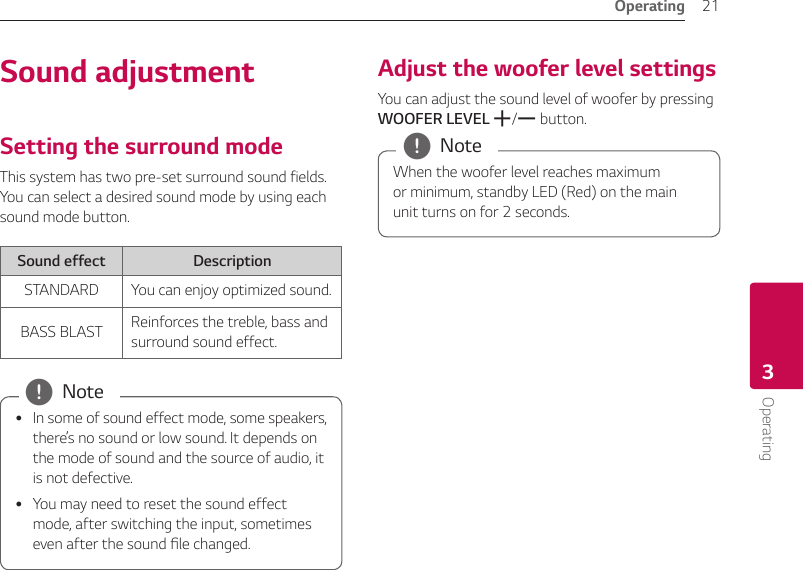
![Connecting12Connecting2Connecting to your TVUsing an OPTICAL cable1. Connect the OPT. IN jack on the back of the unit to OPTICAL OUT jack on the TV using an OPTICAL cable.Optical cable2. Select the input source to Optical by pressing OPTICAL button on the remote control or F button on the unit repeatedly. yBefore connecting the optical cable, be sure to remove the protection plug cover if your cable has the cover. yYou can enjoy the TV audio through the speakers of this unit. In the case of some TV models, you must select the external speaker option from the TV menu. (For details, reference your TV user manual.) ySet up the sound output of TV to listen to the sound through this unit : TV setting menu [ [Sound] [ [TV Sound output] [ [External speaker (Optical)] yDetails of TV setting menu vary depending on the manufacturers or models of your TV. , Note](https://usermanual.wiki/LG-Electronics-USA/SJ2/User-Guide-3358909-Page-12.png)
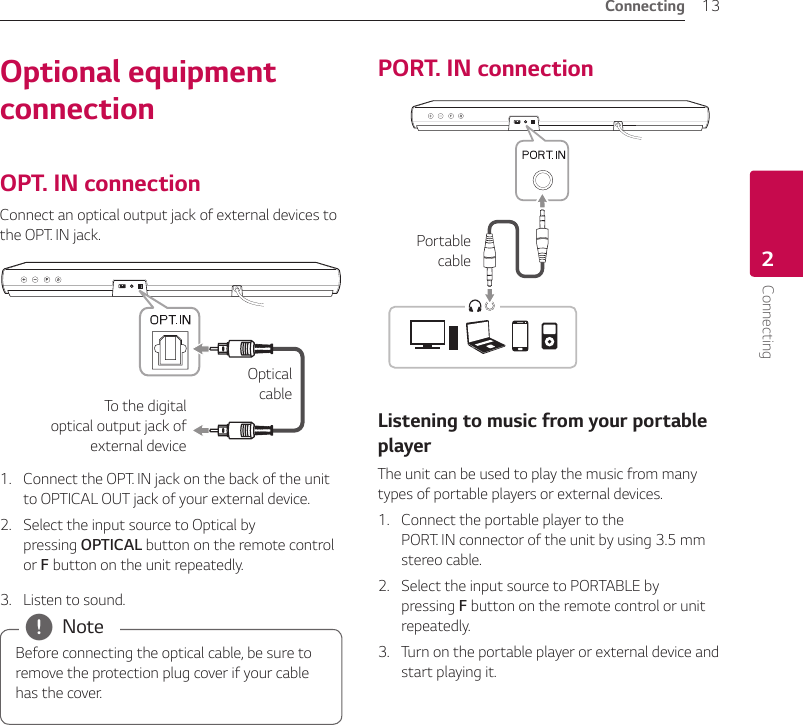
![3 OperatingOperating16Operating3Basic operationsUSB operation1. Connect the USB device to the USB port.2. Select the input source to USB by pressing F button on the remote control or unit repeatedly.To Do thisPlayback Press dM.Pause During playback, press dM.Skip to the next/previous leDuring playback, press V on the remote control to go to the next le.Playing less than 2 seconds, press C on the remote control to go to the previous le.Playing after 3 seconds, press C on the remote control to go to the beginning of the le.Resume playbackThis unit memorizes a current song which is played before changing the function or turning off the unit. yThe resume point may be cleared when you pull out the power cord or removing the USB device from the unit. yIf the USB function is not working, check the USB function is selected. yWhen you pause the USB playback, USB LED on the main unit blinks. , NoteOther operationsDRC (Dynamic Range Control)Make the sound clear when the volume is turned down and prevent sudden increase of sound (Dolby Digital only). This function turns on or off when you press DRC ON/OFF.Turn off the sound temporarilyPress (Mute) to mute your unit. To cancel it, press (Mute) again on the remote control or change the volume level.Using your TV remote controlYou can control some functions of this unit by your TV remote control even by other company’s product. Controllable functions are volume up/down and mute.Press and hold DRC ON on the remote control for about 2 seconds. To turn off this function, press and hold DRC OFF about 2 seconds. ySupported TV brandsLG Panasonic Philips SamsungSharp Sony Toshiba Vizio yMake sure that the sound output of your TV is set to [External speaker]. yDepending on the remote control, this function may not work well. yThis function does not operate on LG TV's magic remote control. , Note](https://usermanual.wiki/LG-Electronics-USA/SJ2/User-Guide-3358909-Page-16.png)
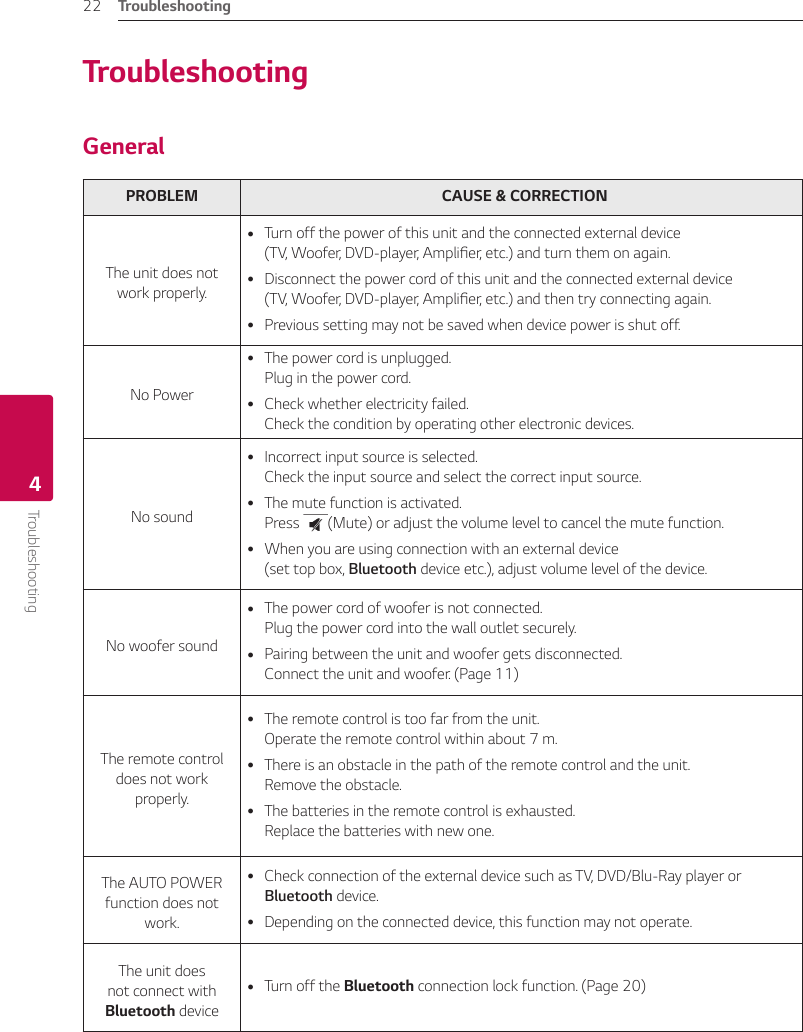
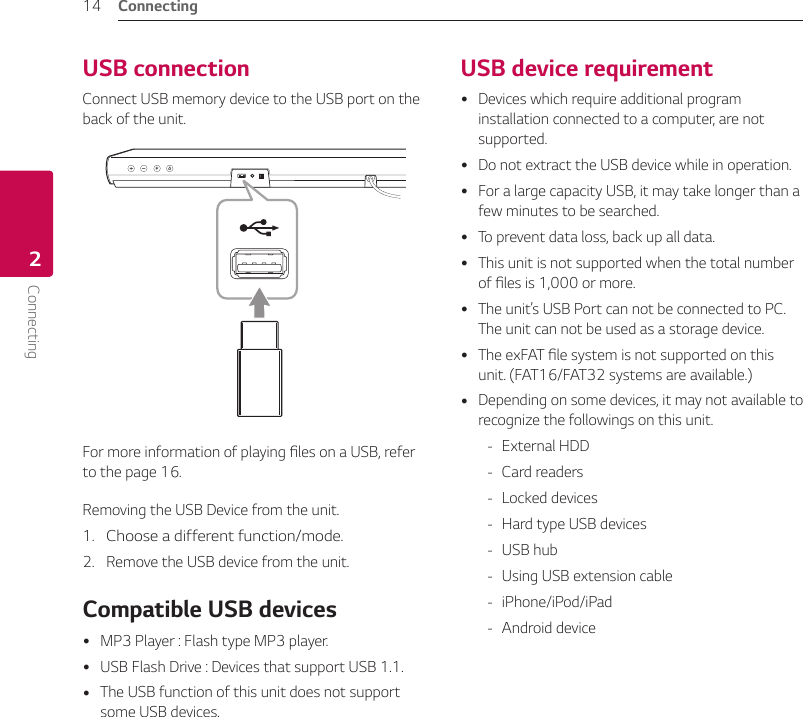
![Troubleshooting 23Troubleshooting4PROBLEM CAUSE & CORRECTIONWhen you feel the output sound of the unit is low.Check the details below and adjust the unit according to them. ySwitch [ON] state of DRC function to [OFF] by using remote controller. yWith the sound bar connected with TV, change the AUDIO DIGITAL OUT setting on TV Setup Menu from [PCM] to [AUTO] or [BITSTREAM]. yWith the sound bar connected with Player, change the AUDIO DIGITAL OUT setting on Player Setup Menu from [PCM] to [PRIMARY PASS-THROUGH] or [BITSTREAM].NOTES to use wireless PROBLEM CAUSE & CORRECTIONThis device may have wireless interference. yWireless may not operate normally in weak signal area. yPlease install the device close enough to wireless subwoofer. yDo not install the device on metal furniture for optimum performance.Bluetooth device may malfunction or make noise in the following cases. yWhen any part of your body contact the transceiver of the Bluetooth device or sound bar. yWhen there is an obstacle or wall or the device is installed in a secluded spot. yWhen there is a device(a wireless LAN, a medical equipment or a microwave) using same frequency, make the distance between the products as far away as possible each other. yWhen to connecting the device to the Bluetooth device, make the distance between the products as close as possible each other. yWhen the device gets too far from the Bluetooth device, the connection is disconnected and also malfunction may occur.](https://usermanual.wiki/LG-Electronics-USA/SJ2/User-Guide-3358909-Page-23.png)

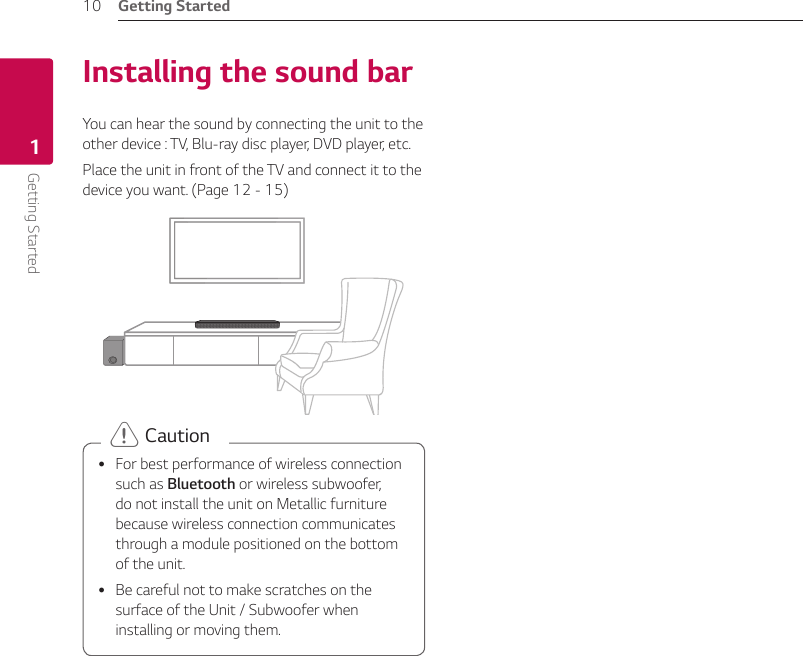
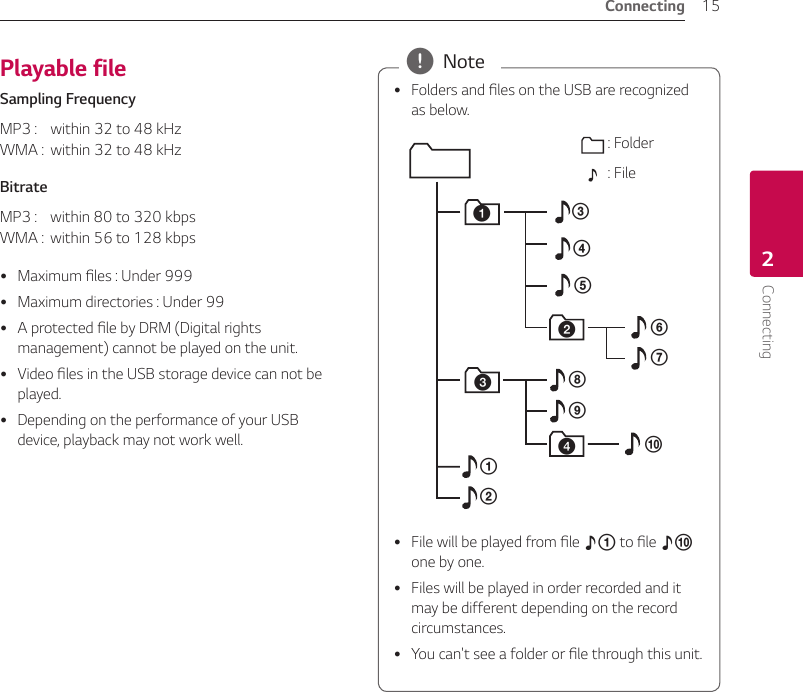
![STANDARD/BASS BLAST: Selects the sound effect.DRC ON/OFF : Makes comfortable sound at Dolby Digital..WOOFER LEVEL +/-: Adjusts the volume level of subwoofer.AUTO POWER ON/OFF: Automatically turns on by an input source.Replacement of batteryRemote controlTV Connection 2TVa Connect the sound bar to the TV using an Optical cable.b Set up [External Speaker (Optical)] on your TV setting menu.Additional Device Connectiona Connect to the external device as follows.TV(Set-top Box, Player etc.)b Set the input source by pressing OPTICAL on the remote control or pressing F on the unit repeatedly.](https://usermanual.wiki/LG-Electronics-USA/SJ2/User-Guide-3358909-Page-31.png)
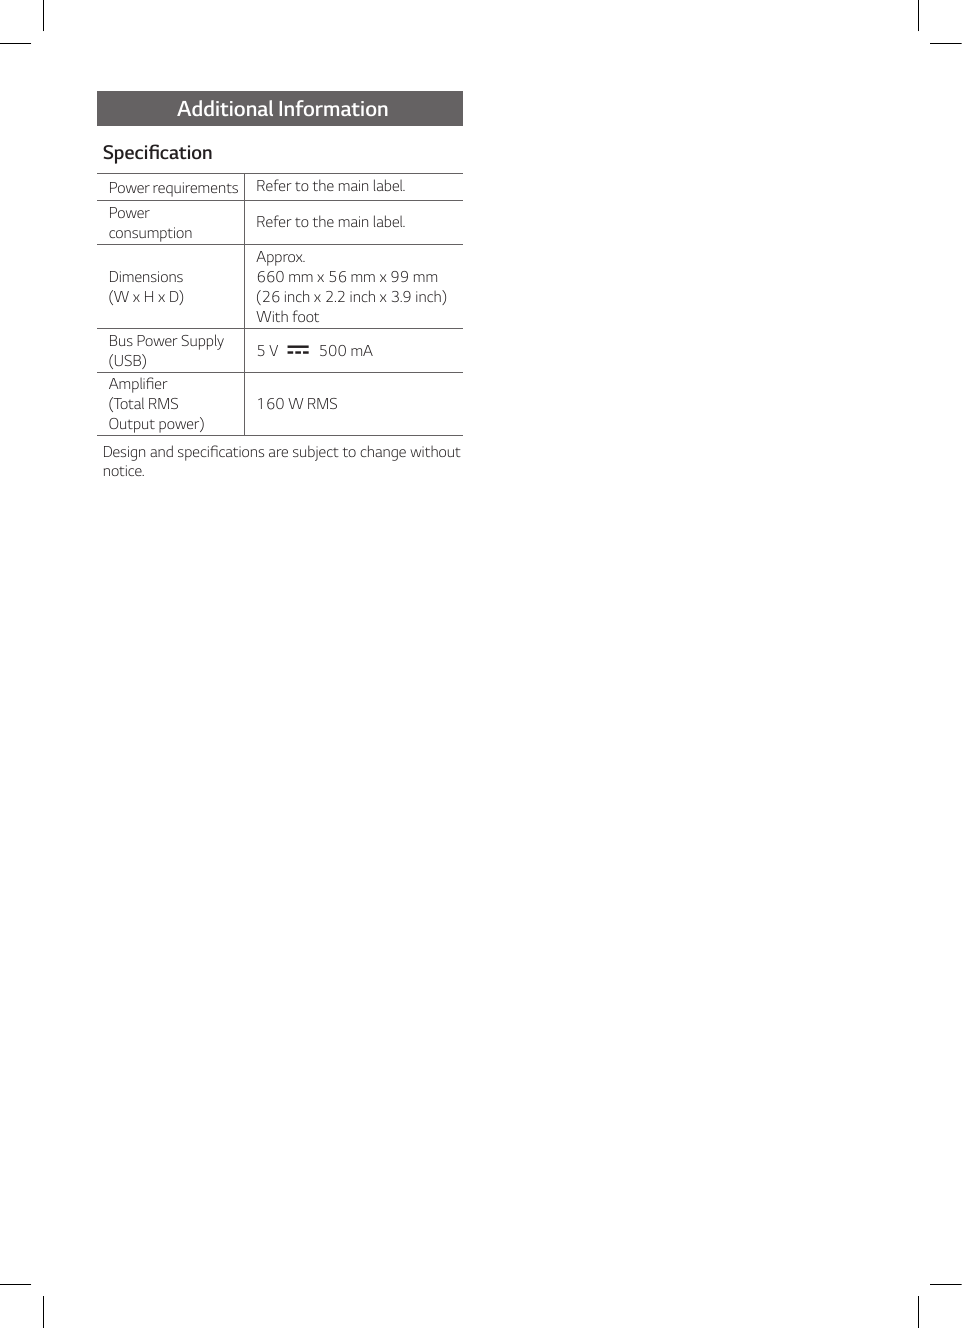

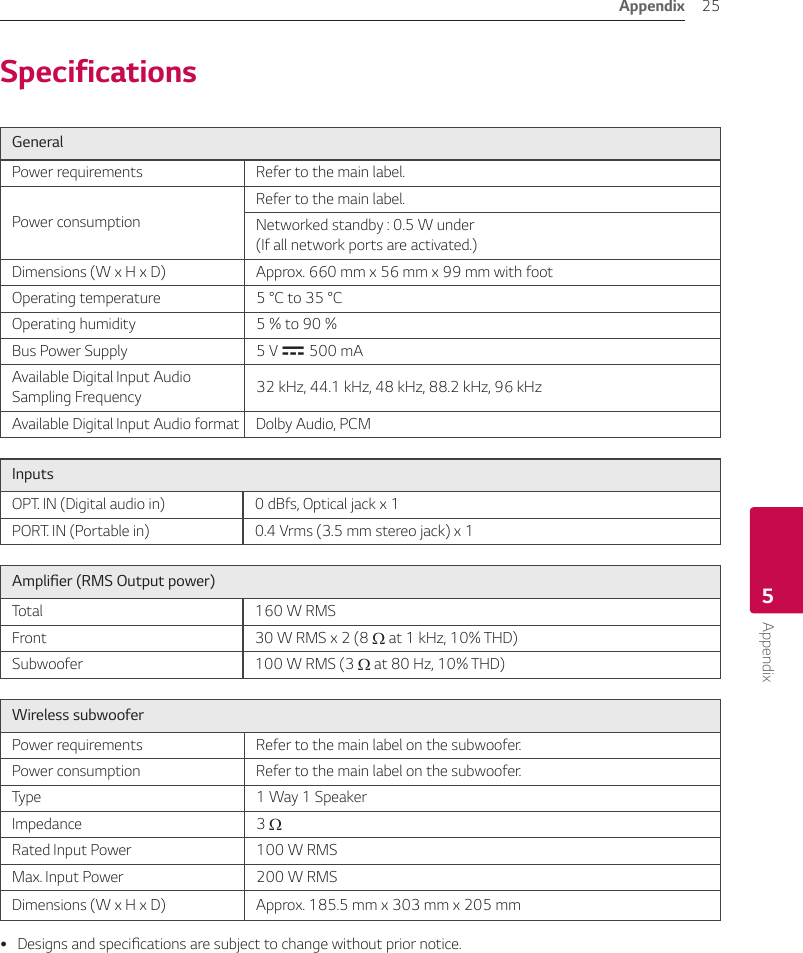
![STANDARD/BASS BLAST: Selects the sound effect.DRC ON/OFF : Makes comfortable sound at Dolby Digital..WOOFER LEVEL +/-: Adjusts the volume level of subwoofer.AUTO POWER ON/OFF: Automatically turns on by an input source.Replacement of batteryRemote controlTV Connection 2a Connect the sound bar to the TV using an Optical cable.b Set up [External Speaker (Optical)] on your TV setting menu.Additional Device Connectiona Connect to the external device as follows.TV(Set-top Box, Player etc.)b Set the input source by pressing OPTICAL on the remote control or pressing F on the unit repeatedly. TVAdditional InformationSpecicationPower requirements Refer to the main label.Power consumption Refer to the main label.Dimensions (W x H x D)Approx. 660 mm x 56 mm x 99 mm With foot Bus Power Supply (USB) 5 V 0 500 mAAmplier (Total RMS Output power)160 W RMSDesign and specications are subject to change without notice.SJ2.ACANLLK_SIM_ENG_.indd 3 2017-03-16 �� 5:21:49](https://usermanual.wiki/LG-Electronics-USA/SJ2/User-Guide-3358909-Page-38.png)
 for devices with detachable antenna(s), the maximum antenna gain permitted for devices in the band 5725-5850 MHz shall be such that the equipment still complies with the e.i.r.p. limits specied for point-to-point and non-point-to-point operation as appropriate; and SJ2.ACANLLK_SIM_ENG_.indd 4 2017-03-16 �� 5:21:49The device meets the exemption from the routineevaluation limits in section 2.5 of RSS 102 and compliancewith RSS-102 RF exposure, users can obtain Canadianinformation on RF exposure and compliance.](https://usermanual.wiki/LG-Electronics-USA/SJ2/User-Guide-3358909-Page-39.png)

![STANDARD/BASS BLAST : Permet de sélectionner l’effet sonore.DRC ON/OFF : procure un confort d'écoute en Dolby Digital.WOOFER LEVEL +/- : Permet de régler le volume du caisson de basses.AUTO POWER ON/OFF : Se met en marche automatiquement grâce à une source d’entrée.Remplacement des pilesTélécommandeInformations supplémentairesRaccordement au téléviseur2a Reliez la barre de son au téléviseur à l’aide du câble optique.b Congurez le [Haut-parleur externe (Optique)] depuis le menu de conguration de votre téléviseur.Raccordement d’un périphérique supplémentairea Raccordez le périphérique externe comme il est indiqué sur le schéma ci-dessous.TV(boîtier décodeur, lecteur, etc.)b Dénissez la source d’entrée en appuyant sur OPTICAL sur la télécommande ou sur F sur l’appareil à plusieurs reprises. CaractéristiquesExigences relatives à l’alimentationSe reporter à l’étiquette principale.Consommation d’énergieSe reporter à l’étiquette principale.Dimensions (L x H x P)Environ 660 mm x 56 mm x 99 mm Avec les piedsAlimentation bus (USB) 5 V 0 500 mAAmplicateur (puissance de sortie R.M.S. totale)160 W RMSLa conception et les caractéristiques peuvent faire l’objet de modications sans notication préalable.TVSJ2.ACANLLK_SIM_FRE(CANADA)_.indd 3 2017-03-16 �� 5:24:30](https://usermanual.wiki/LG-Electronics-USA/SJ2/User-Guide-3358909-Page-42.png)