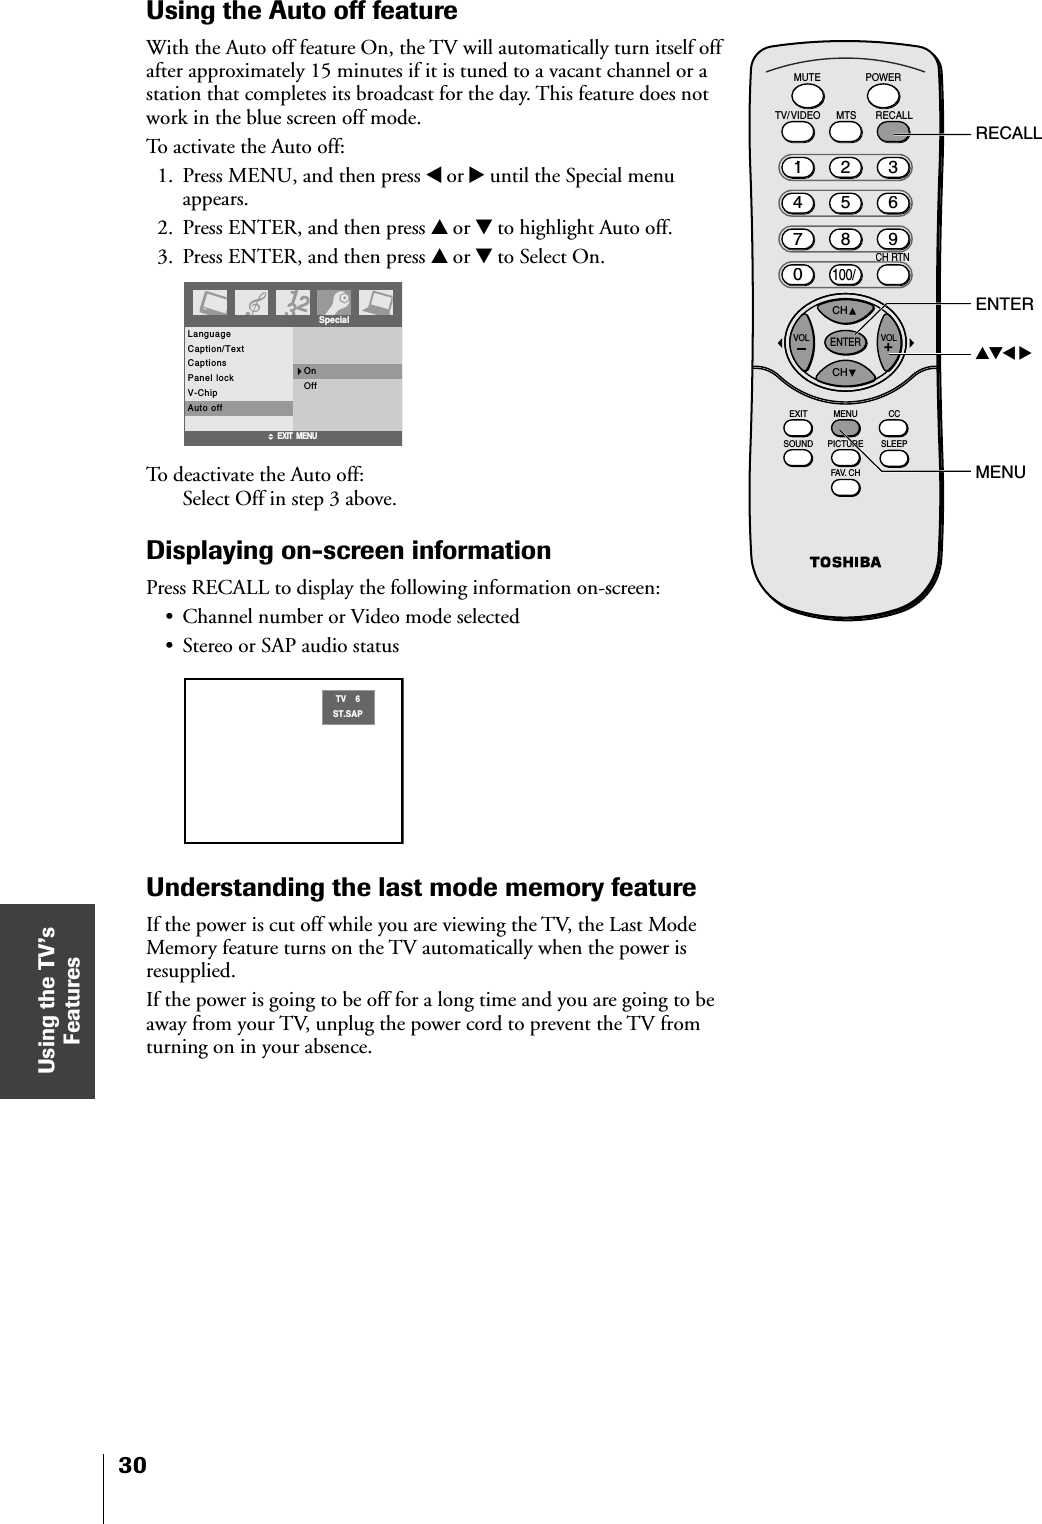
LG Electronics USA T15DL15A 15" LCD TV / MONITOR User Manual User s Manual H
LG Electronics USA 15" LCD TV / MONITOR User s Manual H
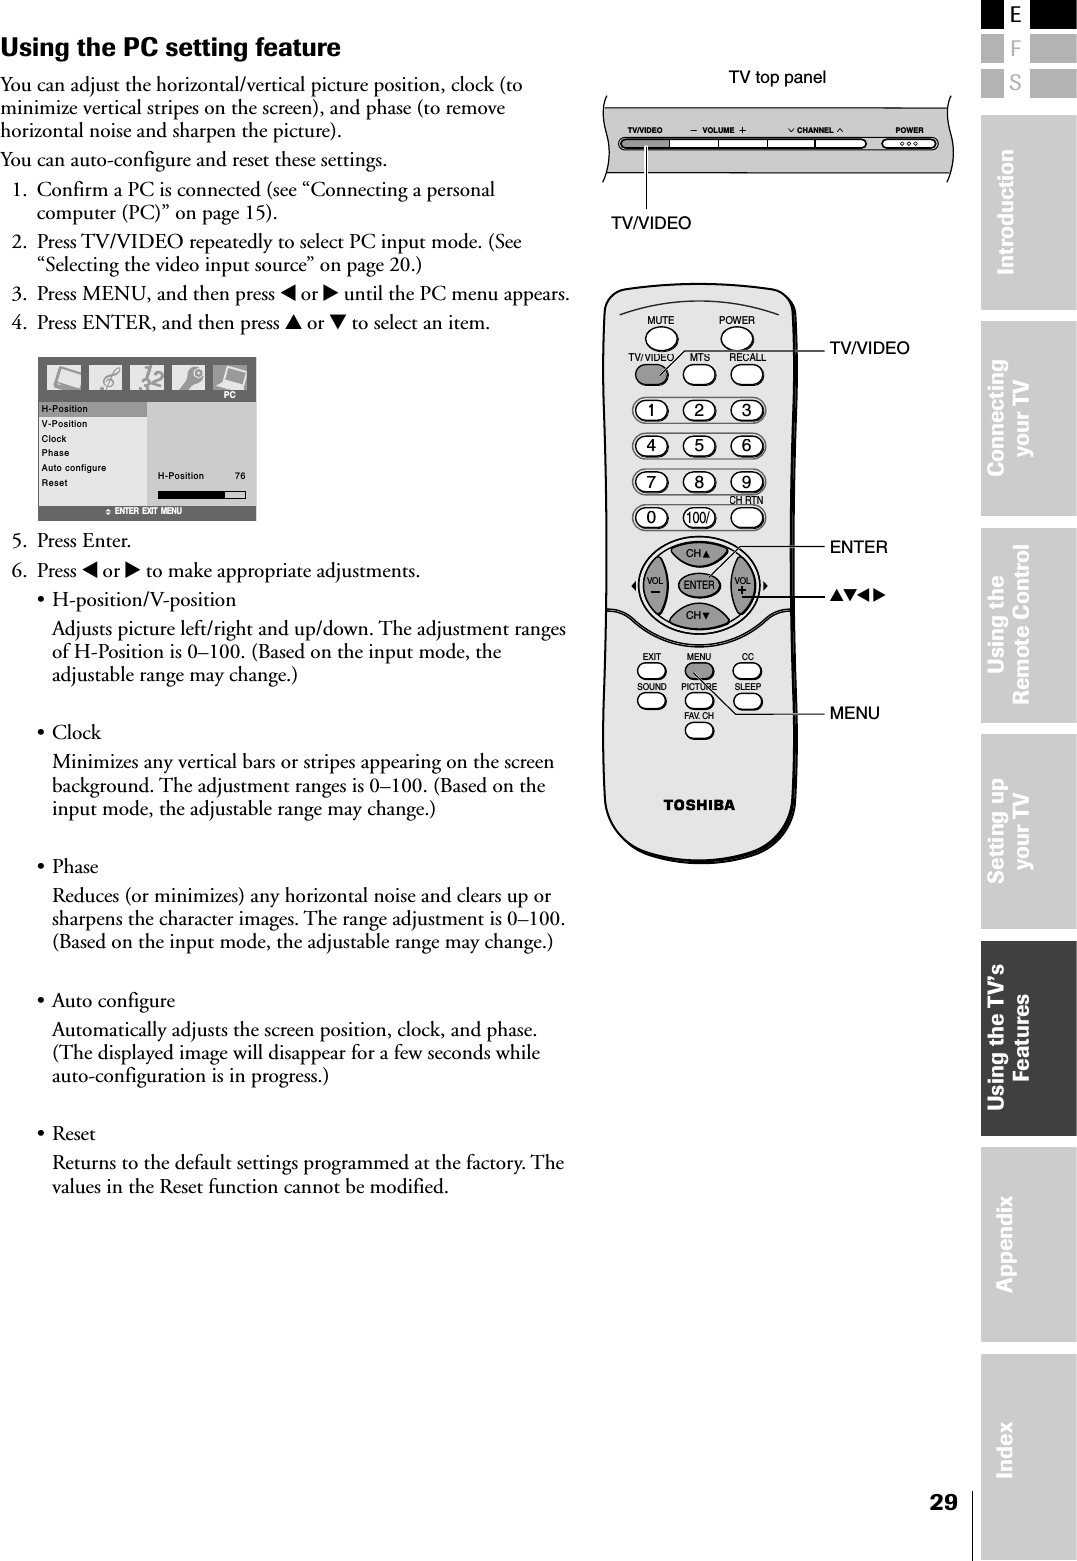
UserManual.wiki
>
LG Electronics USA
>
T15DL15A User Manual
USERS MANUAL
Navigation menu
Upload a User Manual
Namespaces
Wiki Guide
HTML
PDF
Info
Views
User Manual
Discussion / Help
Navigation

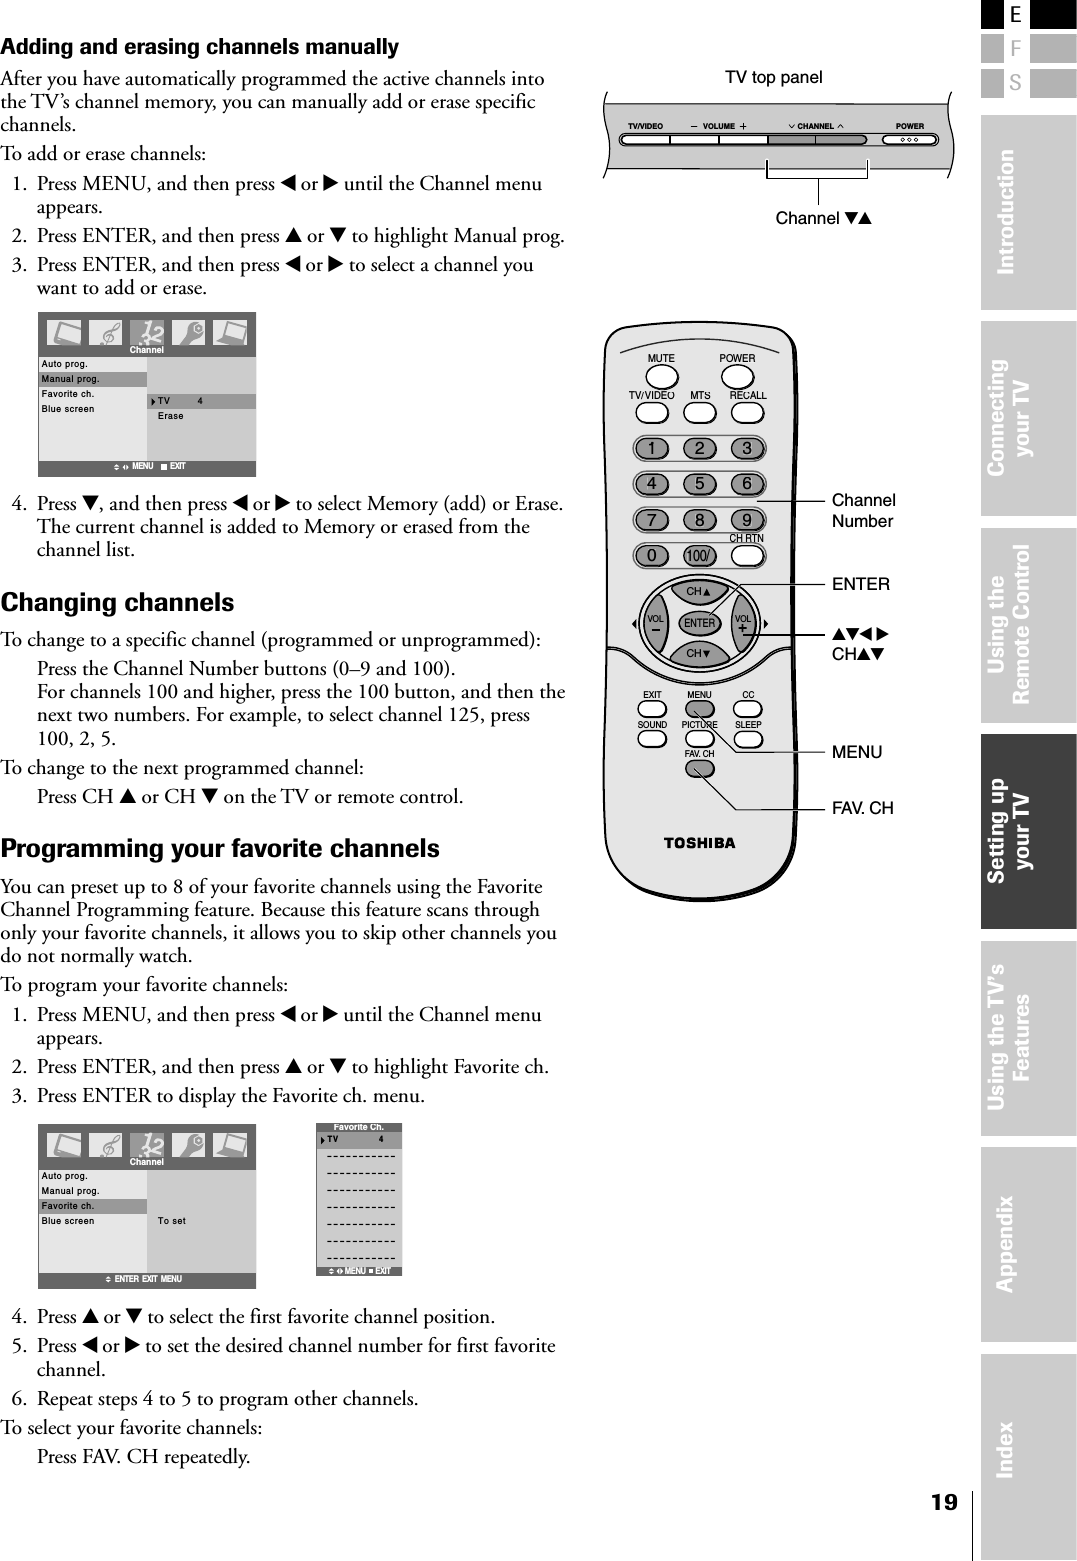
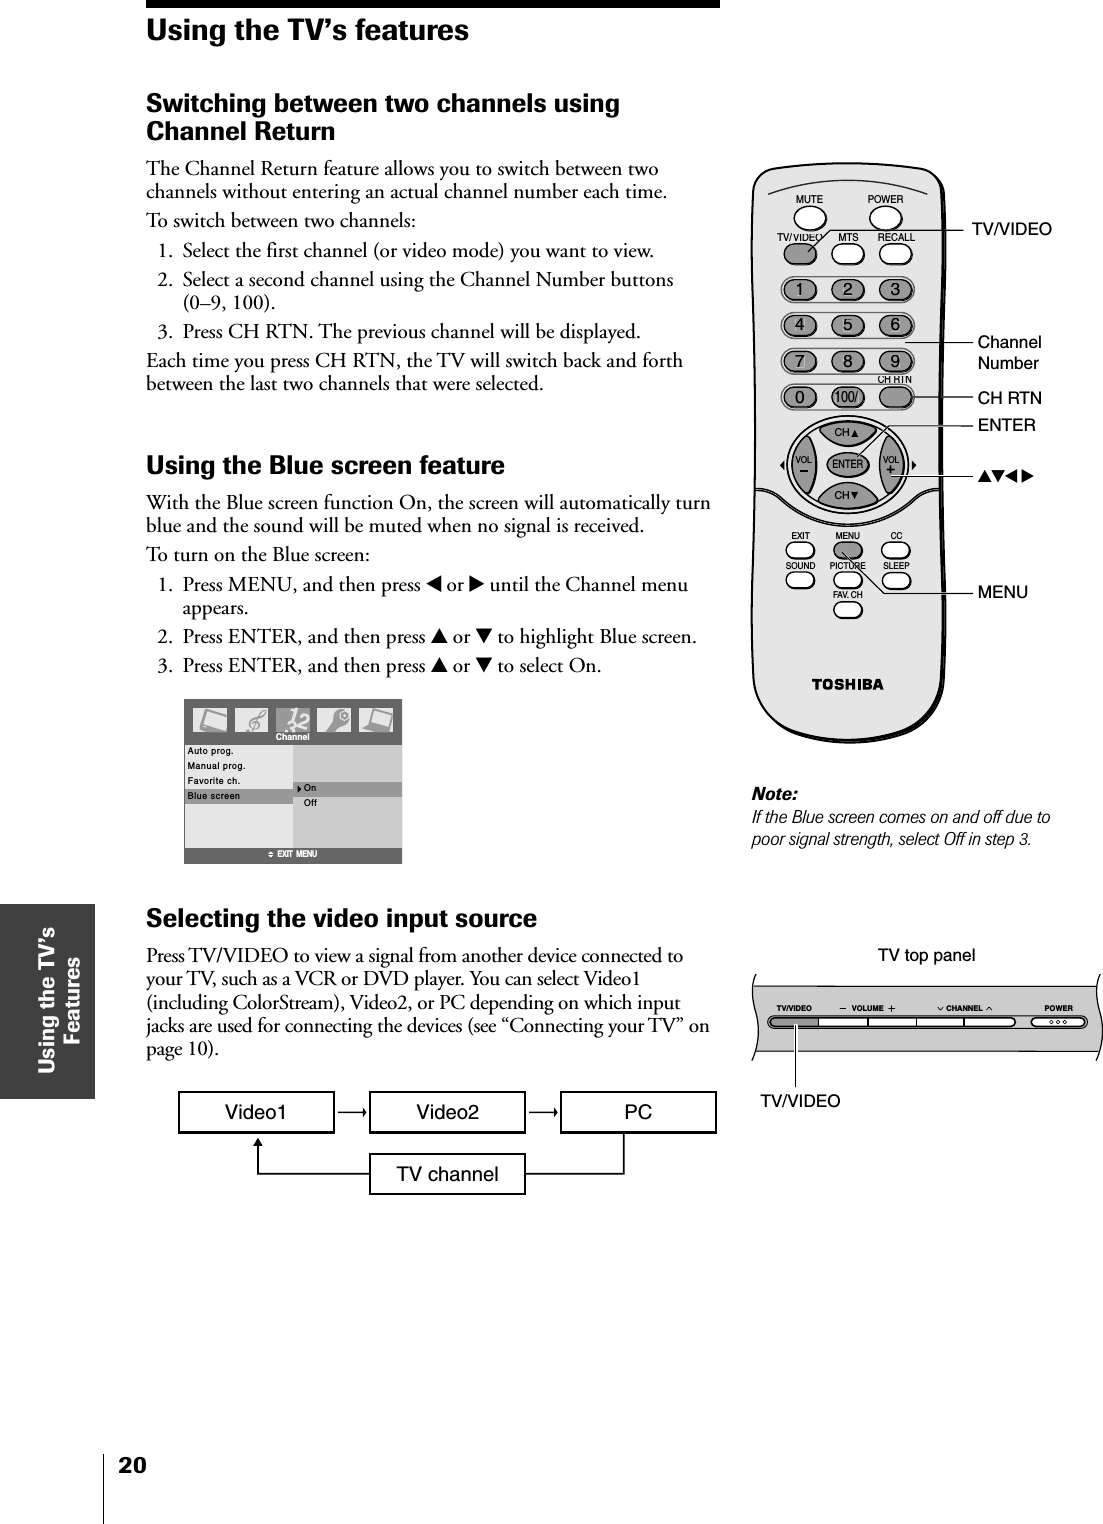

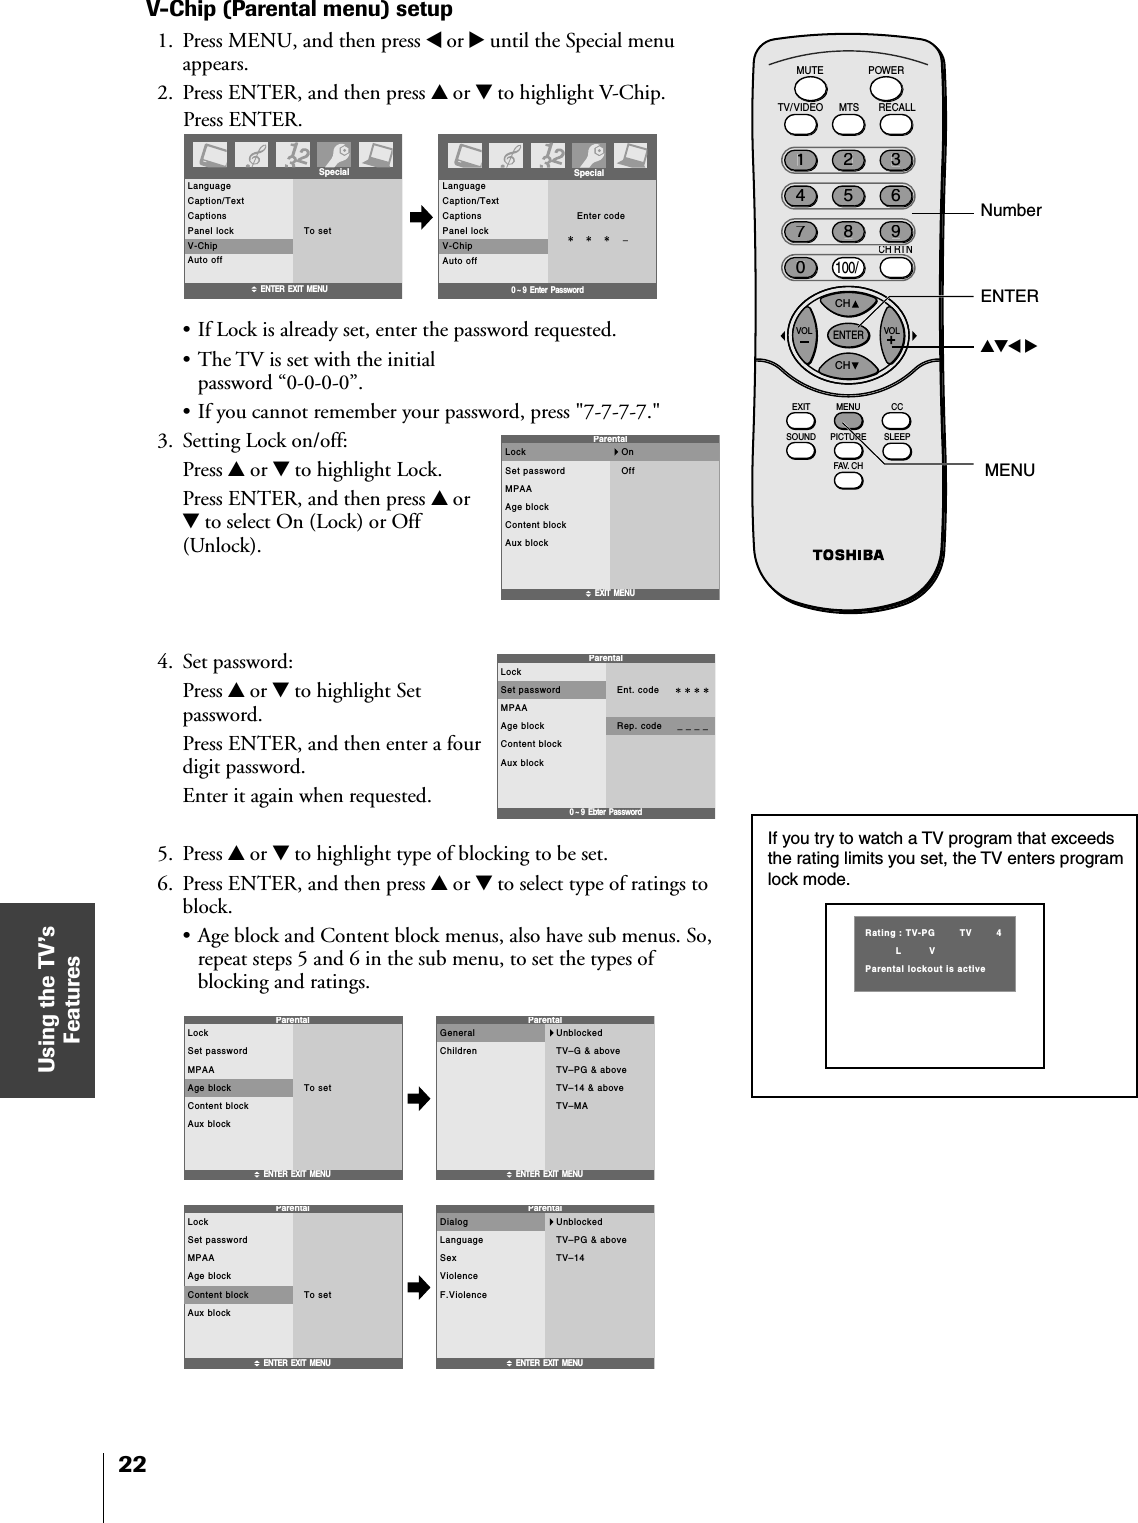

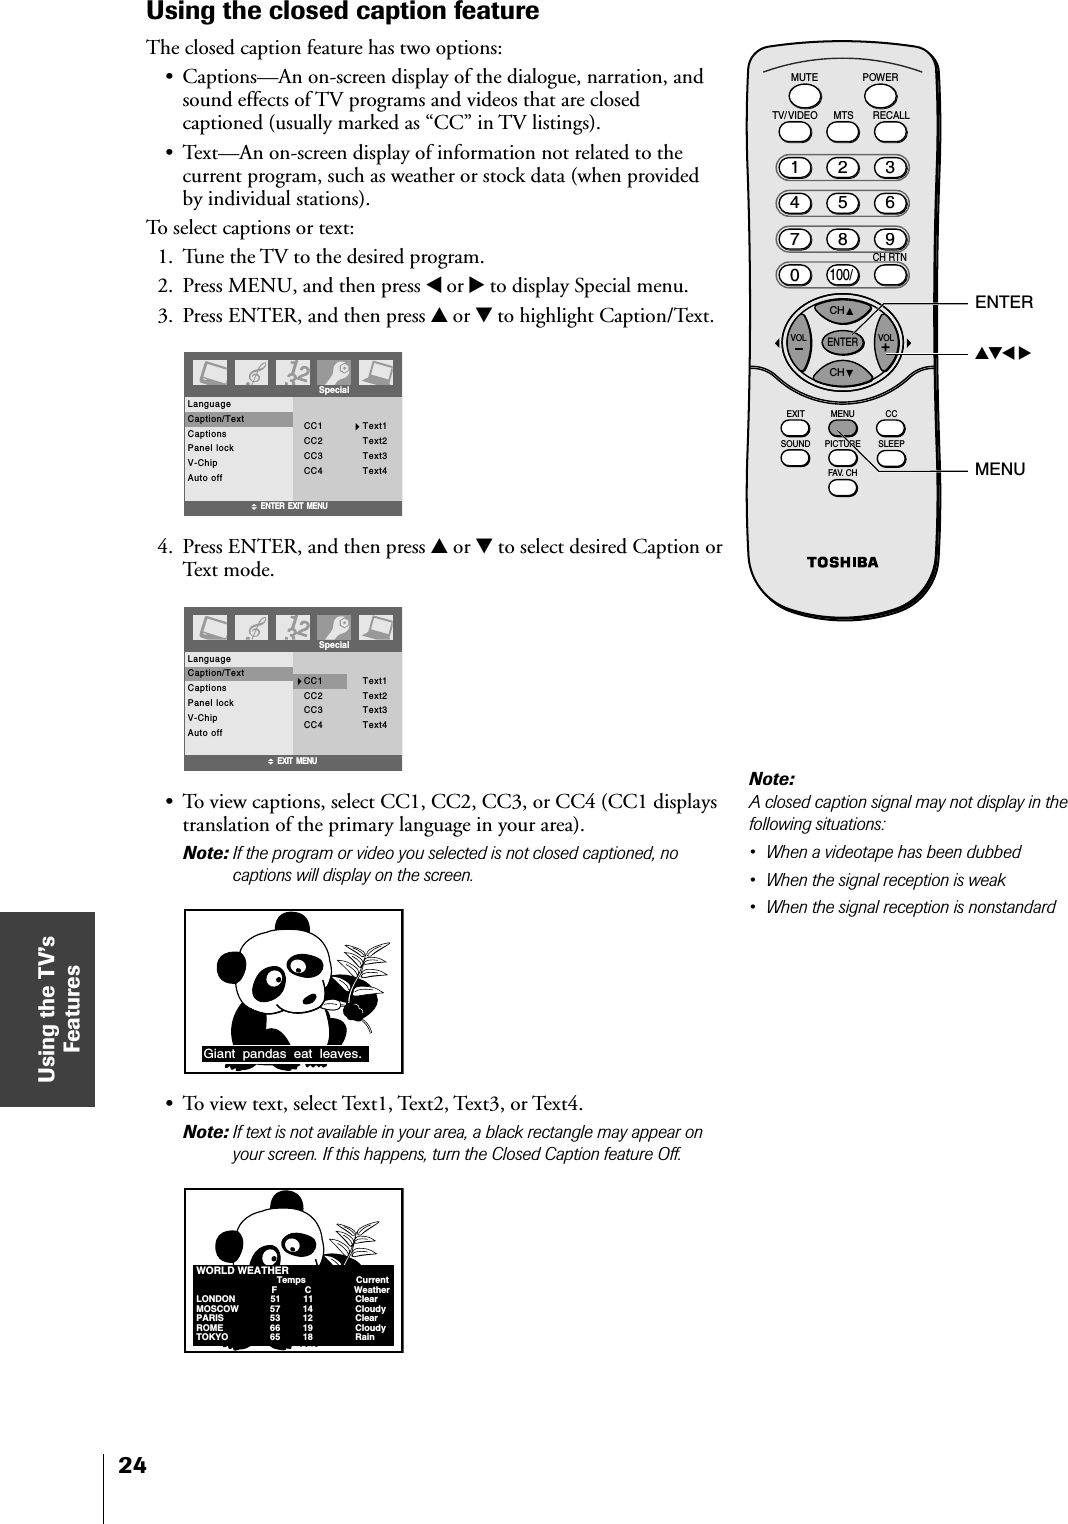
![Appendix34Limited Canada Warrantyfor LCD Televisions, 32” and smallerToshiba Canada Limited, (“TCL”) makes the following limitedwarranties to original consumers in Canada. THESE LIMITEDWARRANTIES EXTEND TO THE ORIGINAL CONSUMERPURCHASER OR ANY PERSON RECEIVING THIS LCDTELEVISION AS A GIFT FROM THE ORIGINAL CONSUMERPURCHASER AND TO NO OTHER PURCHASER ORTRANSFEREE.LCD TELEVISIONS PURCHASED IN CANADA AND USEDANYWHERE OUTSIDE OF CANADA, INCLUDING, WITHOUTLIMITATION, THE U.S.A. AND MEXICO, ARE NOT COVEREDBY THESE WARRANTIES.LCD TELEVISIONS PURCHASED ANYWHERE OUTSIDE OFCANADA, INCLUDING, WITHOUT LIMITATION, THE U.S.A.AND MEXICO, AND USED IN CANADA ARE NOT COVEREDBY THESE WARRANTIES.Limited One (1) Year Warranty on Parts and LabourTCL warrants this LCD Television and its parts against defects inmaterials or workmanship for a period of one (1) year after thedate of original retail purchase. DURING THIS PERIOD, TCLWILL, AT TCL’S OPTION, REPAIR OR REPLACE A DEFECTIVEPART WITH A NEW OR REFURBISHED PART WITHOUTCHARGE TO YOU. YOU MUST DELIVER THE ENTIRETELEVISION TO AN AUTHORIZED TCL SERVICE DEPOT. YOUMUST PAY FOR ALL TRANSPORTATION AND INSURANCECHARGES FOR THE TELEVISION TO AND FROM THESERVICE DEPOT.Rental UnitsThe warranty for LCD Television rental units begins on the date ofthe first rental or thirty (30) days after the date of shipment tothe rental firm, whichever comes first.Limited Warranty for Commercial UnitsTCL warrants LCD Televisions that are sold and used forcommercial purposes as follows: all parts are warranted againstdefects in materials or workmanship for a period of ninety (90)days after the date of original retail purchase. DURING THISPERIOD, TCL WILL, AT TCL’S OPTION, REPAIR OR REPLACE ADEFECTIVE PART WITH A NEW OR REFURBISHED PARTWITHOUT CHARGE TO YOU. YOU MUST DELIVER THEENTIRE TELEVISION TO AN AUTHORIZED TCL SERVICEDEPOT. YOU MUST PAY FOR ALL TRANSPORTATION ANDINSURANCE CHARGES FOR THE TELEVISION TO AND FROMTHE SERVICE DEPOT.Owner’s Manual and Product RegistrationRead this owner’s manual thoroughly before operating this LCDTelevision.Register your LCD Television online at www.toshiba.ca assoon as possible. By registering your LCD Television you willenable TCL to bring you new products specifically designed tomeet your needs and help us to contact you in the unlikely eventa safety notification is required. Failure to register your LCDTelevision does not diminish your warranty rights.Your ResponsibilityTHE ABOVE WARRANTIES ARE SUBJECT TO THEFOLLOWING CONDITIONS:(1) You must retain your original bill of sale or provide otherproof of purchase.(2) All warranty servicing of this LCD TV must be made by anAuthorized TCL Service Depot.(3) The warranties from TCL are effective only if this LCDTelevision is purchased in Canada from an authorized TCLdealer and operated in Canada.(4) Labour service charges for set installation, setup, adjustmentof customer controls, and installation or repair of antennasystems are not covered by this warranty. Receptionproblems caused by inadequate antenna systems,misaligned satellite dishes, cable television distribution,VCRs, DVD players/recorders, personal computer level IEEE-1394 devices, and any other connected signal source deviceare your responsibility.(5) Warranties extend only to defects in materials orworkmanship as limited above, and do not extend to anyLCD Television or parts that have been lost or discarded byyou or to damage to the LCD Television or parts caused byfires, misuse, accident, Acts of God (such as lightning orfluctuations in electric power), improper installation,improper maintenance, or use in violation of instructionsfurnished by TCL; use or malfunction through simultaneoususe of this LCD Television and connected equipment; or tounits that have been modified or had the serial numberremoved, altered, defaced, or rendered illegible.How to Obtain Warranty ServiceIf, after following all of the operating instructions in this manualand reviewing the section entitled “Troubleshooting,” you findthat service is needed:(1) To find the nearest TCL Authorized Service Depot, visit TCL’sweb site at www.toshiba.ca.(2) You must include the original bill of sale (or a copy thereof) orother proof of purchase along with the entire LCD Television tothe Authorized Service Depot. You are responsible for allinbound transportation and insurance charges for the LCDTelevision to the Authorized Service Depot.For additional information, visit TCL’s website:www.toshiba.caALL WARRANTIES IMPLIED BY THE LAW OF ANY PROVINCEOF CANADA, INCLUDING THE IMPLIED WARRANTIES OFMERCHANTABILITY AND FITNESS FOR A PARTICULARPURPOSE, ARE EXPRESSLY LIMITED TO THE DURATION OFTHE LIMITED WARRANTIES SET FORTH ABOVE. WITH THEEXCEPTION OF ANY WARRANTIES IMPLIED BY THE LAW OFANY PROVINCE OF CANADA AS HEREBY LIMITED, THEFOREGOING WARRANTY IS EXCLUSIVE AND IN LIEU OFALL OTHER WARRANTIES, GUARANTEES, AGREEMENTS,AND SIMILAR OBLIGATIONS OF TCL WITH RESPECT TO THEREPAIR OR REPLACEMENT OF ANY PARTS. IN NO EVENTSHALL TCL BE LIABLE FOR CONSEQUENTIAL ORINCIDENTAL DAMAGES (INCLUDING, BUT NOT LIMITED TO,LOST PROFITS, BUSINESS INTERRUPTION, ORMODIFICATION OR ERASURE OF RECORDED DATA CAUSEDBY USE, MISUSE, OR INABILITY TO USE THIS LCDTELEVISION).No person, agent, distributor, dealer, or company is authorized tochange, modify, or extend the terms of these warranties in anymanner whatsoever. The time within which an action must becommenced to enforce any obligation of TCL arising under thewarranty or under any law of Canada or any province thereof ishereby limited to ninety (90) days from the date you discover, orshould have discovered, the defect. This limitation does not applyto implied warranties arising under the law of any province ofCanada.THIS WARRANTY GIVES YOU SPECIFIC LEGAL RIGHTS ANDYOU MAY ALSO HAVE OTHER RIGHTS WHICH MAY VARYFROM PROVINCE TO PROVINCE IN CANADA. SOMEPROVINCES OF CANADA DO NOT ALLOW LIMITATIONS ONTHE DURATION OF AN IMPLIED WARRANTY, WHEN ANACTION MAY BE BROUGHT, OR THE EXCLUSION ORLIMITATION OF INCIDENTAL OR CONSEQUENTIALDAMAGES. THEREFORE, THE ABOVE PROVISIONS MAY NOTAPPLY TO YOU UNDER SUCH CIRCUMSTANCES. [0305]](https://usermanual.wiki/LG-Electronics-USA/T15DL15A/User-Guide-532978-Page-35.png)