LG Electronics USA T23HLA 23" LCD TV/ MONITOR User Manual User s Manual H
LG Electronics USA 23" LCD TV/ MONITOR User s Manual H
USERS MANUAL

EUT Type: 23” LCD TV/Monitor
FCC ID: BEJT23HLA
Test Report No.: GETEC-E3-05-042
FCC Class B Certification
APPENDIX H
: USER’S MANUAL
(E) 23HL85
LCD Color Television
OWNER'S MANUAL
23HL85
Owner's Record
The model number and serial number are on the back
of your TV. Record these numbers in the spaces below.
Refer to these numbers whenever you communicate
with your Toshiba dealer about this TV.
Model number: 23HL85
Serial number:
E: ENGLISH
F: FRANÇAIS
S: ESPAÑOL
E
S
F
Connecting
your TV
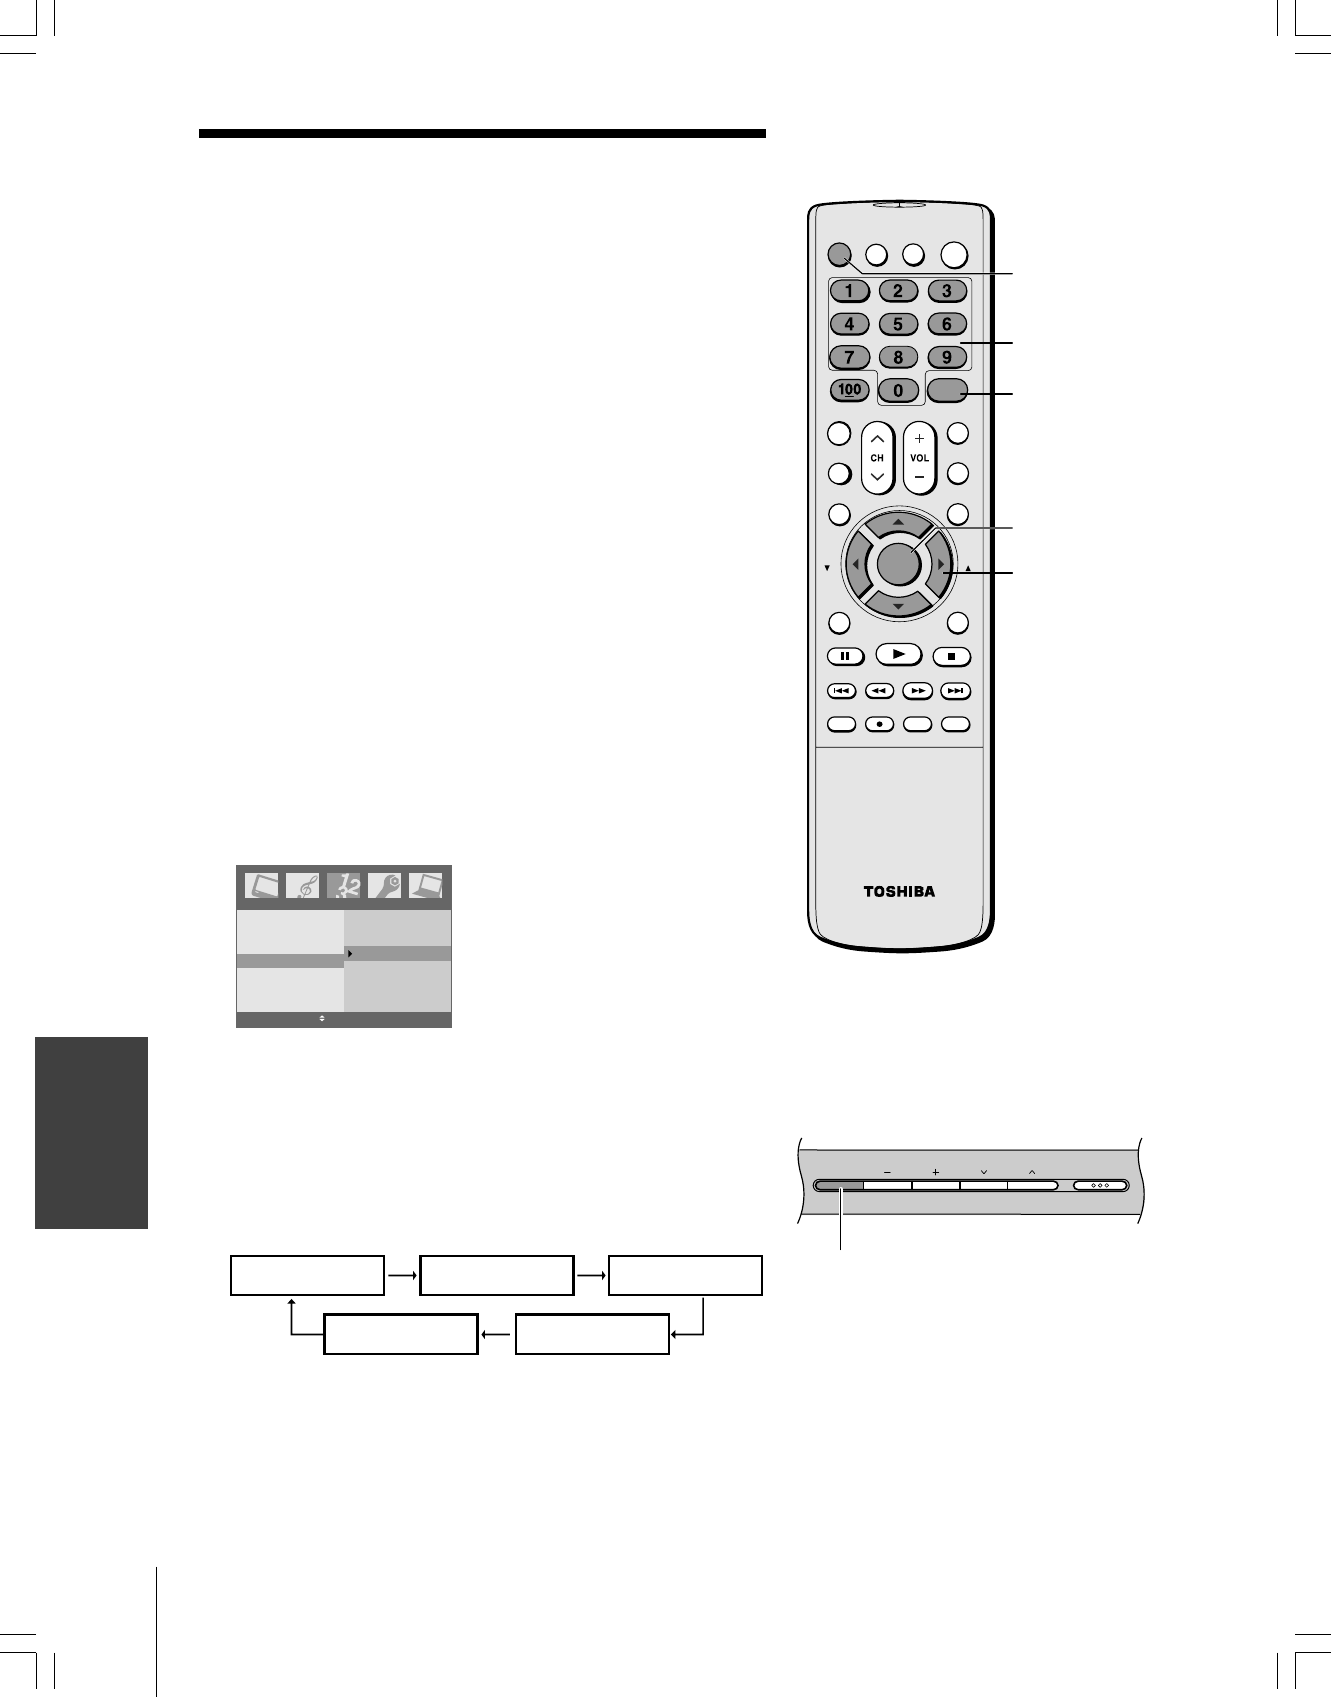
Using the
remote control
Setting up
your TV
Using the TV’s
Features
Appendix
Index Introduction
#01E01_23HL85 05.6.10, 3:14 PM1
Black
(E) 23HL85
Dear Customer,
Thank you for purchasing this Toshiba LCD TV. This manual
will help you use the many exciting features of your new
LCD TV. Before operating the TV, please read this
manual completely, and keep it nearby for future
reference.
WARNING
To prevent injury, this apparatus must be securely attached
to the floor/wall in accordance with the installation
instructions. (See item 20 on page 4.)
NOTE TO CATV INSTALLERS
This is a reminder to call the CATV system installer’s attention
to Article 820-40 of the NEC, which provides guidelines for
proper grounding and, in particular, specifies that the cable
ground shall be connected to the grounding system of the
building, as close to the point of cable entry as practical. For
additional antenna grounding information, see items 25
and 26 on page 4.
FCC Declaration of Conformity Compliance
Statement (Part 15):
The Toshiba 23HL85 LCD Color Televisions comply with
Part 15 of the FCC rules.
Operation is subject to the following two conditions: (1)
this device may not cause harmful interference, and (2)
this device must accept any interference that may cause
undesired operation.
The party responsible for compliance to these rules is:
Toshiba America Consumer Products, L.L.C.
82 Totowa Rd. Wayne, NJ 07470.
Ph: (973) 628-8000
Note: This equipment has been tested and found to comply
with the limits for a Class B digital device, pursuant to Part 15
of the FCC rules. These limits are designed to provide
reasonable protection against harmful interference in a
residential installation. This equipment generates, uses, and
can radiate radio frequency energy and, if not installed and
used in accordance with the instructions, may cause harmful
interference to radio communications. However, there is no
guarantee that interference will not occur in a particular
installation. If this equipment does cause harmful
interference to radio or television reception, which can be
determined by removing and applying power to the
equipment, the user is encouraged to try to correct the
interference by one or more of the following measures:
- Reorient or relocate the receiving antenna.
-Increase the separation between the equipment and the
receiver.
-Connect the equipment into an outlet on a circuit different
from that to which the receiver is connected.
-Consult the dealer or an experienced radio/TV technician
for help.
CAUTION: Changes or modifications to this equipment
not expressly approved by Toshiba could void the user’s
authority to operate this equipment.
Safety Precautions
WARNING: TO REDUCE THE RISK OF FIRE OR
ELECTRIC SHOCK, DO NOT EXPOSE THIS APPLIANCE
TO RAIN OR MOISTURE.
WARNING: TO REDUCE THE RISK OF ELECTRIC
SHOCK, DO NOT REMOVE COVER (OR BACK).
NO USER-SERVICEABLE PARTS INSIDE. REFER
SERVICING TO QUALIFIED SERVICE PERSONNEL.
#01E02-05_23HL85 05.6.10, 3:14 PM2
Black
(E) 23HL85
E
S
F
Connecting
your TV
Using the
remote control
Setting up
your TV
Using the TV’s
Features
Appendix
Index Introduction
Introduction
Welcome to Toshiba
Thank you for purchasing this Toshiba LCD TV. The goal of this
manual is to guide you through setting up and operating your Toshiba
TV as quickly as possible.
The model and serial numbers are on the back of your TV. Write
these numbers in the space provided on the front cover of this manual
for your records.
Instructions in this manual are based on using the remote control.
You also can use the controls on the TV if they have the same name as
those referred to on the remote control.
Please read all the safety and operating instructions carefully, and keep
this manual for future reference.
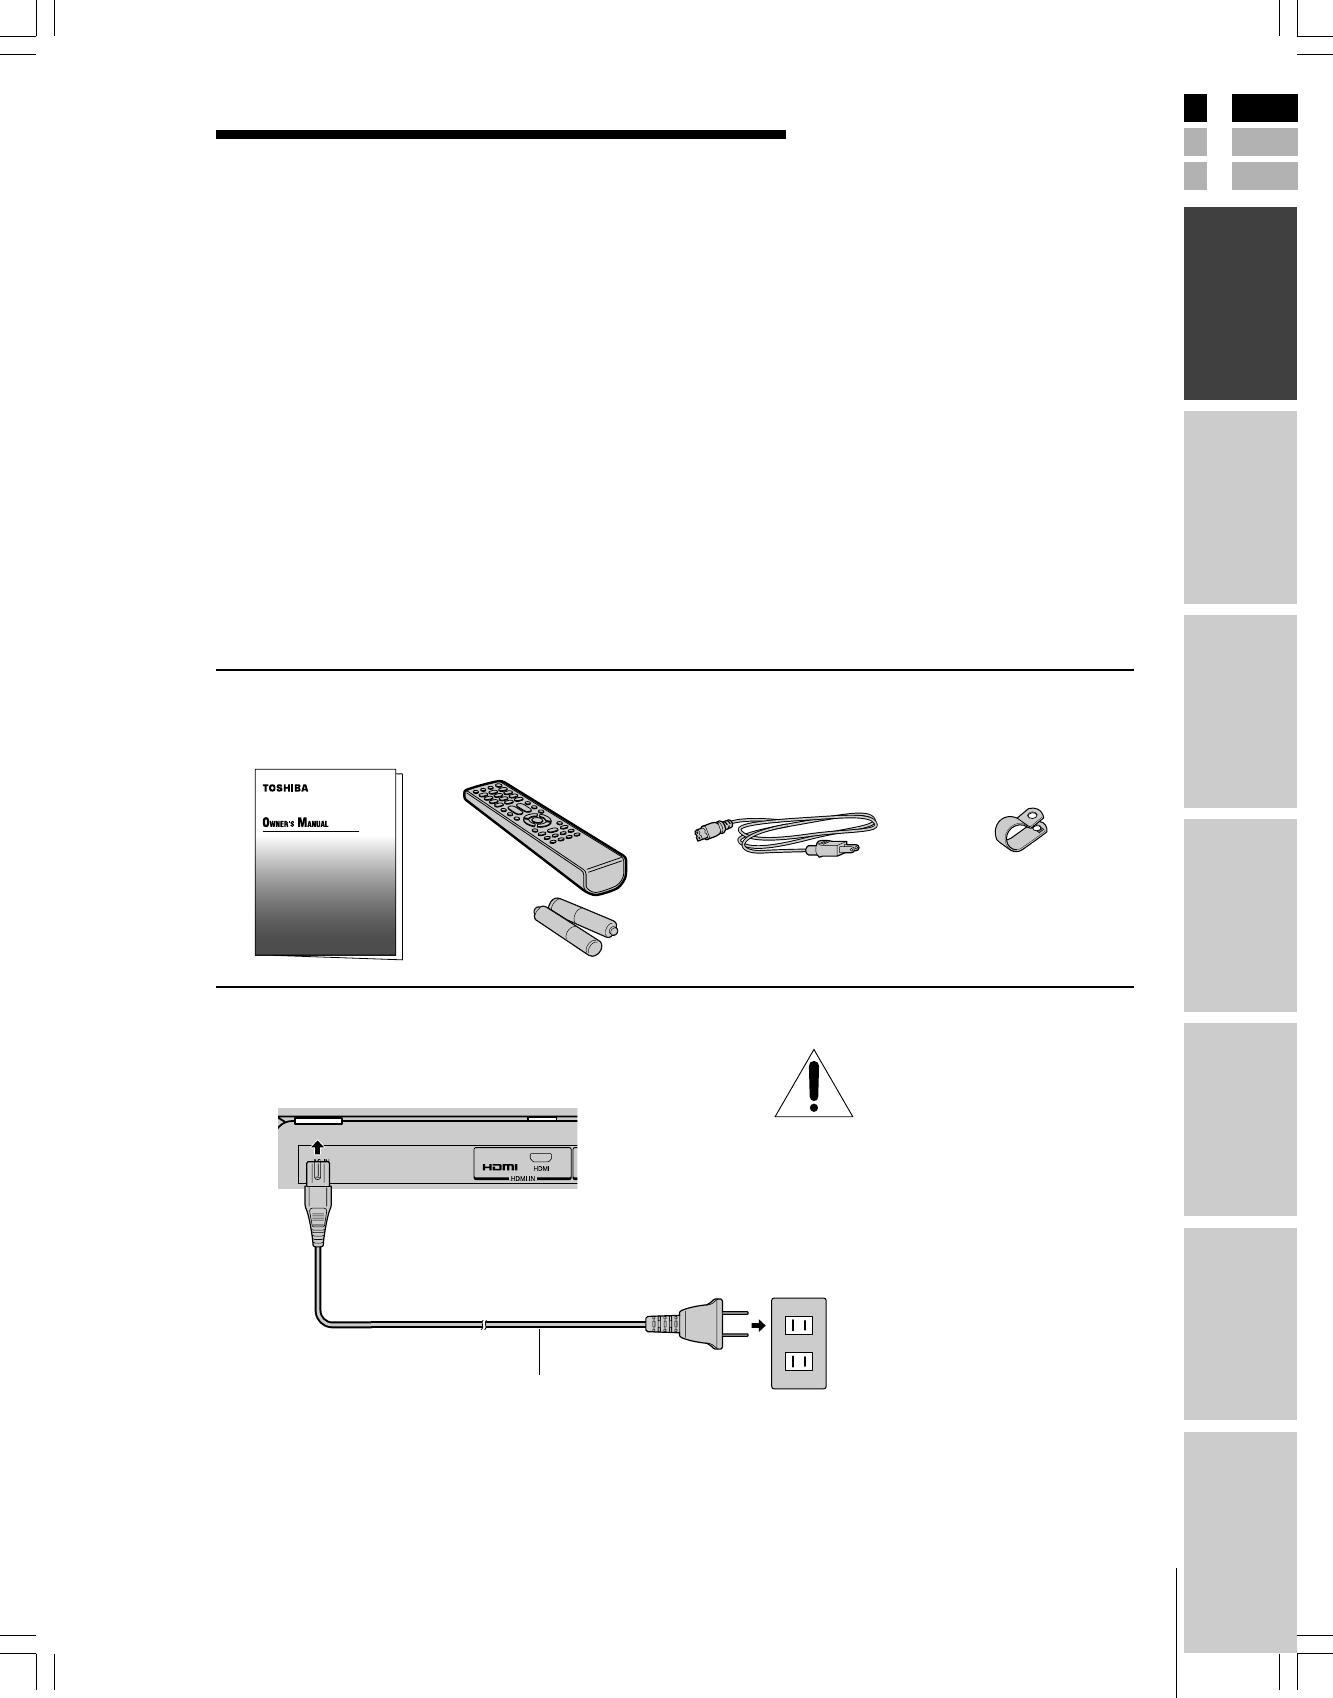
Supplied accessories
Check that you have the accessories and items shown.
Owner’s Manual Remote control Power cord Clip
(This book) Batteries R03 (AAA) × 2
Connecting the power cord
Back of TV
Power cord (supplied)
Wall outlet
100-240 V AC 60Hz
*The power cord supplied with this product is to be used in the United States and Canada only.
NOTE: RISK OF
EQUIPMENT DAMAGE!
Never plug in any power cords
until you have finished connecting all
equipment (see page 10).
Use this clip to attach the
TV to a wall, pillar, or
other immovable structure.
See item 20 on page 4.
#01E07-9_23HL85 05.6.10, 3:15 PM7
Black

(E) 23HL85
Introduction
Back
SKIP/
SEARCH SKIP/
SEARCH
CLEARREC TV/VCR
TOP MENU
REV FF
PAUSE PLAY STOP
ENTER EXIT
FAV FAV
SLEEP PIC SIZE
MENU/
ENTER
DVD MENU
CBL/SAT DVD
TV VCR
+10 CH RTN
INPUT DISPLAY MUTE POWER
ENT
TV front
VOLUME - + CHANNEL
Remote sensor
Remote control
VIDEO-2
IN
TV/VIDEO
Headphone
jack
Power indicator
ANT IN
AUDIO OUT
Power cord
POWER
Top panel
Left side terminals
Te r minal cover removed.
(see page 9)
Exploring your new TV
You can operate your TV by using the buttons on the top panel or the
remote control. The A/V terminals for connecting other equipment to
your TV are on the back panel and side panel (see illustrations below).
Also see “Connecting your TV” on pages 10-16.
VIDEO-1 IN
(ColorStream HD)
RGB/PC
IN
PC AUDIO IN
Cable clamper
HDMI™ IN
#01E07-9_23HL85 05.6.10, 3:15 PM8
Black
(E) 23HL85
E
S
F
Connecting
your TV
Using the
remote control
Setting up
your TV
Using the TV’s
Features
Appendix
Index Introduction
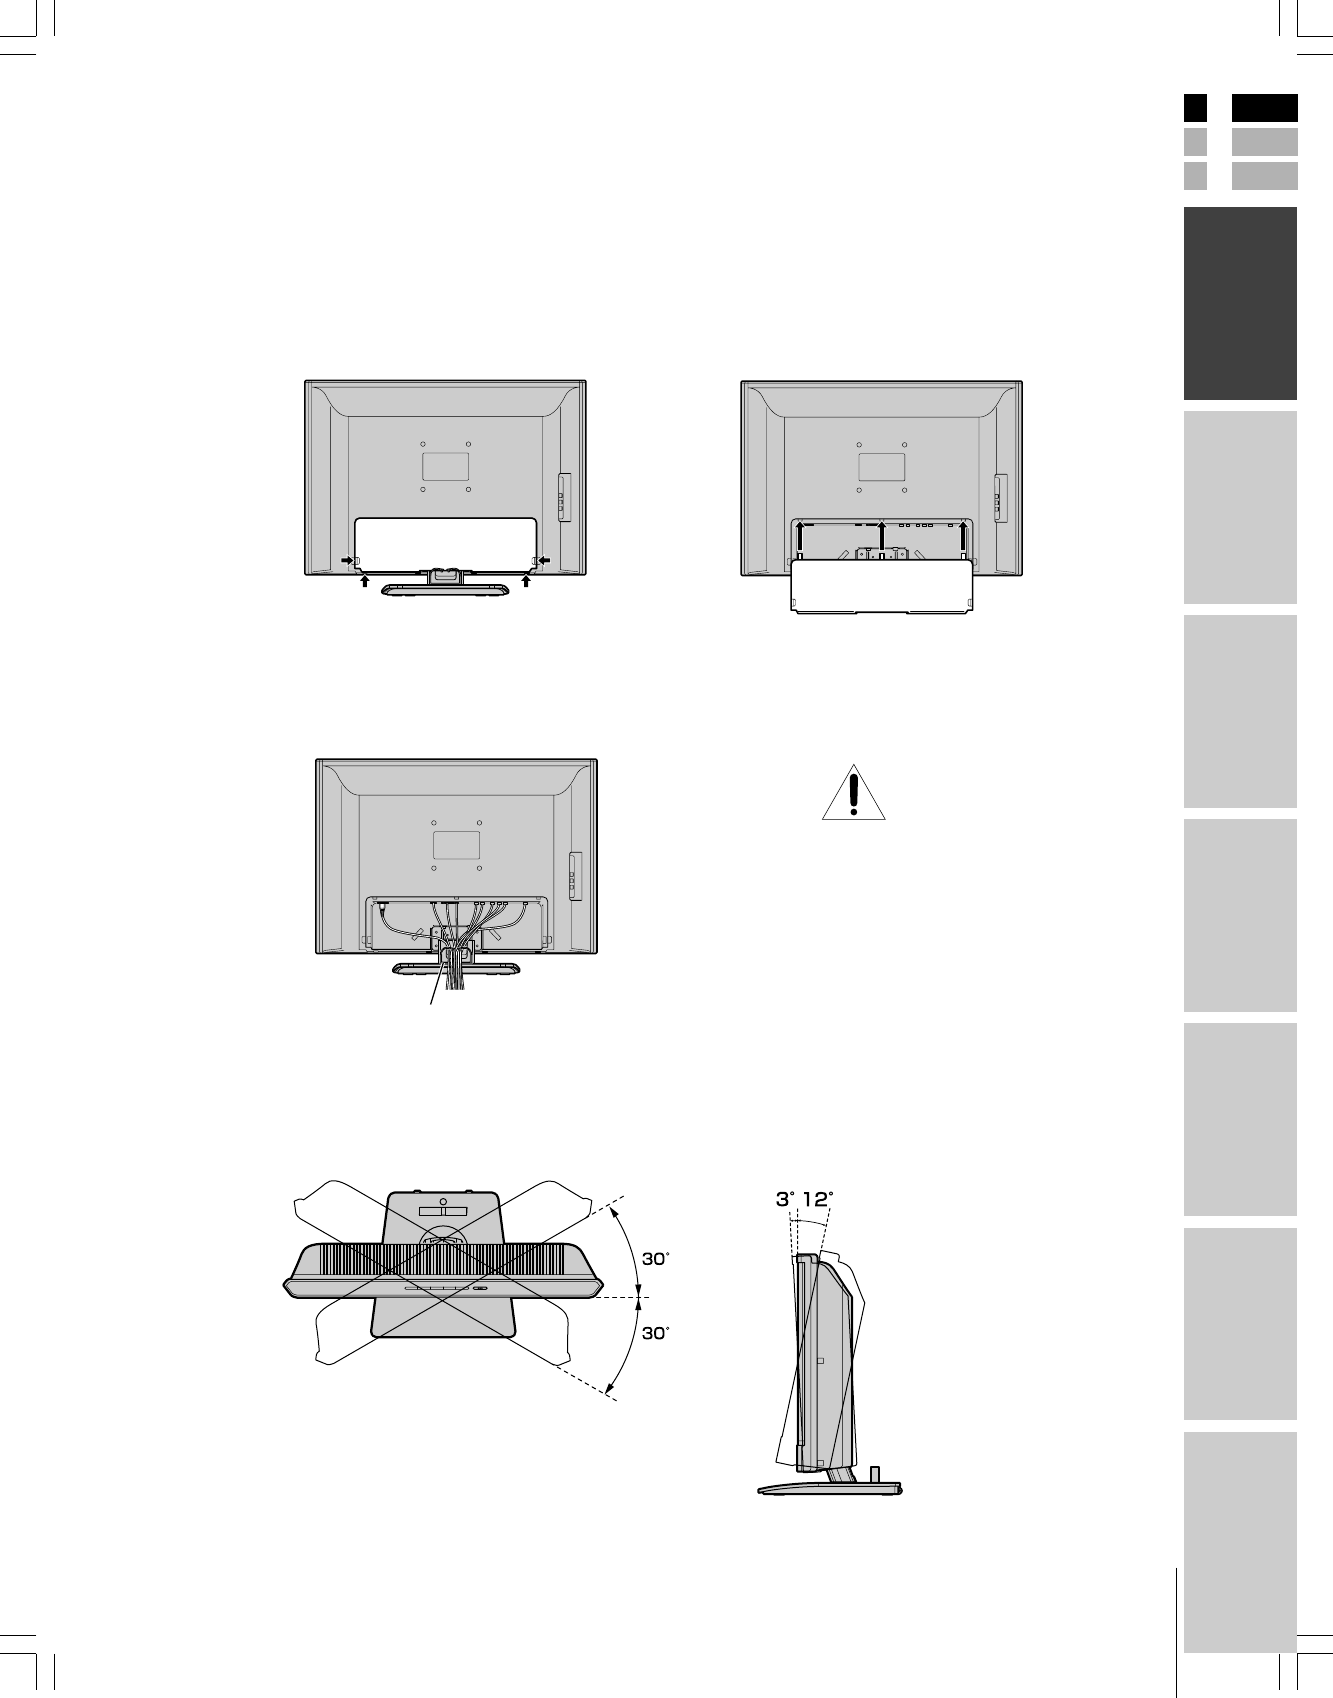
Rear terminal cover
The connection panel is hidden behind the terminal cover.
1. Remove the cover. Release the two hooks on the both sides
of the cover.
2. Install cables as necessary.
3. Reinstall the cover. Align the holes on the TV back with the
three tabs on the rear terminal cover as shown.
4. Close the cover.
Cable clamper
The cable clamper can be used to bundle the connection cables
(see page 10).
Cable clamper
Adjusting the TV viewing angle
You can adjust the angle of the TV screen.
Swivel angle Tilt angle
WARNING: RISK OF
SERIOUS PERSONAL
INJURY OR EQUIPMENT
DAMAGE!
Never grasp the cable clamper when
moving or lifting the TV. The cable clamper
could break, causing the TV to fall.
#01E07-9_23HL85 05.6.10, 3:15 PM9
Black
(E) 23HL85
Connecting
your TV
Connecting your TV
Note: All required cables, if not provided with your other devices, can be
purchased at many electronics accessory suppliers.
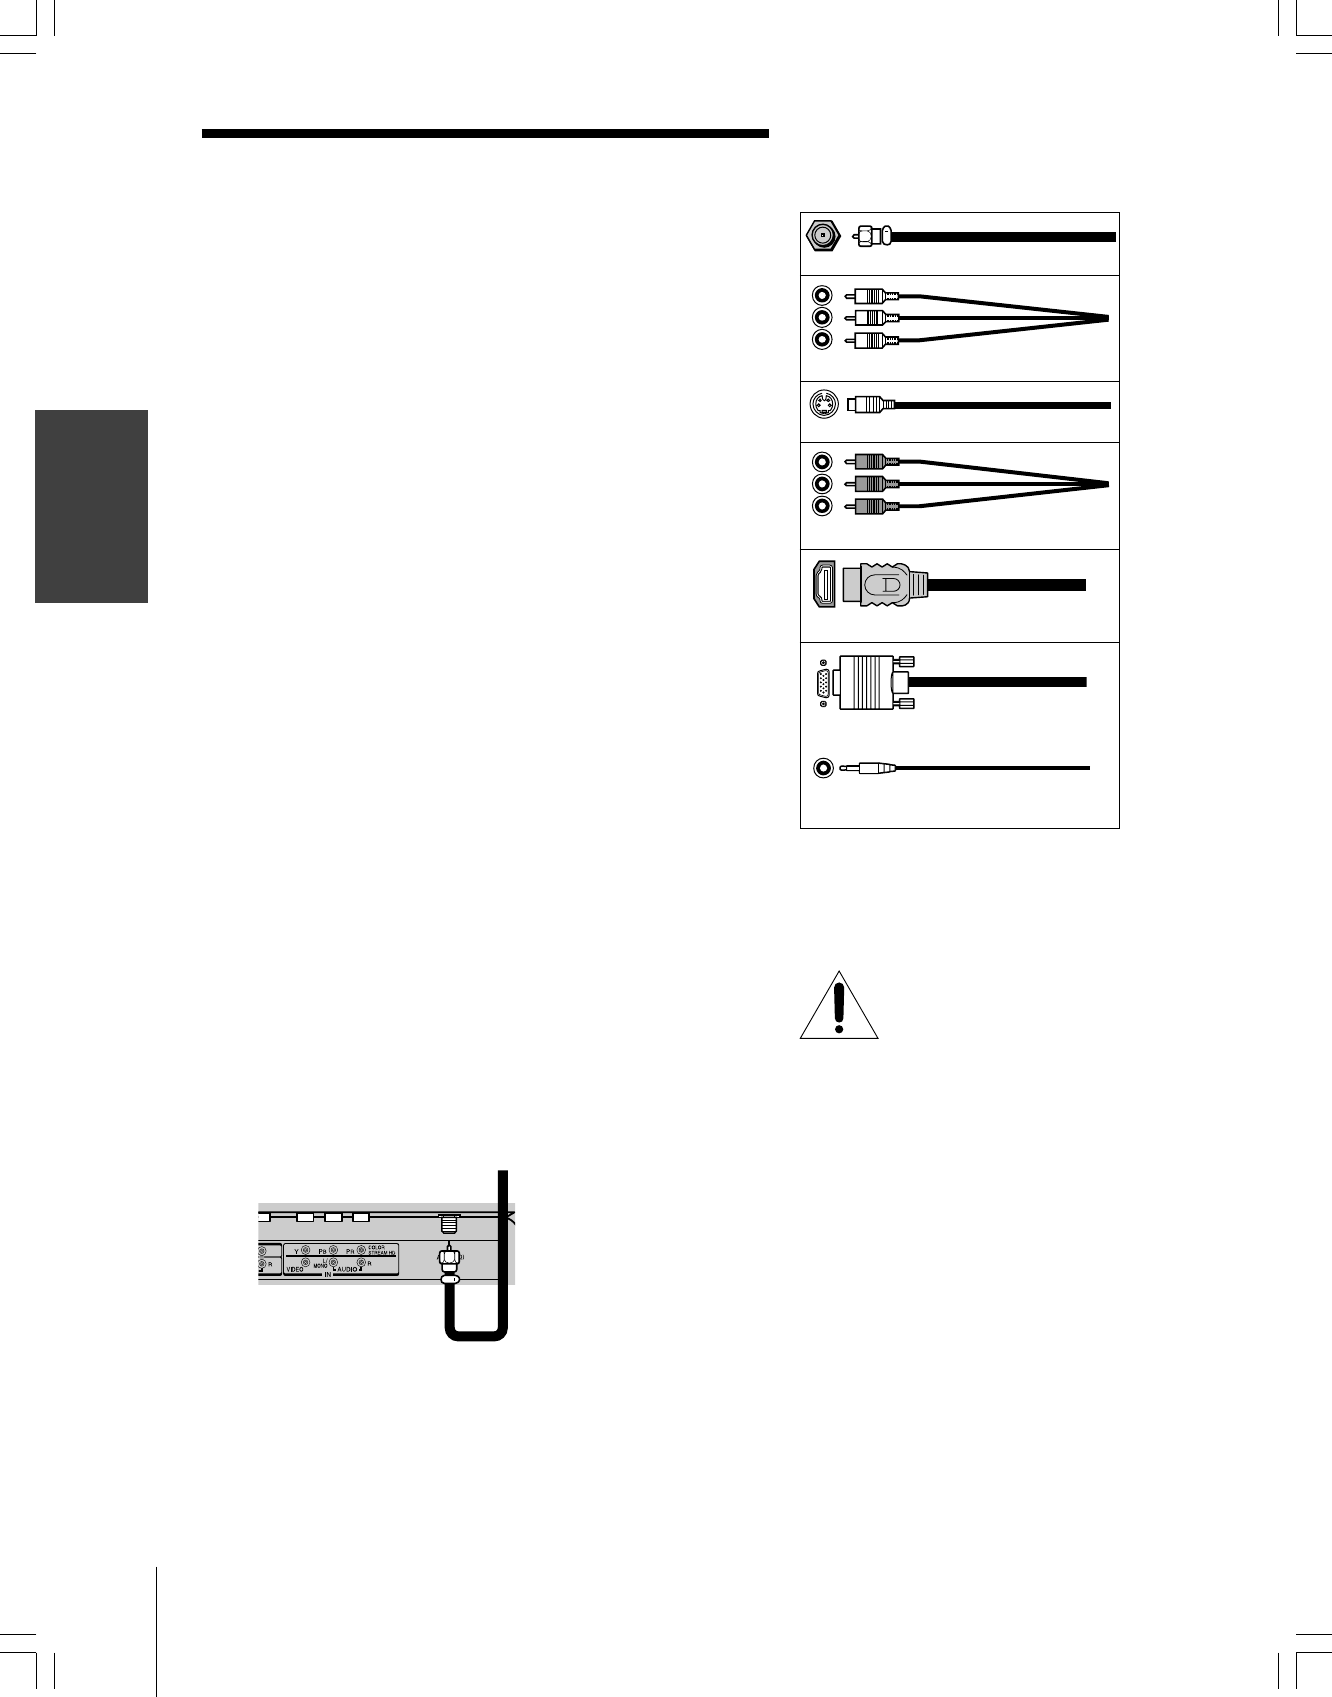
●
Coaxial (F-type) cable is used for connecting your antenna, cable TV
service, and/or cable converter box to the ANT 75 Ω RF input on your
TV.
●Standard A/V cables (composite video) usually come in sets of three,
and are for use with video devices with standard audio and standard
(composite) video output. These cables (and the related inputs on your
TV) are typically color-coded according to use: yellow for video, red
for stereo right audio, and white for stereo left (or mono) audio.
●S-video cable is for use with video devices with S-video output.
Separate audio cables are required for a complete connection.
Note: An S-video cable provides better picture performance than a
standard (composite) video cable.
●Component video cables come in sets of three and are for use with
video devices with component video output. These cables are typically
color-coded red, green, and blue. (ColorStream® is Toshiba’s brand of
component video.) Separate audio cables are required for a complete
connection.
Note: Component video cables provide better picture performance than a
standard (composite) video or S-video cable.
●HDMI cable is for use with devices with uncompressed HDMI (high-
definition multimedia interface) video and compressed audio output.
HDMI cable delivers digital audio and video in its native format (see
page 14). This cable carries both video and audio information;
therefore, separate audio cables are not required for a complete
connection.
Note: HDMI cable provides better picture performance than a standard
(composite) video or S-video cable.
●Mini D-sub 15-pin cable is for use with a personal computer with an
analog RGB (15-pin) output. A separate audio cable is required for a
complete connection.
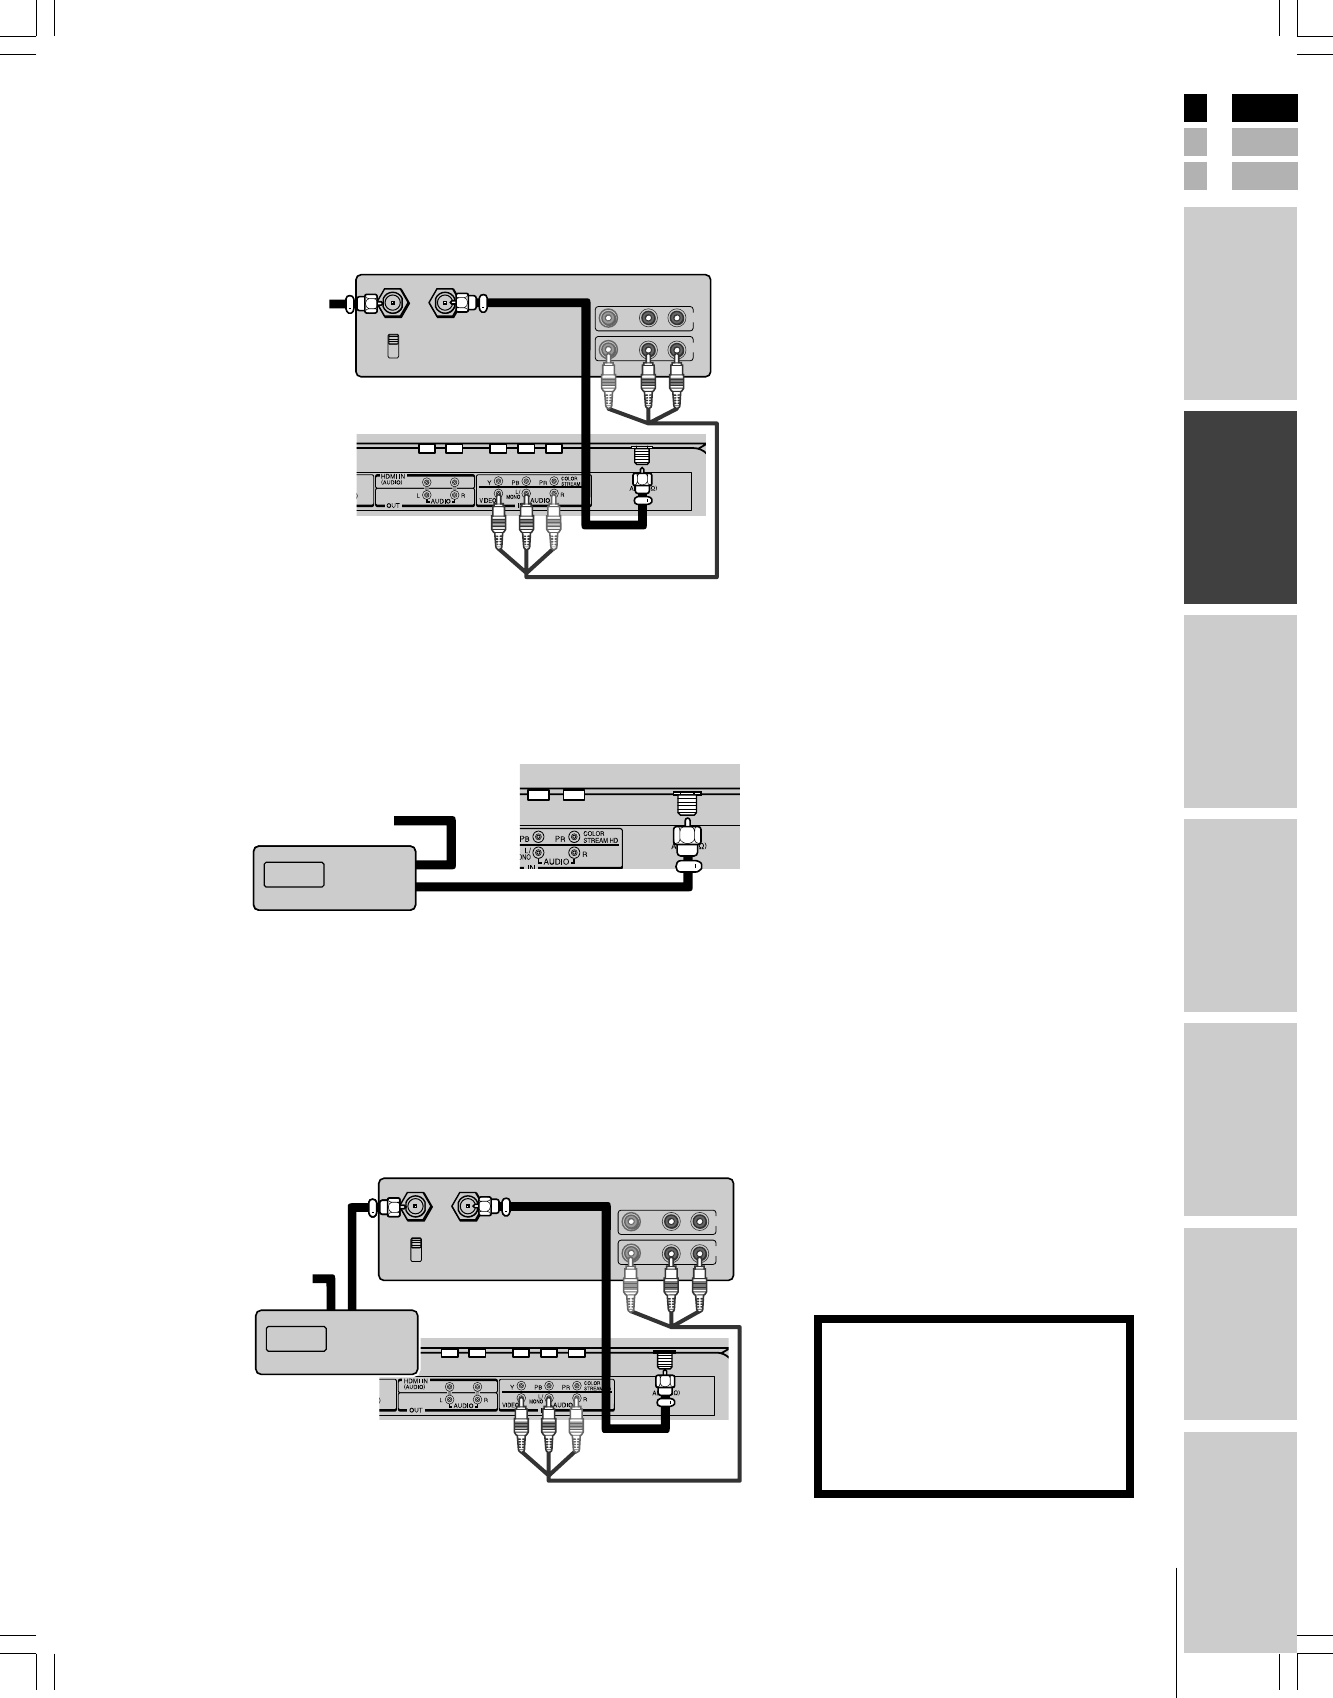
Connecting an antenna or cable TV
This connection allows you to watch TV programs or basic cable
channels.
From Antenna or Cable
Back of TV
Component video cables
Coaxial (antenna) cable
Standard A/V cables (red/white/yellow)
S-video cable
NOTE: RISK OF
EQUIPMENT DAMAGE!
Never plug in any power cords
until you have finished connecting all
equipment.
Mini D-sub 15-pin cable
Audio cable
HDMI cable
#01E10-16_23HL85 05.6.10, 3:15 PM10
Black
(E) 23HL85
E
S
F
Using the
remote control
Setting up
your TV
Using the TV’s
Features
Appendix
Index Introduction
Connecting
your TV
Note:
When you use a converter box with your TV,
the remote control will not operate some
features, such as favorite channel
programming or channel return.
If you have a mono VCR, connect L/Mono to
VCR Audio OUT using only one audio cable.
If you have a VCR with S-video, use an
S-video cable (in the S-video jacks) instead of
a standard video cable.
The TV side panel can be used to connect a
VCR with S-video.
Connecting a VCR
This connection allows you to watch local channels and video
programs, play or record on the VCR while watching TV, and record
from one channel while watching another channel.
IN from ANT
VIDEO AUDIO
OUT to TV
CH 3
LR
CH 4
IN
OUT
Connecting a cable converter box
This connection allows you to watch basic and premium cable channels
.
Tune the TV to channel 3 or 4 (whichever channel is vacant in your
area), and use the converter box to change channels.
Cable box
IN
OUT
Connecting a cable converter box and a VCR
This connection allows you to watch and record basic and premium
cable channels, as well as watch videotapes. Set the TV signal source
to Video1 (page 26). Tune the VCR to channel 3 or 4 (the same
channel as the converter box output switch), and use the cable
converter box to change channels.
IN from ANT
VIDEO AUDIO
OUT to TV
CH 3
LR
CH 4
IN
OUT
Cable box
IN OUT
Note:
When you use a converter box with your TV,
the remote control will not operate some
features, such as favorite channel
programming or channel return.
Note:
If you have a mono VCR, connect L/Mono to
VCR Audio OUT using only one audio cable.
If you have a VCR with S-video, use an
S-video cable (in the S-video jacks) instead of
a standard video cable.
The TV side panel can be used to connect a
VCR with S-video.
The unauthorized recording, use,
distribution, or revision of television
programs, videotapes, DVDs, and other
materials is prohibited under the
Copyright Laws of the United States and
other countries, and may subject you to
civil and criminal liability.
From Cable
Back of TV
From Cable
Box or
Antenna
Stereo VCR
Back of TV
From Cable
Stereo VCR
Back of TV
#01E10-16_23HL85 05.6.10, 3:15 PM11
Black
(E) 23HL85
Connecting
your TV
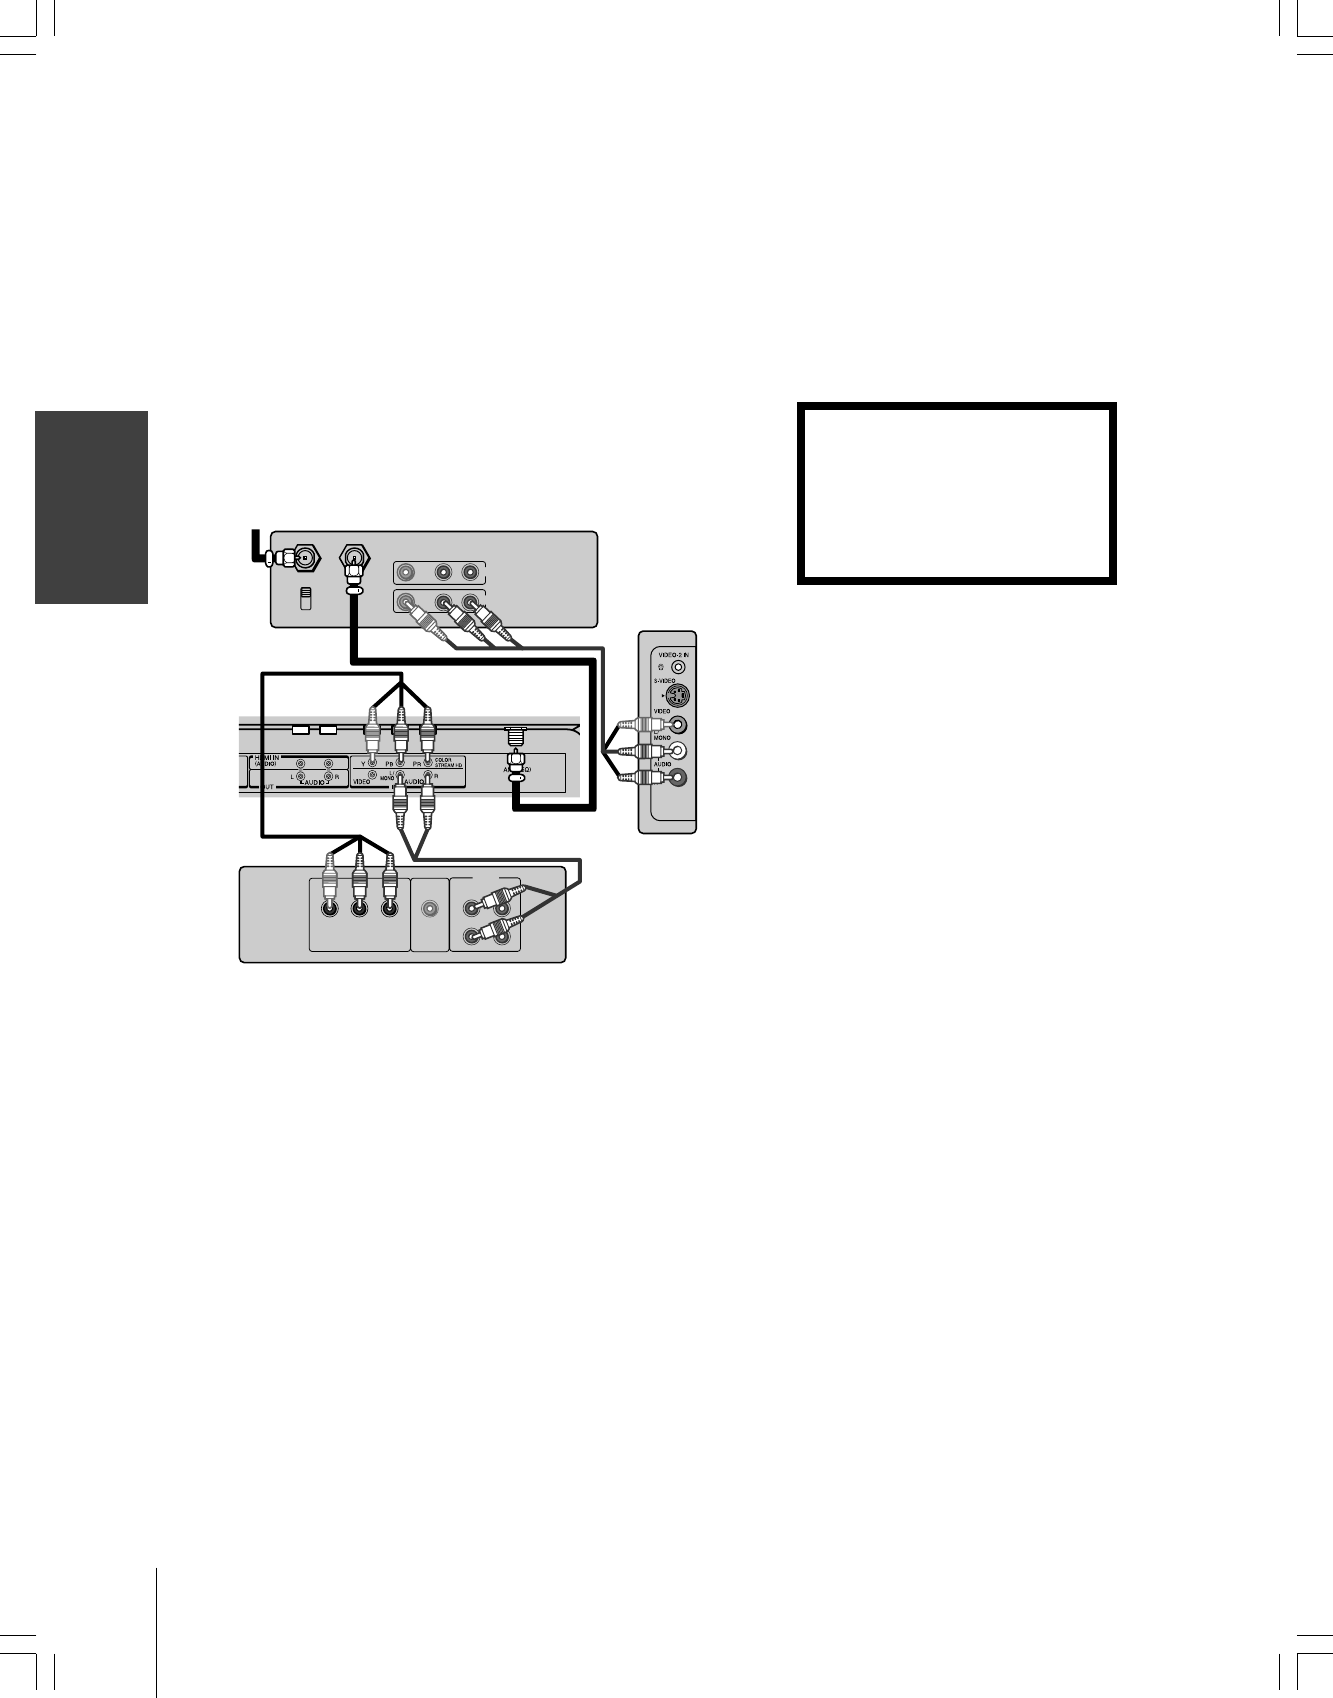
Connecting a DVD player with ColorStream®
(component video) and a VCR
This connection allows you to watch DVD, VCR, and TV programs,
and record TV programs.
Your TV has ColorStream® (component video) inputs. Connecting
your TV to a DVD player with component video can greatly enhance
picture quality and realism.
–To record one TV program while watching another TV program,
tune the VCR to the channel to record, and tune the TV to the
channel to watch.
–To record a TV program while watching a DVD, tune the VCR to
the channel to record, and select Video1 on the TV (see “Selecting
the video input source” on page 26).
VIDEO
OUT
S-VIDEO
AUDIO
COMPONENT VIDEO
OUT
L
R
L
R
PRPBY
IN from ANT VIDEO AUDIO
OUT to TV
CH 3
LR
CH 4
IN
OUT
DVD player with component video
The unauthorized recording, use,
distribution, or revision of television
programs, videotapes, DVDs, and other
materials is prohibited under the
Copyright Laws of the United States and
other countries, and may subject you to
civil and criminal liability.
Note:
For the highest possible picture quality, use
component video cables between the TV and
DVD player.
The ColorStream jacks can be used with 480i
and 480p scan system.
The TV side panel can be used to connect a
VCR with S-video.
Stereo VCR
From
Antenna
TV side pannel
Back of TV
#01E10-16_23HL85 05.6.10, 3:15 PM12
Black

(E) 23HL85
E
S
F
Using the
remote control
Setting up
your TV
Using the TV’s
Features
Appendix
Index Introduction
Connecting
your TV
Connecting a DTV receiver/set-top box with
ColorStream® (component video) and a VCR
This connection allows you to watch DTV (digital TV), VCR, and
TV programs, and record DTV (composite video only) and TV
programs.
Your TV has ColorStream® (component video) inputs. Connecting
your TV to a DTV receiver with component video can greatly
enhance picture quality and realism.
–To record and watch a DTV program, select LINE IN on the
VCR, and select Video1 on the TV (see “Selecting the video input
source” on page 26).
–To record a TV program while watching a DTV program, tune the
VCR to the channel to record, and select Video1 on the TV.
–To record and watch the same TV program, tune the VCR to the
channel to record, and select Video2 on the TV.
–To record one TV program while watching another TV program,
tune the VCR to the channel to record, and tune the TV to the
channel to watch.
IN from ANT OUT to TV
VIDEO AUDIO
LR
IN
OUT
CH 3
CH 4
Satelite IN
VIDEO
OUT
S-VIDEO
AUDIO
COMPONENT VIDEO
OUT
L
R
L
R
P
R
P
B
Y
Note:
For the highest possible picture quality, use
component video cables between the TV and
DTV receiver/set-top box.
The TV side panel can be used to connect a
VCR with S-video.
The unauthorized recording, use,
distribution, or revision of television
programs, videotapes, DVDs, and other
materials is prohibited under the
Copyright Laws of the United States and
other countries, and may subject you to
civil and criminal liability.
DTV Receiver with component video
TV side pannel
From Antenna
Stereo VCR
From
DTV Antenna
Back of TV
#01E10-16_23HL85 05.6.10, 3:15 PM13
Black
(E) 23HL85
Connecting
your TV
[1] HDMI = High-Definition Multimedia Interface.
[2] DVI = Digital Video Interface.
[3] HDCP = High-bandwidth Digital Content Protection.
[4] EIA/CEA-861/861B compliance covers the transmission of
uncompressed digital video with high-bandwidth digital
content protection, the technology of which is being
standardized for reception of high-definition video signals.
Because this is an evolving technology, it is possible that
some devices may not operate properly with the TV.
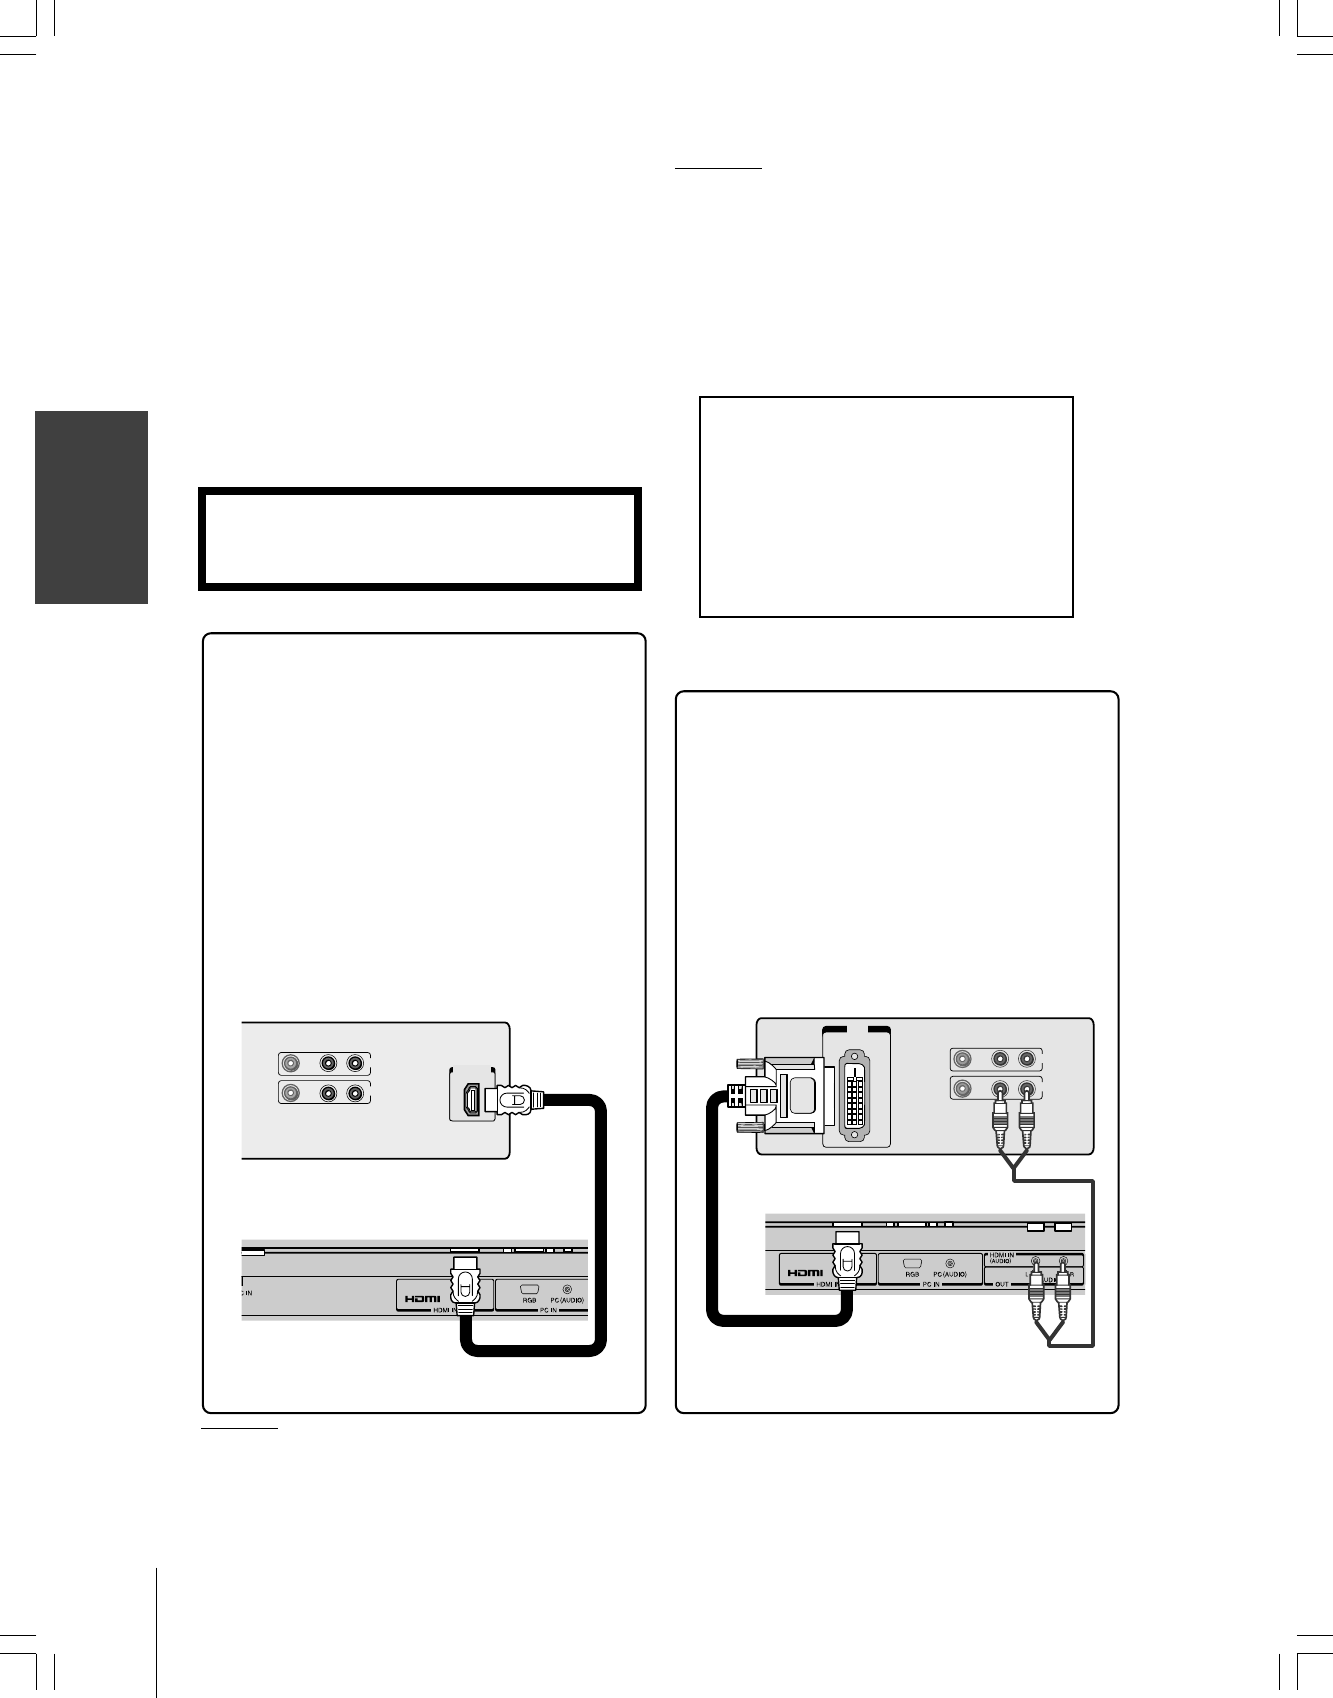
Connecting an HDMI™ or a DVI device to the HDMI input
HDMI, the HDMI logo and High-Definition Multimedia Interface are
trademarks or registered trademarks of HDMI Licensing LLC.
To connect a DVI device, you will need:
•one HDMI
–
to
–
DVI adapter cable
(HDMI type A connector)
For proper operation, the length of an HDMI-to-DVI
adapter cable should not exceed 9.8 ft (3m). The
recommended length is 6.6 ft (2m).
•one pair of standard analog audio cables
An HDMI-to-DVI adapter cable transfers only video.
Separate analog audio cables are required (see
illustration below).
VIDEO AUDIO
LR
IN
OUT
DVI
OUT
To ensure that the HDMI or DVI device is reset
properly, it is recommended that you follow
these procedures:
•When turning on your electronic components,
turn on the TV first, and then the HDMI or
DVI device.
•When turning off your electronic components,
turn off the HDMI or DVI device first, and
then the TV.
The HDMI[1] input on your TV receives digital audio
and uncompressed digital video from an HDMI
device or uncompressed digital video from a DVI[2]
device.
This input is designed to accept HDCP[3] program
material in digital form from EIA/CEA-861/861B–
compliant[4] consumer electronic devices (such as a set-
top box or DVD player with HDMI or DVI output).
The HDMI input is designed for best performance
with 1080i high-definition video signals, but will also
accept and display 480i, 480p, and 720p signals.
To connect an HDMI device, you will need:
• one HDMI cable (type A connector)
For proper operation, it is recommended that you
use a short HDMI cable.
HDMI cable transfers both video and audio. Separate
analog audio cables are not required (see illustration
below). Some CDVs (Video CDs) may not output
digital audio signals, in which case you may be able
to hear sound by connecting analog audio cables.
However, if you connect analog audio cables with this
connection, the HDMI terminal on the TV will not
receive the HDMI digital audio signal and you will
hear analog audio only.
VIDEO AUDIO
LR
IN
OUT
HDMI OUT
TV lower back panel
HDMI device
TV lower back panel
DVI device
Note: The HDMI jack is not intended for connection to
and should not be used with a personal computer. For PC
connection, see page 16.
#01E10-16_23HL85 05.6.10, 3:15 PM14
Black

(E) 23HL85
E
S
F
Using the
remote control
Setting up
your TV
Using the TV’s
Features
Appendix
Index Introduction
Connecting
your TV
Note:
If you have a camcorder with S-video, use an
S-video cable instead of a standard video
cable for better picture performance.
Connecting an audio system
This connection allows you to hear the TV sound through external
speakers connected to an audio amplifier. The audio signal level
(fixed) is not affected by pressing the volume buttons on the TV or
the TV’s remote control. To control the audio through the amplifier,
use the audio system’s remote control.
LINE IN
LR
Connecting a camcorder
This connection allows you to watch video materials recorded on a
camcorder.
VIDEO AUDIO
OUT
L
R
Note:
Set the TV’s volume to the minimum level if
necessary.
Amplifier
Camcorder
VIDEO 2 (side panel)
Back of TV
#01E10-16_23HL85 05.6.10, 3:15 PM15
Black
(E) 23HL85
Connecting
your TV
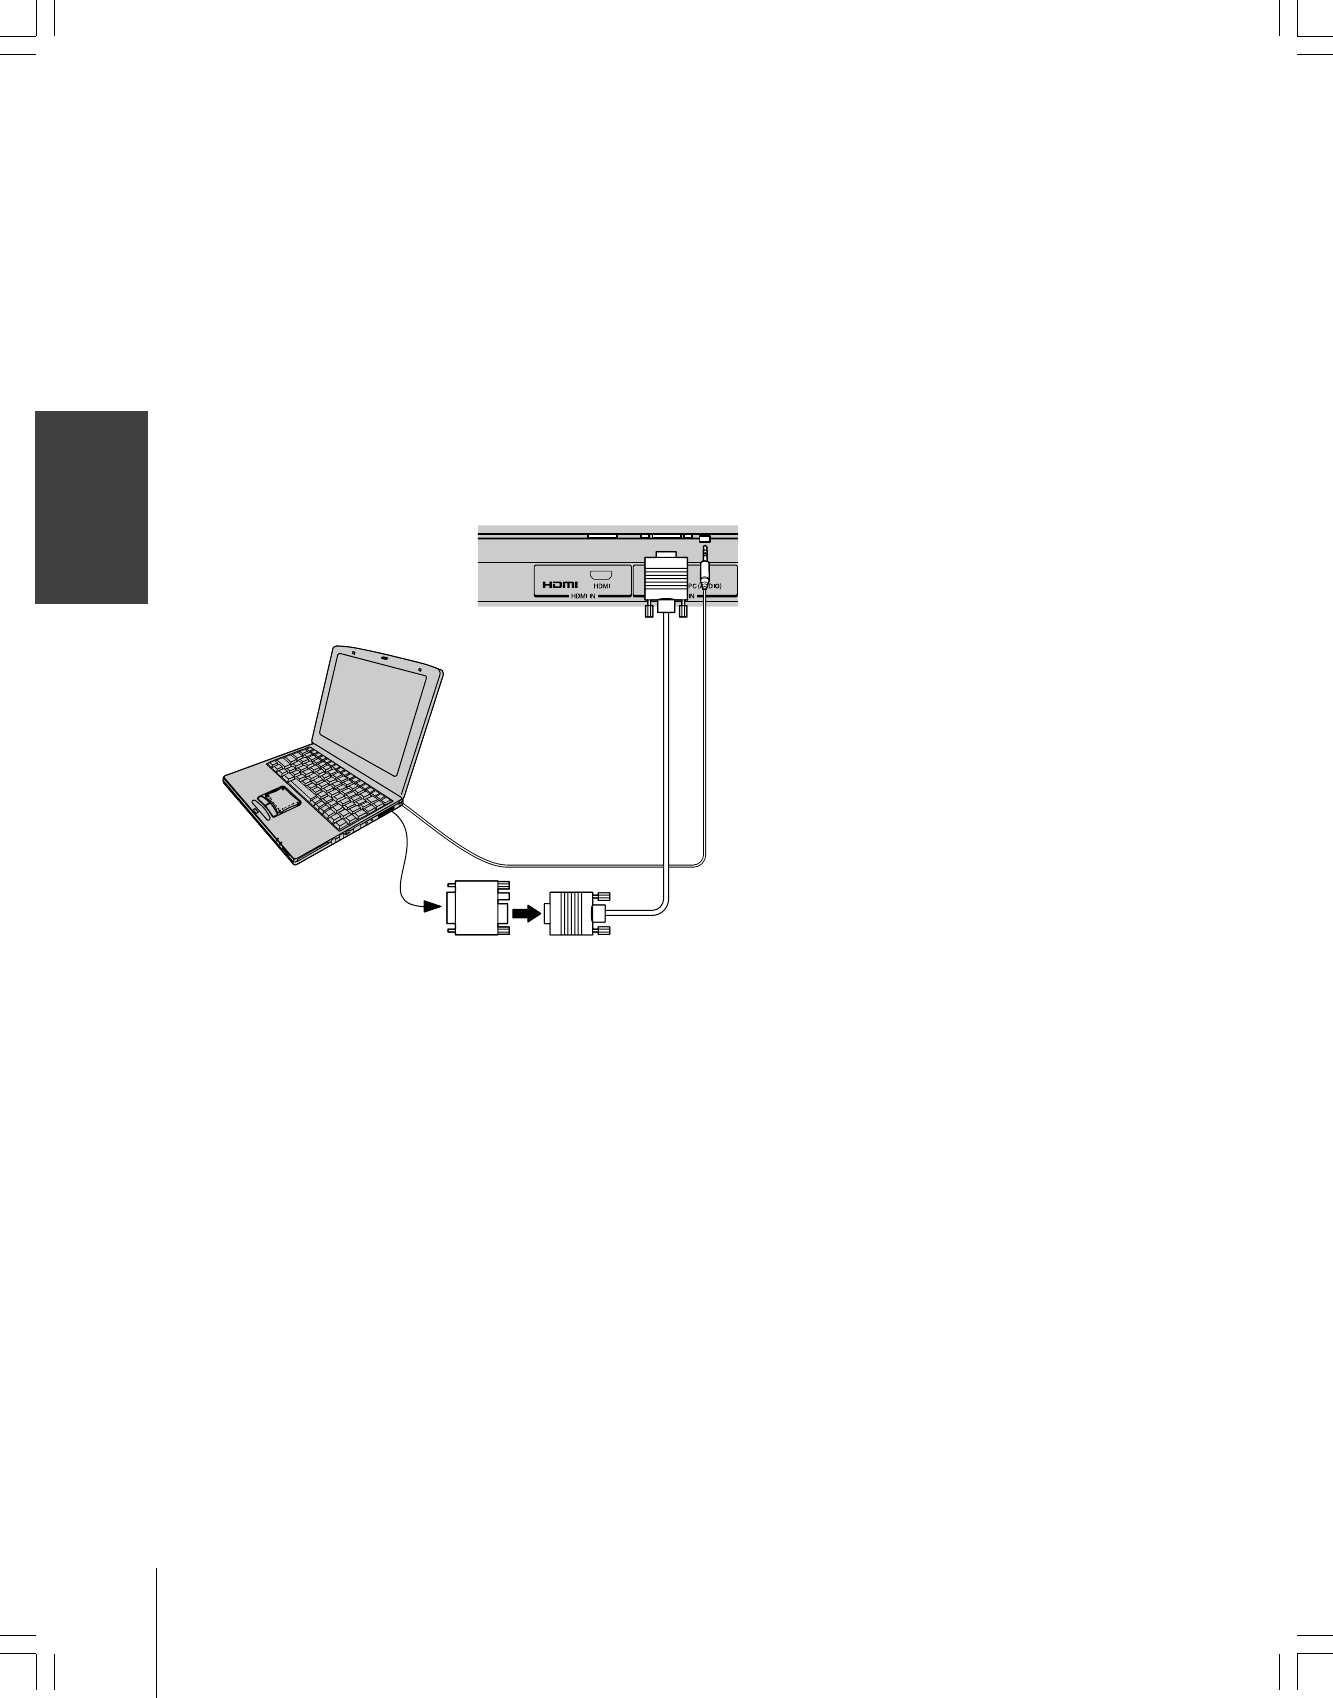
Connecting a personal computer (PC)
This connection allows you to view the image of a personal computer
(PC) on the TV screen. When connecting a PC to the TV, use an
analog RGB (15-pin) computer cable and a PC audio cable.
–To use a PC, set the monitor output resolution on the PC before
connecting it to the TV. The following signals can be displayed.
•WXGA: VESA 1360 × 768 @ 60Hz
Other formats or non-standard signals may not be displayed
correctly.
–To display the optimum picture, use the PC setting feature. (see
“Using the PC setting feature” on page 37).
Note:
•Some PC models cannot be connected to
this TV.
•An adapter is not needed for computers
with a DOS/V compatible mini D-sub
15-pin terminal.
•Depending on the DVD’s title and the
specifications of the PC on which you are
playing the DVD-Video, some scenes may
be skipped or you may not be able to
pause during multi-angle scenes.
Back of TV
Computer
Audio
output
Audio cable
RGB/PC
output
Conversion
adapter
(if necessary)
#01E10-16_23HL85 05.6.10, 3:15 PM16
Black
(E) 23HL85
E
S
F
Using the
remote control
Using the TV’s
Features
Appendix
Index Introduction
Connecting
your TV
Setting up
your TV
Setting up your TV
Learning about the menu system
After you have installed the batteries, you will need to set some
preferences on the TV by using the menu system. You can access the
menu system using the buttons on the TV or remote control.
1. Press MENU to display the menu system.
2. Press x or • to select a menu.
3. Press ENTER, and then press y or z to select an item.
4. Press ENTER, and then press y or z to select or adjust a setting.
5. Press ENTER to save your menu settings.
To close the menu system, press DISPLAY.
To return to the previous menu, press EXIT.
Picture mode
Contrast
Brightness
Color
Sharpness
Tint
Picture
ENTER MENU
Sound mode
Bass
Treble
Balance
StableSound
ENTER MENU
Sound
Auto program
Manual program
Favorite channel
Blue screen
Channel
ENTER MENU
Language
Caption/Text
Captions
Panel lock
V-Chip
Auto off
Special
ENTER MENU
H-Position
V-Position
Clock
Phase
Auto Configure
Reset
ENTER MENU
PC
SKIP/
SEARCH SKIP/
SEARCH
CLEARREC TV/VCR
TOP MENU
REV FF
PAUSE PLAY STOP
ENTER EXIT
FAV FAV
SLEEP PIC SIZE
MENU/
ENTER
DVD MENU
CBL/SAT DVD
TV VCR
+10 CH RTN
INPUT DISPLAY MUTE POWER
ENT
yzx •
MENU/
ENTER
EXIT
Note:
The PC mode is selectable only when the TV
is in PC input mode and active picture is on-
screen (see “Selecting the video input source”
on page 26).
DISPLAY
#01E23-25_23HL85 05.6.10, 3:15 PM23
Black
(E) 23HL85
Setting up
your TV
SKIP/
SEARCH SKIP/
SEARCH
CLEARREC TV/VCR
TOP MENU
REV FF
PAUSE PLAY STOP
ENTER EXIT
FAV FAV
SLEEP PIC SIZE
MENU/
ENTER
DVD MENU
CBL/SAT DVD
TV VCR
Changing the on-screen display language
You can choose from three different languages (English, Spanish and
French) for the on-screen display of adjustment menus and messages.
To select a language:
1. Press MENU, and then press x or • until the Special menu
appears.
2. Press ENTER, and then press y or z to highlight Language.
3. Press ENTER, and then press y or z to select your desired
language.
Language
Caption/Text
Captions
Panel lock
V-Chip
Auto off
English
Español
Français
MENU EXIT
Special
Adding channels to the TV’s memory
When you press CH or CH , your TV will stop only on the
channels you program into the TV’s channel memory.
Follow the steps below and on the next page to program all active
channels into the TV’s memory.
Programming channels automatically
Your TV can automatically detect all active channels in your area and
store them in the channel memory. After the channels are
programmed automatically, you can manually add or erase individual
channels (see page 25).
To program channels automatically:
1. Press MENU, and then press x or • until the Channel menu
appears.
2. Press ENTER, and then press y or z to highlight Auto
program.
To start
ENTER EXIT MENU
Auto program
Manual program
Favorite channel
Blue screen
Channel
3. Press ENTER to start auto-programming. The TV will
automatically cycle through all the TV and Cable channels, and
store all active channels in the channel memory.
2 % TV 4
ENTER
Auto program
Manual program
Favorite channel
Blue screen
Channel
4. Press CH or CH to view the programmed channels.
Note:
•To tune the TV to a channel not
programmed in the channel memory, you
must use the Channel Number buttons on
the remote control.
•If you press the ENTER button during auto-
programming, the function will stop and
only the channels programmed up to that
time will be stored in the channel memory.
SKIP/
SEARCH SKIP/
SEARCH
CLEARREC TV/VCR
TOP MENU
REV FF
PAUSE PLAY STOP
ENTER EXIT
FAV FAV
SLEEP PIC SIZE
MENU/
ENTER
DVD MENU
CBL/SAT DVD
TV VCR
+10 CH RTN
ENT
yzx •
yzx •
MENU/
ENTER
MENU/
ENTER
CH
#01E23-25_23HL85 05.6.10, 3:15 PM24
Black
(E) 23HL85
E
S
F
Using the
remote control
Using the TV’s
Features
Appendix
Index Introduction
Connecting
your TV
Setting up
your TV
Adding and erasing channels manually
After you have automatically programmed the active channels into
the TV’s channel memory, you can manually add or erase specific
channels.
To add or erase channels:
1. Press MENU, and then press x or • until the Channel menu
appears.
2. Press ENTER, and then press y or z to highlight Manual
program.
3. Press ENTER, and then press x or • to select a channel you
want to add or erase.
TV 4
Erase
EXIT MENU
Auto program
Manual program
Favorite channel
Blue screen
Channel
4. Press z, and then press x or • to select Memory (add) or Erase.
The current channel is added to Memory or erased from the
channel list.
Changing channels
To change to a specific channel (programmed or unprogrammed):
Press the Channel Number buttons (0–9 and 100).
For channels 100 and higher, press the 100 button, and then the
next two numbers. For example, to select channel 125, press
100, 2, 5.
To change to the next programmed channel:
Press CH or CH on the TV or remote control.
Programming your favorite channels
You can preset up to 8 of your favorite channels using the Favorite
Channel Programming feature. Because this feature scans through
only your favorite channels, it allows you to skip other channels you
do not normally watch.
To program your favorite channels:
1. Press MENU, and then press x or • until the Channel menu
appears.
2. Press ENTER, and then press y or z to highlight Favorite
channel.
3. Press ENTER to display the Favorite Ch. menu.
To set
ENTER EXIT MENU
Auto program
Manual program
Favorite channel
Blue screen
Channel
TV 4
–––––––––––
–––––––––––
–––––––––––
–––––––––––
–––––––––––
–––––––––––
–––––––––––
Favorite Ch.
MENU EXIT
4. Press y or z to select the first favorite channel position.
5. Press x or • to set the desired channel number for the first
favorite channel position.
6. Repeat steps 4 and 5 to program other channels.
To select your favorite channels:
Repeatedly press FAV y or z on the remote control.
SKIP/
SEARCH SKIP/
SEARCH
CLEARREC TV/VCR
TOP MENU
REV FF
PAUSE PLAY STOP
ENTER EXIT
FAV FAV
SLEEP PIC SIZE
MENU/
ENTER
DVD MENU
CBL/SAT DVD
TV VCR
+10 CH RTN
INPUT DISPLAY MUTE
POWER
ENT
TV top panel
POWERTV/VIDEO VOLUME CHANNEL
CHANNEL
Channel
Numbers
MENU/
ENTER
CH
yzx •
FAV yz
#01E23-25_23HL85 05.6.10, 3:15 PM25
Black
(E) 23HL85
Using the TV’s
Features
Using the TV’s features
Switching between two channels using
Channel Return
The Channel Return feature allows you to switch between two
channels without entering an actual channel number each time.
To switch between two channels:
1. Select the first channel you want to view.
2. Select a second channel using the Channel Number buttons
(0–9, 100).
3. Press CH RTN. The previous channel will be displayed.
Each time you press CH RTN, the TV will switch back and forth
between the last two channels that were selected.
Using the Blue screen feature
With the Blue screen function On, the screen will automatically turn
blue and the sound will be muted when no signal is received.
To turn on the Blue screen feature:
1. Press MENU, and then press x or • until the Channel menu
appears.
2. Press ENTER, and then press y or z to highlight Blue screen.
3. Press ENTER, and then press y or z to select On.
Note: If the Blue screen appears repeatedly because of poor signal
strength, select Off in step 3.
On
Off
Auto program
Manual program
Favorite channel
Blue screen
Channel
EXIT MENU
Selecting the video input source
Press INPUT on the remote control or press TV/VIDEO on the TV top
panel to view a signal from another device connected to your TV, such as
a VCR or DVD player. You can select Video1 (including ColorStream),
Video2, HDMI or PC depending on which input jacks are used for
connecting the devices (see “Connecting your TV” on page 10).
Video1 HDMIVideo2
(TV channel)PC
TV/VIDEO
TV top panel
POWERTV/VIDEO VOLUME CHANNEL
SKIP/
SEARCH SKIP/
SEARCH
CLEARREC TV/VCR
TOP MENU
REV FF
PAUSE PLAY STOP
ENTER EXIT
FAV FAV
SLEEP PIC SIZE
MENU/
ENTER
DVD MENU
CBL/SAT DVD
TV VCR
+10 CH RTN
INPUT DISPLAY MUTE
POWER
ENT
Channel
Numbers
CH RTN
yzx •
MENU/
ENTER
INPUT
#01E26-30_23HL85 05.6.10, 3:16 PM26
Black
(E) 23HL85
E
S
F
Using the
remote control
Using the TV’s
Features
Appendix
Index Introduction
Connecting
your TV
Setting up
your TV
Natural picture size example: The way the image displays will vary
depending on the format of the program you are currently watching.
(continued on next page)
Viewing the wide-screen picture formats
You can view 480i, 480p, 720p, and 1080i format programs in a
variety of picture sizes—Natural, TheaterWide 1, TheaterWide 2,
TheaterWide 3, and Full.
The way the image displays in any of the picture sizes will vary
depending on the format of the program you are viewing. Select the
picture size that displays the current program the way that looks best
to you.
* Full picture size
Selecting the picture size
Repeatedly press PIC SIZE on the remote control to select the desired
picture size, as described below and on the next page.
Full
TheaterWide 3
TheaterWide 2
TheaterWide 1
Natural
Natural picture size
•The image is displayed close to its originally formatted
proportion. Some program formats will display with side bars
and/or bars at the top and bottom.
Conventional picture on a
conventional TV screen
Conventional picture in Natural size
on your wide-screen TV
SKIP/
SEARCH SKIP/
SEARCH
CLEARREC TV/VCR
TOP MENU
REV FF
PAUSE PLAY STOP
ENTER EXIT
FAV FAV
SLEEP PIC SIZE
MENU/
ENTER
DVD MENU
CBL/SAT DVD
TV VCR
+10 CH RTN
INPUT DISPLAY MUTE POWER
ENT
PIC SIZE
480i
480p
720p
1080i
Natural
yes
yes
yes*
yes*
Theater
Wide 1
yes
yes
no
no
Theater
Wide 2
yes
yes
no
no
Theater
Wide 3
yes
yes
no
no
Picture
size
Signal
Full
yes
yes
no
no
#01E26-30_23HL85 05.6.10, 3:16 PM27
Black
(E) 23HL85
Using the TV’s
Features
TheaterWide 1 picture size (For 4:3 format programs)
•The picture is non-uniformly
enlarged—the center of the
picture remains close to its
original proportion, but the left
and right edges are stretched
wider to fill the screen.
•A small part of the picture at
the top and bottom is hidden.
TheaterWide 2 picture size (For Letter box programs)
•The entire picture is uniformly
enlarged—it is stretched the
same amount both wider and
taller (retains its original
proportion).
•Part of the picture at the top
and bottom is hidden.
TheaterWide 3 picture size (For Letter box programs with
subtitles)
•The picture is stretched wider
to fill the width of the screen,
but only slightly stretched
taller.
•A small part of the picture at
the top and bottom is hidden.
Full picture size (For 16:9 format programs)
•If you are receiving a 4:3 format
program, the picture is stretched
wider to fill the width of the
screen, but not stretched taller.
•None of the picture is hidden.
Note:
Using these functions to change the
picture size (i.e., changing the height/
width ratio) for any purpose other than
your private viewing may be prohibited
under the Copyright Laws of the United
States and other countries, and may
subject you to civil and criminal liability.
TheaterWide 1 picture size example
TheaterWide 2 picture size example
A B C D E F G - - - - - - - - - - - - - - - -
TheaterWide 3 picture size example
A B C D E F G - - - - - - - - - - - - - - - -
A B C D E F G - - - - - - - - - - - - - - - - - - - - - - - - - -
Full picture size example
#01E26-30_23HL85 05.6.10, 3:16 PM28
Black
(E) 23HL85
E
S
F
Using the
remote control
Using the TV’s
Features
Appendix
Index Introduction
Connecting
your TV
Setting up
your TV
Using the V-Chip menu
Some TV programs and movies include signals that classify the
content of the program (violence, sex, dialog, language). The V-Chip
control feature in this TV detects the signals and blocks the programs
according to your selections. To use this feature, perform the
following setup.
1. Enable the Lock.
2. Set a four-digit password.
3. Select the ratings and categories you want to block.
V-Chip rating and categories
Rating guidelines are provided by broadcast stations. Most television
programs and television movies can be blocked by TV rating and/or
category. Movies that have been shown at the theaters and direct-to-
video movies use the MPAA movie rating system instead.
For Movies previously shown in theaters :
Movie Ratings :
•Unblocked
•G & above (general audience)
•PG & above (parental guidance suggested)
•PG-13 & above (13 years and older)
•R & above (restricted)
•NC-17 & above (18 years and older)
•X (adult)
If you select “PG-13 & above,” all G and PG rated movies will be
available, and all PG-13, R, NC-17 and X rated movies will be
blocked.
For Television programs including made-for-TV movies:
General TV Ratings:
•Unblocked
•TV-G & above (general audience)
(individual categories do not apply)
•TV-PG & above (parental guidance suggested)
•TV-14 & above (14 years and older)
•TV-MA (mature audience)
Children TV Ratings:
•Unblocked
•TV-Y & above (youth)
(individual content categories do not apply)
•TV-Y7 (youth, 7 years and up)
Content Categories:
•Dialog - sexual dialogue (applies to TV-PG & above,
TV-14)
•Language - adult language (applies to TV-PG & above,
TV-14 & above, TV-MA)
•Sex - sexual situations (applies to TV-PG & above,
TV-14 & above, TV-MA)
•Violence (applies to TV-PG & above,
TV-14 & above, TV-MA)
•F. Violence - fantasy violence (applies only to TV-Y7)
•No Rating (blocks all viewing)
Note:
The V-Chip function is available for the U.S.
V-Chip system only. The Canadian V-Chip
system is not supported.
#01E26-30_23HL85 05.6.10, 3:16 PM29
Black
(E) 23HL85
Using the TV’s
Features
V-Chip blocking (Parental control) setup
1. Press MENU, and then press x or • until the Special menu
appears.
2. Press ENTER, and then press y or z to highlight V-Chip.
Language
Caption/Text
Captions
Panel lock
V-Chip
Auto off
To set
ENTER EXIT MENU
Special
Language
Caption/Text
Captions
Panel lock
V-Chip
Auto off
Enter code
Special
_
0 ~ 9 Enter Password
•If you already set a password, enter your four-digit password.
•If you have not created a password, the TV is initially set up
with the password “0-0-0-0”.
•If you cannot remember your password, press "7-7-7-7."
3. Enabling the Lock:
Press y or z to highlight Lock.
Press ENTER, and then press y or
z to select On (Lock) or Off
(Unlock).
4. Set a password:
Press y or z to highlight Set
password.
Press ENTER, and then enter a
four-digit password.
Enter it again when requested.
5. Press y or z to highlight the type of blocking to be set.
6. Press ENTER, and then press y or z to select the type of ratings
to block.
•The age block and Content block menus also have sub-menus;
therefore, you will need to repeat steps 5 and 6 to set the types
of blocking and ratings in the sub-menus.
General
Children
Unblocked
TV–G & above
TV–PG & above
TV–14 & above
TV–MA
Parental
Lock
Set password
MPAA
Age block
Content block
Aux block
To set
Parental
ENTER EXIT MENU ENTER EXIT MENU
Dialog
Language
Sex
Violence
F.Violence
Unblocked
TV–PG & above
TV–14
Parental
Parental
Lock
Set password
MPAA
Age block
Content block
Aux block
To set
ENTER EXIT MENU ENTER EXIT MENU
SKIP/
SEARCH SKIP/
SEARCH
CLEARREC TV/VCR
TOP MENU
REV FF
PAUSE PLAY STOP
ENTER EXIT
FAV FAV
SLEEP PIC SIZE
MENU/
ENTER
DVD MENU
CBL/SAT DVD
TV VCR
+10 CH RTN
INPUT DISPLAY MUTE POWER
ENT
Lock
Set password
MPAA
Age block
Content block
Aux block
On
Off
Parental
EXIT MENU
Lock
Set password
MPAA
Age block
Content block
Aux block
Ent. code
Rep. code _ _ _ _
Parental
0 ~ 9 Ebter Password
MENU/
ENTER
Press ENTER.
Number
yzx •
If you try to watch a TV program that exceeds
the rating limits you set, the TV enters
program lock mode.
Rating : TV-PG TV 4
L V
Parental lockout is active
#01E26-30_23HL85 05.6.10, 3:16 PM30
Black
(E) 23HL85
E
S
F
Using the
remote control
Using the TV’s
Features
Appendix
Index Introduction
Connecting
your TV
Setting up
your TV
Adjusting the picture
Selecting the picture mode
You can select your desired picture type from four picture modes:
Dynamic, Standard, Movie, or Memory.
To select the picture mode:
1. Press MENU, and then press x or •
until the Picture menu appears.
2. Press ENTER, and then press z or
y to highlight Picture mode.
3. Press ENTER, and then press z or
y to select the mode you prefer.
Adjusting the picture quality
You can adjust the picture quality to your personal preferences,
including the contrast, brightness, color, sharpness, and tint.
To adjust the picture quality:
1. Press MENU, and then press x or •
until the Picture menu appears.
2. Press ENTER, and then press y or
z until the item you want to adjust
is highlighted.
3. Press ENTER.
4. Press x or • to adjust the level.
The Picture qualities you adjusted can be saved in the TV’s Memory.
Mode Picture Quality
Dynamic Bright and dynamic picture (factory setting)
Standard Standard picture setting (factory setting)
Movie Movie-like picture setting (factory setting)
Memory Your personal preference
Note:
If you select one of the factory-set picture
modes (Dynamic, Standard, or Movie) and
then adjust a picture quality setting (for
example, increase the contrast), the picture
mode automatically changes to Memory in
the Picture menu.
Picture mode
Contrast
Brightness
Color
Sharpness
Tint Contrast 85
ENTER EXIT MENU
Picture
SKIP/
SEARCH SKIP/
SEARCH
CLEARREC TV/VCR
TOP MENU
REV FF
PAUSE PLAY STOP
ENTER EXIT
FAV FAV
SLEEP PIC SIZE
MENU/
ENTER
DVD MENU
CBL/SAT DVD
TV VCR
+10 CH RTN
ENT
Picture mode
Contrast
Brightness
Color
Sharpness
Tint
Dynamic
Standard
Movie
Memory
Picture
EXIT MENU
Selection xPressing •
Contrast lower higher
Brightness darker lighter
Color paler deeper
Sharpness softer sharper
Tint reddish greenish
Note:
To continue adjusting the other items, press y
or z in step 4.
yzx •
MENU/
ENTER
Contrast 85
#01E31-33_23HL85 05.6.10, 3:16 PM31
Black
Using the TV’s
Features
(E) 23HL85
Using the TV’s
Features
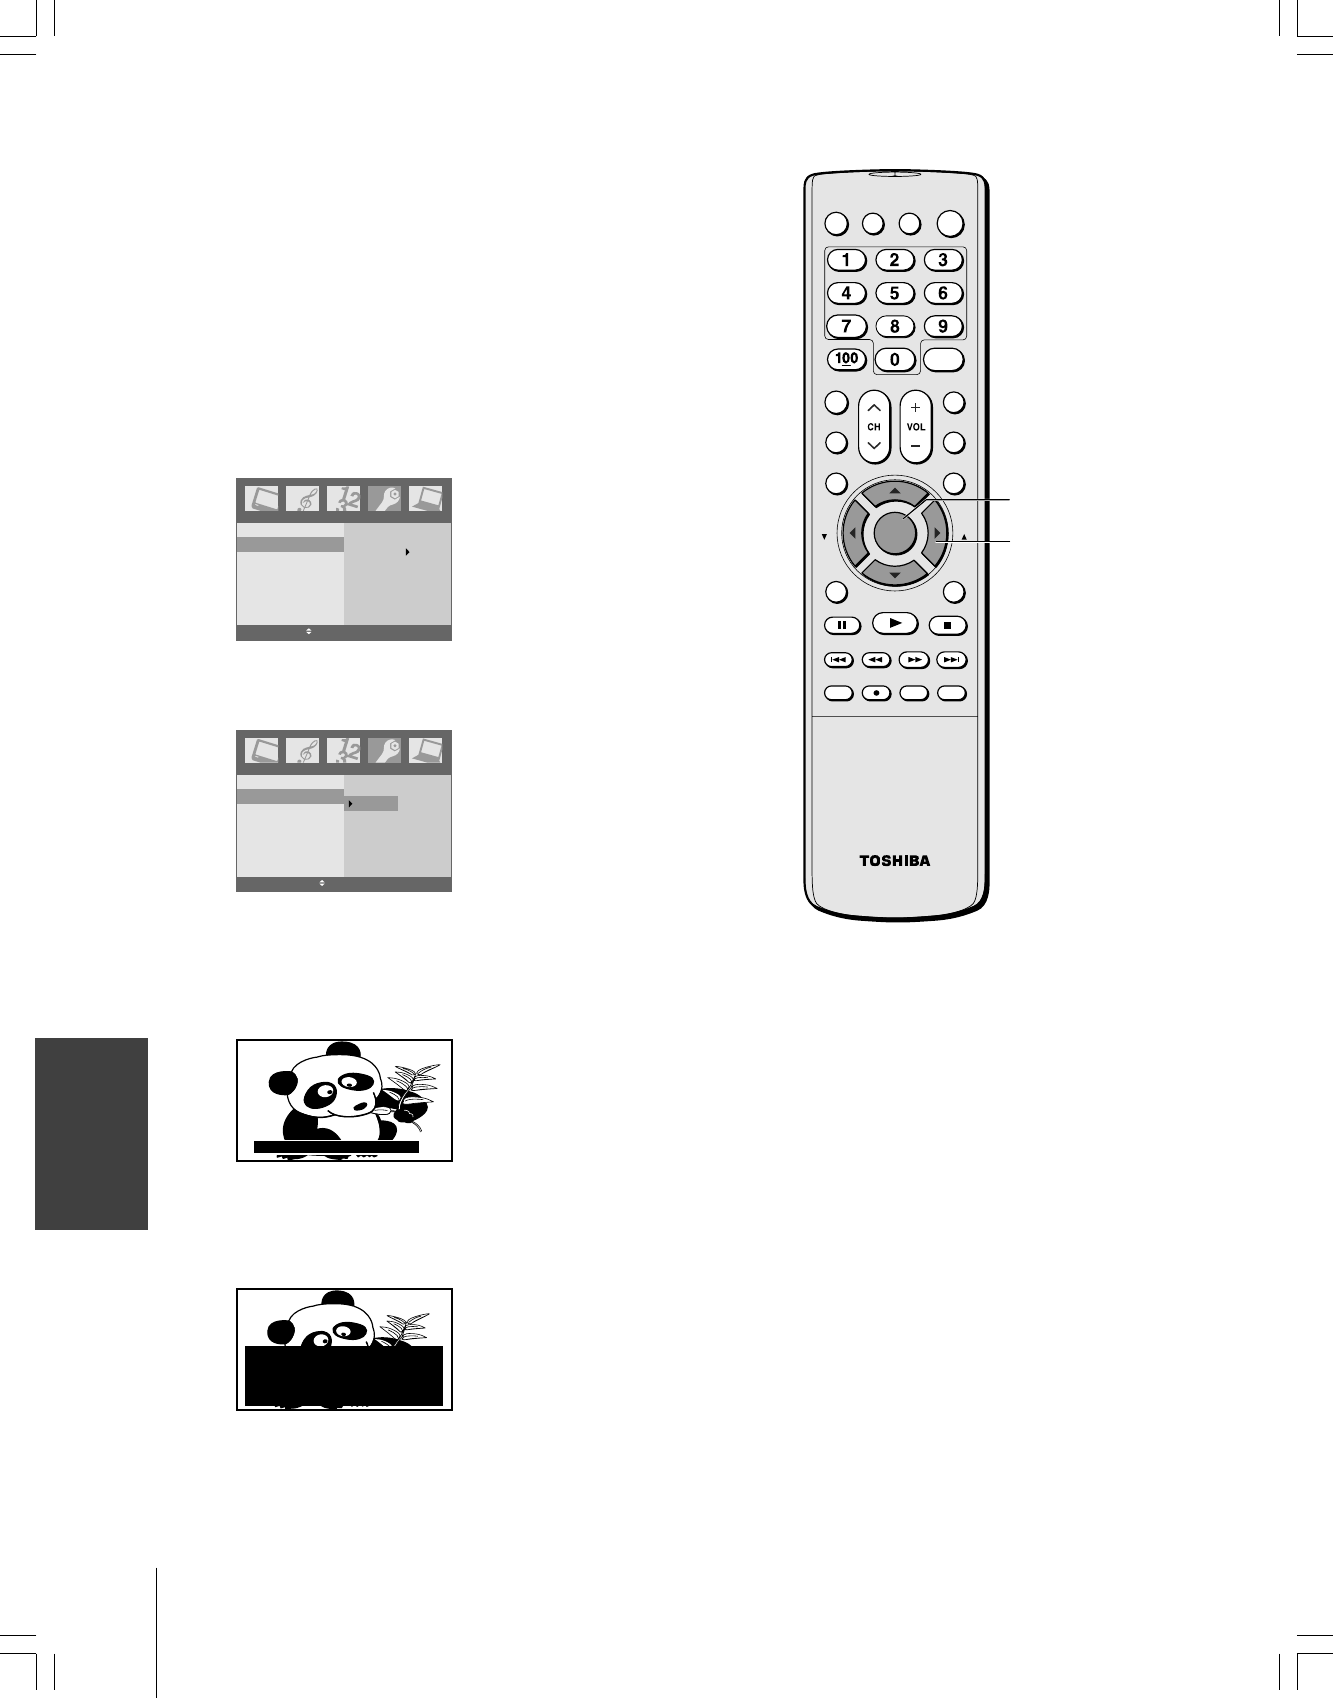
Using the Closed Caption feature
The Closed Caption feature has two options:
•Captions—An on-screen display of the dialogue, narration, and
sound effects of TV programs and videos that are closed
captioned (usually marked as “CC” in TV listings).
•Text—An on-screen display of information not related to the
current program, such as weather or stock data (when provided
by individual stations).
To select captions or text:
1. Tune the TV to the desired program.
2. Press MENU, and then press x or • to display the Special menu.
3. Press ENTER, and then press y or z to highlight Caption/Text.
Language
Caption/Text
Captions
Panel lock
V-Chip
Auto off
CC1 Text1
CC2 Text2
CC3 Text3
CC4 Text4
Special
ENTER EXIT MENU
4. Press ENTER, and then press y or z to select the Caption or
Text mode you prefer.
Language
Caption/Text
Captions
Panel lock
V-Chip
Auto off
CC1 Text1
CC2 Text2
CC3 Text3
CC4 Text4
Special
EXIT MENU
•To view captions, select CC1, CC2, CC3, or CC4 (CC1 displays
captions in the primary language in your area).
Note: If the program or video you selected is not closed captioned, the
captions will not display on the screen.
Giant pandas eat leaves.
•To view text, select Text1, Text2, Text3, or Text4.
Note: If text is not available in your area, a black rectangle may appear on
your screen. If this happens, turn the Closed Caption feature Off.
WORLD WEATHER
Temps Current
F C Weather
LONDON 51 11
MOSCOW
PARIS
ROME
TOKYO
57 14
53 12
66 19
65 18
Cloudy
Clear
Cloudy
Rain
Clear
Note:
A closed caption signal may not display in the
following situations:
•When a videotape has been dubbed
•When the signal reception is weak
•When the signal reception is nonstandard
SKIP/
SEARCH SKIP/
SEARCH
CLEARREC TV/VCR
TOP MENU
REV FF
PAUSE PLAY STOP
ENTER EXIT
FAV FAV
SLEEP PIC SIZE
MENU/
ENTER
DVD MENU
CBL/SAT DVD
TV VCR
+10 CH RTN
INPUT DISPLAY MUTE POWER
ENT
yzx •
MENU/
ENTER
#01E31-33_23HL85 05.6.10, 3:16 PM32
Black
(E) 23HL85
E
S
F
Using the
remote control
Using the TV’s
Features
Appendix
Index Introduction
Connecting
your TV
Setting up
your TV
To turn on or off the Closed Caption feature
1. Press MENU, and then press x or • to display the Special menu.
2. Press ENTER, and then press y or z to highlight Captions.
3. Press ENTER, and then press y or z to select On, Advanced
mute or Off.
•Advanced mute activates the selected Caption or Text mode
when the TV sound is muted.
Language
Caption/Text
Captions
Panel lock
V-Chip
Auto off
On
Advanced mute
Off
Special
EXIT MENU
Using the Panel lock feature
You can lock the control buttons on the TV to prevent your settings
from being changed accidentally (by children, for example).
When the Panel lock is On, no control buttons on the TV top panel
will operate except POWER.
To lock the top panel:
1. Press MENU, and then press x or • to display the Special
menu.
2. Press ENTER, and then press y or z to highlight Panel lock.
3. Press ENTER, and then press y or z to select On.
Language
Caption/Text
Captions
Panel lock
V-Chip
Auto off
On
Off
Special
EXIT MENU
To unlock the top panel:
Select Off in step 3 above.
Setting the sleep timer
To set the sleep timer to turn off the TV automatically:
Repeatedly press SLEEP to set the length of time until the TV turns
off.
Sleep 30
Every time you press SLEEP, the time display will increase by 30
minutes, up to 120 minutes.
30 → 60 → 90 → 120 →
To cancel the sleep timer:
Press SLEEP until “Sleep ” appears.
SKIP/
SEARCH SKIP/
SEARCH
CLEARREC TV/VCR
TOP MENU
REV FF
PAUSE PLAY STOP
ENTER EXIT
FAV FAV
SLEEP PIC SIZE
MENU/
ENTER
DVD MENU
CBL/SAT DVD
TV VCR
+10 CH RTN
INPUT DISPLAY MUTE POWER
ENT
SKIP/
SEARCH SKIP/
SEARCH
CLEARREC TV/VCR
TOP MENU
REV FF
PAUSE PLAY STOP
ENTER EXIT
FAV FAV
SLEEP PIC SIZE
MENU/
ENTER
DVD MENU
CBL/SAT DVD
TV VCR
yzx •
POWERTV/VIDEO VOLUME CHANNEL
Control buttons
TV top panel
Note :
•When an instant power failure occurs, the
sleep timer settings may be cleared.
•To display the amount of time left until the
TV turns off automatically, press SLEEP
once.
yzx •
SLEEP
MENU/
ENTER
MENU/
ENTER
#01E31-33_23HL85 05.6.10, 3:16 PM33
Black
(E) 23HL85
Using the TV’s
Features
SKIP/
SEARCH SKIP/
SEARCH
CLEARREC TV/VCR
TOP MENU
REV FF
PAUSE PLAY STOP
ENTER EXIT
FAV FAV
SLEEP PIC SIZE
MENU/
ENTER
DVD MENU
CBL/SAT DVD
TV VCR
+10 CH RTN
INPUT DISPLAY MUTE POWER
ENT
Adjusting the sound
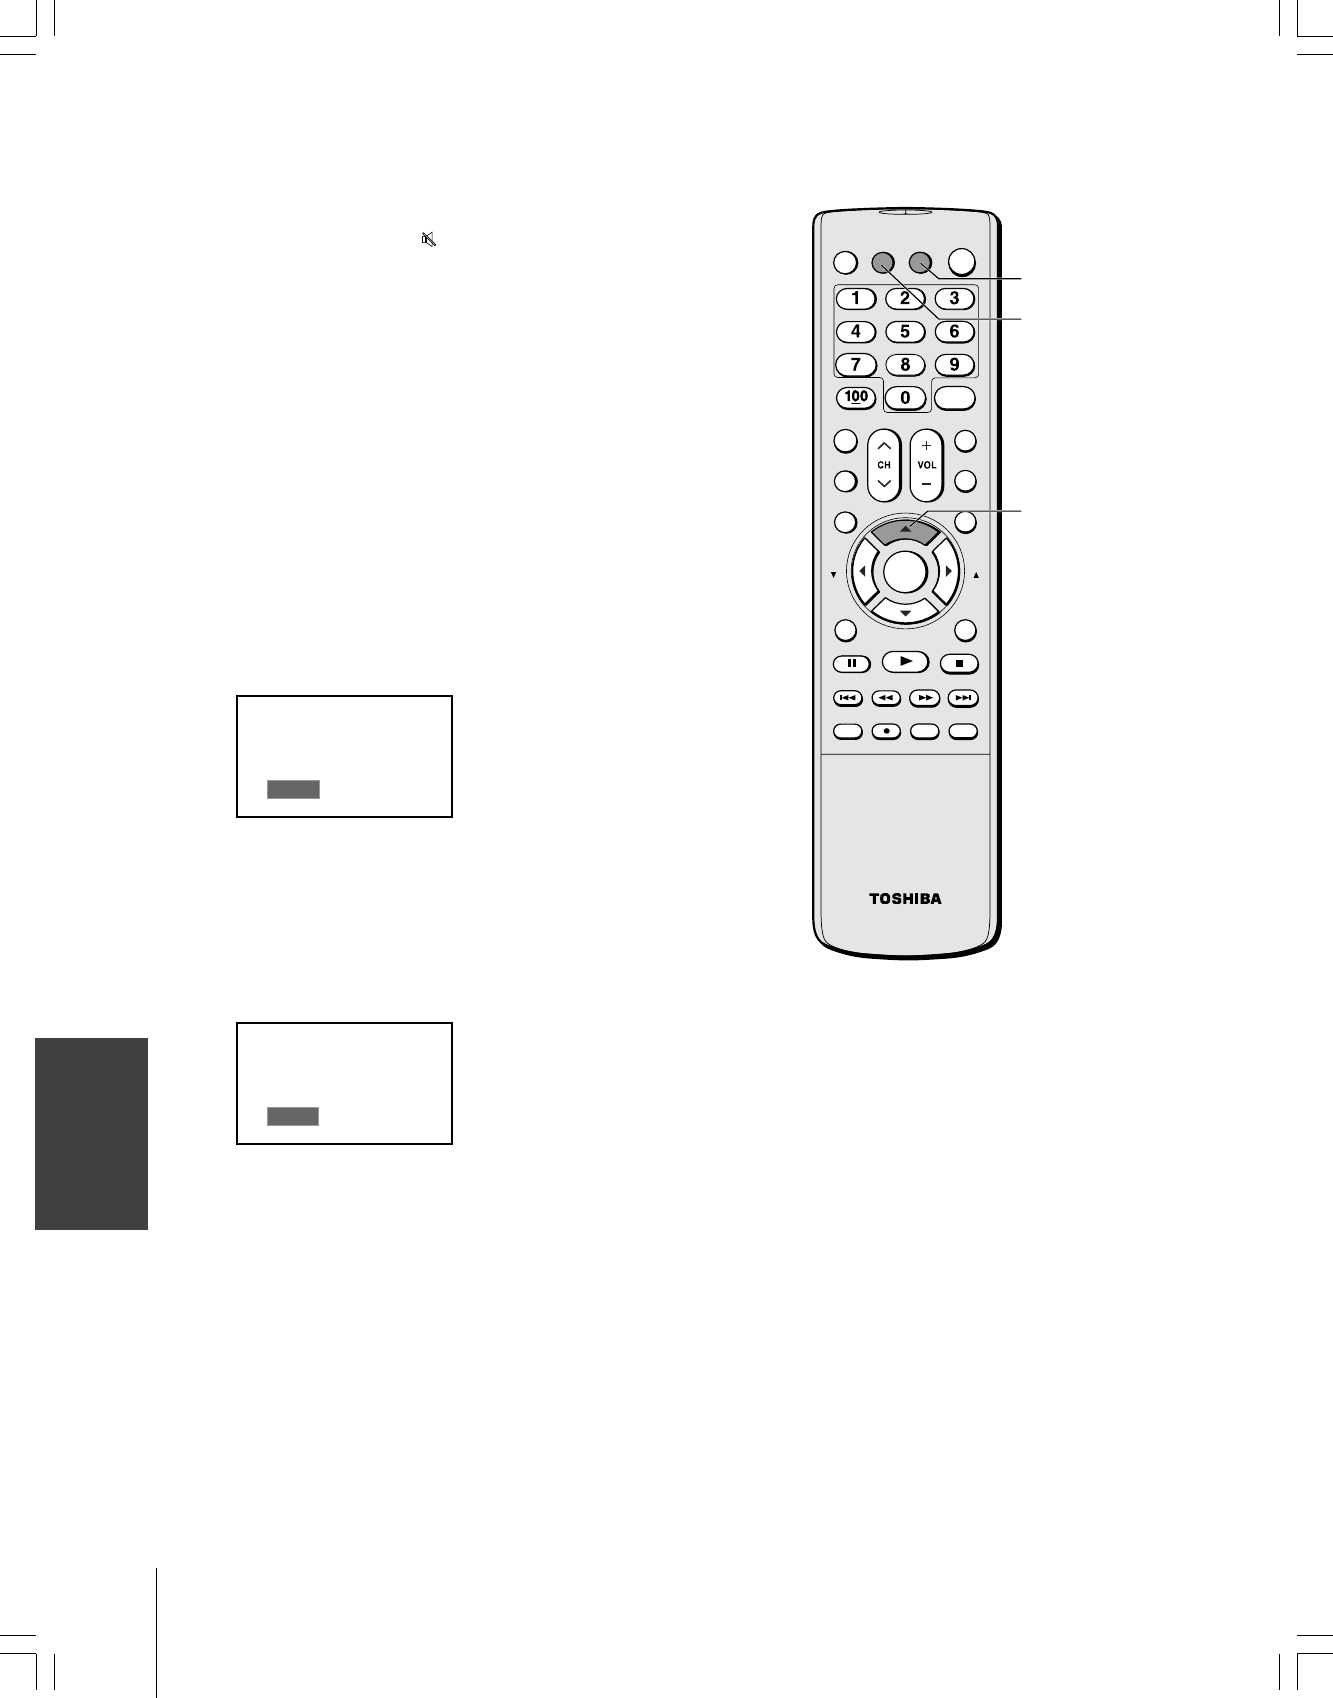
Muting the sound
Press MUTE to temporarily turn off the sound. While the sound is
off, the screen will display “ Mute” in the lower left corner.
When you select “MUTE” mode, the Closed Caption feature is
automatically activated. To deactivate this feature, deactivate MUTE.
This feature works only when the Closed Caption mode is set to
Advanced mute. See “Using the Closed Caption feature” on page 32
for more information.
Selecting stereo/SAP broadcasts
The multi-channel TV sound (MTS) feature allows you to listen to
high-fidelity stereo sound while watching TV. MTS can also transmit
a second audio program (SAP) containing a second language, music,
or other audio information (when provided by individual stations).
When the TV receives a stereo or SAP broadcast, the word “ST.SAP”,
“Stereo” or “SAP” appears on-screen every time the TV is turned on,
the channel is changed, or DISPLAY is pressed.
The MTS feature is not available when the TV is in Video mode.
To listen to stereo sound:
Repeatedly press y to select Stereo.
Stereo
You can leave your TV in Stereo mode because it will
automatically output the type of sound being broadcast (stereo or
monaural).
If the stereo sound is noisy, select Mono to reduce the noise.
To listen to SAP (if available):
Press y repeatedly to select SAP.
SAP
You will hear the station’s second audio program (if available)
from the speakers, while viewing the original program’s picture.
DISPLAY
MUTE
y
#01E34-38_23HL85 05.6.10, 3:16 PM34
Black
(E) 23HL85
E
S
F
Using the
remote control
Using the TV’s
Features
Appendix
Index Introduction
Connecting
your TV
Setting up
your TV
Note:
If the broadcast is monaural, the WOW sound
effect will not work.
Using the WOW surround sound feature
WOW surround widens and deepens audio listening field to deliver
exceptional sound from the TV's speakers. The feature uses stereo
signals from a TV broadcast or video input.
To activate the WOW feature:
1. Select Stereo mode (see “Selecting stereo/SAP broadcasts” on
page 34).
2. Press MENU, and then press x or • until the Sound menu
appears.
3. Press ENTER, and then press y or z to highlight Sound mode.
4. Press ENTER, and then press y or z to select WOW.
Sound mode
Bass
Treble
Balance
StableSound
Sound
WOW
Flat
Hall
Theater
News
Memory
EXIT MENU
Selecting the sound mode
You can select your desired sound type from six sound modes:
WOW, Flat, Hall, Theater, News, or Memory.
To select the sound mode:
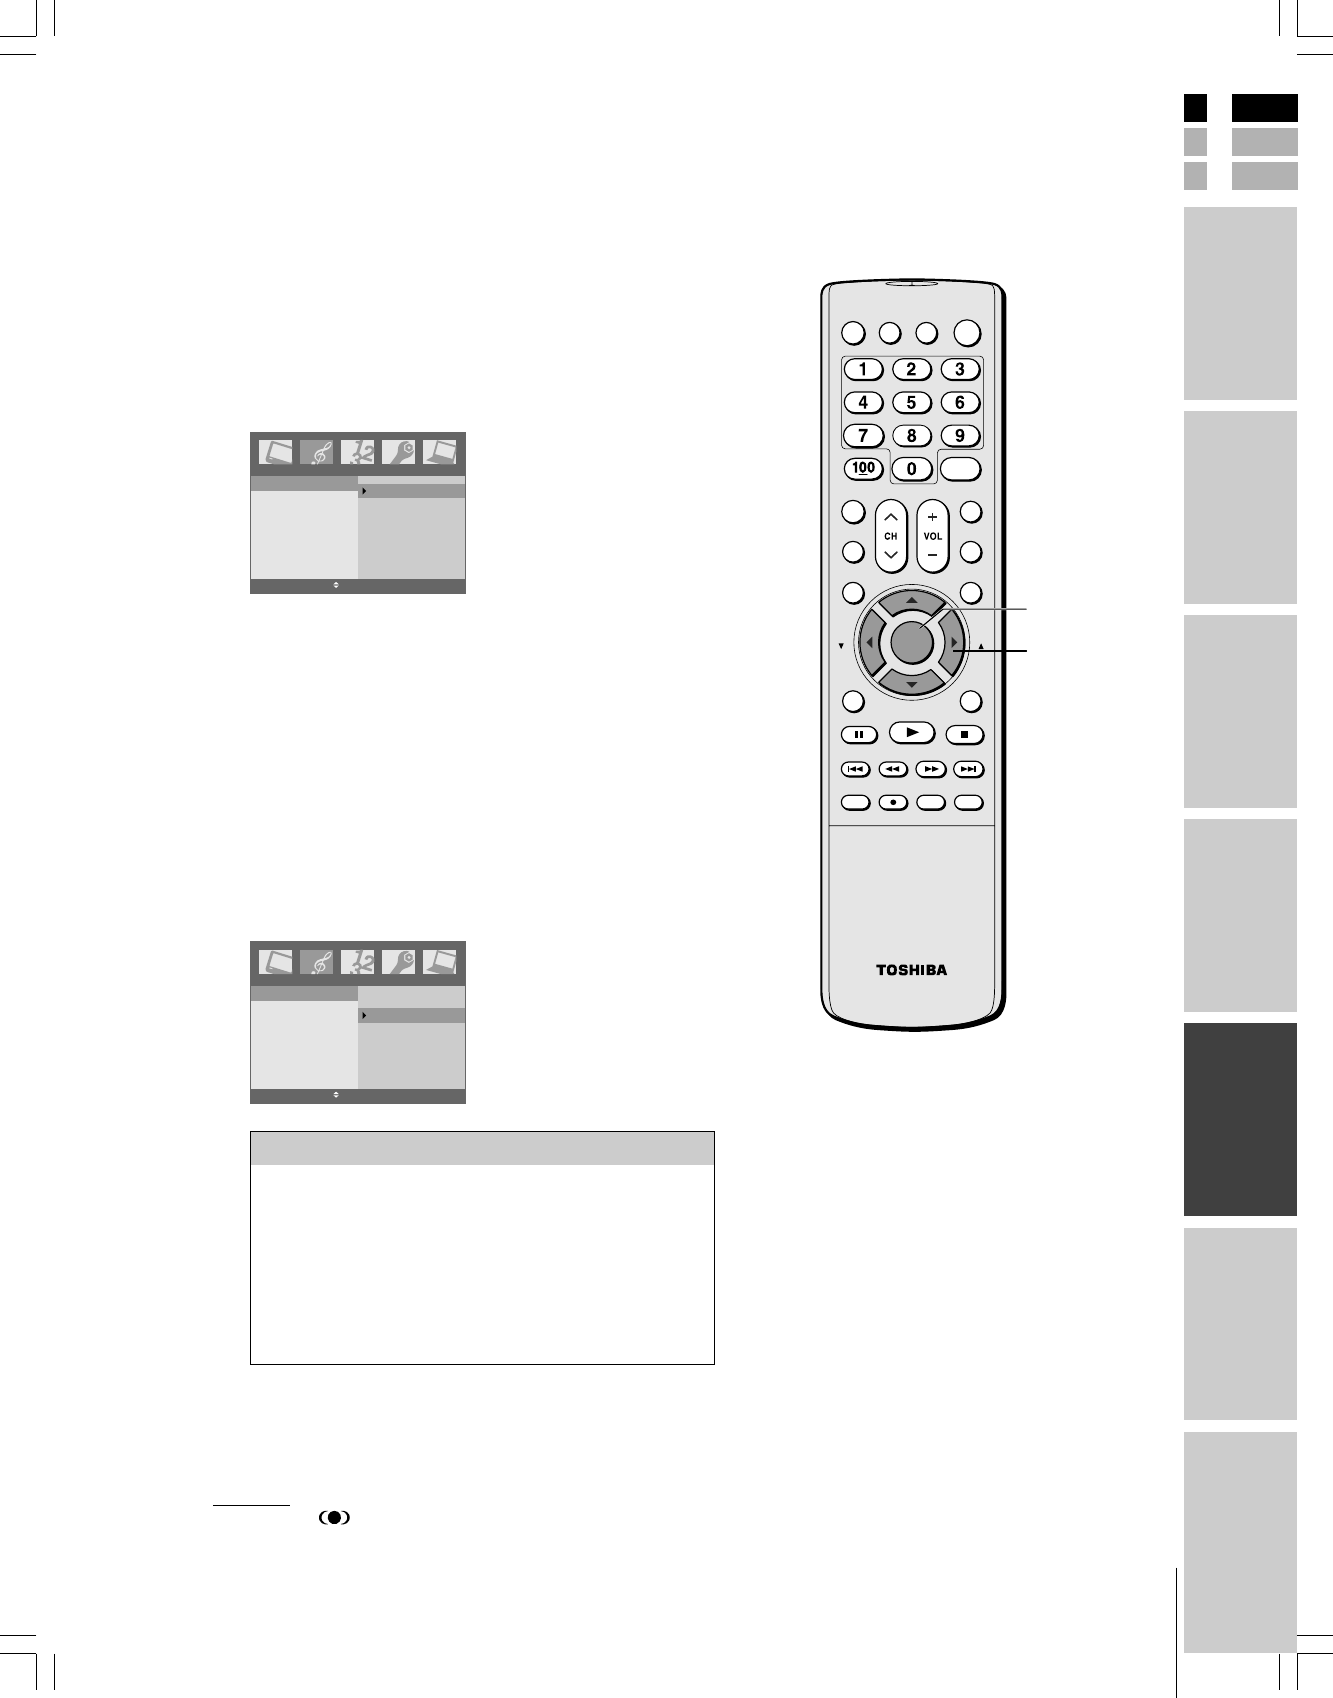
1. Press MENU, and then press x or • until the Sound menu
appears.
2. Press ENTER, and then press z or y to highlight Sound mode.
3. Press ENTER, and then press z or y to select the mode you
prefer.
Sound mode
Bass
Treble
Balance
StableSound
Sound
WOW
Flat
Hall
Theater
News
Memory
EXIT MENU
SKIP/
SEARCH SKIP/
SEARCH
CLEARREC TV/VCR
TOP MENU
REV FF
PAUSE PLAY STOP
ENTER EXIT
FAV FAV
SLEEP PIC SIZE
MENU/
ENTER
DVD MENU
CBL/SAT DVD
TV VCR
+10 CH RTN
INPUT DISPLAY MUTE POWER
ENT
WOW, SRS and symbol are trademarks of SRS Labs, Inc.
WOW technology is incorporated under license from SRS Labs, Inc.
yzx •
Note:
If you select one of the factory-set audio
modes ( WOW, Flat, Hall, Theater, or News )
and then change a sound quality setting ( for
example, increase the bass ), the sound mode
automatically change to Memory mode.
MENU/
ENTER
Mode Sound Quality
WOW see above
Flat flat sound ( factory setting )
Hall a concert hall filled with a rich warm sound
( factory setting )
Theater a movie theater filled with a dynamic sound
( factory setting )
News news/dialogue ( factory setting )
Memory your personal preference
#01E34-38_23HL85 05.6.10, 3:16 PM35
Black
(E) 23HL85
Using the TV’s
Features
Adjusting the sound quality
You can change the quality of your TV’s sound by adjusting the bass,
treble, and balance.
To adjust the sound quality:
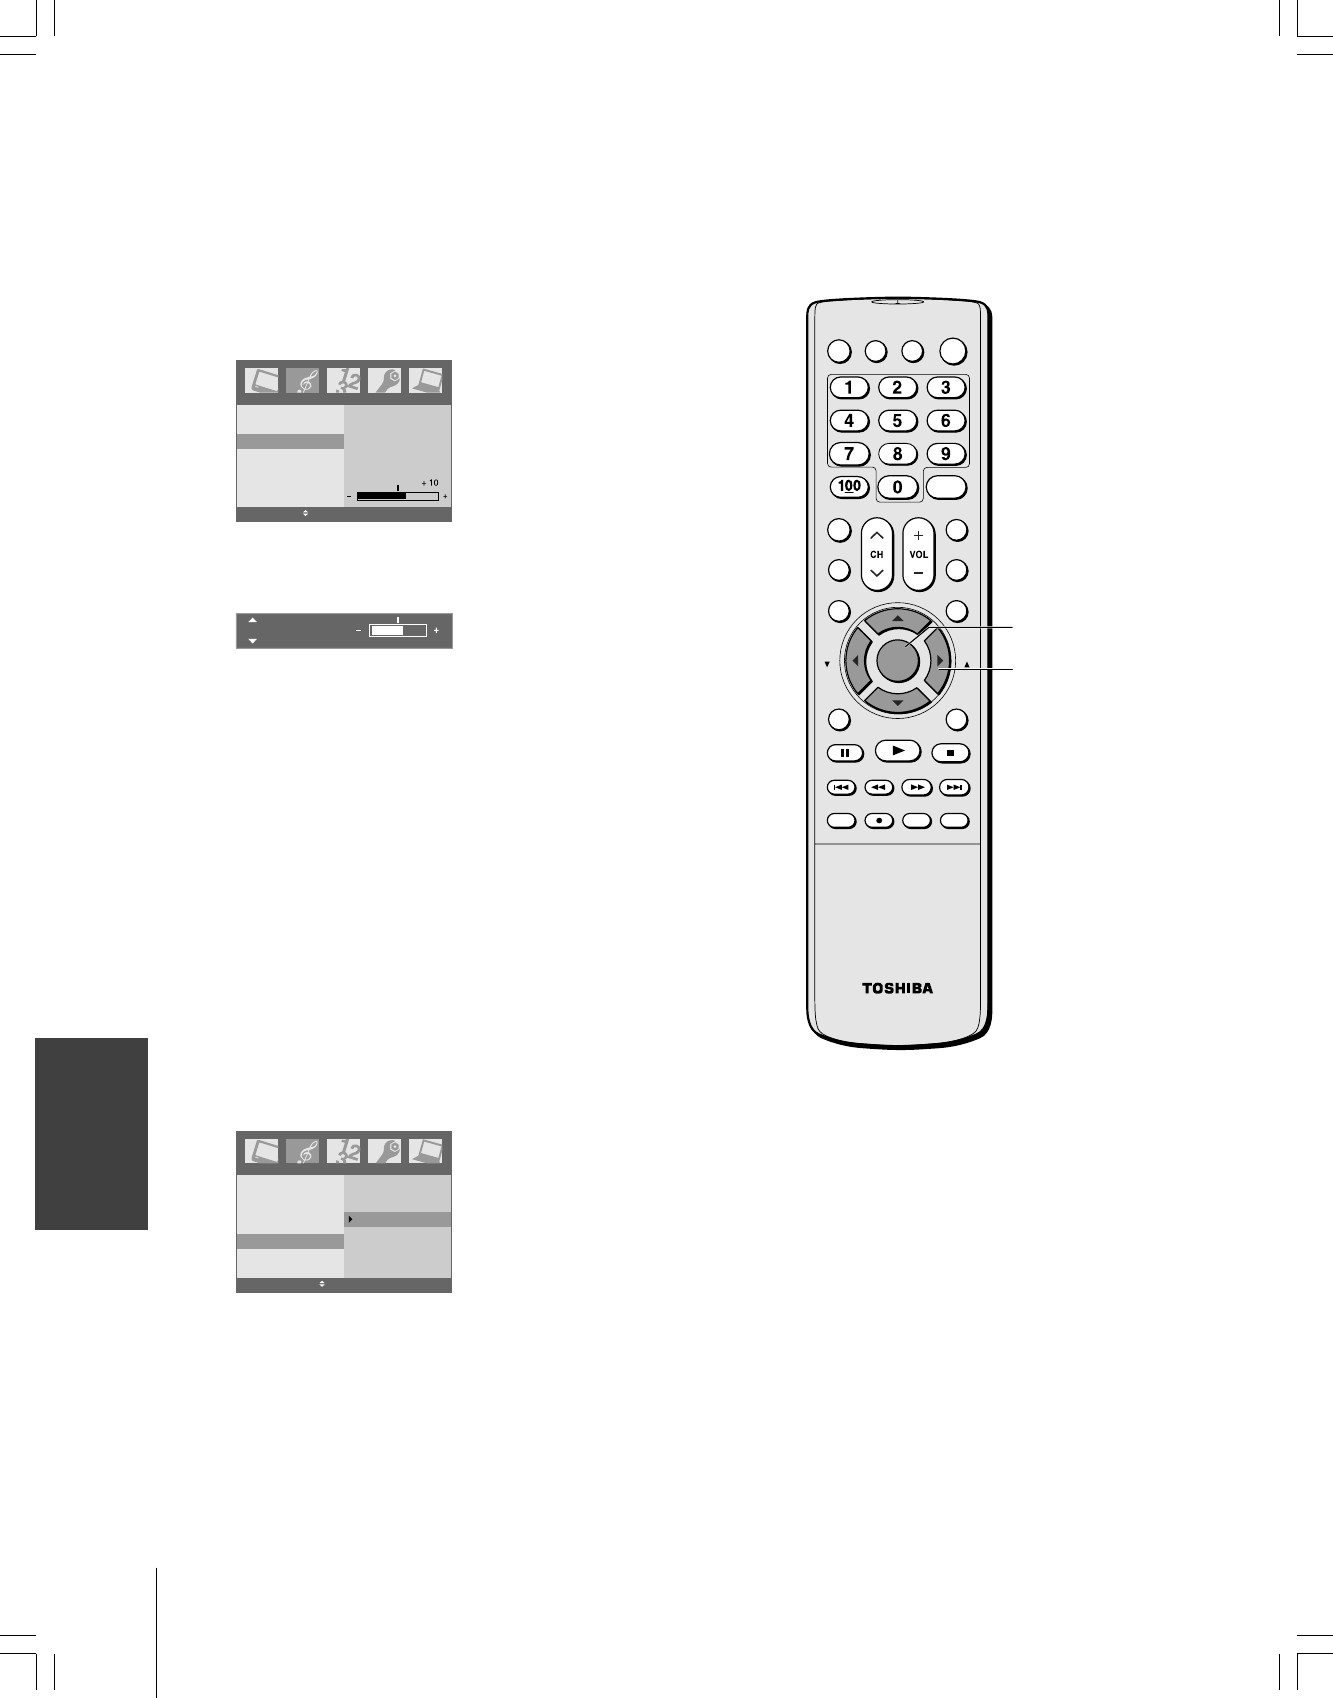
1. Press MENU, and then press x or • until the Sound menu
appears.
2. Press ENTER, and then press y or z to highlight the item you
want to adjust.
Treble
ENTER EXIT MENU
Sound mode
Bass
Treble
Balance
StableSound
Sound
3. Press ENTER.
4. Press x or • to adjust the level.
Treble +10
•x makes the sound quality weaker or increases the balance in
the left channel, depending on the item selected.
•• makes the sound quality stronger or increases the balance in
the right channel, depending on the item selected.
Note:
To continue adjusting the other items, press y or z in step 4.
Using the StableSound® feature
When the signal source is changed, the StableSound feature limits the
highest volume level to prevent extreme changes in volume (for
example, to prevent the sudden increase in volume that often happens
when a TV program switches to a commercial).
To turn on the StableSound feature:
1. Press MENU, and then press x or • until the Sound menu
appears.
2. Press ENTER, and then press y or z to highlight StableSound.
3. Press ENTER, and then press y or z to select On.
Sound mode
Bass
Treble
Balance
StableSound
On
Off
Sound
EXIT MENU
To turn off the StableSound feature:
Select Off in step 3 above.
SKIP/
SEARCH SKIP/
SEARCH
CLEARREC TV/VCR
TOP MENU
REV FF
PAUSE PLAY STOP
ENTER EXIT
FAV FAV
SLEEP PIC SIZE
MENU/
ENTER
DVD MENU
CBL/SAT DVD
TV VCR
+10 CH RTN
INPUT DISPLAY MUTE POWER
ENT
yzx •
MENU/
ENTER
#01E34-38_23HL85 05.6.10, 3:16 PM36
Black
(E) 23HL85
E
S
F
Using the
remote control
Using the TV’s
Features
Appendix
Index Introduction
Connecting
your TV
Setting up
your TV
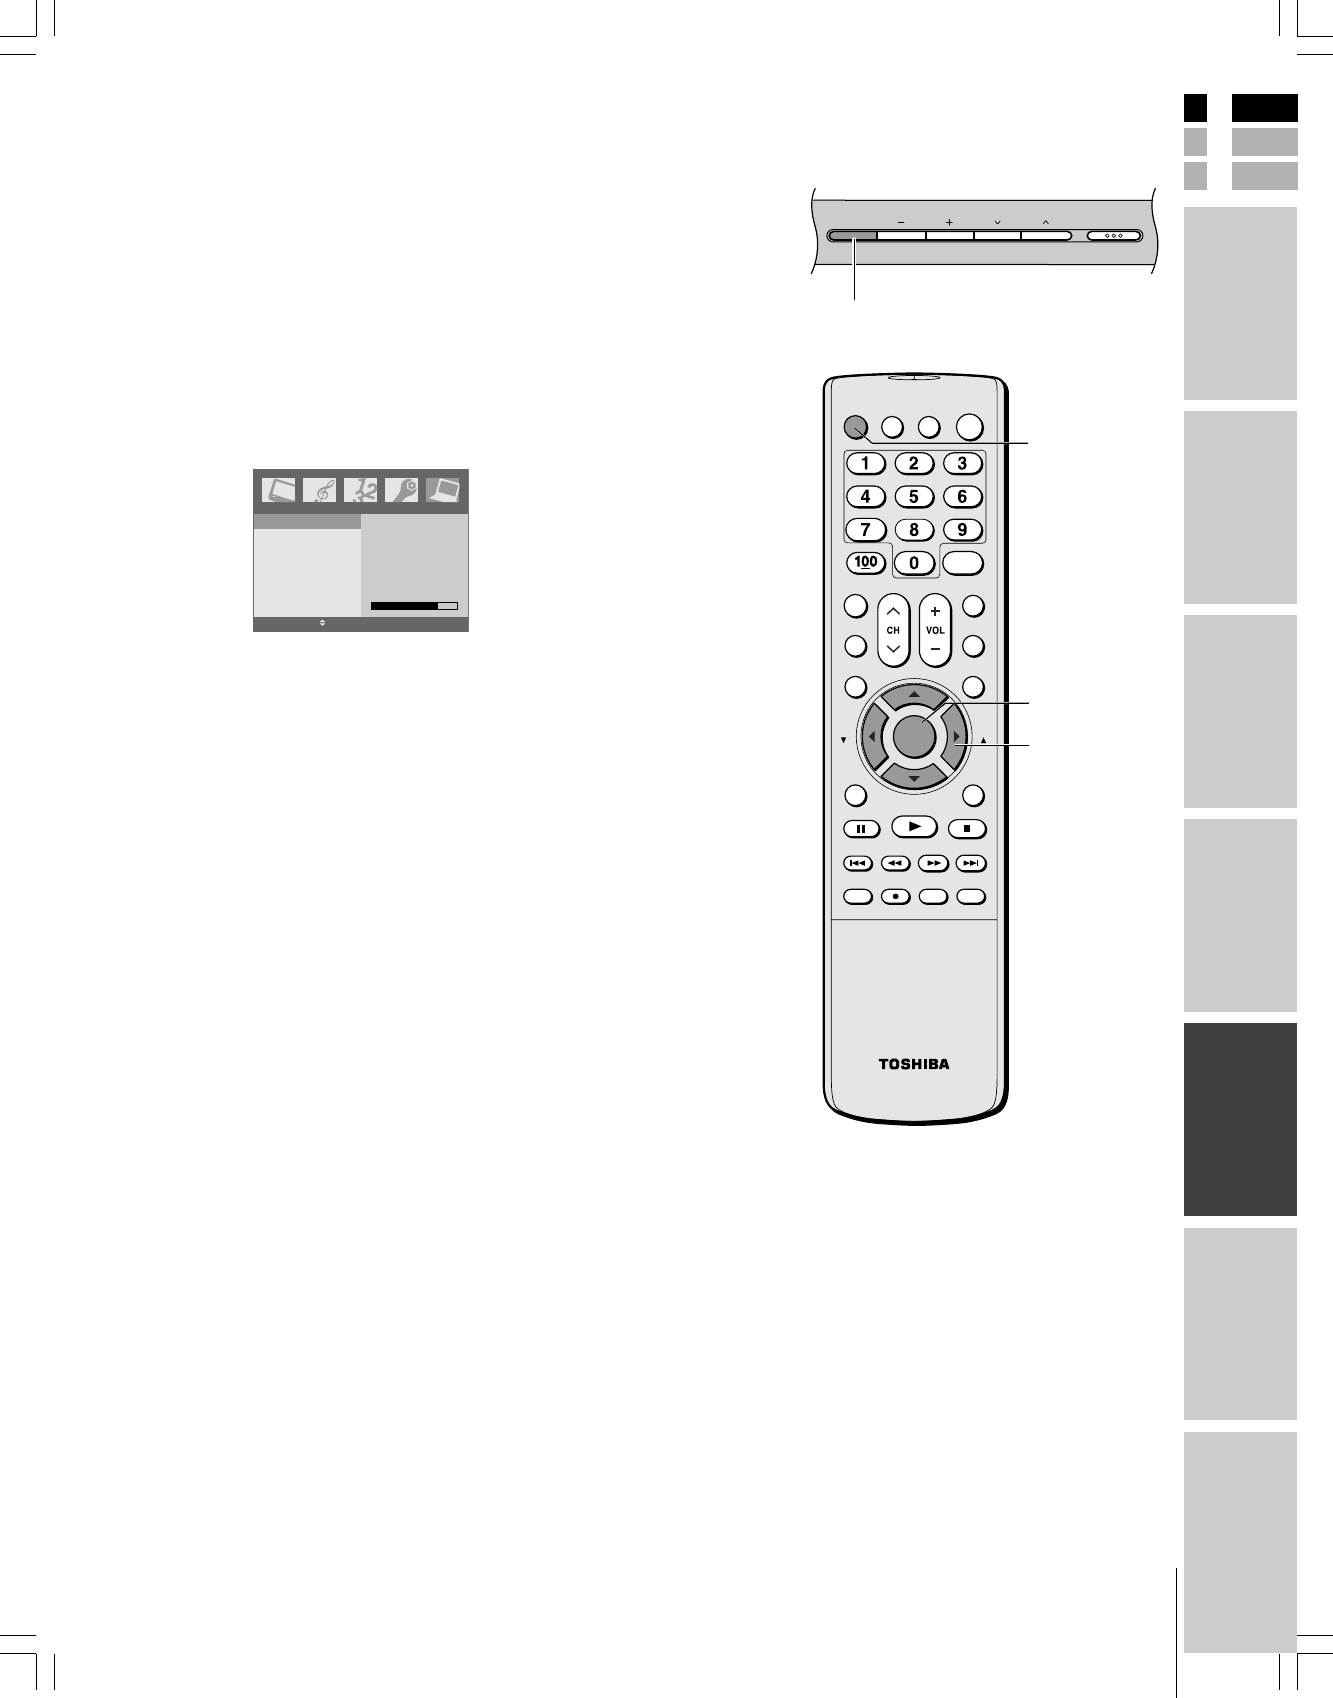
Using the PC setting feature
You can adjust the horizontal/vertical picture position, clock (to
minimize vertical stripes on the screen), and phase (to remove
horizontal noise and sharpen the picture).
You can auto-configure and reset these settings.
1. Confirm a PC is connected (see “Connecting a personal
computer (PC)” on page 16).
2. Repeatedly press INPUT on the remote control (or press TV/
VIDEO on the TV top panel) to select PC input mode. (See
“Selecting the video input source” on page 26.)
3. Press MENU, and then press x or • until the PC menu appears.
4. Press ENTER, and then press y or z to select an item.
H-Position 76
H-Position
V-Position
Clock
Phase
Auto Configure
Reset
PC
ENTER EXIT MENU
5. Press Enter.
6. Press x or • to make the appropriate adjustments.
•H-position/V-position
Adjusts picture left/right and up/down. The adjustment range
is 0–100. (The adjustable range may vary depending on the
input mode.)
•Clock
Minimizes any vertical bars or stripes appearing on the screen
background. The adjustment range is 0–100. (The adjustable
range may vary depending on the input mode.)
•Phase
Reduces (or minimizes) any horizontal noise and clears up or
sharpens the character images. The range adjustment is 0–100.
(The adjustable range may vary depending on the input mode.)
•Auto Configure
Automatically adjusts the screen position, clock, and phase.
(The displayed image will disappear for a few seconds while
auto-configuration is in progress.)
•Reset
Returns to the default settings programmed at the factory. The
values in the Reset function cannot be modified.
SKIP/
SEARCH SKIP/
SEARCH
CLEARREC TV/VCR
TOP MENU
REV FF
PAUSE PLAY STOP
ENTER EXIT
FAV FAV
SLEEP PIC SIZE
MENU/
ENTER
DVD MENU
CBL/SAT DVD
TV VCR
+10 CH RTN
INPUT DISPLAY MUTE POWER
ENT
yzx •
MENU/
ENTER
TV/VIDEO
TV top panel
POWERTV/VIDEO VOLUME CHANNEL
INPUT
#01E34-38_23HL85 05.6.10, 3:16 PM37
Black
(E) 23HL85
E
S
F
Using the
remote control
Using the TV’s
Features
Index Introduction
Connecting
your TV
Setting up
your TV
Appendix
Television System
NTSC standard
Channel Coverage
VHF: 2 through 13
UHF: 14 through 69
Cable TV: Mid band (A-8 through A-1, A through I)
Super band (J through W)
Hyper band (AA through ZZ, AAA, BBB)
Ultra band (65 through 94, 100 through 125)
Power Source
100-240 V AC, 60 Hz
Power Consumption
90 W
0.8 W in standby mode
Audio Power
5 W + 5 W
Video/Audio Terminals
S-VIDEO INPUT
Y: 1 V(p-p), 75 ohms, negative sync.
C: 0.286 V(p-p) (burst signal), 75 ohms
VIDEO/AUDIO INPUT
VIDEO: 1 V(p-p), 75 ohms, negative sync.
AUDIO: 400 mV(rms) (30% modulation equivalent,
22k ohms or greater)
ColorStream® (Component video) INPUT
Y : 1V(p-p), 75 ohms
PR: 0.7 V(p-p), 75 ohms
PB: 0.7 V(p-p), 75 ohms
AUDIO: 400 mV(rms), 22k ohms or greater
Suggested resolutions: 1080i, 480p, 480i, 720p
AUDIO OUTPUT
400 mV(rms) (30% modulation equivalent,
2.2k ohms or less)
Appendix
Specifications
•This model complies with the specifications listed below.
•Designs and specifications are subject to change without notice.
HEADPHONE jack
3.5 mm stereo mini jack
PC INPUT
15-pin D-sub Analog RGB
PC AUDIO INPUT
3.5 mm stereo mini jack
HDMI™ INPUT:
HDMI compliant (type A connector)
HDCP compliant
E-EDID* compliant
Suggested scan rates: 1080i, 480p, 480i, 720p
HDMI Audio:
2-channel PCM;
32/44.1/48 kHz sampling frequency;
16/20/24 bits per sample
Note: This TV does not provide HDMI OUTPUT.
Dimensions (Including TV stand)
Width : 24-3/8 inches (619 mm)
Height : 18-5/8 inches (473 mm)
Depth : 11-1/8 inches (280 mm)
Mass (weight)
27.6 lbs (12.5 kg)
Operating conditions
Temperature: 32°F – 95°F (0°C – 35°C)
Humidity: 20 – 80% (no moisture condensation)
WARNING: RISK OF ELECTRIC SHOCK !
Never attempt to service the TV yourself. Opening and removing the covers may expose you to
dangerous voltage or other hazards. Refer all servicing to a Toshiba Authorized Service Center.
*E-EDID = Enhanced-Extended Display Identification
#01E39-42_23HL85 05.6.10, 8:17 PM39
Black

Appendix
(E) 23HL85
Appendix
Troubleshooting
Before calling a service technician, please check the following table for a possible cause of the symptom and
some solutions.
Symptom Solution
TV will not turn on
No picture, no sound
No sound, picture OK
Poor picture, sound OK
Poor reception of broadcast channels
Black box appears on the screen
Unable to select a certain channel
Multiple images
Poor color or no color
No stereo or SAP sound from a known MTS
broadcast
The top panel buttons do not operate
The remote control does not operate
•Make sure the power cord is plugged in, then press
POWER.
•The remote control batteries may be dead. Replace
the batteries.
•Check the antenna/cable connections.
• The sound may be muted. Press VOL + –.
•The station may have broadcast difficulties. Try
another channel.
•Make sure the MTS feature is set properly.
•Check the antenna connections.
•The station may have broadcast difficulties. Try
another channel.
•Adjust the Picture menu.
•The station may have broadcast difficulties. Try
another channel.
•Check the antenna connections.
•The Closed Caption feature may be set to one of
the Text modes (Text1, Text2, Text3, or Text4). Turn
closed captioning Off.
•The channel may be erased with the Manual
programming feature.
•The station may have broadcast difficulties. Try
another channel.
•Antenna reception may be poor. Use a highly
directional outdoor antenna.
•The station may have broadcast difficulties. Try
another channel.
•Adjust the Tint and/or Color in the Picture menu.
•Make sure the MTS feature is set properly.
•Check the Panel lock feature.
• First press the appropriate device button (TV, VCR,
DVD, CBL/SAT) on the remote control.
• Remove all obstructions between the remote control
and the remote control sensor in the TV.
• The remote control batteries may be dead. Replace
the batteries.
#01E39-42_23HL85 05.6.10, 3:16 PM40
Black

(E) 23HL85
HEAD OFFICE/191 McNABB STREET MARKHAM, ONTARIO L3R 8H2, CANADA TEL: (905) 470-5400
SERVICE CENTERS:
TORONTO: 191 McNABB STREET MARKHAM, ONTARIO L3R 8H2, CANADA TEL: (905) 470-5400
MONTREAL: 18050 TRANS CANADA, KIRKLAND, QUEBEC, H9J-4A1, CANADA TEL:(514)390-7766
VANCOUVER: 22171 FRASERWOOD WAY, RICHMOND, B.C. V6W 1J5, CANADA TEL: (604) 303-2500
HEAD OFFICE:82 TOTOWA ROAD, WAYNE, NEW JERSEY 07470, U.S.A.
NATIONAL SERVICE DIVISION:1420B TOSHIBA DRIVE, LEBANON, TN. 37087, U.S.A.
ColorStream and StableSound are registered trademarks of Toshiba America Consumer Products, L.L.C.
YC/L 72742112
#01E44_23HL85 05.6.10, 3:17 PM44
Black