LG Electronics USA VX8610-DC Bluetooth Handsfree DTC User Manual Layout 1
LG Electronics USA Bluetooth Handsfree DTC Layout 1
UserManual.wiki
>
LG Electronics USA
>
VX8610 DC User Manual
Manual
Navigation menu
Upload a User Manual
Namespaces
Wiki Guide
HTML
PDF
Info
Views
User Manual
Discussion / Help
Navigation
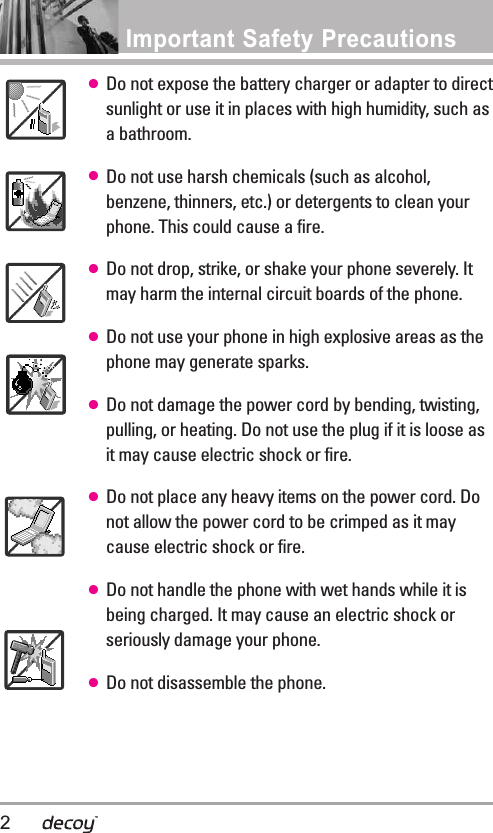

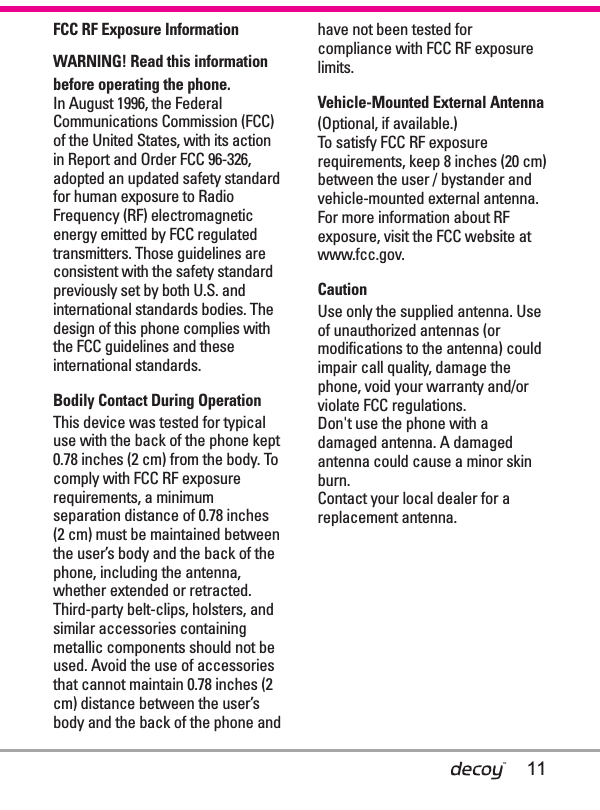
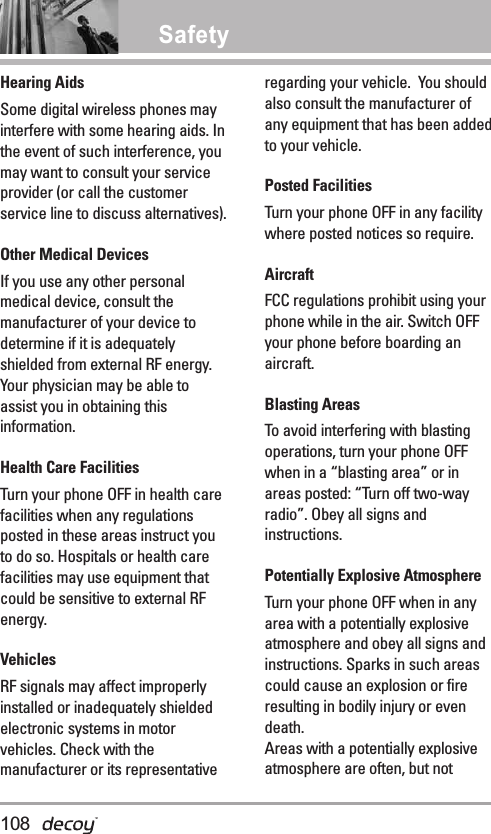
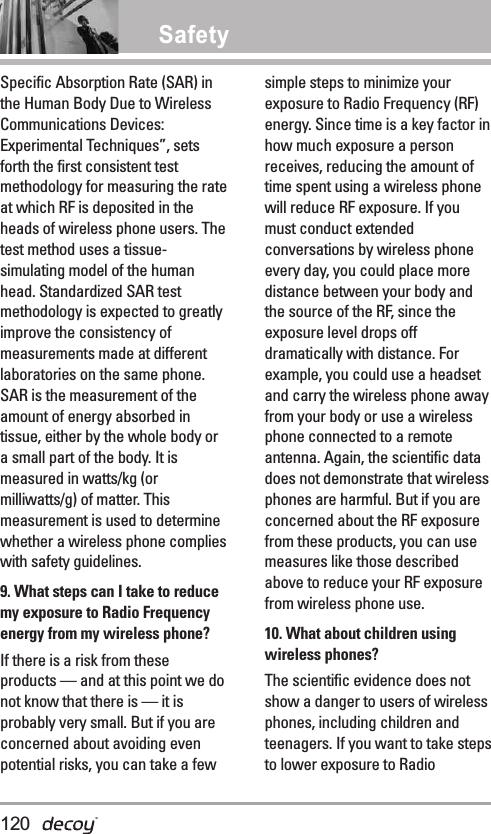
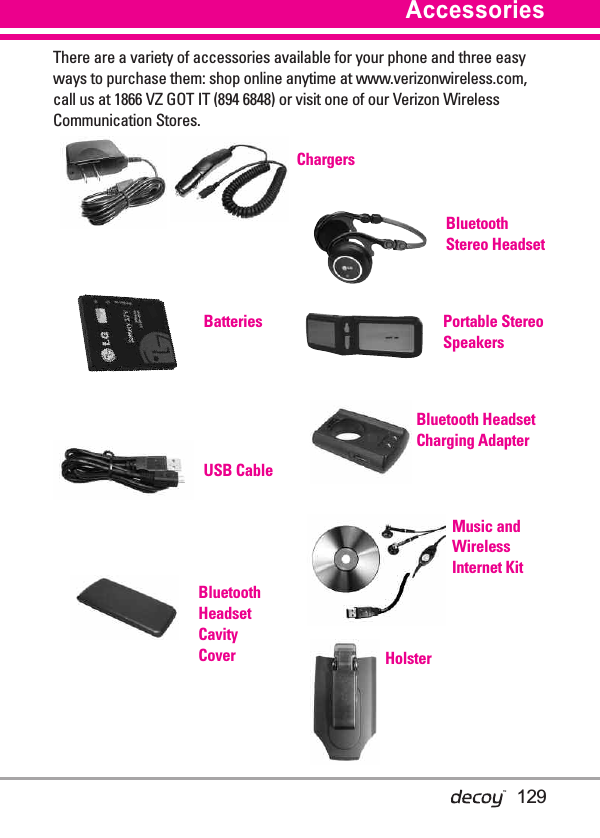
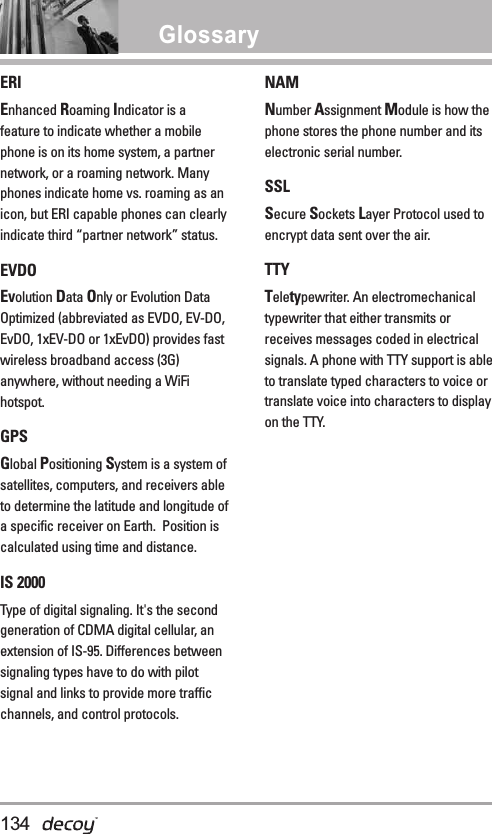
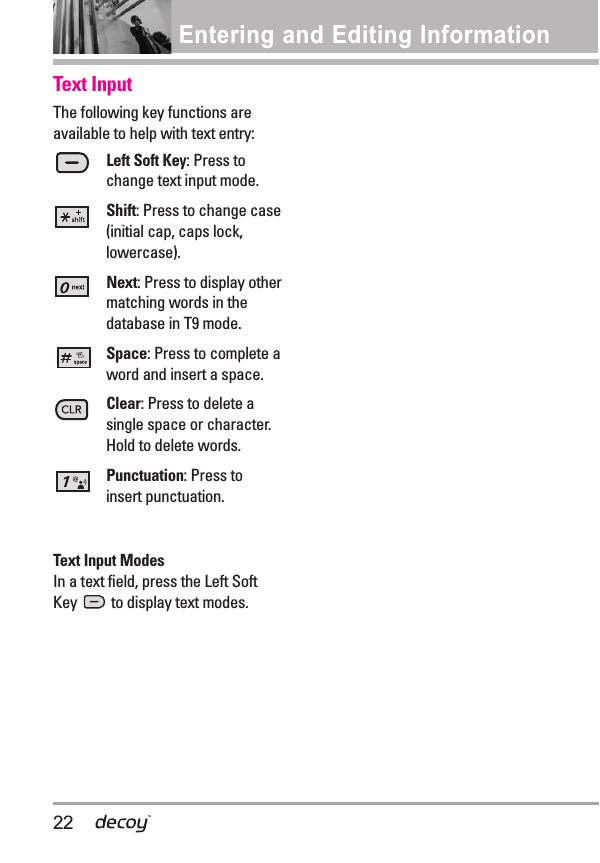
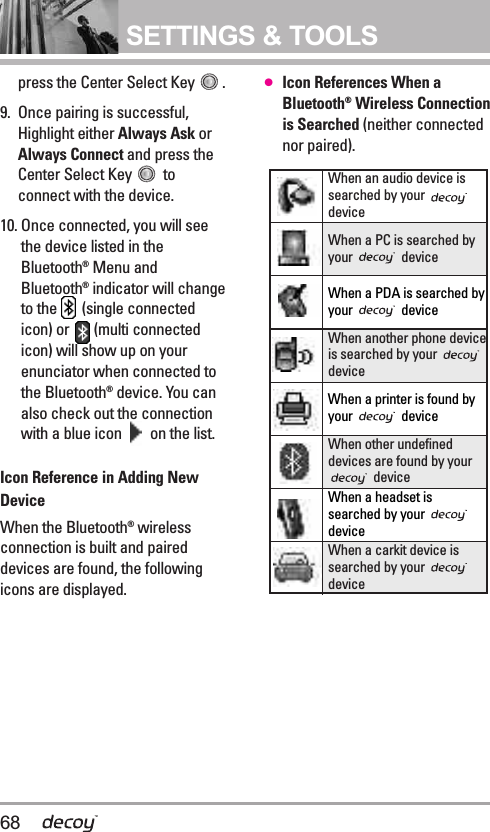
![175. Reset Default6. Restore Phone7. System Select8. NAM Select9. Auto NAM7. Call Settings1. Answer Options2. End Call Options3. Auto Retry4. TTY Mode5. One Touch Dial6. Voice Privacy7. DTMF Tones8. USB Auto DetectionSync MusicSync DataAsk On Plug9. Memory1. Save Options2. Phone Memory3. Card Memory0. Phone Info1. My Number2. SW/HW Version3. Icon Glossary 4. Software UpdateSome content in this user guidemay differ from your phonedepending on the phonesoftware. Features andspecifications are subject tochange without prior notice.Menu AccessPress the Center Select Key[MENU] to have access to9phone menus.](https://usermanual.wiki/LG-Electronics-USA/VX8610-DC/User-Guide-954837-Page-17.png)
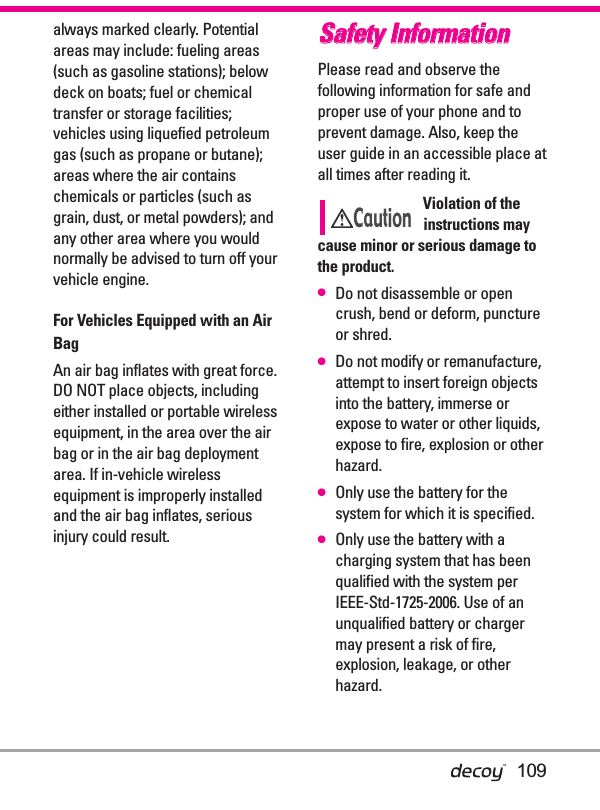
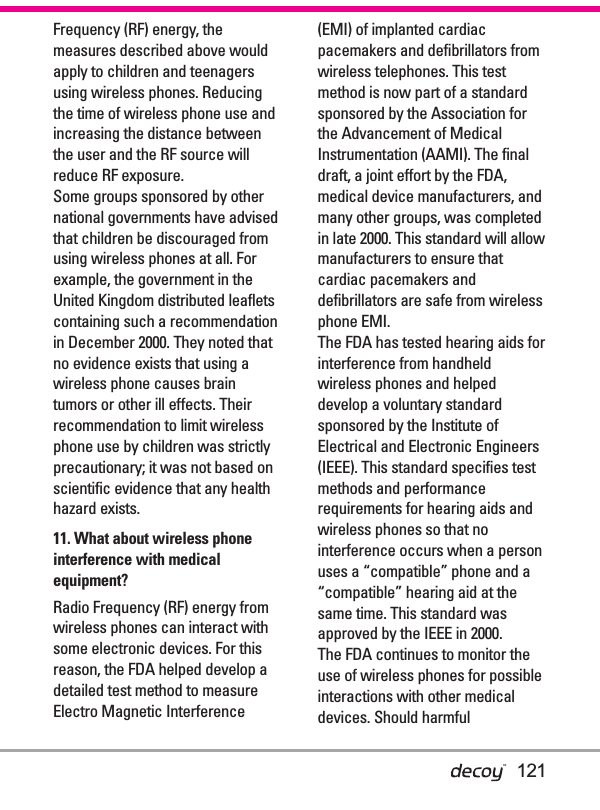
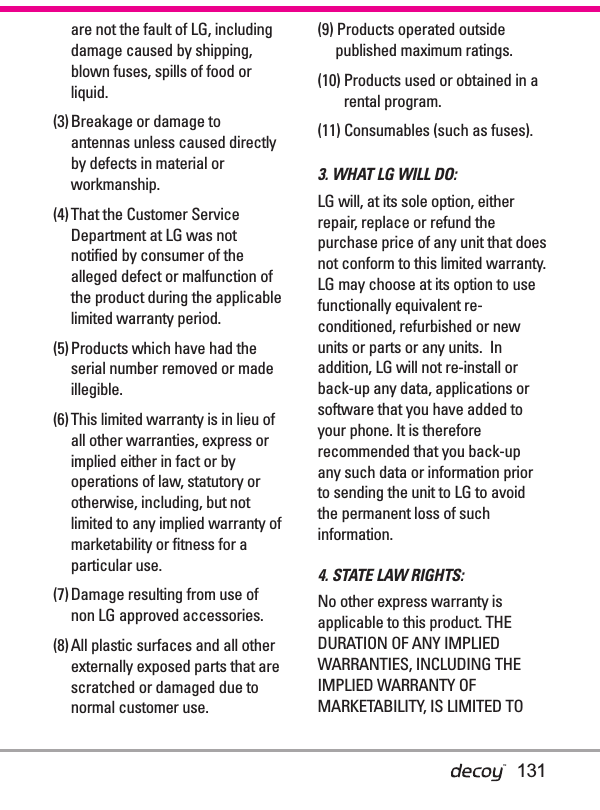
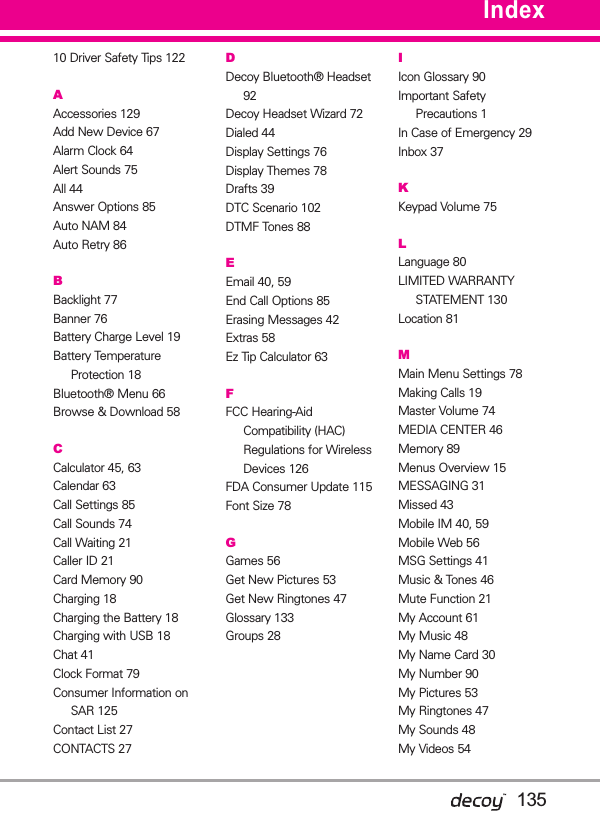
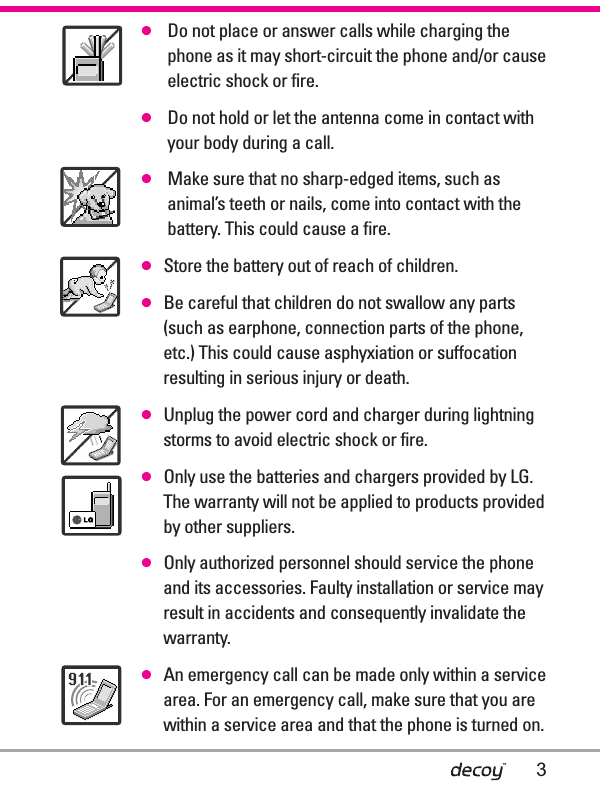
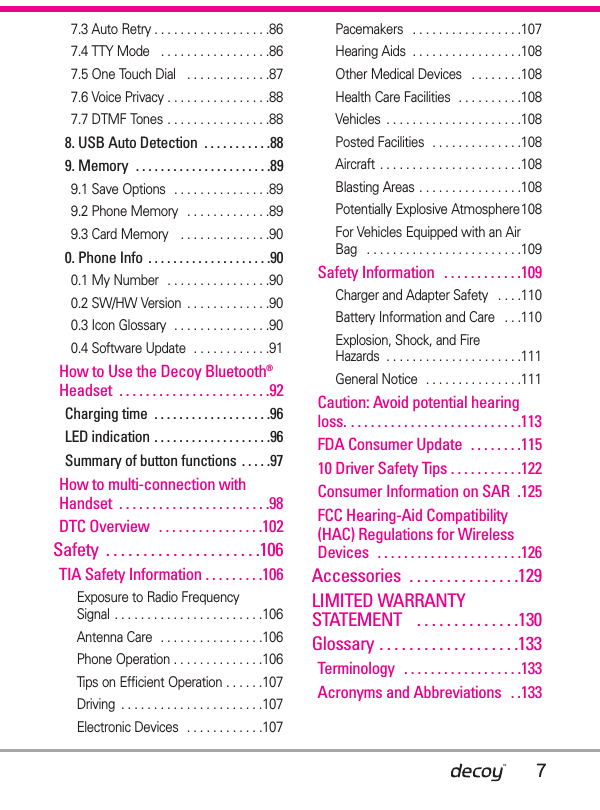
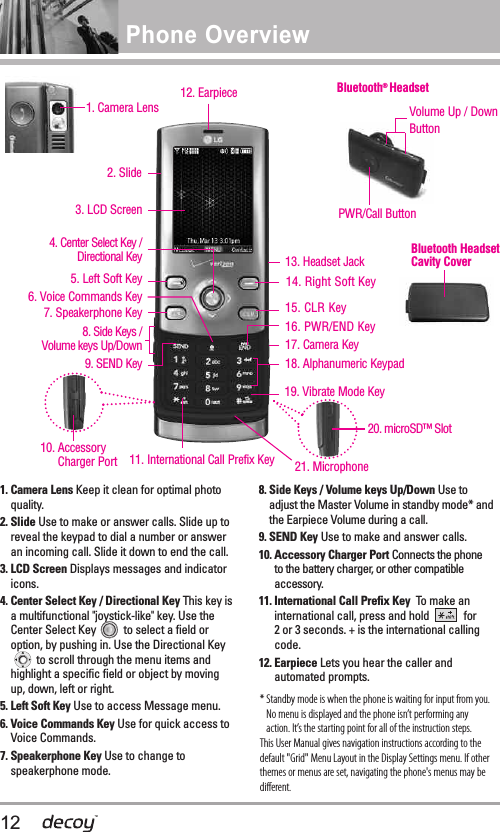
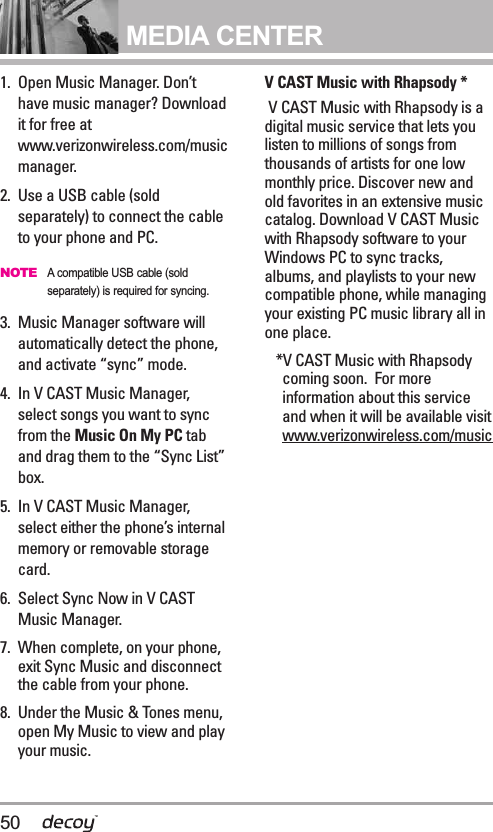
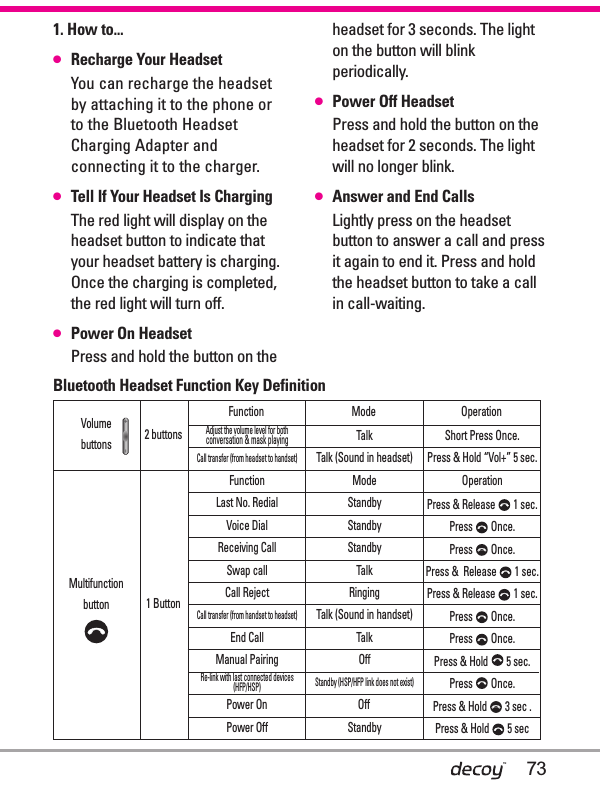
![20Getting Started with Your PhoneCorrecting Dialing MistakesWith the slide open, press once to erase the last digit entered,or hold it down for at least twoseconds to delete all the digits.Redialing Calls1. With the slide open, press twice to redial the last numberdialed.Receiving Calls1. When the phone rings orvibrates, you can answer the callby simply opening the slide. Or,ifyou want to use the phone withthe slide closed, press the RightSoft Key [Unlock],thenpress the Center Select Key [Answer].NOTEIf you press the Left Soft Key [Quiet] while the phone is ringing andunlocked, the ringing or vibration ismuted for that call.NOTEIf you press the Right Soft Key [Ignore] while the phone is ringingand unlocked, the call will end or go tovoicemail.2. With the slide open, press to end the call. If the slide isclosed, you may have to pressthe Right Soft key to Unlock,then you can press the CenterSelect Key [End] to end thecall.Screen IconsWhen the phone is on, the top lineof the LCD screen displays phonestatus icons. Tosee the icon glossary,with theslide open, go to MENU ->SETTINGS & TOOLS -> Phone Info ->Icon Glossary on your phone.](https://usermanual.wiki/LG-Electronics-USA/VX8610-DC/User-Guide-954837-Page-20.png)
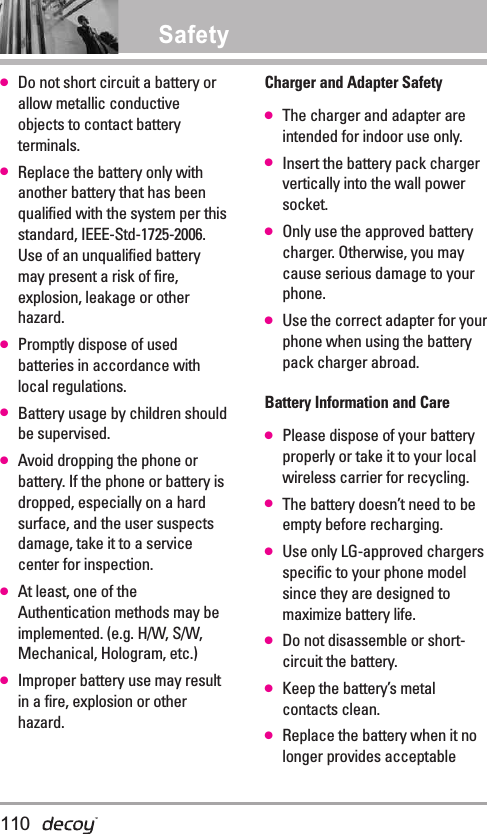
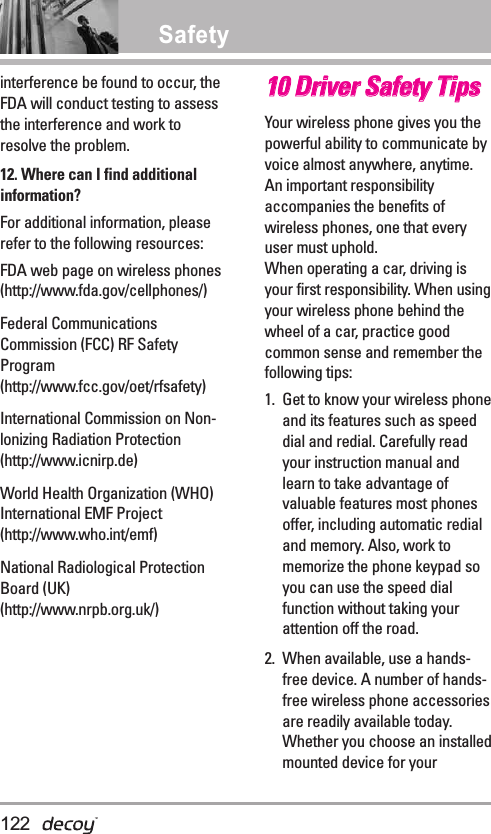
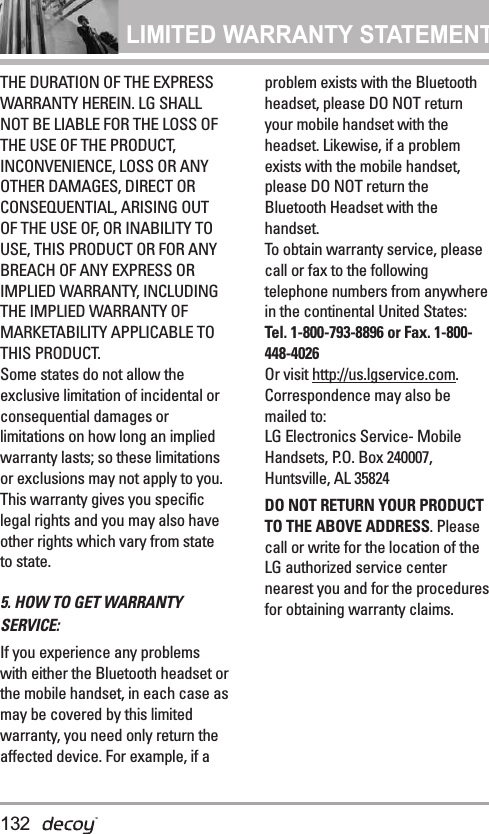
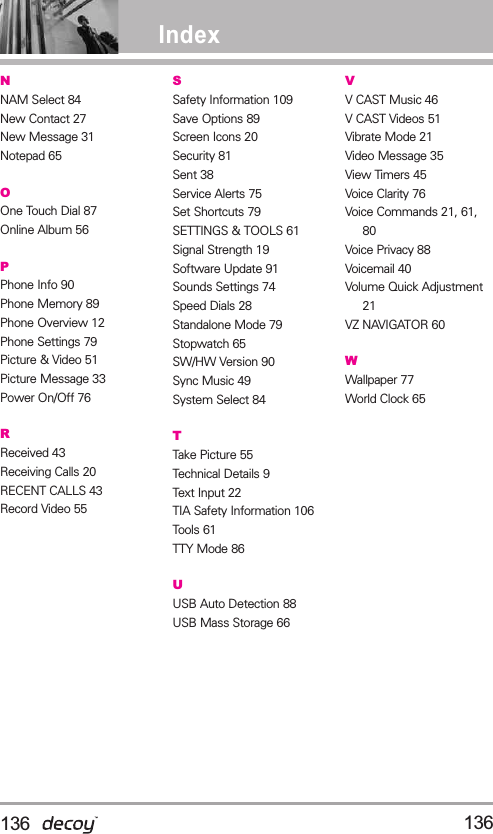
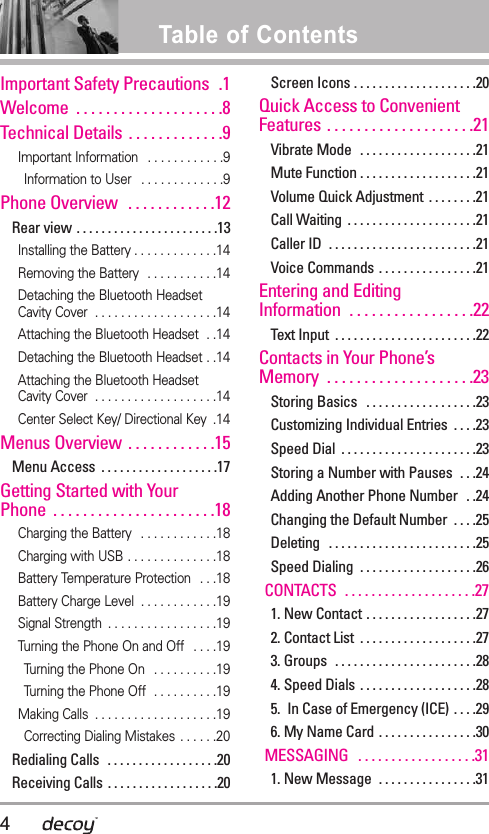
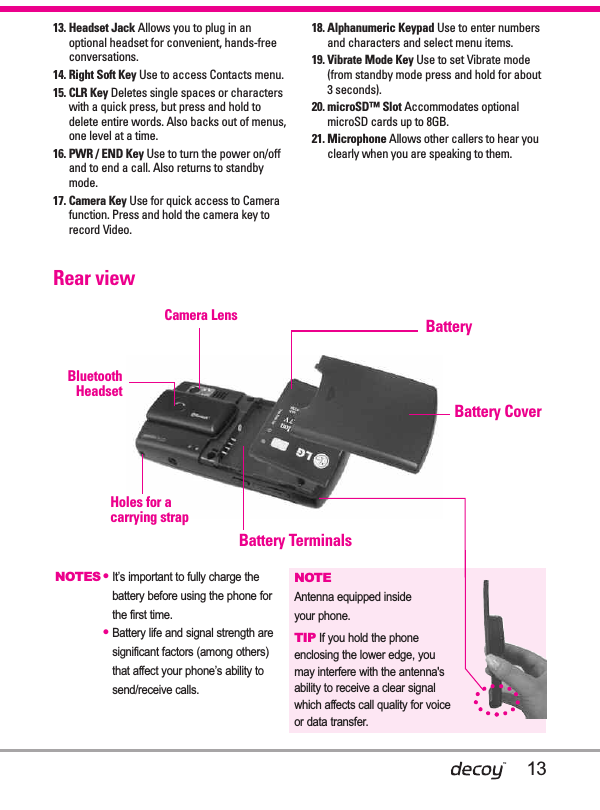
![21Vibrate ModeSets the phone to vibrate instead ofring ( is displayed). To setVibrate Mode, with the slide open,press and hold . To return toNormal Mode, press and hold . Mute FunctionThe Mute Function prevents thetransmission of your voice to thecaller.To quickly activate Mutewhile in a call, press the Left SoftKey [Mute],then to unmutepress the Left Soft Key [Unmute].Volume Quick AdjustmentQuickly adjust ringer and earpiecevolumes by pressing the upper sidekey on the left side of the phoneto increase and lower key todecrease.NOTES •The earpiece volume can only beadjusted during a call and KeyBeep volume can only be adjustedthrough the Menu.•To turn off sounds, press and holdthe lower side key for 3 secondswhen the slide is up, then pressand hold the upper side key toreturn to normal sounds mode. Call WaitingDuring a call, one beep indicatesanother incoming call. With the slide open, press toanswer it and put the first call onhold. Press again to return tothe first call.Caller IDCaller ID displays the numberand/or name of the person callingwhen your phone rings. Voice CommandsVoice Commands allow you to dothings by verbal command (e.g.,make calls, confirm Voicemail, etc.).With the slide open, press the VoiceCommands Key and follow theprompts.NOTEVoice Commands can also be startedwith the designated key on yourBluetooth®device. Please check themanual of the Bluetooth®device forfurther instructions.Quick Access to Convenient Features](https://usermanual.wiki/LG-Electronics-USA/VX8610-DC/User-Guide-954837-Page-21.png)
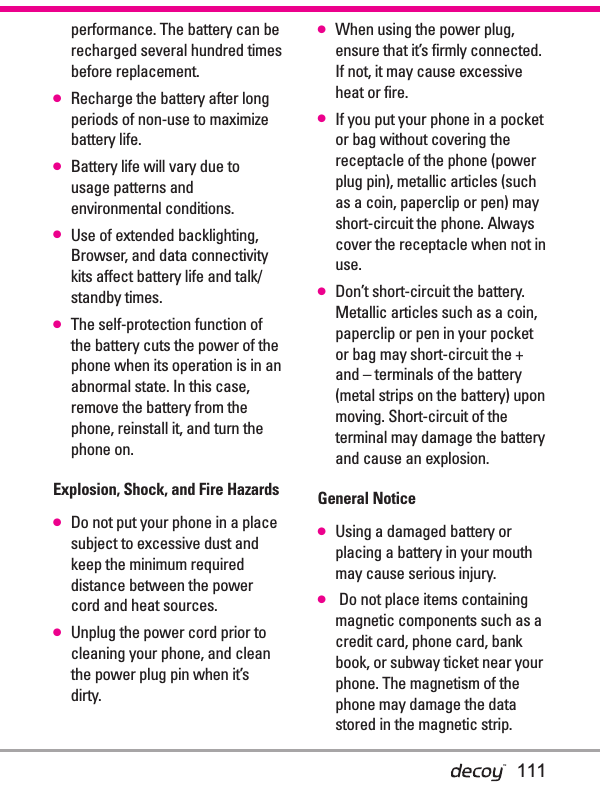
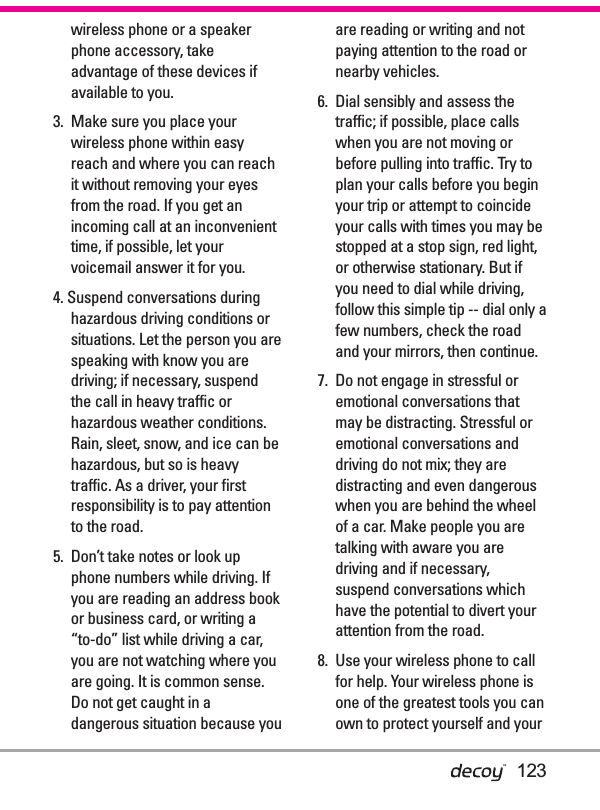
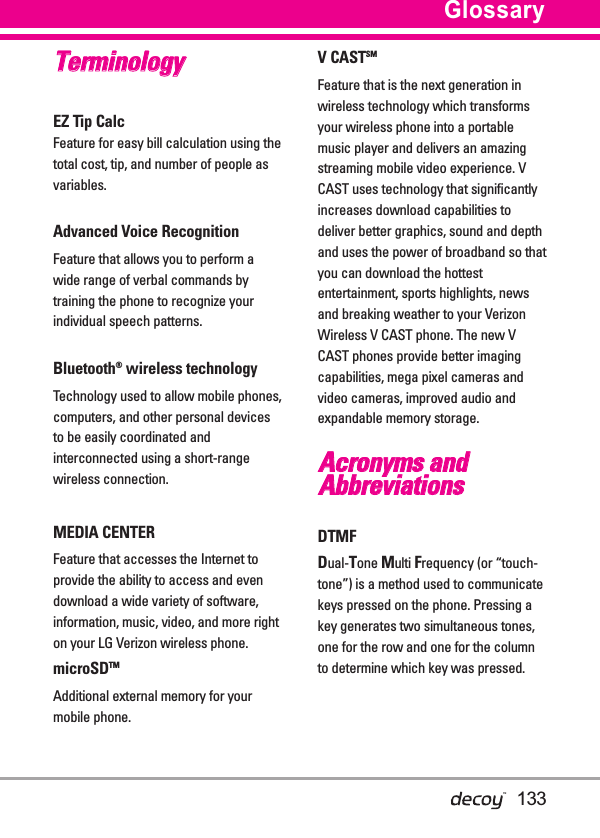
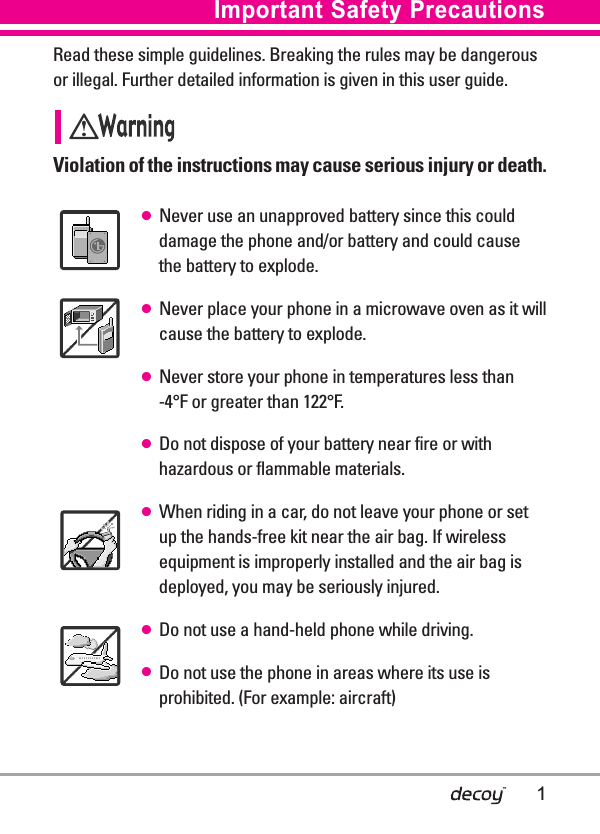
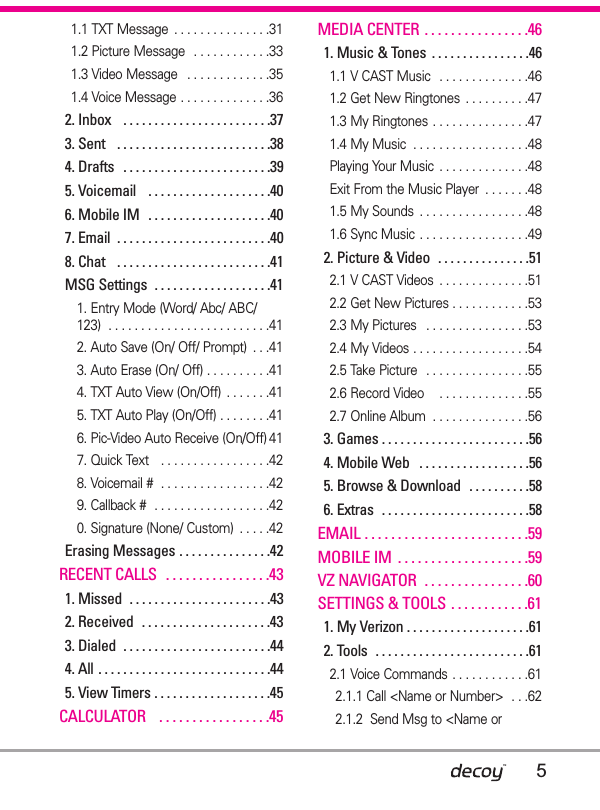
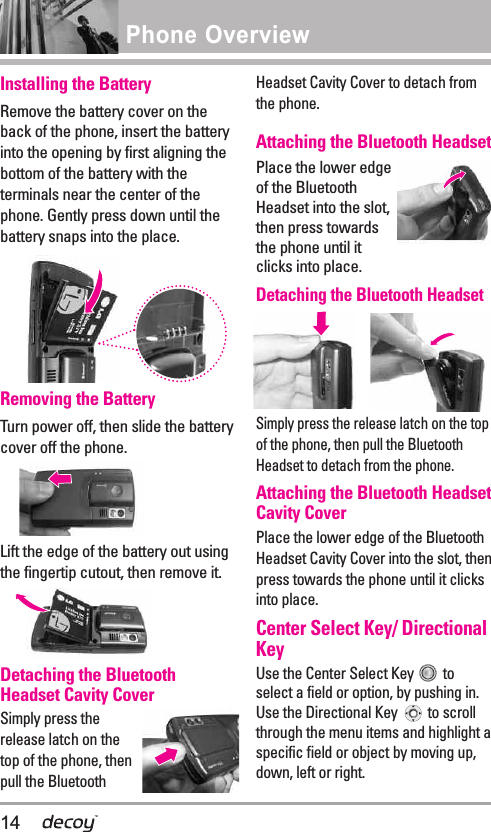
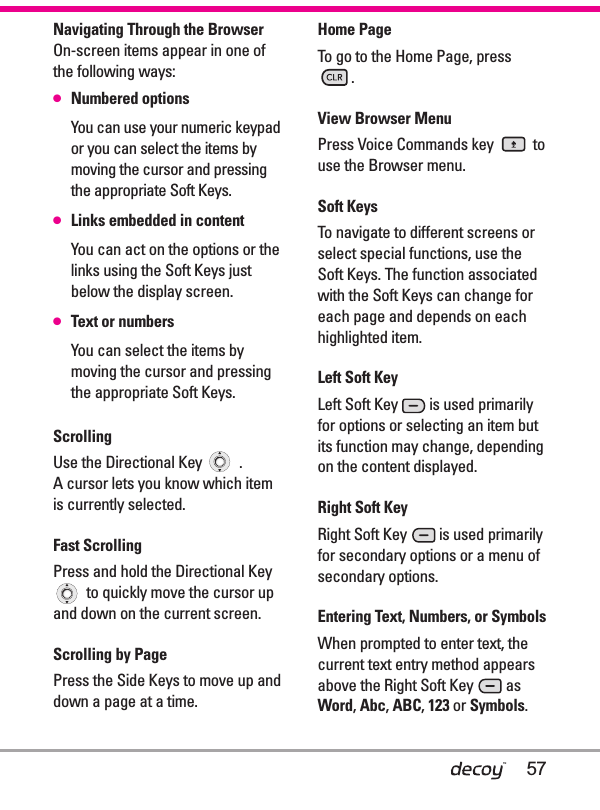
![23Storing Basics1. With the slide open, enter anumber (max. 48 digits), thenpress the Left Soft Key [Save].2. Use the Directional Key tohighlight Add New Contact/Update Existing,then press theCenter Select Key .3. Use the Directional Key tohighlight Mobile 1/ Home/ Work/Mobile 2/ Fax,then press theCenter Select Key . 4. Enter a name (max. 32characters), then press theCenter Select Key .5. Press to exit, to call, orthe Right Soft Key [Options].Customizing IndividualEntries1. With the slide open, press theRight Soft Key [Contacts],then use the Directional Keyto highlight an entry.2. Press the Left Soft Key [Edit].3. Use the Directional Key tohighlight the information tocustomize.4. Change the entry as you want,then press the Center Select Keyto save your changes.Speed DialAllows you to set up your SpeedDials.1. With the slide open, press theRight Soft Key [Contacts],then use the Directional Keyto highlight an entry.2. Press the Left Soft Key [Edit].3. Use the Directional Key tohighlight a phone number,thenpress the Right Soft Key [Options].4. Use the Directional Key tohighlight Set Speed Dial,thenpress the Center Select Key .5. Enter a Speed Dial digit.●Use the keypad, then press theCenter Select Key .●Use the Directional Key tohighlight the Speed Dial digit,then press the Center SelectKey .6. Press the Center Select Key Yes to confirm, then press theCenter Select Key to save.Contacts in Your Phone’s Memory](https://usermanual.wiki/LG-Electronics-USA/VX8610-DC/User-Guide-954837-Page-23.png)
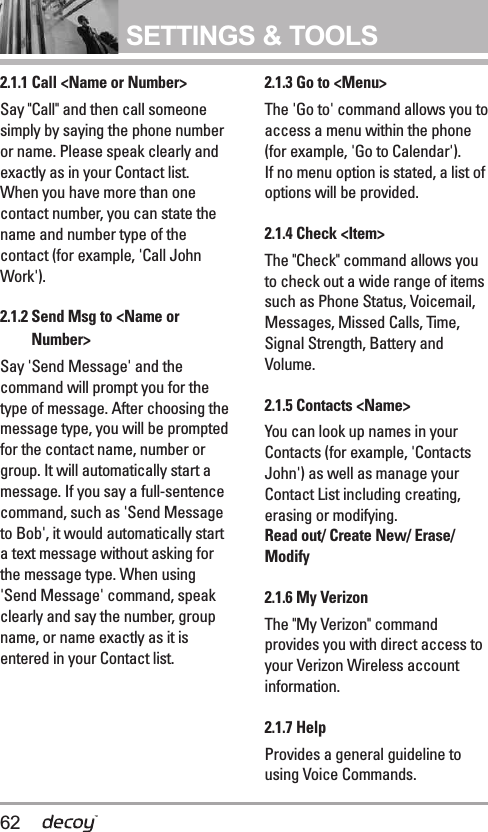
![24Contacts in Your Phone’s MemoryStoring a Number withPausesPauses allow you to enteradditional series of numbers toaccess automated systems such asVoicemail or credit billing numbers.Pause types are: Wait (W) Thephone stops dialing until you pressthe Left Soft Key [Release] toadvance to the next number. 2-SecPause (P) The phone waits twoseconds before sending the nextstring of digits.1. With the slide open, enter thenumber, then press the Right SoftKey [Options].2. Use the Directional Key tohighlight 2-Sec Pause/ Wait,thenpress the Center Select Key .3. Enter additional number(s) (e.g., pinnumber,credit card number,etc.).4. Press the Left Soft Key [Save].5. Continue entering information forthe Contact entry as necessary.Adding Another PhoneNumberFrom standby mode1. With the slide open, enter aphone number, then press theLeft Soft Key [Save].2. Use the Directional Key tohighlight Update Existing,thenpress the Center Select Key .3. Use the Directional Key tohighlight an existing entry,thenpress the Center Select Key . 4. Use the Directional Key tohighlight Mobile 1/ Home/ Work/Mobile 2/ Fax,then press theCenter Select Key to save.From the Contact List Screen1. With the slide open, press theRight Soft Key [Contacts].2. Use the Directional Key tohighlight an entry, then press theLeft Soft Key [Edit].3. Use the Directional Key tohighlight the phone number fieldto add, then enter the numberand press the Center Select Keyto save.](https://usermanual.wiki/LG-Electronics-USA/VX8610-DC/User-Guide-954837-Page-24.png)
![25Changing Saved InformationTo edit any information you stored,access the Edit Contacts screen:1. With the slide open, press theRight Soft Key [Contacts].2. Use the Directional Key tohighlight a Contact entry, thenpress the Left Soft Key [Edit].3. Use the Directional Key tohighlight the field you want tochange.4. Make the changes, then pressthe Center Select Key .Adding a Pause to a Contact Entry1. With the slide open, press theRight Soft Key [Contacts].2. Use the Directional Key tohighlight a Contact entry, thenpress the Left Soft Key [Edit].3. Use the Directional Key tohighlight the number,then pressthe Right Soft Key [Options].4. Press Wait or 2-SecPause.5. Enter additional number(s), thenpress the Center Select Key .Changing the DefaultNumberThe Default Number is the phonenumber you entered when youcreated the Contact. Anothernumber can be saved as theDefault Number.1. With the slide open, press theRight Soft Key [Contacts].2. Use the Directional Key tohighlight an entry.3.Press the Left Soft Key [Edit].4. Use the Directional Key tohighlight a phone number,thenpress the Right Soft Key [Options].5. Use the Directional Key tohighlight Set As Default,thenpress the Center Select Key .6. Press the Center Select Key to set the new number as thedefault.Aconfirmation message isdisplayed.7. Press the Center Select Key again to save.DeletingDeleting a Contact Entry1. With the slide open, press theRight Soft Key [Contacts].](https://usermanual.wiki/LG-Electronics-USA/VX8610-DC/User-Guide-954837-Page-25.png)
![26Contacts in Your Phone’s Memory2. Use the Directional Key tohighlight an entry.3. Press the Right Soft Key [Options].4. Press Erase.5. Press the Center Select Key Yes.Deleting a Speed Dial1. With the slide open, press theRight Soft Key [Contacts].2. Use the Directional Key tohighlight a Contact entry to editand press the Center Select Key[VIEW].3. Select the phone number withthe Speed Dial, then press theCenter Select Key [EDIT].4. Press the Right Soft Key [Options].5. Press Remove Speed Dial.6. Press the Center Select Key Yes.7. Press the Center Select Key again to save. Speed DialingAllows you to make phone callsquickly and easily to numbersstored in Contacts. NOTESpeed Dial 1 is for Voicemail.Speed Dial 411 is for DirectoryAssistance.Single Digit Speed DialsPress and hold the Speed Dial digit.Your phone recalls the phonenumber from your Contacts,displays it, and dials it for you.Multiple Digit Speed DialsWhen you press and hold a numberkey, it signals the phone to attemptaSpeed Dial transmission. TodialSpeed Dials with multiple digits,press the first digit(s) as necessary,then press and hold the last digit.For example, to Speed Dial 25,press , then press and hold.NOTEYou can also enter the Speed Dialdigit(s), then press .Speed Dials 97, 98, and 99Speed Dials 97, 98, and 99 arepreset to access certain phoneaccount information: 97 (#BAL), 98(#MIN), and 99 (#PMT). UnlikeSpeed Dial 1, these can be changedif you want.NOTE211, 311, 611 or 911 No. is notavailable for View,Setor Remove.411 is not available for Setor Remove.](https://usermanual.wiki/LG-Electronics-USA/VX8610-DC/User-Guide-954837-Page-26.png)
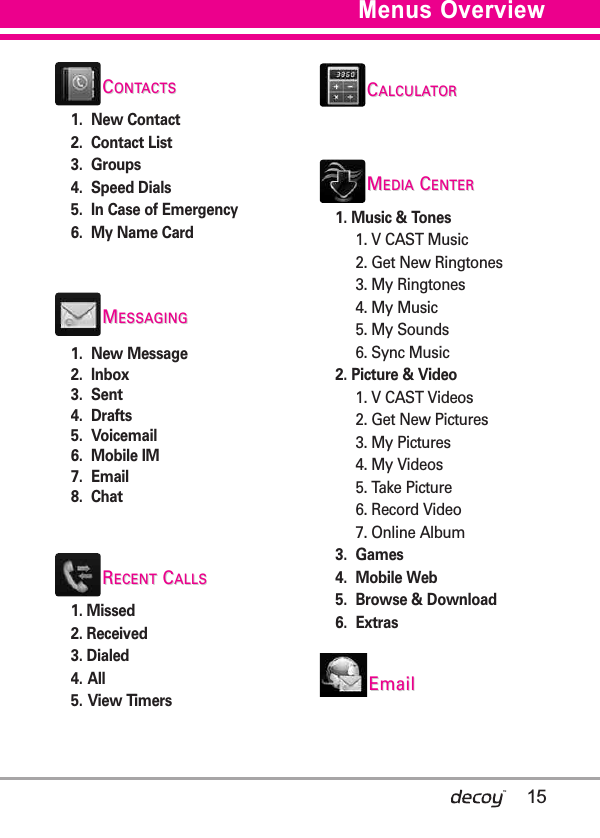
![27CONTACTSCCOONNTTAACCTTSSThe Contacts Menu allows you tostore names, phone numbers andother information in your phone’smemory. SHORTCUTPressing the Right Soft Keyis a hot key to Contact List.1. New ContactAllows you to add a new number toyour Contact List.NOTEUsing this submenu, the number issaved as a new Contact, not into anexisting Contact.1. With the slide open, press theCenter Select Key [MENU]. 2. Press Contacts.3. Press New Contact.4. Enter the name and press theDirectional Key downward.5. Use the Directional Key tohighlight the phone number type.6. Enter the number and press theCenter Select Key .NOTEFor more detailed information, seepage 23.2. Contact ListAllows you to view your ContactList.1. With the slide open, press theCenter Select Key [MENU]. 2. Press Contacts.3. Press Contact List.4. Use the Directional Key toscroll through your Contactsalphabetically.●Press the Right Soft Key [Options] to select one of thefollowing:Call/ New Contact/ Erase/New TXT Message/ NewPicture Message/ New VideoMessage/ New VoiceMessage/ Set As ICE Contact/Erase All/ Send Name Card●Press the Left Soft Key [Edit] to edit.](https://usermanual.wiki/LG-Electronics-USA/VX8610-DC/User-Guide-954837-Page-27.png)
![28CONTACTS3. GroupsAllows you to view your groupedContacts, add a new group, changethe name of a group, delete agroup, or send a message toeveryone in the selected group.1. With the slide open, press theCenter Select Key [MENU]. 2. Press Contacts.3. Press Groups.4. Use the Directional Key tohighlight a group to view thenpress the Center Select Key .●Before selecting group typepress the Left Soft Key [New] to add a new group tothe list.●Before selecting group typepress the Right Soft Key [Options] to select one of thefollowing:New TXT Message/ NewPicture Message/ New VideoMessage/ New VoiceMessage/ Rename/ Erase/Add●Before selecting group typepress the Center Select Key[VIEW] to view the Groupinformation. 4. Speed DialsAllows you to view your list ofSpeed Dials or designate SpeedDials for numbers entered in yourContacts.1. With the slide open, press theCenter Select Key [MENU]. 2. Press Contacts.3. Press Speed Dials.4. Use the Directional Key tohighlight the Speed Dial position,or enter the Speed Dial digit andpress the Center Select Key [SET].5. Use the Directional Key tohighlight the Contact then pressthe Center Select Key . (ForContacts with multiple numbers,highlight the number you chooseto be as Speed Dial, then pressthe Center Select Key .)6. Press the Center Select Key Yes.A confirmation message isdisplayed.](https://usermanual.wiki/LG-Electronics-USA/VX8610-DC/User-Guide-954837-Page-28.png)
![295. In Case of Emergency (ICE)This menu allows you to storenames, phone numbers and otherinformation, which will be veryhelpful in case of emergency. Also,it allows you to add, read, edit, orerase the notes yourself asnecessary in case an emergencytakes place.1. With the slide open, press theCenter Select Key [MENU]. 2. Press Contacts.3. Press In Case ofEmergency.4. Use the Directional Key tohighlight Contact 1, 2, or 3, thenpress the Center Select Key [ADD].5. Press to add Contact fromyour Contact List.Highlight the Contact, then pressthe Center Select Key .ICE CONTACT ASSIGNED isdisplayed.ORPress to enter informationnot stored in your Contact List.6. The generic Contact labelchanges to the specified name. Entering Your ICE Personal Info1. With the slide open, press theCenter Select Key [MENU]. 2. Press Contacts.3. Press In Case ofEmergency.4. Highlight Personal Info, thenpress the Center Select Key .5. Highlight one of the Note entries,then press the Center Select Key.6. Enter information that would behelpful in an emergency (e.g.,your medical record number),then press the Center Select Key.TIPWhen you've assigned ICE Contactsand your phone is locked, the LeftSoft Key appears as [ICE]allowing the emergency information tobe viewed without unlocking thephone.](https://usermanual.wiki/LG-Electronics-USA/VX8610-DC/User-Guide-954837-Page-29.png)
![30CONTACTS6. My Name CardAllows you to view all of yourpersonal Contact informationincluding name, phone numbers,and email address in one entry.1. With the slide open, press theCenter Select Key [MENU]. 2. Press Contacts.3. Press My Name Card.4. Press the Center Select Key [EDIT] to enter your personalContact information.5. Use the Directional Key toscroll to the information youwant to enter.6. Enter your information asnecessary, then press the CenterSelect Key .NOTEPress the Right Soft Key [Options] to send your name card.](https://usermanual.wiki/LG-Electronics-USA/VX8610-DC/User-Guide-954837-Page-30.png)
![31MMEESSSSAAGGIINNGGSHORTCUTFrom standby mode, pressing the Left Soft Keyis a hot key to your MESSAGING. Text messages, Picture messages,and the Voicemail box becomeavailable as soon as the phone ispowered on. ●Check types of messages bypressing the Left Soft Key [Message].●Make a call to the callbacknumber (in Inbox) by pressingduring a message check.The phone can store over 541messages. The information storedin the message is determined byphone model and service capability.Other limits to available charactersper message may exist. Pleasecheck with your service providerfor system features andcapabilities.New Message AlertYour phone will alert you when youhave new messages.1. The phone displays a messageon the screen.2. The message icon ( ) isdisplayed on the display screen.In the case of a high prioritymessage, the icon will flash anda warning message is displayed.1. New MessageAllows you to send messages (Text,Picture, Video, and Voice) andpages. Each message has adestination (Address) andinformation (Message). These aredependent upon the type ofmessage you want to send.1.1 TXT MessageThe Basics of Sending a Message1. With the slide open, press theLeft Soft Key [Message].2. Press New Message.3. Press TXT Message.4. Enter the phone number of therecipient or the email address foran email message. You can enterup to 10 addresses for a singlemessage.5. Press the Directional Key downward.MESSAGING](https://usermanual.wiki/LG-Electronics-USA/VX8610-DC/User-Guide-954837-Page-31.png)
![32MESSAGING6. Type your message.7. Press the Center Select Key [SEND].Customizing the Message UsingOptions●Editing the To: field1. With the To field highlighted,press the Right Soft Key [Add].2. Select the option(s) to customize.From Contacts/ From RecentCalls/ Groups/ To Contacts●Editing Text1. With the Text field highlighted,press the Right Soft Key [Options].2. Select the option(s) to customize.Save As Draft Saves themessage into the Drafts folder. Add Allows you to add Graphic,Animation, Sound, Quick Text,Signature, Name Card, orAddress From Contacts .Format Text Allows you tochange the look of the text. Alignment/ Font Size/ Font Style/Text Color/ BackgroundPriority Level Gives priority tothe message. High/ NormalCallback # Inserts a pre-programmed callback numberwith your message.On/ Off/ EditSave Quick Text Allows you todefine phrases for Quick Text.Cancel Message Cancelsmessage editing and goes toNew Message menu. 3. Complete and then send or savethe message.Using Contacts to Send a MessageYou can designate an entry savedin your Contacts as the addressinstead of manually entering thedestination.1. With the slide open, press theLeft Soft Key [Message].2. Press New Message.3. Press TXT Message.4. Press the Right Soft Key [Add].5. Use the Directional Key tohighlight From Contacts andpress the Center Select Key .](https://usermanual.wiki/LG-Electronics-USA/VX8610-DC/User-Guide-954837-Page-32.png)
![336. Use the Directional Key tohighlight the Contact entrycontaining the destination andpress the Center Select Key .7. Press the Left Soft Key [Done].NOTEThe Address feature allows multi-sending of up to 10 total addresses.8. Complete the message asnecessary.1.2 Picture MessageThe Basics of Sending a Message1. With the slide open, press theLeft Soft Key [Message].2. Press New Message.3. Press Picture Message.4. Enter the cellular phone numberor email address of the recipient.5. Press the Directional Key downward.6. Type your message.7. Use the Directional Key tohighlight Pictureand press theLeft Soft Key [My Pics]. Usethe Directional Key toselect the image you want tosend, then press the CenterSelect Key .8. Use the Directional Key tohighlight Sound, then press theLeft Soft Key [Sounds]. Usethe Directional Key tohighlight the audio file you wantto send then press the CenterSelect Key .9. Use the Directional Key tohighlight Name Card, then pressthe Left Soft Key [Contacts].Use the Directional Key toselect the Name Card you wantto send, then press the CenterSelect Key .10. Use the Directional Key tohighlight Subject and enter thesubject.11. Press the Center Select Key [SEND]. A confirmation message isdisplayed.● Editing the To: field1. With the To field highlighted,press the Right Soft Key [Add].2. Select the option(s) to customize.From Contacts/ From RecentCalls/ Groups/ To Online Album/To Contacts](https://usermanual.wiki/LG-Electronics-USA/VX8610-DC/User-Guide-954837-Page-33.png)
![34MESSAGING●Editing Text1. With the Text field highlighted,press the Right Soft Key [Options].2. Select the option(s) to customize.Preview Displays the Picturemessage as it would be seen bythe recipient.Save As Draft Saves themessage into the Drafts folder.Copy Text Allows you to copytext.Add Quick Text Insertspredefined phrases.Add Slide Insert multiplepictures into a picture message. Priority Level Gives priority tothe message. High/ NormalCancel Message●Editing Picture1. With the Picture field highlighted,press the Right Soft Key [Options].2. Select the option(s) to customize.Preview/ Save As Draft/ AddSlide/ Priority Level/ RemovePicture/ Cancel Message●Editing Sound1. With the Sound field highlighted,press the Right Soft Key [Options].2. Select the option(s) to customize.Preview/ Save As Draft/ AddSlide/ Priority Level/ RemoveSound/ Cancel Message●Editing Name Card 1. With the Name Card fieldhighlighted, press the Right SoftKey [Options].2. Select the option(s) to customize.Preview/ Save As Draft/ AddSlide/ Priority Level/ RemoveName Card/ Cancel Message●Editing a Subject1. With the Subject fieldhighlighted, press the Right SoftKey [Options].2. Select the option(s) to customize.Preview/ Save As Draft/ CopyText/ Add Quick Text/ Add Slide/Priority Level/ Cancel Message3. Complete and press the CenterSelect Key [SEND].](https://usermanual.wiki/LG-Electronics-USA/VX8610-DC/User-Guide-954837-Page-34.png)
![351.3 Video MessageThe Basics of Sending a Message1. With the slide open, press theLeft Soft Key [Message].2. Press New Message.3. Press Video Message.4. Enter the cellular phone numberor email address of the recipient.5. Press the Directional Key downward.6. Type your message.7. Use the Directional Key tohighlight Video and press theLeft Soft Key [Videos].Use the Directional Key tohighlight the video file you wantto send, then press the CenterSelect Key .8. Use the Directional Key tohighlight Name Card, then pressthe Left Soft Key [Contacts].Use the Directional Key toselect the Name Card you wantto send, then press the CenterSelect Key .9. Use the Directional Key tohighlight Subject and enter thesubject.10. Press the Center Select Key [SEND]. A confirmation message isdisplayed.Customizing the Message UsingOptions●Editing the To: field1. With the To field highlighted,press the Right Soft Key [Add].2. Select the option(s) to customize.From Contacts/ From RecentCalls/ Groups/ To Online Album/To Contacts●Editing Text1. With the Text field highlighted,press the Right Soft Key [Options].2. Select the option(s) to customize.Preview Displays the Videomessage as it would be seen bythe recipient.Save As Draft Saves themessage into the Drafts folder.Copy Text Allows you to copytext.Add Quick Text Insertspredefined phrases.](https://usermanual.wiki/LG-Electronics-USA/VX8610-DC/User-Guide-954837-Page-35.png)
![36MESSAGINGPriority Level Gives priority tothe message. High/ NormalCancel Message●Editing Video1. With the Video field highlighted,press the Right Soft Key [Options].2. Select the option(s) to customize.Preview/ Save As Draft/ PriorityLevel/ Remove Video/ CancelMessage●Editing Name Card 1. With the Name Card fieldhighlighted, press the Right SoftKey [Options].2. Select the option(s) to customize.Preview/ Save As Draft/ PriorityLevel/ Remove Name Card/Cancel Message● Editing the Subject1. With the Subject fieldhighlighted, press the Right SoftKey [Options].2. Select the option(s) to customize.Preview/ Save As Draft/ CopyText/ Add Quick Text/ PriorityLevel/ Cancel Message3. Complete and then send or savethe message.1.4 Voice MessageThe Basics of Sending a Message 1. With the slide open, press theLeft Soft Key [Message].2. Press New Message.3. Press Voice Message.4. Press the Center Select Key to start recording.5. Record your voice message.6. Press the Center Select Key to end recording.7. Enter the cellular phone numberor email address of the recipient.8. Press the Directional Key downward.9. Type your message.10. Use the Directional Key tohighlight Name Card, then pressthe Left Soft Key [Contacts]. Use the DirectionalKey to choose My NameCard/ From Contacts.11. Use the Directional Key tohighlight Subject and enter thesubject.](https://usermanual.wiki/LG-Electronics-USA/VX8610-DC/User-Guide-954837-Page-36.png)
![3712. Press the Center Select Key [SEND]. After a connecting display,message is transmitted.2. InboxThe phone alerts you in 3 wayswhen you receive a new message:●By displaying a messagenotification on the screen.●By sounding a sound orvibration, if set.●By blinking (only when youget a high priority message).Viewing Your Inbox1. With the slide open, press theCenter Select Key [MENU].2. Press Messaging.3. Press Inbox.4. Options from here with amessage highlighted:●Press the Center Select Key[OPEN] to view themessage.●Press the Left Soft Key [Erase].●Press the Right Soft Key [Options].Reply Replies to the originationaddress of the received message.Reply With Copy Replies to theorigination address including theoriginal message with your reply.Forward Forwards a receivedmessage to other destinationaddress(es).Add To Contacts Stores thecallback number, email address,and numbers from the address ofthe received message into yourContacts.Extract Addresses Allows you toextract addresses.Sort By Sender/Time Allows youto sort messages alphabeticallyor by time received.Manage Inbox Allows you tomanage (lock or erase) messagelist.Message Info Allows you tocheck the received messageinformation.Message Icon ReferenceNew/Unread TXTMessagesOpened/Read TXTMessages](https://usermanual.wiki/LG-Electronics-USA/VX8610-DC/User-Guide-954837-Page-37.png)
![38MESSAGINGPriority HighLockedNew/Unread Picture/ VideoMessagesOpen/Read Picture/ VideoMessagesNew/Unread BrowserMessagesOpened/Read BrowserMessagesNew/Unread NotificationMessagesOpen/Read NotificationMessages3. SentYou can save up to 100 sentmessages. This menu lists yourSent messages. Use it to verifywhether the transmission wassuccessful or not and viewmessage contents.1. With the slide open, press theCenter Select Key [MENU].2. Press Messaging.3. Press Sent.4. Options from here with amessage highlighted:●Press the Center Select Key[OPEN] to view themessage.●Press the Left Soft Key [Erase].●Press the Right Soft Key [Options].Forward Forwards a sentmessage to other destinationaddress(es).Send/Resend Allows you toretransmit the selectedmessage.Add To Contacts Stores thecallback number, email address,and numbers from the address ofthe message into your Contacts.Sort By Recipient/Time Allowsyou to sort alphabetically or bytime sent.Manage Sent Allows you tomanage (erase or lock) messagelist.Message Info Allows you tocheck the sent messageinformation.](https://usermanual.wiki/LG-Electronics-USA/VX8610-DC/User-Guide-954837-Page-38.png)
![39Message Icon ReferenceText/Picture/VideoMessages sentMessage deliveredText/Picture/VideoMessages failedMultiple Messages sentMultiple MessagesdeliveredMultiple Messages failedMultiple MessagesincompletePriority HighLocked4. DraftsDisplays draft messages.1. With the slide open, press theCenter Select Key [MENU].2. Press Messaging.3. Press Drafts.4. Options from here with amessage highlighted:●Press the Center Select Key[EDIT] to continue themessage.●Press the Left Soft Key [Erase].●Press the Right Soft Key [Options].Send Sends the selectedmessage.Add To Contacts Stores thecallback number, email address,and numbers from the addressincluded in the message intoyour Contacts.Manage Drafts Allows you tomanage (erase or lock)messages.Message Icon ReferenceDraft TXTDraft Picture/Video](https://usermanual.wiki/LG-Electronics-USA/VX8610-DC/User-Guide-954837-Page-39.png)
![40MESSAGING5. VoicemailAllows you to view the number ofnew voice messages recorded inthe Voicemail box. Once youexceed the storage limit, oldmessages are overwritten. Whenyou have a new voice message,your phone will alert you.Checking Your Voicemail Box1. With the slide open, press theCenter Select Key [MENU].2. Press Messaging.3. Press Voicemail.4. Options from here :●Press the Left Soft Key [Clear] to delete information, andthen press the Center Select Key[Yes].●Press or [CALL] tolisten to the message(s).OR1. Dial *86 (*VM) from yourphone or dial your wirelessphone number from any touch-tone phone.2. When the recordedannouncement begins, pressto interrupt (if applicable).3. When prompted, enter yourpassword, then . 6. Mobile IMAllows you to send and receive anInstant Message at any time.1. With the slide open, press theCenter Select Key [MENU].2. Press Messaging.3. Press Mobile IM.7. EmailAllows you to send an email viaMobile Web.1. With the slide open, press theCenter Select Key [MENU].2. Press Messaging.3. Press Email.4. A Mobile Web Browser sessionstarts.5. Highlight an email provider andpress the Center Select Key .6. Login or enter your emailaddress and password.](https://usermanual.wiki/LG-Electronics-USA/VX8610-DC/User-Guide-954837-Page-40.png)
![418. ChatAllows you to chat with InternetMessenger users.1. With the slide open, press theCenter Select Key [MENU].2. Press Messaging.3. Press Chat.4. A Mobile Web Browser sessionstarts.5. Highlight a Chat provider andpress the Center Select Key .NOTEThis feature may require asubscription to a Chat serviceprovider.MSG SettingsAllows you to configure settings foryour messages.1. With the slide open, press theCenter Select Key [MENU].2. Press Messaging.3. Press the Left Soft Key [Settings]. 4.Use the Directional Key tohighlight one of the settings andpress the Center Select Key to select it.Message Settings Sub-MenuDescriptions1. Entry Mode (Word/ Abc/ ABC/123)Allows you to select the defaultinput mode including Word, Abc,ABC, 123.2. Auto Save (On/ Off/ Prompt)With this feature on, messages areautomatically saved in the Sentfolder when transmitted.3. Auto Erase (On/ Off)With this feature on, readmessages are automaticallydeleted when you exceed thestorage limit.4. TXT Auto View (On/Off)Allows you to directly display thecontent when receiving a message.5. TXT Auto Play (On/Off)Allows the display to automaticallyscroll while viewing messages.6. Pic-Video Auto Receive (On/Off)Allows you to directly download thecontent when receiving a Picturemessage.](https://usermanual.wiki/LG-Electronics-USA/VX8610-DC/User-Guide-954837-Page-41.png)
![42MESSAGING7. Quick Text Allows you to display, edit, and addtext phrases. These text stringsallow you to reduce manual textinput into messages.8. Voicemail # Allows you to manually enter theaccess number for VoicemailService. This feature should be onlyused when a VMS (VoicemailService) access number is notprovided from the network.9. Callback # Allows you to automatically send adesignated callback number whenyou send a message.0. Signature (None/ Custom)Allows you make/edit a signature toautomatically send with yourmessages.Erasing MessagesAllows you to erase all messagesstored in your Inbox, Sent, or Draftsfolders. You can also erase allmessages at the same time.1. With the slide open, press theCenter Select Key [MENU].2. Press Messaging.3. Press the Right Soft Key [Options] then select one of thefollowing:Erase Inbox/ Erase Sent/ EraseDrafts/ Erase All4. Press the Center Select Key to erase the messages selected.A confirmation message isdisplayed.](https://usermanual.wiki/LG-Electronics-USA/VX8610-DC/User-Guide-954837-Page-42.png)
![43RREECCEENNTT CCAALLLLSSThe Recent Calls Menu is a list ofthe last phone numbers or Contactentries for calls you placed,accepted, or missed. It's continuallyupdated as new numbers areadded to the beginning of the listand the oldest entries are removedfrom the bottom of the list.1. MissedAllows you to view the list ofmissed calls; up to 90 entries.1. With the slide open, press theCenter Select Key [MENU]. 2. Press Recent Calls.3. Press Missed.4. Use the Directional Key tohighlight an entry, then●Press the Center Select Keyto view the entry.●Press to place a call tothe number.●Press the Right Soft Key [Options] to select:Save To Contacts (Details)/Erase/ Lock(Unlock)/ EraseAll/ View Timers●Press the Left Soft Key [Message] to select:TXT Message/ PictureMessage/ Video Message /Voice Message2. ReceivedAllows you to view the list ofincoming calls; up to 90 entries.1. With the slide open, press theCenter Select Key [MENU]. 2. Press Recent Calls.3. Press Received.4. Use the Directional Key tohighlight an entry, then●Press the Center Select Keyto view the entry.●Press to place a call tothe number.●Press the Right Soft Key [Options] to select:Save To Contacts (Details)/Erase/ Lock(Unlock)/ EraseAll/ View Timers●Press the Left Soft Key [Message] to select:TXT Message/ PictureMessage/ Video Message /Voice MessageRECENT CALLS](https://usermanual.wiki/LG-Electronics-USA/VX8610-DC/User-Guide-954837-Page-43.png)
![44RECENT CALLS3. DialedAllows you to view the list ofoutgoing calls; up to 90 entries.1. With the slide open, press theCenter Select Key [MENU]. 2. Press Recent Calls.3. Press Dialed.4. Use the Directional Key tohighlight an entry, then●Press the Center Select Keyto view the entry.●Press to place a call tothe number.●Press the Right Soft Key [Options] to select:Save(Details)/ Erase/Lock(Unlock)/ Erase All/ View Timers●Press the Left Soft Key [Message] to select:TXT Message/ PictureMessage/ Video Message /Voice Message4. AllAllows you to view the list of allcalls; up to 270 entries.1. With the slide open, press theCenter Select Key [MENU]. 2. Press Recent Calls.3. Press All.4. Use the Directional Key tohighlight an entry, then●Press the Center Select Keyto view the entry.●Press to place a call tothe number.●Press the Right Soft Key [Options] to select:Save(Details)/ Erase/Lock(Unlock)/ Erase All/ View Timers●Press the Left Soft Key [Message] to select:TXT Message/ PictureMessage/ Video Message /Voice MessageSHORTCUT To view a quick list of all yourrecent calls, press from standby mode.](https://usermanual.wiki/LG-Electronics-USA/VX8610-DC/User-Guide-954837-Page-44.png)
![455. View TimersAllows you to view the duration ofselected calls.1. With the slide open, press theCenter Select Key [MENU]. 2. Press Recent Calls.3. Press View Timers.4. Use the Directional Key tohighlight a call list.Last Call/ All Calls/ ReceivedCalls/ Dialed Calls/ RoamingCalls/ Transmit Data/ ReceivedData/ Total Data/ Last Reset/Lifetime Calls/ Lifetime DataCounter 5. Reset all the recorded timers bypressing the Right Soft Key [Reset All] if you want to reset. CCAALLCCUULLAATTOORRAllows you to perform simplemathematical calculations. You canenter numbers up to the eighthdecimal place. Calculations can bemade with up to 4 lines at one time.1. With the slide open, press theCenter Select Key [MENU]. 2. Press Calculator.3. Enter the numbers to get thevalue you want. To cancel anumber, press the Left Soft Key[Clear]. 4. Use the Right Soft Key [Operators] to add parenthesis orpower among numbers forcalculation.5. Use the Directional Key toenter operation betweennumbers and press the CenterSelect Key [ = ] for the result.NOTETo insert a decimal, press . Toinsert ±, press .CALCULATOR](https://usermanual.wiki/LG-Electronics-USA/VX8610-DC/User-Guide-954837-Page-45.png)
![46MEDIA CENTERMMEEDDIIAA CCEENNTTEERRMEDIA CENTER allows you to domore than just talk on your phone.MEDIA CENTER is a technologyand service that allows you todownload and use applications onyour phone. With MEDIA CENTER,it’s quick and easy to personalizeyour phone to your lifestyle andtastes. Just download theapplications that appeal to you.With a wide range of softwareavailable, you can be assured thatyou can find something useful,practical, or entertaining. Anything Unclear?From the MEDIA CENTER menu,press the Right Soft Key [Info]to see your memory status, activitylog, help text, and MEDIA CENTERstatus. Use the Help option to viewinformation from buying newapplications to expired applications.1. Music & TonesPersonalize your phone withringtones. A wide variety ofchoices are available, such ascurrent hits, pop, hip-hop, andmore.Access and Options1. With the slide open, press theCenter Select Key [MENU].2. Press Media Center.3. Press Music & Tones.4. Select a submenu by pressingthe number that correspondswith the submenu.1.1 V CAST MusicAllows you to download a variety ofmusic via V CAST whenever andwherever you are. 1. With the slide open, press theCenter Select Key [MENU]. 2. Press Media Center.3. Press Music & Tones.4. Press V CAST Music.NOTEAdditional charges for music mayapply. V CAST Music service is notavailable in all areas. Checkwww.verizonwireless.com/getitnowwebsite for details.](https://usermanual.wiki/LG-Electronics-USA/VX8610-DC/User-Guide-954837-Page-46.png)
![471.2 Get New RingtonesAllows you to connect to MEDIACENTER and download variousringtones. 1. With the slide open, press theCenter Select Key [MENU]. 2. Press Media Center.3. Press Music & Tones.4. Press Get New Ringtones.VZW Tones Deluxe VZW Tones Deluxe has all the bestsound clips of your favorite songsthat you can use as ringtones foryour phone. Preview, download,and manage all the latest andgreatest ringtones right from yourphone. To find all the latest hits,check out our “What's New”category. If you’re looking for thehottest tones, check out ‘What’sHot”.NOTEAdditional fees apply.VZW SONG IDAccess SONG ID from the Get NewRingtones menu, then use it toidentify songs when you're on the go,and then download them as songs,Ringtones, and Ringback Tones. 1.3 My RingtonesAllows you to select a desiredringtone, download a new ringtone.1. With the slide open, press theCenter Select Key [MENU]. 2. Press Media Center.3. Press Music & Tones.4. Press My Ringtones.5. Use the Directional Key tohighlight a ringtone and pressthe Left Soft Key [Set As].●Ringtone●Contact ID: Highlight andselect the Contact to beidentified by the ringtone youselected.●Alert Sounds: Press thecorresponding number key to setthe ringtone for one of thefollowing:All Messages/ TXT Message/Pic/Video/Voice Message/Voicemail](https://usermanual.wiki/LG-Electronics-USA/VX8610-DC/User-Guide-954837-Page-47.png)
![48MEDIA CENTER1.4 My Music Allows you to store and to listen tomusic right from your phone. Shopfor and download a variety ofmusic, transfer music between yourphone and computer, manage andorganize your music files, and more.NOTEFile storage varies according to thesize of each file as well as memoryallocation of other applications.1. With the slide open, press theCenter Select Key [MENU]. 2. Press Media Center.3. Press Music & Tones.4. Press My Music.5. Use the Directional Key tohighlight a submenu.Playing Your MusicMy Music submenus make it easyto find and play the music you’vestored in your phone.Access My Music1. With the slide open, press theCenter Select Key [MENU]. 2. Press Media Center.3. Press Music & Tones.4. Press My Music.5. Use the Directional Key toselect a submenu, then press theCenter Select Key .Genres/ Artists/ Albums/ Songs/Playlists/ Inbox/ Play All/ Shuffle6. Select a song and press theCenter Select Key to startthe Music Player.Exit From the Music Player1. Display the Music Player.2. Press to exit from theMusic Player.NOTEYou can also exit the Music Player bypressing until the display returnsto standby mode.1.5 My SoundsAllows you to record a new soundor select a desired sound.How to record a new sound1. With the slide open, press theCenter Select Key [MENU]. 2. Press Media Center.3. Press Music & Tones.4. Press My Sounds.5. Press Record New andpress the Center Select Key to start recording.](https://usermanual.wiki/LG-Electronics-USA/VX8610-DC/User-Guide-954837-Page-48.png)
![49How to select a sound1. With the slide open, press theCenter Select Key [MENU]. 2. Press Media Center.3. Press Music & Tones.4. Press My Sounds.5. Use the Directional Key toscroll and highlight a preloadedsound.Options with a sound filehighlighted:●Press the Left Soft Key [Erase].●Press the Center Select Key[PLAY].●Press the Right Soft Key [Options] to select:Send/ To Online Album/Rename/ Move/ Lock(Unlock)/Erase All/ File Info1.6 Sync MusicAllows you to synchronize musicclips from a PC to your phone.Verify that the transfer wassuccessful on the confirmationscreen.Download music to your PC1. Open Music Manager. Don’thave music manager? Downloadit for free atwww.verizonwireless.com/musicmanager.2. Select the Buy Music tab.3. Log in.4. Go to My Purchases.5. Songs that you’ve purchased buthave not yet downloaded areindicated by an icon in the “d/l”column on the right-hand side ofthe list of songs.6. Check the box(es) of songs youwish to download.7. Select “Download.”8. To play the song, you can find itby selecting the Music On My PCtab.NOTES●V CAST Music will only work with Windows®XP and Windows VistaTM operating systems,with Windows Media®Player 10 or higher.Mac OS is not supported.●Acompatible USB cable (sold separately) isrequired for syncing.Sync your music from your PC toyour V CAST Music wirelessdevice](https://usermanual.wiki/LG-Electronics-USA/VX8610-DC/User-Guide-954837-Page-49.png)
![512. Picture & VideoView, take, and trade your digitalpictures and videos right from yourwireless phone. Access and Options1. With the slide open, press theCenter Select Key [MENU]. 2. Press Media Center.3. Press Picture & Video.4. Select a submenu.2.1 V CAST VideosV CAST brings the world to yourmobile phone with full-motion videoand sound. Catch up with what’shappening with video clips fromnews, sports, entertainment, orweather (must be in V CASTcoverage area. Additional fees mayapply).1. With the slide open, press theCenter Select Key [MENU]. 2. Press Media Center.3. Press Picture & Video.4. Press V CAST Videos.Browsing, Selecting, and PlayingVideo Clips1. With the slide open, press theCenter Select Key [MENU]. 2. Press Media Center.3. Press Picture & Video.4. Press V CAST Videos toopen Video Clips Catalog. 5. Use the Directional Key tohighlight Video Clip categoriesincluding News, Entertainment,Sports, and Weather then pressthe Center Select Key toselect.6. Highlight content provider, thenpress the Center Select Key . 7. If applicable, highlight a sub-category, then press the CenterSelect Key .8. Highlight the video clip you wantto view, then press the CenterSelect Key .To view a Streaming Video1. With the slide open, press theCenter Select Key [MENU]. 2. Press Media Center.3. Press Picture & Video.4. Press V CAST Videos.5. Select a Video Clip Category anda Video Clip, and press the](https://usermanual.wiki/LG-Electronics-USA/VX8610-DC/User-Guide-954837-Page-51.png)
![52MEDIA CENTERCenter Select Key .6. Read the description of the videoclip, and press the Center SelectKey to view.7. Select Yes to accept charges,press the Center Select Key and the Video Clip will initiatetransfer.8. The video clip will beginplayback shortly after beingselected. To download a Video Clip1. With the slide open, press theCenter Select Key [MENU]. 2. Press Media Center.3. Press Picture & Video.4. Press V CAST Videos.5. Highlight a video clip, then pressthe Center Select Key .6. Read the description of the videoclip and press the Right Soft Key[Options].7. Press Save Video.8. Select Yes to accept charges,press the Center Select Key and the video clip will initiatedownloading of video.9. Once video is downloaded amessage will appear on yourphone.10. Select Yes and press the CenterSelect Key to view video.11. The video clip will beautomatically saved in My Clipsand in My Videos. NOTENot all videos are downloadable.Only videos that have the option tosave can be downloaded. Additionalcharges for each video clip viewedmay apply. Video Clips service is notavailable in all areas. Checkwww.verizonwireless.com/getitnowwebsite for details.Deleting Video Clips1. With the slide open, press theCenter Select Key [MENU]. 2. Press Media Center.3. Press Picture & Video.4. Press V CAST Videos.5. Press the Left Soft Key [MyVideos]. 6. Highlight the Video to deleteusing the Directional Key .7. Press the Right Soft Key [Options] and press Erase.](https://usermanual.wiki/LG-Electronics-USA/VX8610-DC/User-Guide-954837-Page-52.png)
![538. Press the Center Select Key [Yes] to erase Video.Configure Alerts for New VideoClips1. With the slide open, press theCenter Select Key [MENU]. 2. Press Media Center.3. Press Picture & Video.4. Press V CAST Videos.5. From Video Clips Catalog, selecta category.6. Select Content Provider. 7. Press the Right Soft Key [Options]. 8. Select Alerts.9. Select Configure Alerts.10. Select content for alerts desiredand press the Center Select Keyto save.2.2 Get New PicturesAllows you to connect to MEDIACENTER and download a variety ofimages for My Pictures.1. With the slide open, press theCenter Select Key [MENU]. 2. Press Media Center.3. Press Picture & Video.4. Press Get New Pictures.5. Press the Center Select Key .2.3 My PicturesAllows you to view photos stored inthe phone.1. With the slide open, press theCenter Select Key [MENU]. 2. Press Media Center.3. Press Picture & Video.4. Press My Pictures.5. Highlight a picture with theDirectional Key and pressthe Right Soft Key [Options]. 6. Select one of the followingoptions:Send Picture Message/ ToOnline Album/ Via BluetoothSet As Wallpaper/ Picture IDTake Picture Turns on thecamera function.Get New Pictures Downloadsvarious pictures.Manage My Pics Allows you tomark multiple pictures to beerased, moved or locked/unlocked.Rename Allows you to changethe file name.Print Print via Bluetooth/ PrintPreferences](https://usermanual.wiki/LG-Electronics-USA/VX8610-DC/User-Guide-954837-Page-53.png)
![54MEDIA CENTERFile Info Name/ Date/Time/Resolution/ SizeNOTEThe option 'Send via Bluetooth' is notdisplayed when you select picturesprotected by DRM (Digital RightsManagement).Additional OptionsUse the Directional Key tohighlight a picture, then press [VIEW] to access additionaloptions:Full View Displays the photo usingthe entire screen.Edit Allows you to zoom, rotate andcrop the photo.2.4 My VideosAllows you to view videos stored inthe phone.1. With the slide open, press theCenter Select Key [MENU]. 2. Press Media Center.3. Press Picture & Video.4. Press My Videos.5. Highlight a video with theDirectional Key and pressthe Right Soft Key [Options]. Send Sends a video message.Record Video Turns on the videocamera function.To Online Album Accesses theOnline Album.V CAST Videos Accesses V CAST Videos feature.Manage My Videos Allows youto mark multiple videos to beerased, moved or locked/unlocked.Set As Wallpaper Displays theselected video file as thebackground for your phone.Rename Renames the selectedvideo.File Info Name/ Date/ Time/Duration/ Size6. Press the Center Select Key to play.NOTEFile storage varies according to thesize of each file as well as memoryallocation of other applications.●: Adjust the volume.●Left Soft Key : Mute/ Unmute●: Pause/ Play●Up Navigation Key : Showsthe widescreen.●Down Navigation Key : Stop●Right Navigation Key : FF●Left Navigation Key :Rewind](https://usermanual.wiki/LG-Electronics-USA/VX8610-DC/User-Guide-954837-Page-54.png)
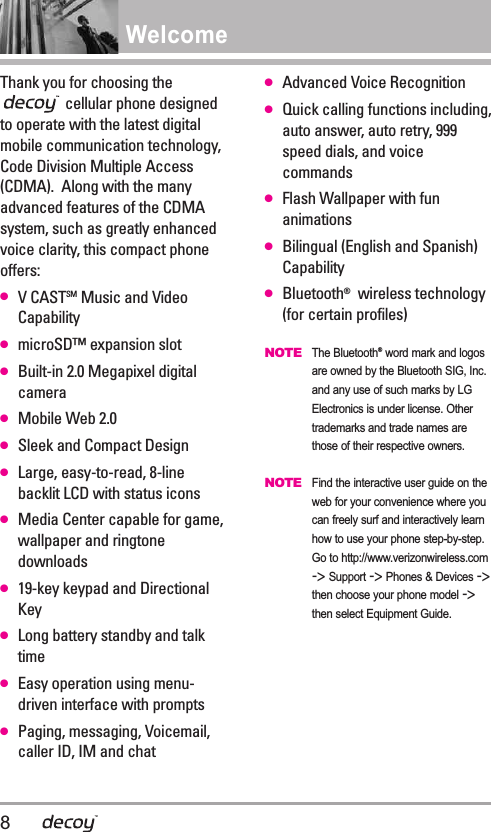
![557. Press the Right Soft Key [Options] to select one of thefollowing options:Set As Wallpaper/ File Info2.5 Take PictureLets you to takedigital pictures.1. With the slideopen, press theCenter SelectKey [MENU]. 2. Press Media Center.3. Press Picture & Video.4. Press Take Picture.5. Set the brightness by moving theDirectional Key Up and Down, zoom by moving theDirectional Key left and right ,and press the Right Soft Key [Options] to change othersettings.●Select the option(s) to customize.RESOLUTION 1600x1200/1280X960/ 640X480/ 320X240 SELF TIMER Off/ 3 Seconds/ 5 Seconds/ 10 SecondsWHITE BALANCE Auto/ Sunny/Cloudy/ Fluorescent/ GlowSHUTTER SOUND Shutter/ NoSound /Say “Cheese”/ Ready! 1 2 3COLOR EFFECTS Normal/Negative/ Aqua/ Sepia/Black&White NIGHT MODE On/ OffSAVE OPTION Internal/ ExternalPHOTOMETRY Average/ SpotPREVIEW Actual view/ FullscreenCAPTURE Camera/ Video6. Take a picture by press thecenter select key [TAKE]. 7. Press the Left Soft Key [Save]. The picture is stored inMy Pictures. 2.6 Record VideoLets you record avideo with sound.1. With the slideopen, press theCenter SelectKey [MENU]. 2. Press Media Center.3. Press Picture & Video.4. Press Record Video.5. Set the brightness by moving theDirectional Key Up and Down](https://usermanual.wiki/LG-Electronics-USA/VX8610-DC/User-Guide-954837-Page-55.png)
![56MEDIA CENTER, zoom by moving theDirectional Key left and right ,and press the Right Soft Key [Options] to change othersettings.RECORDING TIME For Send/ ForSaveRESOLUTION 320X240/ 176X144 SAVE OPTION Internal/ ExternalCOLOR EFFECTS Normal/Negative/ Aqua/ Sepia/Black&WhiteWHITE BALANCE Auto/ Sunny/Cloudy/ Fluorescent/ GlowCAPTURE Camera/ Video6. Press the Center Select Key [REC] to begin recording, andagain to stop.7. Press the Left Soft Key [Save]. The recorded video isstored in My Videos. 2.7 Online AlbumUse to access the Online Album(PIX Place).1. With the slide open, press theCenter Select Key [MENU]. 2. Press Media Center.3. Press Picture & Video.4. Press Online Album.3. GamesAllows you to download games andapplications from the MEDIACENTER server. Choose thesoftware you want from the listdisplayed on the screen.1. With the slide open, press theCenter Select Key [MENU]. 2. Press Media Center.3. Press Games.4. Press the Center Select Key Get New Applications.4. Mobile WebThe Mobile Web feature allowsyou to access news, sports,weather, and email from yourVerizon Wireless device. Accessand selections within this featureare dependent upon your serviceprovider. For specific information onMobile Web access through yourphone, contact your serviceprovider.1. With the slide open, press theCenter Select Key [MENU]. 2. Press Media Center.3. Press Mobile Web.Ending a Browser SessionEnd a Browser session by pressing.](https://usermanual.wiki/LG-Electronics-USA/VX8610-DC/User-Guide-954837-Page-56.png)
![58MEDIA CENTERTo change the input mode, pressthe Right Soft Key . To create anupper case character, press .Deleting Text/Number EnteredWhen entering text or numbers,press to clear the lastnumber, letter, or symbol. Press andhold to clear the input fieldcompletely.Initiating a Phone Call From theBrowserYou can make a phone call from theBrowser if the site you are usingsupports the feature (the phonenumber may be highlighted and theLeft Soft Key appears as Call).The browser connection isterminated when you initiate thecall. After you end the call, yourphone returns to the screen fromwhich you initiated the call.5. Browse & DownloadEverything you need to know whileyou’re on the go. 1. With the slide open, press theCenter Select Key [MENU]. 2. Press Media Center.3. Press Browse &Download.4. Press the Center Select Key Get New Applications.VZ NavigatorSM Now you can find the address of agreat restaurant or the nearestATM. Check movie times. Discoverthe latest hot spots. And knowexactly how to get where you’regoing. VZ Navigator puts all theadvanced features of the latest GPSdevices and systems on yourwireless device — at a fraction ofthe price.NOTES ●To use VZ Navigator, you mustturn location on. (See page 81)●Download, subscription andairtime required for use; only inNational Enhanced ServiceCoverage Area: accuracy andcompleteness of information isnot guaranteed; informationabout location of device will beused to deliver service.6. Extras1. With the slide open, press theCenter Select Key [MENU].2. Press Media Center.3. Press Extras.4. Press the Center Select Key Get New Applications.](https://usermanual.wiki/LG-Electronics-USA/VX8610-DC/User-Guide-954837-Page-58.png)
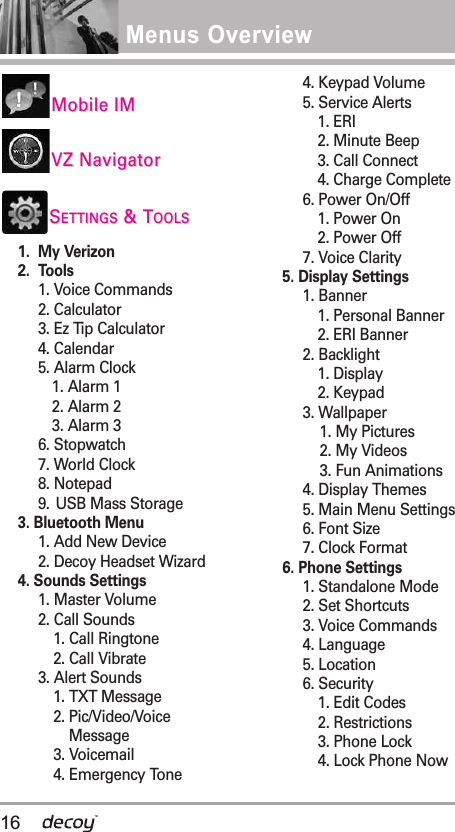
![59EEMMAAIILLThe Email Menu allows you to setup your email account andconveniently exchange emailswirelessly with your device. To usethis feature, download appropriateapplications first; read theinstructions on your device andfollow them.1. With the slide open, press theCenter Select Key [MENU].2. Press Email.MMOOBBIILLEE IIMMThe Mobile IM Menu allows you totalk to your friends without actuallytalking. AIM, WL Messenger,Yahoo! Instant Messenger are justa few of the available Mobile IMapplications you can use with your.1. With the slide open, press theCenter Select Key [MENU].2. Press Mobile IM.EMAIL / MOBILE IM](https://usermanual.wiki/LG-Electronics-USA/VX8610-DC/User-Guide-954837-Page-59.png)
![60VZ NAVIGATORVVZZ NNAAVVIIGGAATTOORRThe VZ Navigator Menu allows youto get directions to locations whenyou're out and about. ●Voice-prompted turn-by-turndirections with auto-rerouting ifyou miss a turn●View detailed color maps thatcan be panned and zoomed●Find points of interest1. With the slide open, press theCenter Select Key [MENU].2. Press VZ Navigator.](https://usermanual.wiki/LG-Electronics-USA/VX8610-DC/User-Guide-954837-Page-60.png)
![61SSEETTTTIINNGGSS && TTOOOOLLSS1. My VerizonCheck your subscriptioninformation ranging from yourpayment plan to your softwareupgrade or other available service.1. With the slide open, press theCenter Select Key [MENU]. 2. Press Settings & Tools.3. Press My Verizon.2. ToolsYour phone tools include VoiceCommands, Calculator, Ez TipCalculator, Calendar, Alarm Clock,Stopwatch, World Clock, Notepad,and USB Mass Storage.2.1 Voice CommandsThis feature provides you with thefollowing options equipped withAVR (Advanced Voice Recognition)technology. Each option has itsdetailed information on the phoneand you can check it out bypressing the Left Soft Key [Info].Access and Options1. With the slide open, press theVoice Command Key .The Voice Commands Feature hasseveral settings which allow you tocustomize how you want to use it.Access Voice Commands, thenpress the Right Soft Key [Settings].Digit Dial Readout On/ OffChoice List Automatic/ Always OffSensitivity Control the sensitivity asReject More/ Automatic/ RejectLess.Train Voice If the phone often asksyou to repeat voice command, trainthe phone to recognize your voicepatterns. Prompts Mode/ Audio Playback/TimeoutFor Mode, set Prompts/ Readout +Alerts/ Readout/ Tones Only. ForAudio Playback, set Speakerphoneor Earpiece. For Timeout, set 5 seconds or 10 seconds.Call Alert Ring Only/ Caller ID +Ring/ Name RepeatSETTINGS & TOOLS](https://usermanual.wiki/LG-Electronics-USA/VX8610-DC/User-Guide-954837-Page-61.png)
![632.2 CalculatorAllows you to perform simplemathematical calculations. You canenter numbers up to the eighthdecimal place. Calculations can bemade with up to 4 lines at one time.1. With the slide open, press theCenter Select Key [MENU]. 2. Press Settings & Tools.3. Press Tools. 4. Press Calculator.5. Enter the numbers to get thevalue you want. To cancel anumber, press the Left Soft Key[Clear]. 6. Use the Right Soft Key [Operators] to add parenthesis orpower among numbers forcalculation.7. Use the Directional Key toenter operation betweennumbers and press the CenterSelect Key [ = ] for the result.NOTETo insert a decimal, press . Toinsert ±, press .2.3 Ez Tip CalculatorAllows you to quickly and easilycalculate bill amounts using the billtotal, tip % and number of people asvariables.1. With the slide open, press theCenter Select Key [MENU]. 2. Press Settings & Tools.3. Press Tools. 4. Press Ez Tip Calculator.5. Enter the variable fields (Totalbill, Tip (%), Split) and thecorresponding calculation fields(tip and total for each person)appear automatically.6. Press the Left Soft Key [Reset] for another calculation.2.4 CalendarAllows you to keep your agendaconvenient and easy to access.Simply store your appointments andyour phone will alert you with areminder you set.SHORTCUTPressing the Directional Keydownward from standbymode is a hot key to Calendarby default.1. With the slide open, press theCenter Select Key [MENU].](https://usermanual.wiki/LG-Electronics-USA/VX8610-DC/User-Guide-954837-Page-63.png)
![64SETTINGS & TOOLS2. Press Settings & Tools.3. Press Tools. 4. Press Calendar.5. Use the Directional Key tohighlight the scheduled day.Left : Previous DayRight : Next DayUp : Previous Week Down : Next Week6. Press the Left Soft Key [Add].7. Enter Subject, then scroll downto set remaining settings.8. Highlight a Calendar setting field,then press the Left Soft Key [Set]. For each Calendar eventyou can set:●Start Time ●End Time●Repeat ●Until●Alerts ●Tones●Vibrate9. Use the Directional Key tohighlight a setting.10. Press the Center Select Key [SAVE] when Calendarinformation is complete.2.5 Alarm ClockAllows you to set up to threealarms. At the alarm time, Alarm 1(or 2 or 3) will be displayed on theLCD screen and the alarm willsound.1. With the slide open, press theCenter Select Key [MENU]. 2. Press Settings & Tools.3. Press Tools. 4. Press Alarm Clock.5. Use the Directional Key tohighlight an Alarm (1, 2, or 3),then press the Center Select Key.6. Enter the alarm informationincluding:●Turn On/Off ●Set Time●Repeat ●Ringtone7. Use the Directional Key tohighlight the information youwant to set, then press the LeftSoft Key [Set] to view yoursetting choices.8. Press the Center Select Key [SAVE] after setting all of theAlarm fields as necessary.When the alarm goes off, firstpress the Right Soft Key [Unlock] to unlock the screen.](https://usermanual.wiki/LG-Electronics-USA/VX8610-DC/User-Guide-954837-Page-64.png)
![65Choose Snooze or Dismiss, thenpress the Directional Key . 2.6 StopwatchAllows you to use your phone astypical stopwatch. Start measuringtime and finish it press the centerselect key . Press the Left SoftKey to lap. Press the Right SoftKey [Reset]. 1. With the slide open, press theCenter Select Key [MENU]. 2. Press Settings & Tools.3. Press Tools. 4. Press Stopwatch.2.7 World Clock Allows you to determine the currenttime in another time zone or countryby navigating with the DirectionalKey to the right or left. 1. With the slide open, press theCenter Select Key [MENU]. 2. Press Settings & Tools.3. Press Tools. 4. Press World Clock.5. Press the Right Soft Key [Cities] to check out a list ofavailable cities.6. Select a city from the list, thenpress the Center Select Key . The display shows the position ofthe city on a global map. 7. Press the Center Select Key again to zoom in on the city andview its date and timeinfomation.NOTEWith the Left Soft Key [Set DST],set to daylight saving time.2.8 Notepad Allows you to add, read, edit, anderase notes to yourself.1. With the slide open, press theCenter Select Key [MENU]. 2. Press Settings & Tools.3. Press Tools. 4. Press Notepad.5. Press the Left Soft Key [Add] to write a new note.6. Press the Left Soft Key tochange the entry mode. 7. After filling in the note, press theCenter Select Key to save it.](https://usermanual.wiki/LG-Electronics-USA/VX8610-DC/User-Guide-954837-Page-65.png)
![66SETTINGS & TOOLS2.9 USB Mass StorageThis menu allows you to transfercontent from your phone to yourWindows®XP or Windows Vista™PC (or vice versa) when your phoneis connected to your Windows®XPor Windows Vista™PC with acompatible USB cable. Mac OSoperating system is not supported. You can only access this menuwhen a microSD card is inserted inyour phone.NOTEDo not insert or remove the microSDwhile playing, deleting or downloadingPictures/Videos/Music/Sounds.1. With the slide open, press theCenter Select Key [MENU]. 2. Press Settings & Tools.3. Press Tools. 4. Press USB Mass Storage.3. Bluetooth®Menu The is compatible withdevices that support the Bluetooth®headset, hands-free, dial-upnetworking, object push forContacts including name cards andCalendar events, Advanced AudioDistribution (Stereo), File TransferProfile(s), PhoneBook AccessProfile, Basic Printing Profile andBasic Imaging Profile.* You may create and store 20pairings within the andconnect to one device with/withoutheadset. The approximate communicationrange for Bluetooth®wirelesstechnology is up to 30 feet (10meters).Bluetooth QD ID B013586NOTERead the user guide of eachBluetooth®accessory that you aretrying to pair with your phone becausethe instructions may be different. NOTEYour phone is based on the Bluetooth®specification, but it is not guaranteedto work with all devices enabled withBluetooth®wireless technology.Phone does not support ALLBluetooth®OBEX Profiles.* For vehicle/accessory compatibility go towww.verizonwireless.com/bluetoothchart.TIPS ●HEADSET:Supports use of acompatible bluetooth headset formono voice.●HANDSFREE: Supports Bluetoothheadsets, and may also support otherinstalled compatible Bluetooth deviceswith speakerphone capabilities, suchas car kits or a conference roomdevice. For Handsfree Car KitCompatibility, refer towww.verizonwireless.com/bluetoothcharton the Verizon Wireless website.●DIAL UP NETWORKING: Allows thephone to be used as a data modemwith a compatible Bluetooth device,such as a laptop or PDA, over theVZW NationalAccess and / or VZWBroadbandAccess systems.●STEREO: Supports delivery of stereoaudio to a compatible Bluetoothdevice.](https://usermanual.wiki/LG-Electronics-USA/VX8610-DC/User-Guide-954837-Page-66.png)
![67●PHONEBOOK ACCESS: Allowssharing of your name card,phonebook entries, and call historywith a compatible Bluetooth device. ●BASIC PRINTING: Allows printing ofJPEG files to a Bluetooth enabledprinter.●OBJECT PUSH: Allows sending andreceiving of contact name cards,calendar events, and JPEG picturesbetween devices.●FILE TRANSFER: Allows acompatible Bluetooth device to view alist of files and transfer non-protectedfiles in either direction.●BASIC IMAGING: Allows sending ofnon-protected images for storing andprinting.1. With the slide open, press the CenterSelect Key [MENU] -> pressMEDIA CENTER -> pressPicture & Video -> pressMy Pictures.2. Use the Directional Key tohighlight the picture you want to print. 3. Press the Right Soft Key [Options]. 4. Use the Directional Key tohighlight Print, then press the CenterSelect Key . To Print viaBluetooth, press the Center SelectKey . 3.1 Add New DevicePairing is the process that allowsthe handset to locate, establish,and register 1-to-1 connection withthe target device. For pairing with a new Bluetooth®deviceNOTEFor instructions on how to pair yourintegrated Bluetooth®Headset, see page 72.1. Follow the Bluetooth®accessoryinstructions to set the device topairing mode.2. With the slide open, press theCenter Select Key [MENU]. 3. Press Settings & Tools.4. Press Bluetooth Menu.5. Press Add New Device.Set the desired device to pairing.6. If Bluetooth®power is set to off,you will be prompted to turnpower on. Highlight Yes andpress the Center Select Key .7. The device will appear in AddNew Device menu once it hasbeen located. Highlight thedevice and press the CenterSelect Key .8. The handset will prompt you forthe passcode. Consult theBluetooth®accessoryinstructions for the appropriatepasscode (typically “0000” - 4zeroes). Enter the passcode and](https://usermanual.wiki/LG-Electronics-USA/VX8610-DC/User-Guide-954837-Page-67.png)
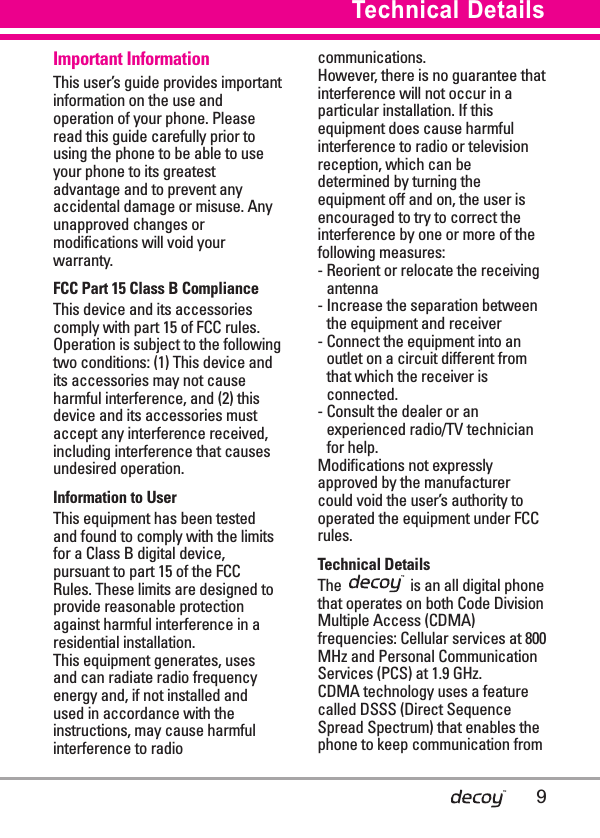
![69● Icon References WhenSuccessfully ConnectedMy Device NameAllows you to edit the name of theBluetooth®device when Add NewDevice menu is highlighted.1. With the slide open, press theCenter Select Key [MENU]. 2. Press Settings & Tools.3. Press Bluetooth Menu.4. Press the Right Soft Key [Options].5. Press My Device Info.6. Press to clear the existingname.7. Use the numeric keypad to entera new custom name.8. Press the Center Select Key to save and exit.TIPBluetooth®wireless connection isdependent on your Blueooth stereodevice. Even though you want toconnect with a headset that supportsboth stereo and handsfree profiles,you may only be able to connect withone. Turn OnAllows you to set the phone'sBluetooth®power On/Off.1. With the slide open, press theCenter Select Key [MENU]. 2. Press Settings & Tools.3. Press Bluetooth Menu.4. Press the Left Soft Key [Turn On].NOTEBy default, your device’s Bluetooth®functionality is turned off. When an only monoheadset is connected withyour deviceWhen an only stereoheadset is connected withyour deviceWhen stereo headsets andmono headsets are allconnected with your deviceWhen an only monoheadset is connected withyour deviceWhen an only stereoheadset is connected withyour deviceWhen stereo headsets andmono headsets are allconnected with your device](https://usermanual.wiki/LG-Electronics-USA/VX8610-DC/User-Guide-954837-Page-69.png)
![70SETTINGS & TOOLSDiscovery ModeAllows you to set whether yourdevice is able to be searched byother Bluetooth devices in the area.1. With the slide open, press theCenter Select Key [MENU]. 2. Press Settings & Tools.3. Press Bluetooth Menu.4. Press the Right Soft Key [Options].5. Press Discovery Mode.6. Use the Directional Key tohighlight a setting, then press theCenter Select Key .On / OffNOTEIf you choose On for Discovery Mode,your device is able to be searched byother in-range Bluetooth®devices.Supported ProfilesAllows you to see profiles that yourphone can support.1. With the slide open, press theCenter Select Key [MENU]. 2. Press Settings & Tools.3. Press Bluetooth Menu.4. Press the Right Soft Key [Options].5. Press Supported Profiles.Dial-up NetworkingIn order to start a dial-upnetworking session:1. Start the Bluetooth serviceapplication or program presenton the Client device.2. Find your phone’s name from thelist of available devices.3. From the list of available servicesor menu, select dial-upnetworking.4. Enter required information suchas ID, password and phonenumber in the "Connect To"dialog box.5. Press the "Dial" button to initiatethe call. Once the connection isestablished, you can start usingthe Internet.File TransferIn order to start a file transfersession:1. Start the Bluetooth serviceapplication or program presenton the Client device. 2. Find your phone’s name from thelist of available devices.](https://usermanual.wiki/LG-Electronics-USA/VX8610-DC/User-Guide-954837-Page-70.png)
![713. From the list of available servicesor menu, select file-transferservice. 4. A separate window appears withthe directory structure of yourphone. You are now able totransfer files to and from theClient device.Phonebook Access Please refer to your handsfreedevice or car audio system manualfor further instructions.Last SearchAllows you to view information fordevices you have tried to search forat least once.1. With the slide open, press theCenter Select Key [MENU]. 2. Press Settings & Tools.3. Press Bluetooth Menu.4. Press the Right Soft Key [Options].5. Press Last Search.Auto Pair HandsfreeAllows the Bluetooth pairing withan audio device to be triedautomatically with a default PINcode- 0000.1. With the slide open, press theCenter Select Key [MENU]. 2. Press Settings & Tools.3. Press Bluetooth Menu.4. Press the Right Soft Key [Options].5. Press Auto Pair Handsfree.For headset devices: 1. Remove Device: You can removethe device from the pairing list. 2. Rename Device: You can renamethe name of the paired device. 3. Service Discovery: Allows you tosearch for the services that theselected device supports.4. Device Info: Shows the deviceinformation. NOTESIn the pairing list, you can disconnect theconnected device with the blue arrow signalby press the Left Soft Key [Turn Off].Reversely, you can turn it on by press theLeft Soft Key [Turn On]again.When an audio device is connected, thenyou select another device and press theCenter Select Key , both devices areconnected.In case your search fails to find any pairingdevice, select found device instead.Print Picture allows you to print to devicesthat support BPP profiles.](https://usermanual.wiki/LG-Electronics-USA/VX8610-DC/User-Guide-954837-Page-71.png)
![72SETTINGS & TOOLS3.2 Decoy Headset WizardAllows your detachable Bluetooth Headset to be paired withyour phone.1. With the slide open, press theCenter Select Key [MENU].2. Press Settings & Tools.3. Press Bluetooth Menu.4. Press Decoy Headset Wizardand follow the on-screeninstructions.5. Detach the headset from thephone.NOTEIn order for headset to pair, it cannotbe attached to the phone. 6. Press the Center Select Key [NEXT].7. Hold down the PWR/Call buttonon the headset topower it on allowing the phoneto locate it.8. Press the Center Select Key [NEXT].9. Wait while the phone andheadset synchronize.10. Once synchronization iscomplete you will see aconfirmation message. Pressthe Center Select Key [DONE] and you can begin usingyour headset.NOTEIf you want to turn the headset off,press the Left Soft Key [TurnOff] or press the Center Select Key[Drop].Headset Options1. With the slide open, press theCenter Select Key [MENU].2. Press Settings & Tools.3. Press Bluetooth Menu.4. Use the Directional Key toscroll to your Decoy Bluetoothheadset device.5. Press the Right Soft Key [Options].6. Select from the listed options.](https://usermanual.wiki/LG-Electronics-USA/VX8610-DC/User-Guide-954837-Page-72.png)
![74SETTINGS & TOOLS2. Un-Pair with HeadsetSelect Yes to unpair headset.3. Rename HeadsetEnter new name and press theCenter Select Key to save.4. Device InfoYou can check paired deviceinformation. 5. Headset Light You can check paired status withheadset light.4. Sounds SettingsProvides options to customize thephone’s sounds.4.1 Master Volume Allows you to set volume settings.1. With the slide open, press theCenter Select Key [MENU]. 2. Press Settings & Tools.3. Press Sounds Settings. 4. Press Master Volume.5. Adjust the volume with theDirectional Key then pressthe Center Select Key tosave the setting.4.2 Call Sounds Allows you to set how the phonealerts you for types of incomingcalls.1. With the slide open, press theCenter Select Key [MENU]. 2. Press Settings & Tools.3. Press Sounds Settings. 4. Press Call Sounds.4.2.1 Call Ringtone 1. With the slide open, press theCenter Select Key [MENU].2. Press Settings & Tools.3. Press Sounds Settings.4. Press Call Sounds. 5. Press Call Ringtone.6. Use the Directional Key to highlight a ringtone thenpress the Center Select Keyto save the sound.4.2.2 Call Vibrate1. With the slide open, press theCenter Select Key [MENU].2. Press Settings & Tools.3. Press Sounds Settings. 4. Press Call Sounds. 5. Press Call Vibrate.](https://usermanual.wiki/LG-Electronics-USA/VX8610-DC/User-Guide-954837-Page-74.png)
![756. Use the Directional Key to highlight a setting, thenpress the Center Select Key.On/ Off4.3 Alert SoundsAllows you to select the alert typefor a new message.1. With the slide open, press theCenter Select Key [MENU]. 2. Press Settings & Tools.3. Press Sounds Settings. 4. Press Alert Sounds.5. Select TXT Message/Pic/Video/Voice Message/Voicemail/Emergency Tone6. The Alert Sounds menu hasthese options:Tone/ Vibrate/ ReminderThe exception for this is theEmergency Tone menu. Thismenu has these options:Alert/ Vibrate/ Off4.4 Keypad Volume Allows you to set the keypadvolume.1. With the slide open, press theCenter Select Key [MENU]. 2. Press Settings & Tools.3. Press Sounds Settings. 4. Press Keypad Volume.5. Adjust the volume with theDirectional Key then pressthe Center Select Key tosave the setting.4.5 Service Alerts Allows you to set any of the fourAlert options to either On or Off.1. With the slide open, press theCenter Select Key [MENU]. 2. Press Settings & Tools.3. Press Sounds Settings. 4. Press Service Alerts.5. Select an alert option.ERI Alerts you to the status ofcellular service. ERI: Enhanced RoamingIndicatorMinute Beep Alerts you 10seconds before the end of everyminute during a call.Call Connect Alerts you whenthe call is connected.Charge Complete Alerts youwhen the battery is completelycharged. 6. Use the Directional Key tohighlight a setting, then press the](https://usermanual.wiki/LG-Electronics-USA/VX8610-DC/User-Guide-954837-Page-75.png)
![76SETTINGS & TOOLSCenter Select Key .On/ Off4.6 Power On/Off Allows you to set the phone tosound a tone when the phone ispowered on/off.1. With the slide open, press theCenter Select Key [MENU]. 2. Press Settings & Tools.3. Press Sounds Settings. 4. Press Power On/Off.5. Select Power On/ Power Off.6. Use the Directional Key tohighlight a setting, then press theCenter Select Key .On/ Off4.7 Voice ClarityAllows you to set the voice clarity.Using the Internal Keypad1. With the slide open, press theCenter Select Key [MENU]. 2. Press Settings & Tools.3. Press Sounds Settings. 4. Press Voice Clarity.5. Use the Directional Key tohighlight a setting, then press theCenter Select Key .On/ Off5. Display SettingsProvides options to customize thephone’s display screen.5.1 BannerAllows you to enter a string of up to23 characters which displays on theLCD screen.1. With the slide open, press theCenter Select Key [MENU]. 2. Press Settings & Tools.3. Press Display Settings. 4. Press Banner.5.1.1 Personal Banner1. With the slide open, press theCenter Select Key [MENU]. 2. Press Settings & Tools.3. Press Display Settings. 4. Press Banner.5. Press Personal Banner.6. Create your own banner textthen press the Center SelectKey [SAVE].](https://usermanual.wiki/LG-Electronics-USA/VX8610-DC/User-Guide-954837-Page-76.png)
![777. Use the Directional Key toscroll to one of the followingbanner colors, then press .Black/ White/ Red/ Blue/Green/ Pink/ Light Blue/Purple/ Gray5.1.2 ERI BannerIf you use ERI Service, ERI Text isshown on the sub banner.1. With the slide open, press theCenter Select Key [MENU]. 2. Press Settings & Tools.3. Press Display Settings. 4. Press Banner.5. Press ERI Banner.6. Use the Directional Key to highlight a setting, thenpress the Center Select Key.On/ Off5.2 BacklightAllows you to set the duration forilluminating the backlight. Displayand Keypad are set separately.1. With the slide open, press theCenter Select Key [MENU]. 2. Press Settings & Tools.3. Press Display Settings. 4. Press Backlight.5. Highlight a Backlight submenuand press the Center Select Key.Display/ Keypad1. Display: 7 Seconds/ 15Seconds/ 30 Seconds/ Always Off2. Keypad: 7 Seconds/ 15Seconds/ 30 Seconds/ Always On/ Always Off5.3 WallpaperAllows you to choose the kind ofbackground to be displayed on thephone's LCD in standby mode.1. With the slide open, press theCenter Select Key [MENU]. 2. Press Settings & Tools.3. Press Display Settings. 4. Press Wallpaper.5. Choose a submenu and pressthe Center Select Key .My Pictures/ My Videos/ FunAnimations6. Select from available screensthen press the Center Select Key.](https://usermanual.wiki/LG-Electronics-USA/VX8610-DC/User-Guide-954837-Page-77.png)
![78SETTINGS & TOOLS5.4 Display ThemesAllows you to choose the color ofthe background screen.1. With the slide open, press theCenter Select Key [MENU]. 2. Press Settings & Tools.3. Press Display Settings. 4. Press Display Themes.5. Use the Directional Key tohighlight a setting, then press theCenter Select Key .Classic/ Slick Black/ DecoyBlue/ Decoy BlackNOTEPress the Left Soft Key [Preview] to preview the selecteddisplay theme.5.5 Main Menu SettingsAllows you to choose how the MainMenu displays for menu selection.1. With the slide open, press theCenter Select Key [MENU]. 2. Press Settings & Tools.3. Press Display Settings. 4. Press Main MenuSettings.5. Use the Directional Key tohighlight a setting, then press theCenter Select Key .Tab/ List/ Grid5.6 Font SizeAllows you to set the dial font size.This setting is helpful for those whoneed the text to display a little bitlarger.1. With the slide open, press theCenter Select Key [MENU]. 2. Press Settings & Tools.3. Press Display Settings. 4. Press Font Size.5. Use the Directional Key toselect Dial Digits/ Menu & Lists/Message.6. Press the Left Soft Key [Set].7. Use the Directional Key tohighlight a setting, then press theCenter Select Key .Dial Digits: Normal/ LargeMenu & Lists: Normal/ LargeMessage: Normal/ Large](https://usermanual.wiki/LG-Electronics-USA/VX8610-DC/User-Guide-954837-Page-78.png)
![795.7 Clock Format Allows you to choose the kind ofclock to be displayed on the LCDscreen.1. With the slide open, press theCenter Select Key [MENU]. 2. Press Settings & Tools.3. Press Display Settings. 4. Press Clock Format.5. Use the Directional Key tohighlight a setting, then press theCenter Select Key .Normal/ Analog/ Digital 12/Large Digital 12/ Digital 24/Large Digital 24/ Dual (Set Cityin World Clock)/ OffNOTEPress the Left Soft Key [Preview] to preview the selectedclock format.6. Phone SettingsThe Phone Settings Menu allowsyou to designate specific settings tocustomize how you use your phone.6.1 Standalone Mode (Airplane Mode)Allows you to use the menufunctions except making calls,Bluetooth®feature, and webaccessing, when radio transmissionis restricted. Activating StandaloneMode will disable all wirelesscommunications. When inStandalone Mode, servicessupporting Location On functionality(such as Chaperone) will besuspended.1. With the slide open, press theCenter Select Key [MENU]. 2. Press Settings & Tools.3. Press Phone Settings.4. Press Standalone Mode.5. Use the Directional Key tohighlight a setting, then press theCenter Select Key .On/ Off6.2 Set ShortcutsAllows you to set shortcuts tophone menus using the down, up,left and right Directional Key.6.2.1 Set My ShortcutsAccess these shortcuts by pressingthe Directional Key to the right fromstandby mode (by default) to displayyour four shortcuts.1. With the slide open, press theCenter Select Key [MENU].](https://usermanual.wiki/LG-Electronics-USA/VX8610-DC/User-Guide-954837-Page-79.png)
![80SETTINGS & TOOLS2. Press Settings & Tools. 3. Press Phone Settings.4. Press Set Shortcut Keys.5. Press Set My Shortcuts.6. Use the Directional Key tohighlight a shortcut key you wantto set. Shortcut 1/ Shortcut 2/ Shortcut3/ Shortcut 46.2.2 Set Directional KeysAccess these shortcuts fromstandby mode by pressing theDirectional Key in the direction youdesignate.1. With the slide open, press theCenter Select Key [MENU]. 2. Press Settings & Tools.3. Press Phone Settings.4. Press Set Shortcuts.5. Press Set Directional Keys.6. Use the Directional Key tohighlight a shortcut key you wantto set. Up Directional Key/ LeftDirectional Key/ DownDirectional Key6.3 Voice CommandsUsing the Internal Keypad1. With the slide open, press theCenter Select Key [MENU]. 2. Press Settings & Tools.3. Press Phone Settings.4. Press Voice Commands.Prompts Mode/ AudioPlayback/ TimeoutFor Mode, set Prompts/ Readout+Alerts/ Readout/ Tones Only.For Audio Playback, setSpeakerphone/ Earpiece. ForTimeout, set 5 seconds or 10seconds. Call Alert Ring Only/ Caller ID +Ring/ Name Repeat6.4 LanguageAllows you to set the bilingual(English or Spanish) featureaccording to your preference. 1. With the slide open, press theCenter Select Key [MENU]. 2. Press Settings & Tools.3. Press Phone Settings.4. Press Language.](https://usermanual.wiki/LG-Electronics-USA/VX8610-DC/User-Guide-954837-Page-80.png)
![815. Use the Directional Key tohighlight a setting, then press theCenter Select Key .English/ Español6.5 LocationAllows you to set GPS (GlobalPositioning System: Satelliteassisted location informationsystem) mode.1. With the slide open, press theCenter Select Key [MENU]. 2. Press Settings & Tools.3. Press Phone Settings.4. Press Location.5. Use the Directional Key tohighlight a setting, then press theCenter Select Key .Location On/ E911 OnlyNOTES ●GPS satellite signals are notalways received by the phone,especially under bad atmosphericand environmental conditions,indoors, etc.●When a Location SettingRestriction is activated in theSecurity Menu, the lock code isrequired when you enter locationmenu. The lock code is the same 4digits you use as your device lockcode; initially the last 4 digits ofyour phone number.●When in Standalone Mode,services supporting Location Onfunctionality (such as Chaperone)will be suspended.6.6 SecurityThe Security menu allows you tosecure the phone electronically.1. With the slide open, press theCenter Select Key [MENU]. 2. Press Settings & Tools.3. Press Phone Settings.4. Press Security.5. Enter the four-digit lock code.The lock code is the last 4 digitsof your mobile phone number if itis set.The lock code is the last 4 digitsof your MEID if your mobilephone number is not set.6.6.1 Edit CodesAllows you to enter a new four-digit lock code.1. With the slide open, press theCenter Select Key [MENU].2. Press Settings & Tools.3. Press Phone Settings.4. Press Security.5. Enter the four-digit lock code.6. Press Edit Codes.7. Select Phone Only or Calls &Services.](https://usermanual.wiki/LG-Electronics-USA/VX8610-DC/User-Guide-954837-Page-81.png)
![82SETTINGS & TOOLS8. Enter your new four-digit lockcode.9. For confirmation, it will askyou to enter the new lockcode again.6.6.2 Restrictions Allows you to set separaterestrictions for Location Setting,Calls, Messages, and Dial UpModem.1. With the slide open, press theCenter Select Key [MENU].2. Press Settings & Tools.3. Press Phone Settings.4. Press Security.5. Enter the four-digit lock code.6. Press Restrictions.7. Enter the four-digit PIN code.8. Select a Restrictions menuthen press the Center SelectKey .Location Setting/ Calls(Incoming Calls/ OutgoingCalls)/ Messages (IncomingMessages/ OutgoingMessages)/ Dial-up Modem9. Use the Directional Key to highlight restriction thenpress the Center Select Key. Location Setting Lock Setting/Unlock SettingCalls Incoming Calls/Outgoing Calls Messages IncomingMessages/ OutgoingMessages Dial-up Modem Allow All/Block All6.6.3 Phone LockKeeps your phone fromunauthorized use. Once thephone is locked, it's in restrictedmode until the lock code isentered. You can receive phonecalls and still make emergencycalls. You can modify the lockcode using Edit Codes submenuwithin the Security menu.1. With the slide open, press theCenter Select Key [MENU]. 2. Press Settings & Tools.3. Press Phone Settings.4. Press Security.5. Enter the four-digit lock code.](https://usermanual.wiki/LG-Electronics-USA/VX8610-DC/User-Guide-954837-Page-82.png)
![836. Press Phone Lock.7. Highlight an option then pressthe Center Select Key .Unlocked The phone is neverlocked (Lock mode can beused). On Power Up The phone islocked when it is turned on.6.6.4 Lock Phone Now1. With the slide open, press theCenter Select Key [MENU]. 2. Press Settings & Tools.3. Press Phone Settings.4. Press Security.5. Enter the four-digit lock code.6. Press Lock Phone Now.6.6.5 Reset Default Allows you to reset your phoneto the factory default settings.1. With the slide open, press theCenter Select Key [MENU]. 2. Press Settings & Tools.3. Press Phone Settings.4. Press Security.5. Enter the four-digit lock code.6. Press Reset Default.7. Press the Center Select Keyafter reading the warningmessage.8. Select Revert by pressing thecenter select key .A confirmation message isdisplayed briefly before thephone resets itself.6.6.6 Restore PhoneAllows you to erase all user dataand Contact information you'veentered in the phone's memoryso it's as if it just left the factory.1. With the slide open, press theCenter Select Key [MENU]. 2. Press Settings & Tools.3. Press Phone Settings.4. Press Security.5. Enter the four-digit lock code.6. Press Restore Phone.7. Press the Center Select Keyafter reading the warningmessage.8. Enter the four-digit lock code.](https://usermanual.wiki/LG-Electronics-USA/VX8610-DC/User-Guide-954837-Page-83.png)
![84SETTINGS & TOOLS6.7 System SelectAllows you to set up the phonemanagement environment. Leavethis setting as the default unlessyou want to alter system selectionas instructed by your serviceprovider.1. With the slide open, press theCenter Select Key [MENU]. 2. Press Settings & Tools.3. Press Phone Settings.4. Press System Select.5. Use the Directional Key tohighlight a setting, then press theCenter Select Key .Home Only/ Automatic6.8 NAM SelectAllows you to select the phone’sNAM (Number AssignmentModule) if the phone is registeredwith multiple service providers.1. With the slide open, press theCenter Select Key [MENU]. 2. Press Settings & Tools.3. Press Phone Settings.4. Press NAM Select.5. Use the Directional Key tohighlight a setting, then press theCenter Select Key .NAM1/ NAM26.9 Auto NAMAllows the phone to automaticallyswitch between programmedtelephone numbers correspondingto the service provider area.1. With the slide open, press theCenter Select Key [MENU]. 2. Press Settings & Tools.3. Press Phone Settings.4. Press Auto NAM.5. Use the Directional Key tohighlight a setting, then press theCenter Select Key .On/ Off](https://usermanual.wiki/LG-Electronics-USA/VX8610-DC/User-Guide-954837-Page-84.png)
![857. Call SettingsThe Call Settings Menu allows youto designate how the phonehandles both incoming andoutgoing calls.7.1 Answer OptionsAllows you to determine how thephone will answer an incoming call.1. With the slide open, press theCenter Select Key [MENU]. 2. Press Settings & Tools.3. Press Call Settings. 4. Press Answer Options.5. Use the Directional Key tohighlight a setting, then press theCenter Select Key .Slide Up/ OK Key/ Auto withHandsfreeNOTEAuto with Handsfree is availableonly when any external device isconnected to your phone. When the following settings are set,Ringer is not activated.●When All Sounds Off / AlarmOnly is set or individual ContactRinger ID is set to No Ring/Silence.●When Ringer is set to mute withside key or "Quiet".7.2 End Call OptionsAllows you to determine how thephone will disconnect a call.1. With the slide open, press theCenter Select Key [MENU]. 2. Press Settings & Tools.3. Press Call Settings. 4. Press End Call Options.5. Use the Directional Key tohighlight a setting, then press theCenter Select Key .Slide Down / OK Key](https://usermanual.wiki/LG-Electronics-USA/VX8610-DC/User-Guide-954837-Page-85.png)
![86SETTINGS & TOOLS7.3 Auto RetryAllows you to set the length of timethe phone waits beforeautomatically redialing a numberwhen the attempted call fails.1. With the slide open, press theCenter Select Key [MENU]. 2. Press Settings & Tools.3. Press Call Settings. 4. Press Auto Retry.5. Use the Directional Key tohighlight a setting, then press theCenter Select Key .Off/ Every 10 Seconds/ Every 30Seconds/ Every 60 Seconds7.4 TTY Mode Allows you to attach a TTY deviceenabling you to communicate withparties also using a TTY device. Aphone with TTY support is able totranslate typed characters to voice.Voice can also be translated intocharacters and then displayed onthe TTY.1. With the slide open, press theCenter Select Key [MENU]. 2. Press Settings & Tools.3. Press Call Settings. 4. Press TTY Mode.An explanation message isdisplayed.Menu User FeatureTransmission/Receiving ModeWhen makingcommunications with anormal terminal TTY FullFor hearing-/verbally-impairedtext message transmission,text message receivingOperator requiredTTY +TalkFor hearing-impaired able to talk voice transmission, textmessage receivingOperator requiredTTY +HearFor verbally-impaired audible text message transmission,voice receiving Operator requiredTTY Offvoice transmission, voicereceivingTTY Mode (Tele Type writer)](https://usermanual.wiki/LG-Electronics-USA/VX8610-DC/User-Guide-954837-Page-86.png)
![875. Press the Center Select Key to continue.6. Use the Directional Key tohighlight a setting, then press theCenter Select Key .TTY Full/ TTY + Talk/ TTY + Hear/TTY OffTTY Full: Users who cannot talkand hear send and receive a textmessage through TTY equipment.TTY + Talk: Users who can talk butcannot hear receive a text messageand send voice through TTYequipment.TTY + Hear: Users who can hearbut cannot talk send a textmessage and receive voice throughTTY equipment.TTY Off: Users send and receivewithout TTY equipment.Connecting TTY Equipment and aTerminal1. Connect a TTY cable to TTYconnection on the terminal (TTYconnection location is the sameas a headset jack). 2. Enter the phone menu and set upthe desired TTY mode.3. After setting a TTY mode, checkthe LCD screen of the phone forthe TTY icon.4. Connect the TTY equipment tothe power source and turn it on.5. Make a phone connection to thedesired number.6. When connection is made, usethe TTY equipment to type in andsend a text message or sendvoice.7. The voice or text message fromthe receiver end displays on theTTY equipment display.7.5 One Touch Dial Allows you to initiate a speed dialcall by pressing and holding thespeed dial digit. If set to Off, SpeedDial numbers designated in yourContacts will not function.1. With the slide open, press theCenter Select Key [MENU]. 2. Press Settings & Tools.3. Press Call Settings. 4. Press One Touch Dial.5. Use the Directional Key tohighlight a setting, then press theCenter Select Key .On/ Off](https://usermanual.wiki/LG-Electronics-USA/VX8610-DC/User-Guide-954837-Page-87.png)
![88SETTINGS & TOOLS7.6 Voice PrivacyAllows you to set the voice privacyfeature for CDMA calls. CDMAoffers inherent voice privacy. Checkwith your service provider foravailability.1. With the slide open, press theCenter Select Key [MENU]. 2. Press Settings & Tools.3. Press Call Settings. 4. Press Voice Privacy.5. Use the Directional Key tohighlight a setting, then press theCenter Select Key .On/ Off7.7 DTMF TonesAllows you to set the DTMF tonelength.1. With the slide open, press theCenter Select Key [MENU]. 2. Press Settings & Tools.3. Press Call Settings. 4. Press DTMF Tones.5. Use the Directional Key tohighlight a setting, then press theCenter Select Key .Normal/ Long8. USB Auto DetectionYour phone automatically detects aUSB device when it is connected toyour phone for Sync Music or SyncData operation. If the option is setto Ask On Plug, you are asked toconfirm whenever the connection ismade. 1. With the slide open, press theCenter Select Key [MENU]. 2. Press Settings & Tools.3. Press USB Auto Detection.4. Use the Directional Key tohighlight a setting, then press theCenter Select Key .Sync Music/ Sync Data/ Ask OnPlug](https://usermanual.wiki/LG-Electronics-USA/VX8610-DC/User-Guide-954837-Page-88.png)
![899. MemoryAllows you to check your internal phone memory as well asthe microSD external memory. The can access thefollowing file types stored on theremovable microSD card.My Pictures: png, jpg, bmp, gifMy Sounds: mid, qcp (used forMMS, cannot be set as ringtones)My Videos: 3gp, 3g2My Music: wma, mp39.1 Save Options Allows you to select which memory(phone or memory card) to use tosave your files.1. With the slide open, press theCenter Select Key [MENU]. 2. Press Settings & Tools.3. Press Memory. 4. Press Save Options.5. Highlight Pictures/ Videos/Sounds then press the CenterSelect Key .6. Highlight Phone Memory/ CardMemory then press the CenterSelect Key .9.2 Phone Memory Shows the memory informationsaved in your phone.1. With the slide open, press theCenter Select Key [MENU]. 2. Press Settings & Tools.3. Press Memory. 4. Press Phone Memory.5. Highlight Memory Usage/ MyPictures/ My Videos/ My Music/My Sounds then press theCenter Select Key to viewthe memory used for each item.Store onStore onmicroSDCardTransferPhone toPC viaCardTransferPC toPhonevia CardV CASTMusic/ WMASongsWW W WRingtonesWSoundWW W WV CASTVideo ClipsWDownloadedPicture/VideoWPicture/Video (user-generated orreceived viaMMS)WW W W](https://usermanual.wiki/LG-Electronics-USA/VX8610-DC/User-Guide-954837-Page-89.png)
![90SETTINGS & TOOLS9.3 Card Memory Shows the memory informationsaved in the card.1. With the slide open, press theCenter Select Key [MENU]. 2. Press Settings & Tools.3. Press Memory. 4. Press Card Memory.5. Highlight Memory Usage/ MyPictures/ My Videos/ My Music/My Sounds then press theCenter Select Key .NOTEThe option Card Memory Usageshows the total used memory andmemory space remaining. NOTEDo not insert or remove the microSDwhile playing, deleting or downloadingPictures/Videos/ Music/Sounds.0. Phone InfoAllows you to view the informationspecific to your phone and software.1. With the slide open, press theCenter Select Key [MENU]. 2. Press Settings & Tools.3. Press Phone Info.0.1 My NumberAllows you to view your phonenumber.1. With the slide open, press theCenter Select Key [MENU]. 2. Press Settings & Tools.3. Press Phone Info.4. Press My Number.0.2 SW/HW VersionAllows you to view the versions ofvarious applications such as SW,PRL, ERI, Browser, Media Center,AVR, MMS, Bluetooth, MSUI, HW,MEID Version, and Warranty DateCode.1. With the slide open, press theCenter Select Key [MENU]. 2. Press Settings & Tools.3. Press Phone Info.4. Press SW/HW Version.0.3 Icon GlossaryAllows you to view all the icons andtheir meanings.1. With the slide open, press theCenter Select Key [MENU]. 2. Press Settings & Tools.3. Press Phone Info.](https://usermanual.wiki/LG-Electronics-USA/VX8610-DC/User-Guide-954837-Page-90.png)
![914. Press Icon Glossary. 0.4 Software UpdateThis feature gives your phone theability to upgrade to the latestsoftware and keeps your phoneoperating with the latest featureswithout visiting a Verizon WirelessCommunications Store for theupgrade. You can either be notifiedautomatically that there is anupdated version of softwareavailable for your phone, or you canmanually check to see if there areany updates available for you todownload.Automatic UpdateYour phone will receive anotification that there is an updatedversion of software available to bedownloaded. You can press theCenter Select Key whennotified that a download is availableor it can happen automatically.Once the download is complete youmay, depending on the nature of theupdate, have three optionsavailable: Accept the update, Deferthe update, or Reject the update.NOTEDuring the update you cannot makeor receive phone calls, including 911calls, or text messages.Manual Update1. With the slide open, press theCenter Select Key [MENU].2. Press Settings & Tools.3. Press Phone Info.4. PressSoftware Update.The two options shown will beStatus and Check New.Press Status to see thestatus of a download or updateand see information on the lastsuccessful update. If updates havenot yet been performed, statusinformation will be unavailable.Press Check New to checkif any new software updates areavailable to download. If a newersoftware version is available, it willautomatically begin downloadingafter 30 seconds or you can beginthe download immediately bypress the Center Select Key .To stop the software downloadpress the Right Soft Key [Quit].](https://usermanual.wiki/LG-Electronics-USA/VX8610-DC/User-Guide-954837-Page-91.png)
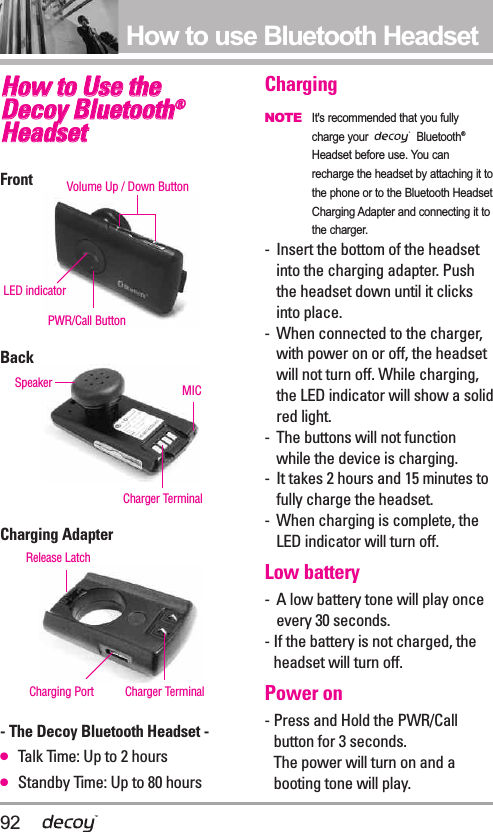
![93Power off- Press and hold the PWR/Callbutton for 5 seconds. A shutdown tone will play, theBluetooth link will disconnect,and the power will turn off.PairingBefore using the Decoy Bluetoothheadset for the first time, it must bepaired with the handset. There arethree Pairing Mode methods:●Decoy Headset Wizard (seepage 72)●Easy Pairing●Manual PairingNOTES ● If your headset has beenpaired to the handsetpreviously, the headset willautomatically reconnect to thehandset when you power iton.● The headset automaticallyturns off if it is left in PairingMode for three minuteswithout being connected to ahandset.● To pair with a different devicein the future, it must beplaced in Pairing Mode.Easy Pairing1. Turn on the Decoy HS device(Decoy Bluetooth headset).Press and hold the PWR/Callbutton for 3 seconds.- The headset enters Auto-Reconnect mode for 10 seconds- After 10 seconds, the headsetautomatically enters PairingMode and the LED indicatorlights to solid blue.2. Set your handset to PairingMode.- With the slide open, press theCenter Select Key [MENU],then .- Press Bluetooth Menu.- Press Add New Device.3. Select the Decoy Bluetoothheadset for pairing.- Highlight LG Decoy HS from thelist of devices, then press theCenter Select Key [Pair] topair it with your handset.- If asked for a pass code, enter“0000” (4 zeros).- Once pairing has completedsuccessfully, a beep will sound.4. Connect the headset andhandset.- Press the Center Select Key Yes when asked if you want toconnect to the headset.](https://usermanual.wiki/LG-Electronics-USA/VX8610-DC/User-Guide-954837-Page-93.png)
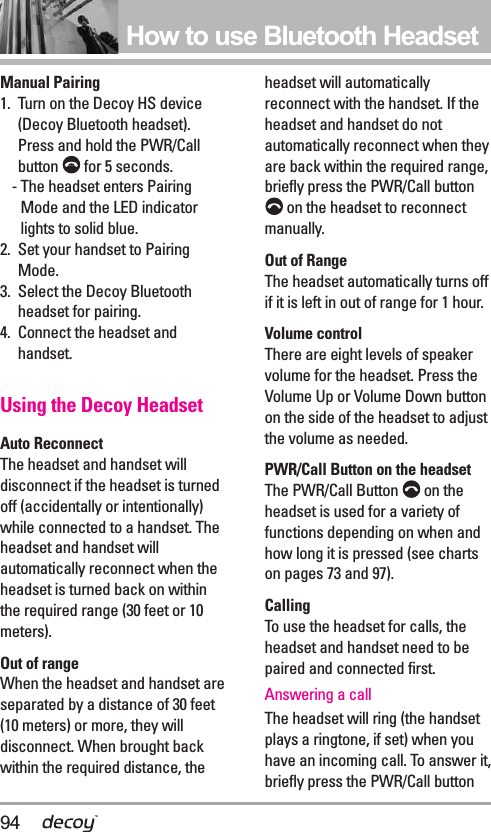
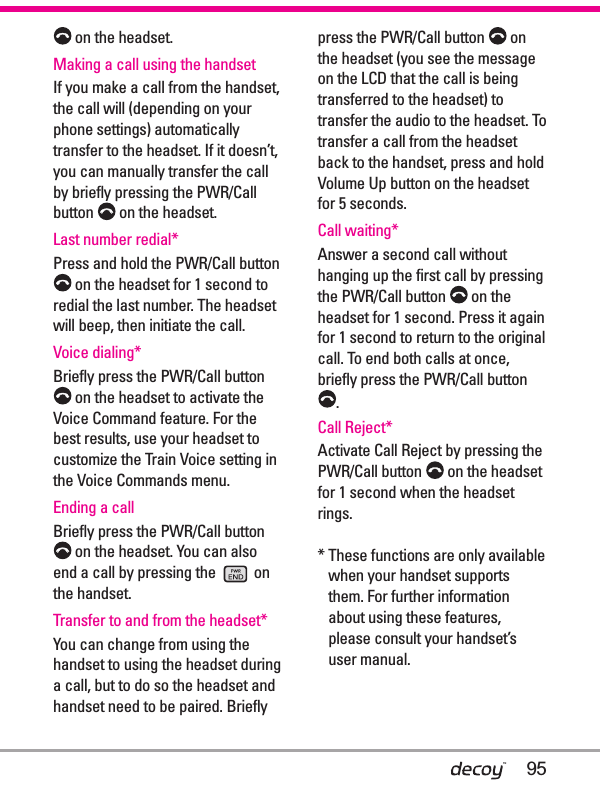
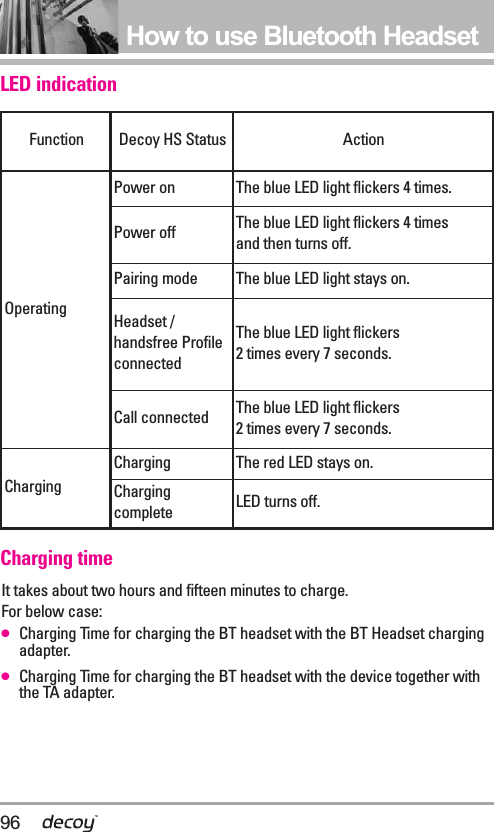
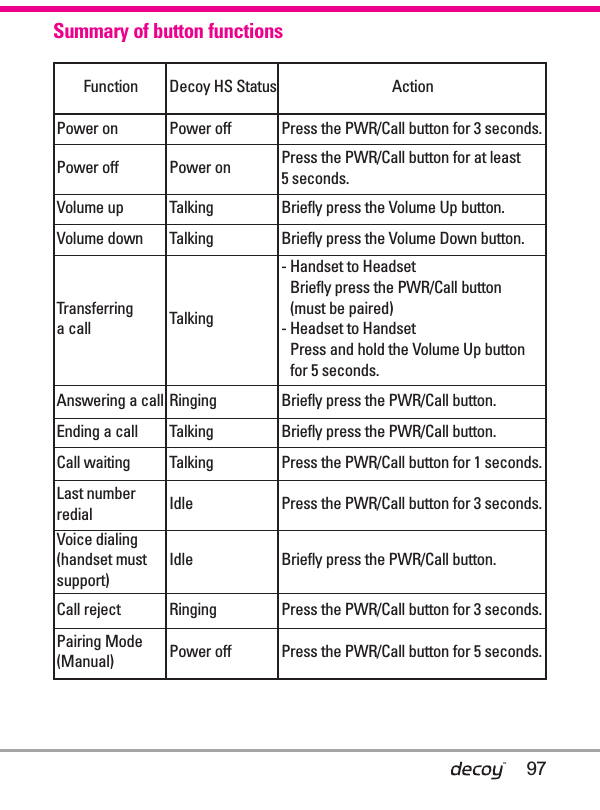
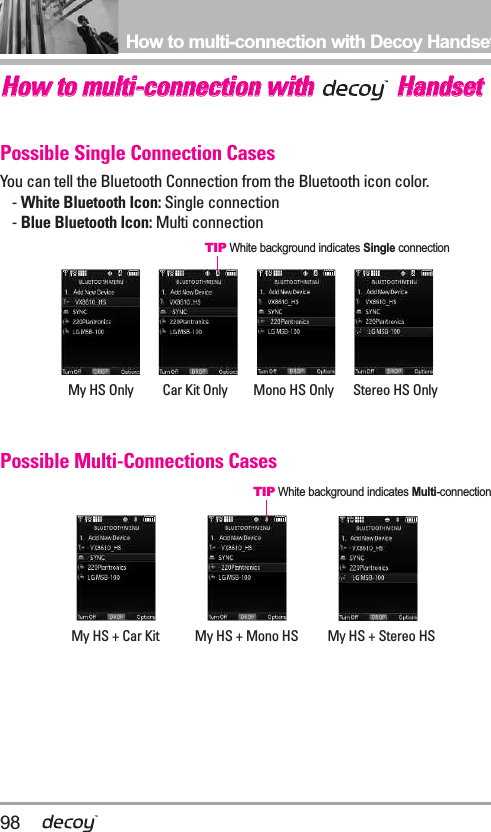
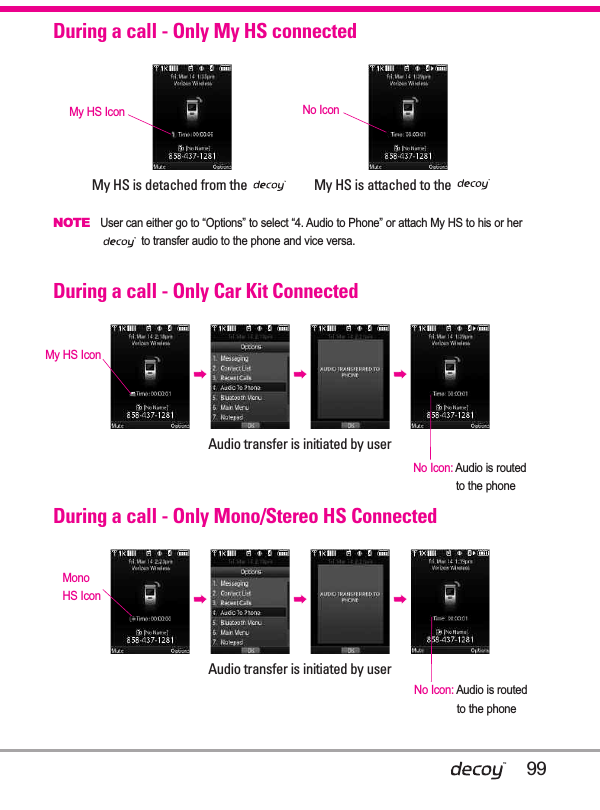
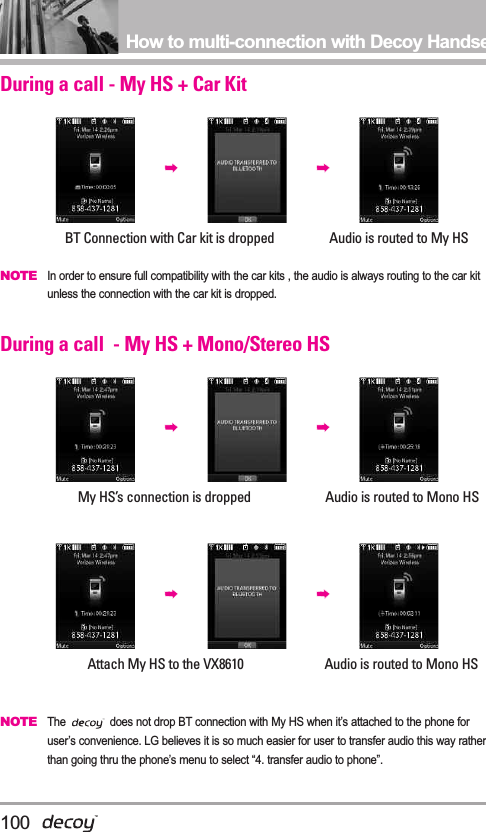
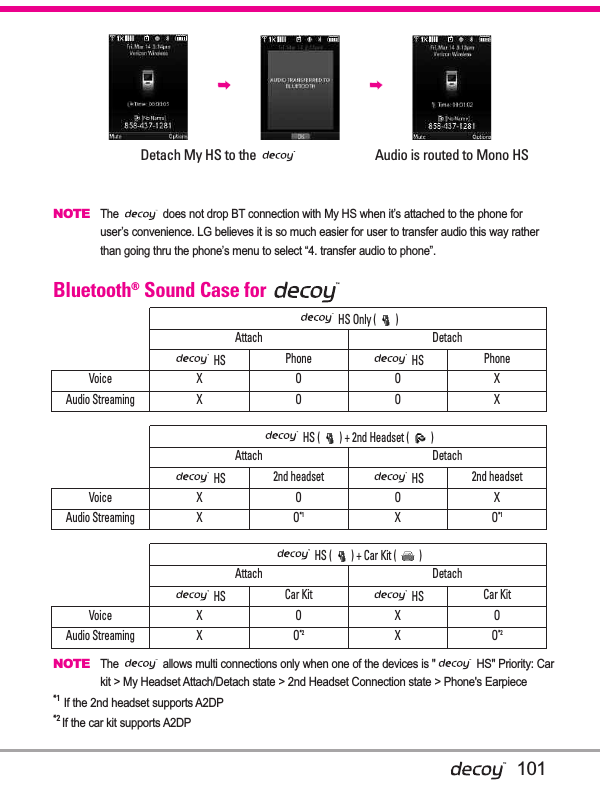
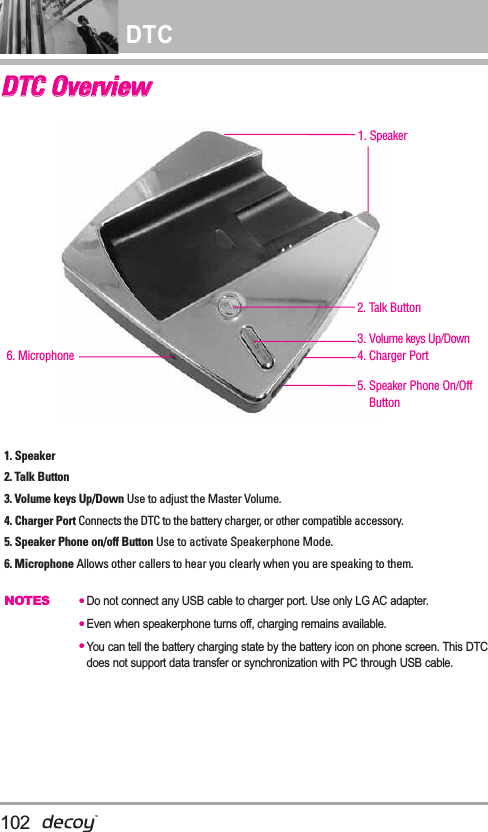
![103*InitializationHow to enter DTC Pairing mode Speakerphone function in DTC isbased on Bluetooth technology.You need use DTC as Bluetoothdevice except charging function.After powering on thespeakerphone on the located rightside of DTC, just wait until the BlueLED turns solid. If not, press TalkButton about 7 seconds. When theblue solid light around “Talk button”appears, you need to pair andconnect it with your asbelow: How to pair your Bluetooth DTC with yourwireless device1. With the slide open, press theCenter Select Key [MENU]. 2. Press Settings & Tools.3. Press Bluetooth Menu.4. Press Add New Device.5. After searching Decoy DC,proceed with auto pairing.6. Select Yes for the connection.*ConnectionWhen you are far from DTC above10m or power off DTC, BTconnection between your phoneand DTC is disconnected. Whenyou want to use DTC afterdisconnection, you must reconnectDTC to your phone. There are twomethods of re-connection.1. When speakerphone function isoff, you can reconnect by turningthe DTC speaker phone on.2. When speakerphone function ison, you can reconnect bypressing “Talk button” briefly.PairingTo enter pairing mode, press “TalkButton” for 7 seconds.ConnectionRe-link with phone(Whendisconnected): Press “Talk Button”briefly. Auto connection works when thespeakerphone is powered on.Incoming call1. Receive call on DTC: Press “TalkButton” briefly.2. Receive call on headset: Detachheadset and press “Talk Button”on headset.3. Receive call on phone: Power offspeakerphone and slide thephone up.](https://usermanual.wiki/LG-Electronics-USA/VX8610-DC/User-Guide-954837-Page-103.png)