LG Electronics USA X169TY Microwave Oven User Manual EMISSION TEST REPORT
LG Electronics USA Microwave Oven EMISSION TEST REPORT
User Manual

Order Number
: GETEC-C1-16-477
FCC Part 18
Test Report Number
: GETEC-E3-16-066
Page 1 / 1
EUT Type: Microwave Oven
FCC ID: BEJX169TY
APPENDIX H
: USER’S MANUAL

Write the model and serial
numbers here:
Model # _________________
Serial # _________________
Find these numbers on a label
inside the oven.
GE is a trademark of the General Electric Company. Manufactured under trademark license.
ESPAÑOL
Para consultar una version en
español de este manual de
instrucciones, visite nuestro sitio de
internet GEAppliances.com.
OWNER’S MANUAL
MICROWAVE OVEN
49-40777 11-16 GEA
PWB7027
PWB7030
CWB7030
Built-in Convection
SAFETY INFORMATION .......3-7
USING THE MICROWAVE
Features ..............................8
Clock .................................8
Controls ..............................9
BAKING AND ROASTING .......10
FAST COOKING .................. 11
WARMING AND PROOFING ....12
MICROWAVING ..................13
Cookware ............................13
Auto Cook ...........................13
Cook By Time ........................14
Add 30 Sec/My Cycle .................14
Power Levels .........................14
Cooking Tips .........................14
Defrost ..............................15
Sensor Cooking ......................16
Steam ...............................17
Things That Are Normal ...............17
OTHER FEATURES ..............18
CARE AND CLEANING
Inside .............................. 20
Turntable ........................... 20
Cooking Trays and Baking Sheets ...... 20
Outside ..............................21
Stainless Steel ........................21
TROUBLESHOOTING ............22
WARRANTY ......................23
CONSUMER SUPPORT ......... 24

2
49-40777
THANK YOU FOR MAKING GE APPLIANCES A PART OF YOUR HOME.
Whether you grew up with GE Appliances, or this is your first, we’re happy to have you in the family.
We take pride in the craftsmanship, innovation and design that goes into every GE Appliances
product, and we think you will too. Among other things, registration of your appliance ensures that we
can deliver important product information and warranty details when you need them.
Register your GE appliance now online. Helpful websites and phone numbers are available in the
Consumer Support section of this Owner’s Manual. You may also mail in the pre-printed registration
card included in the packing material.

49-40777
3
READ AND SAVE THESE INSTRUCTIONS
SAFETY INFORMATION
WARNING To reduce the risk of burns, electric shock, fire, injury to persons, or exposure to
excessive microwave energy:
When using electrical appliances, basic safety precautions should be followed, including the following:
■ Readallinstructionsbeforeusingthisappliance.
■ Readandfollowthespecificprecautionsinthe
PRECAUTIONS TO AVOID POSSIBLE EXPOSURE
TO EXCESSIVE MICROWAVE ENERGY section on
page 7.
■ Usethisapplianceonlyforitsintendeduseas
described in this manual. Do not use corrosive
chemicals or vapors in this appliance. This oven is
specifically designed to heat, dry or cook food, and is
not intended for laboratory or industrial use.
■ Thisappliancemustonlybeservicedbyqualified
service personnel. Contact nearest authorized
service facility for examination, repair or adjustment.
INSTALLATION
■ Installorlocatethisapplianceonlyinaccordance
with the provided installation instructions.
■ This appliance must be grounded. Connect only
to properly grounded outlet. See “GROUNDING
INSTRUCTIONS” found on page 7.
■ ThismicrowaveisULlistedforstandardwall
installation. See installation instructions for approved
appliances to mount over and under the microwave.
■ Do not operate this appliance if it has a damaged
power cord or plug, if it is not working properly, or if it
has been damaged or dropped.
■ Keepcordawayfromheatedsurfaces.
■ Do not let cord hang over the edge of the table or
counter
■ Donotimmersecordorpluginwater.
■ Donotcoverorblockanyopeningsonthe
appliance.
■ Donotstorethisapplianceoutdoors.Donotusethis
product near water—for example, in a wet basement,
near a swimming pool, near a sink or in similar
locations.
■ Donotmountthisapplianceoverasink.
TO REDUCE THE RISK OF FIRE IN THE CAVITY:
■ Do not overcook food. Carefully attend appliance
when paper, plastic or other combustible materials
are placed inside the oven to facilitate cooking.
■ Removewiretwist-tiesandmetalhandlesfrom
paper or plastic containers before placing them in
the oven.
■ Ifmaterialsinsidetheovenignite,keeptheoven
door closed, turn the oven off and disconnect the
power cord or shut off power at the fuse or circuit
breaker panel.
■ Donotstoreanymaterialsinthisovenwhennotin
use. Do not leave paper products, cooking utensils
or food in the cavity when not in use. All racks
should be removed from oven when not in use.
■ Donotoperatethemicrowavefeaturewithoutfoodin
the oven.
■ DonotusetheSensorFeaturestwiceinsuccession
on the same food portion. If food is undercooked
afterthefirstcountdown,useCOOKBYTIMEfor
additional cooking time.
■ Thewireovenrackshouldnotbeusedforfastcook
or microwave cooking to prevent arcing
TO REDUCE THE RISK OF BURNS:
■ Becarefulwhenopeningcontainersofhotfood.Use
pot holders and direct steam away from face and
hands.
■ Vent,pierce,orslitcontainers,pouches,orplastic
bags to prevent build-up of pressure.
■ Becarefulwhentouchingtheturntable,door,racks,
or walls of the oven which may become hot during
use.
■ Liquidsandcertainfoodsheatedinthemicrowave
oven can present a risk of burn when removing
them from the microwave. The potential for a burn is
greater in young children, who should not be allowed
to remove hot items from the microwave.
IMPORTANT SAFETY INFORMATION
READ ALL INSTRUCTIONS BEFORE USING THE APPLIANCE

4
49-40777
SAFETY INFORMATION
READ AND SAVE THESE INSTRUCTIONS
WARNING Arcing can occur during both fast cook and microwave cooking. If you see arcing, press
the CANCEL/OFF pad and correct the problem.
Arcing is the microwave term for sparks in the oven.
Arcing is caused by:
■ Metalorfoiltouchingthesideoftheoven.
■ Foilnotmoldedtofood(upturnededgesactlike
antennas).
■ Usefoilonlyasrecommendedinthismanual.
■ Metalcookwareusedduringeitherfast cook or
microwavecooking(exceptforthepansprovided
with the oven).
■ Metal,suchastwist-ties,poultrypins,or
gold-rimmed dishes, in the oven.
■ Recycledpapertowelscontainingsmallmetal
pieces being used in the oven.
IMPORTANT SAFETY INFORMATION
READ ALL INSTRUCTIONS BEFORE USING THE APPLIANCE
WARNING Continued
OPERATING
■ Aswithanyappliance,closesupervisionis
necessary when used by children.
■ Donotoperatetheovenwithouttheturntablein
place. The turntable must be unrestricted so it can
turn.
■ Donotstoreanythingdirectlyontopofthe
microwave oven surface when the microwave oven
is in operation.
■ Oversizedfoodsoroversizedmetalutensilsshould
not be inserted in a microwave/convection oven as
they may create a fire or risk of electric shock.
■ Do not use paper products in oven when appliance
is operating in any cooking mode except microwave.
■ Someproductssuchaswholeeggsandsealed
containers—for example, closed jars—are able to
explode and should not be heated in this oven.
■ Donotovercookpotatoes.Theycoulddehydrateand
catch fire, causing damage to your oven.
■ Donotcoverracksoranyotherpartoftheovenwith
metal foil. This will cause overheating of the oven.
■ Cookmeatandpoultrythoroughly—
meattoatleastanINTERNALtemperatureof160°F,
and poultry to at least an INTERNAL temperature
of180°F.Cookingtothesetemperaturesusually
protects against foodborne illness.
■ Thisovenisnotapprovedortestedformarineuse.
CLEANING
■ Keeptheovenfreefromgreasebuildup.
■ Donotcleanwithmetalscouringpads.Piecescan
burn off the pad and touch electrical parts involving a
risk of electric shock.
■ Whencleaningsurfacesofdoorandoventhat
comes together on closing the door, use only mild,
nonabrasive soaps, or detergents applied with a
clean sponge or soft cloth. Rinse well.
SUPER HEATED WATER
■ Liquids,suchaswater,coffee,ortea,areableto
be overheated beyond the boiling point without
appearing to be boiling. Visible bubbling or boiling
when the container is removed from the microwave
oven is not always present. THIS COULD RESULT
IN VERY HOT LIQUIDS SUDDENLY BOILING
OVER WHEN THE CONTAINER IS DISTURBED
OR A SPOON OR OTHER UTENSIL IS INSERTED
INTO THE LIQUID.
■ Toreducetheriskofinjurytopersons:
-Donotoverheattheliquid.
-Stirtheliquidbothbeforeandhalfwaythrough
heating it.
- Do not use straight-sided containers with narrow
necks.
- After heating, allow the container to stand in the
microwave oven for a short time before removing
the container.
- Use extreme care when inserting a spoon or other
utensil into the container.
49-40777
5
READ AND SAVE THESE INSTRUCTIONS
IMPORTANT SAFETY INFORMATION
READ ALL INSTRUCTIONS BEFORE USING THE APPLIANCE
SAFETY INFORMATION
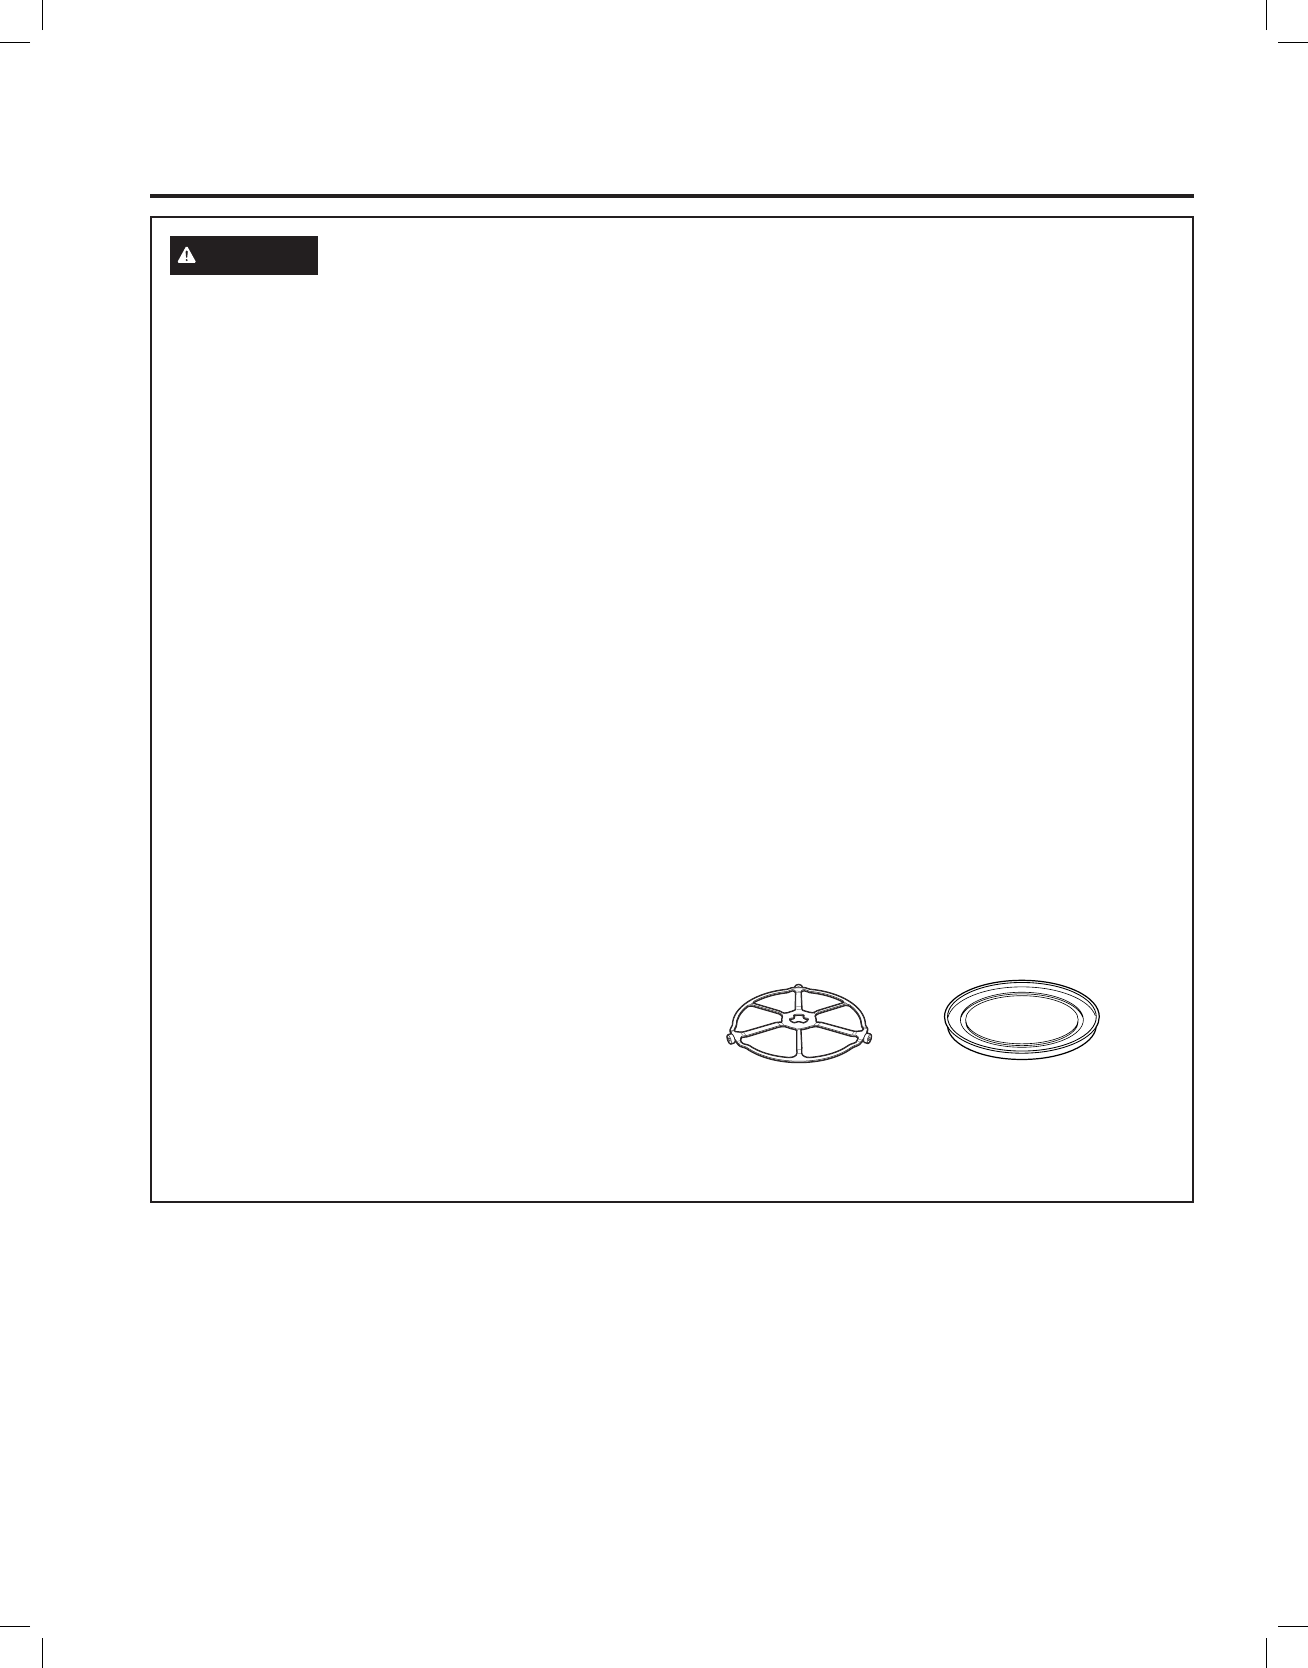
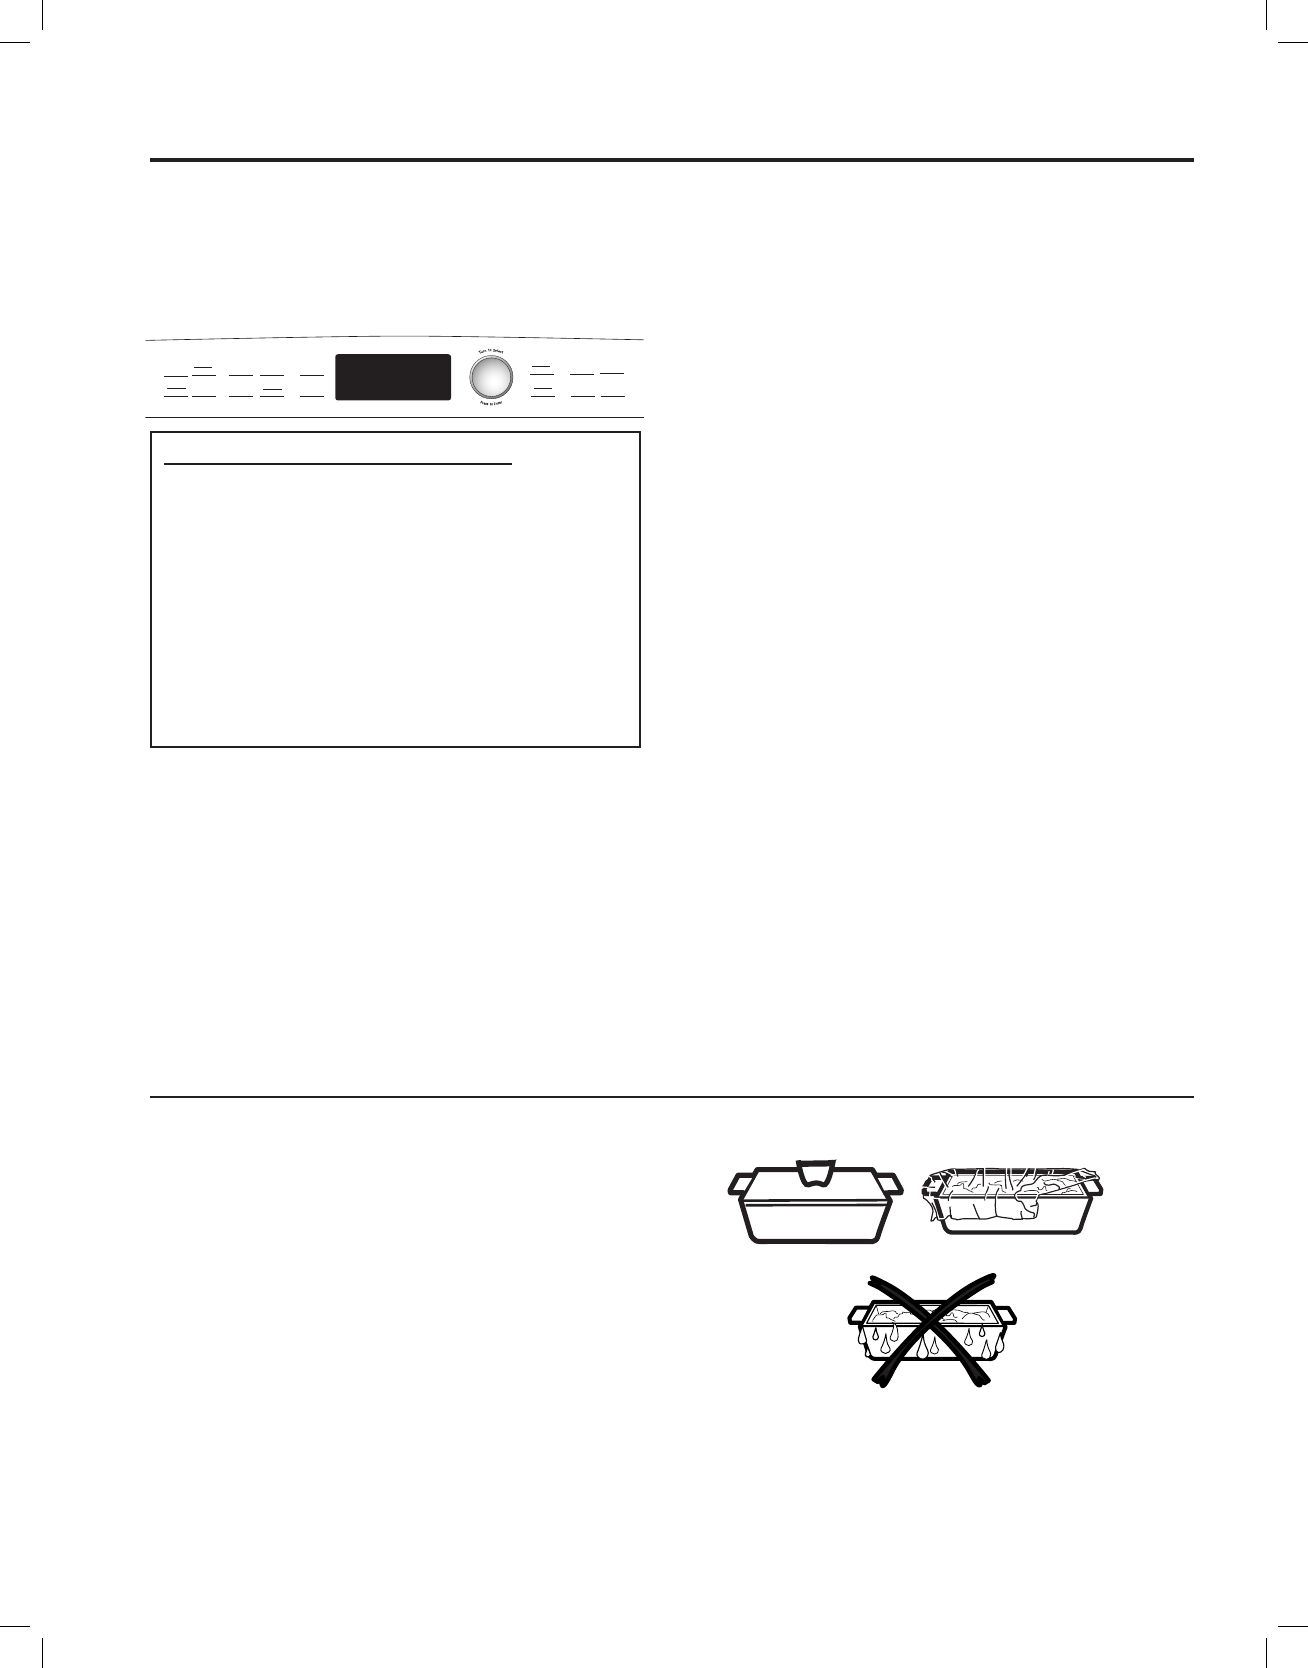
WARNING OVEN-SAFE COOKWARE FOR FAST COOK
■ The oven and door will get very hot when
FastCooking.
■ Cookware will become hot. Oven mitts will be
needed to handle the cookware.
■ Donotusecoverings,containersorcooking/
roasting bags made of foil, plastic or paper when
FastCooking.
■ Donotcoverturntable,wireovenrack,traysor
any part of the oven with metal foil. This will cause
arcing in the oven.
■ Thiscookingmodeusesbothmicrowaveand
convection heat. Glass or Glass-Ceramic
cookware is recommended. Heat-resistant plastic
microwaveablecookware(safeto450°F)maybe
used. Metal cookware cannot be used.
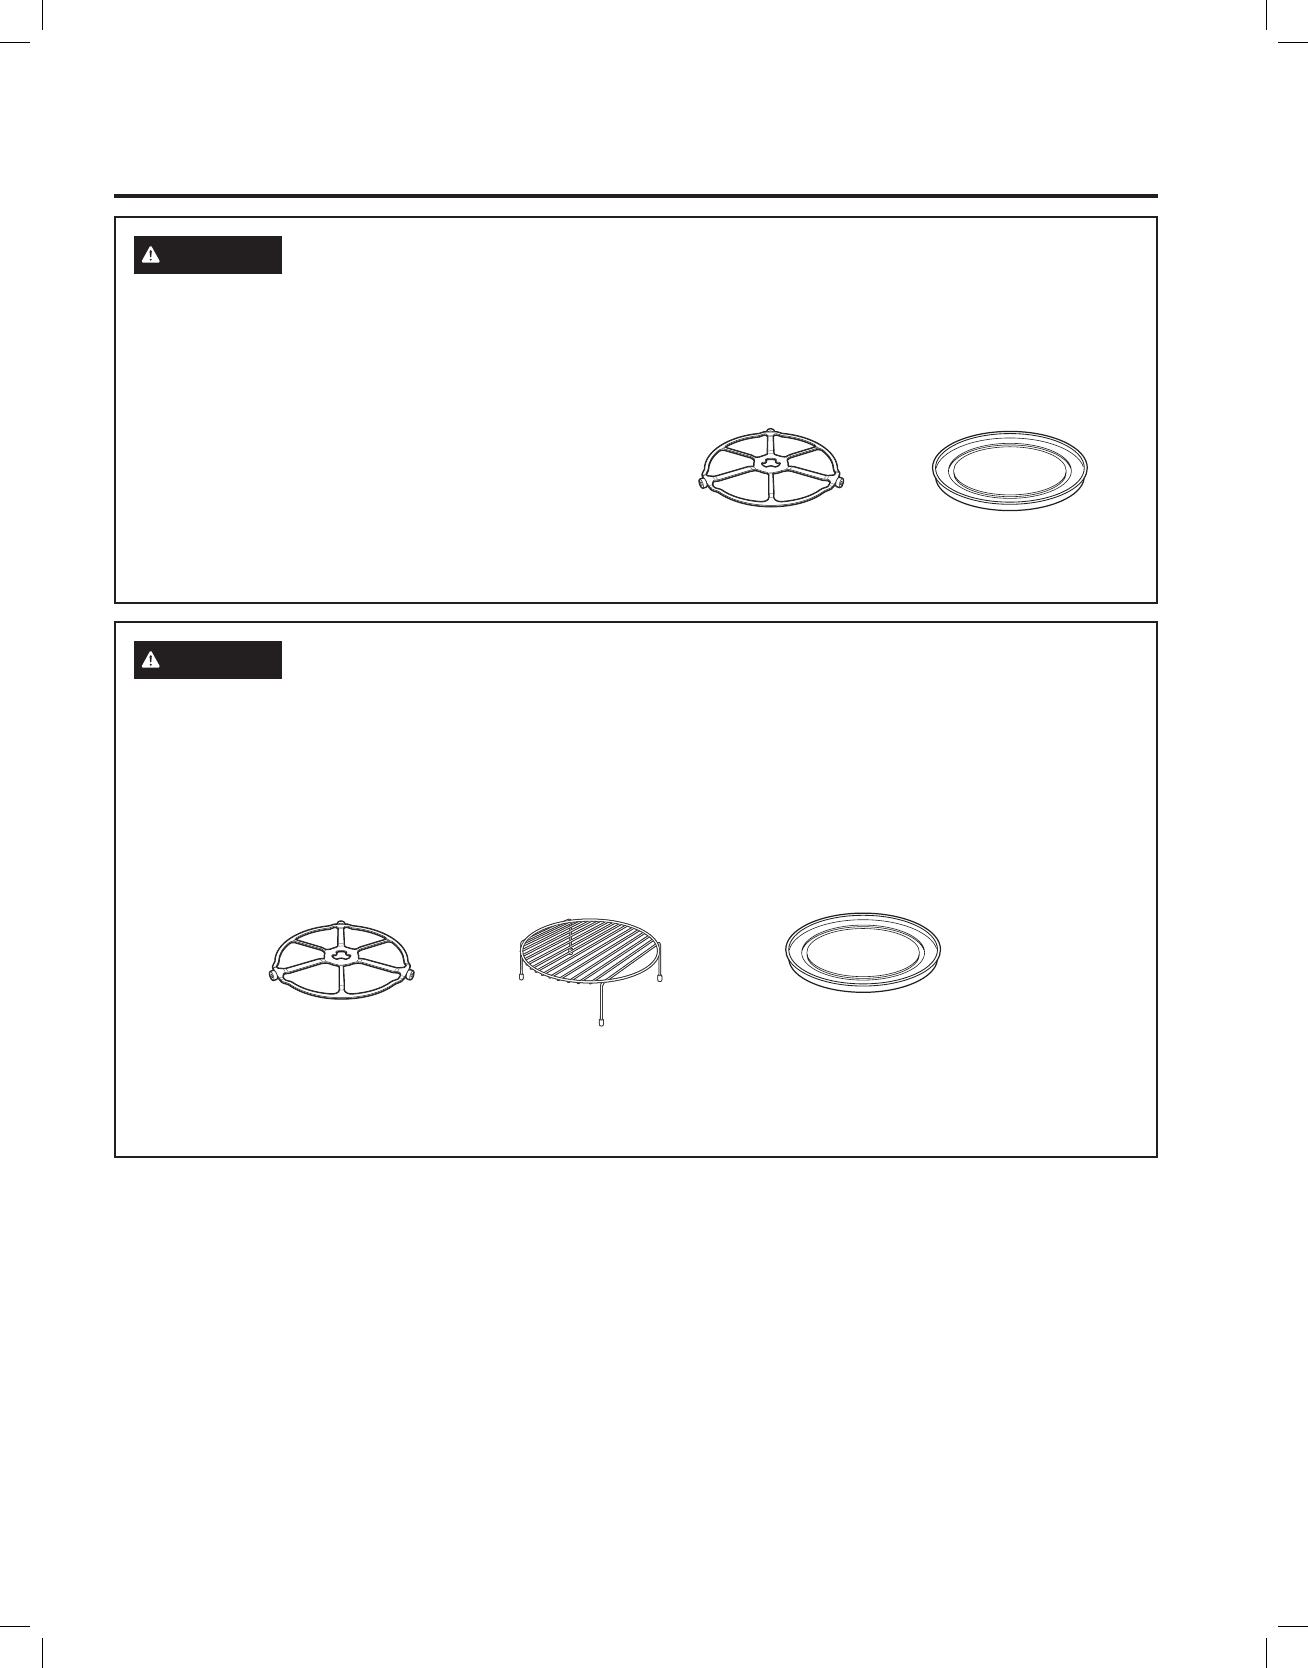
WARNING OVEN-SAFE COOKWARE FOR BAKING, ROASTING, WARMING,
AND PROOFING
■ The oven and door will get very hot when
baking, roasting, warming, or proofing.
■ Cookware will become hot. Oven mitts will be
needed to handle the cookware.
■ Donotcoverturntable,wireovenrack,traysor
any part of the oven with metal foil. This will cause
overheating.
■ Anyoven-safedishcanbeusedinyouroven.
Recipes were tested in Pyrex® glass cookware
and Corningware® ceramic casseroles. Cook times
and results may vary when using other types of
oven-safe dishes. Place them directly on the trays.
The turntable must always
be in place when using the
oven.
The turntable must always
be in place when using the
oven.
The clear glass tray should
always be in place when
microwaving.
Fortwo-levelbaking,placefoodina
metal baking dish on the glass tray.
Place your baking dish with food on top
of the wire rack. Stand the rack with
food on the glass tray.
6
49-40777
READ AND SAVE THESE INSTRUCTIONS
SAFETY INFORMATION
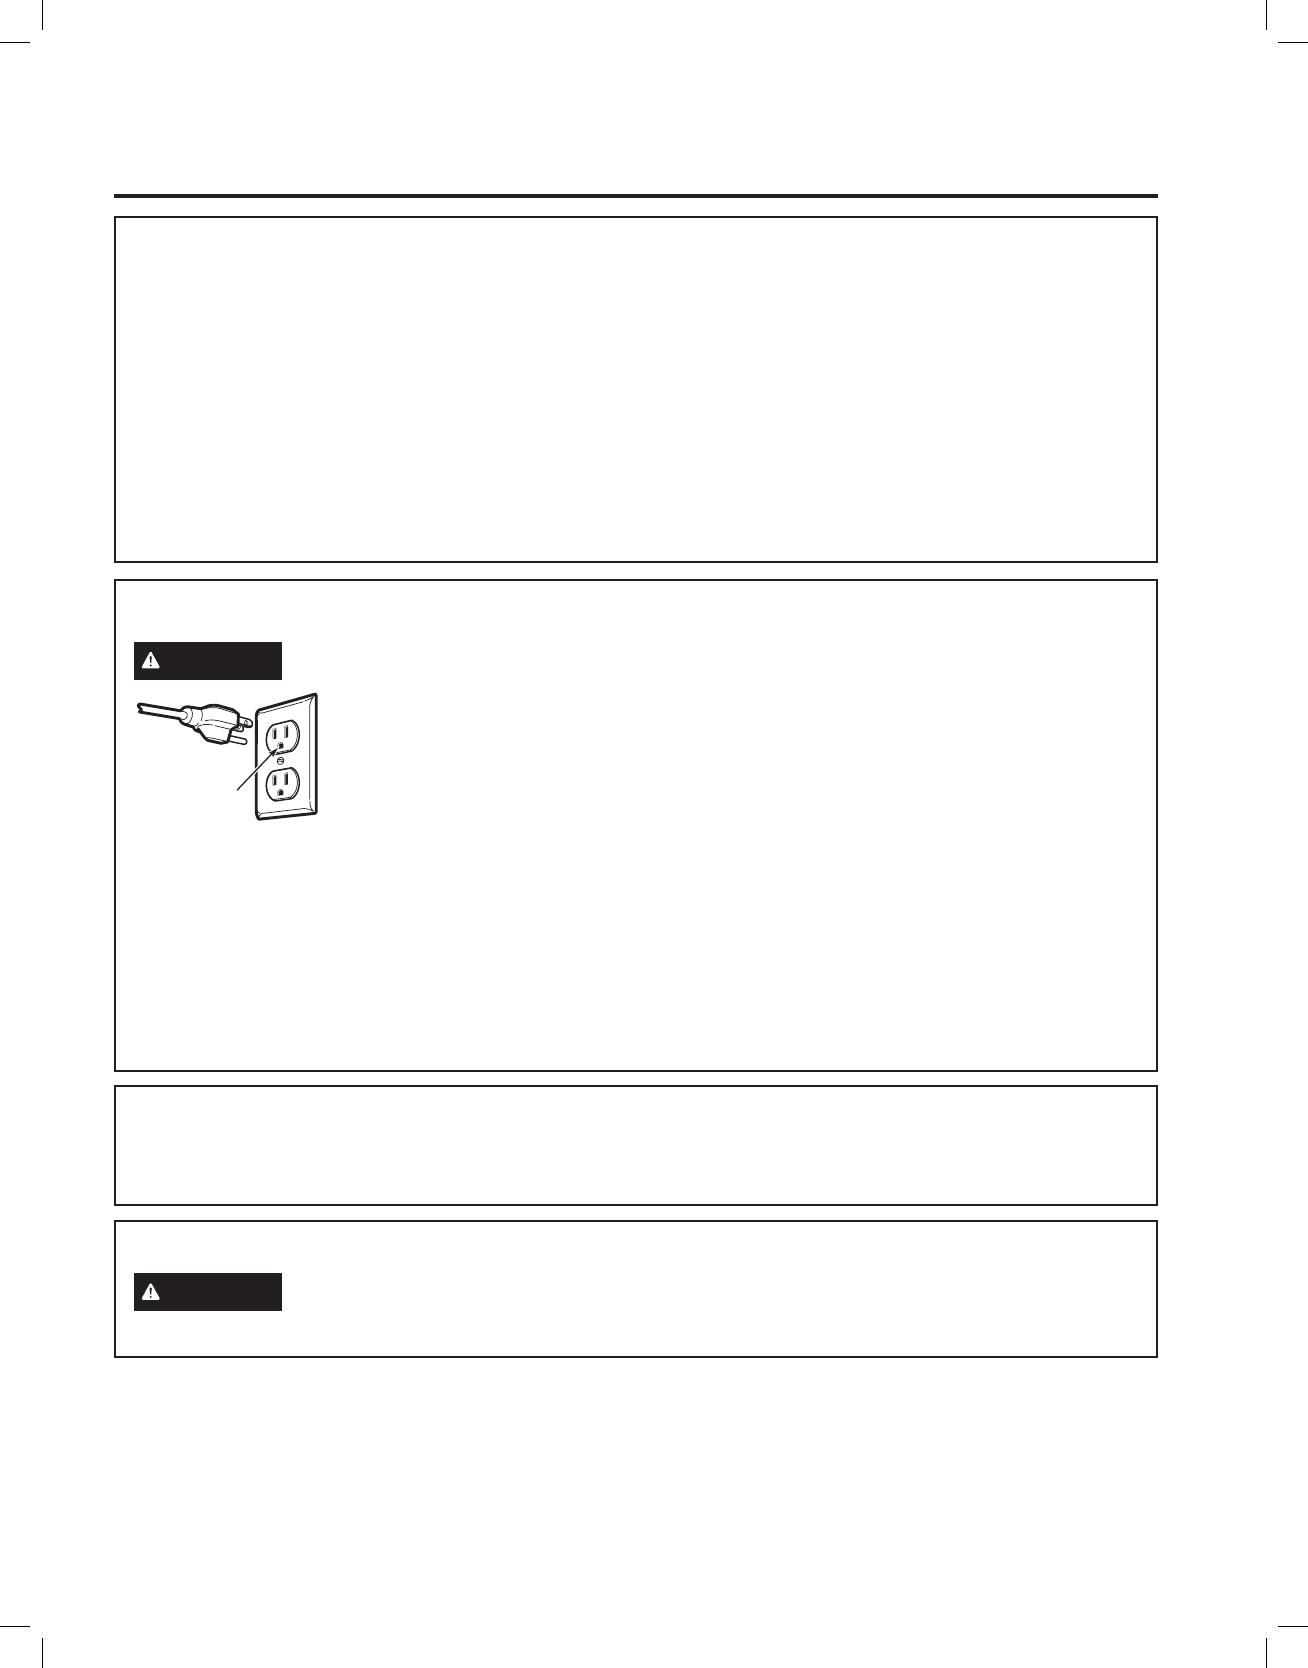
WARNING MICROWAVE-SAFE COOKWARE
Make sure to use suitable cookware during microwave
cooking. Most glass casseroles, cooking dishes,
measuring cups, custard cups, pottery or china
dinnerware which does not have metallic trim or glaze
with a metallic sheen can be used. Some cookware is
labeled “suitable for microwaving.”
■ Placefoodormicrowavablecontainerdirectlyon
the clear glass tray to cook your food.
■ Useofthenon-stickmetaltrayduringmicrowave
cooking will result in inferior cooking performance.
■ Cookwaremaybecomehotbecauseofheat
transferred from the heated food. Oven mitts may
be needed to handle the cookware.
■ Donotuserecycledpaperproducts.Recycled
paper towels, napkins and waxed paper may
contain metal flecks which could cause arcing or
ignite. Paper products containing nylon or nylon
filaments should be avoided, as they may also
ignite.
■ Usefoilonlyasdirectedinthismanual.Whenusing
foilintheoven,keepthefoilatleast1″awayfrom
the sides of the oven.
■ Ifyouuseameatthermometerwhilecooking,make
sure it is safe for use in microwave ovens.
■ Somefoamtrays(likethosethatmeatispackaged
on) have a thin strip of metal embedded in the
bottom. When microwaved, the metal can burn the
floor of the oven or ignite a paper towel.
■ Papertowels,waxedpaperandplasticwrapcanbe
used to cover dishes in order to retain moisture and
prevent spattering. Be sure to vent plastic wrap so
steam can escape.
■ Notallplasticwrapissuitableforuseinmicrowave
ovens. Check the package for proper use.
■ “Boilable”cookingpouchesandtightlyclosedplastic
bags should be slit, pierced or vented as directed by
package. If they are not, plastic could burst during
or immediately after cooking, possibly resulting in
injury. Also, plastic storage containers should be at
least partially uncovered because they form a tight
seal. When cooking with containers tightly covered
with plastic wrap, remove covering carefully and
direct steam away from hands and face.
■ Plasticcookware—Plasticcookwaredesignedfor
microwave cooking is very useful, but should be
used carefully. Even microwave-safe plastic may
not be as tolerant of overcooking conditions as are
glass or ceramic materials and may soften or char if
subjected to short periods of overcooking. In longer
exposures to overcooking, the food and cookware
could ignite.
■ Donotusethewireovenrackformicrowaving.
Followtheseguidelines:
1. Use microwave-safe plastics only and use them in
strict compliance with the cookware manufacturer’s
recommendations.
2. Do not microwave empty containers.
3. Do not permit children to use plastic cookware
without complete supervision.
IMPORTANT SAFETY INFORMATION
READ ALL INSTRUCTIONS BEFORE USING THE APPLIANCE
The turntable must
always be in place when
using the oven.
The clear glass tray
should always be in place
when microwaving.
49-40777
7
NOTICE: PACEMAKERS
Most pacemakers are shielded from interference from electronic products, including microwaves. However,
patients with pacemakers may wish to consult their physicians if they have concerns.
STATE OF CALIFORNIA PROPOSITION 65 WARNINGS
WARNING This product contains one or more chemicals known to the State of California to cause cancer,
and birth defects or other reproductive harm.
PRECAUTIONS TO AVOID POSSIBLE EXPOSURE
TO EXCESSIVE MICROWAVE ENERGY
(a) Do Not Attempt to operate this oven with the
door open since open-door operation can result
in harmful exposure to microwave energy. It is
important not to defeat or tamper with the safety
interlocks.
(b) Do Not Place any object between the oven front
face and the door or allow soil or cleaner residue to
accumulate on sealing surfaces.
(c) Do Not Operate the oven if it is damaged.
It is particularly important that the oven door close
properly and that there is no damage to the:
(1) door(bent),
(2) hingesandlatches(brokenorloosened),
(3) doorsealsandsealingsurfaces.
(d) The Oven Should Not be adjusted or repaired by
anyoneexceptproperlyqualifiedservicepersonnel.
IMPORTANT SAFETY INFORMATION
READ ALL INSTRUCTIONS BEFORE USING THE APPLIANCE
SAFETY INFORMATION
READ AND SAVE THESE INSTRUCTIONS
GROUNDING INSTRUCTIONS
WARNING Improper use of the grounding plug can result in a risk of electric shock.
This appliance must be
grounded. In the event of
an electrical short circuit,
grounding reduces the risk of
electric shock by providing an
escape wire for the electric
current.
Thisapplianceisequippedwithapowercordhavinga
grounding wire with a grounding plug. The plug must
be plugged into an outlet that is properly installed and
grounded.
Consultaqualifiedelectricianorservicetechnicianif
the GROUNDING INSTRUCTIONS are not completely
understood, or if doubt exists as to whether the
appliance is properly grounded.
If the outlet is a standard 2-prong wall outlet, it is
your personal responsibility and obligation to have it
replaced with a properly grounded 3-prong wall outlet.
Do not under any circumstances cut or remove the
third(ground)prongfromthepowercord.
Do not use an extension cord. If the power cord is too
short,haveaqualifiedelectricianorservicetechnician
install an outlet near the appliance.
Forbestoperation,plugthisapplianceintoitsown
electrical outlet to prevent flickering of lights, blowing
of fuse or tripping of circuit breaker.
Ensure proper
ground exists
before use.
8
49-40777
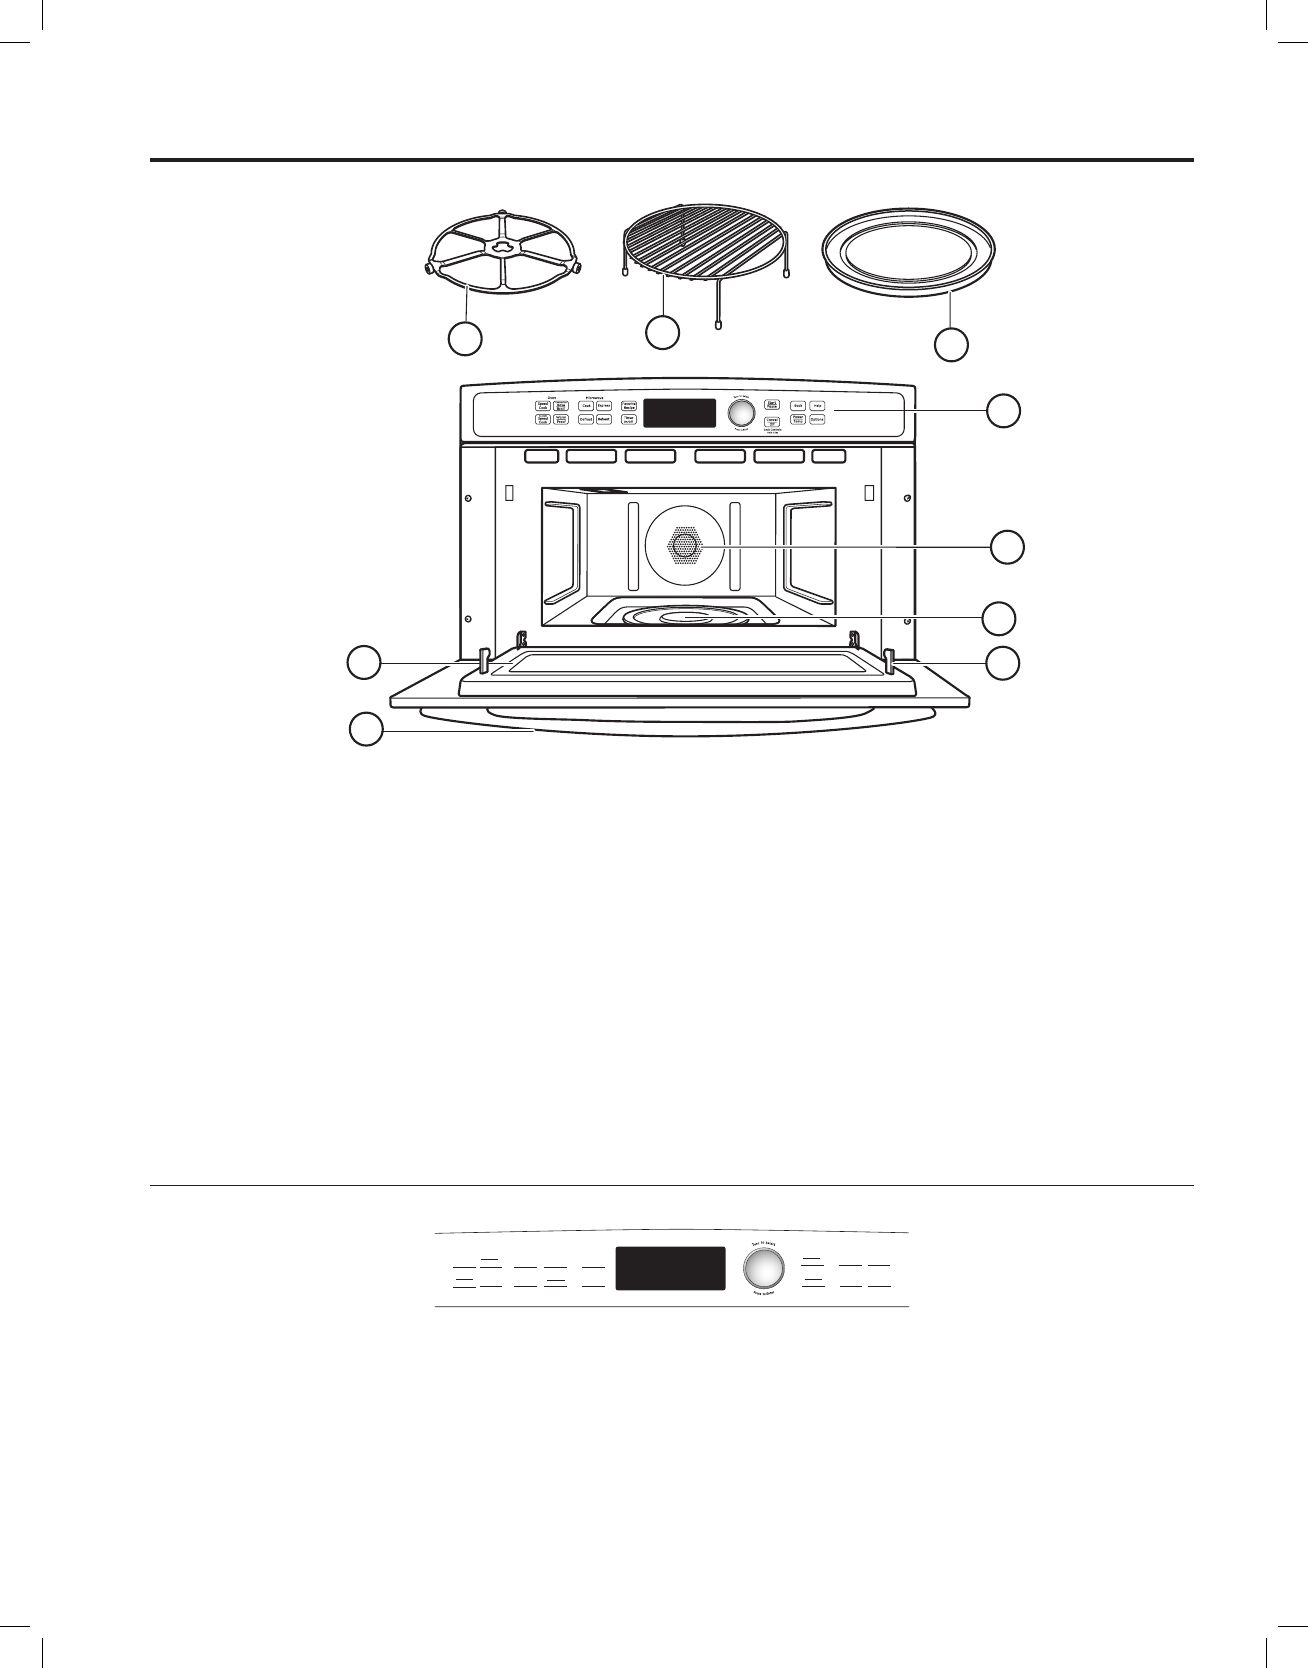
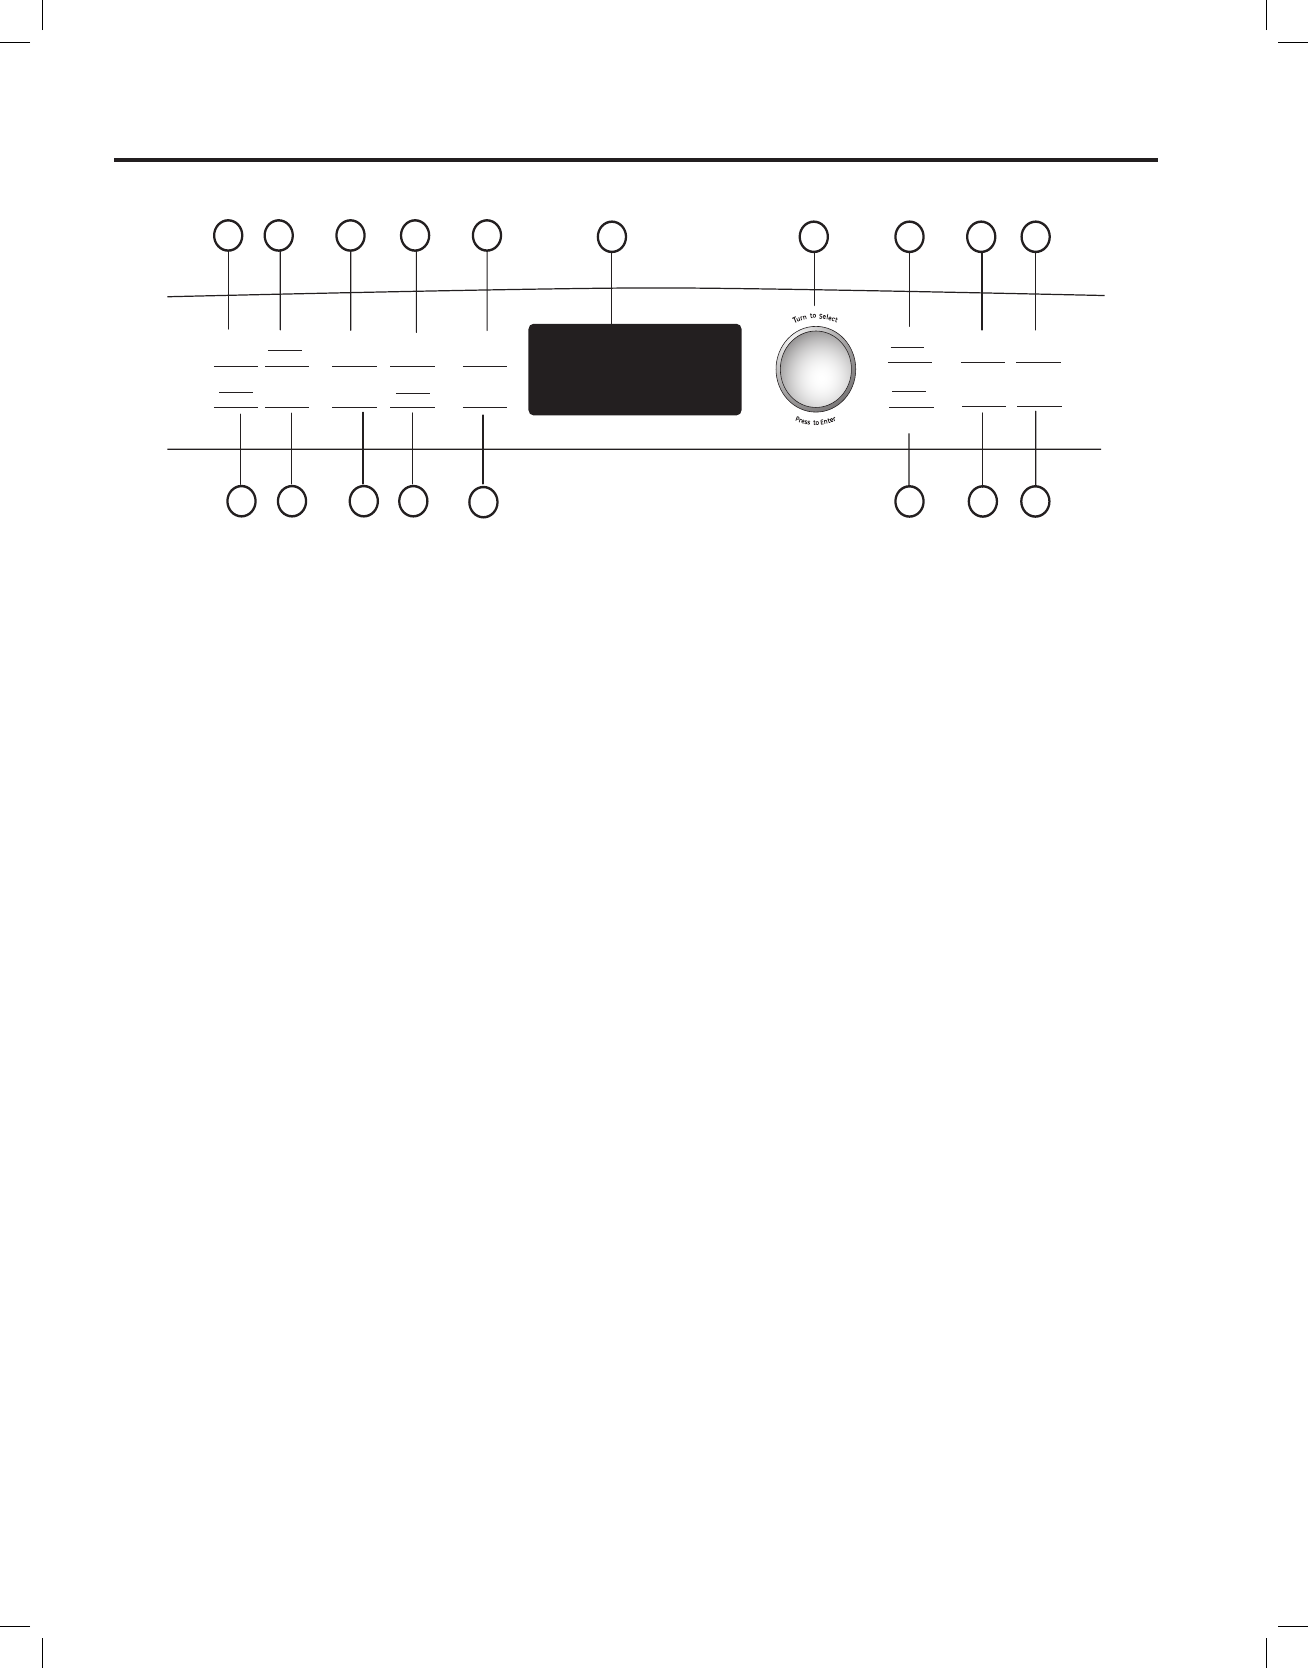
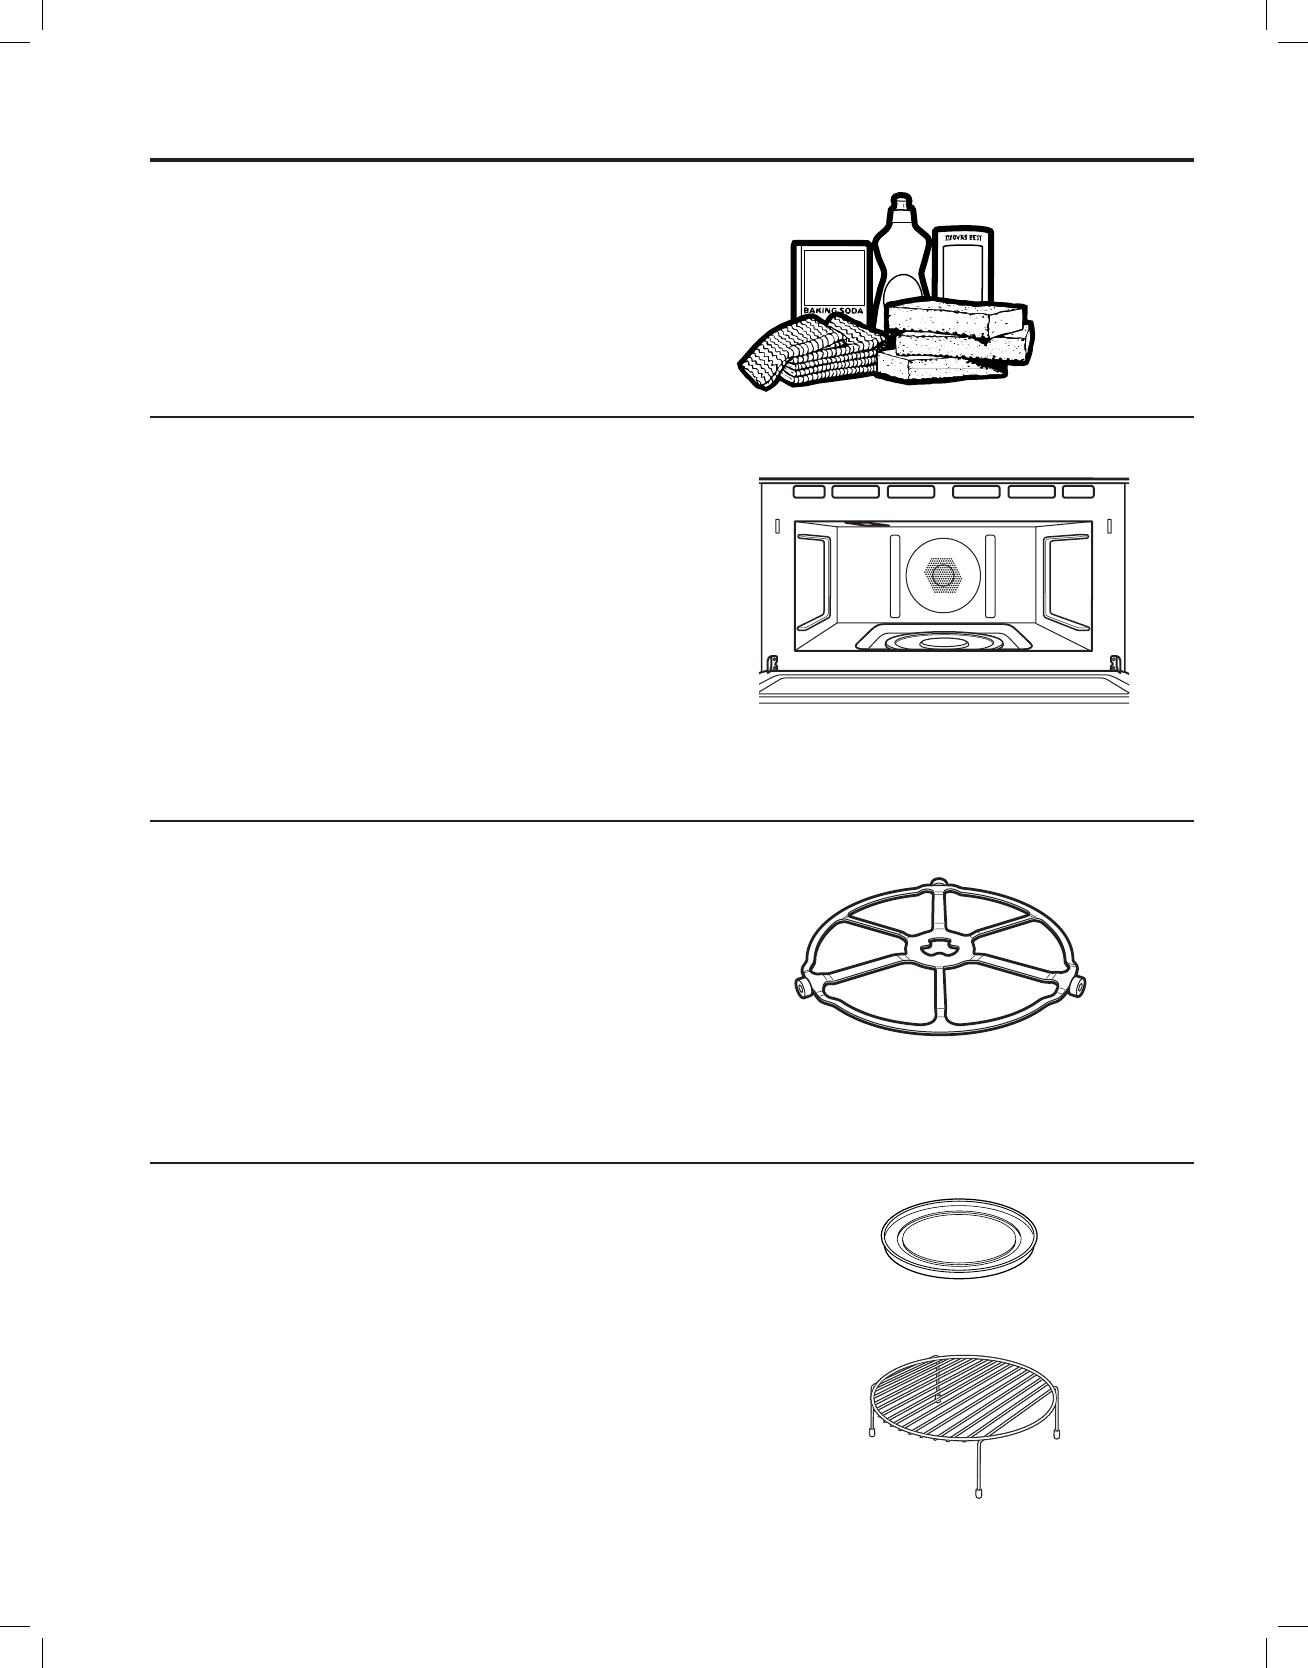
Features
USING THE MICROWAVE
1. Turntable
The turntable must always be in place, on the oven
floor, for all cooking. Be sure the turntable is seated
securely over the spindle in the center of the oven.
2. Wire Oven Rack
Put food directly on an aluminum baking sheet on
the wire oven rack, and place them on the glass tray,
when baking on two levels.
3. Clear Glass Tray
Place on the turntable when using the microwave
features. Place food or microwave-safe cookware
directly on the tray.
4. Window
Allows cooking to be viewed while keeping
microwaves confined in the oven.
5. Door Handle
Pull to open the door. The door must be securely
latched for the oven to operate.
6. Door Latches
7. Lower Ceramic Heater
Operates when using Convection Bake, Roast, and
FastCook.
8. Control Panel
The pads used to operate the oven are located on the
control panel.
9. Rear Convection Heat Element
Operates when using bake.
Throughout this manual, features and appearance may vary from your model.
1
5
6
8
9
7
23
4
NOTE: Handle appearance may differ on some models.
Set the Clock
When you first plug in the oven or after a power outage:
1. Turn the selector dial to set the hour. Press the
dial to enter.
2. Turn the dial to set the minute. Press the dial to enter.
3. Turn the dial to select AM or PM. Press the
dial to enter.
To change the time:
1.PresstheCLOCKpad.
2.Followthedisplaydirectionstoset.
The clock is designed to turn off when unit is idle for
30 seconds to minimize the standby power usage. The
clock will turn on when unit is in use, the door is opened,
theCANCEL/OFFpadispressed,orthedialispressed.
There is not an override option available based on the
DOEenergyrequirements.
Combination
Fast
Cook
Convection
Bake
Roast Popcorn Auto
Cook
Warm
Proof Power
Temp
Defrost Add
30 Sec
My Cycle
Start
Pause
Cancel
Off
Lock Controls
Hold 3 Sec
Back
Settings
Clock
Timer
On/Off
Microwave
Cook
Time
Steam
Cook
Clock
49-40777
9
1. COMBINATION FAST COOK
PressthispadtoaccesstheFASTCOOKmenu.
Press and hold for 3 seconds to repeat the last
cooking selection.
2. CONV BAKE/ROAST
Press this pad to bake or roast.
3. WARM/PROOF
Select WARM to keep hot, cooked foods at serving
temperature.
SelectPROOFtosetforawarmenvironmentuseful
for rising yeast-leavened products.
4. STEAM (Microwave)
5. POPCORN (Microwave)
6. AUTO COOK (Microwave)
7. DEFROST (Microwave)
Press this pad to defrost, soften or melt frozen foods.
8. POWER/TEMP
During cooking, press this pad and turn/press the
selector dial to change the microwave power level,
the convection bake temperature or the fast cook
temperature by adjusting the lower lamp and heater
settings.
9. COOK TIME (Microwave)
Press this pad to microwave food.
10. ADD 30 SEC/MY CYCLE (Microwave)
Press for 30 seconds of microwave cooking time.
Each time the pad is pressed adds an additional 30
seconds to the remaining cooking time. The oven
starts immediately. Edit My Cycle through Settings.
11. DISPLAY
Shows and instructs the use of all features on the
oven.
12. Selector Dial–Turn to select, Press to enter
Firstturn,thenpressthedialtomakeoption,food
power level or temperature selections. Also use the
dialtoincrease(turnclockwise)ordecrease(turn
counterclockwise) cooking times.
13. START/PAUSE
Press this pad to start or pause any cooking
function.
14. CANCEL/OFF
Press this pad to cancel ALL oven programs except
the clock and timer.
15. BACK
Press this pad to step back one or more levels in
the program process, such as when entering custom
recipes.
16. CLOCK
17. SETTINGS
Press this pad to access the Beeper Volume,
Display Scroll Speed, Delay Start, Help, Reminder
features, and to set My Cycle.
18. TIMER ON/OFF
Press this pad to set the minute timer.
Controls
USING THE MICROWAVE
1 2 5 6
3 4 7 8
9
10
11 12 13 15 16
14 17 18
Combination
Fast
Cook
Convection
Bake
Roast Popcorn Auto
Cook
Warm
Proof Power
Temp
Defrost Add
30 Sec
My Cycle
Start
Pause
Cancel
Off
Lock Controls
Hold 3 Sec
Back
Settings
Clock
Timer
On/Off
Microwave
Cook
Time
Steam
Cook
10
49-40777
BAKING AND ROASTING
Baking and Roasting
Baking allows you to cook foods the same way as a
conventional oven, using a heating element to raise
the temperature of the air inside the oven. Any oven
temperaturefrom250°Fto450°Fmaybeset.
A fan gently circulates heated air throughout the oven,
over and around the food. Because the heated air is kept
constantly moving, not permitting a layer of cooler air to
develop around the food, some foods cook slightly faster
than in regular oven cooking.
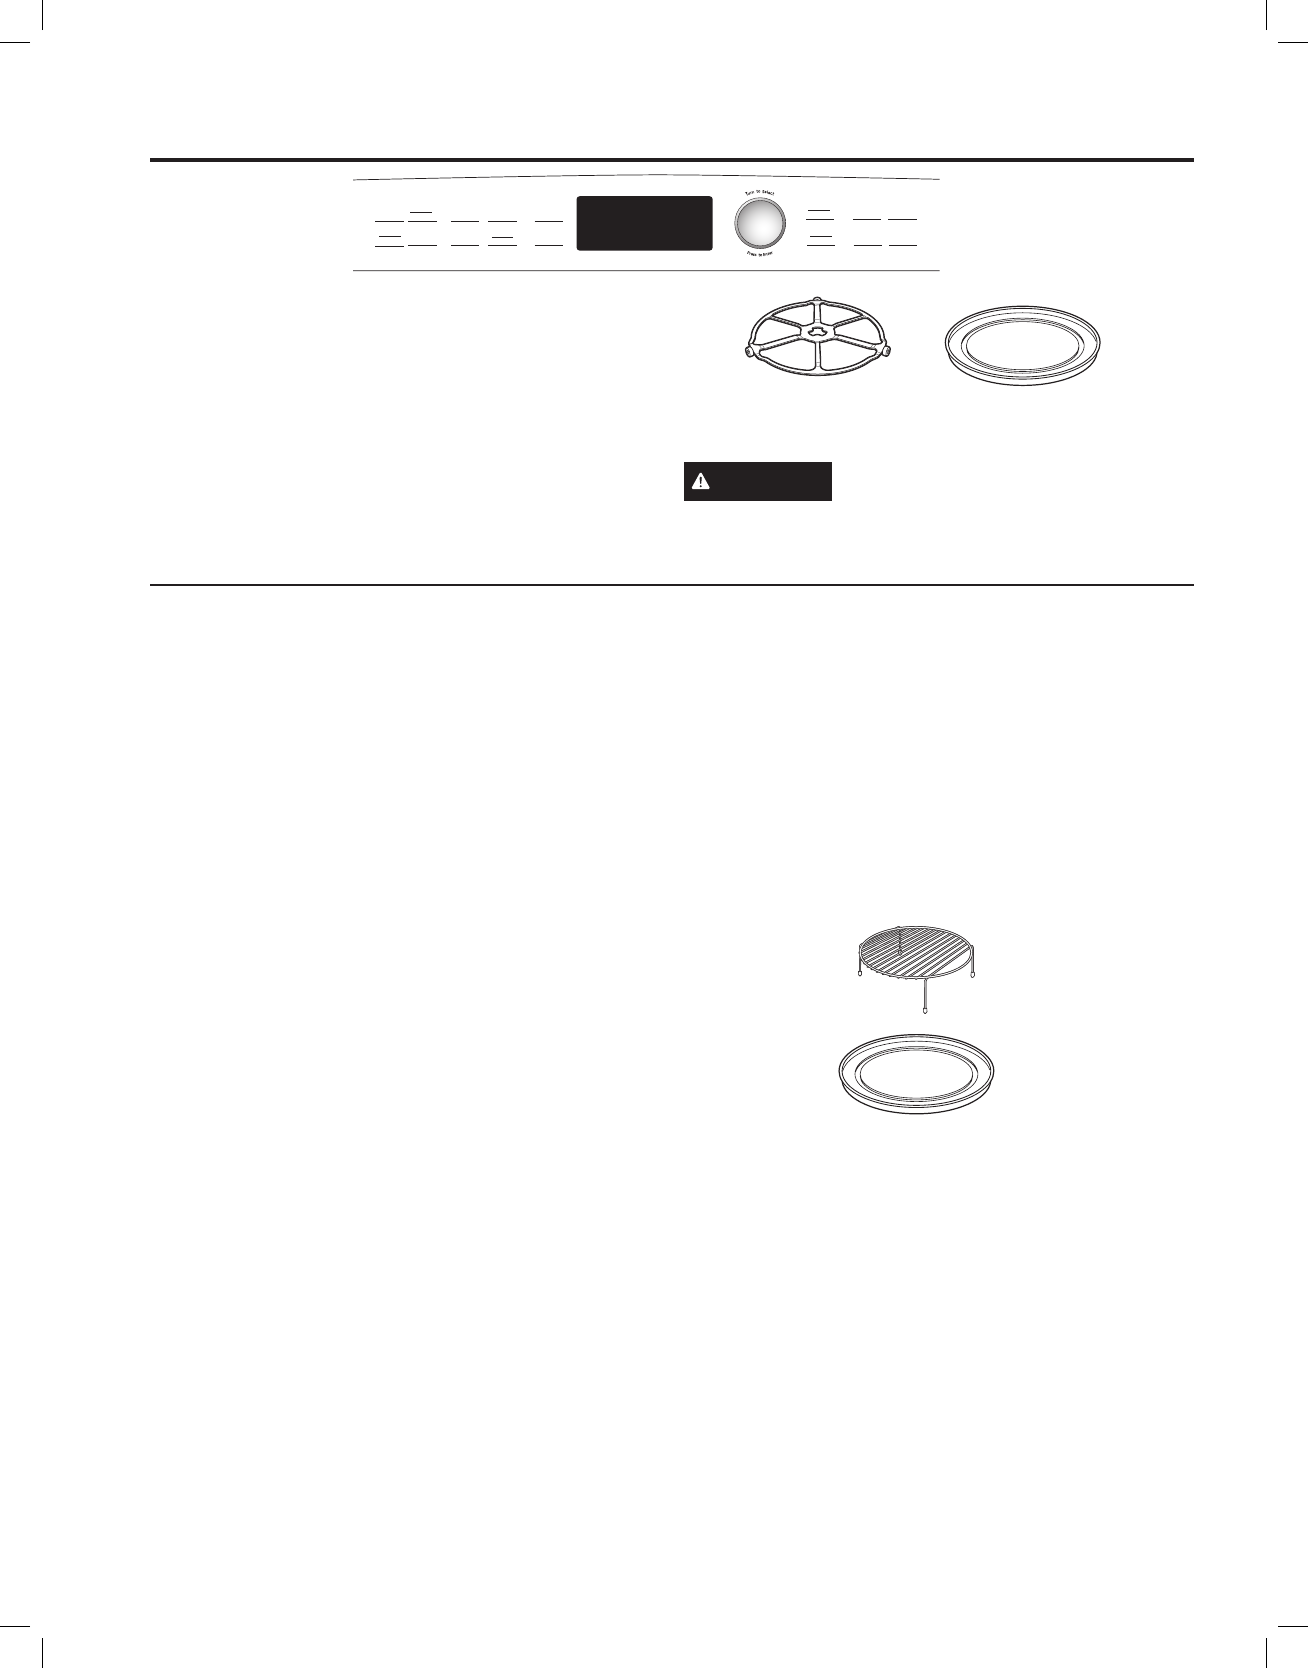
Before you begin, make sure the turntable is in place.
WARNING When baking, remember that the
oven, door and dishes will be very hot!
The turntable must
always be in place when
using the oven.
How to Bake
1. PresstheCONVBAKE/ROASTpad.
2. PressthedialtoselectBAKE.
3. Turn the dial to set the oven temperature and press
to enter.
To bypass preheating:
1. When the prompt shows PREHEAT THE OVEN? turn
the dial to NO. Press the dial to begin cooking.
2. Place the food in the oven, turn the dial to set the
cook time and press to enter.
The oven starts cooking immediately. When cooking
is complete, the oven will signal and turn off.
To preheat:
1. When the prompt shows PREHEAT THE OVEN?
turn the dial to YES. Press the dial or press START/
PAUSE to begin cooking.
The oven starts preheating immediately. Do not place
thefoodintheoven.(Youwillbepromptedtoenter
the cook time, after the oven is preheated.)
2. When the oven is finished preheating, it will signal. If
you do not open the door within 1 hour, the oven will
turn off automatically. Open the oven door and, using
caution, place the food in the oven.
3. Close the oven door. Turn the dial to set the cook
time and press to enter and start cooking. When
cooking is complete, the oven will signal and turn off.
You may change the oven temperature during preheating
by pressing the POWER/TEMP pad and turning the dial
to select the new temperature.
If the oven door is opened during cooking, PAUSE will
appear in the display. Close the door and press start/
pause.
Cook times are shown in minutes and can be a
maximum of 180 minutes. Time can be changed during
cooking by turning the dial.
Combination
Fast
Cook
Convection
Bake
Roast Popcorn Auto
Cook
Warm
Proof Power
Temp
Defrost Add
30 Sec
My Cycle
Start
Pause
Cancel
Off
Lock Controls
Hold 3 Sec
Back
Settings
Clock
Timer
On/Off
Microwave
Cook
Time
Steam
Cook
Put food or oven-safe cookware on
the glass tray to bake.
Fortwo-levelbaking,placefoodinametalbakingdish
on the glass tray. Place your baking dish with food on
top of the wire rack. Stand the rack with food on the
glass tray.

49-40777
11
BAKING AND ROASTING/FAST COOKING
Baking and Roasting
How to Roast
1. PresstheCONVBAKE/ROASTpad.
2. Turn the dial to ROAST and press to enter.
To bypass preheating:
1. When the prompt shows PREHEAT THE OVEN? turn
the dial to NO. Press the dial to begin cooking.
2. Place the food in the oven, turn the dial to set the
cook time and press to enter.
Press the dial to start cooking. When cooking is
complete, the oven will signal and turn off.
To preheat:
1. When the prompt shows PREHEAT THE OVEN?
turn the dial to YES. Press the dial or press START/
PAUSE to begin cooking.
The oven starts preheating immediately. Do not place
thefoodintheoven.(Youwillbepromptedtoenter
the cook time, after the oven is preheated.)
2. When the oven is finished preheating, it will signal. If
you do not open the door within 1 hour, the oven will
turn off automatically. Open the oven door and, using
caution, place the food in the oven.
3. Close the oven door. Turn the dial to set the cook
time and press to ente r and start cooking. When
cooking is complete, the oven will signal and turn off.
If the oven door is opened during cooking, PAUSE will
appear in the display. Close the door and press start/
pause.
WITH PREHEATING:
1. PresstheFASTCOOKpad.
2. Turn the dial to select temperature Press the dial to
enter.
3. When the prompt shows “PREHEAT THE OVEN?”
turn the dial to YES. Press the dial or press START/
PAUSE pad to begin preheating. Do not place the
foodintheoven.(Youwillbepromptedtoenterthe
cook time when the oven is preheated.)
4. The oven will signal when the set temperature is
reached. Open the oven door and place the food in
the oven.
NOTE: If you do not open the door within 1 hour, the
oven will turn off automatically
5. Oncethedisplayshows“SELECTCOOKTIME”
press the dial to begin cooking. The oven will signal
and turn off when cooking time is completed.
WITHOUT PREHEATING:
1. PresstheFASTCOOKpad.
2. When the prompt shows “PREHEAT THE OVEN?”
turn the dial to NO. Press the dial to enter.
3. Open the oven door and place the food in the oven.
4. Close the oven door. Turn the dial to select the
cooking time and press the dial to enter. Press the
dial again or press Start/Pause pad to begin cooking.
The oven will signal and turn off when cooking time is
completed.
Combination Fast Cooking
Cooking Method
Microwave energy
and convection
heat combine to
cook foods faster
than regular ovens,
while browning and
sealing in juices.
Heat Source
Microwave energy
and circulating
heated air.
Heat Conduction
Foodheatsfrom
instant energy from
penetration and
heat conducted
from outside of
food.
Benefits
Shortened
cooking time from
microwave energy,
plus browning
and crisping from
convection heat.
YourovenalsoofferstheoptionofCombinationFastCook,usingmicrowaveenergyalong
with convection cooking. You cook with speed and accuracy, while browning and crisping
to perfection.
Cookware for Fast Cooking
This cooking mode uses both microwave and convection heat. Glass or Glass-Ceramic cookware is recommended.
Heat-resistantplasticmicrowaveablecookware(safeto450°F)maybeused.Metalcookwarecannotbeused.
12
49-40777
Warming and Proofing
WARMING AND PROOFING
Warming
The WARM feature will keep hot, cooked foods at
serving temperature. Always start with hot food. Use
cookware and utensils that can withstand temperatures
upto230˚F.
1. PresstheWARM/PROOFpad.
2. TurnthedialtoselectHOLDFOODWARM.Press
the dial to enter.
3. Turn the dial to select the oven temperature. See the
chart and tips below. Press the dial to enter.
LOW 140–160°F
MEDIUM 160–195°F
HIGH 195–230°F
4. Turn the dial to select the level of moisture you want.
See the chart and tips below. Press the dial to enter.
If the oven door is opened during warming, PAUSE will
appear in the display. Close the door and press START/
PAUSE.
To Crisp Stale Items:
■ PreheatonLOWsettingandselectCRISP.
■ Checkcrispnessafter45minutes.Addtimeas
needed.
Tips for Crisp Foods.
■ Leavefooduncovered.
■ Donotuseplasticcontainersorplasticwrap.
■ Preheatpriortouseaccordingtorecommended
times.
Tips for Moist Foods:
■ Coverfoodwithlidoraluminumfoil.
■ Donotuseplasticcontainersorplasticwrap.
■ Preheatpriortouseaccordingtorecommended
times.
Proofing
The proofing feature automatically provides the optimum
temperature for the proofing process, and therefore does
not have a temperature adjustment.
1. PresstheWARM/PROOFpad.
2. TurnthedialtoselectPROOFBREAD.Pressthedial
to enter. The oven starts proofing immediately and
shows the amount of proofing time completed.
■ Toavoidloweringtheoventemperatureand
lengthening proofing time, do not open the oven door
unnecessarily.
■ Checkbreadproductsearlytoavoidover-proofing.
NOTES:
■ Donotusetheproofingmodeforwarmingfoodor
keeping food hot. The proofing oven temperature is
not hot enough to hold foods at safe temperatures.
Use the WARM feature to keep food warm.
■ Proofingwillnotoperateiftheovenistoohot.Allow
the oven to cool before proofing.
The turntable must always be in
place when using the oven.
The turntable must always be in
place when using the oven.
FoodType Control
Setting
Moisture
Setting
Bread, hard rolls MEDIUM CRISP
Bread, soft rolls MEDIUM MOIST
Casseroles MEDIUM MOIST
Friedfoods HIGH CRISP
Meats* and fish MEDIUM CRISP
Pancakes, waffles HIGH CRISP
Pizza HIGH CRISP
Potatoes, baked HIGH CRISP
Potatoes, mashed MEDIUM MOIST
Poultry HIGH MOIST
Tortilla Chips LOW CRISP
Vegetables MEDIUM MOIST
*USDA/FSISrecommendsaninternaltemperatureof145°F
as the minimum doneness for beef.
Use a portable meat thermometer to check internal
temperatures.
Combination
Fast
Cook
Convection
Bake
Roast Popcorn Auto
Cook
Warm
Proof Power
Temp
Defrost Add
30 Sec
My Cycle
Start
Pause
Cancel
Off
Lock Controls
Hold 3 Sec
Back
Settings
Clock
Timer
On/Off
Microwave
Cook
Time
Steam
Cook
Temperature and Moisture Selection Chart
Put food on the
glass tray to warm.
Put bread dough in a bowl/
bread pan and place on the
glass tray to proof.
49-40777
13
Microwaving
MICROWAVING
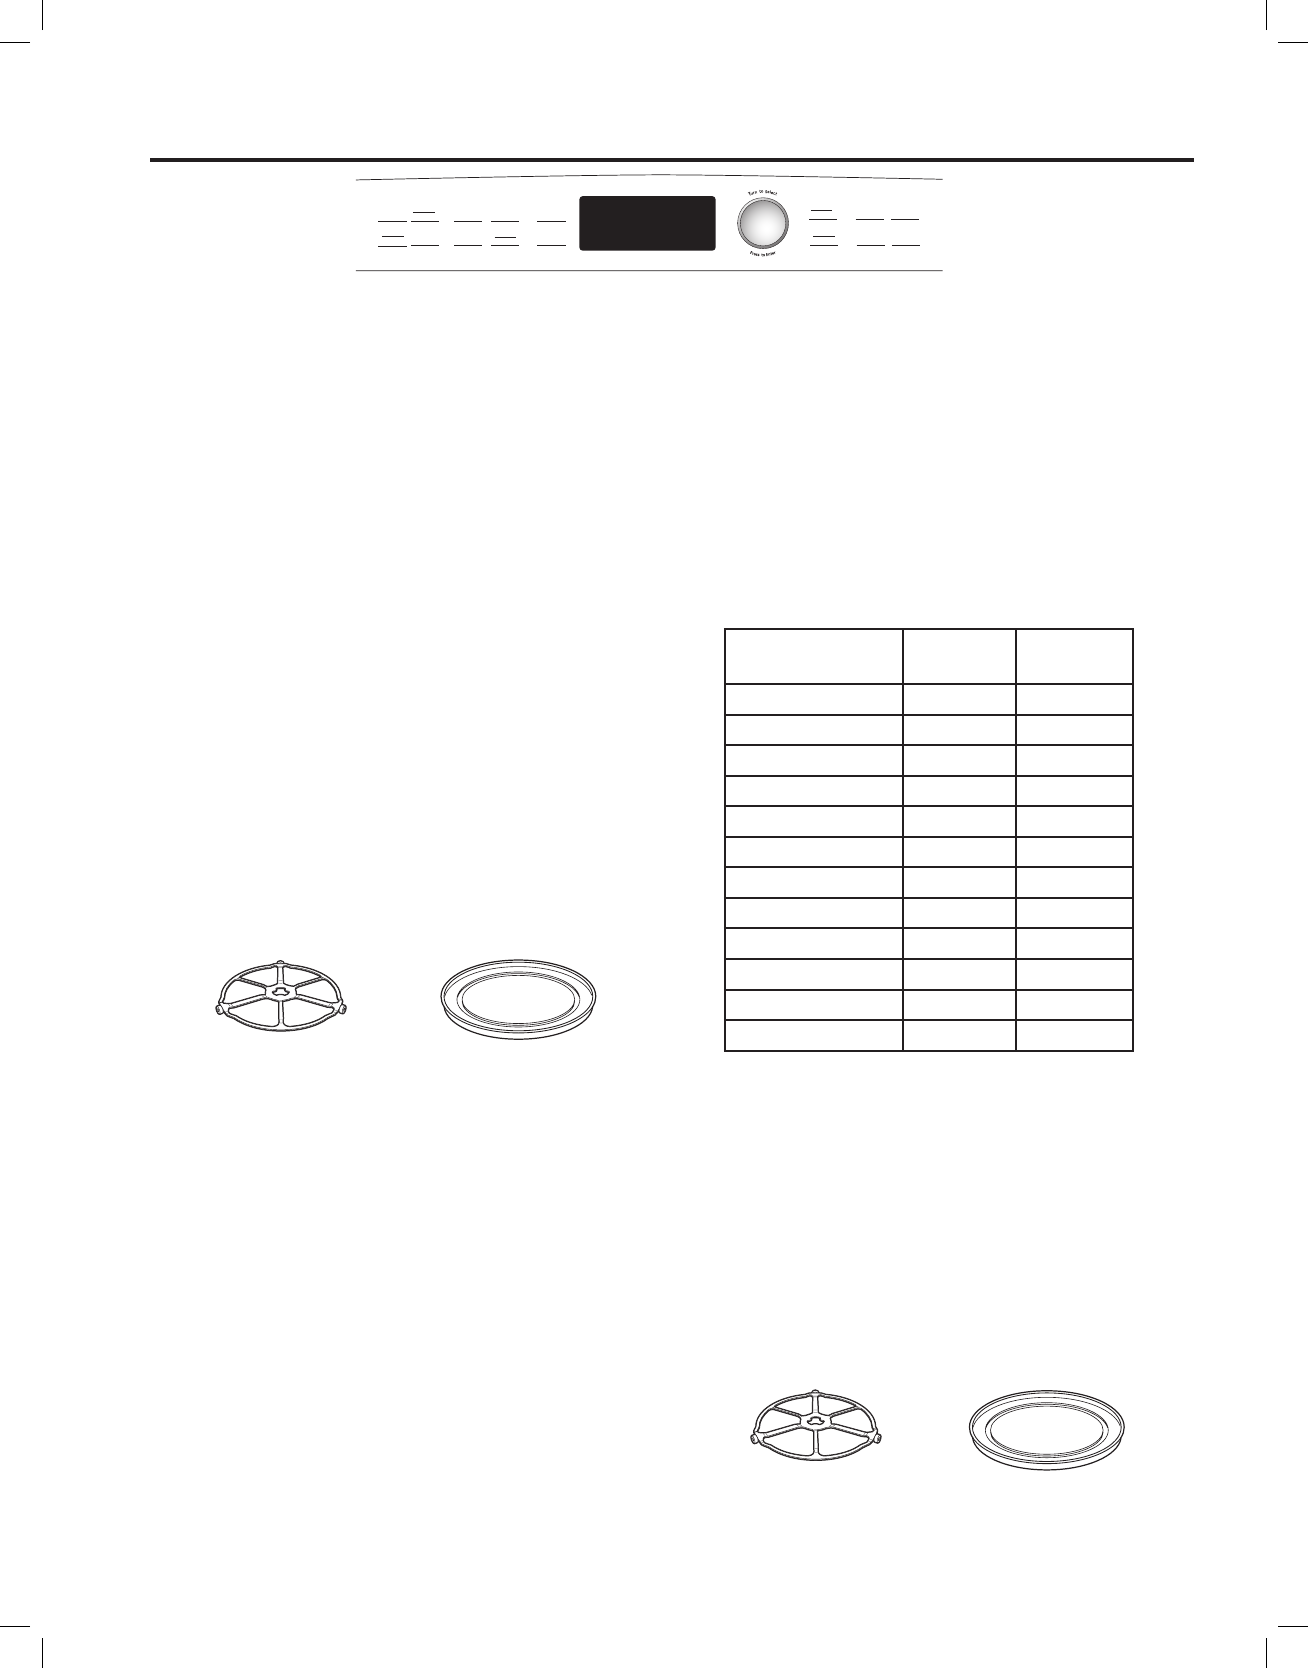
Make sure the turntable and clear glass tray are in place.
Place food or microwavable container directly on the
clear glass tray to cook your food.
Cookware
■Makesurethatcookwareissuitableformicrowaving.
■Placefoodormicrowavablecontainerdirectlyonthe
clear glass tray to cook your food.
The turntable must always
be in place when using the oven.
The clear glass tray should always
be in place when microwaving.
Microwave Auto Cook
1. PressthemicrowaveAUTOCOOK,DEFROSTor
COOKTIMEpad.Ifnoselectionismadewithin15
seconds, the display will return to blank.
2. Turn the dial to find the food you want to cook, de-
frost or reheat. Press the dial to enter.
3. Turn the selector dial to select the type, amount,
weightand/orsize.(Asrequired,theovenwillprompt
you.) Press the dial after each selection.
4. Press the dial or the START/ PAUSE pad to start
cooking.
To review settings during cooking, press the selector dial.
If the door is opened during cooking, the oven will stop
and PAUSE will appear in the display. Close the door and
press START/ PAUSE to resume cooking.
If you enter an undesired selection at any time, simply
presstheBACKpadandre-enterthedesiredselections.
Combination
Fast
Cook
Convection
Bake
Roast Popcorn Auto
Cook
Warm
Proof Power
Temp
Defrost Add
30 Sec
My Cycle
Start
Pause
Cancel
Off
Lock Controls
Hold 3 Sec
Back
Settings
Clock
Timer
On/Off
Microwave
Cook
Time
Steam
Cook
MICROWAVE AUTO COOK SELECTIONS:
■Beverage
–Water(8-12oz.)
– Coffee
(8-12oz.)
–Tea(8-12oz.)
–Milk(8-12oz.)
– Hot Cocoa
(8-12oz.)
■Popcorn
– Popcorn Sensor
■Melt
– Butter
– Caramel
– Cheese
– Chocolate Chips
– Marshmallow
■Steam Cook
■Slow Cook
■Cook Time
– By Time
– By Time 1 & 2
■Soften
– Butter
– Cream Cheese
–Frosting(16oz.)
– Ice Cream
■Defrost
– 1.0 lb Quick
– By Time
– By Weight
–ByFoodType
– Melt
– Soften
■Reheat
– Beverage
– Casserole
– Chicken
– Pasta
– Pizza
–PlateofFood
– Rice
– Soup
– Steaks/Chops
– Vegetables

14
49-40777
Microwaving
MICROWAVING
Cook By Time / Cook By Time 1 & 2
UseCOOKBYTIMEandCOOKBYTIME1&2to
microwave food that is not in the recipe section and at
thetime(s)youset.
■ Thepowerlevelisautomaticallysetathigh,butyou
can change it for more flexibility.
1. PresstheCOOKTIMEpad.
2. TurnthedialtoselectCOOKBYTIMEorCOOKBY
TIME 1 & 2 and press the dial to enter.
3. Turn the dial to set the cook time and press the dial
to enter.
IfyouselectedCOOKBYTIME1&2,turnthedialtoset
the second cook time and press the dial to enter.
NOTE: To change the power level if you don’t want
full power, press the POWER/TEMP pad after entering
thetime(s).Turnthedialtoselectandpressthedialto
enter.
4. Press the dial or the START/ PAUSE pad to start
cooking.
YoumayopenthedoorduringCOOKBYTIMEand
COOKBYTIME1&2tocheckthefood.Closethedoor
and press START/PAUSE to resume cooking.
Add 30 Sec/My Cycle
Use this pad for 30 seconds of cooking time. The oven
starts immediately. Press ADD 30 SEC/MY CYCLE pad
again for additional 30-second increments of microwave
cooking. You can add or subtract time by turning the dial.
NOTE: To change the time increment on the Add 30
Sec/My Cycle go to Settings then Set My Cycle. Choose
the new time increment you want and press the dial to
enter.
Cooking Tips
■Whencookingbacon,layerstripsonaplate.Cover
each layer with a paper towel.
■Whencookingvegetables,useamicrowave-safe
casserole or bowl. Cover with a microwave-safe lid or
vented plastic wrap.
■ Forfrozenvegetables,followthepackageinstructions
for adding water.
■ Forfreshvegetables,add2tablespoonsofwaterfor
each serving.
Microwave Power Level(s)
1. First,followdirectionsforCOOKBYTIME,COOKBY
TIME1&2,DEFROSTBYTIMEorEXPRESS.
2. Press the POWER/TEMP pad.
3. Turn the dial clockwise to increase and
counterclockwise to decrease the power level. Press
the dial to enter.
4. Press the dial or the START/ PAUSE pad to start
cooking.
■Youcanchangethepowerlevelbeforeorduringa
cooking program.
Here are some examples of uses for various power
levels:
High 10: Fish,bacon,vegetables,boilingliquids.
Med-High 7: Gentle cooking of meat and poultry;
baking casseroles and reheating.
Medium 5: Slow cooking and tenderizing for stews and
less tender cuts of meat.
Low 2 or 3: Defrosting; simmering; delicate sauces.
Warm 1: Keepingfoodwarm;softeningbutter.

49-40777
15
Microwaving
MICROWAVING
Defrost By Food Type
Auto Defrost automatically sets the defrosting times and
power levels to give even defrosting results for meats,
poultry and fish weighing up to 6 pounds.
1. Remove food from the package and place it on a
microwave-safe dish.
2. PresstheDEFROSTpad.
3. TurnthedialtoDEFROSTBYFOODTYPE.Press
the dial to enter.
4. Turn the dial to select food type. Press the dial to
enter.
5. Turn the dial to the food weight, using the Conversion
Guideatright.Forexample,dial1.2for1.2pounds
(1pound,3oz.).Pressthedialtoenter.
6. Press the dial or START/PAUSE pad to start
defrosting.
7. Turn the food over when the oven signals TURN
FOODOVER.
■ Removedefrostedmeatorshieldwarmareaswith
small pieces of foil for even defrosting.
■ Afterdefrosting,mostmeatsneedtostand5minutes
to complete defrosting. Large roasts should stand for
about 30 minutes.
Conversion Guide
If the weight of food is stated in pounds and ounces, the
ouncesmustbeconvertedtotenths(.1)ofapound.
Weight of Food
in Ounces Enter Food Weight
(tenths of a pound)
1-2 .1
3.2
4-5 .3
6-7 .4
8.5
9-10 .6
11 .7
12-13 .8
14-15 .9
Defrost By Time
Use Time Defrost to defrost for a selected length of time.
1. PresstheDEFROSTpad.
2. TurntheselectordialtoDEFROSTBYTIME.Press
the dial to enter.
3. Turn the dial to select the time you want. Press the
dial to enter.
4. Press the dial or START/PAUSE pad to start
defrosting.
5. Turn the food over when the oven signals TURN
FOODOVER.
Power level is automatically set at 3, but can be
changed. To change the power levels, see the
MicrowavePowerLevel(s)section.Youcandefrost
smallitemsquicklybyraisingthepowerlevelafter
entering the time. Power level 7 cuts the total defrosting
time in about half; power level 10 cuts the total time to
about 1/3. When defrosting at high power levels, food
willneedmorefrequentattentionthanusual.
Defrosting Tips
UseDEFROSTBYFOODTYPEformeat,poultryand
fish.UseDEFROSTBYTIMEformostotherfrozen
foods.
■Foodsfrozeninpaperorplasticcanbetimedefrosted
in the package, but foods should be taken out of the
packagewhenusingDEFROSTBYFOODTYPE.
Closed packages should be slit, pierced or vented
after food has partially defrosted. Plastic storage
containers should be partially uncovered.
■Family-size,prepackagedfrozendinnerscanbe
defrosted and microwaved. If the food is in a foil
container, transfer it to a microwave-safe dish.
■Foodsthatspoileasilyshouldnotbeallowedtosit
out for more than one hour after defrosting. Room
temperature promotes the growth of harmful bacteria.
■Formoreevendefrostingoflargerfoods,suchas
roasts,useDEFROSTBYTIME.Besurelargemeats
are completely defrosted before cooking.
■Whendefrosted,foodshouldbecoolbutsoftenedin
all areas. If still slightly icy, return to the microwave
very briefly, or let it stand a few minutes.
16
49-40777
Microwaving
MICROWAVING
Sensor Cooking Cookware
The proper containers and covers are essential for best
sensor cooking.
■Alwaysusemicrowave-safecontainersandcoverthem
with lids or vented plastic wrap. Never use tight sealing
plastic containers—they can prevent steam from
escaping and cause food to overcook.
■Besuretheoutsideofthecookingcontainersand
the inside of the oven are dry before placing food in
the oven. Beads of moisture turning into steam can
mislead the sensor.
■Beveragesarebestheateduncovered.
Sensor Cooking
Some microwave modes feature sensor cooking. The
oven automatically senses when food is done and shuts
itself off - eliminating the need to program cook times
and power levels. The oven automatically adjusts the
cooking time to various types and amounts of food.
1. Press theAUTOCOOKpadandturnthedialto
COOKBYFOODTYPEorREHEAT.Pressthedial
to enter.
2. Turn the dial to select the food you want. Press the
dial to enter.
3. Press the dial or press the START/ PAUSE pad to
start cooking.
Do not open the oven door until time is counting down
in the display. If the door is opened, close it and press
START/PAUSE immediately. If the food is not done
enough,useCOOKBYTIMEinthemicrowaveselector
to cook for more time.
NOTE: Do not use the sensor features twice in
succession on the same food portion—it may result
in severely overcooked or burnt food. If food is
undercookedafterthefirstcountdown,useCOOKBY
TIME for additional cooking time.
NOTE: If the oven is too hot then it will automatically
change to time cooking.
■ Toshortenorlengthenthecooktime,waituntilthe
time countdown shows in the display. Then turn the
dial to add or subtract time.
■ Ifyouopenthedoorwhilesensorcooking,SENSOR
ERROR will appear. Close the door, press START/
PAUSE to begin again.
Notes About the Reheat Program:
Reheated foods may have wide variations in
temperature. Some areas may be extremely hot.
ItisbesttouseCOOKBYTIMEandnotREHEATfor
these foods:
■ Breadproducts
■ Foodthatmustbereheateduncovered.
■ Foodsthatneedtobestirredorturned.
■ Foodscallingforadrylookorcrispsurfaceafter
reheating.
Covered Vented
Dry off dishes so they
don’t mislead the sensor.
MICROWAVE SENSOR PROGRAMS:
■ Ground Meat
■ Popcorn – Prepackaged microwave popcorn,
3.0 oz. to 3.5 oz.
■ Soup
■ Rice
■ Vegetables (Canned, Fresh, Frozen)
■ Chicken Reheat
■ Pasta Reheat
■ Plate of Food Reheat
■ Soup Reheat
■ Vegetable Reheat
Combination
Fast
Cook
Convection
Bake
Roast Popcorn Auto
Cook
Warm
Proof Power
Temp
Defrost Add
30 Sec
My Cycle
Start
Pause
Cancel
Off
Lock Controls
Hold 3 Sec
Back
Settings
Clock
Timer
On/Off
Microwave
Cook
Time
Steam
Cook
49-40777
17
Microwaving
MICROWAVING
Things that are Normal
Interference
■TV/radiointerferencemightbenoticedwhileusing
the microwave. Similar to the interference caused by
other small appliances, it does not indicate a problem
with the microwave. Move the radio or TV as far away
from the microwave as possible, or check the position
of the TV/radio antenna.
Lights
■Theovencavitylightwillcomeonduringamicrowave
cooking cycle.
Oven Heat
■Cookwaremaybecomehotbecauseofheat
transferred from the heated food. Oven mitts may be
needed to handle the cookware.
■Steamorvapormayescapefromaroundthedoor.
Steam Feature
TIMED or SENSOR STEAM
Forbestresultsusesteamorsimmerbowl.Add2
Tablespoons of water when steaming vegetables.
1. Press the STEAM pad.
2. Turn the selector dial to TIMED or SENSOR. Press
the dial to enter.
3. Turn the dial to select food type. Press the dial to
enter.
4. Press the dial to select the amount, size and/or
doneness(ifrequired,theovenwillpromptyou).
Press the dial after each selection.
5. Insert food and close the door.
* Timed Steam is a pre-set time-based cook.
** Sensor Steam is a variable time based on a sensor.
MENU SELECTION FOR SENSOR STEAM
Forbestresultsuse1-4cups.
• Asparagus
• Brussels Sprouts
• Carrots
• Cauliflower
• Potatoes
• Rice
• Squash
• Zucchini
MENU SELECTION FOR TIMED STEAM
MENU SELECTION FOR TIMED STEAM
(continued)
Asparagus 1 Cup
2 Cups
4 Cups
Broccoli 1 Cup
2 Cups
4 Cups
Brussels Sprouts 1 Cup
2 Cups
4 Cups
Carrots 1 Cup
2 Cups
4 Cups
Cauliower 1 Cup
2 Cups
4 Cups
Chicken Breast 1 Piece 6-8 Ounces
8-10 Ounces
2 Pieces 6-8 Ounces
8-10 Ounces
Fish 1 Piece ThinFilet-1/2”
MediumFilet-1”
ThickFilet-11/2”
2 Pieces ThinFilet-1/2”
MediumFilet-1”
ThickFilet-11/2”
Green Beans 1 Cup
2 Cups
4 Cups
Potatoes 1 Cup
2 Cups
4 Cups
Quinoa 1 Cup
Rice 1 Cup
Scallops Bay Scallops 6-10 Ounces
10-16 Ounces
Sea Scallops 6-10 Ounces
10-16 Ounces
Shrimp 1/2 Pound
1 Pound
Squash 1 Cup
2 Cups
4 Cups
Zucchini 1 Cup
2 Cups
4 Cups

18
49-40777
Other Features
OTHER FEATURES
Cook Time Completed
To remind you that you have food in the oven, the oven
willdisplayCOOKTIMECOMPLETEDandbeeponcea
minute until you either open the oven door or press the
CANCEL/OFFpad.
Review
Use this feature to review the current cooking selections
you have set.
Press the selector dial during any cooking feature.
Settings
Delay Start:
Delay Start allows you to set the oven to delay cooking
up to 24 hours. Press the SETTINGS pad, turn the dial
to select DELAY START and press the dial to enter.
FollowthedisplaydirectionstosettheDelayStarttime
and feature you wish to delay.
Beeper Volume:
Use this feature to adjust the volume of the beeper. You
can even turn it off. Press the SETTINGS pad, turn the
dial to select BEEPER VOLUME, press the dial to enter,
and follow the display directions.
Scroll Speed:
Is the message scroll too slow or too fast? Change
it! Press the SETTINGS pad, turn the dial to select
DISPLAY SCROLL SPEED, press the dial to enter, and
follow the display directions.
Reminder:
Use this feature to set an alarm beep to sound at a
specific the time of day. Press the SETTINGS pad, turn
the dial to SET REMINDER and press the dial to enter.
Turn the dial to select the hour and press to enter. Turn
the dial to select the minute and press to enter. Turn the
dial to select AM or PM and press to enter.
To review the setting, turn the dial to REVIEW
REMINDER and press the dial to enter. Turn the dial to
REVIEW and press to enter.
To cancel the setting, turn the dial to CLEAR
REMINDER and press the dial to enter. Turn the dial to
CLEAR and press to enter.
Help:
Use this feature to find out more about your oven and
its features. The display will show a description for the
program you have chosen.
My Cycle:
Use this feature to change the cook time increment on
the ADD 30 SEC/MY CYCLE pad. The increment can be
set between 5 and 55 seconds.

49-40777
19
Other Features
OTHER FEATURES
Help
Use this feature to find out more about your oven and its
features.
1. Press the SETTINGS pad.
2. Turn the dial to select HELP. Press the dial to enter.
3. Turn the dial to select the feature name. Press the
dial to enter.
The display will show a description for the program you
have chosen.
Child Lock-Out
You may lock the control panel to prevent the oven from
being accidentally started or used by children.
PressandholdCANCEL/OFFfor3secondstolockand
unlock.
Whenthecontrolpanelislocked,ControlisLOCKED
will be displayed briefly anytime a pad or dial is pressed.
Automatic Fan
An automatic fan protects the oven from too much heat
inside the oven cavity.
It automatically turns on at low speed if it senses too
much heat.
The fan will automatically turn off when the internal parts
are cool. It may stay on for 30 minutes or more after the
oven control is turned off.
Timer
Use this feature anytime you need a general purpose
timer. It can even be used while cooking in the oven.
1. Press the TIMER pad.
2. Turn the dial to select the minutes. Press the dial to
enter.
3. Turn the dial to select the seconds. Press the dial to
enter.
To cancel, press TIMER.
Features found in the HELP function.
Adding Time Defrost By Time Settings
Add 30 Sec Defrost By Weight Sensor Cooking
Auto Cook Delay Start Set Beeper Volume
Timed Steam FastCook Sensor Steam
Back Help Set Display Speed
Bake/Roast HoldFoodWarm Set/Clear Reminder
Cancel/Off My Cycle Slow Cook
Clock Popcorn Soften/Melt
Control Lockout Power / Temp Start/Pause
CookByFoodType Proof Bread Steam
Cook Time Reheat Timer On/Off
Cook Time 1 & 2 Repeat Last Warm/Proof
Defrost Resume
DefrostByFoodType Review
Repeat Last
Use this time saving feature for cooking repetitive items
like cookies or appetizers.
NOTE: The last program used is stored for two hours.
1. PressandholdtheCOMBINATIONFASTCOOK,
CONVECTIONBAKE/ROAST,AUTOCOOK,COOK
TIME,DEFROSTorSTEAMCOOKpadfor3seconds.
2. The last pre-set food will be displayed.
3. Press the START/PAUSE pad or the selector dial to
start cooking.
Resume
1. If your food needs to cook a bit longer, you can
restart the oven by pressing the START/PAUSE pad
or selector dial.
2. RESUMECOOKINGwillbedisplayedandtheoven
will restart immediately at 10% of the original time.
The program stays in memory for 10 minutes. After that
you will need to begin the program again.
20
49-40777
Care and Cleaning
CARE AND CLEANING
Helpful Hints
An occasional thorough wiping with a solution of baking
soda and water keeps the inside fresh.
Be certain the oven control is turned off before
cleaning any part of this oven.
Inside
Clean the inside of the oven often for proper heating
performance.
Some spatters can be removed with a paper towel,
othersmayrequireawarmsoapycloth.Removegreasy
spatters with a sudsy cloth, then rinse with a damp cloth.
Do not use abrasive cleaners or sharp utensils on oven
walls.
Never use a commercial oven cleaner on any part of
your oven.
Do not clean the inside of the oven with metal scouring
pads. Pieces can break off the pad, causing electrical
shock.
Removable Turntable
The area underneath the turntable should be cleaned
frequentlytoavoidodorsandsmokingduringacooking
cycle.
The turntable can be broken if dropped. Wash carefully
in warm, sudsy water. Dry completely and replace.
To replace the turntable, place its center over the
spindle in the center of the oven and turn it until it seats
intoplace.(Makesurethesmoothsideoftheturntable
is facing up and that its center seats securely on the
spindle.)
Cooking Trays and Baking Sheet
To prevent breakage, allow the trays to cool completely
before cleaning. Wash carefully in warm, sudsy water or
in the dishwasher.
Do not use metal scouring pads or abrasives, as they
may damage the finish. A soap-filled scouring pad may
be used to clean the trays.
Walls,Floor,InsideWindow,Metal
and Plastic Parts on the Door
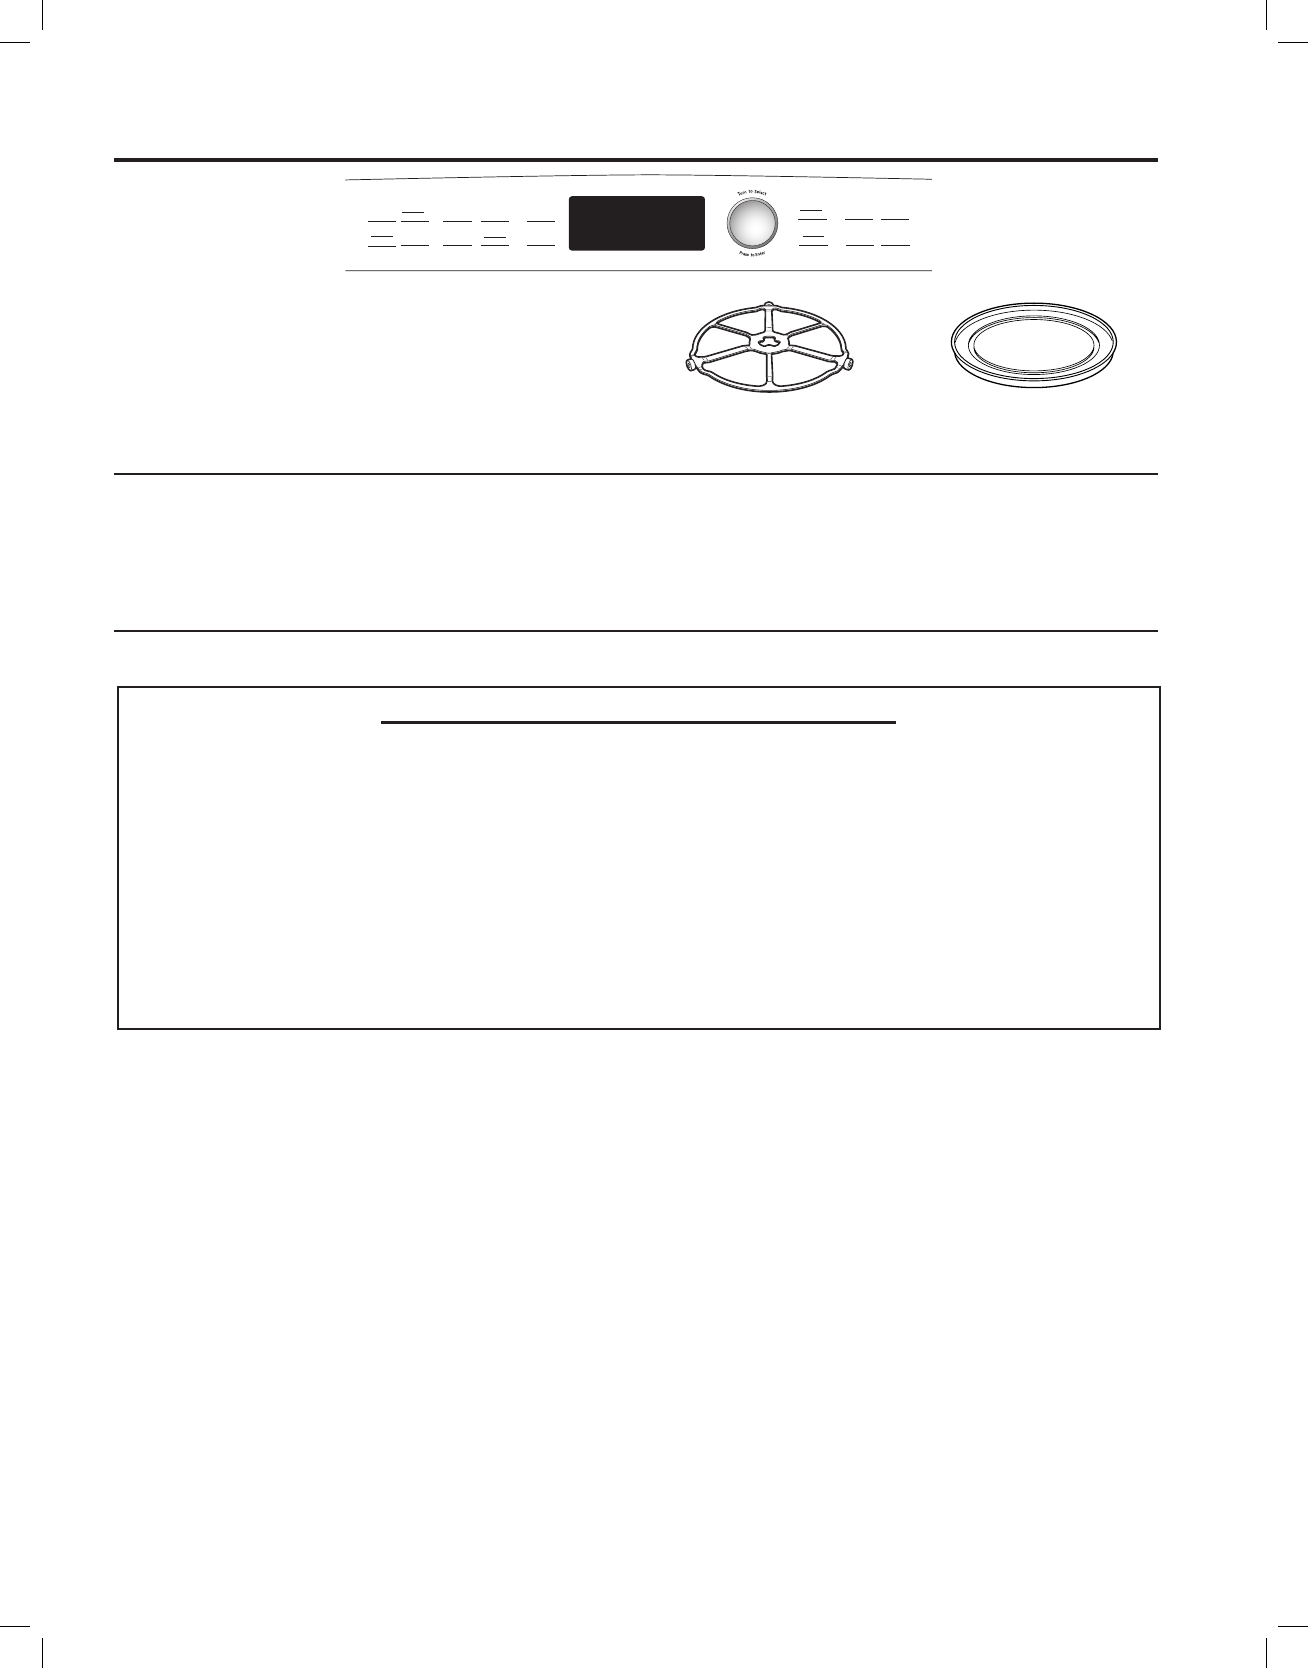
Do not use the oven without
the turntable in place.
Turntable
Clear glass tray for microwaving
Wire oven rack

49-40777
21
Outside
We recommend against using cleaners with ammonia
or alcohol, as they can damage the appearance of
the oven. If you choose to use a common household
cleaner, first apply the cleaner directly to a clean cloth,
then wipe the soiled area.
Case
Clean the outside with a sudsy cloth. Rinse and then dry.
Wipe the window clean with a damp cloth.
Glass Control Panel and Door
Wipe with a clean damp sponge. Dry thoroughly. Do not
use cleaning sprays, large amounts of soap and water,
abrasives or sharp objects on the panel—they can
damage it.
Door Seal
It’s important to keep the area clean where the door
seals against the oven. Use only mild, non-abrasive
detergents applied with a clean sponge or soft cloth.
Rinse well.
Stainless Steel (onsomemodels)
To clean the stainless steel surface, use warm sudsy
water or a stainless steel cleaner or polish. Always
wipethesurfaceinthedirectionofthegrain.Follow
the cleaner instructions for cleaning the stainless steel
surface.
Toinquireaboutpurchasingstainlesssteelappliance
cleaner or polish, or to find the location of a dealer
nearest you, please call our toll-free number,
800.626.2005 or visit GEAppliances.com.
Care and Cleaning
CARE AND CLEANING
FEDERAL COMMUNICATIONS COMMISSION RADIO FREQUENCY
INTERFERENCE STATEMENT (U.S.A. ONLY)
ThisequipmentgeneratesandusesISMfrequency
energy and if not installed and used properly, that is in
strict accordance with the manufacturer’s instructions,
may cause interference to radio and television
reception. It has been type tested and found to comply
withlimitsforISMEquipmentpursuanttopart18of
FCCRules,whicharedesignedtopart18ofFCC
Rules, which are designed to provide residential
installation.
However, there is no guarantee that interference will not
occurinaparticularinstallation.Ifthisequipmentdoes
cause interference to radio or television reception, which
canbedeterminedbyturningtheequipmentoffandon,
the user is encouraged to try to correct the interference
by one or more of the following:
■Reorientthereceivingantennaoftheradioor
television.
■RelocatetheMicrowaveOvenwithrespecttothe
receiver.
■Movethemicrowaveovenawayfromthereceiver.
■Plugthemicrowaveovenintoadifferentoutletsothat
the microwave oven and the receiver are on different
branch codes.
The manufacturer is not responsible for any radio of TV
interference caused by unauthorized modification to this
microwave oven. It is the responsibility of the user to
correct such interference.
22
49-40777
Problem Possible Cause What To Do
FAN
Fan continues to run after
cooking stops
The oven is cooling. The fan will automatically shut off when the internal
parts of the oven have cooled.
Oven vent emits warm air
while oven is on
This is normal.
Fan comes on automatically
when using the microwave
This is normal.
COOKING
The oven makes unusual
sounds while cooking
Clicks and fans blowing are
normal. The relay board is turning
the components on and off.
These sounds are normal.
Smoke comes out of the
oven when I open the door
Food is high in fat content.
Aerosol spray used on the pans.
Smoke is normal when cooking high-fat foods.
Food is not fully cooked
or browned at the end of a
cooking program
Programmed times may not match
the size or amount of food you are
cooking.
Adjust time for doneness or adjust the upper or lower
lamps for browning and doneness.
SENSOR ERROR displayed
along with an oven signal
Food amount or type placed in the
oven does not match the program
that was set.
PresstheCANCEL/OFFpad.Settheovenprogram
tomatchthefoodorliquidtobecookedorheated.
Steam was not sensed by the
oven because plastic wrap was
not vented, a lid too tight was on
the dish or a liquid was covered.
Ventplasticwrap,usealooserlidoruncoverliquids
when cooking or heating.
DISPLAY
The display is blank The clock is designed to turn off when unit is idle for
30 seconds to minimize the standby power usage
“Control is LOCKED”
appears in display The control has been locked. PressandholdCANCEL/OFFfor5secondsto
unlock the control.
Control display is lighted yet
oven will not start Clock is not set. Set the clock.
Door not securely closed. Open the door and close securely.
START/PAUSE pad not pressed
after entering cooking selection. Press START/PAUSE.
Another selection already entered
in oven and CANCEL/OFF pad not
pressed to cancel it.
PressCANCEL/OFF.
Size, quantity, or cooking time not
entered after final selection. Make sure you have entered cooking time after
selecting.
CANCEL/OFF was pressed
accidentally. Reset cooking program and press START/PAUSE.
OTHER PROBLEMS
The door and inside of the
oven feels hot The heat lamps produce intense
heat when ready.
This is normal. Use oven mitts to remove food when
in a small space.
Oven will not start A fuse in your home may be blown
or the circuit breaker tripped.
Replace fuse or reset circuit breaker.
Troubleshooting Tips... Before you call for service
TROUBLESHOOTING TIPS
Save time and money! Review the charts on the following pages first and you may not need to call for service.

49-40777
23
Staple your receipt here. Proof of the original purchase
date is needed to obtain service under the warranty.
GEAppliances.com
AllwarrantyserviceisprovidedbyourFactoryServiceCenters,oranauthorizedCustomerCare® technician. To schedule
service online, visit us at www.geappliances.com/service_and_support/, or call GE Appliances at 800.GE.CARES
(800.432.2737).Pleasehaveyourserialnumberandyourmodelnumberavailablewhencallingforservice.
WARRANTY
Built-in Convection Microwave Oven Warranty
EXCLUSION OF IMPLIED WARRANTIES
Your sole and exclusive remedy is product repair as provided in this Limited Warranty. Any implied warranties,
including the implied warranties of merchantability or fitness for a particular purpose, are limited to one year or
the shortest period allowed by law.
This warranty is extended to the original purchaser and any succeeding owner for products purchased for home use
within the USA. If the product is located in an area where service by a GE Appliances Authorized Servicer is not available,
youmayberesponsibleforatripchargeoryoumayberequiredtobringtheproducttoanAuthorizedGEAppliances
Service location for service. In Alaska, the warranty excludes the cost of shipping or service calls to your home.
Somestatesdonotallowtheexclusionorlimitationofincidentalorconsequentialdamages.Thiswarrantygivesyou
specific legal rights, and you may also have other rights which vary from state to state. To know what your legal rights
are, consult your local or state consumer affairs office or your state’s Attorney General.
Warrantor: GE Appliances
For the period of GE Appliances will replace
PROFILE MODELS ONLY
One year
Fromthedate
of the original
purchase
Any part of the oven which fails due to a defect in materials or workmanship. During this
limited one-year warranty, GE Appliances will also provide, free of charge, all labor and
related service costs to replace the defective part.
One years
Fromthedate
of the original
purchase
The magnetron tube, if the magnetron tube fails due to a defect in materials or workmanship.
During this one-year limited warranty, you will be responsible for any labor or in-home
service costs.
CAFÉ MODELS ONLY
One year
Fromthedate
of the original
purchase
Any part of the oven which fails due to a defect in materials or workmanship. During this
limited one-year warranty, GE Appliances will also provide, free of charge, all labor and
related service costs to replace the defective part.
Five years
Fromthedate
of the original
purchase
The magnetron tube, if the magnetron tube fails due to a defect in materials or workmanship.
During this five-year limited warranty, you will be responsible for any labor or in-home
service costs.
What GE Appliances will not cover:
■Servicetripstoyourhometoteachyouhowtousethe
product.
■Improperinstallation,deliveryormaintenance.
■Productnotaccessibletoproviderequiredservice.
■Failureoftheproductordamagetotheproductifitis
abused,misused(forexample,cavityarcingfromwire
rack or metal/foil), or used for other than the intended
purpose or used commercially.
■Replacementofhousefusesorresetting
of circuit breakers.
■Replacementofthecooktoplightbulbs.
■Damagetotheproductcausedbyaccident,fire,floods
or acts of God.
■Incidentalorconsequentialdamagecausedby
possible defects with this appliance.
■Damagecausedafterdelivery.

24
49-40777
PrintedinKorea
Consumer Support
CONSUMER SUPPORT
GE Appliances Website
Haveaquestionorneedassistancewithyourappliance?TrytheGEAppliancesWebsite24hoursaday,anyday
of the year! You can also shop for more great GE Appliances products and take advantage of all our on-line support
services designed for your convenience. In the US: GEAppliances.com
Register Your Appliance
Register your new appliance on-line at your convenience! Timely product registration will allow for enhanced
communication and prompt service under the terms of your warranty, should the need arise. You may also mail in
the pre-printed registration card included in the packing material. In the US: GEAppliances.com/register
Schedule Service
Expert GE Appliances repair service is only one step away from your door. Get on-line and schedule your service at
your convenience any day of the year. In the US: GEAppliances.com/ge/service-and-support/service.htm
or call 800.432.2737 during normal business hours.
Extended Warranties
Purchase a GE Appliances extended warranty and learn about special discounts that are available while your
warranty is still in effect. You can purchase it on-line anytime. GE Appliances Services will still be there after your
warranty expires. In the US: GEAppliances.com/ge/service-and-support/shop-for-extended-service-plans.htm
or call 800.626.2224 during normal business hours.
Remote Connectivity
Forassistancewithwirelessnetworkconnectivity(formodelswithremoteenable),
visit our website at GEAppliances.com/ge/connected-appliances/ or call 800.220.6899 in the US.
Parts and Accessories
Individualsqualifiedtoservicetheirownappliancescanhavepartsoraccessoriessentdirectlytotheirhomes
(VISA,MasterCardandDiscovercardsareaccepted).Orderon-linetoday24hourseveryday.
In the US: GEApplianceparts.com or by phone at 877.959.8688 during normal business hours.
Instructions contained in this manual cover procedures to be performed by any user. Other servicing
generally should be referred to qualified service personnel. Caution must be exercised, since improper
servicing may cause unsafe operation.
Contact Us
If you are not satisfied with the service you receive from GE Appliances, contact us on our Website with all the
details including your phone number, or write to:
IntheUS:GeneralManager,CustomerRelations|GEAppliances,AppliancePark|Louisville,KY40225
GEAppliances.com/ge/service-and-support/contact.htm