LINKSYS DP-608 HIGH DEFINITION MEDIA PLAYER User Manual Manual DP 600 v1 2 indd
LINKSYS LLC HIGH DEFINITION MEDIA PLAYER Manual DP 600 v1 2 indd
LINKSYS >
Contents
- 1. USERS MANUAL 1
- 2. USERS MANUAL 2
- 3. USERS MANUAL 3
- 4. USERS MANUAL 4
- 5. USERS MANUAL 5
USERS MANUAL 3

14
english
Now that you have connected your player to the other devices, you can begin setup. First, we recommend that you turn on your television before turning on your KiSS Player.
This way, the video channel you have chosen will appear on your television screen automatically. Turning on your KiSS Player before your television, however, has no negative
affect on the use or operation of your player. In this case, you would simply have to use your TV remote to search for the video channel you want your player set to, instead
of it appearing automatically.
6Turning your player "On" for the first time
2. Press the On/Off button located on the back of your KiSS player to turn the
player on. A red light will appear on the front display indicating that the player
is on Standby mode.
1. Turn "On" your television.
3. Press the Standby button on your remote to start the player. If you
are powering up your KiSS player for the first time, the Quick Setup
Menu will appear automatically.
english
15
english
Powering up your player for the first time, you will be presented with the Quick Setup wizard allowing you basic setup of your player with very few button presses and minimal
technical knowledge. The Quick Setup is simple and largely self-explanatory. Should you at a later time wish to go through it again or alter some more advanced settings,
please consult the “Advanced Setup” section of this User Guide.
7Quick Setup
- If this menu does not appear when you start the DVD Player, re-check the cable connections.
- You can always go back and start again if you happen to do something wrong, Just press on the SETUP button of your remote, go to MISC. SETTINGS and select QUICK SETUP.
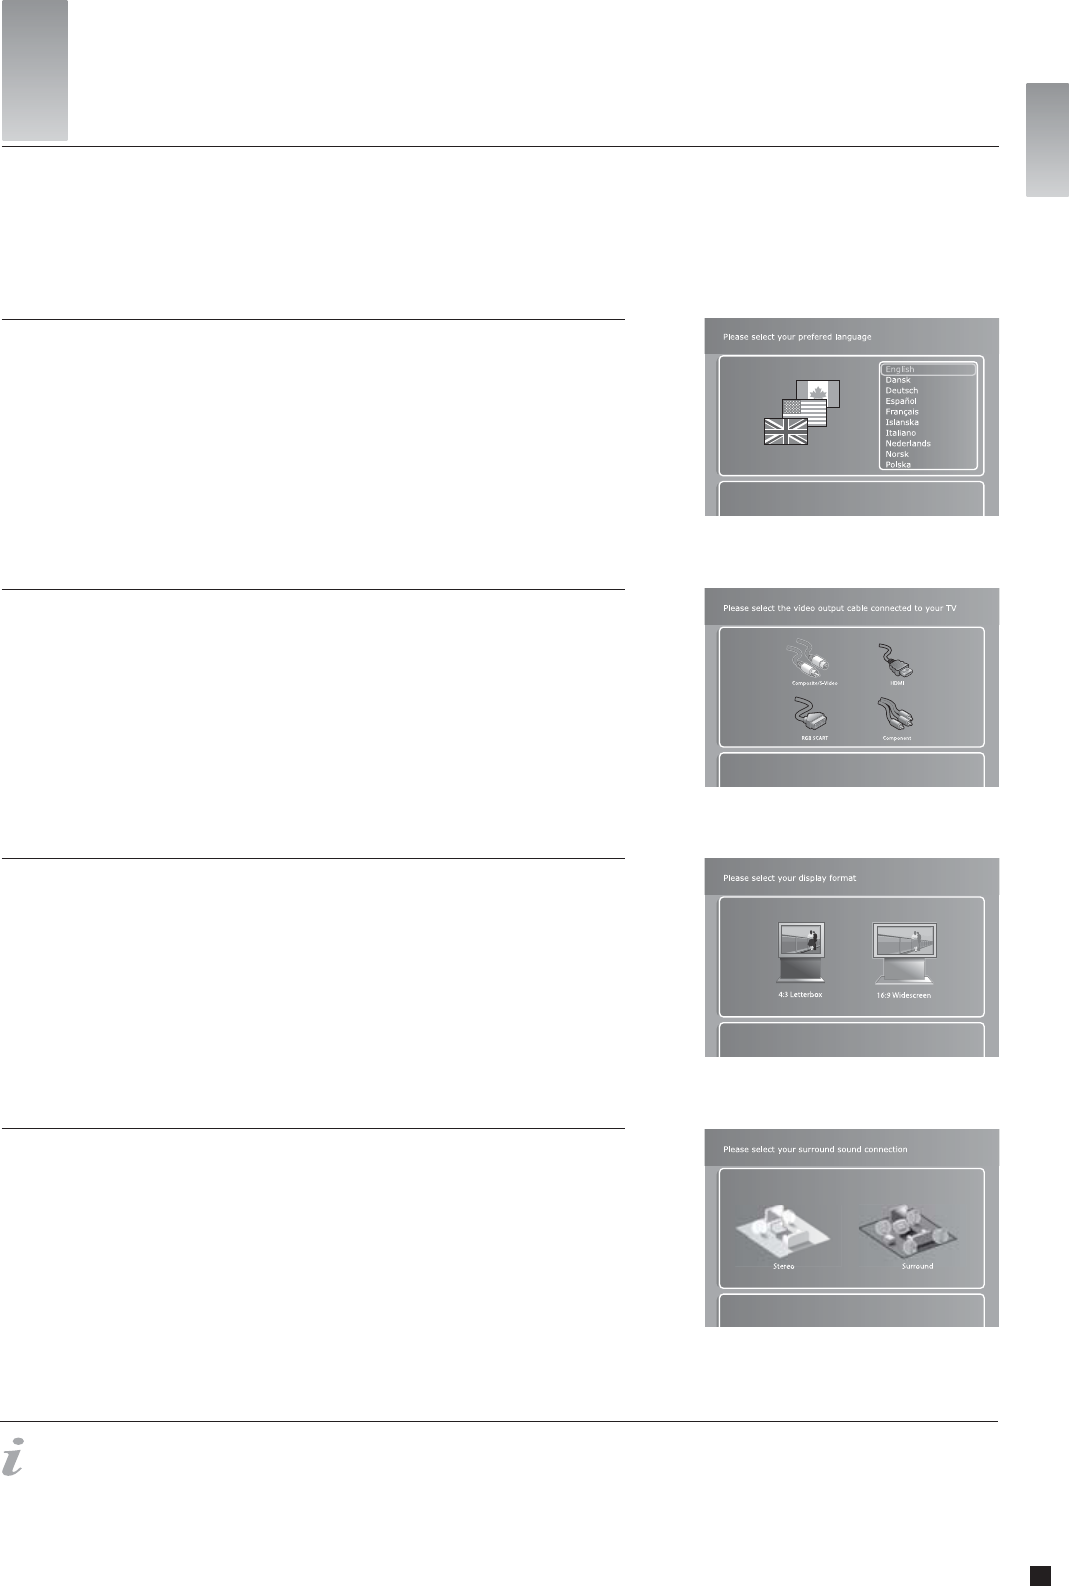
4. Loud Speaker setup selection
Please select the loud speaker setup connected to your amplifier or TV. If you are using more than two
speakers connected to a surround sound amplifier, please select “Surround”. If there are only two speakers
connected or you are receiving sound from your TV only, please select “Stereo”.
This screen will prompt you to select the video output you will be using. Please select the same cable type
that you used to connect your player to your TV. If you are uncertain of which cable you connected, pictures
act as a rough guide.
2. Video output selection
3. Display format selection
This screen will prompt you to select the format of the TV connected to your player. Choices are 16:9
widescreen or conventional 4:3 format. If you are unsure what your television is, select the depiction that is
closest in resemblance.
This first screen will tell you to select the language you wish to use on your DVD Player. Use the directional
buttons of your remote control to navigate and press the OK button to select a language.
1. Language Selection
english
16
english
- If this menu does not appear when you start the DVD Player, re-check the cable connections.
- You can always go back and start again if you happen to do something wrong, Just press on the SETUP button of your remote, go to MISC. SETTINGS and select QUICK SETUP.
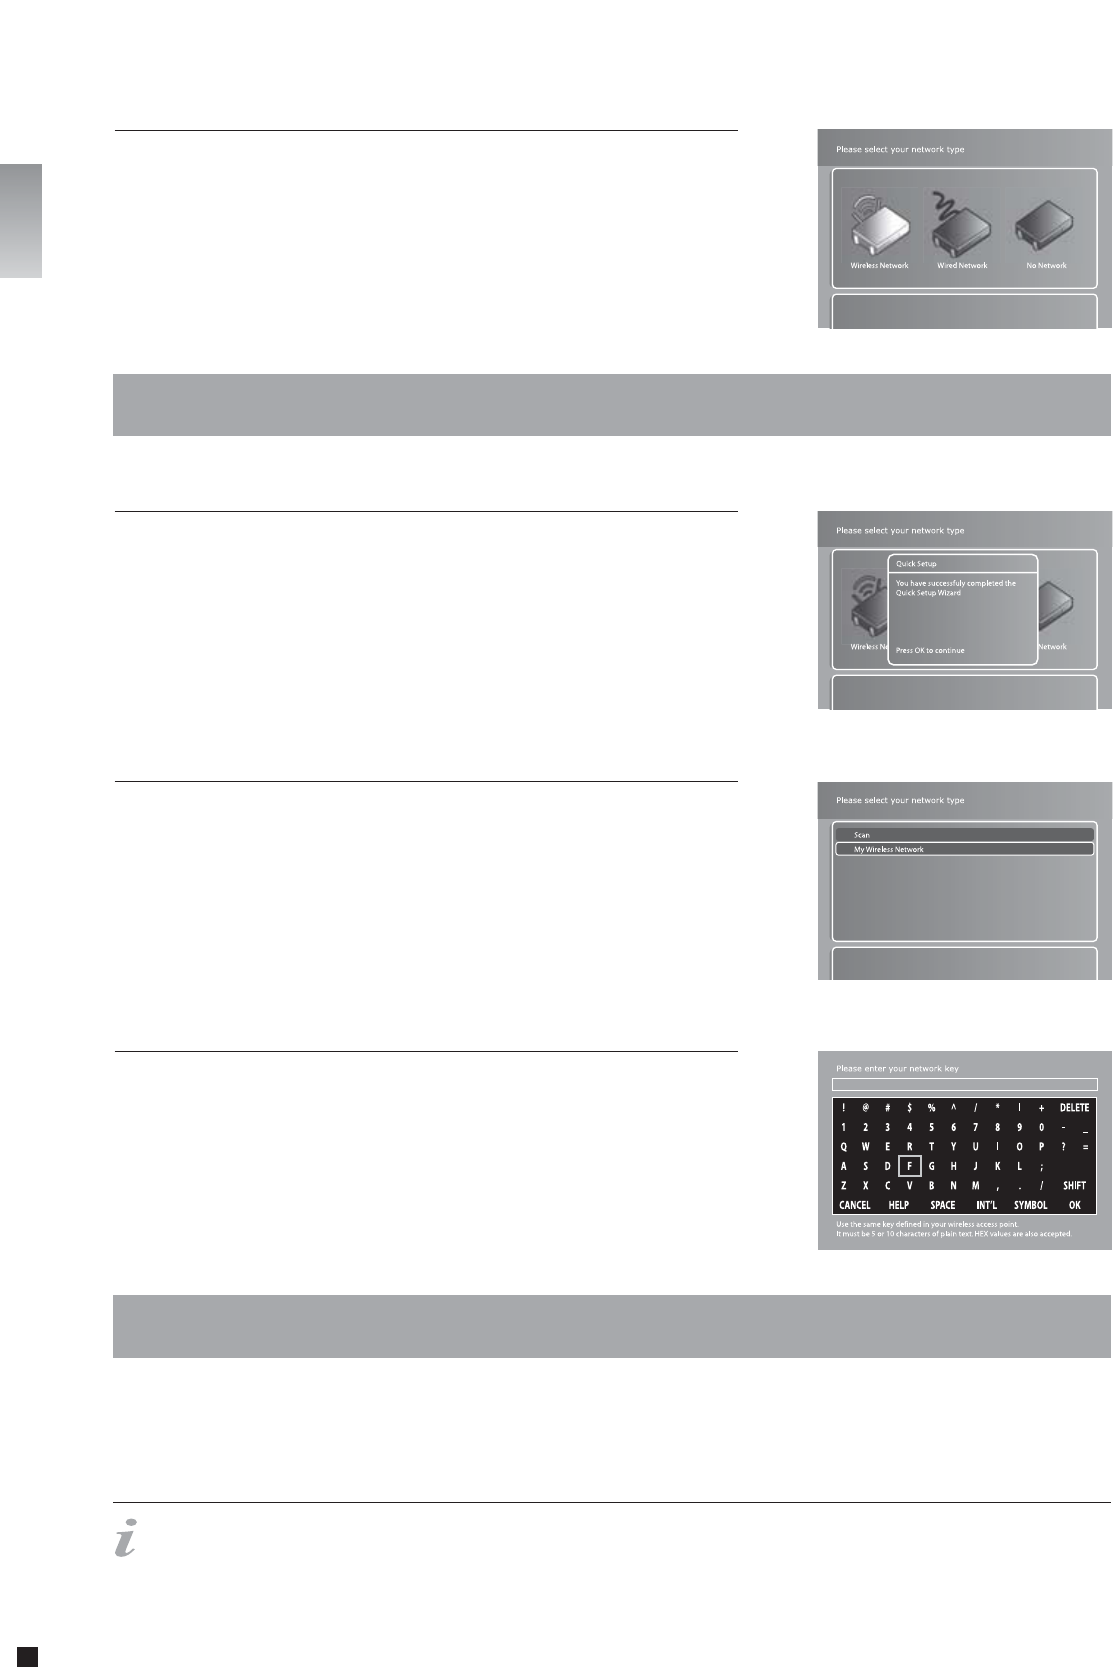
Once you have connected an Ethernet cable to your DP-600 or are ready to set your wireless network, select
either “Wired Network” (for ethernet cable connection) or “Wireless Network” depending on the type of
network connection you wish to set up.
- If you have selected “Wired Network”, proceed to item 6a.
- If you have selected “Wireless Network”, proceed to item 6b.
- If you do not wish to set up your network yet, simply select “No Network” to complete QuickSetup.
5. Selecting the Network
7. Setting the Wireless Network Encryption Key
Congratulations! You have successfully set up your player!
Don’t forget to set up your network!
Networks labelled “Locked” are protected by a Network Encryption Key. Press “OK” on your remote to select
the network. Use the on-screen keypad to enter the Network Key (password) exactly. This enables the DP-600
to use the wireless network freely. Once you have entered the Key, press “OK” to complete the Quick Setup.
See this manual’s chapter on Advanced Setup, if you wish to change any Network Settings manually.
Selecting “Wired Network” turns on the Automatic Network Configuration (DHCP) . Press “OK” to complete
the Quick Setup. See this manual’s chapter on Advanced Setup, if you wish to change any Network Settings
manually.
6a. Selecting the Network (Wired Networks)
6b. Selecting the Network (Wireless Networks)
When you select “Wireless Network”, the DP-600 displays a list showing all of the networks that are
available. Use the arrow buttons on your remote to choose the desired network. Networks labelled as
“Unlocked” are available for free. Networks labelled “Locked” are protected. Select the available network of
your choice. If you select a free network, press “OK” to complete the Quick Setup. See item 7 if the network
you wish to select is “Locked”. See this manual’s chapter on Advanced Setup, if you wish to change any
Network Settings manually.
Congratulations!
You have set up your player
english

17
english
This section walks you through each section of the main menu of the player giving you access to all of its primary functions like file browsing, playback of media and online
services. To exit or re-enter the menu, simply press the MENU button on your remote control.
Play: Play the disc currently inserted in the player.
Resume playback: If you have previously stopped playback of a DVD disc still in the player, press this to
resume playback where you left off.
Video files: Browse and play video files on the inserted disc.
Audio files: Browse and play audio files on the inserted disc.
Picture files: Browse and view JPG-format pictures on the inserted disc.
Eject: This opens the disc tray of the player.
Disc Playback
8Player Menu
This menu section contains options for browsing and playing files residing on your computer from your DP-
600. In order to use them, you need to set up a KiSS PC-Link host on your PC or a KiSS MacLink host for the
Apple Macintosh. Please refer to the “Using KiSS PC-Link” section of this User Guide for information on how
to do this. Once KiSS PC-Link is running on a computer, this computer is referred to as a “host”.
Video files: Browse and play video files added to the PC-Link software on your PC or Mac.
Audio files: Browse and play audio files added to the PC-Link software on your PC or Mac.
Picture files: Browse and view JPG-format pictures added to the PC-Link software on your PC or Mac.
Select host: This will search for PC-Link hosts on your network. When one or more has been found, press
the one you would like to be your default content host. Once done, you will be sent back to the PC-Link menu
section where you will be able to browse and play content from the selected host by entering one of the
three categories described above.
KiSS PC-Link
KiSS Online
This menu section deals with the online capabilities and features of the DP-600. Accessing KiSS Online
or KML pages requires the player to have Internet access through either a wired or wireless network. For
more information about connecting the player to a network, see the “Connecting your player to a network”
section of this User Guide. More information about each individual online application can be obtained in the
dedicated “KiSS Online” section.
KiSS Online: This menu option gives you access to the KiSS Online portal, where you will have direct access
to a portfolio of online applications. Currently the portal features KiSS TV Guide - an electronic program
guide, WebRadio – a repository containing thousands of internet-based radio channels, weather information,
a stock viewer and a handful of interactive board games.
WebRadio: This menu item brings up WebRadio directly without the need to browse the main menu of the
KiSS Online portal. For information on how to use WebRadio3, please refer to the KiSS Online section of this
User Guide.
My KML page: This menu item brings you directly to your personally specified KML page. See next paragraph
for information on how to add one. KML stands for KiSS Media Language and is essentially a language for
presenting online content like text, images and video in a proper way on a TV screen, much like websites do
english
18
english
on a computer monitor. Developing KML pages require some basic programming skills but is fairly simple to
understand. Information on how to develop your own KML pages can be found in the support section of our
website at www.kiss-technology.com/support.
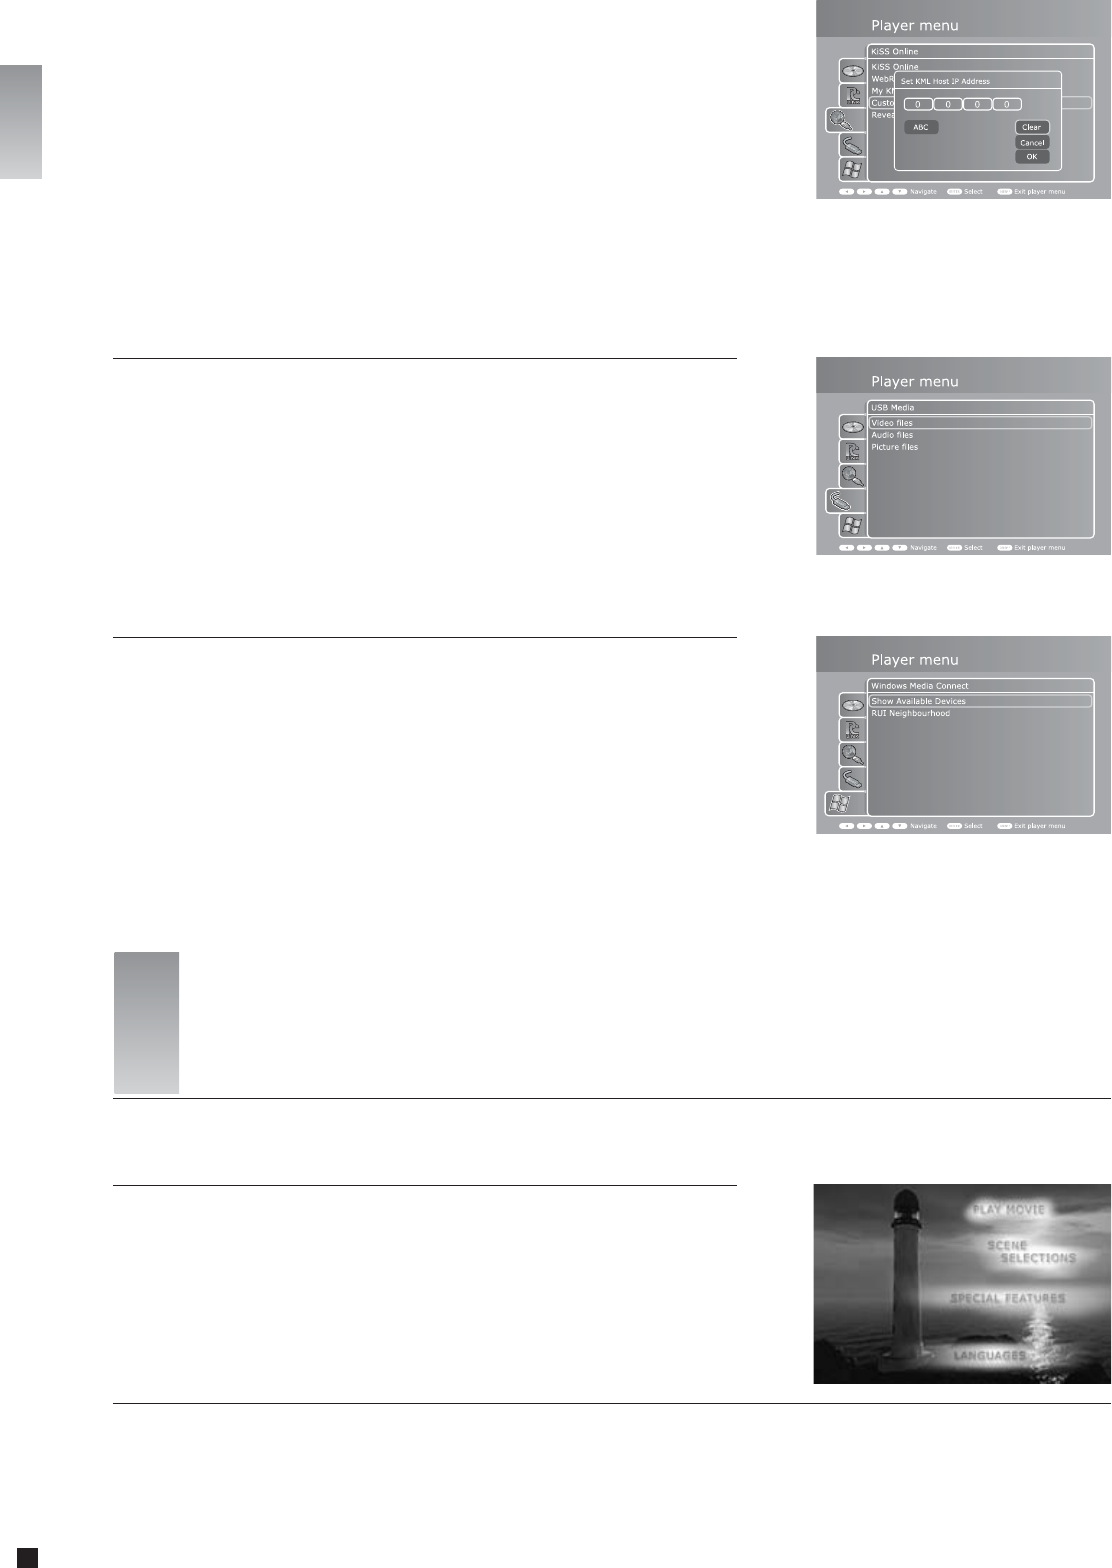
Customize "My KML" Page: Entering this menu item allows you to define an IP address pointing to a KML
page of your choice. KiSS Technology does not maintain or keep track of third party pages. Therefore we
do not currently provide a repository of available pages. Instead we recommend doing an Internet search.
Please note that pages are provided “as is” by third party developers and are in no shape or form affiliated
with KiSS Technology.
Reveal Player ID: Enter this menu item to reveal your Player ID. A player ID is your player’s unique name and
is used to access KiSS Online features as well as KiSS web services. The Player ID is used for authentication
and storing your unique preferences only, and you will almost never be asked to enter this anywhere. KiSS
would like to advise you NOT to give this out to anyone except when asked for login on KiSS web services or
by request from KiSS Customer Service in the resolving of specific issues.
This menu section contains options for browsing and playing files residing on an USB storage device connected to
the player. In order to use them, please connect an USB storage device (hard drive, USB memory dongle or other)
to the USB port concealed behind the removable cover in the bottom right side of your player or the port on the
back of the player. See the “Connecting a USB mass storage device” section of this User Guide for depiction.
Video files: Browse and view video files on the connected USB storage device.
Audio files: Browse and view audio files on the connected USB storage device.
Picture files: Browse and view JPG-format pictures on the connected USB storage device.
USB Media
Windows Media Connect is a way of sharing media content between Windows XP and supported devices
such as your player. To take advantage if this you will need to install Windows Media Connect on your
Windows PC. The newest version can also be obtained as a download directly from Microsoft’s website.
Show available devices: Press this to scan for Windows Media Connect supported devices on the
network. Once one or more has been found you will be able to browse and play supported files from the
selected device.
Note: You may need to download and install Windows Media Connect on your PC for this function to work.
Windows Media Connect can be found in the download section of the Microsoft website or alternatively at
the following link: http://www.microsoft.com/windows/windowsmedia/devices/wmconnect/default.aspx.
Windows Media Connect
9Playing Media
Press the EJECT button on the front of the player or on the remote to open the disc tray. Place the DVD in it
and press either the PLAY or EJECT button again to start it automatically. After a few seconds the DVD menu
will appear. You can navigate it using the arrow buttons on your remote and press OK to enter a menu item.
When a DVD is already in inserted into the DP-600, you can start it by pressing PLAY on your remote. From
the menu you can also access it by selecting the Disc menu and select “Play disc”.
Options: At any time during playback you can press the OPTIONS button on the remote control for a list of
additional DVD playback related options.
Playing DVDs
english