LINKSYS WAP300N Selectable Dual-Band Wireless-N Access Point User Manual WAP300N UG for certificaionx
LINKSYS LLC Selectable Dual-Band Wireless-N Access Point WAP300N UG for certificaionx
LINKSYS >
Contents
- 1. User Manual
- 2. User Manual - Statements
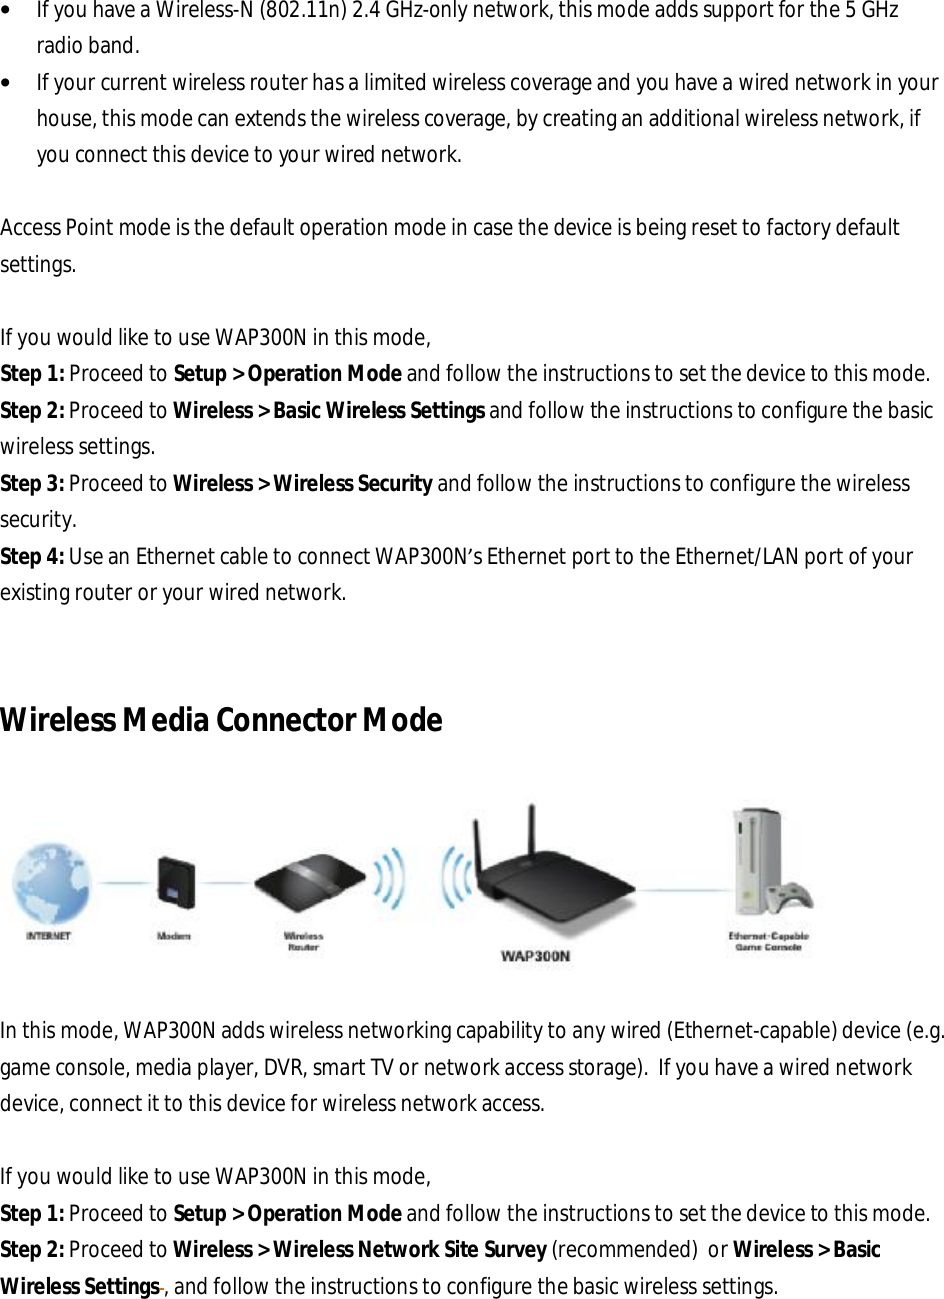
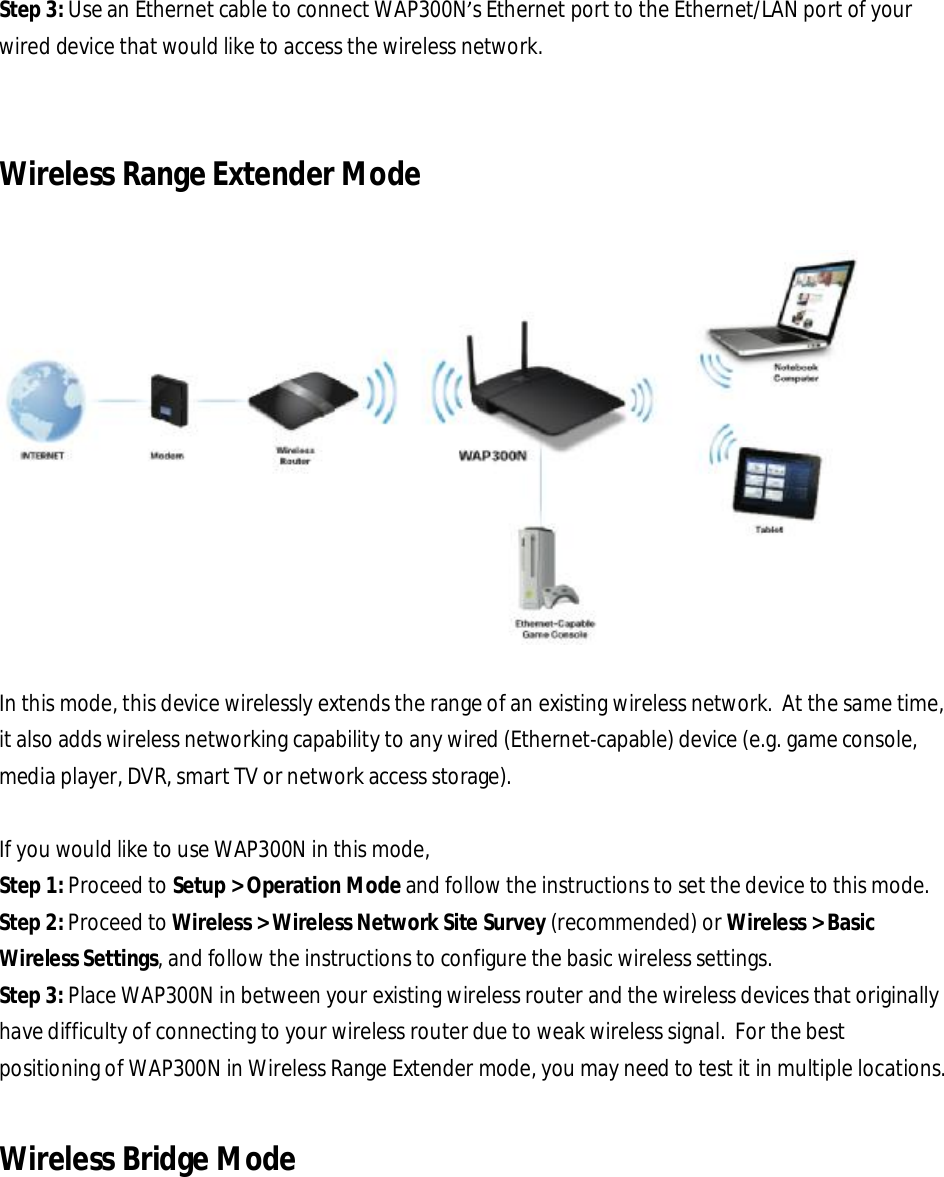
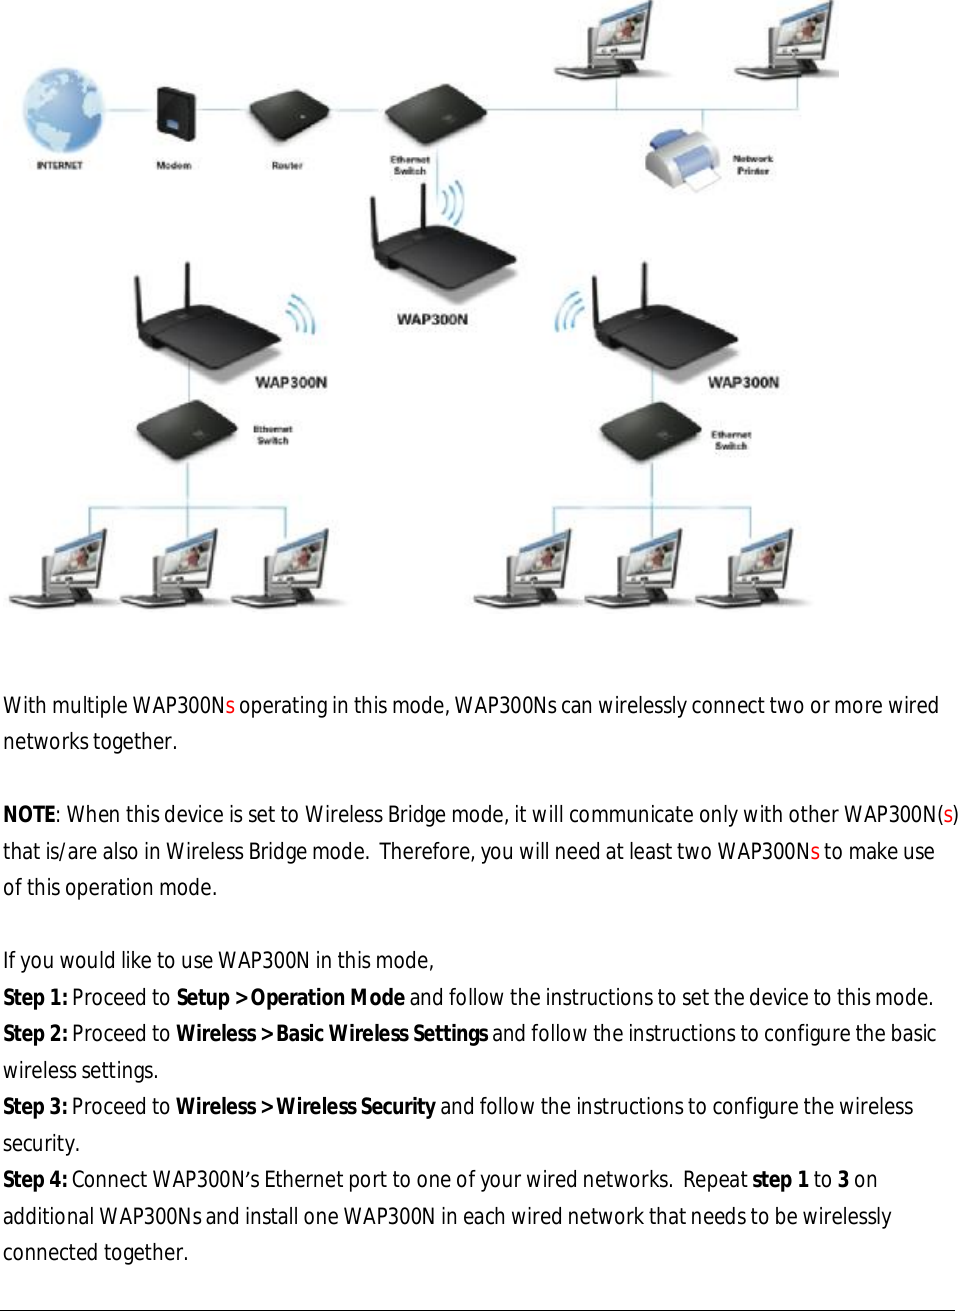
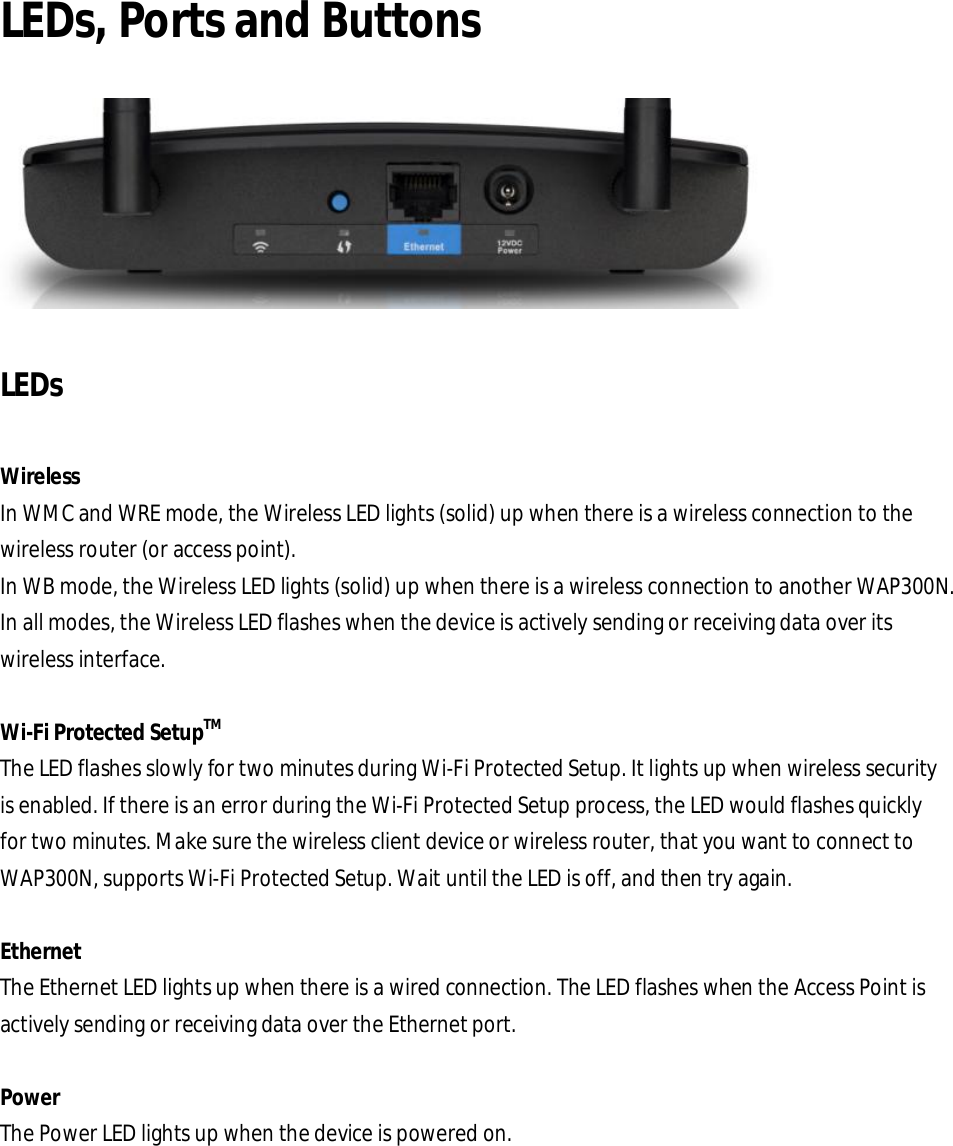
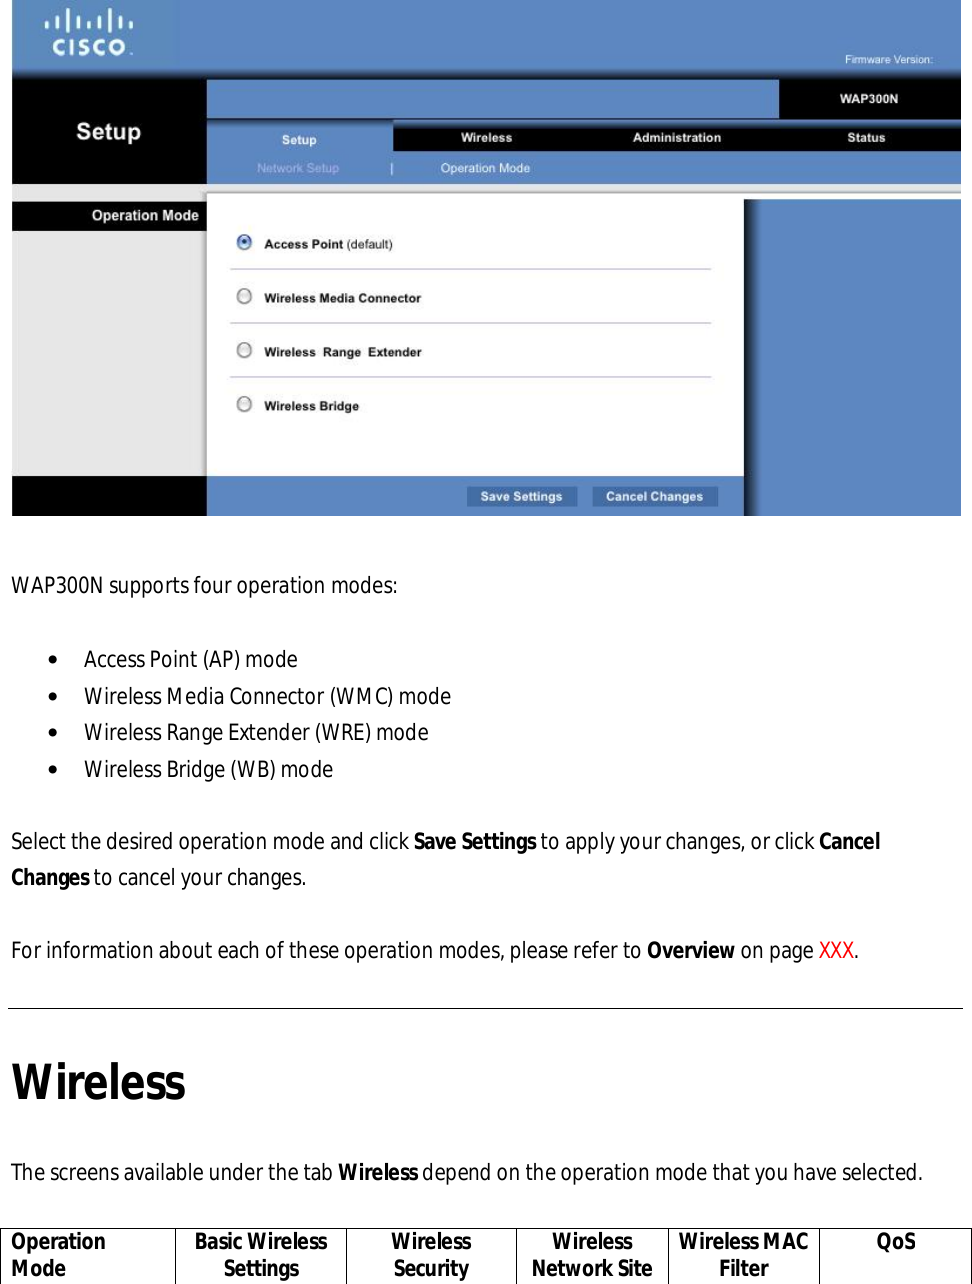
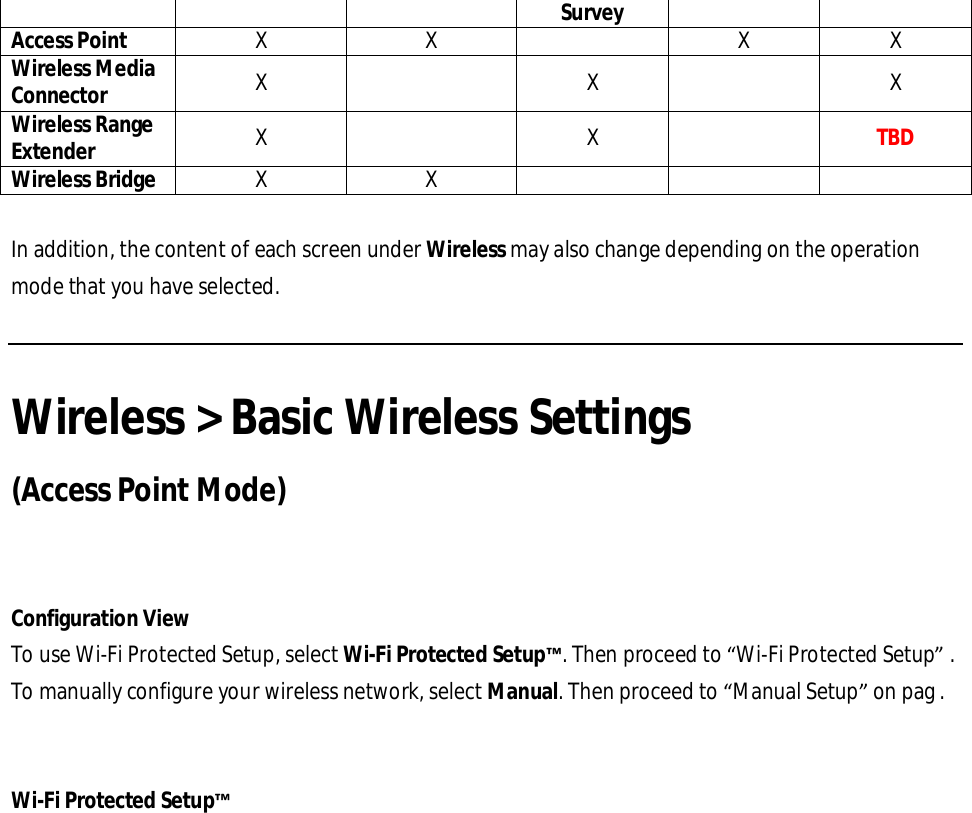
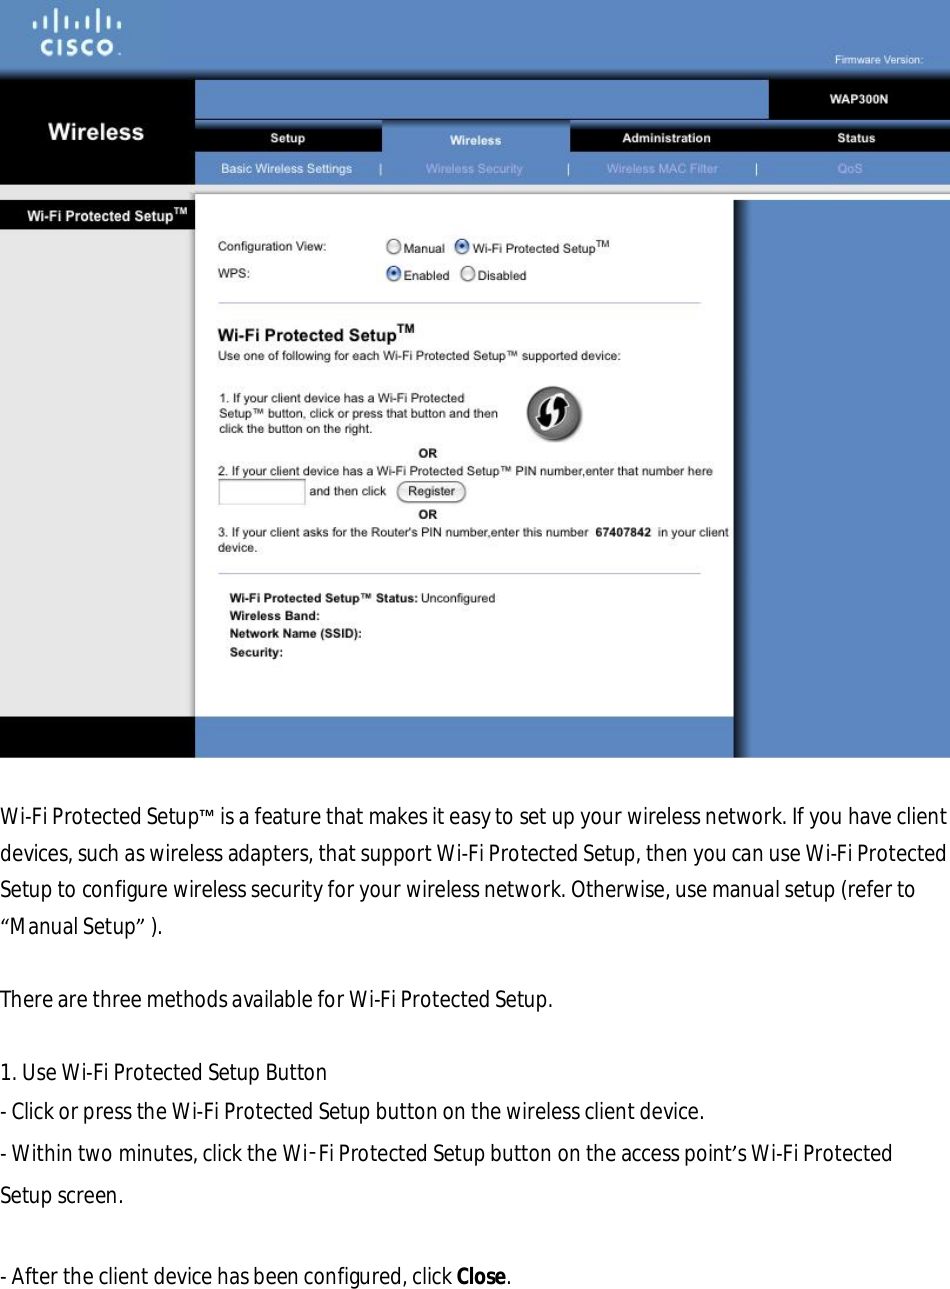
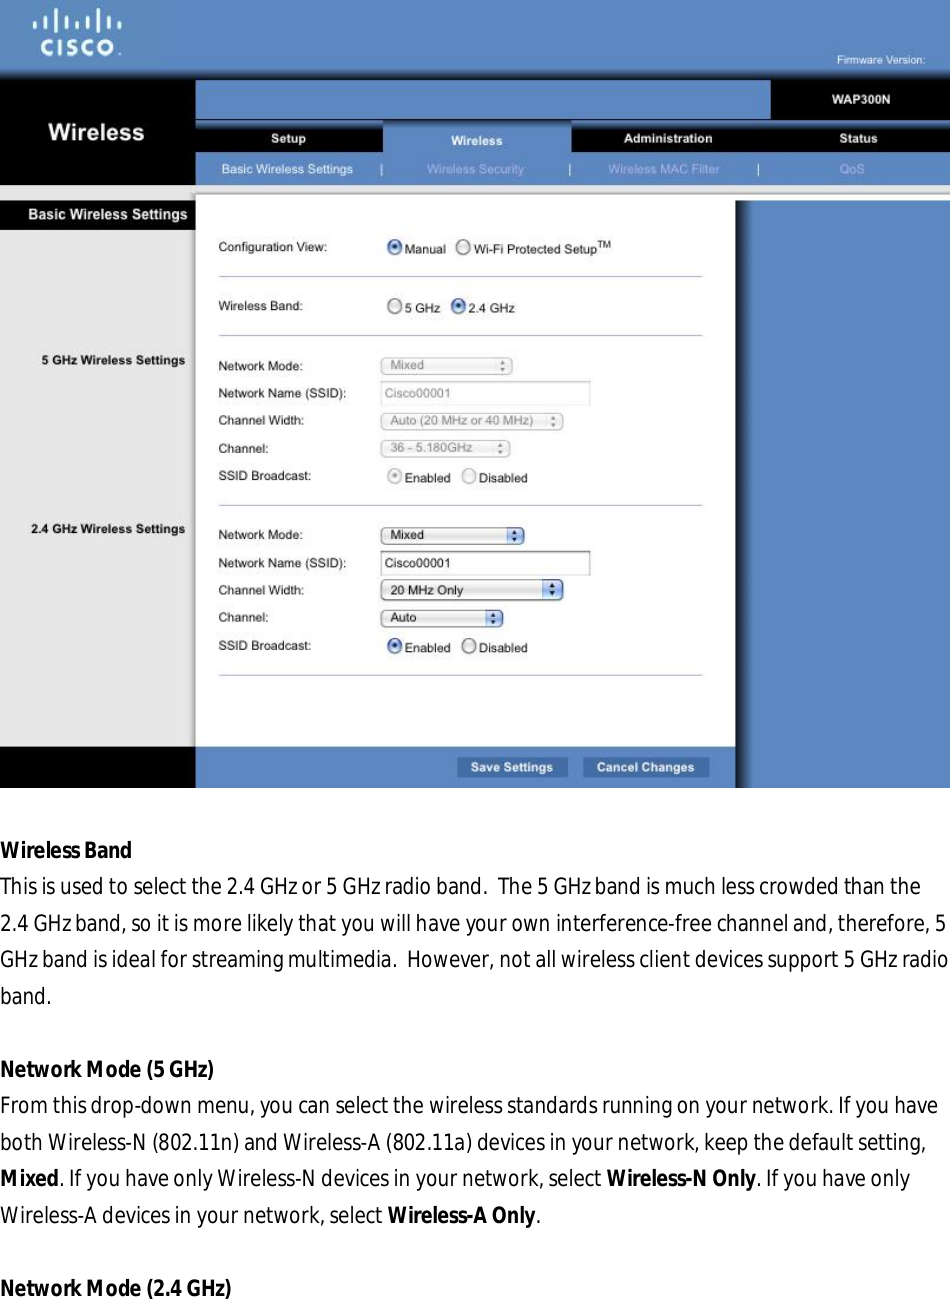
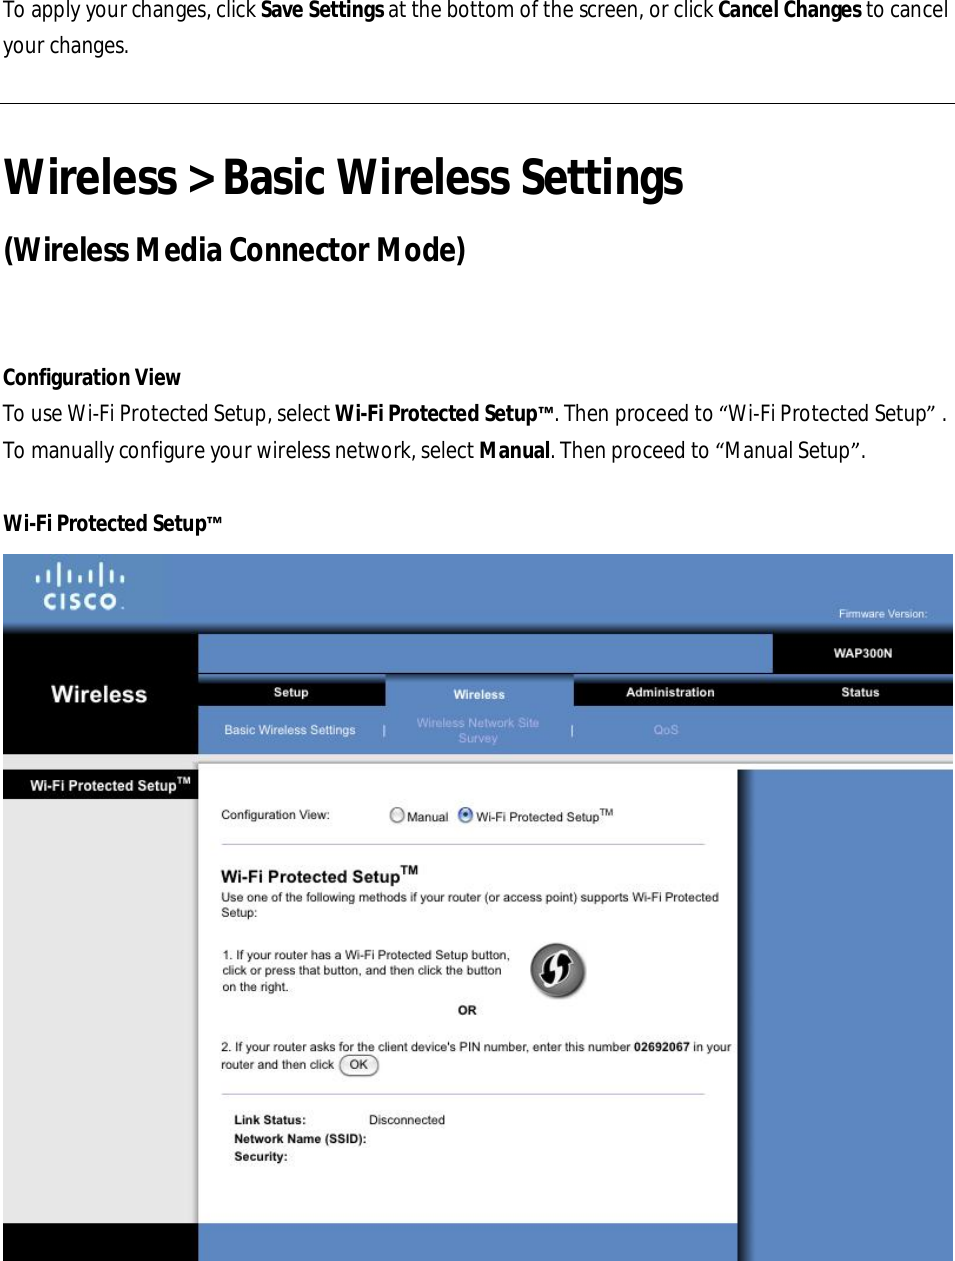
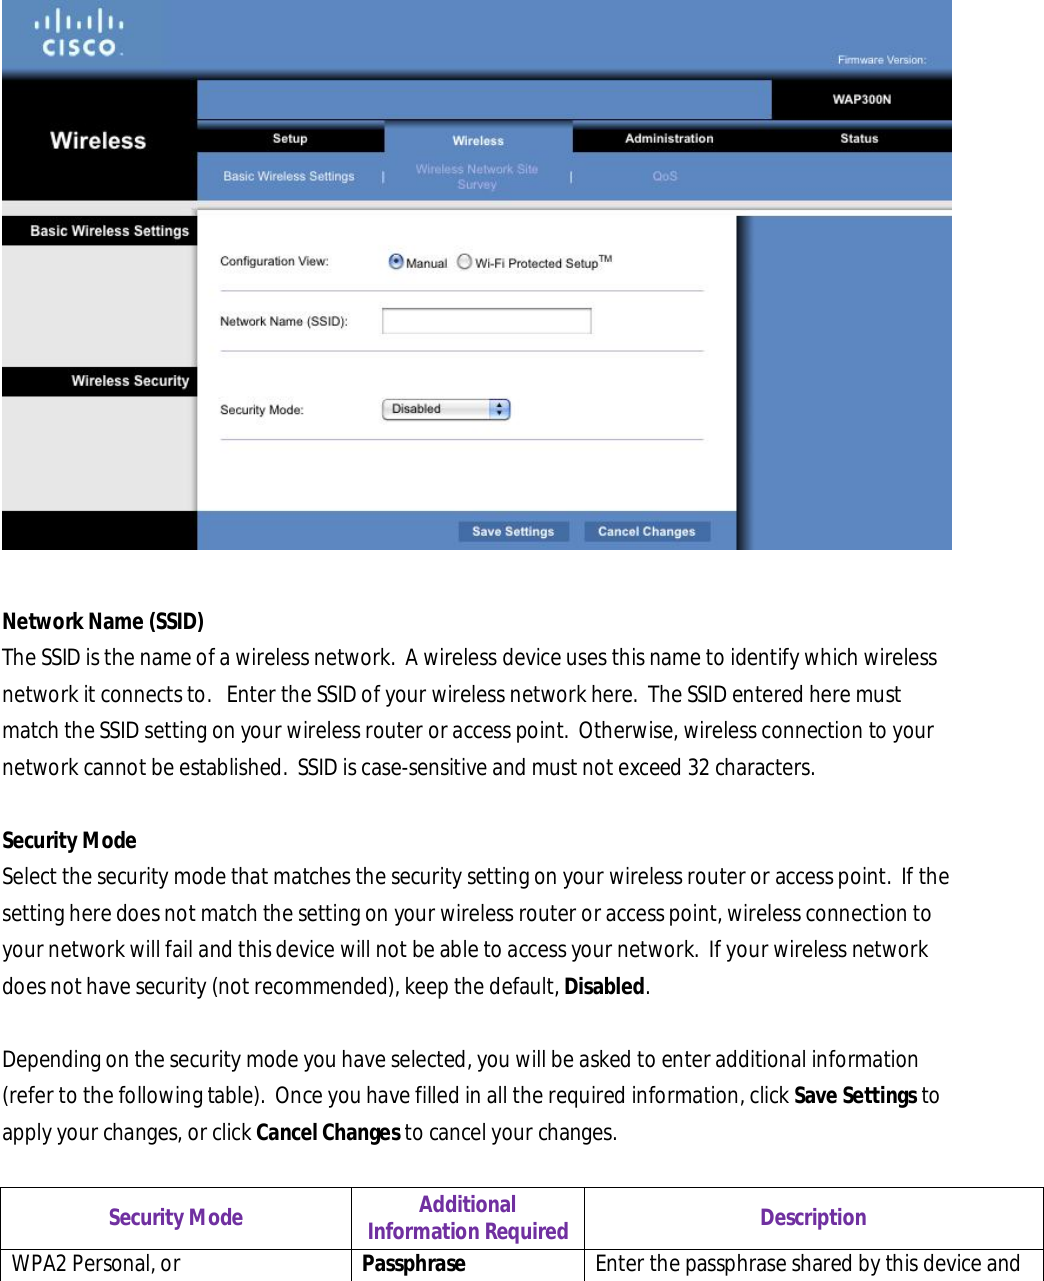
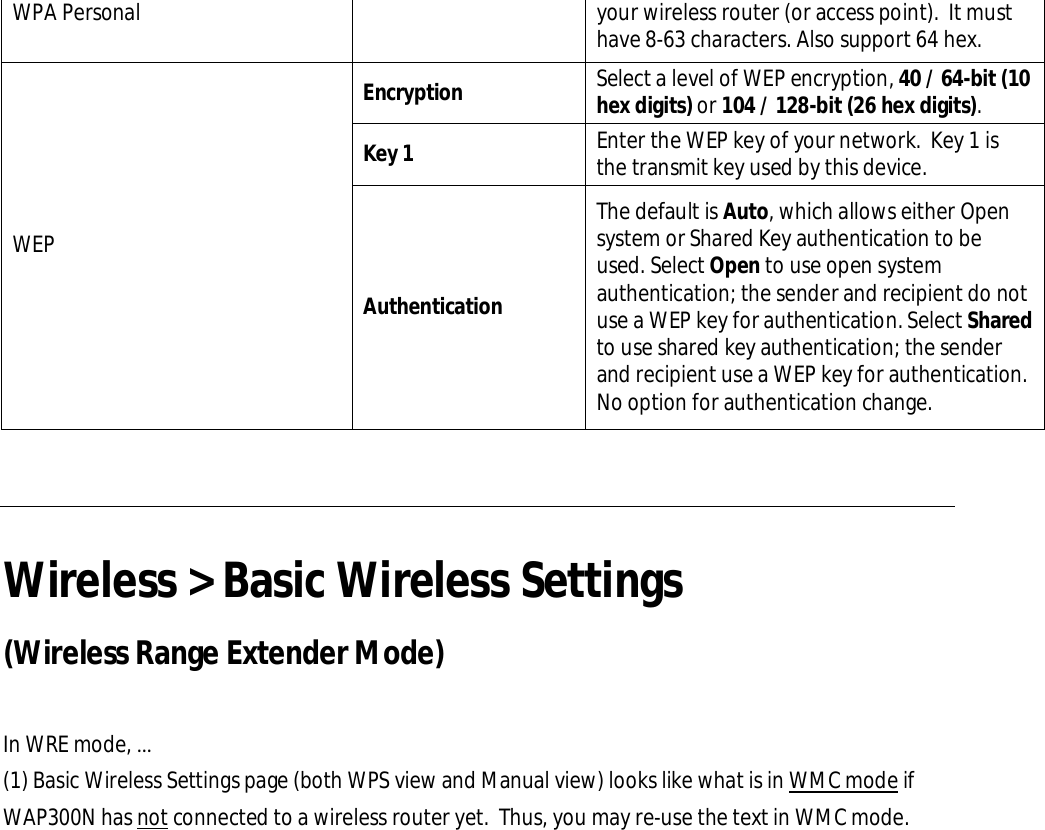
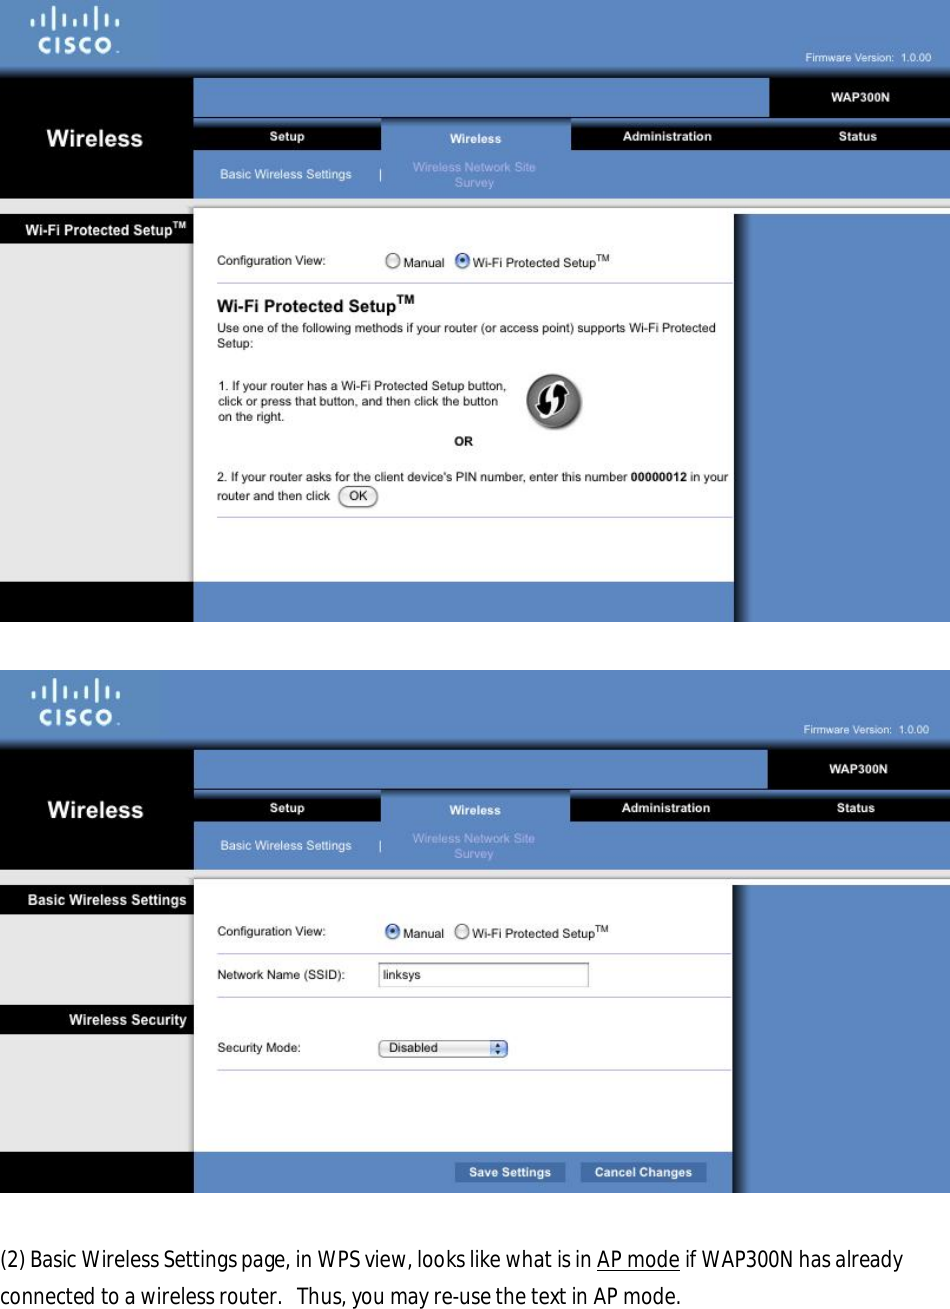
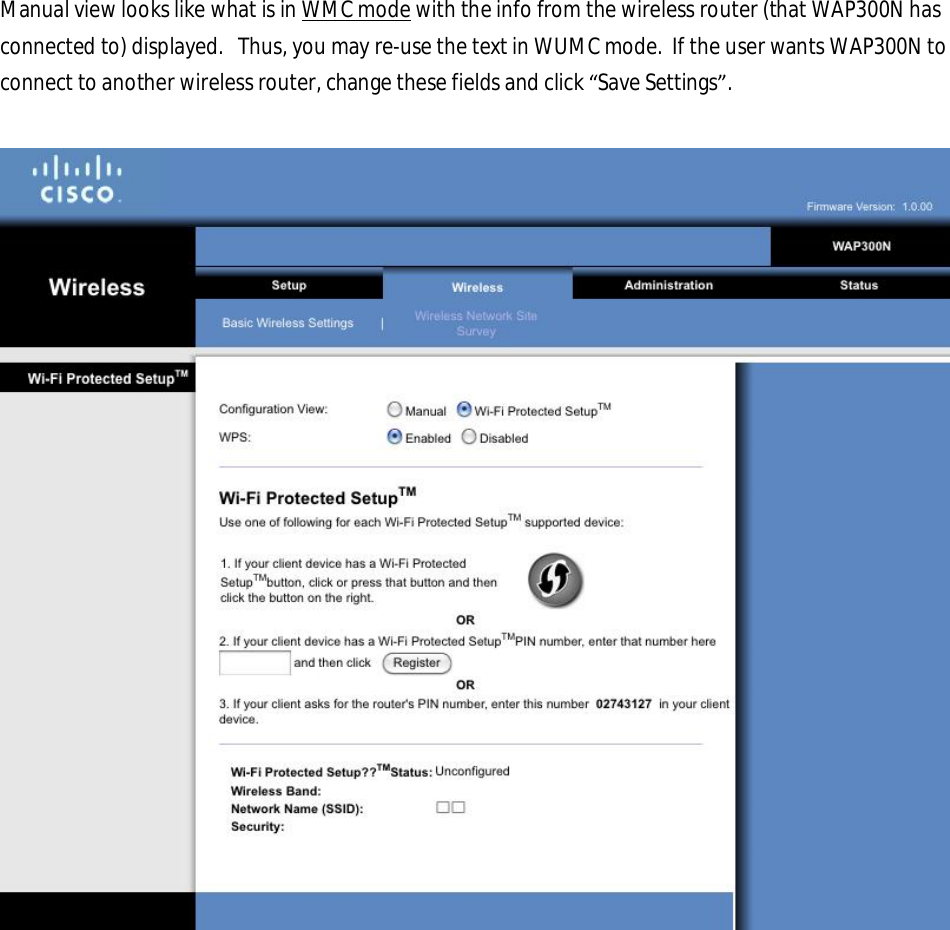
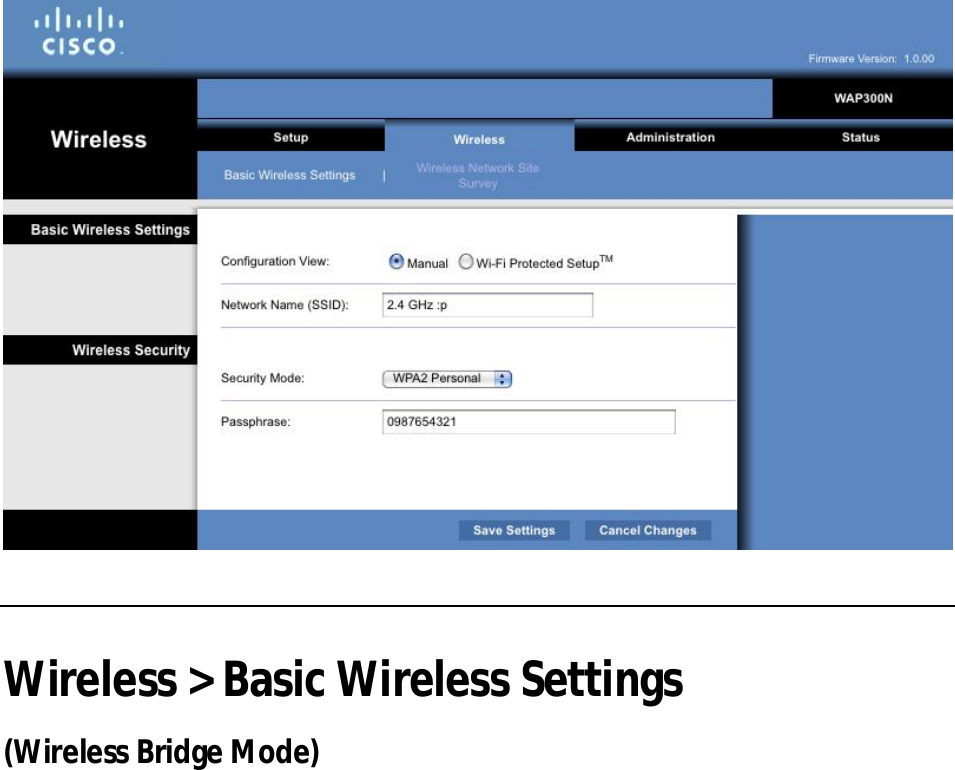
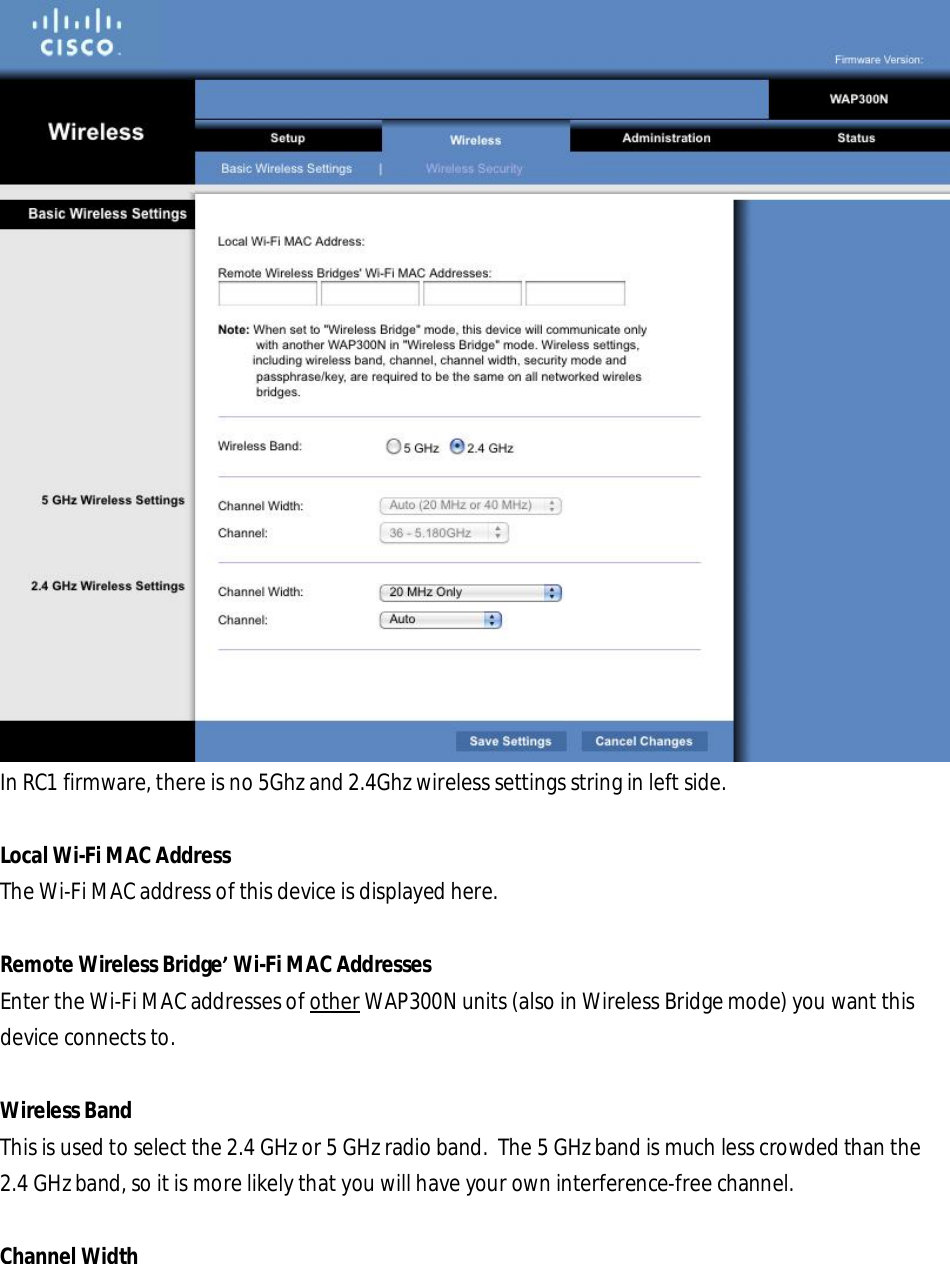
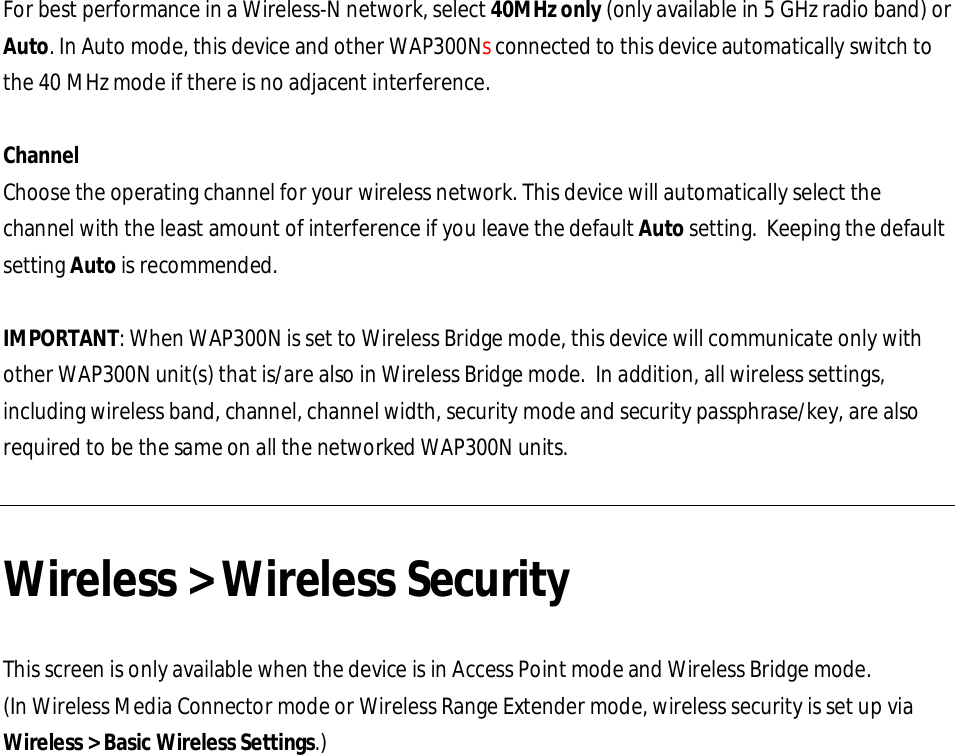
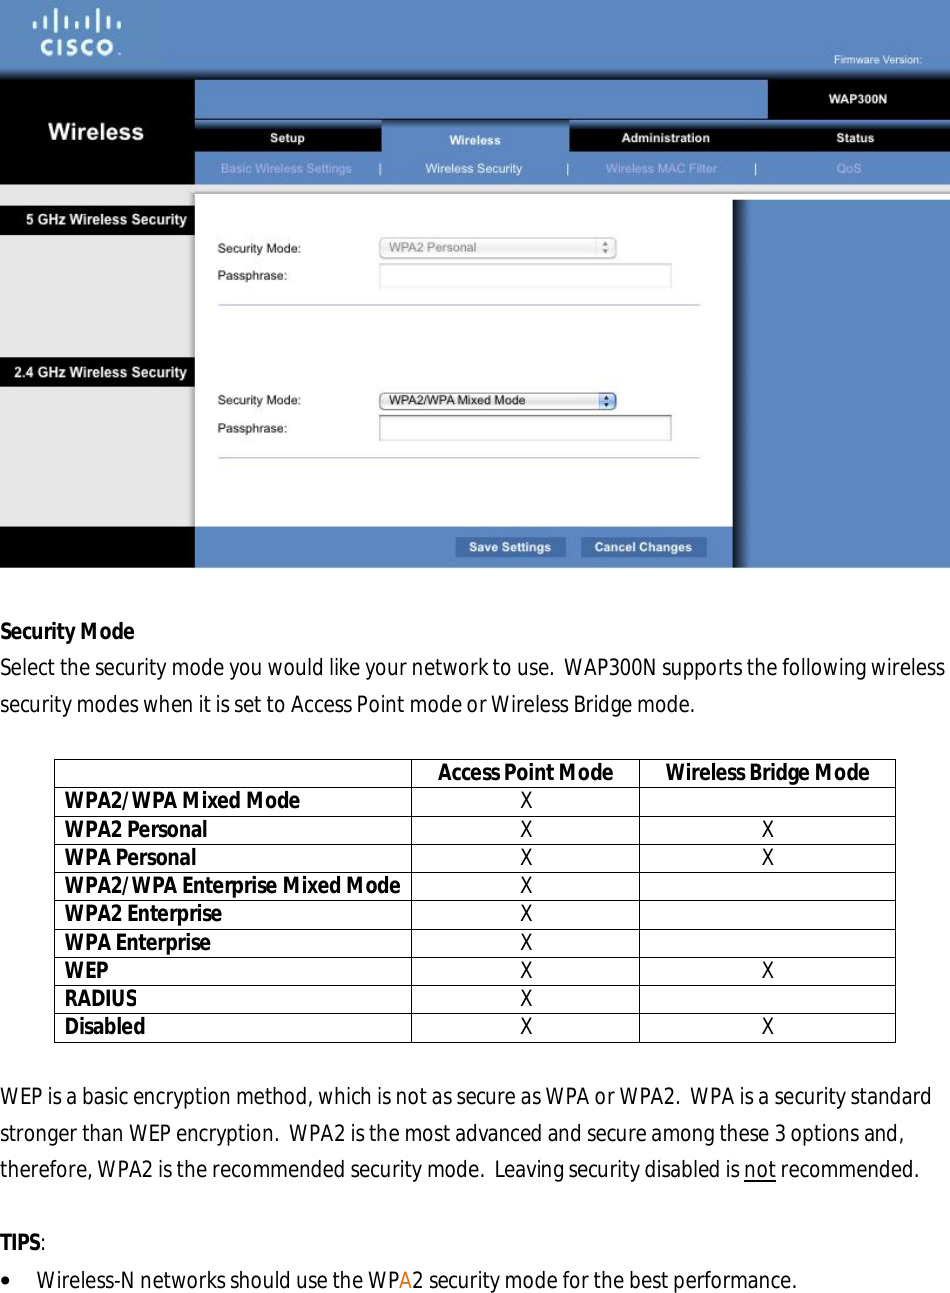
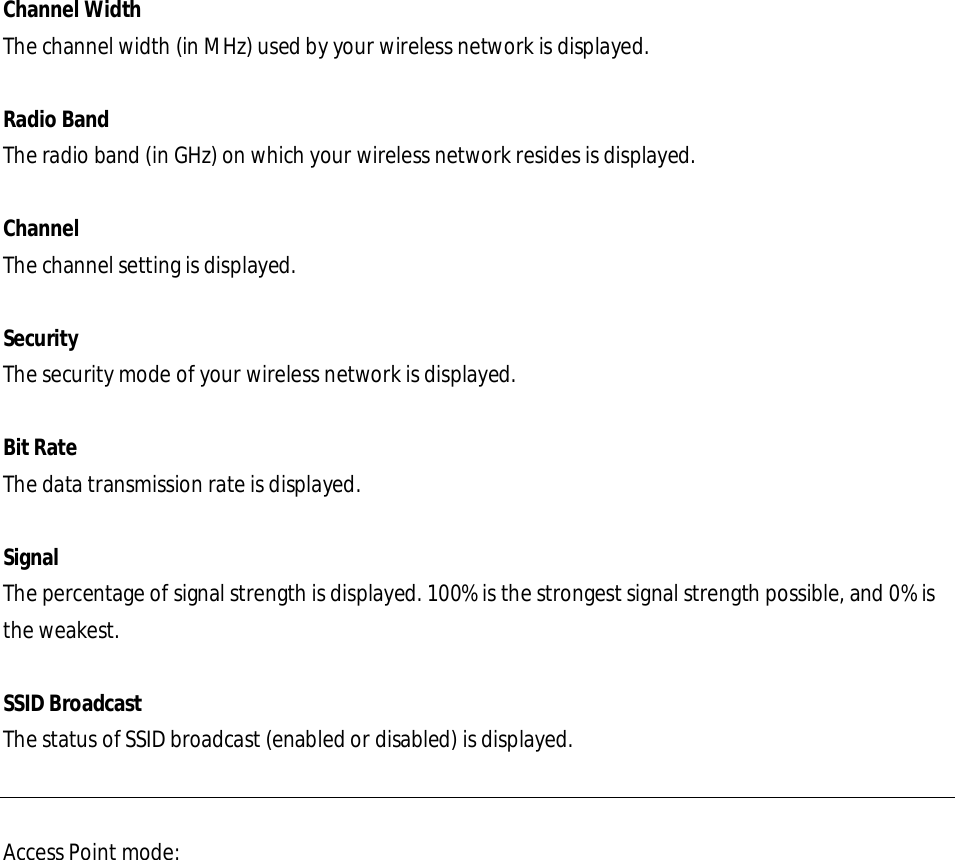
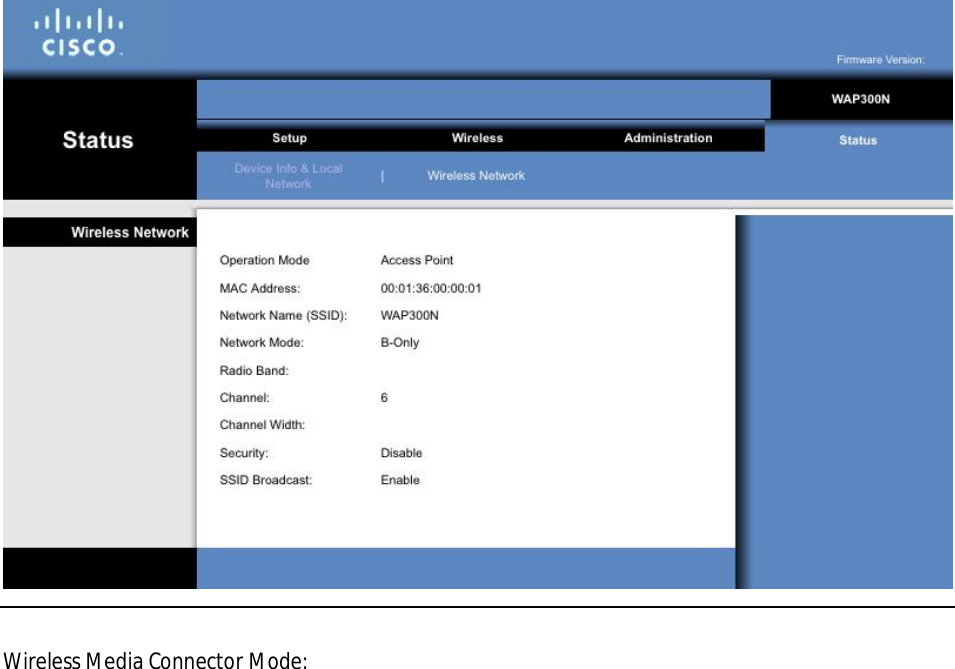
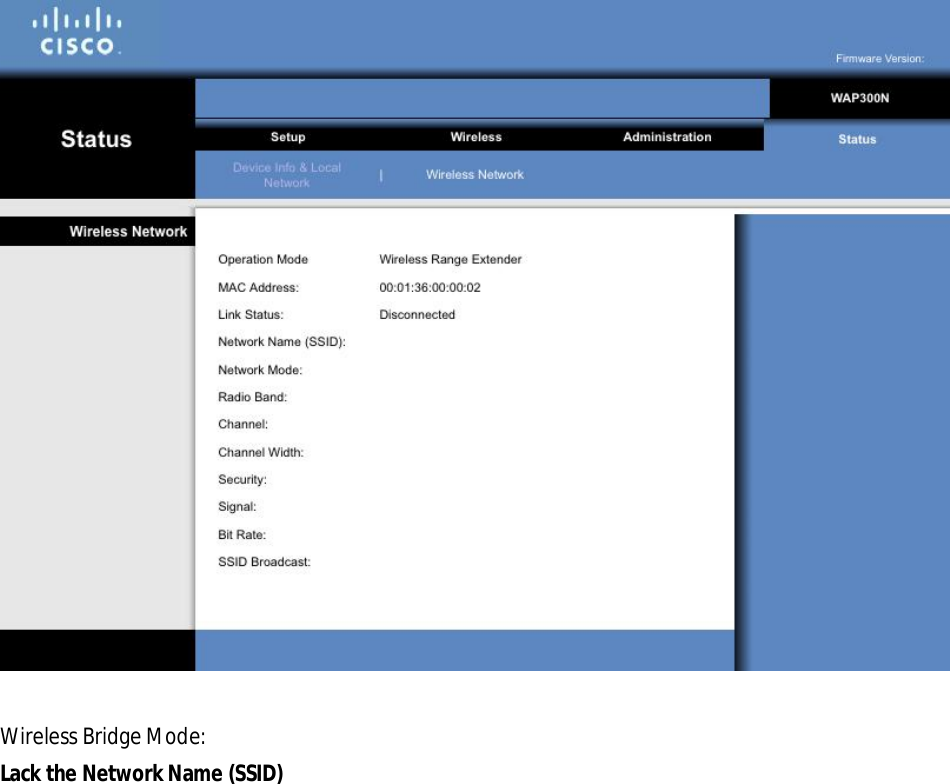
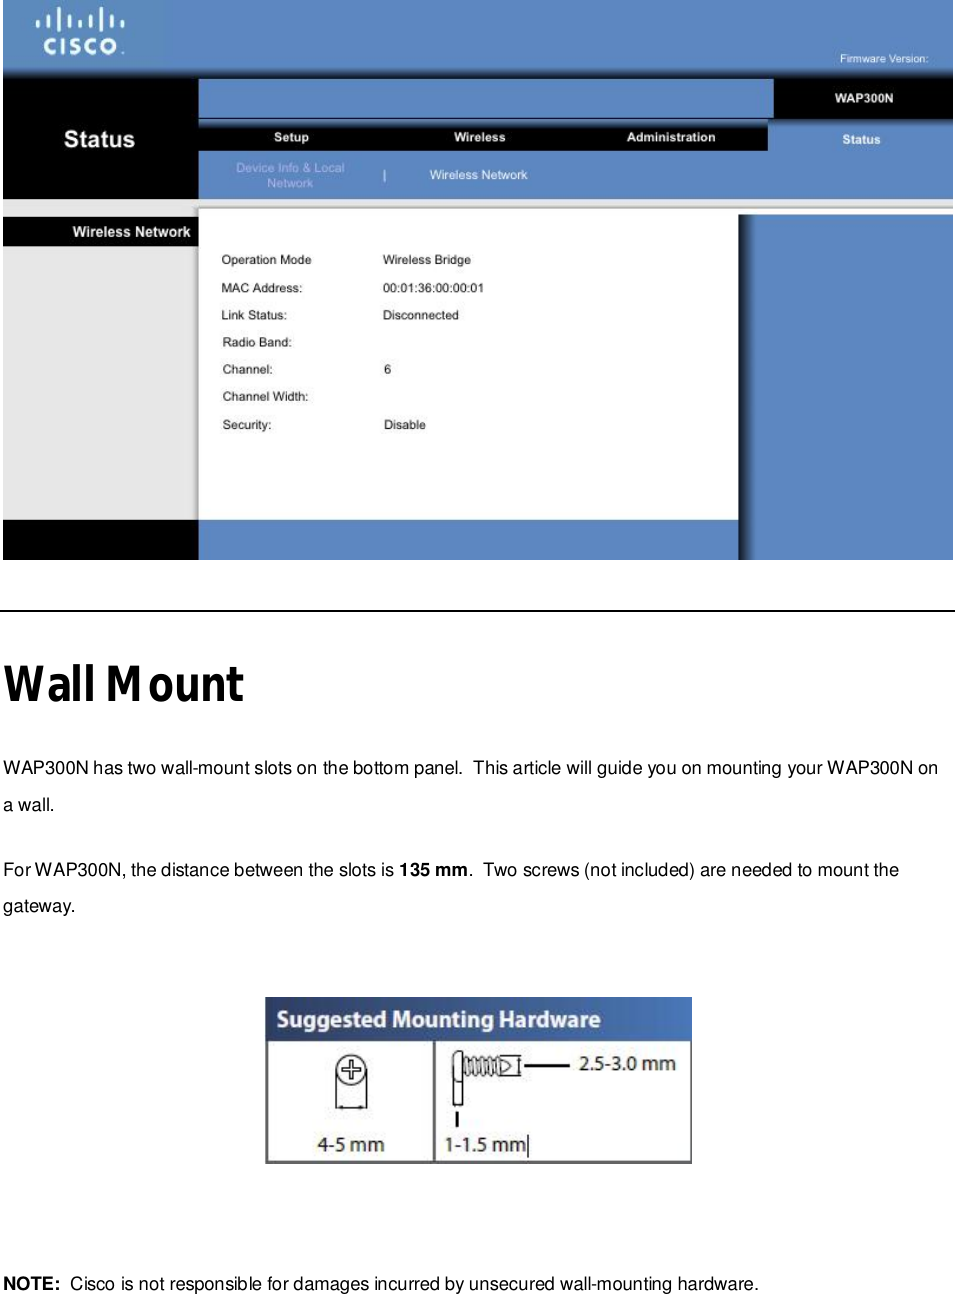
User Manual