LINKSYS WML11B Wireless-B Media Link for Music User Manual Book
LINKSYS LLC Wireless-B Media Link for Music Book
UserManual.wiki
>
LINKSYS
>
WML11B User Manual
>
user manual part 5
Contents
1.
user manual part 1
2.
user manual part 2
3.
user manual part 3
4.
user manual part 4
5.
user manual part 5
6.
user manual part 6
user manual part 5
Navigation menu
Upload a User Manual
Namespaces
Wiki Guide
HTML
PDF
Info
Views
User Manual
Discussion / Help
Navigation
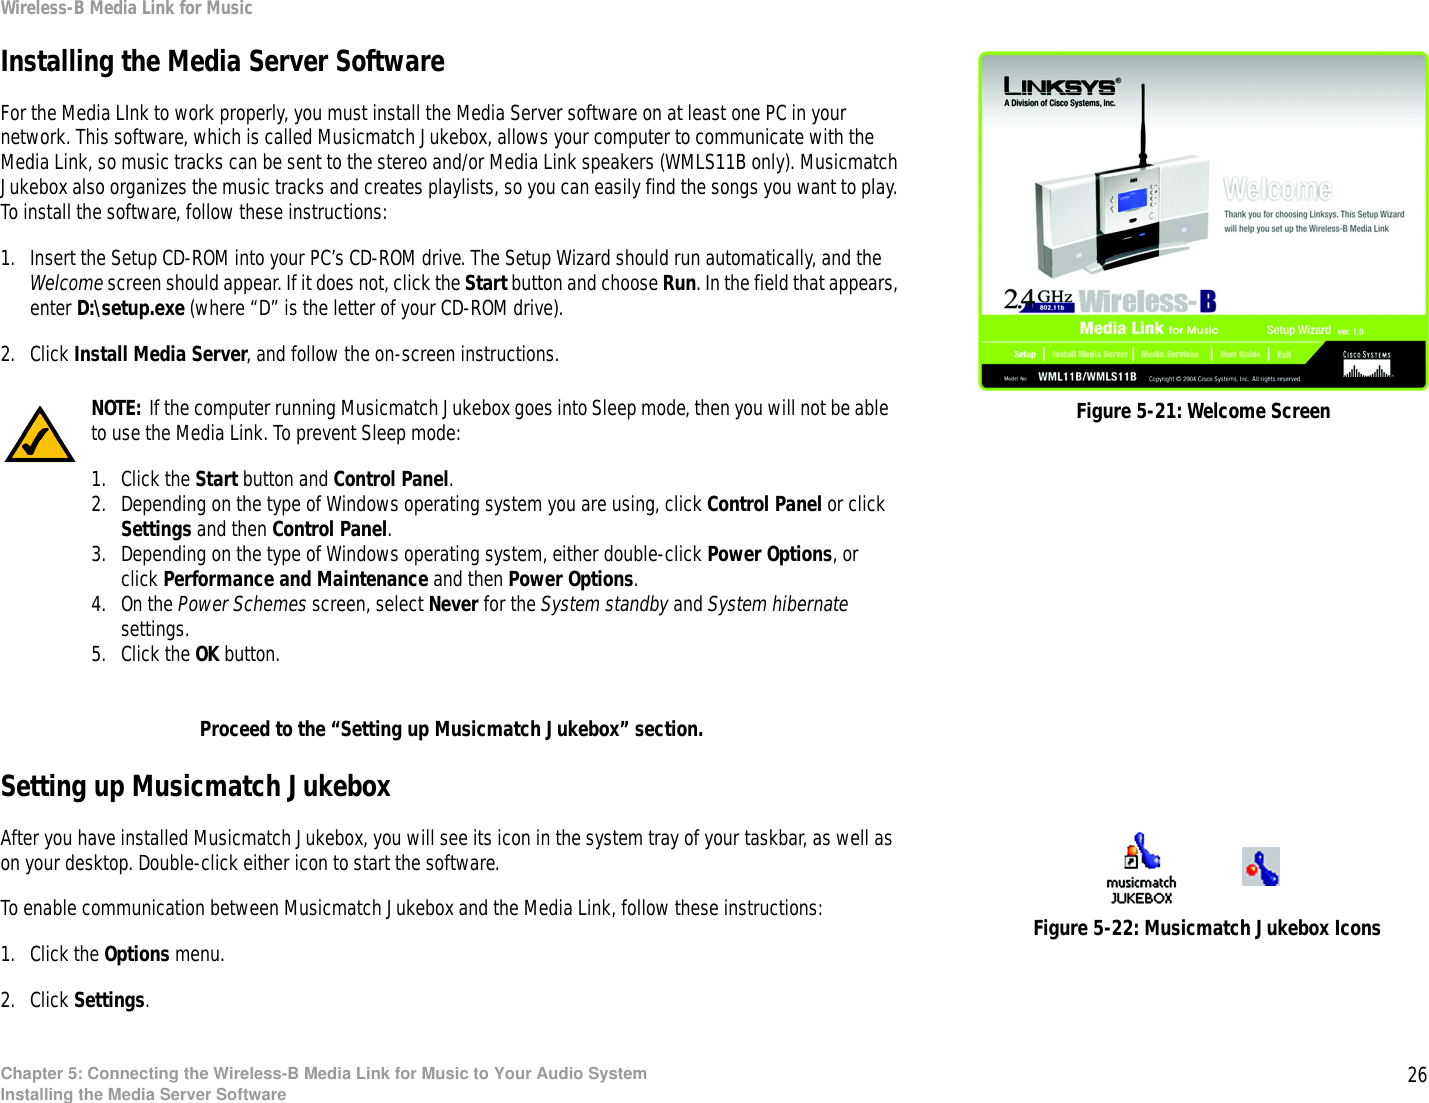
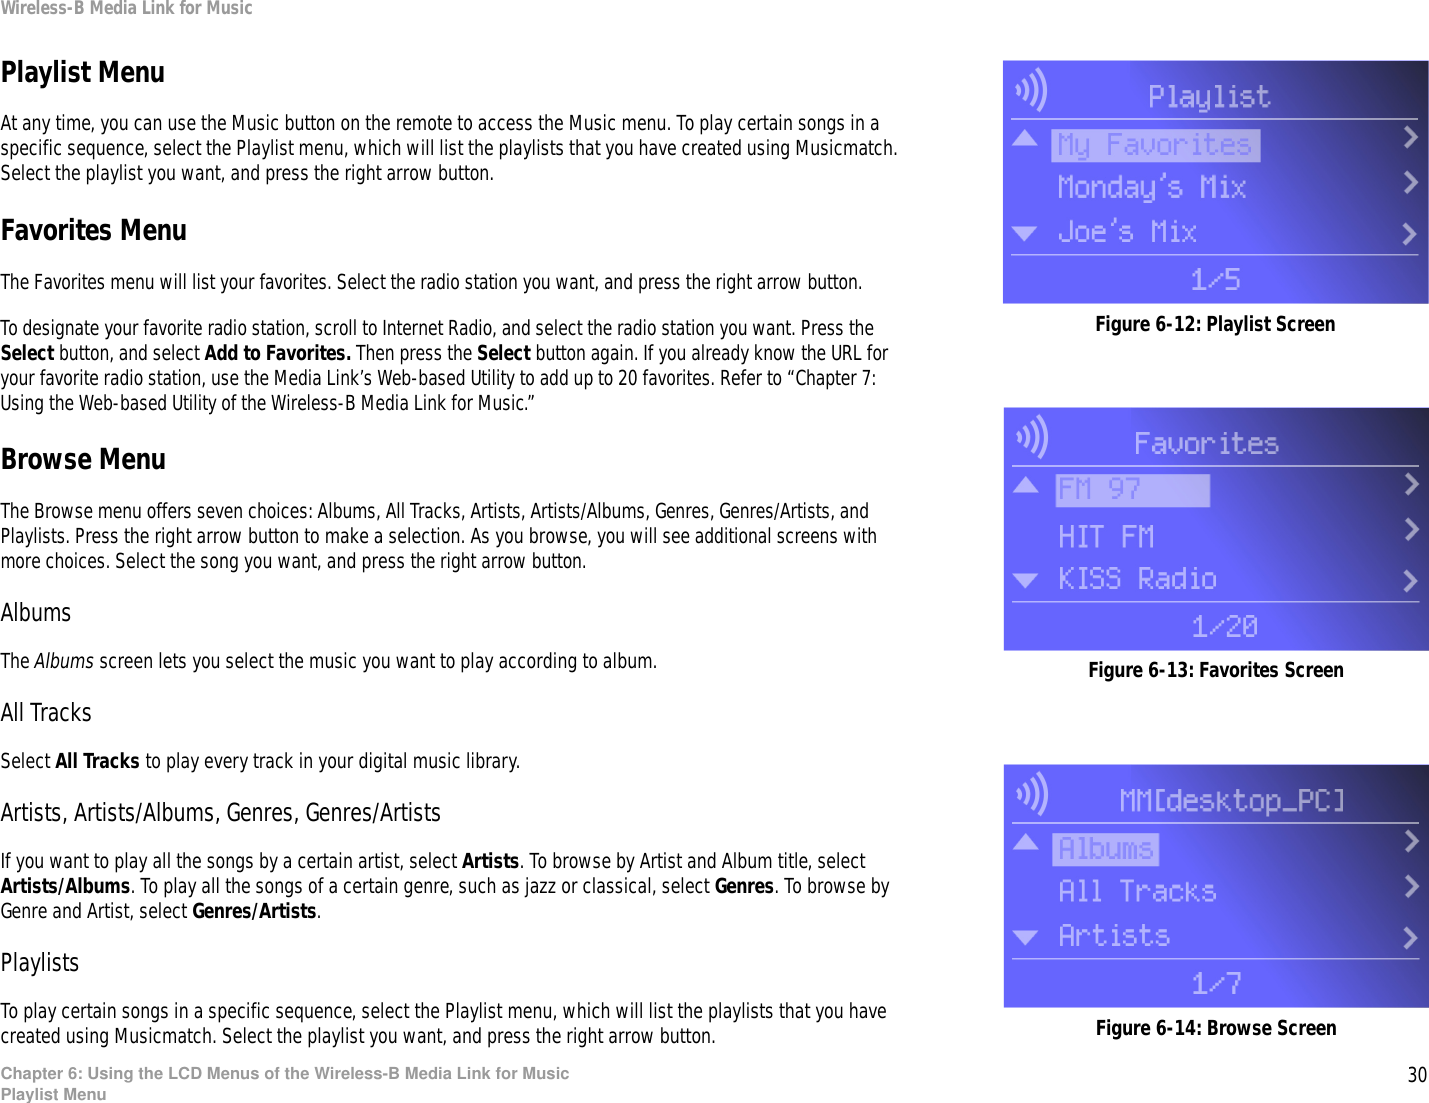
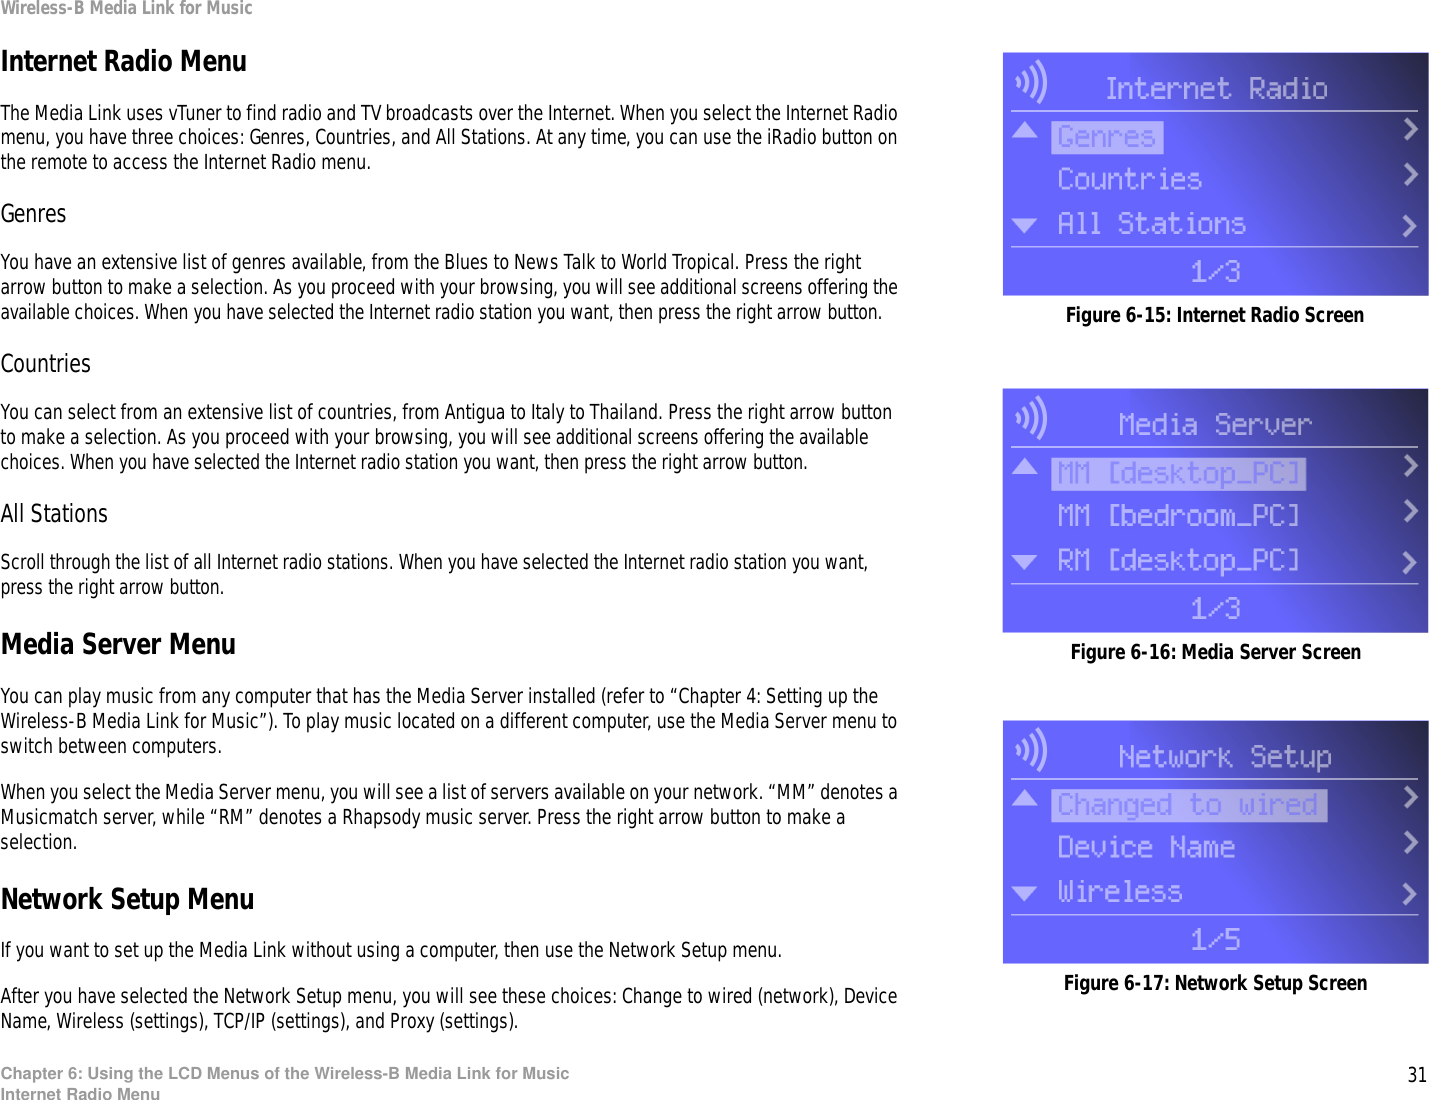
![24Chapter 5: Connecting the Wireless-B Media Link for Music to Your Audio SystemUsing the LCD Menus to Set up the Media LinkWireless-B Media Link for MusicEncryptionIf you want to change the Media Link’s encryption settings, select Encryption. You will see four choices: WEP (Wired Equivalent Privacy), Key Entry Method, Key Size, and Key.WEP - To enable or disable WEP encryption, select WEP. To enable WEP encryption, select Enable. To disable WEP encryption, select Disable. Your selection will be denoted by a bracketed asterisk, [*]. Press the right arrow button to save your new setting. Press the left arrow button to cancel your change.Key Entry Method - To change how you want to enter the WEP key, select Key Entry Method. If you want to enter a passphrase to generate a WEP key, select ASCII. If you want to enter the WEP key using hexadecimal characters, select HEX. Your selection will be denoted by a bracketed asterisk, [*]. Press the right arrow button to save your new setting. Press the left arrow button to cancel your change.Key Size - To change the size of the WEP key, select Key Size. If you want to use a 64-bit key, select 64. If you want to use a 128-bit key, select 128. Your selection will be denoted by a bracketed asterisk, [*]. Press the right arrow button to save your new setting. Press the left arrow button to cancel your change.Key - To change the passphrase or WEP key, select Key. Enter the passphrase (ASCII characters) or WEP key (hexadecimal characters) in this field. Use the arrow keys to scroll through the available ASCII or hexadecimal characters. To make a selection, press the Select button. Press the right arrow button to save your new setting. Press the left arrow button to cancel your change. If you are entering hexadecimal characters, make sure you enter the exact number of hexadecimal characters requested on the Key screen.Site SurveyIf you want to search for all available wireless networks, select Site Survey. A list of wireless networks will appear. To connect to a specific network, select it, and press the right arrow button. If the network uses WEP encryption, a new screen will appear and ask you to enter the WEP key.TCP/IPTo change the Media Link’s TCP/IP settings, select TCP/IP. You will see up to six choices: DHCP, IP Address, Subnet Mask, Gateway, DNS Server 1, and DNS Server 2.Figure 5-17: Encryption ScreenWEP (Wired Equivalent Privacy): a method of encrypting data transmitted on a wireless network for greater security.Passphrase: used much like a password, a passphrase simplifies the WEP encryption process by automatically generating the WEP encryption for Linksys products.Figure 5-18: Site Survey Screen](https://usermanual.wiki/LINKSYS/WML11B.user-manual-part-5/User-Guide-413967-Page-1.png)
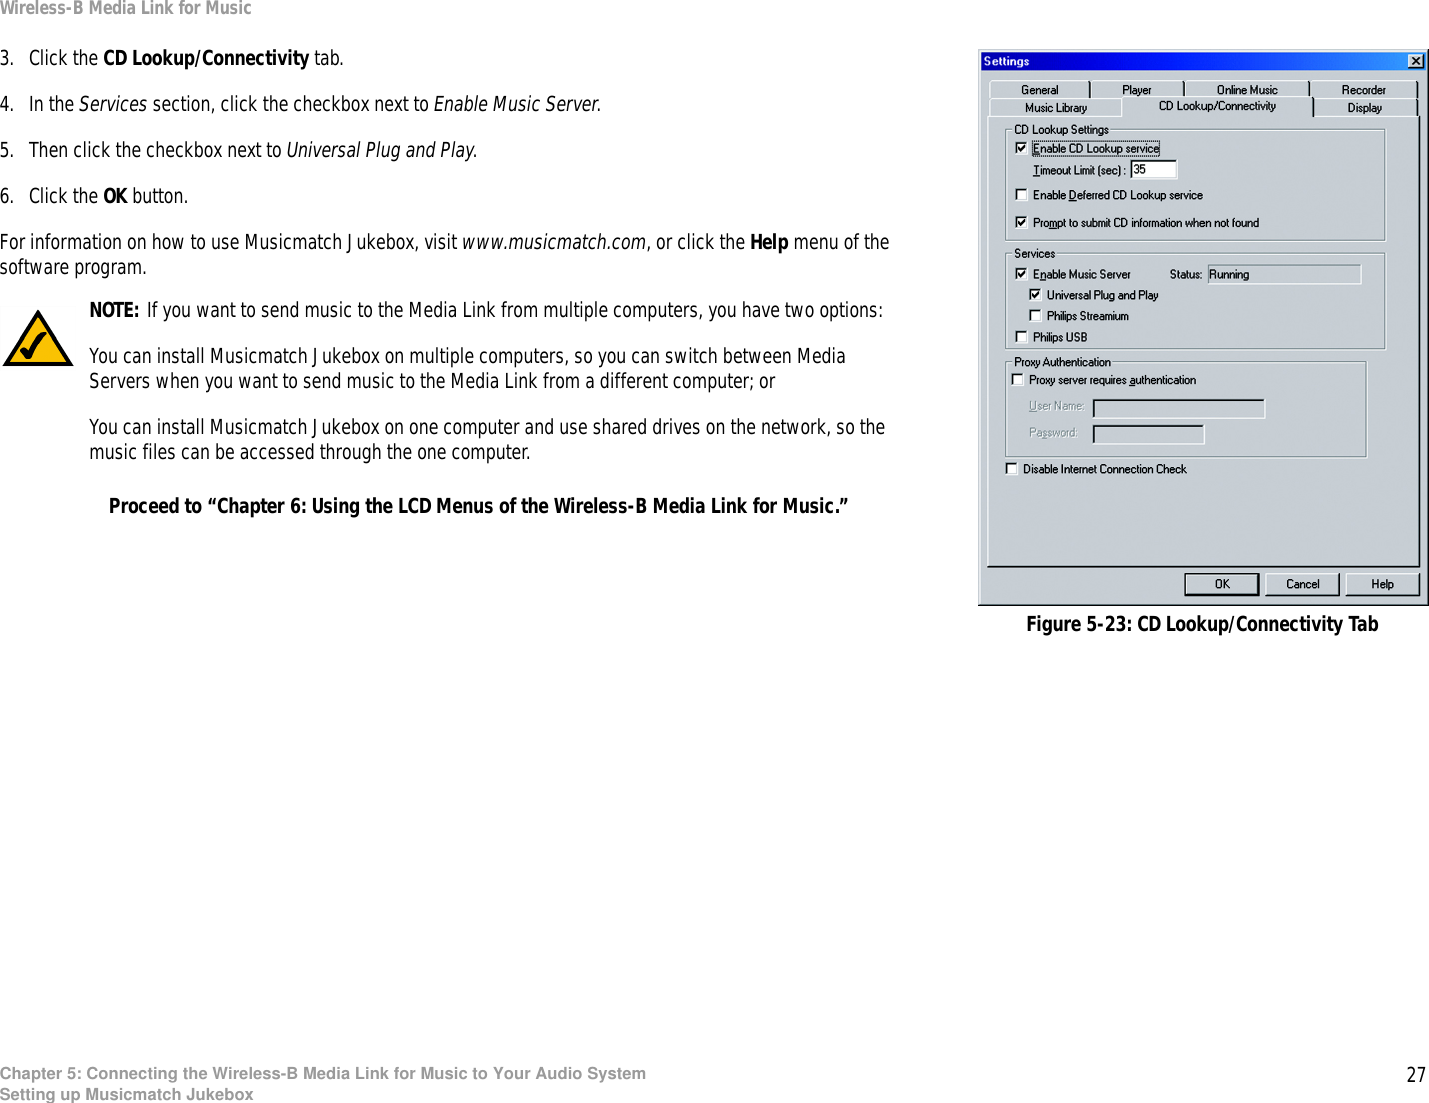
![25Chapter 5: Connecting the Wireless-B Media Link for Music to Your Audio SystemUsing the LCD Menus to Set up the Media LinkWireless-B Media Link for MusicDHCPTo change the Media Link’s DHCP setting, select DHCP. If the Media Link will be assigned an IP address automatically by a router or other DHCP server, then select Enable. You will not see the IP Address, Subnet Mask, Gateway, and DNS Server menus because these settings will be set automatically. If the Media Link needs a static IP address, then select Disable. You will need to configure the IP Address, Subnet Mask, Gateway, and at least one of the DNS Server settings.Your selection will be denoted by a bracketed asterisk, [*]. Press the right arrow button to save your new setting. Press the left arrow button to cancel your change.IP AddressTo change the Media Link’s static IP address, select IP Address. Use the arrow keys to scroll through the numbers 0-9 and punctuation (a period). To make a selection, press the Select button. Press the right arrow button to save your new setting. Press the left arrow button to cancel your change.Subnet MaskTo change the Media Link’s subnet mask, select Subnet Mask. Use the arrow keys to scroll through the numbers 0-9 and punctuation (a period). To make a selection, press the Select button. Press the right arrow button to save your new setting. Press the left arrow button to cancel your change.GatewayTo change the Media Link’s gateway, select Gateway. Use the arrow keys to scroll through the numbers 0-9 and punctuation (a period). To make a selection, press the Select button. Press the right arrow button to save your new setting. Press the left arrow button to cancel your change.DNS Server 1 and DNS Server 2To change the Media Link’s DNS server address, select DNS Server 1 and/or DNS Server 2. (You must enter at least one DNS server address.) Use the arrow keys to scroll through the numbers 0-9 and punctuation (a period). To make a selection, press the Select button. Press the right arrow button to save your new setting. Press the left arrow button to cancel your change.For information about the other LCD menus, refer to “Chapter 6: Using the LCD Menus of the Wireless-B Media LInk for Music.”After you have finished configuring the Media Link’s network settings, proceed to the next section, “Installing the Media Server Software.”Figure 5-19: TCP/IP ScreenFigure 5-20: IP Address ScreenStatic IP address: a fixed address assigned to a computer or device connected to a network.](https://usermanual.wiki/LINKSYS/WML11B.user-manual-part-5/User-Guide-413967-Page-2.png)
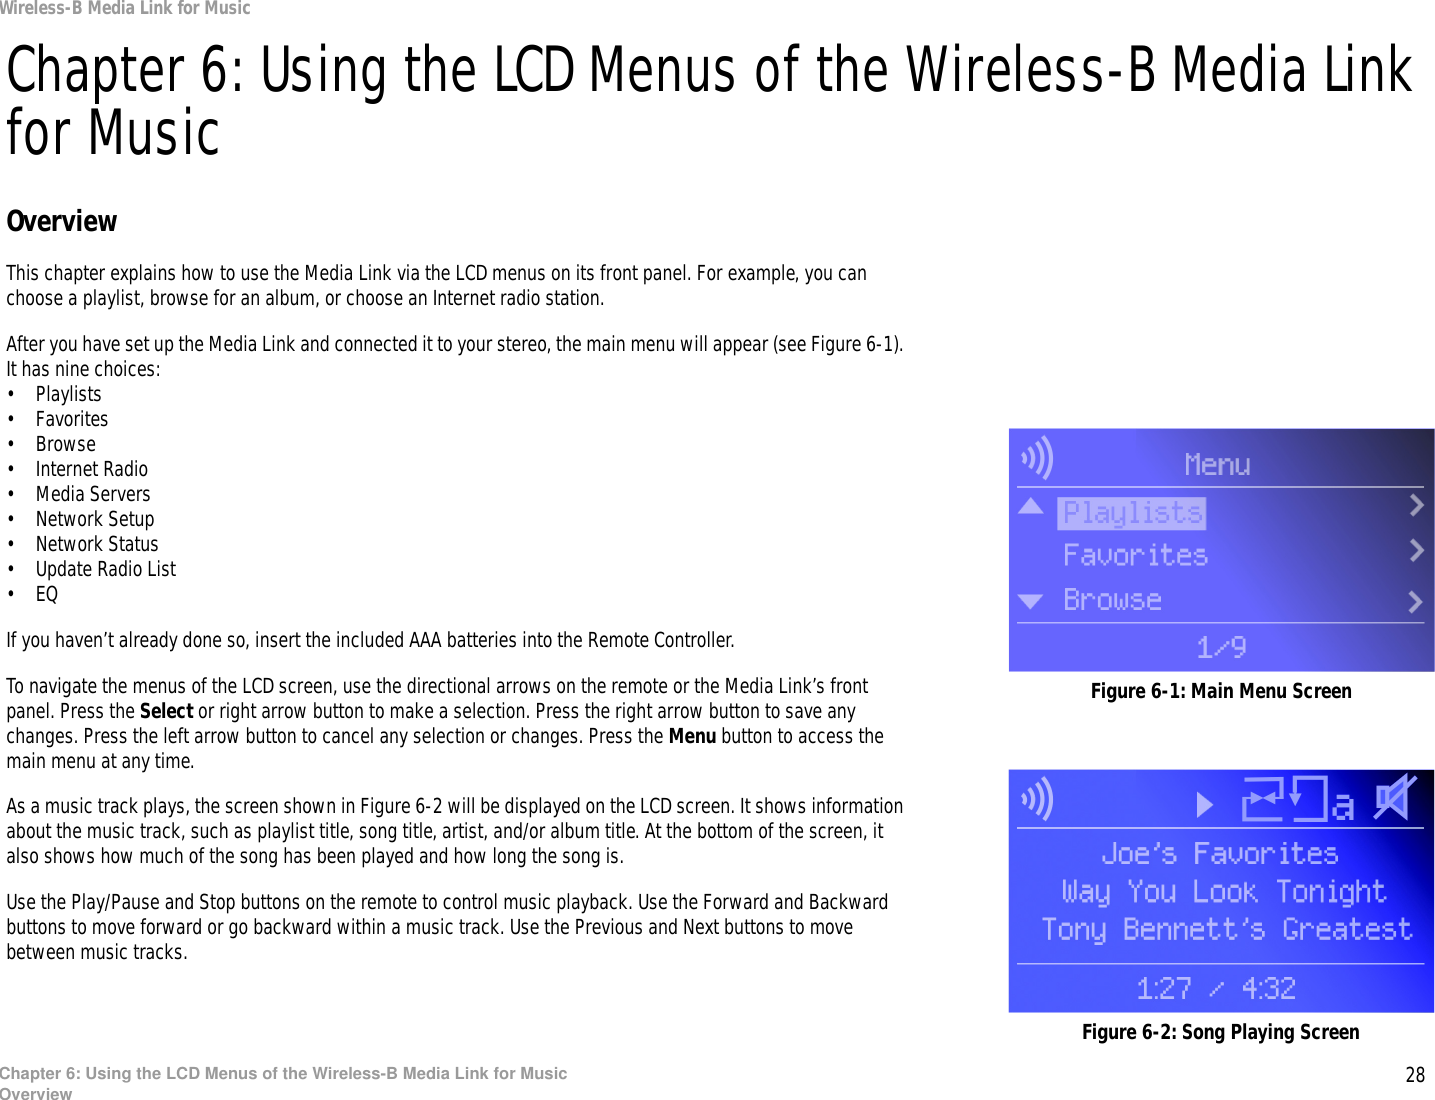
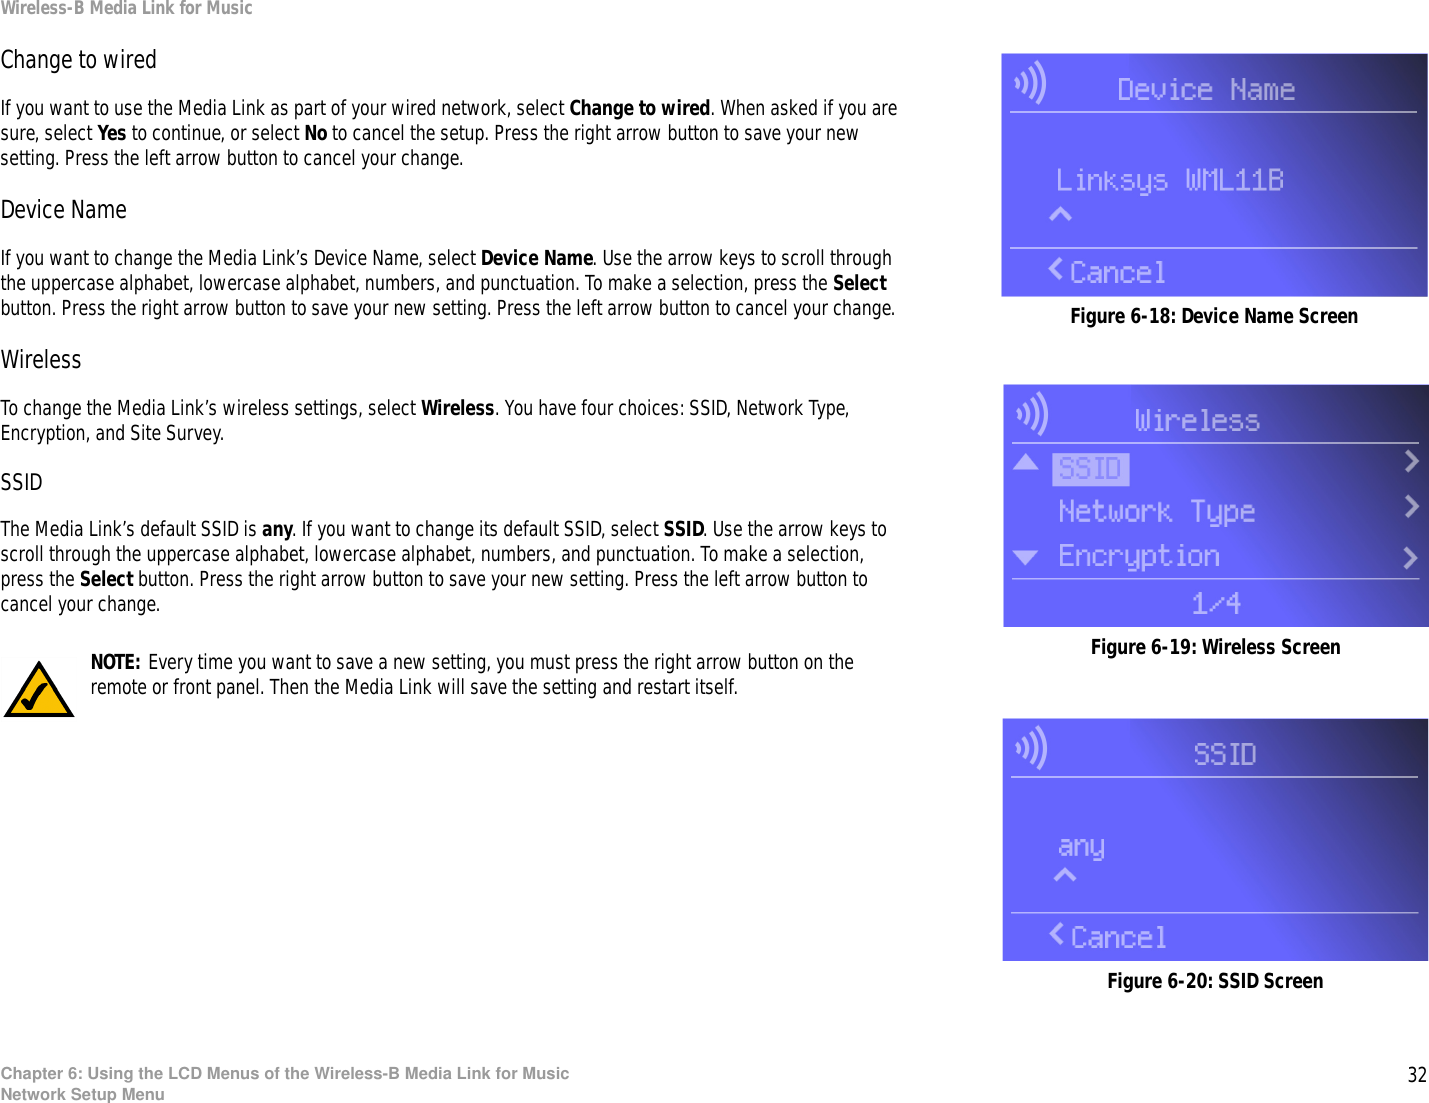
![33Chapter 6: Using the LCD Menus of the Wireless-B Media Link for MusicNetwork Setup MenuWireless-B Media Link for MusicNetwork TypeIf you want to change the wireless network type, select Network Type. If your network uses infrastructure mode, then select Infrastructure. If your network uses ad-hoc mode, then select Ad-Hoc. Your selection will be denoted by a bracketed asterisk, [*]. Press the right arrow button to save your new setting. Press the left arrow button to cancel your change.EncryptionIf you want to change the Media Link’s encryption settings, select Encryption. You will see four choices: WEP (Wired Equivalent Privacy), Key Entry Method, Key Size, and Key.WEP - To enable or disable WEP encryption, select WEP. To enable WEP encryption, select Enable. To disable WEP encryption, select Disable. Your selection will be denoted by a bracketed asterisk, [*]. Press the right arrow button to save your new setting. Press the left arrow button to cancel your change.Key Entry Method - To change how you want to enter the WEP key, select Key Entry Method. If you want to enter a passphrase to generate a WEP key, select ASCII. If you want to enter the WEP key using hexadecimal characters, select HEX. Your selection will be denoted by a bracketed asterisk, [*]. Press the right arrow button to save your new setting. Press the left arrow button to cancel your change.Key Size - To change the size of the WEP key, select Key Size. If you want to use a 64-bit key, select 64. If you want to use a 128-bit key, select 128. Your selection will be denoted by a bracketed asterisk, [*]. Press the right arrow button to save your new setting. Press the left arrow button to cancel your change.Key - To change the passphrase or WEP key, select Key. Enter the passphrase (ASCII characters) or WEP key (hexadecimal characters) in this field. Use the arrow keys to scroll through the available ASCII or hexadecimal characters. To make a selection, press the Select button. Press the right arrow button to save your new setting. Press the left arrow button to cancel your change. If you are entering hexadecimal characters, make sure you enter the exact number of hexadecimal characters requested on the Key screen.Figure 6-21: Network Type ScreenFigure 6-22: Encryption ScreenFigure 6-23: Key ScreenNOTE: Every time you want to save a new setting, you must press the right arrow button on the remote or front panel. Then the Media Link will save the setting and restart itself.](https://usermanual.wiki/LINKSYS/WML11B.user-manual-part-5/User-Guide-413967-Page-10.png)