LINKSYS WML11B Wireless-B Media Link for Music User Manual Book
LINKSYS LLC Wireless-B Media Link for Music Book
LINKSYS >
Contents
user manual part 5
24
Chapter 5: Connecting the Wireless-B Media Link for Music to Your Audio System
Using the LCD Menus to Set up the Media Link
Wireless-B Media Link for Music
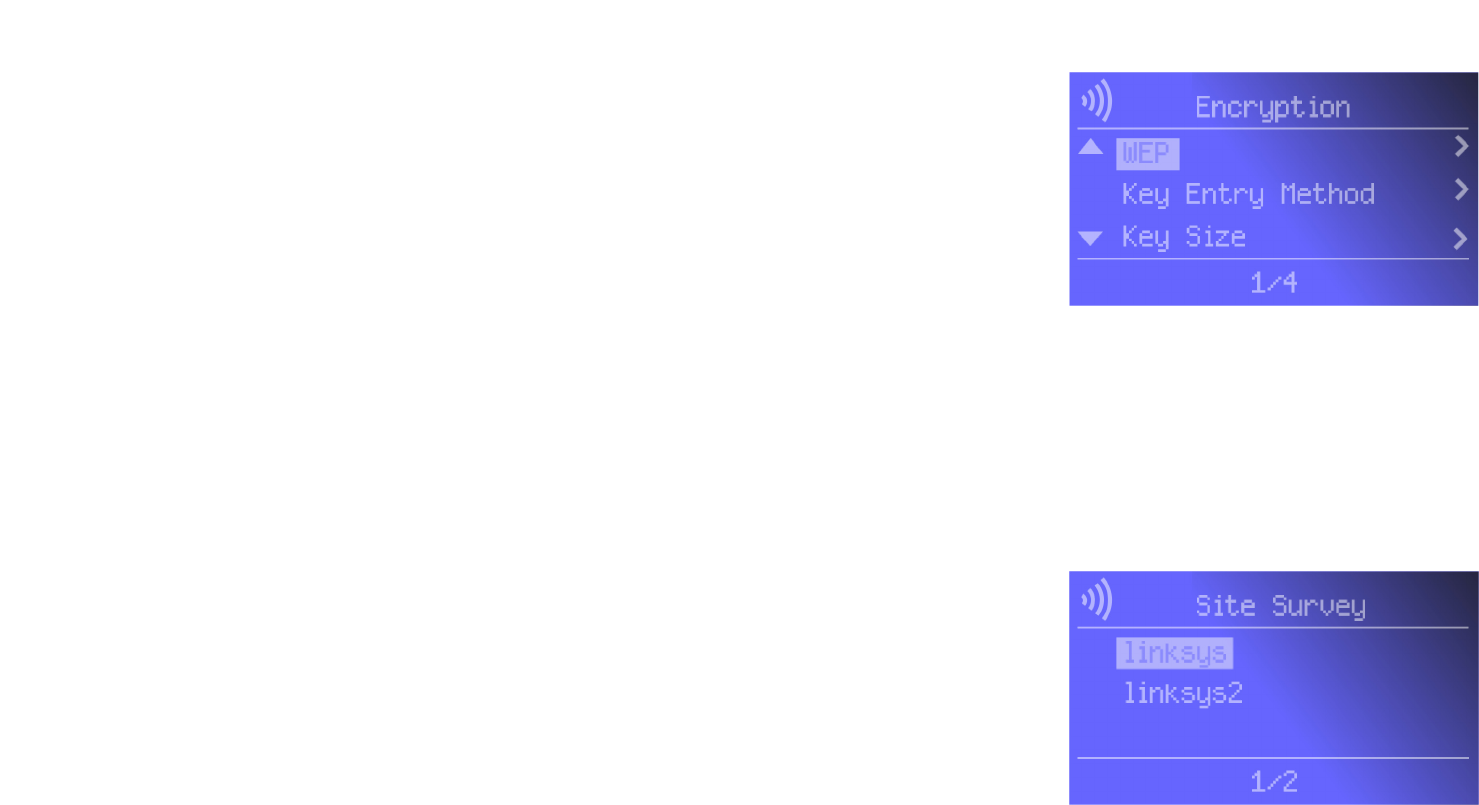
Encryption
If you want to change the Media Link’s encryption settings, select Encryption. You will see four choices: WEP
(Wired Equivalent Privacy), Key Entry Method, Key Size, and Key.
WEP - To enable or disable WEP encryption, select WEP. To enable WEP encryption, select Enable. To disable WEP
encryption, select Disable. Your selection will be denoted by a bracketed asterisk, [*]. Press the right arrow
button to save your new setting. Press the left arrow button to cancel your change.
Key Entry Method - To change how you want to enter the WEP key, select Key Entry Method. If you want to enter
a passphrase to generate a WEP key, select ASCII. If you want to enter the WEP key using hexadecimal
characters, select HEX. Your selection will be denoted by a bracketed asterisk, [*]. Press the right arrow button to
save your new setting. Press the left arrow button to cancel your change.
Key Size - To change the size of the WEP key, select Key Size. If you want to use a 64-bit key, select 64. If you
want to use a 128-bit key, select 128. Your selection will be denoted by a bracketed asterisk, [*]. Press the right
arrow button to save your new setting. Press the left arrow button to cancel your change.
Key - To change the passphrase or WEP key, select Key. Enter the passphrase (ASCII characters) or WEP key
(hexadecimal characters) in this field. Use the arrow keys to scroll through the available ASCII or hexadecimal
characters. To make a selection, press the Select button. Press the right arrow button to save your new setting.
Press the left arrow button to cancel your change. If you are entering hexadecimal characters, make sure you
enter the exact number of hexadecimal characters requested on the Key screen.
Site Survey
If you want to search for all available wireless networks, select Site Survey. A list of wireless networks will
appear. To connect to a specific network, select it, and press the right arrow button. If the network uses WEP
encryption, a new screen will appear and ask you to enter the WEP key.
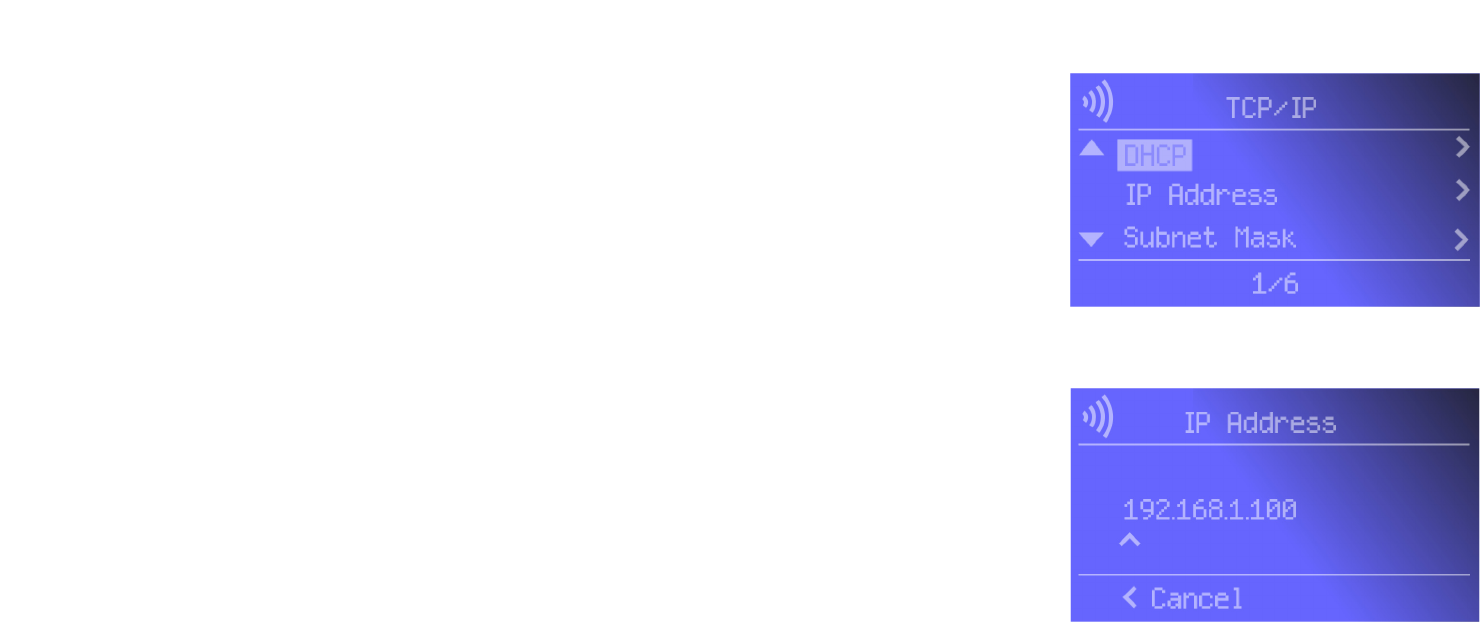
TCP/IP
To change the Media Link’s TCP/IP settings, select TCP/IP. You will see up to six choices: DHCP, IP Address, Subnet
Mask, Gateway, DNS Server 1, and DNS Server 2.
Figure 5-17: Encryption Screen
WEP (Wired Equivalent Privacy): a method
of encrypting data transmitted on a wireless
network for greater security.
Passphrase: used much like a password, a
passphrase simplifies the WEP encryption
process by automatically generating the WEP
encryption for Linksys products.
Figure 5-18: Site Survey Screen
25
Chapter 5: Connecting the Wireless-B Media Link for Music to Your Audio System
Using the LCD Menus to Set up the Media Link
Wireless-B Media Link for Music
DHCP
To change the Media Link’s DHCP setting, select DHCP. If the Media Link will be assigned an IP address
automatically by a router or other DHCP server, then select Enable. You will not see the IP Address, Subnet Mask,
Gateway, and DNS Server menus because these settings will be set automatically. If the Media Link needs a static
IP address, then select Disable. You will need to configure the IP Address, Subnet Mask, Gateway, and at least
one of the DNS Server settings.
Your selection will be denoted by a bracketed asterisk, [*]. Press the right arrow button to save your new setting.
Press the left arrow button to cancel your change.
IP Address
To change the Media Link’s static IP address, select IP Address. Use the arrow keys to scroll through the
numbers 0-9 and punctuation (a period). To make a selection, press the Select button. Press the right arrow
button to save your new setting. Press the left arrow button to cancel your change.
Subnet Mask
To change the Media Link’s subnet mask, select Subnet Mask. Use the arrow keys to scroll through the numbers
0-9 and punctuation (a period). To make a selection, press the Select button. Press the right arrow button to save
your new setting. Press the left arrow button to cancel your change.
Gateway
To change the Media Link’s gateway, select Gateway. Use the arrow keys to scroll through the numbers 0-9 and
punctuation (a period). To make a selection, press the Select button. Press the right arrow button to save your
new setting. Press the left arrow button to cancel your change.
DNS Server 1 and DNS Server 2
To change the Media Link’s DNS server address, select DNS Server 1 and/or DNS Server 2. (You must enter at
least one DNS server address.) Use the arrow keys to scroll through the numbers 0-9 and punctuation (a period).
To make a selection, press the Select button. Press the right arrow button to save your new setting. Press the left
arrow button to cancel your change.
For information about the other LCD menus, refer to “Chapter 6: Using the LCD Menus of the Wireless-B Media
LInk for Music.”
After you have finished configuring the Media Link’s network settings, proceed to the next section,
“Installing the Media Server Software.”
Figure 5-19: TCP/IP Screen
Figure 5-20: IP Address Screen
Static IP address: a fixed address assigned to
a computer or device connected to a network.
26
Chapter 5: Connecting the Wireless-B Media Link for Music to Your Audio System
Installing the Media Server Software
Wireless-B Media Link for Music
Installing the Media Server Software
For the Media LInk to work properly, you must install the Media Server software on at least one PC in your
network. This software, which is called Musicmatch Jukebox, allows your computer to communicate with the
Media Link, so music tracks can be sent to the stereo and/or Media Link speakers (WMLS11B only). Musicmatch
Jukebox also organizes the music tracks and creates playlists, so you can easily find the songs you want to play.
To install the software, follow these instructions:
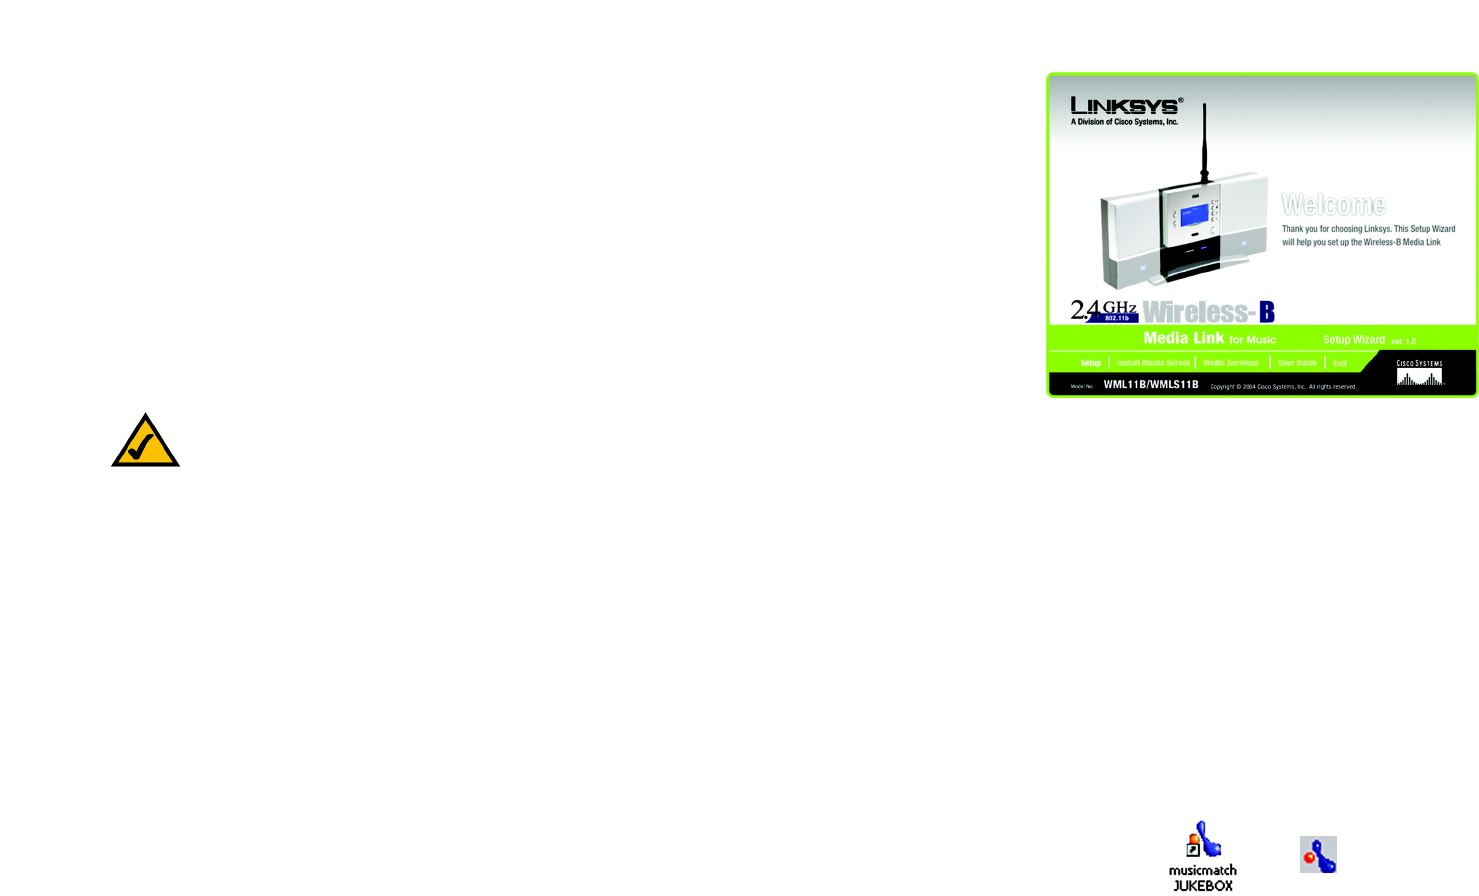
1. Insert the Setup CD-ROM into your PC’s CD-ROM drive. The Setup Wizard should run automatically, and the
Welcome screen should appear. If it does not, click the Start button and choose Run. In the field that appears,
enter D:\setup.exe (where “D” is the letter of your CD-ROM drive).
2. Click Install Media Server, and follow the on-screen instructions.
Proceed to the “Setting up Musicmatch Jukebox” section.
Setting up Musicmatch Jukebox
After you have installed Musicmatch Jukebox, you will see its icon in the system tray of your taskbar, as well as
on your desktop. Double-click either icon to start the software.
To enable communication between Musicmatch Jukebox and the Media Link, follow these instructions:
1. Click the Options menu.
2. Click Settings.
Figure 5-21: Welcome Screen
NOTE: If the computer running Musicmatch Jukebox goes into Sleep mode, then you will not be able
to use the Media Link. To prevent Sleep mode:
1. Click the Start button and Control Panel.
2. Depending on the type of Windows operating system you are using, click Control Panel or click
Settings and then Control Panel.
3. Depending on the type of Windows operating system, either double-click Power Options, or
click Performance and Maintenance and then Power Options.
4. On the Power Schemes screen, select Never for the System standby and System hibernate
settings.
5. Click the OK button.
Figure 5-22: Musicmatch Jukebox Icons
27
Chapter 5: Connecting the Wireless-B Media Link for Music to Your Audio System
Setting up Musicmatch Jukebox
Wireless-B Media Link for Music
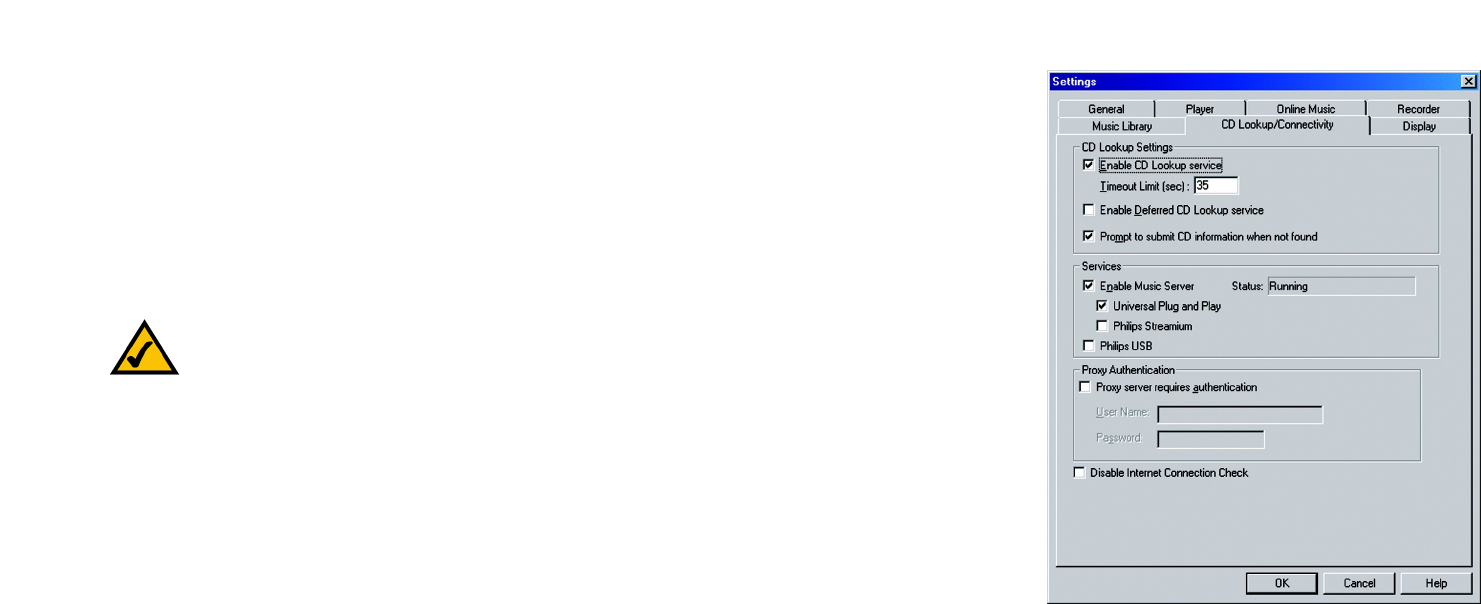
3. Click the CD Lookup/Connectivity tab.
4. In the Services section, click the checkbox next to Enable Music Server.
5. Then click the checkbox next to Universal Plug and Play.
6. Click the OK button.
For information on how to use Musicmatch Jukebox, visit www.musicmatch.com, or click the Help menu of the
software program.
Proceed to “Chapter 6: Using the LCD Menus of the Wireless-B Media Link for Music.”
NOTE: If you want to send music to the Media Link from multiple computers, you have two options:
You can install Musicmatch Jukebox on multiple computers, so you can switch between Media
Servers when you want to send music to the Media Link from a different computer; or
You can install Musicmatch Jukebox on one computer and use shared drives on the network, so the
music files can be accessed through the one computer.
Figure 5-23: CD Lookup/Connectivity Tab
28
Chapter 6: Using the LCD Menus of the Wireless-B Media Link for Music
Overview
Wireless-B Media Link for Music
Chapter 6: Using the LCD Menus of the Wireless-B Media Link
for Music
Overview
This chapter explains how to use the Media Link via the LCD menus on its front panel. For example, you can
choose a playlist, browse for an album, or choose an Internet radio station.
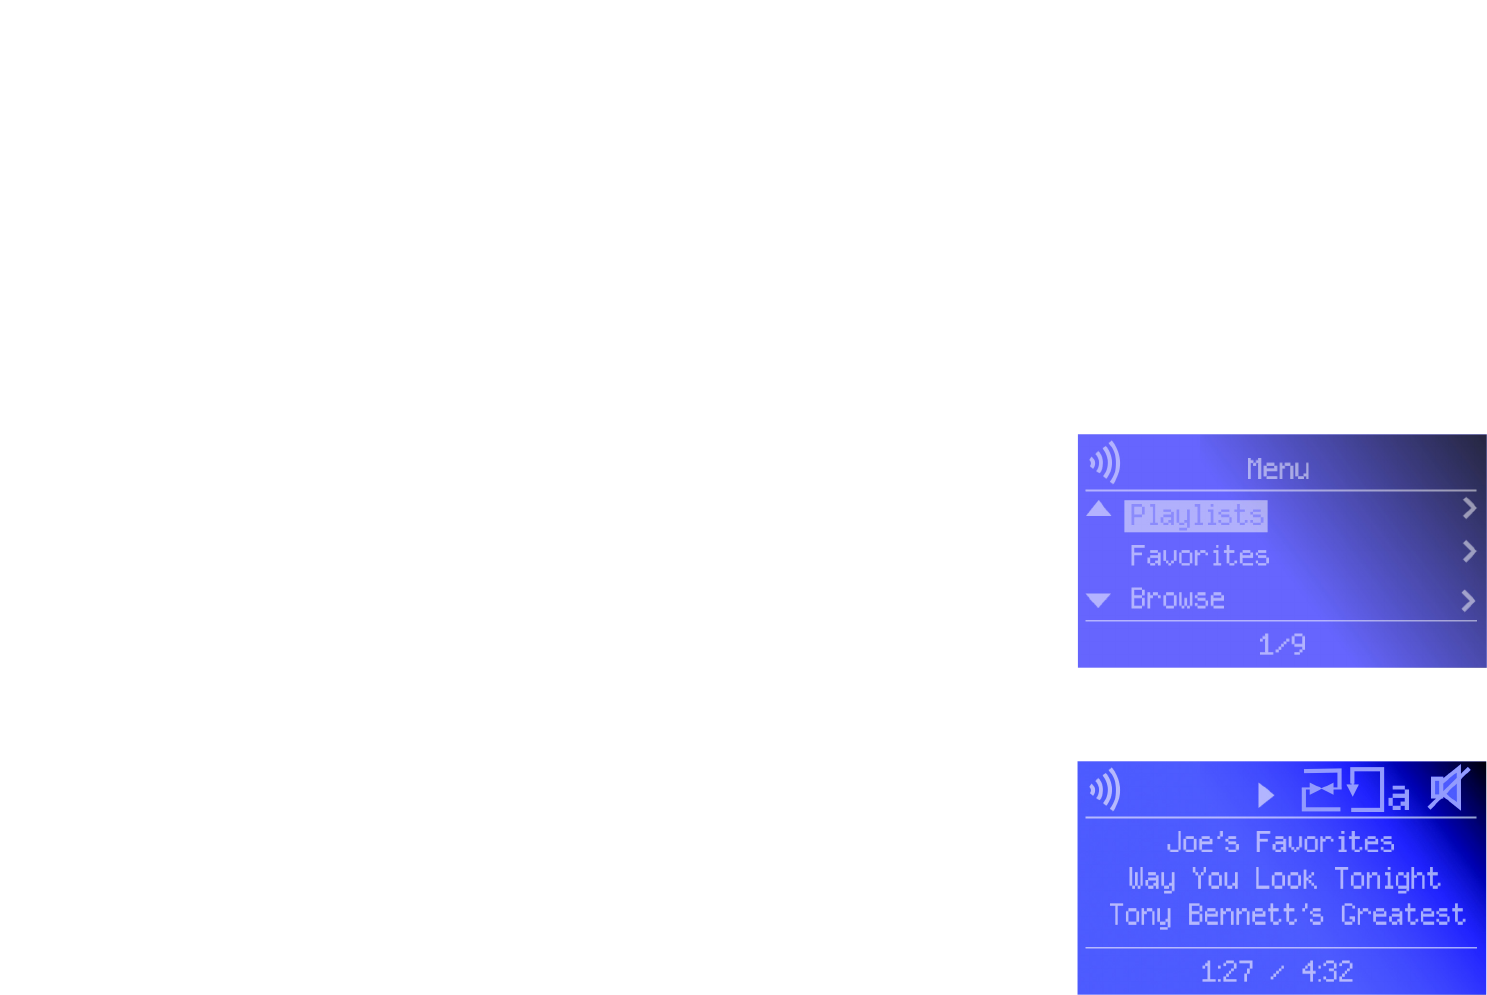
After you have set up the Media Link and connected it to your stereo, the main menu will appear (see Figure 6-1).
It has nine choices:
• Playlists
• Favorites
• Browse
• Internet Radio
• Media Servers
•Network Setup
• Network Status
• Update Radio List
•EQ
If you haven’t already done so, insert the included AAA batteries into the Remote Controller.
To navigate the menus of the LCD screen, use the directional arrows on the remote or the Media Link’s front
panel. Press the Select or right arrow button to make a selection. Press the right arrow button to save any
changes. Press the left arrow button to cancel any selection or changes. Press the Menu button to access the
main menu at any time.
As a music track plays, the screen shown in Figure 6-2 will be displayed on the LCD screen. It shows information
about the music track, such as playlist title, song title, artist, and/or album title. At the bottom of the screen, it
also shows how much of the song has been played and how long the song is.
Use the Play/Pause and Stop buttons on the remote to control music playback. Use the Forward and Backward
buttons to move forward or go backward within a music track. Use the Previous and Next buttons to move
between music tracks.
Figure 6-1: Main Menu Screen
Figure 6-2: Song Playing Screen
29
Chapter 6: Using the LCD Menus of the Wireless-B Media Link for Music
LCD Menu Icons
Wireless-B Media Link for Music
LCD Menu Icons
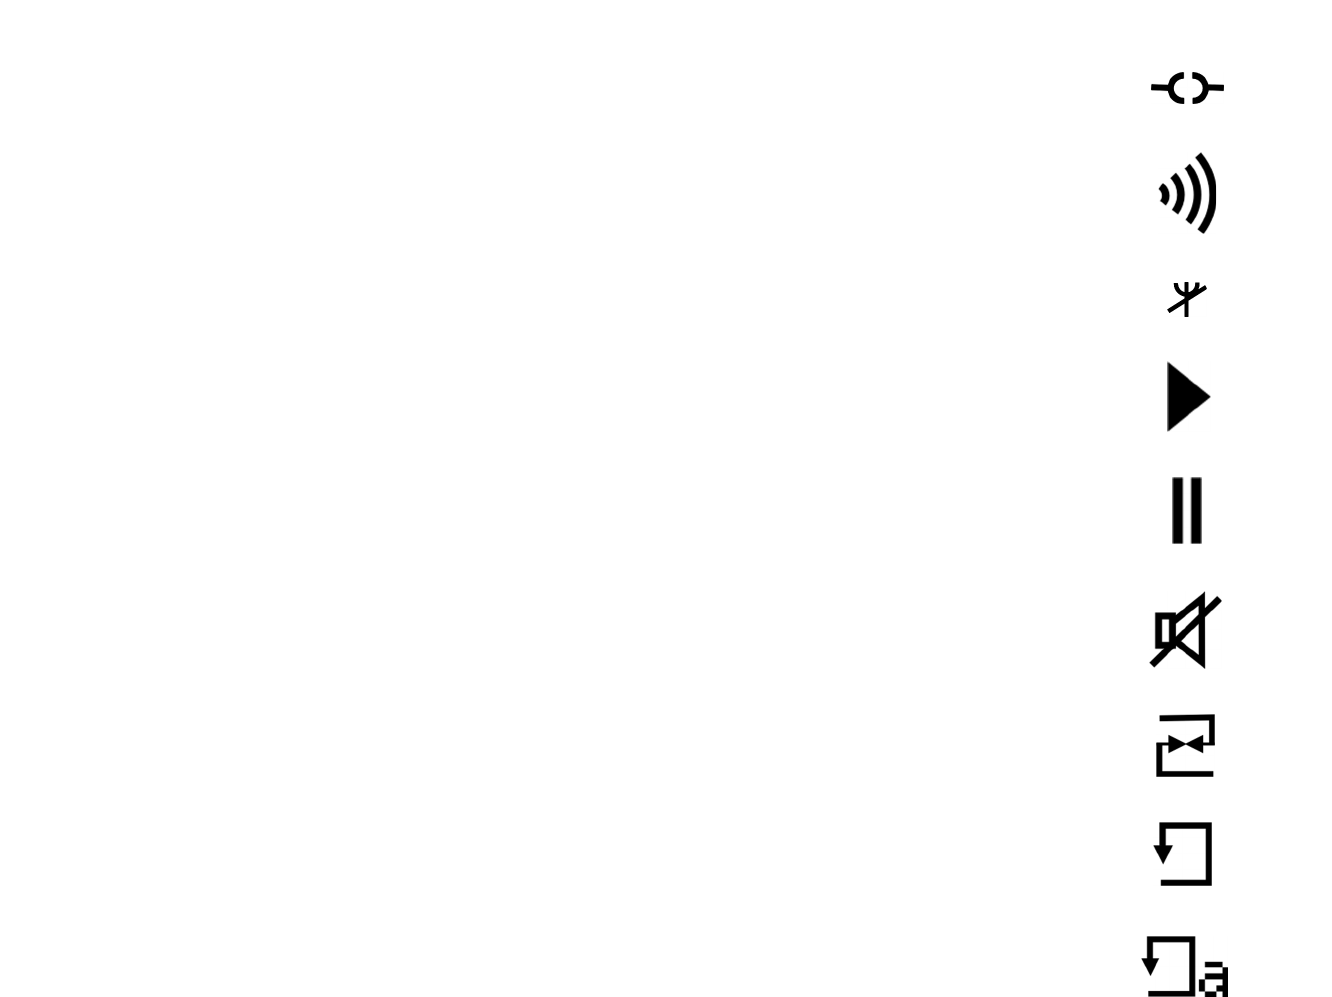
At the top of the LCD screen, you will see one or more icons indicating the Media Link’s network type, the status
of the music track, and which options you have selected. Here are descriptions of the nine icons:
• Wired Network - The Media Link is functioning as part of your wired network.
• Wireless Network - The Media Link is functioning as part of your wireless network.
• No Network Signal - The Media Link is not receiving a signal from any network.
• Music Track Playing - The Media Link is playing the selected music track.
• Music Track Paused - You have paused the selected music track.
• Mute Music Track - You have silenced the music track that is currently playing.
• Shuffle Music Tracks - The selected music tracks are playing in a random sequence.
• Repeat Music Track - You are re-playing the selected music track.
• Repeat All Music Tracks - You are re-playing all of the selected music tracks.
Figure 6-5: No Network Signal
Figure 6-4: Wireless Network
Figure 6-3: Wired Network
Figure 6-6: Music Track Playing
Figure 6-7: Music Track Paused
Figure 6-8: Mute Music Track
Figure 6-9: Shuffle Music Tracks
Figure 6-10: Repeat Music Track
Figure 6-11: Repeat All Music Tracks
30
Chapter 6: Using the LCD Menus of the Wireless-B Media Link for Music
Playlist Menu
Wireless-B Media Link for Music
Playlist Menu
At any time, you can use the Music button on the remote to access the Music menu. To play certain songs in a
specific sequence, select the Playlist menu, which will list the playlists that you have created using Musicmatch.
Select the playlist you want, and press the right arrow button.
Favorites Menu
The Favorites menu will list your favorites. Select the radio station you want, and press the right arrow
button.
To designate your favorite radio station, scroll to Internet Radio, and select the radio station you want. Press the
Select
button, and select
Add to Favorites.
Then press the
Select
button again. If you already know the URL for
your favorite radio station, use the Media Link’s Web-based Utility to add up to 20 favorites. Refer to “Chapter 7:
Using the Web-based Utility of the Wireless-B Media Link for Music.”
Browse Menu
The Browse menu offers seven choices: Albums, All Tracks, Artists, Artists/Albums, Genres, Genres/Artists, and
Playlists. P
ress the right arrow button to make a selection. As you browse, y
ou will see additional screens with
more choices.
Select the song you want, and press
the right arrow button.
Albums
The Albums screen lets you select the music you want to play according to album.
All Tracks
Select All Tracks to play every track in your digital music library.
Artists, Artists/Albums, Genres, Genres/Artists
If you want to play all the songs by a certain artist, select Artists. To browse by Artist and Album title, select
Artists/Albums. To play all the songs of a certain genre, such as jazz or classical, select Genres. To browse by
Genre and Artist, select Genres/Artists.
Playlists
To play certain songs in a specific sequence, select the Playlist menu, which will list the playlists that you have
created using Musicmatch. Select the playlist you want, and press the right arrow button.
Figure 6-13: Favorites Screen
Figure 6-14: Browse Screen
Figure 6-12: Playlist Screen
31
Chapter 6: Using the LCD Menus of the Wireless-B Media Link for Music
Internet Radio Menu
Wireless-B Media Link for Music
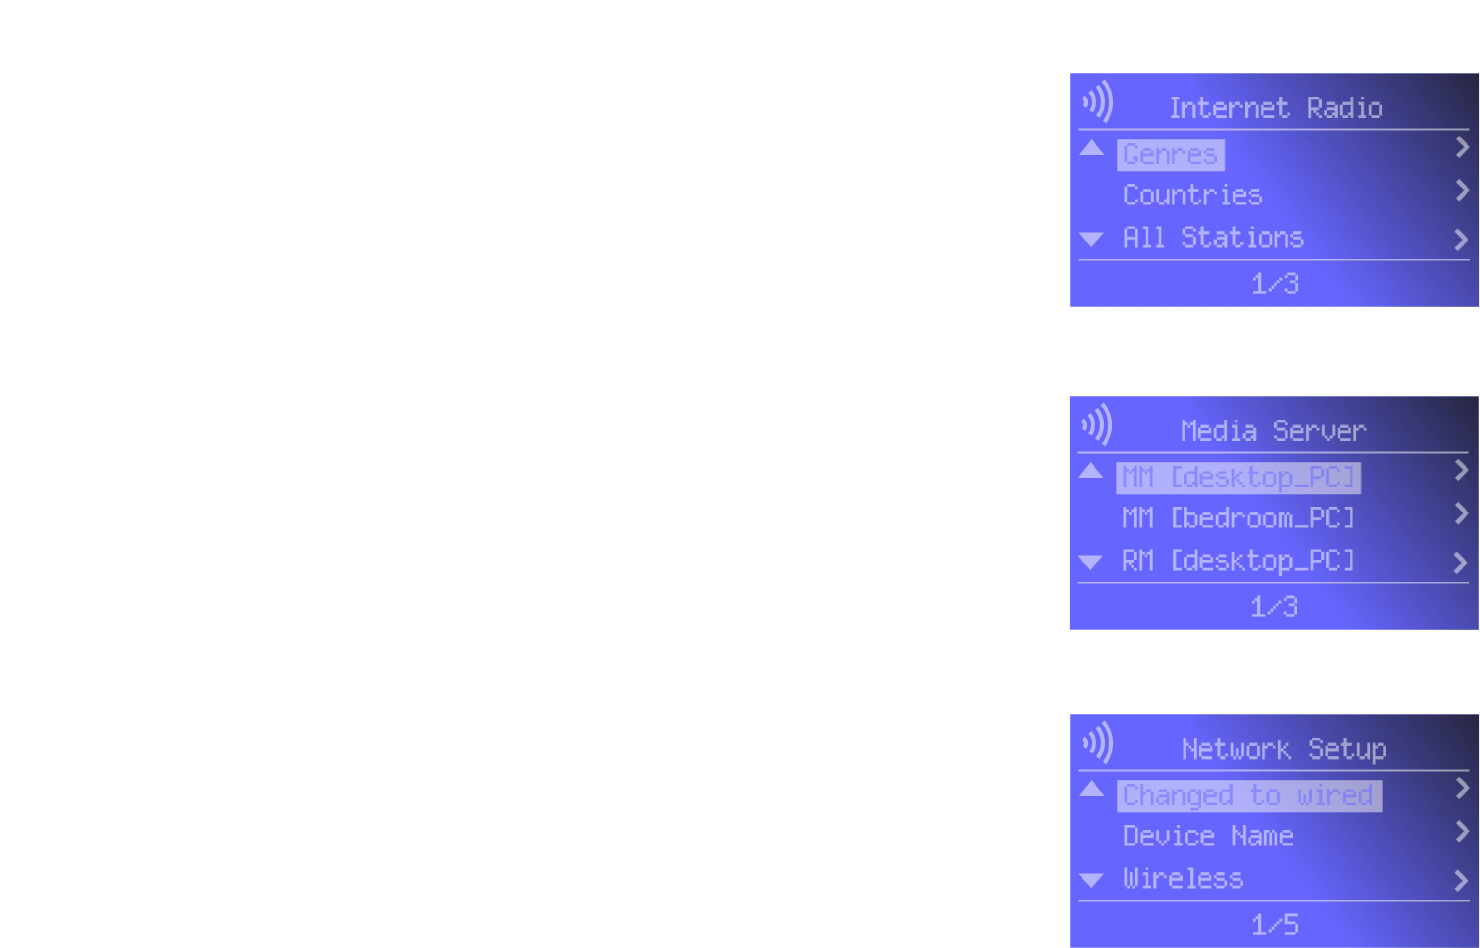
Internet Radio Menu
The Media Link uses vTuner to find radio and TV broadcasts over the Internet. When you select the Internet Radio
menu, you have three choices: Genres, Countries, and All Stations. At any time, you can use the iRadio button on
the remote to access the Internet Radio menu.
Genres
You have an extensive list of genres available, from the Blues to News Talk to World Tropical.
P
ress the right
arrow button to make a selection. As you proceed with your browsing, y
ou will see additional screens offering the
available choices. When you have selected the Internet radio station you want, then press the right arrow button.
Countries
You can select from an extensive list of countries, from Antigua to Italy to Thailand.
P
ress the right arrow button
to make a selection. As you proceed with your browsing, y
ou will see additional screens offering the available
choices. When you have selected the Internet radio station you want, then press the right arrow button.
All Stations
Scroll through the list of all Internet radio stations. When you have selected the Internet radio station you want,
press the right arrow button.
Media Server Menu
You can play music from any computer that has the Media Server installed (refer to “Chapter 4: Setting up the
Wireless-B Media Link for Music”). To play music located on a different computer, use the Media Server menu to
switch between computers.
When you select the Media Server menu, you will see a list of servers available on your network. “MM” denotes a
Musicmatch server, while “RM” denotes a Rhapsody music server.
P
ress the right arrow button to make a
selection.
Network Setup Menu
If you want to set up the Media Link without using a computer, then use the Network Setup menu.
After you have selected the Network Setup menu, you will see these choices: Change to wired (network), Device
Name, Wireless (settings), TCP/IP (settings), and Proxy (settings).
Figure 6-15: Internet Radio Screen
Figure 6-16: Media Server Screen
Figure 6-17: Network Setup Screen
32
Chapter 6: Using the LCD Menus of the Wireless-B Media Link for Music
Network Setup Menu
Wireless-B Media Link for Music
Change to wired
If you want to use the Media Link as part of your wired network, select Change to wired. When asked if you are
sure, select Yes to continue, or select No to cancel the setup. Press the right arrow button to save your new
setting. Press the left arrow button to cancel your change.
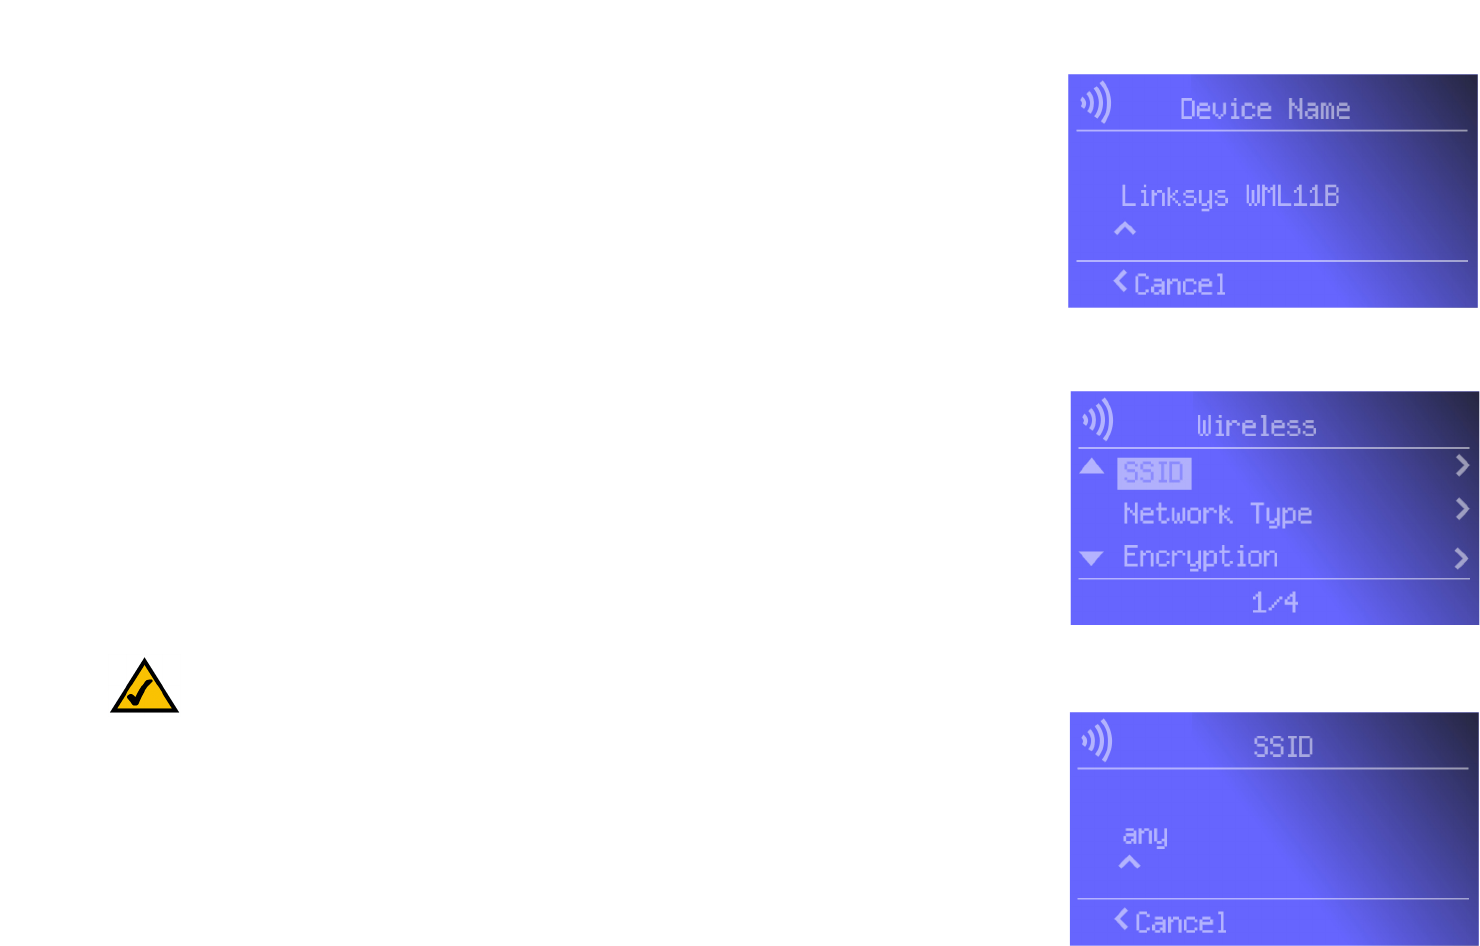
Device Name
If you want to change the Media Link’s Device Name, select Device Name. Use the arrow keys to scroll through
the uppercase alphabet, lowercase alphabet, numbers, and punctuation. To make a selection, press the Select
button. Press the right arrow button to save your new setting. Press the left arrow button to cancel your change.
Wireless
To change the Media Link’s wireless settings, select Wireless. You have four choices: SSID, Network Type,
Encryption, and Site Survey.
SSID
The Media Link’s default SSID is any. If you want to change its default SSID, select SSID. Use the arrow keys to
scroll through the uppercase alphabet, lowercase alphabet, numbers, and punctuation. To make a selection,
press the Select button. Press the right arrow button to save your new setting. Press the left arrow button to
cancel your change.
Figure 6-18: Device Name Screen
Figure 6-19: Wireless Screen
Figure 6-20: SSID Screen
NOTE: Every time you want to save a new setting, you must press the right arrow button on the
remote or front panel. Then the Media Link will save the setting and restart itself.
33
Chapter 6: Using the LCD Menus of the Wireless-B Media Link for Music
Network Setup Menu
Wireless-B Media Link for Music
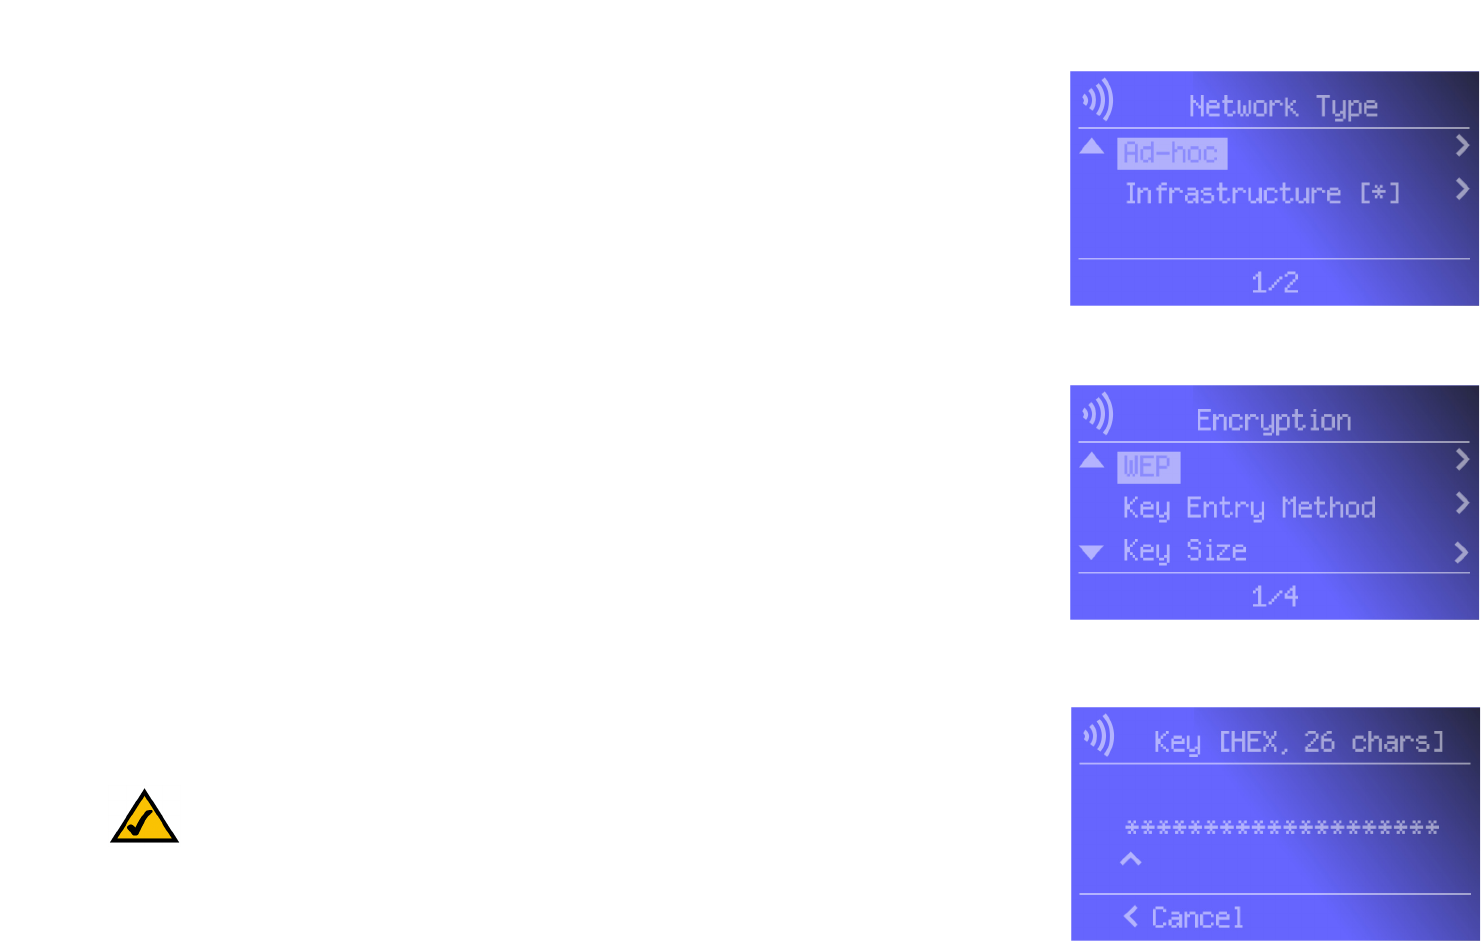
Network Type
If you want to change the wireless network type, select Network Type. If your network uses infrastructure mode,
then select Infrastructure. If your network uses ad-hoc mode, then select Ad-Hoc. Your selection will be
denoted by a bracketed asterisk, [*]. Press the right arrow button to save your new setting. Press the left arrow
button to cancel your change.
Encryption
If you want to change the Media Link’s encryption settings, select Encryption. You will see four choices: WEP
(Wired Equivalent Privacy), Key Entry Method, Key Size, and Key.
WEP - To enable or disable WEP encryption, select WEP. To enable WEP encryption, select Enable. To disable WEP
encryption, select Disable. Your selection will be denoted by a bracketed asterisk, [*]. Press the right arrow
button to save your new setting. Press the left arrow button to cancel your change.
Key Entry Method - To change how you want to enter the WEP key, select Key Entry Method. If you want to enter
a passphrase to generate a WEP key, select ASCII. If you want to enter the WEP key using hexadecimal
characters, select HEX. Your selection will be denoted by a bracketed asterisk, [*]. Press the right arrow button to
save your new setting. Press the left arrow button to cancel your change.
Key Size - To change the size of the WEP key, select Key Size. If you want to use a 64-bit key, select 64. If you
want to use a 128-bit key, select 128. Your selection will be denoted by a bracketed asterisk, [*]. Press the right
arrow button to save your new setting. Press the left arrow button to cancel your change.
Key - To change the passphrase or WEP key, select Key. Enter the passphrase (ASCII characters) or WEP key
(hexadecimal characters) in this field. Use the arrow keys to scroll through the available ASCII or hexadecimal
characters. To make a selection, press the Select button. Press the right arrow button to save your new setting.
Press the left arrow button to cancel your change. If you are entering hexadecimal characters, make sure you
enter the exact number of hexadecimal characters requested on the Key screen.
Figure 6-21: Network Type Screen
Figure 6-22: Encryption Screen
Figure 6-23: Key Screen
NOTE: Every time you want to save a new setting, you must press the right arrow button on the
remote or front panel. Then the Media Link will save the setting and restart itself.