LINKSYS WMP54GSV11 Wireless-G PCI Card with SpeedBooster User Manual Book
LINKSYS LLC Wireless-G PCI Card with SpeedBooster Book
LINKSYS >
Contents
- 1. Users Manual 1
- 2. Users Manual 2
- 3. Users Manual 3
- 4. Users Manual 4
Users Manual 2
13
Chapter 3: Software Installation and Configuration
Wireless-G PCI Adapter with SpeedBooster
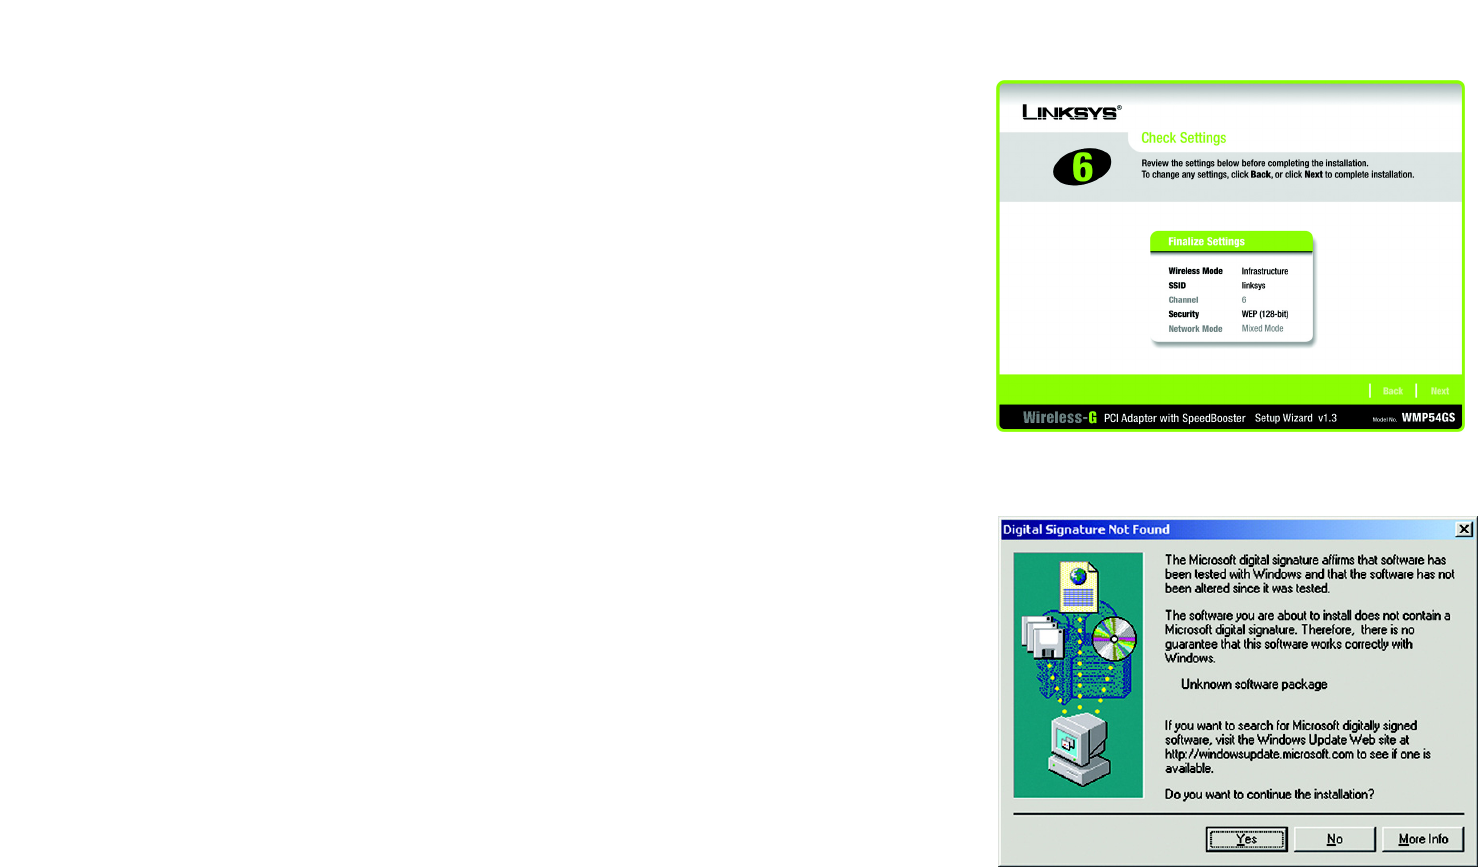
7. The Setup Wizard will ask you to review your settings before it starts to copy files. Click the Next button to
save these settings, or click the Back button to change any settings.
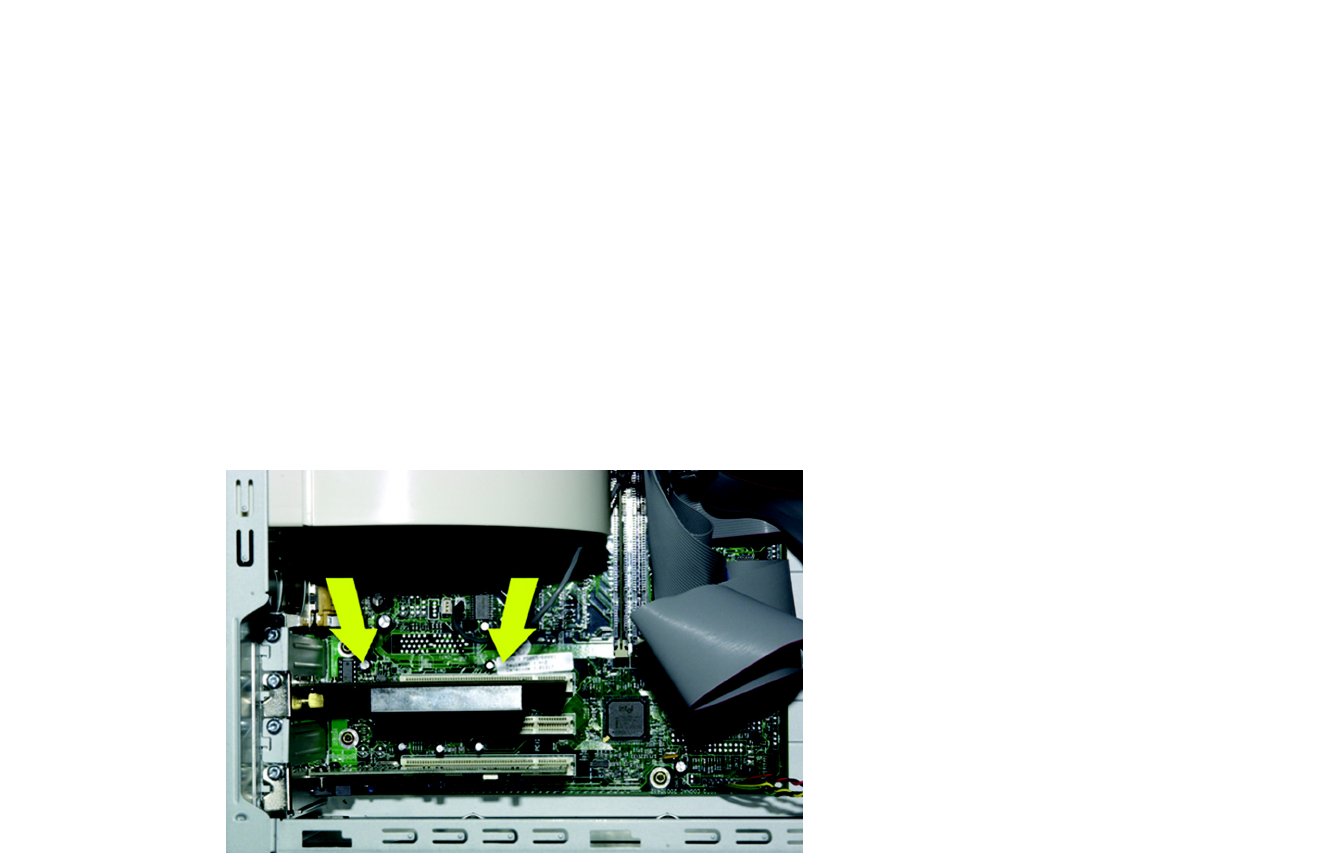
8. For Windows 2000 users, a screen stating that a digital signature was not found may appear. This software
has been tested and found to work properly with Windows 2000. Click the Yes button to continue installation.
Figure 3-13: The Check Settings Screen
Figure 3-14: The Windows Digital Signature Screen

14
Chapter 3: Software Installation and Configuration
Wireless-G PCI Adapter with SpeedBooster
9. After the files have been successfully copied, the Congratulations screen will appear. Click the Exit button.
Now that the software installation is complete, proceed to Chapter 4: Connecting the Wireless-G PCI Adapter.
Figure 3-15: The Congratulations Screen
15
Chapter 4: Connecting the PCI Adapter
Wireless-G PCI Adapter with SpeedBooster
Chapter 4: Connecting the PCI Adapter
1. Before connecting the PCI Adapter to your PC, turn off your desktop PC.
2. Open your PC case and locate an available PCI slot on the motherboard. Check with your computer
manufacturer for instructions.
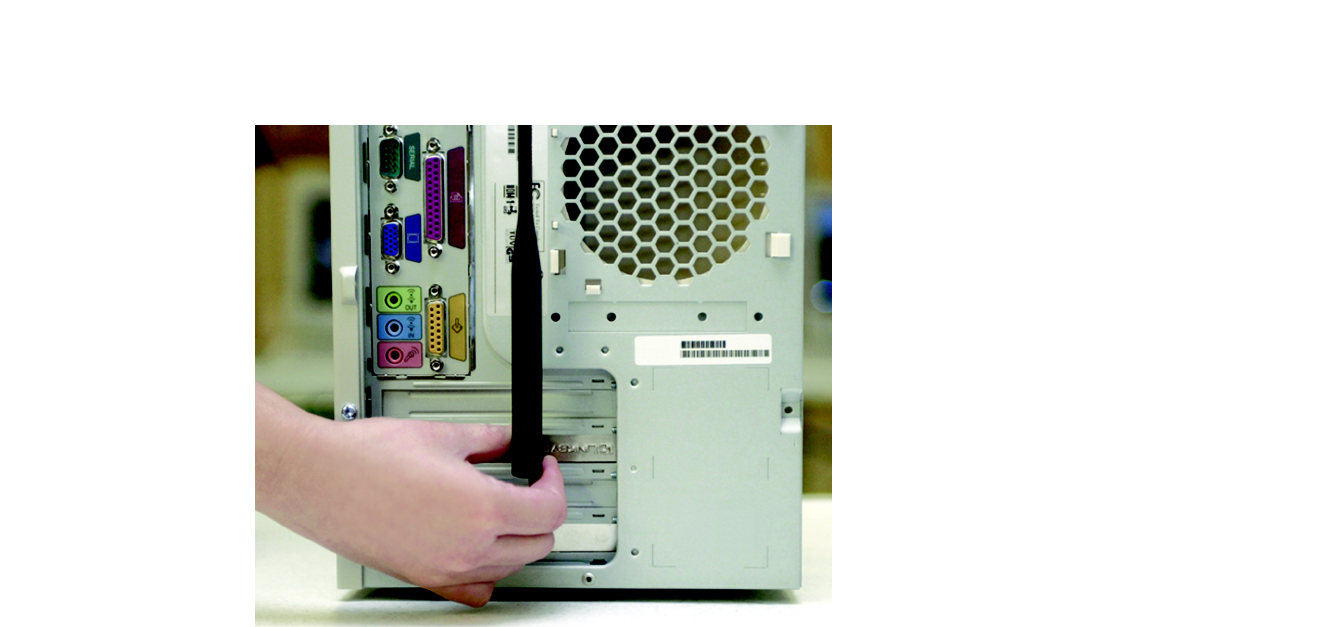
3. Slide the PCI Adapter into the PCI slot. Make sure that all of its pins are touching the slot's contacts. You may
have to apply a bit of pressure to slide the adapter all the way in. After the adapter is firmly in place, secure its
fastening tab to your PC's chassis with a mounting screw. Then, close your PC.
Figure 4-1: Your Computer’s PCI slot with Adapter installed
16
Chapter 4: Connecting the PCI Adapter
Wireless-G PCI Adapter with SpeedBooster
4. Attach the external antenna to the adapter’s antenna port.
5. Power on your desktop PC.
6. For Windows 2000 users, a screen stating that a digital signature was not found may appear. This software
has been tested and found to work properly with Windows 2000. Click the Yes button to continue installation
The installation of the Wireless-G PCI Adapter is complete. If you want to check the link information, search for
available wireless networks, or make additional configuration changes, proceed to “Chapter 5: Using the Wireless
Network Monitor.”
Figure 4-2: Proper Positioning of the Antenna
port: the connection point on a computer or networking
device used for plugging in a cable or an adapter.
17
Chapter 5: Using the Wireless Network Monitor
Overview
Wireless-G PCI Adapter with SpeedBooster
Chapter 5: Using the Wireless Network Monitor
Overview
Use the Wireless Network Monitor to check the link information, search for available wireless networks, or create
profiles that hold different configuration settings.
Accessing the Wireless Network Monitor
After installing the Adapter’s Setup Wizard, the Wireless Network Monitor icon will appear in your system tray. If
the Wireless Network Monitor is enabled, then the icon will be green. If the Wireless Network Monitor is disabled
or the Adapter is not connected, then the icon will be gray.
Double-click the icon. The Link Information tab will appear. From this tab, you can find out the strength of the
current wireless signal as well as its quality. You can also click the More Information button to view additional
status information about the current wireless connection. To search for available wireless networks, click the
Site Survey tab. To perform configuration changes, click the Profiles tab.
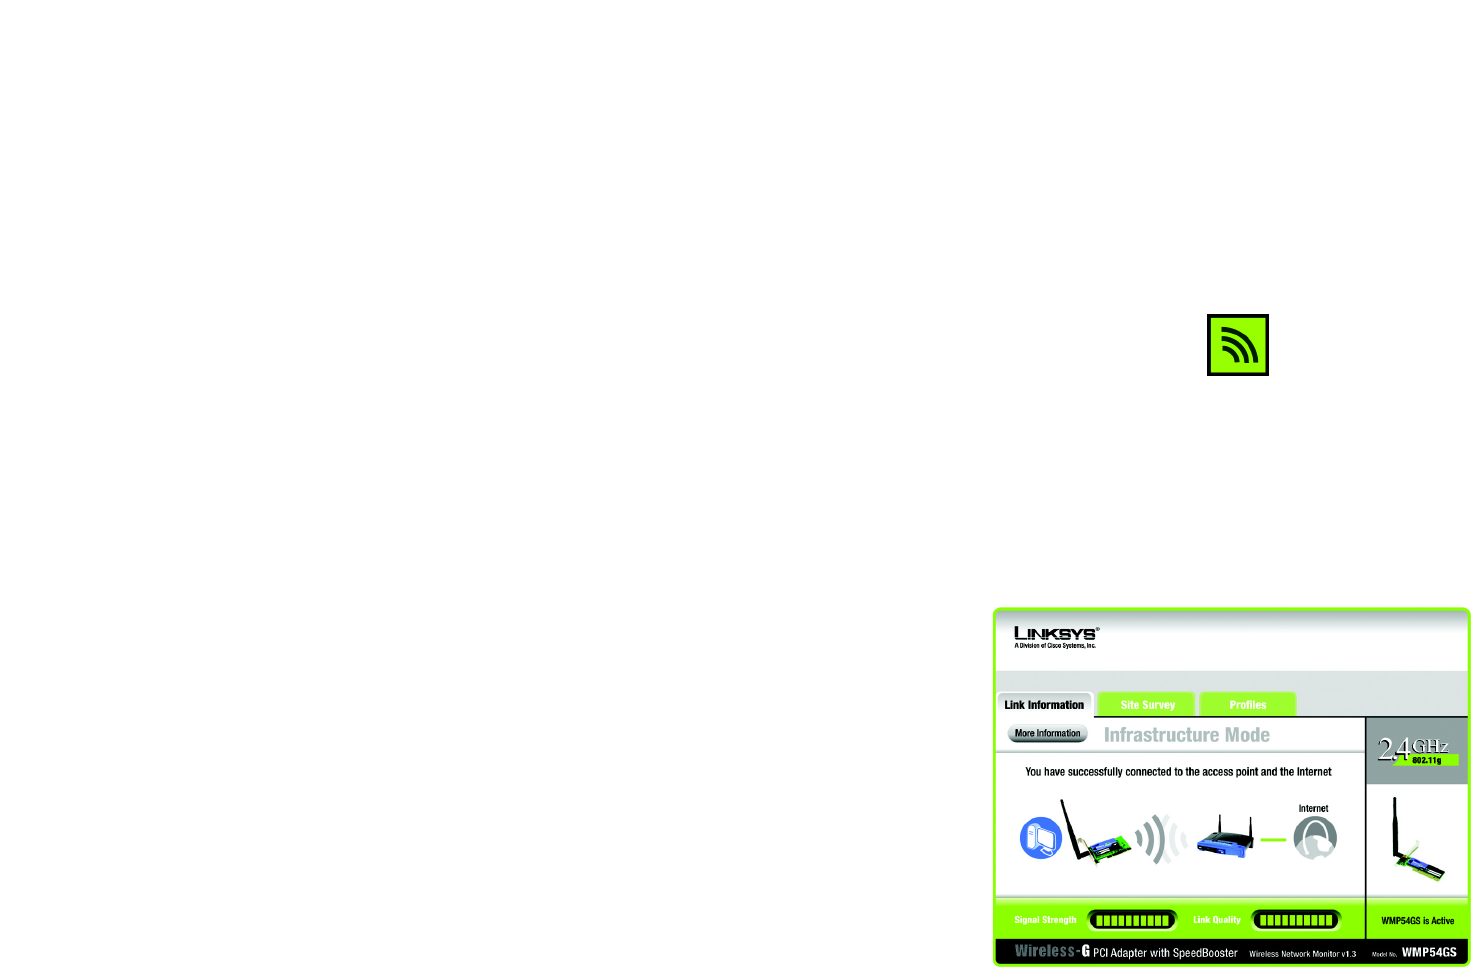
The Link Information Tab
The Link Information tab displays the signal strength and link quality information about the current connection
and provides a button to click for additional status information.
Ad-Hoc Mode or Infrastructure Mode - The screen indicates whether the Adapter is currently working in ad-
hoc or infrastructure mode.
Signal Strength - The Signal Strength bar indicates the signal strength.
Link Quality - The Link Quality bar indicates the quality of the wireless network connection.
Click the More Information button to view more information about the wireless network connection.
Click the X (Close) button in the upper right corner to exit the Wireless Network Monitor.
Figure 5-2: The Link Information Tab
Figure 5-1: The Link Information Tab

18
Chapter 5: Using the Wireless Network Monitor
The Link Information Tab
Wireless-G PCI Adapter with SpeedBooster
Clicking the More Information button displays much more information about the Adapter’s connection, as shown
below:
Wireless Network Status
Status - This shows the status of the wireless network connection.
SSID - This is the unique name of the wireless network.
Wireless Mode - The mode of the wireless network currently in use is displayed here.
Transfer Rate - The data transfer rate of the current connection is shown here.
Channel - This is the channel to which the wireless network devices are set.
Security - The status of the WEP encryption security feature is shown here.
Authentication - This is your wireless network’s authentication method.
IP Address - This shows the Adapter’s IP Address.
Subnet Mask - This shows the Adapter’s Subnet Mask.
Default Gateway - This is the Adapter’s Default Gateway address.
DNS - The DNS address of the Adapter is displayed here.
DHCP Client- This displays the status of the DHCP client.
MAC Address- This is the Adapter’s MAC Address.
Signal Strength - The Signal Strength bar indicates the signal strength.
Link Quality - The Link Quality bar indicates the quality of the wireless network connection.
Click the Statistic button for the Wireless Network Statistics screen. Click the Back button to return to the initial
Link Information tab. Clicking the Save to Profile button save the currently active connection to a profile. Click
the X (Close) button in the upper right corner to exit the Wireless Network Monitor.
Clicking the Statistics button brings up the following information on your wireless connection:
default gateway: a device that forwards
Internet traffic from your local area network
Figure 5-3: The Link Information Tab - More Information
DHCP: a protocol that lets one device on a local network,
known as a DHCP server, assign temporary IP addresses
to the other network devices, typically computers.
DNS: the IP address of your ISP's server, which
translates the names of websites into IP addresses.
IP address: the address used to identify a
computer or device on a network
subnet mask: an address code that
determines the size of a network
wep: a method of encrypting data transmitted on a
wireless network for greater security.
TCP/IP: a set of instructions PCs use to
communicate over a network.

19
Chapter 5: Using the Wireless Network Monitor
The Link Information Tab
Wireless-G PCI Adapter with SpeedBooster
Transmit Rate - This shows the speed, in megabits per second, at which data is transmitted from the
Adapter.
Receive Rate - This shows the speed, in megabits per second, at which data is received by the Adapter.
Packets Received - This shows the packets received by the Adapter, in real time, since connecting to the
Wireless Network or since the Refresh button was last pressed.
Packets Transmitted - This shows the packets transmitted from the Adapter, in real time, since connecting
to the Wireless Network or since the Refresh button was last pressed.
Noise Level - This shows the level of background noise affecting the wireless signal. A lower reading
translates into a higher quality signal.
Signal Strength - This is the intensity of the wireless signal received by the card.
Up Time - This shows the period of the most recent connection to a wireless network.
Total Up Time - This shows the cummulative total of connection time with the Adapter.
Driver Version - This shows the version of the Adapter’s driver.
Refresh Statistics - Click this button to refresh the statistics.
Signal Strength - The Signal Strength bar indicates the signal strength.
Link Quality - The Link Quality bar indicates the quality of the wireless network connection.
Click the Back button to return to the initial Link Information tab. Click the Status button to return to the Wireless
Network Status screen of information about your wireless connection. Clicking the Save to Profile button save
the currently active connection to a profile. Click the X (Close) button in the upper right corner to exit the Wireless
Network Monitor.
Figure 5-4: The Link Information Tab - Statistics
packet: a unit of data sent over a network
byte: a unit of data that is usually eight bits long

20
Chapter 5: Using the Wireless Network Monitor
The Site Survey Tab
Wireless-G PCI Adapter with SpeedBooster
The Site Survey Tab
The Site Survey tab displays available networks and allows you to connect to them. The information about these
networks are displayed as below:
SSID - The SSID or unique name of the wireless network.
CH - The channel upon which the network broadcasts.
Signal - The percentage of signal strength, from 0 to 100%.
Site Information
SSID - The SSID or unique name of the wireless network.
Wireless Mode - The mode of the wireless network currently in use.
Channel - The channel to which the wireless network devices are set.
Security - The status of the security feature.
MAC Address - The MAC address of the wireless network’s access point.
Refresh - Click the Refresh button to perform a new search for wireless devices.
Connect - To connect to one of the networks on the list, select the wireless network (by SSID), and click the
Connect button. If the wireless network has WEP encryption, WPA, or WPA2 enabled, you will need to
configure the wireless security with that network. For more information, refer to the following section.
Figure 5-5: The Site Survey Tab

21
Chapter 5: Using the Wireless Network Monitor
The Site Survey Tab
Wireless-G PCI Adapter with SpeedBooster
WEP Key Needed for Connection
Select 64-bit or 128-bit encryption from the drop-down menu. Enter a passphrase in the Passphrase field,
so a WEP key is automatically generated. It is case-sensitive, cannot be longer than 16 alphanumeric
characters, and must match the passphrase of your other Linksys wireless network devices. (If you have any
non-Linksys wireless products, enter the WEP key manually.) If you enter a manual WEP key, it must match
the WEP key of your wireless network. For 64-bit encryption, enter exactly 10 hexadecimal characters. For
128-bit encryption, enter exactly 26 hexadecimal characters. Valid hexadecimal characters are “0” to “9” and
“A” to “F”. Click the Connect button to continue.
WPA-Personal Needed for Connection
Select TKIP or AES for encryption. Then enter a Passphrase that is 8-63 characters in length. Click the
Connect button to continue.
WPA2-Personal Needed for Connection
Enter a Passphrase that is 8-63 characters in length. Click the Connect button to continue.
Figure 5-7: WPA-Personal Needed for Connection
Figure 5-8: WPA2-Personal Needed for Connection
Figure 5-6: WEP Key Needed for Connection