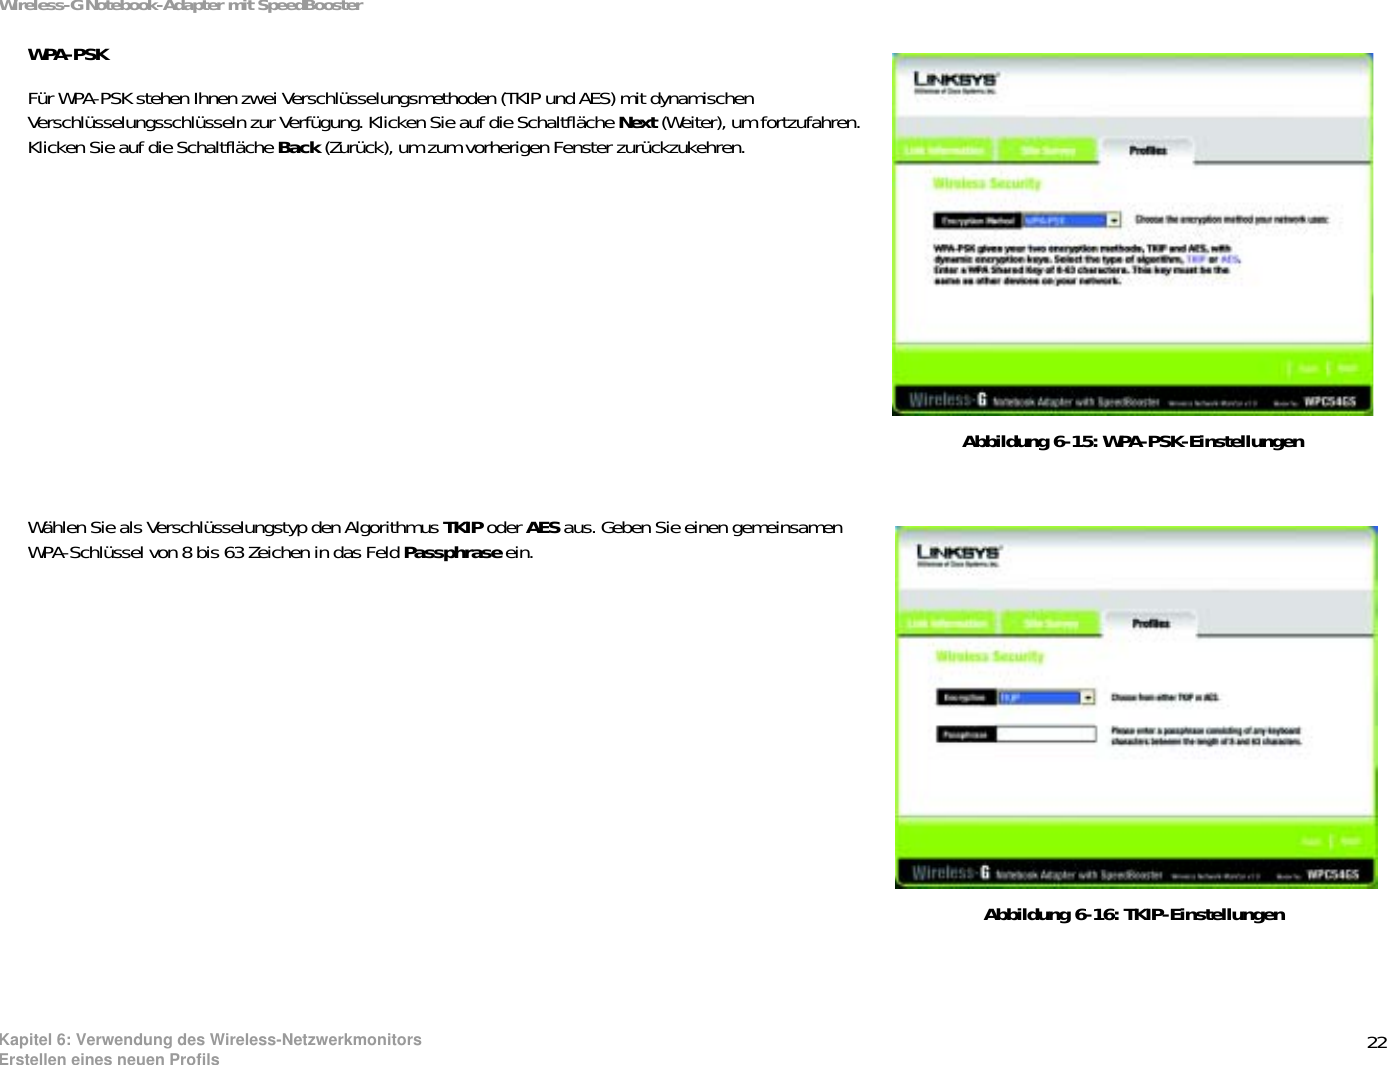
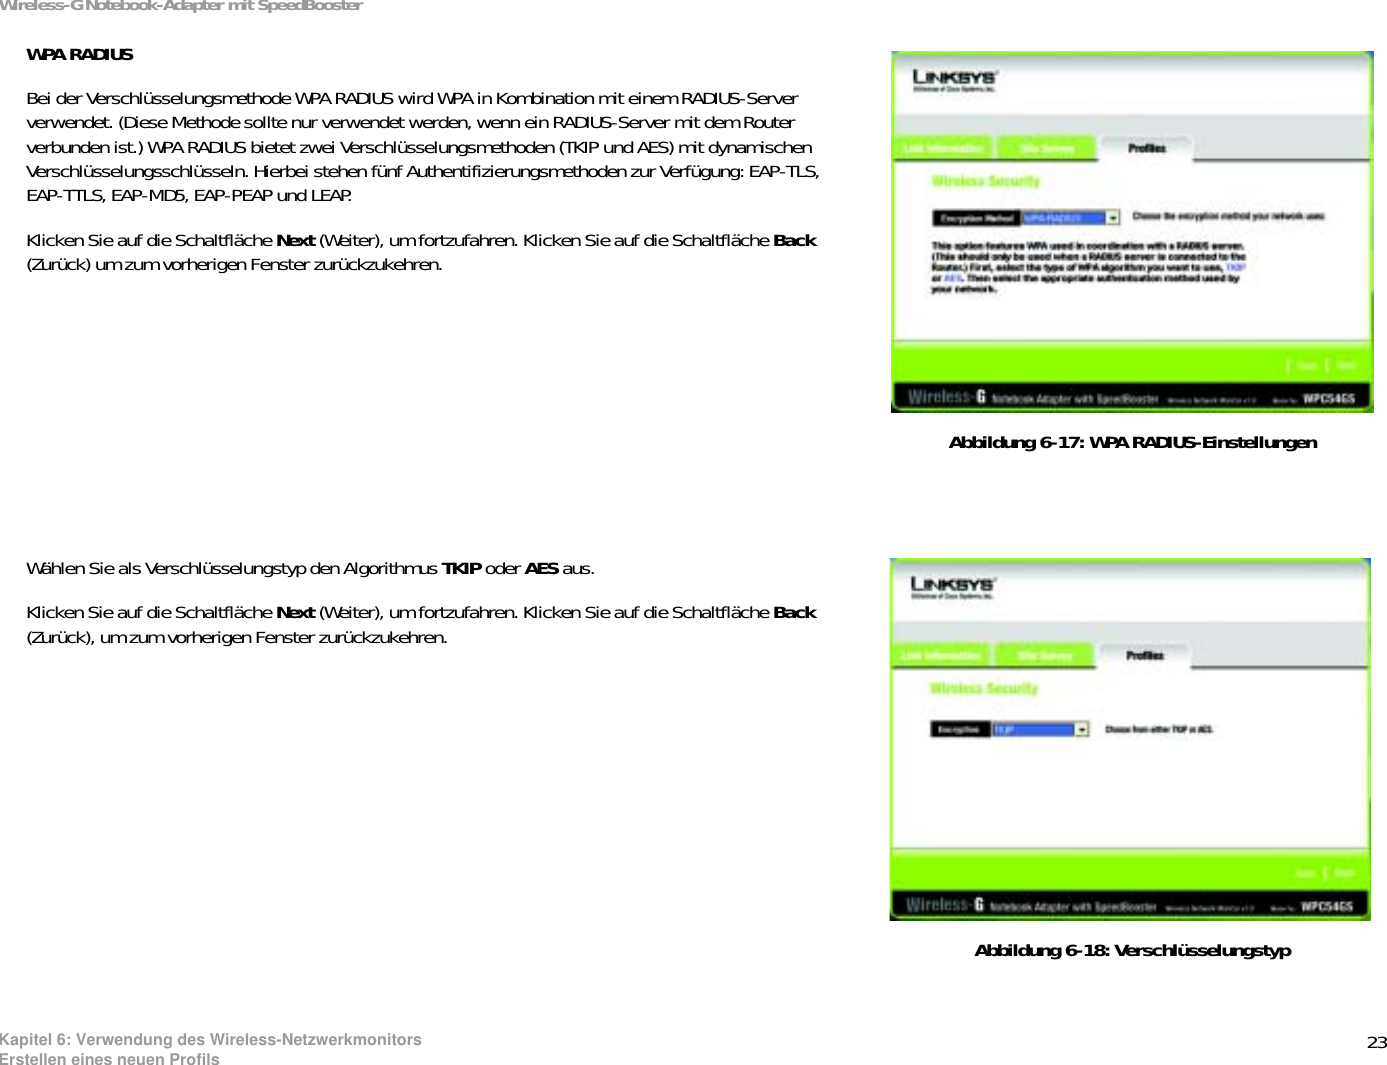
LINKSYS WPC54GSV11 Wireless 11g CardBus Card User Manual
LINKSYS LLC Wireless 11g CardBus Card Users Manual
UserManual.wiki
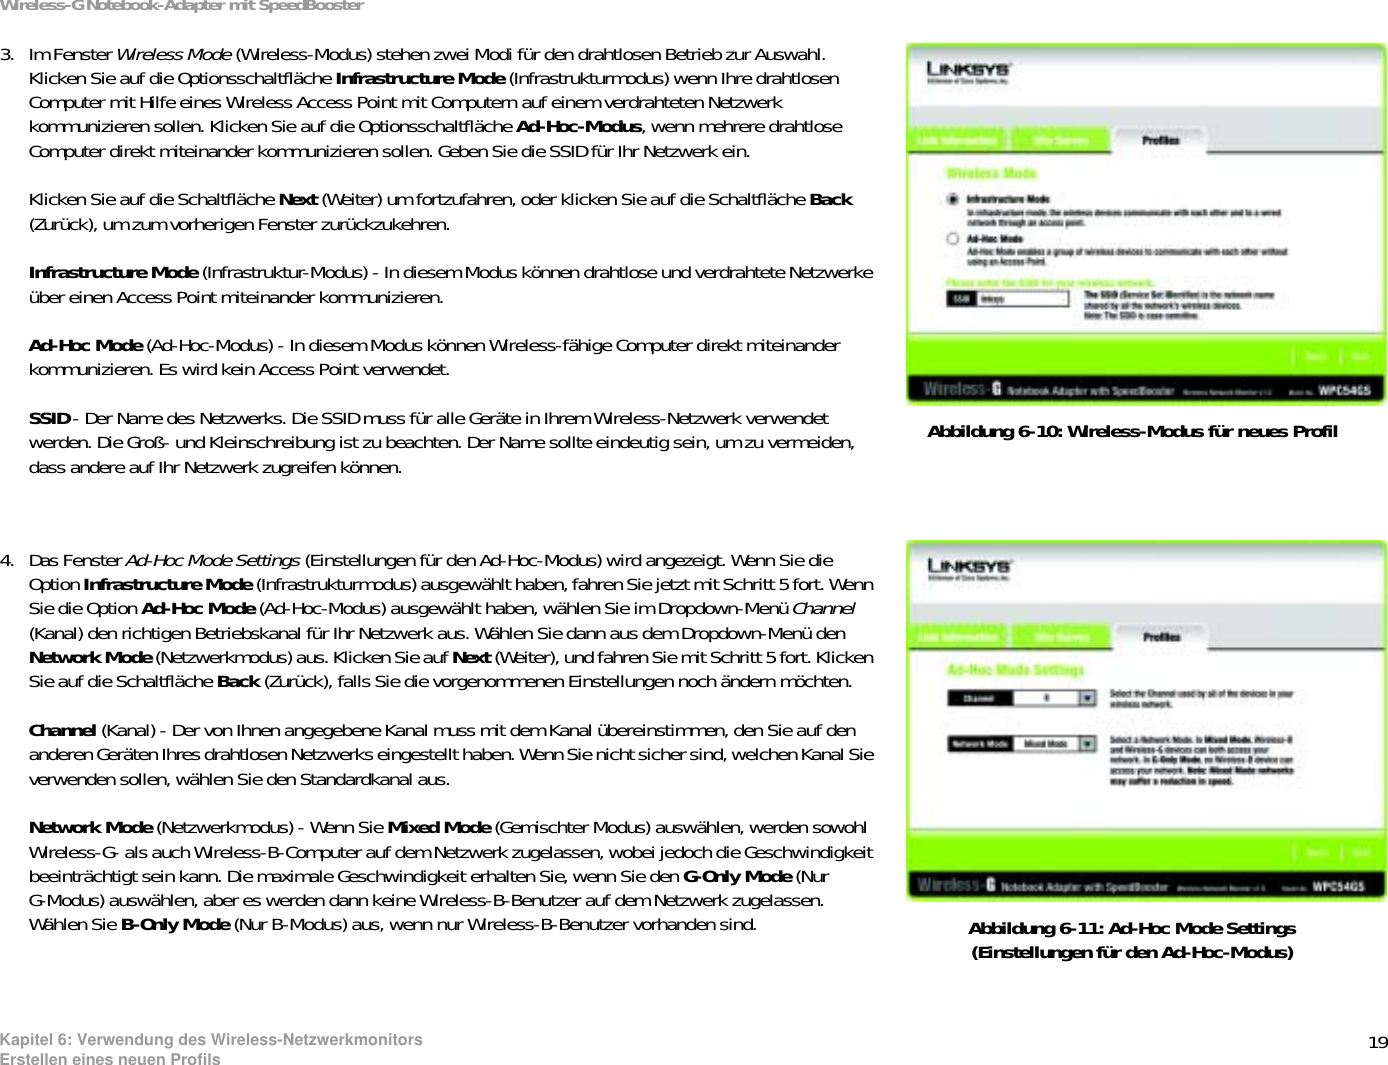
>
LINKSYS
>
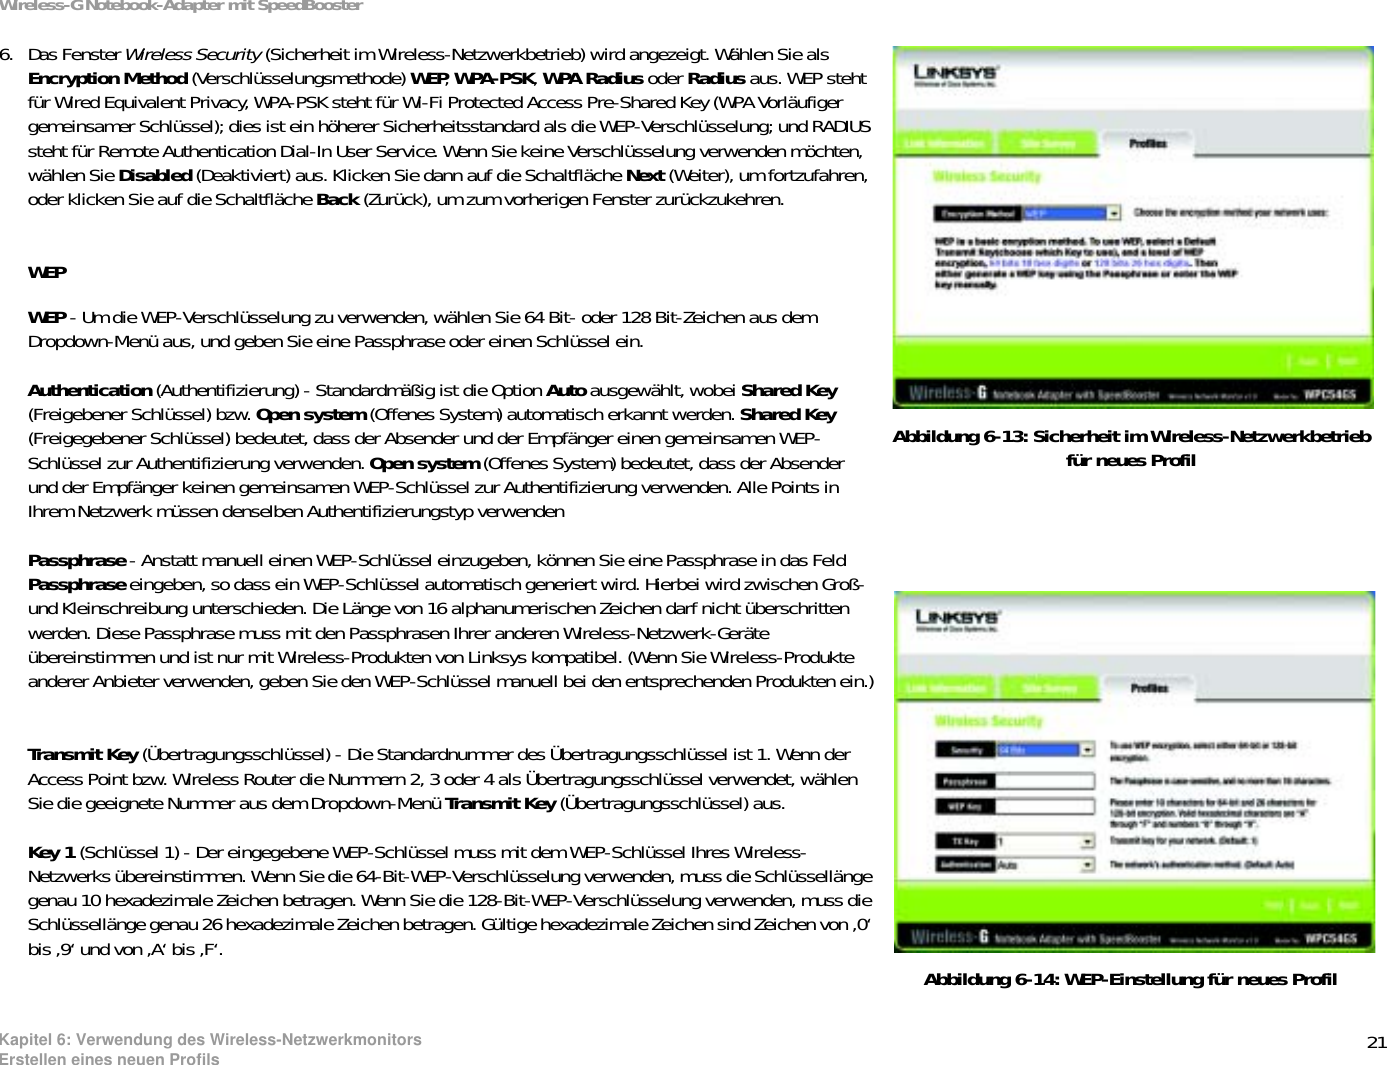
WPC54GSV11 User Manual
Users Manual
Navigation menu
Upload a User Manual
Namespaces
Wiki Guide
HTML
PDF
Info
Views
User Manual
Discussion / Help
Navigation


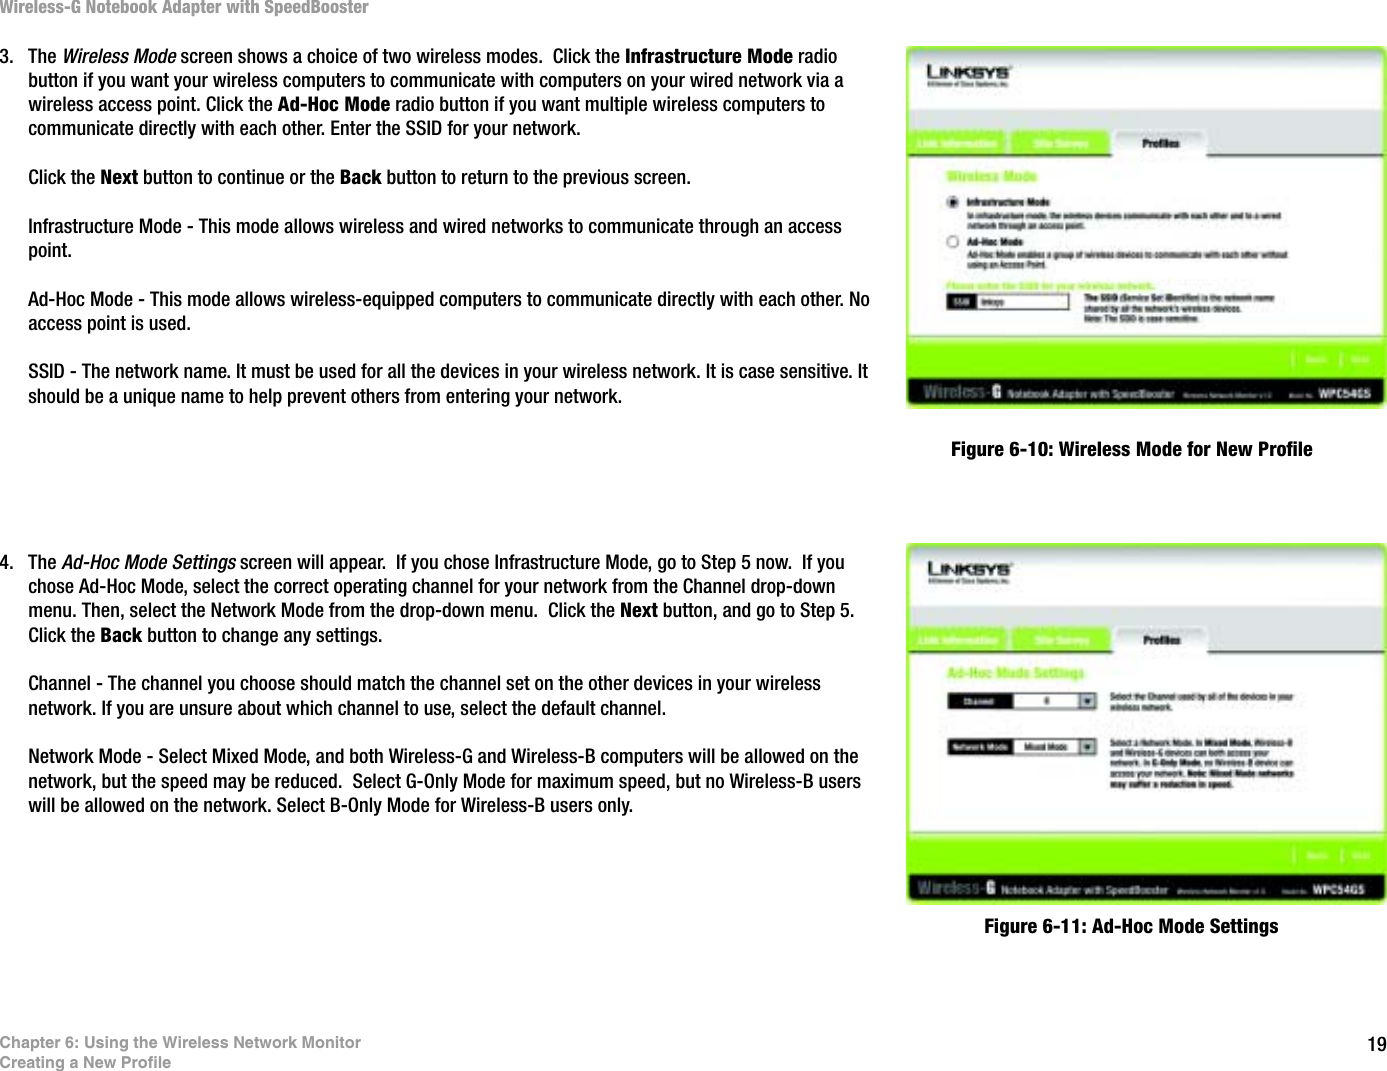


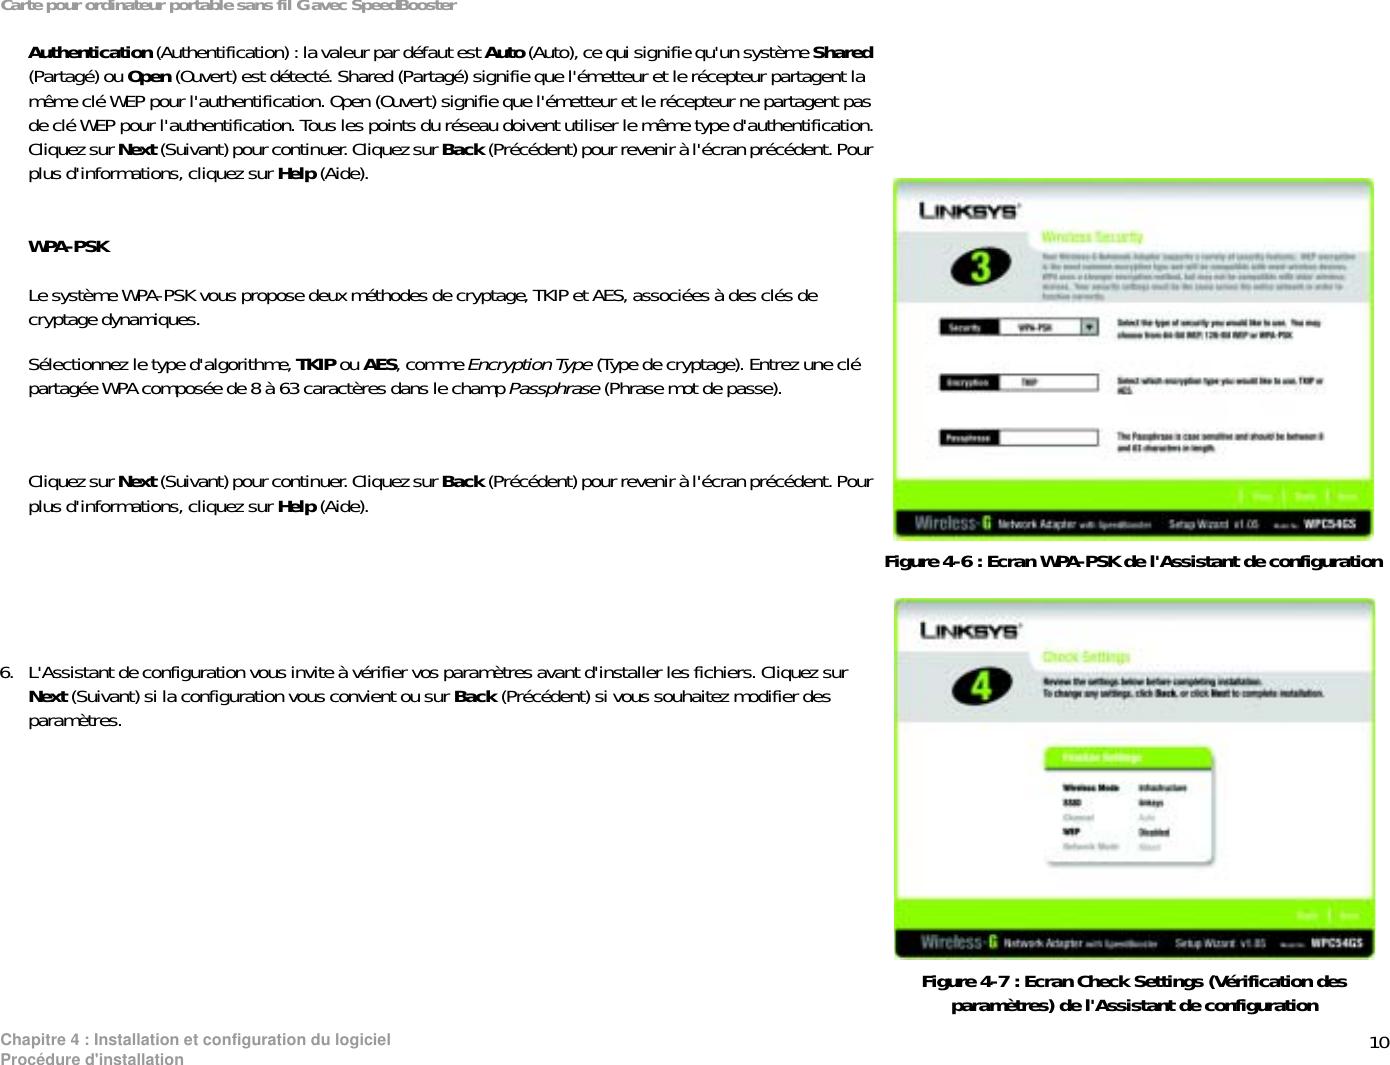
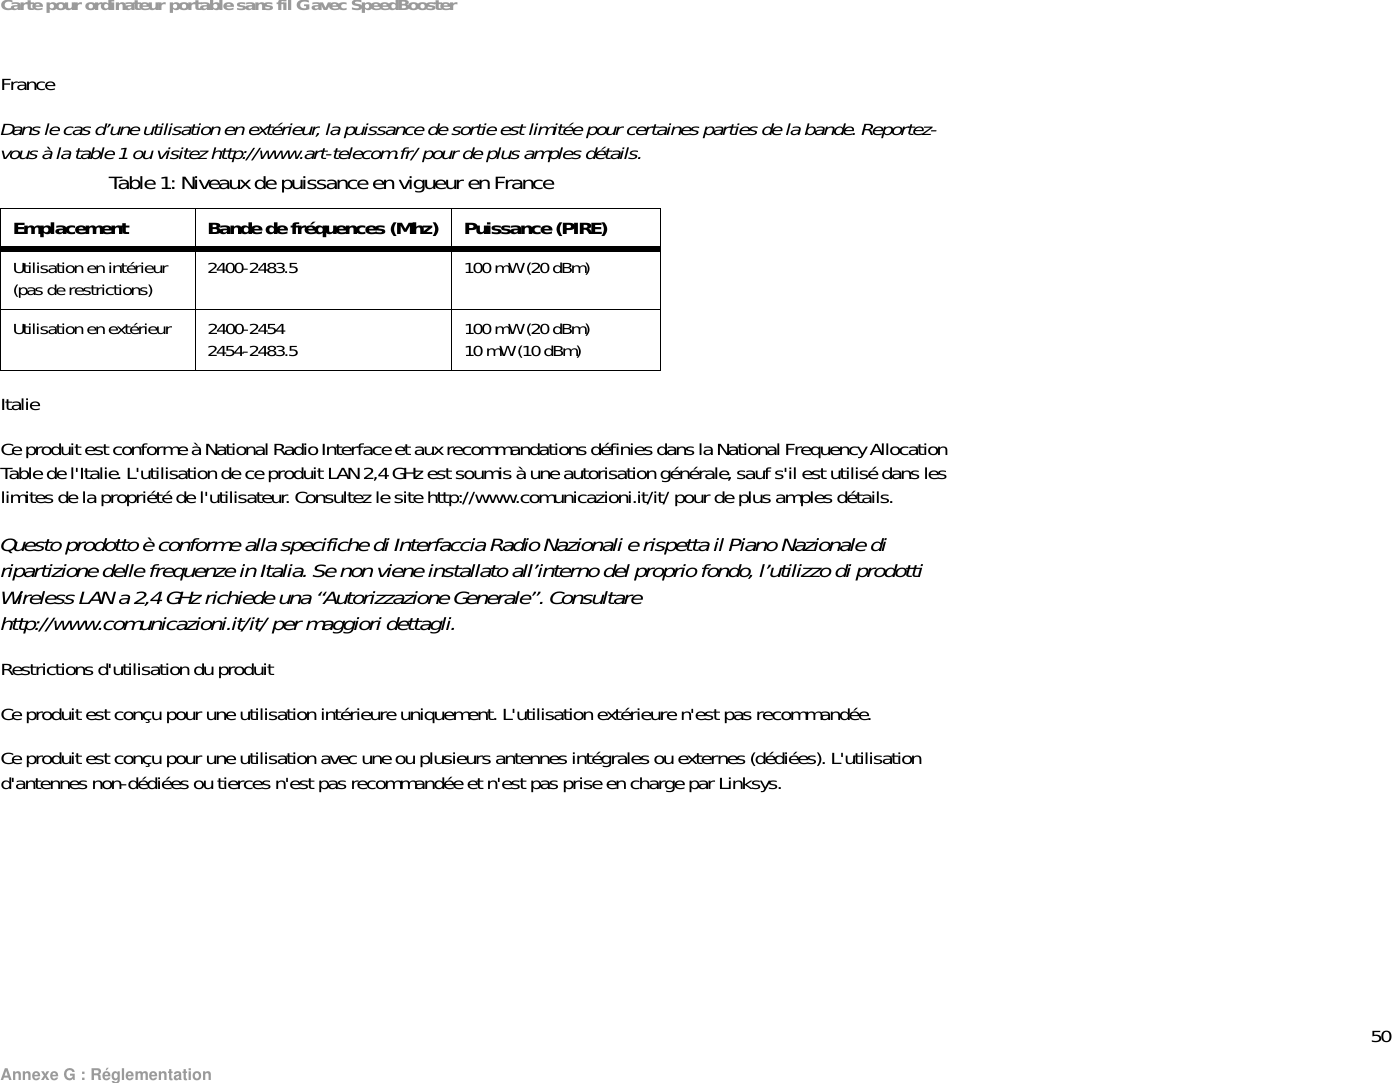
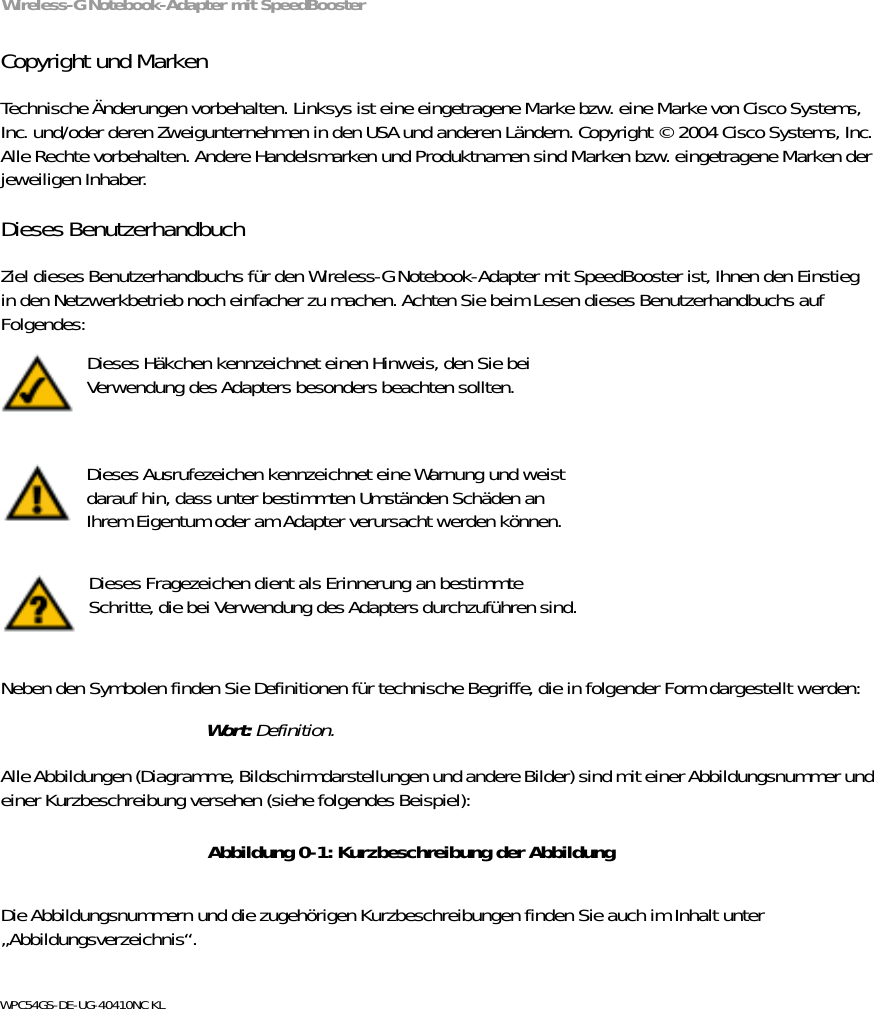
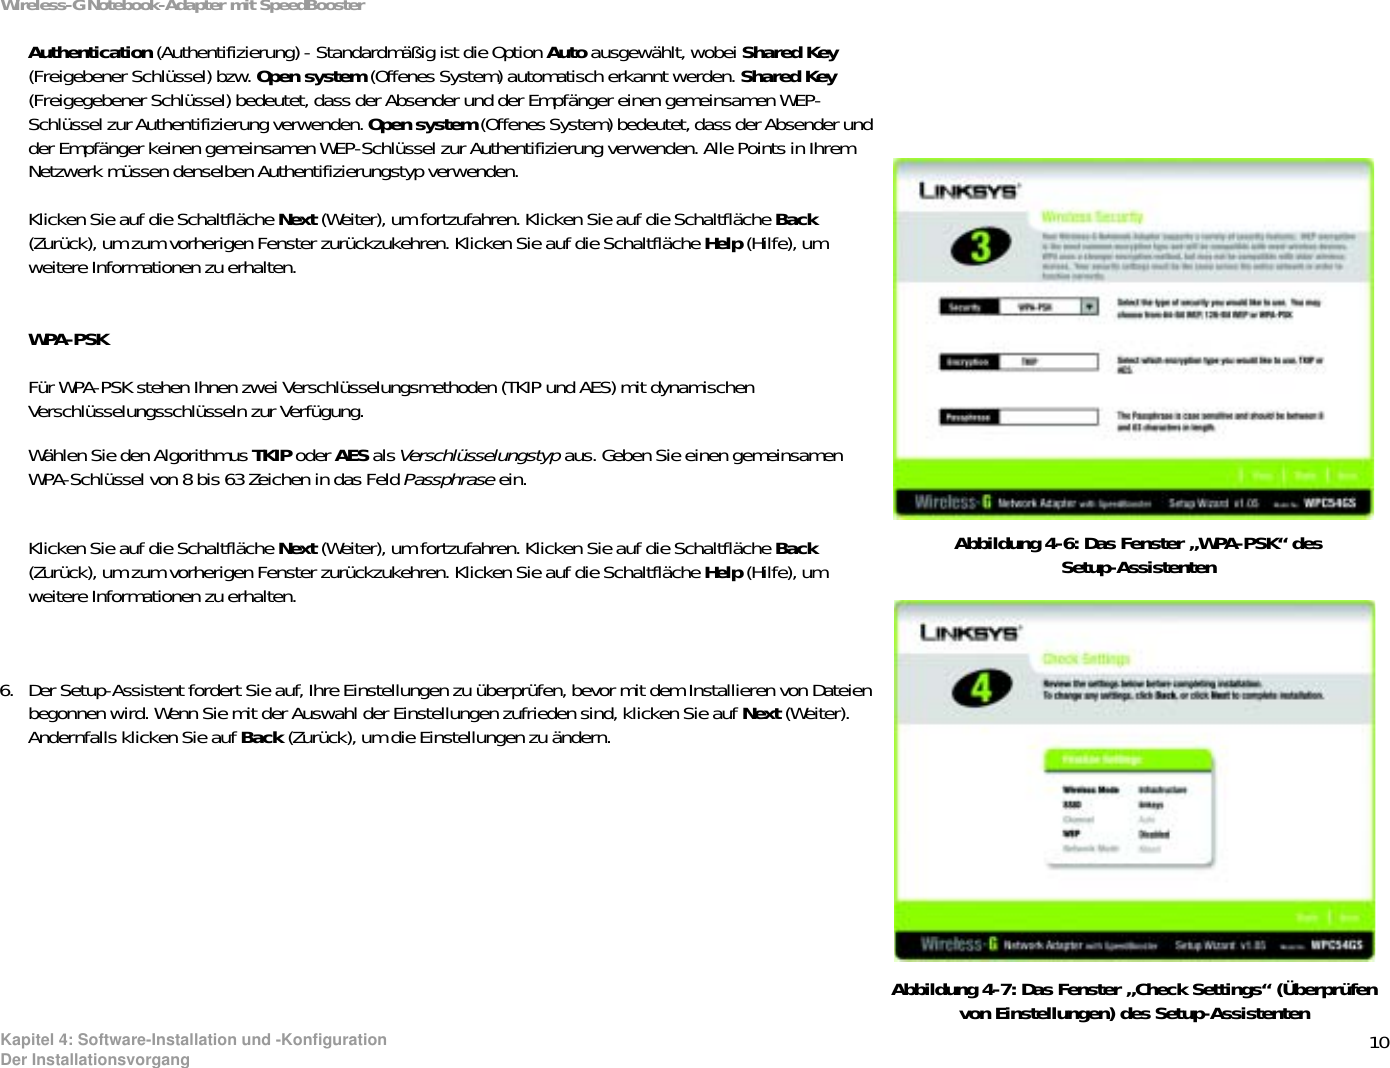
![48Appendix G: Regulatory InformationWireless-G Notebook Adapter with SpeedBoosterCompliance Information for 2,4-GHz Wireless Products Relevant to the EU and Other Countries Following EU Directive 1999/5/EC (R&TTE Directive)Declaration of Conformity with Regard to the EU Directive 1995/5/EC (R&TTE Directive)Deutsch[German]:Dieses Gerät entspricht den grundlegenden Anforderungen und den weiteren entsprechenden Vorgaben der Richtlinie 1999/5/EU.Dansk[Danish]:Dette udstyr er i overensstemmelse med de væsentlige krav og andre relevante bestemmelser i Direktiv 1999/5/EF.English: This equipment is in compliance with the essential requirements and other relevant provisions of Directive 1999/5/EC.Español [Spanish]:Este equipo cumple con los requisitos esenciales asi como con otras disposiciones de la Directiva 1999/5/CE.ǼȜȜȘȞȚțȒ[Greek]:ǹȣIJȩȢ Ƞ İȟȠʌȜȚıµȩȢ İȓȞĮȚ ıİ ıȣµµȩȡijȦıȘ µİ IJȚȢ ȠȣıȚȫįİȚȢ ĮʌĮȚIJȒıİȚȢțĮȚ ȐȜȜİȢ ıȤİIJȚțȑȢ įȚĮIJȐȟİȚȢ IJȘȢ ȅįȘȖȓĮȢ 1999/5/EC.Français [French]:Cet appareil est conforme aux exigences essentielles et aux autres dispositions pertinentes de la Directive 1999/5/EC.Íslenska[Icelandic]:Þetta tæki er samkvæmt grunnkröfum og öðrum viðeigandi ákvæðum Tilskipunar 1999/5/EC.Italiano[Italian]:Questo apparato é conforme ai requisiti essenziali ed agli altri principi sanciti dalla Direttiva 1999/5/CE.Nederlands[Dutch]:Dit apparaat voldoet aan de essentiele eisen en andere van toepassing zijnde bepalingen van de Richtlijn 1999/5/EC.Norsk[Norwegian]:Dette utstyret er i samsvar med de grunnleggende krav og andre relevante bestemmelser i EU-direktiv 1999/5/EF.Português[Portuguese]:Este equipamento está em conformidade com os requisitos essenciais e outras provisões relevantes da Directiva 1999/5/EC.Suomi[Finnish]:Tämä laite täyttää direktiivin 1999/5/EY olennaiset vaatimukset ja on siinä asetettujen muiden laitetta koskevien määräysten mukainen.Svenska[Swedish]:Denna utrustning är i överensstämmelse med de väsentliga kraven och andra relevanta bestämmelser i Direktiv 1999/5/EC.NOTE: If you need any technical documentation, see the “How to Access Technical Documents on www.linksys.com/international” section for more information.](https://usermanual.wiki/LINKSYS/WPC54GSV11/User-Guide-471670-Page-101.png)


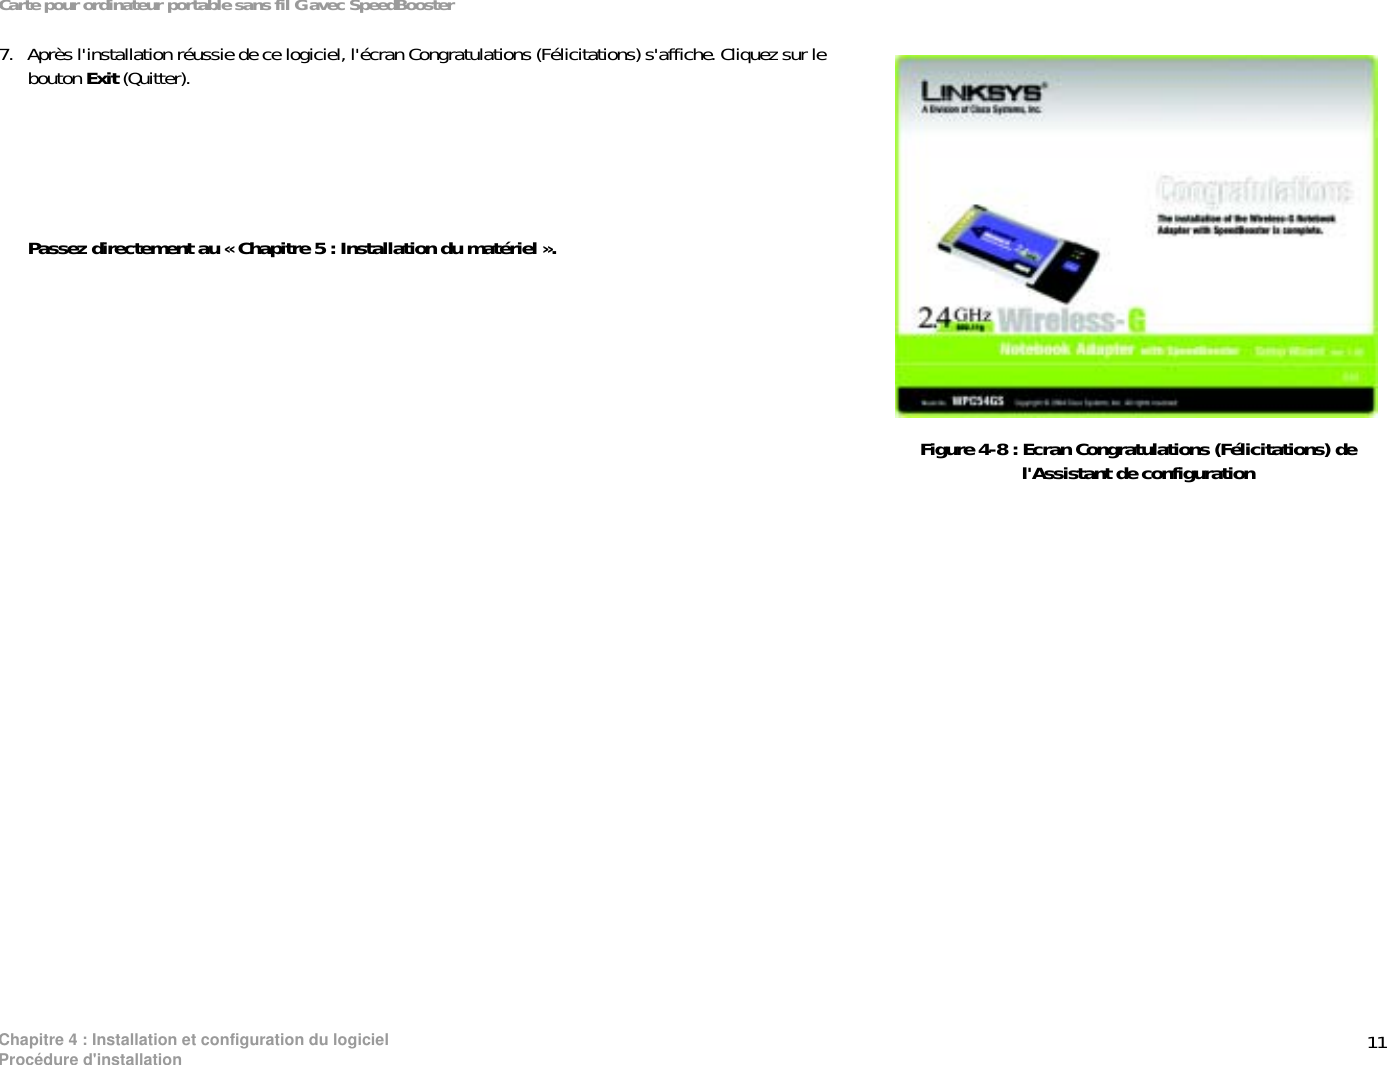

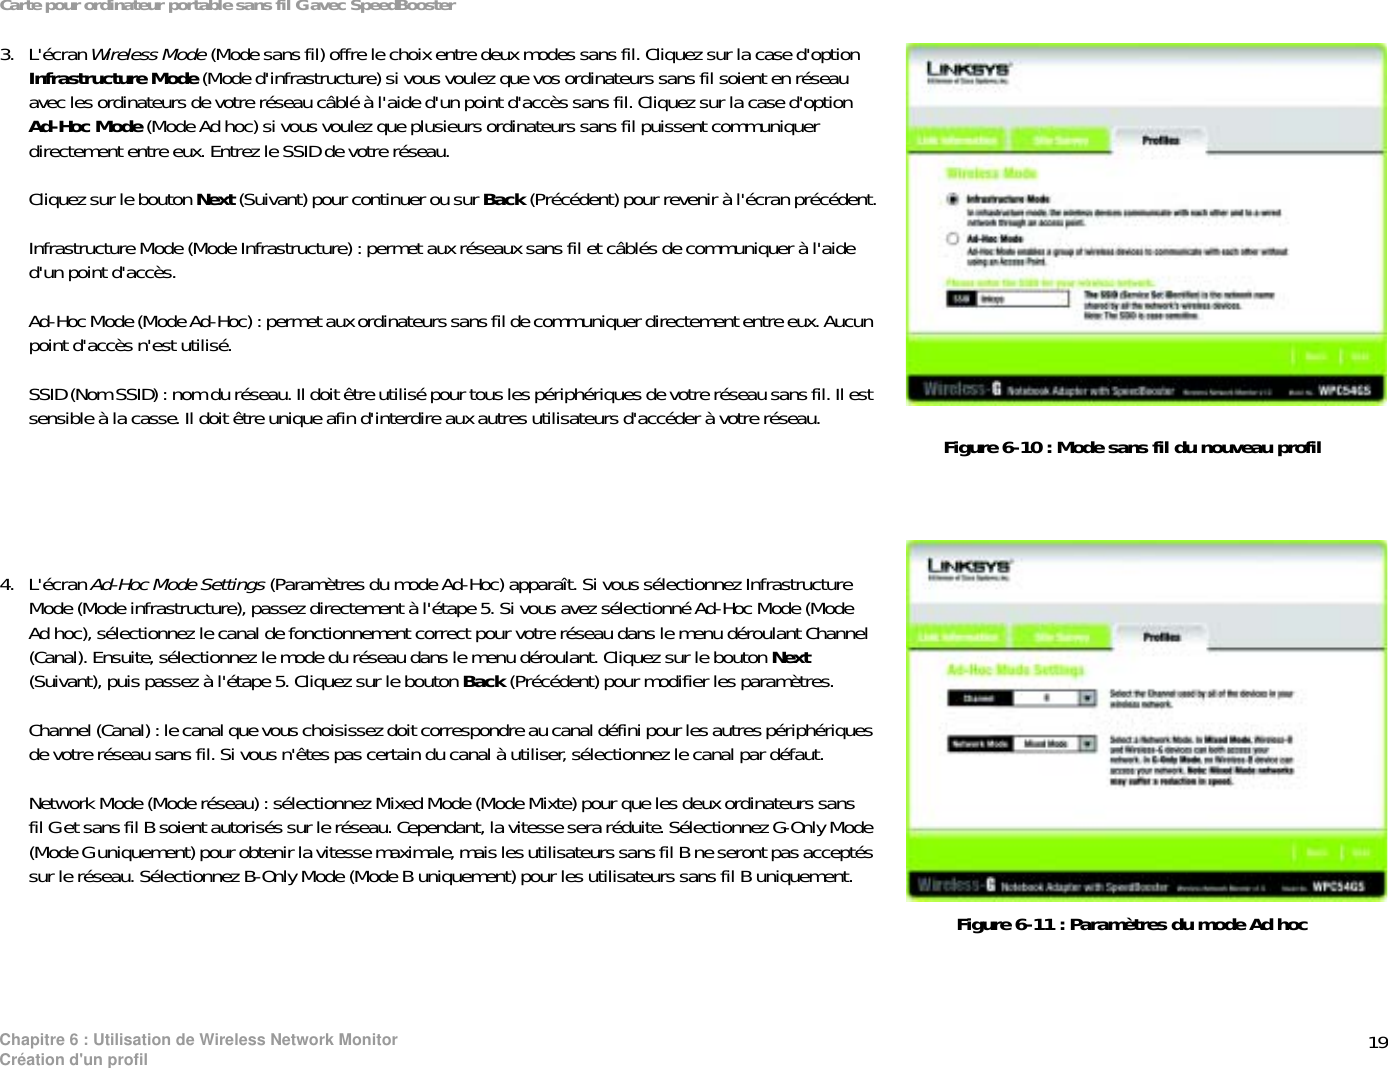


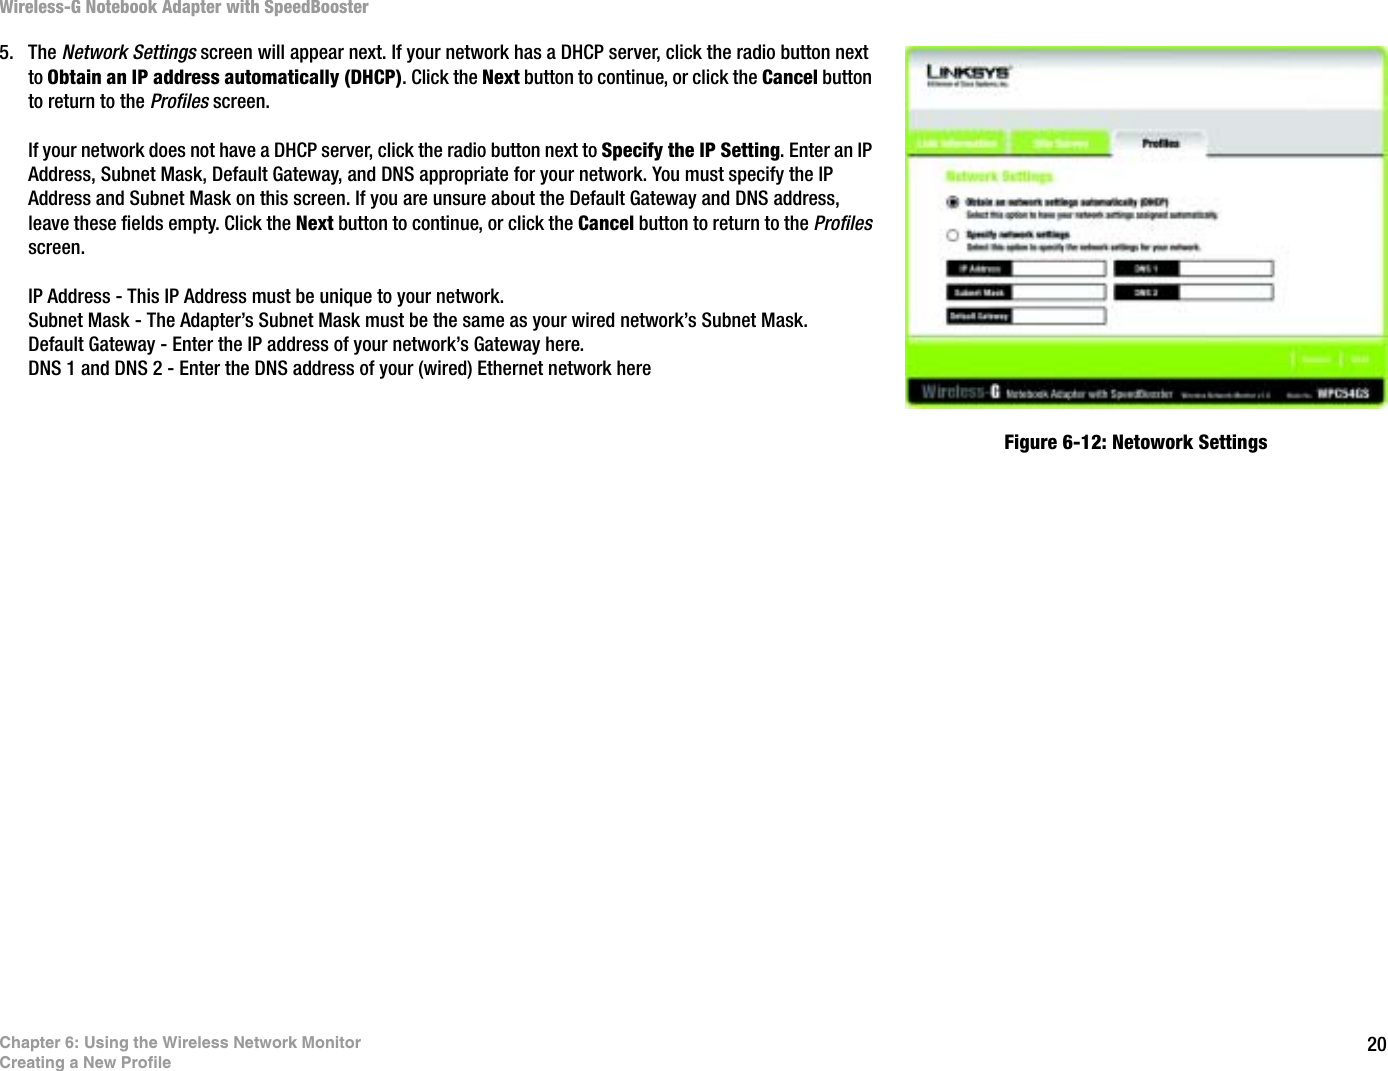
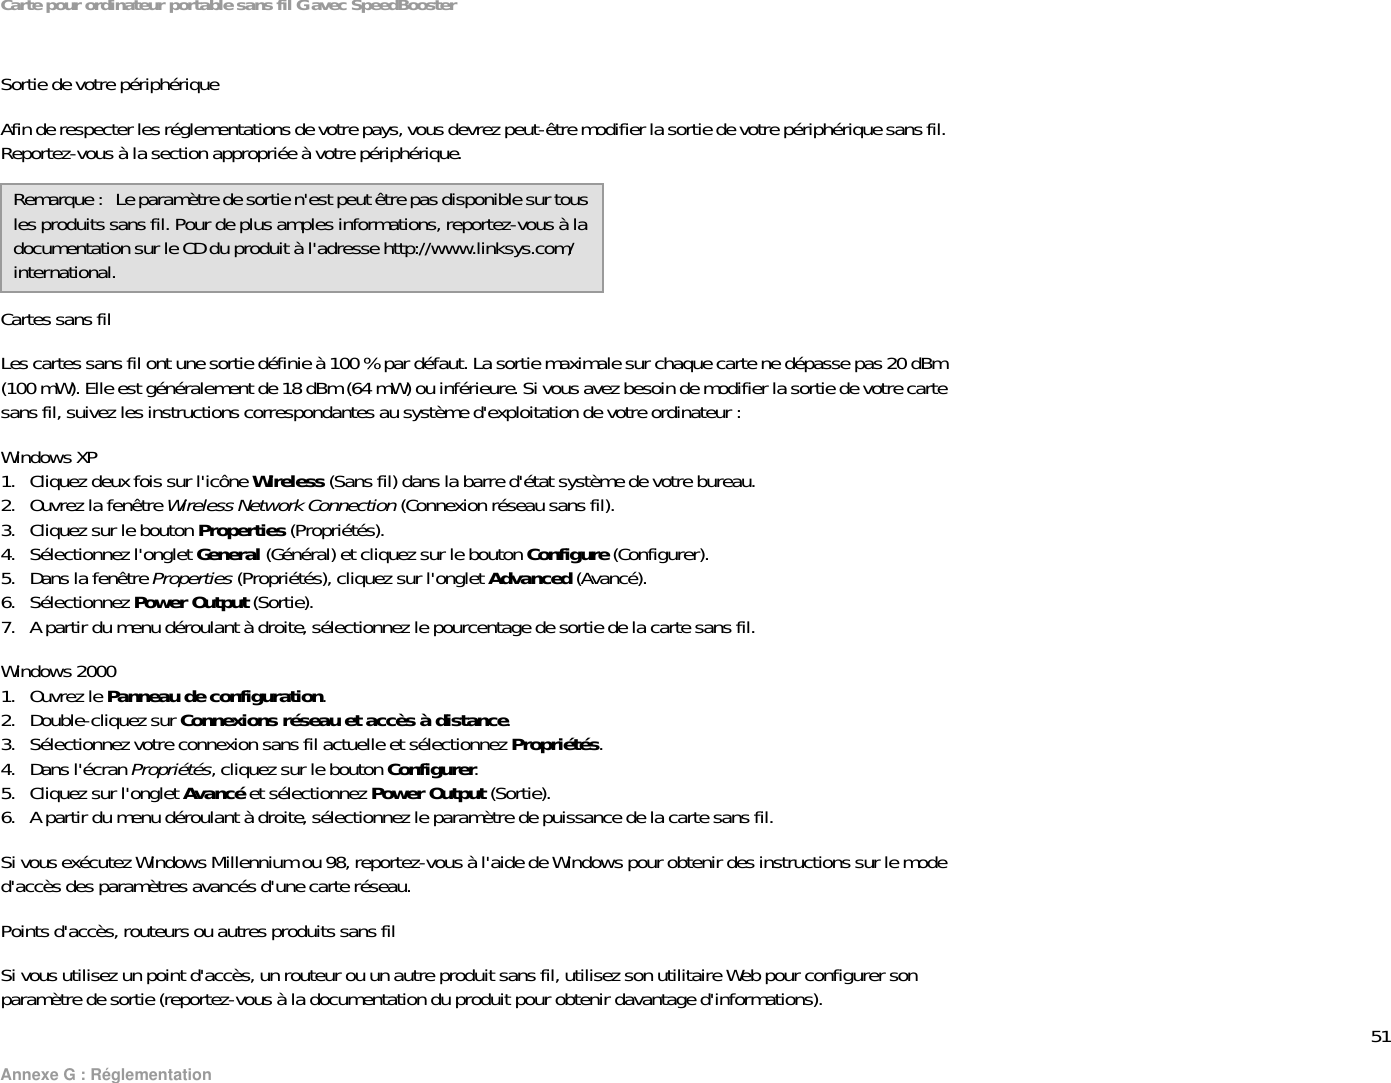
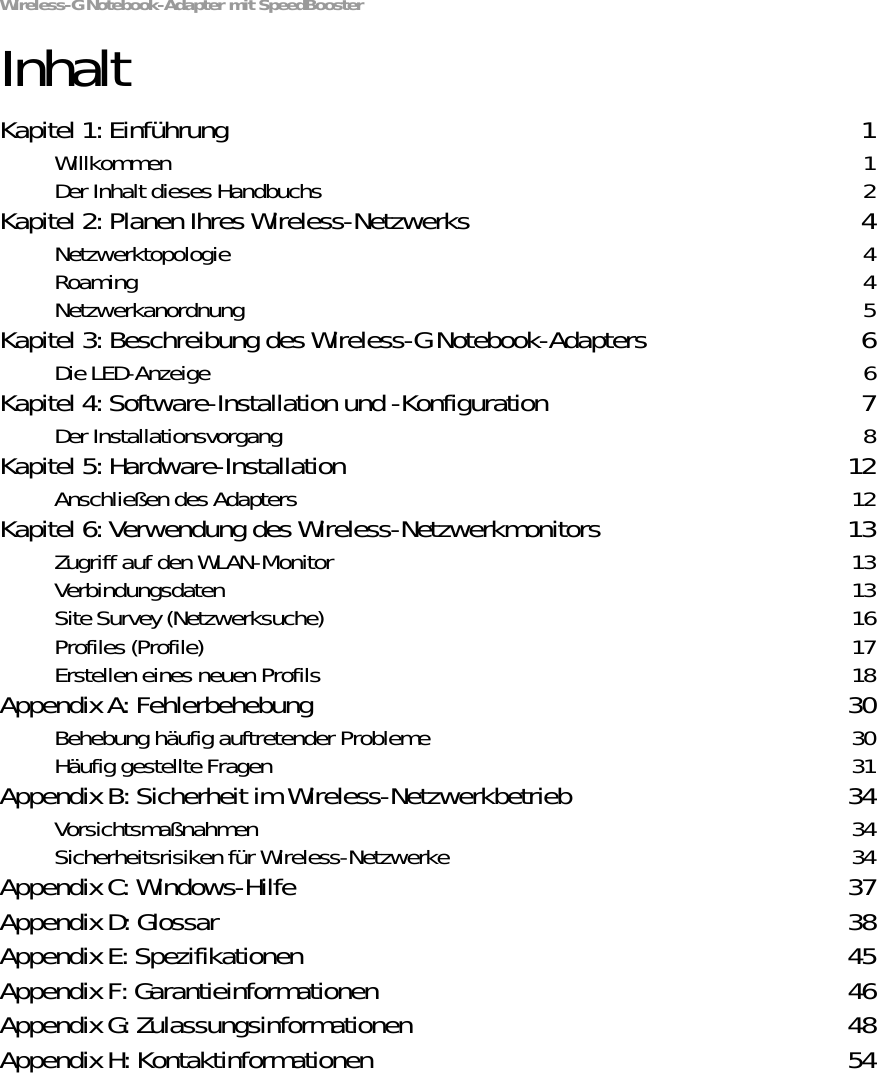
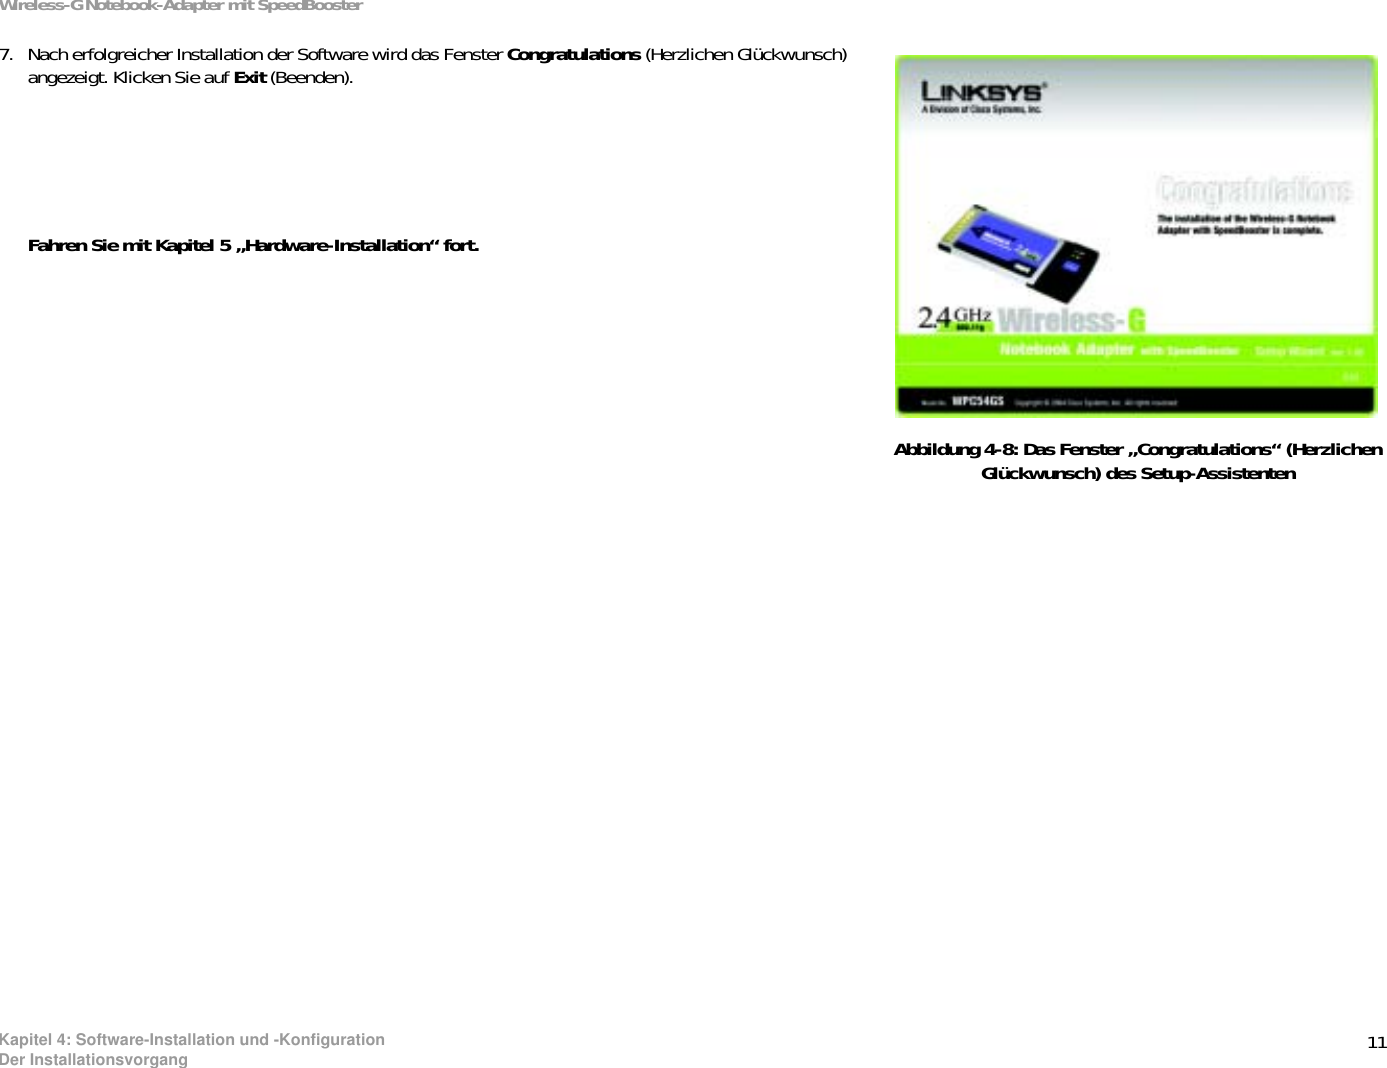
![48Annexe G : RéglementationCarte pour ordinateur portable sans fil G avec SpeedBoosterInformations de conformité pour les produits sans fil 2,4-GHz concernant l'Union européenne et les autres pays suivant la directive européenne 1999/5/EC (R&TTE)Déclaration de conformité concernant la directive européenne 1995/5/EC (R&TTE)Deutsch[allemand] : Dieses Gerät entspricht den grundlegenden Anforderungen und den weiteren entsprechenden Vorgaben der Richtlinie 1999/5/EU.Dansk[danois] : Dette udstyr er i overensstemmelse med de væsentlige krav og andre relevante bestemmelser i Direktiv 1999/5/EF.English[anglais] : This equipment is in compliance with the essential requirements and other relevant provisions of Directive 1999/5/EC.Español [espagnol] : Este equipo cumple con los requisitos esenciales Ȣasi como con otras disposiciones de la Directiva 1999/5/CE.ǼȜȜȘȞȚțȒ[grec] : ǹȣIJȩȢ Ƞ İȟȠʌȜȚıµȩȢ İȓȞĮȚ ıİ ıȣµµȩȡijȦıȘ µİ IJȚȢ ȠȣıȚȫįİȚȢĮʌĮȚIJȒıİȚȢ țĮȚ ȐȜȜİȢ ıȤİIJȚțȑȢ įȚĮIJȐȟİȚȢ IJȘȢ ȅįȘȖȓĮȢ 1999/5/EC.Français : Cet appareil est conforme aux exigences essentielles et aux autres dispositions pertinentes de la Directive 1999/5/EC.Íslenska[islandais] : Þetta tæki er samkvæmt grunnkröfum og öðrum viðeigandi ákvæðum Tilskipunar 1999/5/EC.Italiano[italien] : Questo apparato é conforme ai requisiti essenziali ed agli altri principi sanciti dalla Direttiva 1999/5/CE.Nederlands[néerlandais] : Dit apparaat voldoet aan de essentiele eisen en andere van toepassing zijnde bepalingen van de Richtlijn 1999/5/EC.Norsk[norvégien] : Dette utstyret er i samsvar med de grunnleggende krav og andre relevante bestemmelser i EU-direktiv 1999/5/EF.Português[portuguais] : Este equipamento está em conformidade com os requisitos essenciais e outras provisões relevantes da Directiva 1999/5/EC.Suomi[finnois] : Tämä laite täyttää direktiivin 1999/5/EY olennaiset vaatimukset ja on siinä asetettujen muiden laitetta koskevien määräysten mukainen.Svenska[suédois] : Denna utrustning är i överensstämmelse med de väsentliga kraven och andra relevanta bestämmelser i Direktiv 1999/5/EC.Remarque : Si vous avez besoin de documentation technique, reportez-vous à la section « Comment accéder aux documents techniques depuis l'adresse www.linksys.com/international » pour plus d'informations.](https://usermanual.wiki/LINKSYS/WPC54GSV11/User-Guide-471670-Page-159.png)
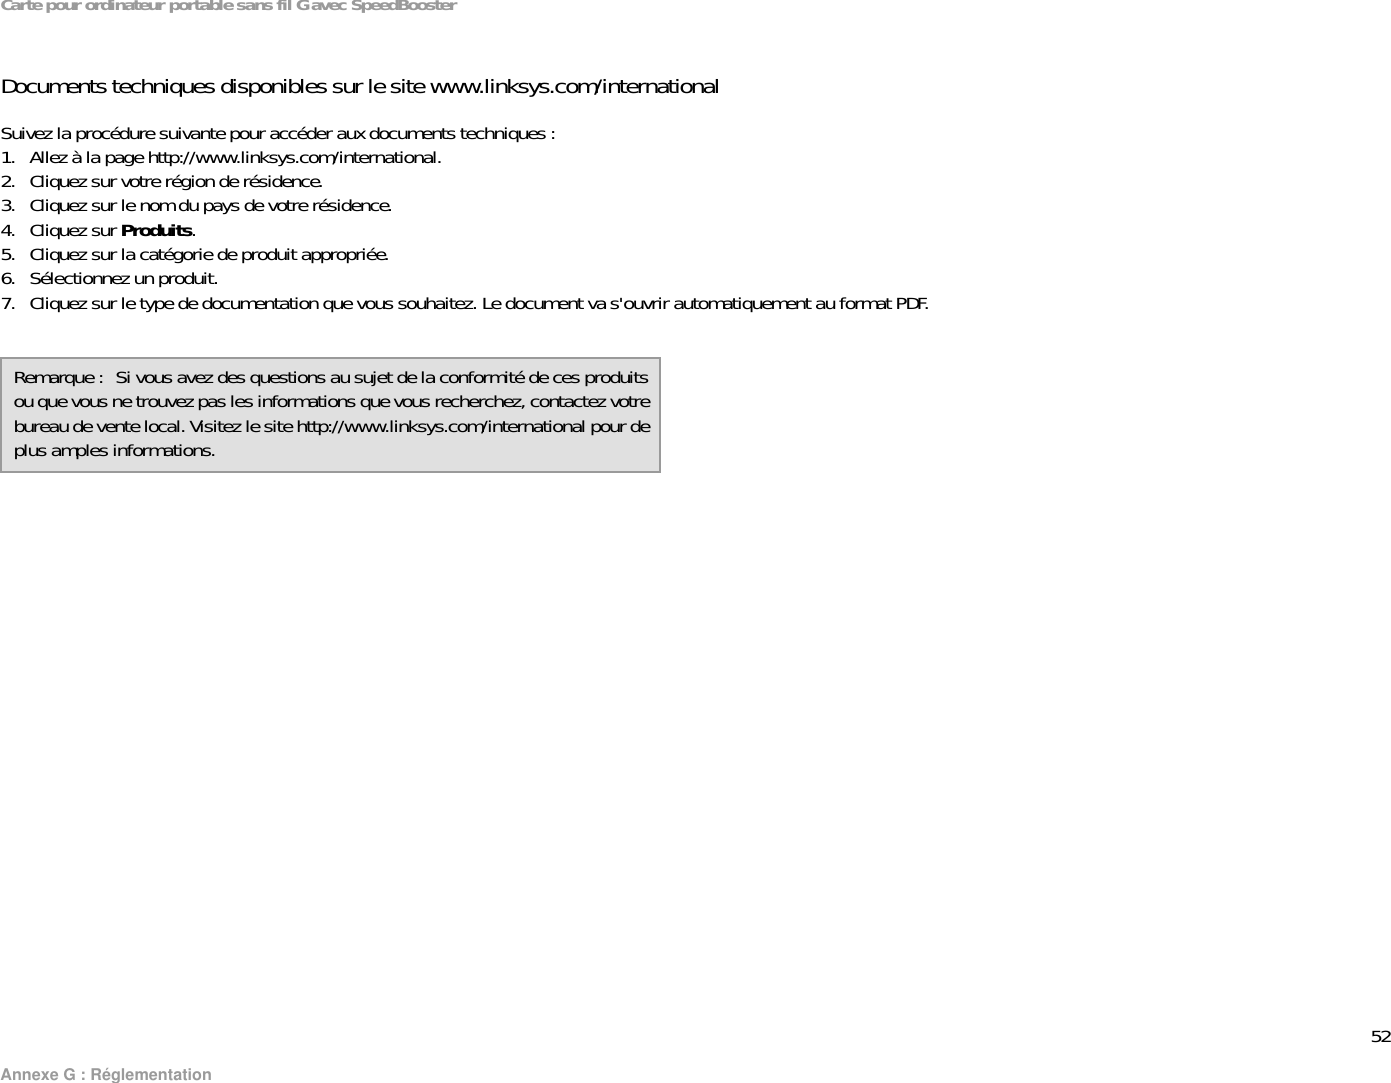

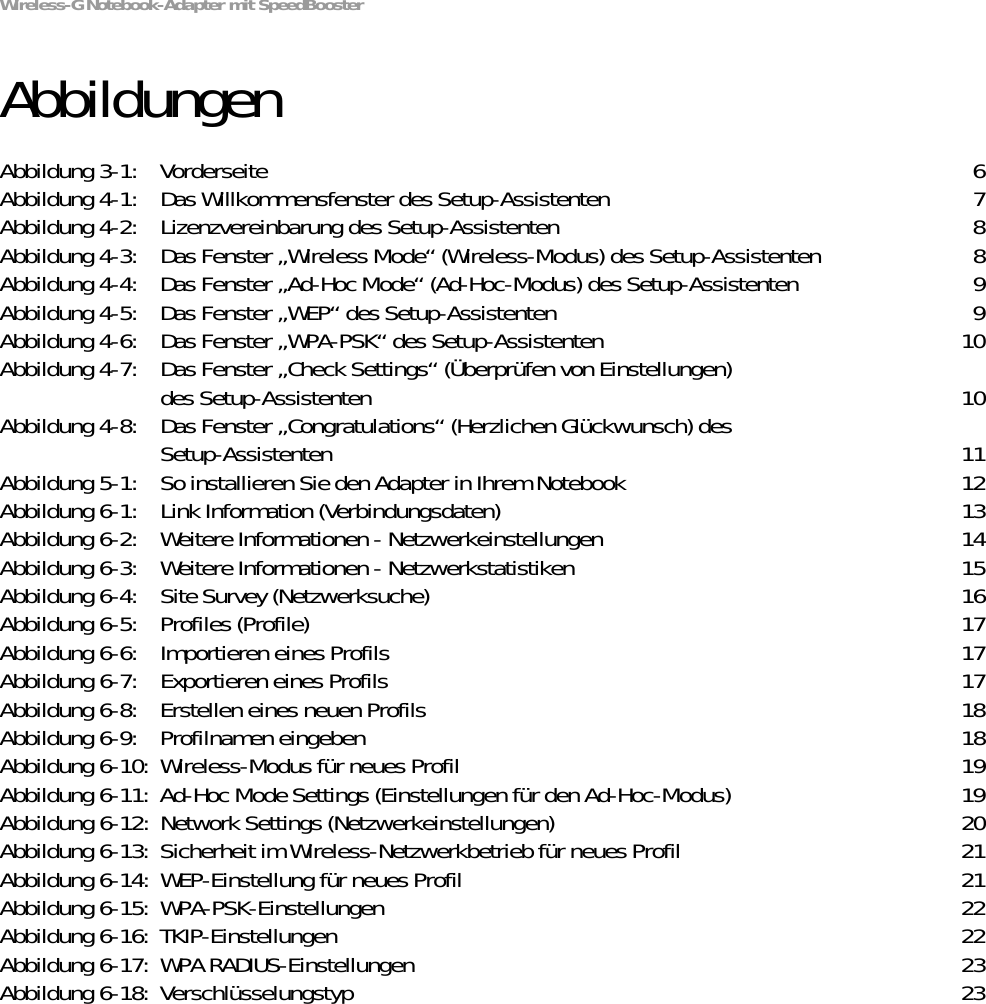

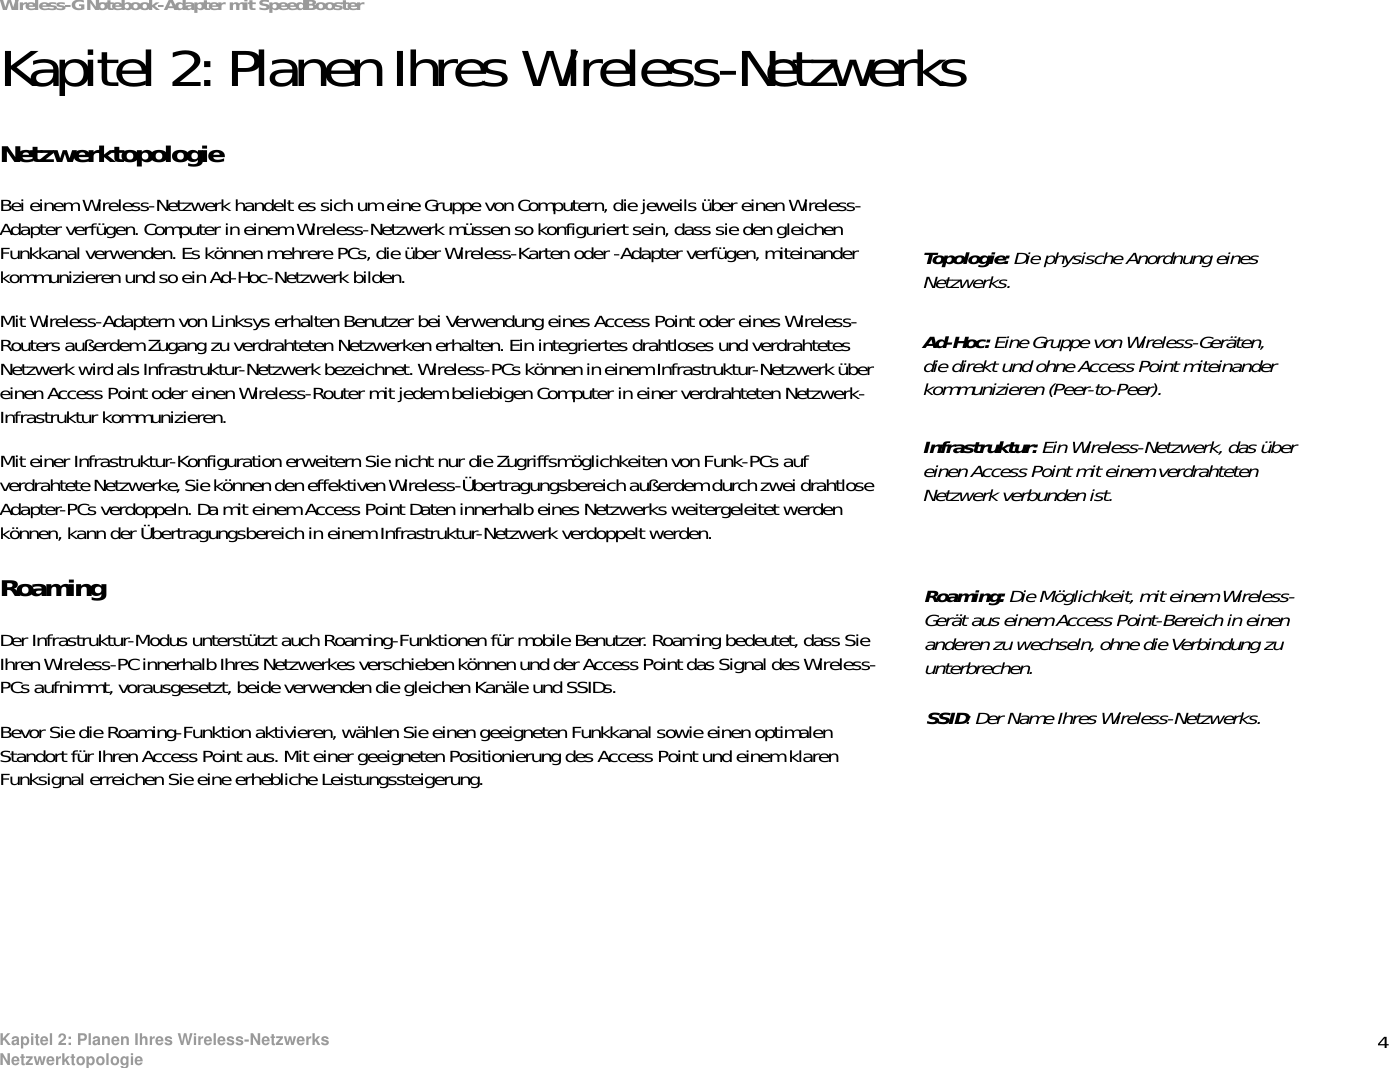
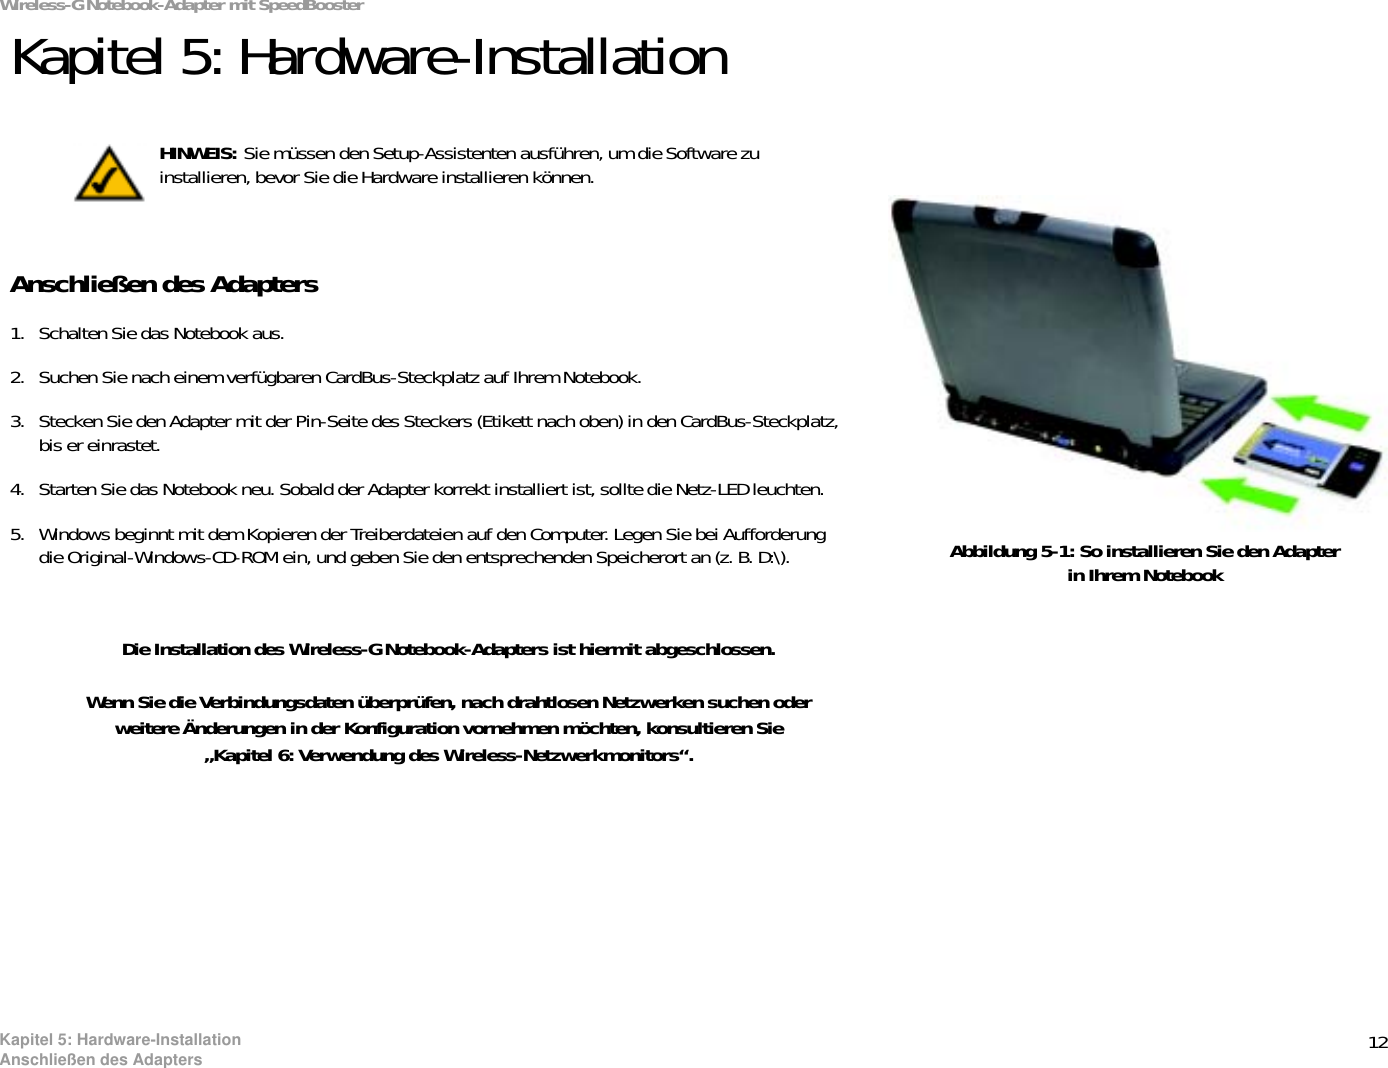
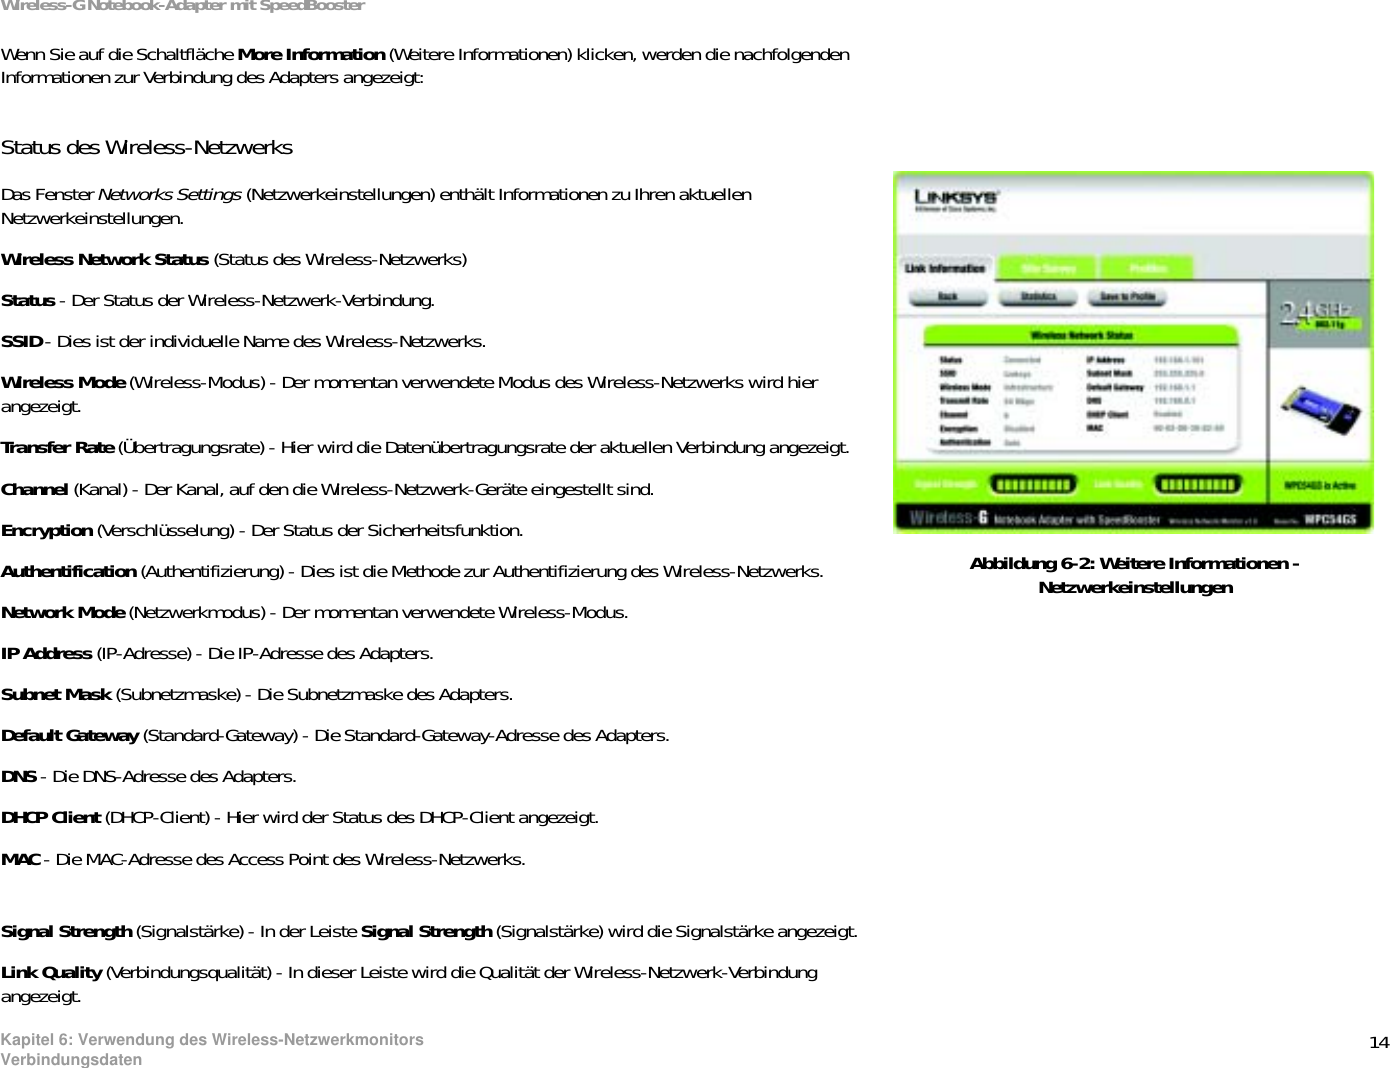
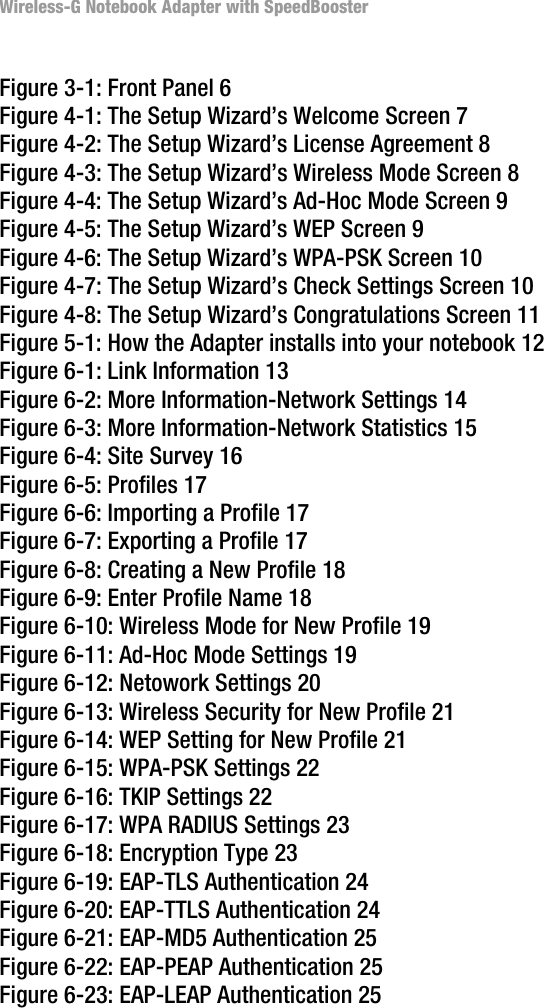
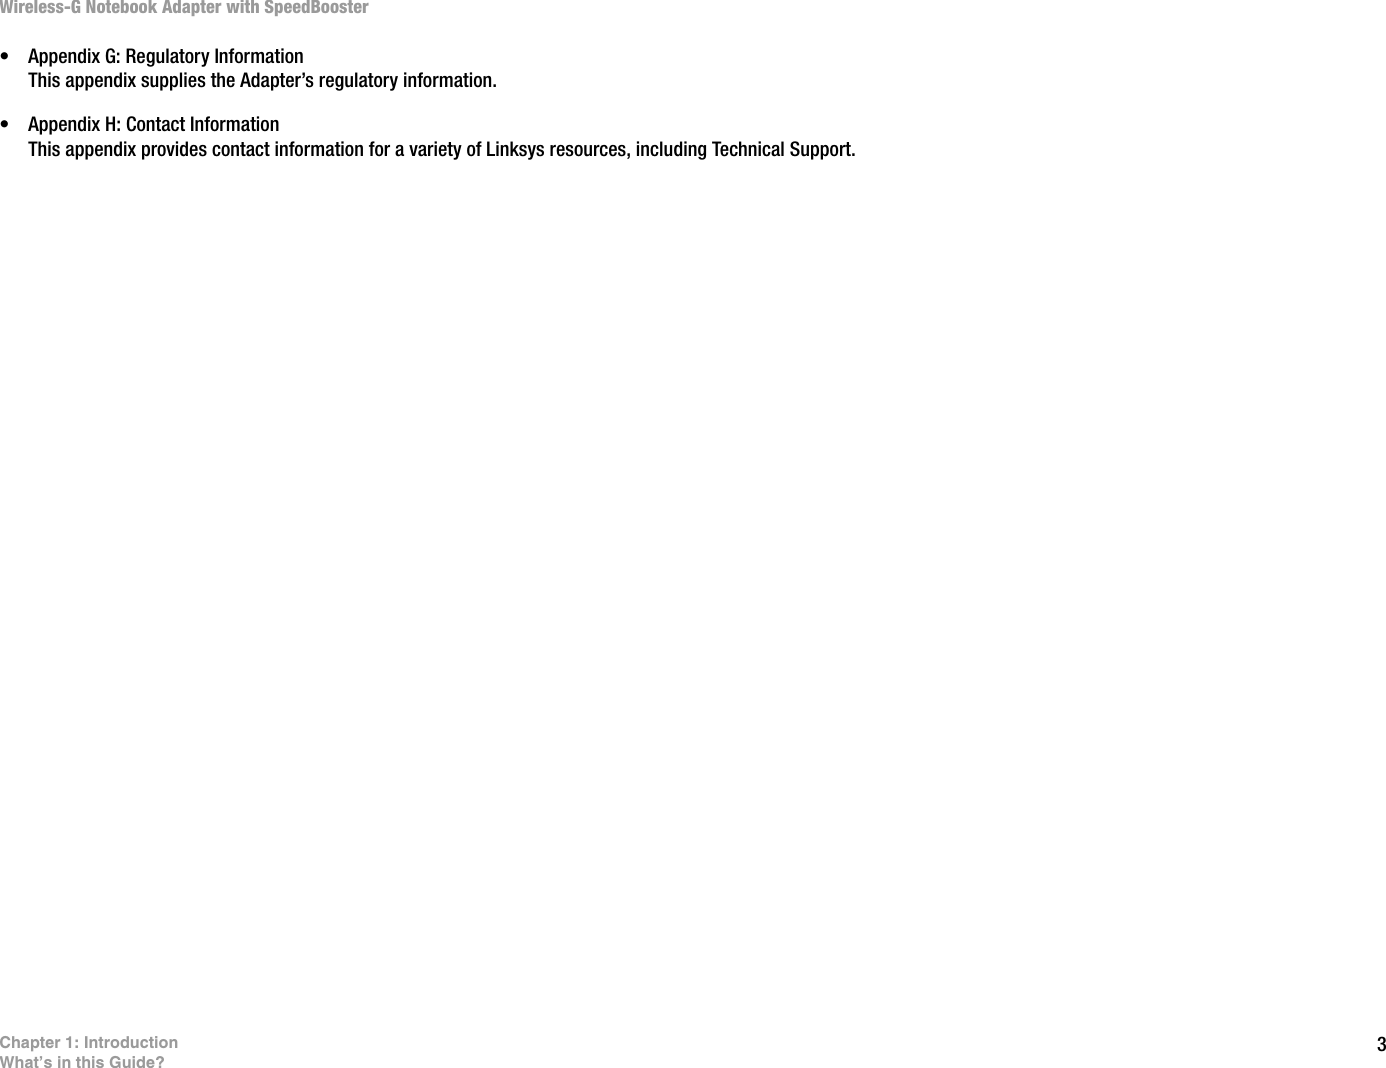
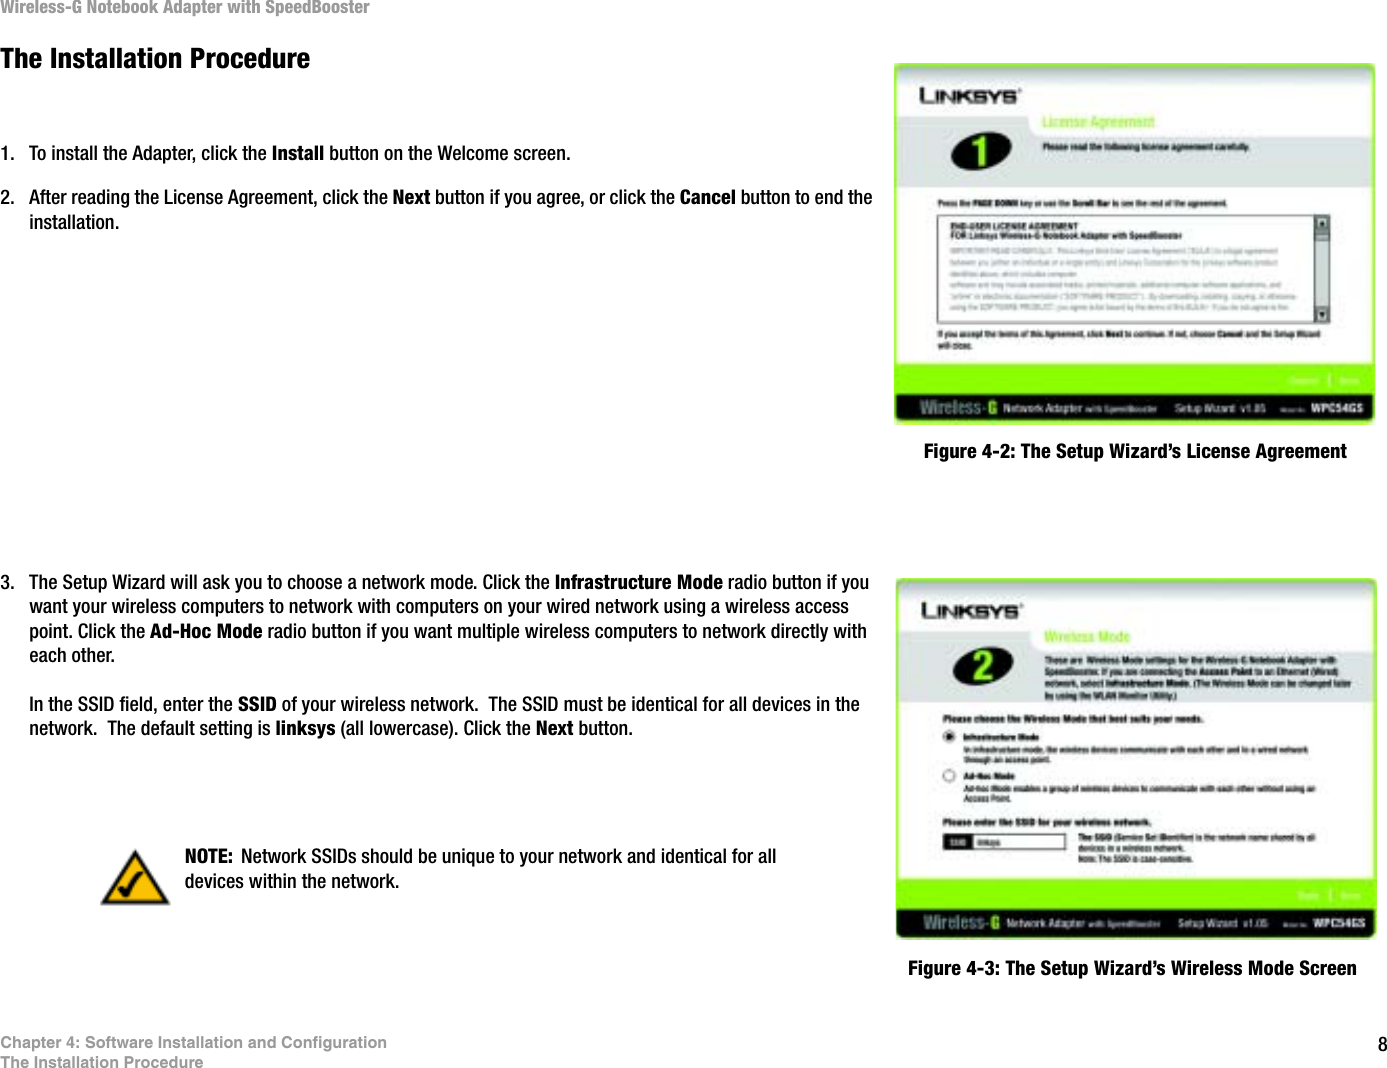
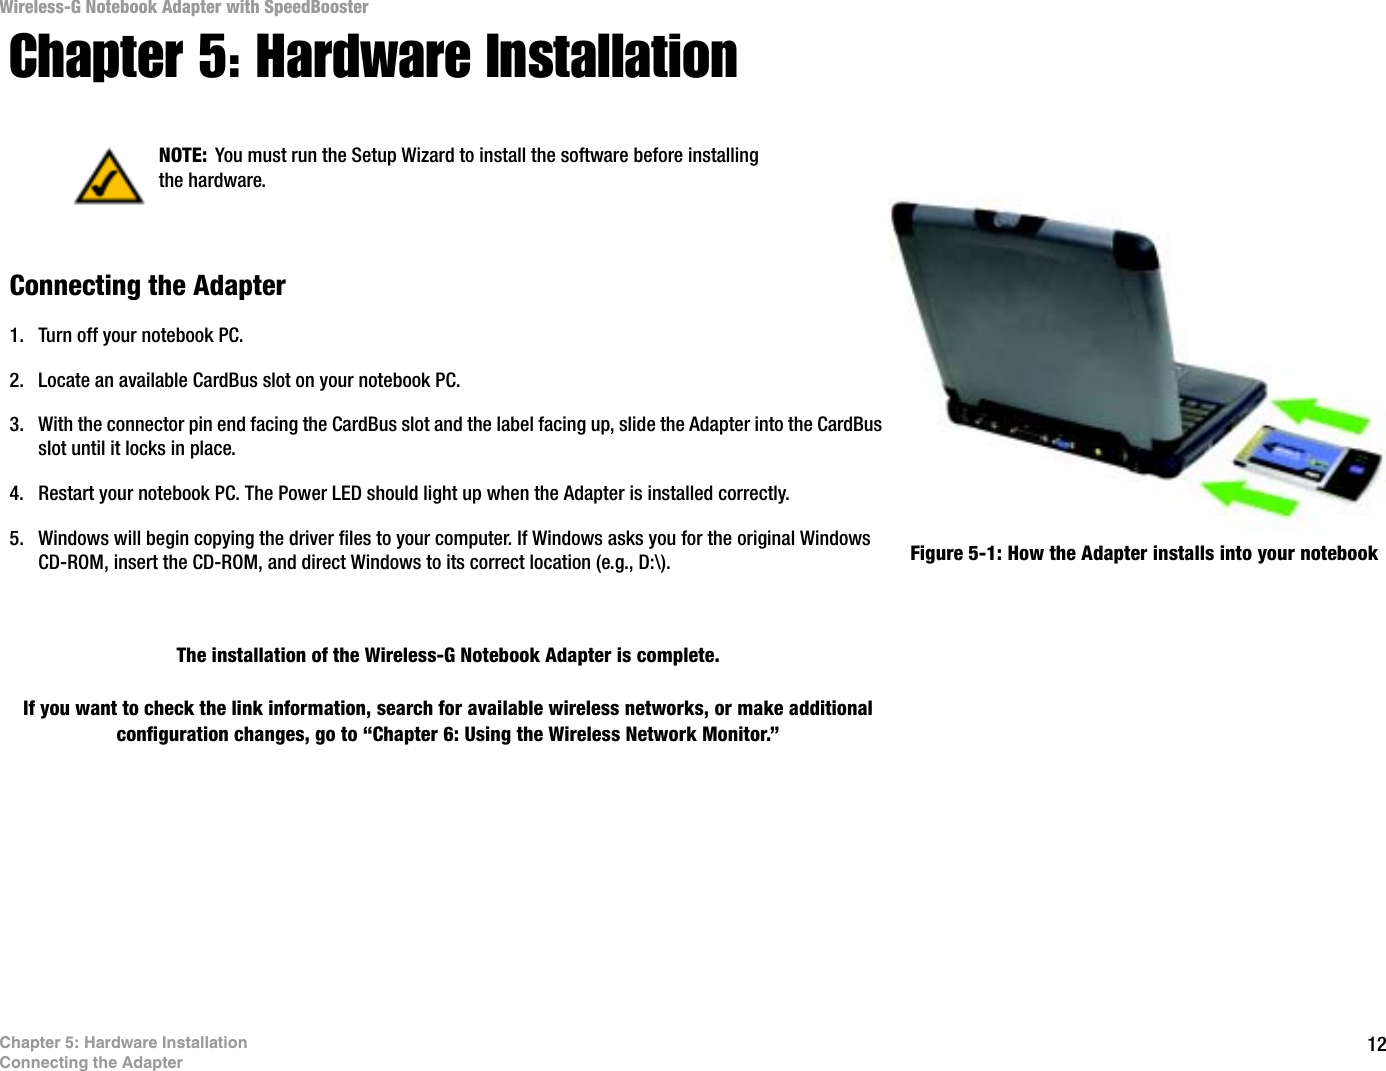
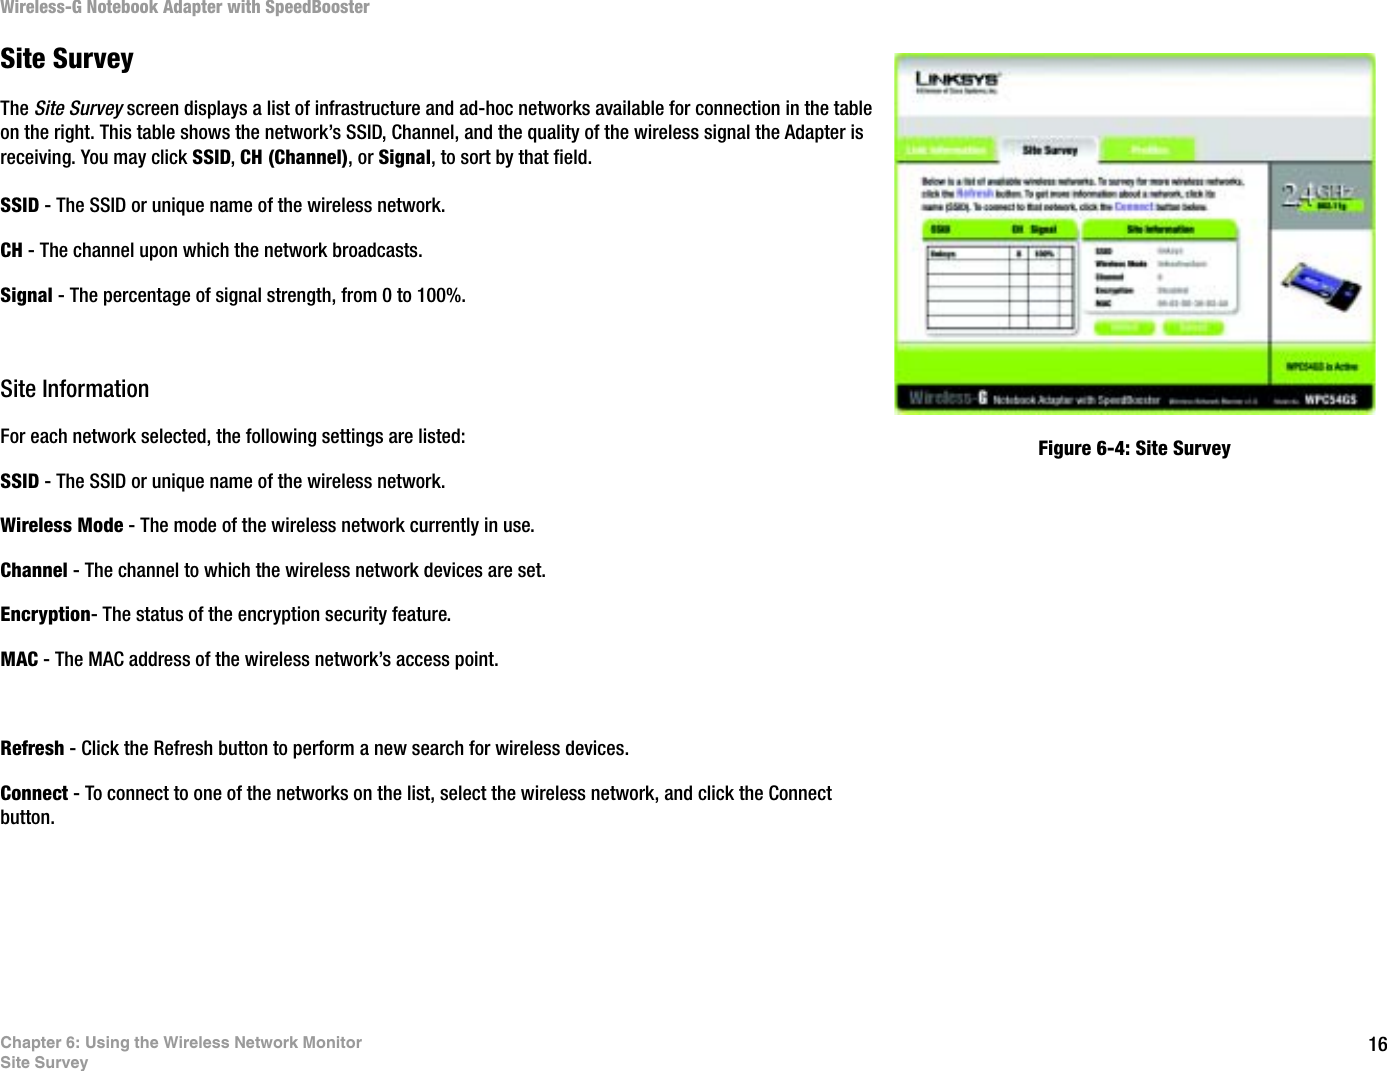
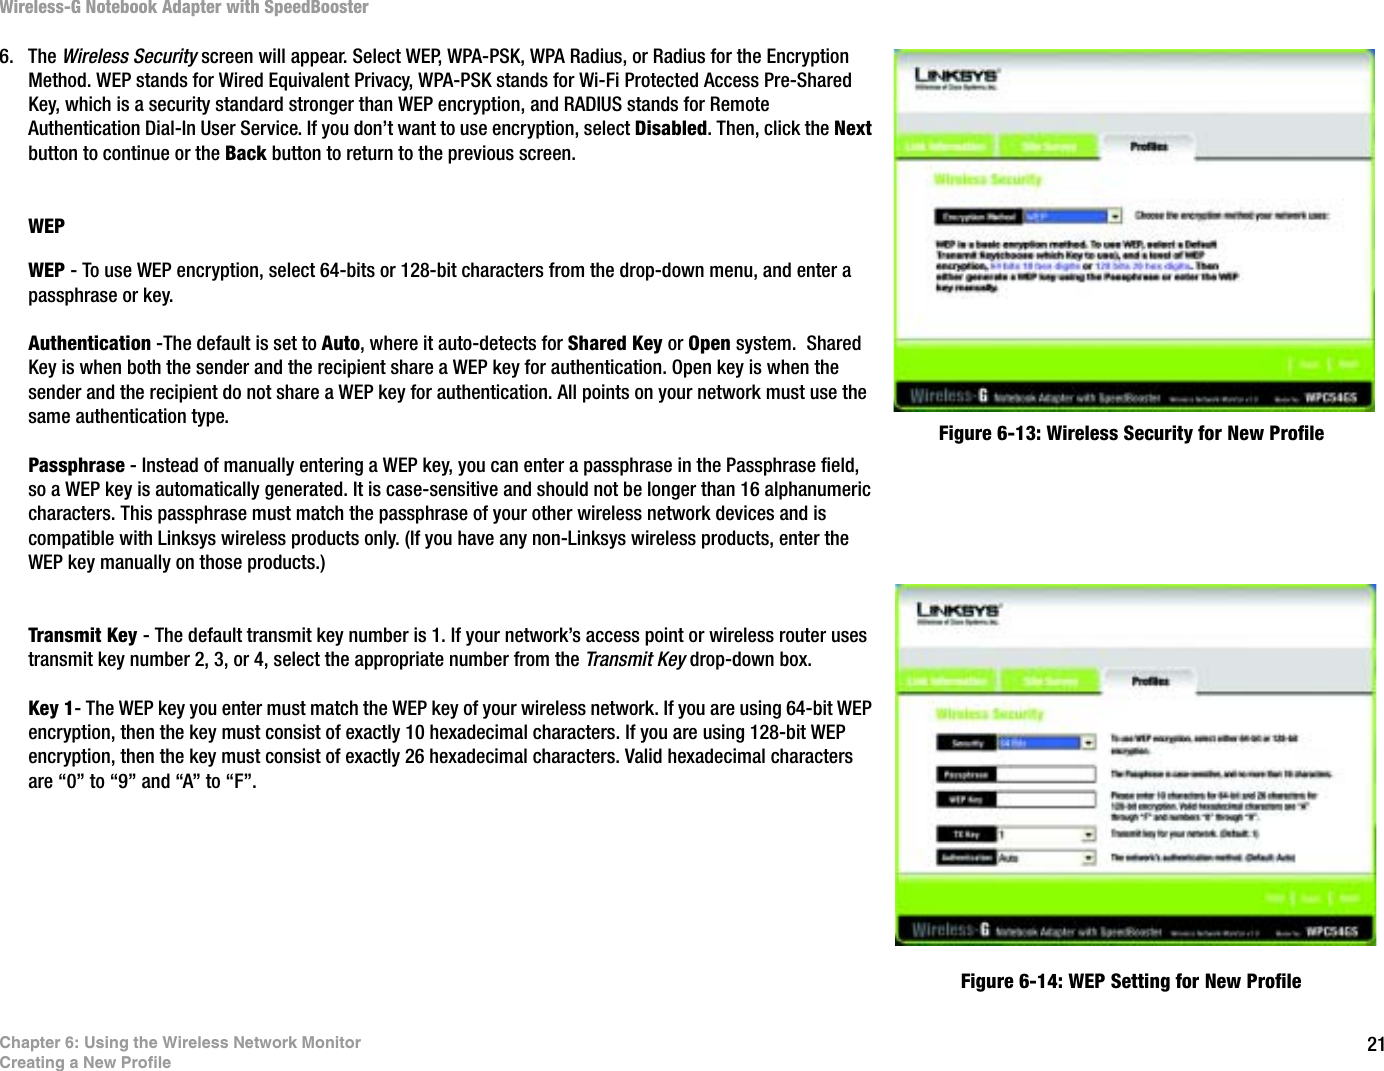
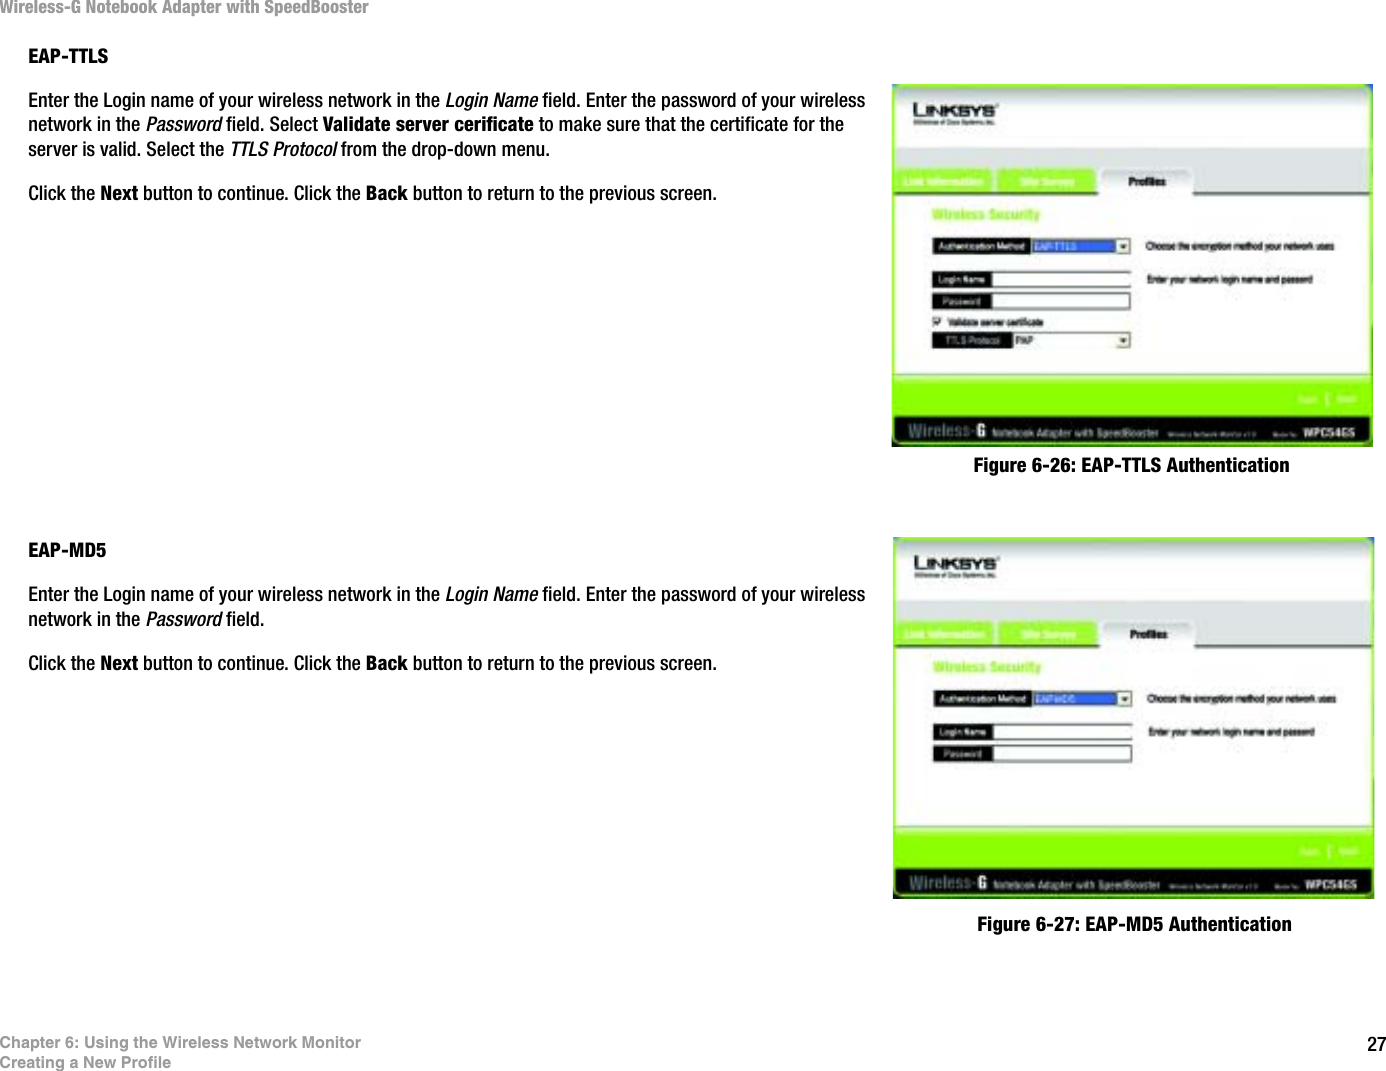
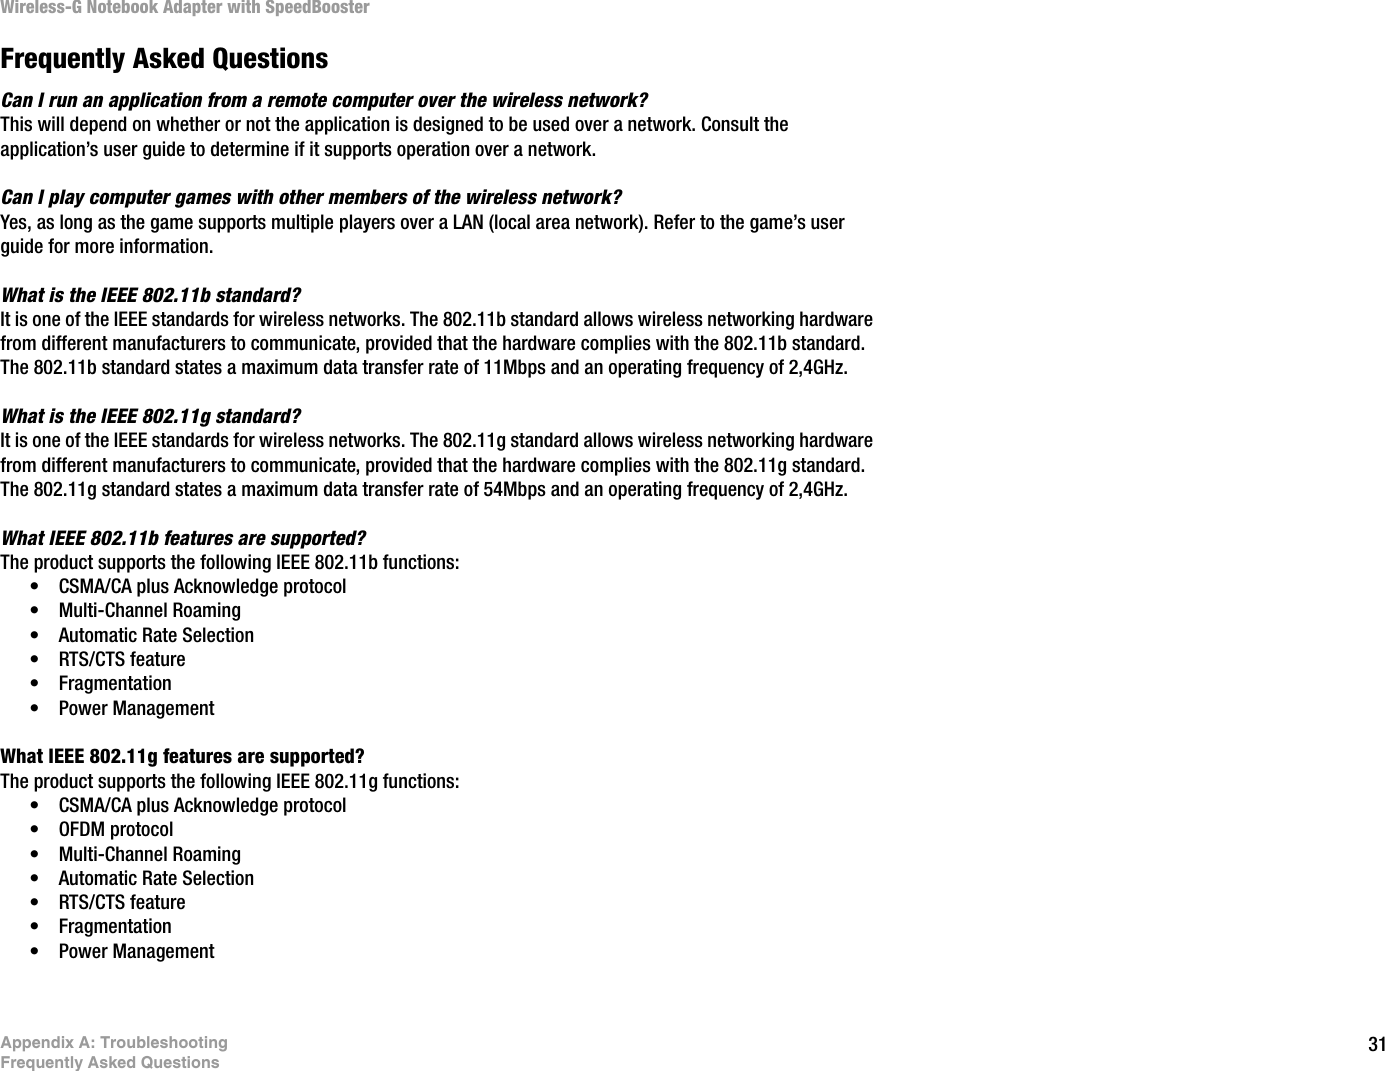
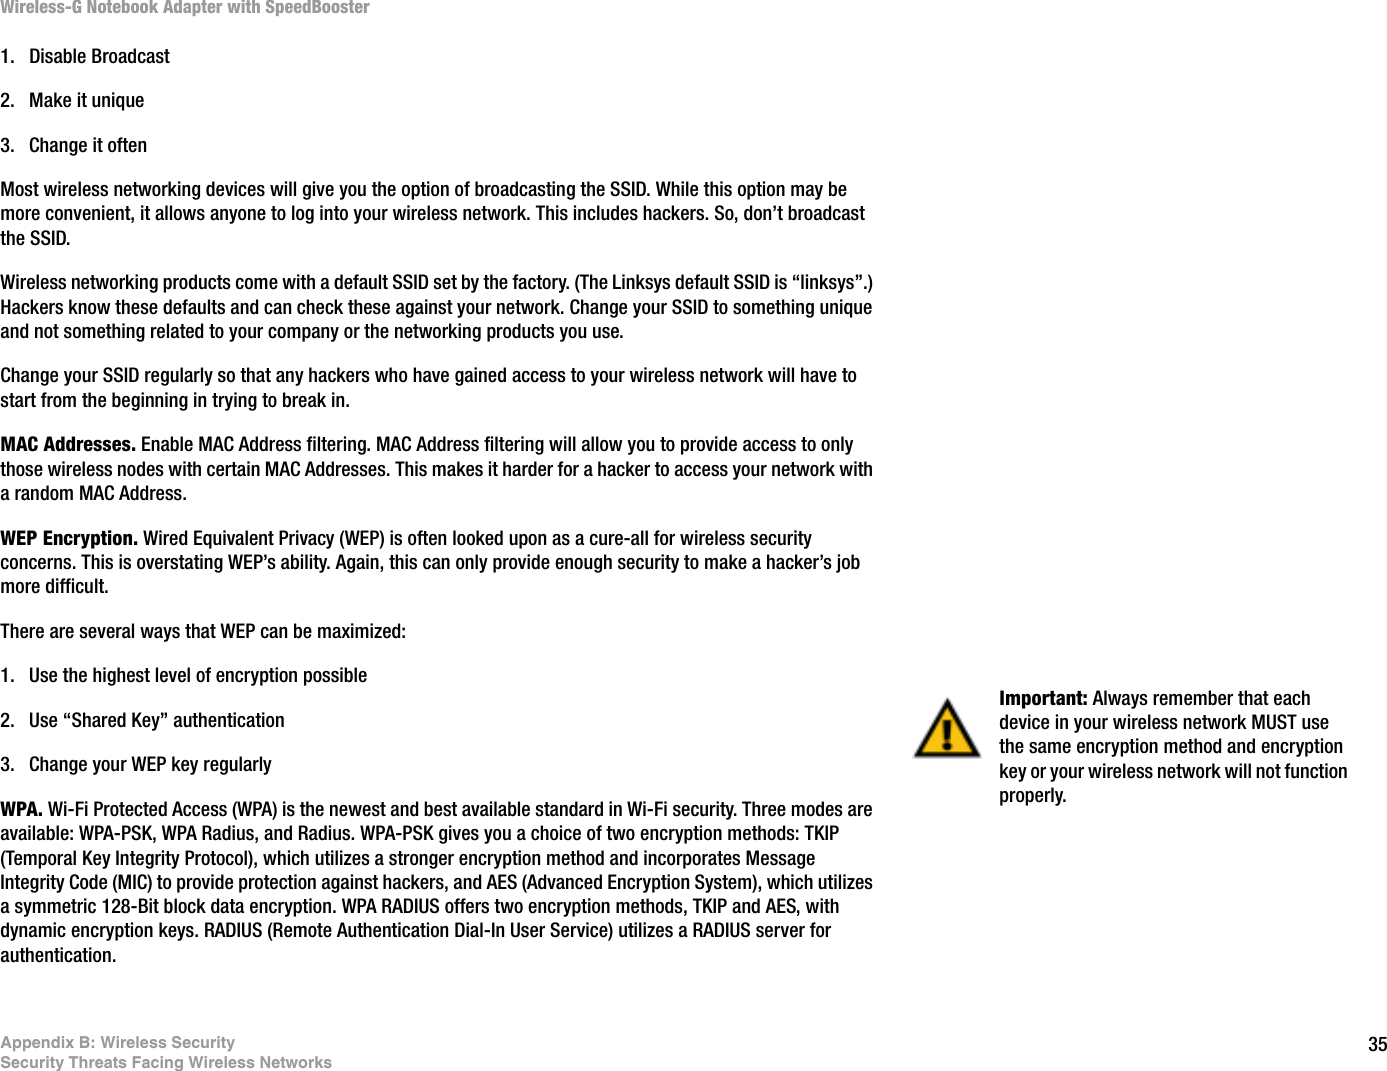
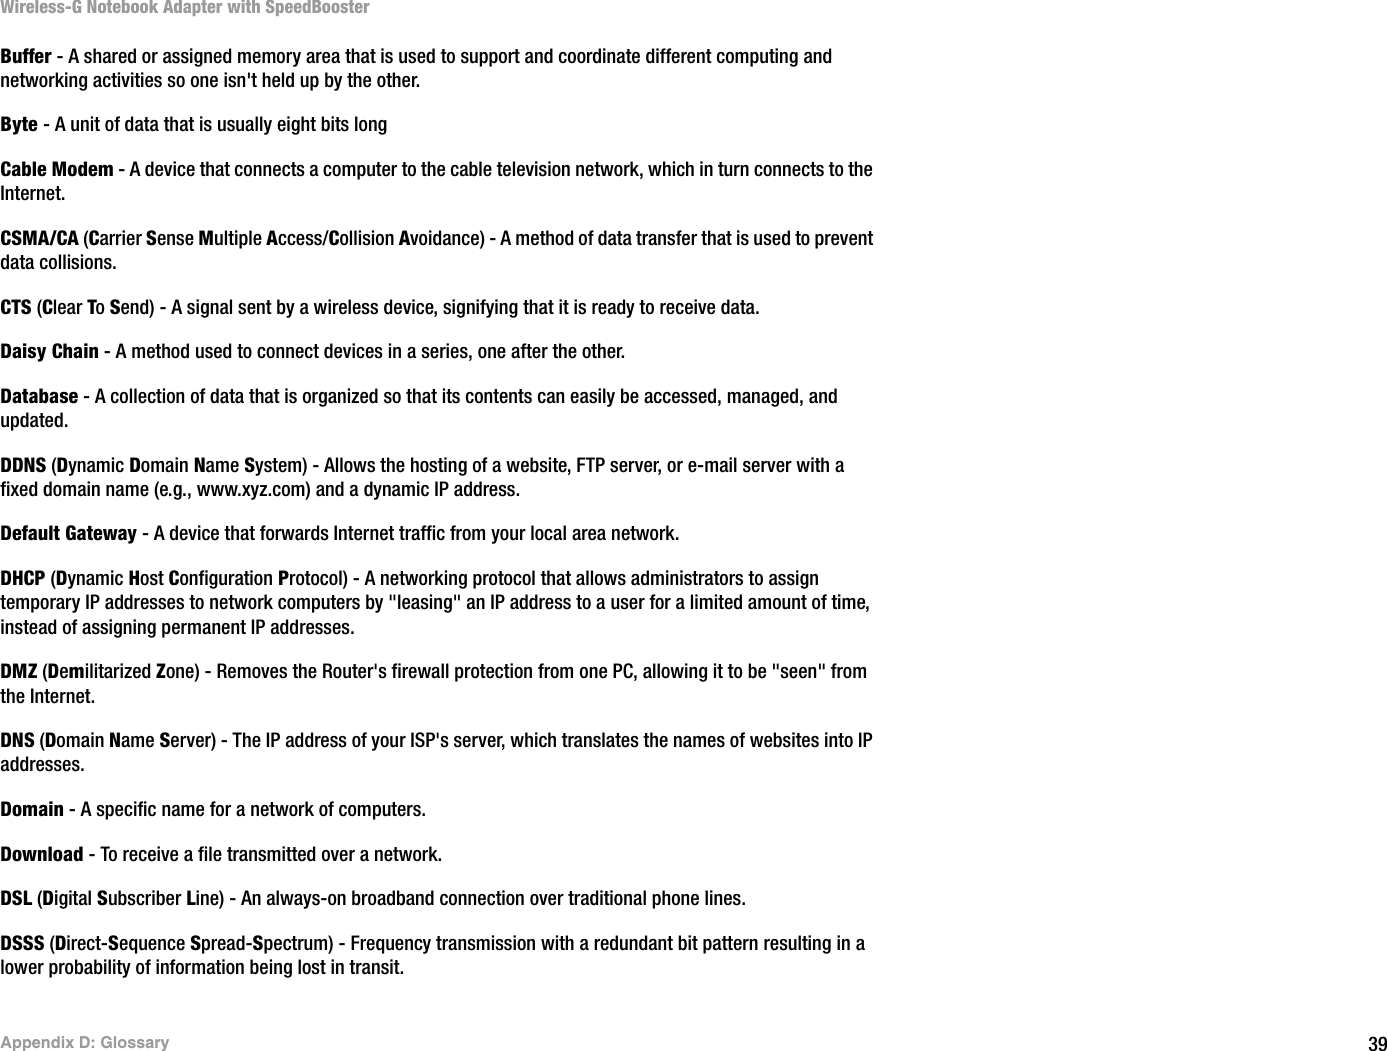
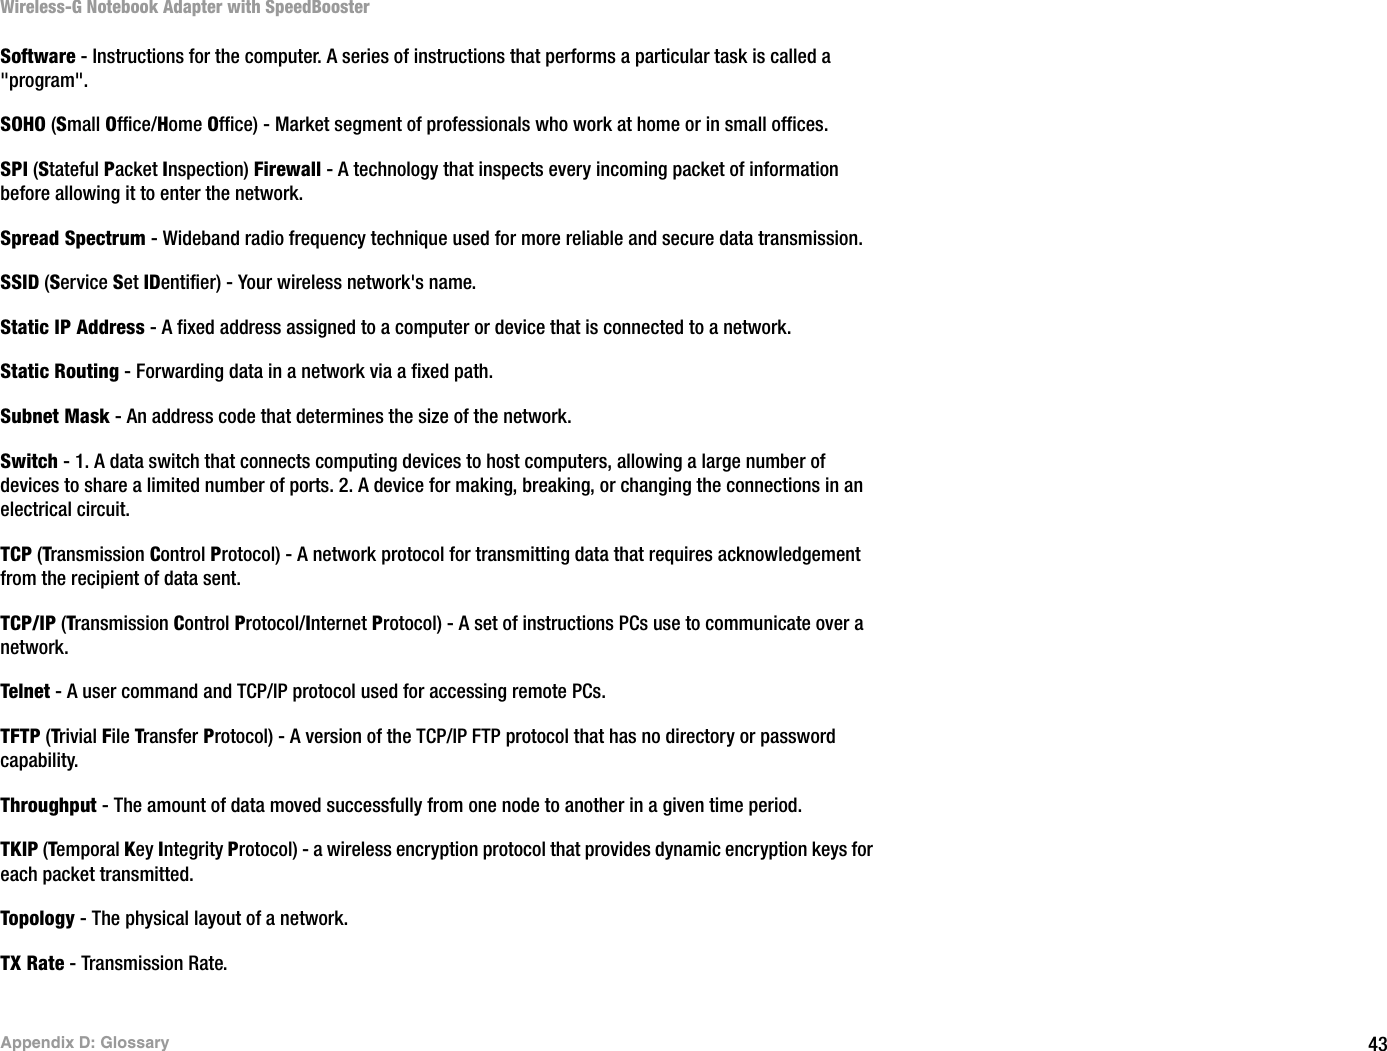
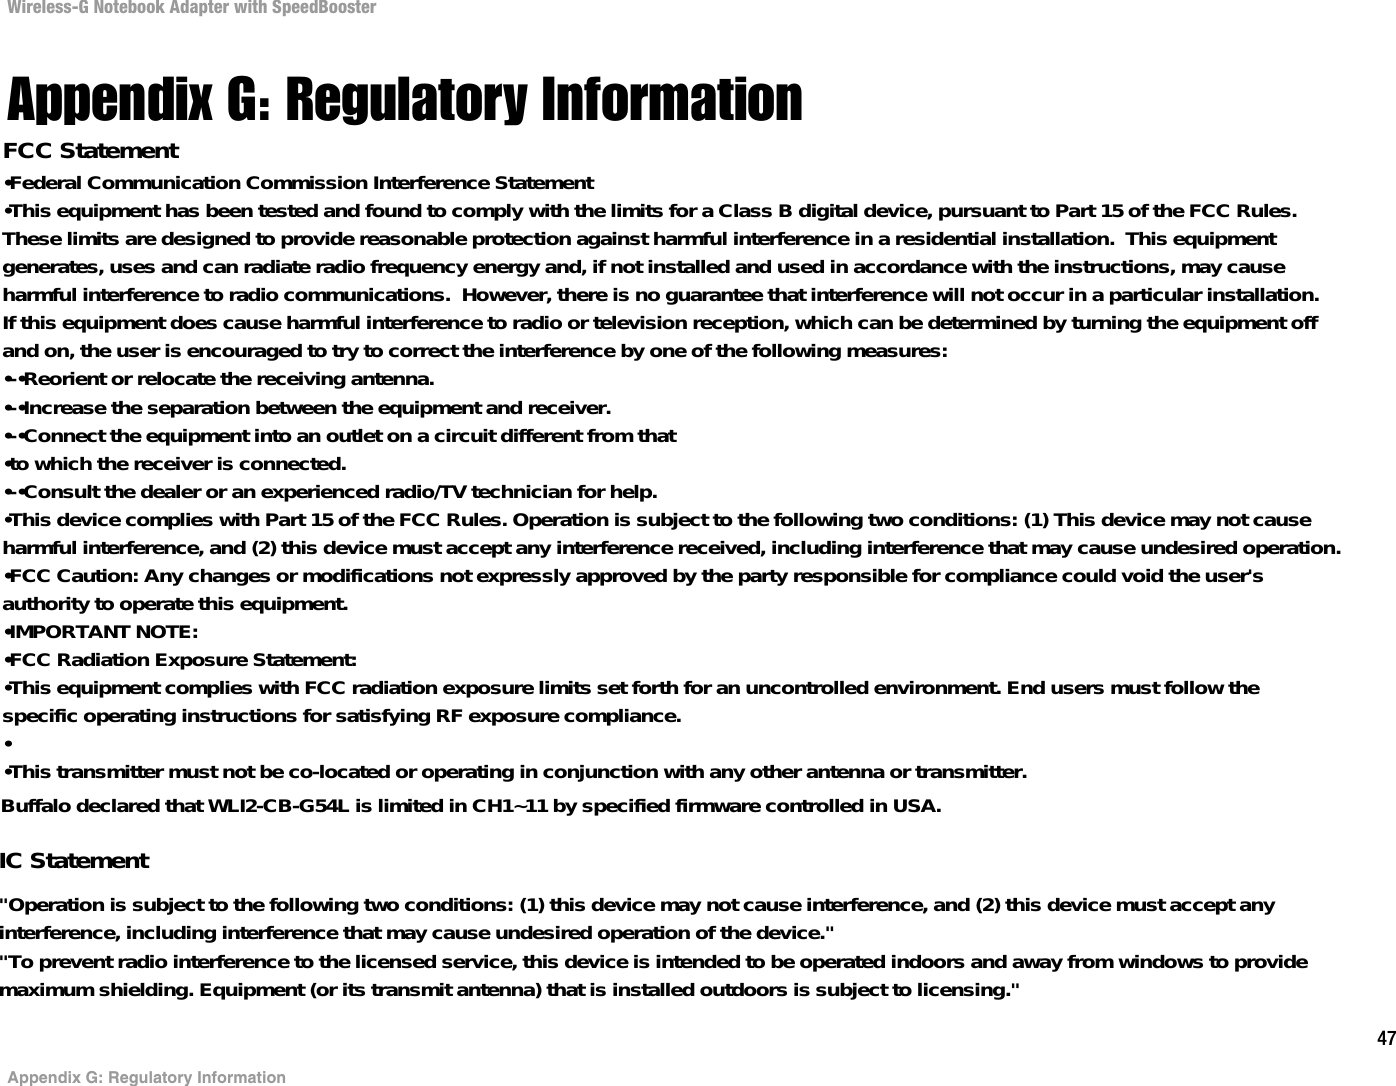
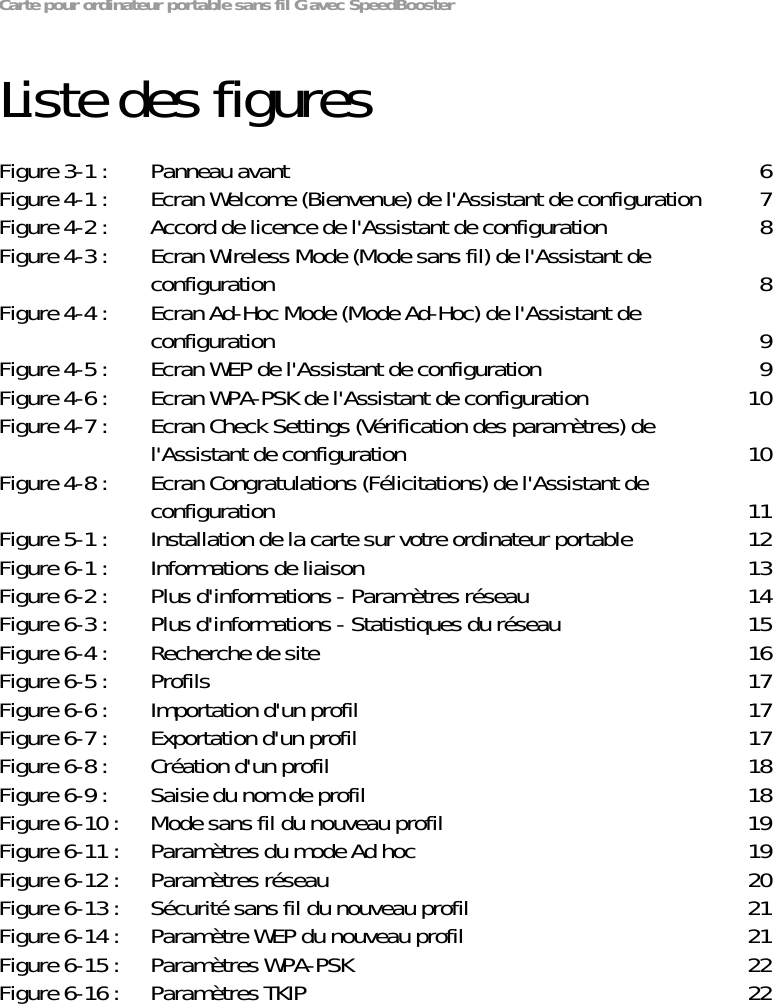
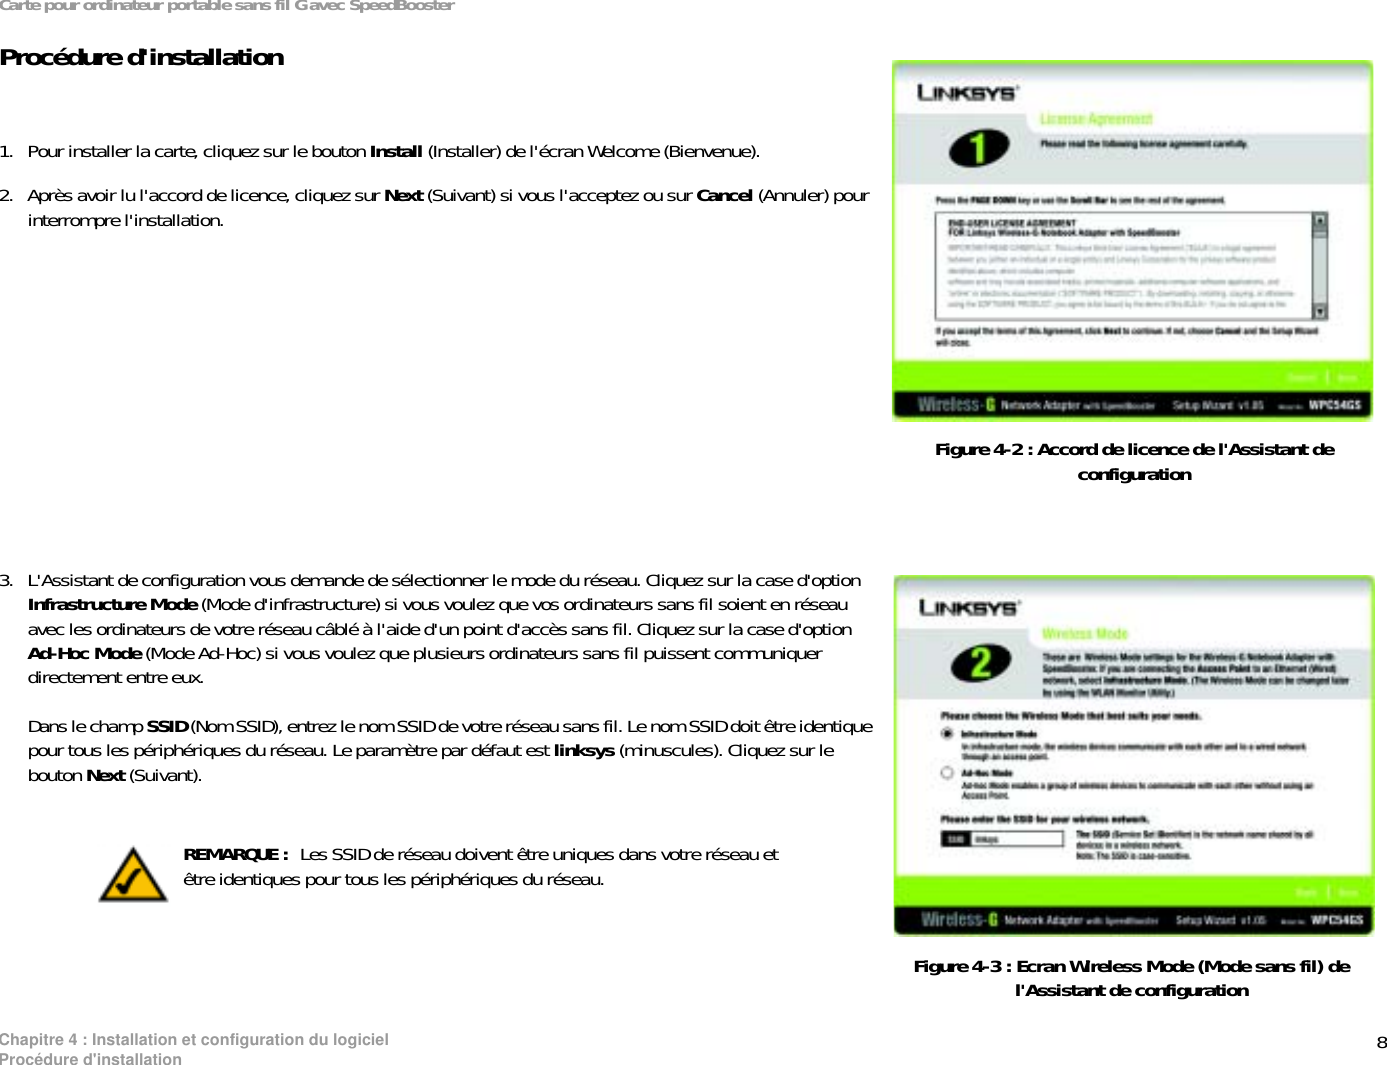
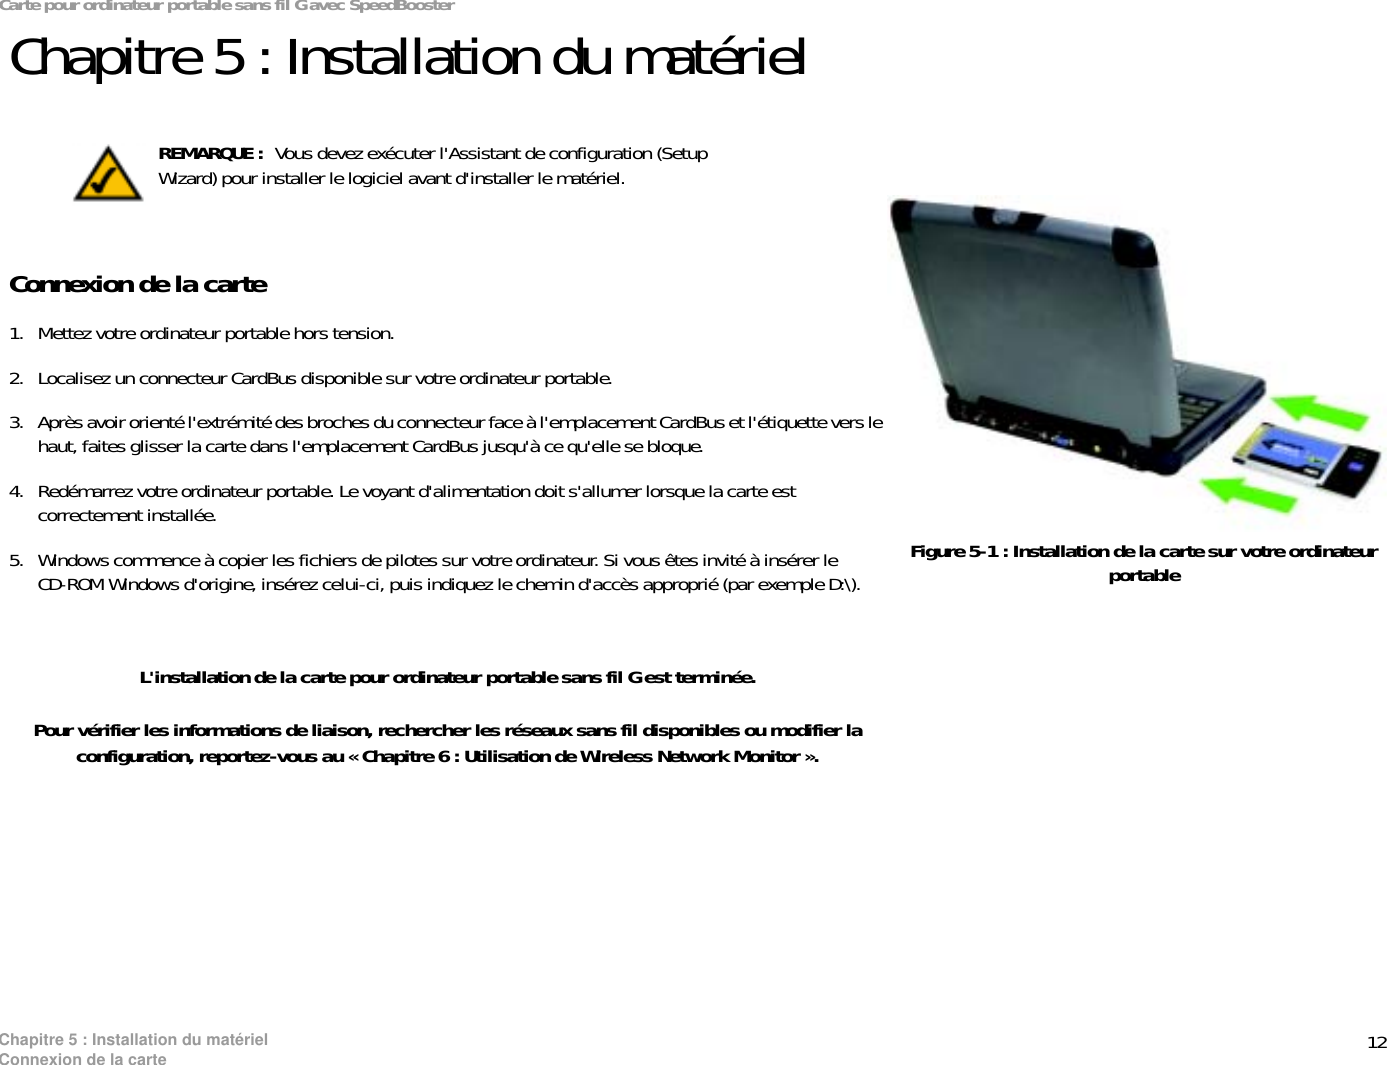
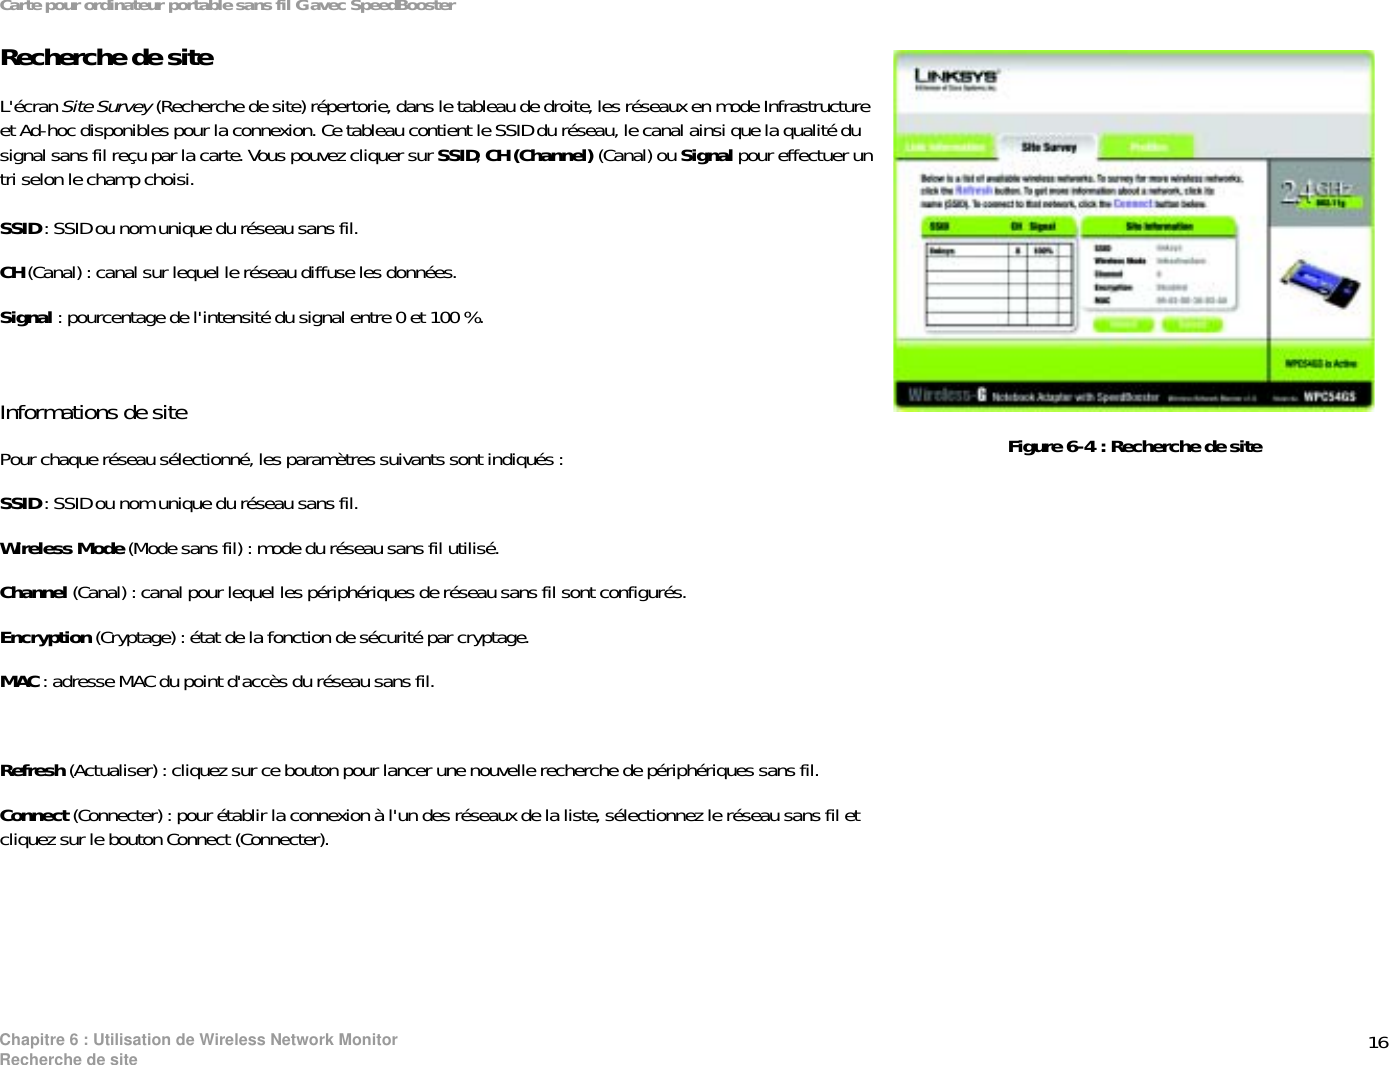
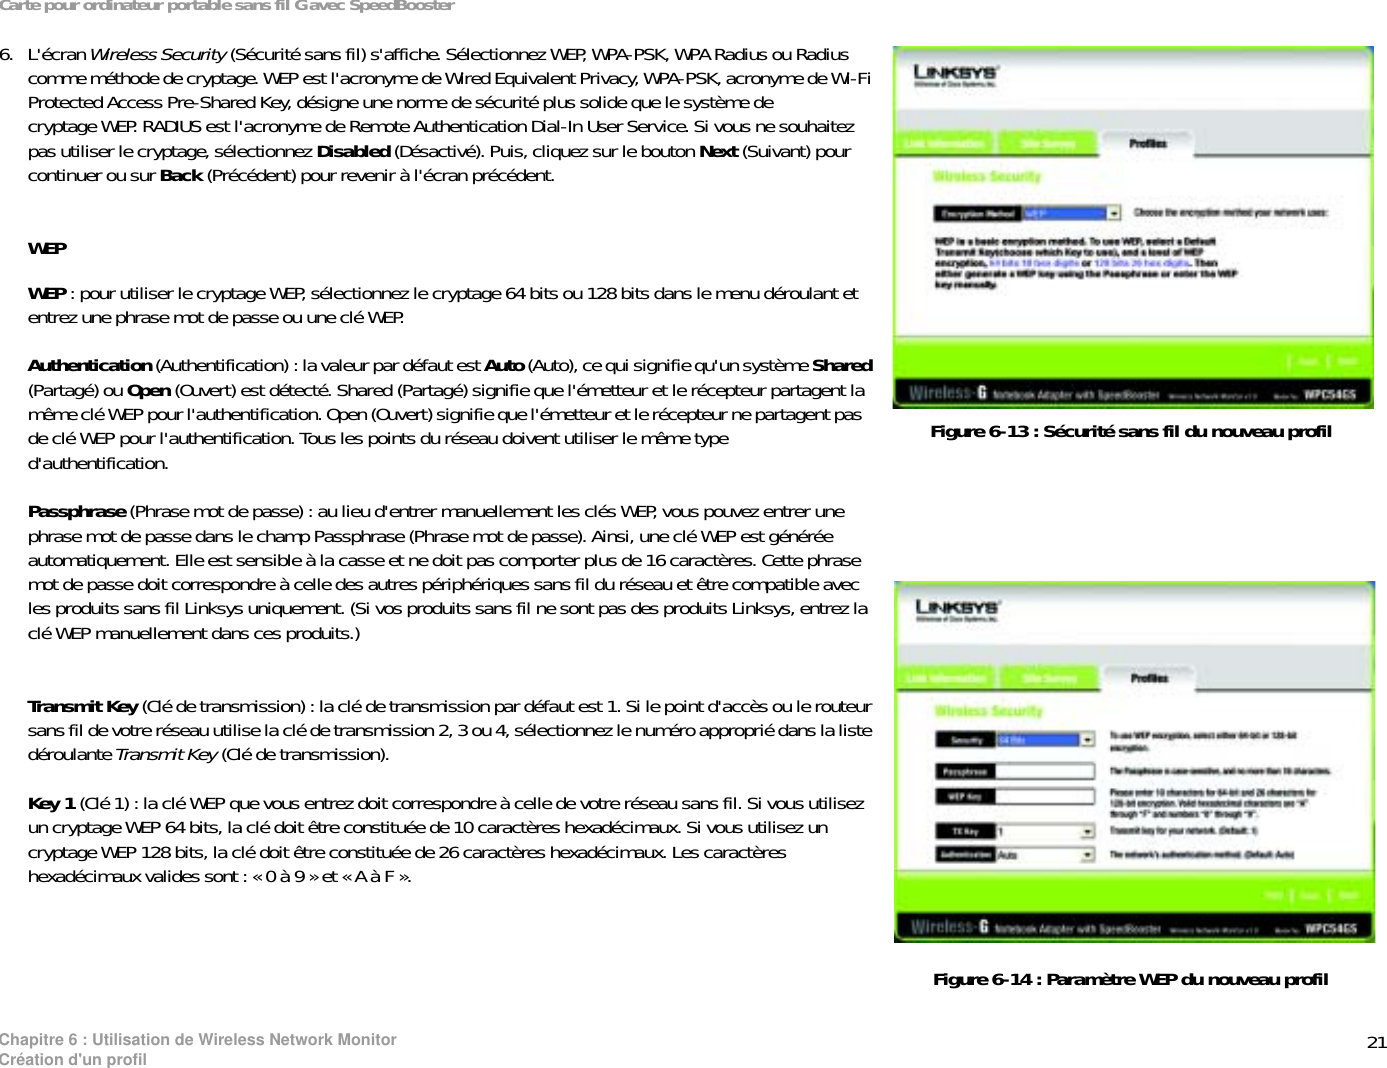
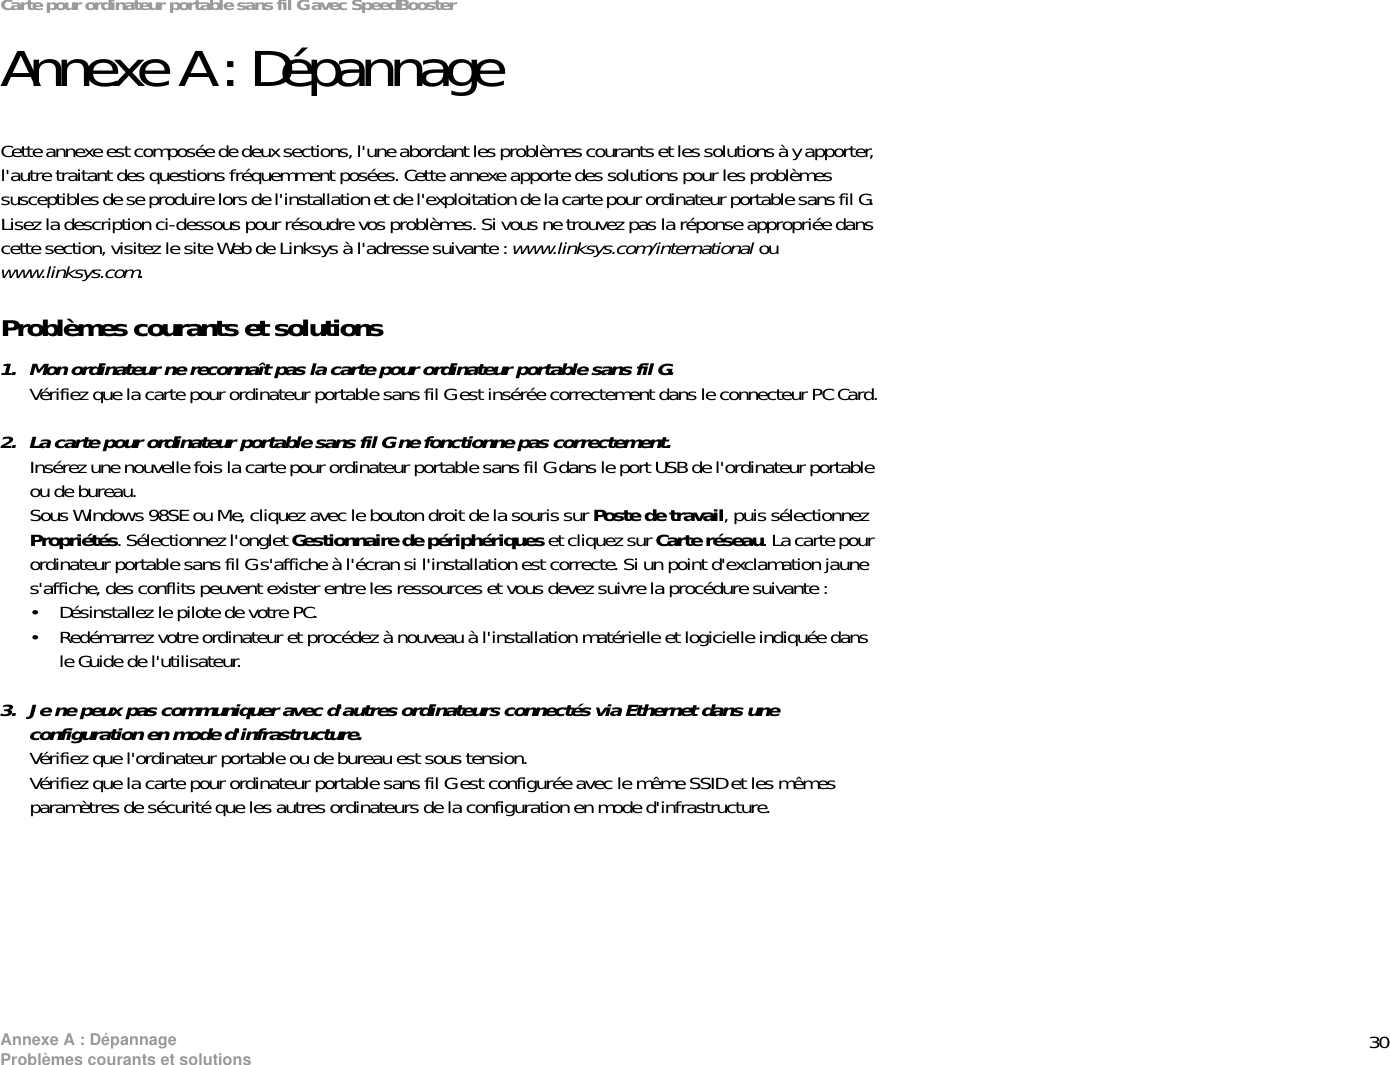
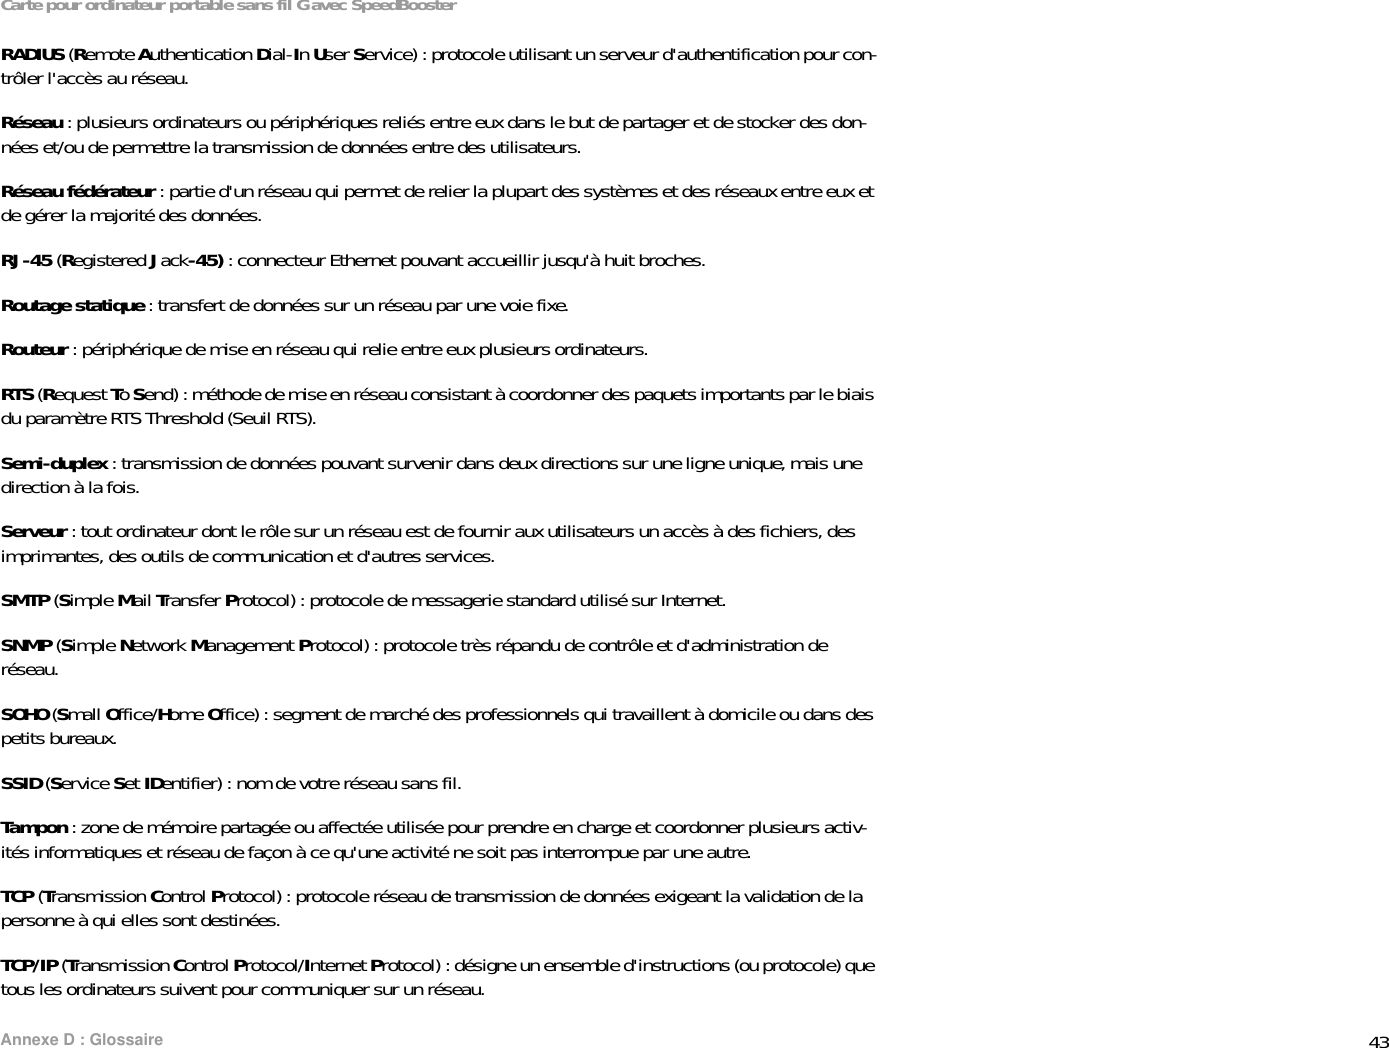
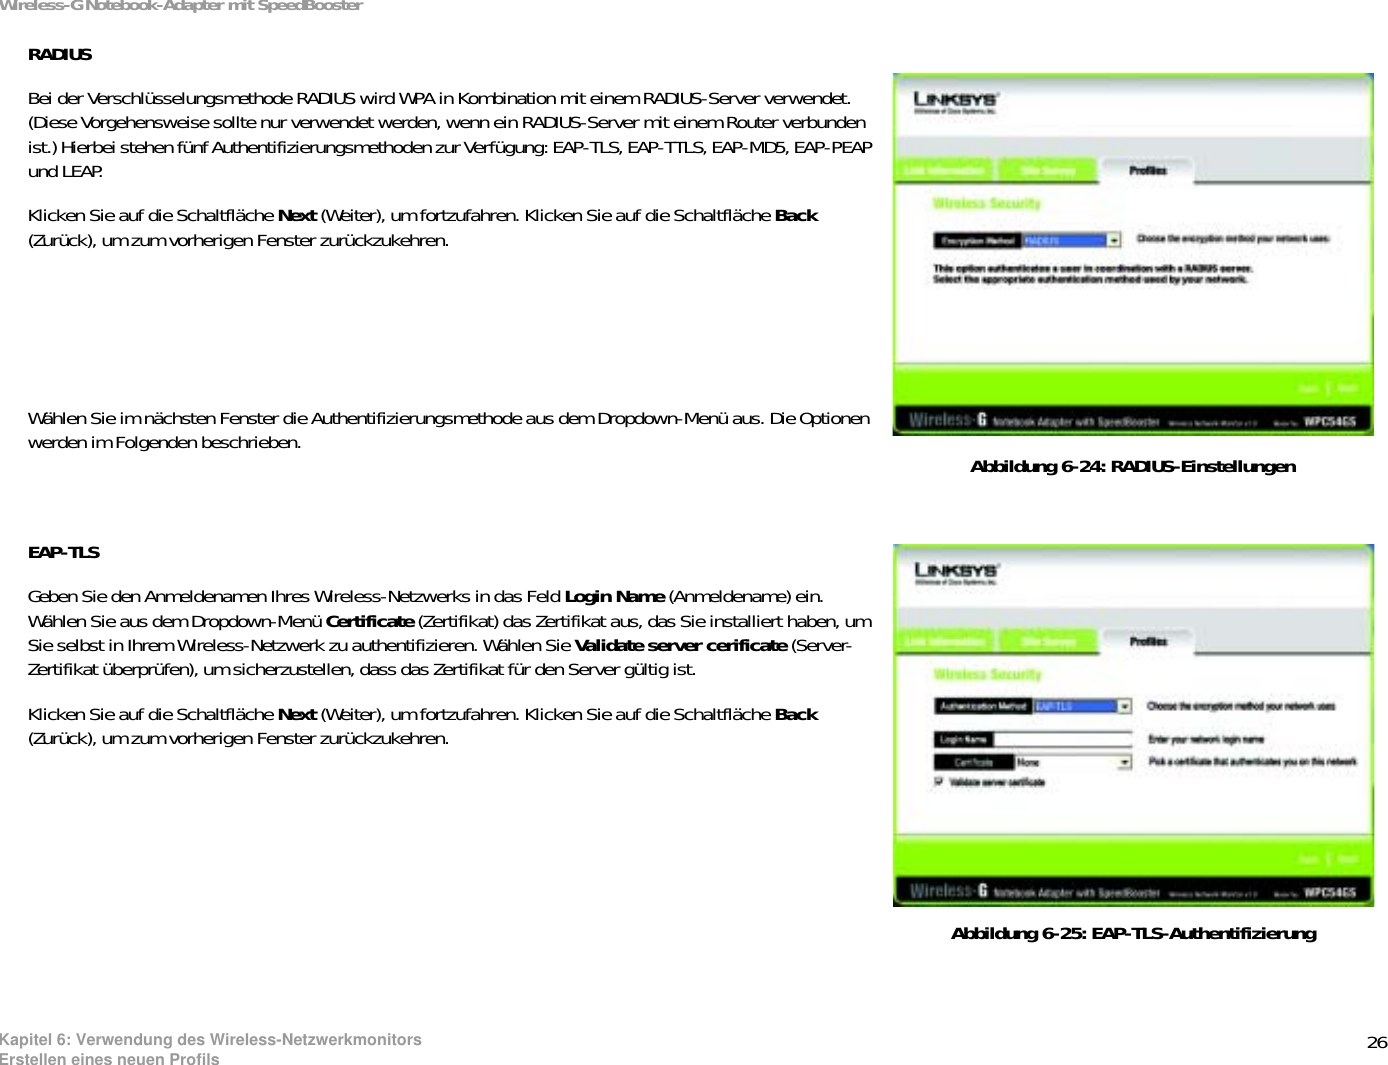
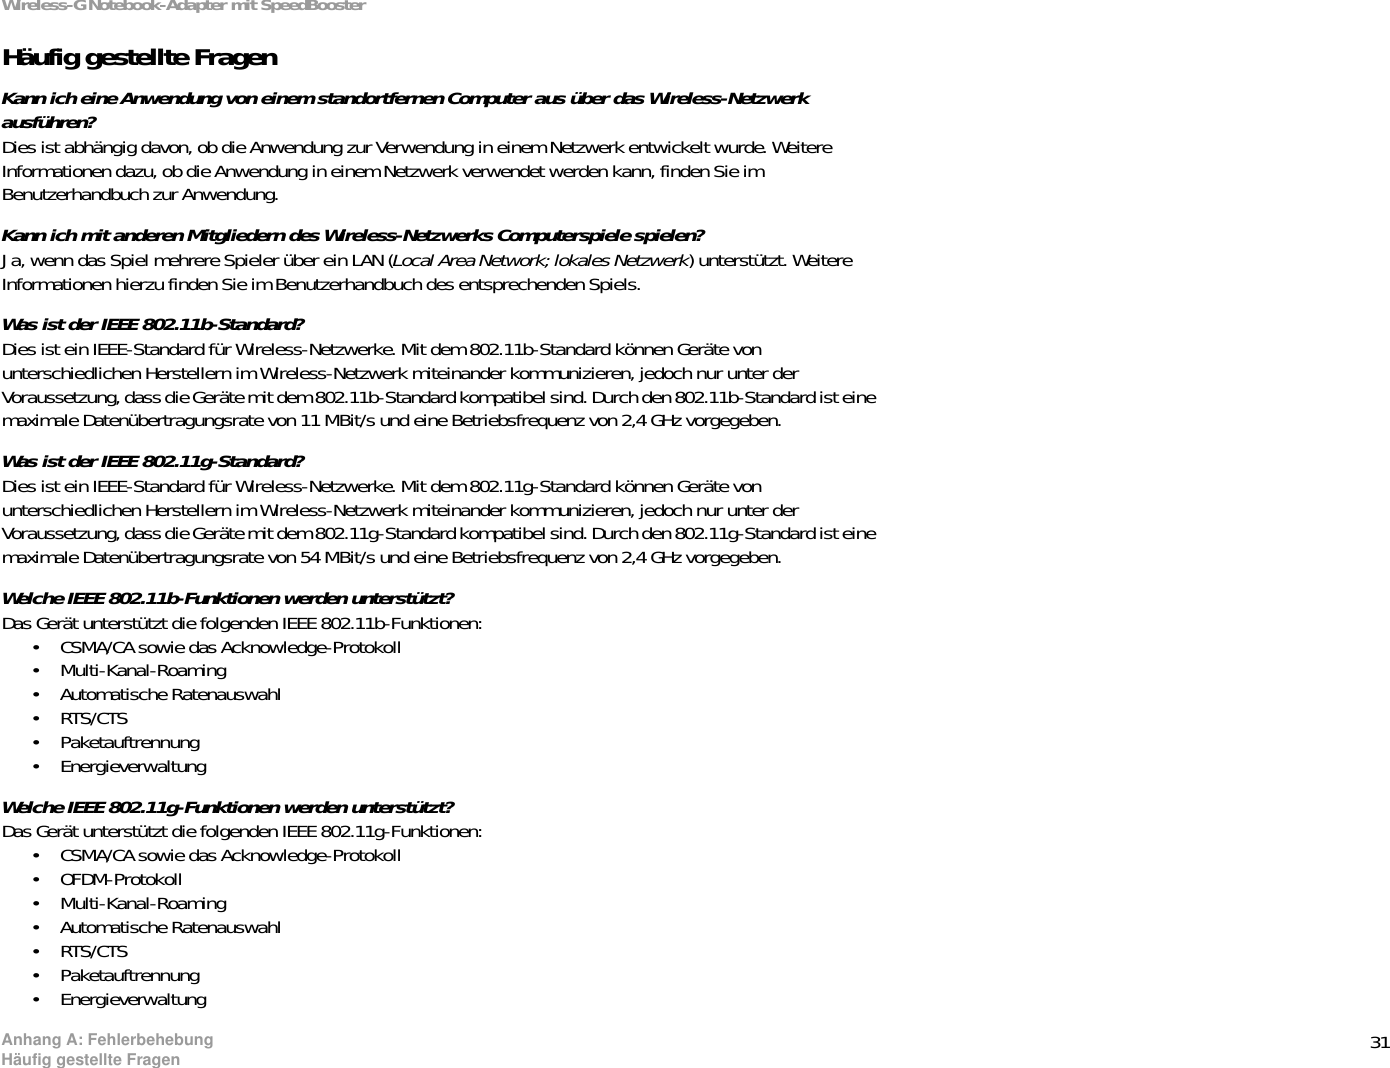
![16Kapitel 6: Verwendung des Wireless-NetzwerkmonitorsSite Survey (Netzwerksuche)Wireless-G Notebook-Adapter mit SpeedBoosterKlicken Sie auf die Schaltfläche Back (Zurück), um zu dem ursprünglichen Fenster Link Information(Verbindungsdaten) zurückzukehren. Klicken Sie auf die Schaltfläche Status, um zu dem Fenster Network Status(Status des Wireless-Netzwerks) zu gelangen. Klicken Sie auf die Schaltfläche Save to Profile (Im Profil speichern), um die momentan aktive Verbindung mit einem Profil zu speichern. Klicken Sie auf die Schaltfläche Refresh Stats (Statistiken akt.), um das Fenster zu aktualisieren.Site Survey (Netzwerksuche)Im Fenster Site Survey (Netzwerksuche) wird rechts in der Tabelle eine Liste von Infrastruktur- und Ad-Hoc-Netzwerken angezeigt, die für Verbindungen verfügbar sind. In dieser Tabelle werden die SSID des Netzwerks, der Kanal und die Qualität des Wireless-Signals, das der Adapter empfängt, dargestellt. Sie können auf SSID,CH (Channel) [Kanal] oder Signal klicken, um nach dem entsprechenden Feld zu sortieren.SSID - Die SSID, d. h. der individuelle Name des Wireless-Netzwerks. CH - Der Kanal, auf dem das Netzwerk sendet.Signal - Der Prozentsatz der Signalstärke, von 0 bis 100 %.Site Information (Netzwerkinformationen)Für jedes ausgewählte Netzwerk werden folgende Einstellungen aufgeführt:SSID - Die SSID, d. h. der individuelle Name des Wireless-Netzwerks. Wireless Mode (Wireless-Modus) - Der momentan verwendete Modus des Wireless-Netzwerks.Channel (Kanal) - Der Kanal, auf den die Wireless-Netzwerk-Geräte eingestellt sind. Encryption (Verschlüsselung) - Der Status der Sicherheitsfunktion.MAC - Die MAC-Adresse des Access Point des Wireless-Netzwerks.Refresh (Aktualisieren) - Klicken Sie auf die Schaltfläche Refresh (Aktualisieren), um eine neue Suche nach Wireless-Geräten durchzuführen. Connect (Verbinden) - Um eine Verbindung zu einem der Netzwerke auf der Liste zu erstellen, wählen Sie das Wireless-Netzwerk aus, und klicken Sie auf die Schaltfläche Connect (Verbinden). Abbildung 6-4: Site Survey (Netzwerksuche)](https://usermanual.wiki/LINKSYS/WPC54GSV11/User-Guide-471670-Page-185.png)
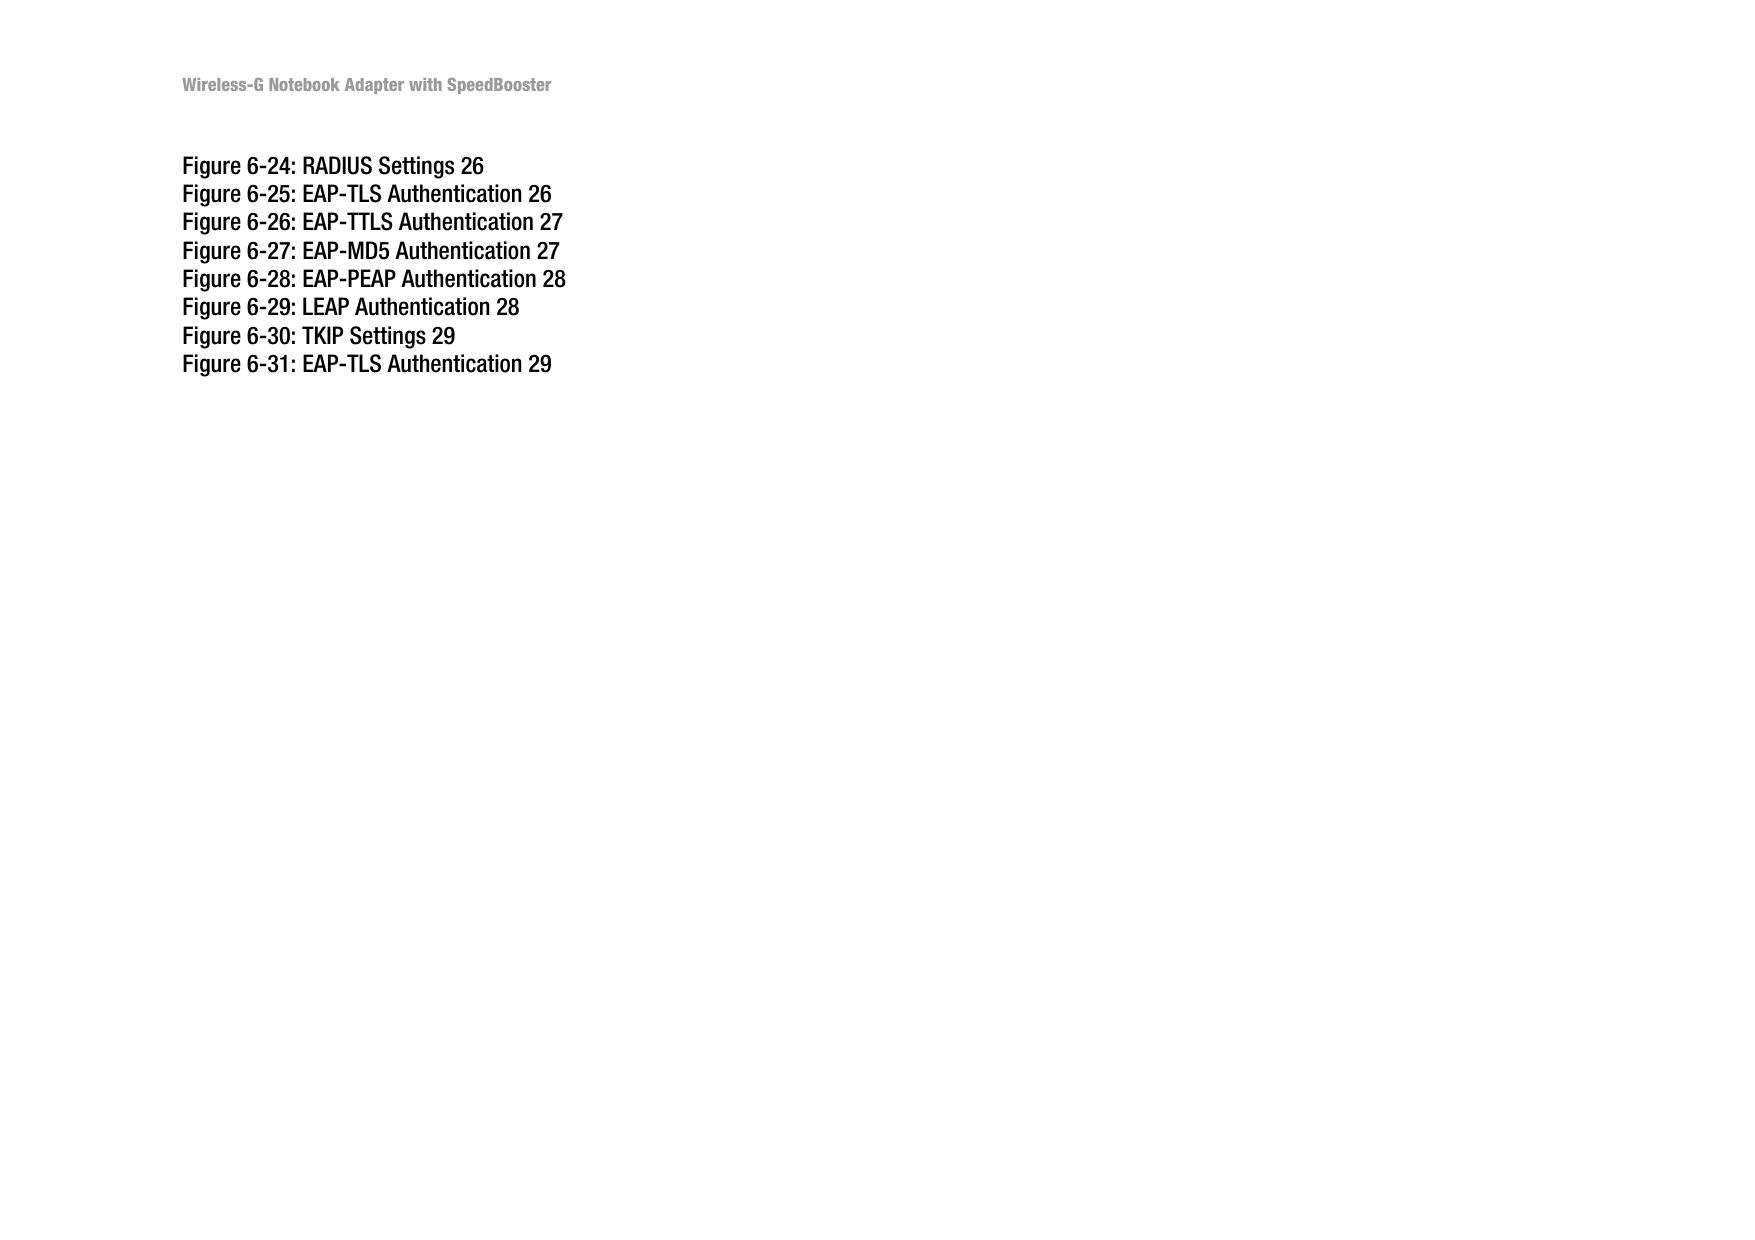
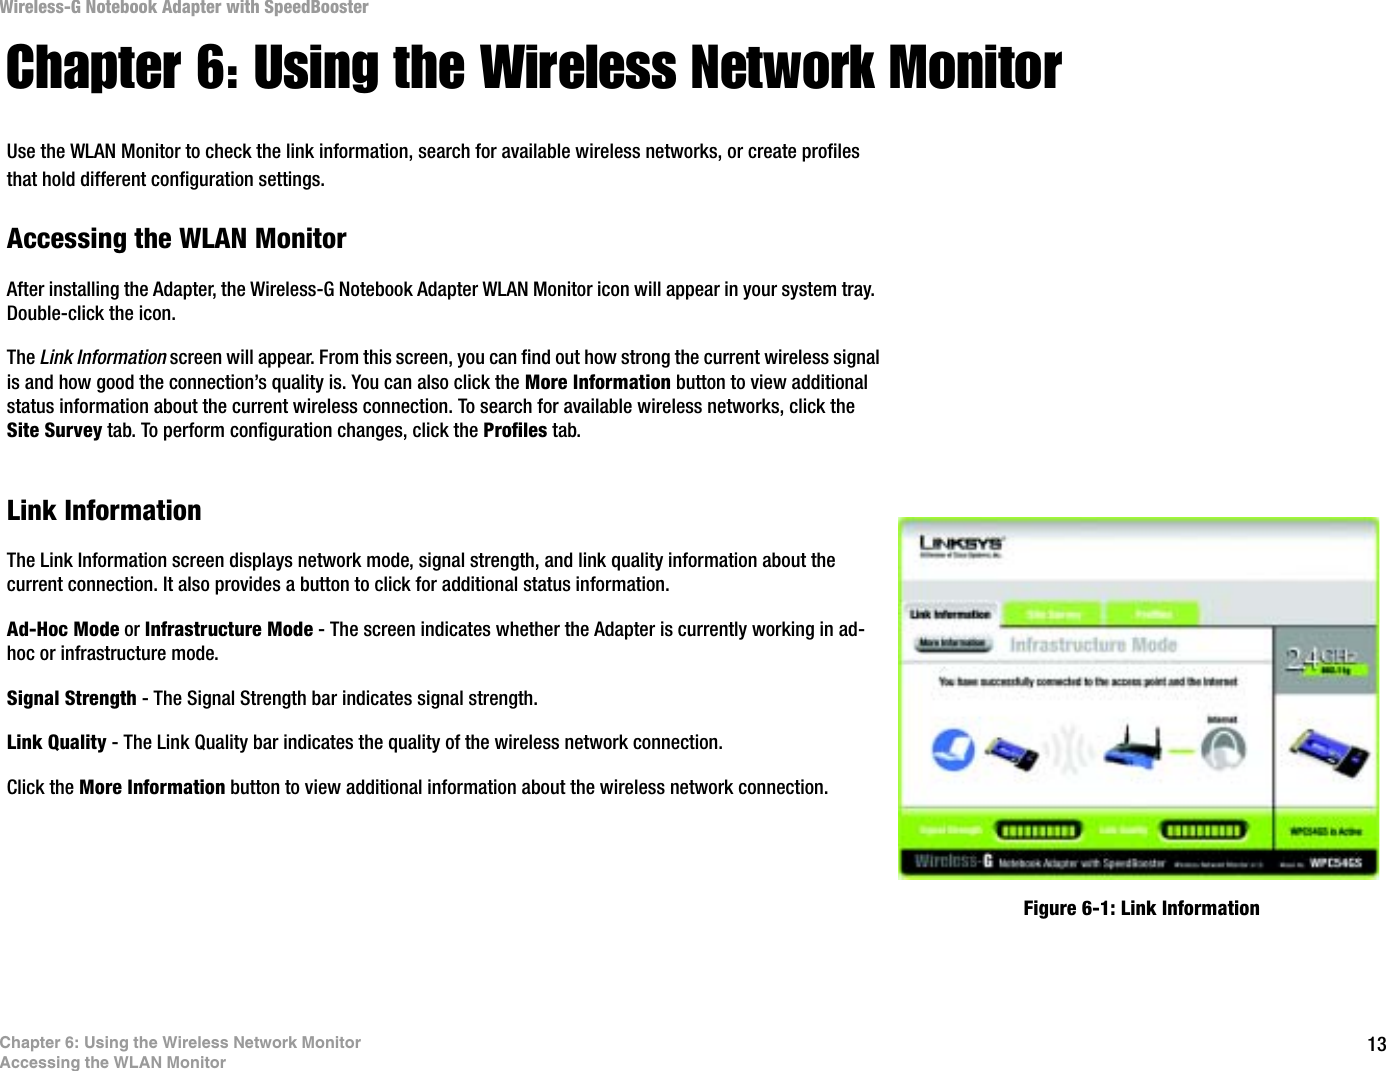
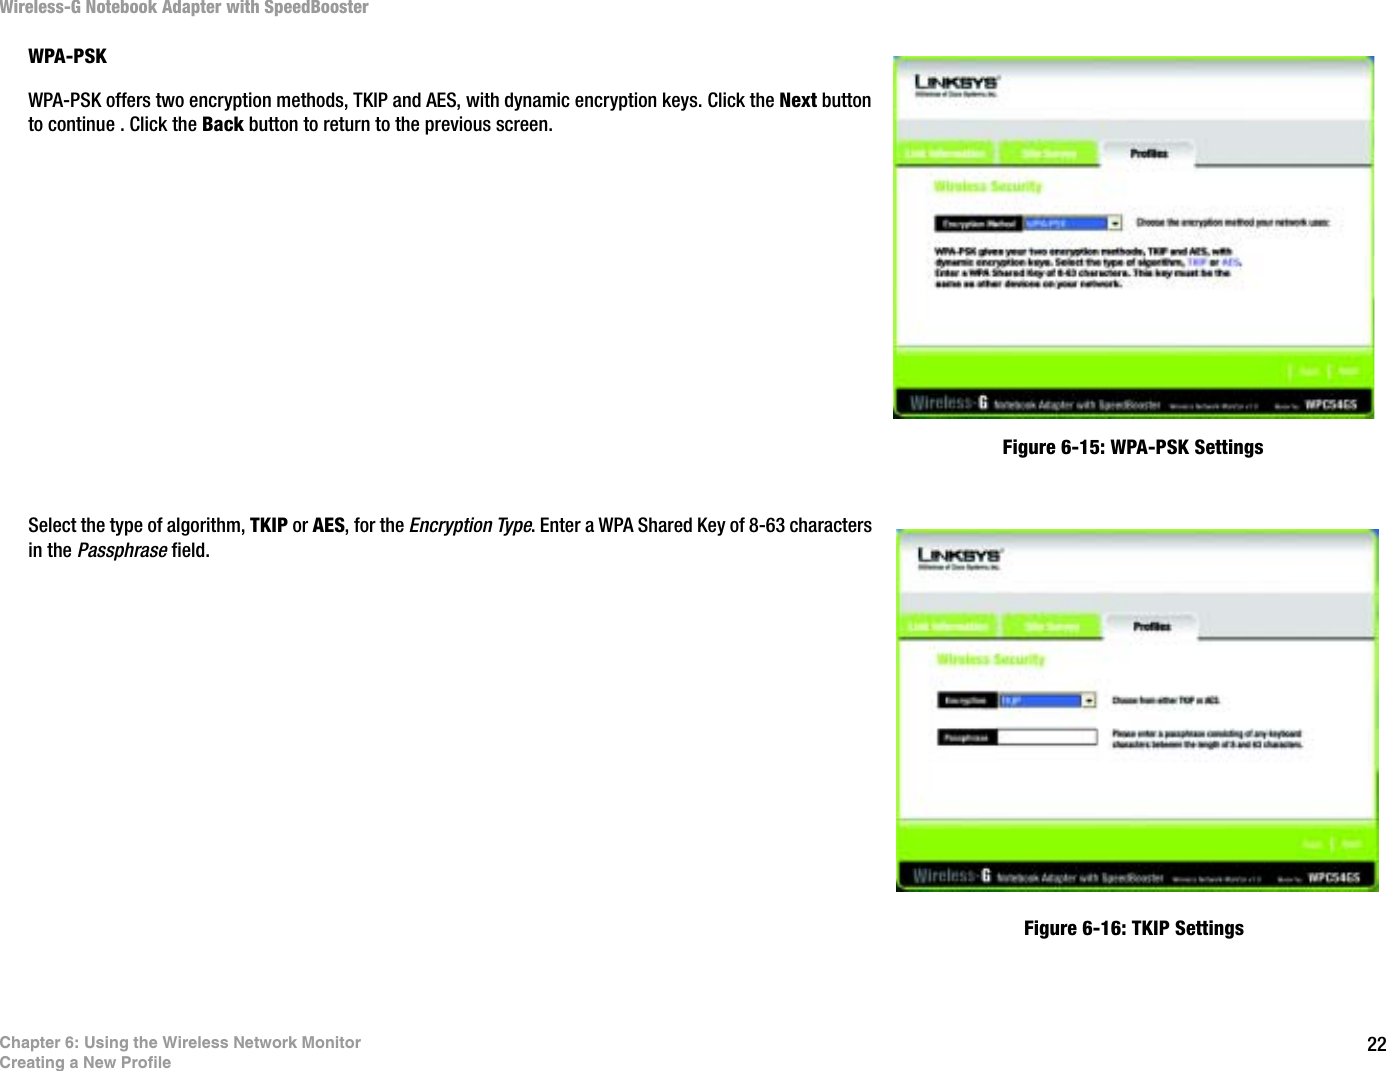
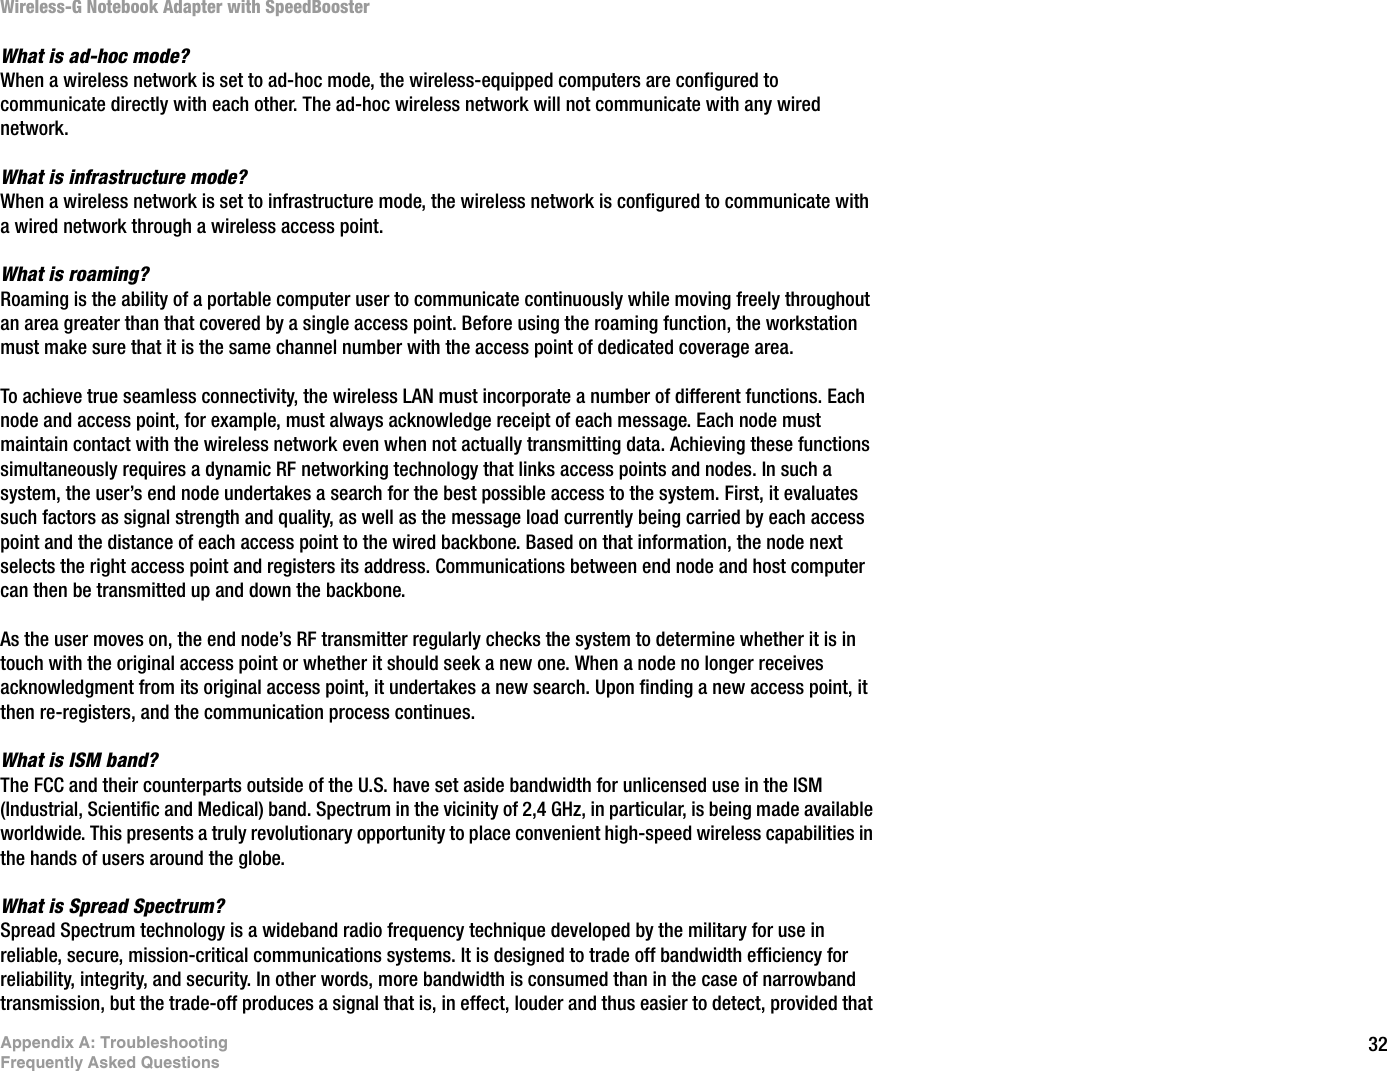
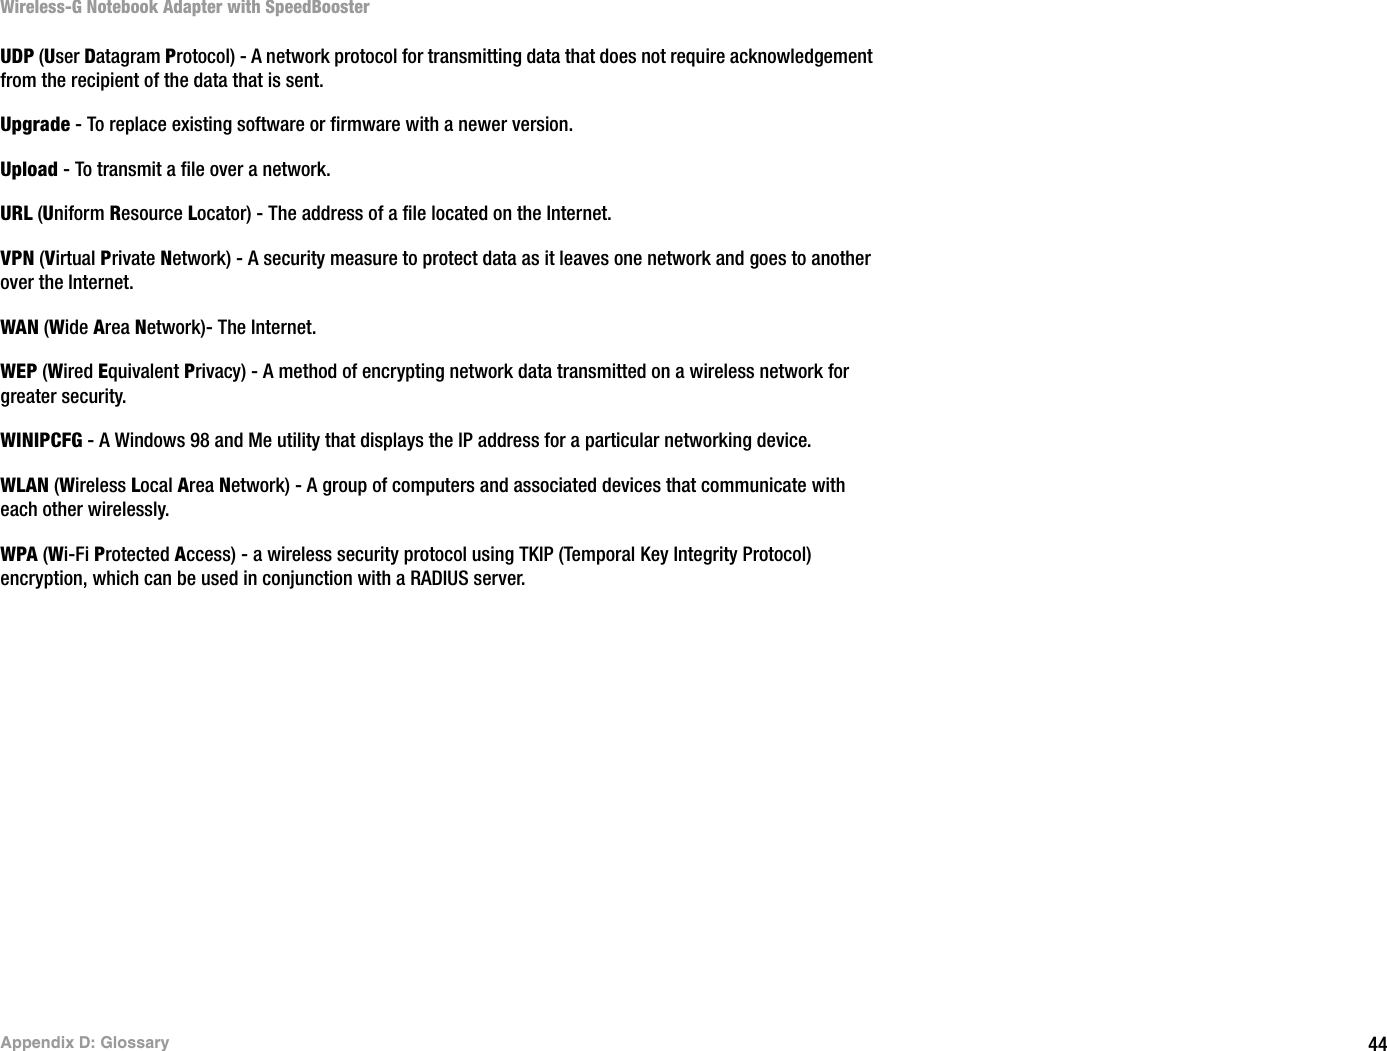
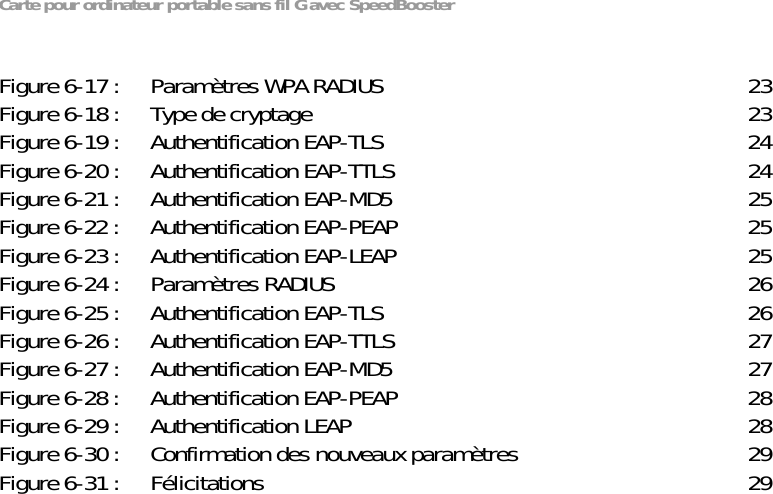
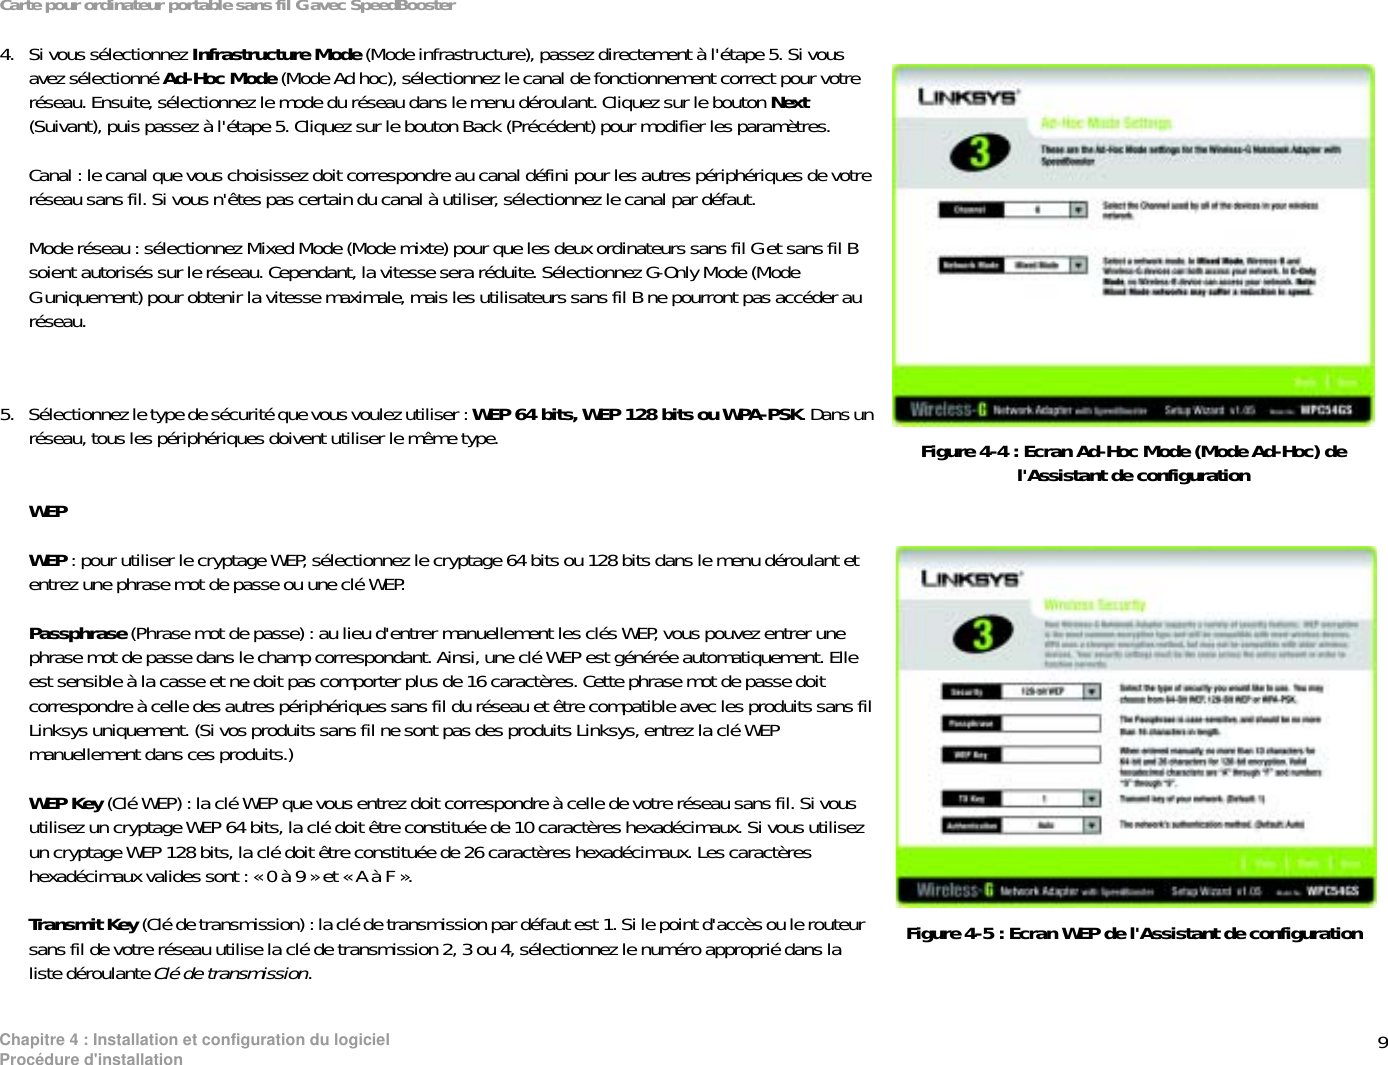
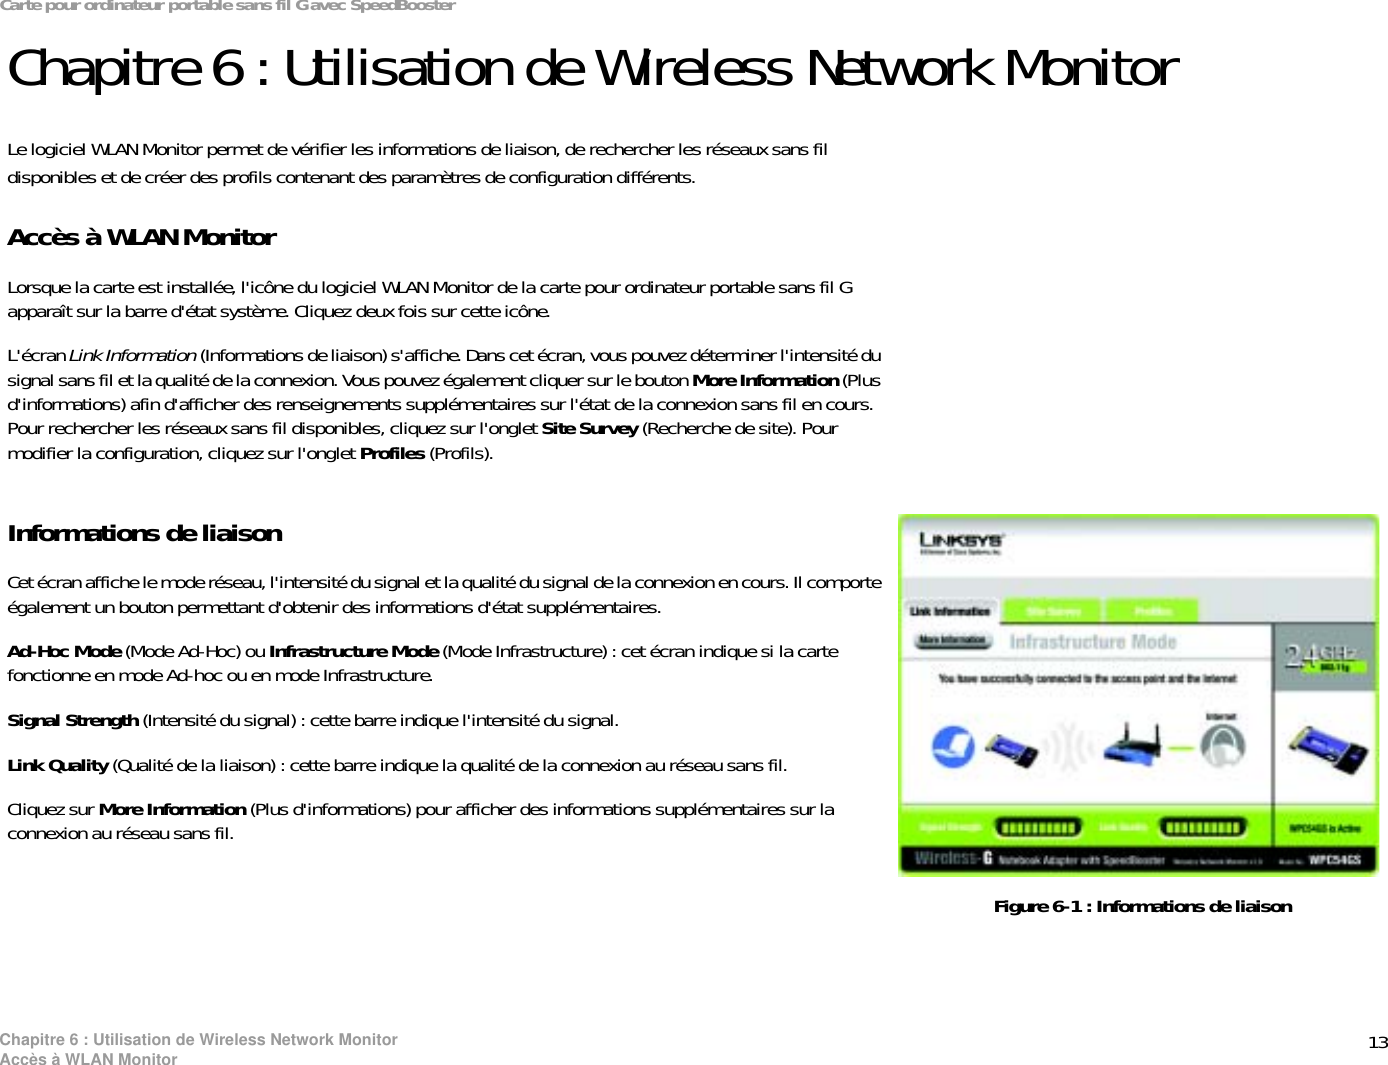
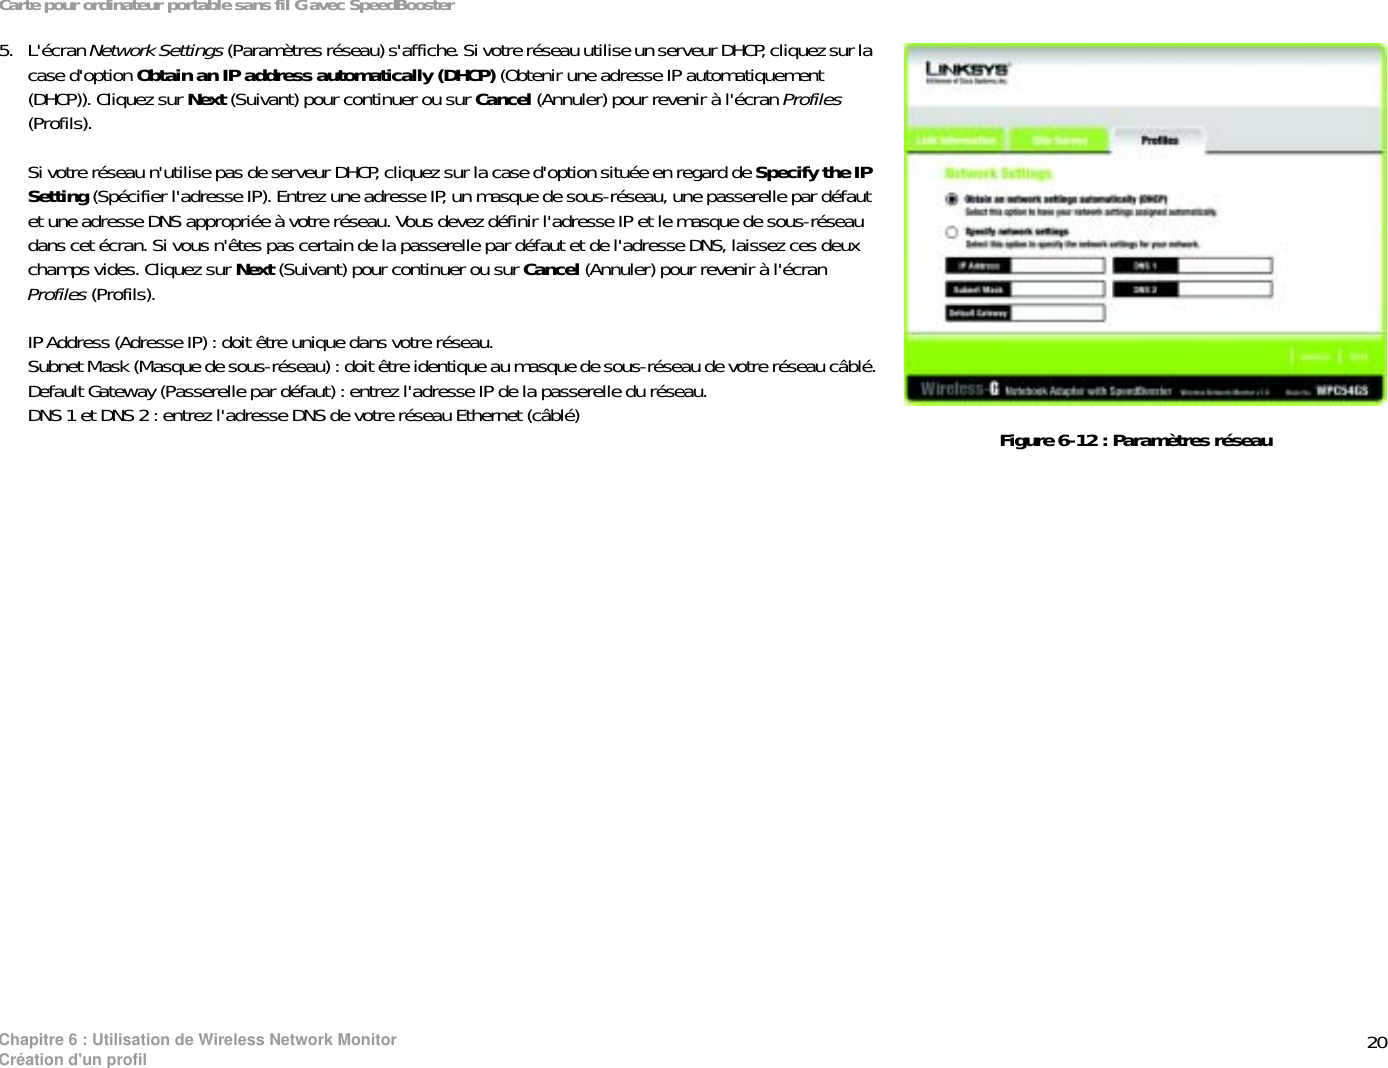
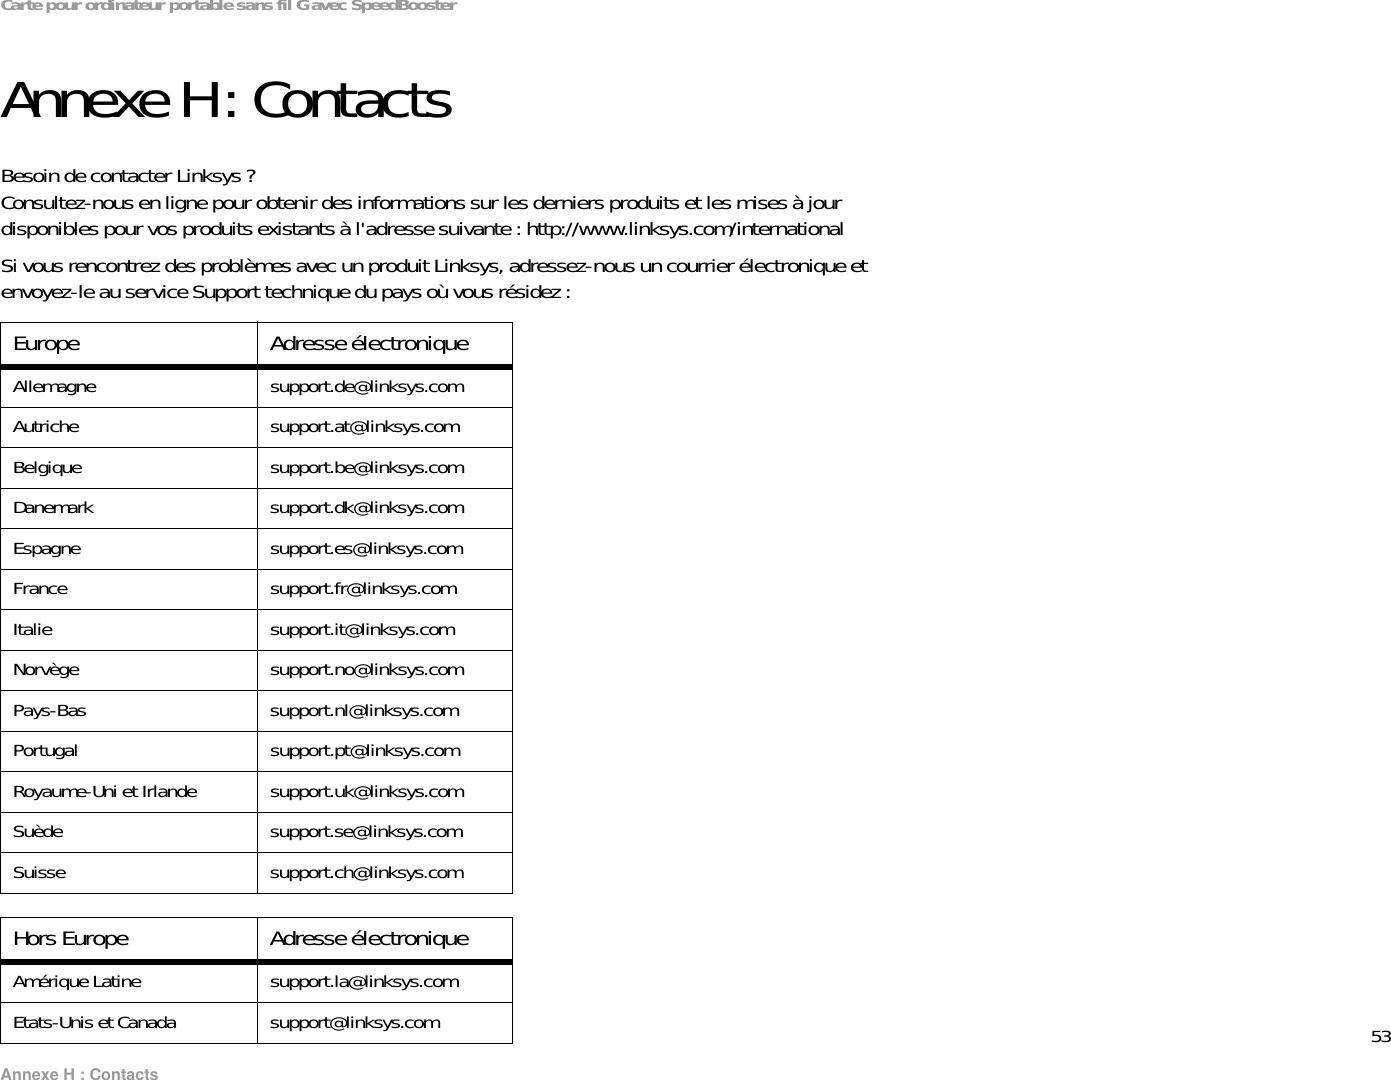
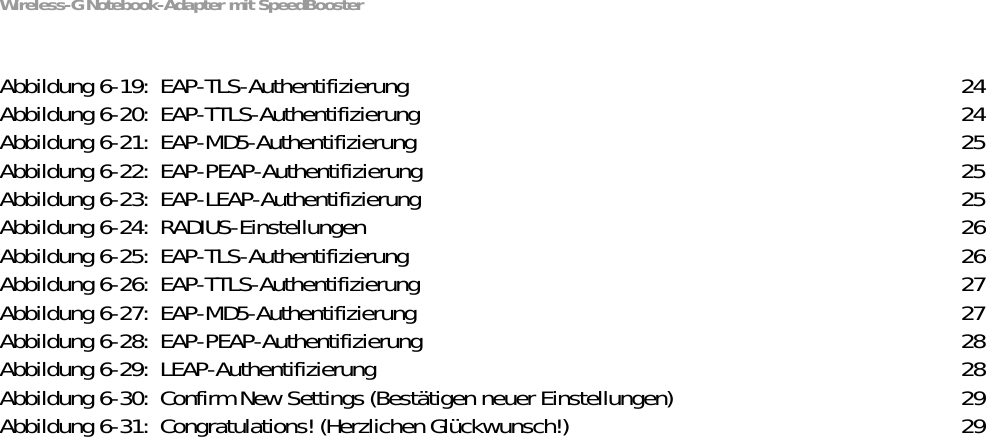
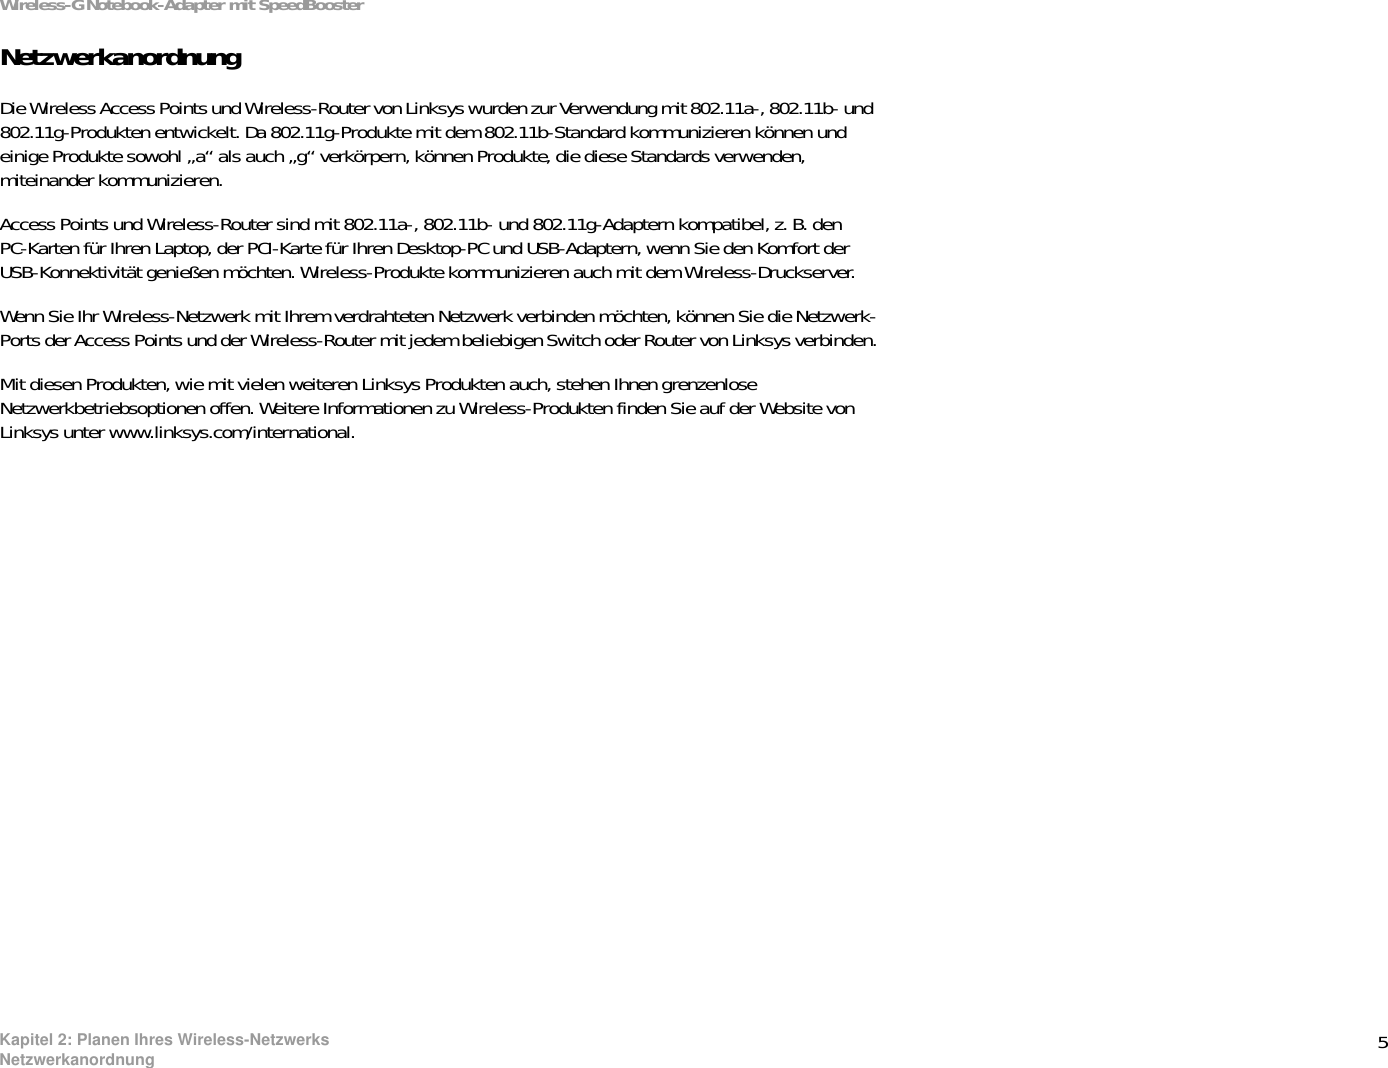
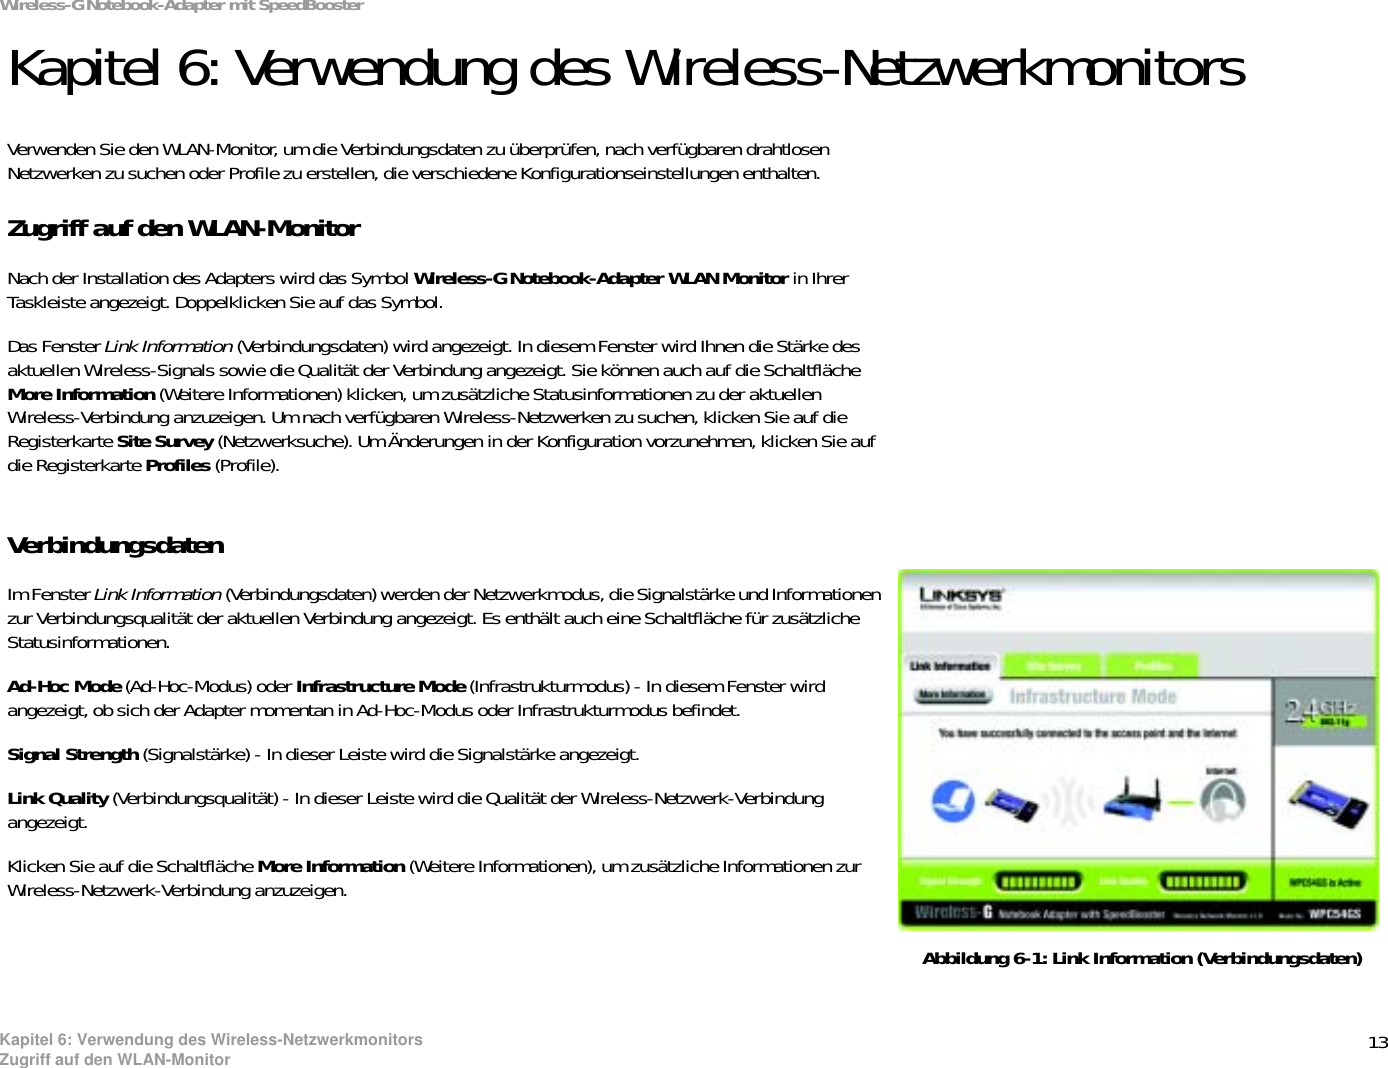
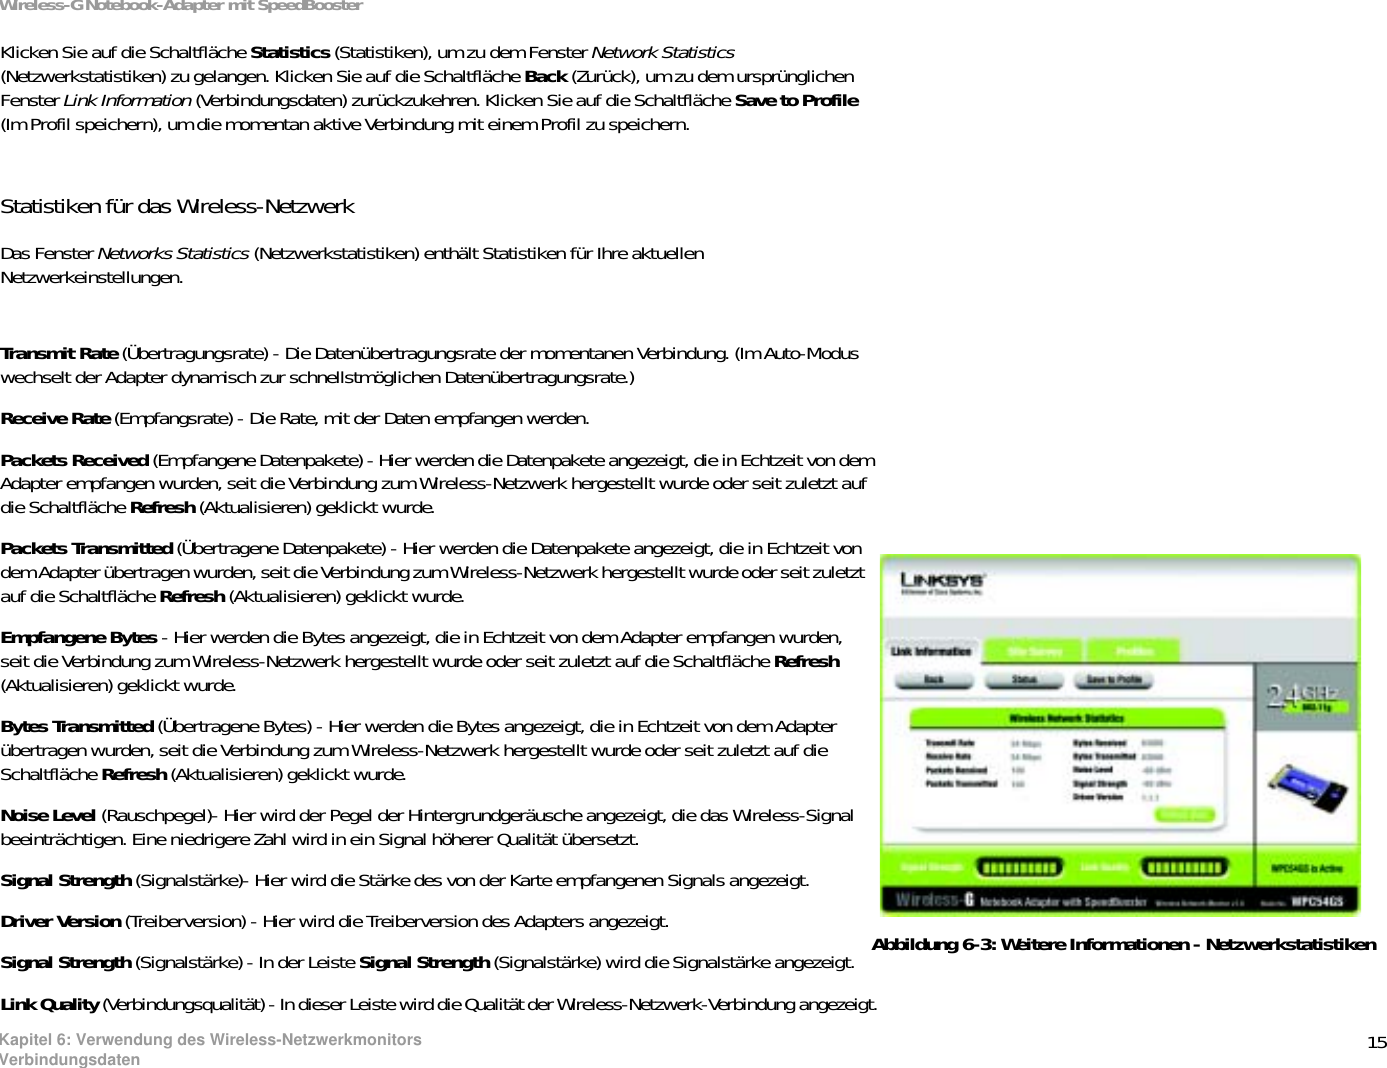
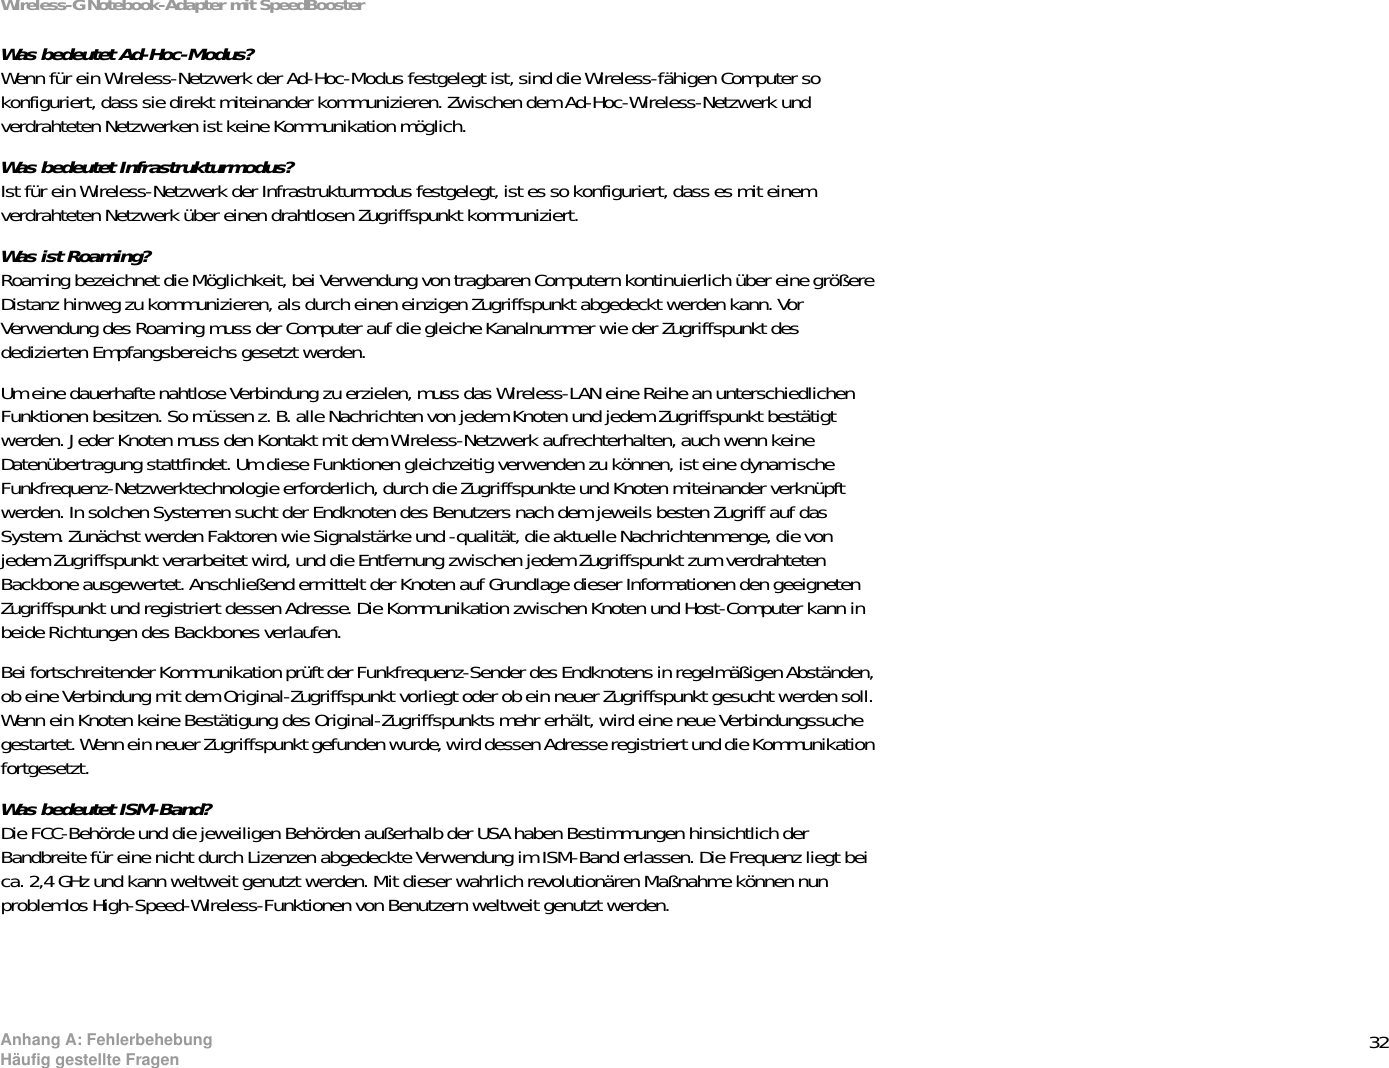
![20Kapitel 6: Verwendung des Wireless-NetzwerkmonitorsErstellen eines neuen ProfilsWireless-G Notebook-Adapter mit SpeedBooster5. Das Fenster Network Settings (Netzwerkeinstellungen) wird als nächstes angezeigt. Wenn Ihr Netzwerk einen DHCP-Server enthält, klicken Sie auf die Optionsschaltfläche neben Obtain an IP address automatically (DHCP) [IP-Adresse automatisch beziehen (DHCP)]. Klicken Sie auf die Schaltfläche Next (Weiter), um fortzufahren, oder klicken Sie auf die Schaltfläche Cancel, (Abbrechen), um zu dem Fenster Profiles (Profile) zurückzukehren.Wenn Ihr Netzwerk keinen DHCP-Server enthält, klicken Sie auf die Optionsschaltfläche neben Specify the IP Setting (IP-Einstellung angeben). Geben Sie eine IP-Adresse, eine Subnetzmaske, Standard-Gateway und DNS ein, die für Ihr Netzwerk geeignet sind. Geben Sie in diesem Fenster die IP Address (IP-Adresse) und Subnet Mask (Subnetzmaske) ein. Wenn Sie sich nicht sicher sind, welches die korrekten Einstellungen für das Standard-Gateway und die DNS-Adresse sind, lassen Sie diese Felder leer. Klicken Sie auf die Schaltfläche Next (Weiter), um fortzufahren, oder klicken Sie auf die Schaltfläche Cancel, (Abbrechen), um zu dem Fenster Profiles (Profile) zurückzukehren. IP Address (IP-Adresse) - Diese IP-Adresse muss im Netzwerk eindeutig sein.Subnet Mask (Subnetzmaske) - Die Subnetzmaske des Adapters muss mit der Subnetzmaske Ihres verdrahteten Netzwerks übereinstimmen.Default Gateway (Standard-Gateway) - Geben Sie die IP-Adresse des Gateway Ihres Netzwerks hier ein. DNS 1 und DNS 2 - Geben Sie die DNS-Adresse Ihres (verdrahteten) Ethernet-Netzwerks hier ein.Abbildung 6-12: Network Settings (Netzwerkeinstellungen)](https://usermanual.wiki/LINKSYS/WPC54GSV11/User-Guide-471670-Page-189.png)


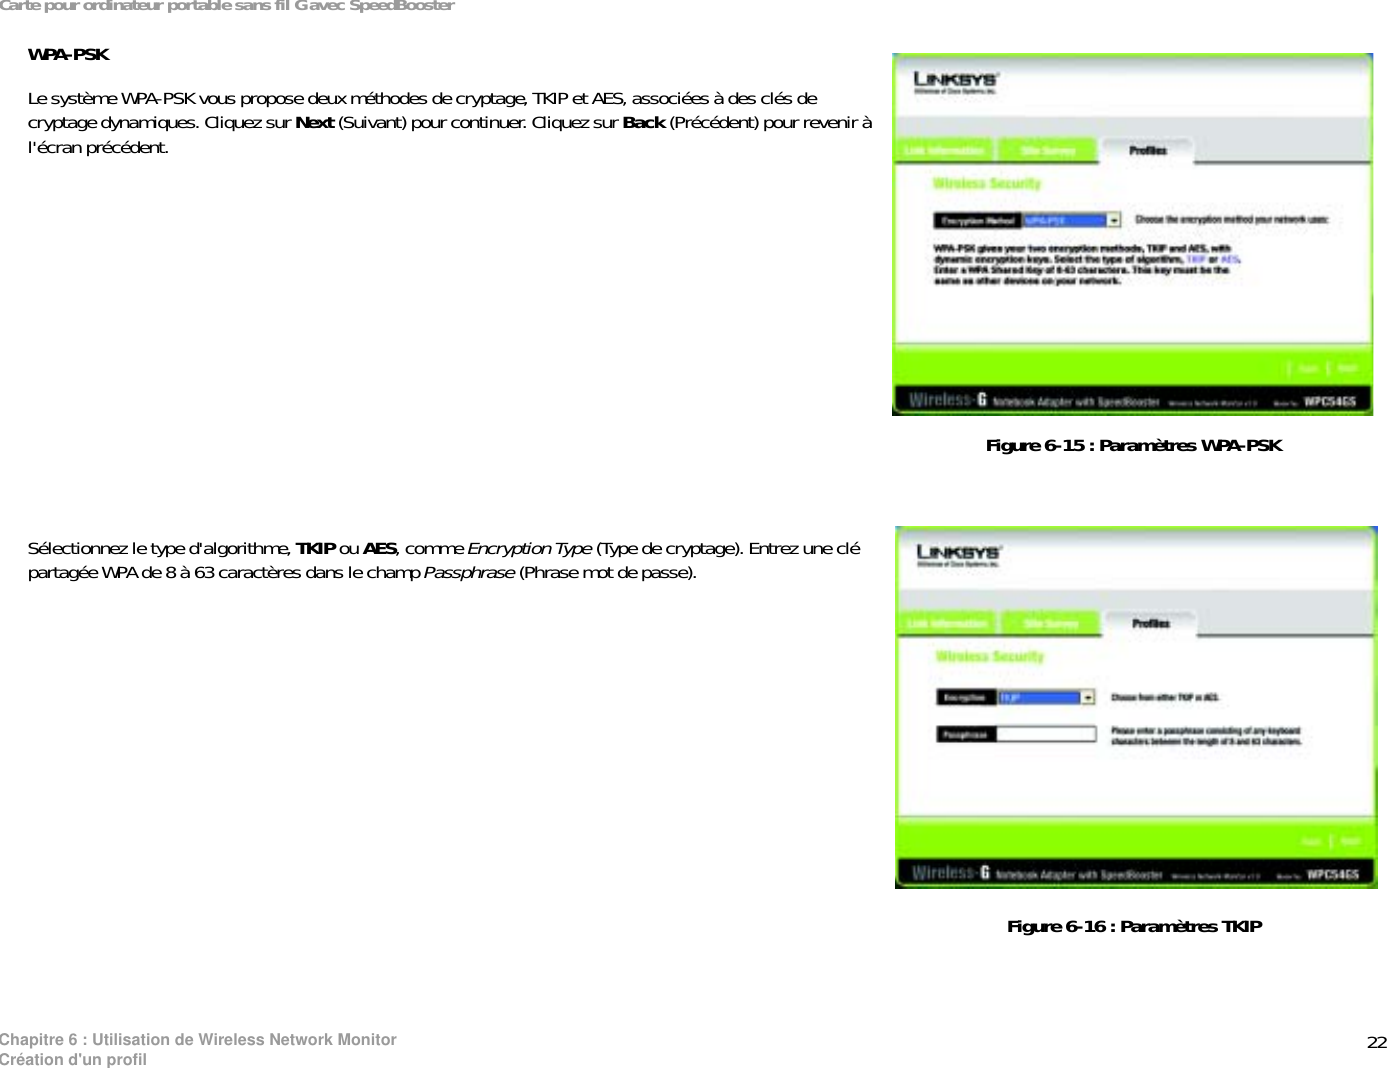
![49Anhang G: ZulassungsinformationenWireless-G Notebook-Adapter mit SpeedBoosterInformationen zur Einhaltung gesetzlicher Vorschriften bei 2,4-GHz-Wireless-Produkten für den Bereich der EU und anderer Länder gemäß EU-Richtlinie 1999/5/EG (R&TTE-Richtlinie)Konformitätserklärung in Bezug auf EU-Richtlinie 1995/5/EG (R&TTE-Richtlinie)Deutsch[German]: Dieses Gerät entspricht den grundlegenden Anforderungen und den weiteren entsprechenden Vorgaben der Richtlinie 1999/5/EG.Dansk[Danish]: Dette udstyr er i overensstemmelse med de væsentlige krav og andre relevante bestemmelser i Direktiv 1999/5/EF.English: This equipment is in compliance with the essential requirements and other relevant provisions of Directive 1999/5/EC.Español [Spanish]: Este equipo cumple con los requisitos esenciales asi como con otras disposiciones de la Directiva 1999/5/CE.ǼȜȜȘȞȚțȒ[Greek]: ǹȣIJȩȢ Ƞ İȟȠʌȜȚıµȩȢ İȓȞĮȚ ıİ ıȣµµȩȡijȦıȘ µİ IJȚȢ ȠȣıȚȫįİȚȢĮʌĮȚIJȒıİȚȢ țĮȚ ȐȜȜİȢ ıȤİIJȚțȑȢ įȚĮIJȐȟİȚȢ IJȘȢ ȅįȘȖȓĮȢ 1999/5/EC.Français [French]: Cet appareil est conforme aux exigences essentielles et aux autres dispositions pertinentes de la Directive 1999/5/EC.Íslenska[Icelandic]: Þetta tæki er samkvæmt grunnkröfum og öðrum viðeigandi ákvæðum Tilskipunar 1999/5/EC.Italiano[Italian]: Questo apparato é conforme ai requisiti essenziali ed agli altri principi sanciti dalla Direttiva 1999/5/CE.Nederlands[Dutch]: Dit apparaat voldoet aan de essentiele eisen en andere van toepassing zijnde bepalingen van de Richtlijn 1999/5/EC.Norsk[Norwegian]: Dette utstyret er i samsvar med de grunnleggende krav og andre relevante bestemmelser i EU-direktiv 1999/5/EF.Português[Portuguese]: Este equipamento está em conformidade com os requisitos essenciais e outras provisões relevantes da Directiva 1999/5/EC.Suomi[Finnish]: Tämä laite täyttää direktiivin 1999/5/EY olennaiset vaatimukset ja on siinä asetettujen muiden laitetta koskevien määräysten mukainen.Svenska[Swedish]: Denna utrustning är i överensstämmelse med de väsentliga kraven och andra relevanta bestämmelser i Direktiv 1999/5/EC.HINWEIS: Wenn Sie technische Dokumente benötigen, finden Sie im Abschnitt „Technische Dokumente unter www.linksys.com/international“ weitere Informationen.](https://usermanual.wiki/LINKSYS/WPC54GSV11/User-Guide-471670-Page-218.png)