LRE Medical Esterline 8048000 RFID Reader User Manual
LRE Medical GmbH Esterline Corporation RFID Reader
user manual
Page 1
ASPECT Reader™
User Guide - English
AW201127 Rev. 1
UG0001 - EN
2 ASPECT Reader User Guide
Before You Begin
Several important sources of information are available to help get you started and to refer to as needed to ensure accurate test results. Before
using this system, read this entire User Guide and the package insert that comes with the ASPECT-PLUS™ ST2 corresponding test. Take special note
of throughout this User Guide.
Important Safety Instructions
F Follow proper infection control guidelines for handling all blood samples and anything that comes in contact with blood.
F All parts of the kit are considered biohazardous and can potentially transmit infectious diseases, even after you have performed
cleaning and disinfection.
F Users should adhere to standard precautions when handling or using this device. For more information, refer to
“Guideline for Isolation Precautions: Preventing Transmission of Infectious Agents in Healthcare Settings 2007”,
http: www.cdc.gov/hicpac/2007ip/2007isolationprecautions.html
ASPECT Reader SERIAL NUMBER:
Distributor to Call When Ordering Supplies
NAME:
CONTACT INFORMATION:
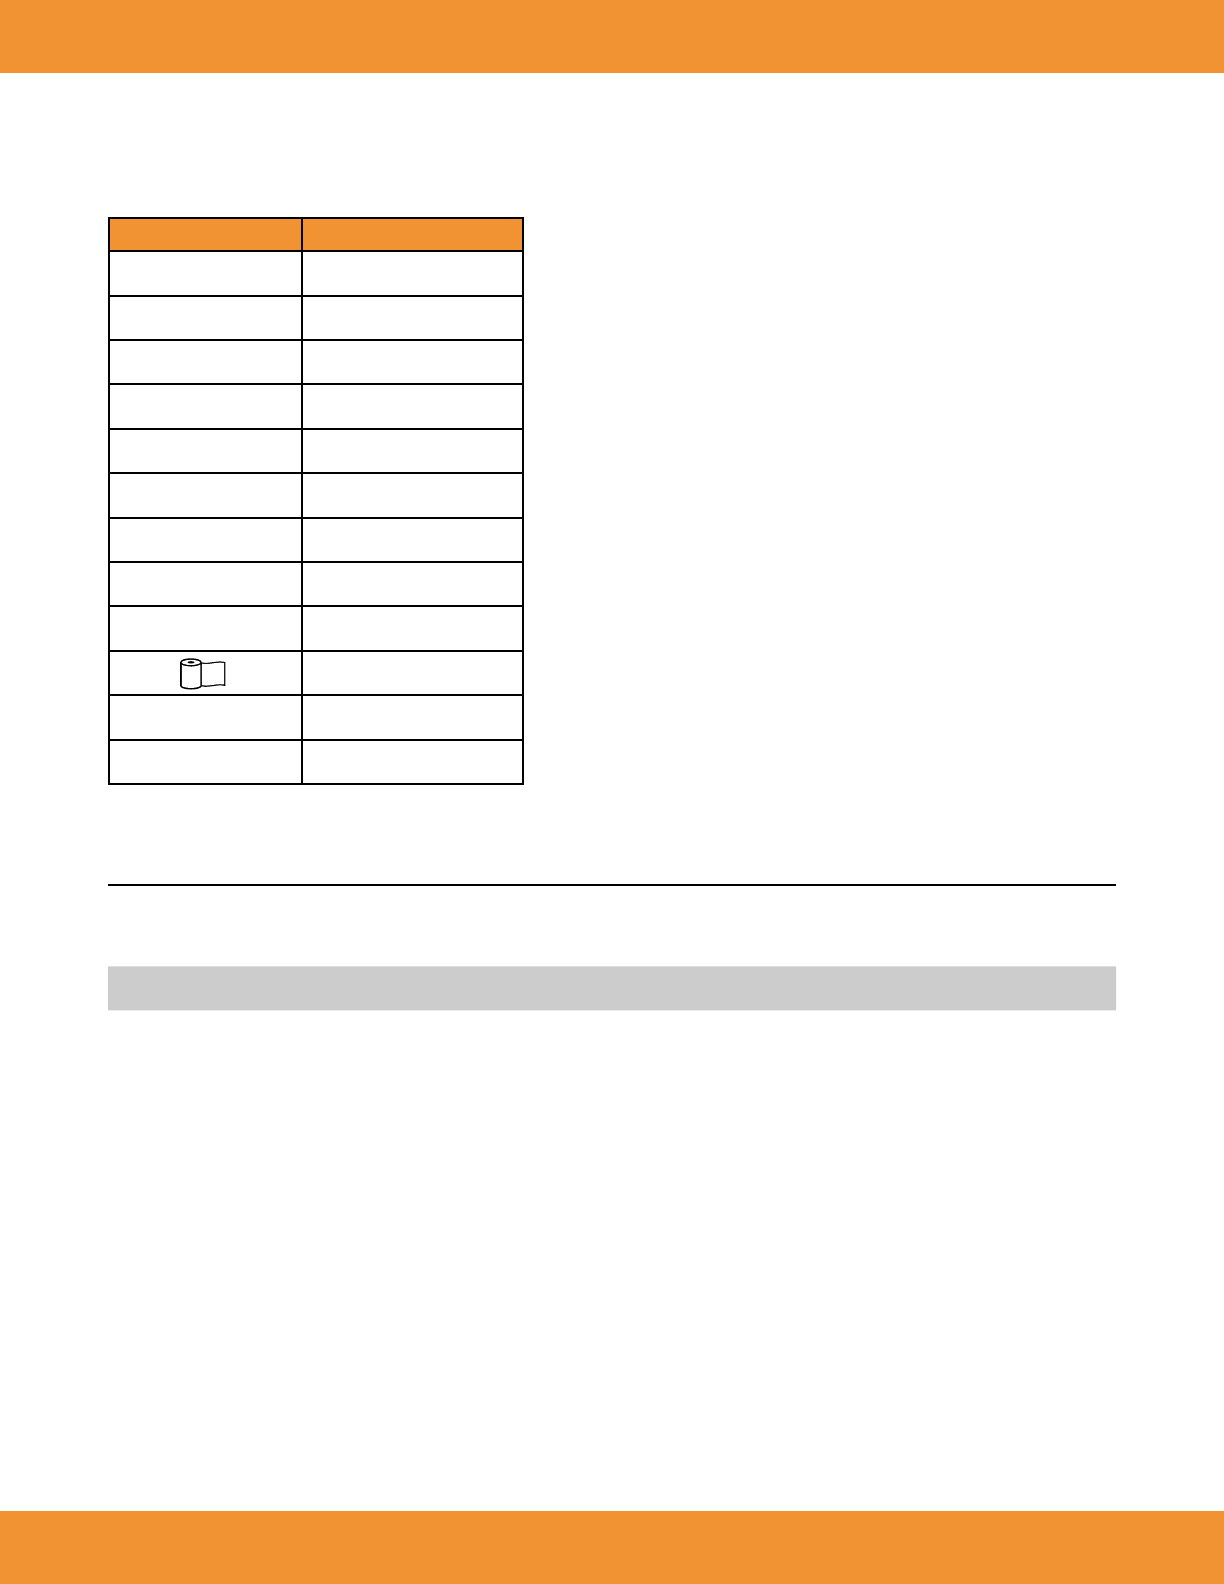
To reorder supplies, contact your Critical Diagnostics distributor:
Product Name Part Number Description
ASPECT-PLUS ST2 Test PLUS0001 ST2 Test Cassettes (20 cassettes)
ASPECT Reader READ0001 Complete reader system
ASPECT Reader Paper PAP0001 Paper roll for ASPECT Reader (5 rolls)
ST2 Controls LQC0001 ST2 liquid quality controls, high and low (2 high, 2 low)
Electronic Quality Control EQC0001 ASPECT Reader EQC cassette (1 cassette)

ASPECT Reader User Guide 3
User Guide Overview
INTRODUCTION contains a brief description of the features and theory of operation of the ASPECT Reader. It also contains some basic information
about interface controls such as keyboard keys and data entry elds and their use in the software.
INSTALLATION contains information about the unpacking and set up, as well as specications and warranty information about the reader.
INITIAL SET-UP contains information about setting up general reader settings, LIS and Network settings, as well as setting up user access rights
and viewing and/or printing error logs.
OPERATION contains detailed information about running samples on the ASPECT Reader and menu items found under the Operator icon.
REVIEW DATA contains information about reviewing patient results, as well as viewing liquid and electronic quality control results. Information
about printing results and sending patient results, liquid and electronic quality control results to a LIS system is contained in this chapter.
CONTROLS contains information about setting up and running controls.
MAINTENANCE contains information about routine maintenance of the ASPECT Reader.
TROUBLESHOOTING contains information about troubleshooting the reader.

4 ASPECT Reader User Guide
TABLE OF CONTENTS
INTRODUCTION................................................................................................................................................................. 6
Welcome ............................................................................................................................................................................6
System Overview ................................................................................................................................................................ 6
Intended Use .......................................................................................................................................................6
Principles of Measurement ...................................................................................................................................6
Data Entry Fields .................................................................................................................................................6
System Specifications Table ..................................................................................................................................7
Warnings, Precautions, Limitations .......................................................................................................................7
Symbols ..............................................................................................................................................................8-10
INSTALLATION ................................................................................................................................................................... 10
Reader ............................................................................................................................................................................... 11
Accessories ......................................................................................................................................................................... 11
Installation ......................................................................................................................................................................... 12-13
INITIAL SET-UP .................................................................................................................................................................. 13
Main Menu ......................................................................................................................................................................... 13
General Reader Settings ...................................................................................................................................................... 14
Language ........................................................................................................................................................................... 14
Default Settings .................................................................................................................................................................. 15
Time and Time Format ...................................................................................................................................................... 15-16
Date and Date Format ...................................................................................................................................................... 16
QC Settings ....................................................................................................................................................................... 16-17
Time-out Set-up ................................................................................................................................................................ 17
Test Mode ........................................................................................................................................................................... 17
LIS Settings ........................................................................................................................................................................ 18
Network Settings ................................................................................................................................................................ 18-19
Printer Settings ................................................................................................................................................................... 19
Manage Users..................................................................................................................................................................... 20
Edit User .......................................................................................................................................................................... 21
Delete Selected User ......................................................................................................................................................... 21
Add User .......................................................................................................................................................................... 22
OPERATION ....................................................................................................................................................................... 22
Log In ................................................................................................................................................................................ 22-23
Running a Sample .............................................................................................................................................................. 23-24
Cassette Preparation ........................................................................................................................................................... 24
Removing Cassette .............................................................................................................................................................. 25
Printing Results................................................................................................................................................................... 25
Transmitting Results ............................................................................................................................................................ 25
REVIEW DATA AND ERROR LOG ........................................................................................................................................ 26
Review Patient Results by Date ............................................................................................................................................ 26-27
Show Details Option .......................................................................................................................................................... 27
Print List Option ................................................................................................................................................................ 28
Review Patient Results by Sequence #.................................................................................................................................. 28
Show Details Option .......................................................................................................................................................... 29
Print List Option ................................................................................................................................................................ 29-30
Review Patient Results by Patient ID .................................................................................................................................... 30
Show Details Option .......................................................................................................................................................... 31
Print List Option ................................................................................................................................................................ 31

ASPECT Reader User Guide 5
Review Patient Results by Operator ID ................................................................................................................................. 32
Show Details Option .......................................................................................................................................................... 32-33
Print List Option ................................................................................................................................................................ 33
Review Liquid QC (LQC) Results ........................................................................................................................................... 33
Show Details Option .......................................................................................................................................................... 34
Print List Option ................................................................................................................................................................ 35
Review Electronic QC (EQC) Results ...................................................................................................................................... 35-36
Show Details Option .......................................................................................................................................................... 36
Print List Option ................................................................................................................................................................ 36-37
Send Results to LIS .............................................................................................................................................................. 37-38
View Error Log .................................................................................................................................................................... 38
Instrument Errors Log ....................................................................................................................................................... 38-39
Handling Errors Log .......................................................................................................................................................... 39
CONTROLS ........................................................................................................................................................................ 39
Liquid Quality Controls (LQC) .............................................................................................................................................. 40-41
Printing LQC Results .......................................................................................................................................................... 41
Electronic Quality Control (EQC) ........................................................................................................................................... 42-43
Printing EQC Results .......................................................................................................................................................... 43-44
UPDATING READER ........................................................................................................................................................... 44
Update ............................................................................................................................................................................... 44
Update Firmware .............................................................................................................................................................. 44-45
EXPORT LOGS ...................................................................................................................................................................45
Patient Results .................................................................................................................................................................... 45-46
Liquid QC Results ................................................................................................................................................................ 46
EQC Results ........................................................................................................................................................................ 46
Users.................................................................................................................................................................................. 46-47
Raw Scans .......................................................................................................................................................................... 47
MAINTENANCE .................................................................................................................................................................. 47
System Shipping and Storage .............................................................................................................................................. 47
Recommended Maintenance and Cleaning ........................................................................................................................... 47
Main Housing of the Reader .............................................................................................................................................. 48
Cassette Drawer ................................................................................................................................................................ 48
Replacing the Paper Roll ..................................................................................................................................................... 48-49
Battery Power .................................................................................................................................................................... 49
Changing Batteries ........................................................................................................................................................... 49
System Decontamination ..................................................................................................................................................... 49-50
Long Term Shutdown......................................................................................................................................................... 50
TROUBLESHOOTING ......................................................................................................................................................... 51
Troubleshooting and Error Codes ......................................................................................................................................... 51
WARRANTY .......................................................................................................................................................................52

6 ASPECT Reader User Guide
INTRODUCTION
Welcome
Congratulations on the decision to test with the ASPECT Reader System by Critical Diagnostics. This user guide will provide useful information on
performing tests with this system.
System Overview
The ASPECT Reader System is a semi-automated bench- top reader intended for use with cassette-based immunouorescent in-vitro diagnostic
assays. Utilizing the principles of rapid lateral ow immunoassay technology, samples are analyzed using a test cassette. The test cassette
contains a Radio Frequency ID (RFID) tag that identies parameters such as test name, calibration coefcients, expiry date, Sample/Reagent
Assembly (SRA) type. After the test cassette is loaded with a specimen it is inserted into the reader. An internal scanner reads the RFID tag and
automatically processes the test. Internal software interprets and reports the test results which are displayed on the screen, where they can be
printed and/or electronically exported.
Test specic information is stored on the RFID tag. No upload of any test-related information is required prior to performing a test.
Intended Use
The ASPECT Reader is a benchtop instrument intended to be used with cassette-based immunouorescent in vitro diagnostic assays manufactured
by Critical Diagnostics. The ASPECT Reader is used in the professional laboratory environment.
After the patient sample has been added to the Test cassette, the cassette is placed inside of the ASPECT Reader to be analyzed. The ASPECT
Reader will scan the test strip and measure the uorescent signal by processing the results using method-specic algorithms. The ASPECT Reader
will display the test results.
Refer to assay-specic package insert for details on specic tests.
Principles of Measurement
The ASPECT Reader detects a uorescent-label (TF5: Excitation 650nm; Emission 670nm) in a lateral ow immunoassay (LFI) test format. A
pre-determined amount of test specimen is pipetted into the sample well of the test cassette. A buffer solution is pipetted into the second well.
The test cassette (called cartridge in the software) is then immediately inserted into the ASPECT Reader for analysis. The reader assembly excites
the uorescent label area of the test cassette then measures the uorescent signal to generate a quantitative result when processed through the
calibration curve algorithm. The analyte result is displayed on the screen where it can be printed and/or exported to a LIS system.
Data Entry Fields
Data entry elds are areas in a screen in which information is entered. One screen can have several data entry elds, but only one eld can
be selected and active for entering data at a time. Pressing a numeric key will input that character into the data entry eld. If the number of
characters in a eld is exceeded, no additional characters may be entered unless others have been deleted.
To select a data entry eld, move the cursor via the [↑] or [↓] keys to move up and down in the screen. To move back and forth between left
and right text elds, use the [→] or [←] keys. The content of the eld is highlighted to show it is selected or active.
To delete characters from a data eld, select the eld using the reader’s [↑] or [↓] keys, then press the [⇐] Delete key at the bottom of the
numeric keys. The last character in the eld will be deleted.
~ ~

ASPECT Reader User Guide 7
System Specications Table
Power Requirements 100 - 240 VAC, 47- 63Hz, self-switching (U.S./International), 0.9-0.34 Amps max
Replaceable Batteries 4x LR6-AA + 6V— 4.16 A
Ambient Operating Temperature 15 – 30° C / 59 – 86° F
Ambient Operating Humidity Range 30 – 80% R.H. (non-condensing)
Shipping & Storage Temperature -20 – 55 °C
Shipping & Storage Humidity 30 – 80% R.H. (non-condensing)
Keypad Numeric
Display 3.5 inch diagonal
Weight 3 lb. (6.6 kg)
Width 6.3 in. (~16 cm)
Depth 9.5 in. (~24cm)
Height 3.9 in. (~10cm)
Radio Frequency (RF) Operating Frequency 13.56 MHz
RF Output Power 200 mW
The ASPECT Reader meets the relevant EC harmonized standards for safety: IEC 61010-1, EN 61010-2-101, CSA 61010-1-04, EN61326-1:2002,
EN61326-2-6:2006.
FCC ID:YMQ-8048000 This device complies with Part 15 of the FCC rules. Operation is subject to the following conditions:
1. The device may not cause harmful interference.
2. This device must accept any interference received, including interference that may cause undesired operation.
3. Changes or modications not expressly approved by the party responsible for compliance could void the user’s authority to operate the
equipment.
Warnings, Precautions, Limitations
Before using this system, read this entire User Guide and the Instructions For Use for the specific test being performed on the ASPECT Reader.
• For in vitro diagnostic use.
• For use by healthcare professional.
• Results should be interpreted along with clinical findings and other laboratory test results.
• Individuals assigned to operate this reader must be properly trained and fully aware of the potential hazards when using the ASPECT Reader
prior to use.
• Do not place the ASPECT Reader in water.
• Do not drop or throw the reader.
• Operate the reader on a dry, level surface.
• Do not move the reader while a test is in process.
• Plug the reader into a grounded power source.
• The ASPECT Reader was tested and has passed all declared EMC compliance standards. However, the use of ancillary equipment may
electromagnetically interfere with this reader. Take precautionary measures to minimize electromagnetic interference where possible.
• Always follow universal precautions when handling patient samples. Wear the proper personal protective equipment such as: lab coats, non-
powdered disposable gloves, safety glasses, etc. when working with the ASPECT Reader and patient samples.
• Use of new non-powdered disposable gloves will reduce the risk of cross contamination when handling patient samples.
• All samples, controls, etc. should be treated as though they are infectious.
• Dispose of unused reagents and waste in accordance with Country, Federal, Provincial, State and local regulations.
• Clean all work surfaces before and after testing.
• The ASPECT Reader has been designed to work as a system. Performance characteristics have not been established for use of the system with
other supplies or equipment.
• Please note that the infected medical equipment must be disposed of as medical biohazard waste and may not be included in used electronic
equipment disposal or recycling program.
8 ASPECT Reader User Guide
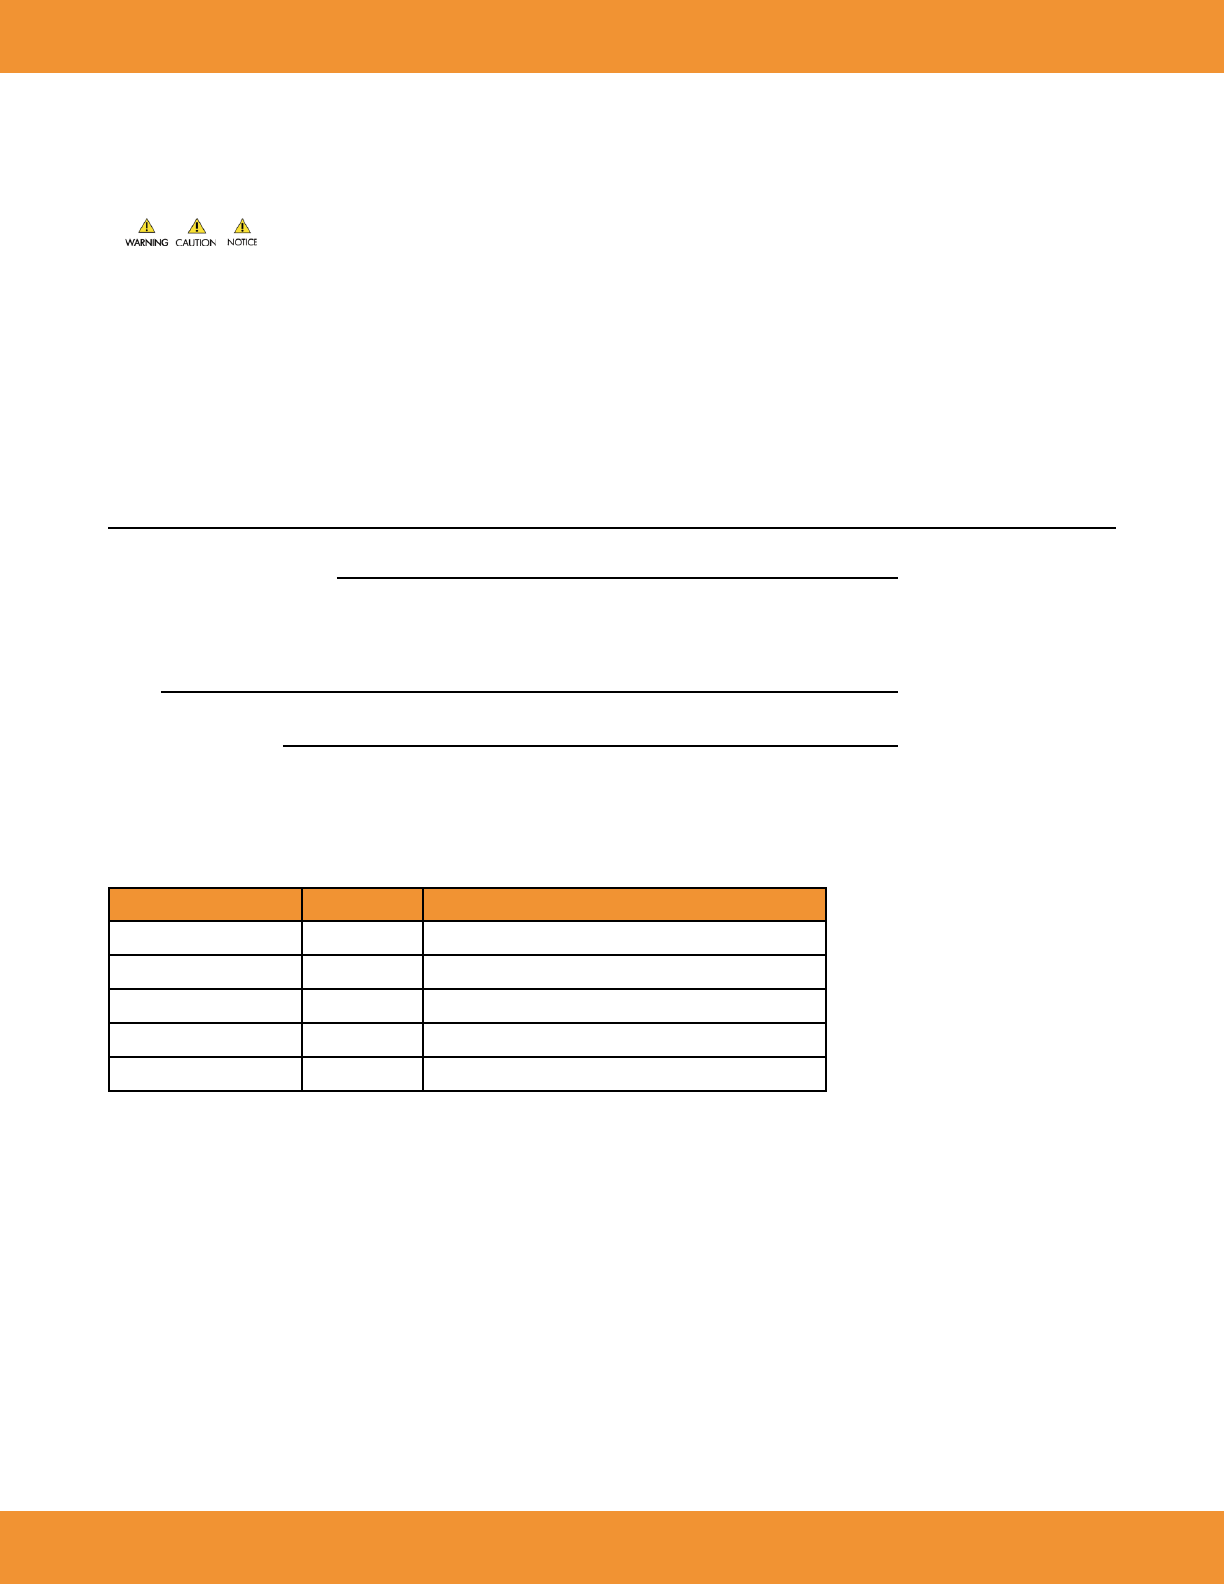
The following symbols are used in this guide:
Symbol Meaning
The term WARNING is used to inform you about situations or conditions that could result in personal injury.
The term CAUTION is used to inform you about situations or conditions that could result in damage to the ASPECT
Reader or related components.
Indicates warnings that are not related directly to personal injury hazards, but concern the proper use of the ASPECT
Reader or related components.
NOTE Presents information that will permit accurate measurement through correct use of the ASPECT Reader, as well as
other useful information.
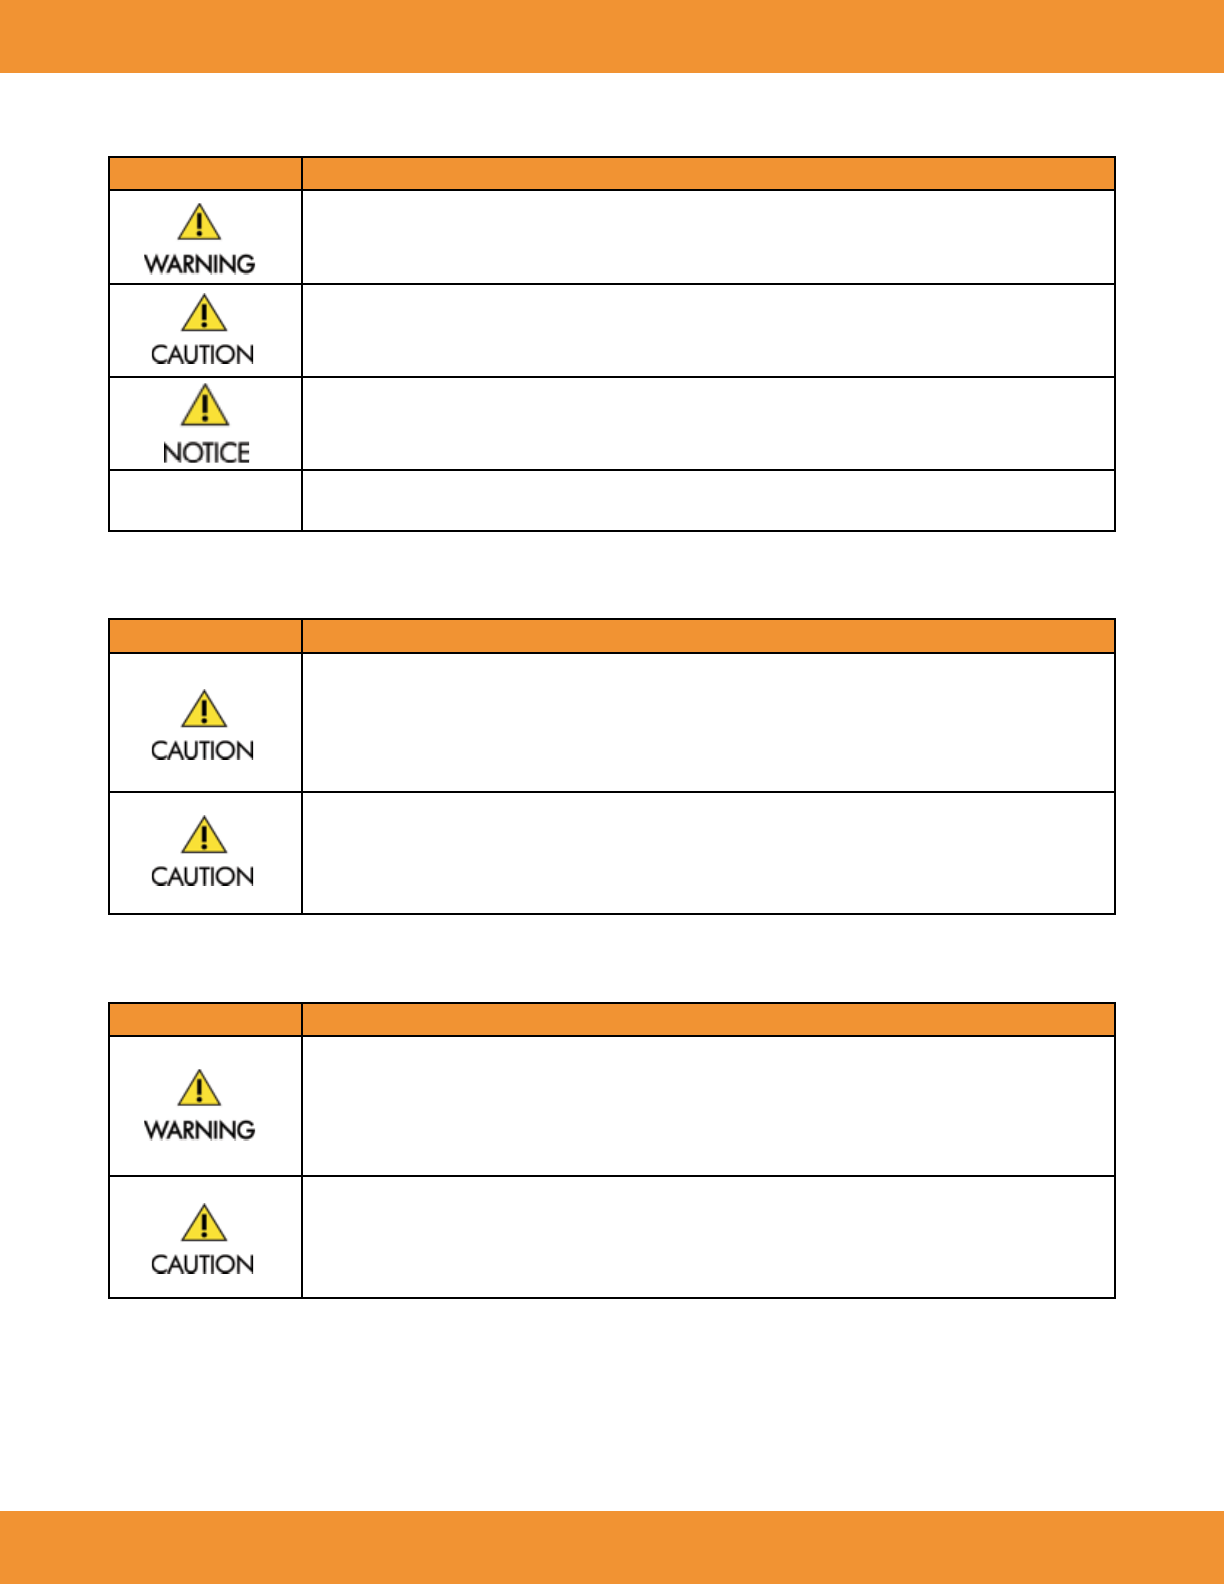
Environmental
Symbol Meaning
Operating Specifications:
• Temperature: 15°C–30°C
• Humidity: 30% to 80% Relative Humidity, Non-condensing
• Altitude: 0–2000 m
• Degree of pollution: 2
To ensure proper operating temperature, do not place the ASPECT Reader near radiators, bright sunlight, heat
registers, stoves and/or other heat-producing equipment.
Electrical Warnings
Symbol Meaning
Operate the ASPECT Reader using only the power cord and power supply (AC adaptor). The ASPECT Reader should only
be connected to an earth-grounded outlet with:
• 100–240 VAC
• 47–63 Hz
• 0.9-0.34 A
The ASPECT Reader is intended for indoor use only. To reduce the risk of electric shock, always unplug the power
supply from the AC power source following use
ASPECT Reader User Guide 9
Date Management
Symbol Meaning
The printout is the formal record of the test result. Print out every test result and make 2 photocopies. Place the
printed test results and both photocopies in the subject’s Case Report Form (CRF) binder.
Results stored in the ASPECT Reader memory are for temporary back-up purposes only, and may be overwritten. The
ASPECT Reader memory stores results for the last 100 tests run. Once memory capacity has been reached, the most
recent test result automatically overwrites the oldest test result.
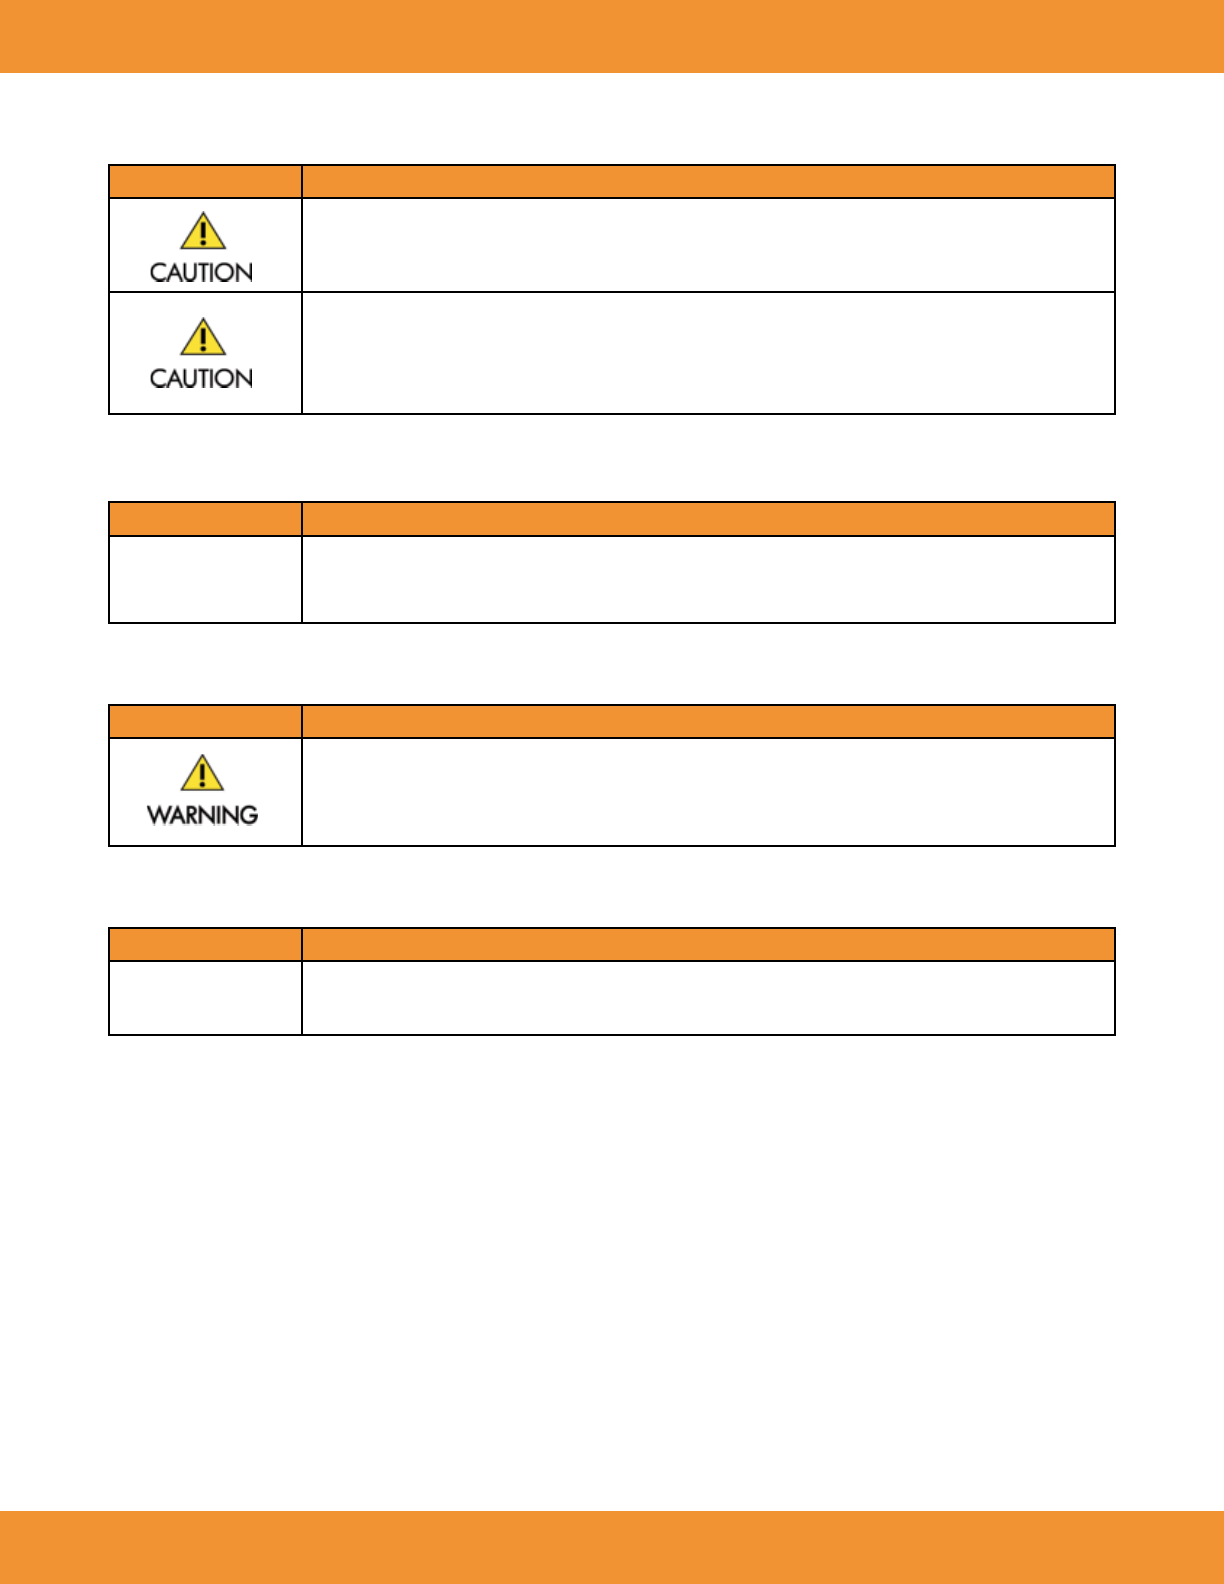
Disposal Information
Symbol Meaning
FBiohazard Warning
Handle and dispose of Test Cassettes in accordance with standard biohazard practices, unless otherwise indicated in the
relevant package insert.
Laser Device Caution
Symbol Meaning
Do not remove external panels to access the interior of the ASPECT Reader. The ASPECT Reader contains a UV LED used
to read the Test Cartridges. UV LED’s are not considered to be hazardous when used for their intended purpose.
Biohazard Warning
Symbol Meaning
FWhen using the ASPECT Reader, observe universal precautions for safety, laboratory working practices, and follow
laboratory operating procedures regarding personal protective equipment (lab coats, gloves, etc.) and safety.
10 ASPECT Reader User Guide
Symbols
Symbols that may be associated with the ASPECT Reader:
Symbol Meaning
CCE Mark
DDo not re-use
VIn Vitro Diagnostic device
MManufacturer
hCatalog Number
gBatch Code
rTemperature Limitation
PAuthorized Representative
iConsult instructions for use
Printer Paper
wProtect from any light source
pProtect from moisture
INSTALLATION
1. Position the shipping container upright and open the top aps.
2. Open the cardboard box inside the shipping container.
NOTE: If using a utility knife, extend the blade to an appropriate length to avoid cutting any internal components.
3. Lift out the top cardboard spacer. The side boxes of this spacer contain the:
• power cord
• adaptor plugs for US and ex-US power
• power adaptor
• paper roll
• four (4) LR6-AA batteries (1.5V)
4. Lift the next cardboard spacer from the box.
5. Remove the reader by slowly lifting it vertically out of the shipping container.
6. Place the reader on a stable surface. The reader is contained in a sealed plastic bag containing a desiccant pouch. Remove the reader from
the plastic bag.
7. Replace all packing materials in the shipping container for storage.
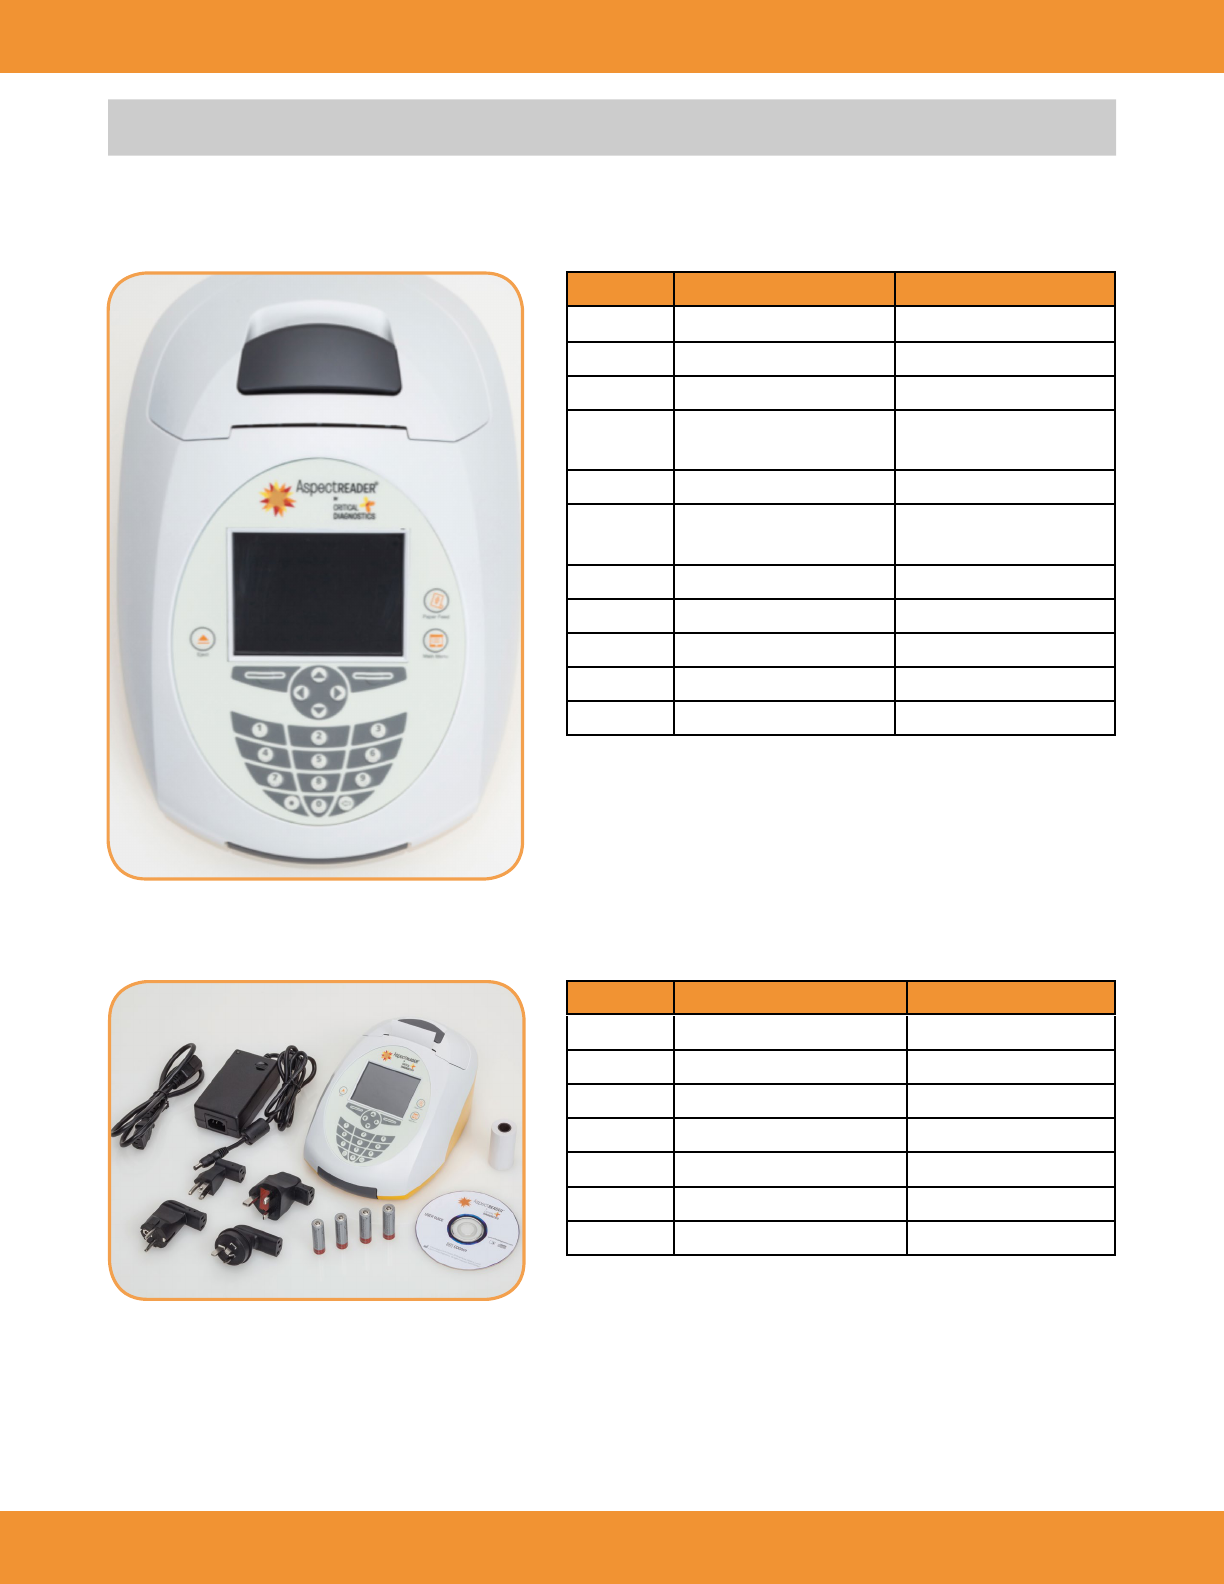
8. Check the contents of the box (Figure 8-1) with the shipping list shown below:
• ASPECT Reader
• External power supply
• Power cord
• Power Supply Adaptors (US, EU)
• ASPECT Reader User Guide
• 1 roll of thermal paper
ASPECT Reader User Guide 11
NOTE: If the reader is stored at a temperature below 59°F and above 90°F (below 15°C and above 32°C) or at a humidity below 20% and
above 80% relative humidity (RH), allow the reader to acclimate to the nal environment temperature for a minimum of two (2) hours.
Reader
Accessories
Number Description Function
1Display Screen Displays user function
2 Eject Opens cassette drawer
3 Paper Advance Advances printer paper
4 Main Menu Cancels current operation,
return to Main Menu
5 Soft Keys Multi-function keys
6 Navigation Arrows Used to move cursor between
data fields
7 Numeric Keys Enters selected number
8⇐ Deletes last numeric entry
9.Adds a decimal point
10 Paper Roll Cover Printer
11 Cassette Drawer Holds cassette during testing
Number Description Reference No.
1ASPECT Reader READ0001-03
2 Power Cord
3 External Power Supply READ0001-6
4 Power Supply Adapters (EU, US) READ0001-7
5 4 — LR6-AA Batteries (1.5V)
6 ASPECT Reader User Guide
7 Paper Roll READ0001-5
3
10
4
55
1
6
2
7
9 8
11
1
23
4
56
7
12 ASPECT Reader User Guide
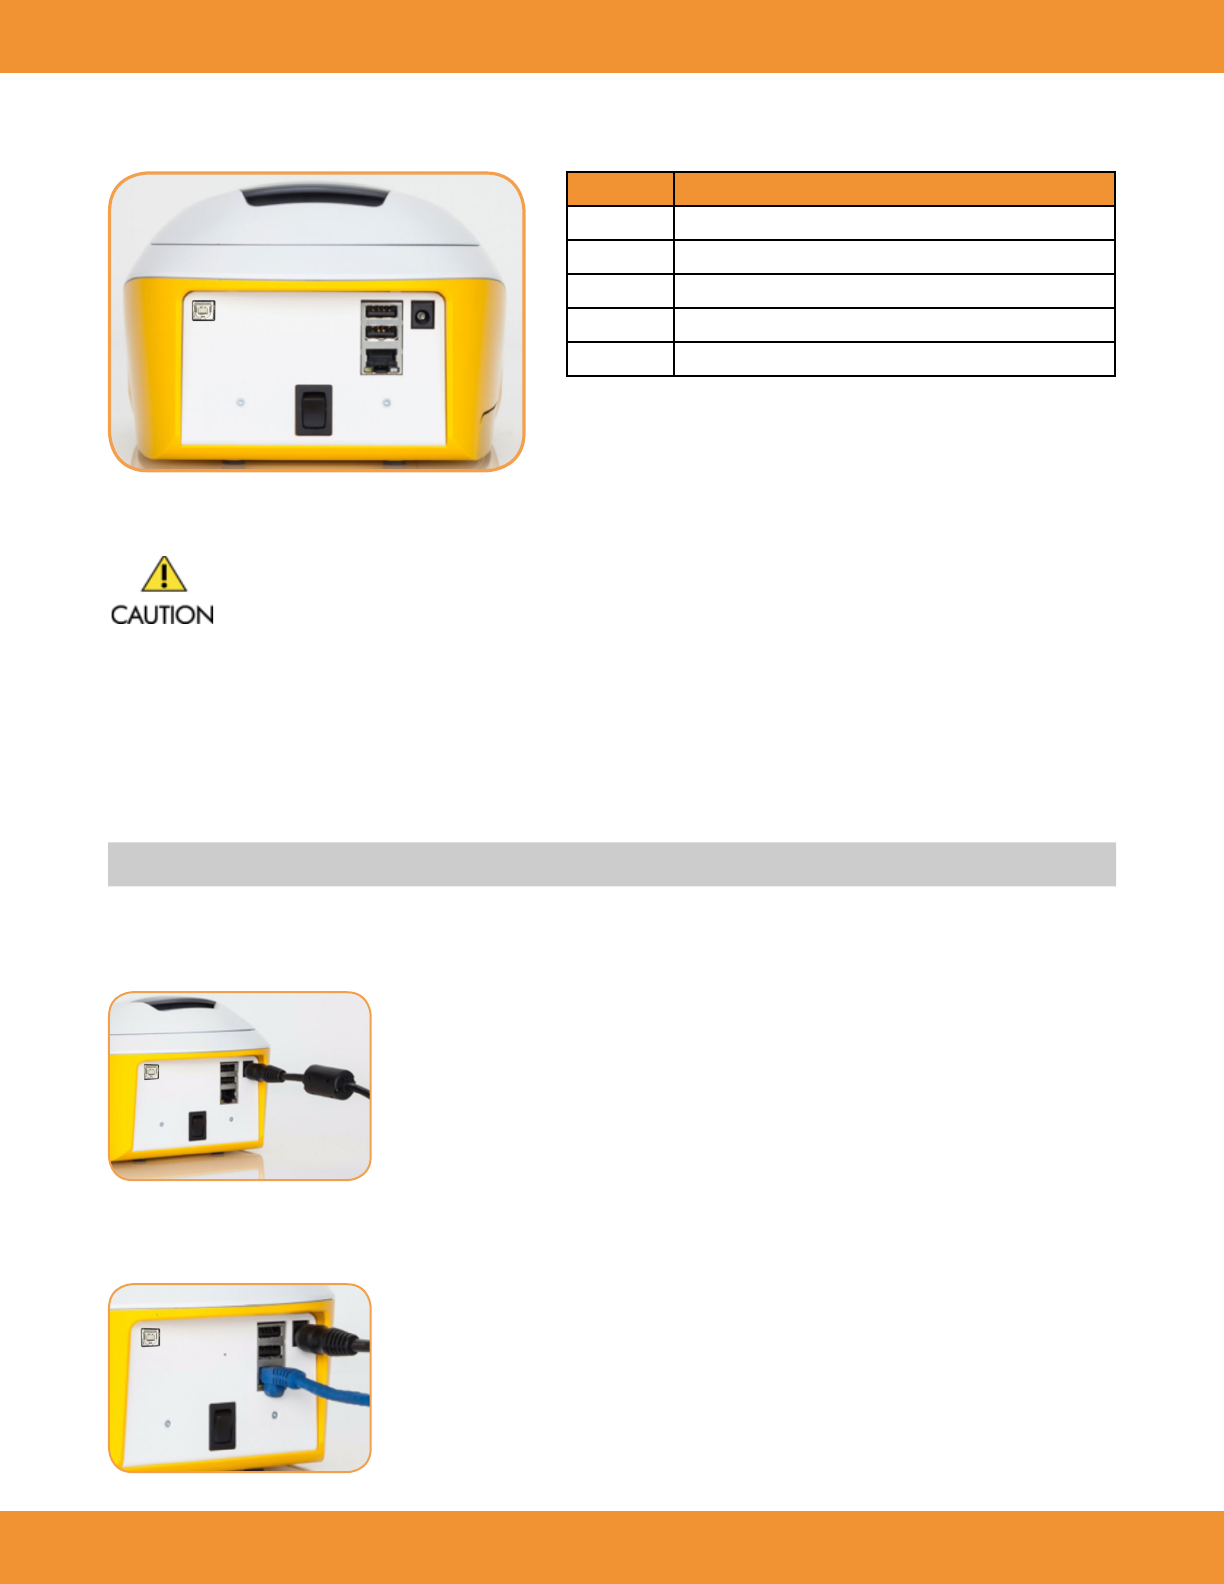
Back of Reader
Installation
To ensure proper operating temperature, do not place the ASPECT Reader near radiators,
bright sunlight, heat registers, stoves and/or heat-producing equipment.
Operate the ASPECT Reader using only the power cord and power supply (AC adaptor) supplied. The ASPECT Reader should only be connected to
an earth-grounded outlet with:
• 100-240 VAC
• 47-63Hz
• 0.9-0.34 A
1. Place the ASPECT Reader on a clean, dry, and at surface.
NOTE: Always make sure the reader is powered off before connecting or disconnecting the cables or accessories.
2. Attach the power adaptor to the power cord.
3. Attach the correct adaptor plug (appropriate for your wall socket) to the external power adaptor.
4. Attach the power supply’s cable plug into its receptor located on the back of the reader (Figure 1).
5. Plug the external power supply into a wall power outlet. Make sure the reader is plugged into a grounded power line that meets voltage
requirements in the Specication section of this manual (See “System Specications Table” on page 7).
6. If the reader is to be connected to a LIS system, insert the data transmit cable to the LIS port (Figure 2).
Number Description
1 Power Cord in Power Port
2 On/Off Switch
3 LIS Port
4 USB Ports
5 Printer Port
FIGURE 1
FIGURE 2
3
41
2
5
ASPECT Reader User Guide 13
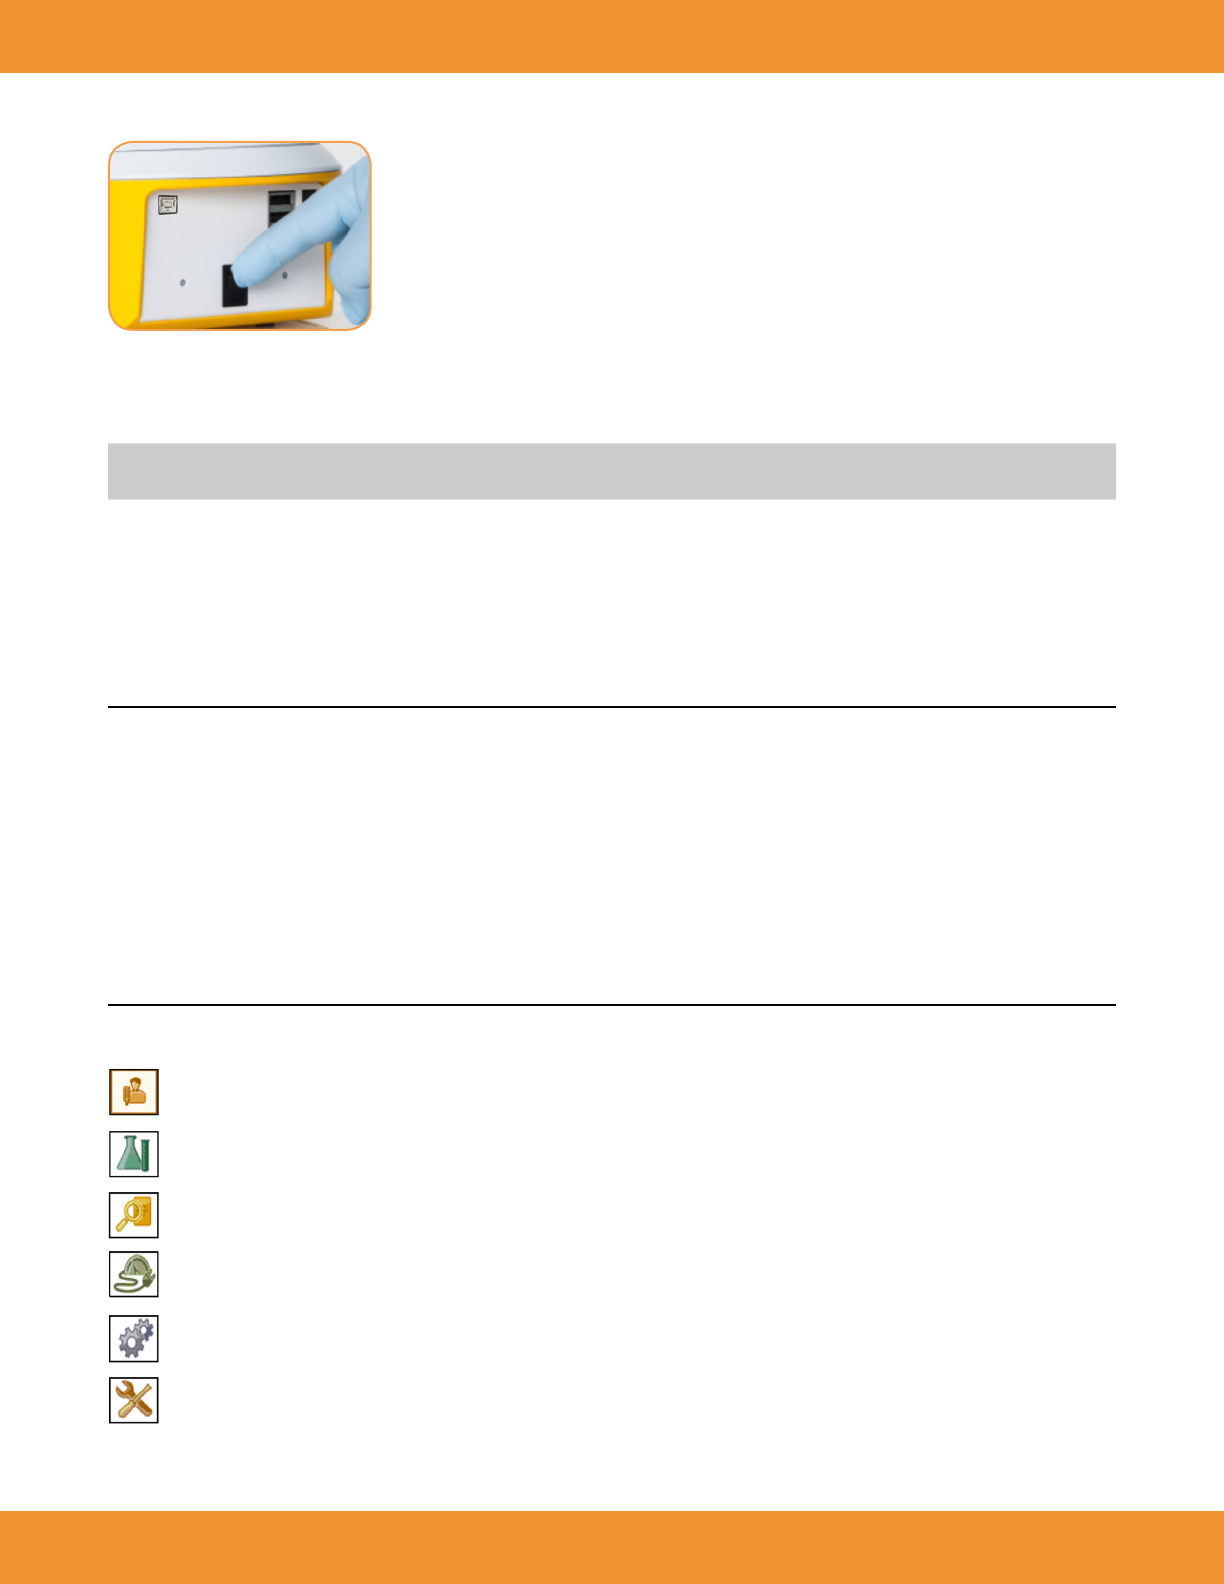
7. Press and hold the power switch located at the back of the reader to power the reader on (Figure 3). An initializing screen will be displayed.
8. Batteries may be inserted into the base of the reader for an optional power source. Refer to “Battery Power” on page 49.
9. Install the paper roll in the printer cavity. Refer to “Replacing the Paper Roll” on page 48-49.
10. Perform EQC (electronic quality control) on reader. Refer to “Electronic Quality Control (EQC)” on page 42-43.
NOTE: The EQC is a required function that checks the Internal analyzer optics and systems. This must performed every thirty (30) days or less,
as set by the supervisor.
11. If EQC and Liquid Quality Control (LQC) performance intervals are desired, refer to “QC Settings” on page 16-17.
12. If specic laboratory or hospital information for the print out of the reader is desired, refer to “Printer Settings” on page 19.
13. Review sections of this manual such as “Operation” prior to analyzing specimens for the rst time.
INITIAL SET-UP
The Supervisor Menu is only accessible for logon by a supervisor, and contains all supervisory functions.
In this chapter you will learn how to:
FIGURE 3
• set the displayed time and time format for
the reader
• select a desired language for the reader
• select QC Settings for Electronic QC (EQC)
• select transmit setup to LIS System
• set up printer settings
• read Reader information (current network
conguration)
• export data to a USB stick
• set the displayed date and date format for
the reader
• select QC settings for Liquid QC (LQC)
• select Time-out setup
• select transmit setup to Network Settings
• add, edit, delete users
• update rmware or languages
Run Patient —used to run patient samples. (The software defaults to this icon when powered on.)
LQC (Liquid Quality Control)—used to run control samples whenever specied by your laboratory’s quality control requirements.
Review Data—used to review patient results, liquid control results (LQC), electronic control results (EQC) and transmit results to a LIS.
Note: Menu items will be grayed out until data is available for review.
eQC (Electronic Quality Control)—used to perform an electronic control when the reader is set up; transported or moved; whenever specied
by your laboratory’s quality control requirements; or whenever there is a question regarding the performance of the ASPECT Reader.
Operator—used to view error logs and change operator settings such as time and date formats and language.
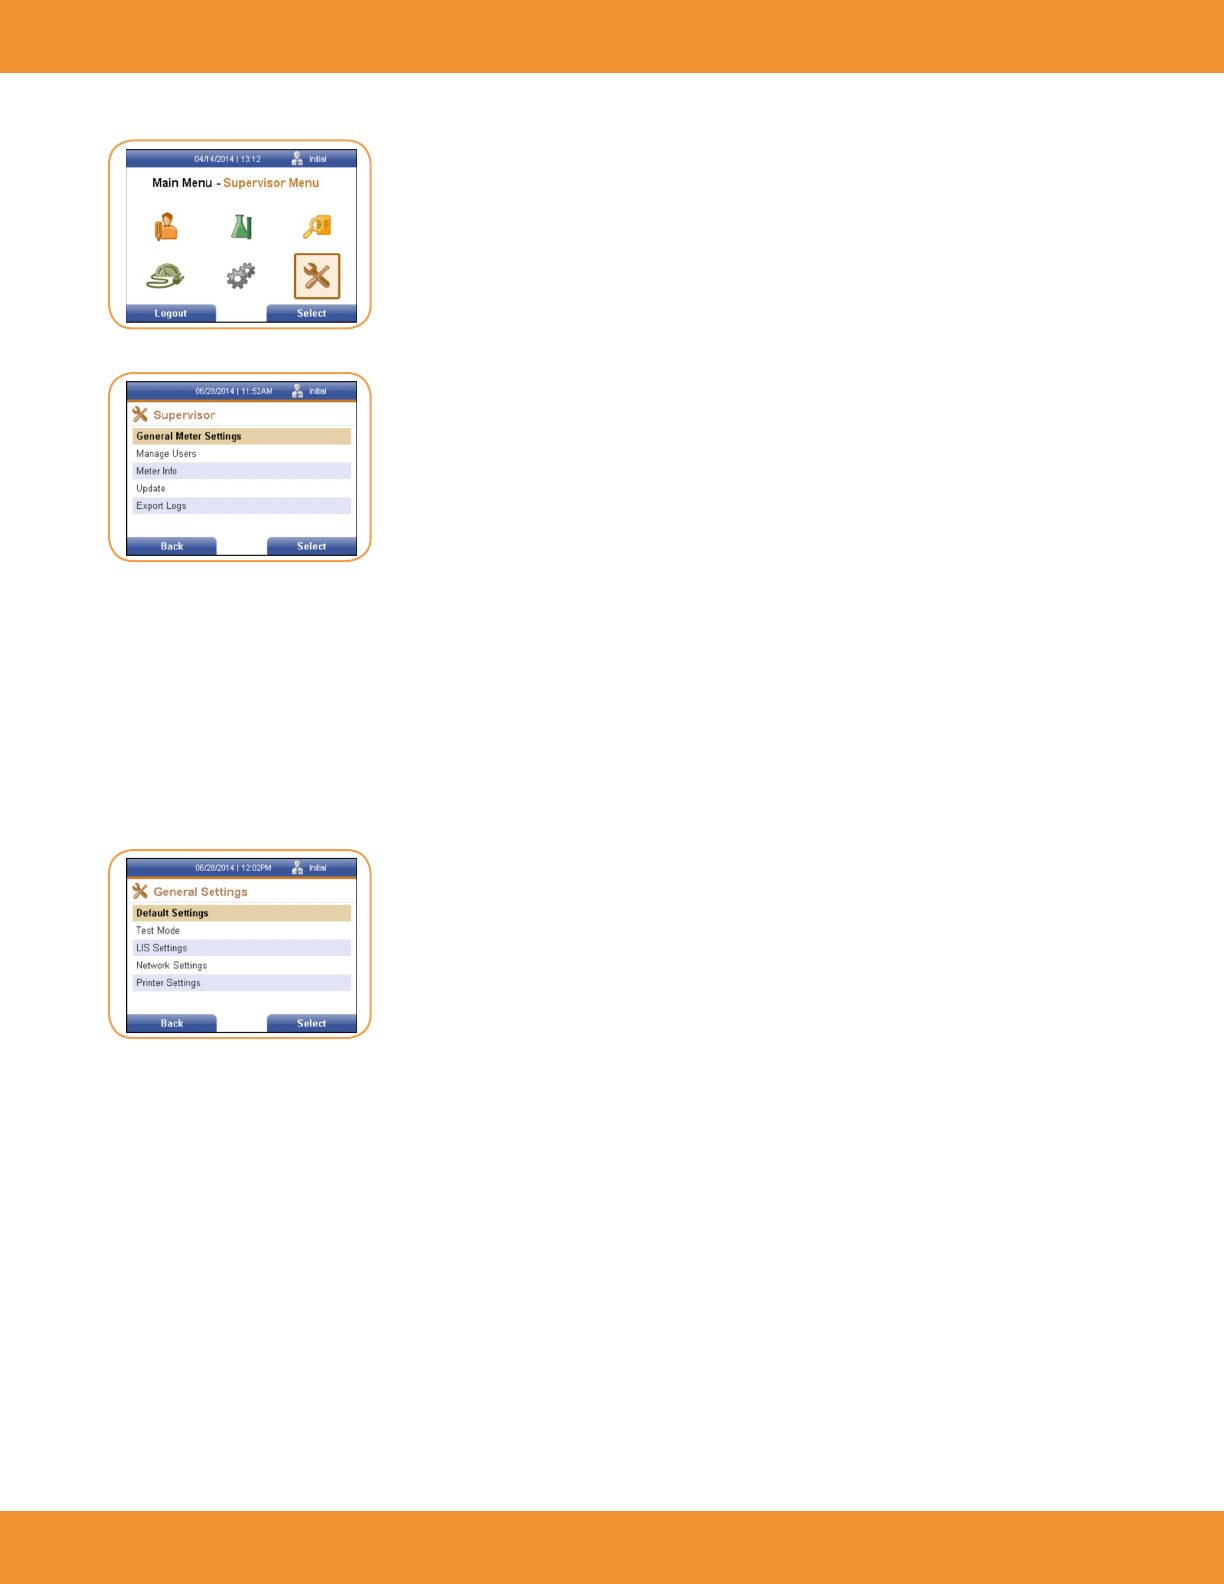
Supervisor—used to access all supervisory functions. (This icon is only accessible by supervisor)
The Main Menu contains the following items:
14 ASPECT Reader User Guide
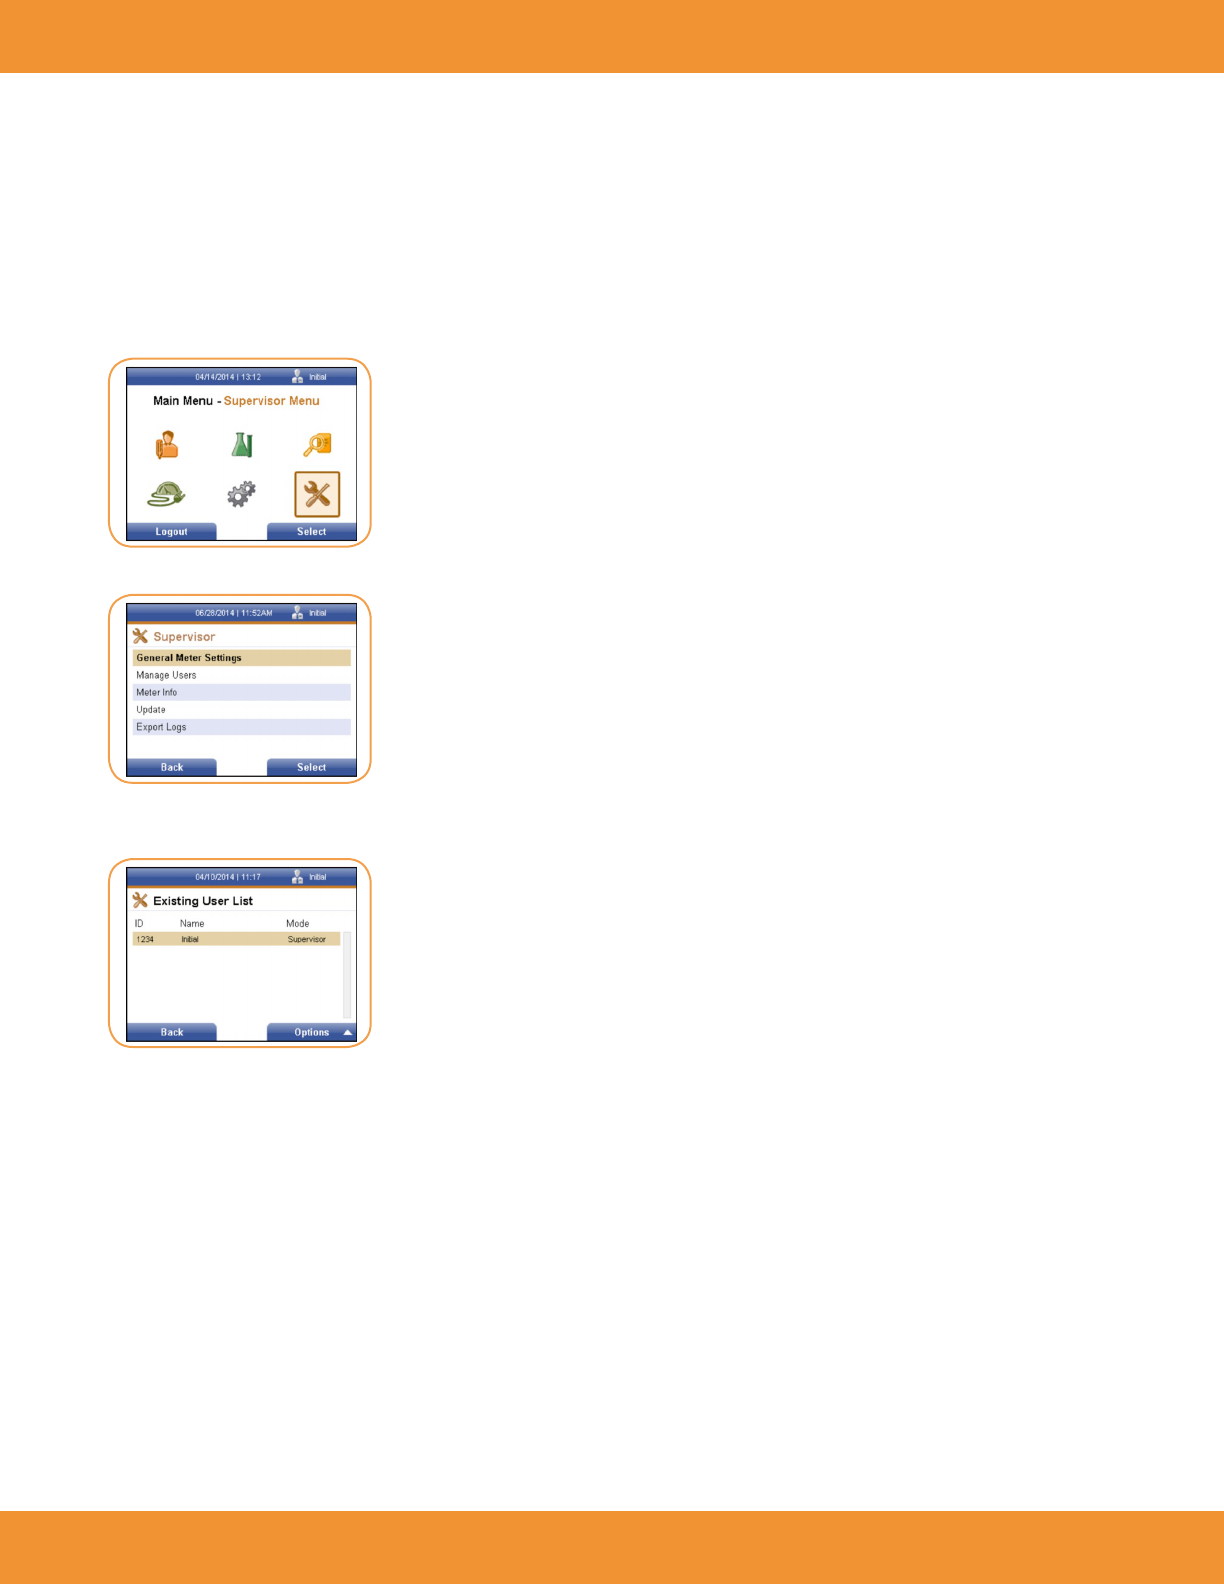
1. Using the [→] or [←] and the [↑] or [↓] keys, select the Supervisor Menu icon from the Main Menu screen (Figure 4).
The Supervisor screen is displayed (Figure 5).
The Supervisor screen allows the supervisor to:
• set general reader settings, such as time, date, language, QC settings, i.e. QC intervals and Time-out setup.
• add or delete users and edit existing users
• view reader information, i.e. relevant network information
• update rmware or languages
• view and print both instrument and handling error logs
General Reader Settings
1. Using the right soft key, select General Reader Settings. The General Settings screen is displayed (Figure 6).
The General Settings screen allows the supervisor to:
• set default reader settings, such as time, date, language, QC settings, i.e. QC intervals, and reader Time- out.
• select Test Mode settings
• set up LIS settings such as LIS availability, IP Address, Time-out, etc.
• set up Network settings such as IP Address and Port
• set up Printer settings such as auto print and facility information
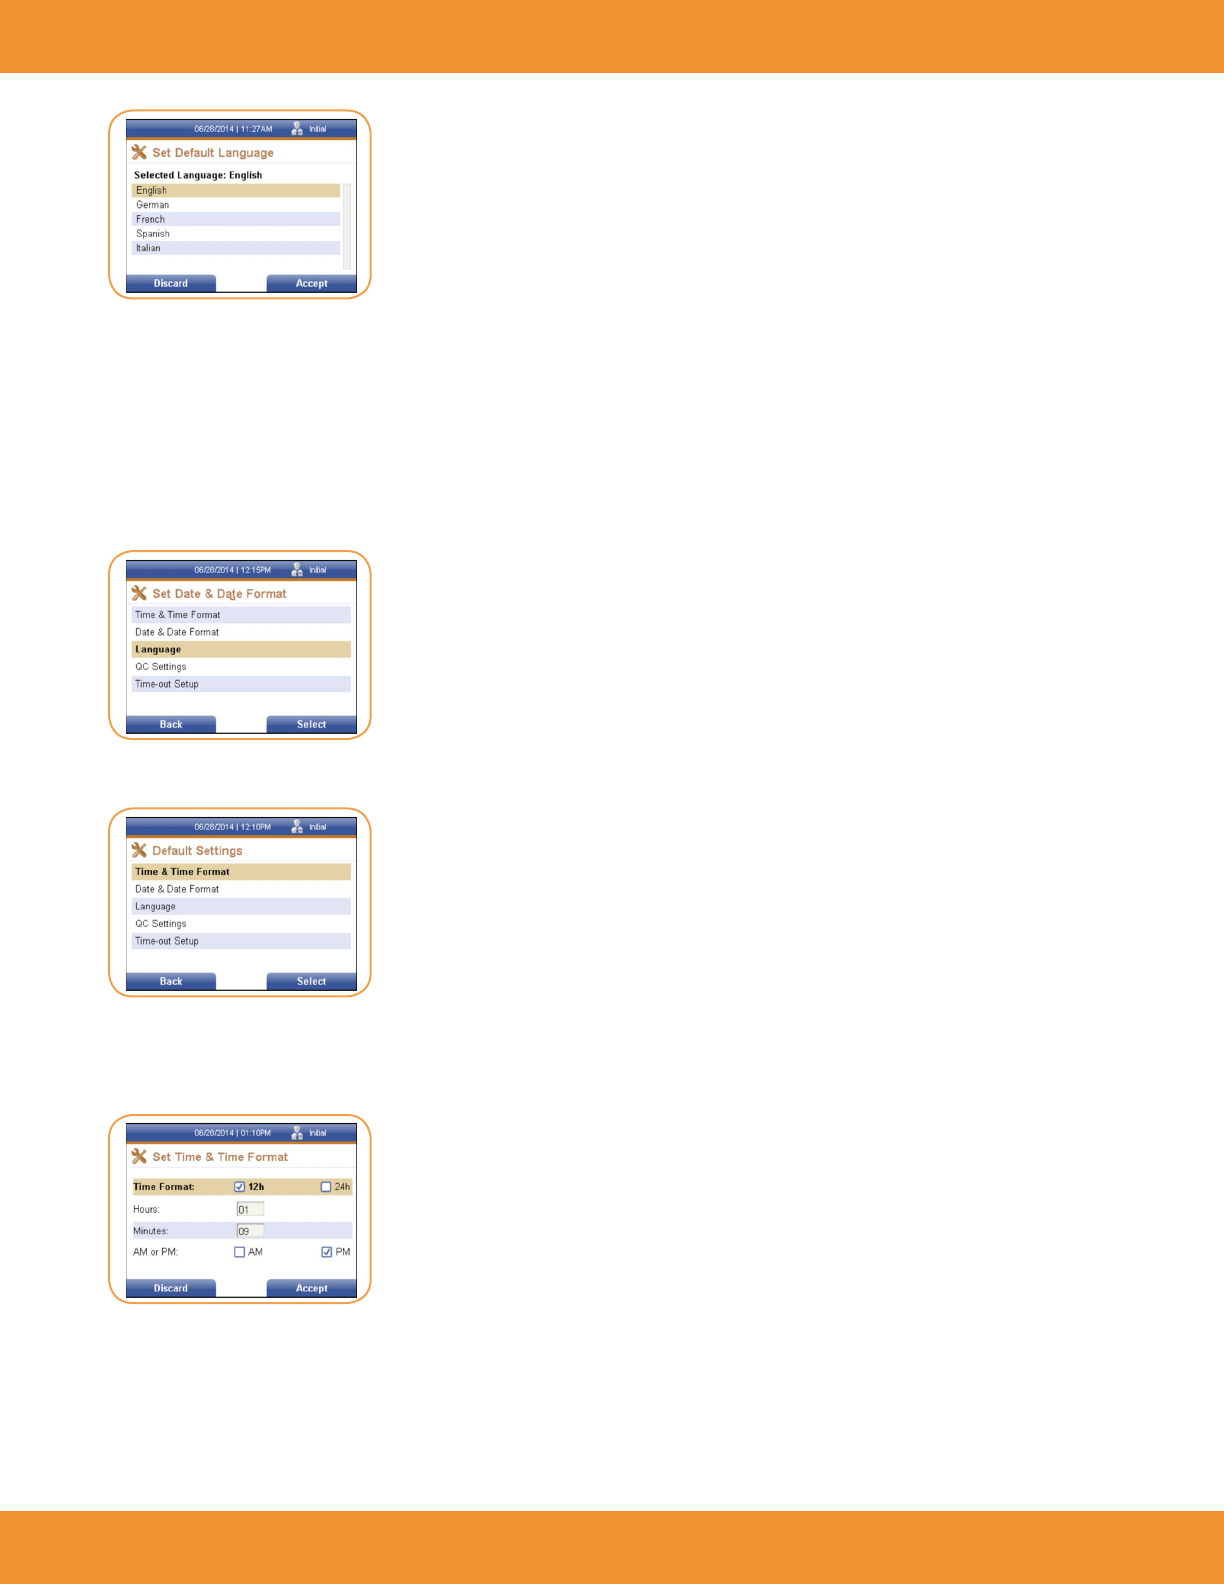
Language
1. Use the [↓] key to cursor down to the Language menu item. Press the right soft key to select it. The Language screen is displayed
(Figure 7).
FIGURE 5
FIGURE 6
FIGURE 4
ASPECT Reader User Guide 15
2. Use the [↑] or [↓] keys to toggle through the available languages listed:
• English
• German
• French
• Spanish
• Italian
3. Select the desired language, then press the right soft key to accept the changes or the left soft key to discard any changes. Either
returns the user to the previous menu (Figure 8).
Default Settings
Time & Time Format
1. Press the right soft key to select Time & Time Format. The Set Time & Time Format screen is displayed (Figure 10).
2. To set the time format, use the [←] or [→] keys to select the desired format, either 12 hour or 24 hour.
3. To set the current time, use the [↓] key to access the Hours: and Minutes: text elds, then use the numeric keys to enter the desired time.
4. To set either AM or PM, use the [←] or [→] keys to select the desired format.
5. Press the right soft key to Accept the changes to the time and time format, or press the left soft key to Dis- card the changes. Either selection
returns the user to the previous screen (Figure 11).
FIGURE 10
FIGURE 9
The General Settings screen defaults to the Default Settings menu item. Press the
right soft key to select it. The Default Settings screen is displayed (Figure 9).
FIGURE 7
FIGURE 8
16 ASPECT Reader User Guide
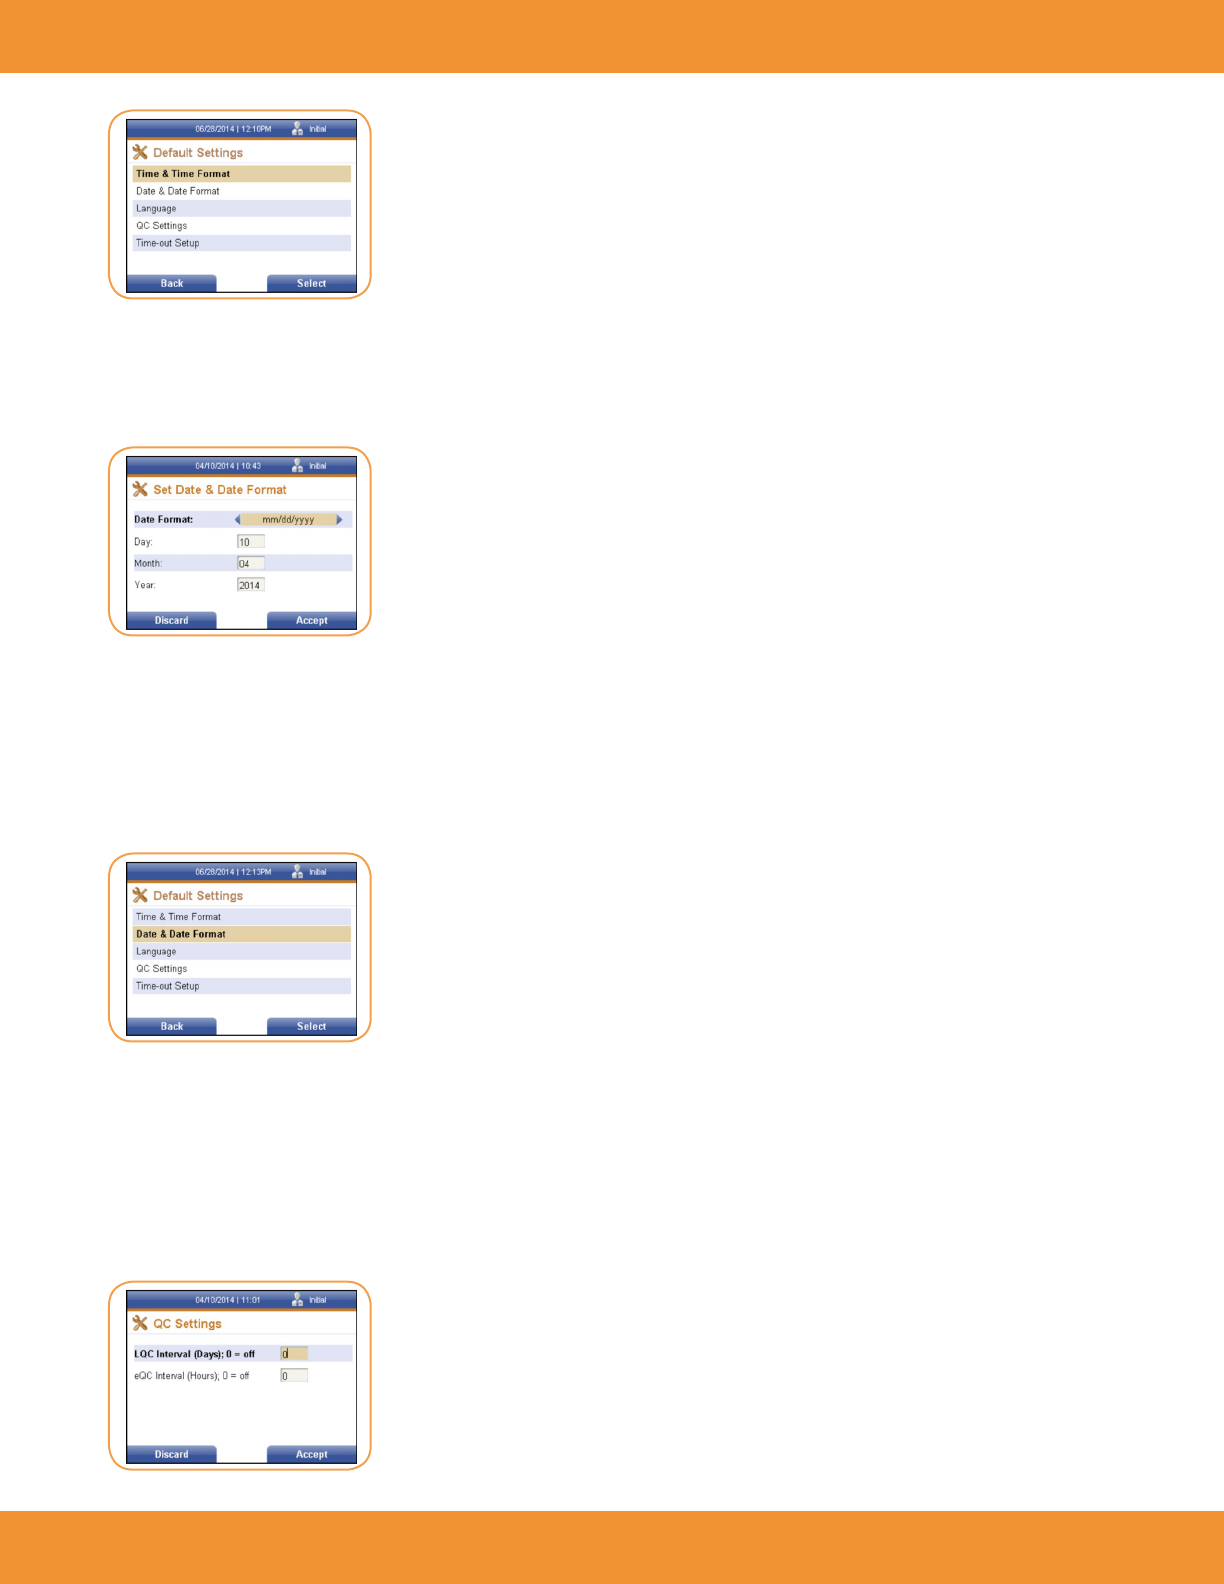
Date & Date Format
1. Use the [↓] key to cursor down to the Date & Date Format menu item. Press the right soft key to select it. The Date & Date Format screen is
displayed (Figure 12).
2. Use the [←] or [→] keys to toggle through the available date formats listed:
• mm/dd/yyyy
• dd/mm/yyyy
3. Select the desired format, then use the [↓] key to cursor down to the Day:, Month: and Year: text elds.
4. Using the numeric keypad, enter the desired information into the text elds, then press the right soft key to accept the changes
made, or the left soft key to discard any changes. Either returns the user to the previous menu (Figure 13).
QC Settings
The QC Settings screen allows the supervisor to enter QC intervals for Liquid QC testing in days, and QC intervals for electronic QC (EQC) testing in
hours. Zeros can also be entered into the text elds to set the QC settings to off.
1. Use the [↓] key to cursor down to the QC Settings menu item.
2. Press the right soft key to select it. The QC Settings (Figure 14)
FIGURE 14
FIGURE 11
FIGURE 12
FIGURE 13

ASPECT Reader User Guide 17
3. Enter the desired numbers in the text elds using the numeric keys on the reader, then press the right soft key to accept the changes made,
or select the left soft key to discard any changes made to the time selections. Either selection will return the user to the previous menu
(Figure 15).
Time-out Setup
The Time-out Setup screen allows the supervisor to switch the battery on or off, or set a time limit for switching the battery off. Also available
is the Switch Off Time Mains option. It can be set to off, or a time limit can be set for switching it off. These time-out options force the reader to
power down after the selected time interval, in minutes, after a period of inactivity on the reader, i.e., no key strokes, no measurement, etc.
1. Use the [↓] key to cursor down to the Time-out Setup menu item.
2. Press the right soft key to select it. The Time-out Setup screen is displayed (Figure 16).
1. Enter the desired times in the text elds using the numeric keys on the reader, then press the right soft key to accept the changes made to
the timing, or select the left soft key to discard any changes made to the time selections. Either selection will return the user to the previous
menu (Figure 17).
2. Press the left soft key to return to the General Settings screen (Figure 18).
Test Mode
The Test Mode screen allows the supervisor to select the default mode of the reader. Need more info here.
FIGURE 15
FIGURE 16
FIGURE 18
FIGURE 17

18 ASPECT Reader User Guide
1. Under the General Settings menu, use the [↓] key to select/highlight the Test Mode menu item.
2. Press the right soft key to select it. The Test Mode Settings screen is displayed (Figure 19).
3. Use the [←] or [→] keys to check the desired Default Mode option and the Temporary mode allowed option.
4. Once all information has been entered, select the right soft key to accept the information, or the left soft key to discard any
changes made. Either selection will return the user to the previous menu (Figure 20).
LIS Settings
The LIS Settings screen allows the supervisor to set LIS information, such as whether a LIS system is available, if the system should auto-transmit
the data and enter the LIS IP Address, Port Number and Time-out (in seconds).
1. Under the General Settings menu, use the [↓] key to select/highlight the LIS Settings menu item.
2. Press the right soft key to select it. The LIS Settings screen is displayed (Figure 21).
3. Enter the desired information using the numeric keys on the reader.
4. Use the [←] or [→] keys to check the Auto Transmit option and the LIS available option.
5. Once all information has been entered, select the right soft key to accept the information, or the left soft key to discard any changes made.
Either selection will return the user to the previous menu (Figure 22).
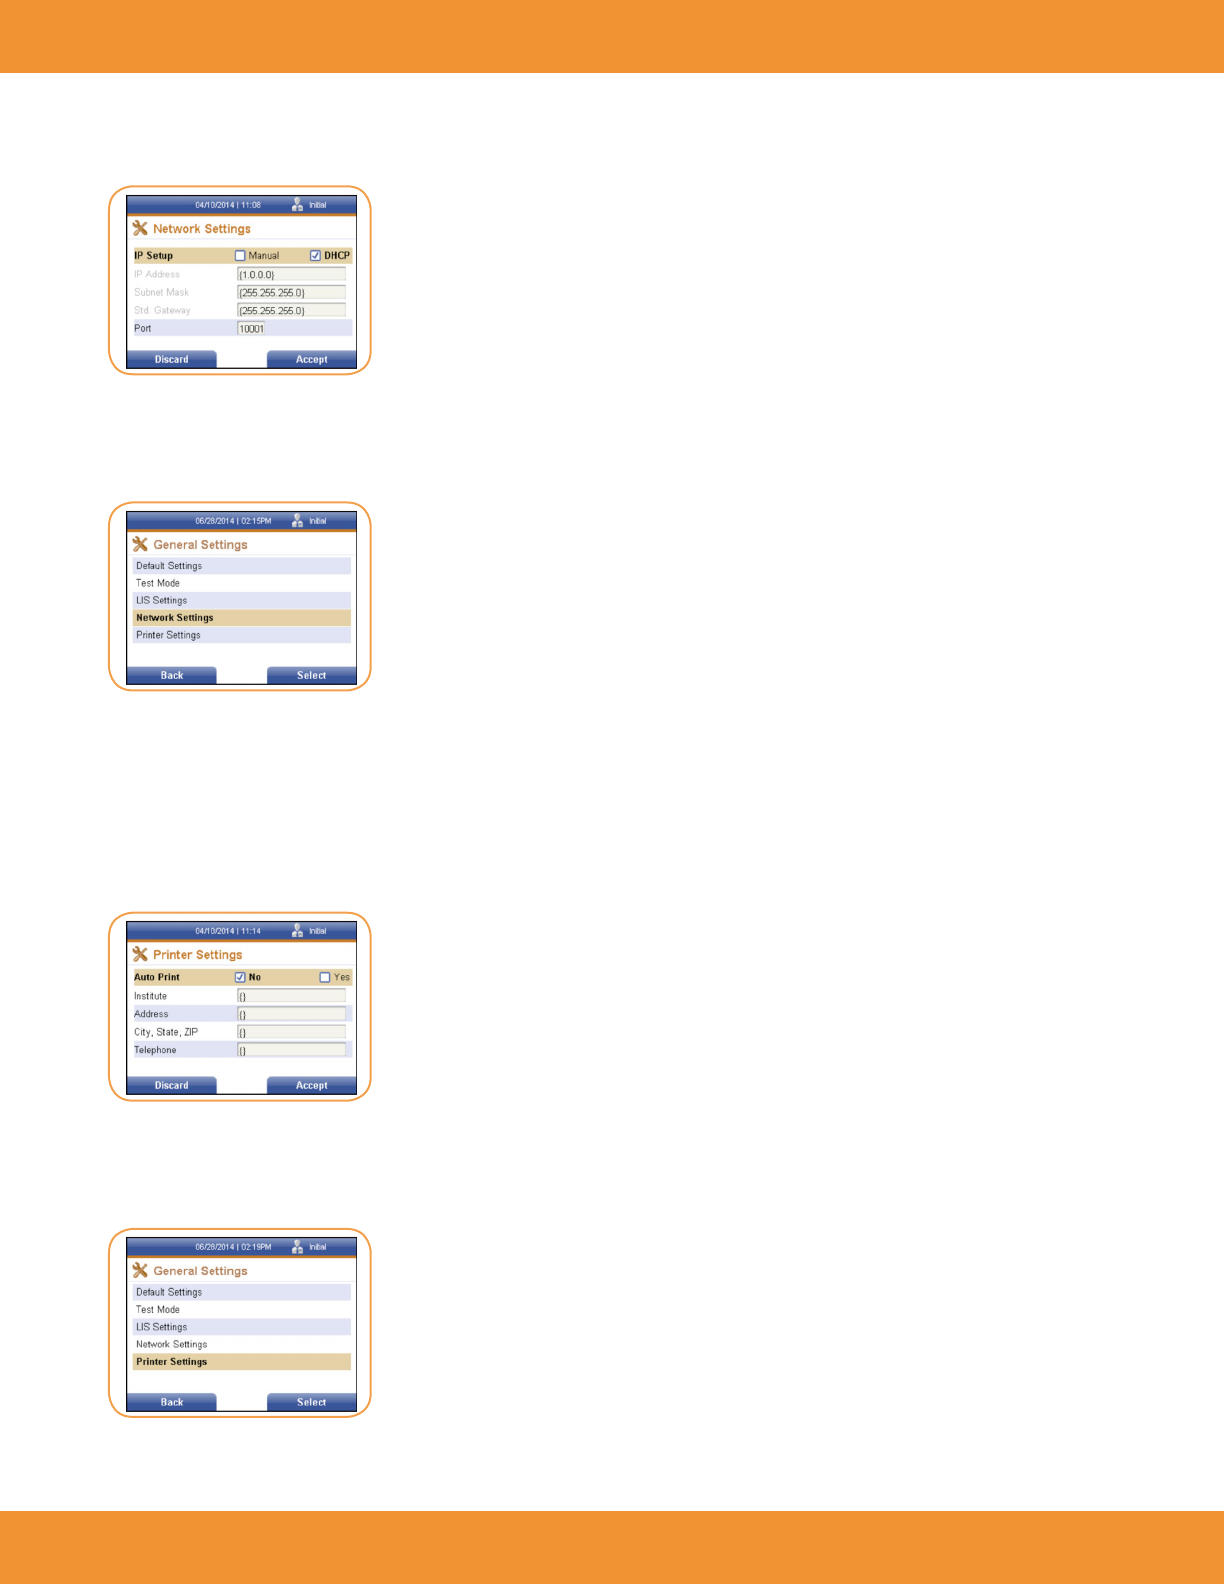
Network Settings
The Network Settings screen allows the supervisor to set network information, such as IP Setup, IP Address and Port Number.
FIGURE 19
FIGURE 20
FIGURE 22
FIGURE 21
ASPECT Reader User Guide 19
1. Under the General Settings menu, use the [↓] key to select/highlight the Network Settings menu item.
2. Press the right soft key to select it. The Network Settings screen is displayed (Figure 23).
3. Use the [←] or [→] keys to check the IP Setup option.
4. Enter the desired information using the numeric keys on the reader.
5. Once all information has been entered, press the right soft key to accept the information, or the left soft key to discard any changes made.
Either selection will return the user to the previous menu (Figure 24).
Printer Settings
The Printer Settings screen allows the supervisor to set printer information, such as Auto Print, and information to be displayed on the result print
out. A standard keyboard with a USB connector will be required (not supplied).
1. Under the General Settings menu, use the [↓] key to select/highlight the Printer Settings menu item.
2. Press the right soft key to select it. The Printer Settings screen is displayed (Figure 25).
3. Use the [←] or [→] keys to check the Auto Print option.
4. Using an external keyboard enter the desired information into each text eld. Use the [↓] key to cursor down to the desired text eld.
5. Once all information has been entered, press the right soft key to accept the information, or the left soft key to discard any changes made.
Either selection will return the user to the previous menu (Figure 26).
6. Press the left soft key to return to the Supervisor screen.
FIGURE 23
FIGURE 26
FIGURE 25
FIGURE 24
20 ASPECT Reader User Guide
Manage Users
Under the Manage Users menu item, the supervisor is able to:
• view list of existing users by ID number, name and access mode
• edit existing users
• delete users
• add new users
1. Using the [→] or [←] and the [↑] or [↓] keys, select the Supervisor Menu icon from the Main Menu screen (Figure 27).
The Supervisor screen is displayed (Figure 28).
1. Use the [↓] key to cursor down to the Manage Users menu item. Press the right soft key to select it. The Existing User List screen is
displayed (Figure 29).
FIGURE 27
FIGURE 28
FIGURE 29
ASPECT Reader User Guide 21
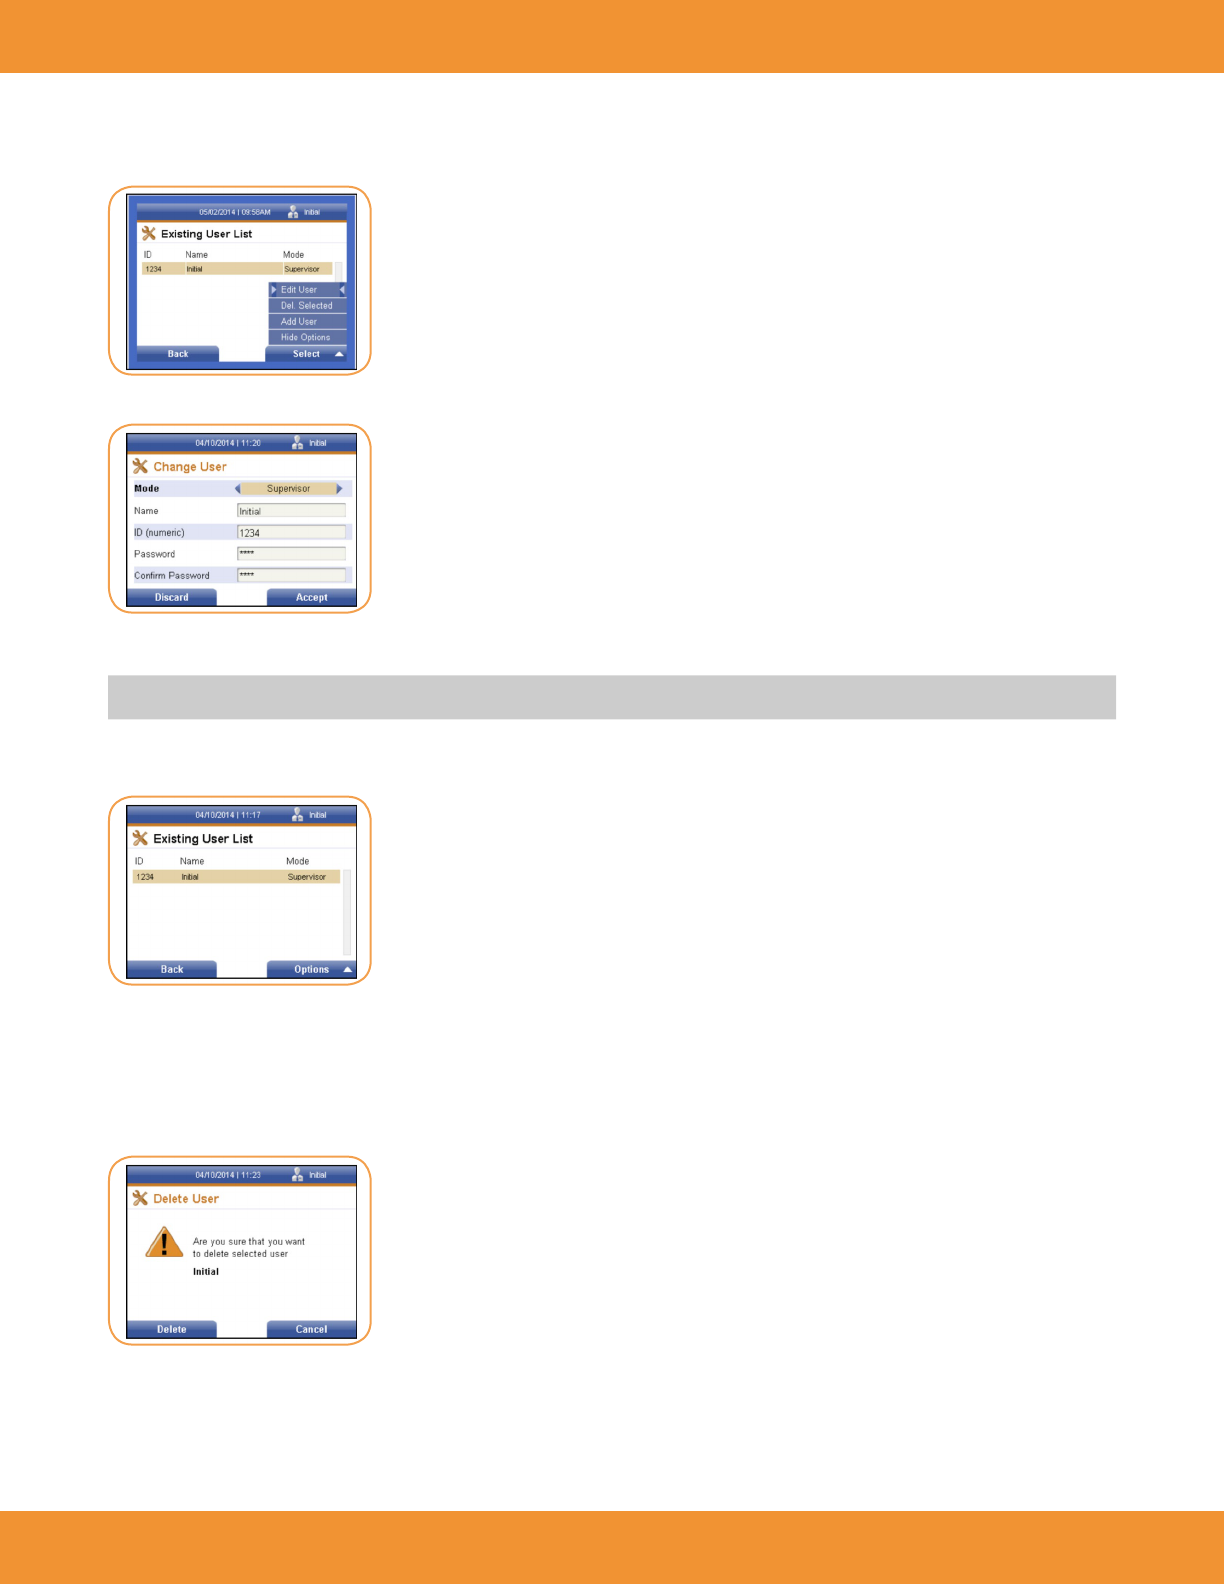
Edit User
1. Select the desired user. Press the right soft key to access the Options menu (Figure 30).
2. The Edit User menu item is already selected. Press the right soft key. The Change User screen is displayed (Figure 31).
3. Make the desired changes to the existing user information using the numeric keypad or keyboard.
NOTE: Use a standard keyboard with a USB connector.
4. Then press the right soft key to accept the changes made, or the left soft key to discard any changes. The Existing User List screen is
displayed (Figure 32).
Delete Selected User
1. Select/highlight the user to be deleted from the existing user list.
2. Press the right soft key to access the Options menu. Using the [↓] key cursor to the Del. Selected menu item and press the right soft key to
select it. The Delete User screen is displayed (Figure 33).
3. The Delete User is a conrmation window asking if the user listed in the screen is to be deleted. If the answer is yes, press the left soft key
to delete the user. If the answer is no, press the right soft key to cancel the deletion and return to the previous menu. Use the [←] or [→]
keys to check the Auto Print option.
FIGURE 30
FIGURE 31
FIGURE 32
FIGURE 33
22 ASPECT Reader User Guide
OPERATION
In this section you will learn how to:
• log on and off the reader as Operator
• run a sample
• insert cassette
• remove cassette
• view results
• transmit results
• print results
• view Operator settings
• view error logs
Log in
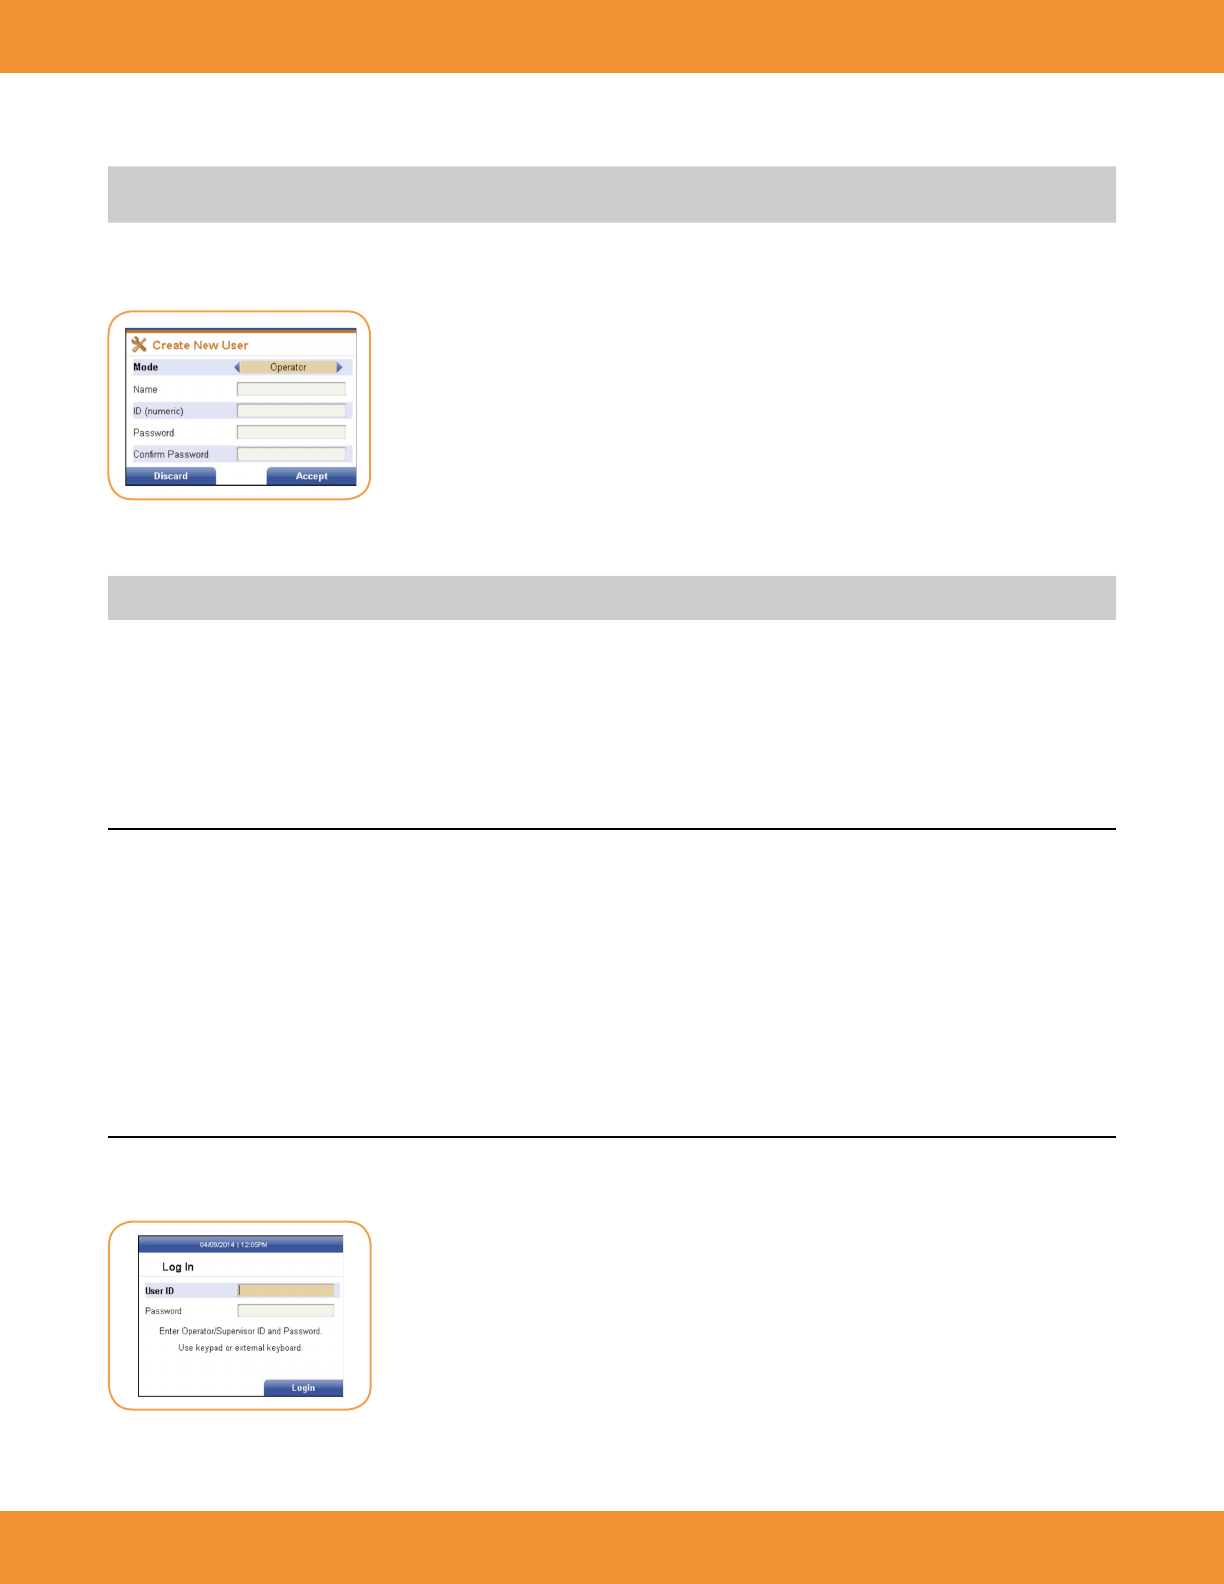
Add User
NOTE: A standard keyboard with a USB connector will be required (not supplied). From the Existing User screen, press the right soft key to
access the Options menu.
1. Using the [↓] key cursor to the Add User menu item and press the right soft key to select it. The Create New User screen is displayed
(Figure 34).
2. Select whether the user will have supervisor or operator access mode by using the [→] or [←] keys.
3. Using the [↓] key cursor to the next text elds and enter the information needed using a keyboard.
NOTE: The User ID and Passwords are numeric. These text elds will not accept alphabetic characters, unless a keyboard is connected.
4. When all information has been entered, press the right soft key to accept the information. The new user will be displayed on the Existing
User List screen.
5. If no changes are desired, press the left soft key to discard any changes made and return to the previous screen.
FIGURE 34
FIGURE 35
ASPECT Reader User Guide 23
1. Enter the desired User ID number using the numeric keypad, then cursor down using the [↓] arrow to the next text eld
NOTE: Initial set-up User ID and Password will be 1234 for both entries. It is recommended that a new User ID and Password be established for
Supervisor after initial set-up.
2. Enter the desired password, then press the right soft key to select Login. The Main Menu will be displayed (Figure 36).
Running a Sample
NOTE: Prior to running any sample, it is recommended that an EQC (Electronic Quality Control) cassette be run to verify the performance of the
reader. Refer to “Electronic Quality Control (EQC)” on page 42-43.
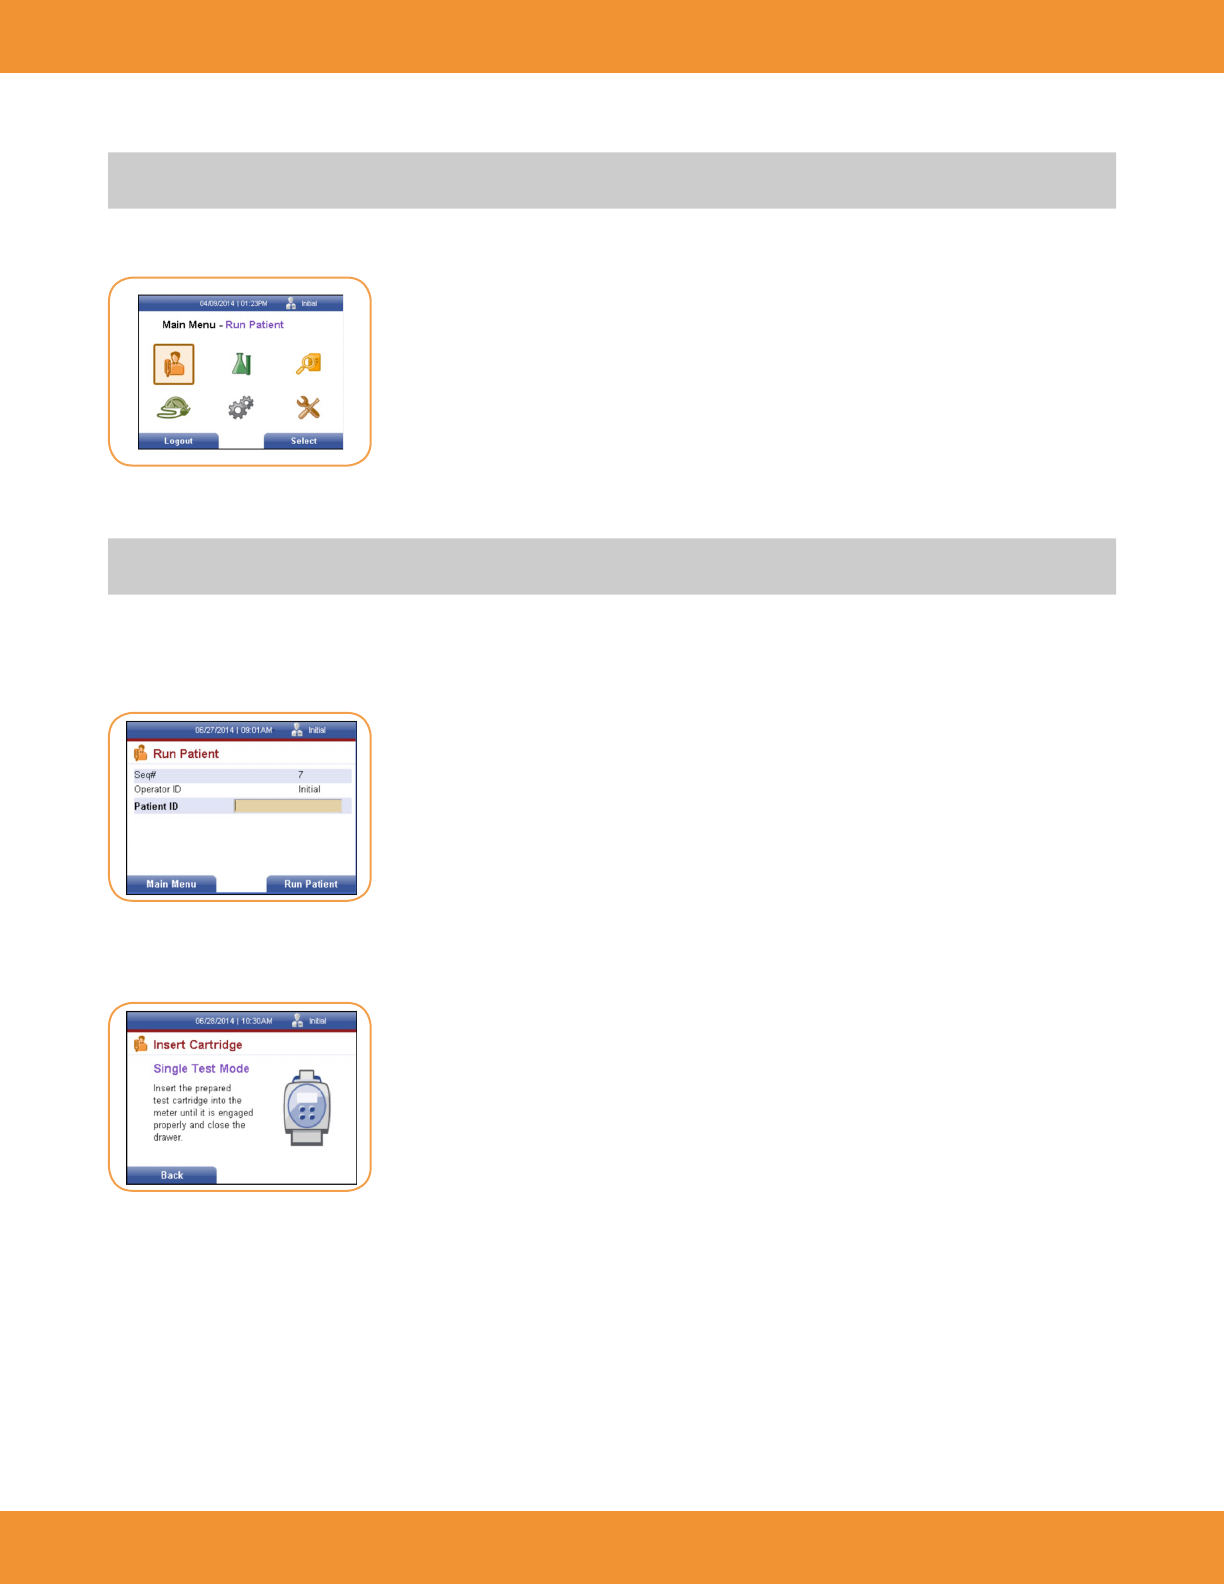
Once EQC has been successfully performed, select the Run Patient icon on the Main Menu.
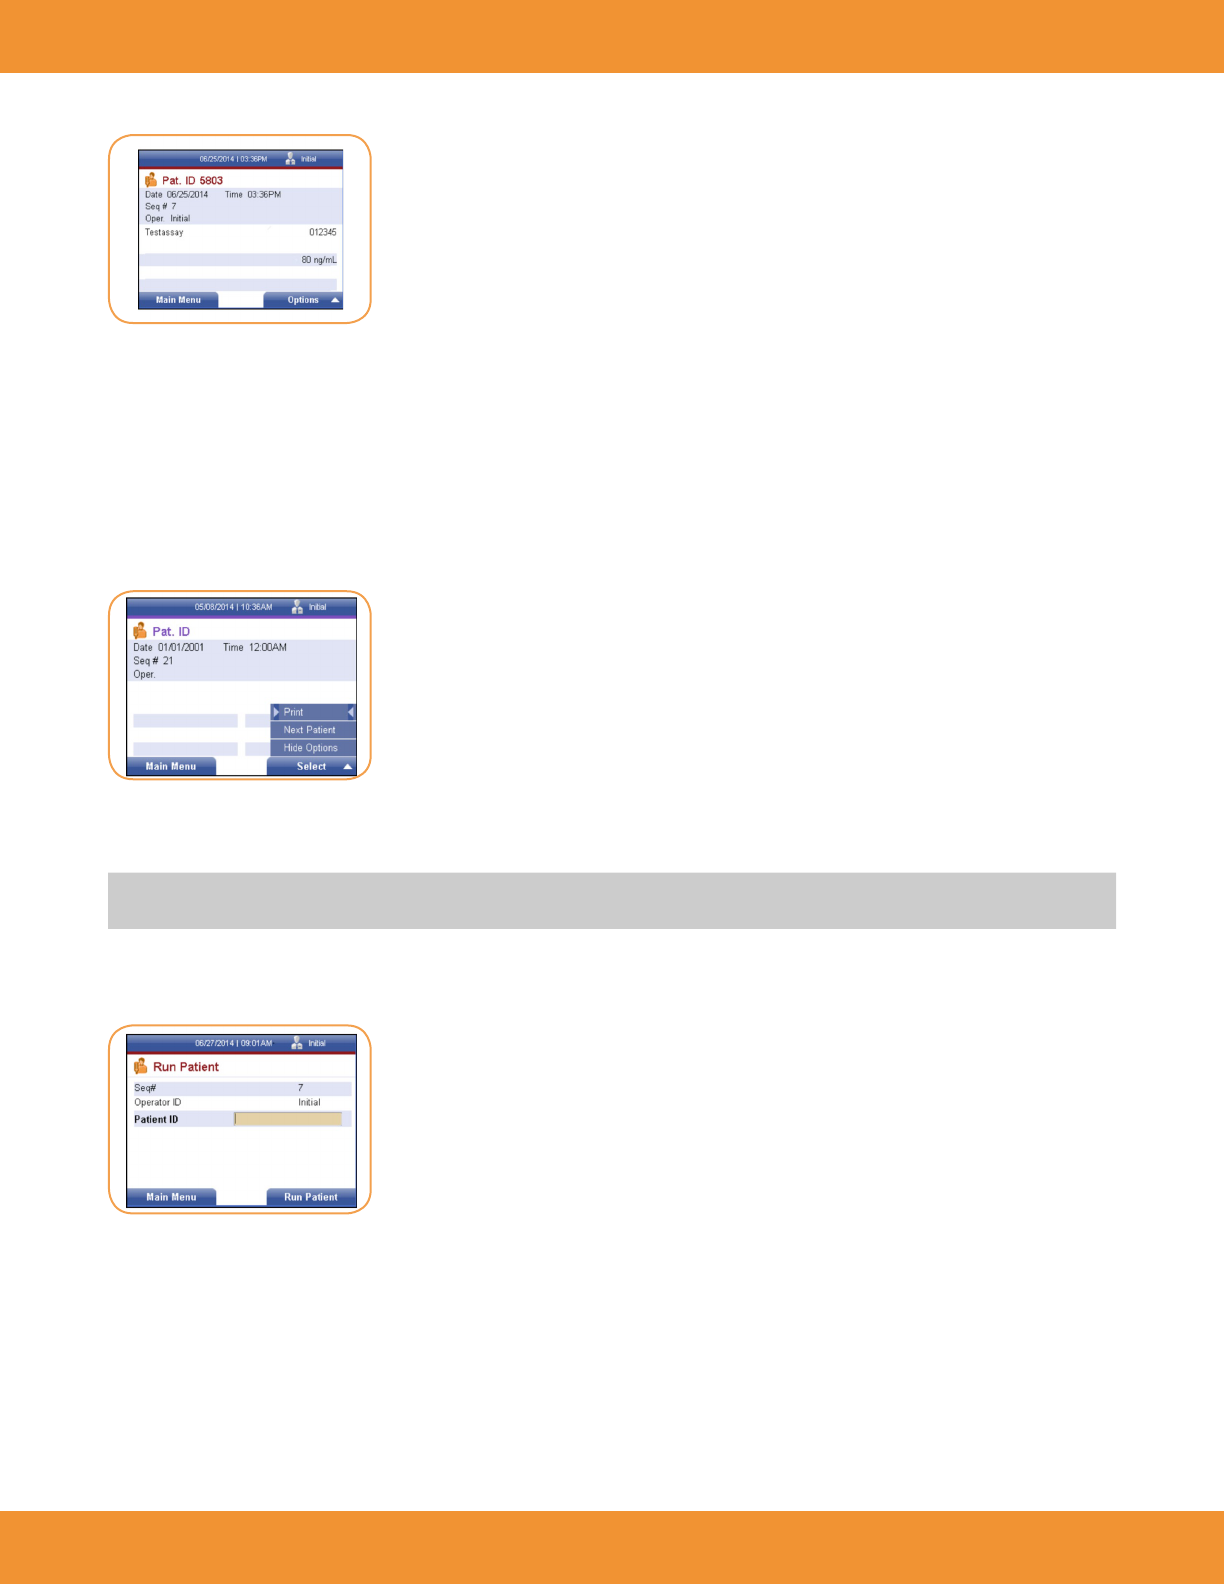
1. Press the right soft key to select the Run Patient icon. The Run Patient screen will be displayed (Figure 37).
The latest sequence number will be displayed, as well as the Operator ID of the person logged into the reader. The Patient ID text eld is selected.
2. Enter the Patient ID using the numeric keys, then select the right soft key. The Insert Cartridge screen will be displayed (Figure 38).
FIGURE 36
FIGURE 37
FIGURE 38
24 ASPECT Reader User Guide
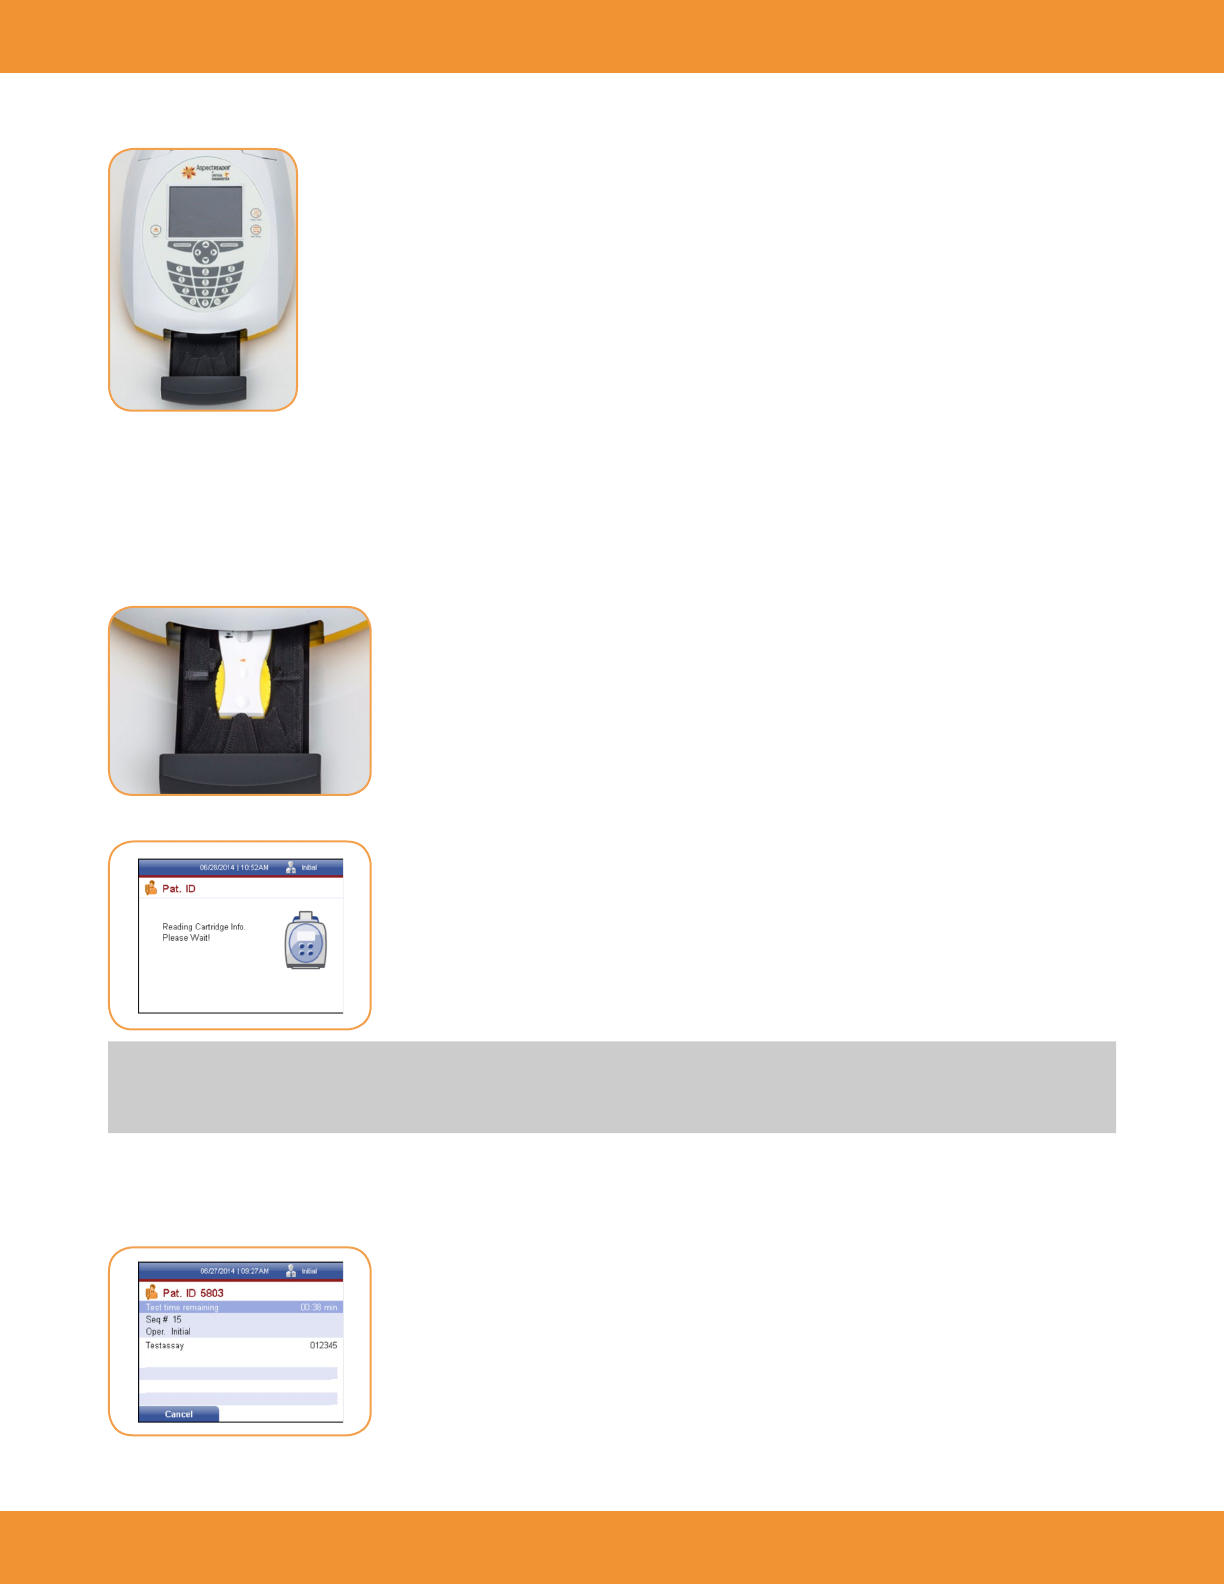
3. The cassette drawer will open (Figure 39).
Cassette Preparation
Follow proper infection control guidelines for handling all blood samples and anything that comes in contact with blood.
1. Follow the Instructions For Use for the test being performed to prepare the test cassette for the reader.
2. After preparing the test cassette, immediately insert the cassette into the reader. (Figure 40).
3. Close the drawer. A reading cartridge screen will be displayed (Figure 41).
NOTE: Each test cassette includes an internal control check (control line on test cassette) that is run automatically with every sample to ensure
that there is proper ow in the cassette. If the automatic check of this built-in control is not within acceptable limits, a test result will not be
reported. The reader will display an error message and the test must be repeated using a new cassette.
Once the cassette information has been read and veried by the ASPECT Reader the analysis will start.
The Patient ID screen will be displayed, showing the time remaining for the testing (Figure 42).
FIGURE 40
FIGURE 41
FIGURE 42
FIGURE 39
F
ASPECT Reader User Guide 25
The ASPECT Reader measures the test automatically and the result is displayed on the screen in ng/mL (Figure 43).
Removing Cassette
1. To open the cassette drawer, press the eject button. The reader will automatically open the cassette drawer to allow removal of the cassette.
2. Dispose of cassette according to Country, Federal, Provincial, State and local regulations.
Printing Results
1. To print patient results, press the right soft key to select Options. The Option menu will be displayed (Figure 44).
2. The Print option is selected. Press the right soft key to print patient results. Printing will appear at the bottom of the Pat. ID screen, and the
reader will print out the result.
NOTE: Auto print may be selected by the Supervisor under “Printer Settings” on page 106 to automatically print any patient results once testing
is nished.
3. To run another test, use the [↓] key to Next Patient menu item. Press the right soft key to select it. The Run Patient screen will be displayed,
ready for the next Patient ID number to be entered (Figure 45).
Transmitting Results
Patient results may be transmitted to a LIS system if desired. Refer to “LIS Settings” on page 18 of the Supervisor chapter.
FIGURE 43
FIGURE 44
FIGURE 45
26 ASPECT Reader User Guide
REVIEW DATA AND ERROR LOG
In this chapter you will learn how to:
• review patient results
• review Liquid QC results (LQC)
• review Electronic QC results (EQC)
• reviewing Error Log
• send results to LIS
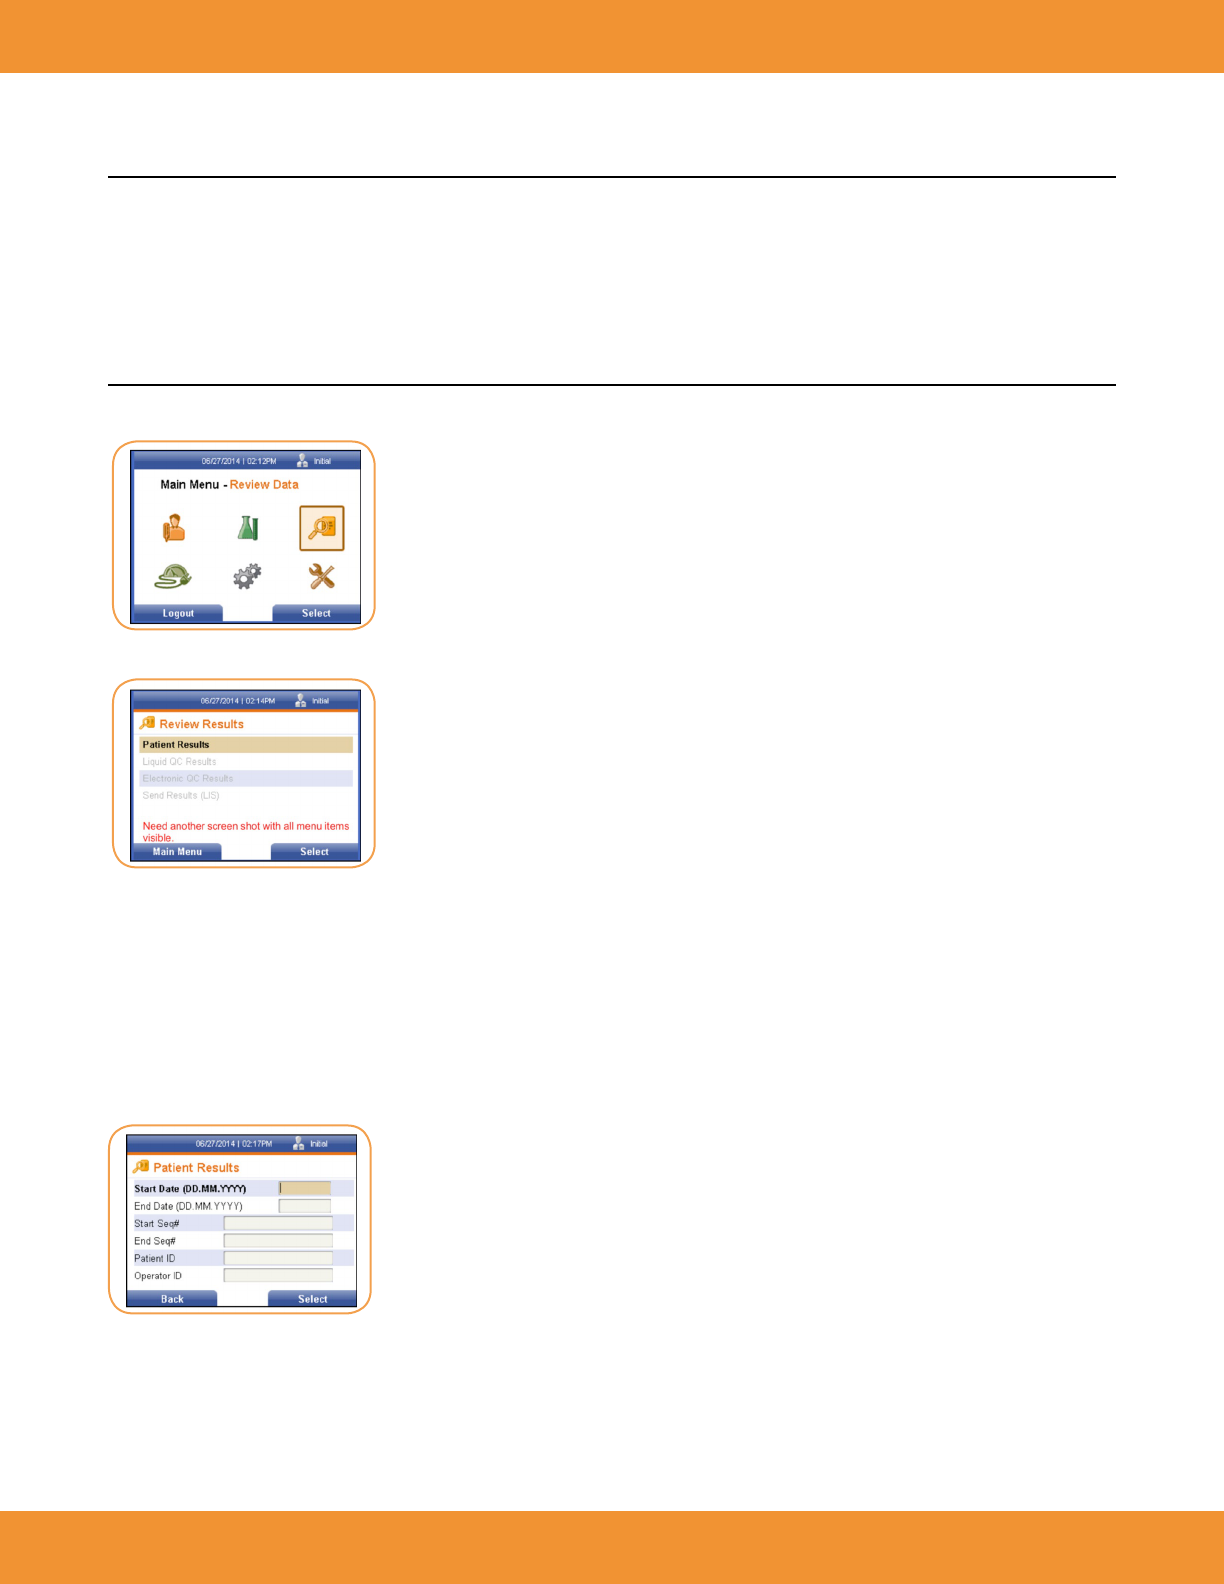
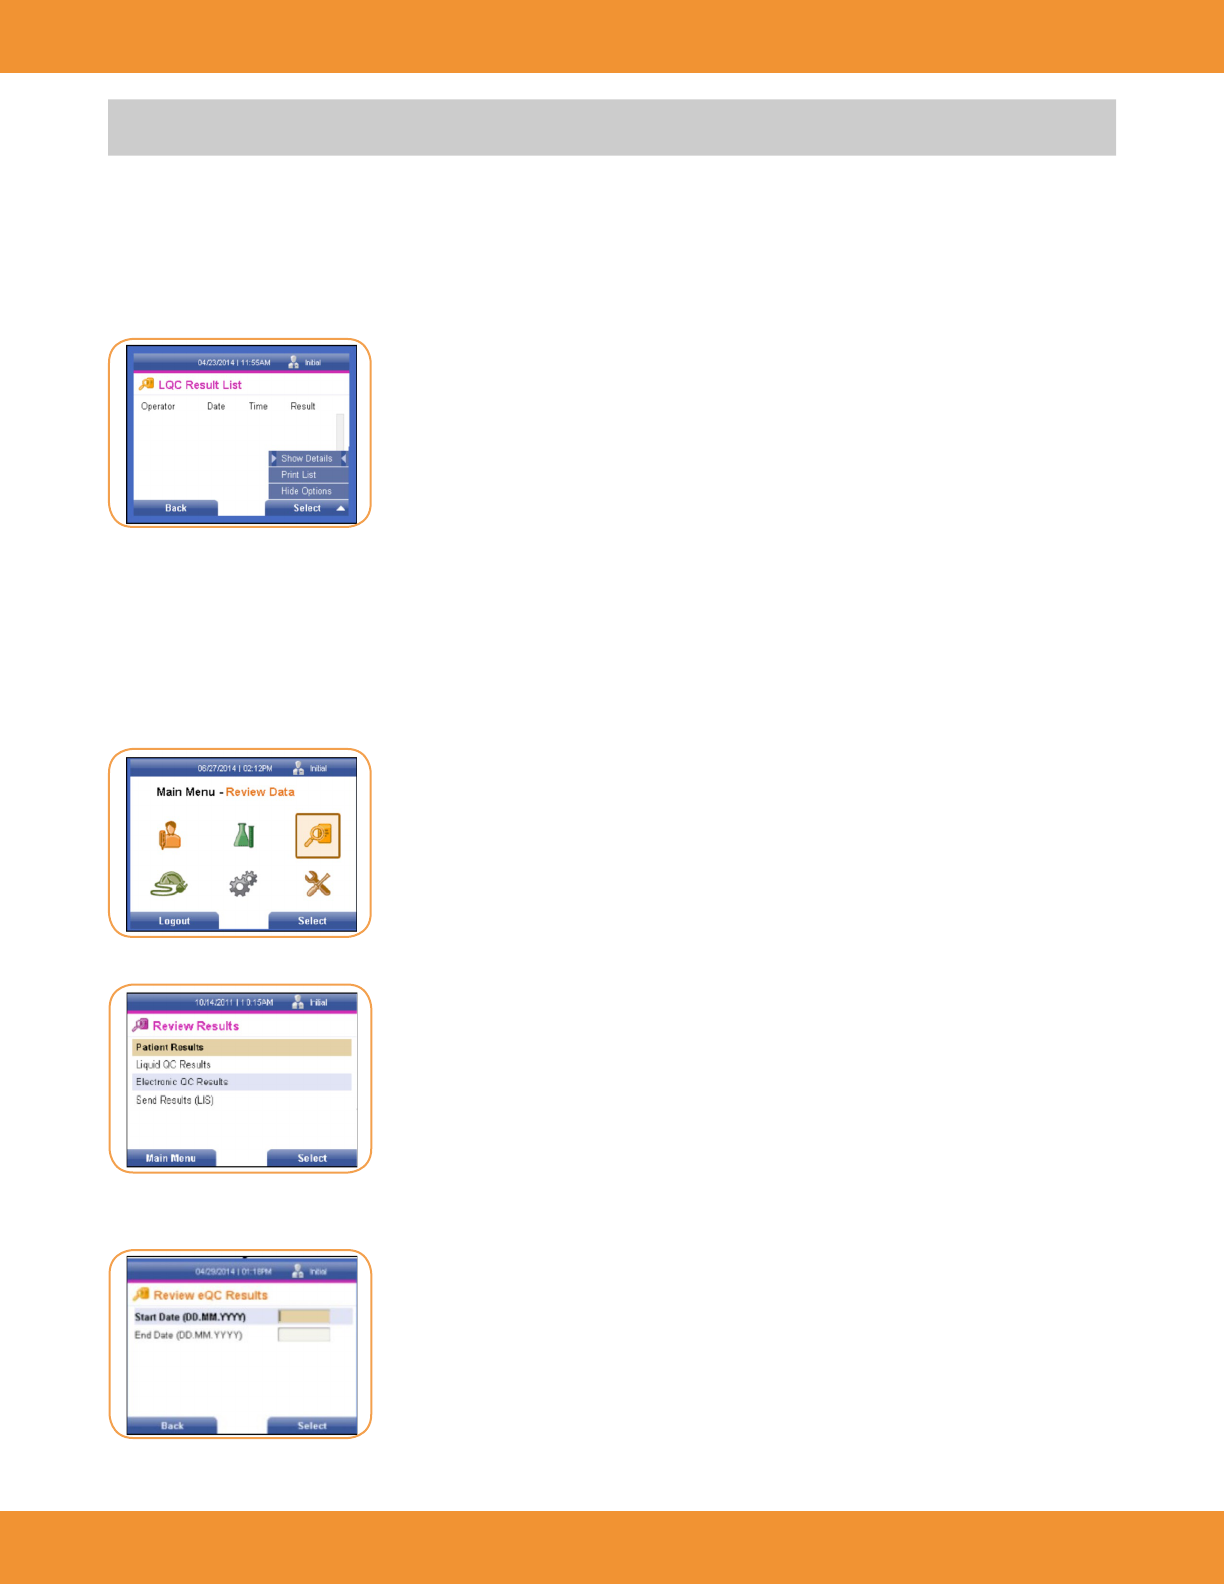
1. Using the [→] or [←] keys, select the Review Data icon from the Main Menu screen (Figure 46).
The Review Results screen is displayed (Figure 47).
The Review Results screen allows the user to:
• review patient results by either start and end date, start and end sequence numbers, patient ID or operator ID.
• review Liquid QC (LQC) results by start and end date
• review electronic QC (EQC) by start and end date
• send results to a LIS system
Review Patient Results by Date
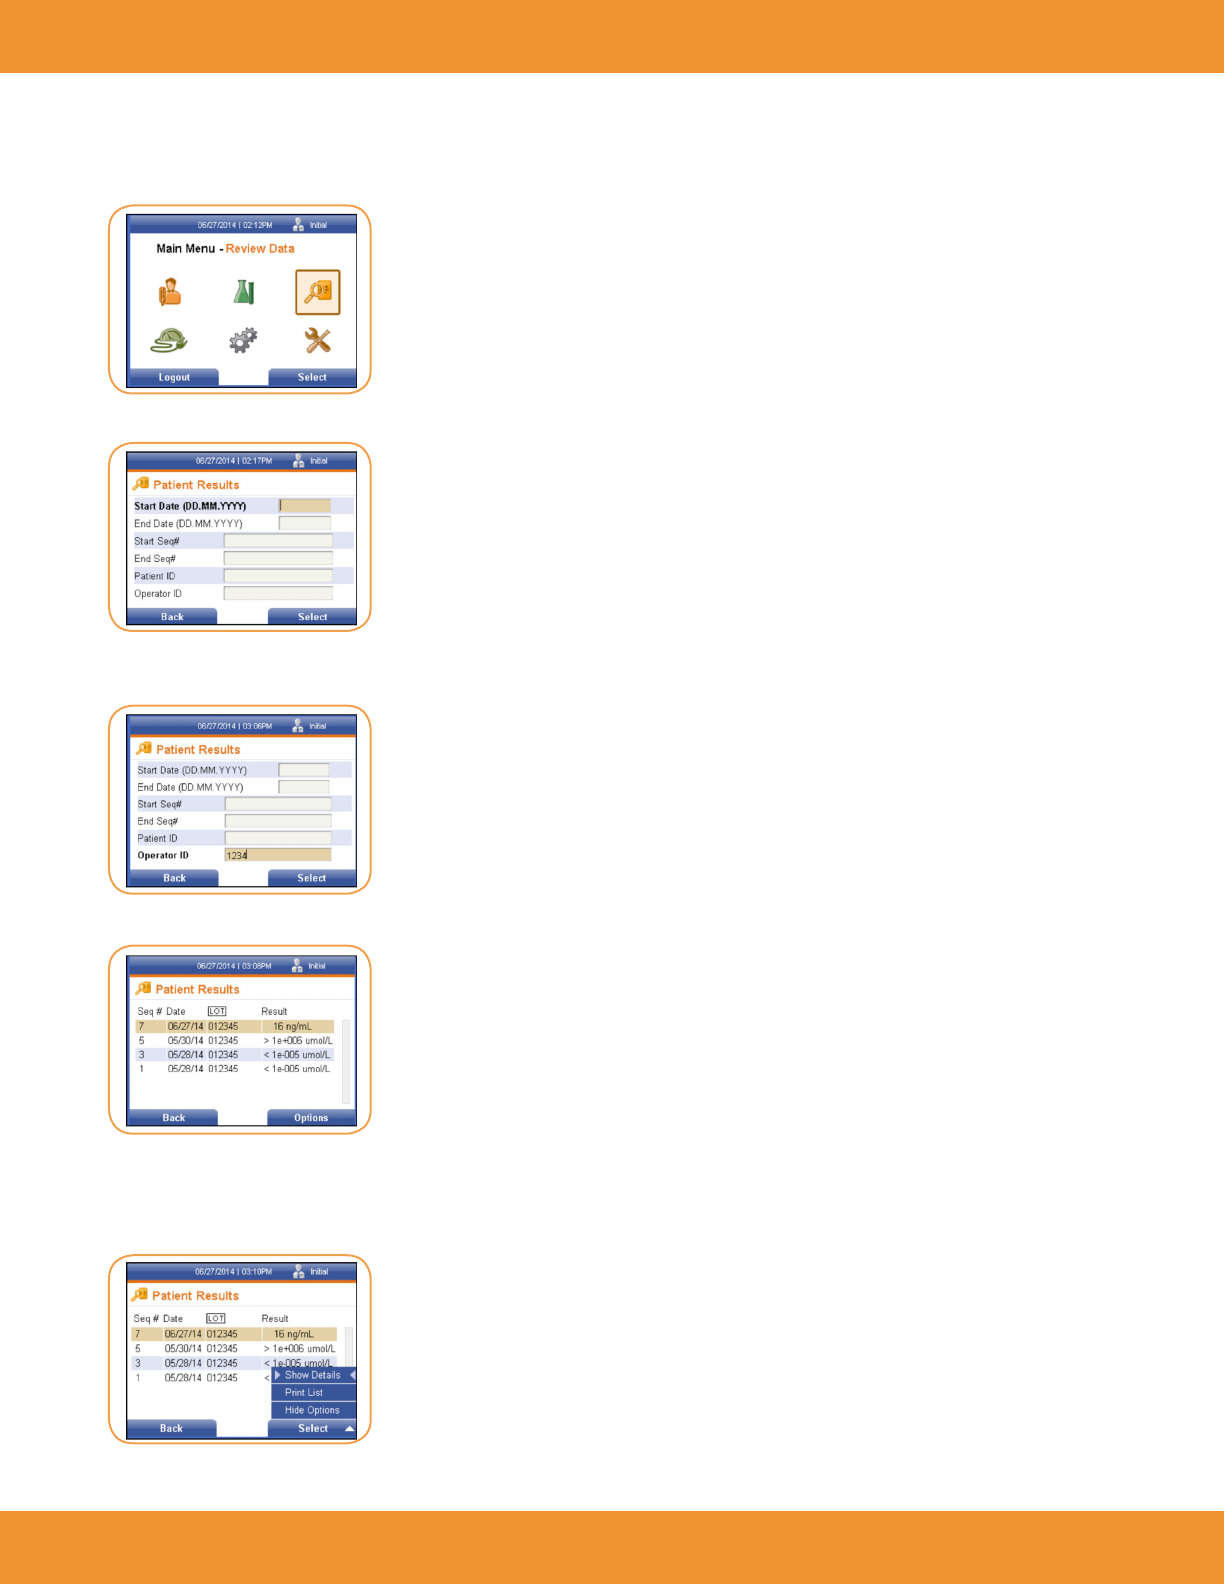
1. Using the right soft key, select Patient Results. The Patient Results screen is displayed (Figure 48).
2. To view desired results by date, enter a start date using the numeric keys on the keypad in the format shown.
3. Use the [↓] key to cursor to the next text eld.
FIGURE 46
FIGURE 47
FIGURE 48
ASPECT Reader User Guide 27
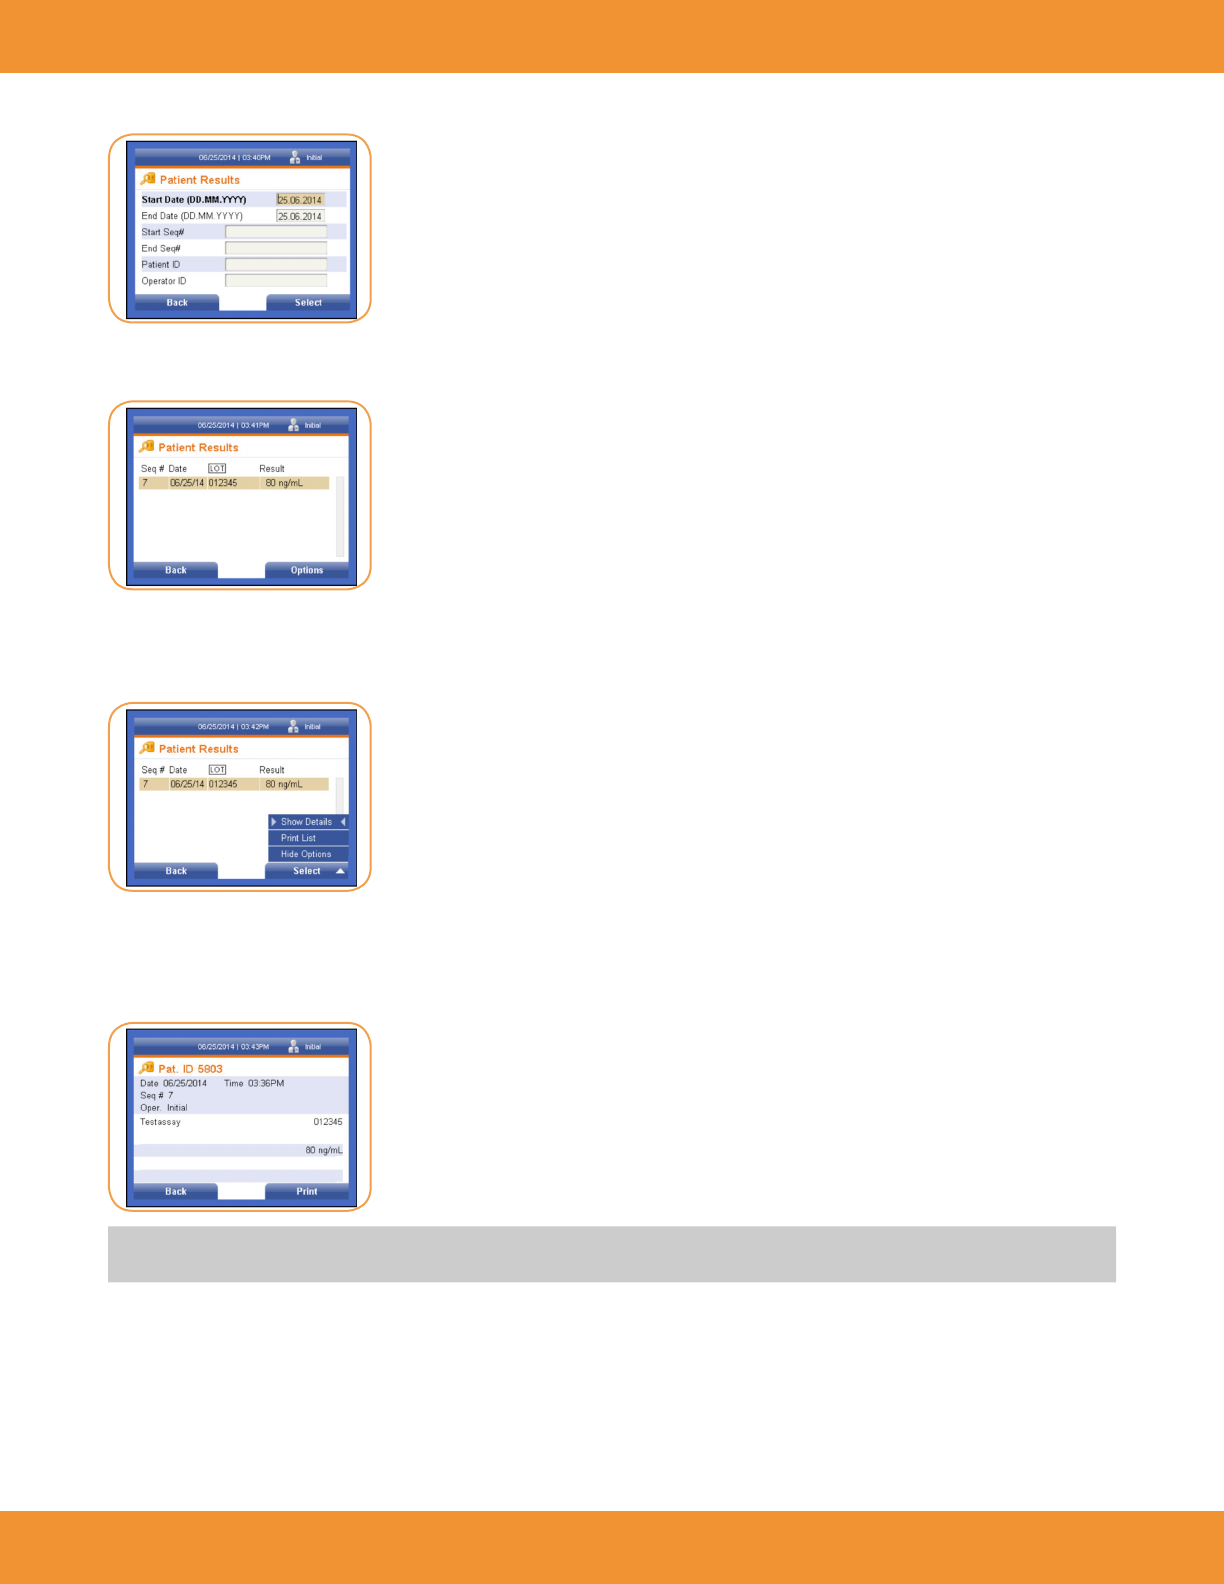
4. Enter an end date using the format shown (Figure 49).
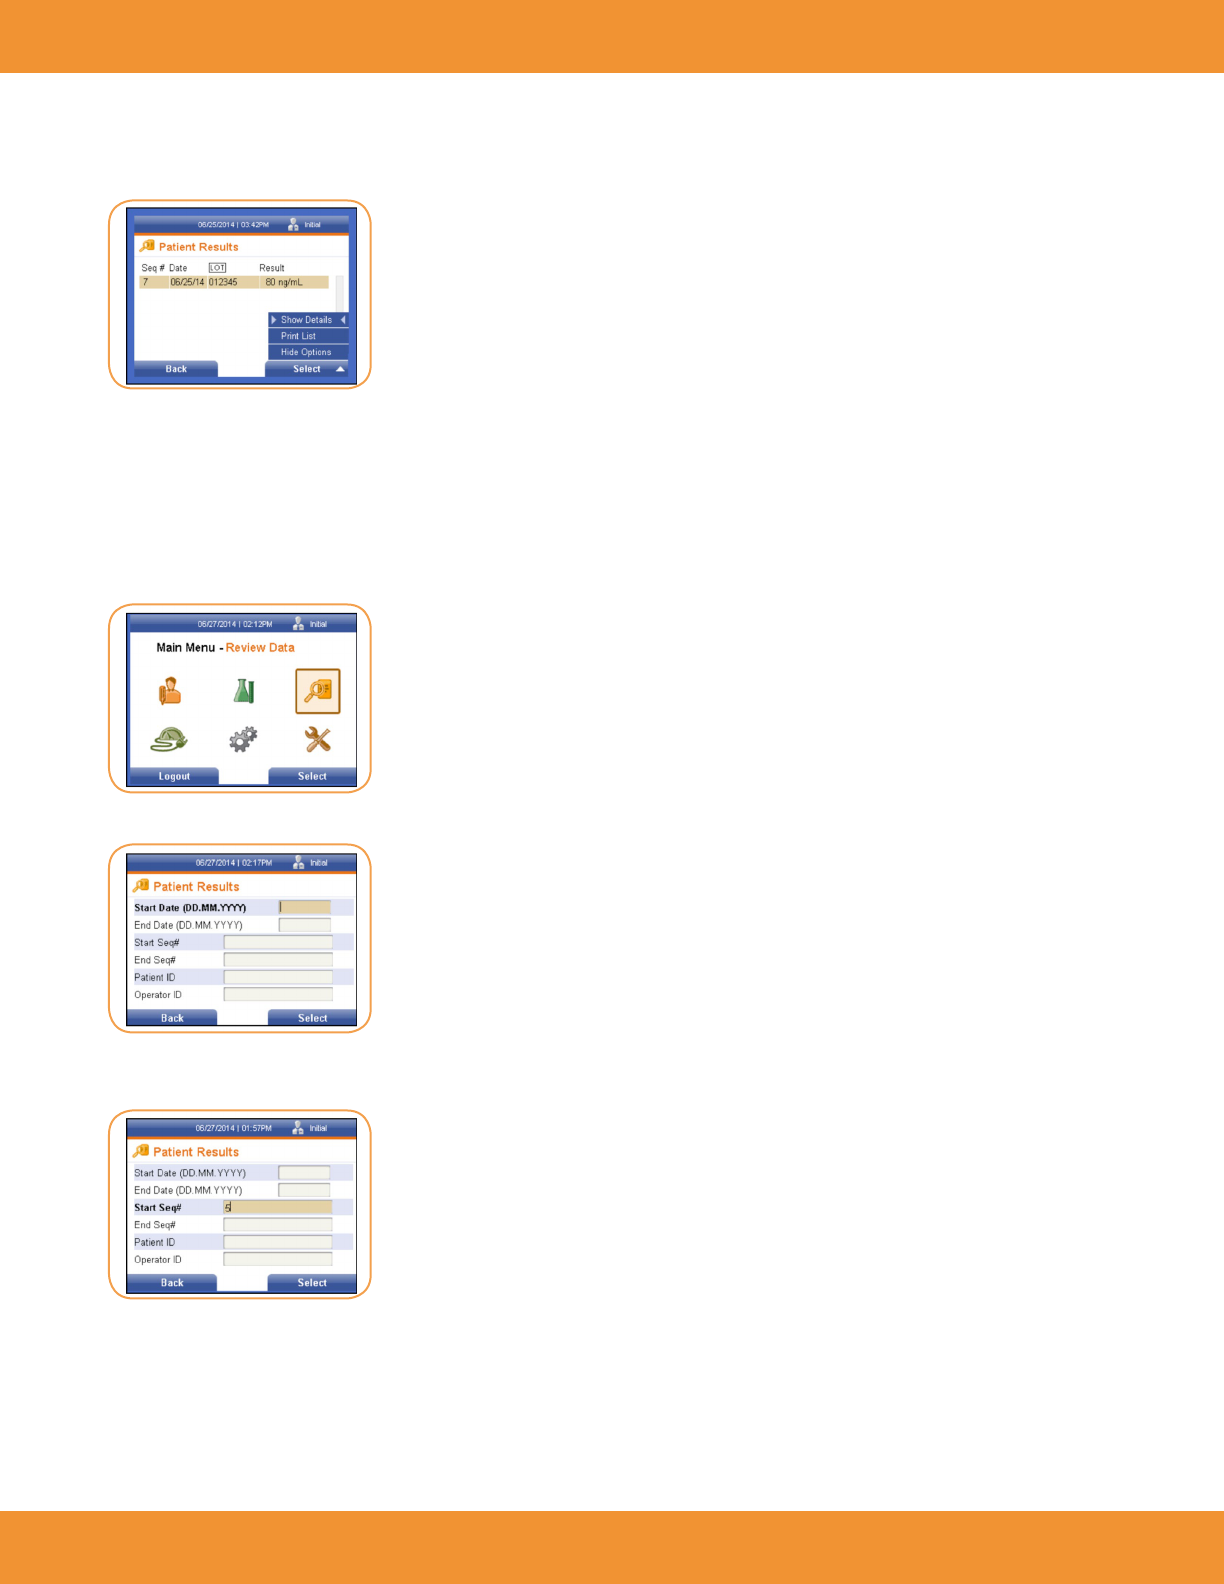
5. Press the right soft key to select to view the desired results. The Patient Results screen will be displayed with the patient’s sequence number,
date, lot number and result (Figure 50).
Show Details Option
1. Press the right soft key to view options available under the Patient Results screen. The Options menu is displayed (Figure 51).
Under the Options menu, the user can choose to show details of the results displayed, or print a list of displayed results.
2. Use the right soft key on the keypad to select Show Details. The date and time the result was obtained is displayed, along with the sequence
number and the operator (Figure 52).
NOTE: The Patient ID screen may be printed by pressing the right soft key. A screen will appear stating that the Patient ID information is
printing, please wait.
3. Select the left soft key to return to the previous screen.
FIGURE 49
FIGURE 50
FIGURE 51
FIGURE 52
28 ASPECT Reader User Guide
Print List Option
1. From the Patient Results screen, press the right soft key to display the Option menu (Figure 53).
2. Use the [↓] key to cursor down to the Print List option. Press the right soft key to select it. A screen will appear stating that the list is
printing, please wait.
3. Once the list has been printed, press the left soft key to return to the previous menu.
Review Patient Results by Sequence #
1. From the Main Menu, select the Review Data icon by using the [↓] or [↑] or [←] or [→] keys to highlight/select it (Figure 54).
2. Press the right soft key to select it. The Patient Results screen is displayed (Figure 55).
3. Using the [↓] key, cursor to the Start Seq# text eld. Enter the desired Start Seq# in the text eld using the numeric keypad
(Figure 56).
4. Using the [↓] key, cursor to the End Seq# text eld. Enter the desired End Seq# in the text eld using the numeric keypad.
FIGURE 53
FIGURE 54
FIGURE 55
FIGURE 56
ASPECT Reader User Guide 29
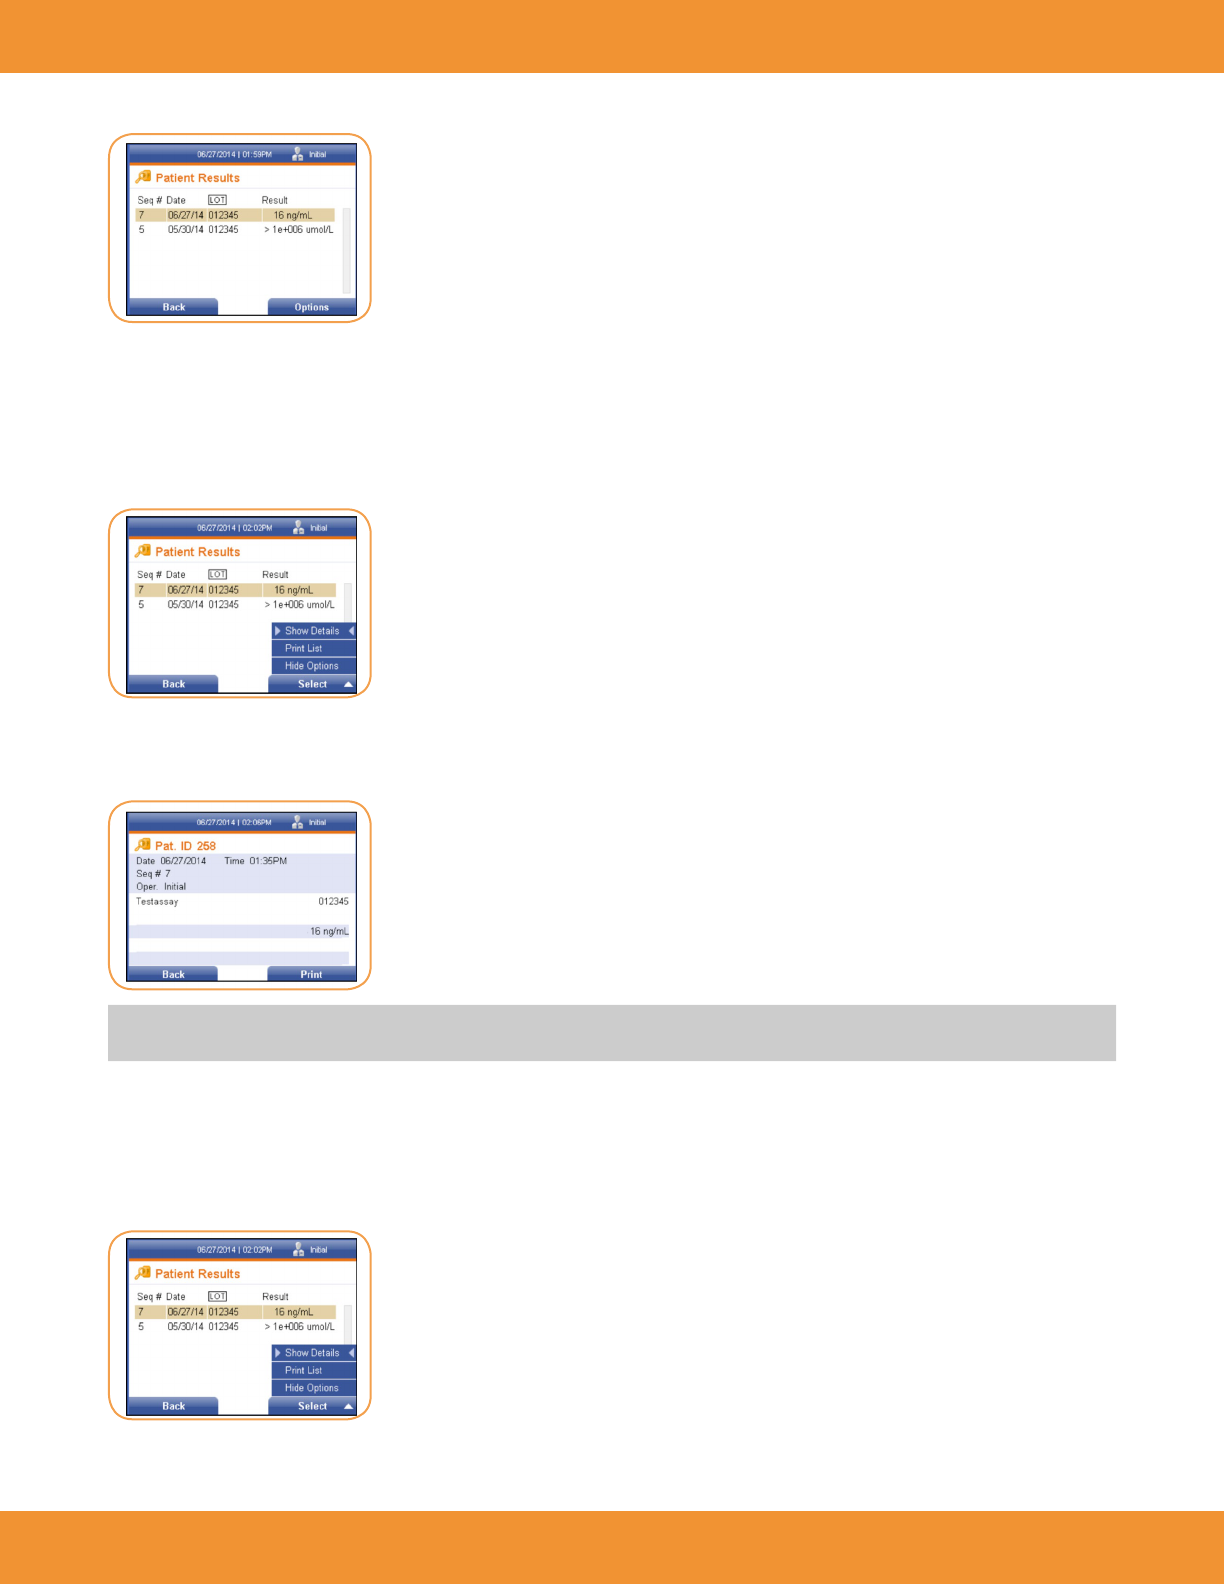
5. Press the right soft key to select to view the patient results by sequence number (Figure 57).
6. Press the right soft key to select to view the desired results. The Patient Results screen will be displayed with the patient’s sequence number,
date, lot number and result.
Show Details Option
1. Press the right soft key to view options available under the Patient Results screen. The Options menu is displayed (Figure 58).
2. Using the [↓] key, select the desired result line. Use the right soft key on the keypad to select Show Details. The date and time the result
was obtained is displayed, along with the sequence number, the operator, test number, test lot, control result?? and patient result (Figure
59).
NOTE: The Patient ID screen may be printed by pressing the right soft key. A screen will appear stating that the Patient ID information is
printing, please wait.
3. Press the left soft key to return to the previous menu.
Print List Option
1. From the Patient Results screen, press the right soft key to display the Options menu (Figure 60).
FIGURE 57
FIGURE 58
FIGURE 59
FIGURE 60
30 ASPECT Reader User Guide
2. Use the [↓] key to cursor down to the Print List option. Press the right soft key to select it. A screen will appear stating that the list is
printing, please wait.
3. Once the list has been printed, press the left soft key to return to the previous menu.
Review Patient Results by Patient ID
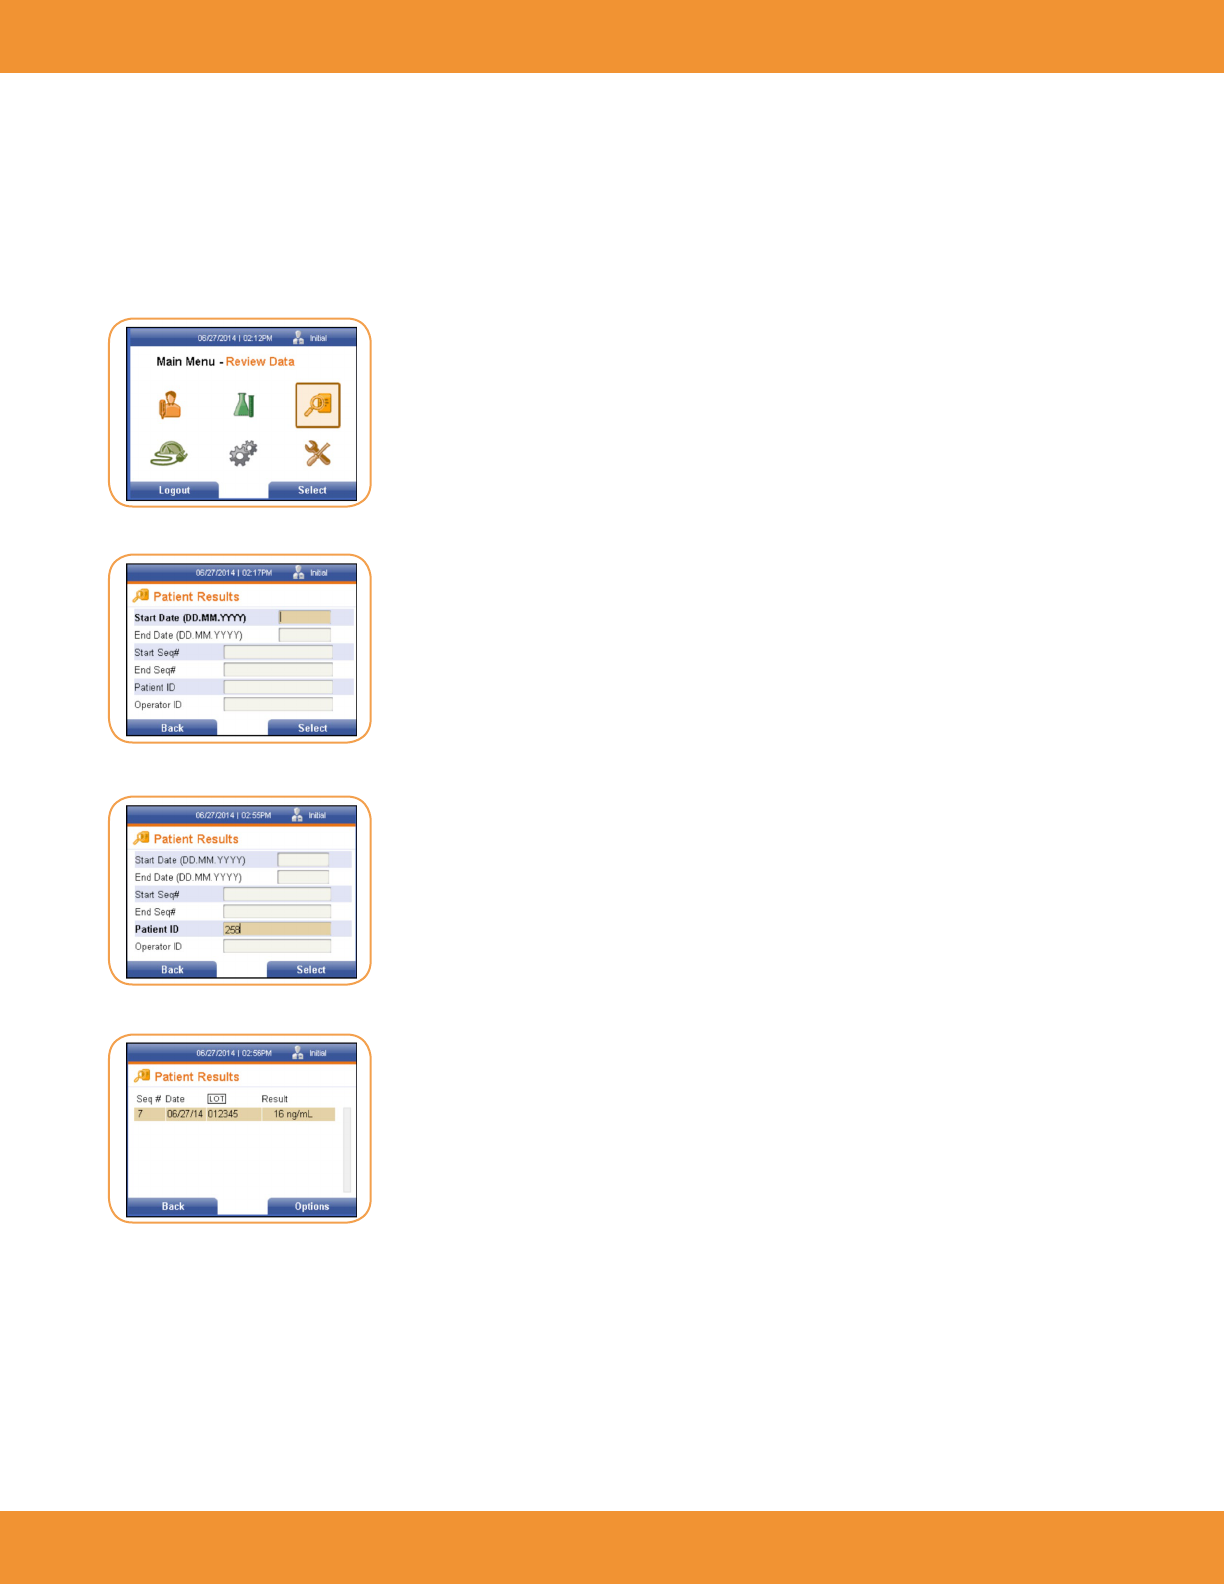
1. From the Main Menu, select the Review Data icon by using the [↓] or [↑] or [←] or [→] keys to highlight/select it (Figure 61).
2. Press the right soft key to select it. The Patient Results screen is displayed (Figure 62).
3. Using the [↓] key, cursor to the Patient ID text eld. Enter the desired ID number in the text eld using the numeric keypad (Figure 63).
4. Press the right soft key to select to view the patient results by Patient ID (Figure 64).
FIGURE 61
FIGURE 63
FIGURE 64
FIGURE 62
ASPECT Reader User Guide 31
Show Details Option
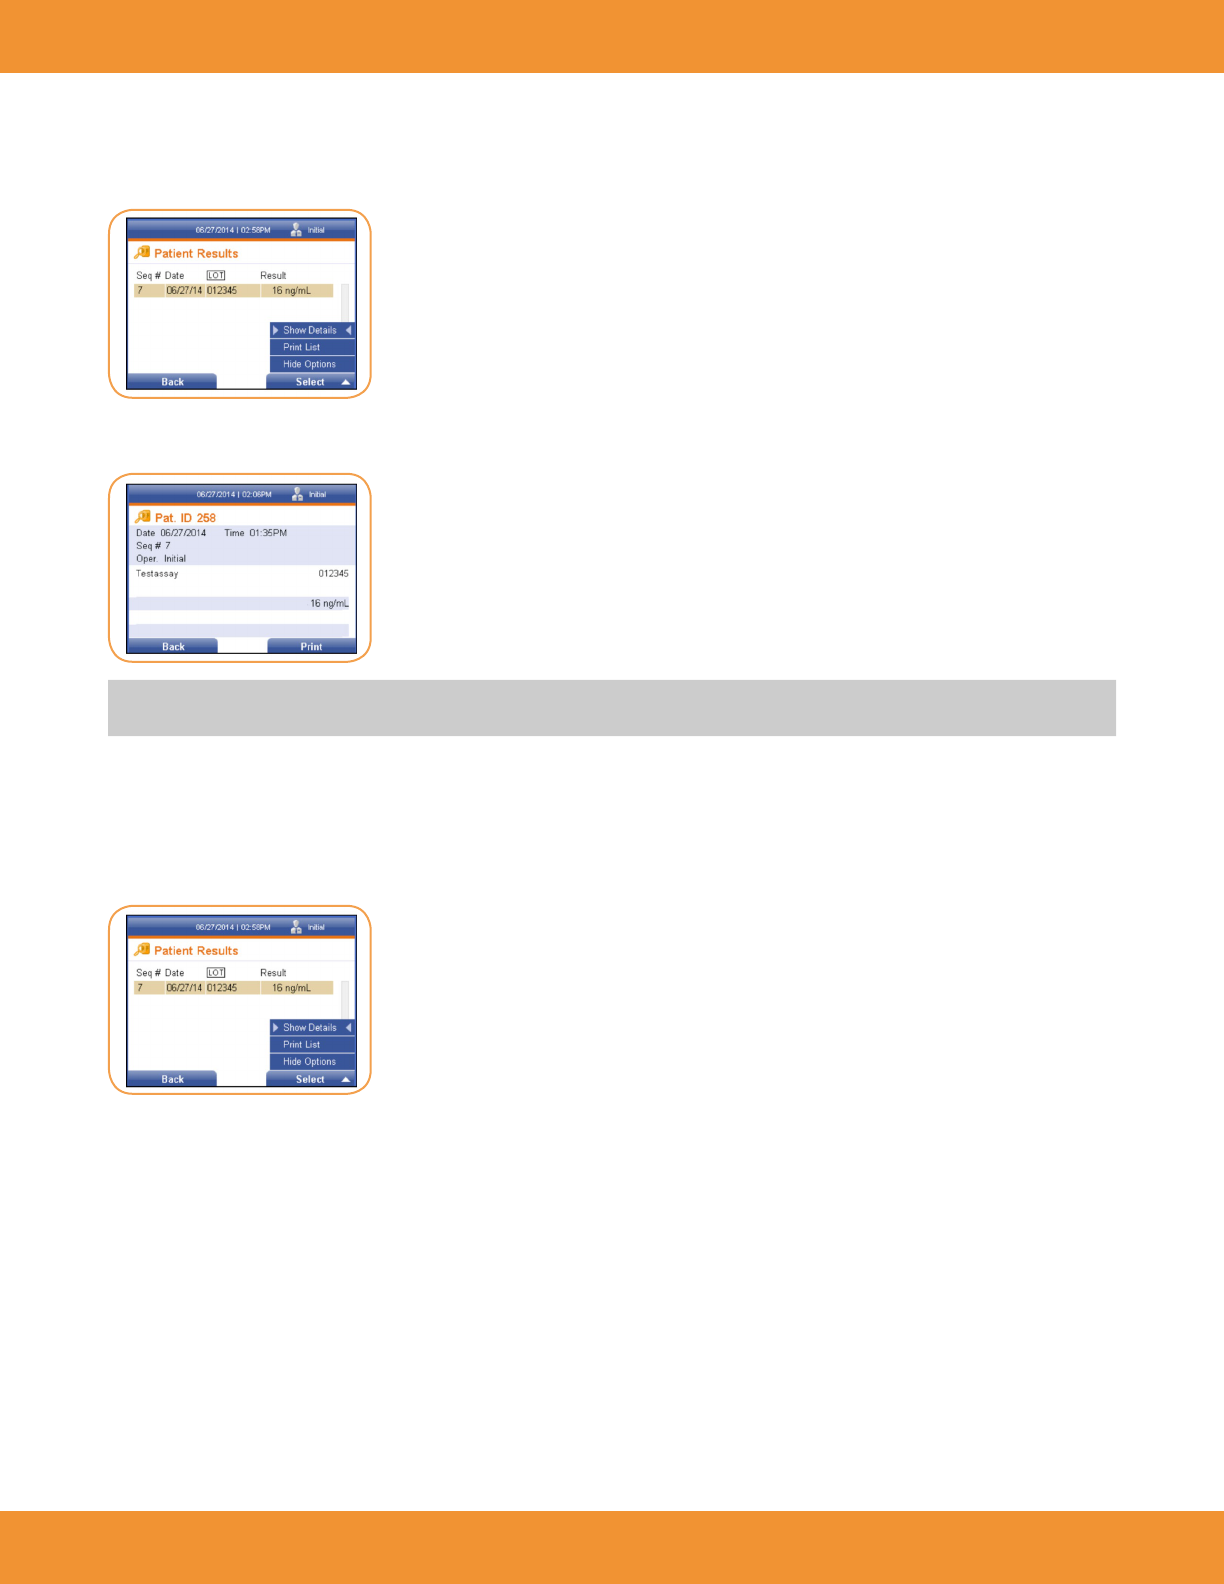
1. Press the right soft key to view options available under the Patient Results screen. The Options menu is displayed (Figure 65).
2. Use the right soft key on the keypad to select Show Details. The date and time the result was obtained is displayed, along with the sequence
number, the operator, test number, test lot, control result and patient result (Figure 66).
NOTE: The Patient ID screen may be printed by pressing the right soft key. A screen will appear stating that the Patient ID information is
printing, please wait.
3. Press the left soft key to return to the previous menu.
Print List Option
1. From the Patient Results screen, press the right soft key to display the Options menu (Figure 67).
2. Use the [↓] key to cursor down to the Print List option. Press the right soft key to select it. A screen will appear stating that the list is
printing, please wait.
3. Once the list has been printed, press the left soft key to return to the previous menu.
FIGURE 65
FIGURE 66
FIGURE 67
32 ASPECT Reader User Guide
Review Patient Results by Operator ID
1. From the Main Menu, select the Review Data icon by using the [↓] or [↑] or [←] or [→] keys to highlight/select it (Figure 68).
2. Press the right soft key to select it. The Patient Results screen is displayed (Figure 69).
3. Using the [↓] key, cursor to the Operator ID text eld. Enter the desired ID number in the text eld using the numeric keypad
(Figure 70).
4. Press the right soft key to select to view the patient results by Operator ID (Figure 71).
Show Details Option
1. Press the right soft key to view options available under the Patient Results screen. The Options menu is displayed (Figure 72).
FIGURE 71
FIGURE 70
FIGURE 69
FIGURE 72
FIGURE 68

ASPECT Reader User Guide 33
2. Using the [↓] key, select the desired result line. Use the right soft key on the keypad to select Show Details. The date and time the result
was obtained is displayed, along with the sequence number, the operator, test number, test lot, control result and patient result
(Figure 73).
NOTE: The Patient ID screen may be printed by pressing the right soft key. A screen will appear stating that the Patient ID information is
printing, please wait.
3. Press the left soft key to return to the previous menu.
Print List Option
1. From the Patient Results screen, press the right soft key to display the Options menu (Figure 74).
2. Use the [↓] key to cursor down to the Print List option. Press the right soft key to select it. A screen will appear stating that the list is
printing, please wait.
3. Once the list has been printed, press the left soft key to return to the previous menu.
Review Liquid QC (LQC) Results
1. Using the [→] or [←] keys, select the Review Data icon from the Main Menu screen (Figure 75).
The Review Results screen is displayed (Figure 76).
FIGURE 73
FIGURE 74
FIGURE 75
FIGURE 76
34 ASPECT Reader User Guide
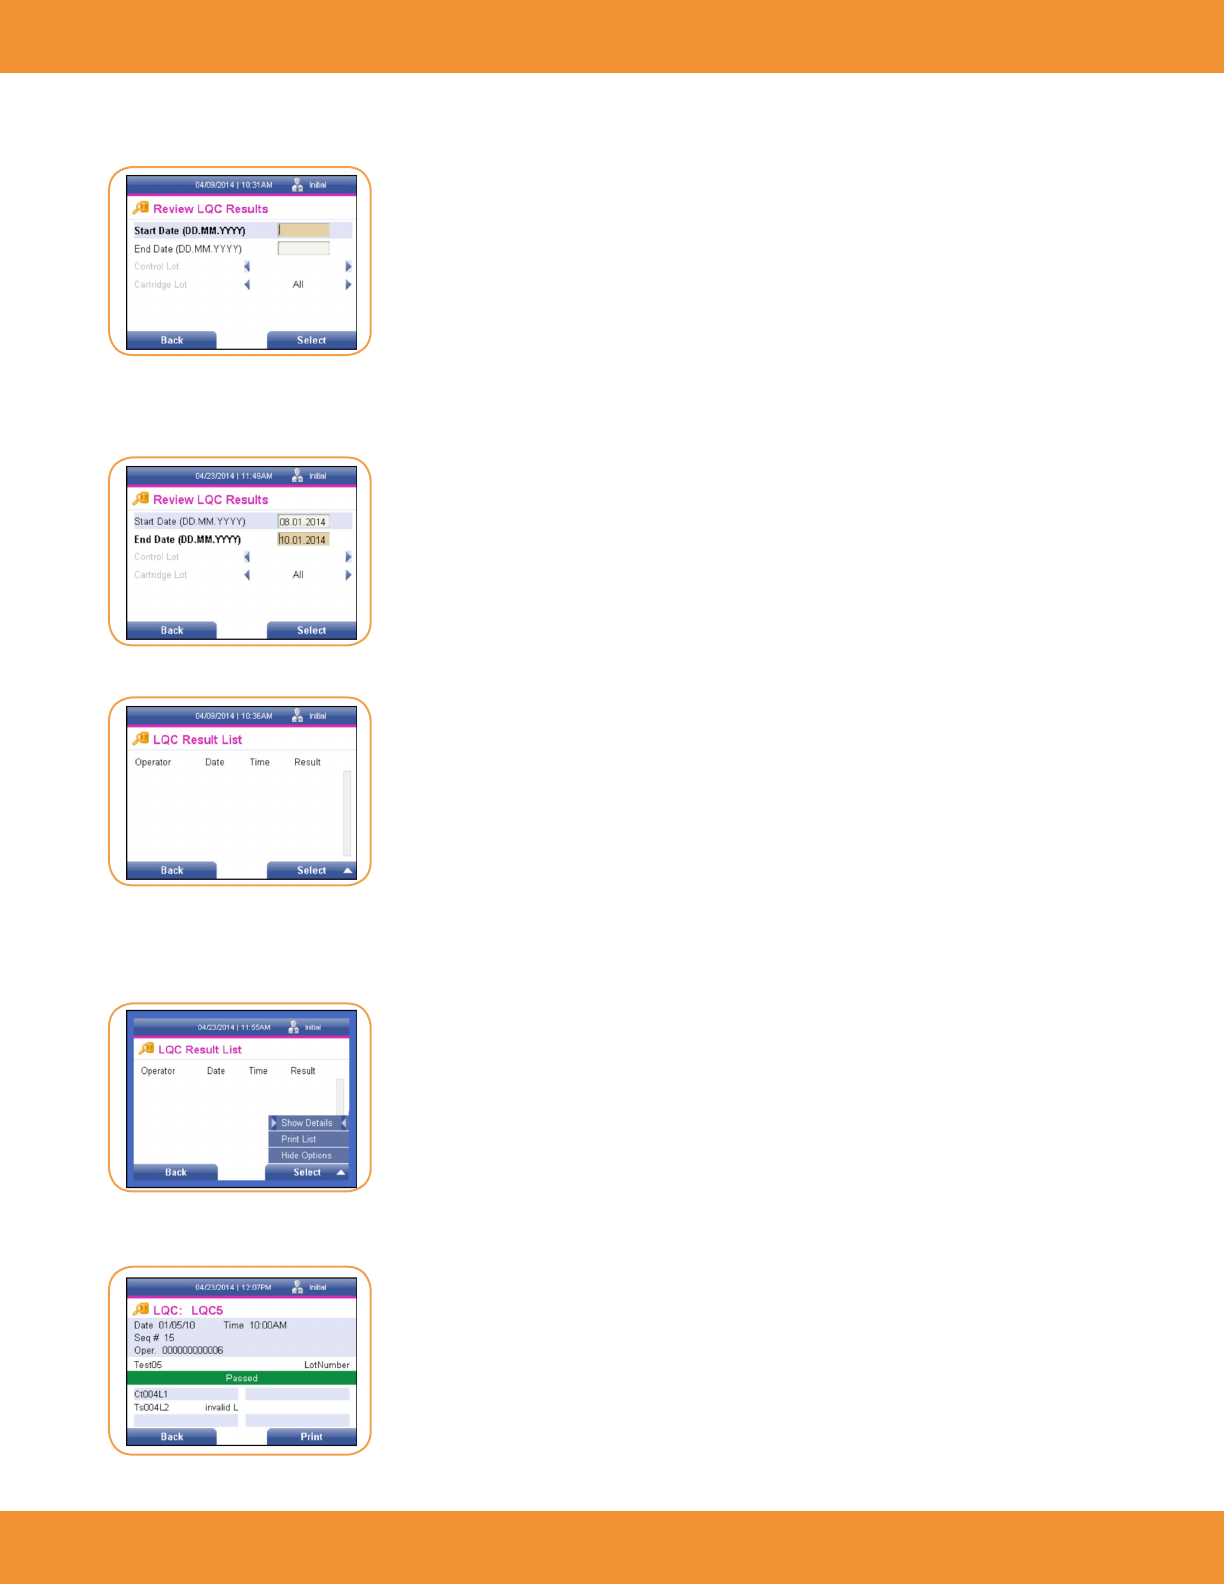
2. Using the [↓] key, cursor to the Liquid QC Results text eld, then press the right soft key to select it. The Review LQC Results screen is
displayed (Figure 77).
3. Enter a start date using the numeric keys on the keypad in the format shown.
4. Use the [↓] key to cursor to the next text eld.
5. Enter an end date using the format shown (Figure 78).
The LQC Result List screen is displayed (Figure 79).
Show Details Option
1. Press the right soft key to view options available under the LQC Result List screen. The Options menu is displayed (Figure 80).
2. Use the right soft key on the keypad to select Show Details. The date and time the QC result was obtained is displayed, along with the
sequence number, the operator, test and lot number, as well as the control result and if the result passed or failed (Figure 81).
FIGURE 79
FIGURE 78
FIGURE 77
FIGURE 80
FIGURE 81
ASPECT Reader User Guide 35
NOTE: The LQC: screen may be printed by pressing the right soft key. A screen will appear stating that the LQC information is printing, please
wait.
3. Press the left soft key to return to the previous menu.
Print List Option
1. From the LQC Result List screen, press the right soft key to display the Options menu (Figure 82).
2. Use the [↓] key to cursor down to the Print List option. Press the right soft key to select it. A screen will appear stating that the list is
printing, please wait.
3. Once the list has been printed, press the left soft key to return to the previous menu.
Review Electronic QC (EQC) Results
1. Using the [→] or [←] keys, select the Review Data icon from the Main Menu screen (Figure 83).
The Review Results screen is displayed (Figure 84).
2. Using the [↓] key, cursor to the Electronic QC Results text eld, then press the right soft key to select it. The Review eQC Results screen is
displayed (Figure 85).
FIGURE 84
FIGURE 82
FIGURE 85
FIGURE 83
36 ASPECT Reader User Guide
3. Enter a start date using the numeric keys on the keypad in the format shown.
4. Use the [↓] key to cursor to the next text eld.
5. Enter an end date using the format shown.
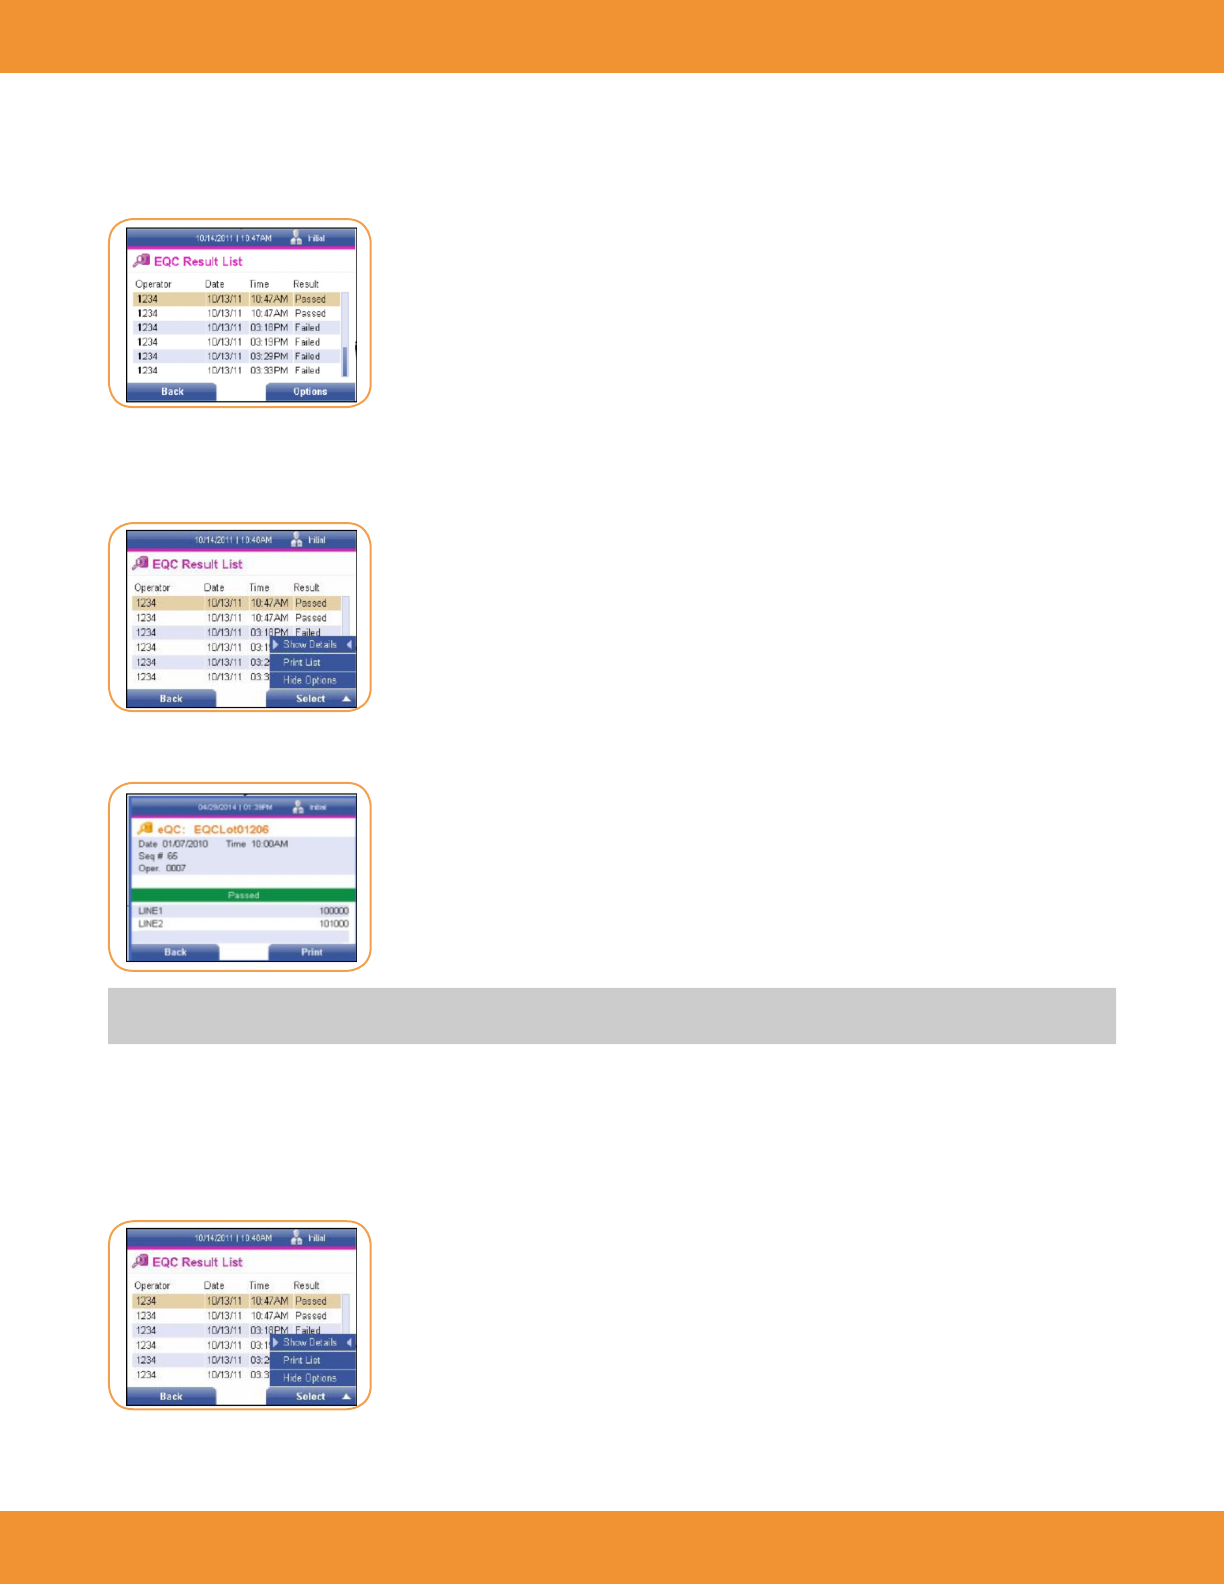
6. Press the right soft key to select the entered dates. The EQC Result List screen is displayed (Figure 86).
Show Details Option
1. Press the right soft key to view options available under the eQC Result List screen. The Options menu is displayed (Figure 87).
2. Use the right soft key on the keypad to select Show Details. The date and time the QC result was obtained is displayed, along with the
sequence number, the operator, test and lot number, as well as the control result and if the result passed or failed (Figure 89).
NOTE: The EQC screen may be printed by pressing the right soft key. A screen will appear stating that the LQC information is printing, please
wait.
3. Press the left soft key to return to the previous menu.
Print List Option
1. From the EQC Result List screen, press the right soft key to display the Options menu (Figure 90).
FIGURE 86
FIGURE 88
FIGURE 89
FIGURE 90
ASPECT Reader User Guide 37
2. Use the [↓] key to cursor down to the Print List option. Press the right soft key to select it. A screen will appear stating that the list is
printing, please wait (Figure 91).
3. Once the list has been printed, press the left soft key to return to the previous menu.
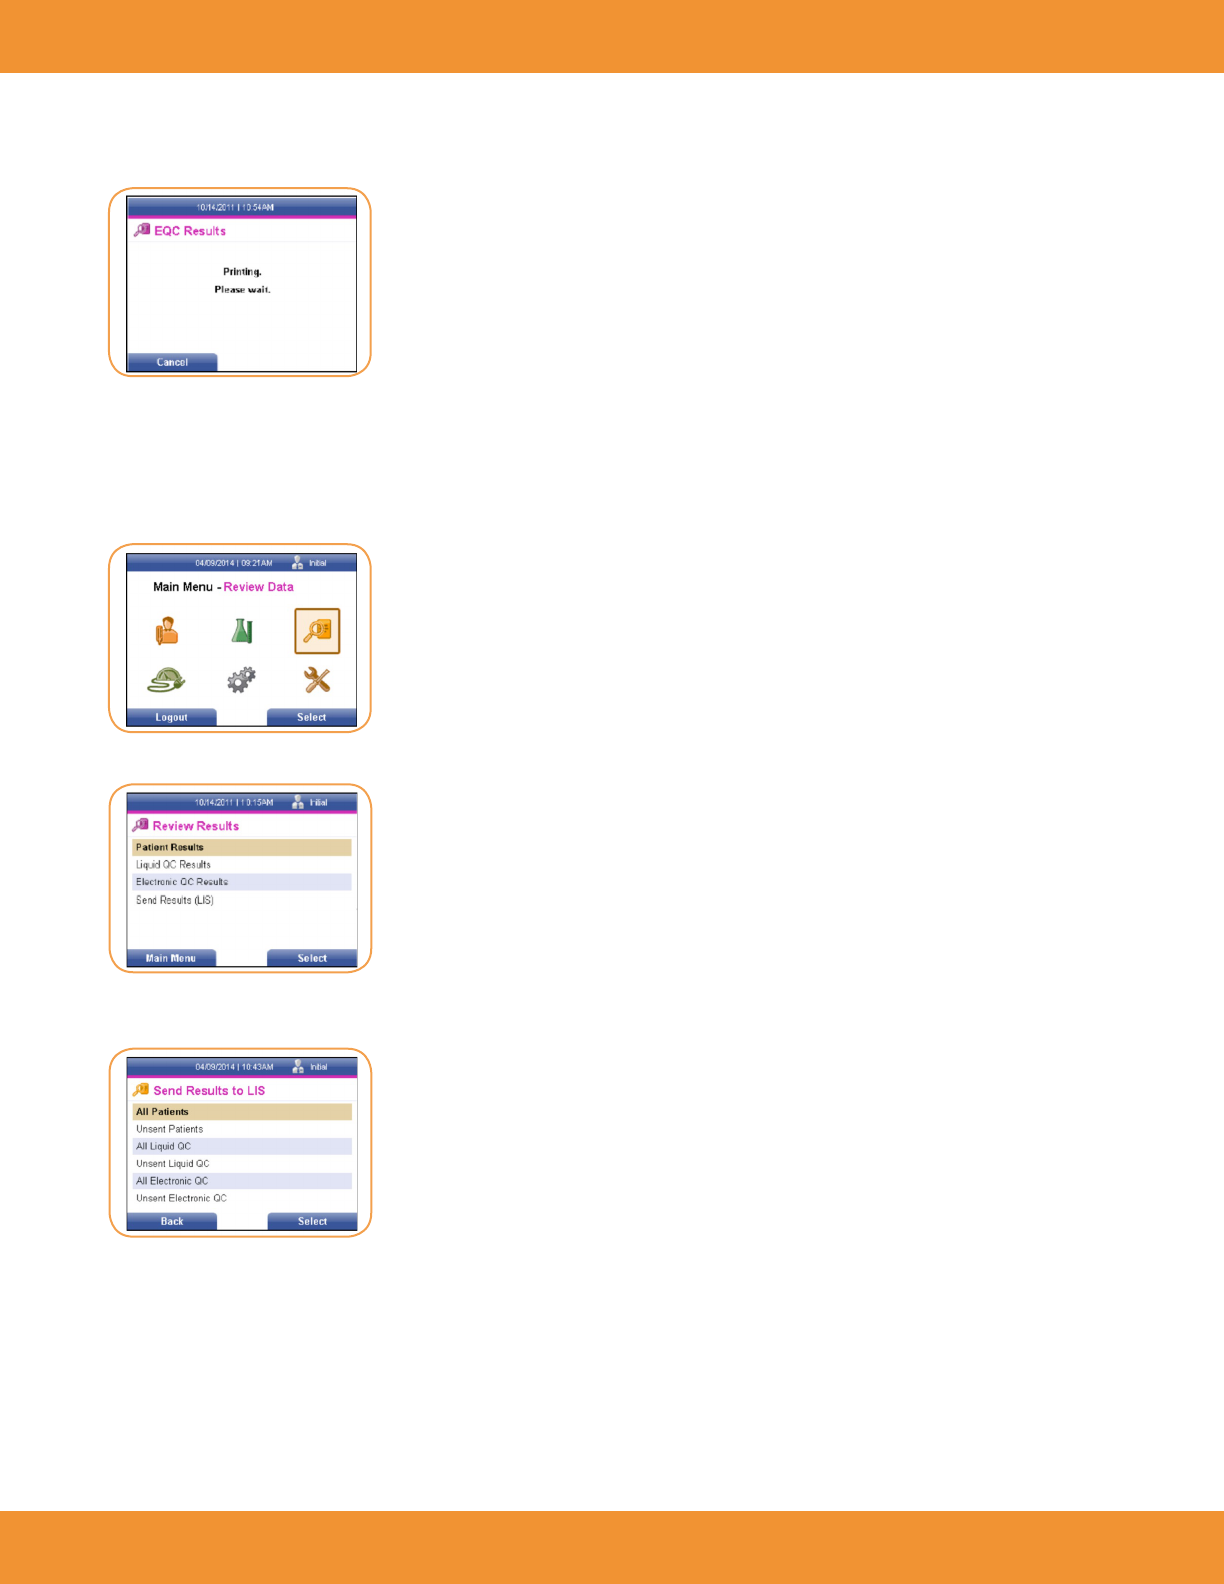
Send Results to LIS
1. Using the [→] or [←] keys, select the Review Data icon from the Main Menu screen (Figure 92).
The Review Results screen is displayed (Figure 93).
2. Using the [↓] key, cursor to the Send Results (LIS) text eld, then press the right soft key to select it. The Send Results to LIS screen is
displayed (Figure 94).
3. Under the Send Results to LIS screen, the user can select one of several options:
• Send all patient results
• Send all unsent patient results
• Send all Liquid QC (LQC) results
• Send all unsent Liquid QC (LQC) results
• Send all electronic QC (EQC) results
• Send all unsent electronic QC (EQC) results
FIGURE 93
FIGURE 94
FIGURE 92
FIGURE 91
38 ASPECT Reader User Guide
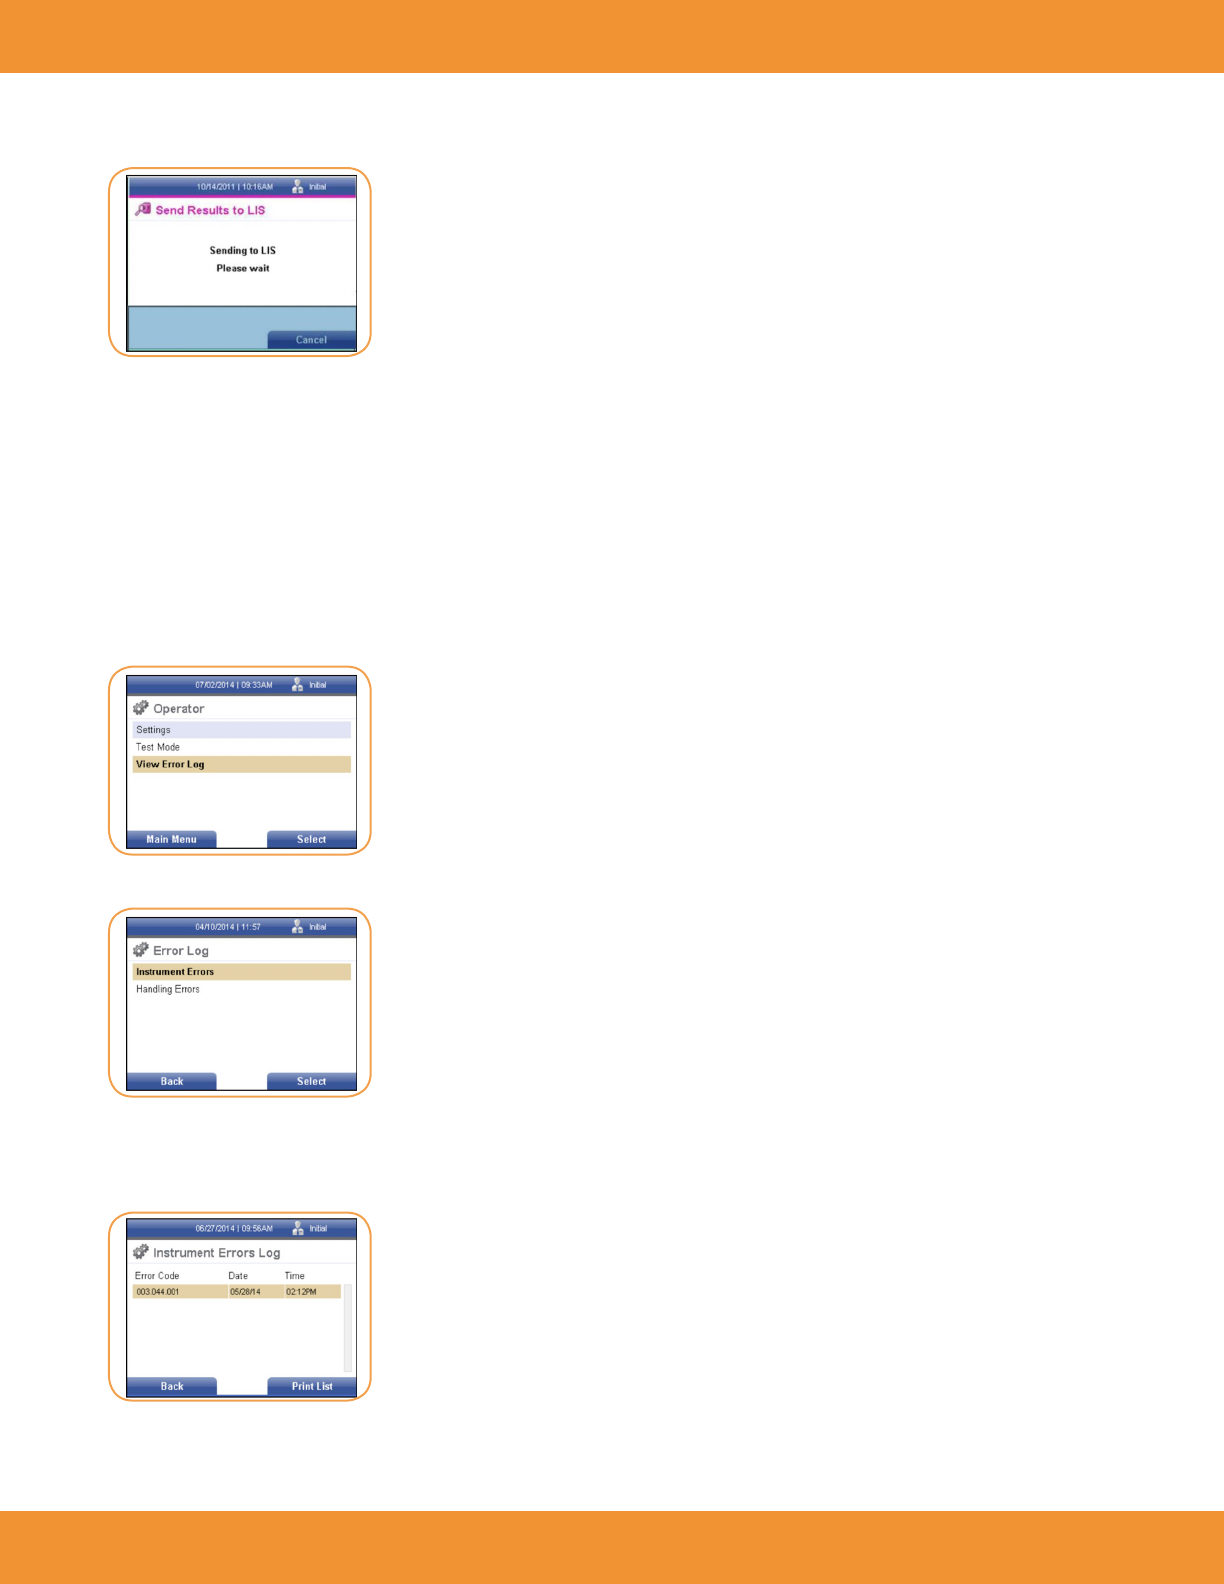
4. Using the [↓] key, select the desired option, then press the right soft key. A screen will appear stating that the reader is sending the results
to LIS (Figure 95).
5. Press the right soft key to cancel the send request.
6. Press the left soft key to return to the previous menu.
View Error Log
The ASPECT Reader will display Instrument Errors and Handling Errors. Instrument Errors are errors that are directly associated with the reader’s
hardware, software, and/or rmware. Instrument Errors often require contacting Technical Support to resolve. Handling Errors are errors that
are associated with sample or pre-analytical handling and preparation of the test cassette.
7. From the Operator screen, use the [↓] key to cursor down to the View Error Log text eld (Figure 96).
8. Press the right soft key to select it. The Error Log screen is displayed (Figure 97).
Instrument Errors Log
1. Press the right soft key to select Instrument Errors. The Instrument Errors Log screen is displayed (Figure 98).
FIGURE 95
FIGURE 96
FIGURE 98
FIGURE 97
ASPECT Reader User Guide 39
The Instrument Errors Log displays instrument errors by error code, date and time. Refer to “Troubleshooting/Error Codes” on page 51 for more
details about the errors.
2. Press the right soft key to print the Instrument Errors List. A screen will appear stating that the list is “Printing Please Wait”.
3. Once the error list is printed, the screen returns to the Instrument Errors Log screen.
4. To cancel the print request, press the left soft key once. Wait a few seconds for the reader to stop printing and` return to the previous
screen.
5. Press the left soft key to return to the Error Log screen.
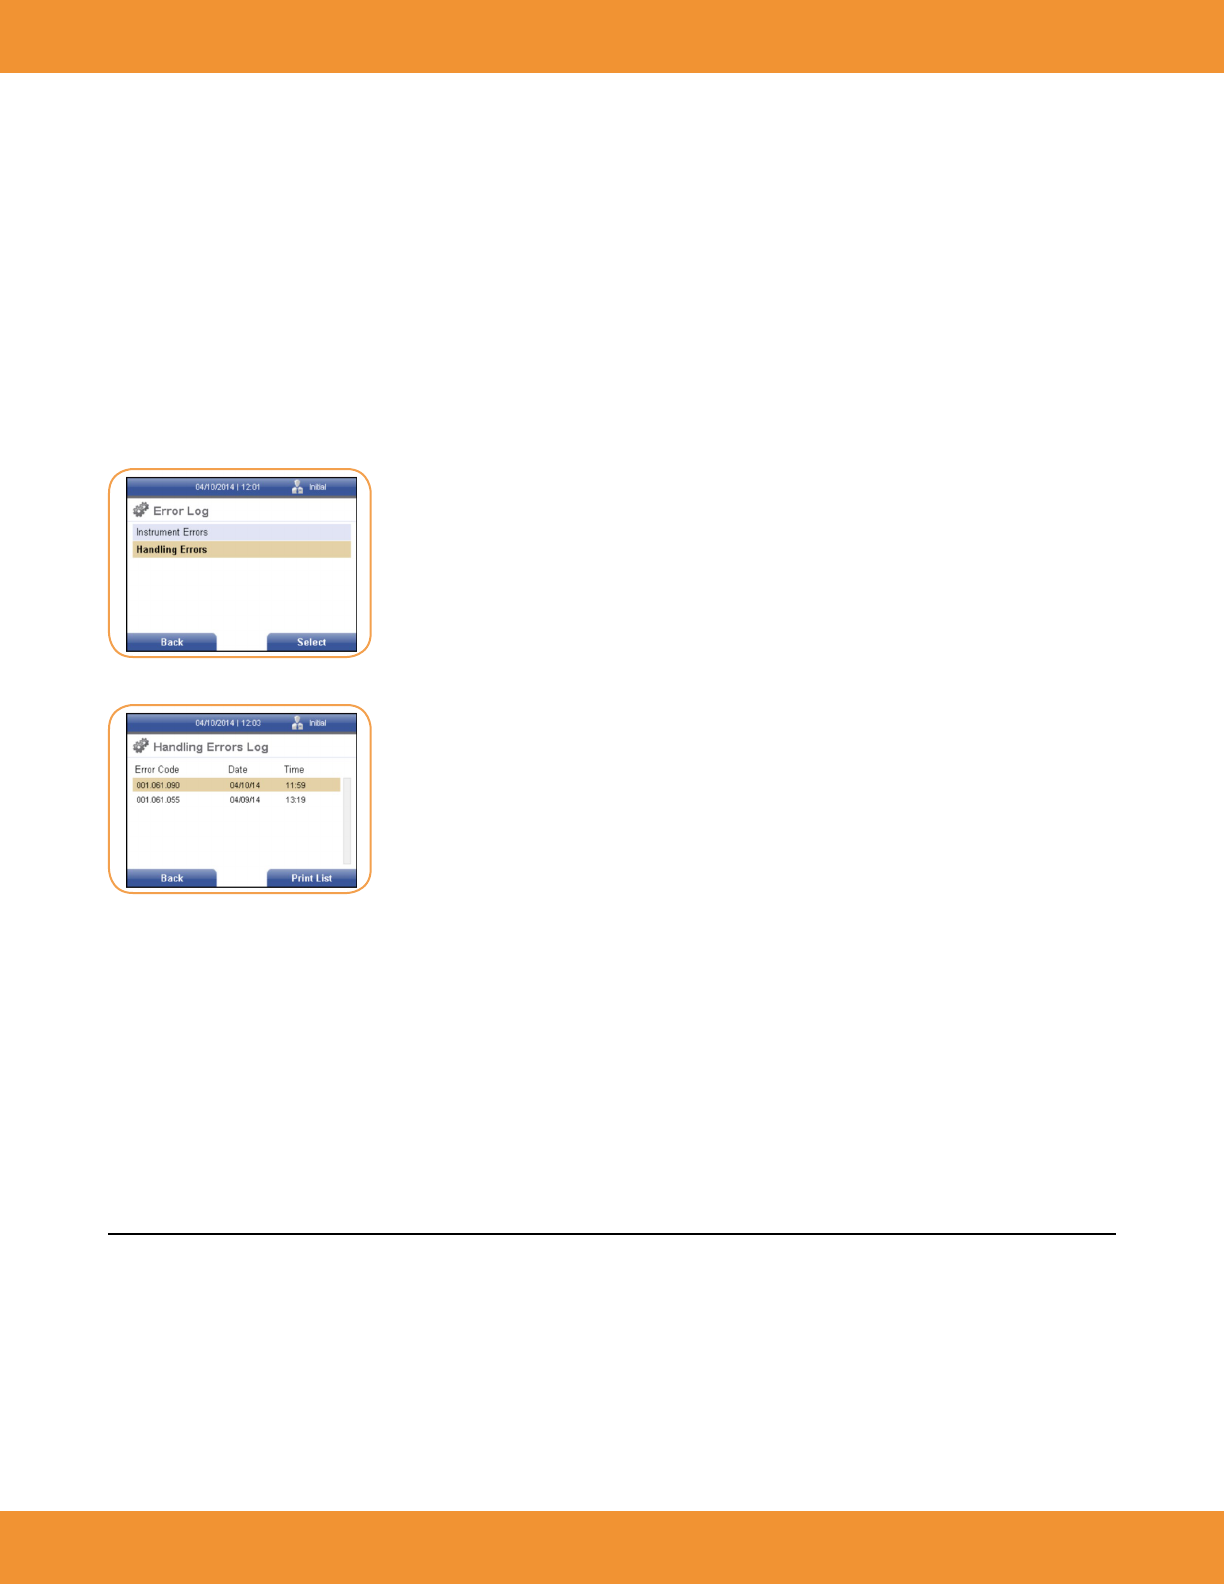
Handling Errors Log
1. Use the [↓] key to cursor down to the Handling Errors text eld from the Error Log screen (under Operator→ View Error Log)
(Figure 99).
2. Press the right soft key to select Handling Errors. The Handling Error Log screen is displayed (Figure 100).
The Handling Errors Log displays handling errors by error code, date and time. Refer to “Troubleshooting/Error Codes” on page 51 for more
details about the errors.
3. Press the right soft key to print the Handling Errors List. A screen will appear stating that the list is printing, to please wait. Once the error
list is printed, the screen returns to the Handling Errors Log screen.
4. You may cancel the print request by pressing the left soft key once. It will take a few seconds for the reader to stop printing, then return to
the previous screen.
5. Press the left soft key to return to the Error Log screen.
CONTROLS
Quality Control is important to ensure the integrity of the reader. Provided separately from the reader is the EQC cassettes (Electronic Quality
Control), which checks the internal reader optics and systems. If the EQC result is outside of the specied range, the reader will display the test
as Failed and must be repeated. If the EQC is within the specied range, the test result is valid and conrms that the reader is performing within
specications. If the repeated EQC tests fails a second time, please call Technical Support.
Also available, but not provided with the reader are liquid quality controls (LQC) which can be set up to be run at the discretion of the laboratory.
These controls will test the performance of the cassette, reader and also the testing technique used.
FIGURE 99
FIGURE 100
40 ASPECT Reader User Guide
In this section you will learn how to:
• run liquid controls (LQC)
• run electronic controls (EQC)
Running Liquid Quality Controls
External high and low Liquid Quality Controls (LQC) should be tested to demonstrate that the test reagents, cassettes and test procedures are
performing properly. Refer to the Instructions For Use for specic details on performing the LQC test.
Good Laboratory Practice suggests that external controls should be tested with each new lot or shipment of test materials, or every 30 days,
and as otherwise required by your laboratory’s standard quality control procedures. Controls should be tested in the same manner as if testing
patient specimens. When running patient specimens or external controls, if an analyte fails for any reason (built-in control failure or an external
control out of range) no patient results will be reported.
NOTE: Users should follow government guidelines (for example, federal, state or local) and/or accreditation requirements for quality control.
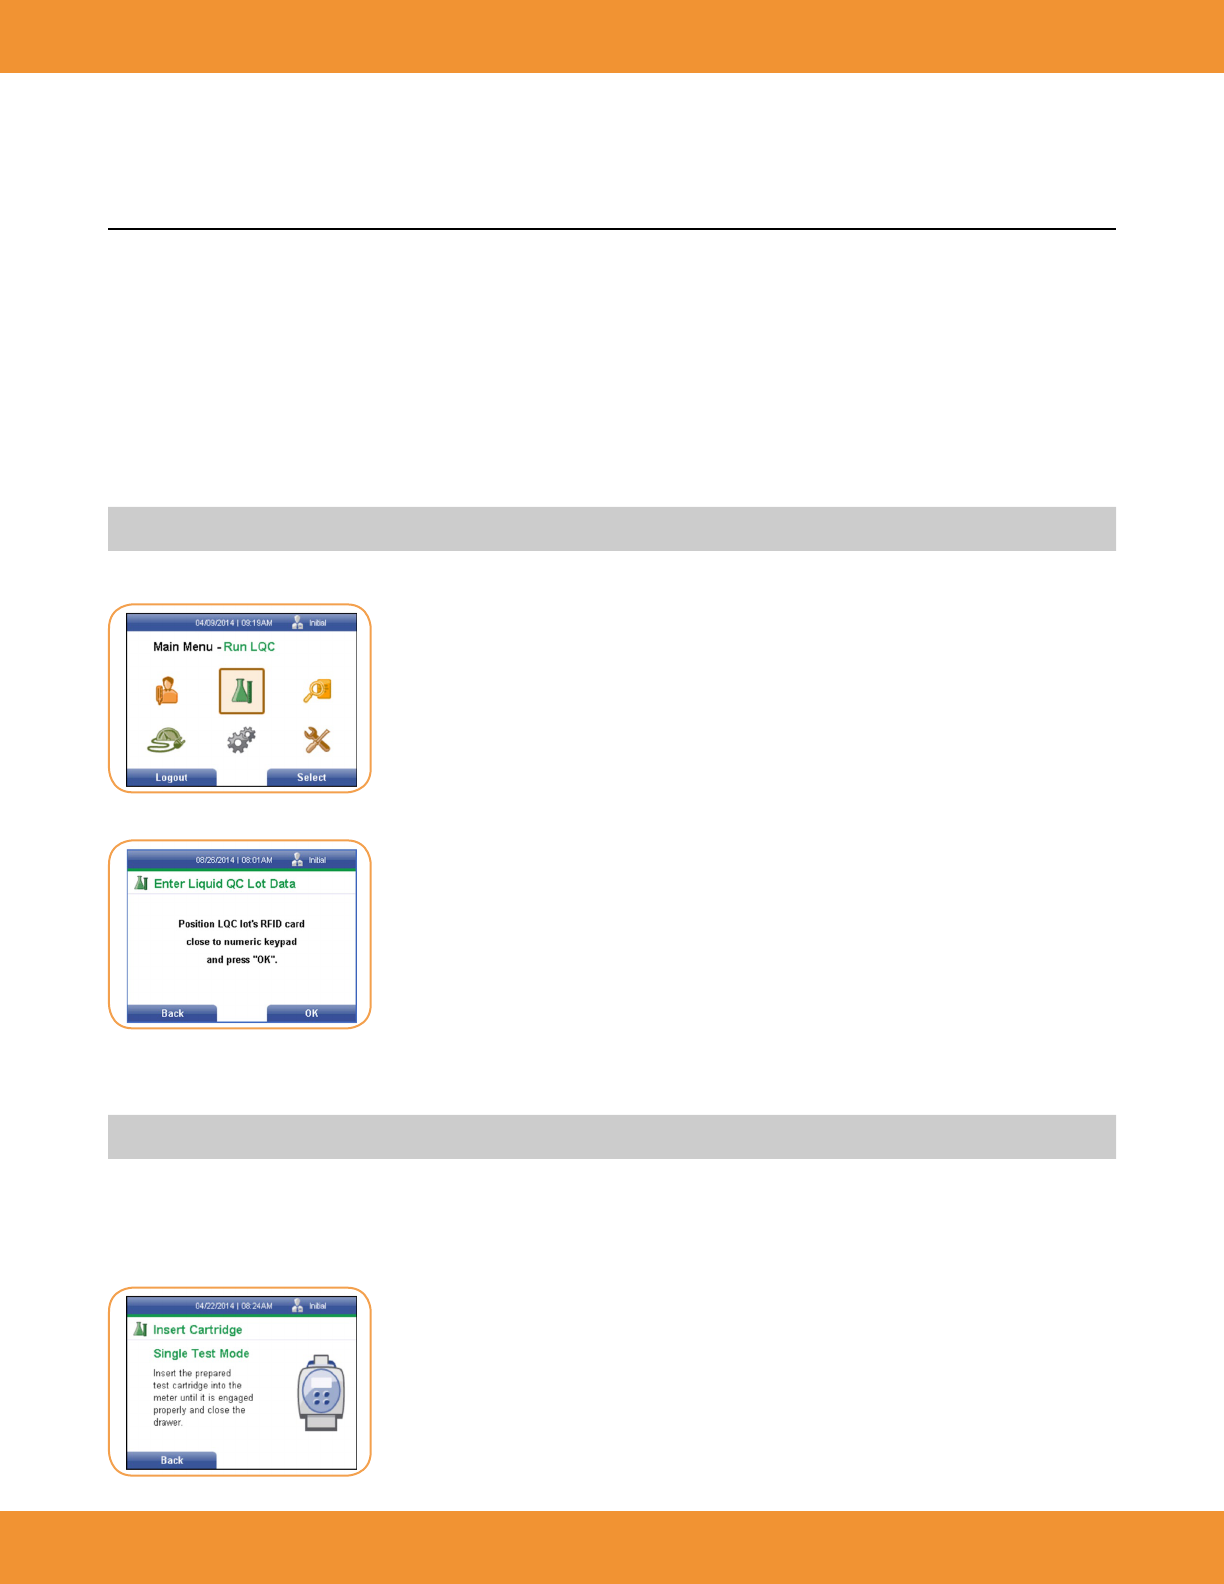
6. Using the [→] or [←] keys, select the Liquid Control icon from the Main Menu screen (Figure 101).
7. Press the right soft key to select Run LQC (Figure 102).
8. Scan the LQC RFID card included with the control kit by placing it over the keypad of the reader.
9. Select HI or LO control.
NOTE: Ensure that the correct control level is performed after selecting HI or LO from Step 9.
10. Prepare the controls as outlined in the Instructions For Use.
11. When preparing to test, follow the Instructions For Use included with the specic test being performed, and perform the control testing as if
is a patient specimen.
12. The Insert Cartridge screen will be displayed (Figure 103).
FIGURE 101
FIGURE 102
FIGURE 103

ASPECT Reader User Guide 41
13. Immediately insert the cassette into the drawer as instructed, then close the drawer. The reader will automatically start the LQC testing and
a Run LQC screen will be displayed (Figure 104).
14. Once completed the reader will display the results (Figure 105).
15. Press the eject button to remove the cassette once the test is nished.
16. Dispose of cassette according to Country, Federal, Provincial, State and local regulations.
17. Repeat Steps 6 through 14 if a second level control is required.
Printing Liquid Control Results
1. To print control results, press the right soft key to select Options. The Option menu will be displayed (Figure 106).
2. The Print option is selected. Press the right soft key to print control results.
Auto print may be selected by the Supervisor under “Printer Settings” on page 106 to automatically print any control results once testing is
nished.
3. To run another liquid control, use the [↓] key to Next Control menu item. Press the right soft key to select it. The Prepare to Perform QC
Tests screen will be displayed, ready for the next QC Barcode number to be scanned (Figure 107).
FIGURE 104
FIGURE 105
FIGURE 106
FIGURE 107
42 ASPECT Reader User Guide
4. Once all desired controls have been run, press the left soft key to return to the Main Menu.
Electronic Quality Control (EQC)
Electronic Quality Control ensures the proper function of the ASPECT Reader.
The EQC cassette is light sensitive. Be sure to store the EQC cassette in the provided foil pouch to ensure
accurate test results.
EQC should be performed:
• on initial setup of the reader
• if the reader is transported or moved
• whenever required by your laboratory’s quality control requirements
• whenever there is a question concerning the performance of the ASPECT Reader
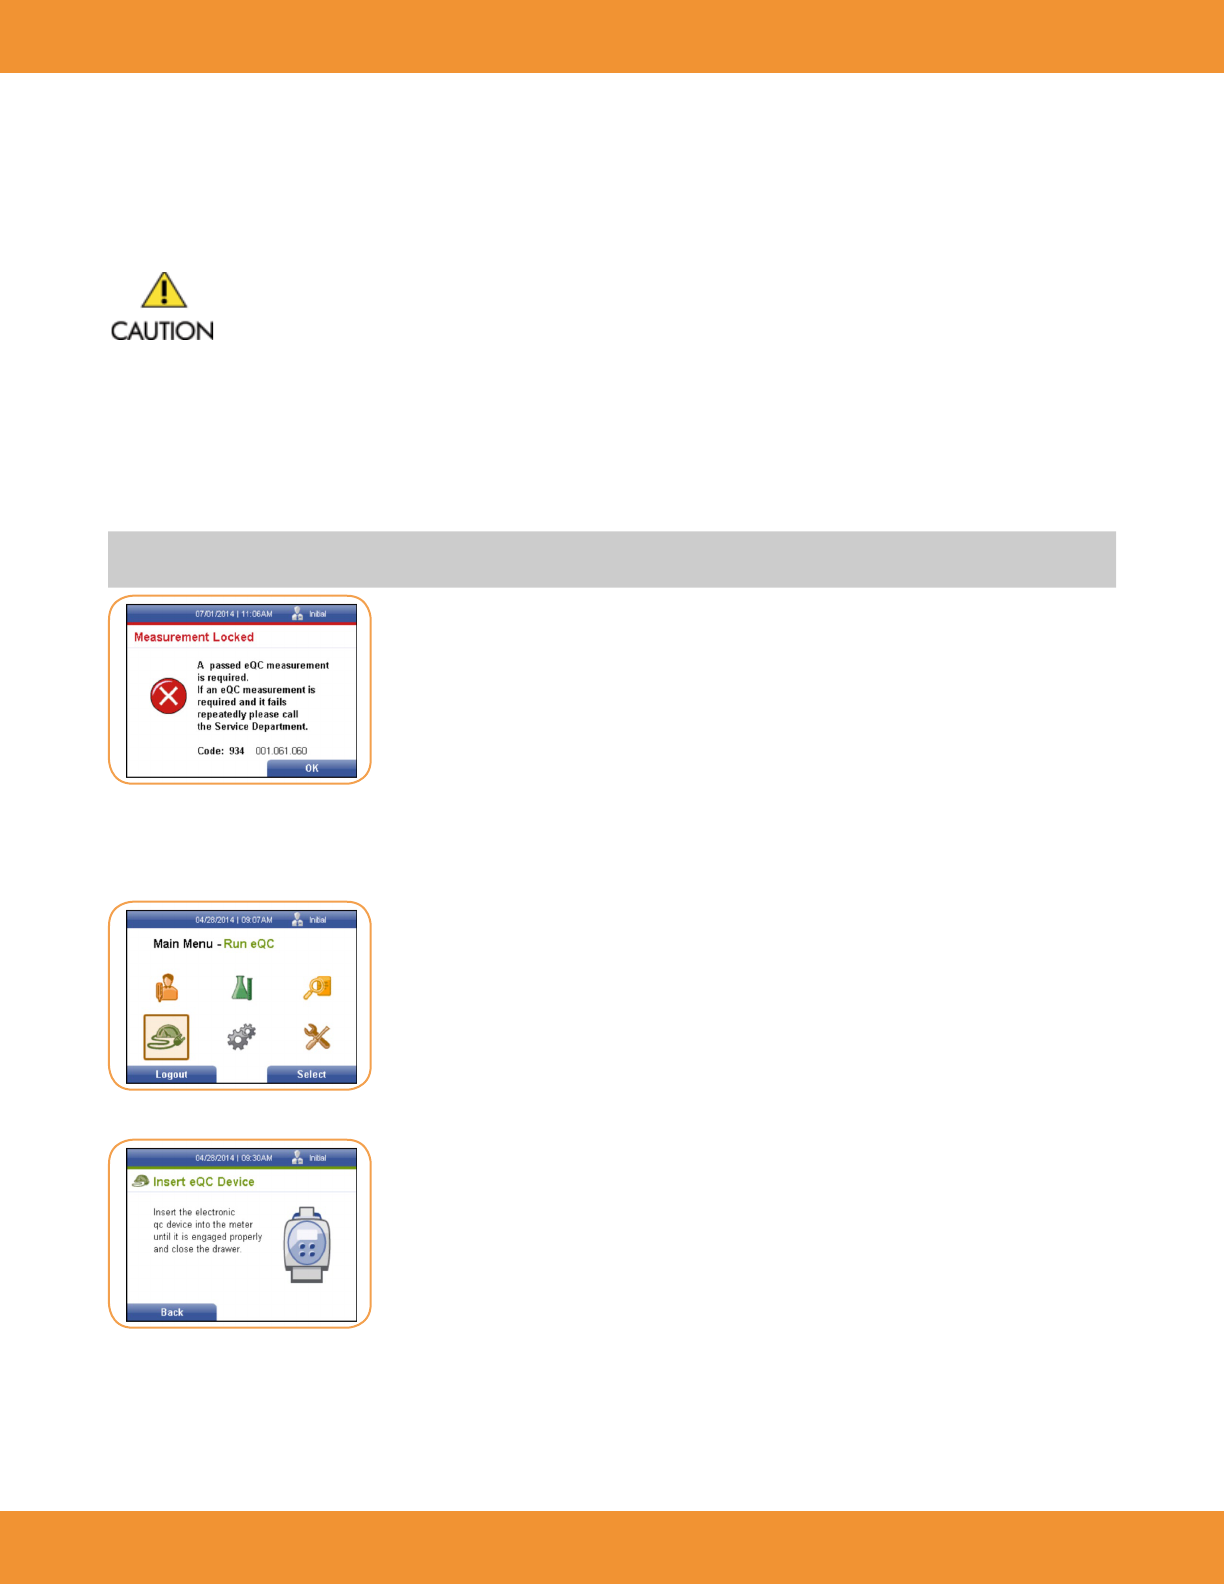
NOTE: If an EQC interval has been entered into the ASPECT Reader by a supervisor and the interval has elapsed, a passed EQC result is required
before any patient testing is permitted. The following screen will be displayed (Figure 108).
Perform the EQC
1. Using the [→] or [←] and[↓] or [↑] keys, select the EQC icon from the Main Menu screen (Figure 109).
2. Press the right soft key to select Run eQC. The Insert eQC Device screen is displayed (Figure 110).
3. Remove the EQC cassette from foil pouch.
4. Insert the cassette into the reader drawer.
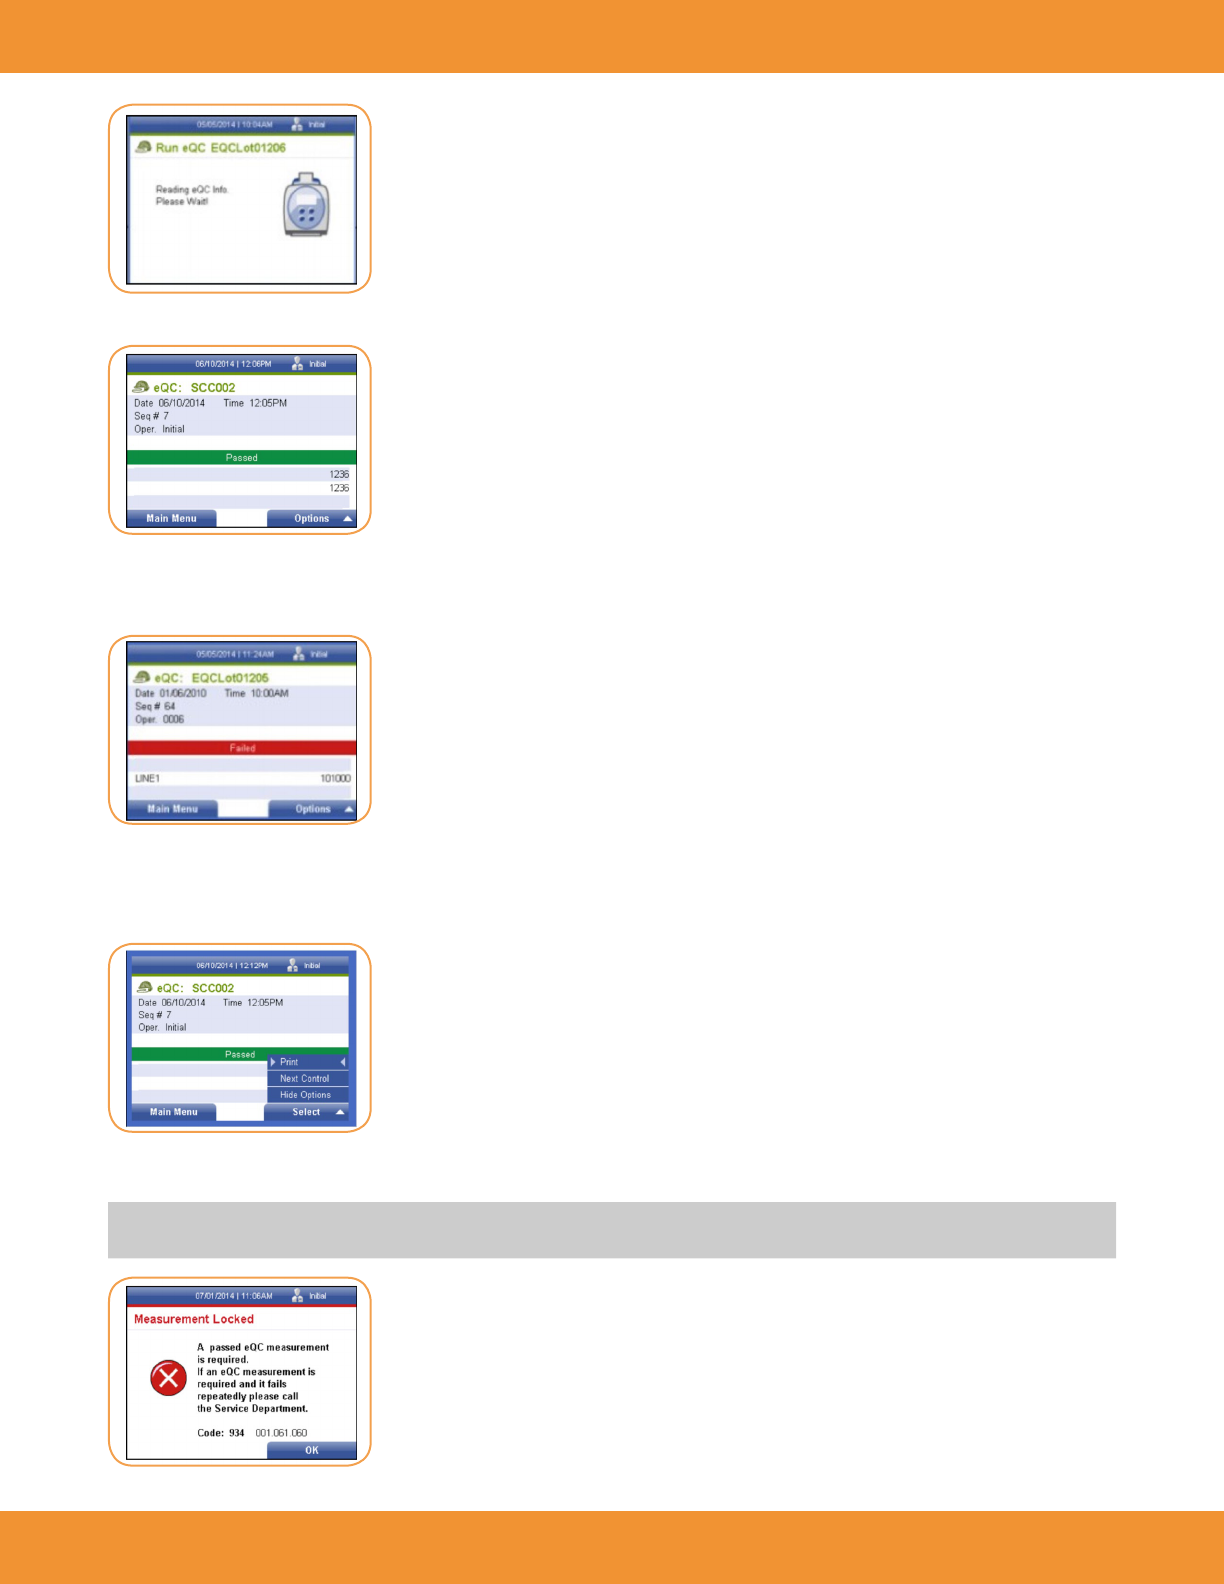
5. Close the drawer. The reader will automatically start the EQC testing (Figure 111).
FIGURE 108
FIGURE 109
FIGURE 110
ASPECT Reader User Guide 43
6. Once completed the reader will display the results of the testing (Figure 112).
7. Once EQC has passed, remove the cassette from the cassette drawer by pressing the eject button. See Figure 4-7.
8. Replace the EQC cassette into its foil pouch for storage.
9. If EQC fails (Figure 113), repeat steps 1 to 7. If EQC fails again, contact Technical Support.
Printing EQC Results
1. To print control results, press the right soft key to select Options. The Option menu will be displayed (Figure 114).
2. The Print option is selected. Press the right soft key to print control results.
NOTE: If an EQC interval has been entered into the ASPECT Reader by a supervisor and the interval has elapsed, a passed EQC result is required
before any patient testing is permitted. The following screen will be displayed (Figure 115).
FIGURE 112
FIGURE 113
FIGURE 114
FIGURE 111
FIGURE 115
44 ASPECT Reader User Guide
3. Press the left soft key to return to the Main Menu.
UPDATING READER
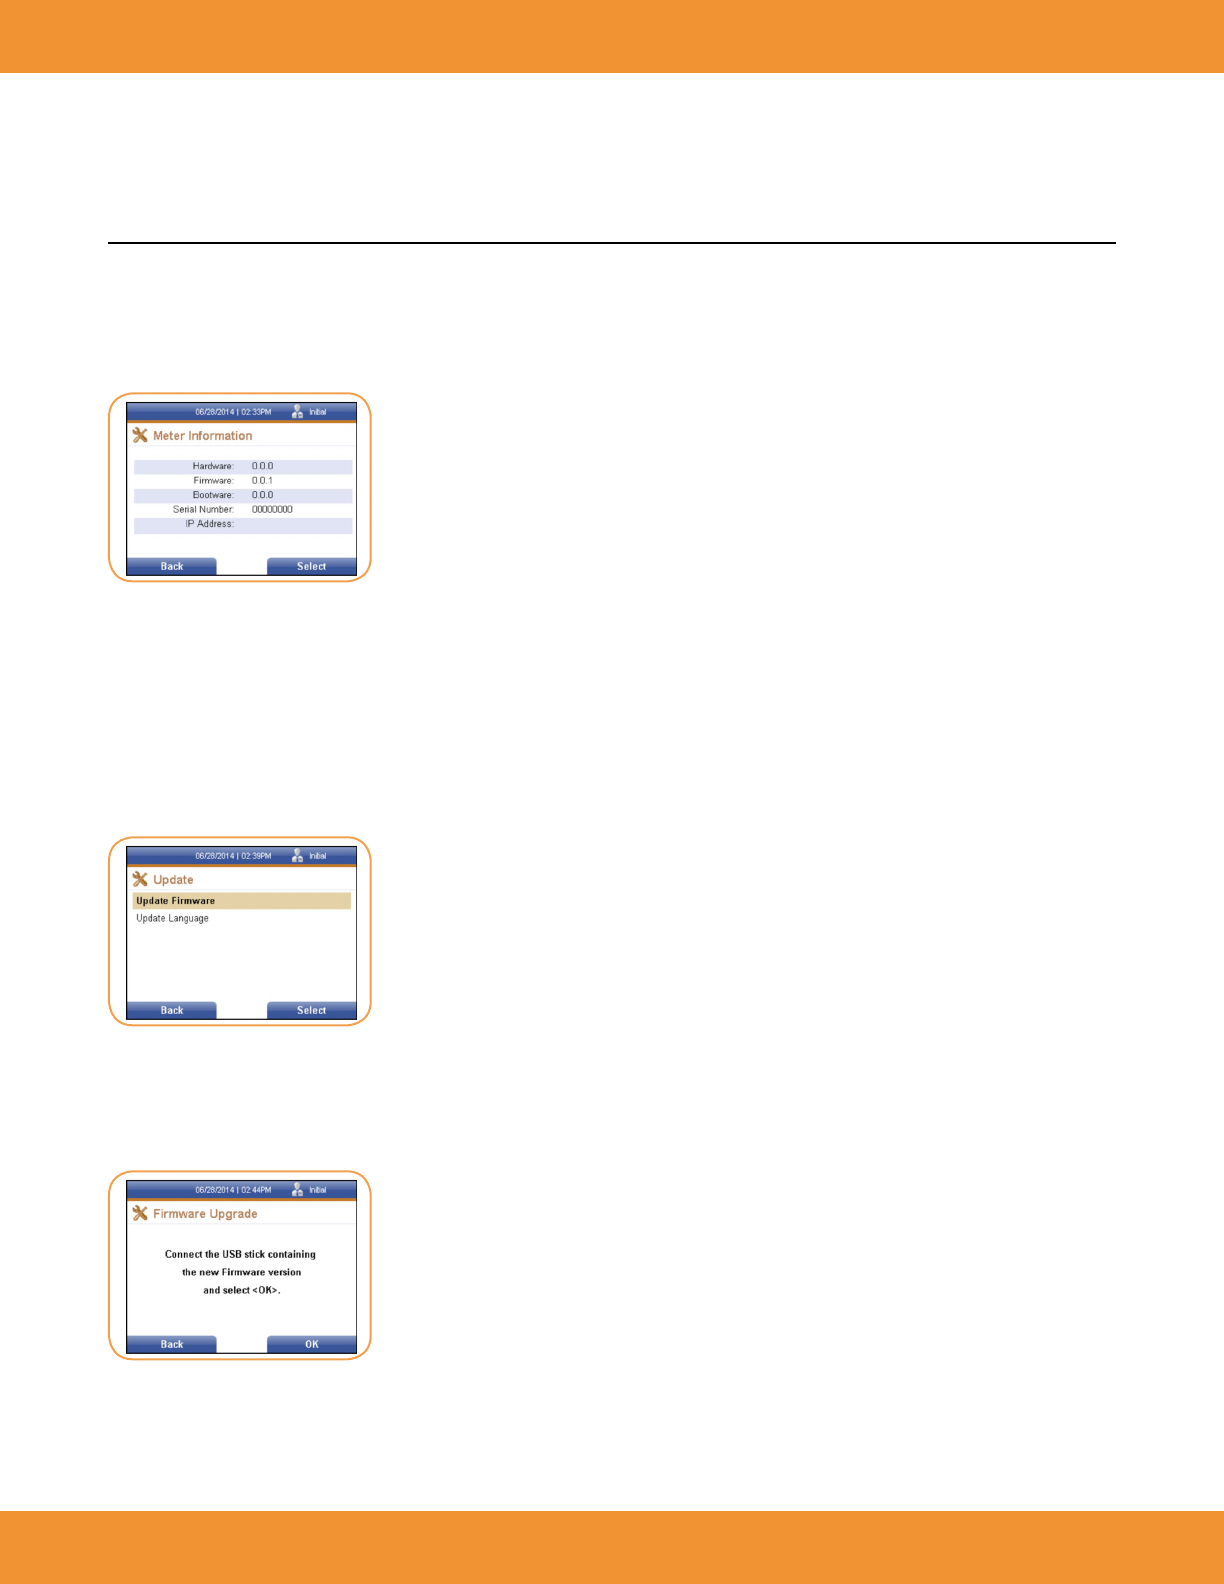
Reader Info displays the current network conguration of the reader and current version numbers for the hardware, rmware and bootware, as
well as the reader’s serial number and current IP address.
1. From the Supervisor screen, use the [↓] key to cursor down to the Reader Info menu item. Press the right soft key to select it. The Reader
Information screen is displayed (Figure 116).
2. Press the left soft key to return to the Supervisor screen.
Update
The Update screen allows the user to upload new rmware to the reader, using a USB stick.
1. From the Supervisor screen, use the [↓] key to cursor down to the Update text eld.
2. Press the right soft key to select it. The Update screen is displayed (Figure 117).
Update Firmware
1. The Update screen defaults to the Update Firmware text eld. Press the right soft key to select it.
2. The Firmware Upgrade screen is displayed (Figure 118).
3. Insert the USB stick containing the new rmware into a USB Port on the back of the reader (Figure 119).
FIGURE 116
FIGURE 117
FIGURE 118
ASPECT Reader User Guide 45
4. Press the right soft key to select OK to download the new rmware.
5. Once the new rmware has been downloaded, the...
6. Press the left soft key to return to the Update screen.
EXPORT LOGS
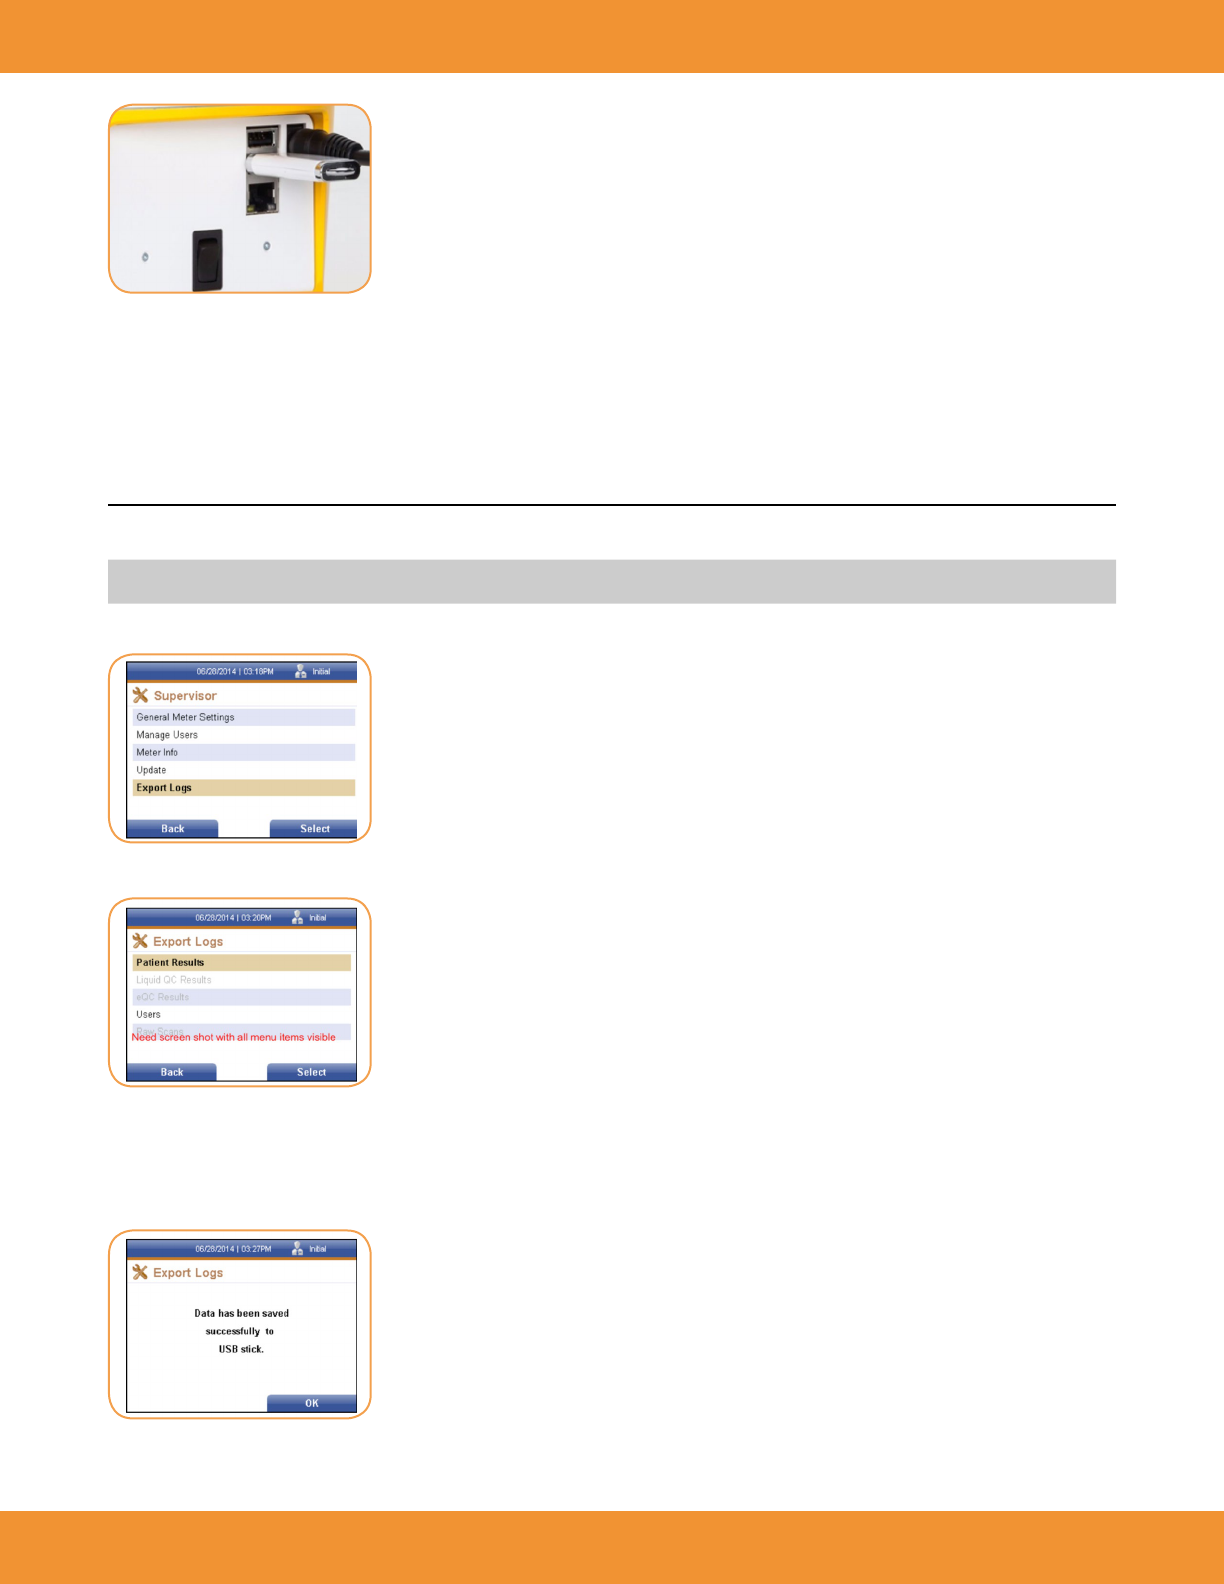
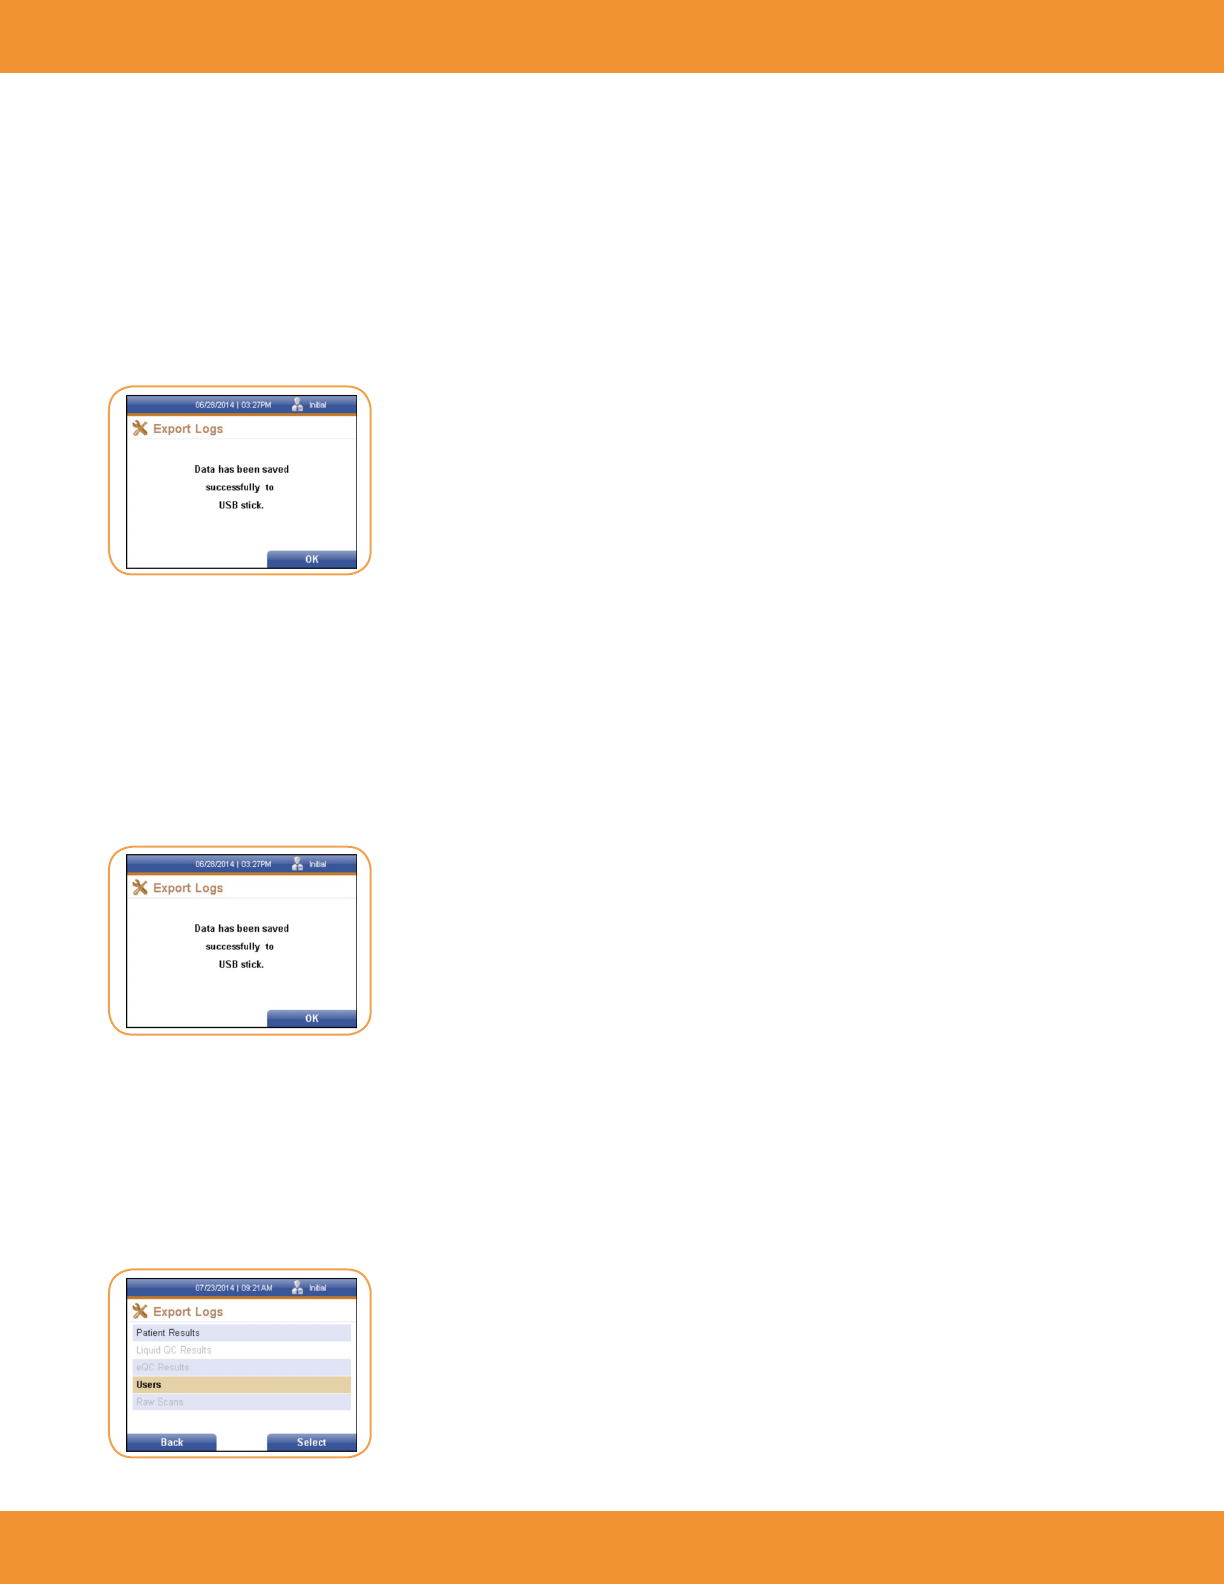
Under the Export Logs screen, the supervisor is able to export patient results, liquid QC results, EQC results, users, and raw scans to a USB stick.
NOTE: Insert a USB stick in a USB port on the back of the reader. Refer to picture of “Back of Reader” on page 11.
1. From the Supervisor screen, use the [↓] key to cursor down to the Export Logs text eld (Figure 120).
2. Press the right soft key to select it. The Export Logs screen is displayed (Figure 121).
Patient Results
1. Press the right soft key to select Patient Results. A window conrming that the data has been successfully saved to a USB stick is displayed
(Figure 122).
FIGURE 119
FIGURE 120
FIGURE 121
FIGURE 122
46 ASPECT Reader User Guide
2. Press the right soft key to select OK and return to the Export Logs screen.
3. Remove the USB stick from the back of the reader.
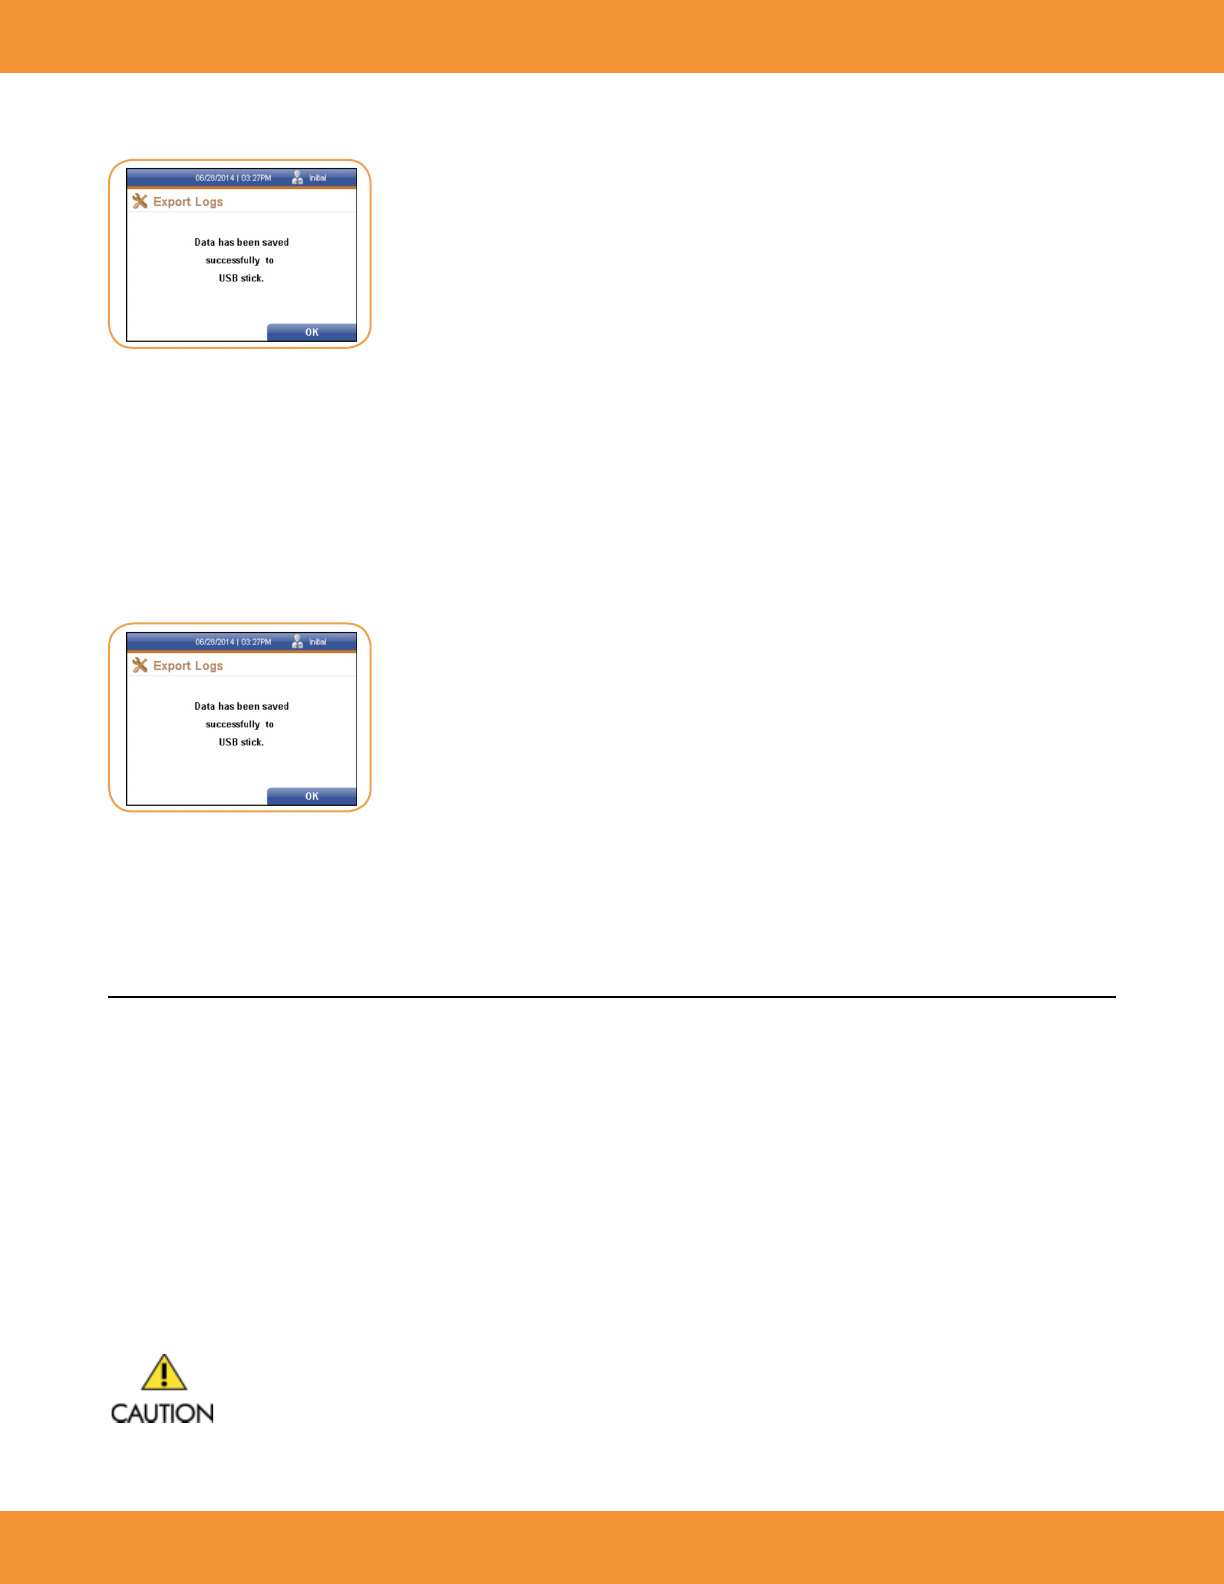
Liquid QC Results
1. Insert the desired USB stick into a USB port on the back of the reader.
2. Use the [↓] key to cursor down to the Liquid QC Results menu item from the Export Logs screen (under Supervisor→ Export Logs)
Press the right soft key to select Liquid QC Results.
3. A window conrming that the data has been successfully saved to a USB stick is displayed (Figure 123).
4. Press the right soft key to select OK and return to the Export Logs screen.
5. Remove the USB stick from the back of the reader.
EQC Results
1. Insert the desired USB stick into a USB port on the back of the reader.
2. Use the [↓] key to cursor down to the EQC Results menu item from the Export Logs screen (under Supervisor→ Export Logs)
Press the right soft key to select EQC Results.
3. A window conrming that the data has been success- fully saved to a USB stick is displayed (Figure 124).
4. Press the right soft key to select OK and return to the Export Logs screen.
5. Remove the USB stick from the back of the reader.
Users
1. Insert the desired USB stick into a USB port on the back of the reader.
2. Use the [↓] key to cursor down to the Users menu item from the Export Logs screen (under Supervisor→ Export Logs) (Figure 125).
FIGURE 123
FIGURE 124
FIGURE 125
ASPECT Reader User Guide 47
3. Press the right soft key to select Users.
4. A window conrming that the data has been successfully saved to a USB stick is displayed (Figure 126).
5. Press the right soft key to select OK and return to the Export Logs screen.
6. Remove the USB stick from the back of the reader.
Raw Scans
1. Insert the desired USB stick into a USB port on the back of the reader.
2. Use the [↓] key to cursor down to the Raw Scans menu item from the Export Logs screen (under Supervisor→ Export Logs)
Press the right soft key to select Raw Scans.
3. A window conrming that the data has been success- fully saved to a USB stick is displayed (Figure 127).
4. Insert the USB stick containing the new rmware into a USB Port on the back of the reader.
5. Remove the USB stick from the back of the reader.
MAINTENANCE
System Shipping and Storage
Environmental Conditions for ASPECT Reader Shipping and Storage:
• Humidity: 10 - 85% (non-condensing)
• Temperature: -25°C to 45°C
Recommended Maintenance & Cleaning
The reader parts that may be cleaned or disinfected:
• main housing of the reader
• cassette drawer
Do not wash or rinse LCD display screen, electrical or computer connections.
FIGURE 126
FIGURE 127
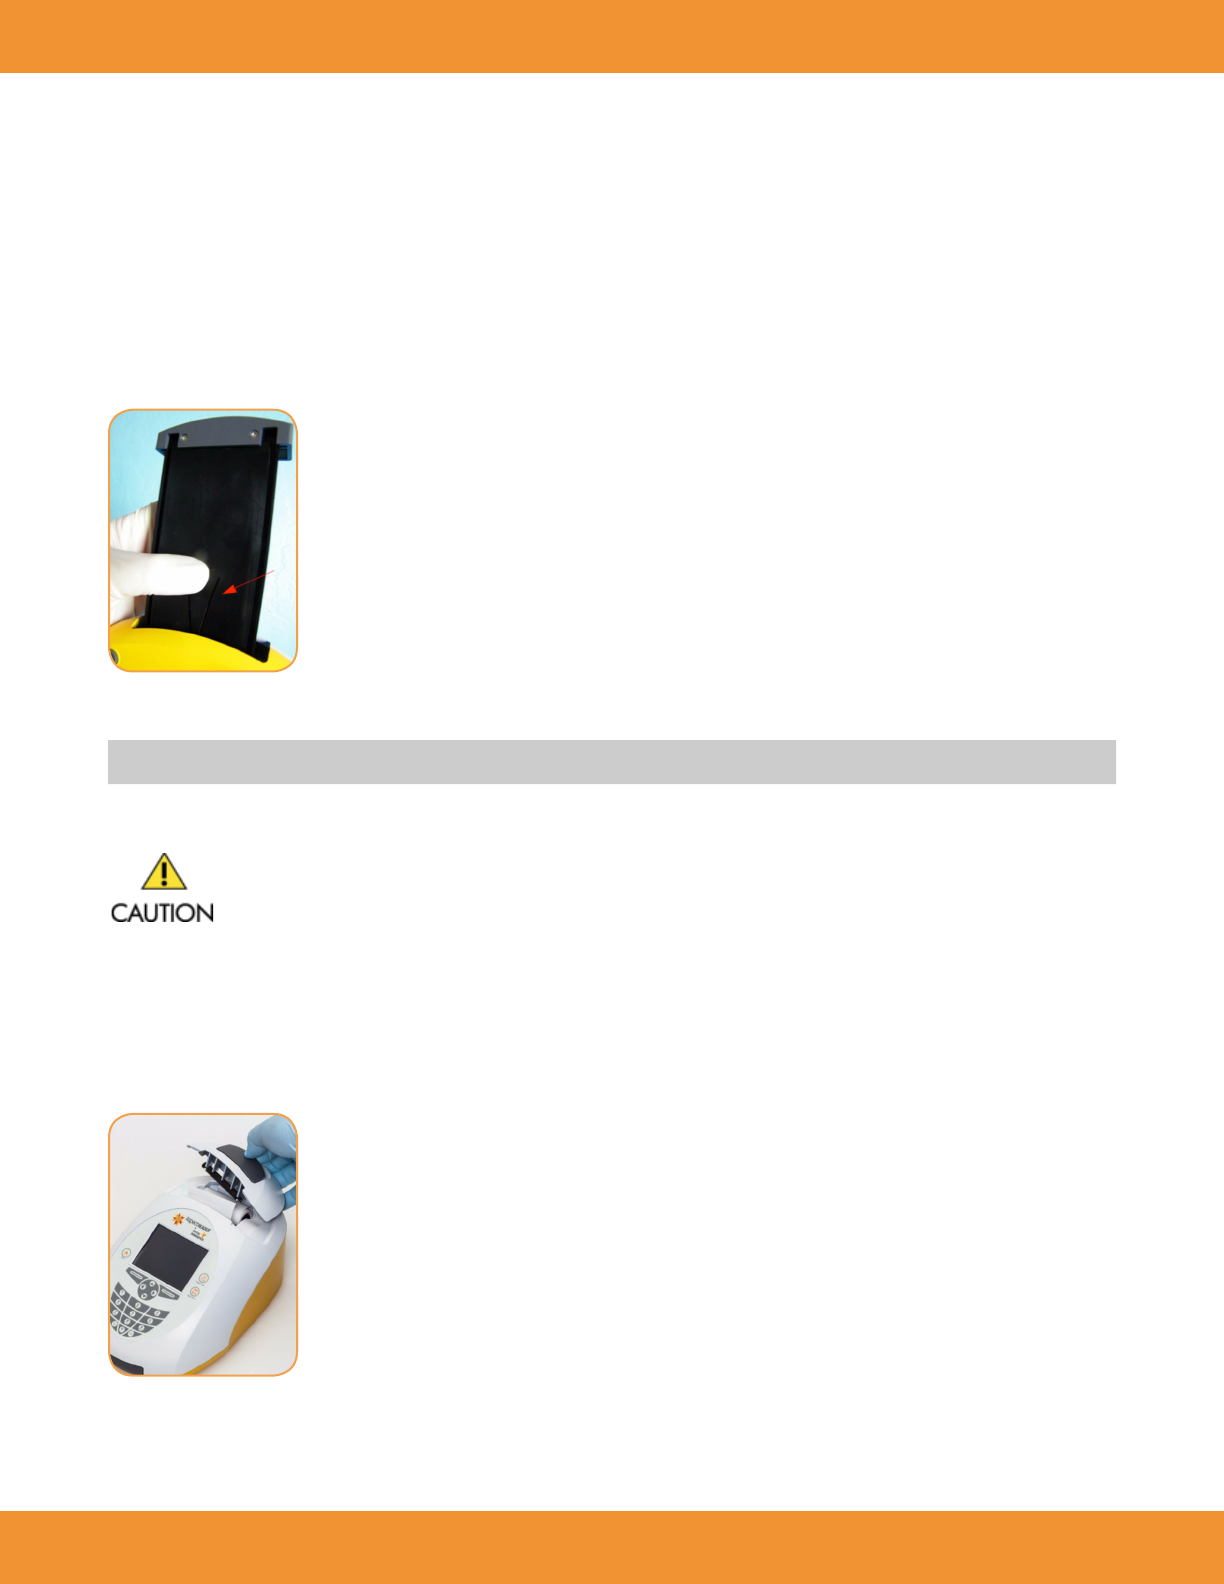
48 ASPECT Reader User Guide
Main Housing of the Reader
1. Power off reader.
2. Wipe surfaces that come into contact with specimens with a fresh solution of 0.6% bleach. Wipe with a cloth dampened with water and dry
with a soft cloth or paper towel. Avoid excess moisture.
Cassette Drawer
1. Power on the reader. Allow the self test to complete.
2. Press the eject button located on the top left of the reader.
3. Gently pull the drawer out, until it stops.
4. Lift the reader to display the bottom of the drawer slide (Figure 128).
5. Gently press the V-shaped slot on the underside of the drawer and slowly slide the drawer out.
NOTE: Additional pressure may be required to release the drawer.
6. Use a soft cloth dampened with 70% alcohol or 0.6% bleach solution to clean the cassette drawer. Dry with a soft cloth.
DO NOT clean the interior of the reader. DO NOT submerge the drawer in cleaning solution.
7. After cleaning, reinsert the drawer carefully by aligning the rails of the drawer into the tracks of the cassette reader.
8. Go to the Main Menu and perform EQC. Refer to “Electronic Quality Control (eQC)” on page 42-43.
Replacing the Paper Roll
1. Lift the gray handle up and towards the front of the reader to open the paper cover (Figure 129).
2. Place the paper in the paper holder with the paper tail coming from under the roll towards the front of the reader.
FIGURE 128
FIGURE 129
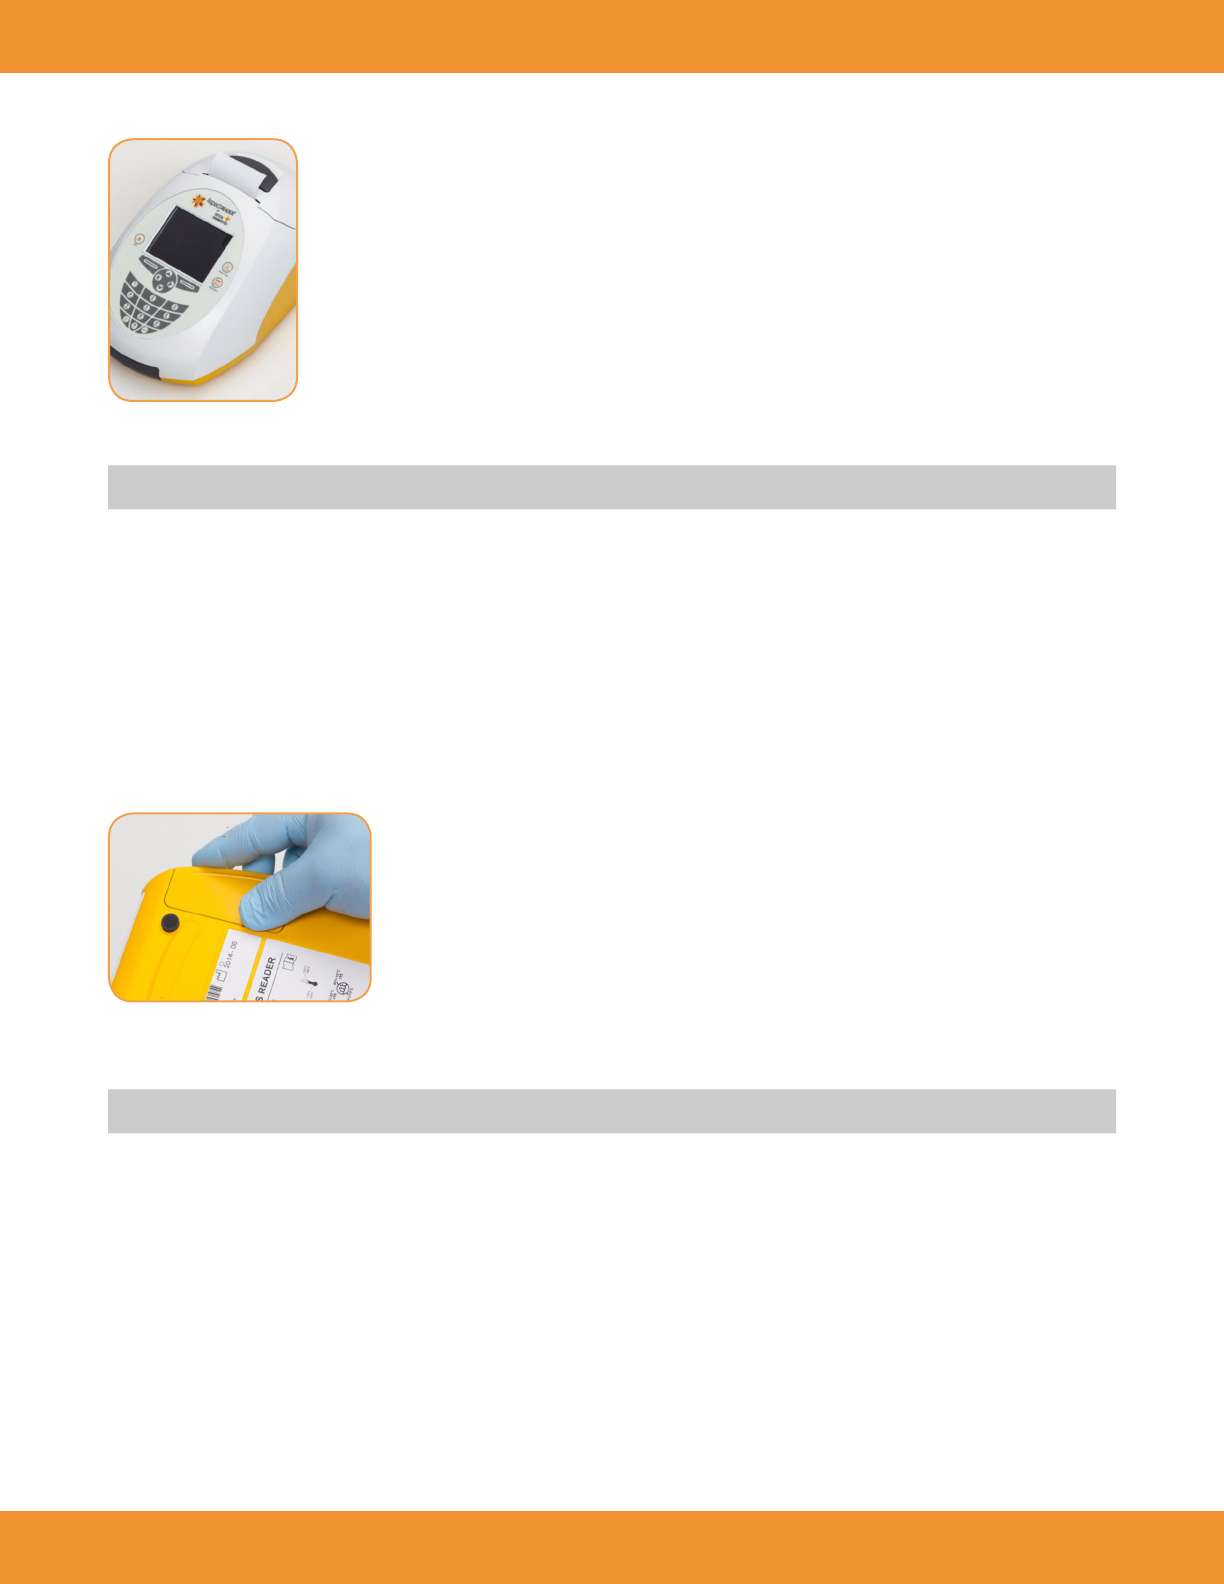
ASPECT Reader User Guide 49
3. Holding the paper tail towards the front of the reader, replace the paper cover and snap it in place (Figure 130).
4. Press the Paper Feed button on the reader to advance the paper.
NOTE: The reader must be powered on.
Battery Power
The batteries provide an optional power source if electric power is unavailable. The reader does not automatically switch to batteries in the event
of a power failure. Unplugging the external power cord from the back of the reader will automatically switch the reader to battery power.
Changing Batteries
1. Make sure there are no cassettes in the reader.
2. Power the reader off.
3. Gently turn the reader upside down and slide the battery cover to the right to remove it (Figure 131).
4. Replace the batteries using the diagram on the reader according to positive or negative polarity.
5. Replace the battery cover, place the instrument right side up and power on the instrument.
NOTE: The batteries act as an alternative power source with limited capacity.
System Decontamination
The following decontamination protocol is to be followed before transporting the system out of the laboratory for servicing.
1. Wear proper personal protective equipment including non-powdered disposable gloves, lab coat and eye protection when conducting
decontamination.
2. Power off the reader.
3. Disconnect power supply for the reader.
4. Open the drawer and remove any ASPECT Reader cassettes.
5. For all external parts of the system and the interior drawer compartment, clean with the following protocol:
• Thoroughly wipe all areas with a lint-free cloth dampened with a 0.6% bleach solution.
• Thoroughly wipe all areas with a lint-free cloth dampened with water. Wipe several times to ensure all bleach is removed from the
reader parts.
• Thoroughly wipe all areas with a lint-free cloth dampened with 70% alcohol to remove any residue.
FIGURE 130
FIGURE 131

50 ASPECT Reader User Guide
6. Package the reader for shipment following the reverse of the unpacking of the Reader. Refer to “Installation” on page 10.
70% Alcohol Preparation:
Combine 700mL 100% Ethanol or Isopropanol and 300mL of DH2O, or 70mL 100% Ethanol or Isopropanol and 30mL DH2O.
Long Term Shutdown
1. Remove any cassettes from the reader.
2. Power off the system.
3. Disconnect the power cord from the wall outlet and the system.
4. Wipe down all surfaces with a disinfectant solution 0.6% bleach solution, followed by water. Wipe all surfaces dry using a lint-free cloth.
5. Close the drawer to maintain a dust-free interior.
~
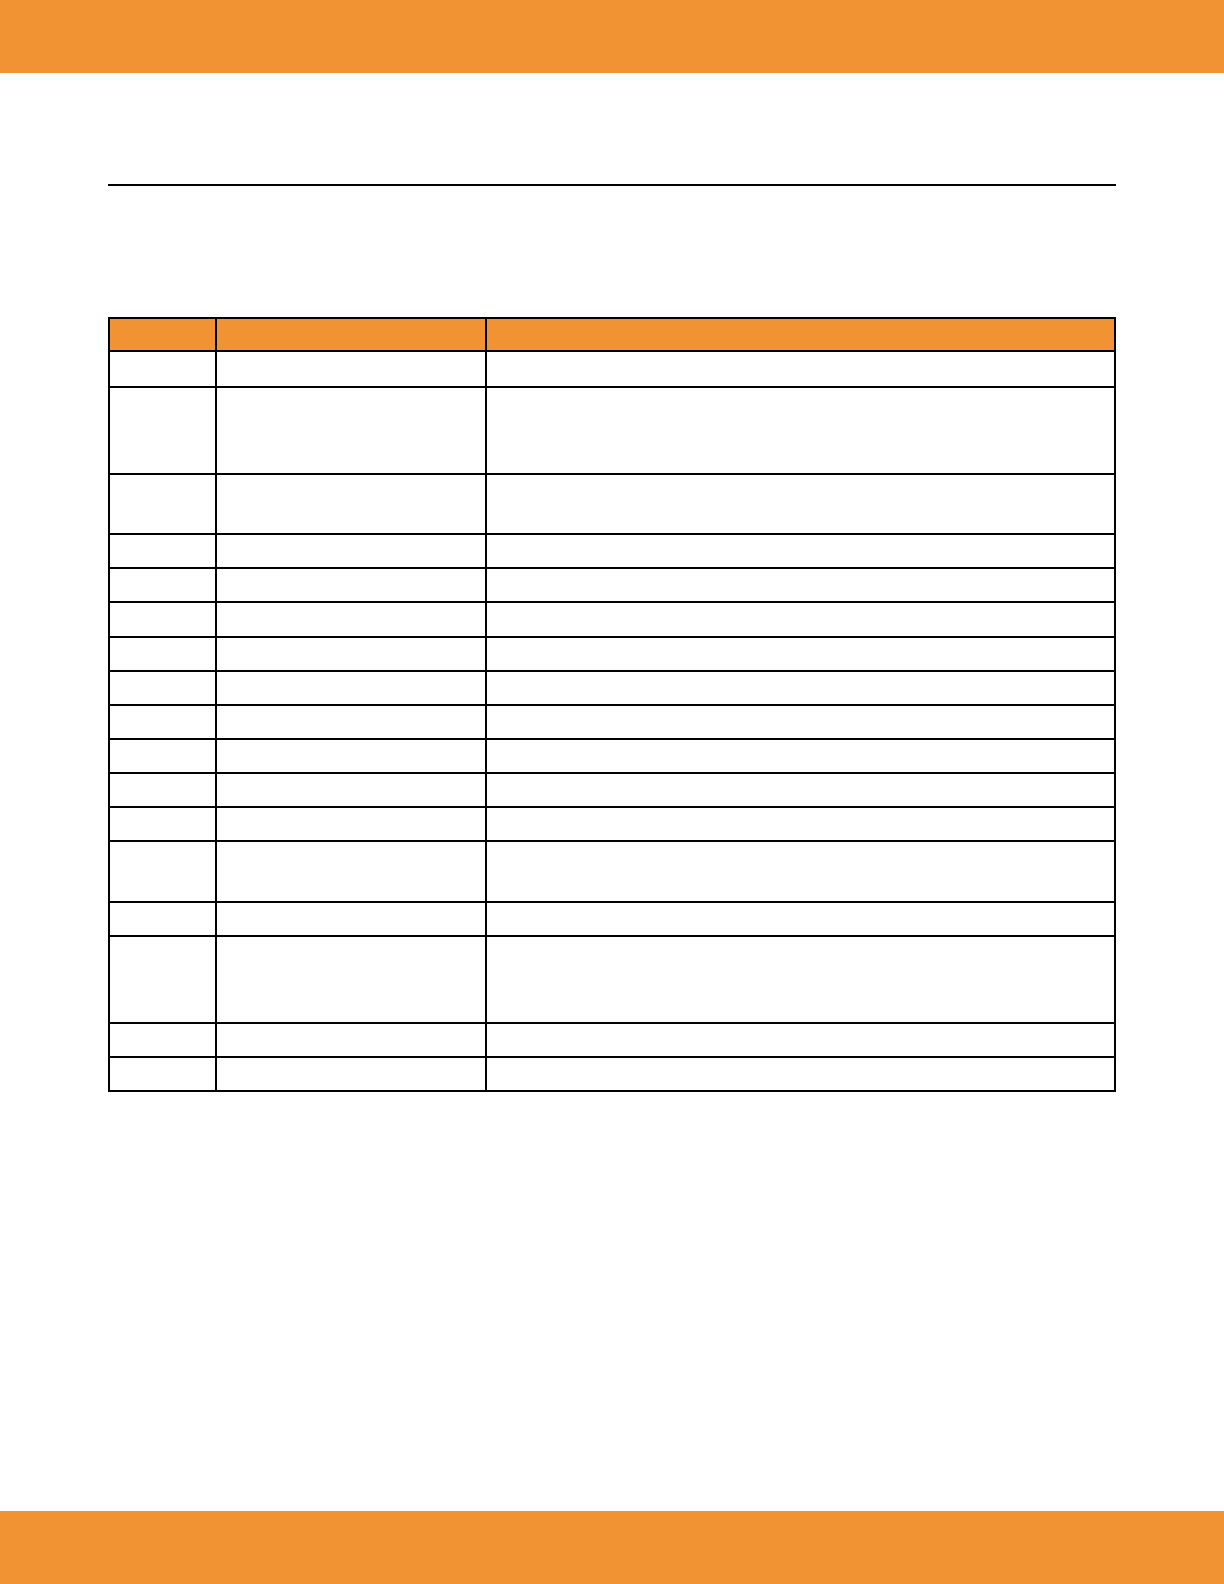
ASPECT Reader User Guide 51
TROUBLESHOOTING
Troubleshooting/Error Codes
Several problem scenarios with possible causes and recommended actions:
Error Codes Description Recommended Action
.044.001 Self test failed Discontinue use. Contact Technical Support.
.060.006 Drawer blocked
1. Unblock drawer.
2. Press eject key again.
3. If error continues, contact Technical Support.
.061.002 Reader has recognized a used
cassette. Retest using a new cassette.
.061.008 Cassette Lot locked. QC for this lot of cassette is expired. Run controls.
.061.012 Supervisor ID Error Supervisor ID should have between 4 - 12 characters.
.061.032 Analyzer calibration failed. Contact Technical Support.
.061.040 User ID already exists Choose another User ID.
.061.043 Expired cassette Retest using a new cassette.
.061.044 Device type is incorrect Retest using a cassette of the correct device type.
.061.046 QC card is expired Retest with a non-expired QC card.
.061.050 Abort Test User selected to abort test. If aborted, the test will need to be repeated with a new cassette.
.061.051 Low Battery Warning Replace batteries before running another test.
.061.055 Wrong Entry. Wrong format or range.
Please correct the entry. Check the entered information and correct accordingly.
.061.060 Reader locked EQC failed. Repeat test with new EQC. If EQC continues to fail, contact Technical Support.
.061.085
Invalid User Error: The user is not
stored, or it has no proper rights for
this function.
Select a different user or check with a supervisor about user rights.
.061.094 RFID Error. Wrong Cassette Retest using a new cassette.
.061.116 Write failure on USB stick Ensure that a USB stick is connected.

52 ASPECT Reader User Guide
WARRANTY
Critical Diagnostics warrants that the ASPECT Reader (the “Product”) will be free from defects in materials and workmanship under normal use
and when used in accordance with the instructions for use for a period of twelve (12) months from the date of shipment (the “Warranty Period”).
This limited warranty extends to the rst end-user purchaser only and is not assignable or transferable.
Critical Diagnostics at its option, will at no charge either repair the Product (with new and/or reconditioned parts) or replace the Product during
the Warranty Period. All replaced parts become the property of Critical Diagnostics.
This warranty does not apply to any Product damaged through abnormal use, misuse, mishandling, neglect, accident, negligence, tampering or
unauthorized service.
Copyright and Trademark Information
The information in this manual is protected by copyright. Except as specically permitted, no portion of this document may be distributed or
reproduced by any means, or in any form, without Critical Diagnostics prior written permission.
Critical Diagnostics, ASPECT-PLUS, Advancing Medicine. Saving Lives. and ASPECT Reader are all trademarks of Critical Diagnostics in the US and
other countries.
© 2014 by Critical Diagnostics, All rights reserved.

ASPECT Reader User Guide 53

Medpace Medical Device B.V.
Maastrichterlaan 127-129
NL – 6291 EN Vaals
Phone: +31 43 306 3320
Fax: +31 43 306 3338
Critical Diagnostics Limited
23 Mespil Road
Dublin 4
Ireland
www.criticaldiagnostics.com
PM
C