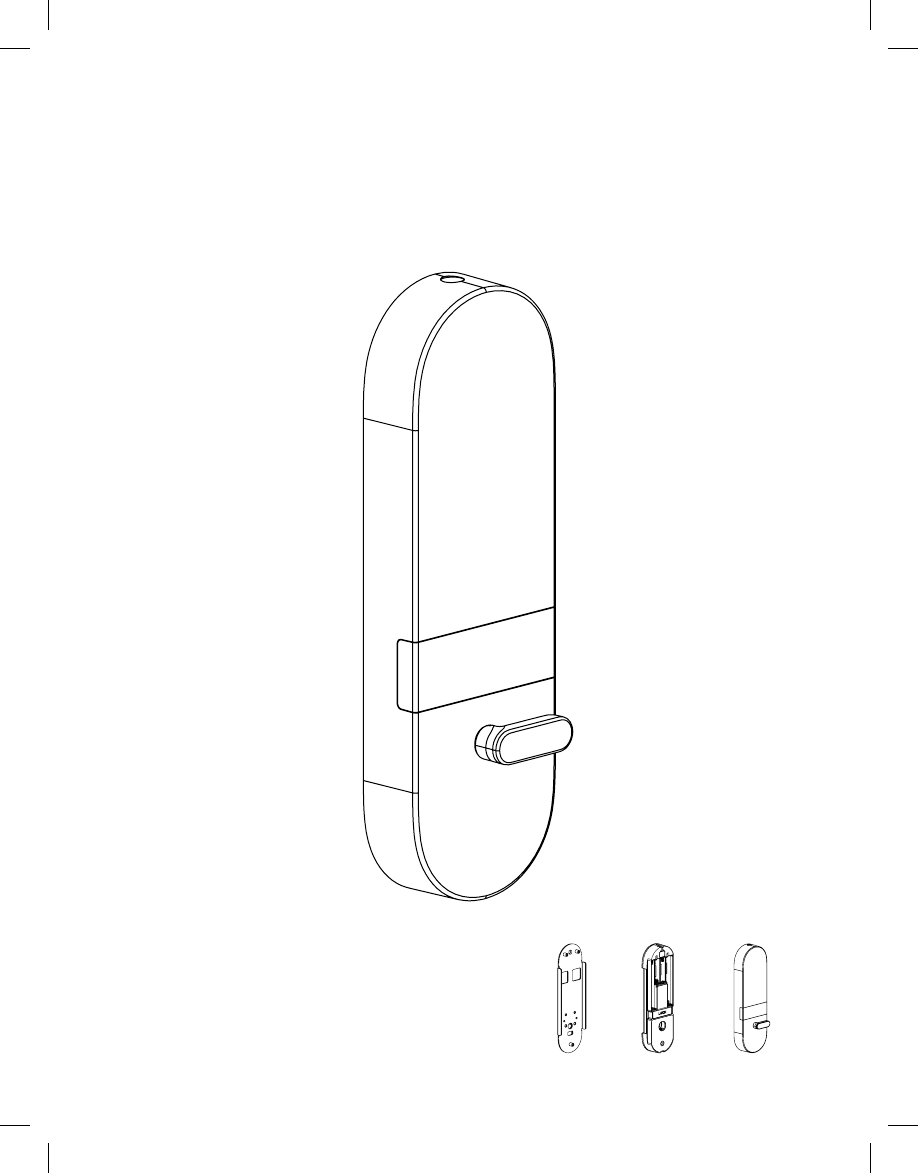
Latch Systems C1 Smart Access Control Product with Wi-Fi and BLE User Manual
Latchable, Inc. Smart Access Control Product with Wi-Fi and BLE Users Manual
Users Manual

INSTALLATION GUIDE
C SERIES
INSTALLATION GUIDE
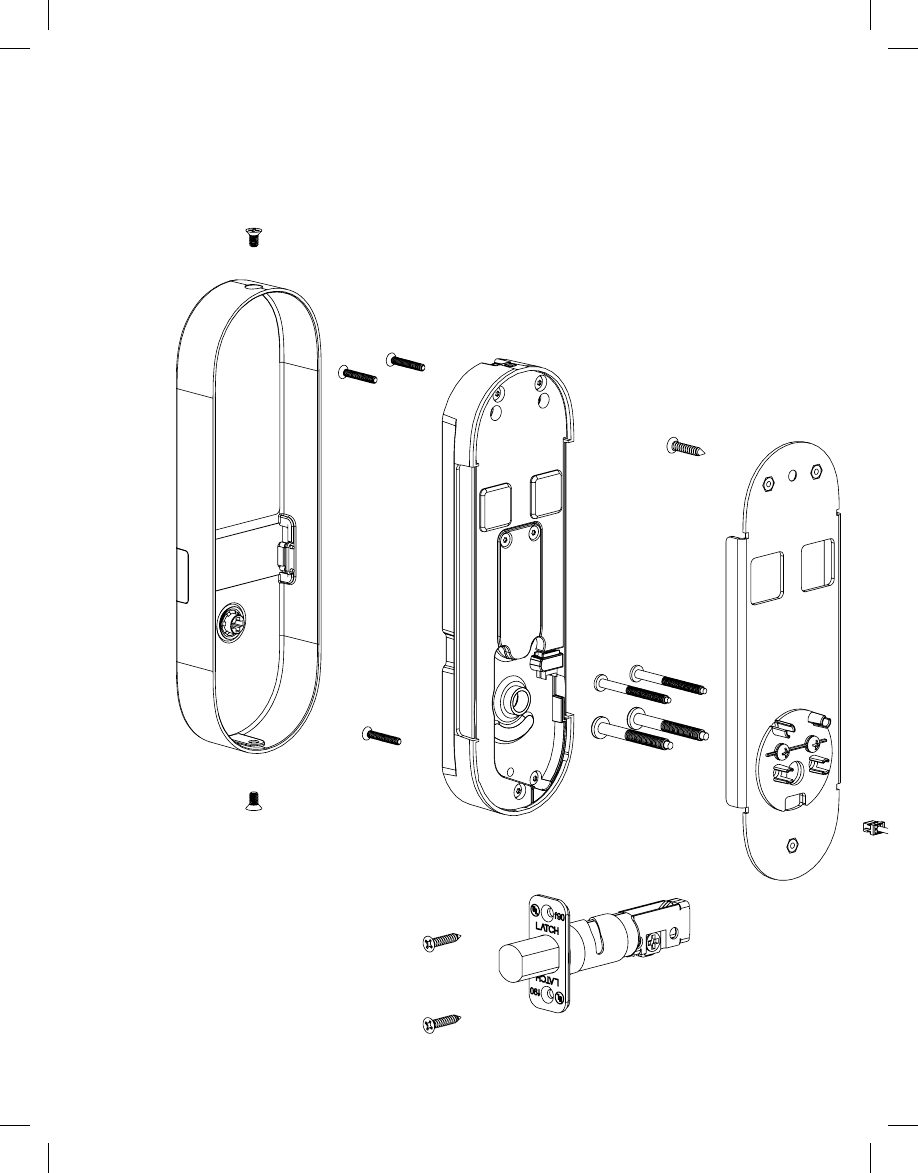
Inside the Box
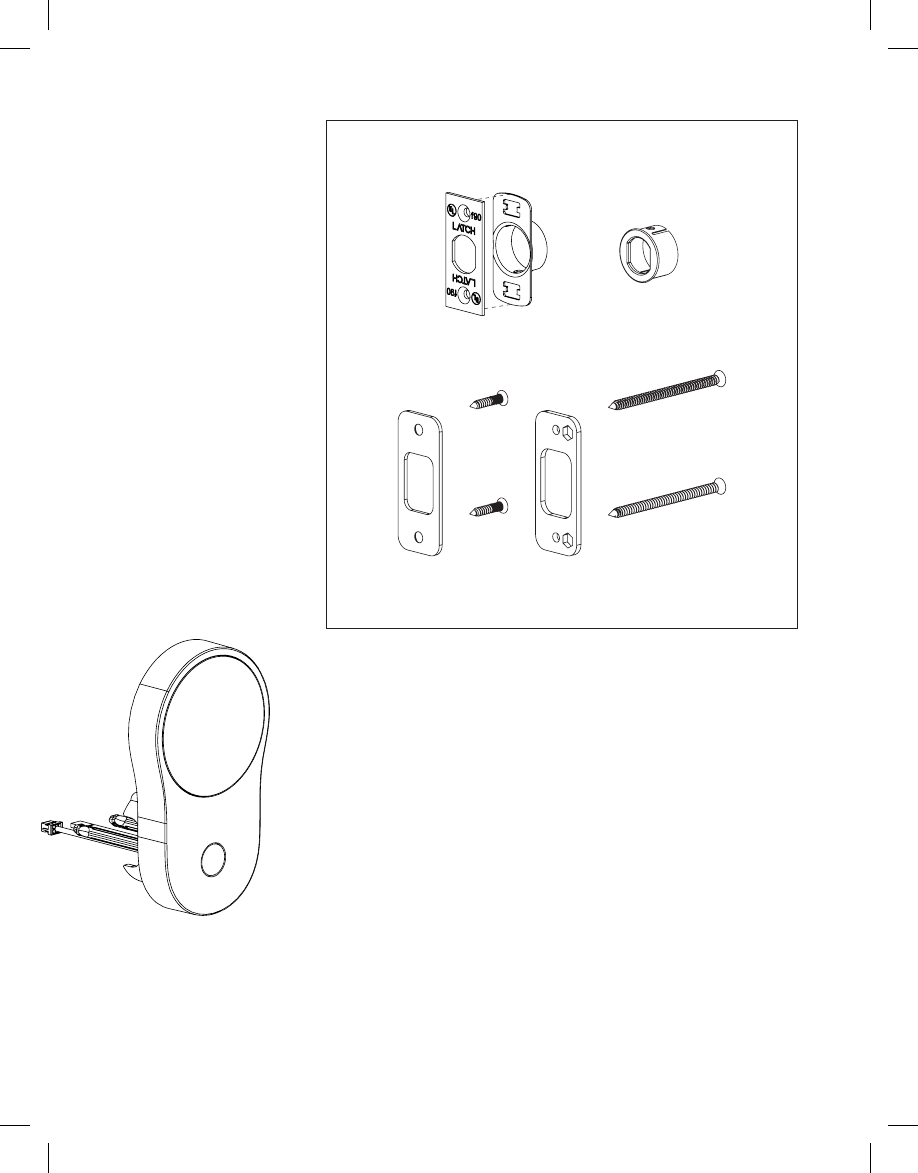
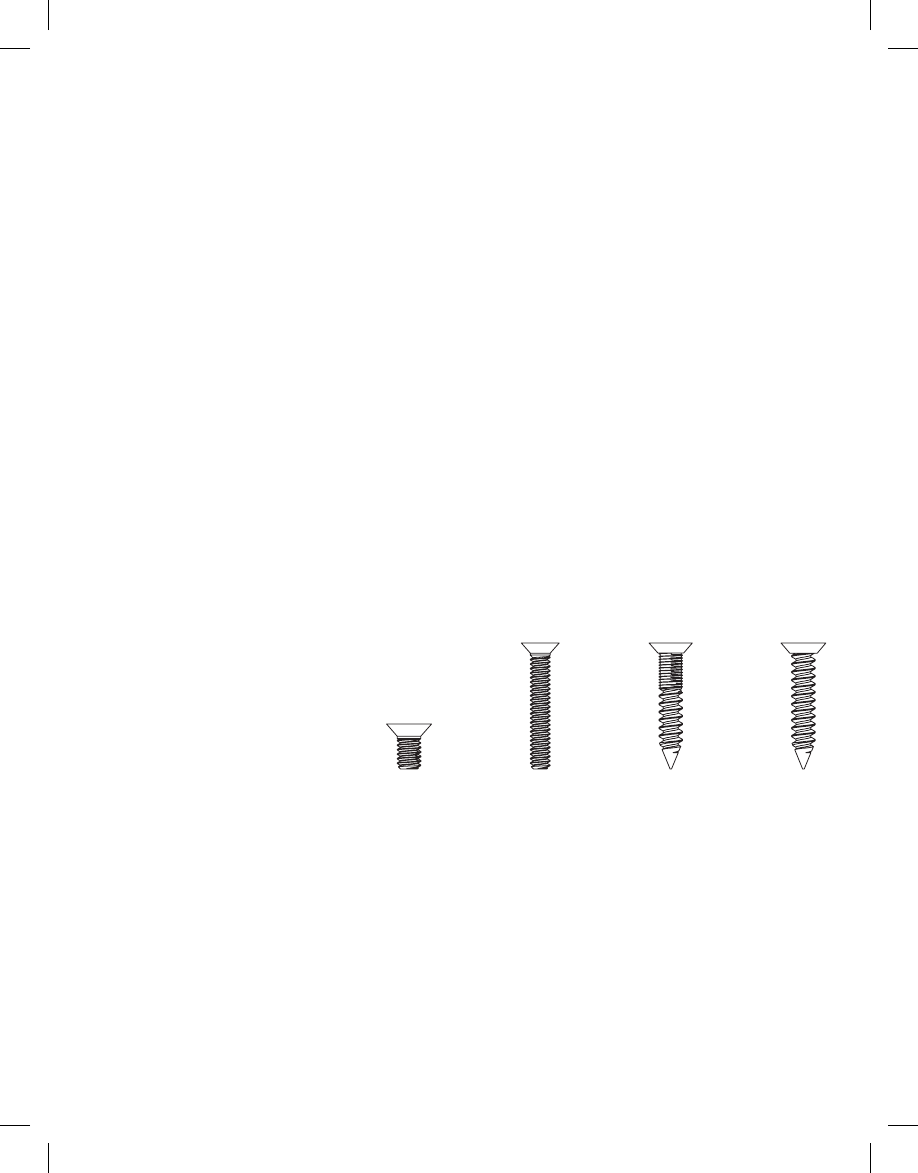
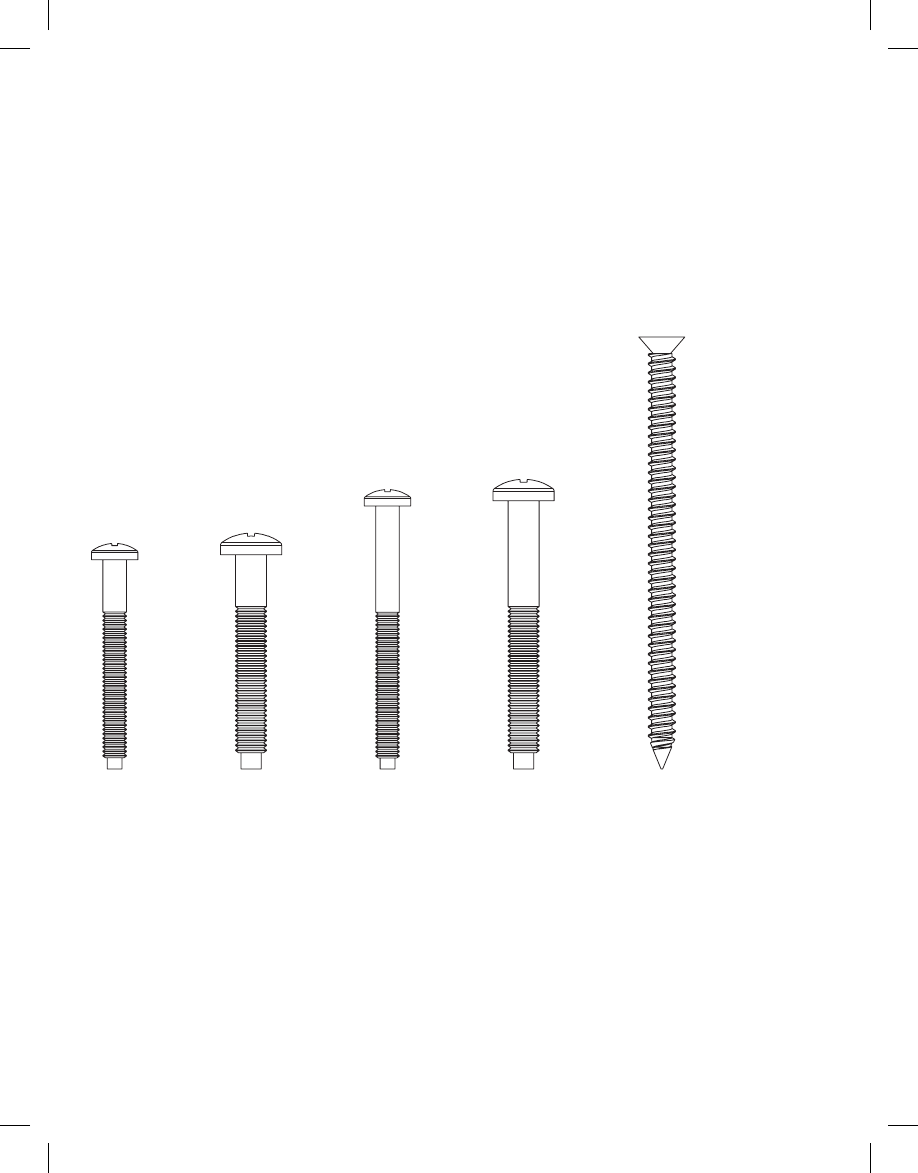
Screws
X 4X 3X 2 X 1
X 2 X 2X 2 X 2 X 2


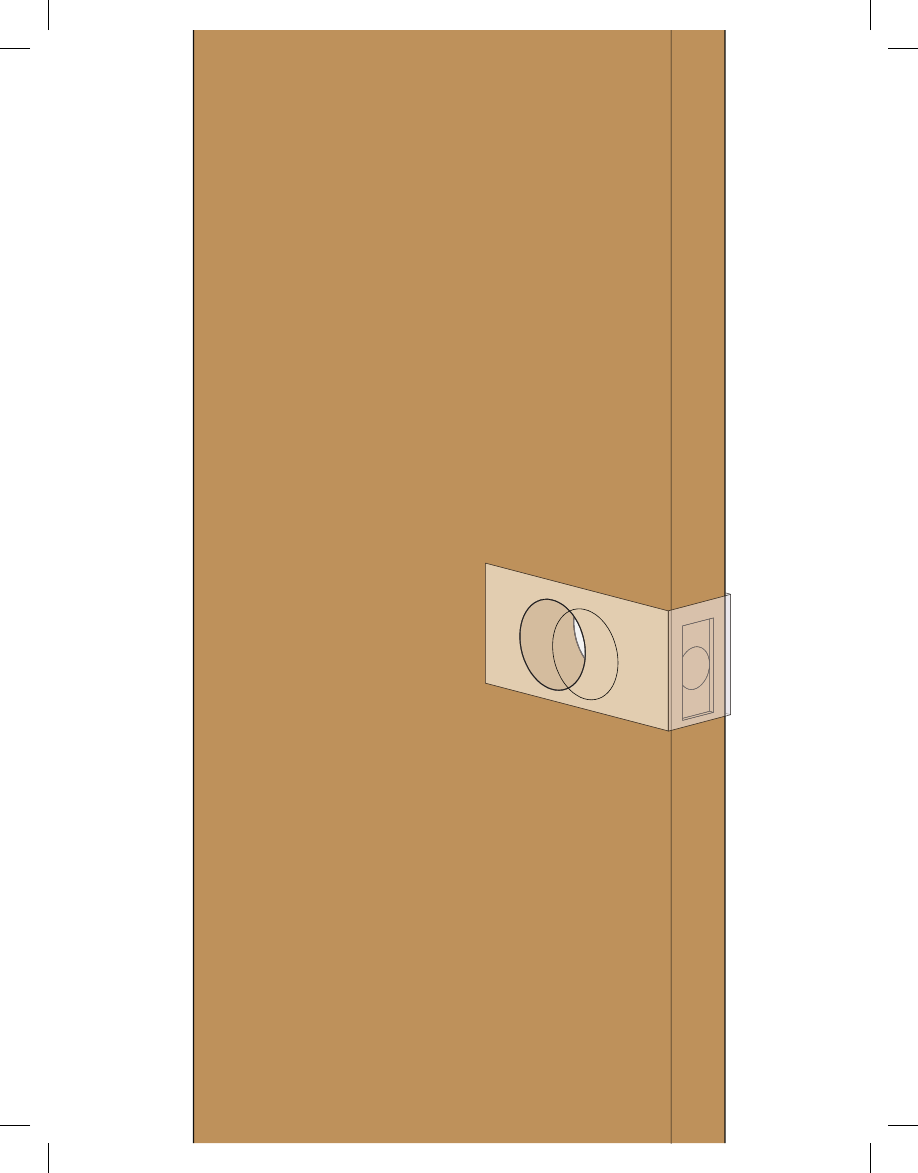
PREPARATION
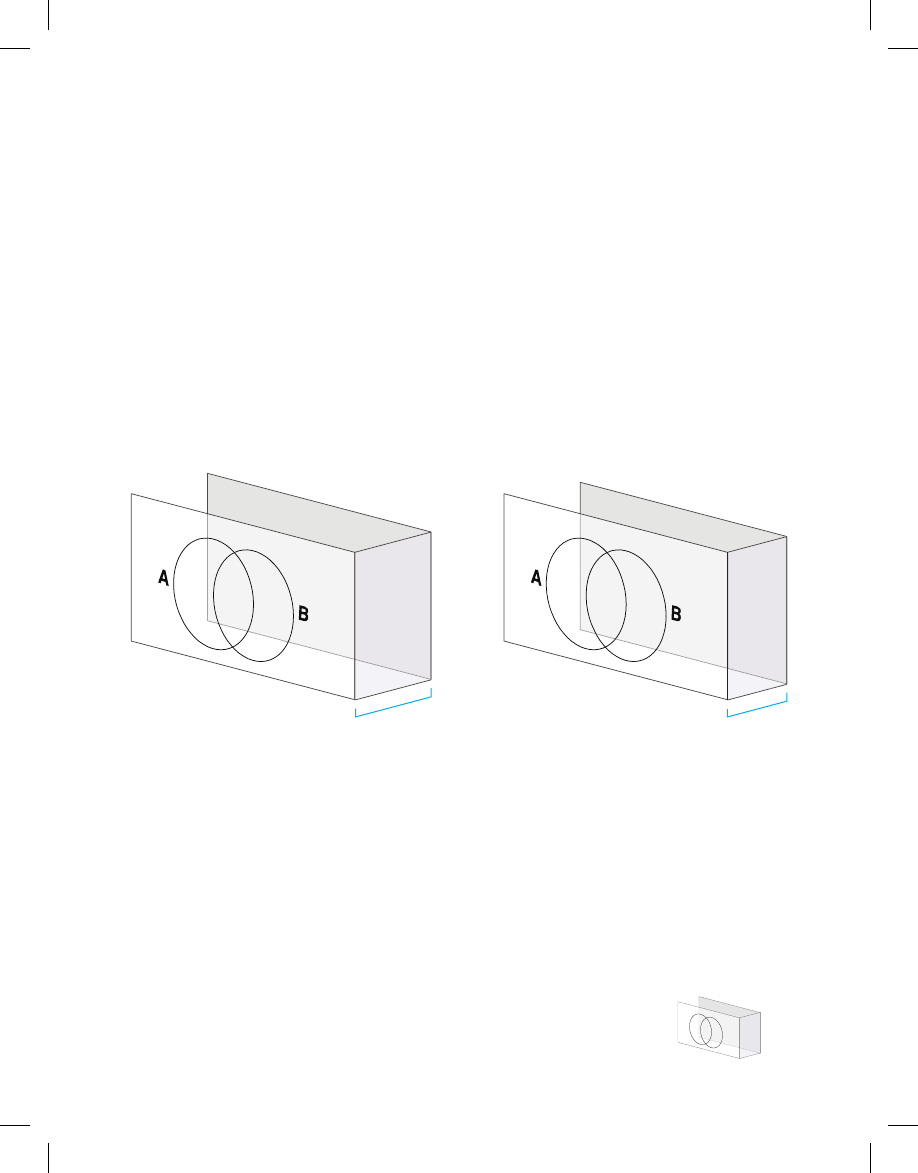
Measure
Select the correct cutsheet according to
the door thickness. Identify if your door has
backset A or backset B with the cutsheet.
X 2
A
B
1-3/8"1- 3 /4"
A
B
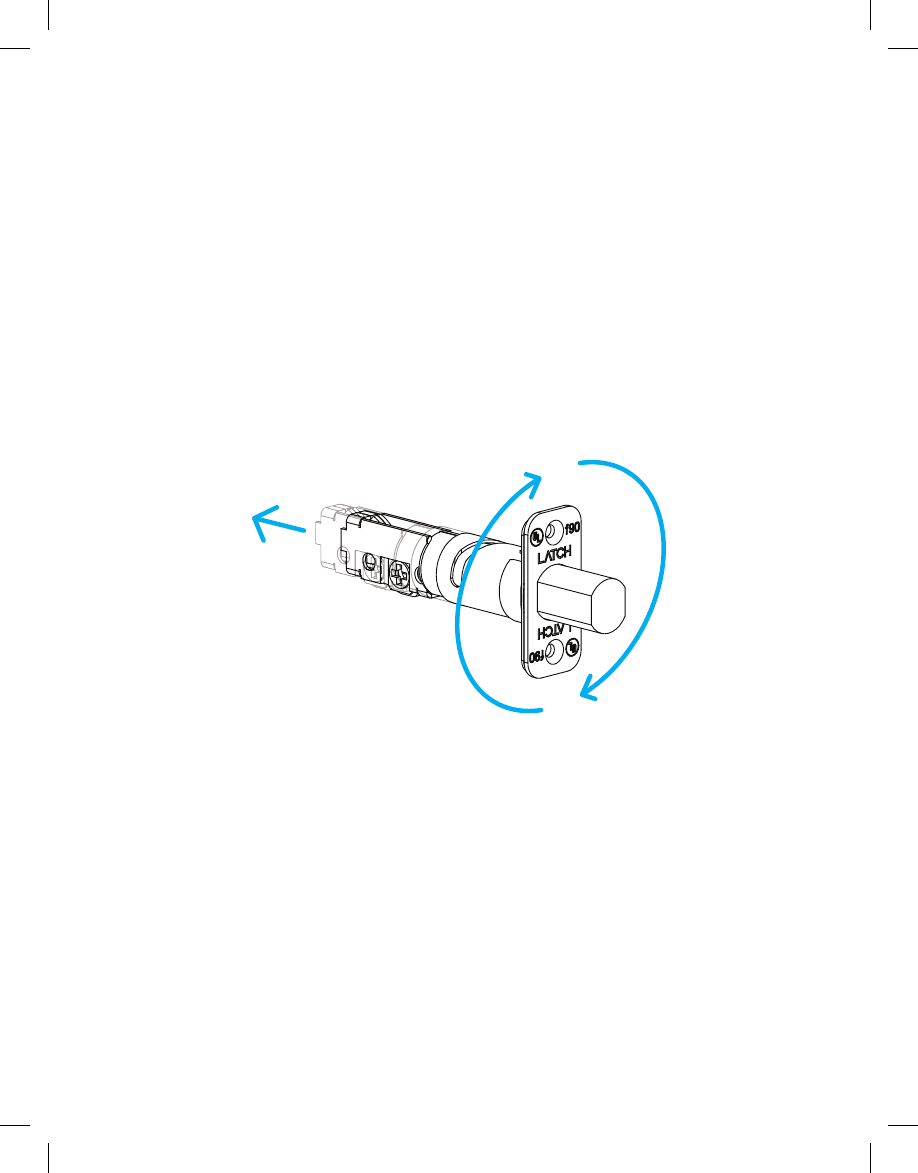
The deadbolt extends or retracts by
spinning the rotating part 180º.
Extend or retract the deadbolt depending on the
backset type.
A) EXTEND
B) RETRACT
A
B
A
B
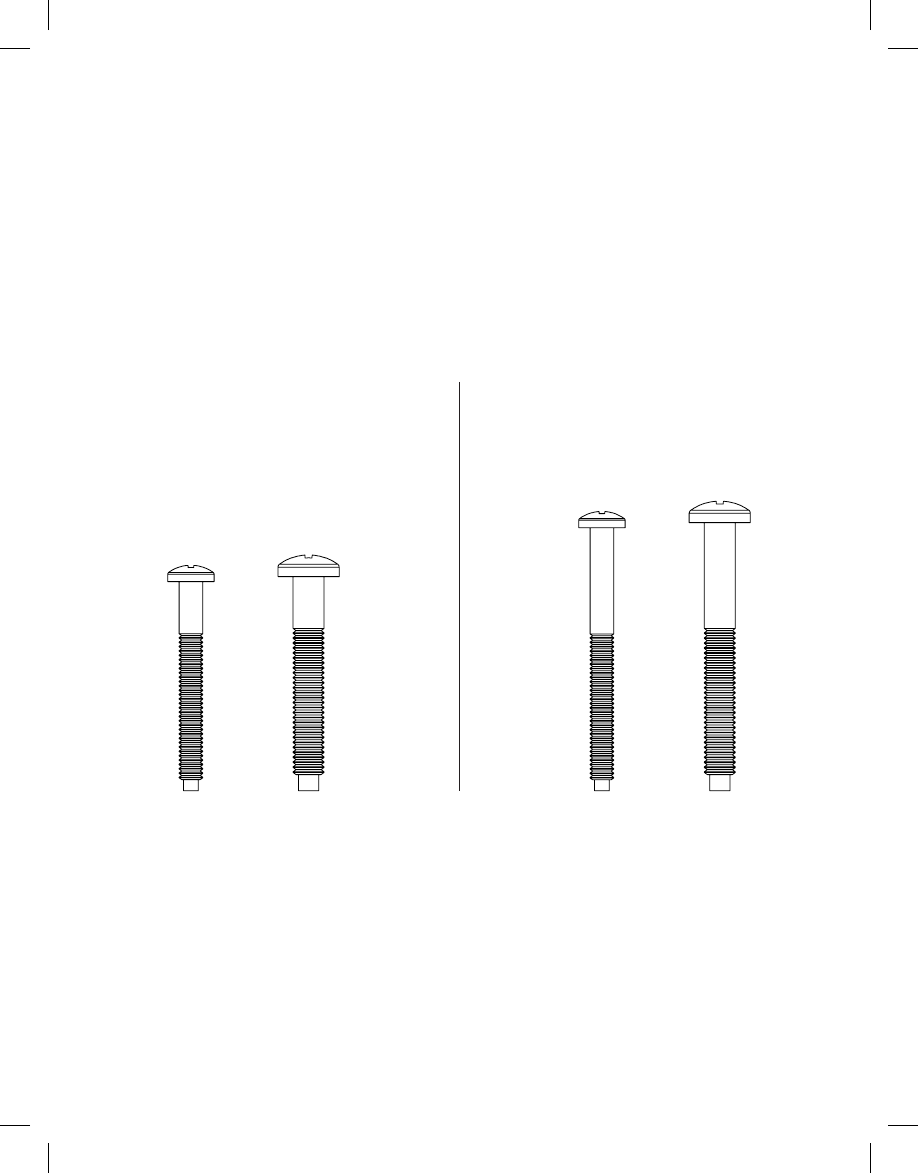
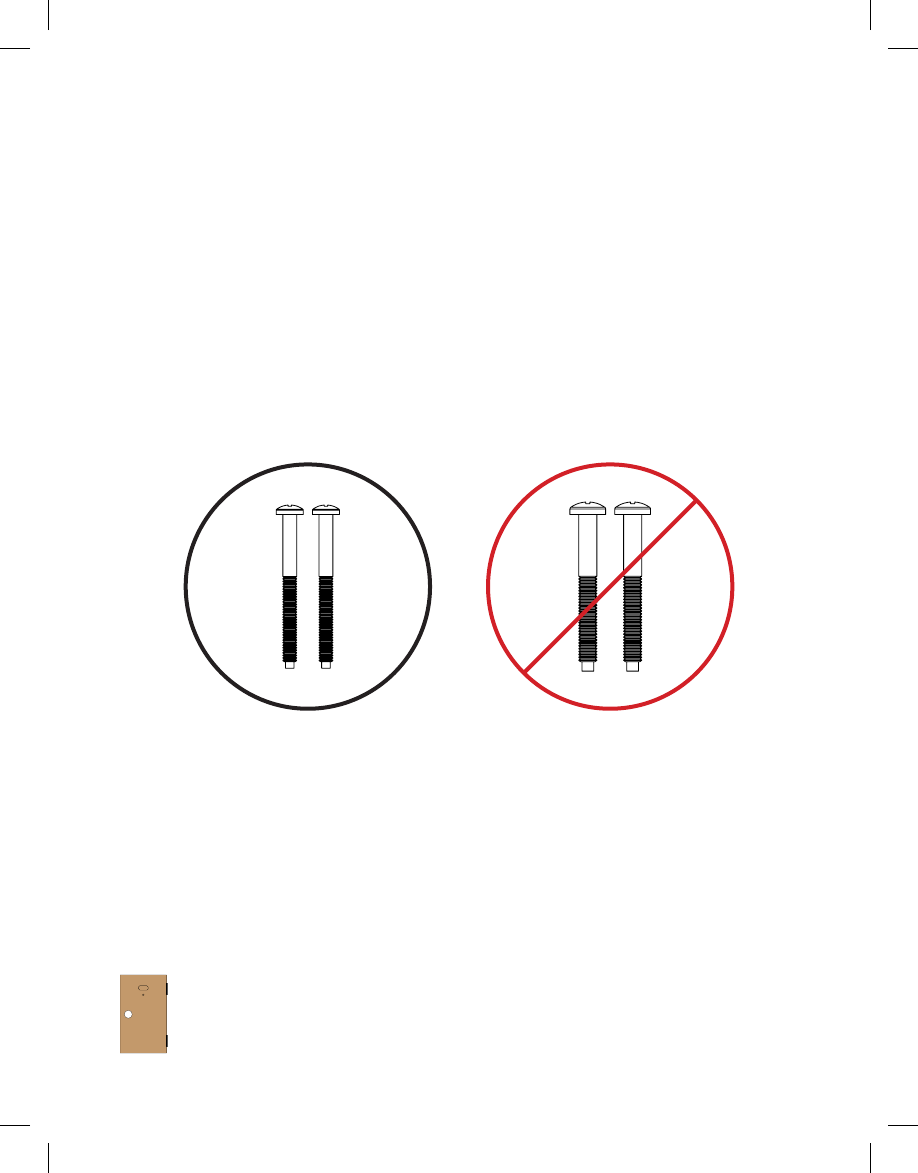
Choose the respective mounting screws according
to your door thickness.
1-3/8" 1- 3/4"

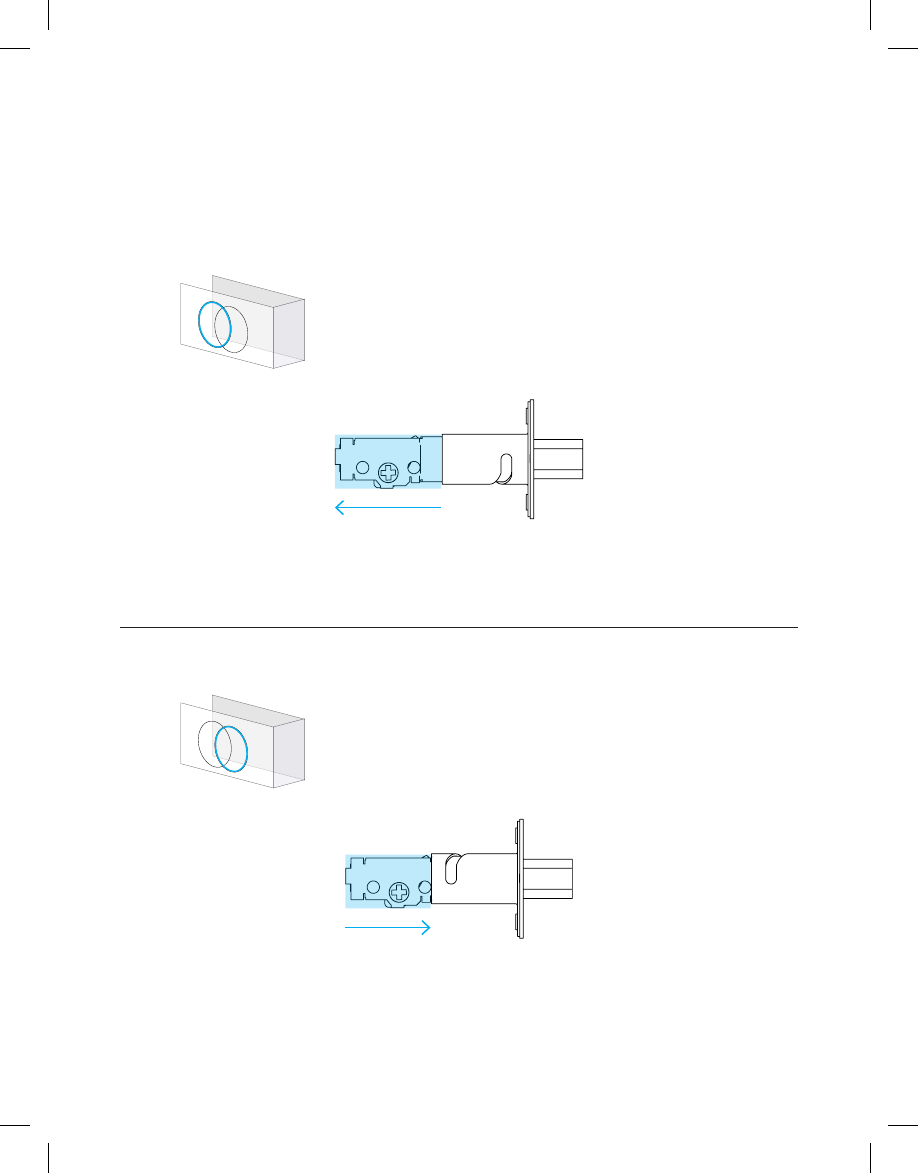
If you have a 1-3/8" thick door
Break the tailpiece to shorten it.


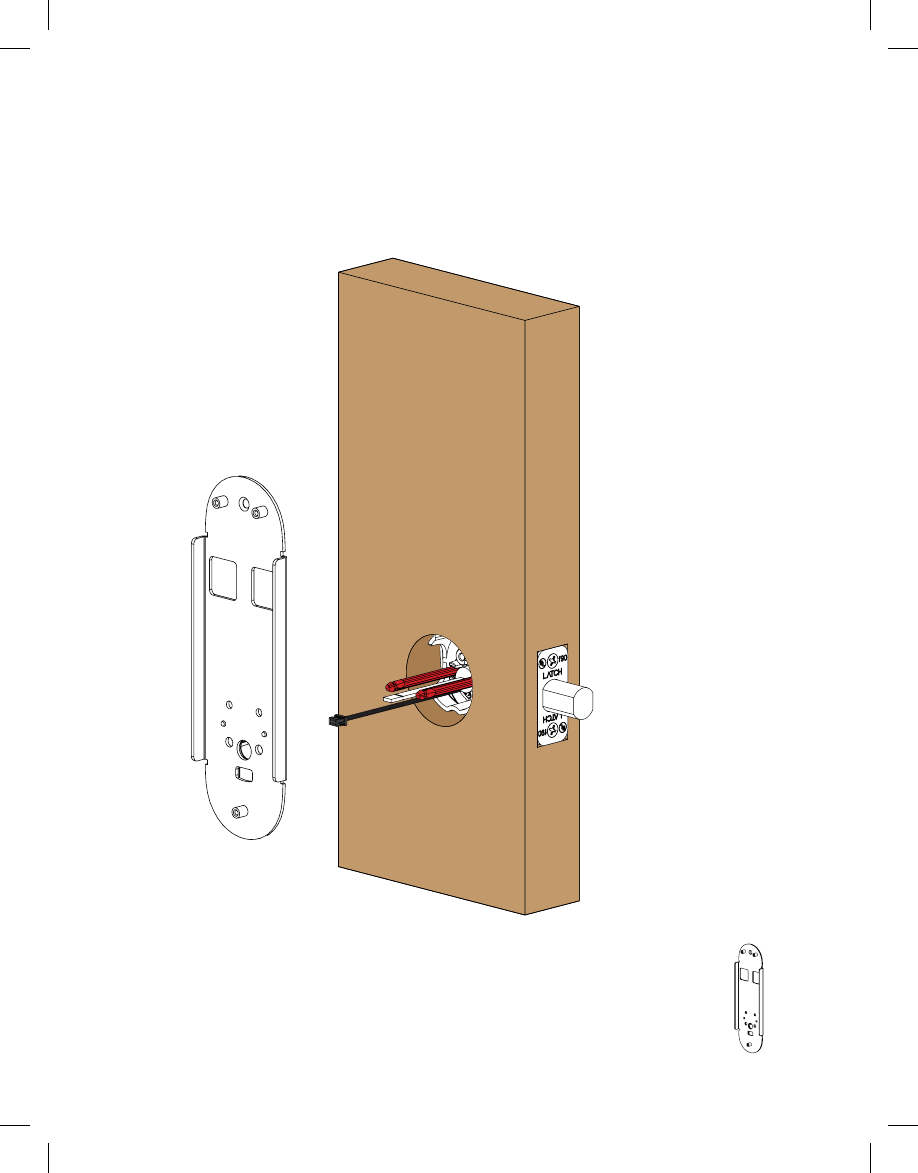
INSTALLATION
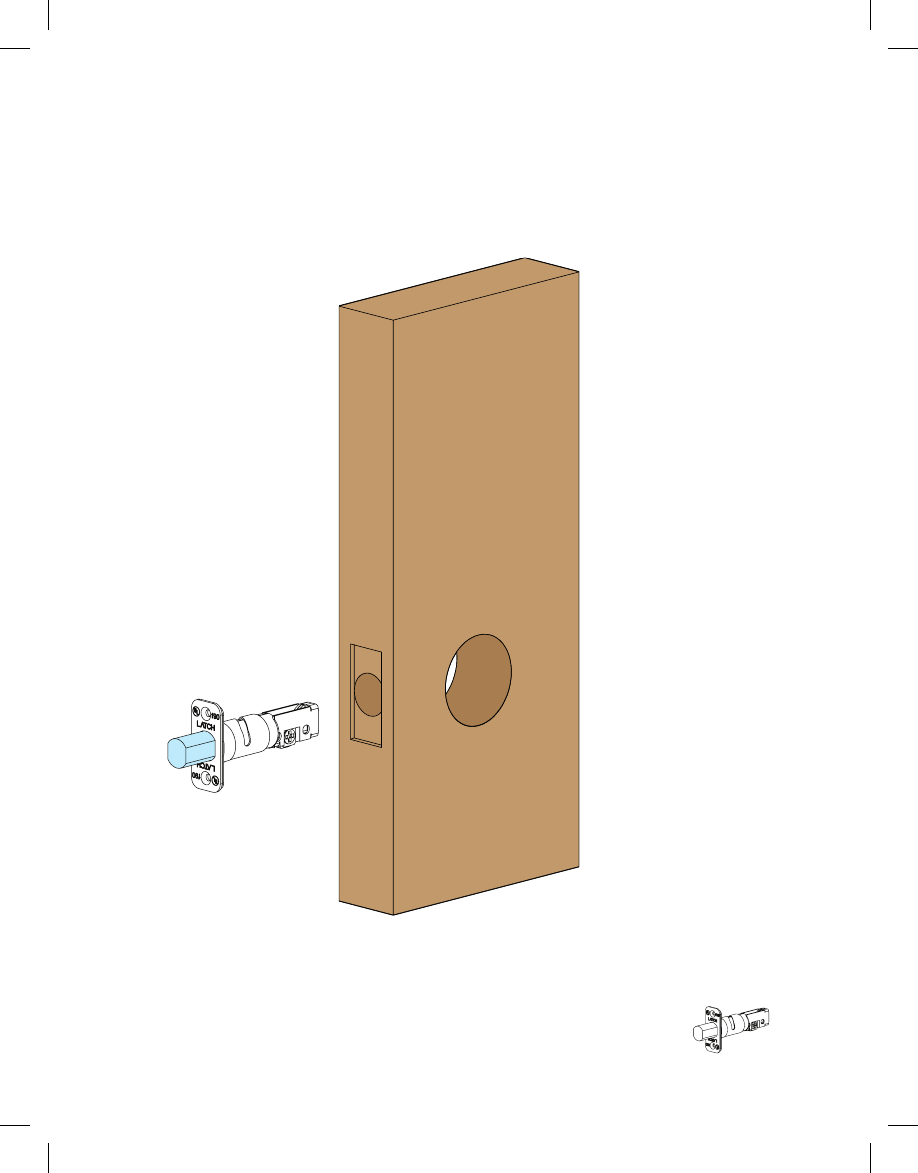
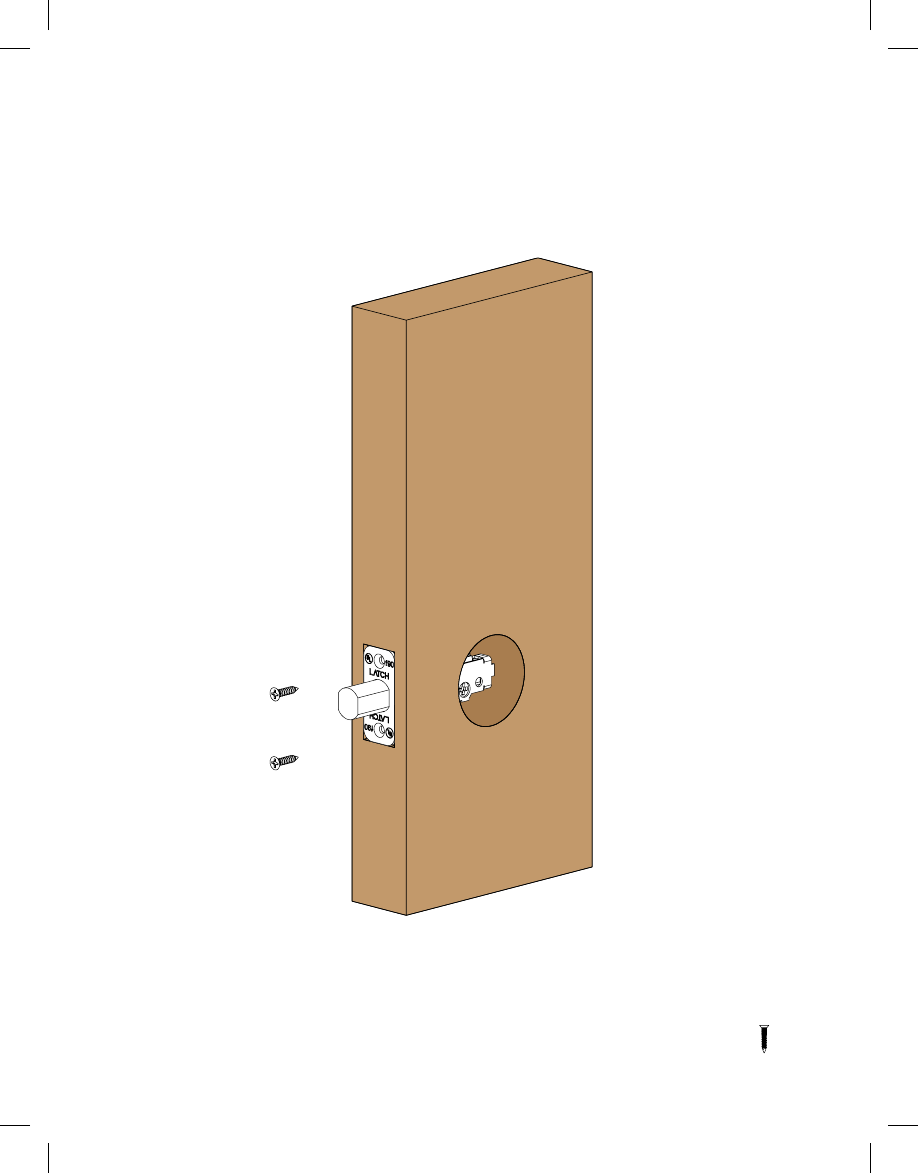
Insert the deadbolt.
1
X 1* KEEP THE DEADBOLT OUT THROUGHOUT THE INSTALLATION.
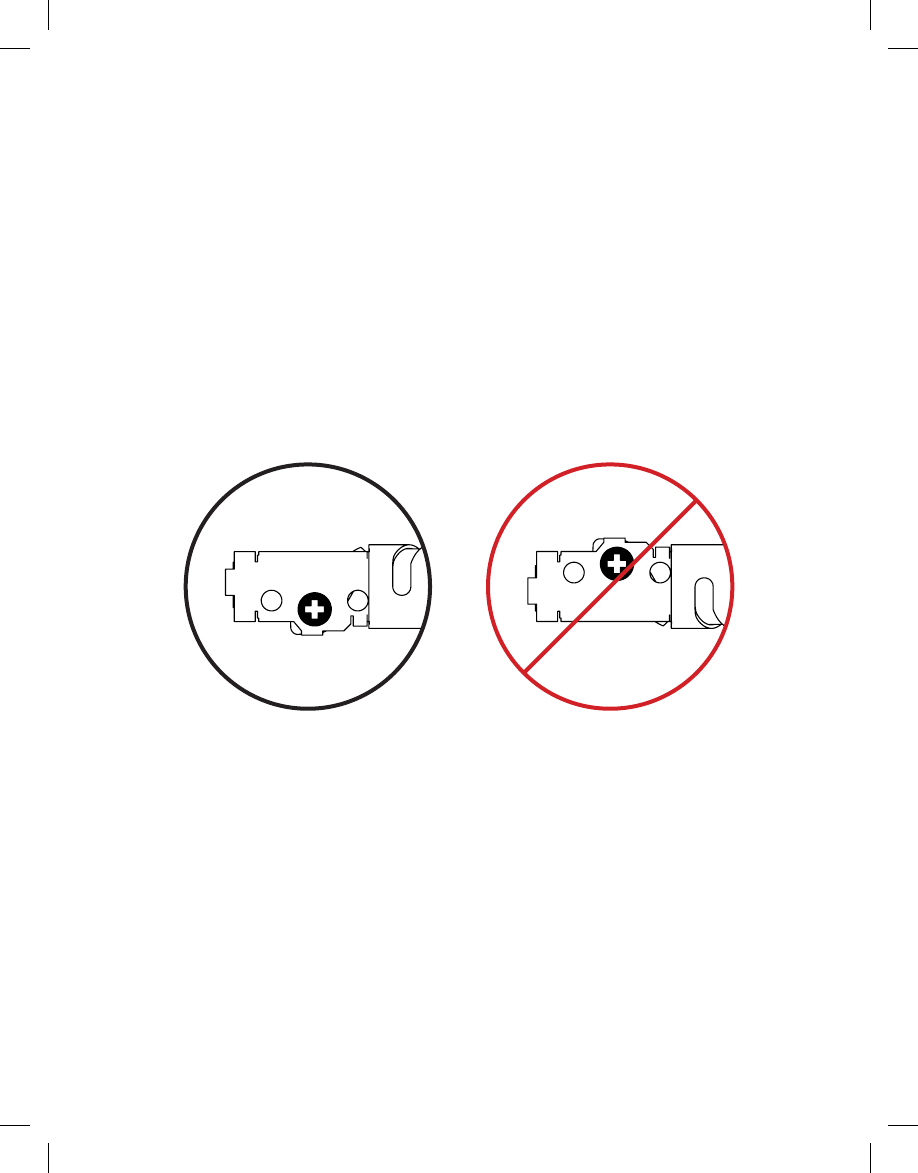
MAKE SURE THAT
The cross is at the bottom.
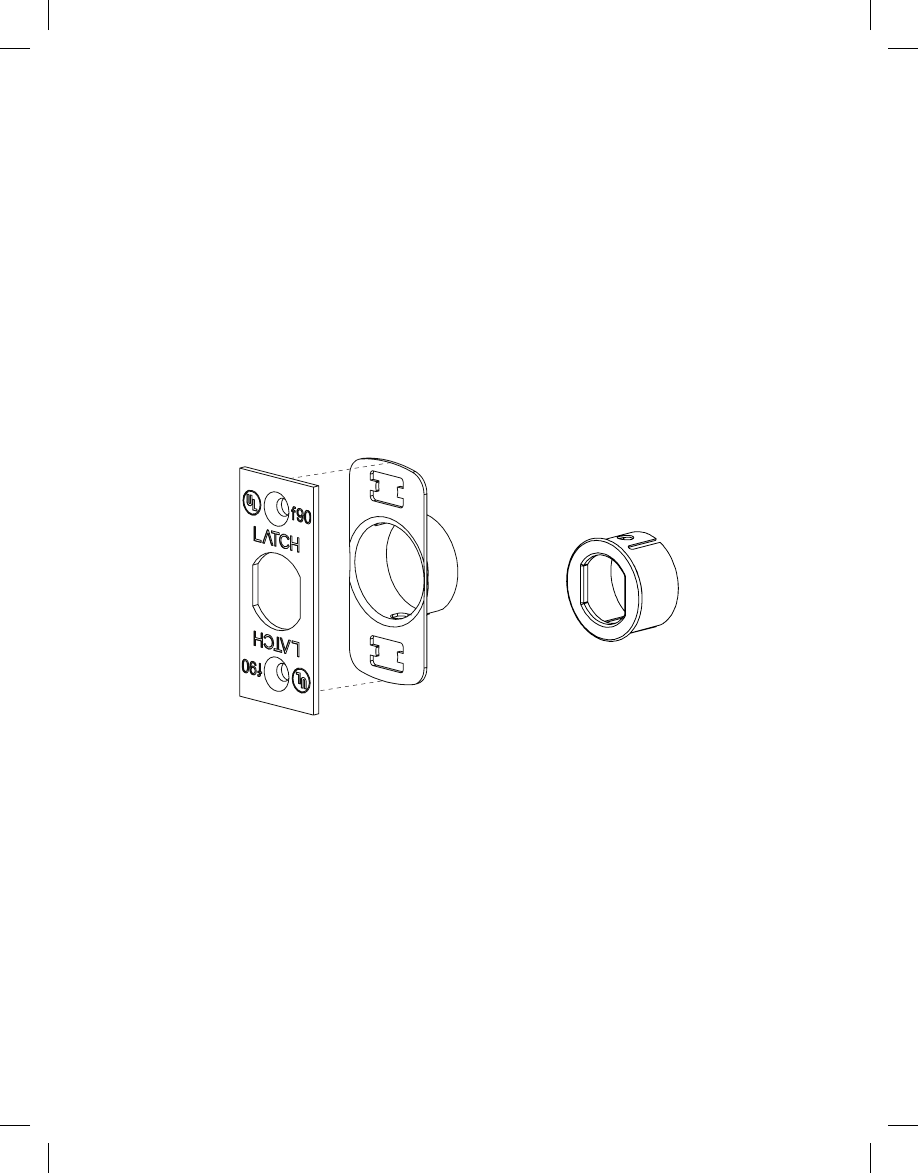
If your door has a different shaped faceplate,
select one of the other faceplate options.
FACEPLATE OPTIONS
Screw the deadbolt in.
2
X 2
Prepare the front face.
3
X 1

You rotate the tailpiece to the respective position.
MAKE SURE THAT
1C 1C
1C 1C
RIGHT-HANDED DOOR
HORIZONTAL TAILPIECE
LEFT-HANDED DOOR
VERTICAL TAILPIECE
* KEEP THE TAILPIECE IN THE DESIRED POSITION THROUGHOUT THE INSTALLATION.
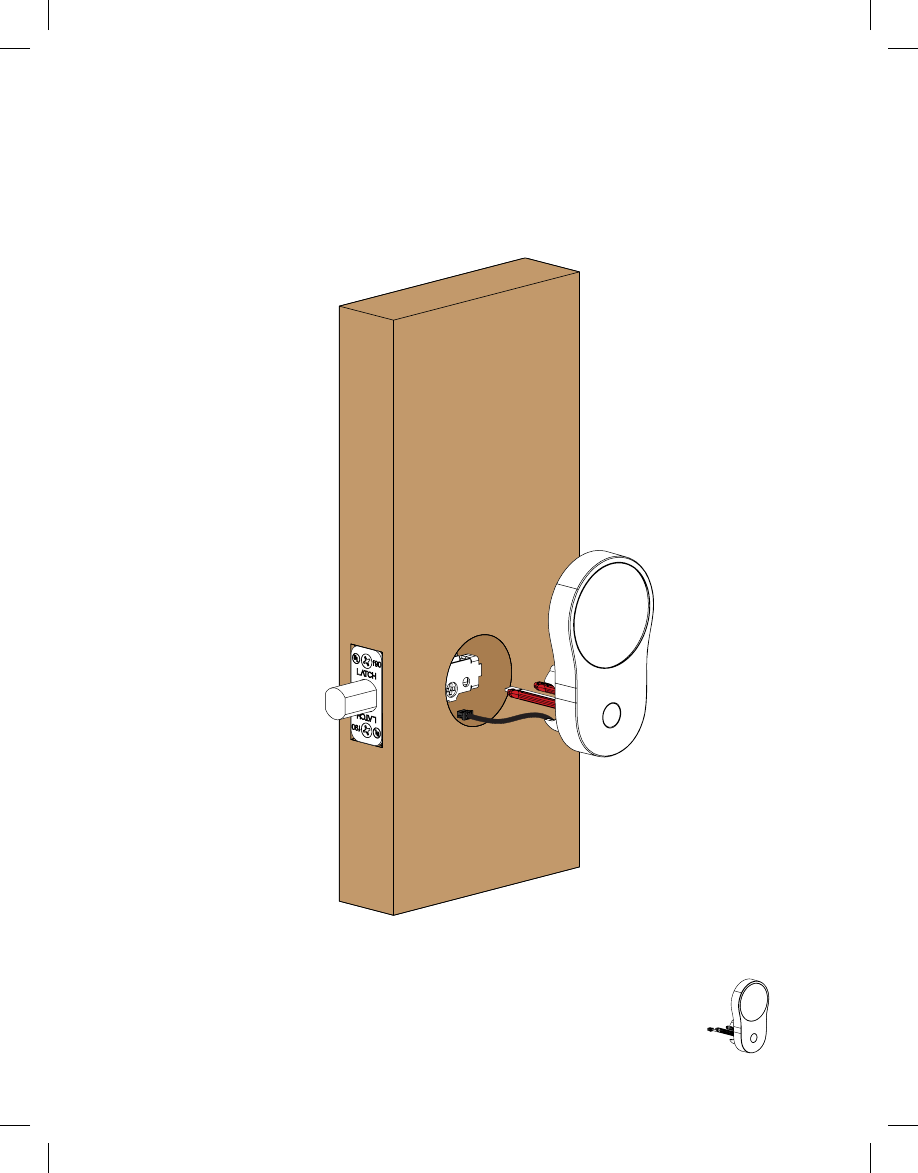
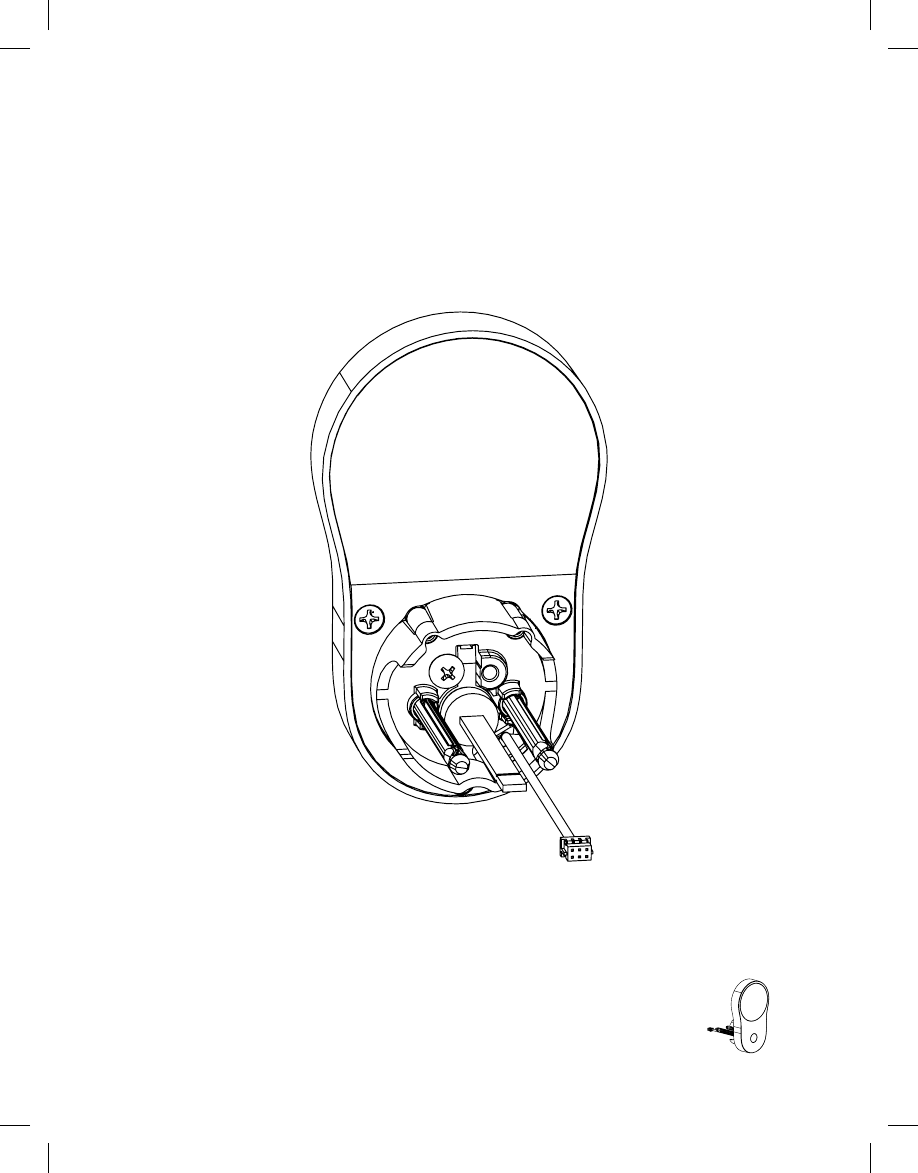
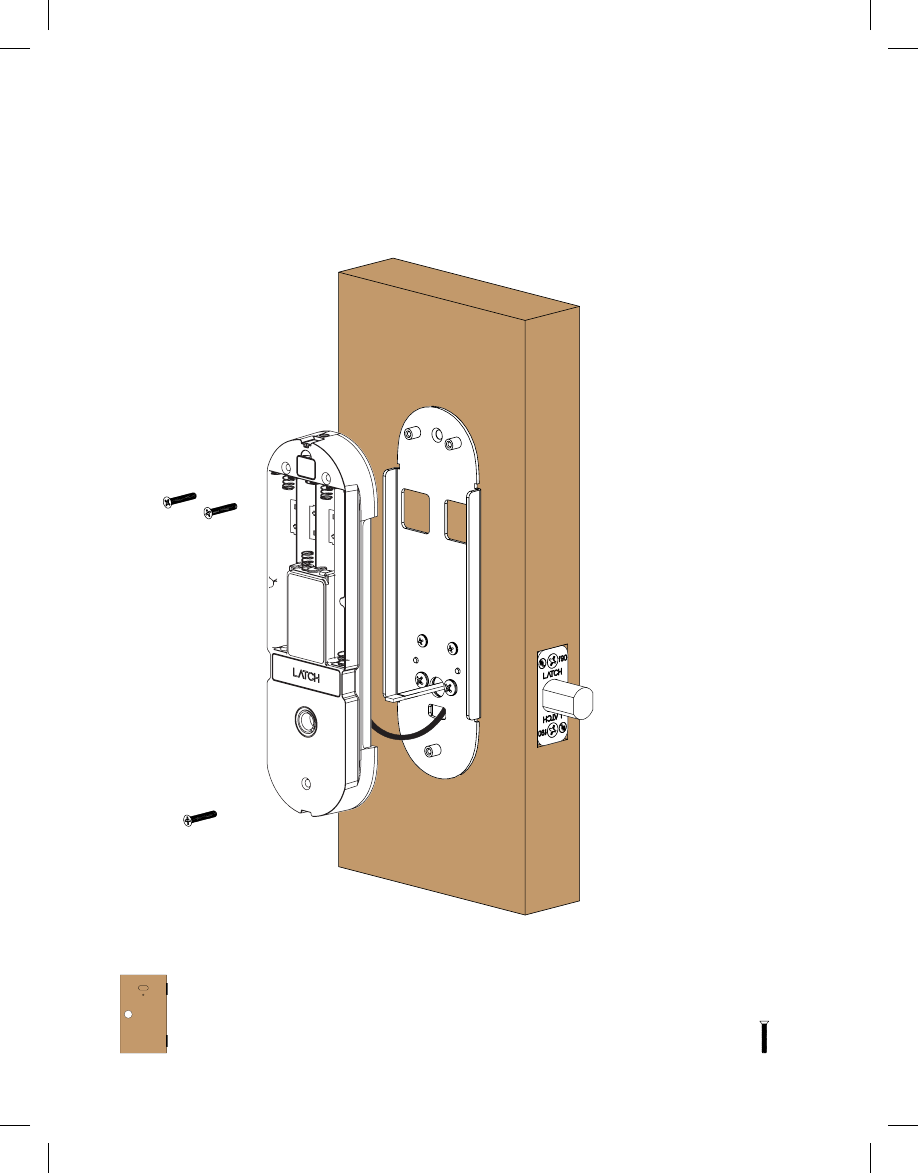
4Insert the front face into the deadbolt.
X 1
MAKE SURE THAT
1 The cable routes under the deadbolt.
2 Each post goes into the respective hole.
REMEMBER TO HAVE THE TAILPIECE IN THE VERTICAL POSITION
FOR A LEFTHANDED DOOR.
5Separate the back cover.
X 1 X 1 X 1
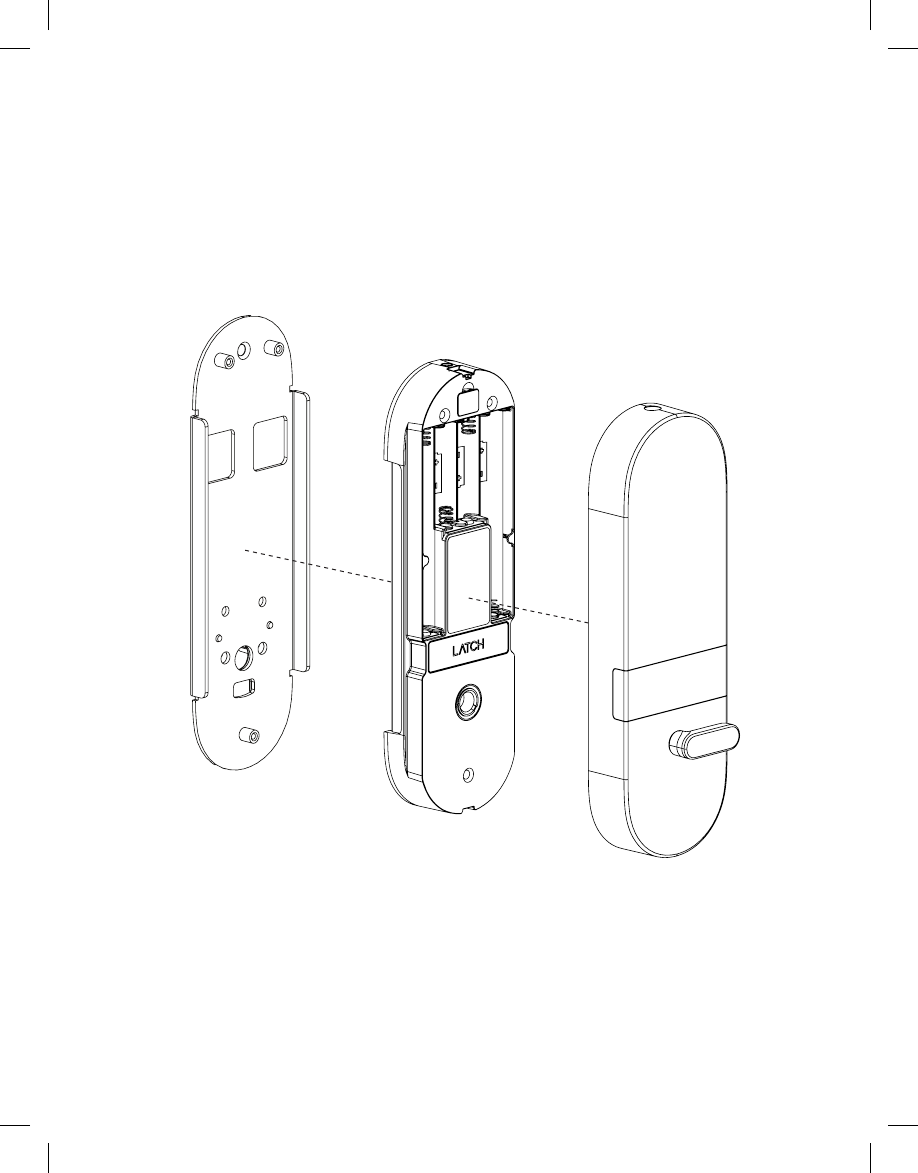
6Place the mounting plate.
X 1
The cable and each post goes into the respective hole.
MAKE SURE THAT
1C 1C
THIS EXAMPLE IS FOR A RIGHTHANDED DOOR.
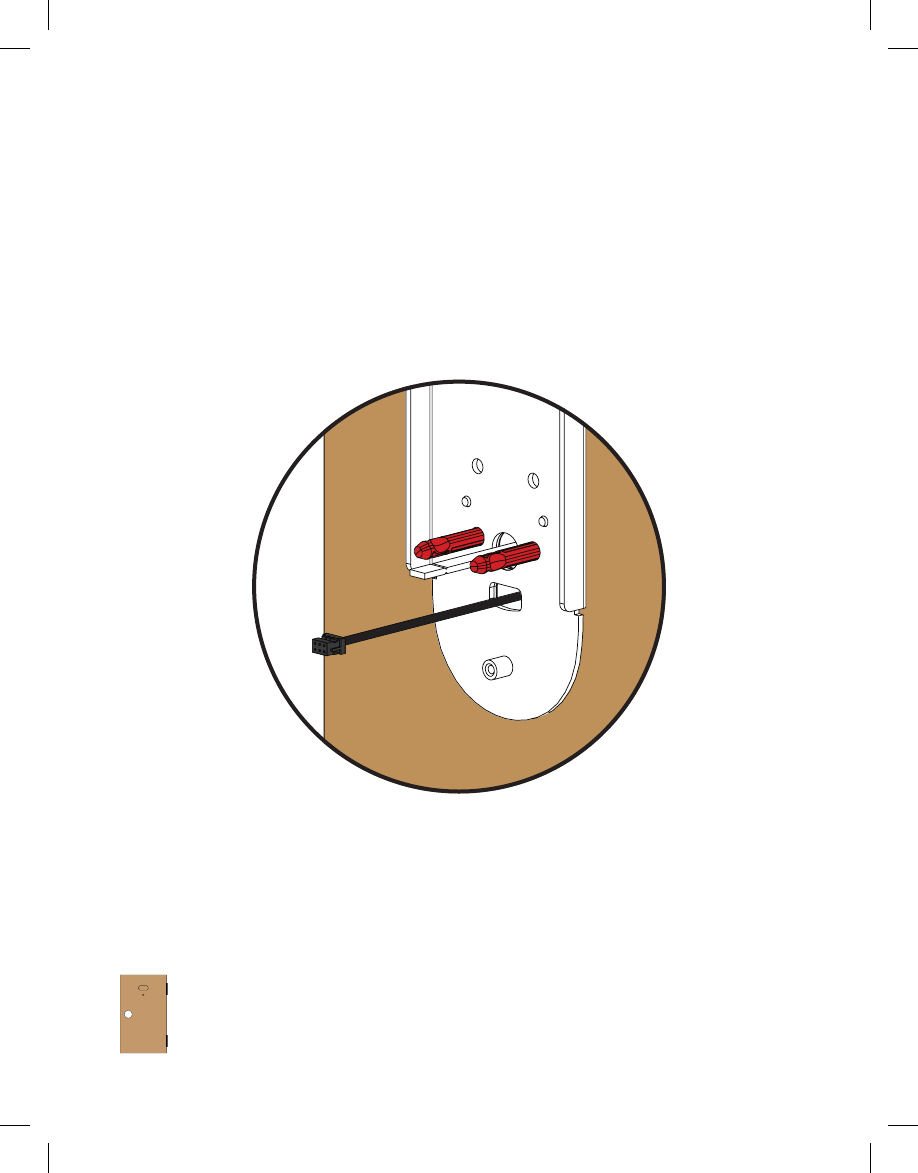
7Screw the backplate in.
X 2
You use the thinner screws in this step.
MAKE SURE THAT
1C 1C
THIS EXAMPLE IS FOR A RIGHTHANDED DOOR.
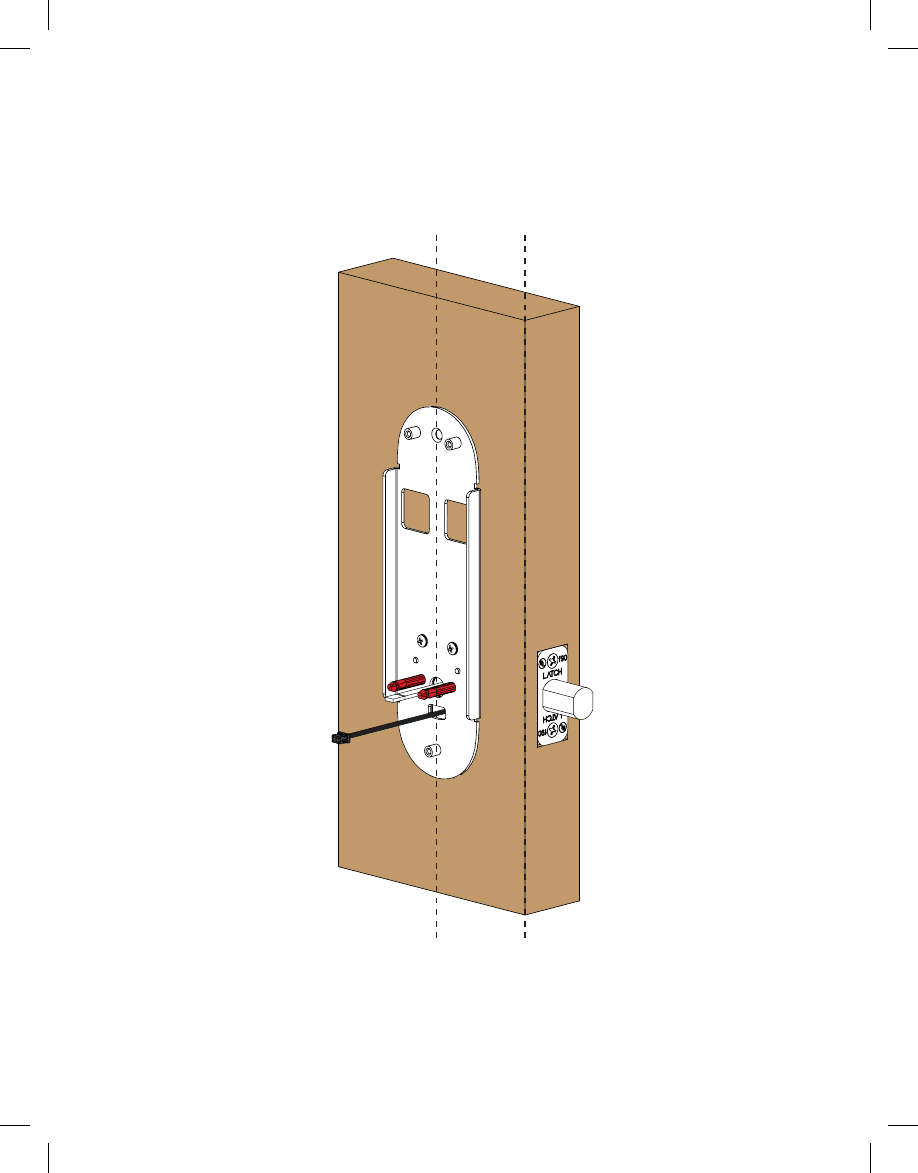
8Make sure the mounting plate is straight.
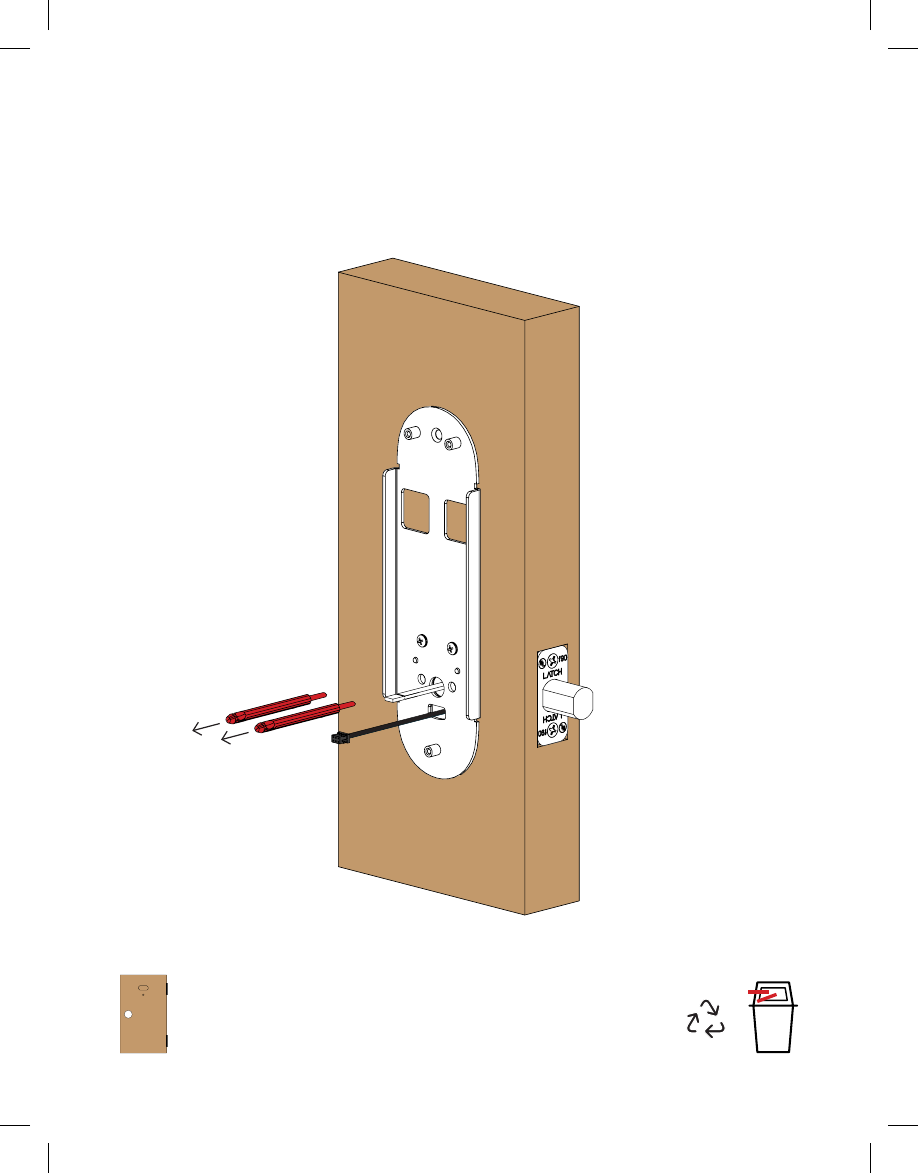
9Discard the red alignment pins.
ABS
9
1C 1C
THIS EXAMPLE IS FOR A RIGHTHANDED DOOR.
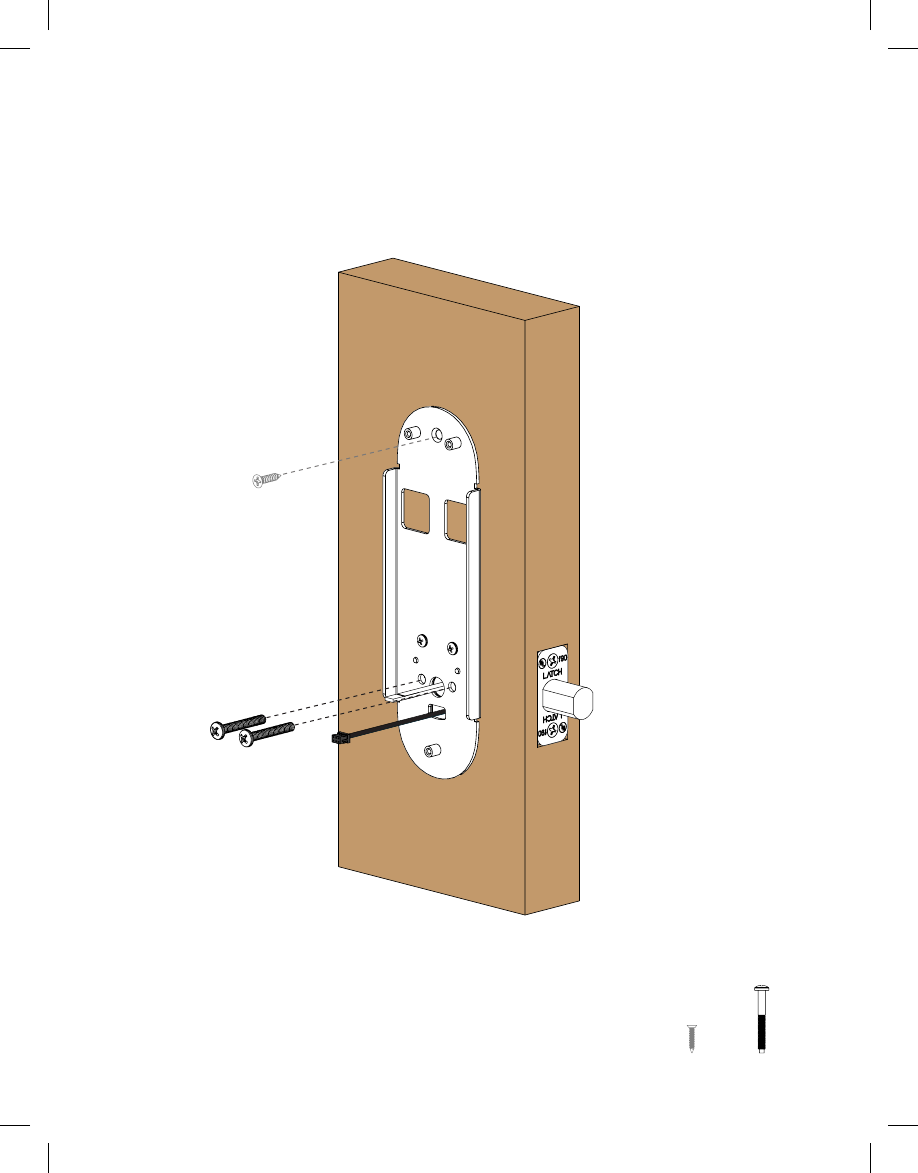
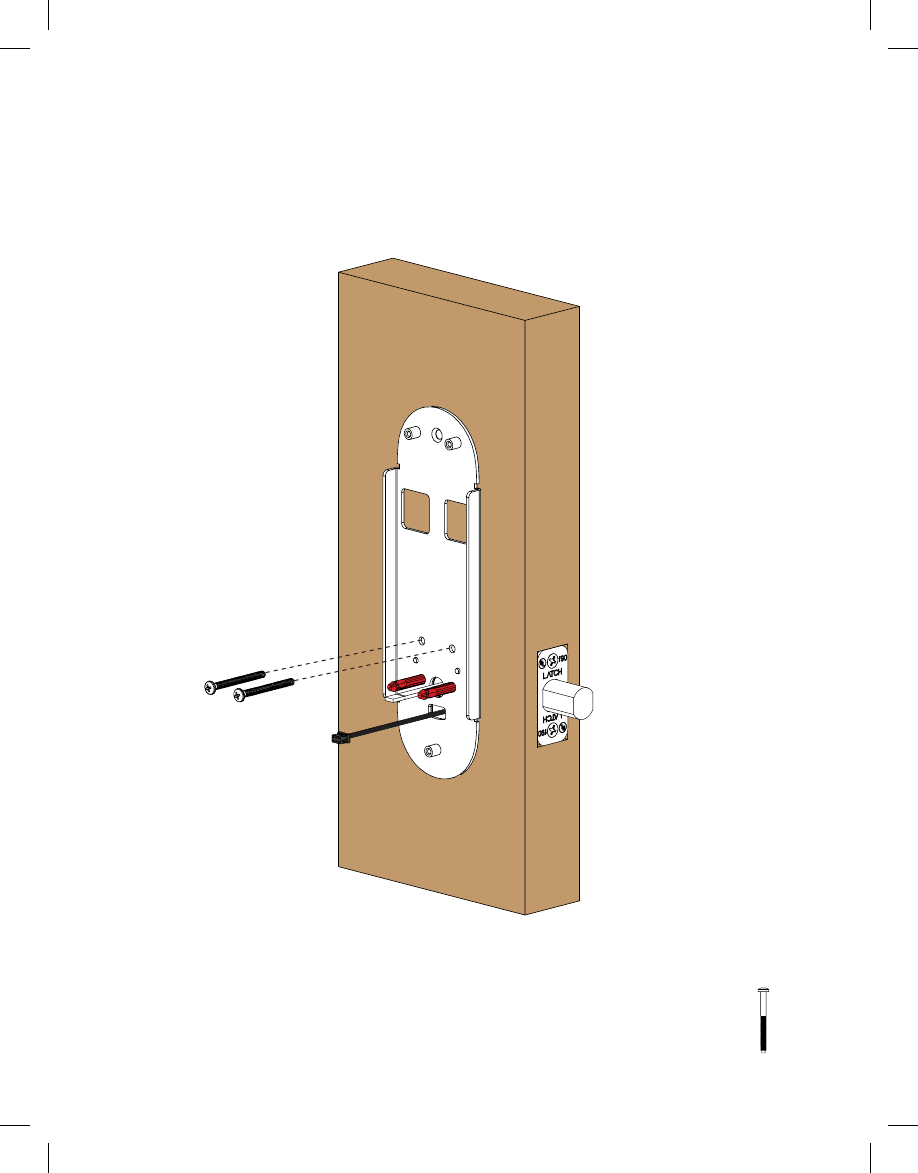
10 Screw the back plate’s remaining 3 screws in.
X 2X 1
RECOMMENDED
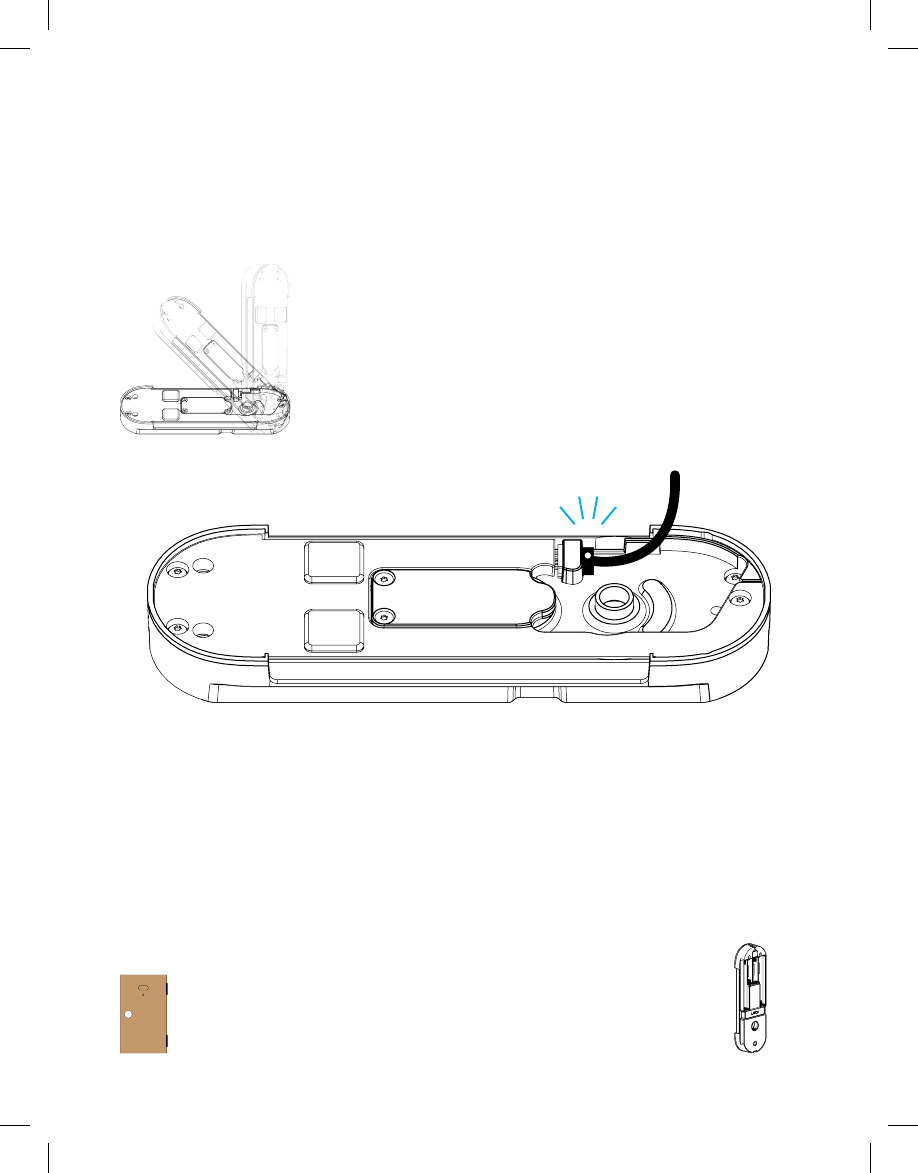
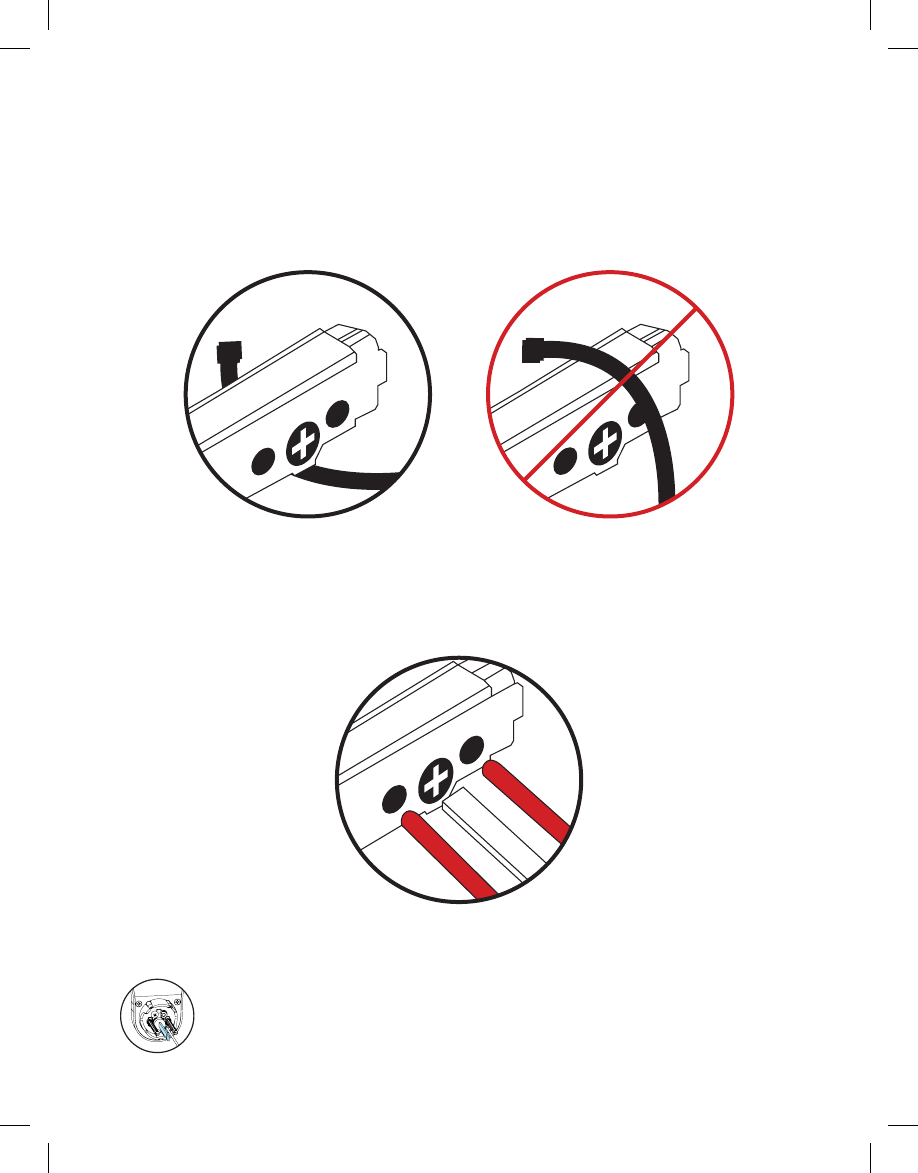
11 Tilt the battery tray and connect the cable.
X 1
1C 1C
THIS EXAMPLE IS FOR A RIGHTHANDED DOOR.
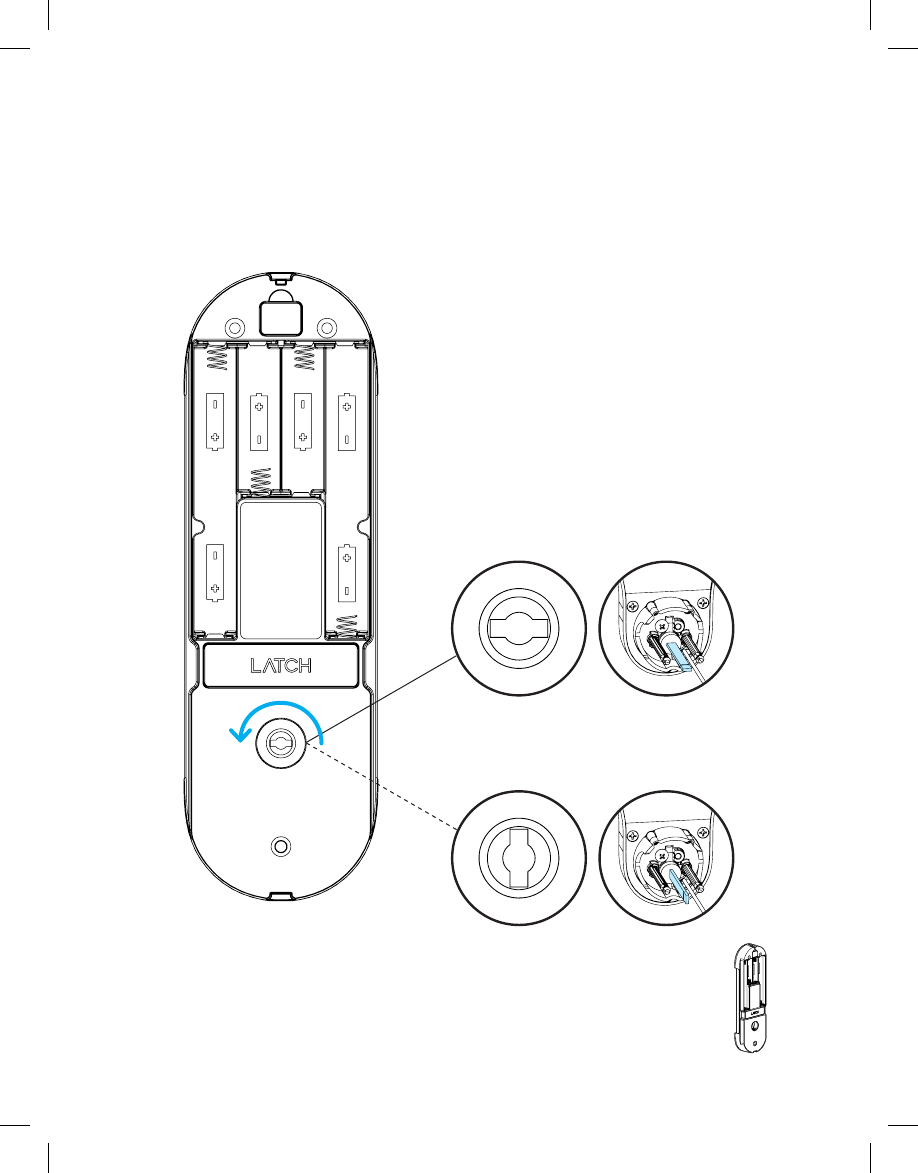
12 Spin the battery tray slot to the respective position.
X 1
* KEEP THE TAILPIECE IN THE DESIRED POSITION.
13 Screw the battery tray in.
X 3
1C 1C
THIS EXAMPLE IS FOR A RIGHTHANDED DOOR.
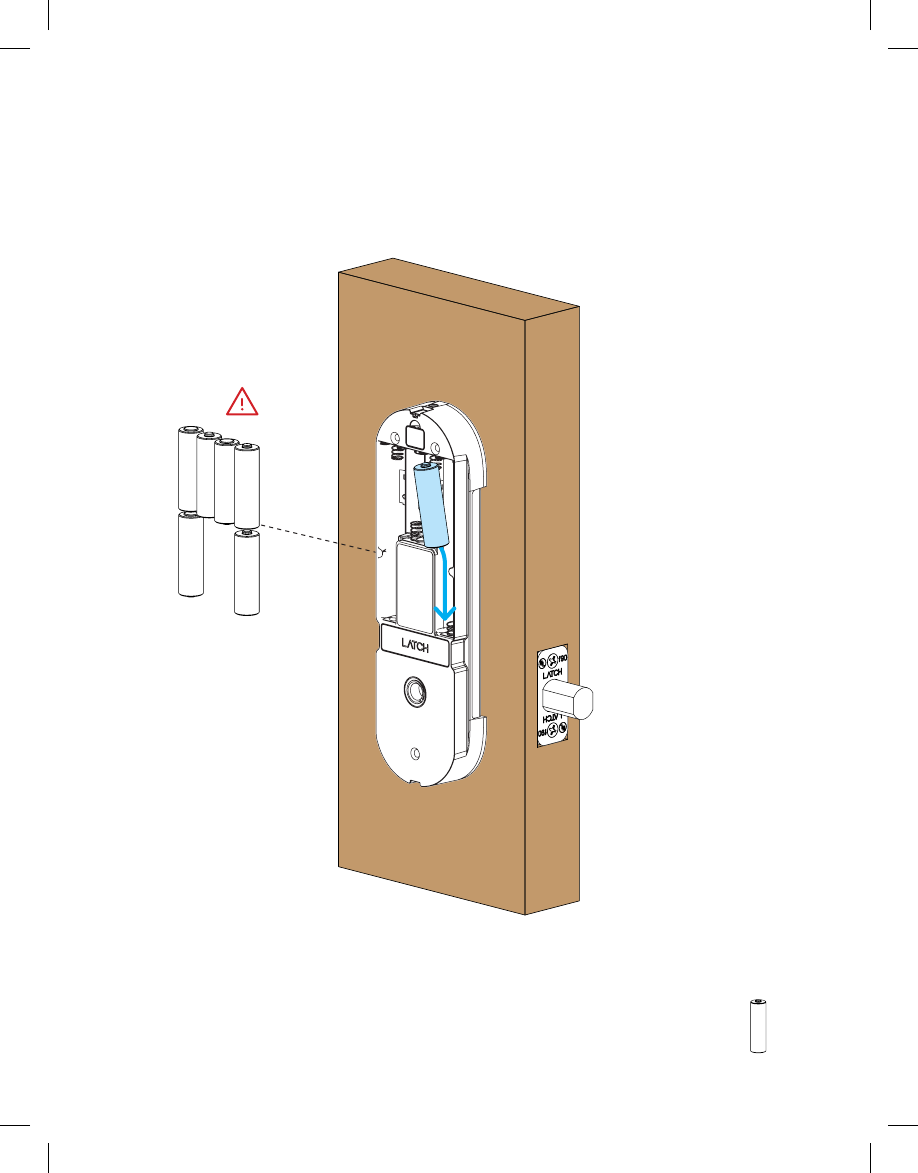
14 Insert 6 AA non-rechargeable batteries.
X 6
WARNING
ONLY USE NONRECHARGEABLE ALKALINE AA BATTERIES.
INCORRECT BATTERY ORIENTATION CAN CAUSE DAMAGE.
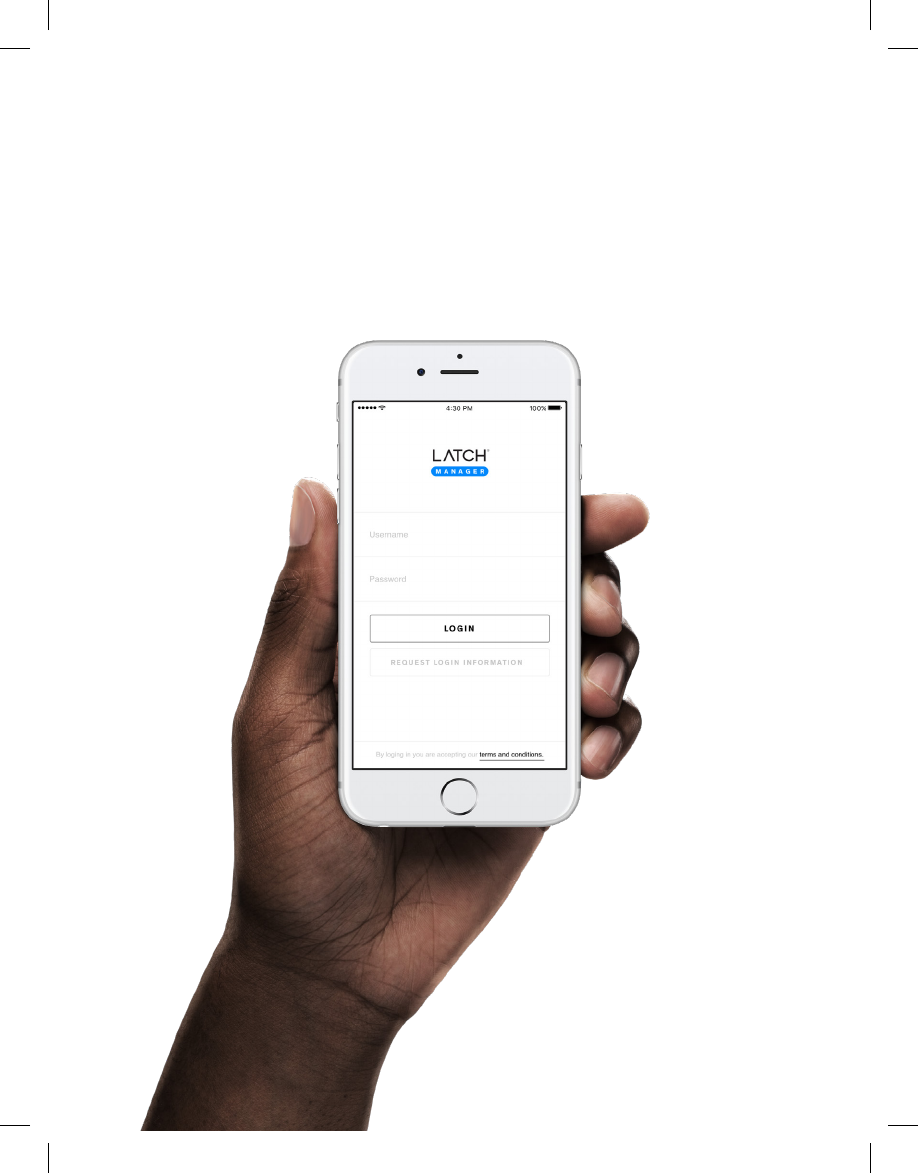
15 Download Latch Manager App and congure.
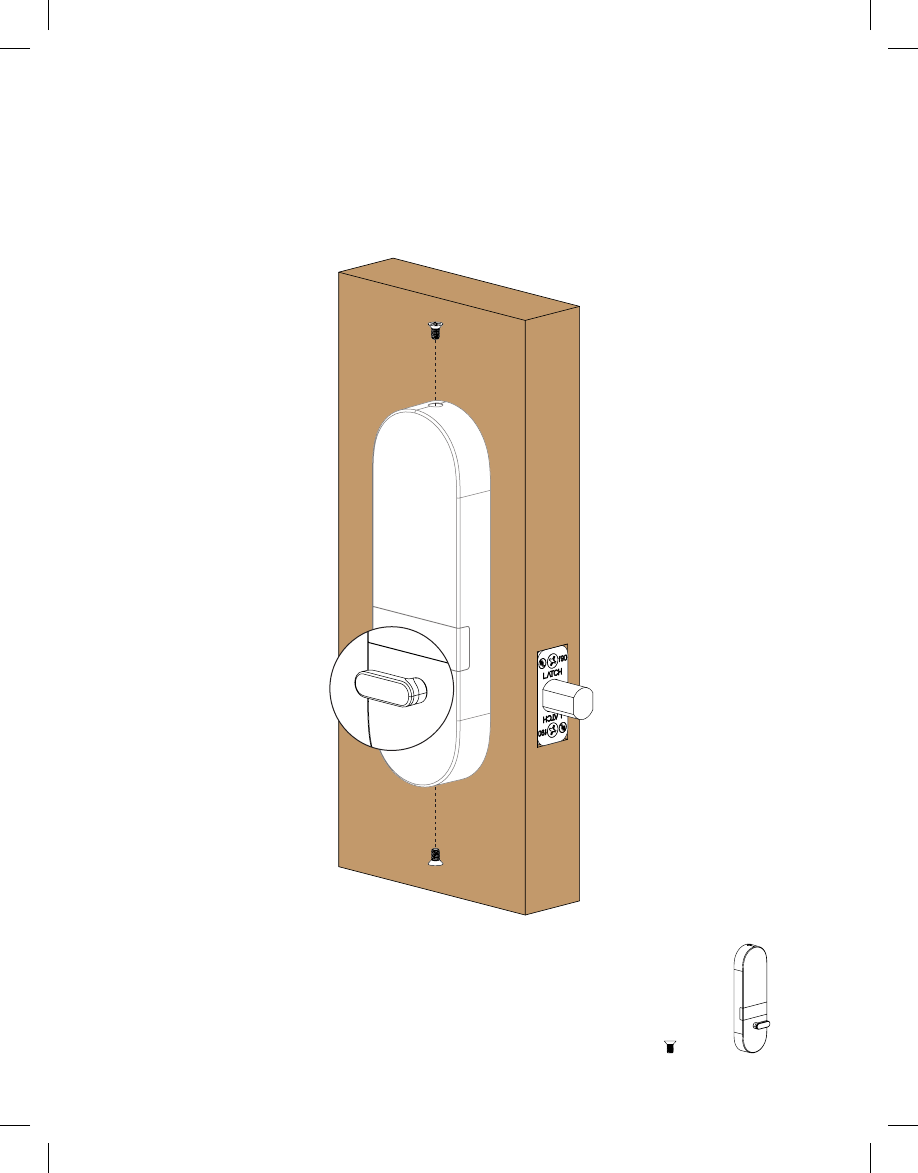
16 Align thumbturn, place and secure the back cover.
THUMBTURN SHOULD
FACE AWAY
FROM DOOR EDGE
X 2 X 1

(A) Federal Communications Commission Statement
This device complies with FCC Rules Part 15. Operation is subject to the following two conditions:
• This device may not cause harmful interference.
• This device must accept any interference received, including interference that may cause undesired operation.
(B) This equipment has been tested and found to comply with the limits for a class B digital device, pursuant to
Part 15 of the Federal Communications Commission (FCC) rules. These limits are designed to provide reasonable
protection against harmful interference in a residential installation. This equipment generates, uses, and can radiate
radio frequency energy and, if not installed and used in accordance with the instructions, may cause harmful
interference to radio communications. However, there is no guarantee that interference will not occur in a particular
installation. If this equipment causes harmful interference to radio or television reception, which can be determined
by turning the equipment off and on, the user is encouraged to try to correct the interference by doing one or more
of the following measures:
• Reorient or relocate the receiving antenna.
• Increase the separation between the equipment and receiver.
• Connect the equipment into an outlet on a circuit different from that to which the receiver is connected.
• Consult the dealer or an experienced radio/TV technician for help
(C) Radiation Exposure Statement:
This equipment must be installed and operated in accordance with provided instructions and the antenna(s) used
for this transmitter must be installed to provide a separation distance of at least 20 cm from all persons and must not
be co-located or operating in conjunction with any other antenna or transmitter.
(A) Radio Frequency (RF) Exposure Information
The radiated output power of the Wireless Device is below the Industry Canada (IC) radio frequency exposure limits.
The Wireless Device should be used in such a manner such that the potential for human contact during normal
operation is minimized. This device has been evaluated for and shown compliant with the IC Specic Absorption
Rate (“SAR”) limits when installed in specic host products operated in portable exposure conditions.
Canada’s REL (Radio Equipment List) can be found at the following web address:
http://www.ic.gc.ca/app/sitt/reltel/srch/nwRdSrch.do?lang=eng
Additional Canadian information on RF exposure also can be found at the following web address:
http://www.ic.gc.ca/eic/site/smt-gst.nsf/eng/sf08792.html
(B) Canada, avis d’Industrie Canada (IC)
Cet appareil numérique de classe B est conforme aux normes canadiennes ICES-003 et RSS-247.
Son fonctionnement est soumis aux deux conditions suivantes: (1) cet appareil ne doit pas causer d’interférence
et (2) cet appareil doit accepter toute interférence, notamment les interférences qui peuvent affecter son
fonctionnement. L’identiant
Informations concernant l’exposition aux fréquences radio (RF)
La puissance de sortie émise par cet appareil sans l est inférieure à la limite d’exposition aux fréquences radio d’
Industrie Canada (IC). Utilisez l’appareil sans l de façon à minimiser les contacts humains lors du fonctionnement
normal.
Ce périphérique a été évalué et démontré conforme aux limites SAR (Specic Absorption Rate – Taux d’absorption
spécique) d’ IC lorsqu’il est installé dans des produits hôtes particuliers qui fonctionnent dans des conditions
d’exposition à des appareils
portables.
Ce périphérique est homologué pour l’utilisation au Canada. Pour consulter l’entrée correspondant à l’appareil dans
la liste d’équipement radio (REL - Radio Equipment List) d’Industrie Canada rendezvous sur:
http://www.ic.gc.ca/app/sitt/reltel/srch/nwRdSrch.do?lang=eng
Pour des informations supplémentaires concernant l’exposition aux RF au Canada rendez-vous sur :
http://www.ic.gc.ca/eic/site/smt-gst.nsf/eng/sf08792.html
FCC Compliance Statement
Industry Canada Statement

v.4.0