Launch Tech CR971 TPMS Activation and Diagnostic Tool User Manual
Launch Tech Co., Ltd. TPMS Activation and Diagnostic Tool Users Manual
UserManual.wiki
>
Launch Tech
>
CR971 User Manual
Users Manual
Navigation menu
Upload a User Manual
Namespaces
Wiki Guide
HTML
PDF
Info
Views
User Manual
Discussion / Help
Navigation


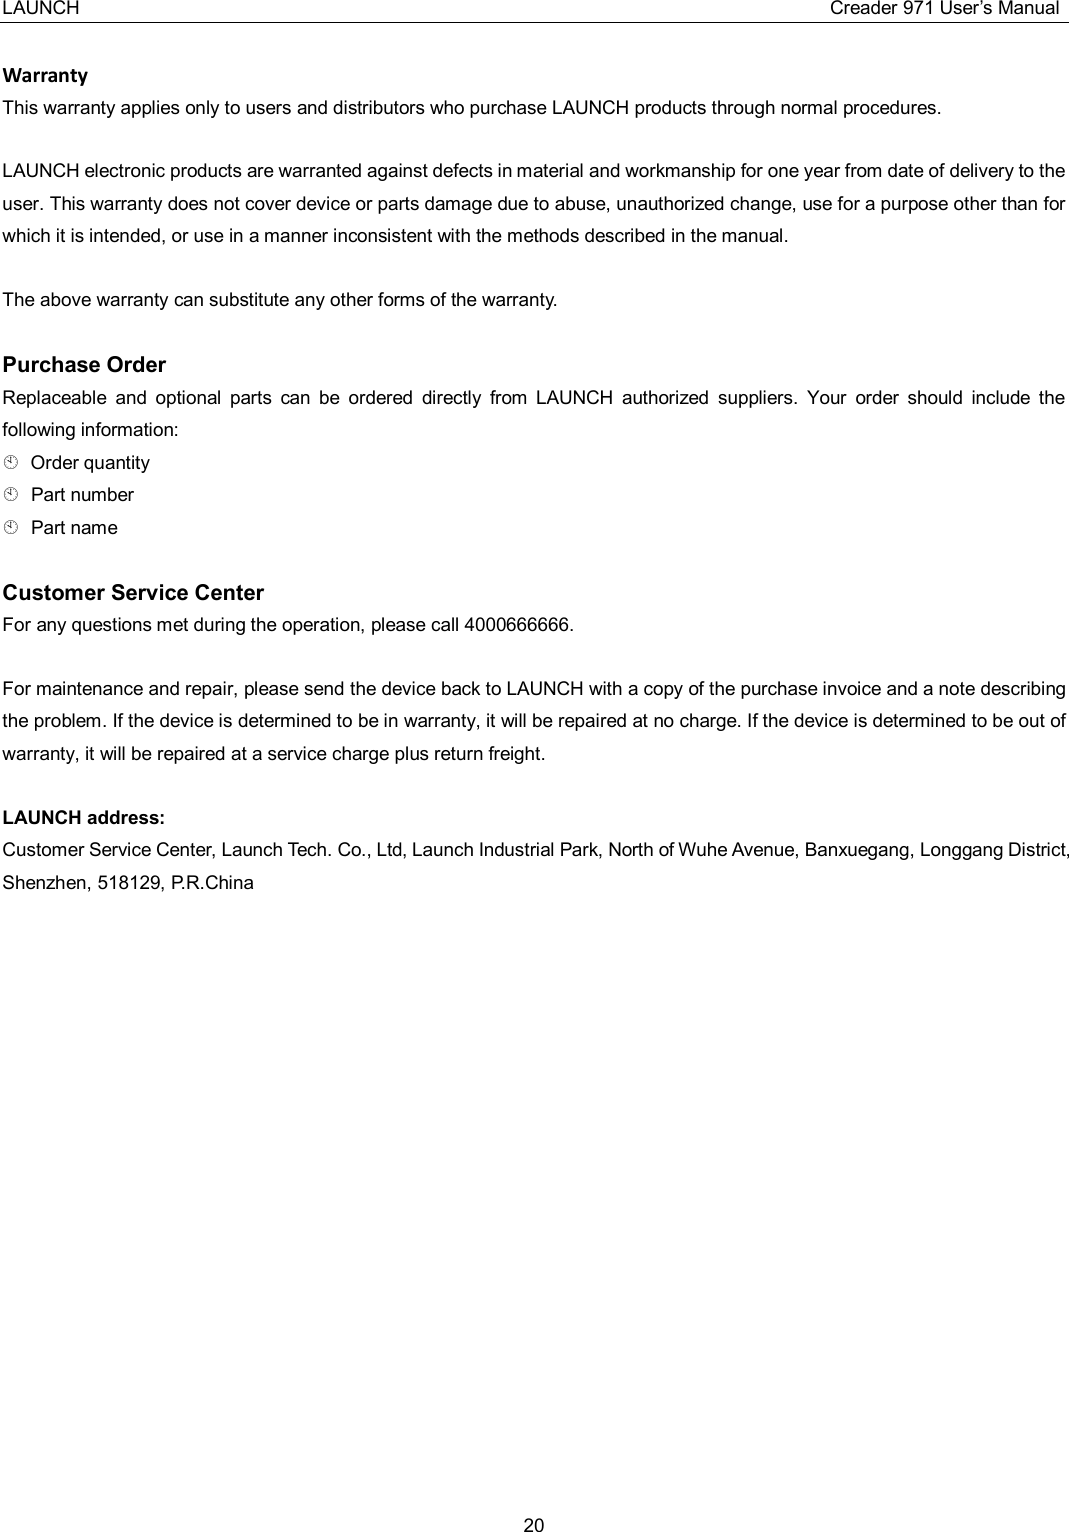
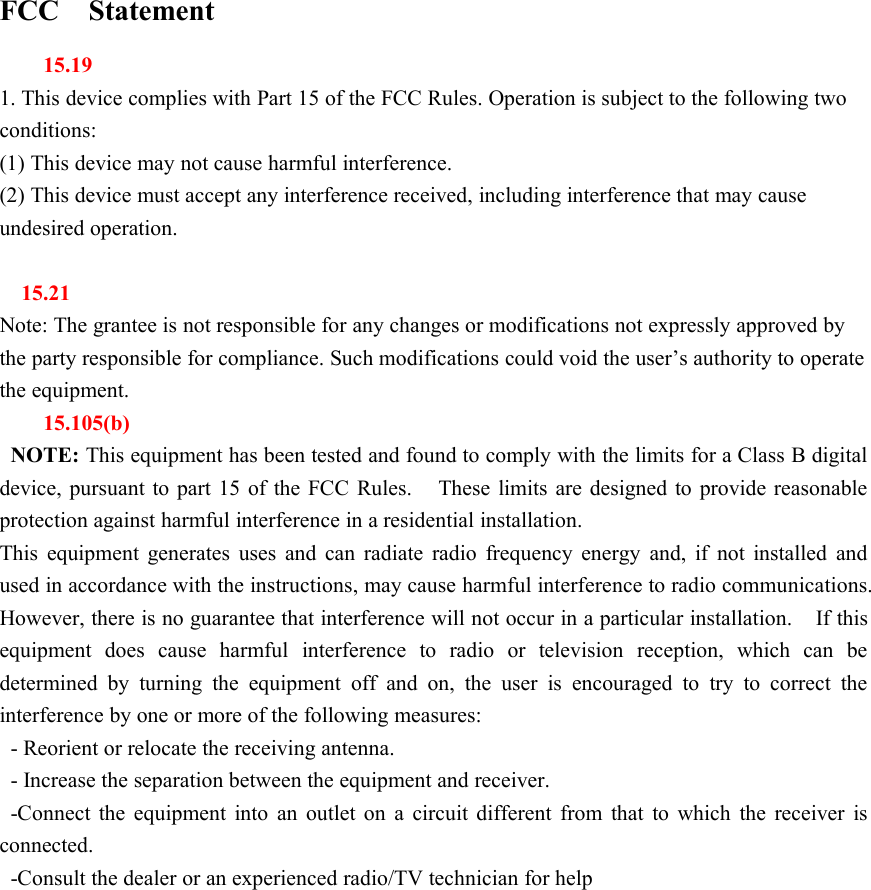
![LAUNCH Creader 971 User’s Manual 17 2. Input the product serial number (can be found in the back of the device). Note: After inputting the product serial number, "Reset system" function will be activated. This option is for the system reset after the replacement of Memory card. 3. Click [Device Upgrade] to enter the registration page. Input the email address and registration code, then click [OK], see picture 2. (Refer to Step 4-7 to get the registration code.) (Skip to Step 8 if already have the registration code.)) 4. The registration code can be found in the diagnostic tool. Press power button to start the device. 5. In the main menu, use arrow keys to select 'Help', then click [OK]. 6. In picture 3, select "Tool Information" and click [OK] to enter picture 4. 7. The registration code displayed in picture 4 is the one required in Step 3. (Back to Step 3 and input the registration code, then continue.)](https://usermanual.wiki/Launch-Tech/CR971/User-Guide-3627076-Page-18.png)
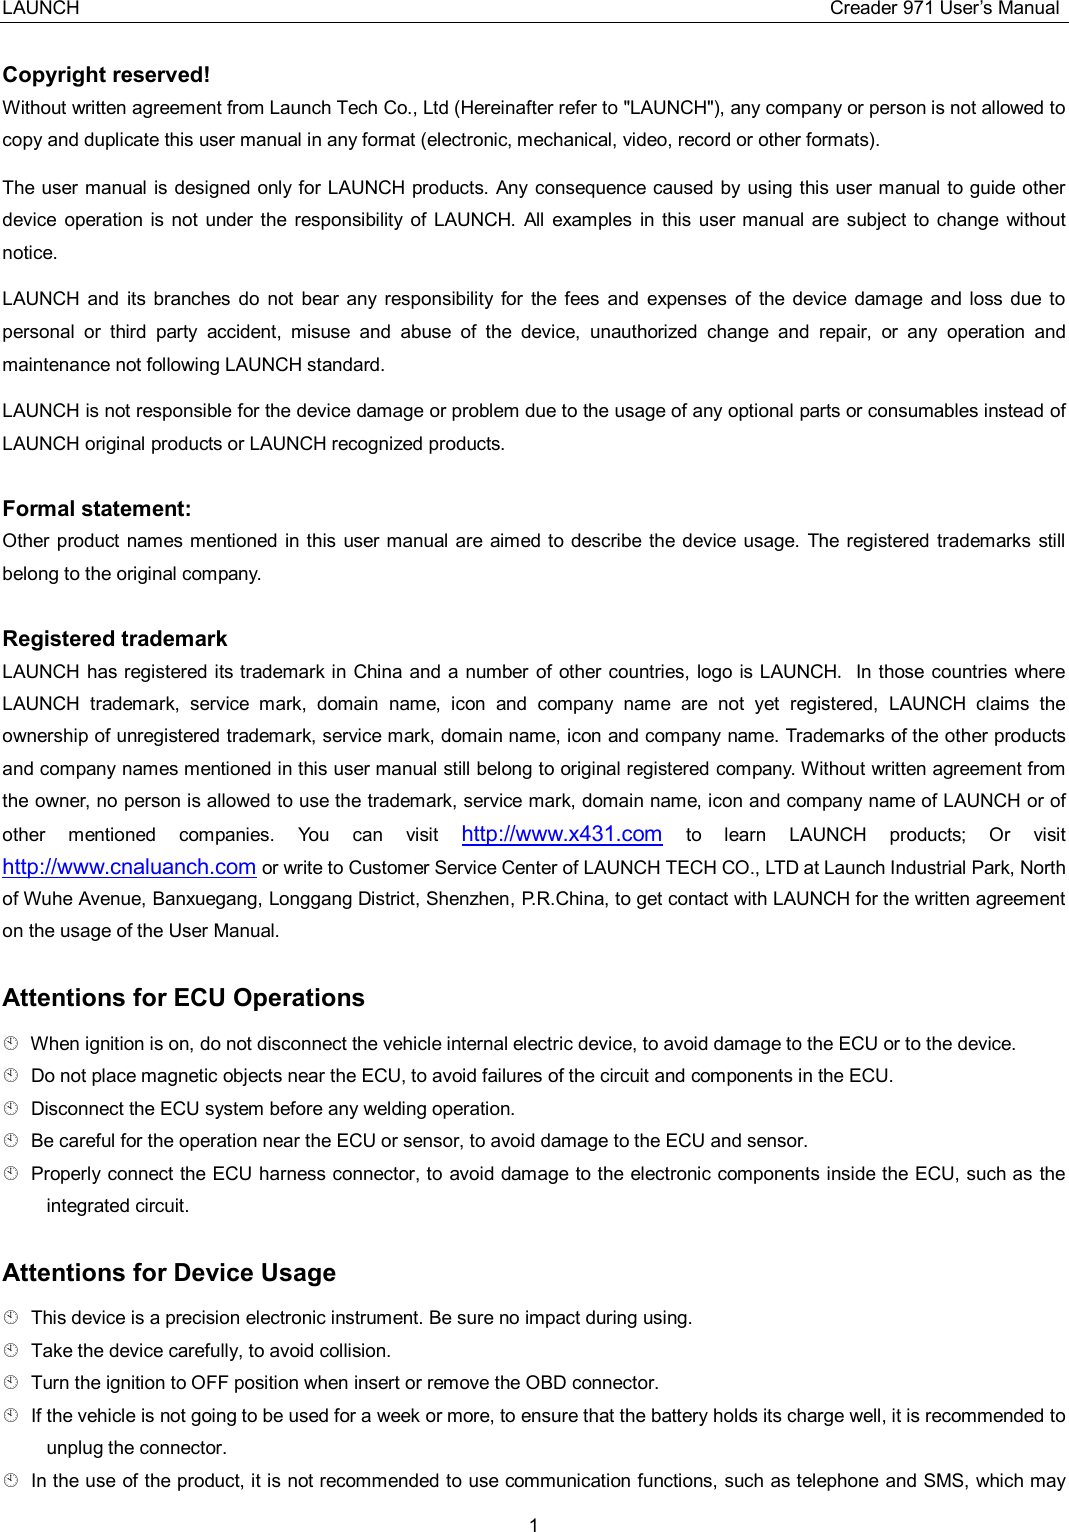
![LAUNCH Creader 971 User’s Manual 18 (picture 3&4) 8. Remove the Memory card from the device and insert it to the included card reader, then insert the card reader to the computer's USB port. 9. Restart the upgrade tool. Select the item to be updated or click "All", then click [Download] to download. 10. After above steps, remove the Memory card from the card reader and insert it back to the device. Press the power button to start the device. It prompts an upgrade dialog box (see Picture 5)(Note: This dialog box will not appear if only latest diagnostic software is available but no firmware package to be downloaded). Click [OK] to confirm the upgrade. 11. Registration and upgrade steps are complete. The device can be used now. Method 2: Via USB cable Note: When use this method to upgrade, please ensure the network is normal. 1. Connect one end of the USB cable to the device, the other end to the computer's USB port. 2. If a new version has been found, the screen will display as shown in the Picture 6. 3. Click [OK] button to set the device as USB device, see Picture 7.](https://usermanual.wiki/Launch-Tech/CR971/User-Guide-3627076-Page-19.png)
![LAUNCH Creader 971 User’s Manual 19 (Note: The serial number and registration code displayed in this picture are the ones required in Step 4-6.) 4. Start the upgrade tool, screen displays as shown in the Picture 9. 5. Input the product serial number, click [Device Upgrade] to enter the registration page. Input the email address and registration code, then click [OK] to enter the upgrade page. 6. Select the item to be updated or click "All", then click [Download] to download. 7. After above steps, restart the device. The system will prompt an upgrade dialog box, click [OK] to upgrade. 8. Registration and upgrade steps are complete. The device can be used now.](https://usermanual.wiki/Launch-Tech/CR971/User-Guide-3627076-Page-20.png)