Leetac Electronics Technology LEETACE696B Wooden Music Center with Bluetooth User Manual E 696B IM REV0 0
Zhongshan Leetac Electronics Co., Ltd. Wooden Music Center with Bluetooth E 696B IM REV0 0
UserManual.wiki
>
Leetac Electronics Technology
>
LEETACE696B User Manual
User Mnaual.pdf
Navigation menu
Upload a User Manual
Namespaces
Wiki Guide
HTML
PDF
Info
Views
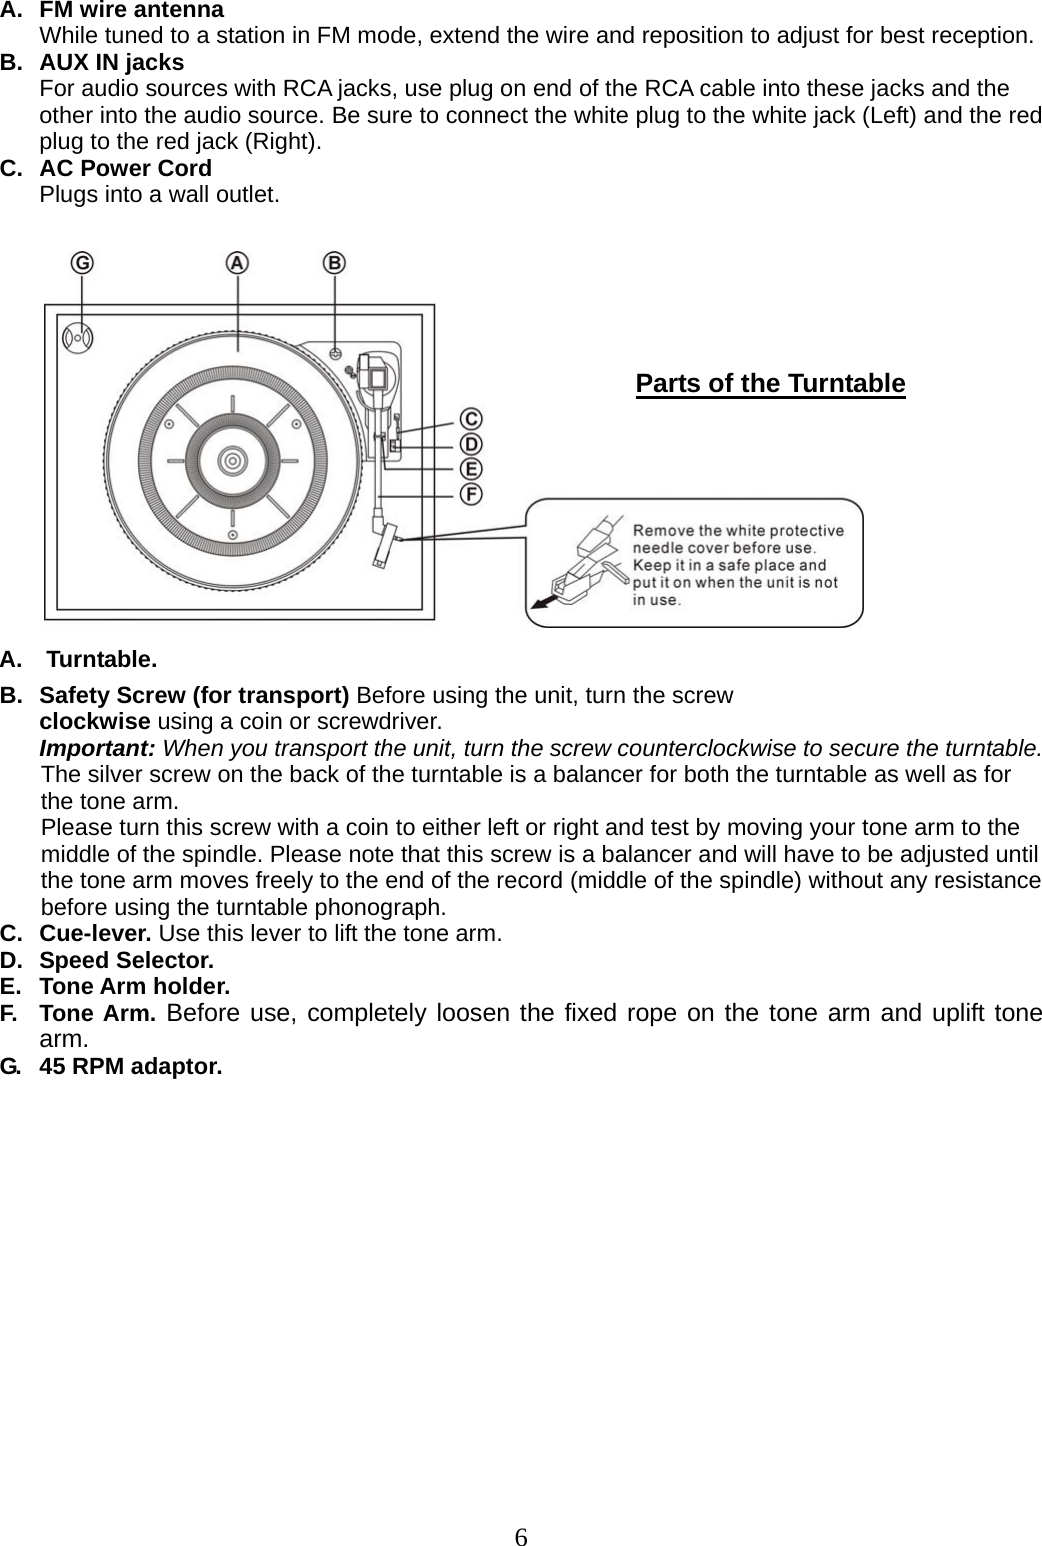
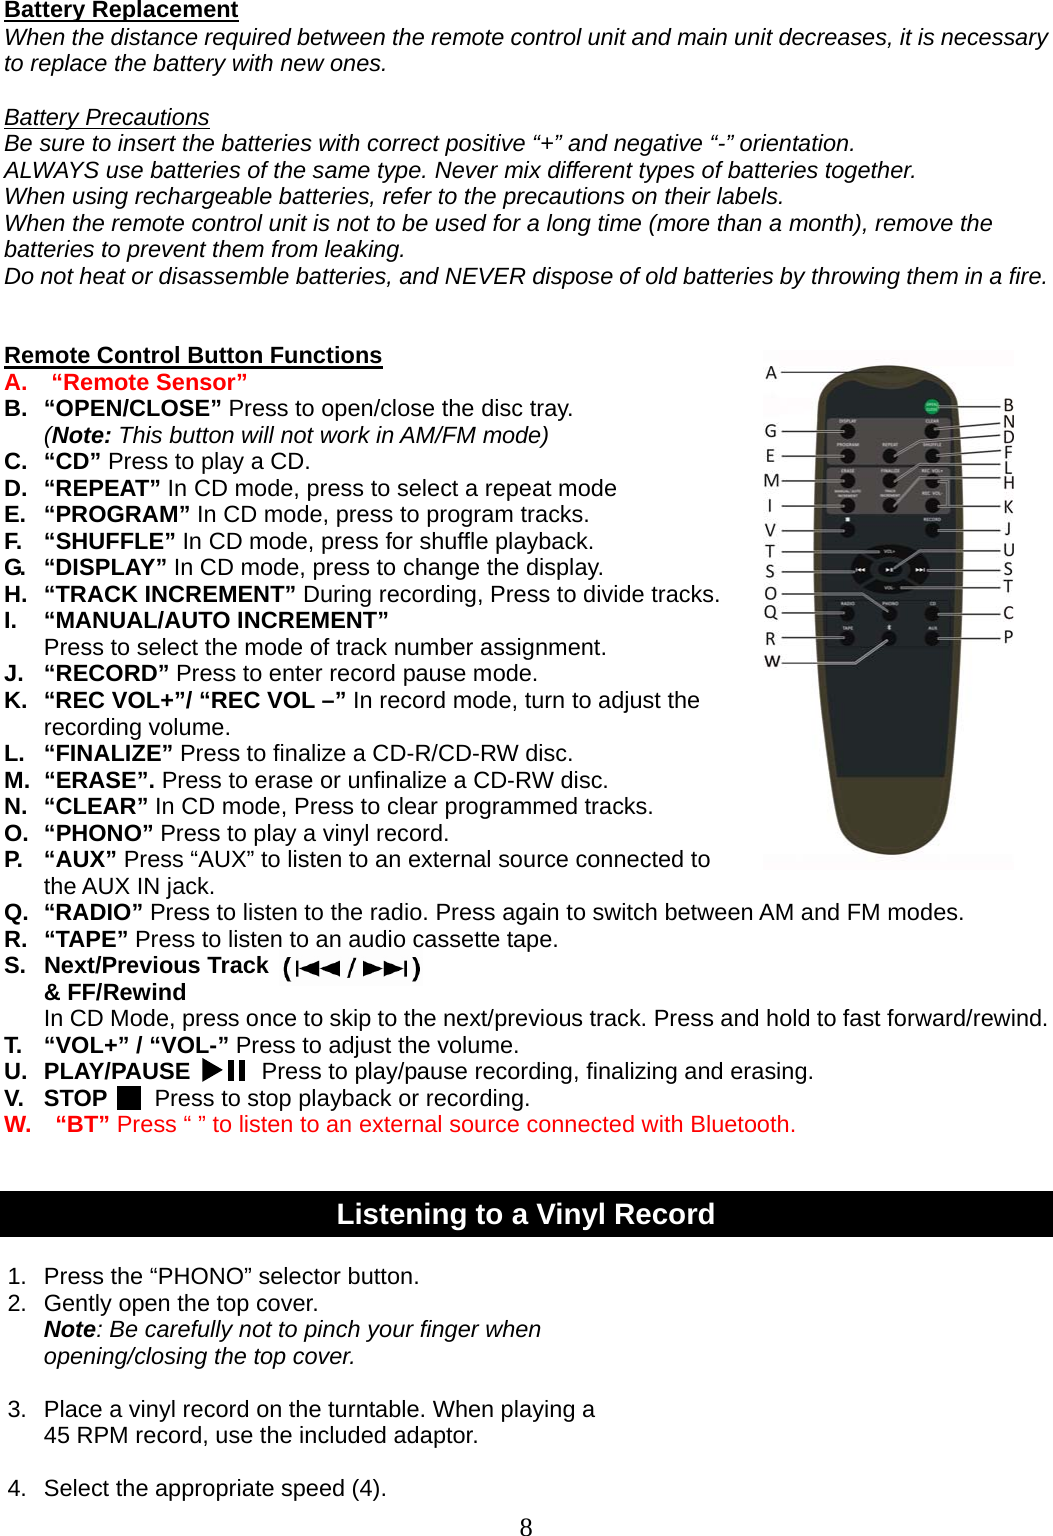
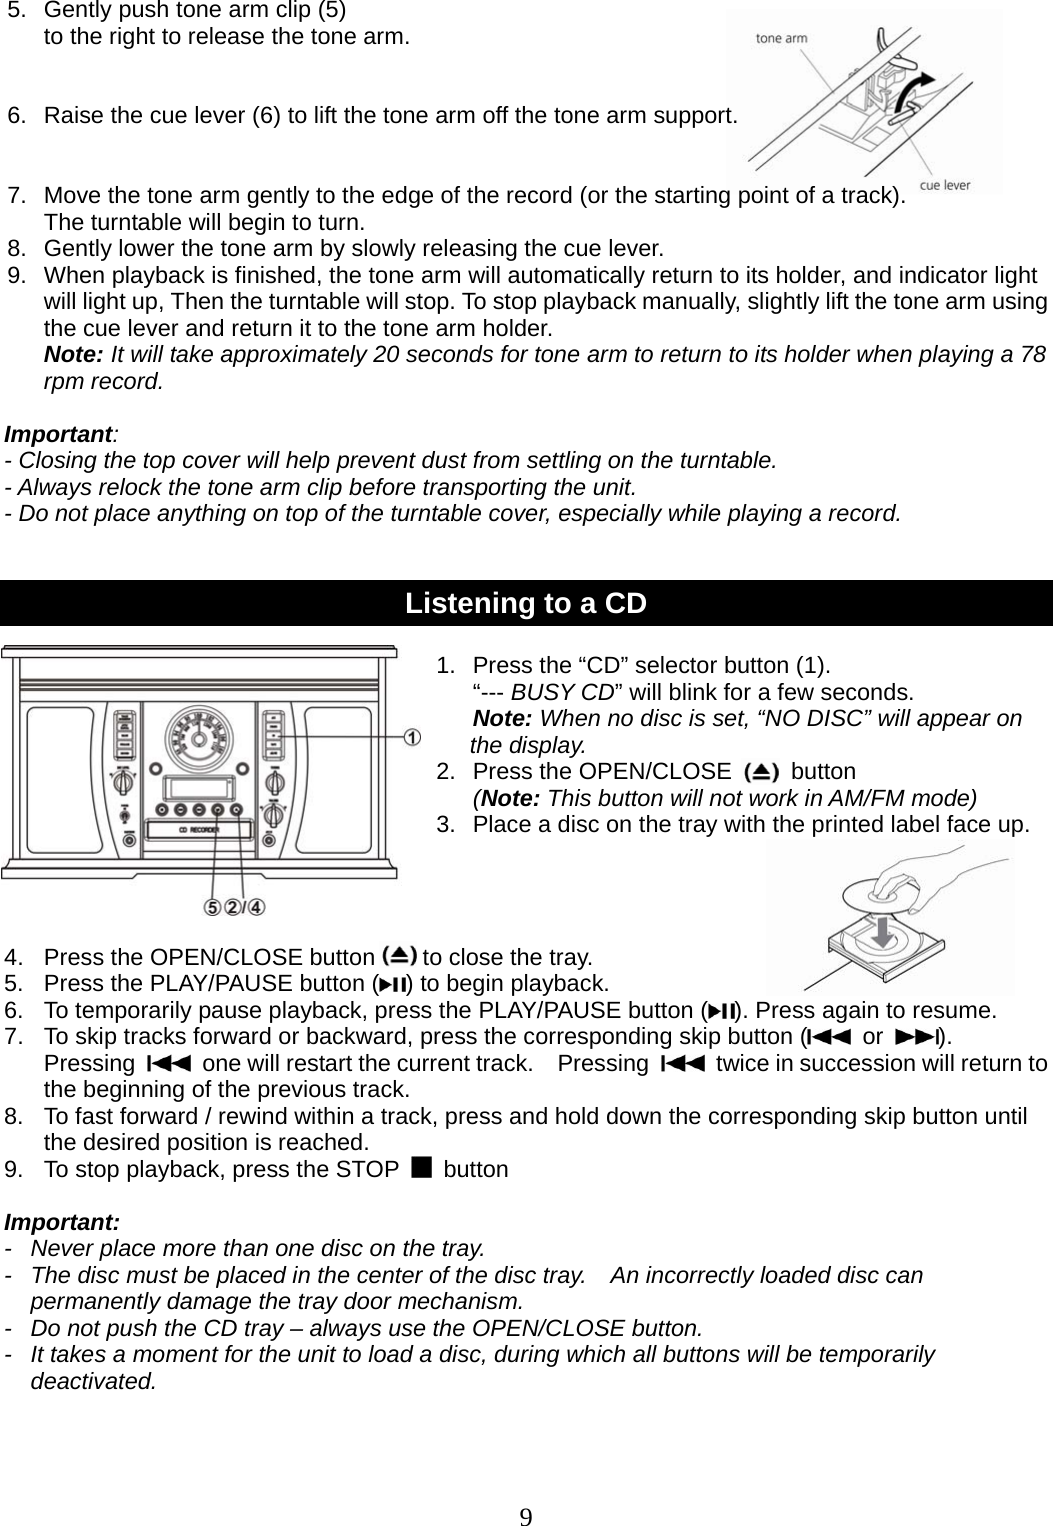
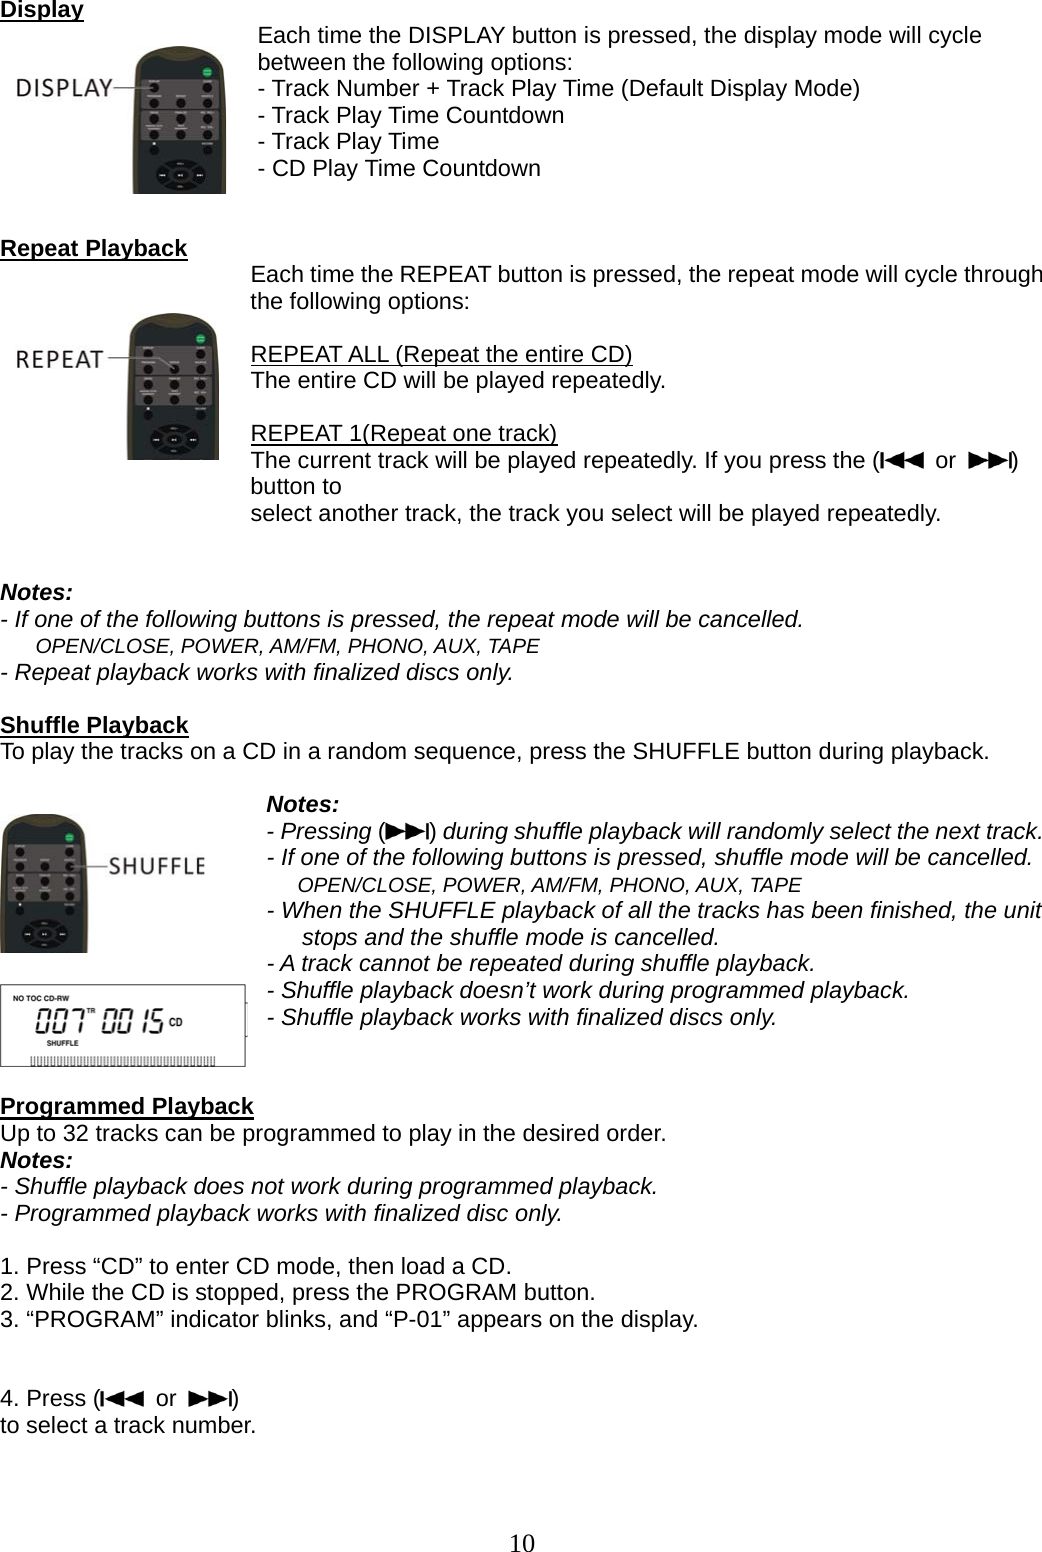
User Manual
Discussion / Help
Navigation