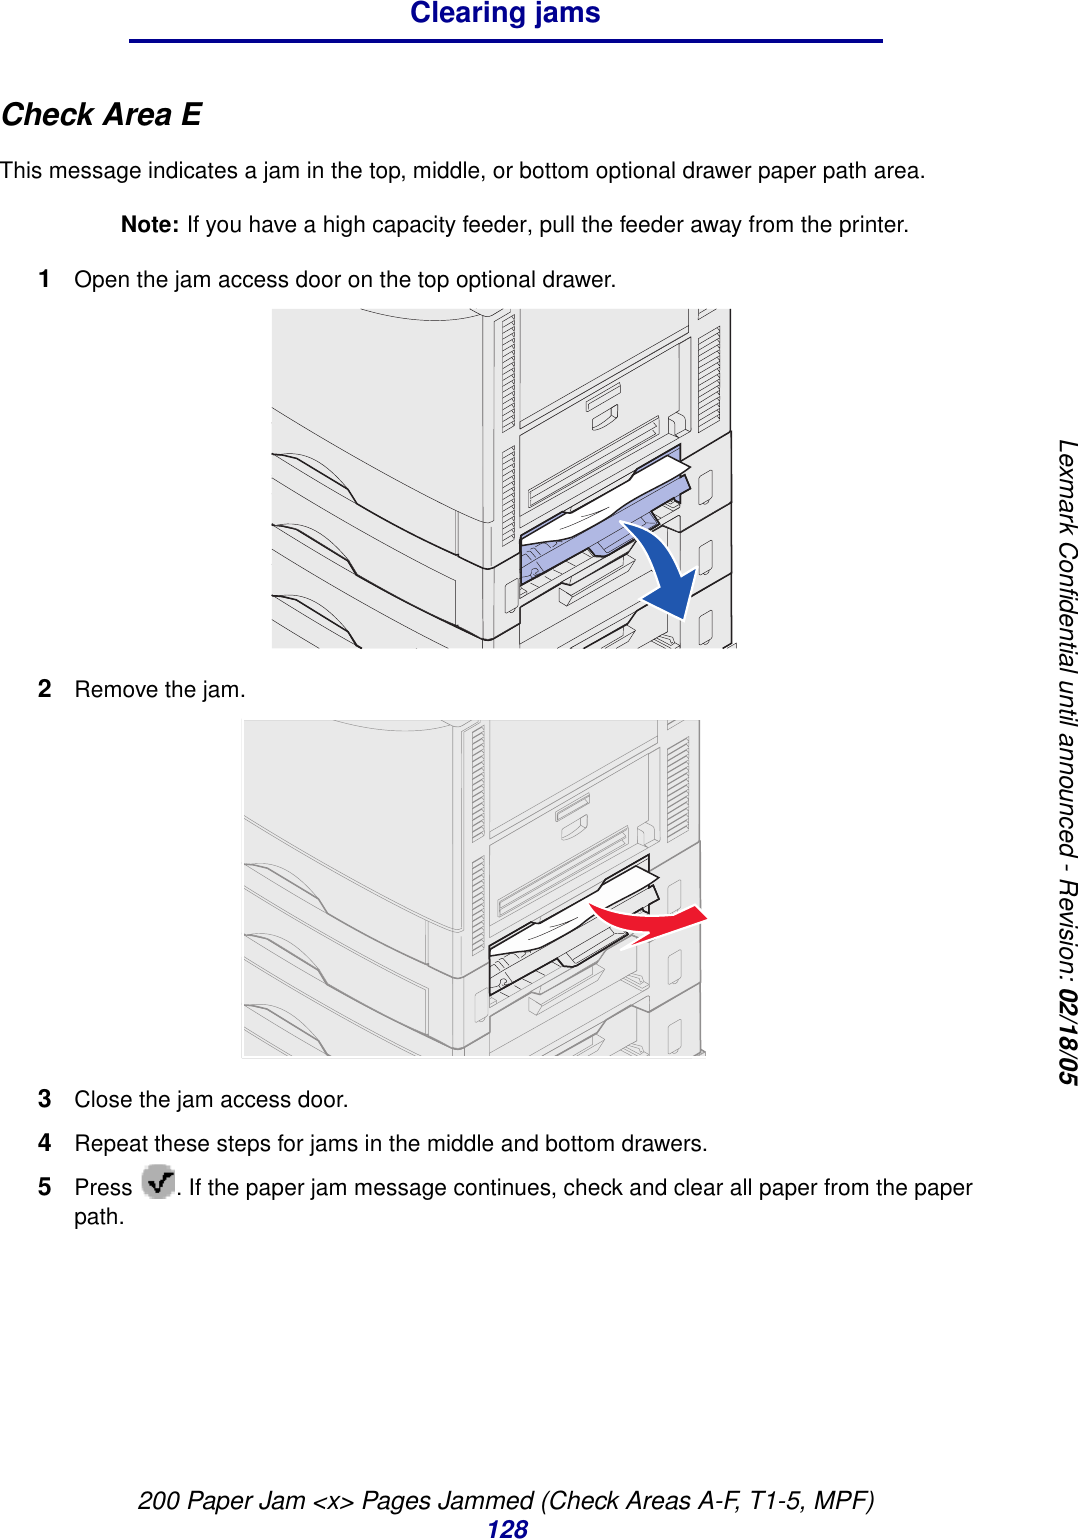
Lexmark 5056 Lexmark C920/C920n Printer User Manual Users guide
Lexmark International Inc Lexmark C920/C920n Printer Users guide
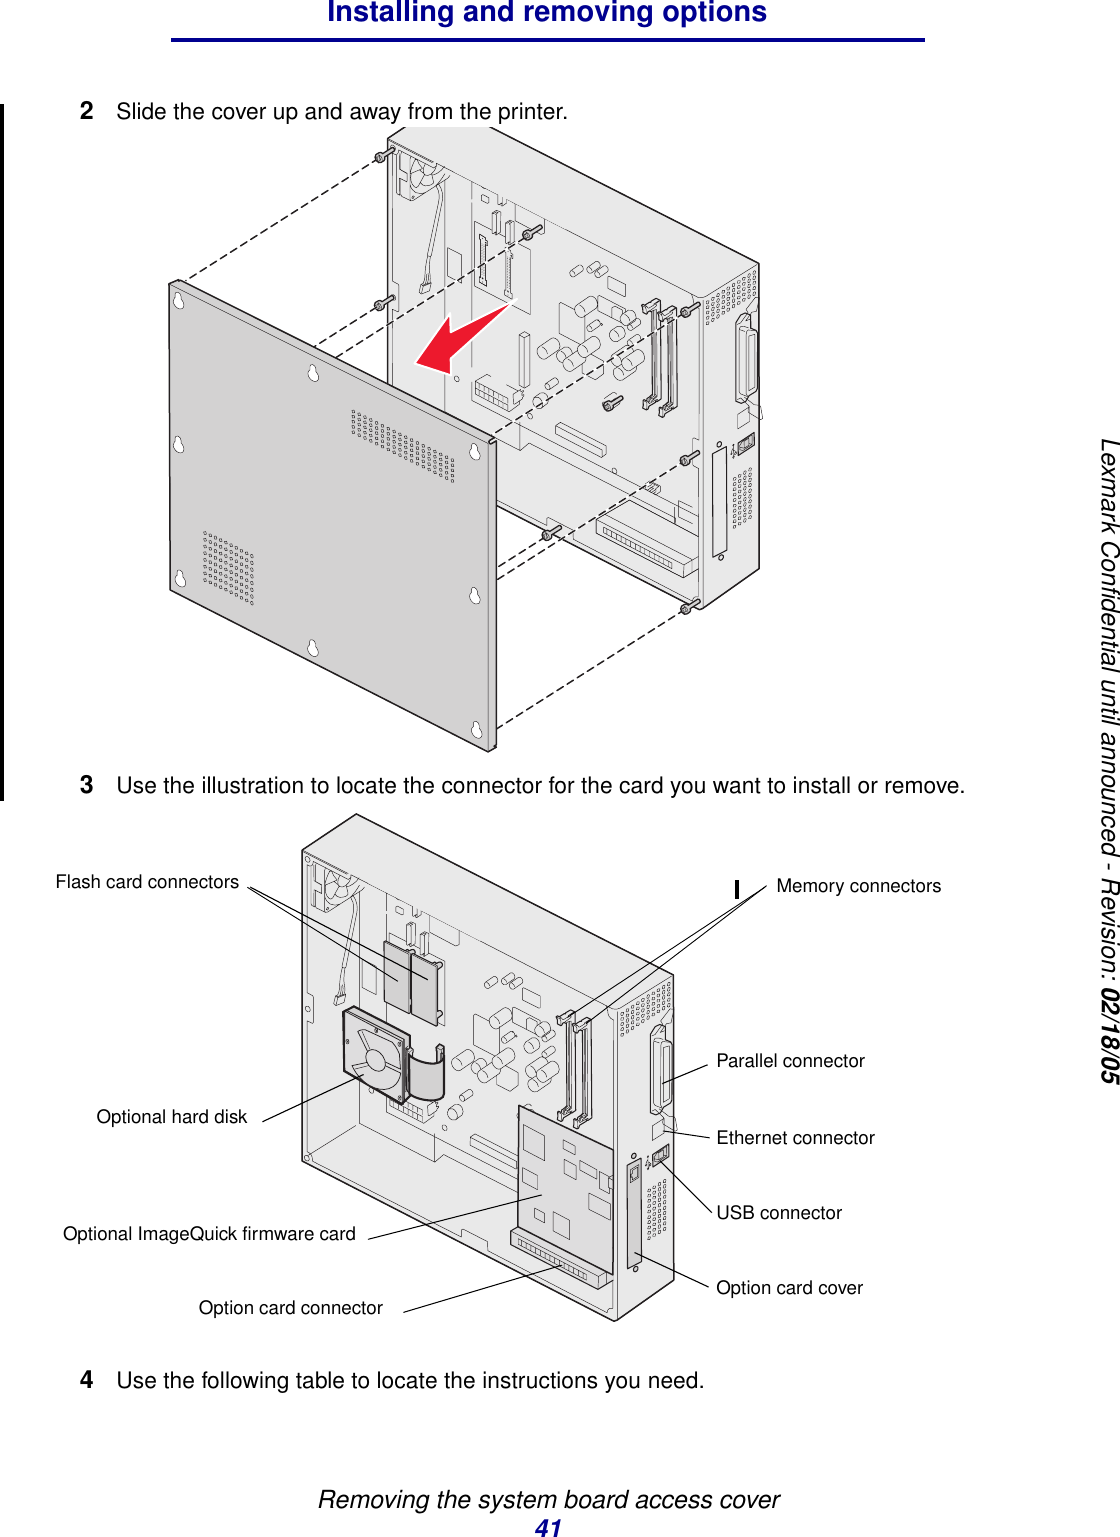
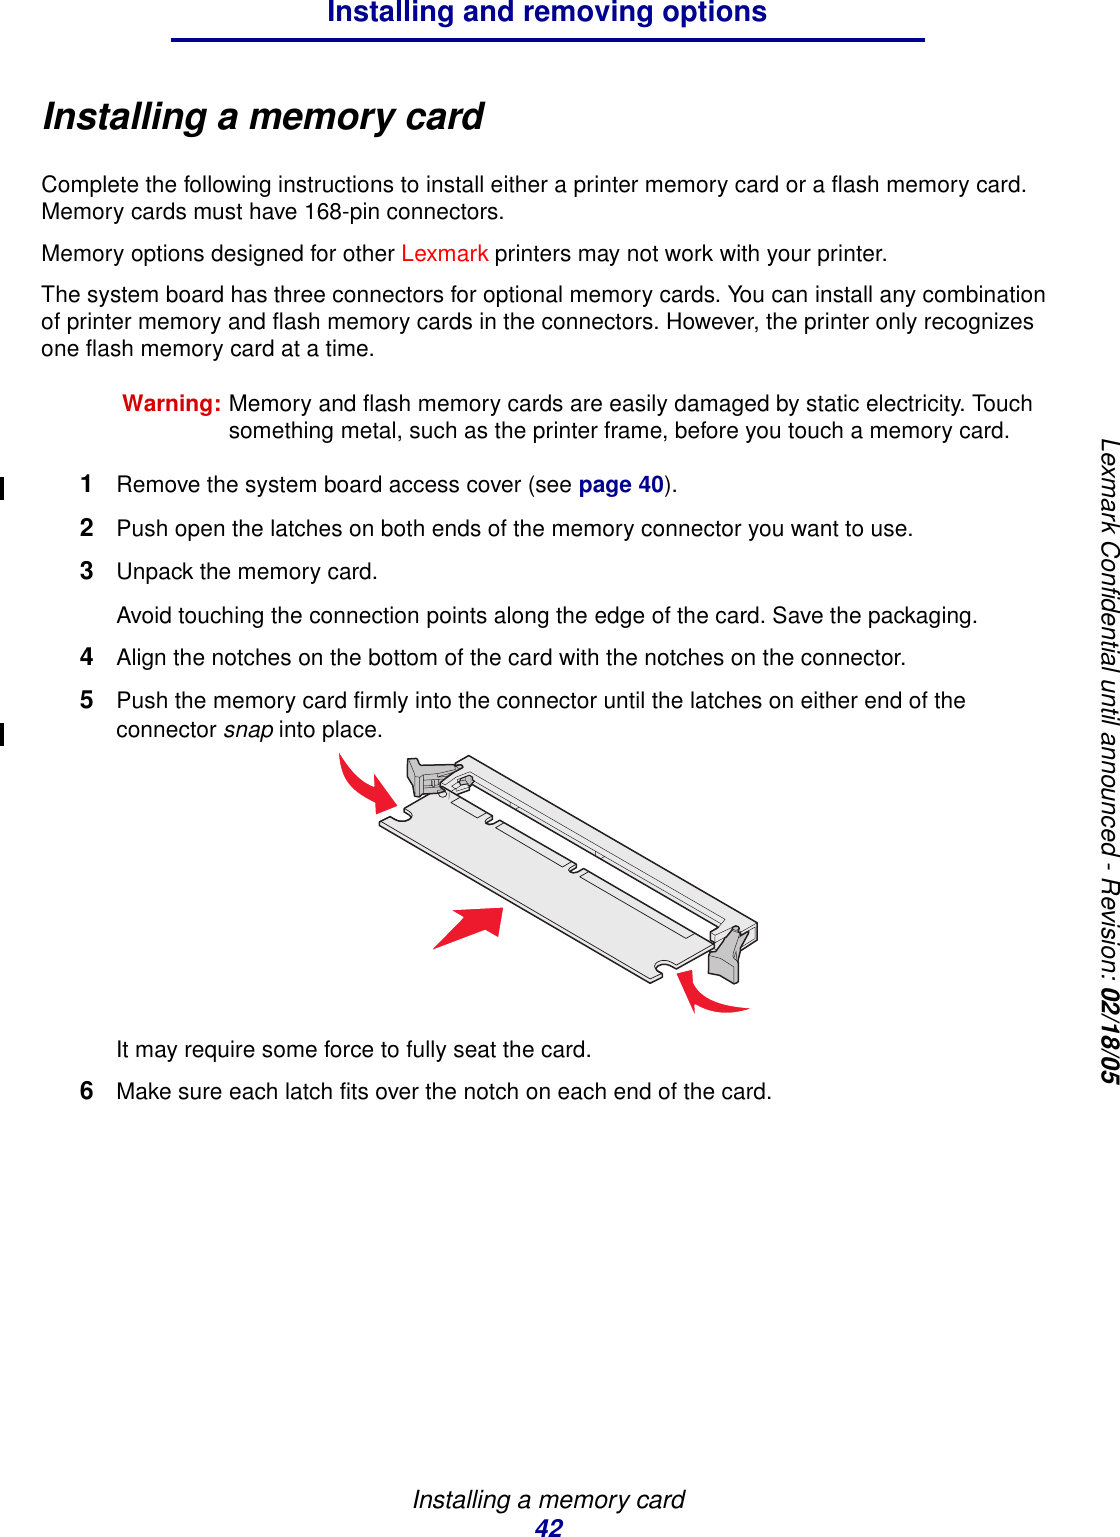
UserManual.wiki
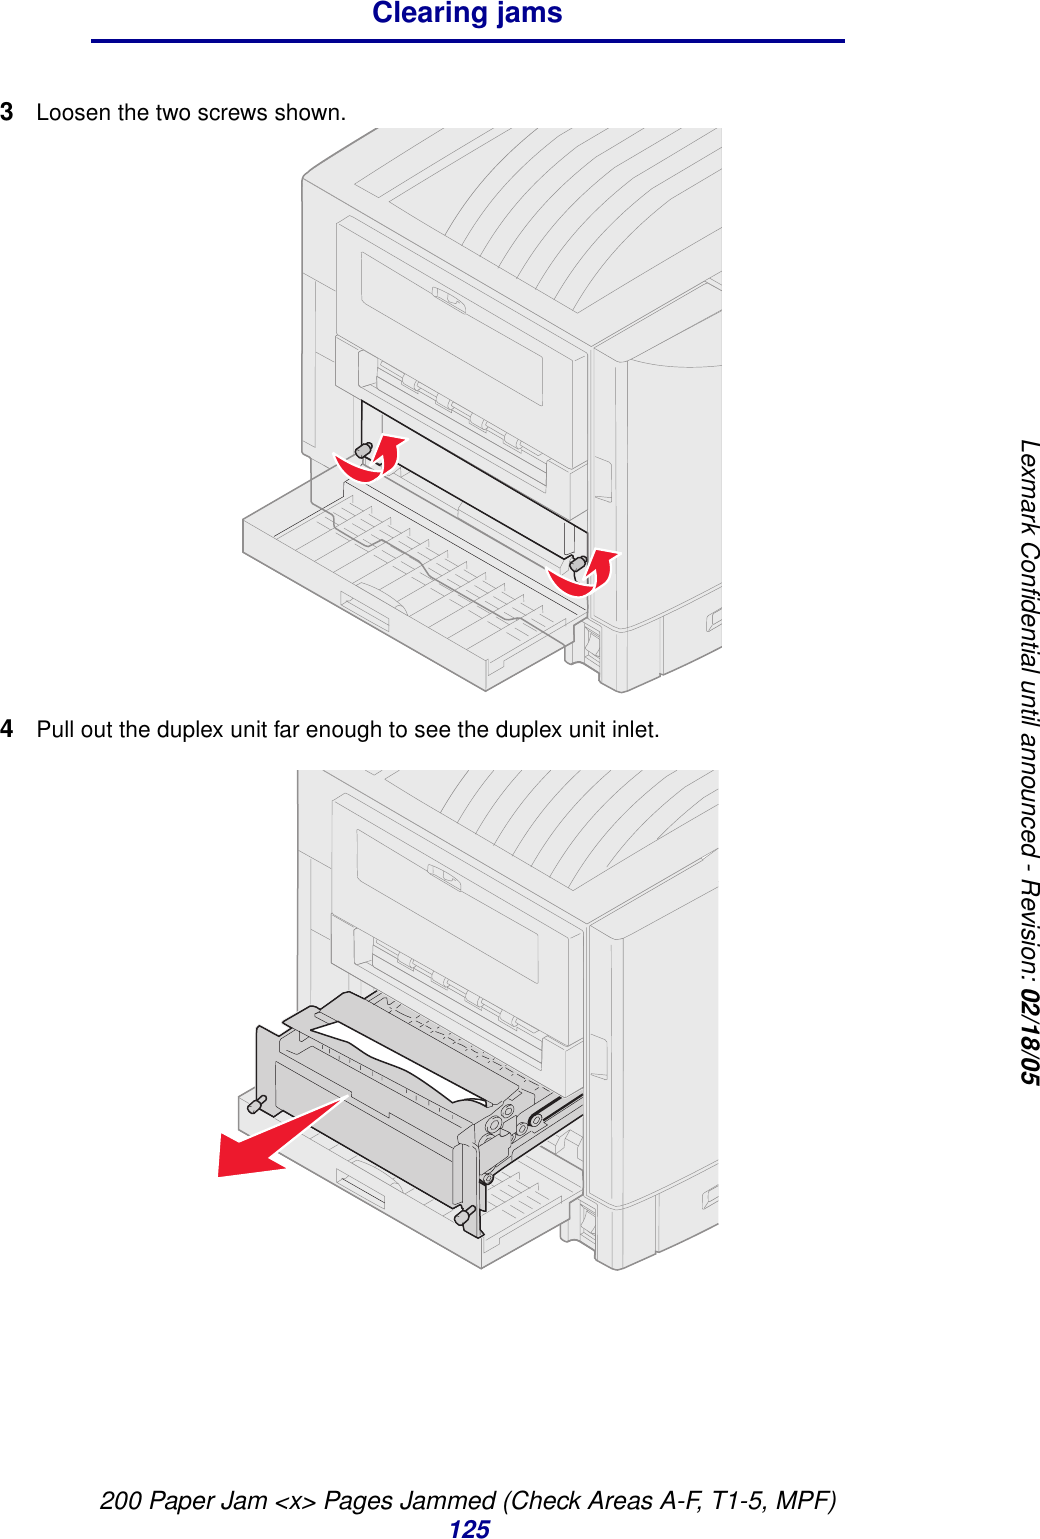
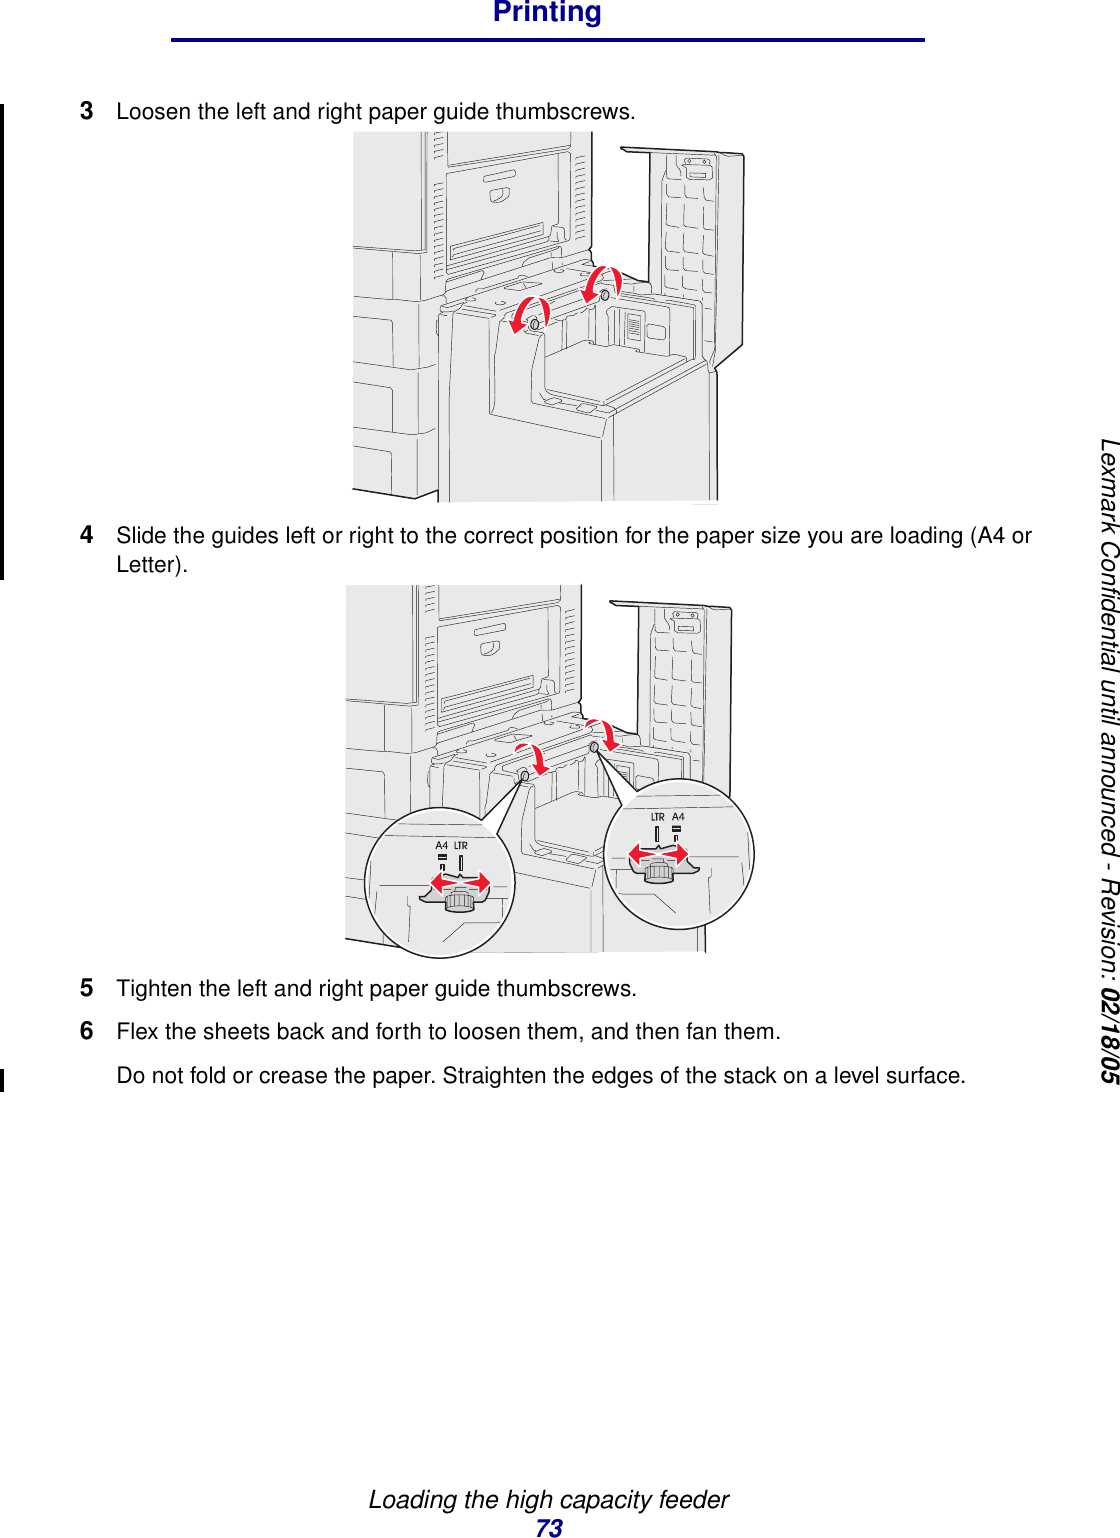
>
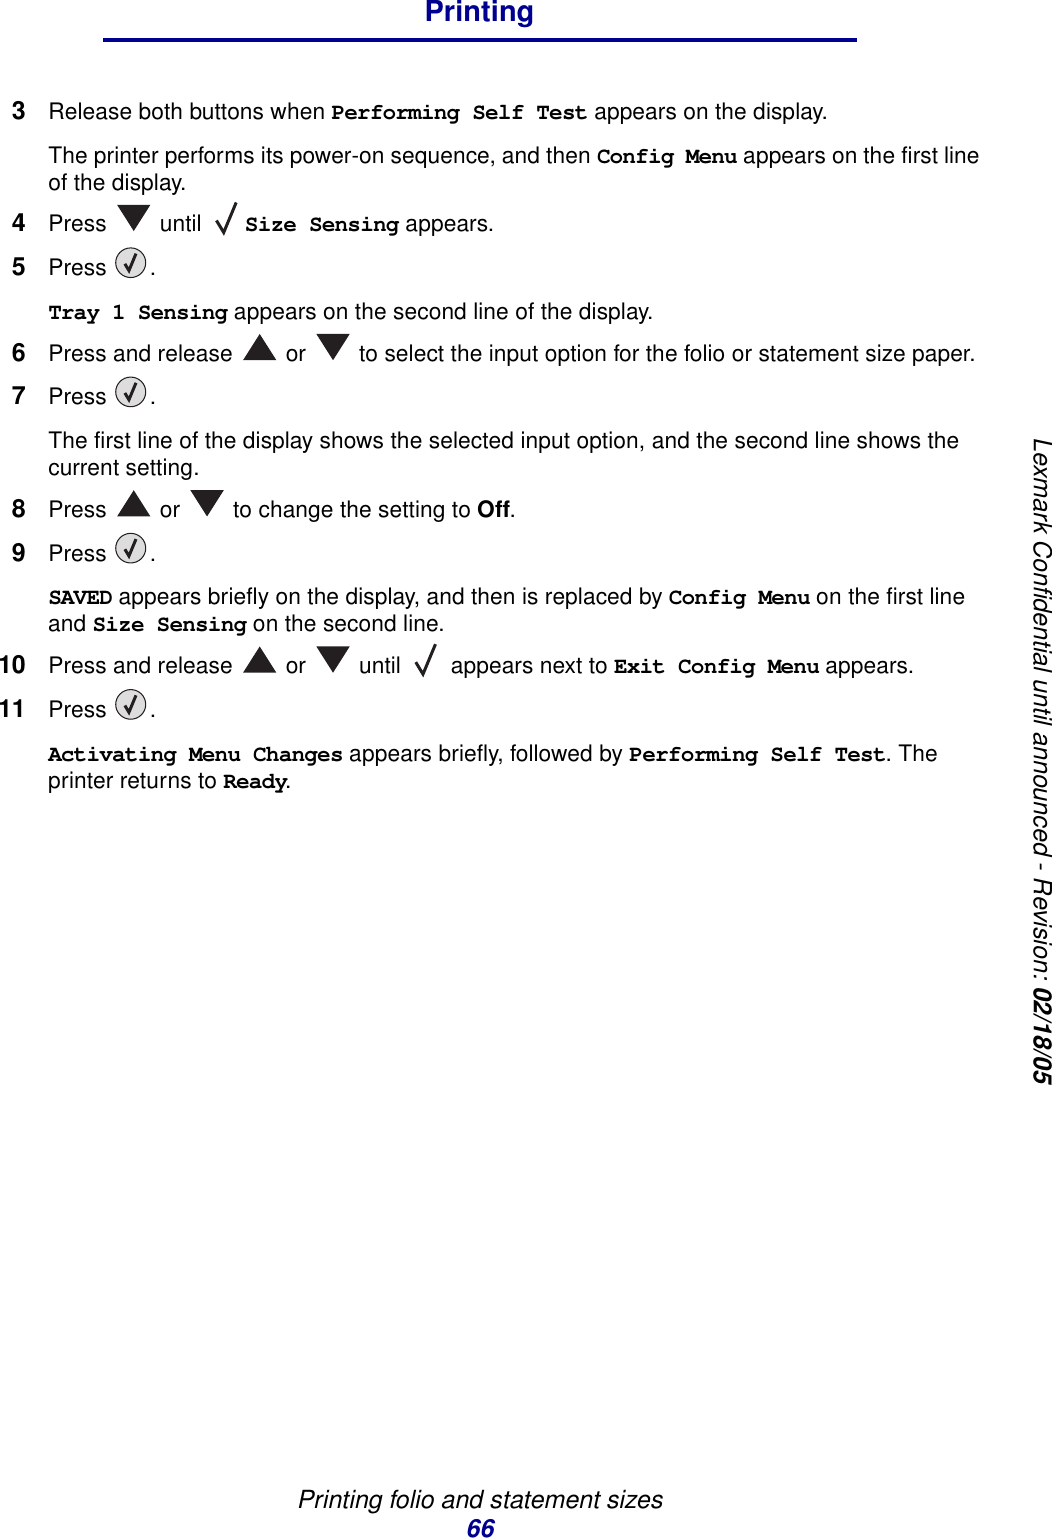
Lexmark
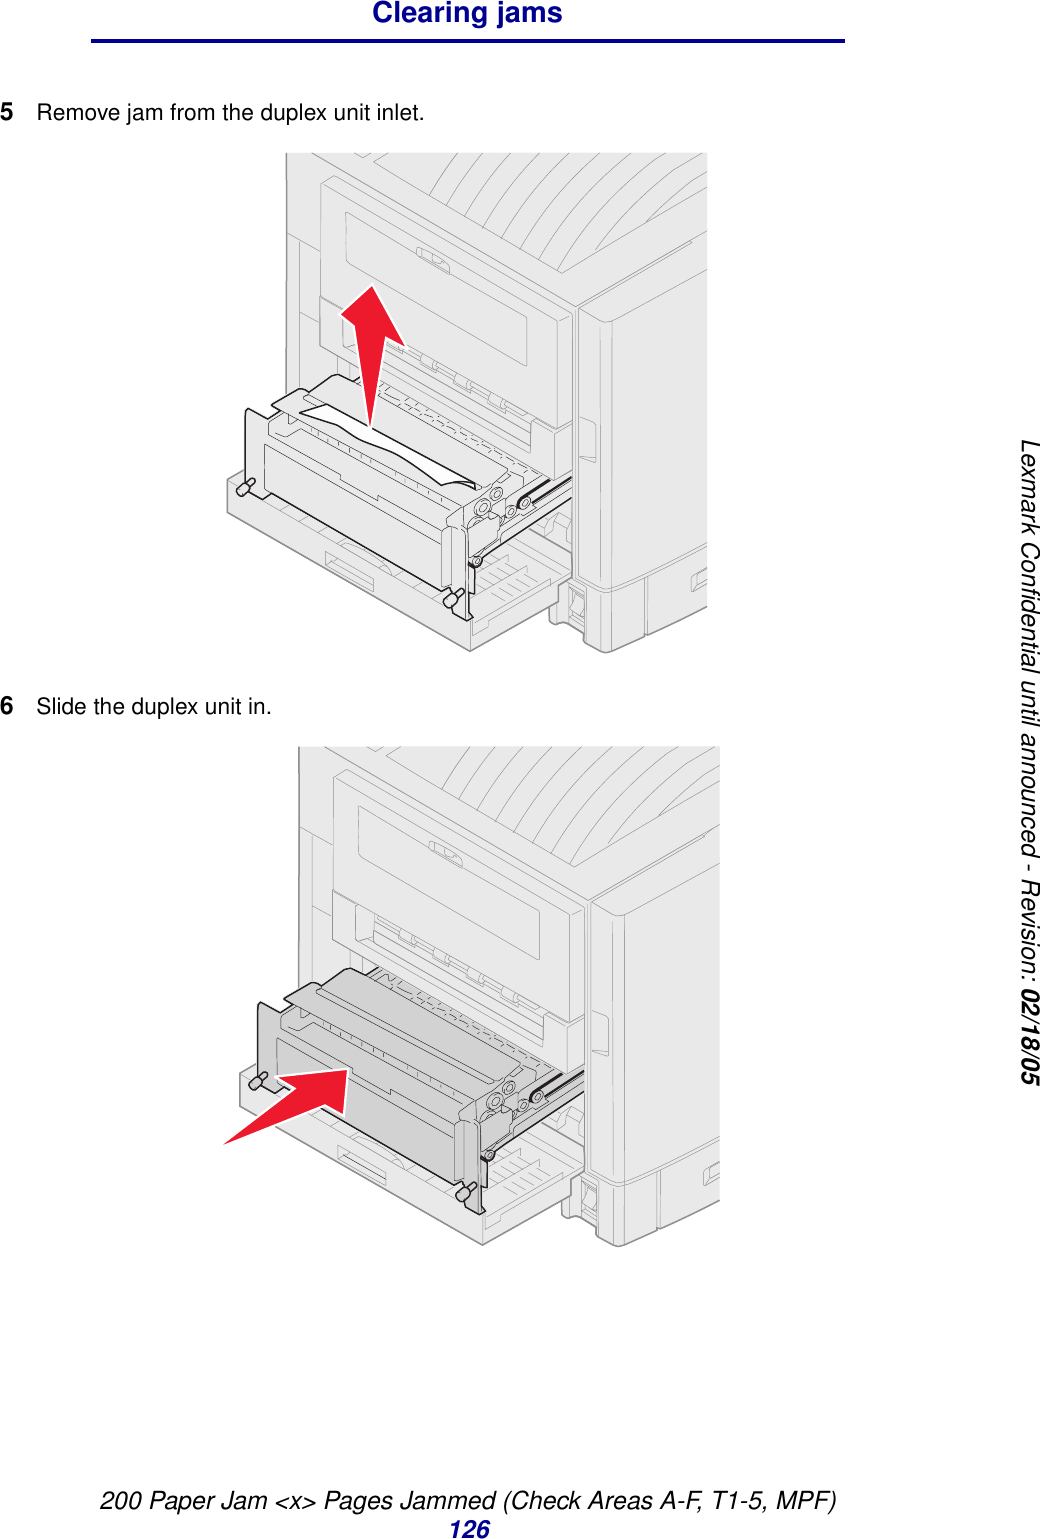
>
5056 User Manual
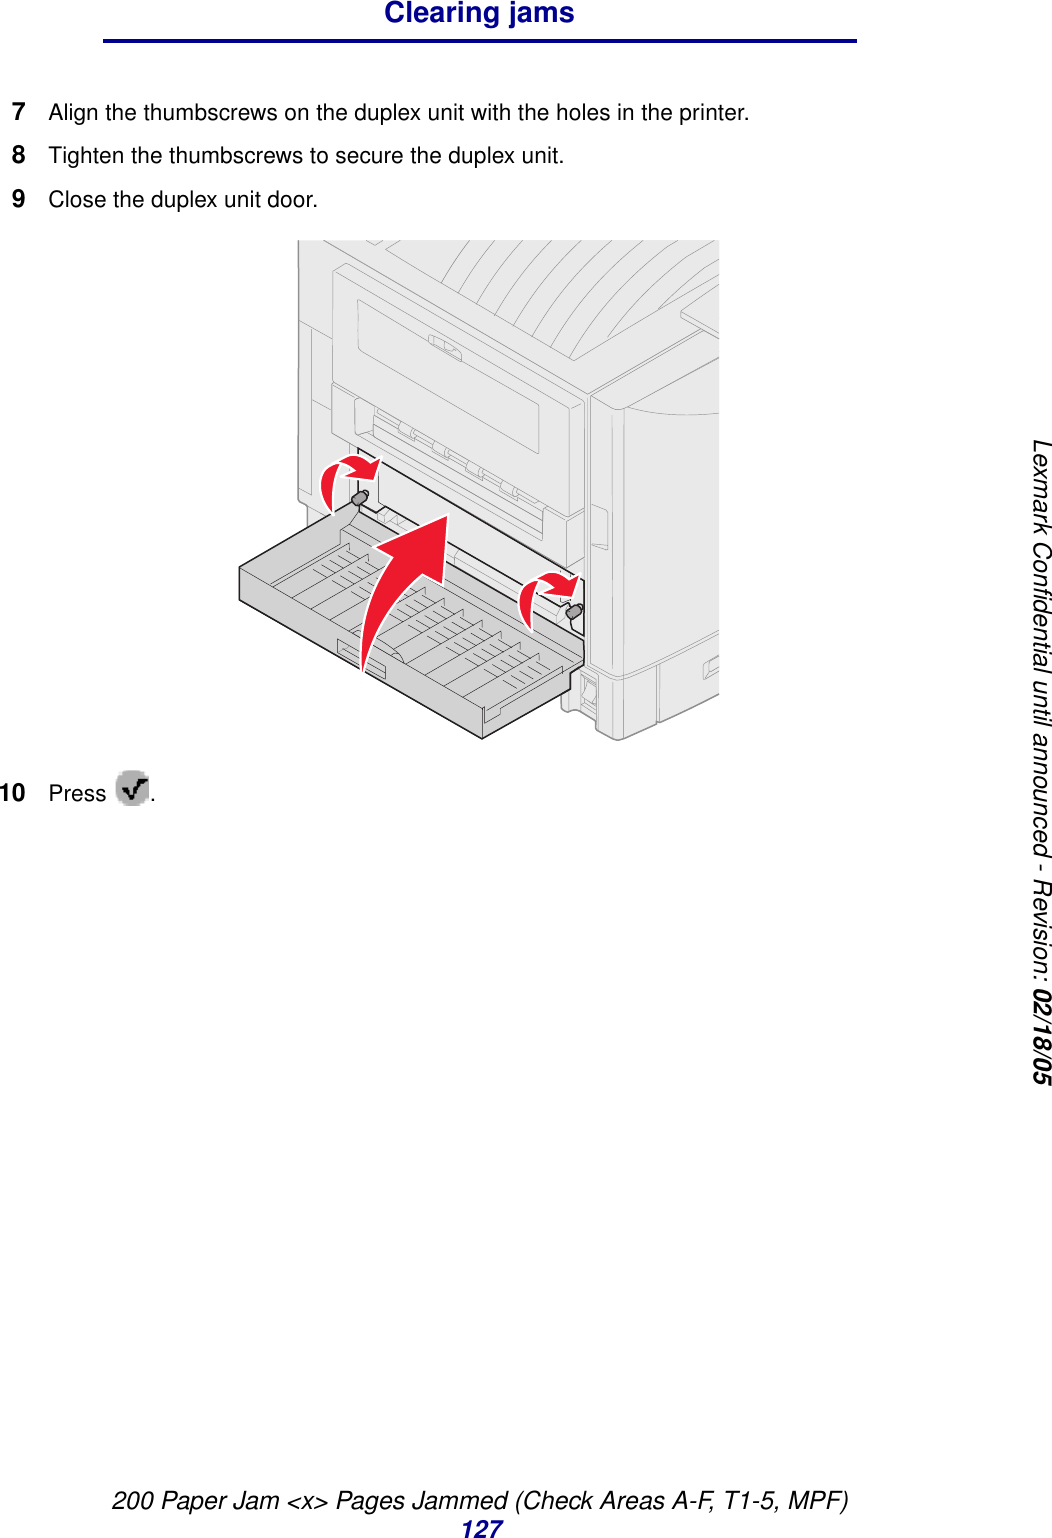
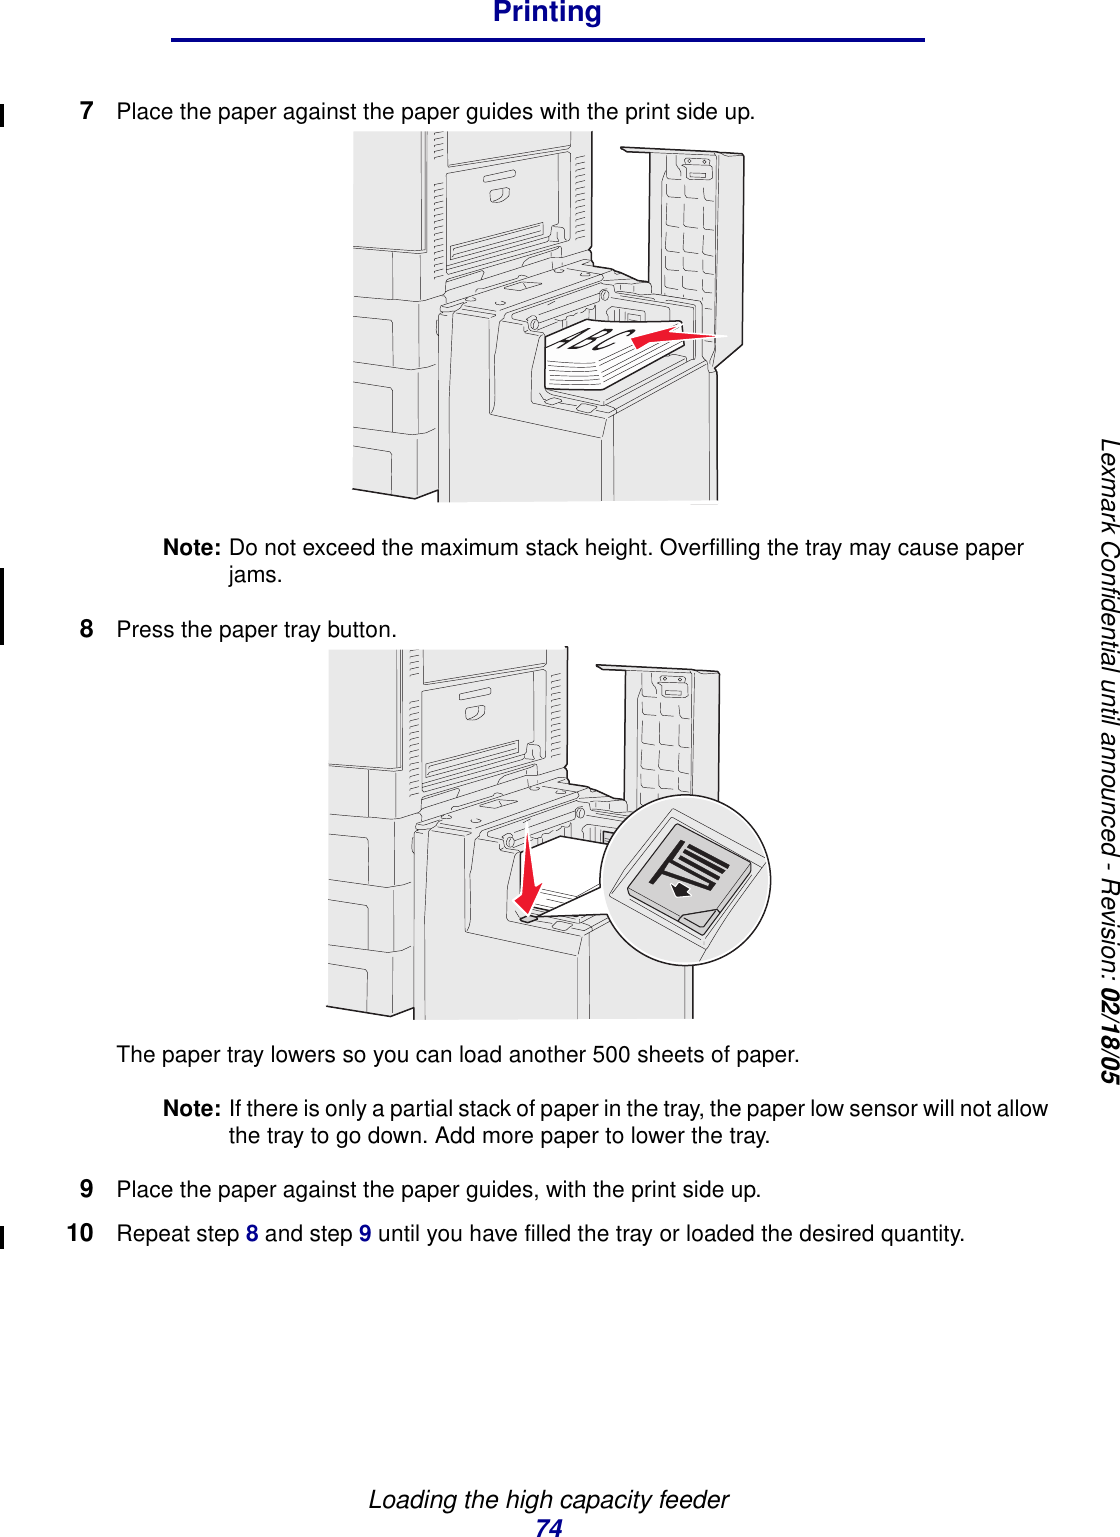
Users guide
Navigation menu
Upload a User Manual
Namespaces
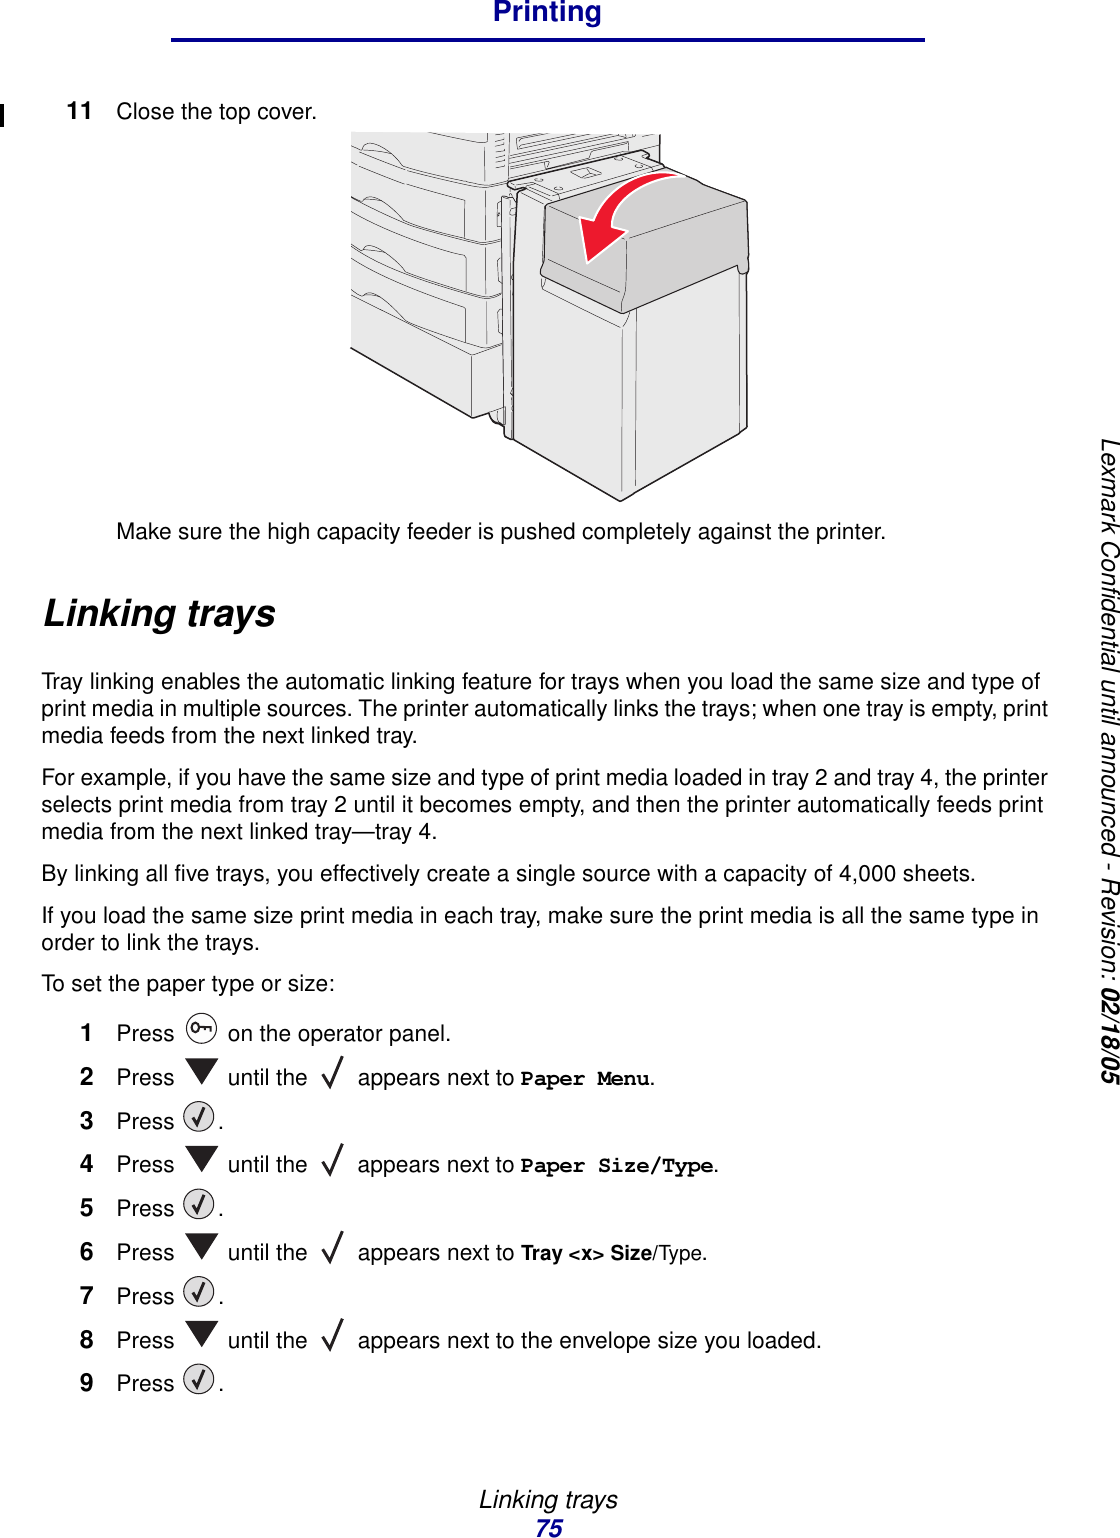
Wiki Guide
HTML
PDF
Info
Views
User Manual
Discussion / Help
Navigation


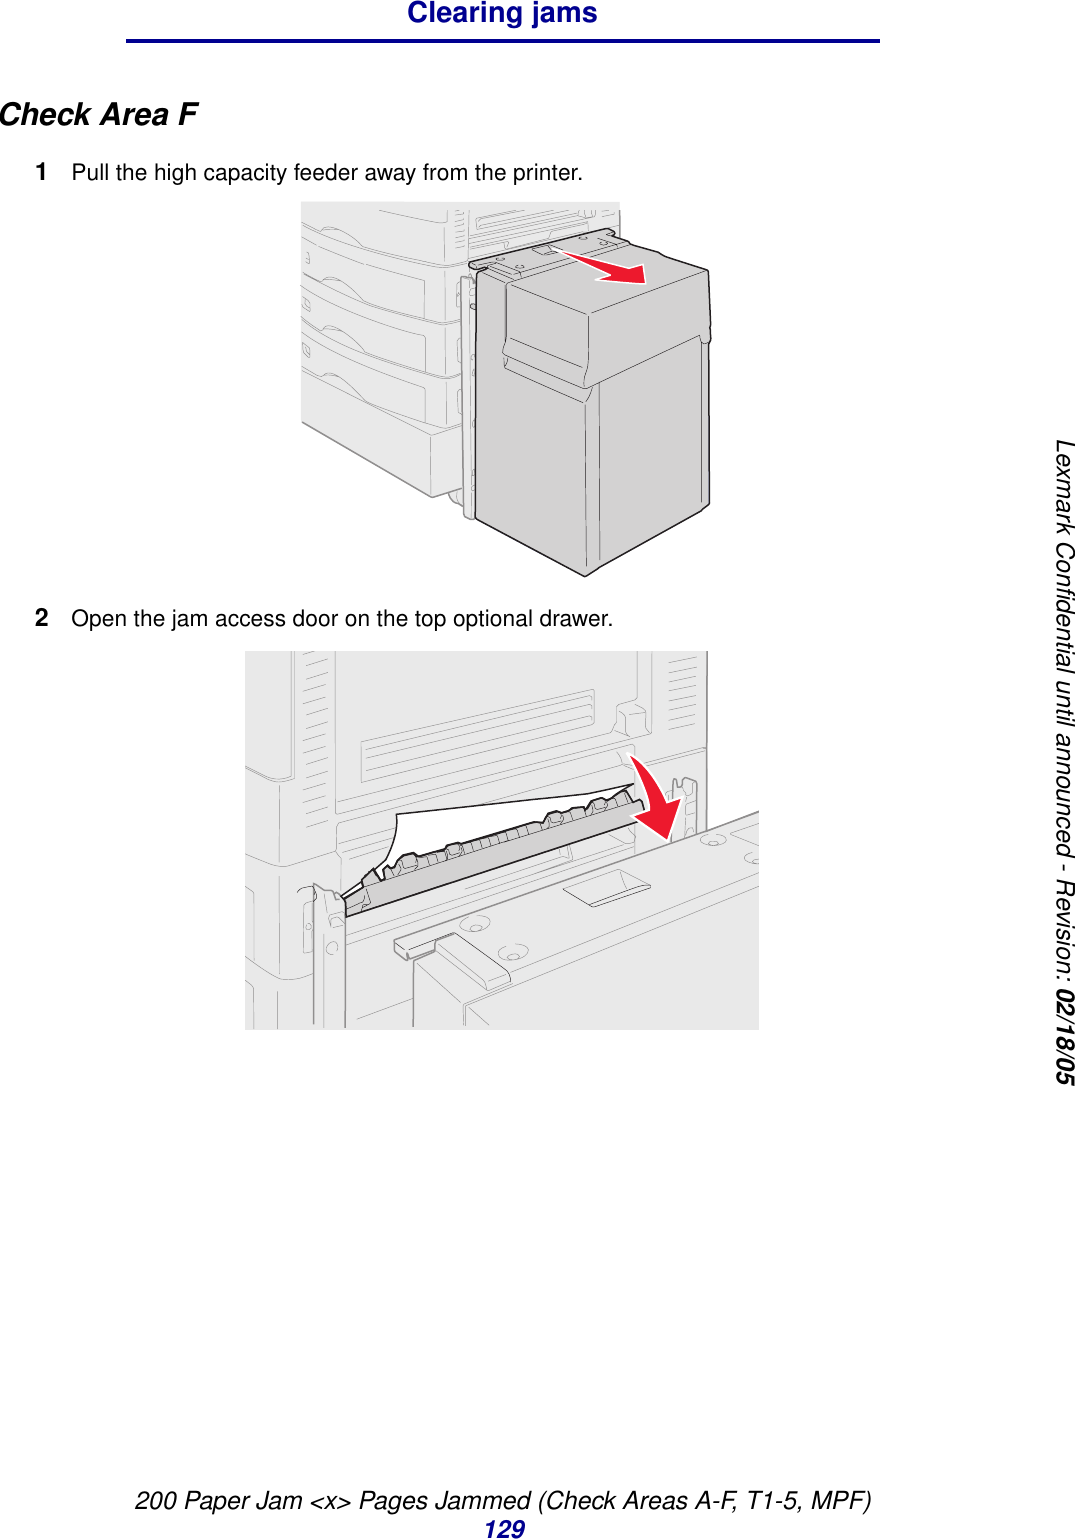
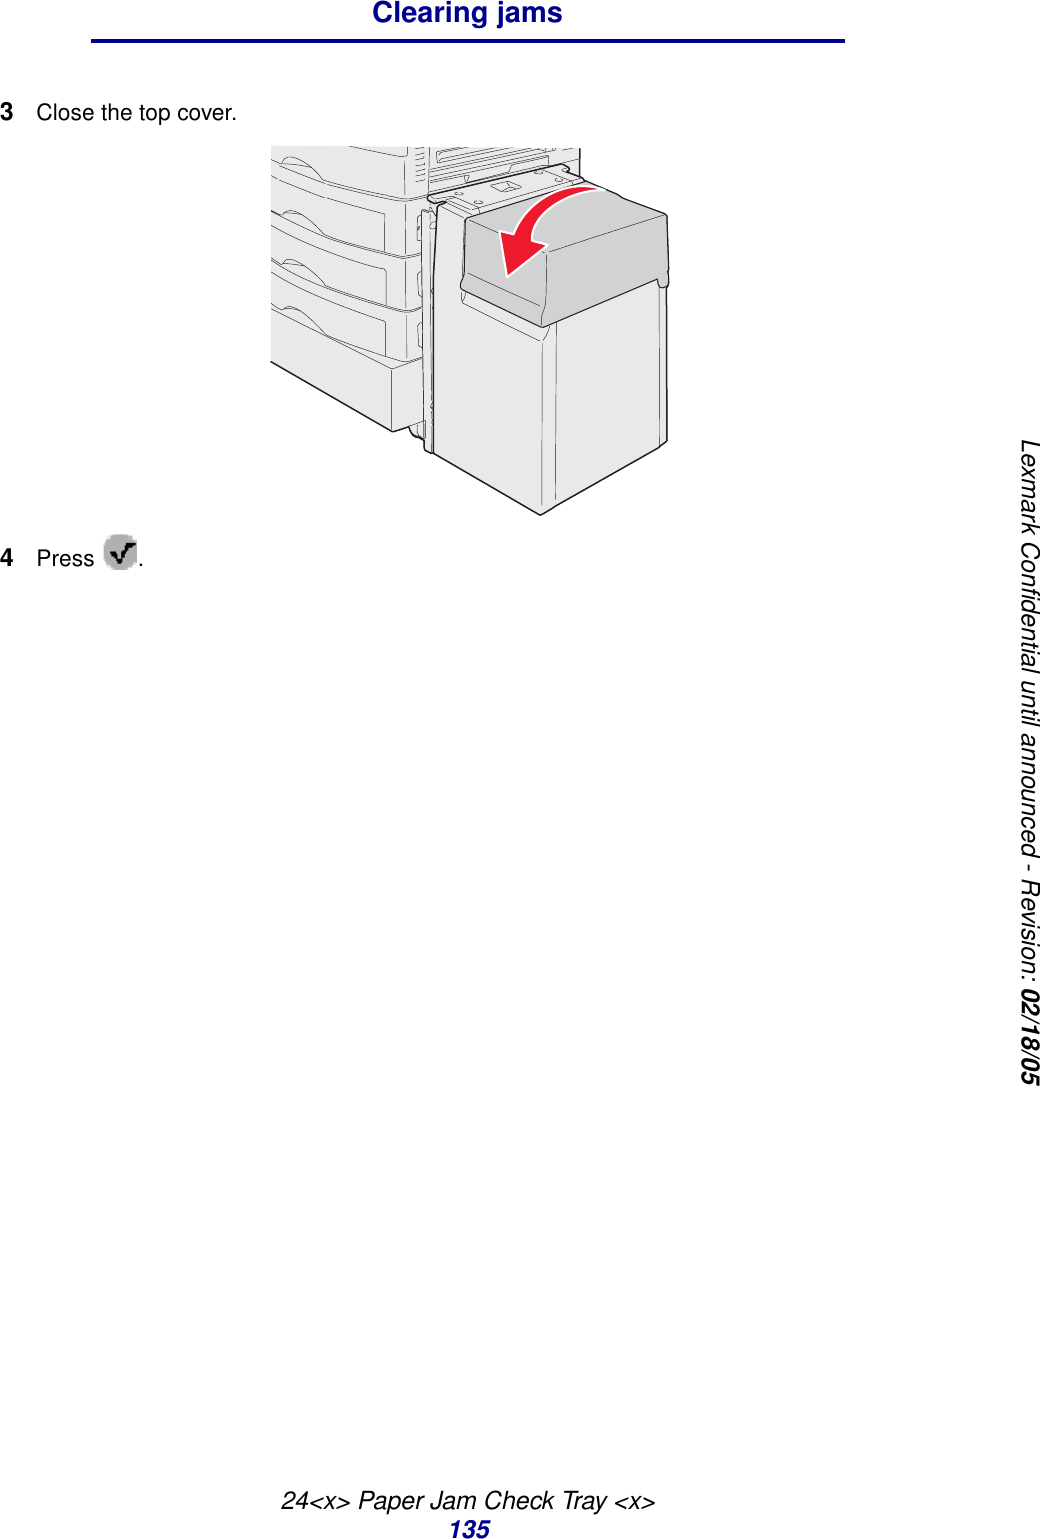
![Windows21Installing drivers for local printingLexmark Confidential until announced - Revision: 02/18/055Insert the drivers CD. If the CD launches automatically, click Exit to return to the Add Printer Wizard.6Specify the location of the custom printer driver on the drivers CD.The path should be similar to the following:X:\Drivers\Print\Win_9xMe\<language>Where X=the letter of your CD-ROM drive, and <language>=your preferred language. For example, D:\Drivers\Print\Win_9xMe\English.7Click OK.It may take some time for the drivers to load.8Close the drivers CD.Serial printing[NOTE TO WRITERS: Delete this section if your printer does not support serial printing.]With serial printing, data is transferred one bit at a time. Although serial printing is usually slower than parallel printing, it is the preferred option when there is a great deal of distance between your printer and computer, or when a parallel interface is not available.Note: A serial interface card is required and can be purchased separately.Before you can print, you must establish communication between your printer and computer. To do this, you have to 1) set serial parameters in the printer, 2) install a printer driver on the attached computer, and 3) match the serial settings in the COM port.Setting parameters in the printer1Press on the operator panel.2Press until Print Menus appears.3Press .Note: For information about serial menus and messages, see the publications CD that shipped with your printer.4Press until Serial Standard (or Serial Option X if you installed a serial interface card).5Press .6Press until <Parameter> appears. Where <Parameter>=the parameter you want to change.7Press .](https://usermanual.wiki/Lexmark/5056/User-Guide-525146-Page-21.png)


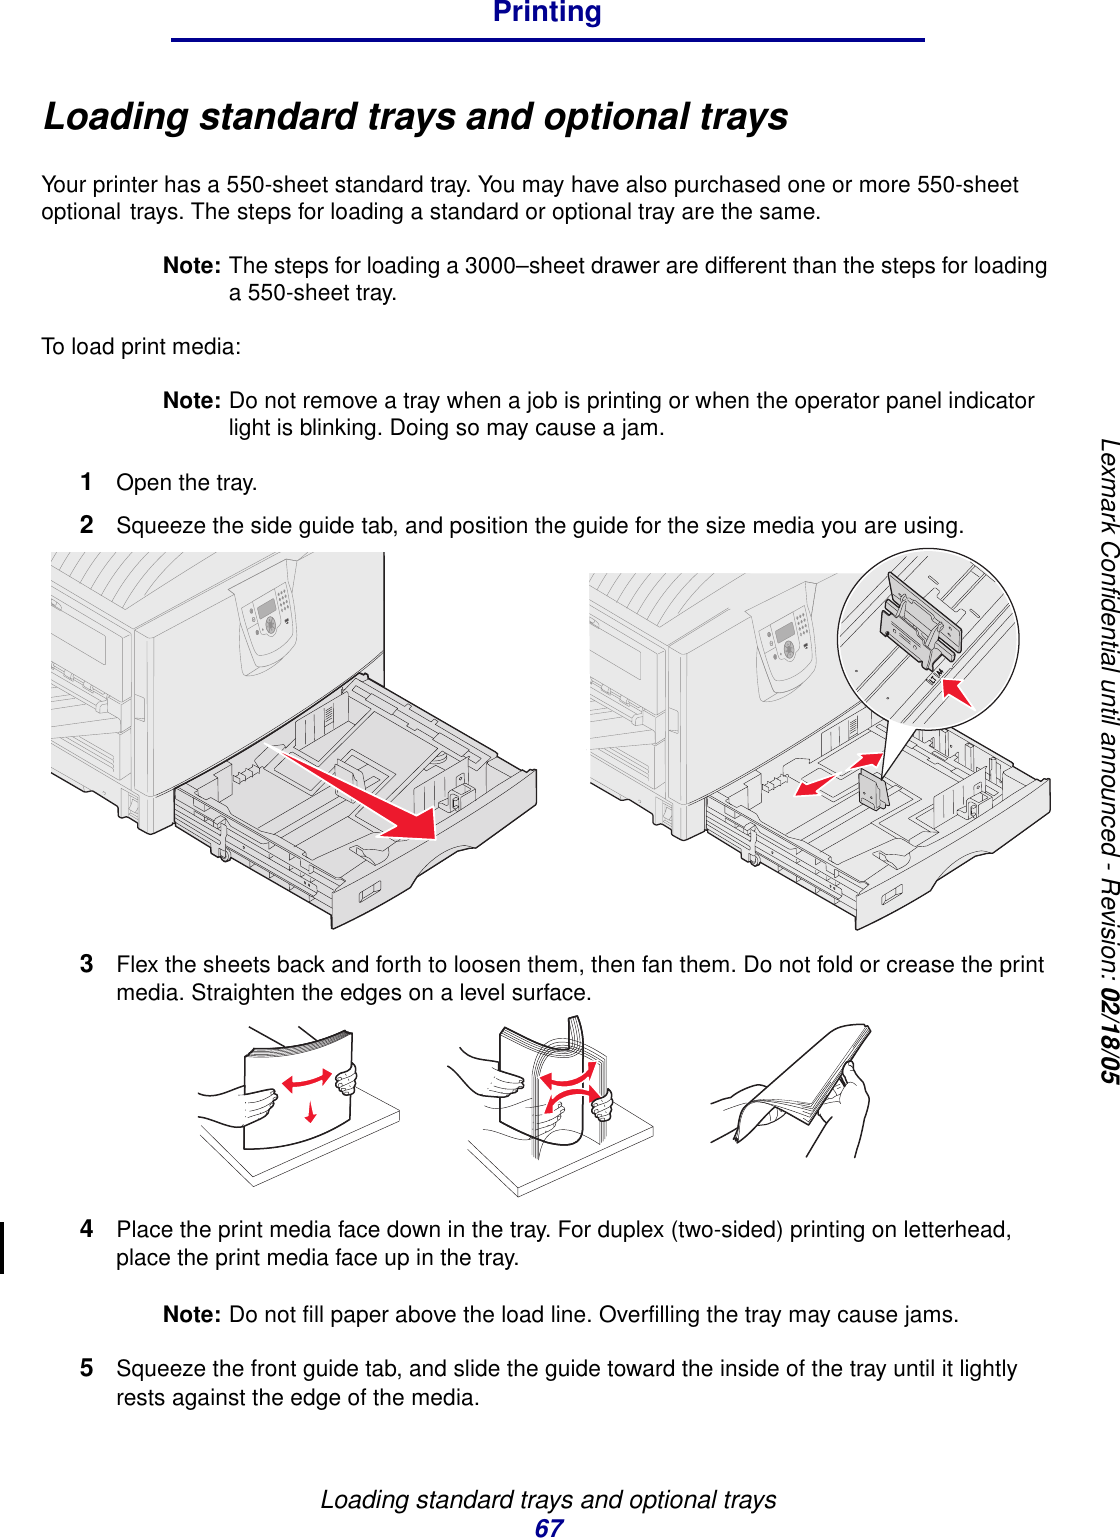
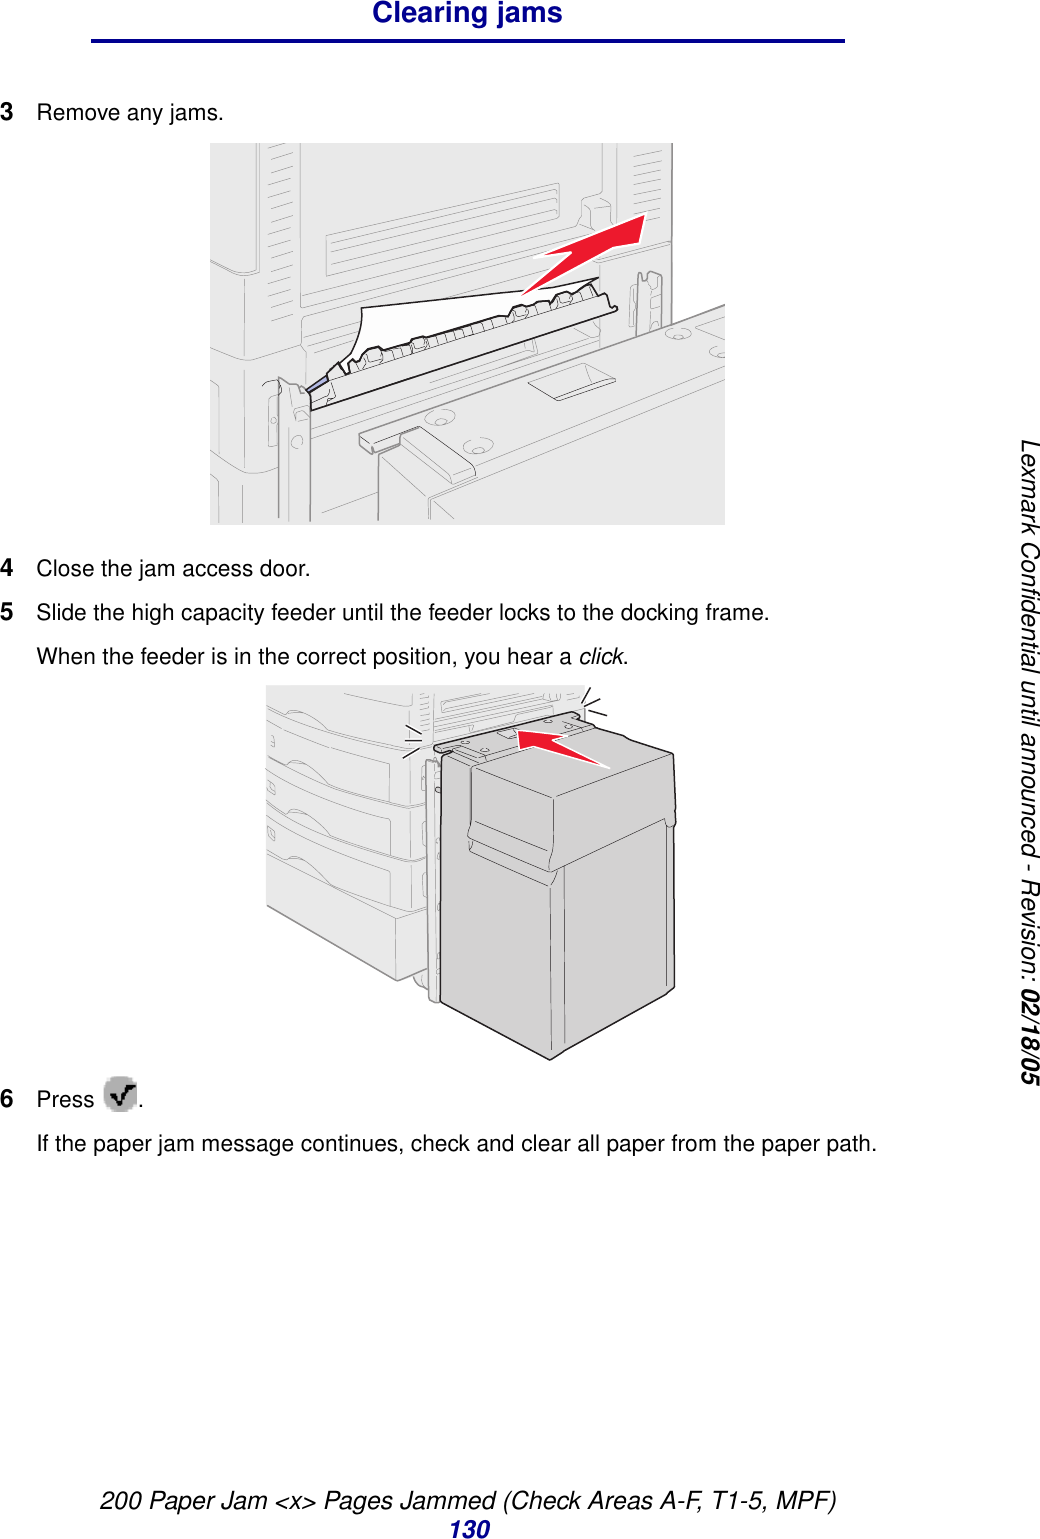
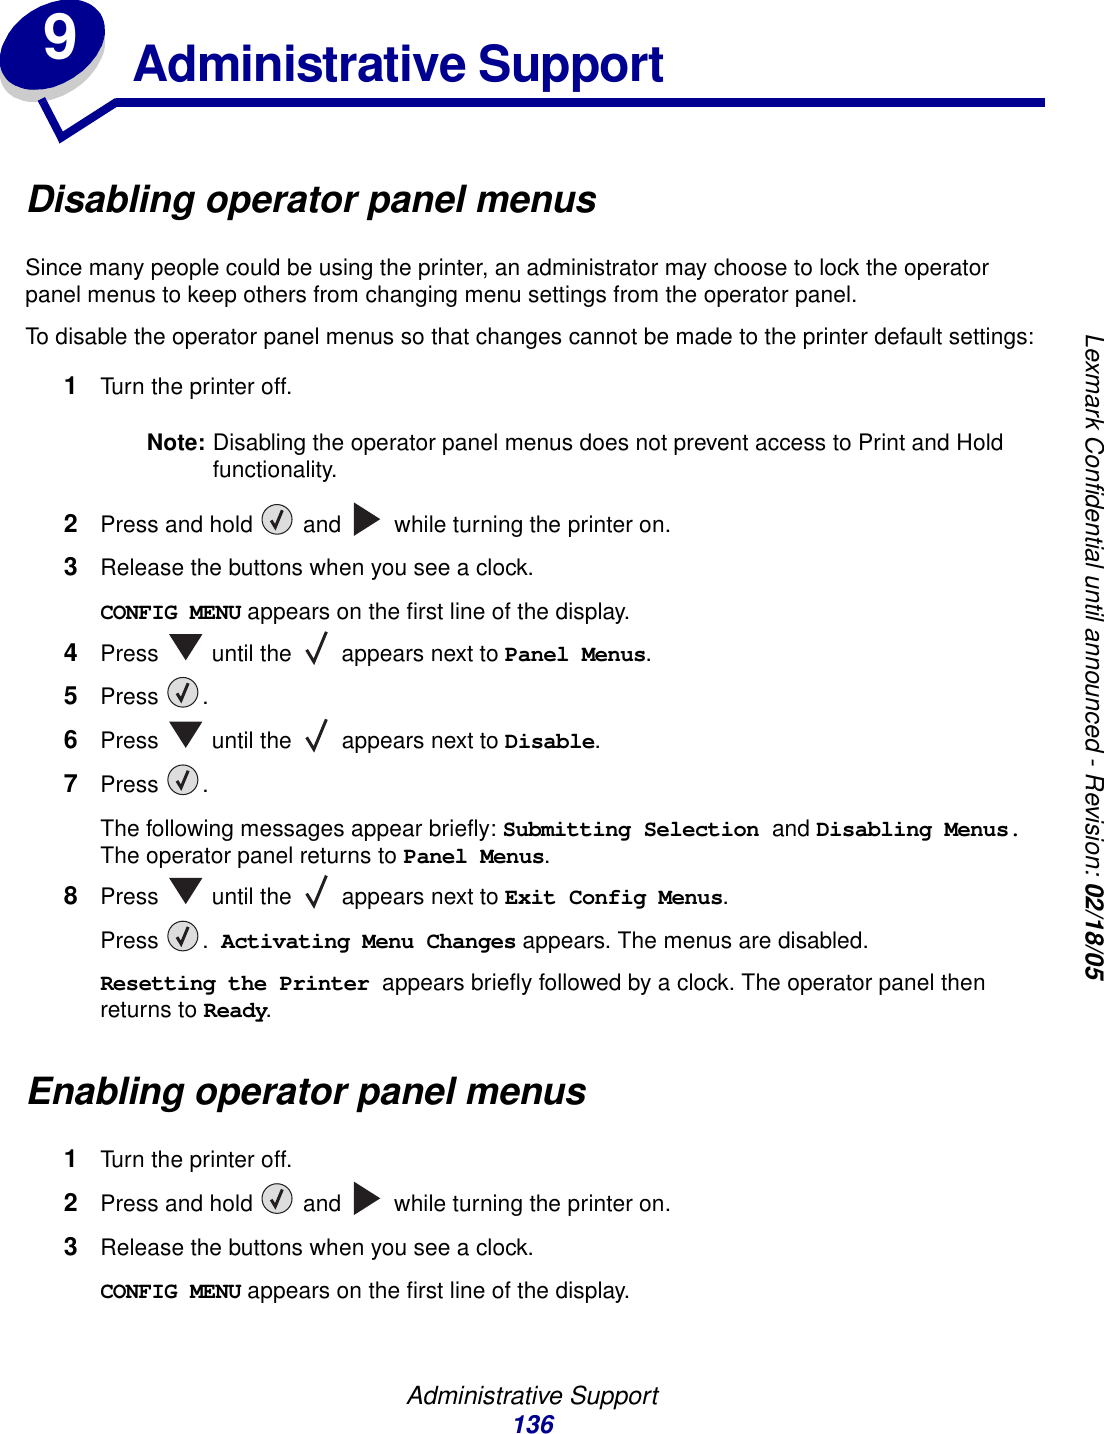
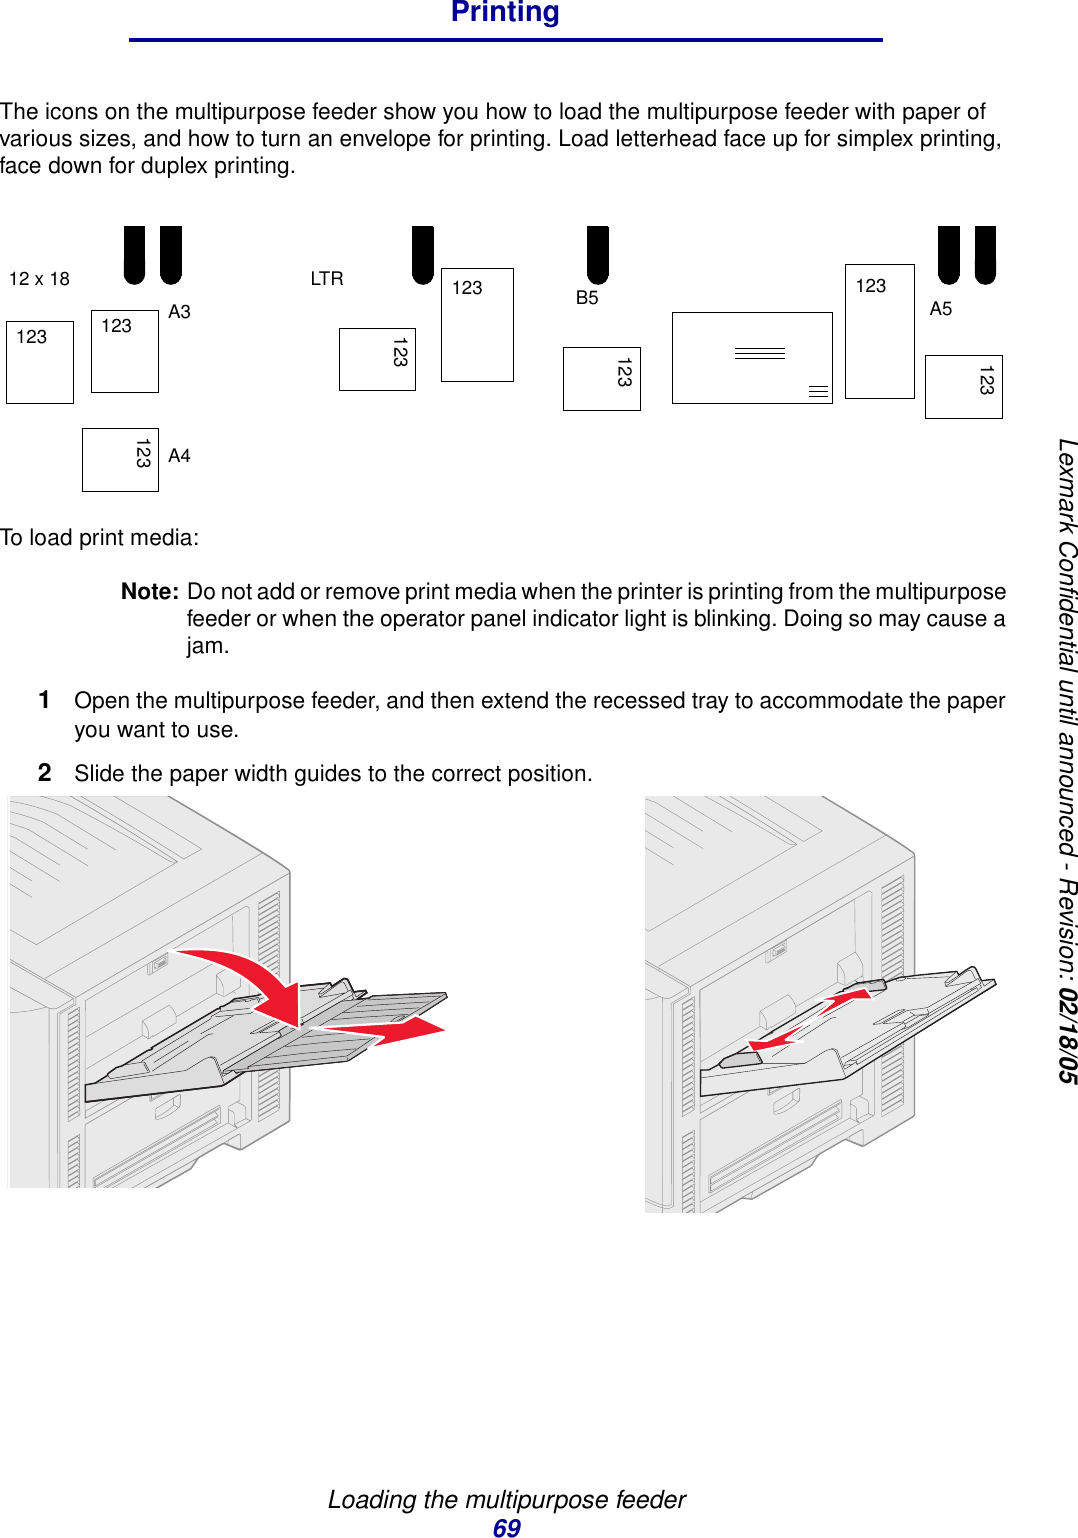
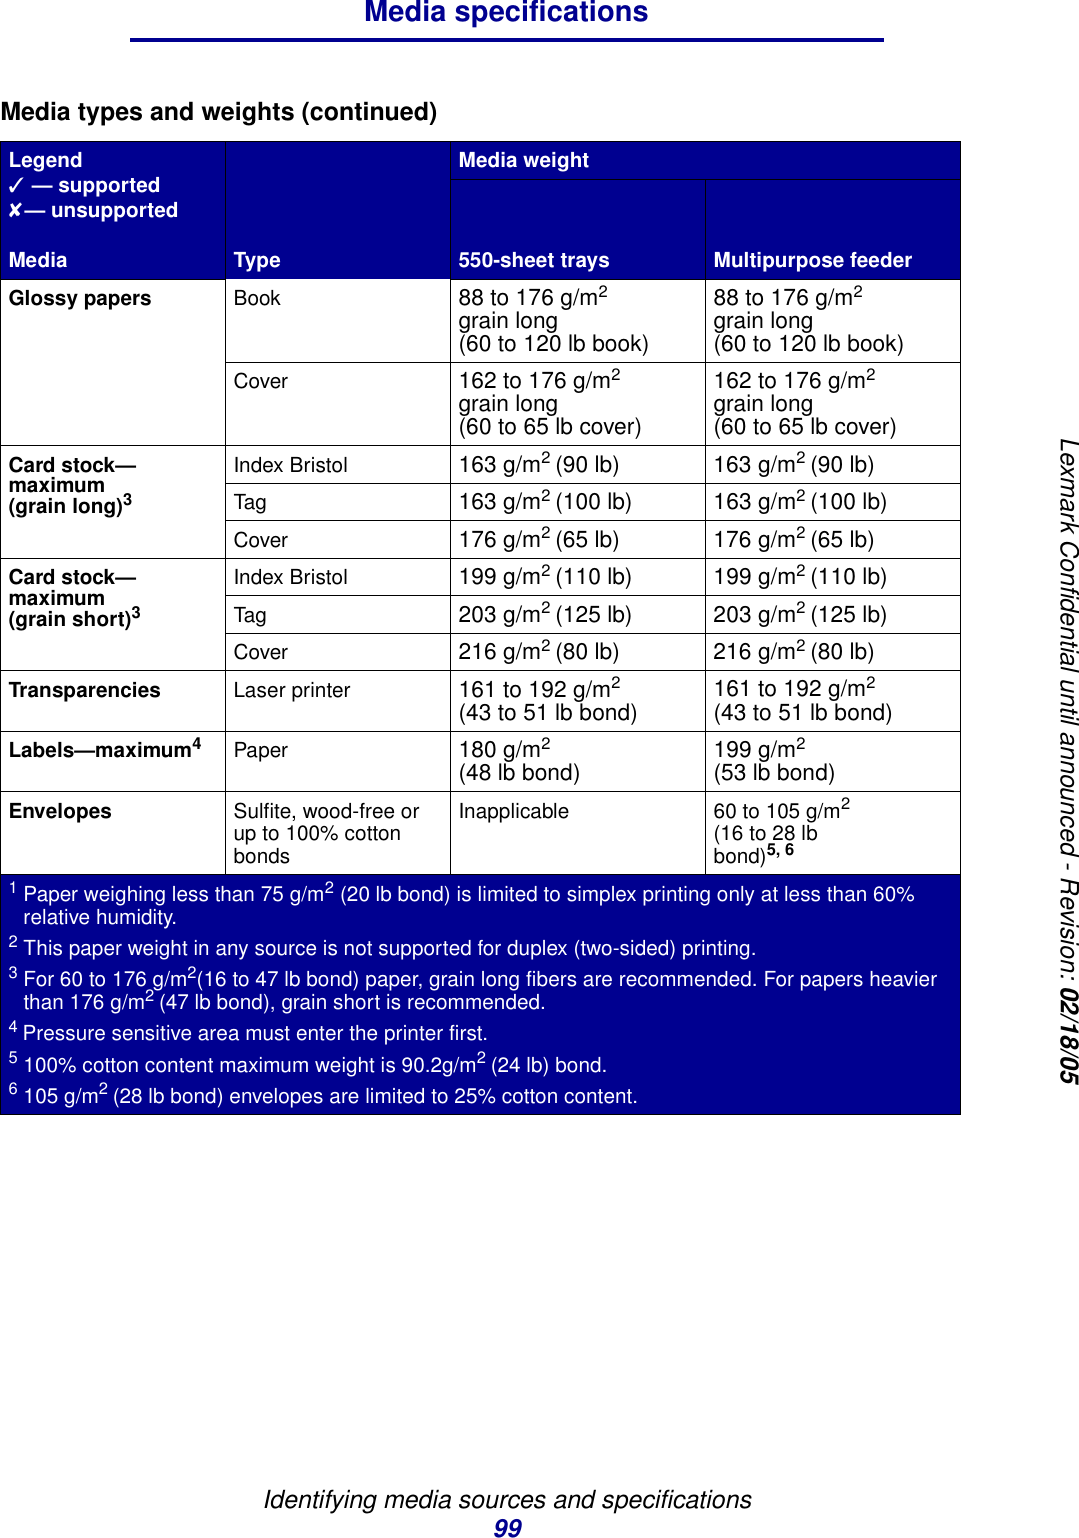
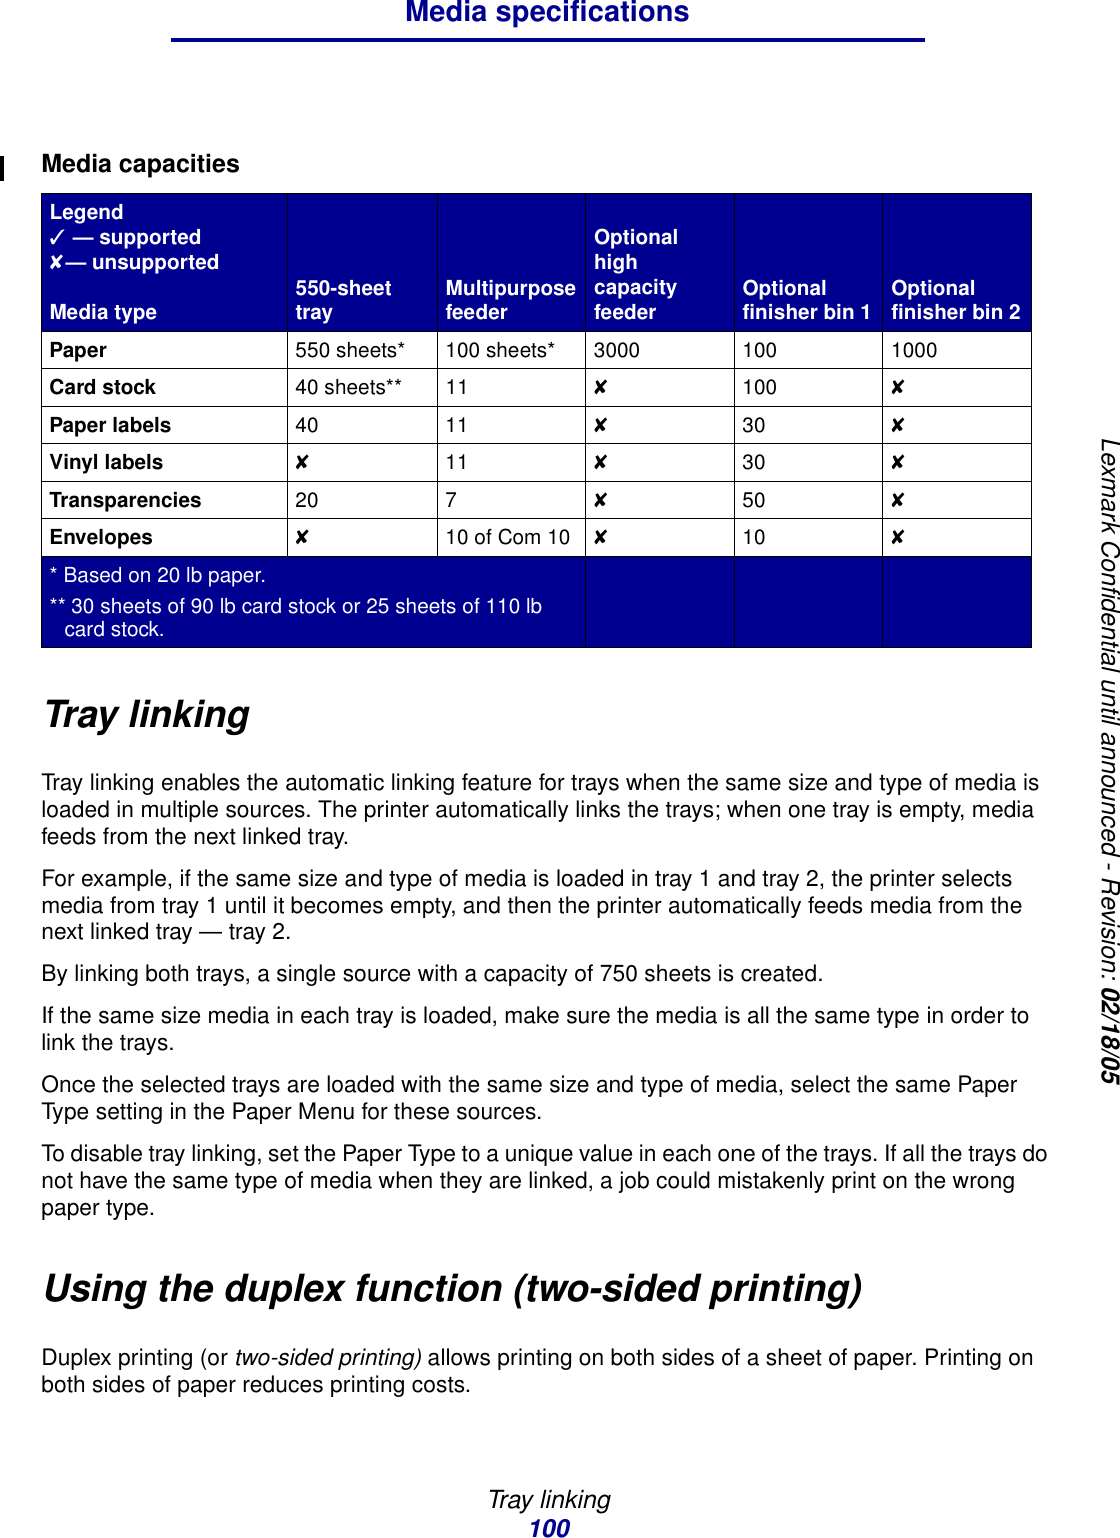
![Loading the multipurpose feeder68PrintingLexmark Confidential until announced - Revision: 02/18/056Adjust the knob to show the size of the print media currently loaded.Note: This setting serves as a visual reminder only; it has no effect on the operation of the printer.7Insert the tray into the printer.Loading the multipurpose feederThe multipurpose feeder can hold several sizes and types of print media, such as transparencies, postcards, note cards, and envelopes. It can be used for single-page or manual printing or as an additional tray.The multipurpose feeder can hold approximately:•100 sheets of 75 g/m2 (20 lb.) paper•80 sheets of 24 lb. 12x18 paper•55 sheets of labels•55 sheets of card stock•50 transparencies•10 envelopes•1 sheet of glossy paper (manual feed)•1 sheet of banner paper (297.2 x 914.4 mm. [11.7 x 36 in.]), manual feedThe multipurpose feeder accepts print media within the following dimensions:•Width—69.85 mm (2.75 in.) to 215.9 mm (8.5 in.) •Length—127 mm (5 in.) to 355.6 mm (14 in.)](https://usermanual.wiki/Lexmark/5056/User-Guide-525146-Page-68.png)


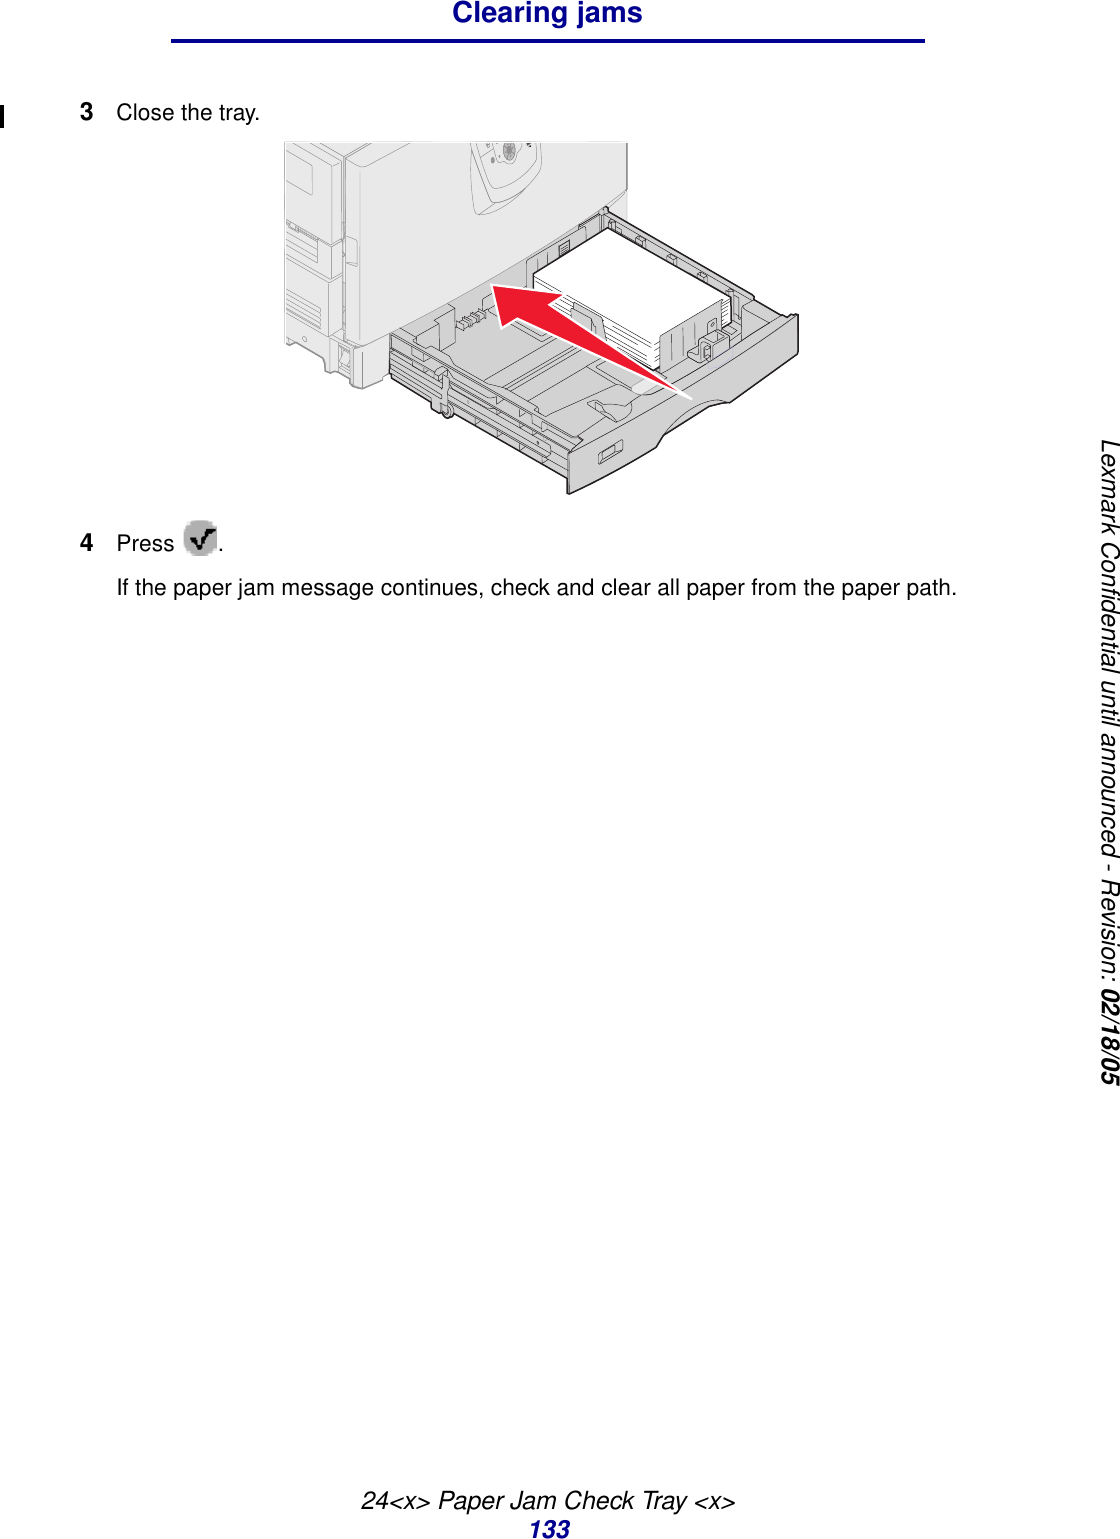
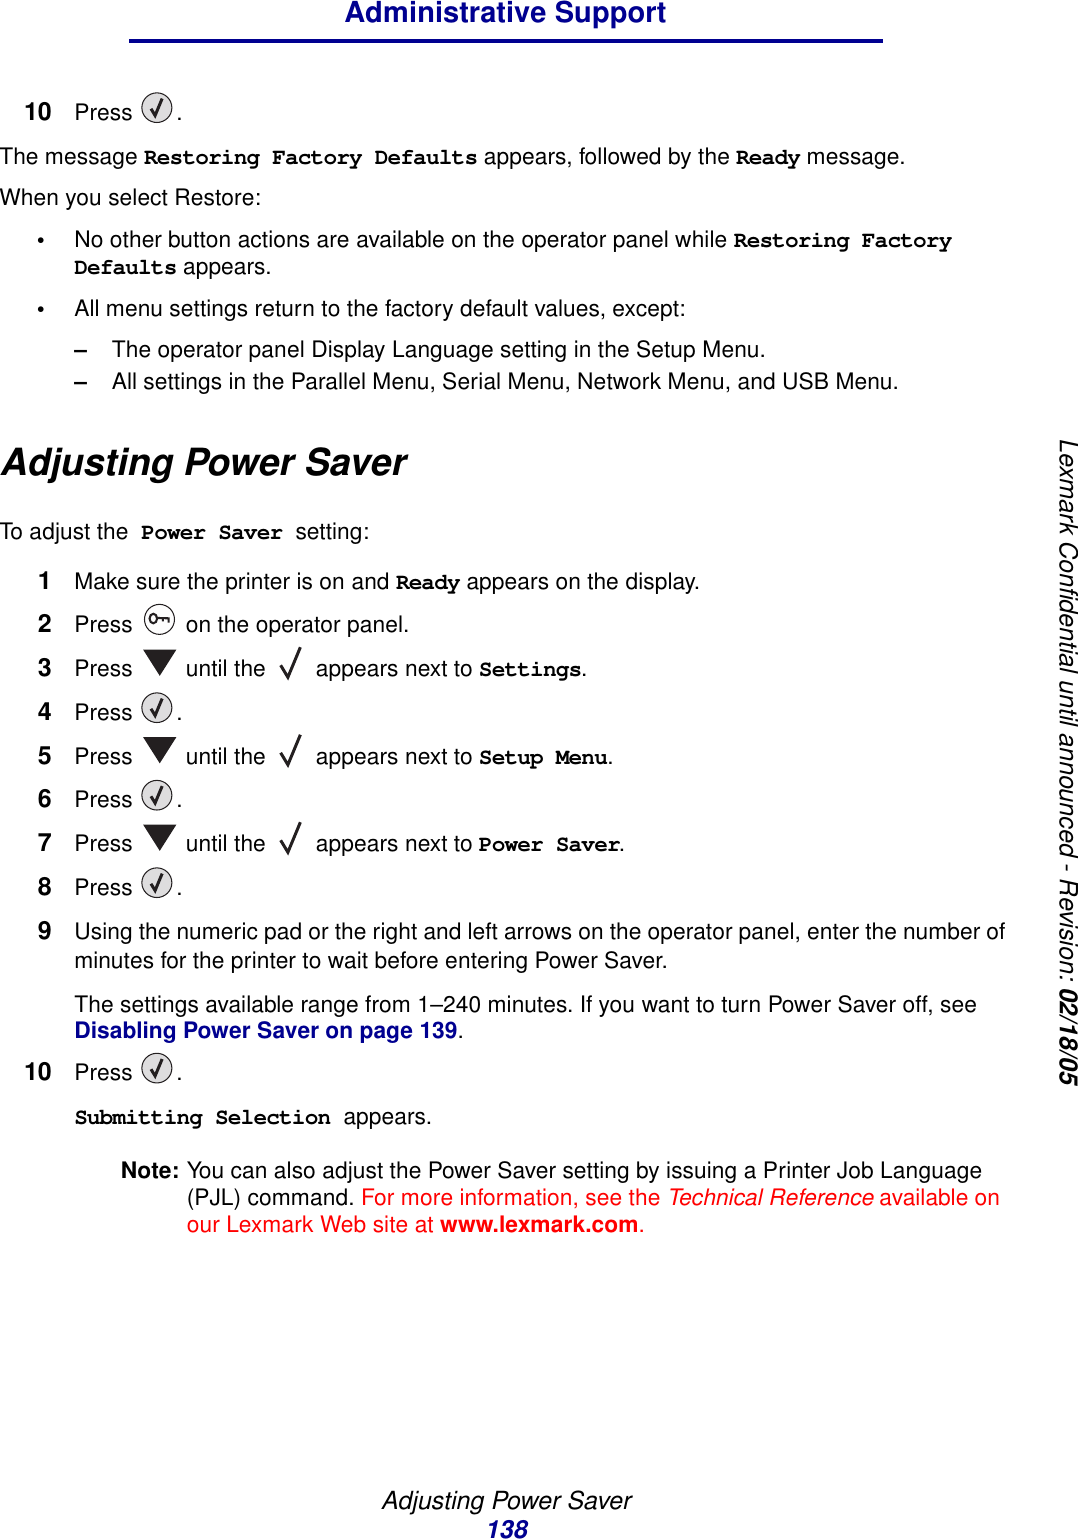
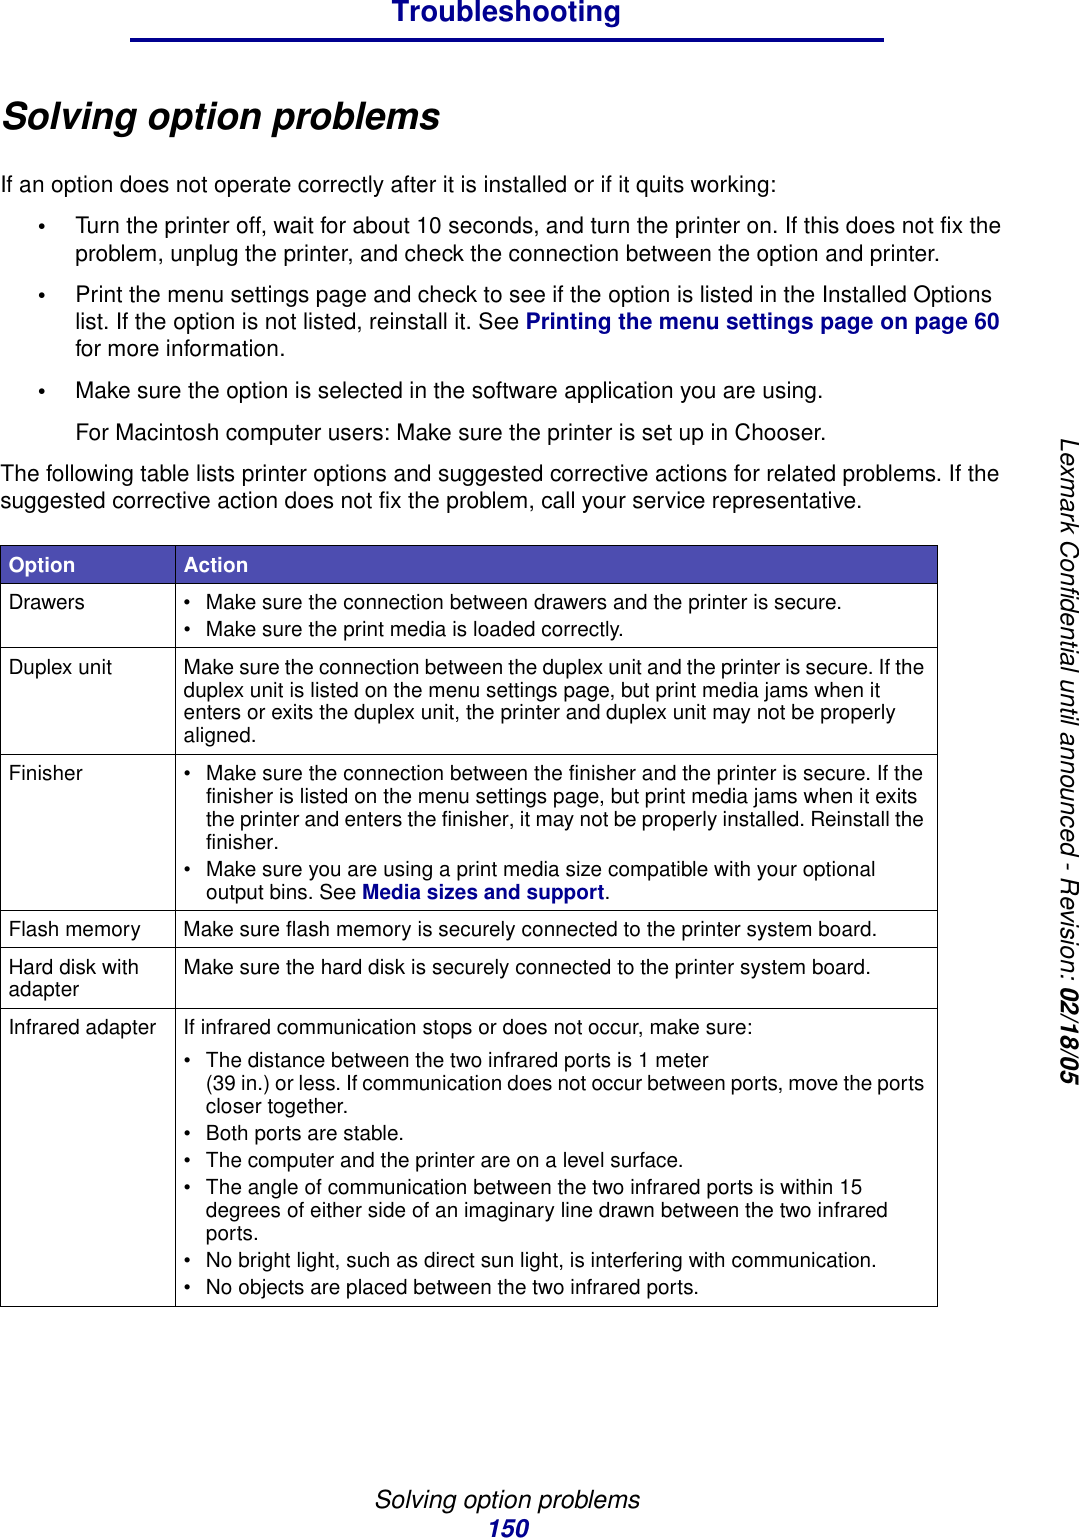
![Ordering supplies107Maintaining the printerLexmark Confidential until announced - Revision: 02/18/05Ordering suppliesTo order supplies in the U.S., contact Lexmark at 1-800-539-6275 for information about Lexmark Authorized Supplies Dealers in your area. In other countries or regions, visit the Lexmark Web site at www.lexmark.com or contact the place where you bought your printer.To order supplies, contact the place where you bought your printer for more information.Ordering a toner cartridgeWhen the [color] Low message appears, you should order a new print cartridge. You can print a few hundred pages after the [color] Low message comes on. You need to have a new cartridge available when the current one no longer prints satisfactorily.Note: Be sure to shake your new print cartridge before installing it into the printer, to maximize its yield.The recommended print cartridges specifically designed for your printer are:For information about the print cartridges available for your printer, contact the place where you bought your printer.Print media Multipage Print in the Defaults Æ Finishing Menu Causes the printer to print the two or more page images on one side of a sheet. Values for Multipage Print are 2 Up, 3 Up, 4 Up, 6 Up, 9 Up, 12 Up, and 16 Up. Combined with the duplex setting, Multipage Print lets you print up to 32 pages on one sheet of paper (16 images on the front and 16 on the back).Duplex in the Defaults Æ Finishing Menu Duplex printing is available when you attach the optional duplex unit. It lets you print on both sides of a sheet of paper.Use your software application or printer driver to send a Verify Print job.Lets you examine the first copy of a multiple-copy job to be sure it is satisfactory before you print the other copies. If the job is unsatisfactory, you can cancel the job.See Printing and deleting held jobs for more information about a Verify Print job.Part number Description Average yield1C9202CH Cyan toner cartridge 14,000 pagesC9202MH Magenta toner cartridge 14,000 pagesC9202YH Yellow toner cartridge 14,000 pagesC9202KH Black toner cartridge 15,000 pages1 At approximately 5% coverage.Supply Menu selection item What the setting does](https://usermanual.wiki/Lexmark/5056/User-Guide-525146-Page-107.png)