Light Speed Vision 174M Camera User Manual
Light Speed Vision (Beijing) Co.,Ltd. Camera
UserManual.wiki
>
Light Speed Vision
>
174M User Manual
User manual
Navigation menu
Upload a User Manual
Namespaces
Wiki Guide
HTML
PDF
Info
Views
User Manual
Discussion / Help
Navigation
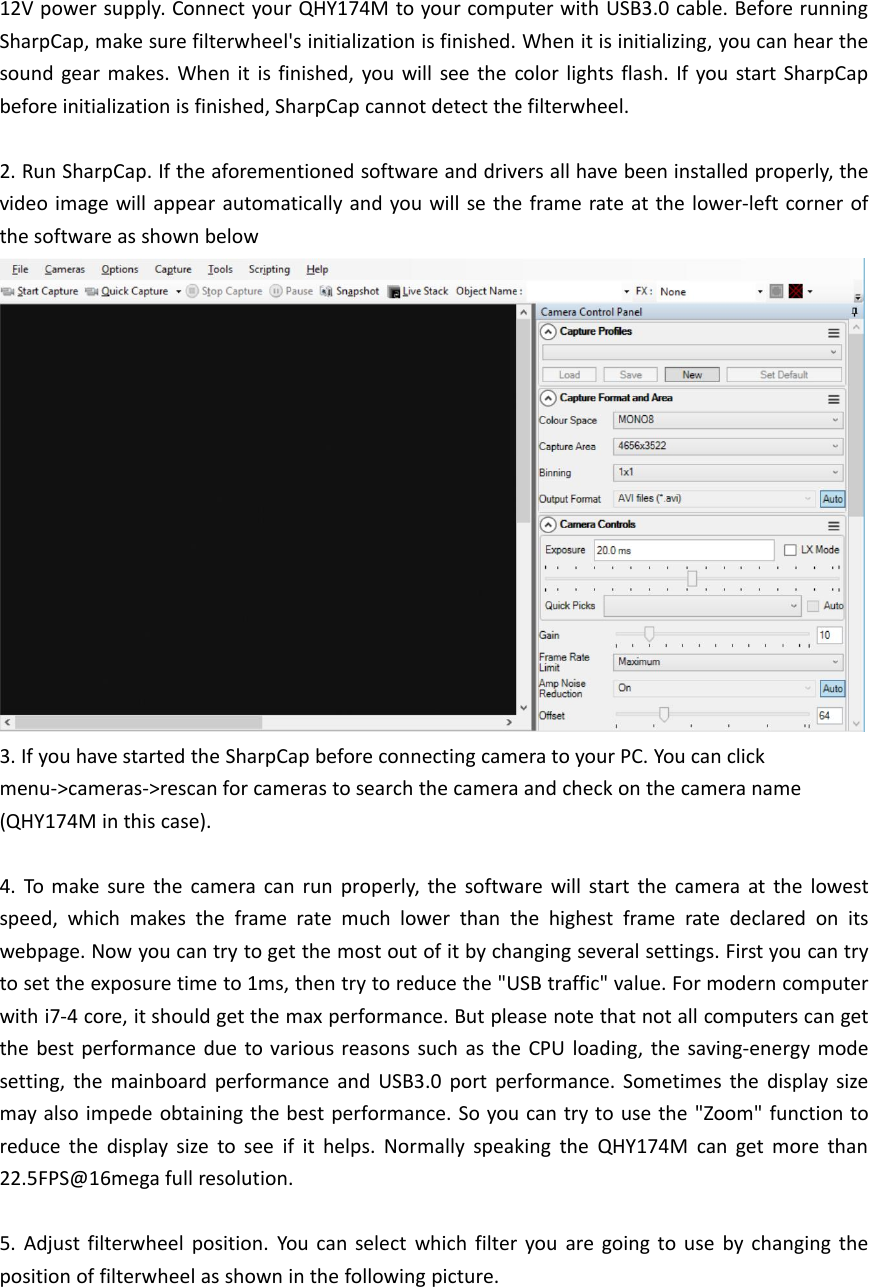
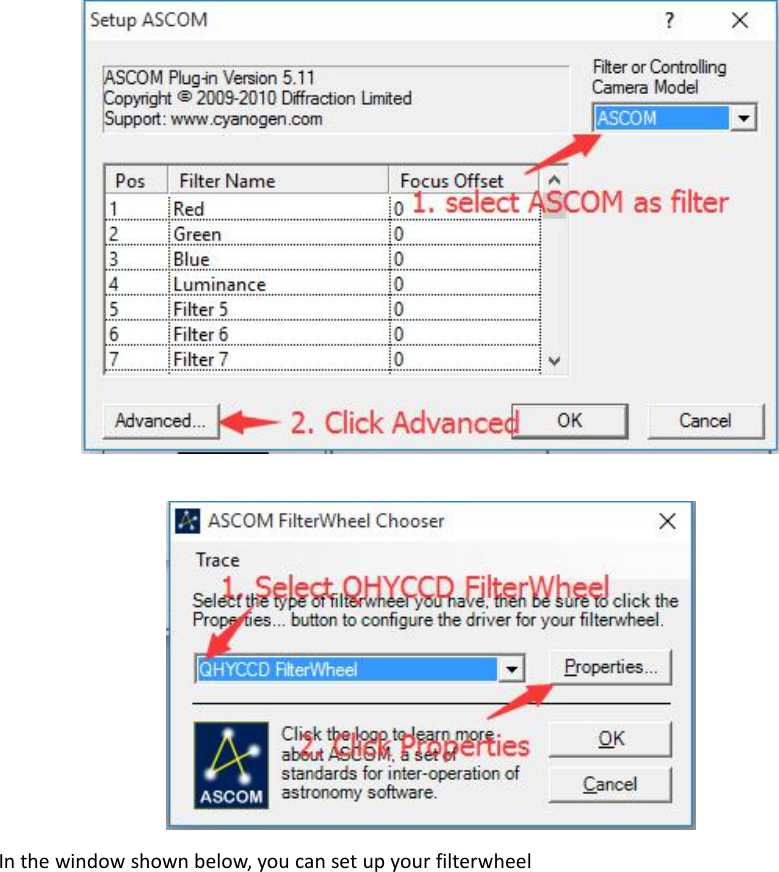
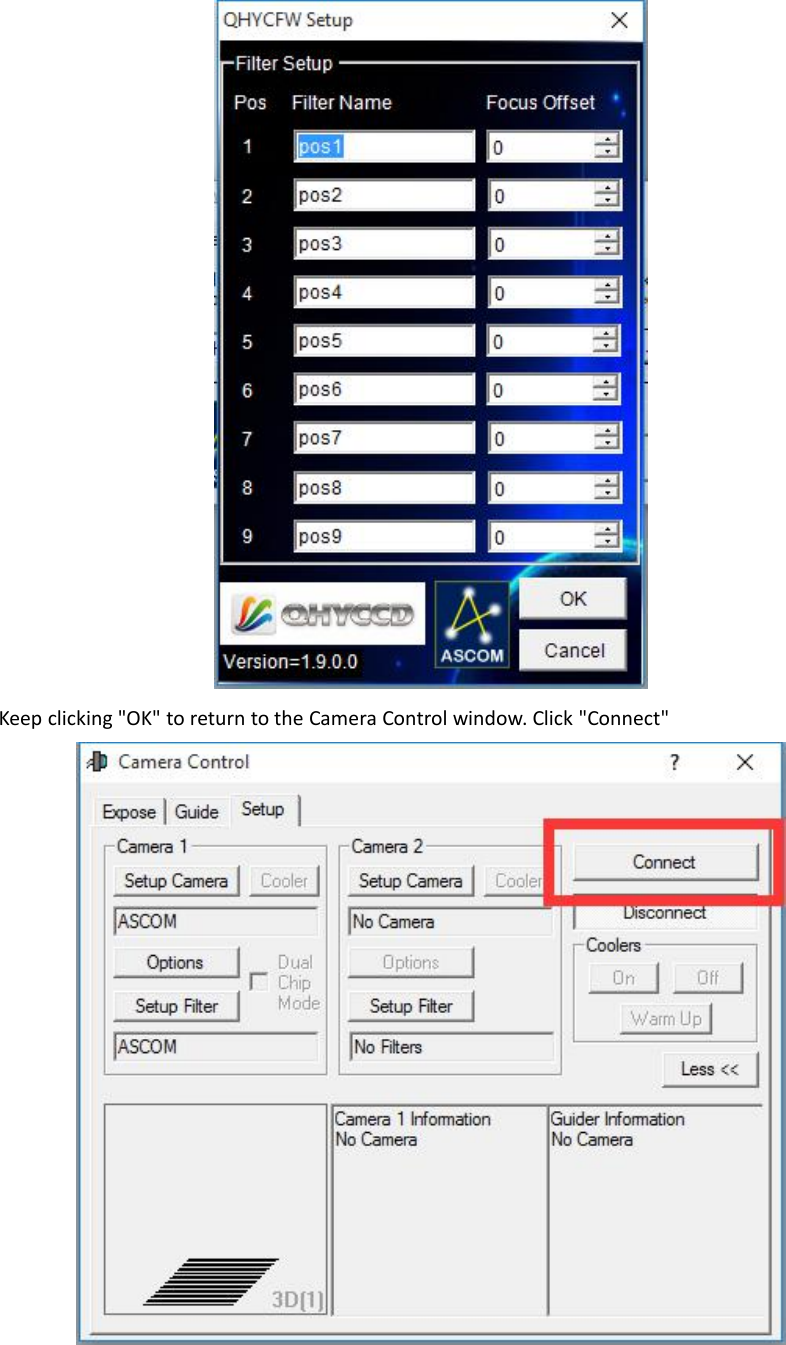
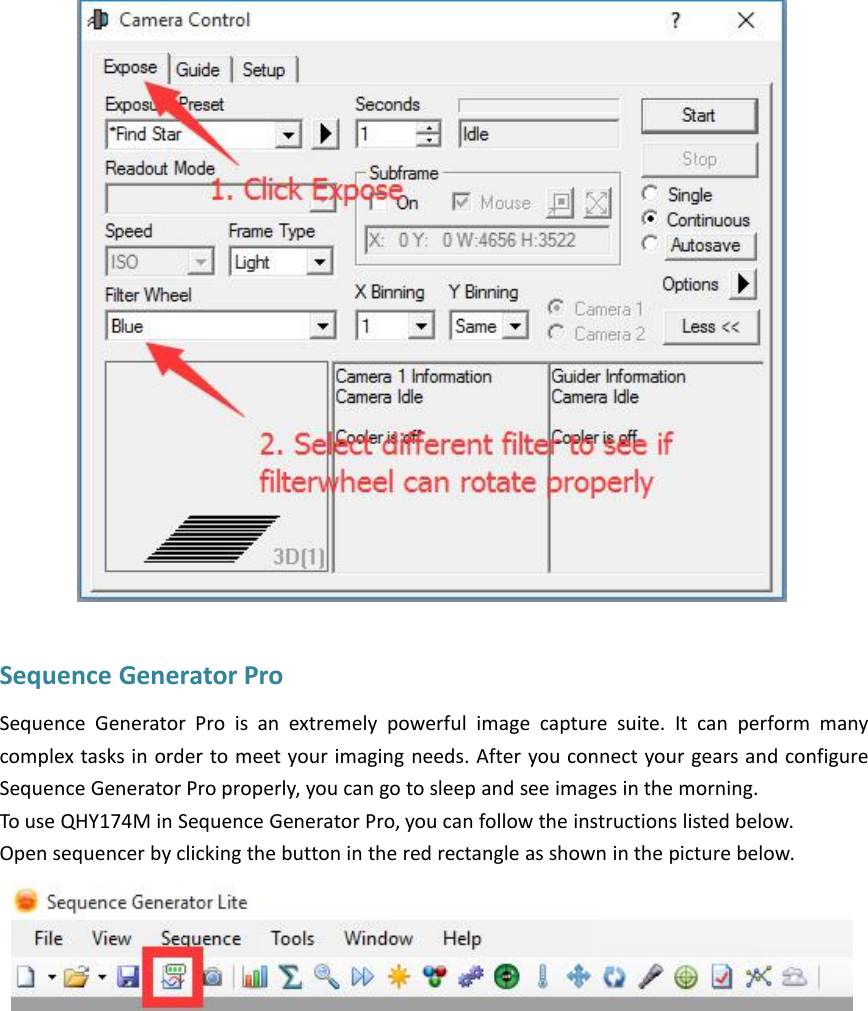
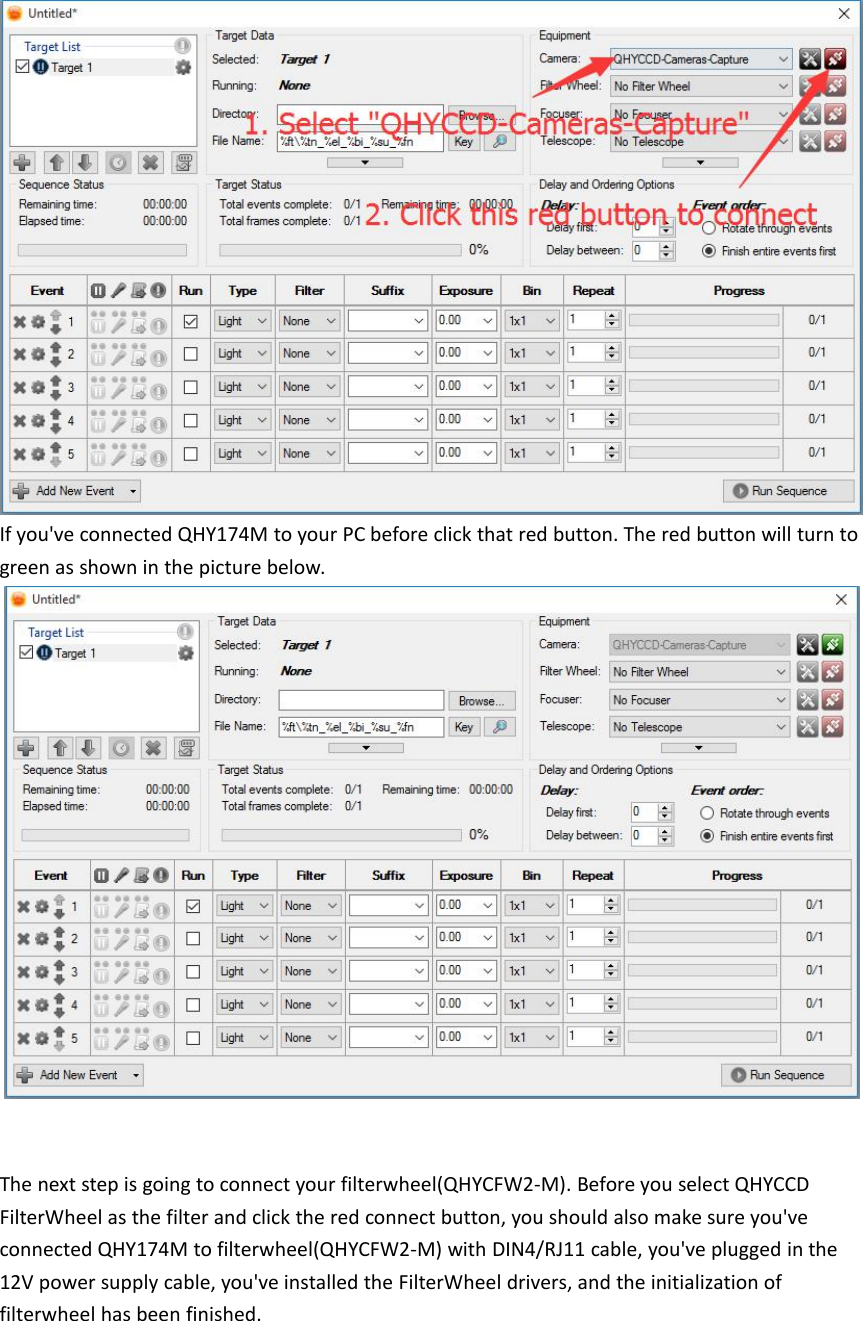
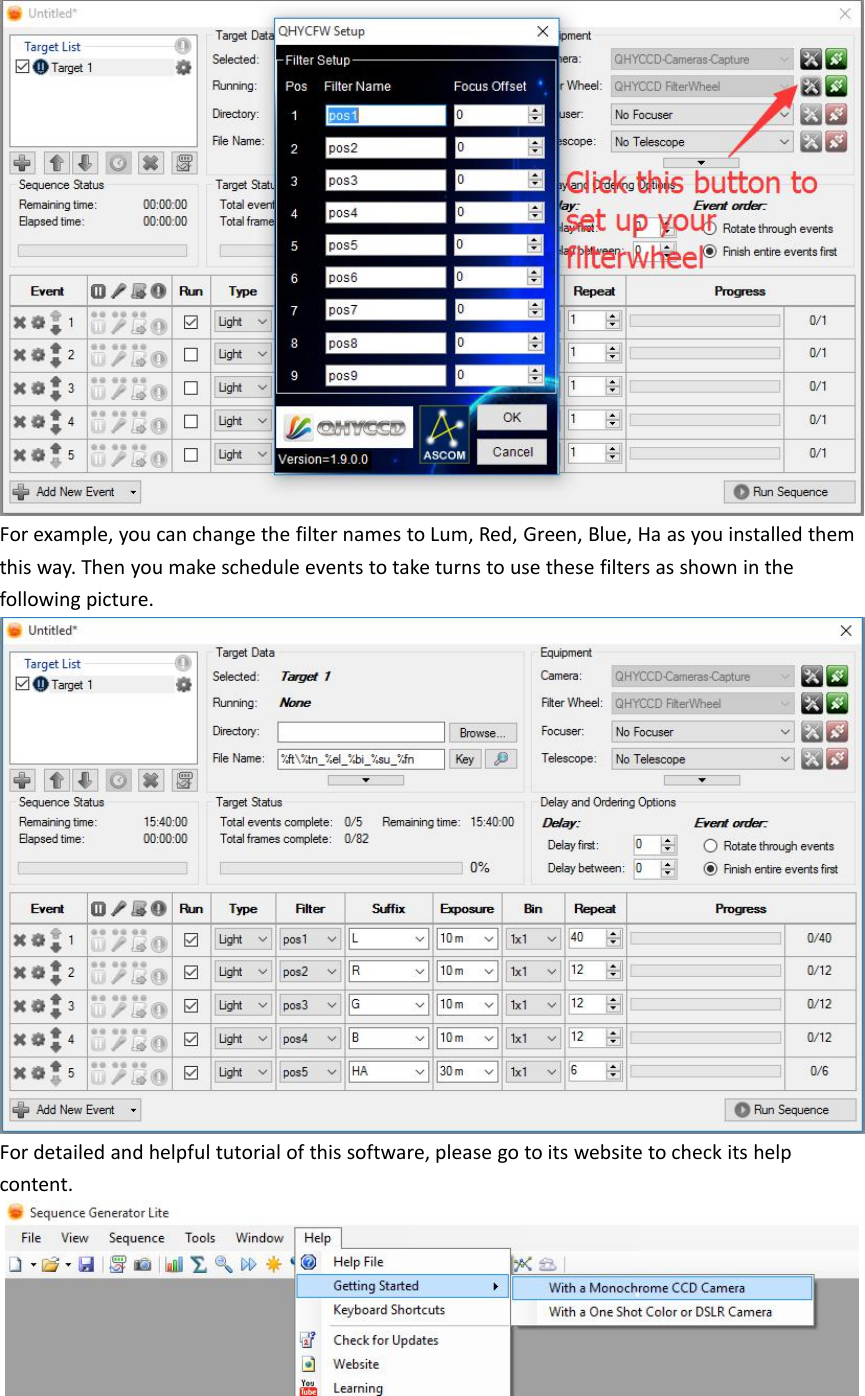
![02 How to Connect QHY174M to Color Filter WheelQHY174M is a monochromatic camera and it is frequently used with color filter wheel. With itsM42/2inch lense mount(this has already been installed on QHY174M), connecting it with QHYcolor filter wheel will be simple and quick. QHY174M supports connections both withQHYCFW2-S and QHYCFW2-M.Take QHYCFW2-M for example, you can refer to the following instructions in the link below to setup your QHYCFW-M.http://www.qhyccd.com/ManualCFW2M2.1.htmlAfter you've installed color filters for your QHYCFW2-M properly, you can begin to connect it withQHY174M as shown in the picture below.First, you need to stick QHY174M into QHYCFW2-M as shown in the picture above. Then youshould screw those three bolts in. At the first time you screw bolts, you may find it a little bitdifficult to screw in, in this case, please make sure that the bolts are pointing towards the centerand apply a little bit more of force. Finally, you should connect your QHY174M with QHYCFW2-Mby using DIN4/RJ11 cable, which is included in the box.The last thing you need to do before using QHY174M with QHYCFW2-M is to open the link belowto download and install the drivers(CFW2 and Filter[RS232]) for QHYCFW2-M.http://www.qhyccd.com/QHYCFW2-M.htmlNow, you should be all set. Read the following parts to know how to use QHY174M with colorfilter wheel in SharpCap, MAXIMDL, and Sequence Generator Pro.03 Use QHY174M in SharpCap1. Connect your QHY174M to color filter wheel with DIN4/RJ11 cable. Connect your QHY174M to](https://usermanual.wiki/Light-Speed-Vision/174M/User-Guide-3154056-Page-2.png)