Line 6 Dt50 112 Quick Start Guide Guitar Amplifier Pilot's Revision D
Line-6-Dt50-212-Quick-Start-Guide line-6-dt50-212-quick-start-guide
Line-6-Dt50-Head-Quick-Start-Guide line-6-dt50-head-quick-start-guide
2014-07-19
: Line-6 Line-6-Dt50-112-Quick-Start-Guide line-6-dt50-112-quick-start-guide line-6 pdf
Open the PDF directly: View PDF ![]() .
.
Page Count: 8

Pilot’s Guide
Manuel de pilotage
Pilotenhandbuch
Pilotenhandboek
Manual del Piloto
取扱説明書
40-00-0284 Pilot’s Handbook available @ www.line6.com/manuals Rev D
®
DT50 Guitar Amplifier
CAUTION: This equipment has been tested and found to comply with the limits for a Class B digital device pursuant to Part 15 of FCC Rules. Operation is subject to the
following two conditions: (1) This device may not cause harmful interference, and (2) this device must accept any interference received, including interference that may
cause undesired operation.
Important Safety Instructions
WARNING: TO REDUCE THE RISK OF FIRE OR ELECTRIC SHOCK, DO NOT EXPOSE THE APPLIANCE TO RAIN OR MOISTURE.
WARNING: TO REDUCE THE RISK OF FIRE OR ELECTRIC SHOCK, DO NOT REMOVE SCREWS. NO USER-SERVICEABLE PARTS INSIDE.
REFER SERVICING TO QUALIFIED SERVICE PERSONNEL.
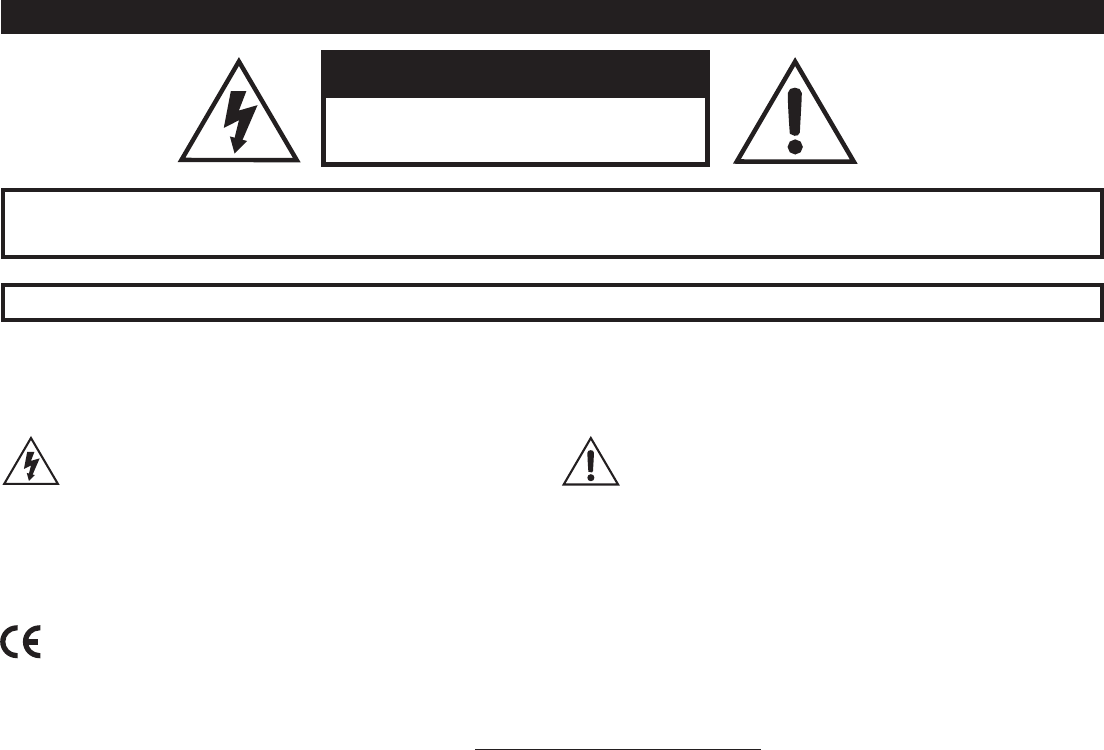
The lightning symbol within a triangle means “electrical caution!” It in-
dicates the presence of information about operating voltage and potential
risks of electrical shock.
The exclamation point within a triangle means “caution!” Please read the
information next to all caution signs.
CAUTION
RISK OF ELECTRIC
SHOCK DO NOT OPEN
SERIAL NO:
Please Note:
Line 6 and POD are trademarks of Line 6, Inc. registered in the U.S. and other countries. DT50 is a trademark of Line 6, Inc. All rights reserved.
Line 6, Inc.:
The POD, Clifton House, Butler’s leap.
Rugby, Warwickshire, United Kingdom, CV 21 3RQ
26580 Agoura Road,
Calabasas, CA 91302-1921 USA

You should read these Important Safety Instructions. Keep these instructions in a safe place
• Readtheseinstructions.
• Keeptheseinstructions.
• Heedallwarnings.
• Followallinstructions.
• Donotusethisapparatusnearwater.
• Cleanonlywithdrycloth.
• Donotblockanyventilationopenings.Installinaccordancewiththemanufacturer’sinstructions.
• Donotinstallnearanyheatsourcessuchasradiators,heatregisters,stoves,orotherapparatus(includingampliers)thatproduceheat.
• ThisapparatusshallbeconnectedtoaMAINSsocketoutletwithaprotectiveearthingconnection.
• Donotdefeatthesafetypurposeofthepolarizedorgrounding-typeplug.Apolarizedplughastwobladeswithonewiderthantheother.Agroundingtypeplug
hastwobladesandathirdgroundingprong.Thewidebladeorthethirdprongareprovidedforyoursafety.Iftheprovidedplugdoesnottintoyouroutlet,
consult an electrician for replacement of the obsolete outlet.
• Protectthepowercordfrombeingwalkedonorpinchedparticularlyatplugs,conveniencereceptacles,andthepointwheretheyexitfromtheapparatus.
• Onlyuseattachments/accessoriesspeciedbythemanufacturer.
• Useonlywiththecart,stand,tripod,bracket,ortablespeciedbythemanufacturer,orsoldwiththeapparatus.Whenacartisused,usecautionwhenmoving
thecart/apparatuscombinationtoavoidinjuryfromtip-over.
• Unplugthisapparatusduringlightningstormsorwhenunusedforlongperiodsoftime.
• Referallservicingtoqualiedservicepersonnel.Servicingisrequiredwhentheapparatushasbeendamagedinanyway,suchaspower-supplycordorplugisdam-
aged, liquid has been spilled or objects have fallen into the apparatus, the apparatus has been exposed to rain or moisture, does not operate normally, or has been
dropped.
• Theapparatusshallnotbeexposedtodrippingorsplashingandthatnoobjectslledwithliquids,suchasvases,shallbeplacedontheapparatus.
• WARNING:Toreducetheriskofreorelectricshockdonotexposethisapparatustorainormoisture.
• Theappliancecouplerisusedasthedisconnectdevice,thedisconnectdeviceshallremainreadilyoperable.
• ConnectonlytoACpoweroutletsrated:100/120V220/240V50/60Hz(dependingonthevoltagerangeoftheincludedpowersupply).
• Prolongedlisteningathighvolumelevelsmaycauseirreparablehearinglossand/ordamage.Alwaysbesuretopractice“safelistening.”
• Serviceisrequiredwhentheapparatushasbeendamagedinanyway,suchas:
•power-supplycordorplugisdamaged.
•liquidhasbeenspilledorobjectshavefallenintotheapparatus.
•theunithasbeenexposedtorainormoisture.
•theunitisdroppedortheenclosureisdamaged.
•theunitdoesnotoperatenormallyorchangesinperformanceinasignicantway.

Front Panel Controls & ConneCtions
1. Guitar In – Plugyourguitarinhere.It’snotuncommontouseHIGH
input for guitars equipped with standard pickups and LOW when using
guitarsequippedwithactiveelectronics.SomeliketouseHIGH input
for guitars equipped with single coil pickups and LOW when using
guitarsequippedwithhumbuckers.There’snohardandfastrule–just
plug in to the input that sounds best to you.
2. Power Switch – Connect the included power cable to your rear panel.
For optimum tube life always power your amp on with your amp set to
STBY.
3. Standby Switch – Allowtheamptowarmupforoneminutebefore
setting STBY to ON. This extends the life and performance of your
vacuum tubes. It is not necessary to set the amp to STBY before
setting the Power Switch to its OFF position, but it can be a good
habit,ifonlytoensureyou’vegotitsetproperlynexttimeyoupower
up the amp.
4. Master Volume – Setstheoverallvolumeoftheamplierwithout
having to change your individual channel settings.
5. Channel A & B Controls – DRIVE controls how much “dirt” or
“distortion” you get in your sound. BASS, MID, TREBLE and
PRESENCE controls will interact differently depending on which
VOICING you have selected.
REVERBadjuststhechannel’s reverb level, allowing you to switch
betweenchannelswithdifferentamountsofreverb.Ifyoudon’twant
any reverb, simply turn this knob fully counter-clockwise.
VOLUME sets the output level for its channel only.
6. Channel Select Switch – DT50 features two independent
channels, A & B.WhensettoA,usethe(5A)controls.ForB use
the (5B) controls. You can assign unique combinations of Voicing/
Feedback Topology, Amplier Operating Class and Pentode/
Triode settings for each channel. This provides much more than the
traditionalclean/dirtychannelconguration.Eitherchannelcanbeset
upanywayyoulike…evenidentically,ifthat’swhatyou’relookingfor.
Customizationofeachchannelisnotlimitedtosimplychangingsome
components of the preamp or tone stack - the entire power section
canbereconguredandswitchedinstantlytoo.It’s like having two
extremely versatile tube amps in one box!
7. Voicing Switch – This switch determines the flavor of the currently
selected channel’s preamp and tone stack, as well as the Negative
Feedback Loop topology (NFL). NFL has a big impact on tonal
characteristics and the overall “feel” of the amp. Flip the switch up or
downtotogglethroughsettingsIthroughIV.Withasingleswitchyour
tonecangofromcleantomean.Eachvoicingisdistinct:
I – PutstheNFLinitstightestsettingwhileconguringtheChannel
Control’sbehaviorreminiscentofthegreatAmerican“Blackface”
ampsofthe60’s.Recommended settings: Class AB, Pentode
II – Sets the NFL topology to be a little looser than I while the
Channel Control settings are capable of dialing in echoes of
classic British amps. Recommended settings: Class AB, Pentode
III – ThisistheZeroNegativeFeedbackLoopsettingwhichproducesa
very “open” or “dynamic” feeling amp. In this setting, the Channel

Controlsareconguredforversatilitywitha distinct “chime-y”
quality. Recommended settings: Class A, Pentode (clean) or
Triode (rounder, vintage feel)
IV – Setting IV brings the NFL back in and adds a low frequency
resonance that pairs quite well with high gain voicing applied to
the Channel Controls. Recommended settings: Class AB, Pentode
8. Class A / Class AB Switch – Class A operation is more dynamic
with greater touch sensitivity. Use Class AB operation for greater
headroom and power. In addition to setting the operating class, this
switch also determines the wattage and bias type:
WhensettoClass Atheampisrunningat25Watts and cathode
biased.WhensettoClass ABtheampisrunningat50Wattsandxed
biased.
Try both settings with each voicing to see what sounds best to you.
9. Pentode / Triode Switch – Thisswitchchangestheconguration
of the power tubes. Set switch to Pentode to sound clear and
commanding. Triode sounds quieter and rounder with a more vintage
feel.
rear Panel Controls & ConneCtions
10. Power Cord Receptacle – Plug the included power cable here.
11. Speaker Outs – Connect speakers here using speaker cables only.
You should only use one output (A, B, or C) at a time and never power
theamplierupwithoutspeakersconnected.Ifyouwanttosilencethe
speakers,usetheStandbyswitch.Thedetailsareasfollows:
Output A isfora4-ohmspeakerload.Youcaneitherhookupone
4-ohmspeaker/cabortwo8-ohmspeakers/cabs
Output Bisforan8-ohmspeakerload.Youcaneitherhookupone
8-ohmspeaker/cabortwo16-ohmspeakers/cabs.
Output Cisforasingle16-ohmspeakerload.
12. Cabinet Simulated Direct Out – Provides a transformer-tapped
direct output with cabinet simulation for studio recording or live
performancewithoutmic’ingyouramplier.Thegroundliftswitchcan
beusedtoeliminatehumorbuzz.
13. Serial Effect Loop – Usetheeffectlooptosendyouraudiosignal
to external effects processors and stomp boxes such as modulations,
delays&reverbs.UsetheLEVEL knob to adjust the incoming signal
strength. Note:Signalpathisinseries.WhenusingtheSEND, audio
will not pass through to the poweramp without a connection back to
the RETURN.
14. Footswitch – ConnectaTip-Sleeve(TS)latchingfootswitchherefor
easy access to switch between Channels A and B.
15. MIDI – IntegrateyourDT50ampintoyourexistingMIDIrig.
16. L6 LINK – isapowerful,proprietaryconnectiondevelopedbyLine6
toenableeasy,reliable,one-cableconnectivitybetweenvariousLine6
products.InthecaseoftheDT50SeriesguitarampliersandPODHD
(300/400/500) series multi-effects processors, this connection allows
both products to sync and communicate uniquely with each other.
L6 LINK passes both audio and control data in a single cable, and
the resulting operation allows users to plug a single cable from their
PODHDfamilyprocessorintoaDT50seriesampandreceivemany
incrediblebenets:
MAINS FUSE – CAUTION:
FOR CONTINUED PROTECTION AGAINST
RISK OF FIRE REPLACE ONLY WITH SAME
TYPE FUSE.
UTILISER UN FUSIBLE DE RECHANGE DE
MEME TYPE ET CALIBRE
120V ~
50 - 60Hz
300W Max
POWER REQUIREMENTS
CAUTION
RISK OF ELECTRIC SHOCK
DO NOT OPEN
TUBE AMP DESIGN BY
100V - 120V =
T5.0AL / 250V SLO-BLO FUSE
220V - 240V =
T2.5AL / 250V SLO-BLO FUSE
FOOTSWITCH
DT50 112
U.S. PATENT NO. 5,789,689
41-00-0291
SERIAL NUMBER
MADE IN CHINADESIGNED IN U.S.A.
®
The power tubes get extremely hot during normal
operation. DO NOT TOUCH!
CAUTION: HOT TUBES!
WARNING/AVIS:
SHOCK HAZARD – DO NOT OPEN. RISQUE DE CHOC ÉLECTRIQUE – NE PAS OUVRIR.
TO REDUCE THE RISK OF FIRE OR ELECTRIC SHOCK DO NOT EXPOSE THIS EQUIPMENT
TO RAIN OR MOISTURE. TO REDUCE THE RISK OF ELECTRIC SHOCK DO NOT REMOVE
COVER. NO USER SERVICEABLE PARTS INSIDE. REFER SERVICING TO QUALIFIED
SERVICE PERSONNEL.
THIS EQUIPMENT HAS BEEN TESTED AND FOUND TO COMPLY WITH THE LIMITS FOR
A CLASS B DIGITAL DEVICE PURSUANT TO PART 15 OF THE FCC RULES. OPERATION
IS SUBJECT TO THE FOLLOWING TWO CONDITIONS: (1) THIS DEVICE MAY NOT CAUSE
HARMFUL INTERFERENCE, AND (2) THIS DEVICE MUST ACCEPT ANY INTERFERENCE
RECEIVED, INCLUDING INTERFERENCE THAT MAY CAUSE UNDESIRABLE OPERATION.
CABINET-SIMULATED DIRECT OUT
SENDRETURN
EFFECT LOOPLEVEL
MIDI
INPUT OUT (POWER AMP IN) (PREAMP OUT)
SPEAKER OUTPUTS
USE CLASS 2 WIRING ONLY
4 OHM OUT 8 OHM OUT 16 OHM OUT
Connect speakers to ONE
output only – A, B or C.
NEVER OPERATE WITHOUT
SPEAKERS CONNECTED.
(Use STANDBY to silence speakers.)
GND
Use 8 OHM pair OR 4 OHM single Use 16 OHM pair OR 8 OHM single
BC
A
LIFT
TUBE PROTECTION FUSE
CAUTION: FOR CONTINUED
PROTECTION AGAINST RISK OF
FIRE REPLACE ONLY WITH SAME
TYPE FUSE.
UTILISER UN FUSIBLE DE
RECHANGE DE MEME TYPE ET
CALIBRE
T
1
.
0
A
L
/
2
5
0
V
S
L
O
-
B
L
O
F
U
S
E
L6 LINK
THRU
CONNECT TO L6 LINK ONLY
• No additional cables are required to connect a POD HD
(300/400/500)toaDT50seriesguitaramplier.
• ChangingTonesettings(forexample)oneitherthePODHDor
DT50 immediately updates the other, with the result that both
units stay perfectly in sync.
• “Edit”apresetonaPODHDbysimplyturningknobsontheDT50
asonewouldanyotherguitaramp,thensaveitonthePODHDto
perfectly recall every time the preset is selected.
• Thisoneiscrazycool!Callingupaparticularampmodelorpreset
onthePODHDenablestheDT50todynamicallyrecongureitself
intheanalogrealmtooptimizeitscomponentstomatchthesource
amplier. ChangeyourpresetonaPODHD,and the DT50will
immediately align itself in the analog realm to such things as the
appropriate Class A or AB operation, Biasing method, Feedback
topology,Triode/Pentodepowertubecongurationandmore!
• Automaticsensingallowsampsthataredaisy-chainedviaL6LINK
tooperateinavarietyofways, depending on whichPODHDis
connected.Ataminimum,allPODHDmulti-effectssupportstereo
operationwithlinkedDT50s,andPODHD500supportsuptofour
uniquelylinkedampswithcongurationslike“wet/drymode”easily
available.
More online at www.line6.com/manuals
Whileyou’reonlinebesuretoregisteryouramporsimplylloutandmail
us your included registration card. Registering gets you all set up for war-
rantyserviceshouldyouhaveanissuewithyouramp,andalsoqualiesyou
for contests, special offers and more.

MiDi iMPleMentation
Continous Controller
(MIDI CC #) Value Function
19 0-63 = Channel A, 64-127 = Channel B Channel A/B Toggle
77 0 = Voicing I, 1 = Voicing II, 2 = Voicing III, 3 = Voicing IV Channel A Voicing (I, II, III, IV)
73 0-63 = Class A, 64-127 = Class AB Channel A Operation Class Conguration (Class A / Class AB)
75 0-63 = Triode, 64-127 = Pentode Channel A Power Tube Conguration (Pentode/Triode)
36 0-63 = Reverb Off, 64-127 = Reverb On Channel A Reverb On/Off
114 0 = Voicing I, 1 = Voicing II, 2 = Voicing III, 3 = Voicing IV Channel B Voicing (I, II, III, IV)
115 0-63 = Class A, 64-127 = Class AB Channel B Operation Class Conguration (Class A / Class AB)
116 0-63 = Triode, 64-127 = Pentode Channel B Power Tube Conguration (Pentode/Triode)
105 0-63 = Reverb Off, 64-127 = Reverb On Channel B Reverb On/Off
