Lionel WIFICAM1 WIFI Camera User Manual
Lionel L.L.C. WIFI Camera
UserManual.wiki
>
Lionel
>
WIFICAM1 User Manual
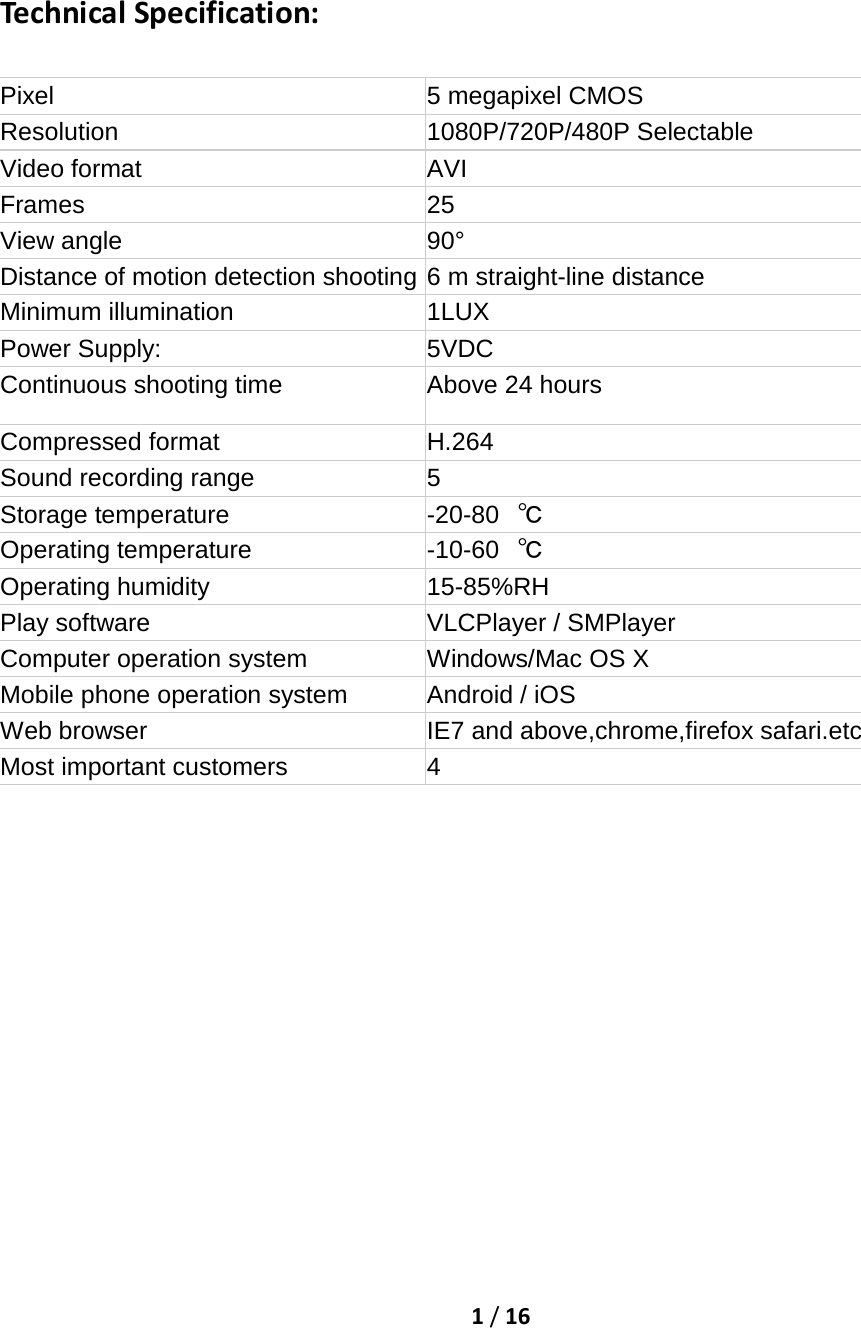
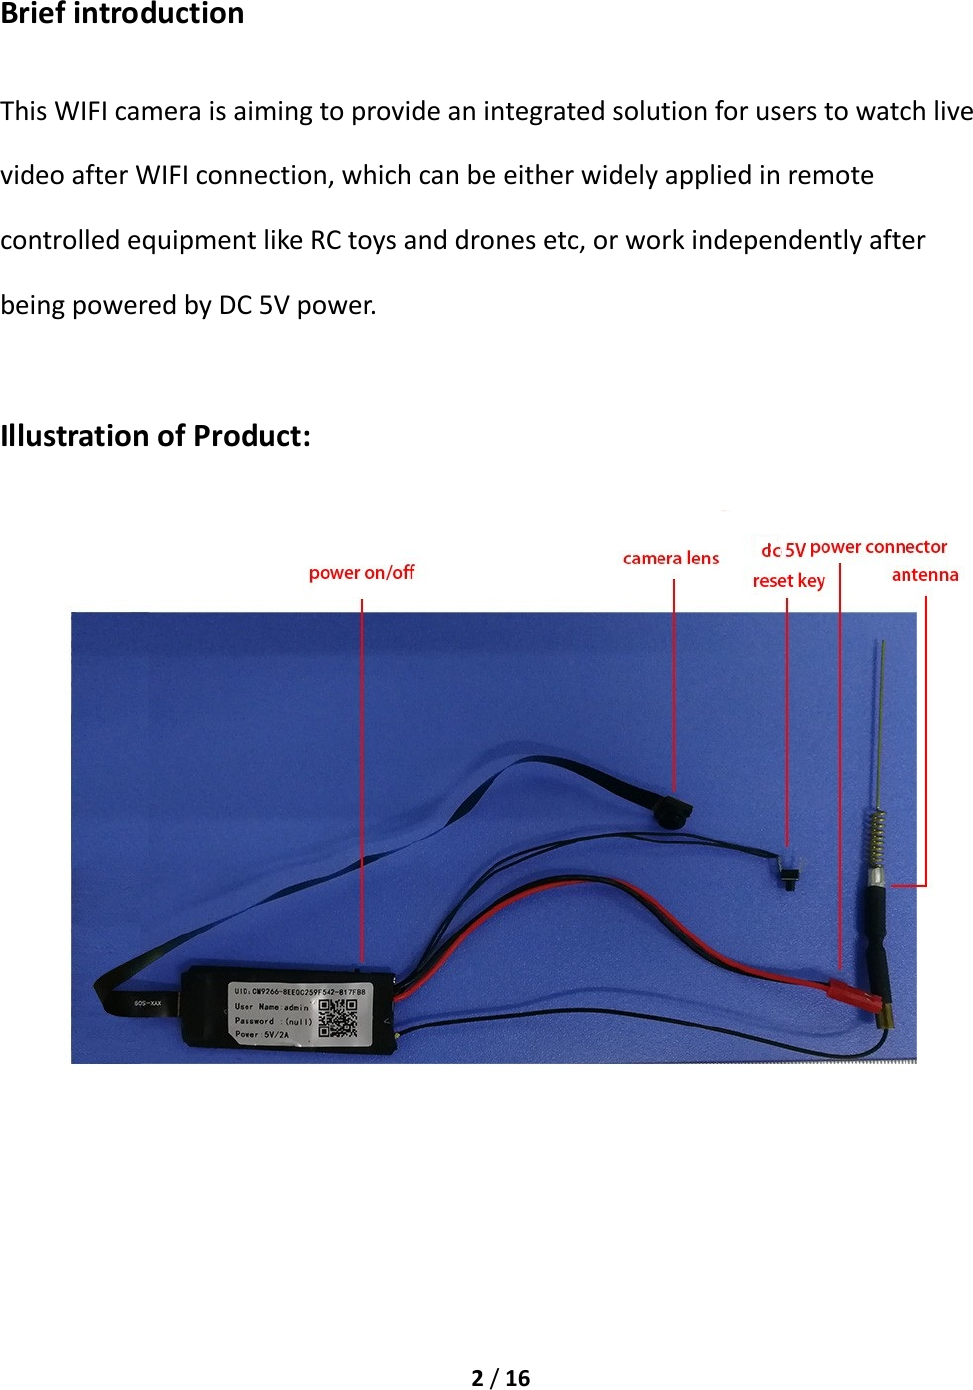
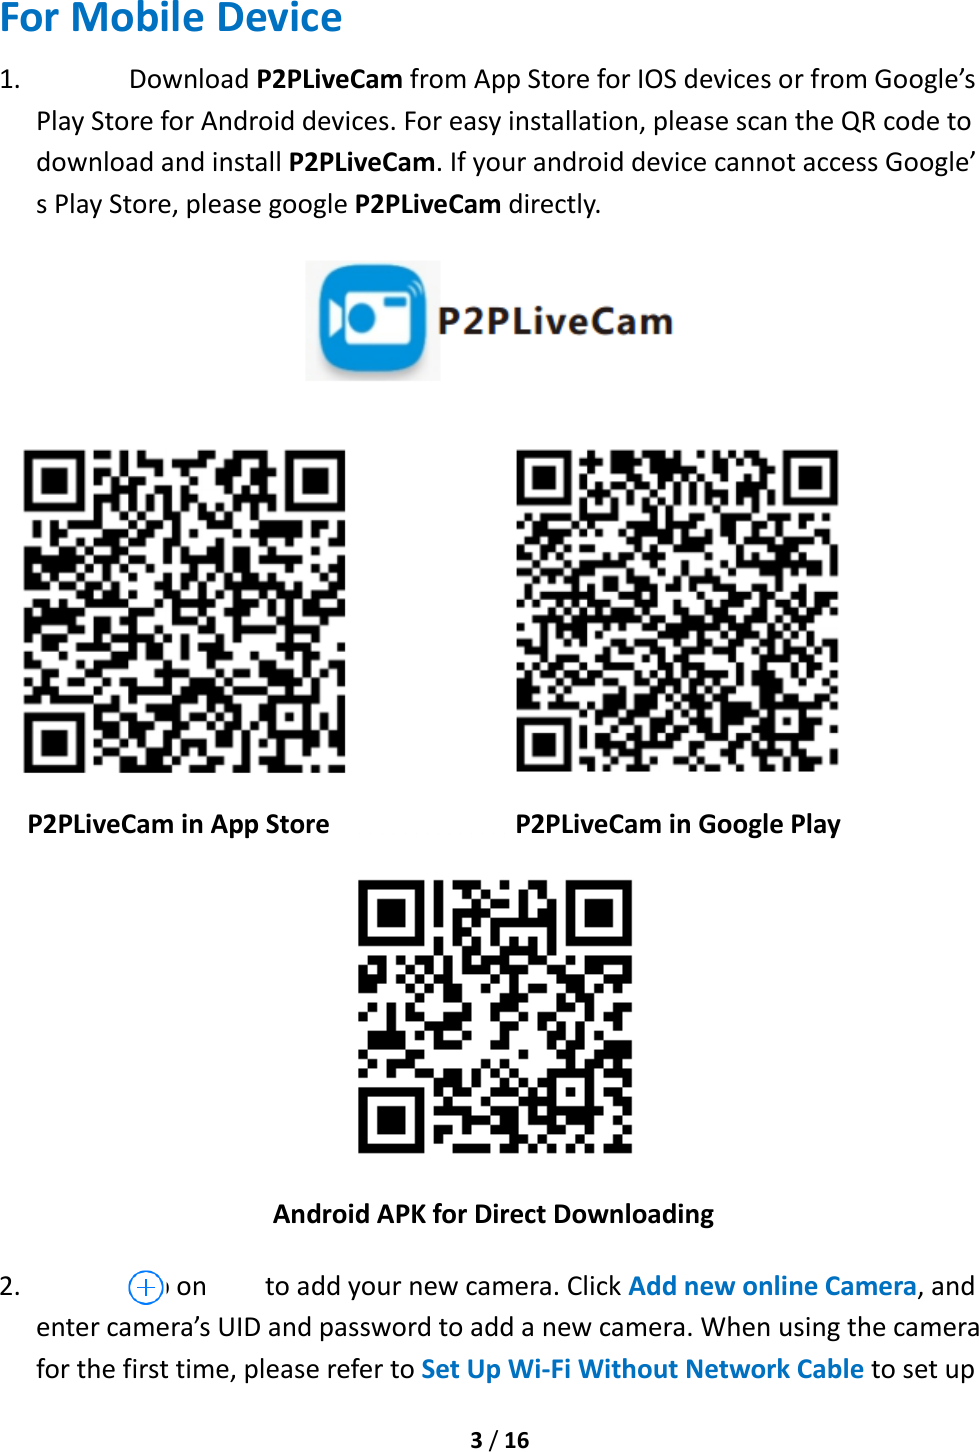
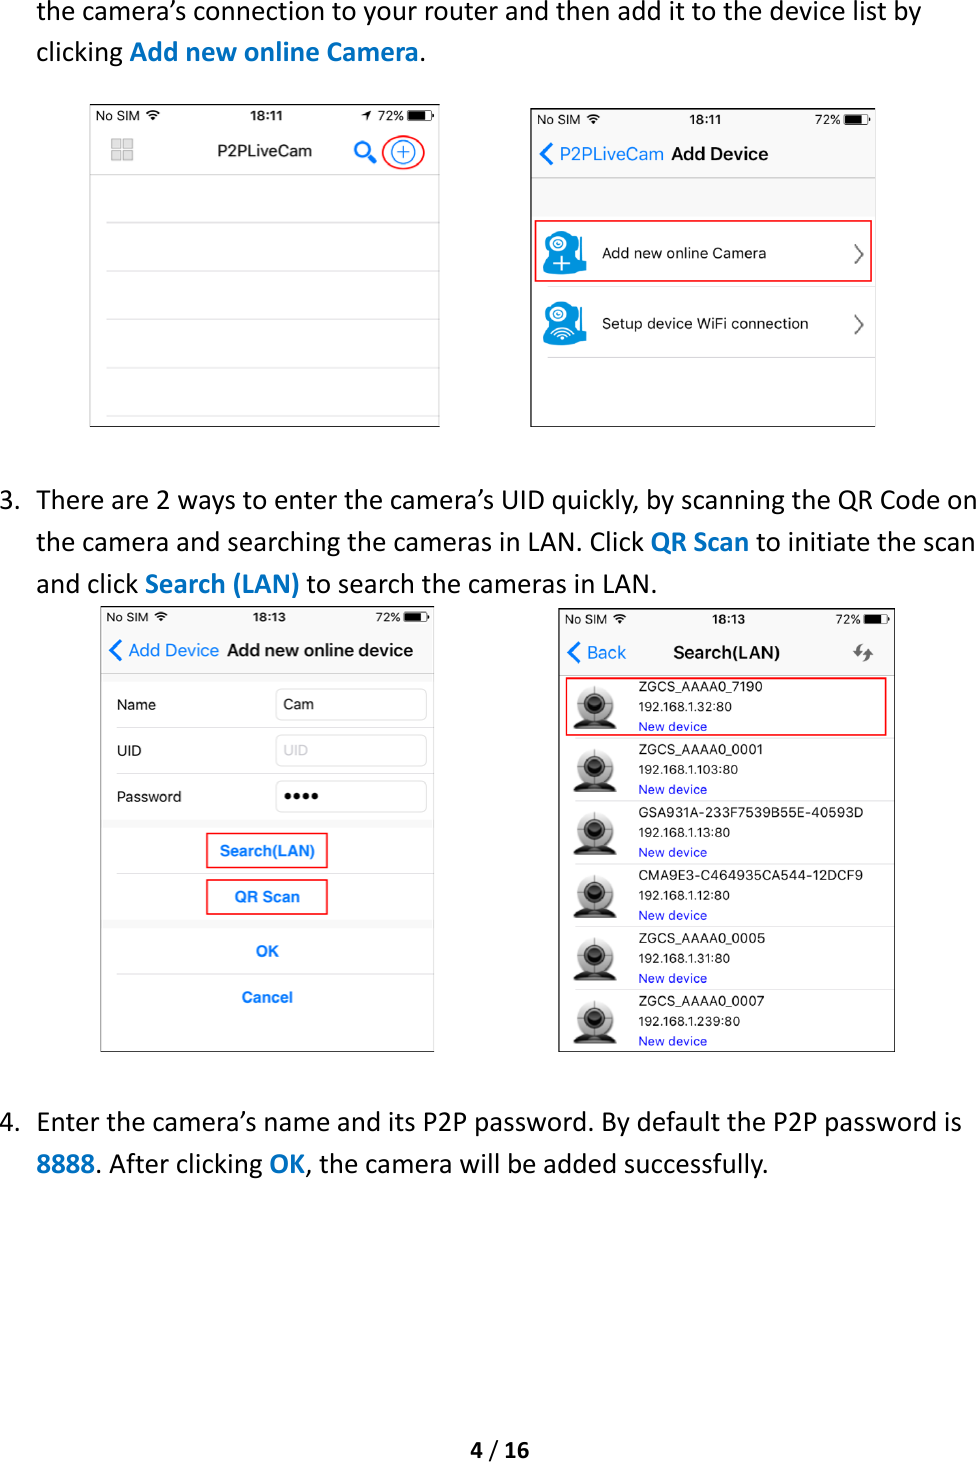
User manual
Navigation menu
Upload a User Manual
Namespaces
Wiki Guide
HTML
PDF
Info
Views
User Manual
Discussion / Help
Navigation
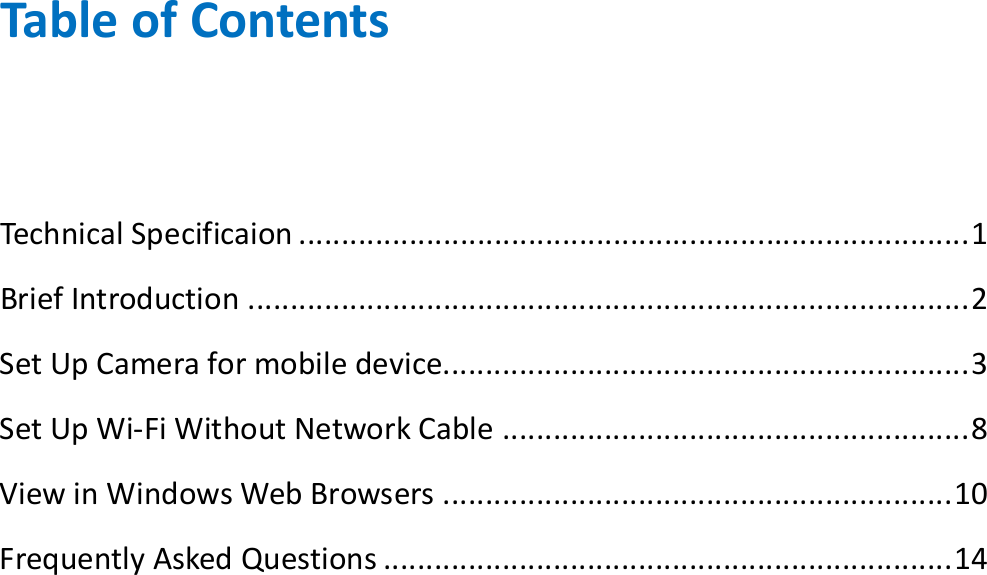
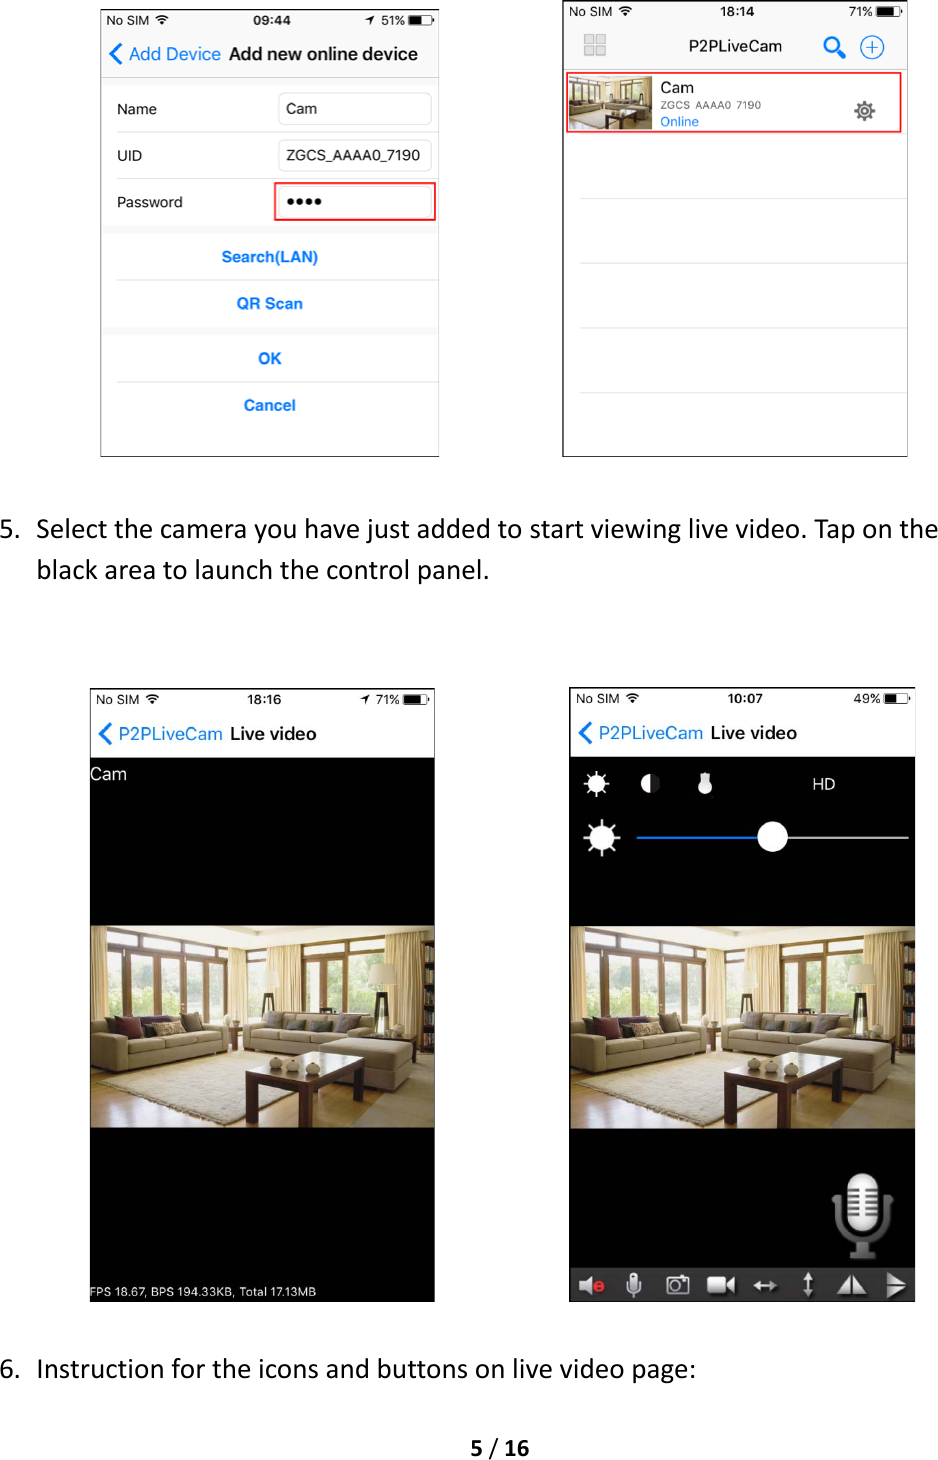
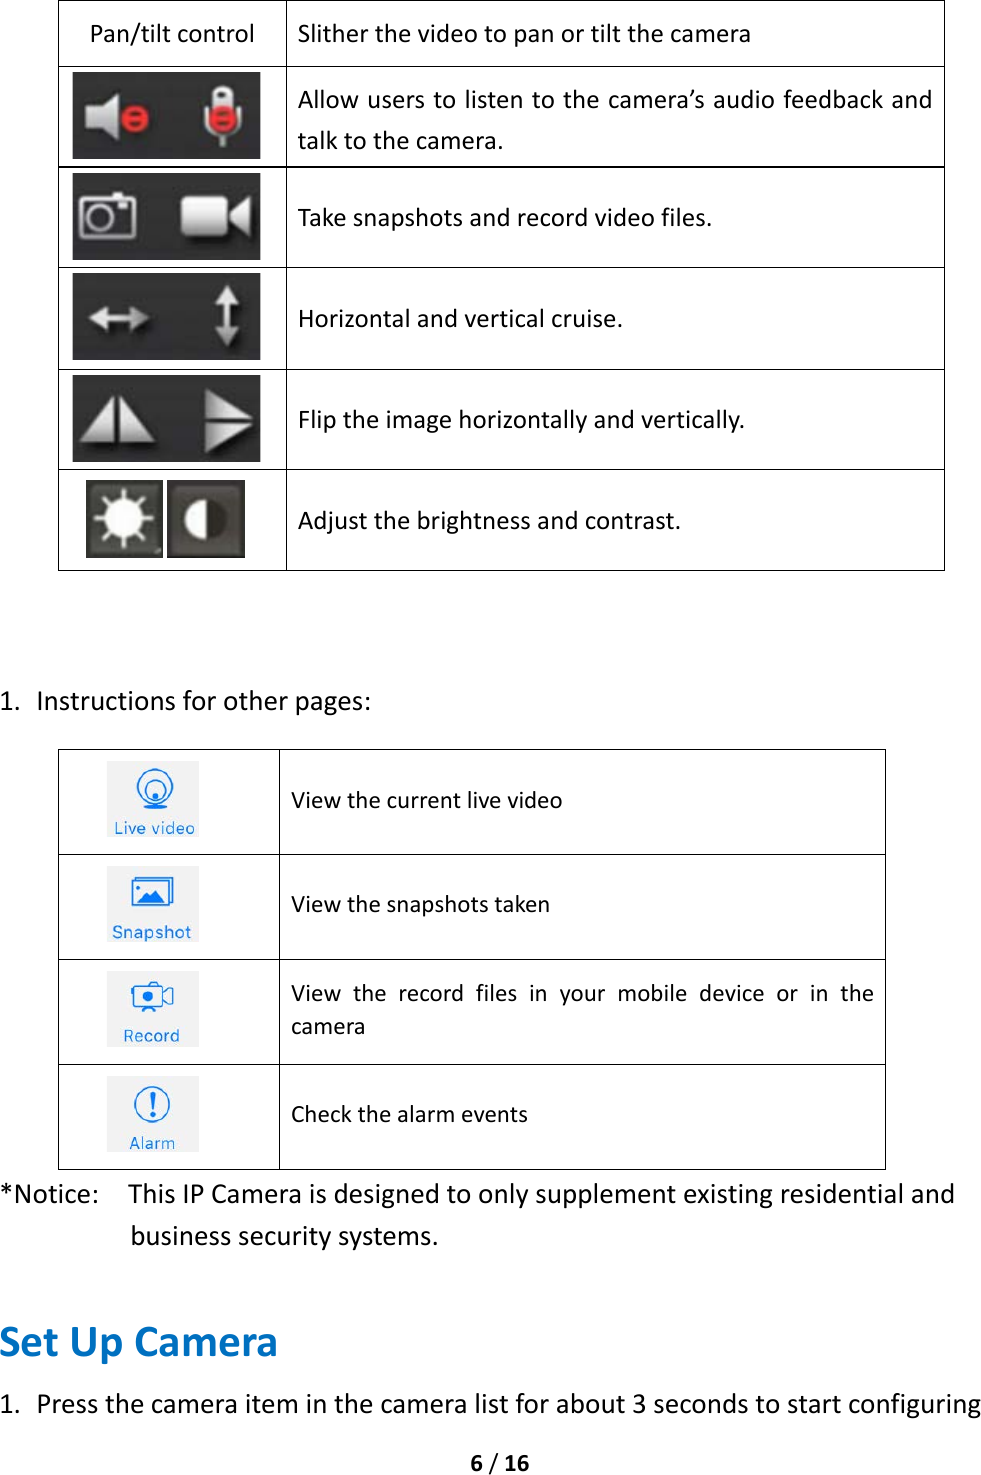
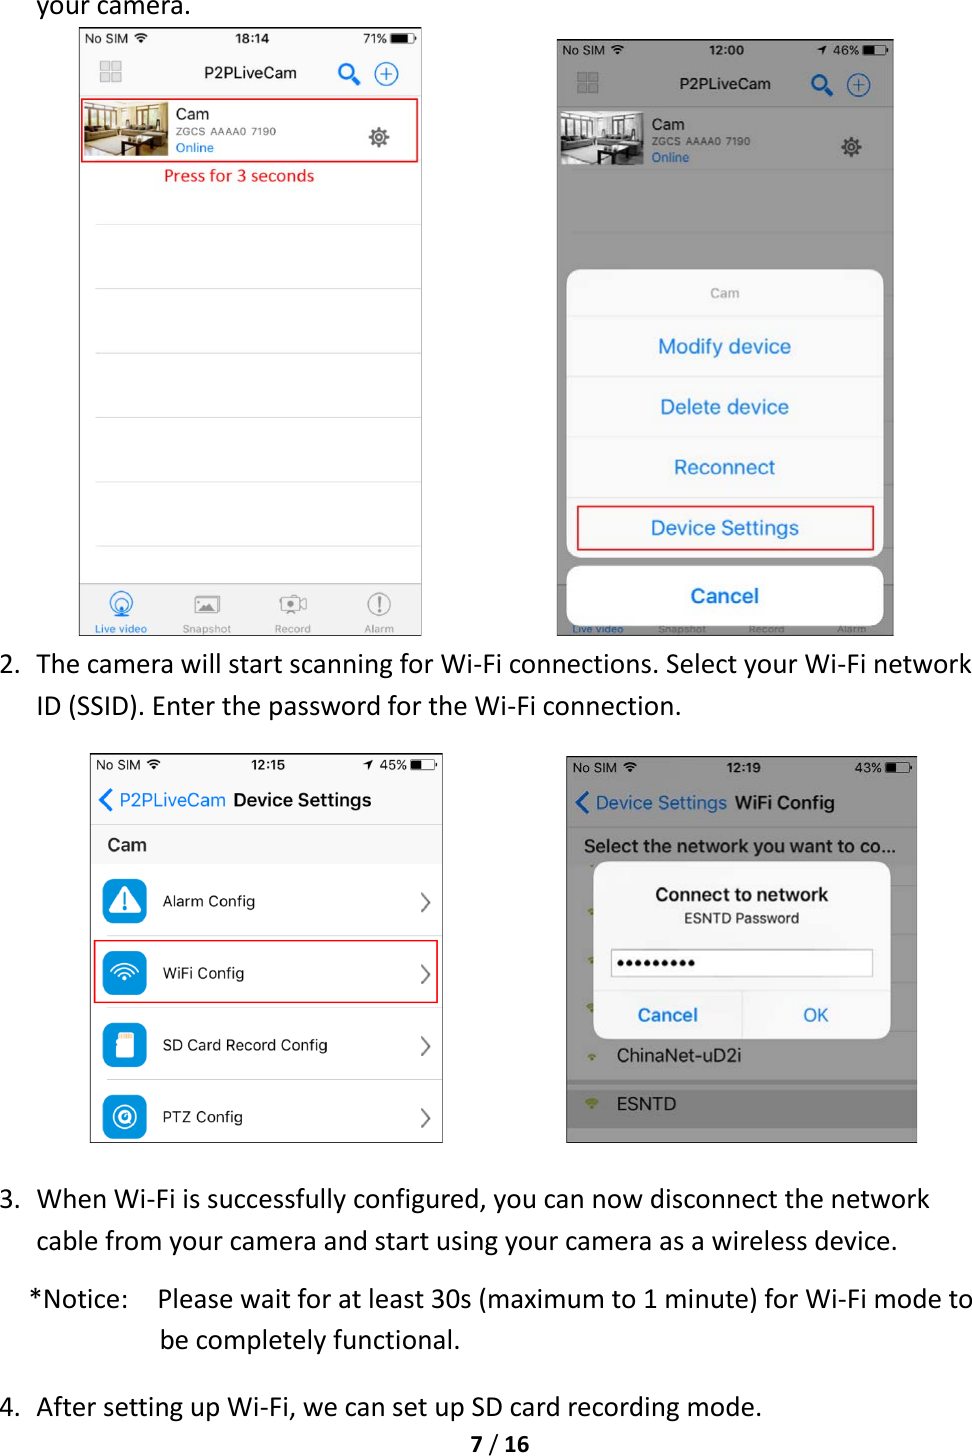
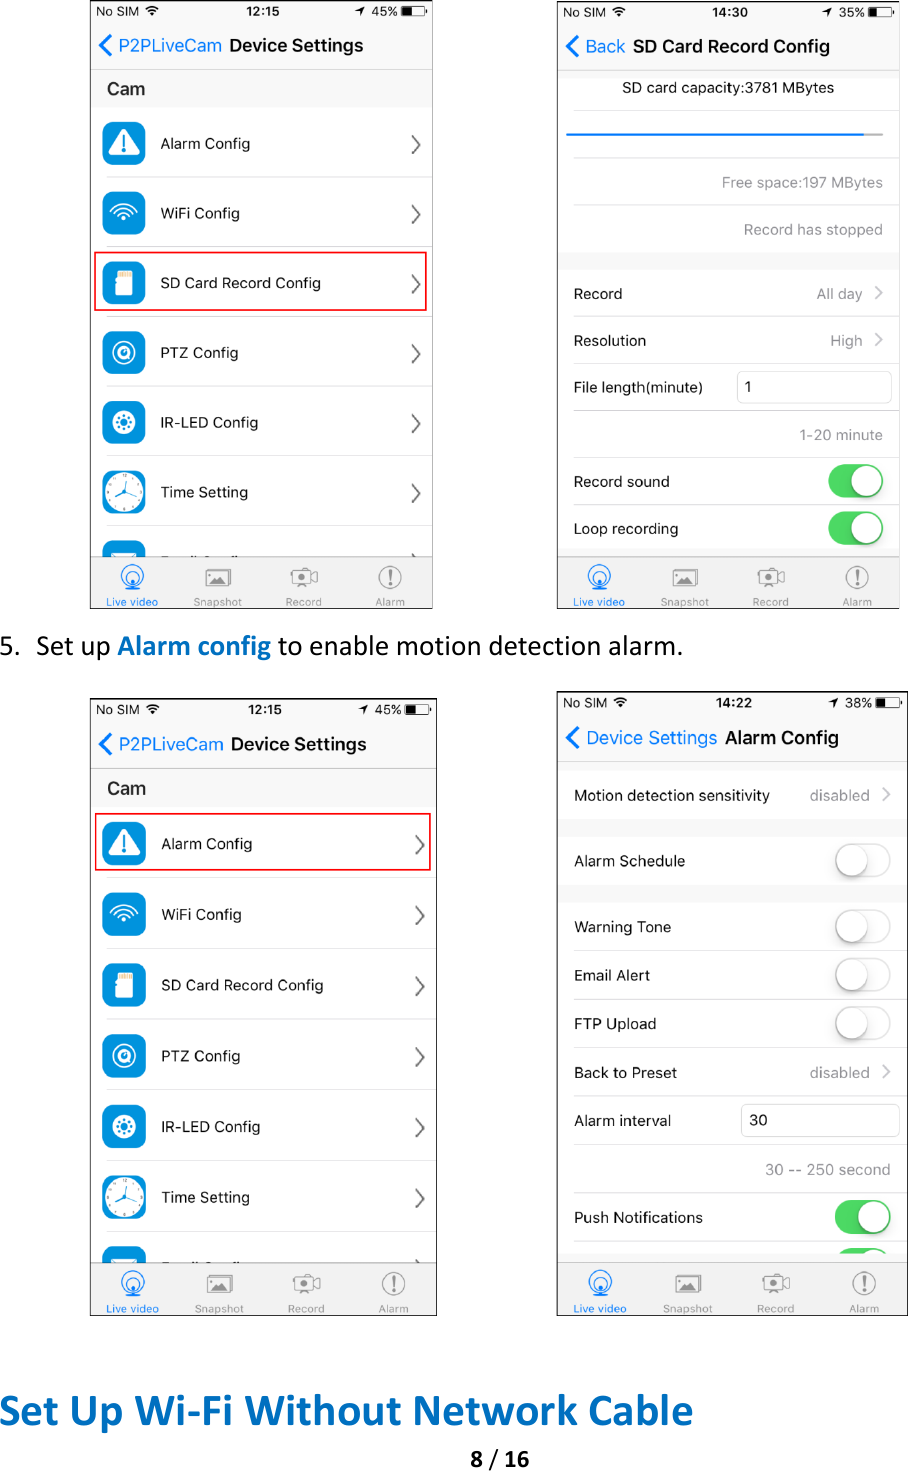
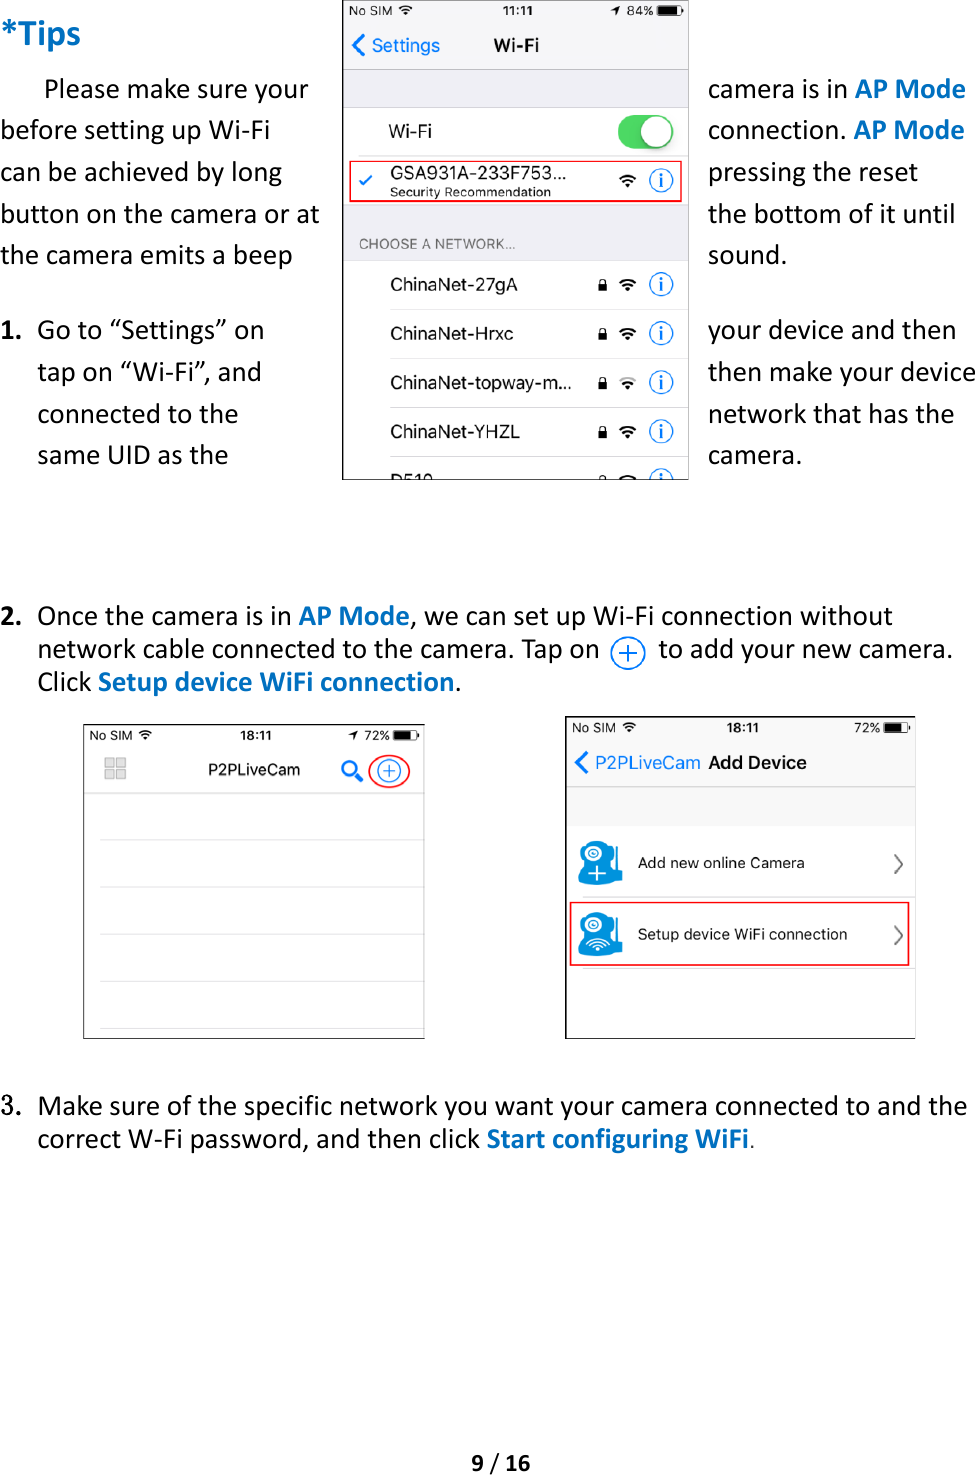
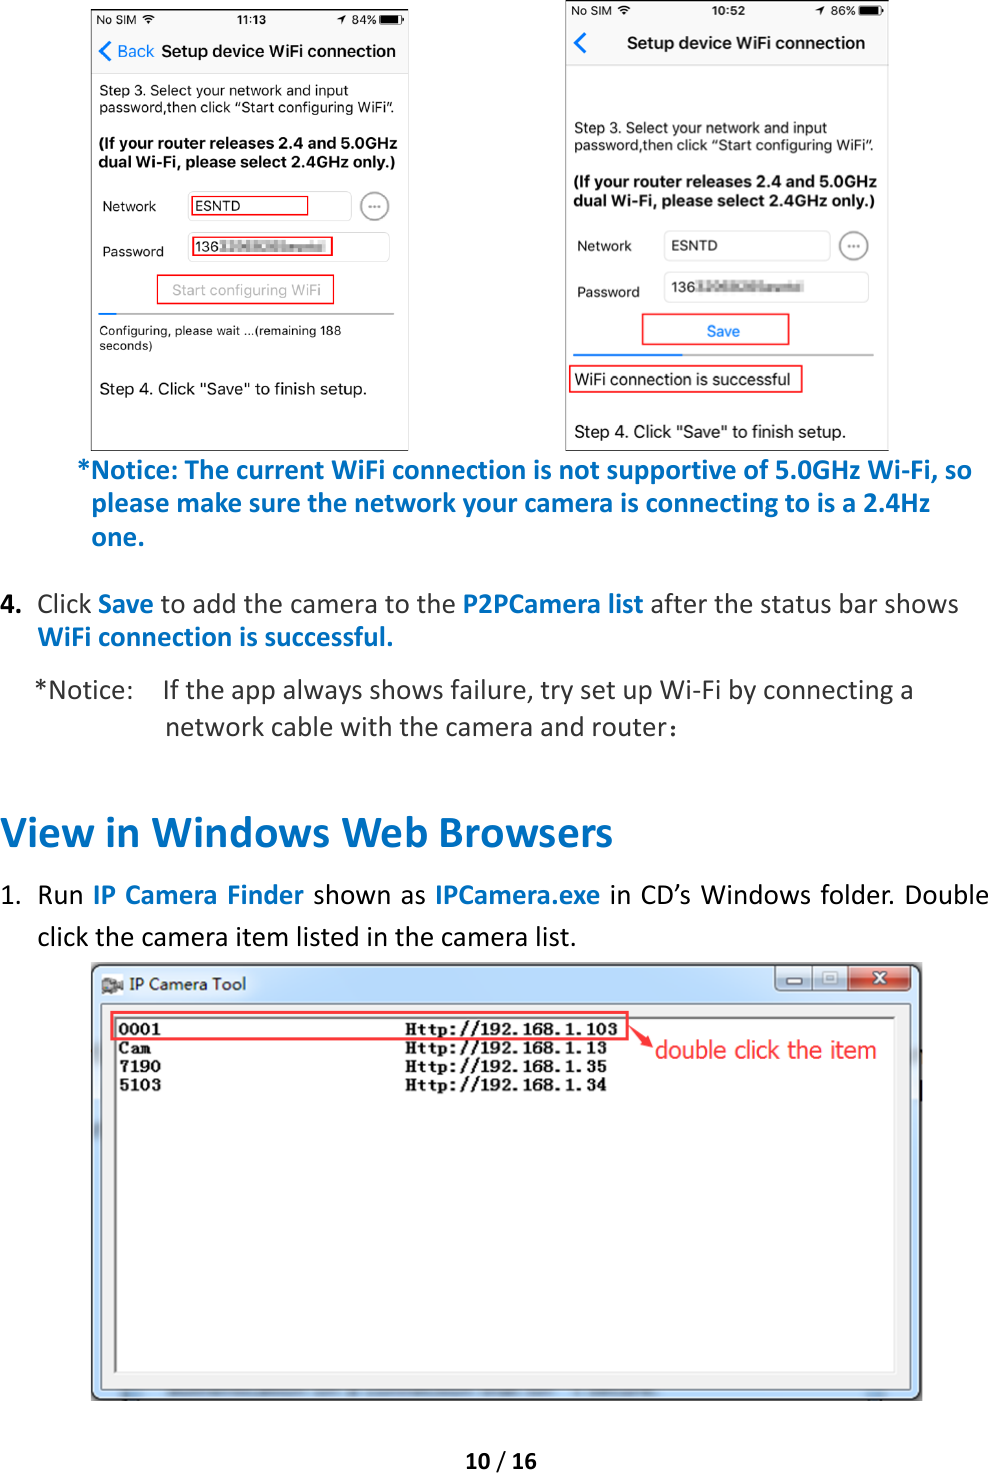

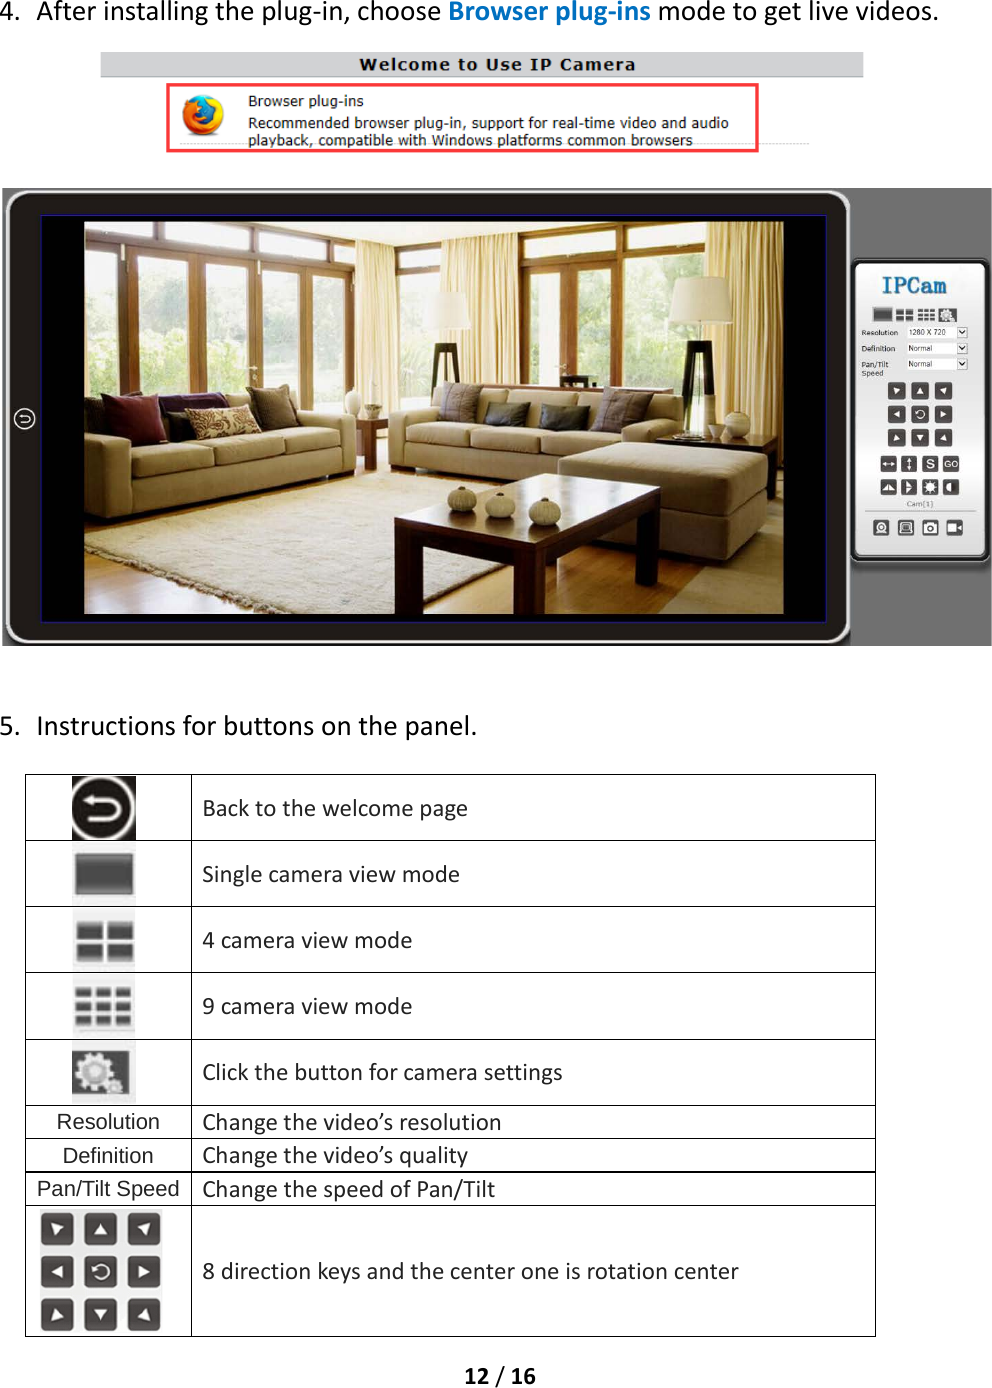

![14 / 16 Frequently Asked Questions 1. Why does my computer or security software say the software is dangerous and it is a virus? The software will detect devices in your network and install a plug-in for live video viewing. That seems like a virus though it does no harm to your PC in fact. Please ignore the warning and continue. 2. Why can’t the search tool detect the camera? Please make sure the network cable is connected. Turn off the firewall and security software on your computer. Make sure the camera is connected to the router instead of the computer. 3. Why does the camera always ask for username and password, or it says “incorrect user”? The camera’s default username is [admin], and its default password is N/A, which means you just leave it blank. If you forget your username or password, you can reset the camera to factory settings to get the default username and password. 4. Why can’t I get live video in web browser? Please download and install plug-in before getting live video. If there is still no live video, check whether or not the plug-in is enabled in your web browser? 5. How can I reset the camera to factory settings? Please long press the reset button under or on the camera for about 3 to 5 seconds until the camera’s indicator is off. Please make sure the power supply is connected when you are doing it. 6. Why can’t the camera record videos? Please make sure you are running the web browser as an administrator. Right click the web browser and select Run as Administrator to run as an administrator. For android app, please insert a TF card into the camera before recording? 7. Why is the image blurry? Remove the protective film on the lens and rotate the lens of the camera to get a clear image. 8. How can I improve it when the live video appears in black screen but showing no image? Triple click the app name on the title bar of live video page to switch to software decode mode. By default the app decodes images through hardware decoder for its high efficiency of decoding. Users can switch between the states of software decode mode and hardware decode mode by triple-clicking the app name.](https://usermanual.wiki/Lionel/WIFICAM1/User-Guide-3665893-Page-16.png)