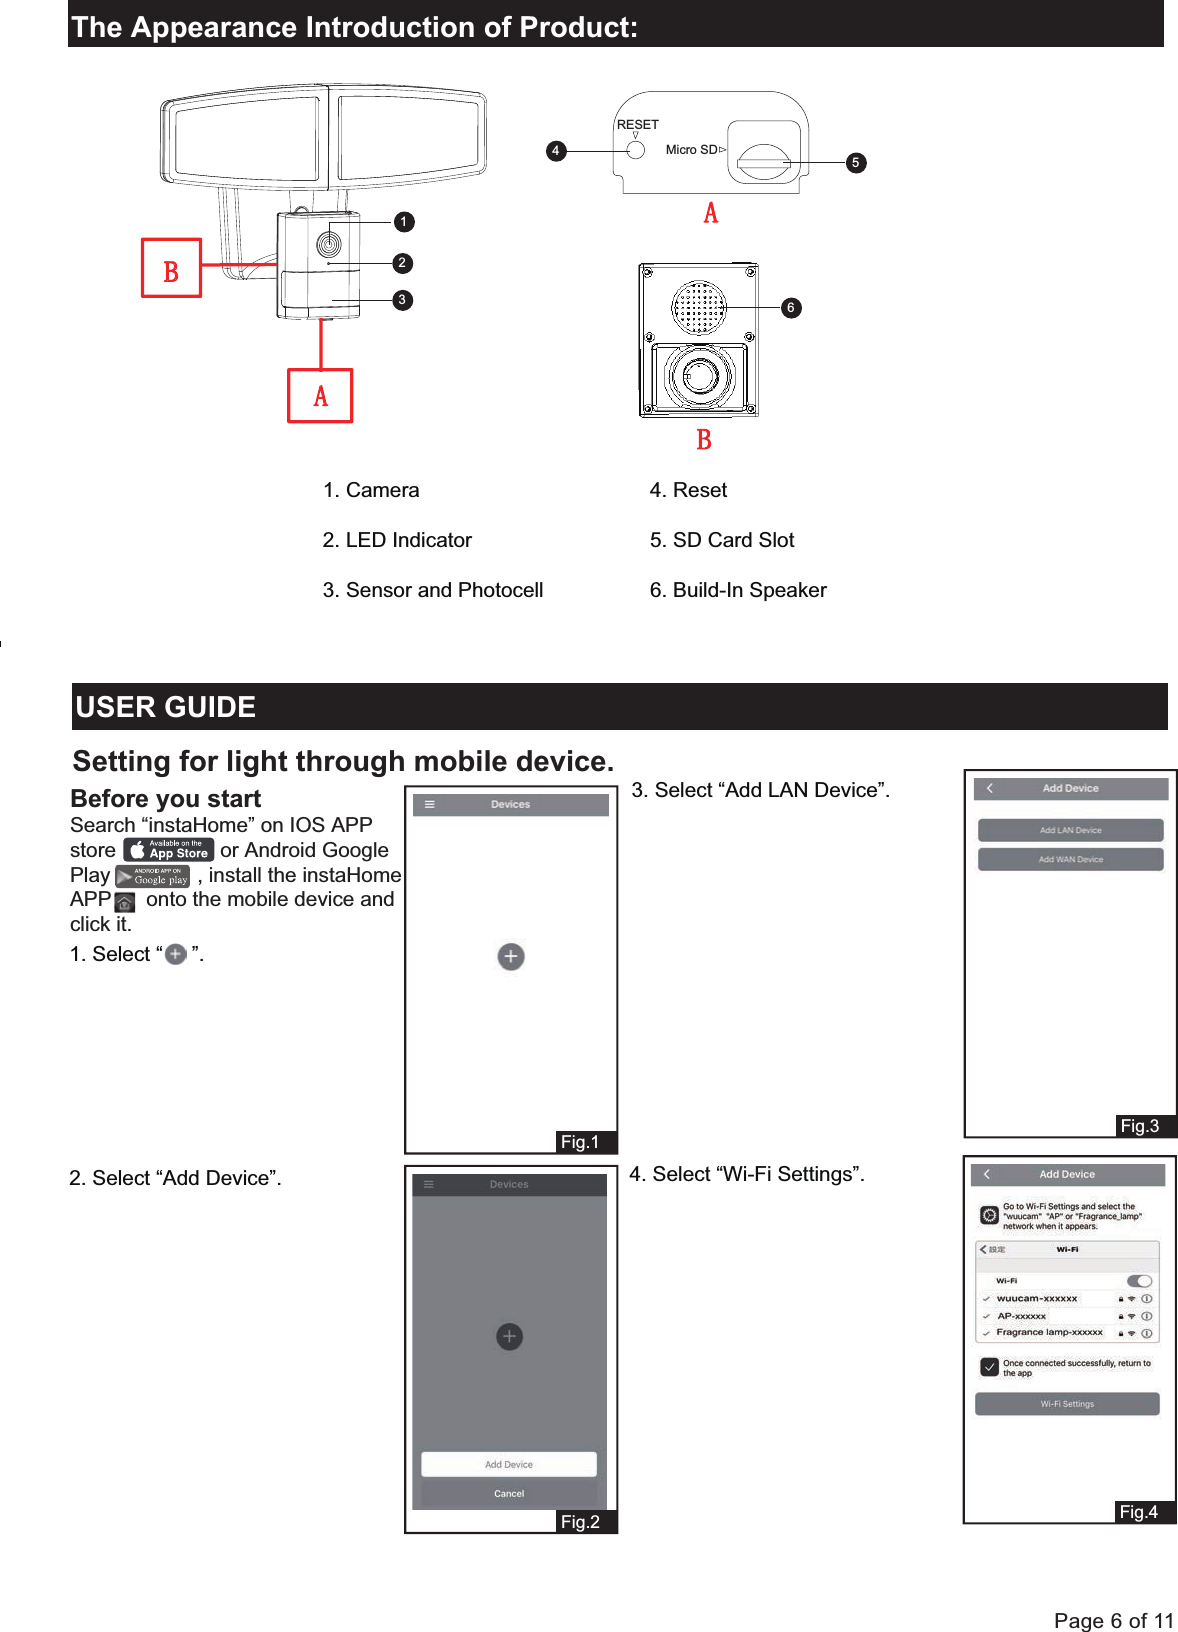
Luminex DH7061 LED Motion Sensor Security Light with Wi-Fi Camera User Manual DH7061
Luminex International Co., Ltd LED Motion Sensor Security Light with Wi-Fi Camera DH7061
UserManual.wiki
>
Luminex
>
DH7061 User Manual
15_DH7061 UserMan
Navigation menu
Upload a User Manual
Namespaces
Wiki Guide
HTML
PDF
Info
Views
User Manual
Discussion / Help
Navigation
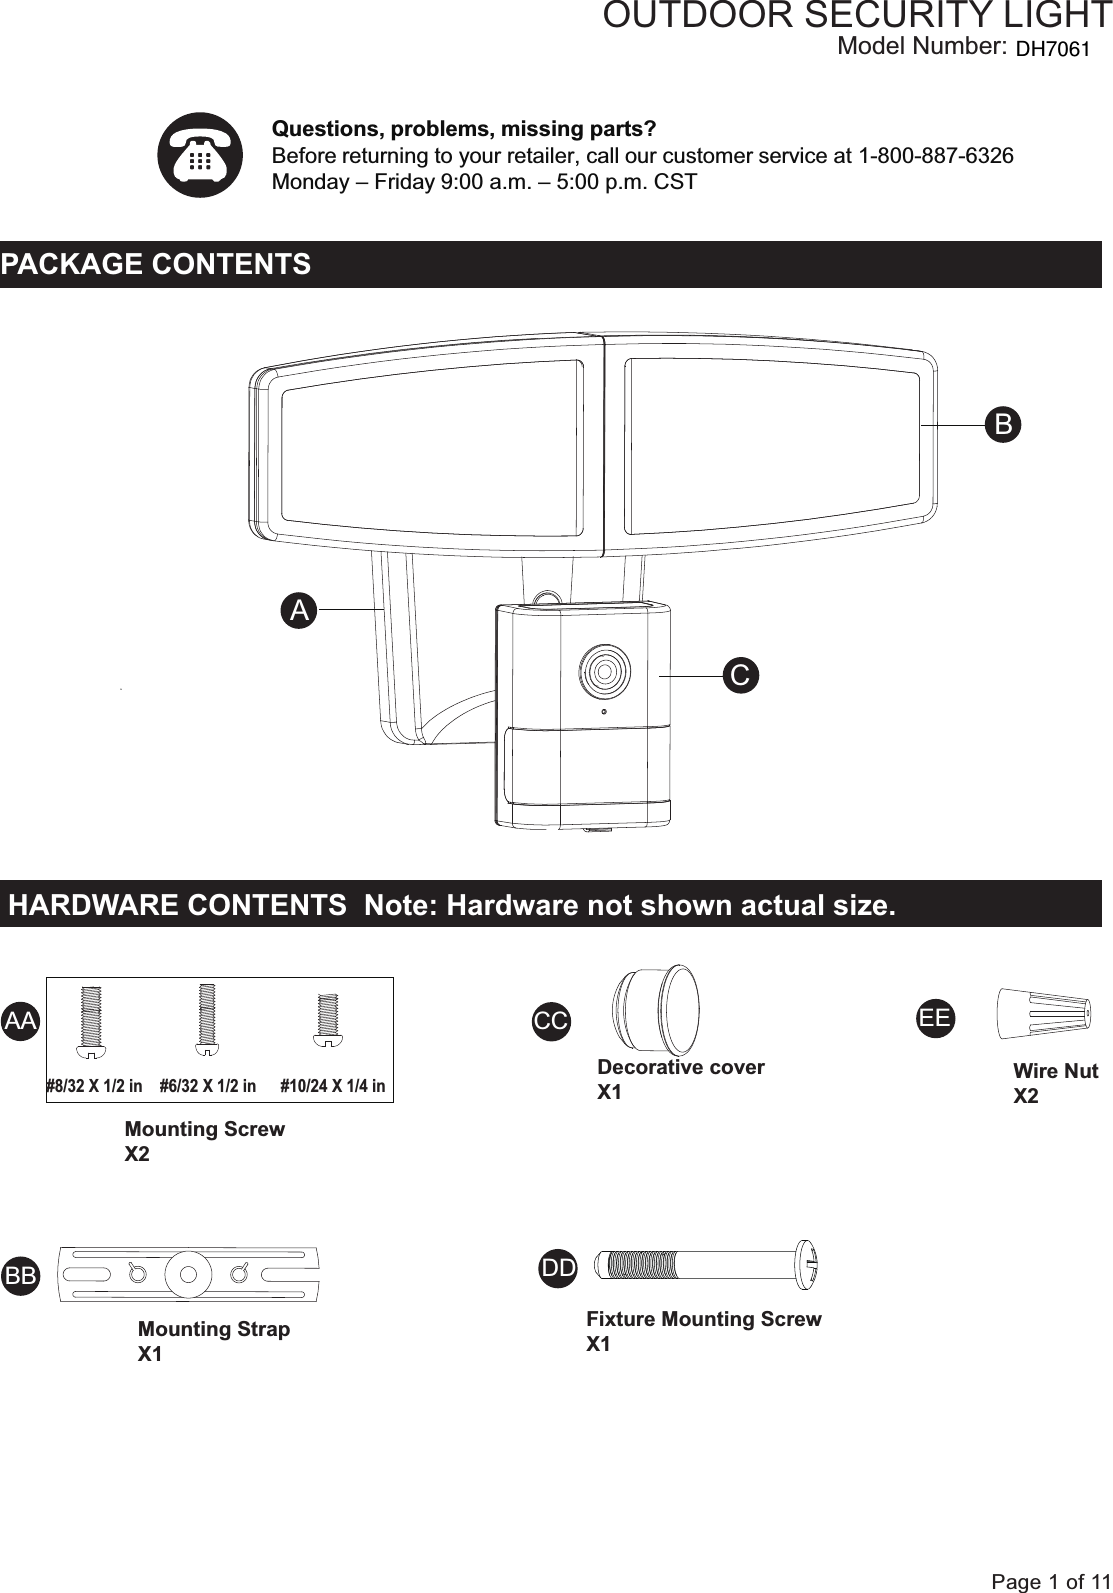
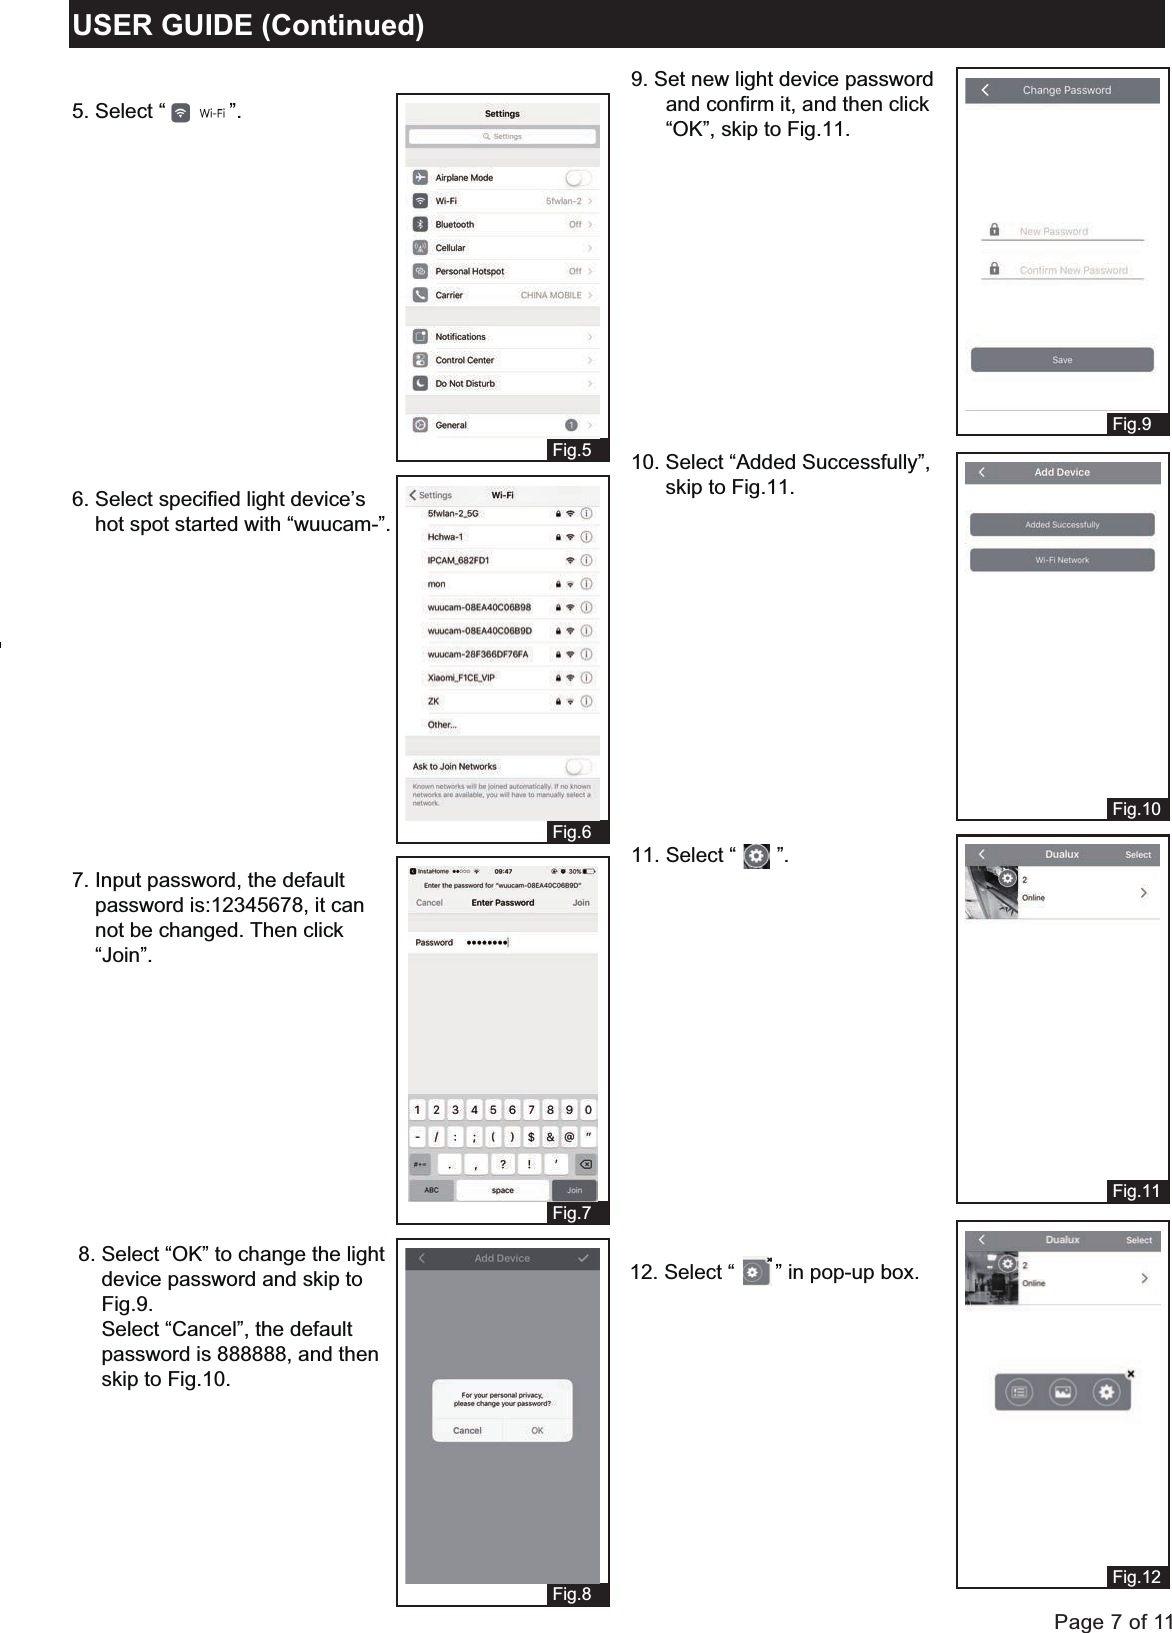
![Page 3 of 11ASSEMBLY INSTRUCTIONS (continued)CameraBack Plate4. With silicone caulking compound (not included), caulk completely around where the back plate of the light fixture(A) meets the wall surface. CAUTION: Be sure to caulk completely where the back plate meets the wall surface to prevent water from seeping into the outlet box.Turn on the power at fuse or circuit box.Camera1For eave mounted only:5RWDWHWKHVHQVRUKHDGFORFNZLVHÛKRUL]RQWDOO\DQGWKHQWLOWDQJOHSURSHUO\Turn off the power at fuse or circuit box.1. Install the mounting strap(BB) to the outlet box with the stamped word “FRONT” facing away from the outlet box, using two mounting screws(AA) that best fit the outlet box. (Choose one matching pair of suitable mounting screws from the 3 pairs provided)Installation StepsFRONT3422. Connect the fixture black wire to the house black wire and the fixture white wire to the house white wire using wire nuts(EE) provided. Carefully tuck the wires back into the outlet box.Adjusting the Sensor Head: 1. a: Aim sensor head(C) toward desired detection area, maintaining a 5° - 40° downward angle to allow moisture to drain. (See Fig.1) Note: Make sure sensor head is positioned with camera facing towards the ground. b: You can rotate the sensor head up and down to change the coverage area . Walk through the detection zone at the farthest distance you wish to detect motion.2. Range set too high may increase false triggering. (See Fig.2, Fig.3) 3. Attach the back plate of the light fixture(A) to the mounting strap(BB), and then secure it with the fixture mounting screw(DD). Push the decorative cover(CC) firmly into the fixture mounting screw(DD) hole on the light fixture(A).Fig. 1Sensor Adjustment Lower For Short CoverageSensor Adjustment Higher For Long CoverageFig. 2 Fig. 3BBAAEECABBADD CC](https://usermanual.wiki/Luminex/DH7061/User-Guide-3458671-Page-3.png)
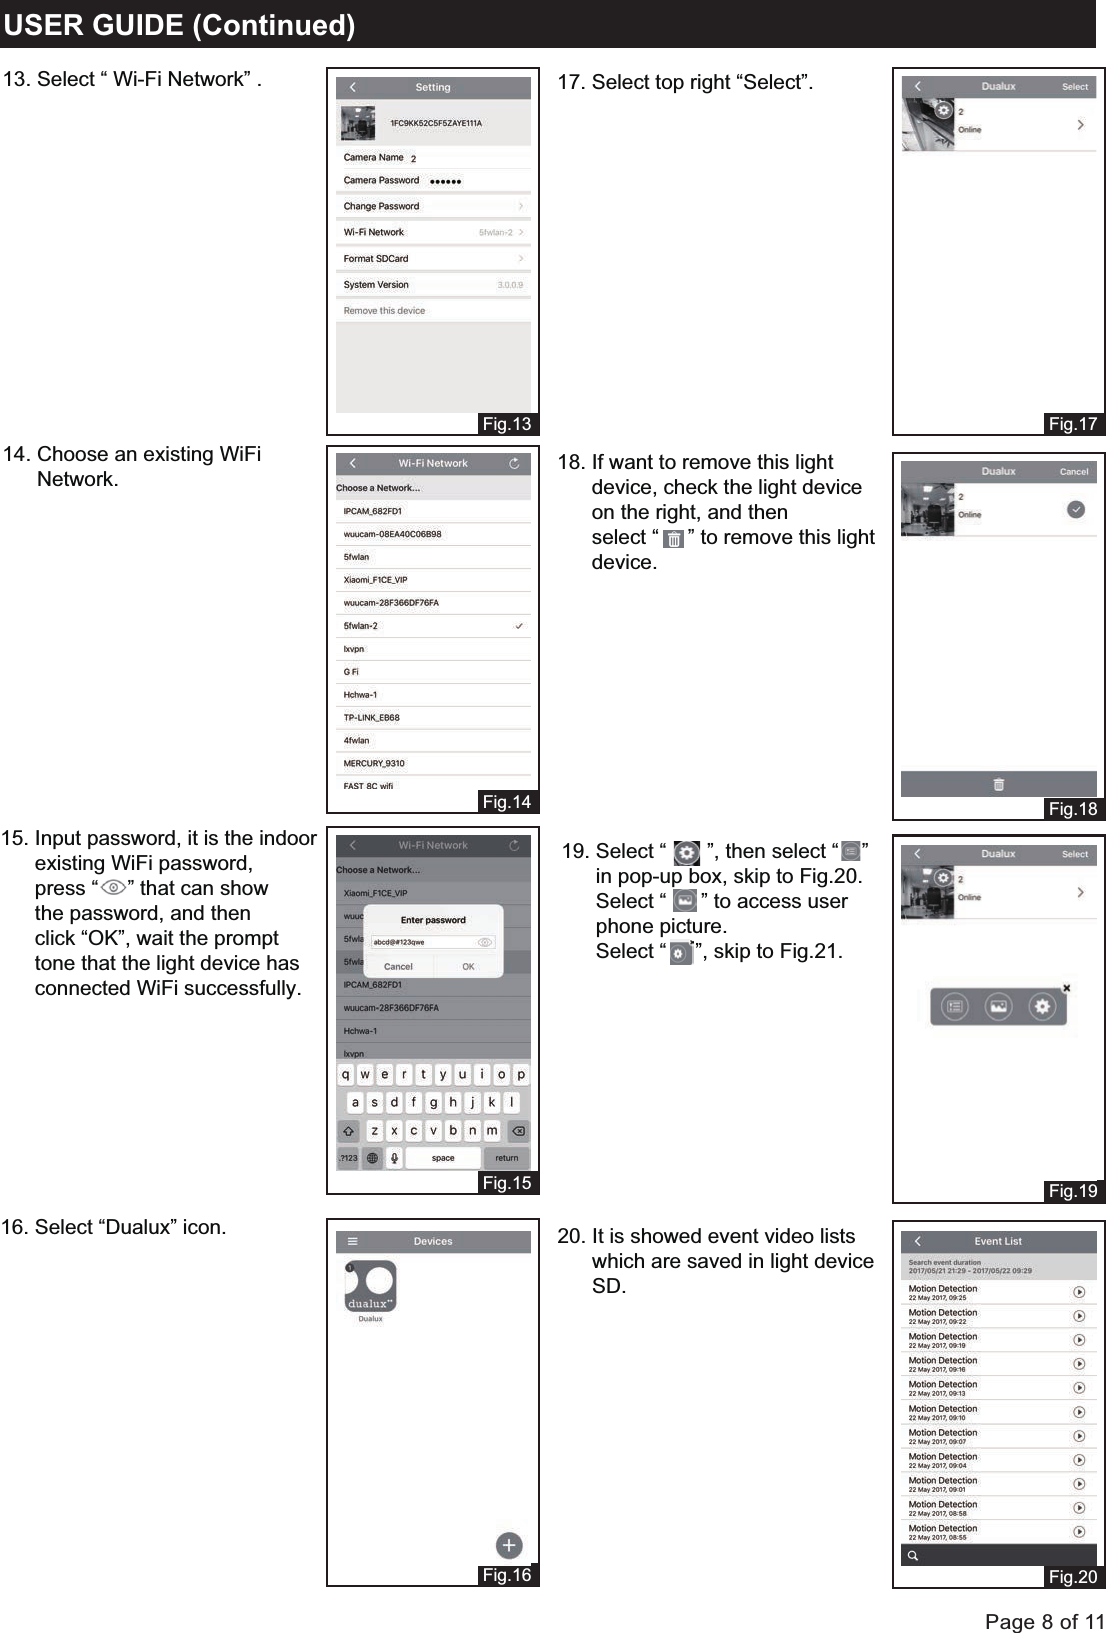
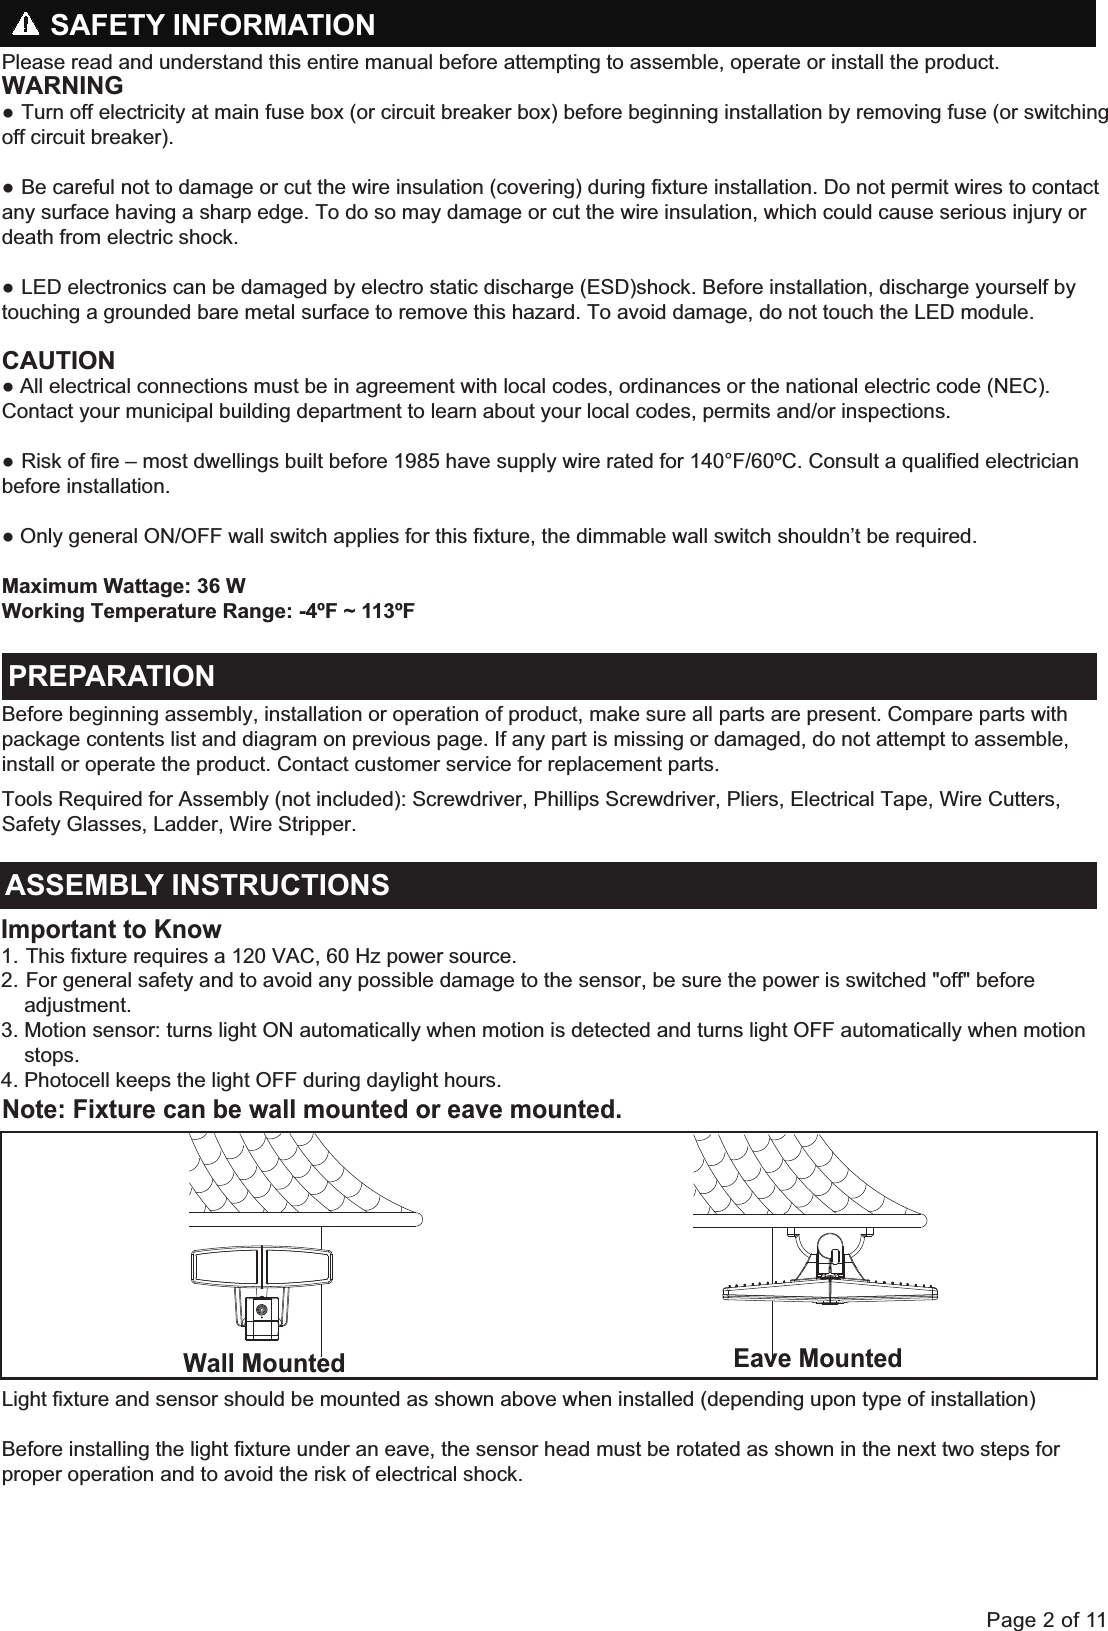
![Page 4 of 11Spare Parts List:The following parts are available for re-order if damaged or missing. Call us toll-free at 1-800-887-6326CARE AND MAINTENANCEAssembly Kit5731MM (1 SET) Fig. 4Fixture Mounting ScrewX1Wire Nut X3AA DDCCBB EEMounting Screw X2Mounting Strap X1Decorative coverX1#8/32 X 1/2 in #6/32 X 1/2 in#10/24 X 1/4 inƔTo prolong the original appearance, clean the light fixture with clear water and a soft, damp cloth only.ƔDo not use paints, solvents, or other chemicals on this light fixture. They could cause a premature deterioration of the finish. This is not a defect in the finish and will not be covered by the warranty.Adjusting the Light Head: 1. Gently grasp the light heads(B) and tilt them up or down, left or right to DGMXVWWKHOLJKWFRYHUDJHDUHD.HHSWKHOLJKWKHDGVDWOHDVWÝPP away from the sensor. (See Fig.4).HHSWKHOLJKWKHDGVÛEHORZKRUL]RQWDOWRDYRLGZDWHUdamage and electrical shock. Notes:1. The sensitivity of the motion sensor will increase as the environmental temperature gets cooler. You may wish to make adjustments when the season changes. For best performance, gently clean the lens with a soft cloth every 1 or 2 months to assure maximum sensitivity.2. For best performance, install fixture at least 8 feet above the ground. At such a height, the fixture will provide a detection distance of up to 70 feet at 77 degrees Fahrenheit. (See Fig.5)3. The sensor detects movement across a detection range of 240 degrees. (See Fig.6)4. The sensor will be more sensitive to motion across its detection path than motion directly towards it. (See Fig.7)5. To reduce possible nuisances, do not mount the fixture near a heat source like an air conditioner, vent or furnace exhaust, or in a direction facing any reflecting object or other light source.25'8.0'12.0'70'Where you install your fixture is important:Be sure the light is mounted straight on the wallor eave; otherwise, the detection distance maybe limited. Fig. 5 Fig. 6MotionLeast sensitiveMotionMost sensitiveSensorFig. 7240'B](https://usermanual.wiki/Luminex/DH7061/User-Guide-3458671-Page-4.png)