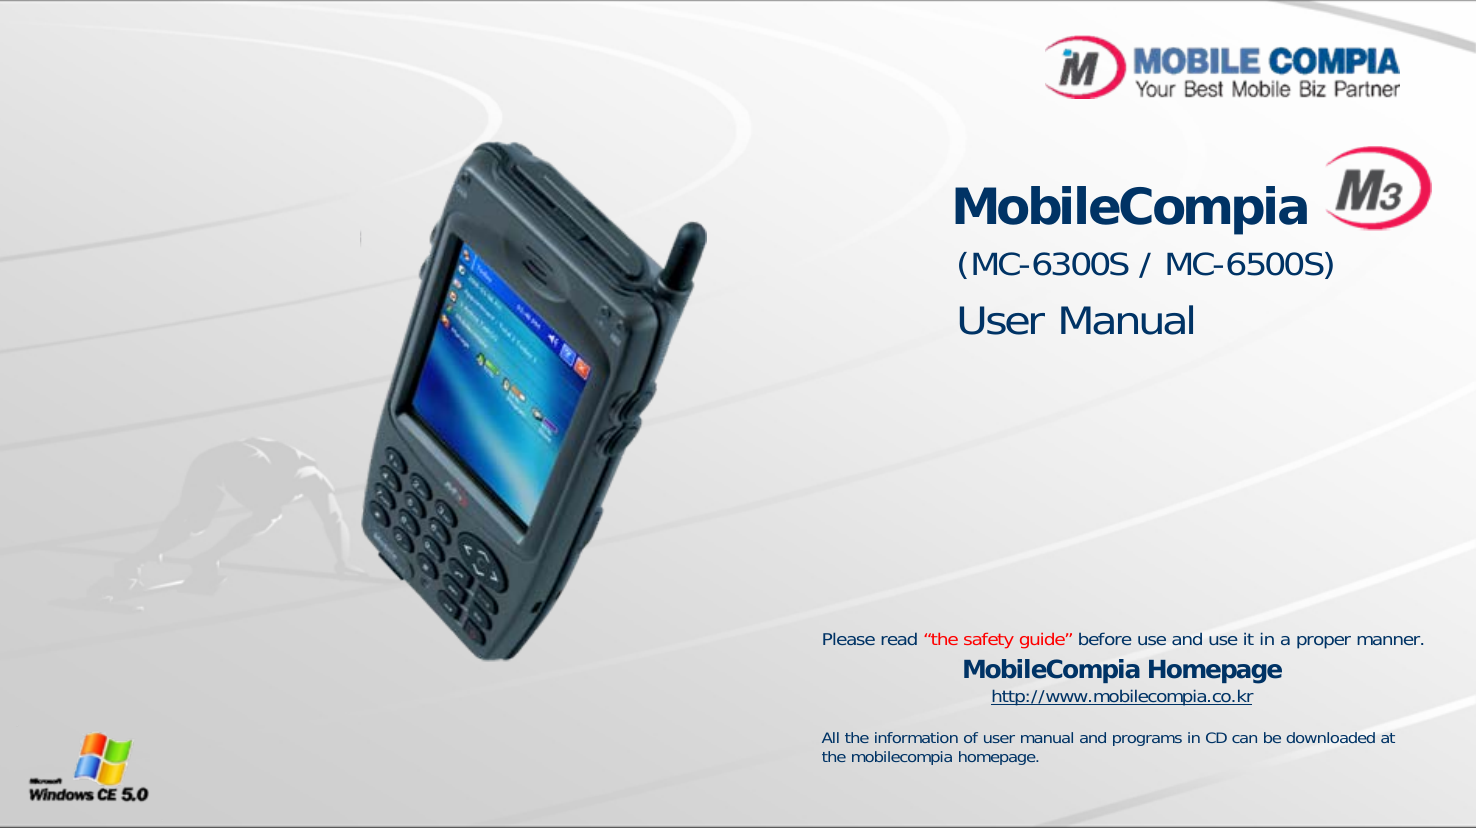
M3 Mobile MC-6500S Portable Data Collection Terminal User Manual 1
M3 Mobile Co., Ltd Portable Data Collection Terminal 1
UserManual.wiki
>
M3 Mobile
>
MC 6500S User Manual
User Manual
Navigation menu
Upload a User Manual
Namespaces
Wiki Guide
HTML
PDF
Info
Views
User Manual
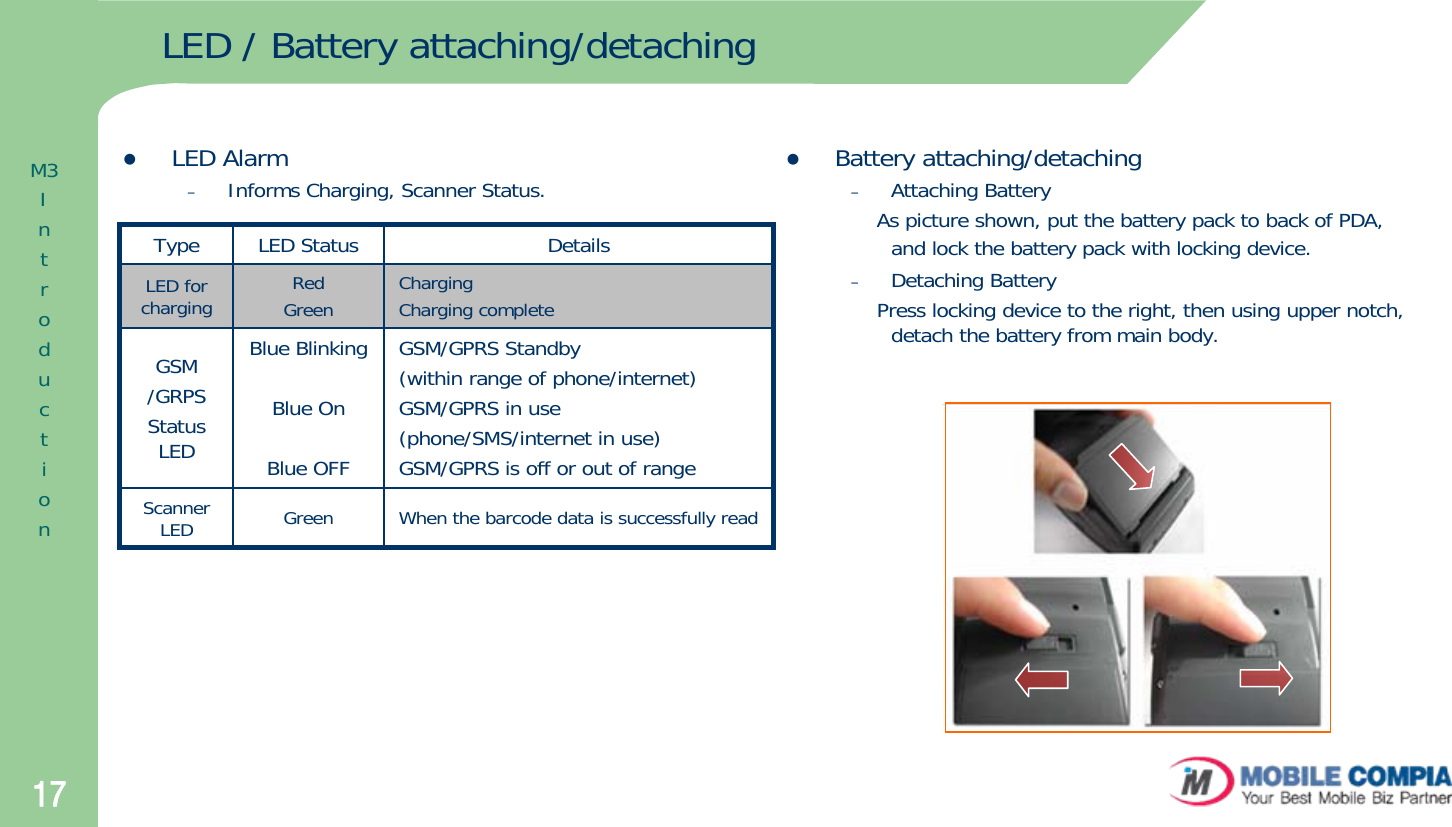
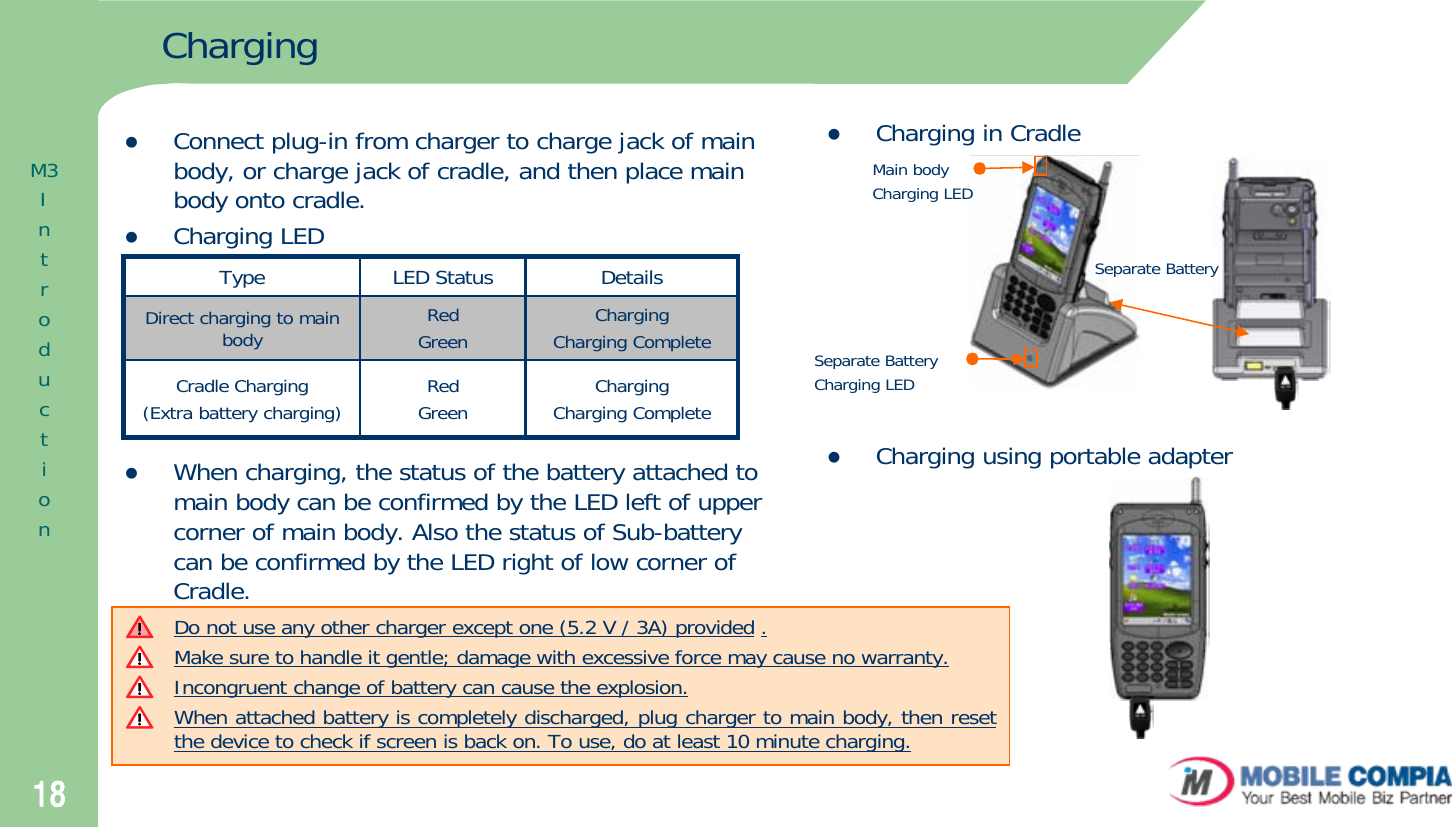
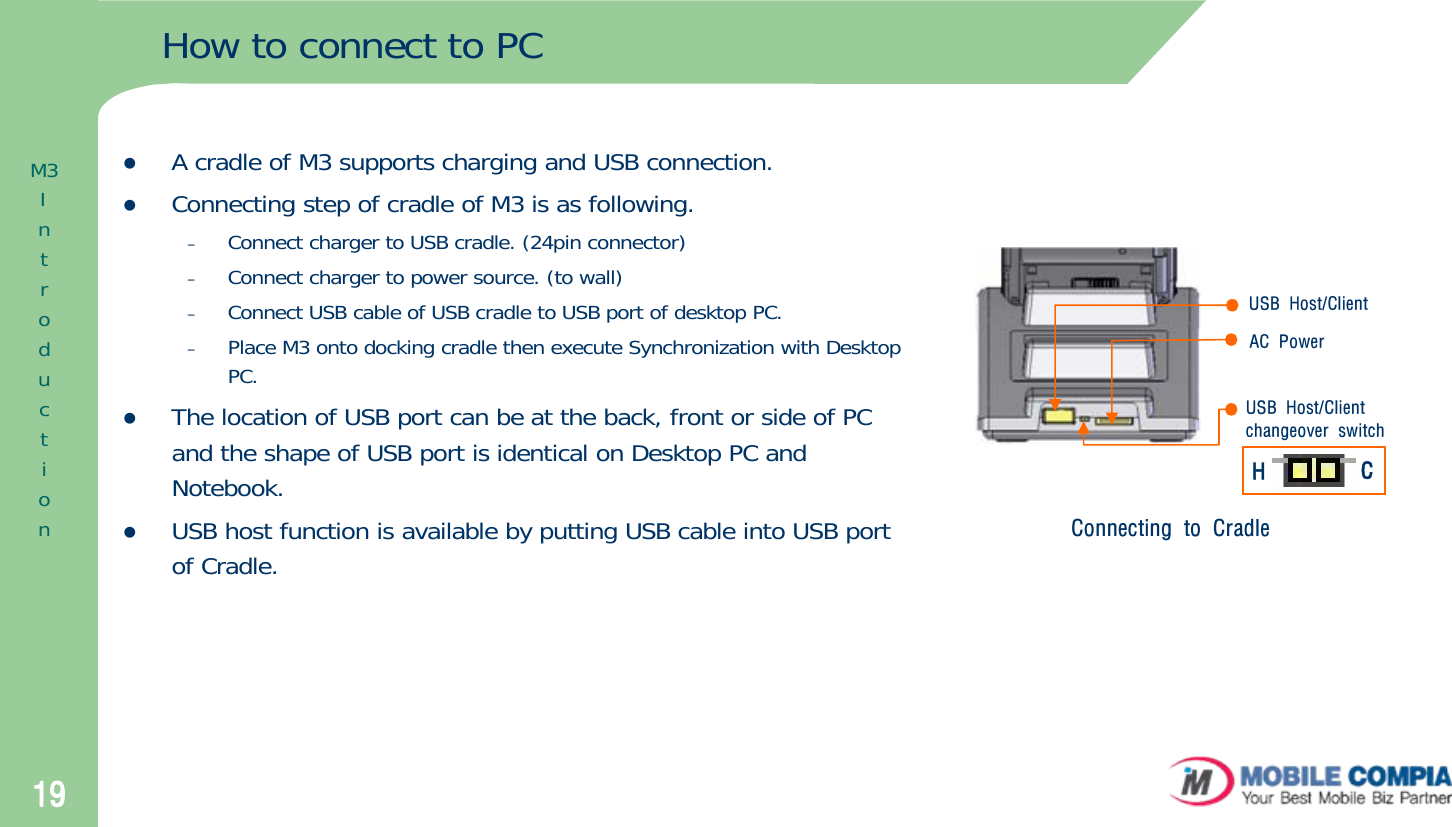
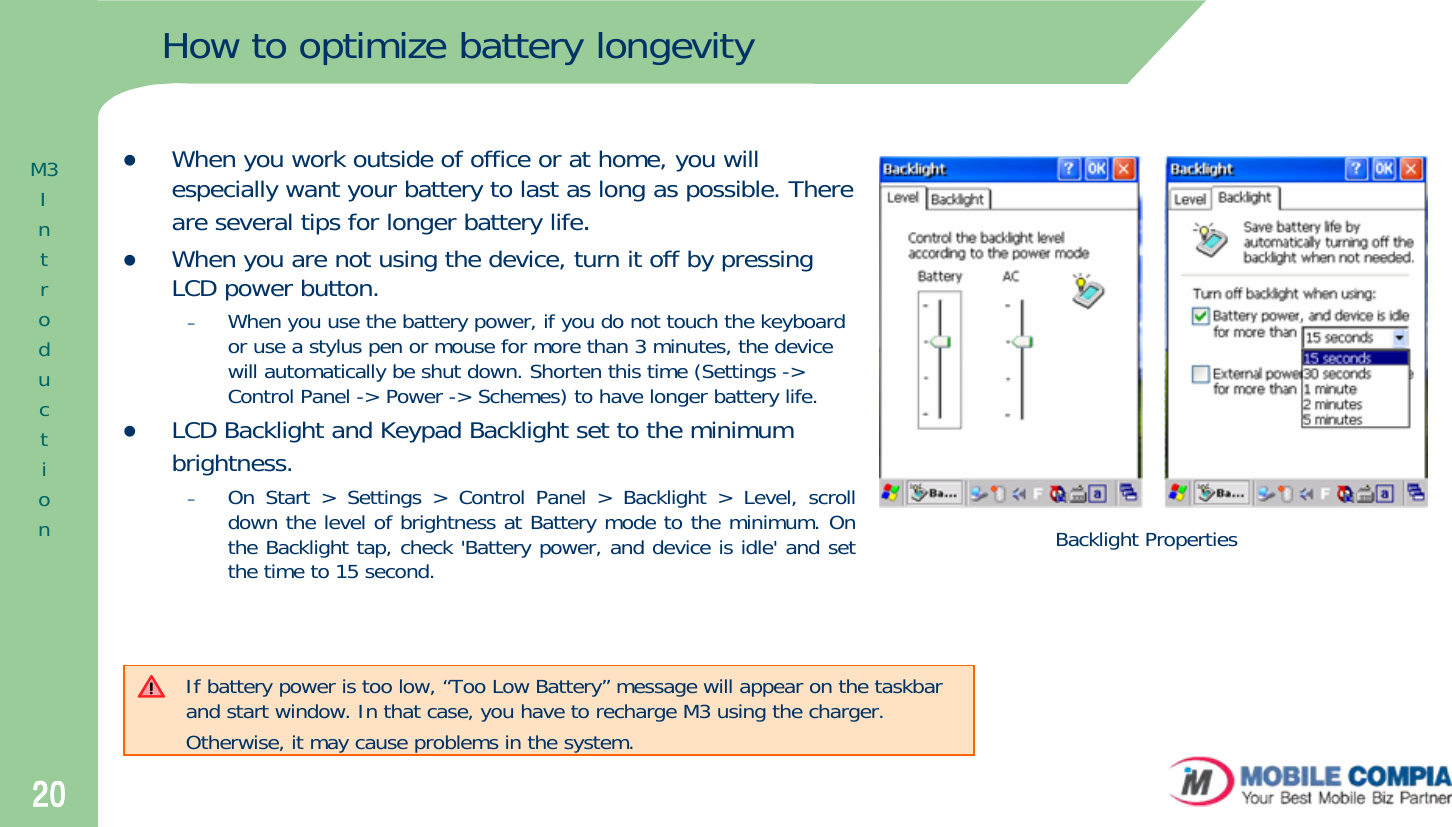
Discussion / Help
Navigation

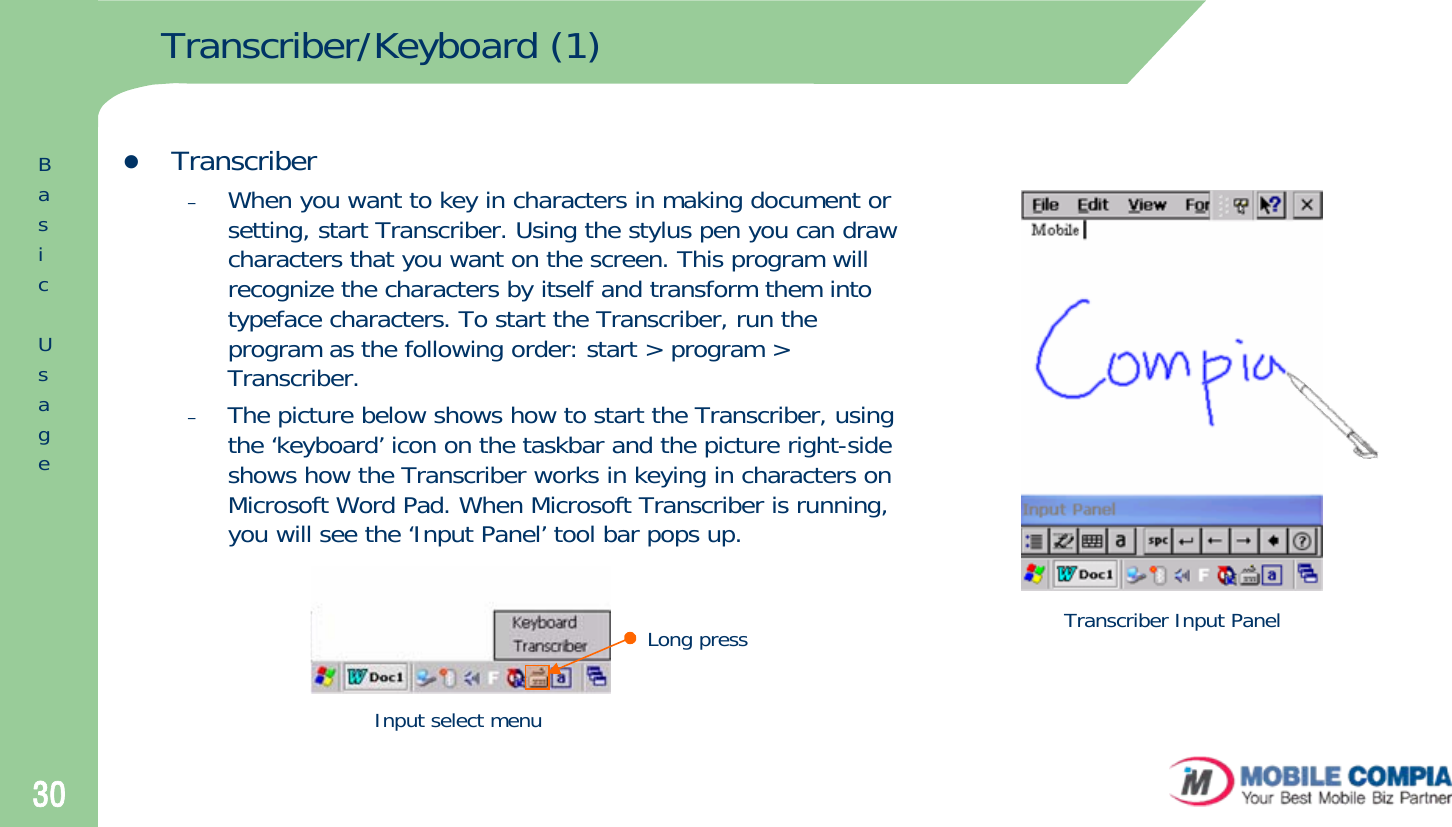
![31Transcriber/Keyboard (2)zKeyboard–Upper/lower case SelectionPress this icon to change upper and lower case letter. If you select upper case, capital letter and its character will appear on the number key pad. It serves the same function with Shift key.–Hot key SelectionIf you use hot key such as “z”, “x”, “c” and “v”, you can carry out Cancel, Cut, Copy, and Paste, respectively. If you want to change the features of soft keyboard, select keyboard in Go to Start> Setting> Control Panel> Input Panel and click the option you like to set up.–Input MethodTo carry out character key-in using [keyboard] input, press keyboard icon on the taskbar. In case of {Script Reorganization}, you can key in by activating Transcriber in the following order. Start > program > Transcriber. When you press the keyboard once, it will appear on the screen and one more press will make it disappear. Keyboard Input PanelBasicUsage](https://usermanual.wiki/M3-Mobile/MC-6500S/User-Guide-812734-Page-31.png)
![33Via GPRS/EDGE (1)zHow to set GPRS/EDGE–Select the 4th icon (configuration menu) on the program menu.–On the Configuration menu, select EGPRS settings.–Insert setting values for desired network and click ok to save. –User can check the saved EGPRS settings at [Start / Settings / Network and Dial-up Connections].zHow to connect to GPRS/EDGE –User can connect to EGPRS by double clicking the EGPRS icon at [Start / Settings / Network and Dial-up Connection]. –When user intends to connect to the Internet (e.g. opening Internet Explorer), Connecting to EGPRS box pops up automatically to let user to connect to EGPRS. zHow to disconnect EGPRS connection–Double click the ‘EGPRS Tray Icon’ on the tray bar.–Click disconnect button on ‘Connecting to EGPRS’ box.HowtouseInternetIf EGPRS is built in at manufacturing, the network setting is done by default. If the network setting is deleted by mistake, it can be restored by resetting the device. GPRS/EDGE Connect/Disconnect](https://usermanual.wiki/M3-Mobile/MC-6500S/User-Guide-812734-Page-33.png)
![34Via GPRS/EDGE (2)zHow to connect the GPRS/EDGE manually–Start / Settings / Network and Dial-up Connections or Control Panel / Network and Dial-up Connections. –Select make new Connection. Enter the name of connection. check dial-up connection, and press next. (ex. Make Name:GPRS)–Select Hayes Compatible on COM1–Press [configure..], and set [Device properties] .Port Settings Tab : Set a Baud Rate to 460800. other data remain as the picture below.Call Options Tab : On Extra settings Enter special modem commands “+CGDCONT=1”,”IP”,”apn_name” then press OK.–After done with configuration, input “*99***1#” in the ‘Phone number’ edit box and leave all the rest untouched. As last press ‘Finish’ button. –Now the connection icon would have been generated on the ‘Network and Dial-UP Connections’ Window as the picture below. On the window which pops up by double-clicking on this icon, user needs to input the username and the password, provided by the SIM card or Network provider.–Check mark “ save password”, then press “connect” to finish Internet setting After using Internet, press button from taskbar to disconnect–On the internet explorer, select View >Internet Options and under Autodial name on the Connection Tab, you can choose the name which has been generated. If the configuration setting was not correct, the name would not be displayed. –Now you can use internet just by running Internet Explorer without extra procedure for Dial-Up Connecting. This way of setting is used when there is GPRS/EDGE module installed, but the user does not want to use the mobilecompia's phone program or there is no phone program installed.HowtouseInternet](https://usermanual.wiki/M3-Mobile/MC-6500S/User-Guide-812734-Page-34.png)
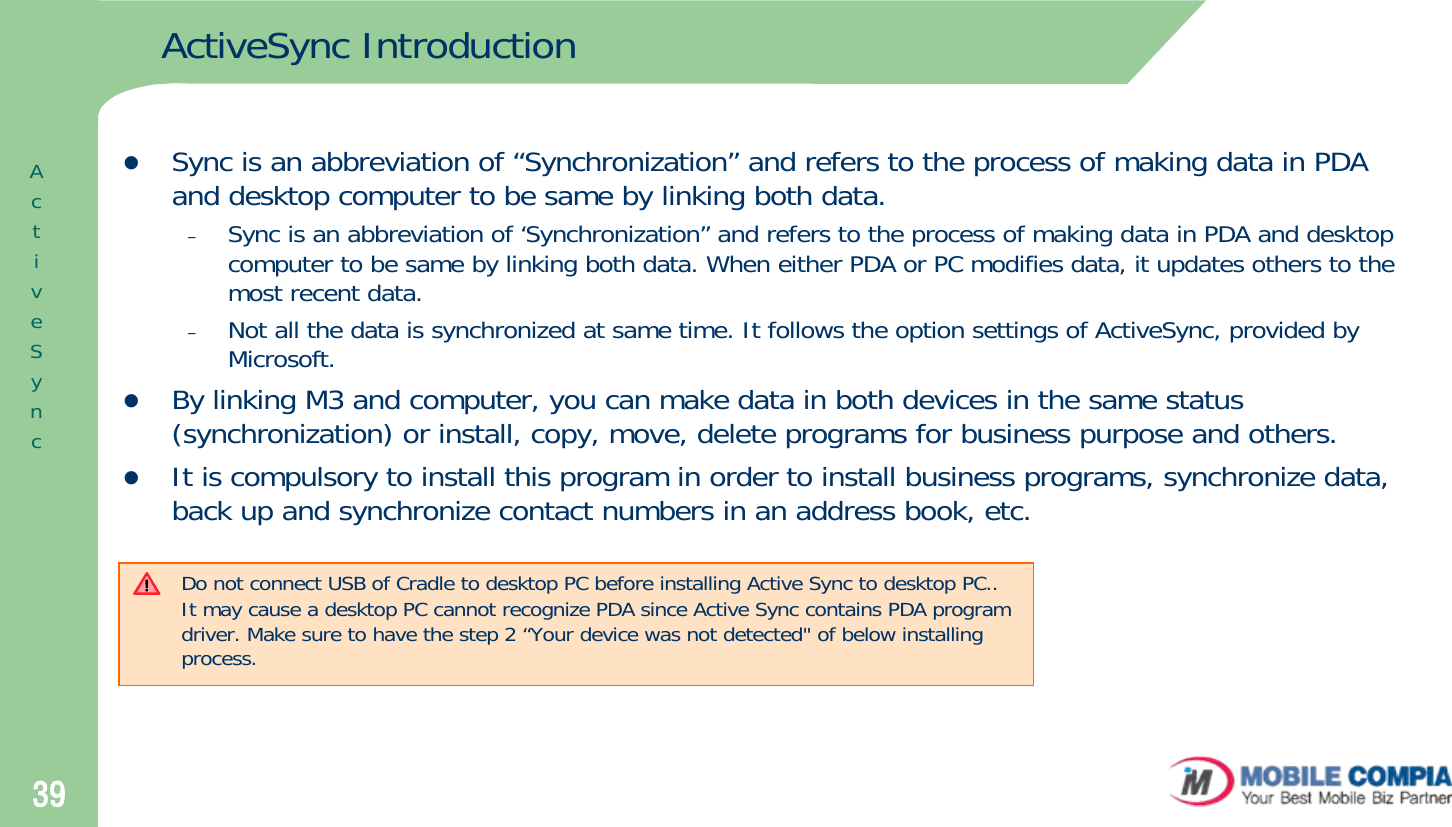
![40Installing ActiveSynczHow to install ActiveSync–Place Active Sync CD in CD Rom of desktop PC, installation will automatically executed.–When clicking [next] button, if [your device was not detected] sign is shown, then click [cancel] button. –Connect USB cable from cradle to computer USB port. Then place M3 on cradle after turn the screen on.–If [new hardware searching wizard] screen is shown, then click [next]. Now driver will be installed automatically. Click [finish].–If [Set Up a partnership] screen is shown, make a partnership, then click [next].–If [Setup Complete] is shown, then press [finish] to close the installation.–With [Microsoft Active Sync] screen is shown, synchronization of programs that were selected when partnership was made starts.zWhat is Partnership ?–The certification process that approves data communication between M3 and computer.※Microsoft outlook 2000 and above version is able to Sync with M3, however Outlook Express is not reliable. please re-try the synchronization if connection is disturbed by strong noise or static. ActiveSync](https://usermanual.wiki/M3-Mobile/MC-6500S/User-Guide-812734-Page-40.png)
![42ActiveSync TroubleshootingzWhen active Sync is not working–Check the USB cable that connect the cradle and desktop PC if properly connected.–Check if LCD and power is on.–Open the windows by selecting [File>Connection Settings] of ActiveSync program.Check if [Allow USB connection with this desktop computer] is check marked.If it is not checked, please check it and then retry to sync.–Try soft / hard reset. Make sure to save all data and close all executing program.–Press [start> setting> control panel> system] select [hardware] tap, then double click on device manager. Check if “universal serial bus controllers” or “Window CE USB Devices” has yellow exclamation mark sign underneath of the folder. ※If see the yellow exclamation mark sign, try below steps1. Double click “ Microsoft USB Sync “ under Windows CE USB Devices folder.2. Double click “ update “ from Driver tap.3. From window [device driver update wizard] , press [next] button, then select [search appropriate driver for device],then double click [next].4. After check “ Microsoft Windows Updates”, press [next].5. Most updated USB driver is automatically downloaded from MS website via internet.6. Restart computer and try Sync again.ActiveSync](https://usermanual.wiki/M3-Mobile/MC-6500S/User-Guide-812734-Page-42.png)