MATRIX COMSEC PVT VP510 SPARSH VP510 User Manual EON510 User Guide
MATRIX COMSEC PVT. LTD. SPARSH VP510 EON510 User Guide
UserManual.wiki
>
MATRIX COMSEC PVT
>
VP510 User Manual
User manual
Navigation menu
Upload a User Manual
Namespaces
Wiki Guide
HTML
PDF
Info
Views
User Manual
Discussion / Help
Navigation


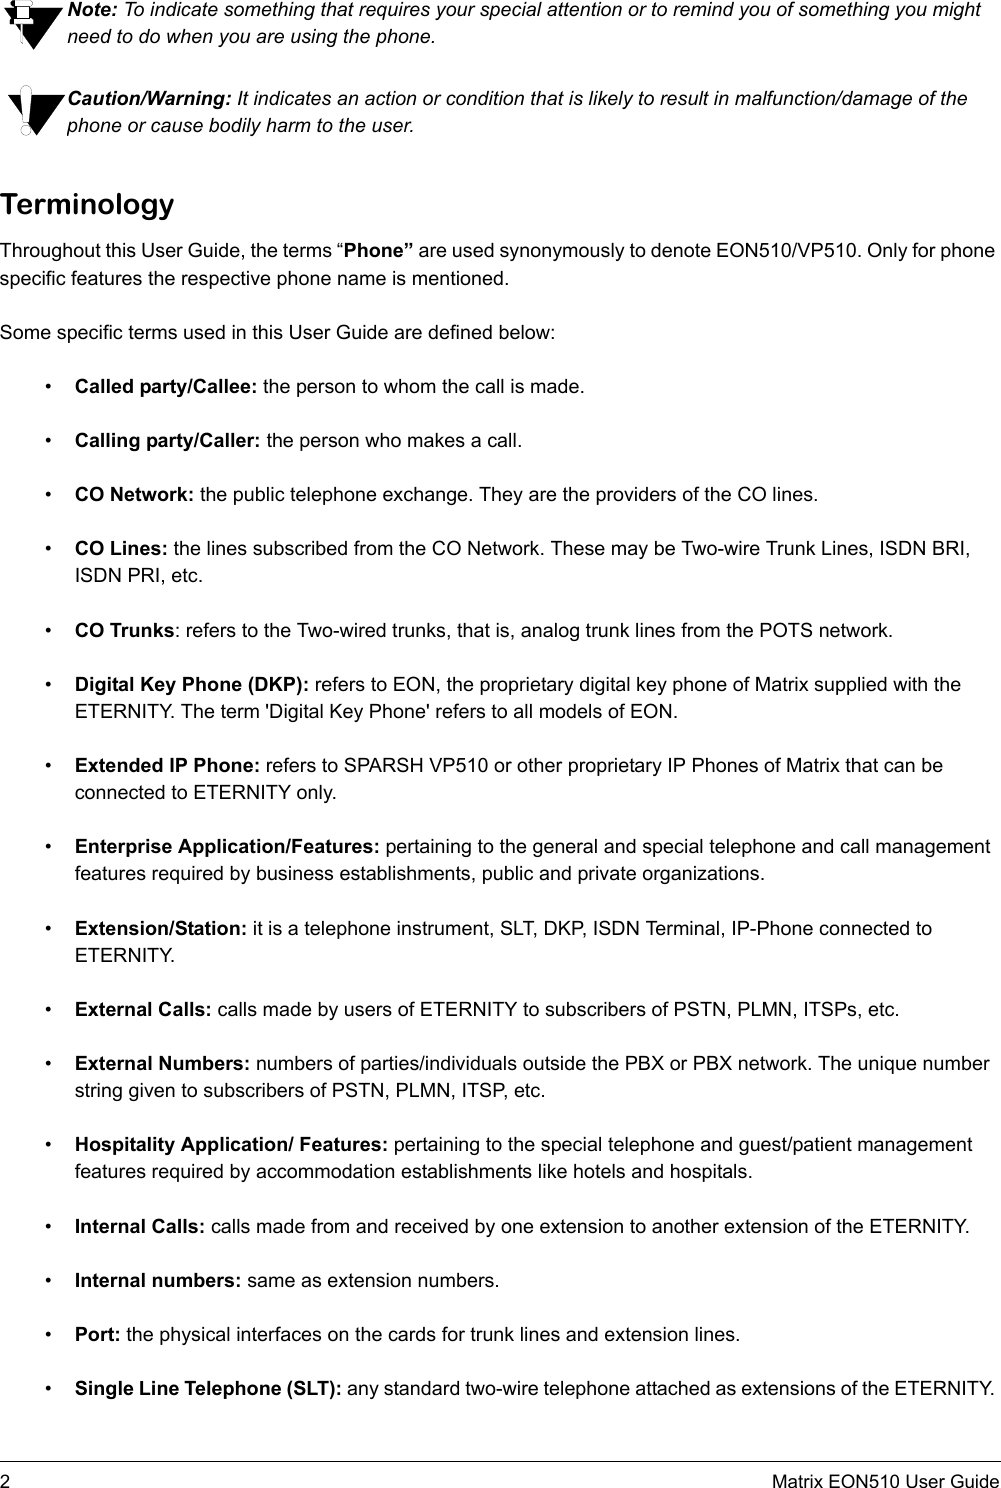

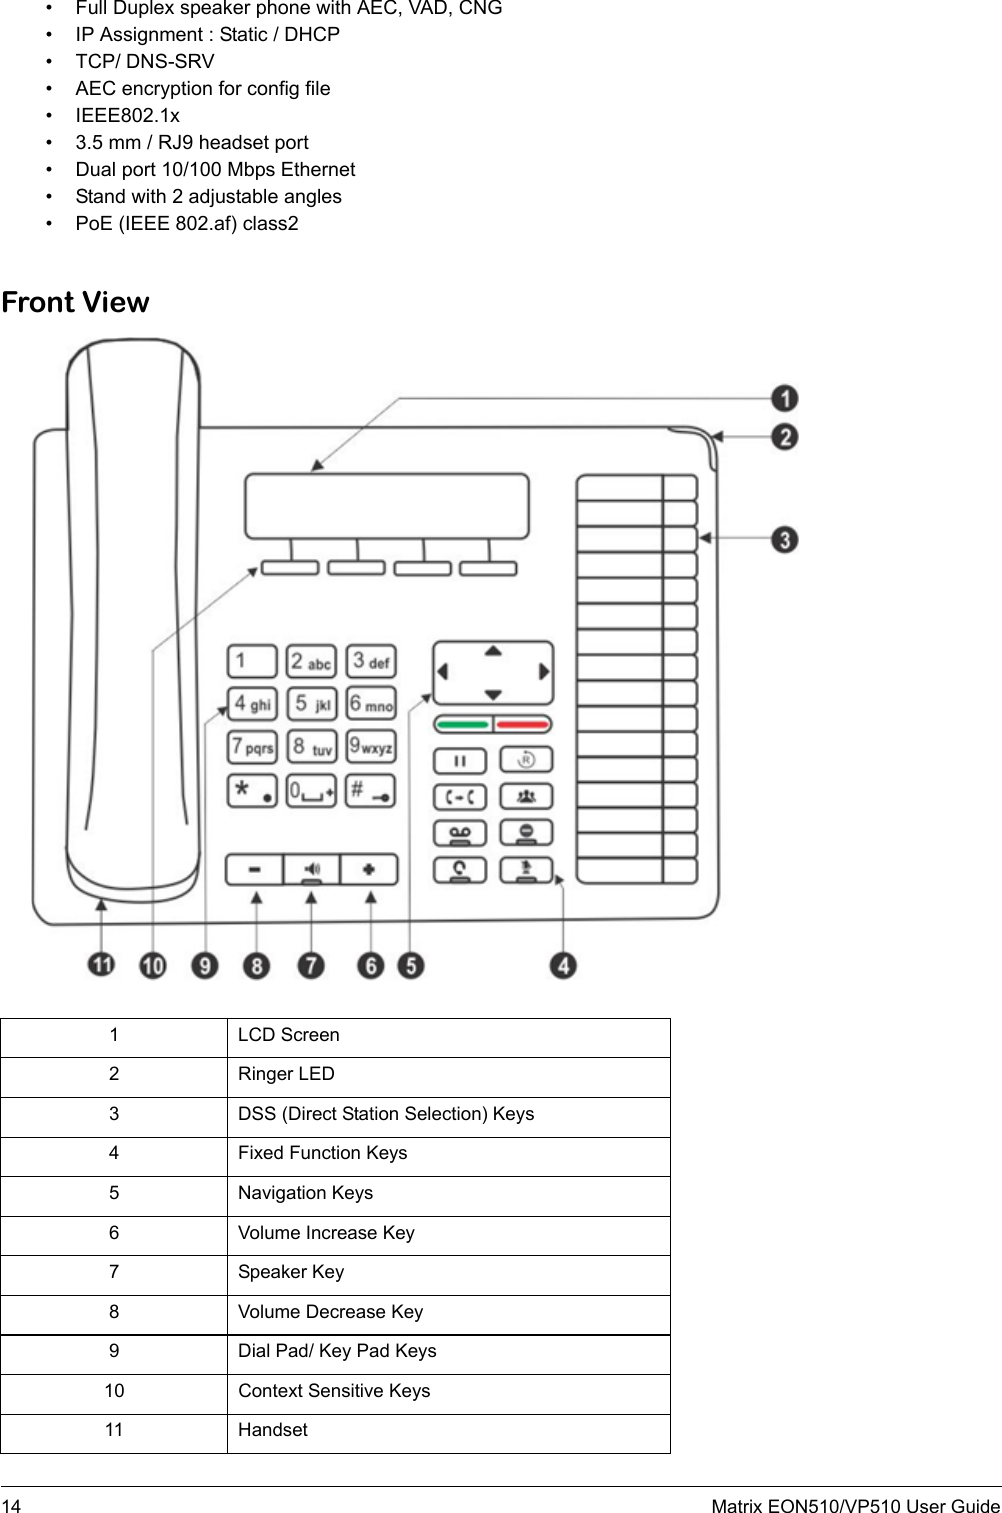
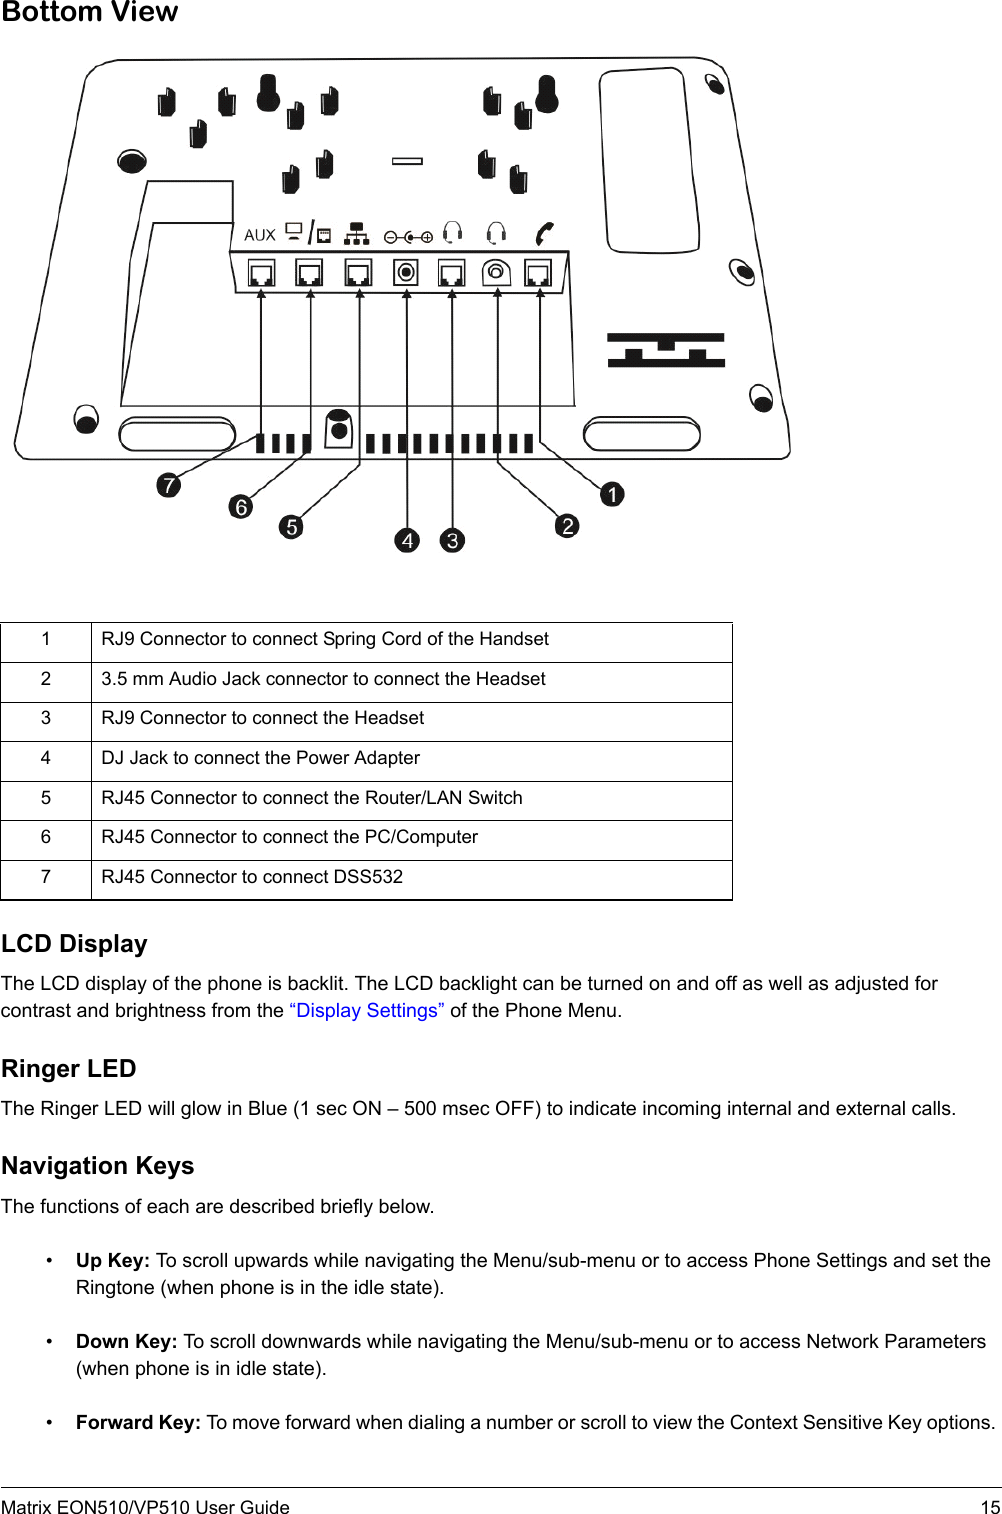
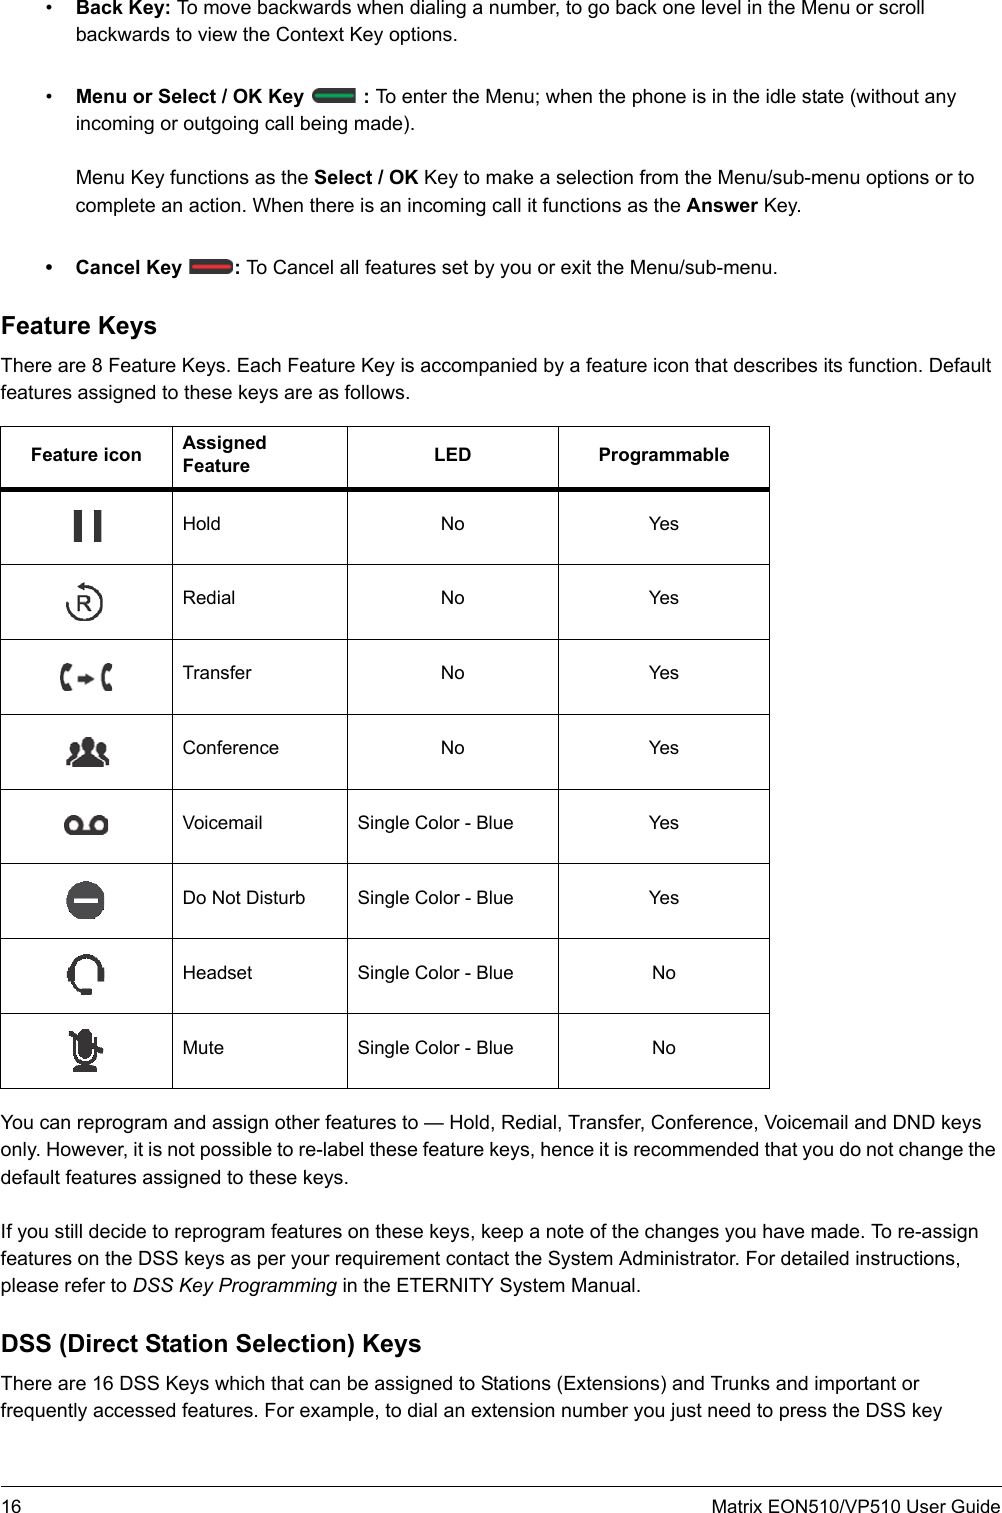


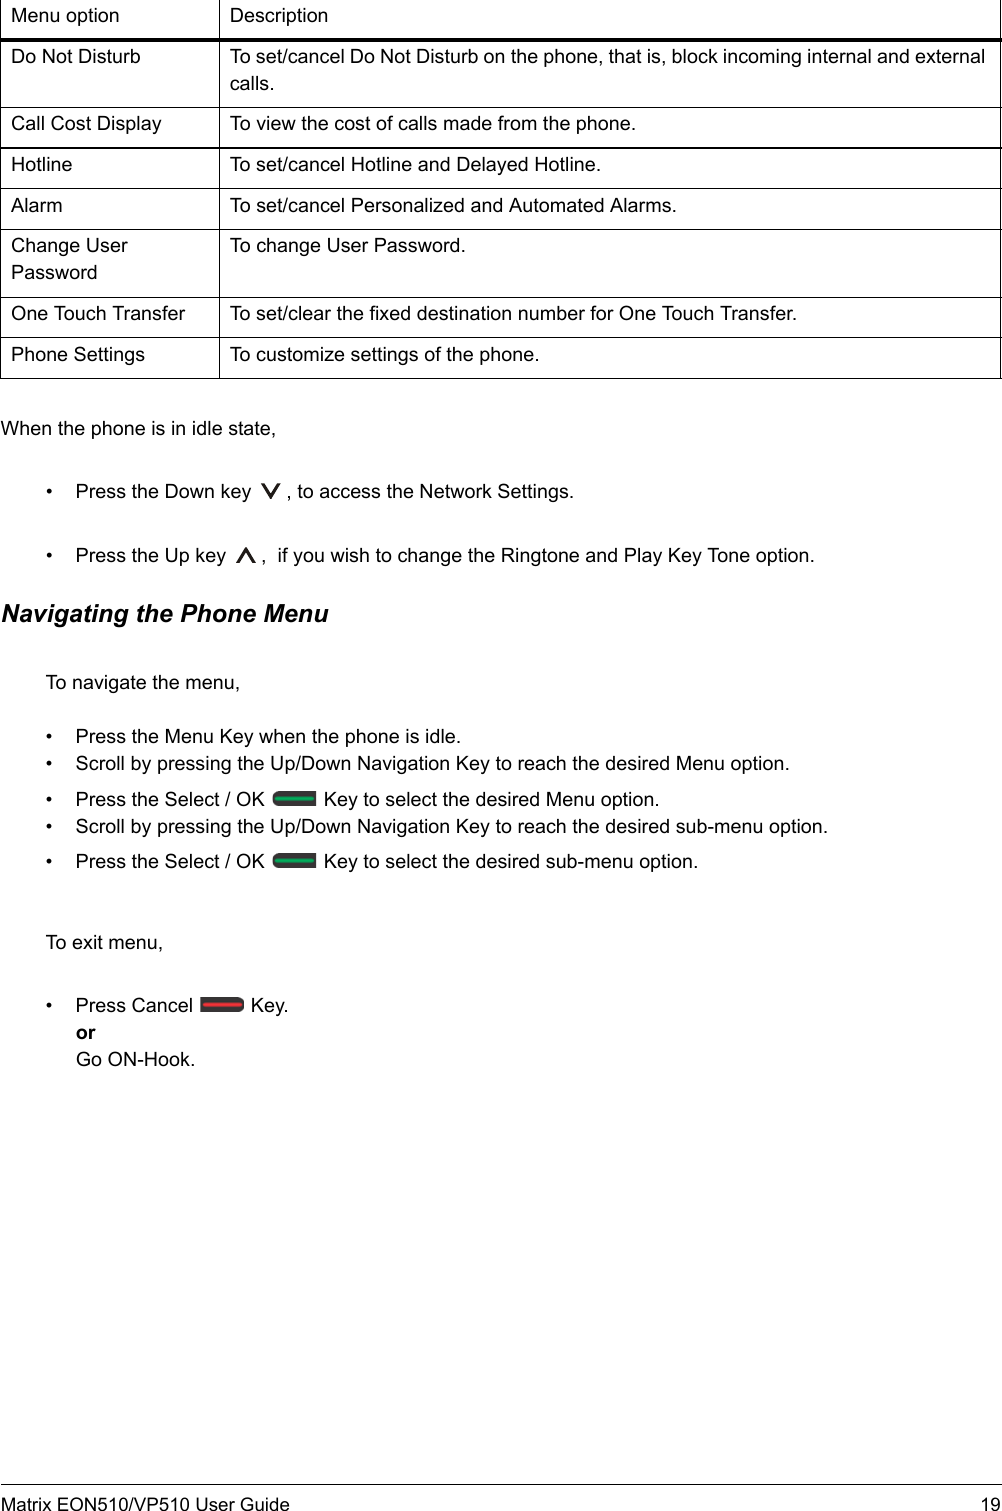


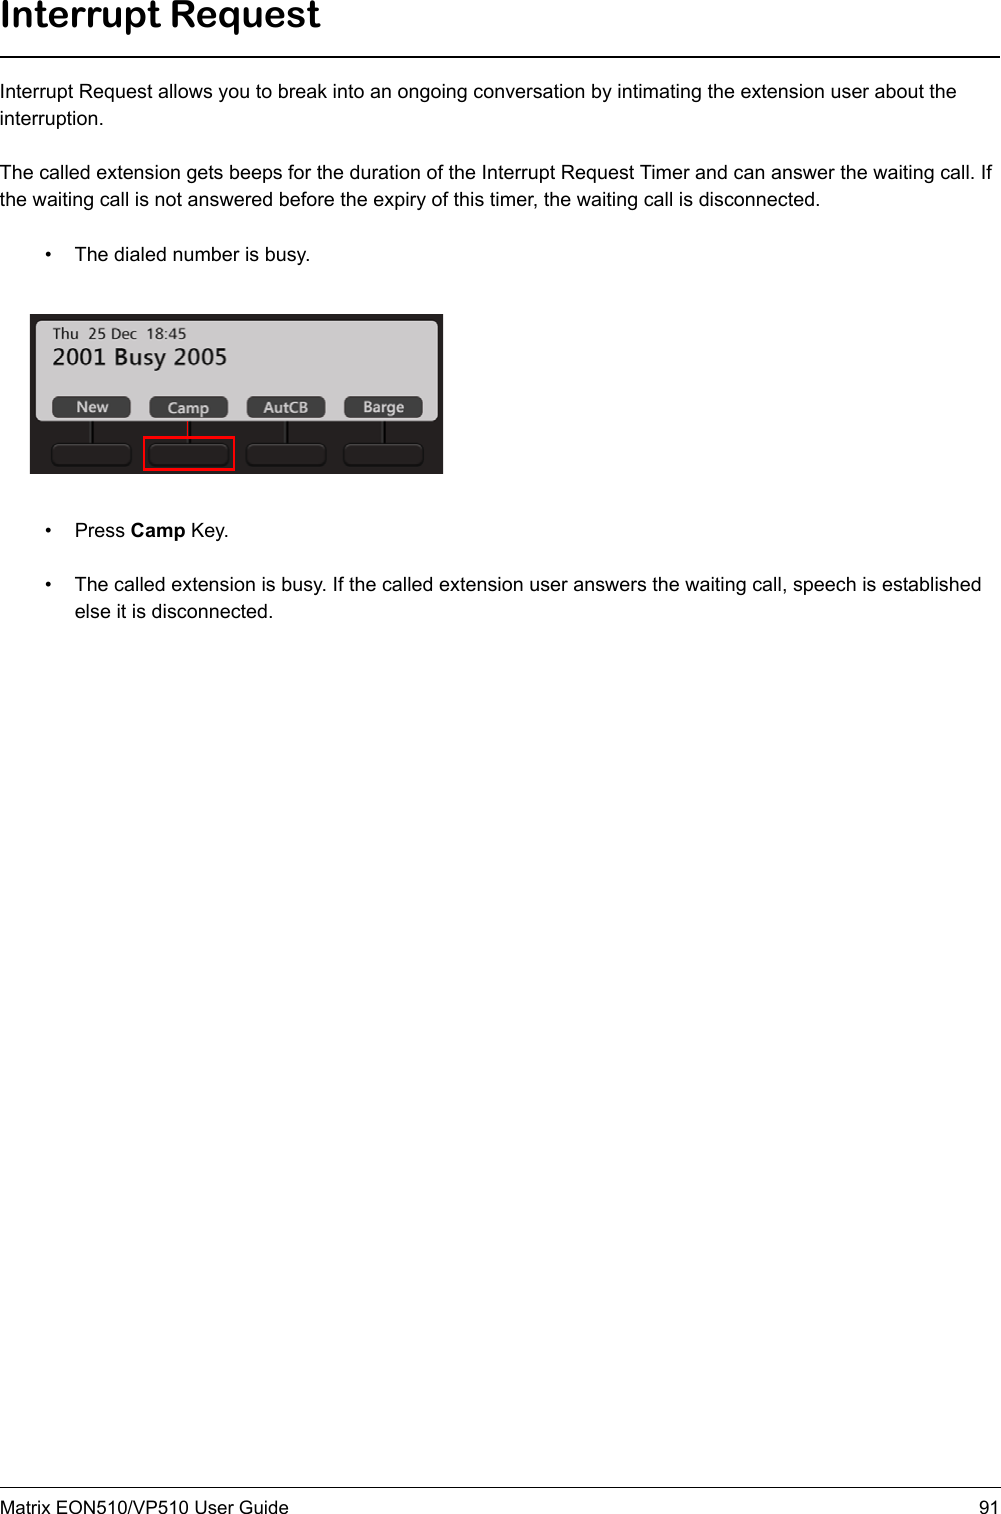


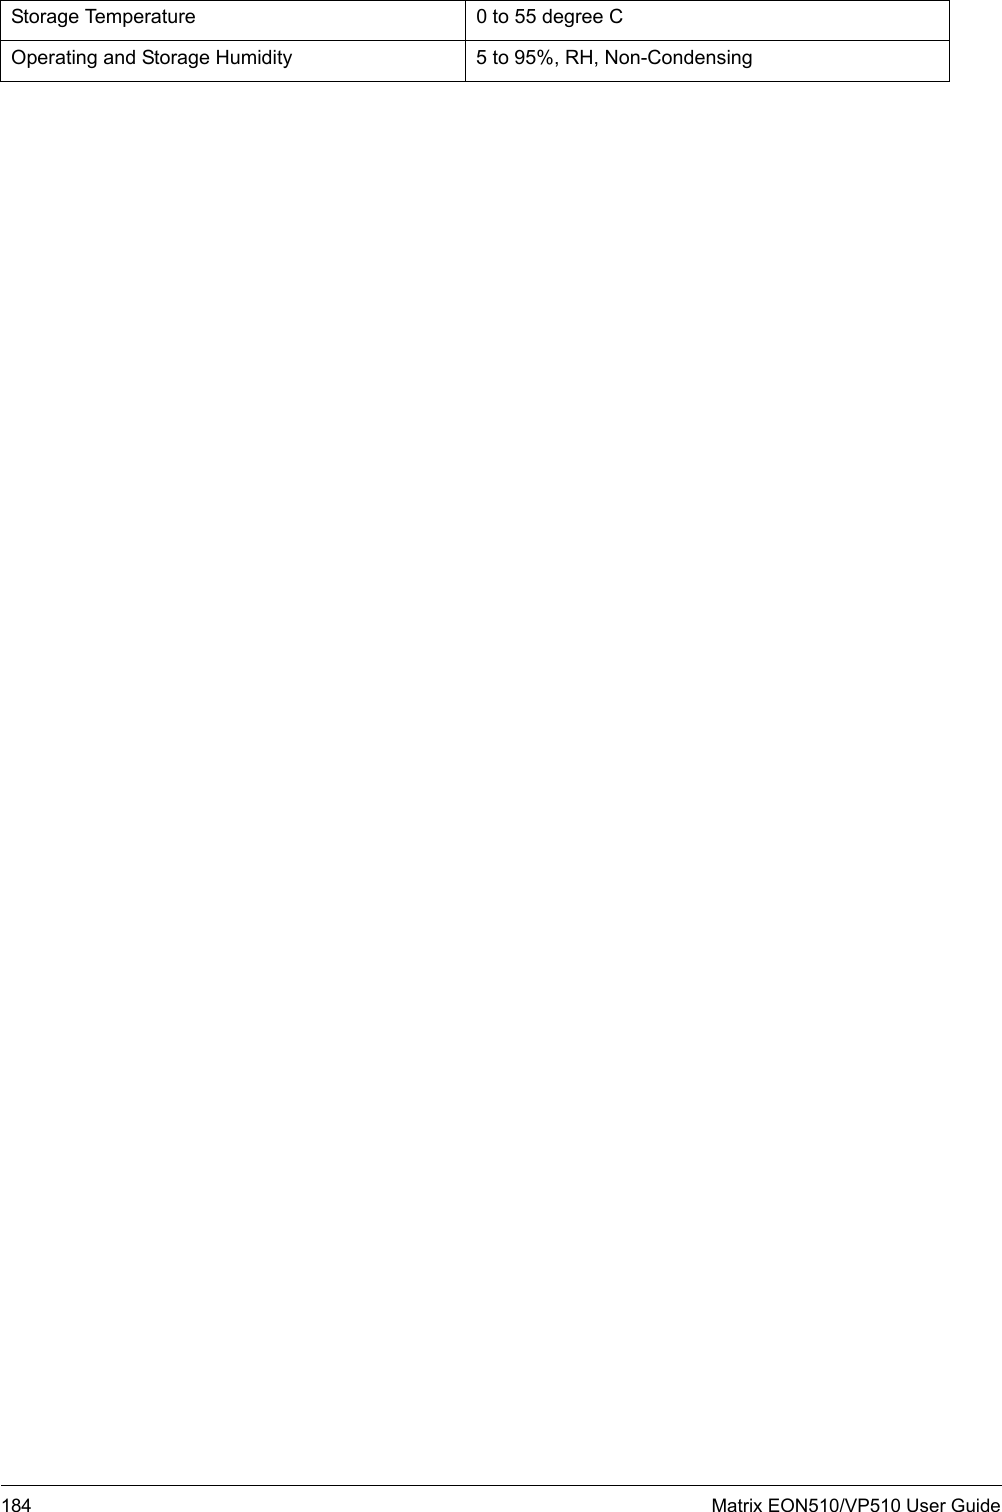
![Matrix EON510/VP510 User Guide 183Technical SpecificationsEON510SPARSH VP510MechanicalWeight 805 gmDimension in mm [L*B*H] 247*183*43Material ABS PlasticInstallation Mounting Wall Mount and Table - TopEnvironmental ConditionsOperating Temperature Range 0 to 45 degree CStorage Temperature 0 to 55 degree COperating and Storage Humidity 5 to 95%, RH, Non-CondensingVoIPVoIP Protocols SIP v2, SDP, RTP, RFC 2833Network Protocol IPv4, TCP, DHCP, PPPoEVoice CODECS G.722 Wideband, G.711 A/µ-Law, G.723, G.729Voice Dynamic Jitter Buffer (Adaptive)Quality of Service Layer 2 CoS, Layer 3 DIFFServ and TOSData Network LAN Port (RJ45), 10/100 Base T (PoE Optional)PC Port (RJ45), 10/100 Base TSecurity TLS, SRTPLCD 240*64 Pixel Graphic LCD DisplayPower SupplyInput 5VDC @2A through External Adaptor (100-240 VAC, 50 - 60 Hz)Power Consumption 2.25W (stand alone)MechanicalWeight 805 gmDimension in mm [L*B*H] 247*183*43Material ABS PlasticInstallation Mounting Wall Mount and Table - TopEnvironmental ConditionsOperating Temperature Range 0 to 45 degree C](https://usermanual.wiki/MATRIX-COMSEC-PVT/VP510/User-Guide-2891763-Page-180.png)