MET METYH1368 BLUETOOTH PORTABLE CD BOOMBOX WITH AM/FM RADIO User Manual
MET INDUSTRIAL LTD BLUETOOTH PORTABLE CD BOOMBOX WITH AM/FM RADIO
MET >
User Manual
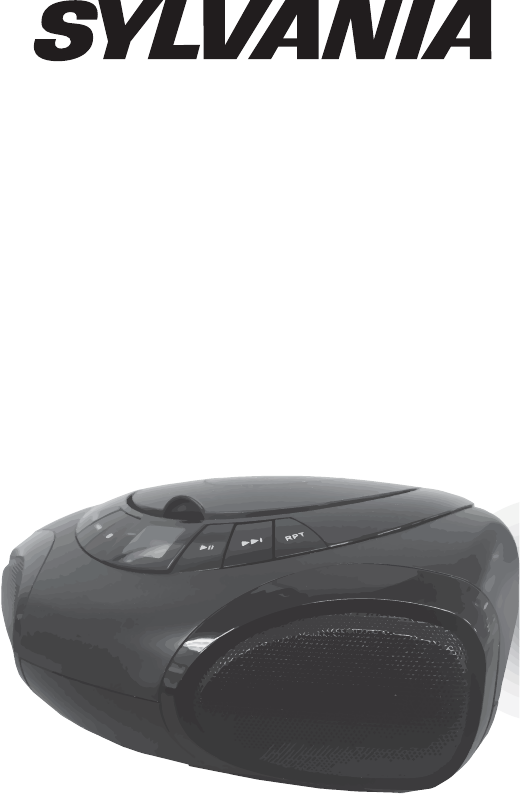
MODEL NO. SRCD1368BT
OWNER'S MANUAL
BLUETOOTH PORTABLE CD BOOMBOX
WITH AM/FM RADIO
PLEASE READ BEFORE USING THIS UNIT
1
This equipment is a Class II or
double insulated electrical
appliance. It has been designed in
such a way that it does not
require a safety connection to
electrical earth.
CLASS1
LASER PRODUCT
This mark indicates this unit belongs to
class 1 laser product.The laser beam
may produce radiation harm to the directly
touching human body.
IMPORTANT SAFETY INSTRUCTIONS
IMPORTANT SAFETY INSTRUCTIONS
2
Use only with the cart, stand, tripod,
bracket, or table specified by the
manufacturer, or sold with the apparatus.
When a cart is used, use caution when
moving the cart/apparatus combination to
avoid injury from tip-over.
12.
Read these instructions – All the safety
and operating instructions should be read
before this product is operated.
Keep these instructions – The safety and
operating instructions should be retained
for future reference.
Heed all warnings – All warnings on the
appliance and in the operating
instructions should be adhered to.
Follow all instructions – All operating and
use instructions should be followed.
Do not use this apparatus near water –
The appliance should not be used near
water or moisture – for example, in a wet
basement or near a swimming pool, and
the like.
Clean only with dry cloth.
Do not block any ventilation openings.
Install in accordance with the
manufacture’s instructions.
Do not install near any heat sources such
as radiators, heat registers, stoves, or
other apparatus (including amplifiers) that
produce heat.
Do not defeat the safety purpose of the
polarized or grounding-type plug. A
polarized plug has two blades with one
wider than the other. A grounding-type
plug has two blades and a third grounding
prong. The wide blade or the third prong
are provided for your safety. If the
provided plug does not fit into your outlet,
consult an electrician for replacement of
the obsolete outlet.
Protect the power cord from being walked
on or pinched particularly at plugs,
convenience receptacles, and the point
where they exit from the apparatus.
Only use attachments/accessories
specified by the manufacturer.
1.
2.
3.
4.
5.
6.
7.
8.
9.
10.
11.
13. Unplug this apparatus during lightning
storms or when unused for long periods
of time.
Refer all servicing to qualified service
personnel. Servicing is required when the
apparatus has been damaged in any way,
such as power-supply cord or plug is
damaged, liquid has been spilled or
objects have fallen into the apparatus, the
apparatus has been exposed to rain or
moisture, does not operate normally, or
has been dropped.
WARNING:To reduce the risk of fire or
electric shock, do not expose this apparatus
to rain or moisture. The apparatus shall not
be exposed to dripping or splashing and that
objects filled with liquids, such as vases,
shall not be placed on apparatus.
Main plug is used as disconnect device
and it should remain readily operable
during intended use. In order to
disconnect the apparatus completely, the
main plug should be disconnected from
the main socket outlet completely.
Battery shall not be exposed to excessive
heat such as sunshine, fire or the like.
14.
15.
16.
17.
18.
IMPORTANT SAFETY INSTRUCTIONS
3
19.
25.
Do not install this equipment in a confined or
building-in space such as a book case or similar
unit, and remain a well ventilation conditions at
open site. The ventilation should not be impeded
by covering the ventilation openings with items
such as newspaper, table-cloths, curtains etc.
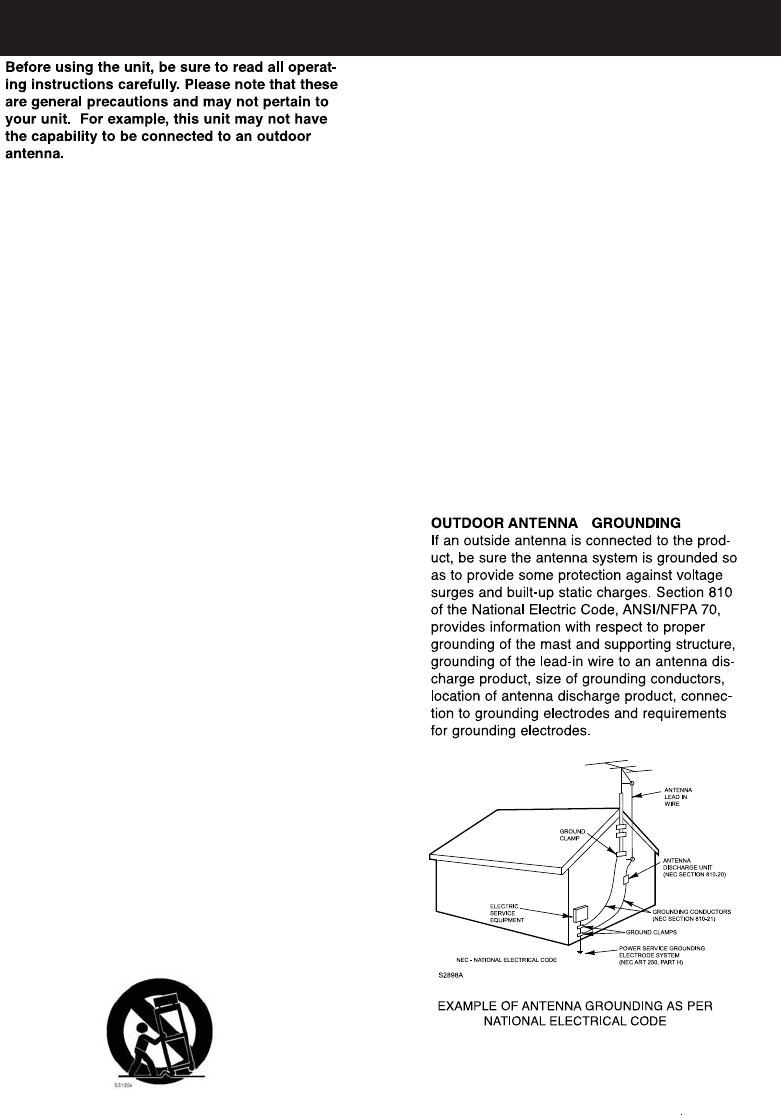
WARNING:Please refer the information on
exterior bottom enclosure for electrical and
safety information before installing or operating
the apparatus.
No naked flame sources, such as lighted
candles, should be placed on the apparatus.
Attention should be drawn to environmental
aspects of battery disposal.
Use of the apparatus in moderate climates.
26.
27.
28.
29.
30.
This device complies with part 15 of the FCC
Rules. Operation is subject to the following two
conditions: (1) This device may not cause harmful
interference, and (2) this device must accept any
interference received, including interference that
may cause undesired operation.
Any Changes or modifications not expressly
approved by the party responsible for
compliance could void the user's authority to
operate the equipment.
Note: This equipment has been tested and found
to comply with the limits for a Class B digital
device, pursuant to part 15 of the FCC Rules.
These limits are designed to provide reasonable
protection against harmful interference in a
residential installation. This equipment generates
uses and can radiate radio frequency energy and,
if not installed and used in accordance with the
instructions, may cause harmful interference to
radio communications. However, there is no
guarantee that interference will not occur in a
particular installation. If this equipment does
cause harmful interference to radio or television
reception, which can be determined by turning
the equipment off and on, the user is encouraged
to try to correct the interference by one or more
of the following measures:
-Reorient or relocate the receiving antenna.
-Increase the separation between the equipment
and receiver.
-Connect the equipment into an outlet on a circuit
different from that to which the receiver is
connected.
-Consult the dealer or an experienced radio/TV
technician for help.
The device has been evaluated to meet general
RF exposure requirement. The device can be
used in portable exposure condition without
restriction.
31.
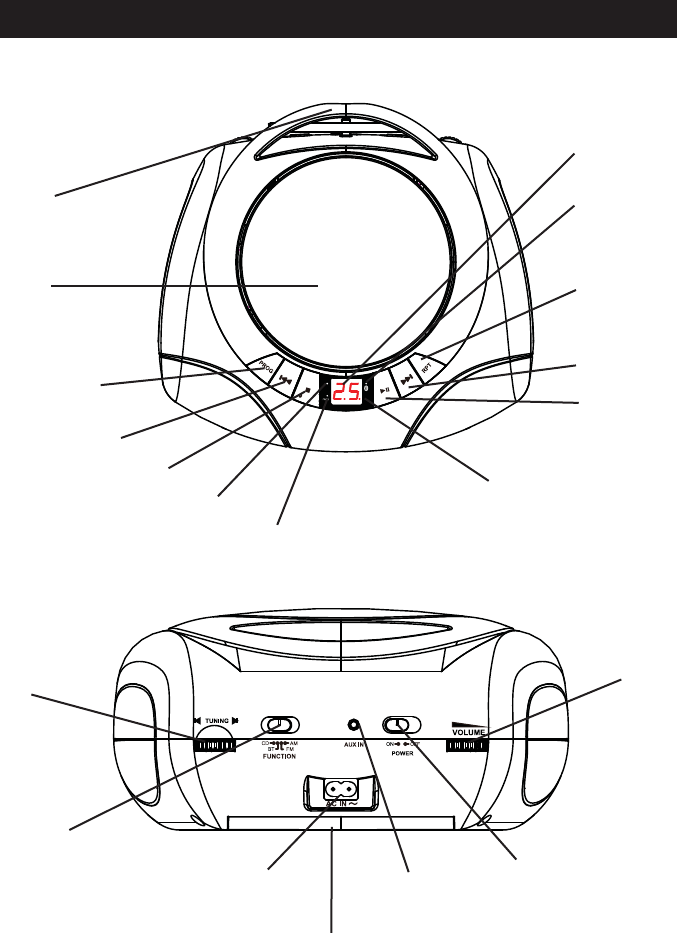
Control Location (Top Views)
HANDLE
CD DOOR
AUX IN JACK
VOLUME KNOB
POWER BUTTON
TUNING KNOB
AC SOCKET
BATTERIES
COMPARTMENT
4
PROGRAM BUTTON
REPEAT BUTTON
PLAY/PAUSE BUTTON
STOP/BLUETOOTH PAIR BUTTON
SKIP BACKWARD BUTTON
BLUETOOTH INDICATOR
STANDBY INDICATOR
TRACK DISPLAY (CD ONLY)
FUNCTION SWITCH
(CD/BLUETOOTH/FM/AM)
PROGRAM INDICATOR
REPEAT INDICATOR
SKIP FORWARD BUTTON
POWER
PLAY/PAUSE
RPT
PAIR
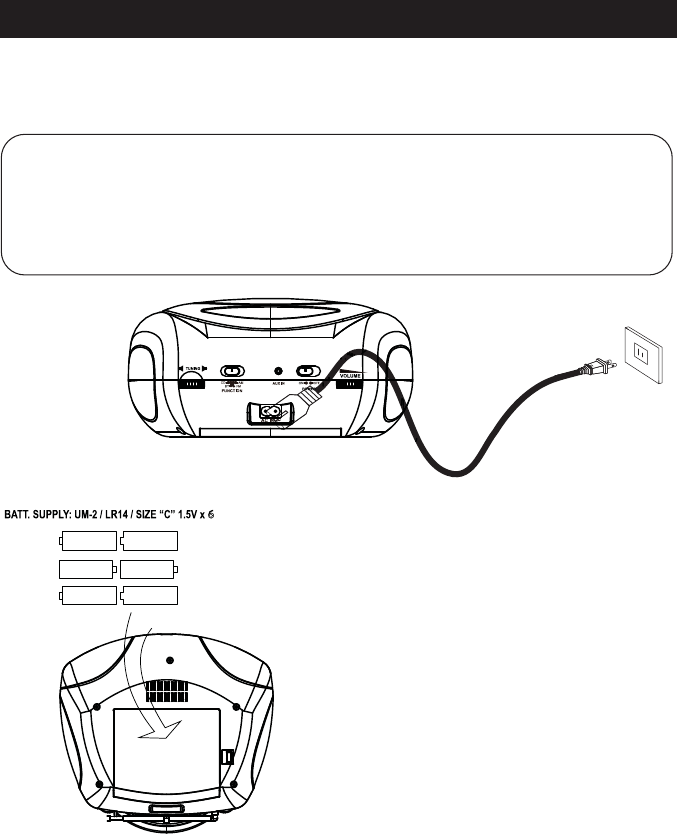
Connecting AC Power
Connect the small end of AC cord to the socket at the back of the main unit and insert the
plug of AC cord into standard AC wall outlet.
Battery Operation
Before installing batteries (not included), ensure
that the unit is disconnected from the mains
supply.
Remove the battery compartment cover on the
bottom of the unit by sliding the battery cover with
the opening direction indicated on the battery
cover.
Install 6 pieces of 1.5V (UM2) batteries (not
included) by following the polarity markings and
then replace the cover.
For battery operation, unplug the AC cord from
the AC wall outlet first and then remove the AC cord from the socket at the back of the main
unit.
Caution:
The unit is designed to operate from mains supply of AC 120V~60Hz. If the plug of
AC cord does not fit properly, try to turn it over and try again. Do not force it.
When the unit is intended for being unused for a long period of the time. Please press
the STANDBY button to turn off the unit and unplug the power cord from the AC wall
outlet. AC
Power Connection
5
6

Switching On for the first time
Plug into AC power or install batteries by following instructions on the previous Power
C
the unit. The STANDBY indicator will be lighted off.
To turn the unit off, slide the POWER switch again to turn the unit off.
onnection section. The STANDBY indicator willl lit. Slide the POWER switch to turn on
Switching between different sources (CD/BLUETOOTH/FM/AM)
After turning on the unit, press and toggle FUNCTION switch to select different sound
sources.
Adjusting sound volume level
After turning on the unit, turn the VOLUME knob to adjust the level of sound volume.
Main Operation
Caution:
There is a danger of explosion if batteries are replaced incorrectly.
Replace batteries with the same type and same brand only.
When the unit is intended for being unused for a long period of the time, press the
POWER button to turn OFF the unit and remove all batteries from the main unit.
6

The unit is designed to play normal music CD disc bearing the correct
identification logo. If the disc does not confirm tothe standard, it may not
be played back properly.
Loading disc
1. Press and toggle the FUNCTION button to switch to CD mode.
2. Press down the OPEN/CLOSE AREA on the CD door on the top of the unit to unlock
and open the CD door.
3. Hold the CD disc by its edge with CD graphical side facing up and put it onto the CD
compartment after the CD door is opened. Make sure that the disc label is facing up.
4. Close the CD door and make sure the VOLUME knob is not in minimum position.
CD playback
After loading the disc, the disc will begin spinning and the total number of the tracks on the
disc will be shown on the display and the first track/file on the CD will be played back
automatically.
Play/Pause Control
To pause playback temporarily by pressing the PLAY/PAUSE button. Music playback will
be paused and the current elapsed track number will be shown on the display and the play
icon will be blinking. Press the PLAY/PAUSE button again to resume playback.
Stop playback
To stop playback, press the STOP button on the unit. The total number of tracks of the disc
will be displayed.
Caution:
Playback of CD-R / CD-RW may depend on recording conditions.
Do not attach a seal or label to either side (the recordable side or the labeled side) of a
CD-R/ RW disc. It may cause malfunction.
Do not load a blank CD-R/ RW disc. It will take over 1 minute to read the disc. The disc
may be damaged if you try to open the CD Door while reading the disc.
CD-ROM
,
CD-I
,
CDV
,
VCD
,
DVD or com
p
uter CDs are not
p
ossible to be read.
Remark:
If there is no disc in the unit, “NO” will be indicated on the display.
If the CD cannot be read
,
“NO” will be indicated on the display.
CD Operation
Skip track
During playback, press the forward or backward SKIP buttons to skip to the next or
previous tracks.
High-speed music search
During playback, press and hold the forward or backward SKIP buttons to skip/search
through the current track at high speed in forward or backward directions. When the SKIP
buttons are released, normal playback speed will be resumed immediately.
7

Repeat playback modes (Repeat 1 / Repeat all)
Repeat the Current Track
Repeat All Tracks
During playback, press the REPEAT button twice to repeat the entire album.
Return to normal playback
Press the REPEAT button until NO repeat indicator is displayed. The normal playback
will be resumed.
During playback, press the REPEAT button once to repeat the current CD track.
Programmed CD playback
This unit can be programmed to play up to 20 tracks in CD mode. Load the music CD disc
onto the CD compartment (without pressing the “PLAY/PAUSE” button)
1. Press PROGRAM button once in the stop mode. “P01” will be shown on the display
and blinking.
2. Press the SKIP buttons to select the desired track to be programmed.
3. Press PROGRAM button again to save the selected track/files.
4. Repeat steps 2-3 to program up to 20 tracks.
5. Press the PLAY/PAUSE button to play the programmed tracks after programming is
completed. The “PROG” indicator will lit.
6. To clear program and resume normal playback, press the STOP button twice during
playback, or open the CD door, or change to next mode to clear the programmed tracks.
Remark:
The unit can store up to 20 tracks in the programmable memories. During the
pro
g
rammed pla
y
back, user can still select the “repeat 1 / repeat all” functions.
CD Operation-Continued
8

• Press the POWER button to turn on the unit.
• Press and toggle the FUNCTION button to select Bluetooth mode. The unit will
search the paired device with the “BLUETOOTH” Indicator lit.
• Press and hold the STOP/PAIR Button for 4~5 seconds. Then the “BLUETOOTH”
Indicator is flashing, the unit will goes into Pairing/Discoverable mode.
• Turn on the Bluetooth function of your Bluetooth device and enable the search or
scan function to find the unit.
• Select "SRCD1368BT ecived eht morf"li ecived ruoy no sraeppa ti nehw tssc fI .neer
required, enter the pass code “0000” to pair (link) the unit with your device.
• After successfully pairing (linking) the Bluetooth enabled device the “BLUETOOTH”
Indicator steadily and a short beep will heard.
Note: If you can’t pair the unit with your Bluetooth enabled device, you can try to turn Off &
On the power of your unit to solve the problem.
The unit is designed to receive FM Stereo / FM and AM radio bands.
1. Switch and toggle the FUNCTION button on the top of the unit to switch to AM
or FM mode.
2. Adjust the TUNING knob on the top of unit to tune the frequency of desired radio
station.
3. To turn off the unit power, press the STANDBY button to switch off the unit.
Remark:
The unit has built-in AM ferrite bar antenna, which can provide adequate reception in
most areas. If the AM reception is weak, try to adjust the location of the unit or
relocatethe unit to improve the reception. If the FM reception is weak, try to adjust the
length and the angle of the XQLW to improve the signal reception.
1. If the unit has never been paired with a Bluetooth device before, you need to follow the
pairing instructions below to link the SRCD1368BT with your Bluetooth device.
Bluetooth Operation
Radio Operation
9

1. Plug into a 3.5mm audio cable (not included) into your external music player and
connect the other end (3.5mm jack) into the AUX IN jack on the top of the unit.
2. Make sure your external music player is turned on and start music playback on the
music player
3. Adjust VOLUME knob to control the sound level of music playback from the speakers
on the unit.
Power Output. . . . . . . . . . . . . . . . . . 1.5 watt RMS x 2 channels
AC Power . . . . . . . . . . . . AC120V~60Hz
BatterySize . . . . . . . . . . . . . . . .UM- or &-Size batteries x 6PCS
Radio Frequency. . . . . . . . . . . . . . . FM: 87.5 – 108MHz , AM: 520- 1710 kHz
Setting up (AUX IN) connection
AUX-IN jack will allow you to connect external music player or external sound source to the
main unit.
AUX IN Operation
Specifications
10