Medicalgorithmics PECGT-III Pocket ECG Monitor User Manual Part 2 092414
Medicalgorithmics S.A. Pocket ECG Monitor Users Manual Part 2 092414
UserManual.wiki
>
Medicalgorithmics
>
PECGT-III User Manual
>
Users Manual Part 2 092414
Contents
1.
Users Manual Part 1 092414
2.
Users Manual Part 2 092414
Users Manual Part 2 092414
Navigation menu
Upload a User Manual
Namespaces
Wiki Guide
HTML
PDF
Info
Views
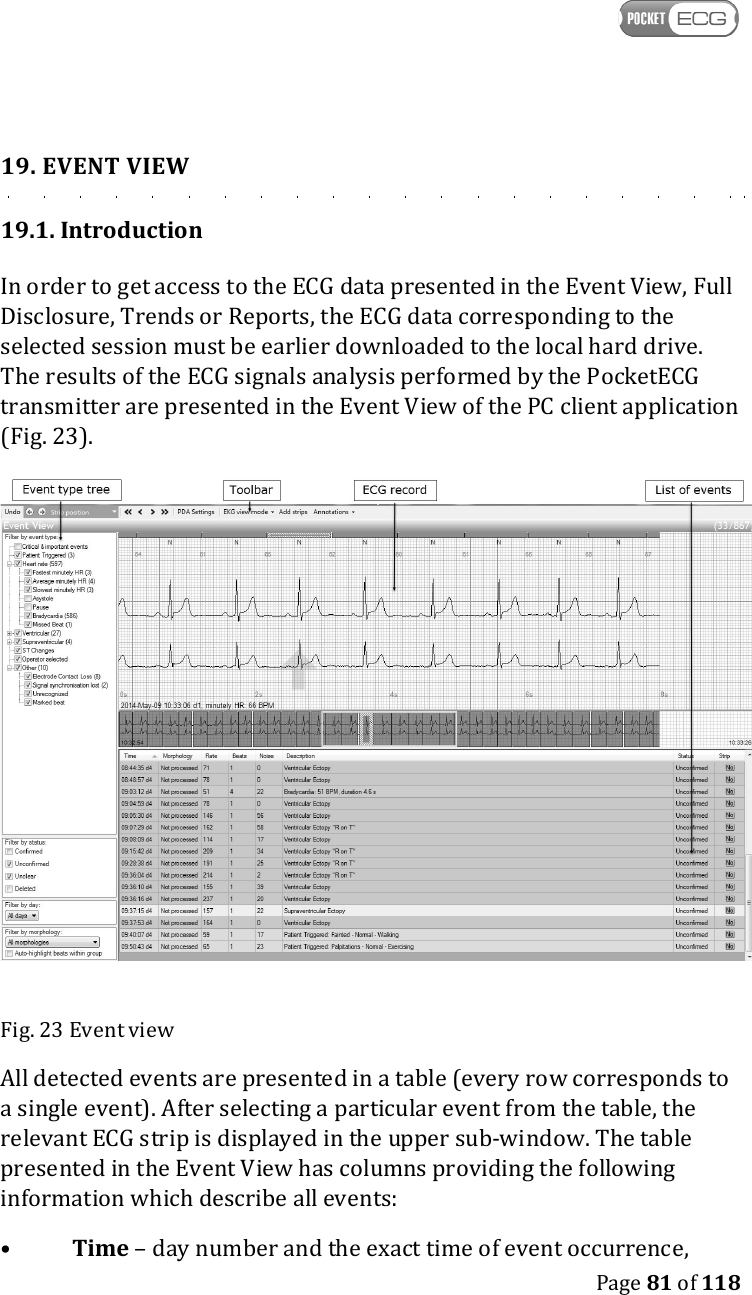
User Manual
Discussion / Help
Navigation
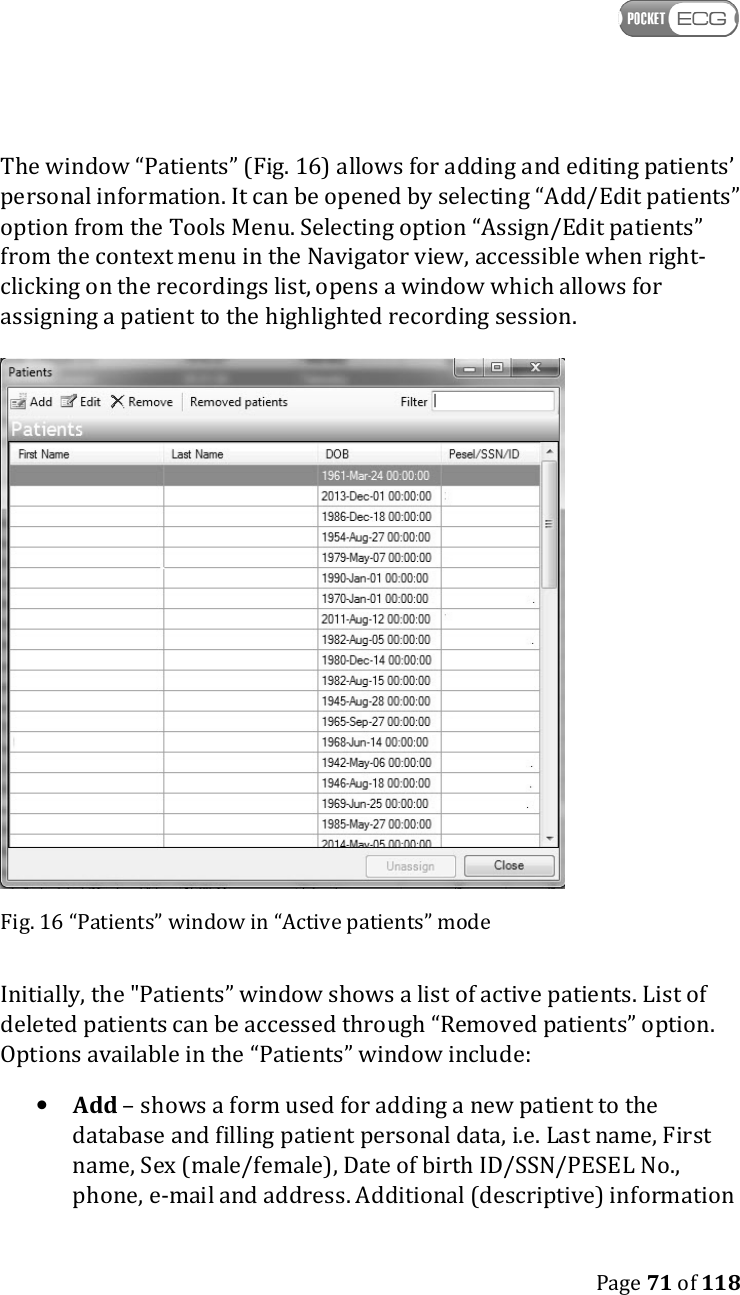
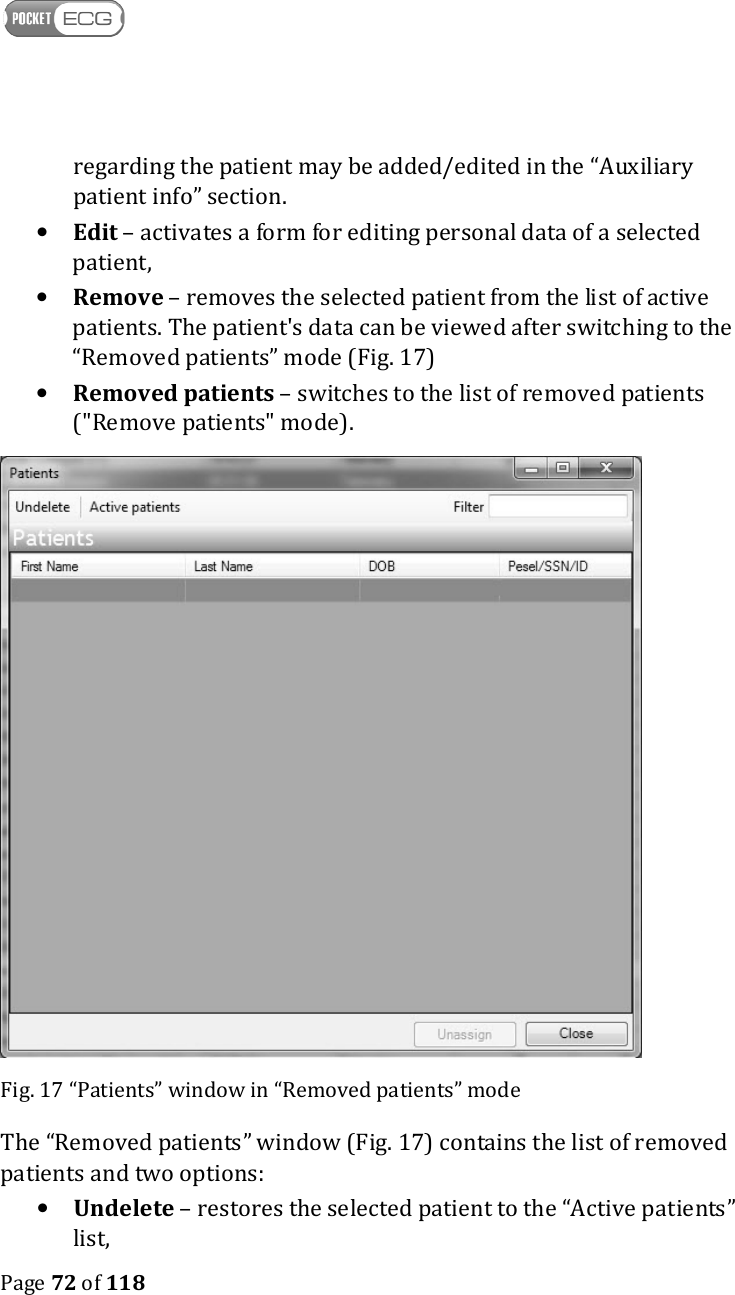
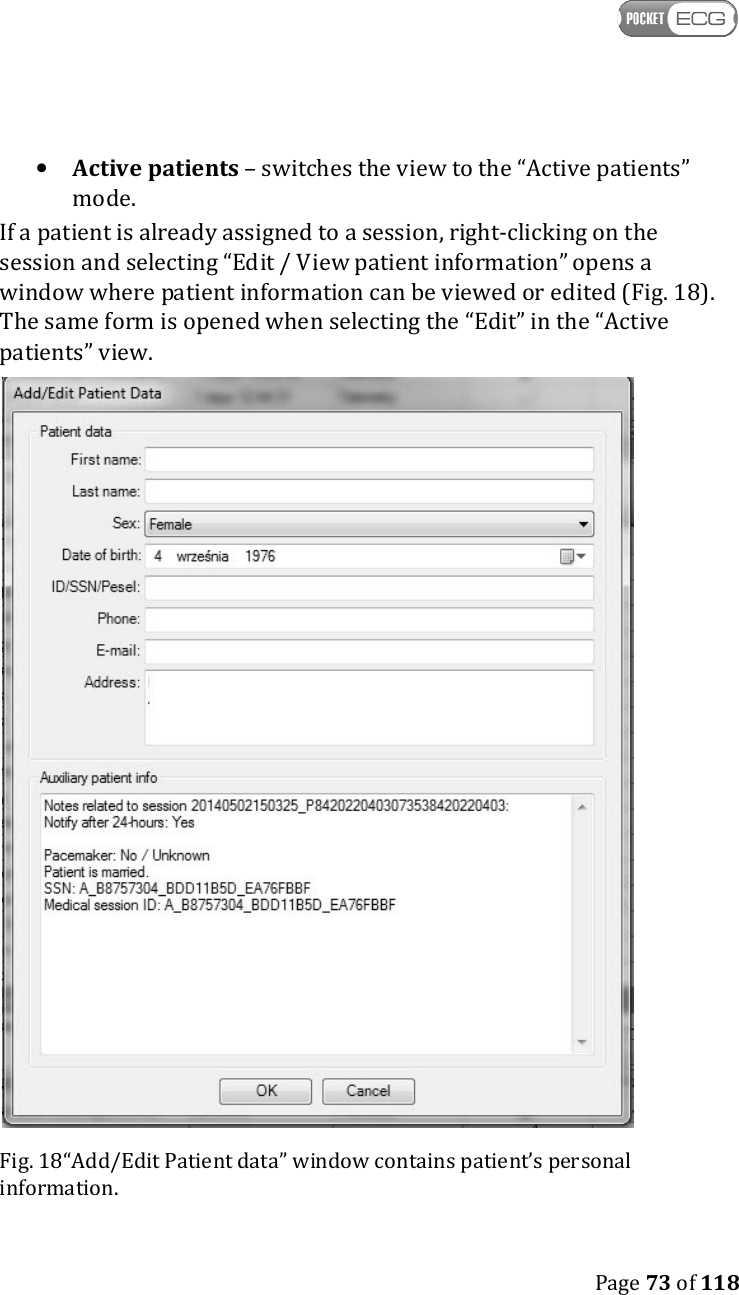
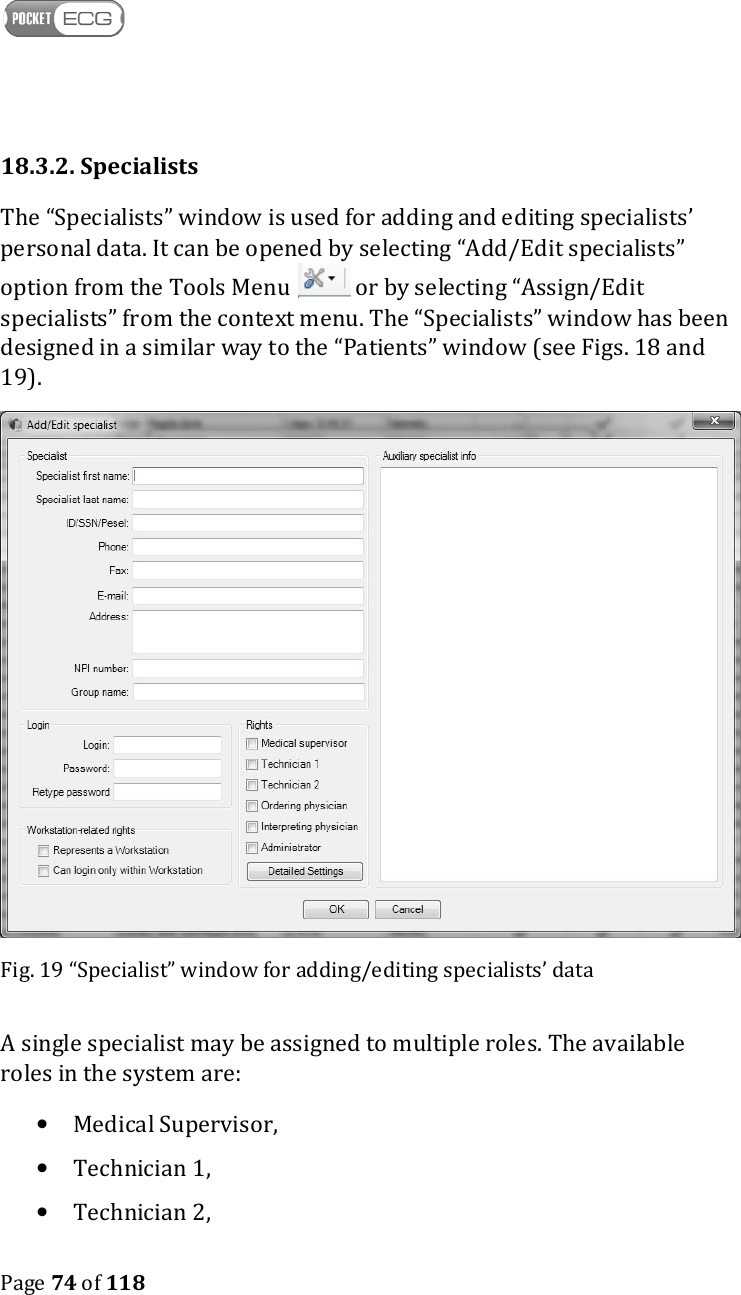

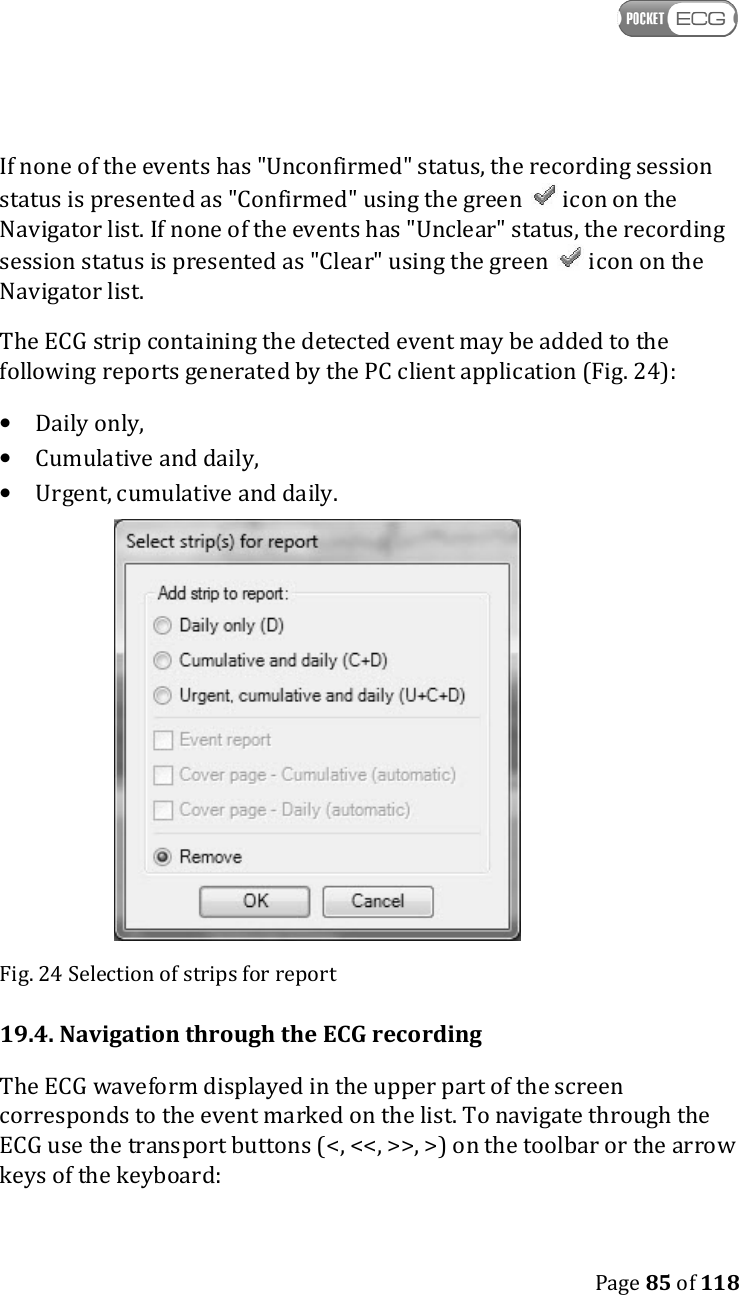

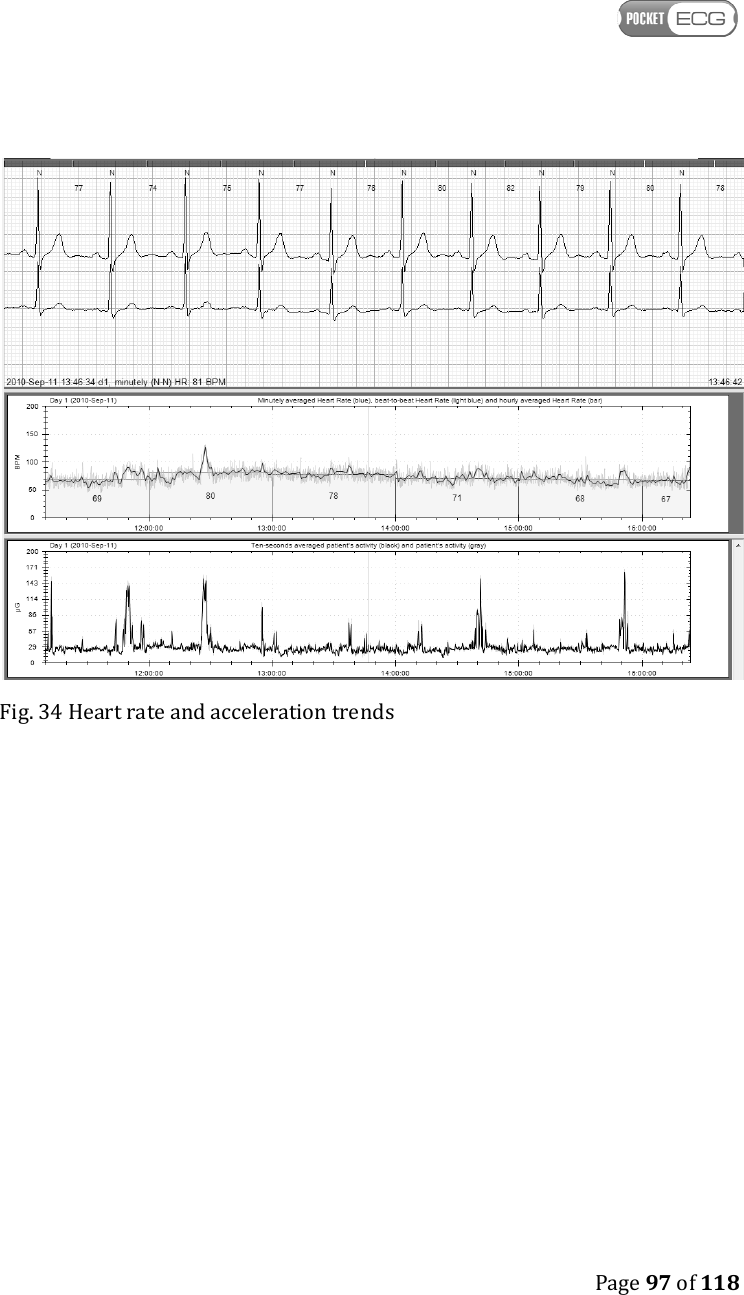
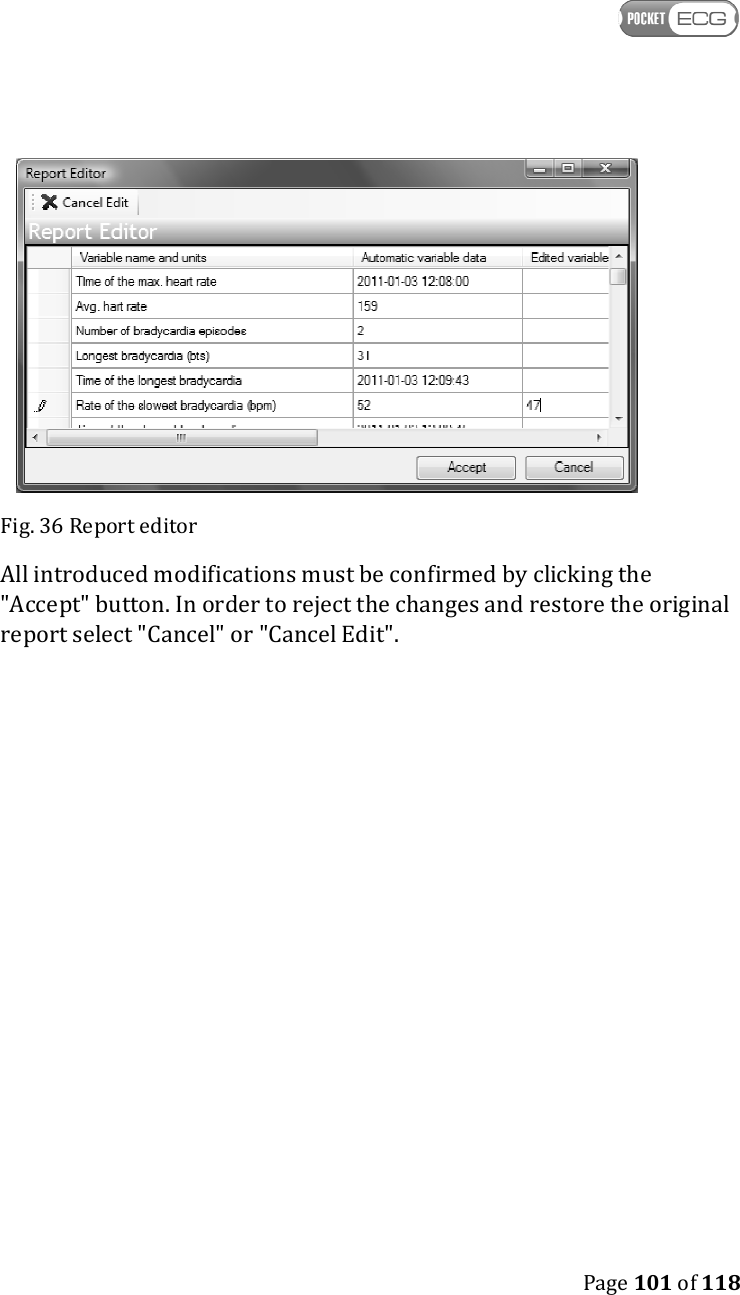

![Page 107 of 118 has been successfully started on the PocketECG transmitter, but it is not listed in the PocketECG client application. view' → About → Session info- the '[OK]' text string indicates that the wireless connection between PocketECG transmitter and remote server has been successfully established. If instead of '[OK]' an error code is displayed in the brackets, the transmitter cannot connect to the remote server. Ensure that the Internet connection is properly configured on the phone and that it is within the mobile network range. If the '[OK]' status is displayed and the newly started recording session still cannot be found in the PocketECG Client application, the PC operating PocketECG Client does not have an active Internet connection. Consult your PocketECG distributor or service provider for support. The recording session has been finished, but the mobile phone network is not working (ECG data cannot be transmitted) or internet is inaccessible due to its infrastructure failure. Finish the recording session and remove SD card from the PocketECG transmitter. Use micro SD card reader equipped with USB interface and connect it to the PC operating the PocketECG Client application and download the ECG data from the SD card to the local hard drive (refer to subsection 18.7). The PocketECG Client application cannot communicate with the remote server - the ECG data cannot be downloaded. Refer to subsection 17.1](https://usermanual.wiki/Medicalgorithmics/PECGT-III.Users-Manual-Part-2-092414/User-Guide-2432929-Page-42.png)