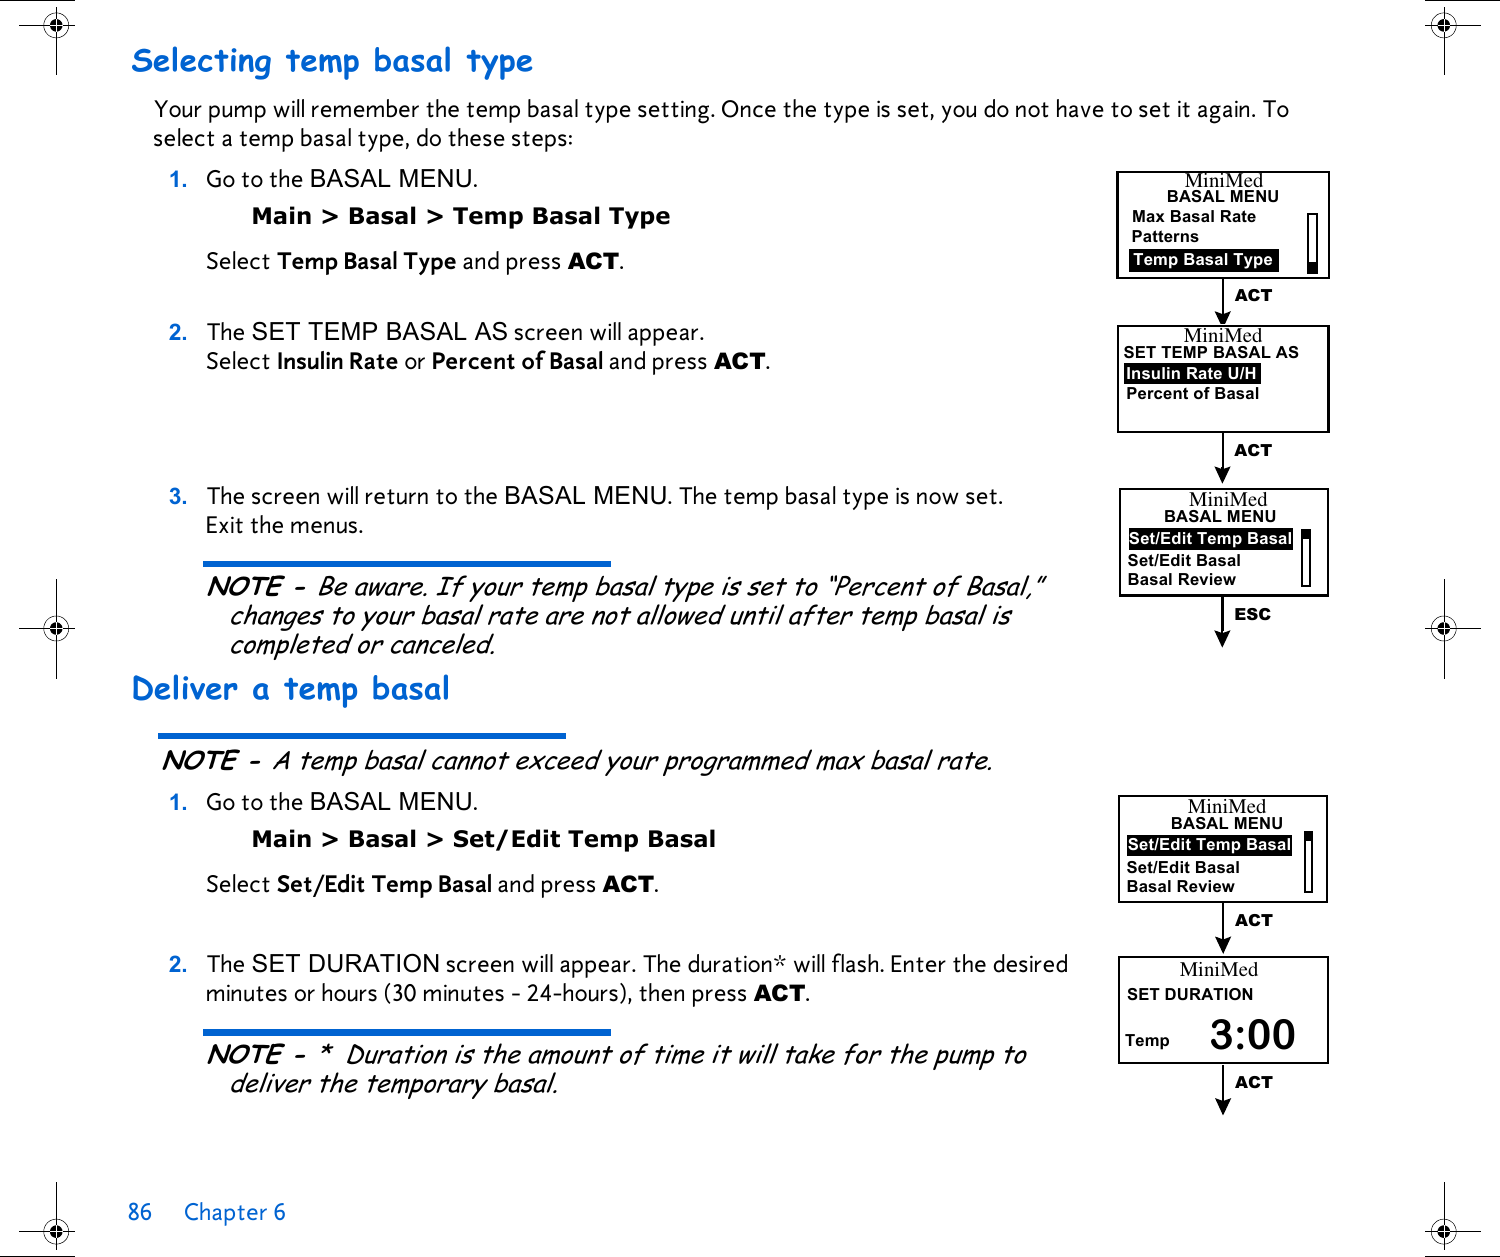
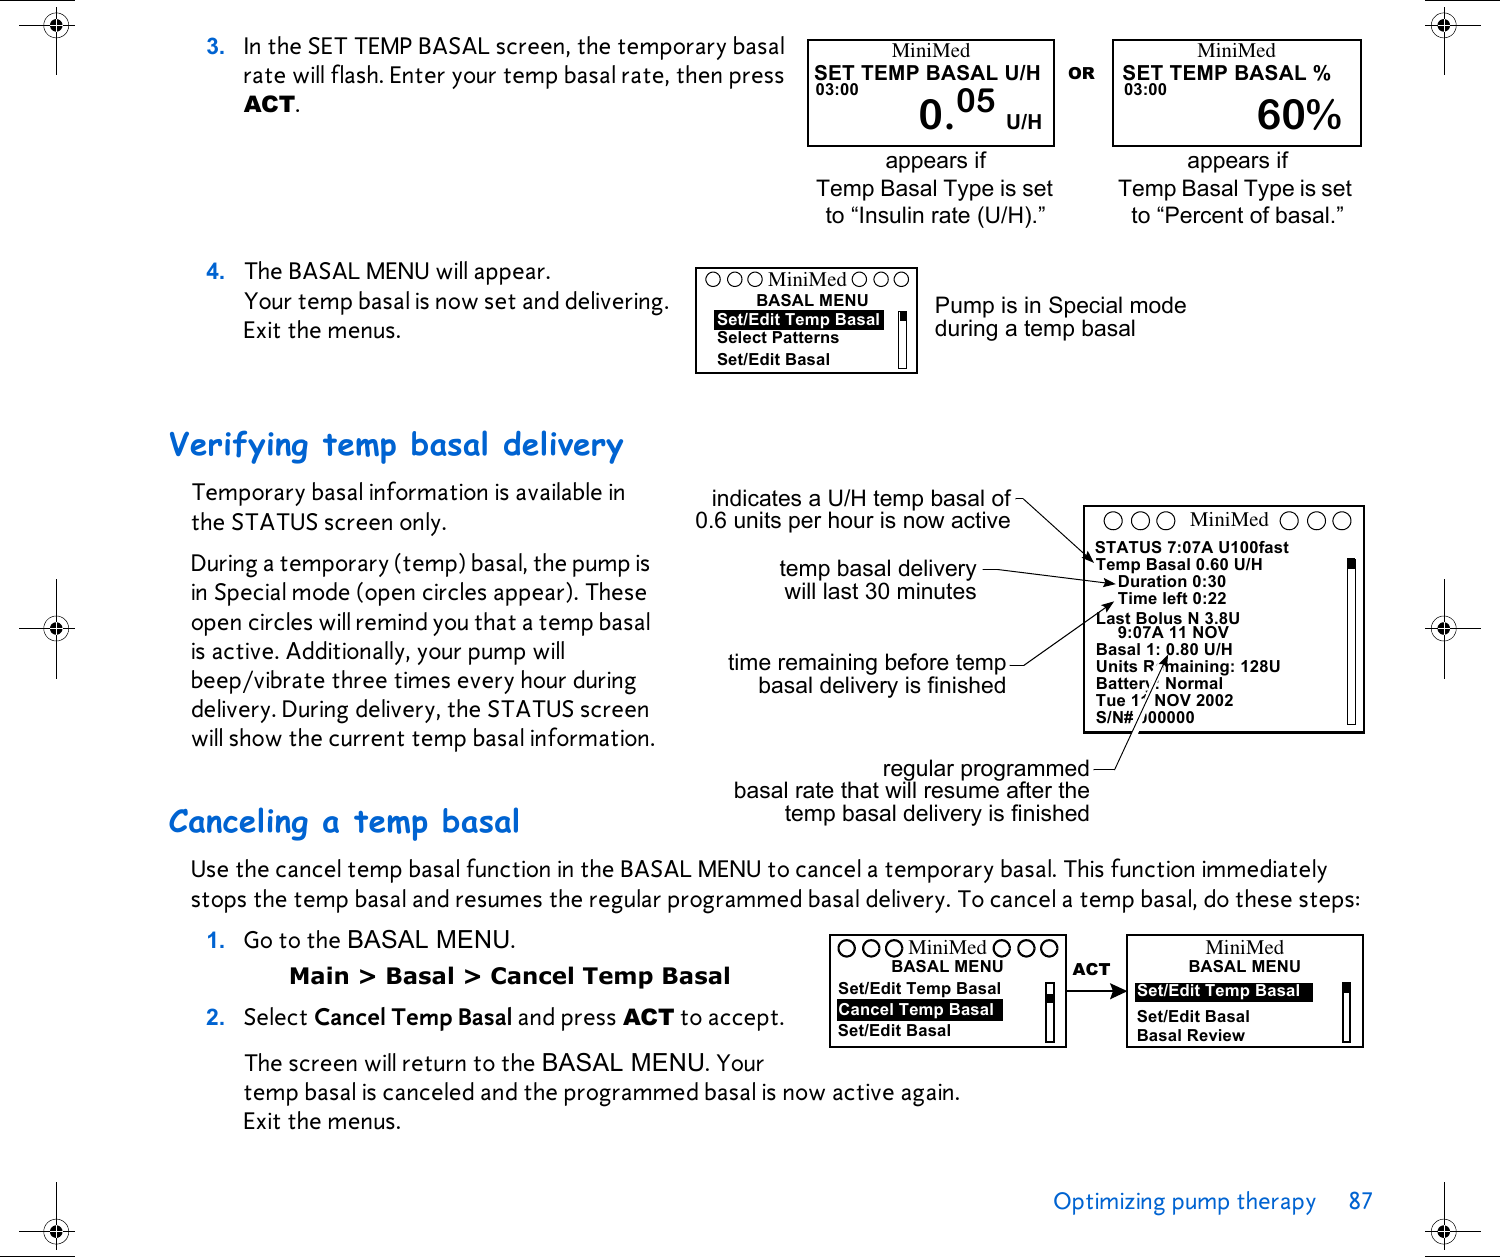
Medtronic MiniMed 712 Paradigm 712 User Manual Mp6024914 012 a
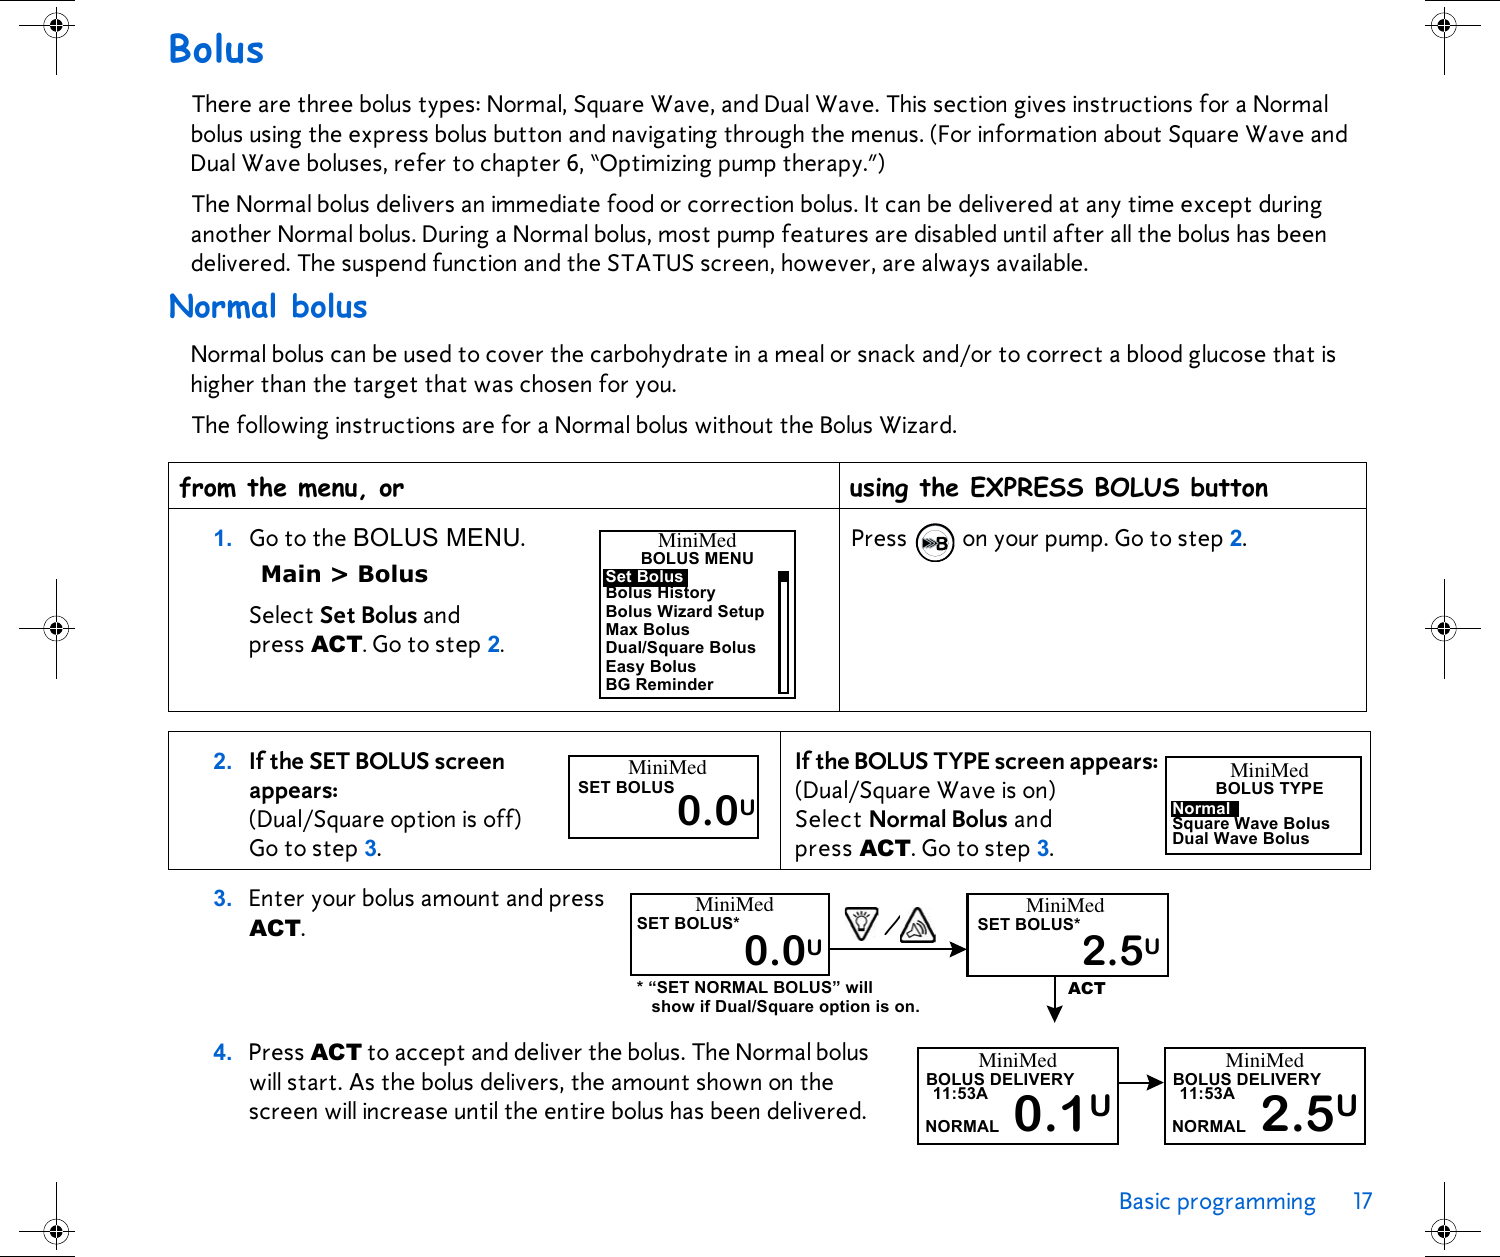
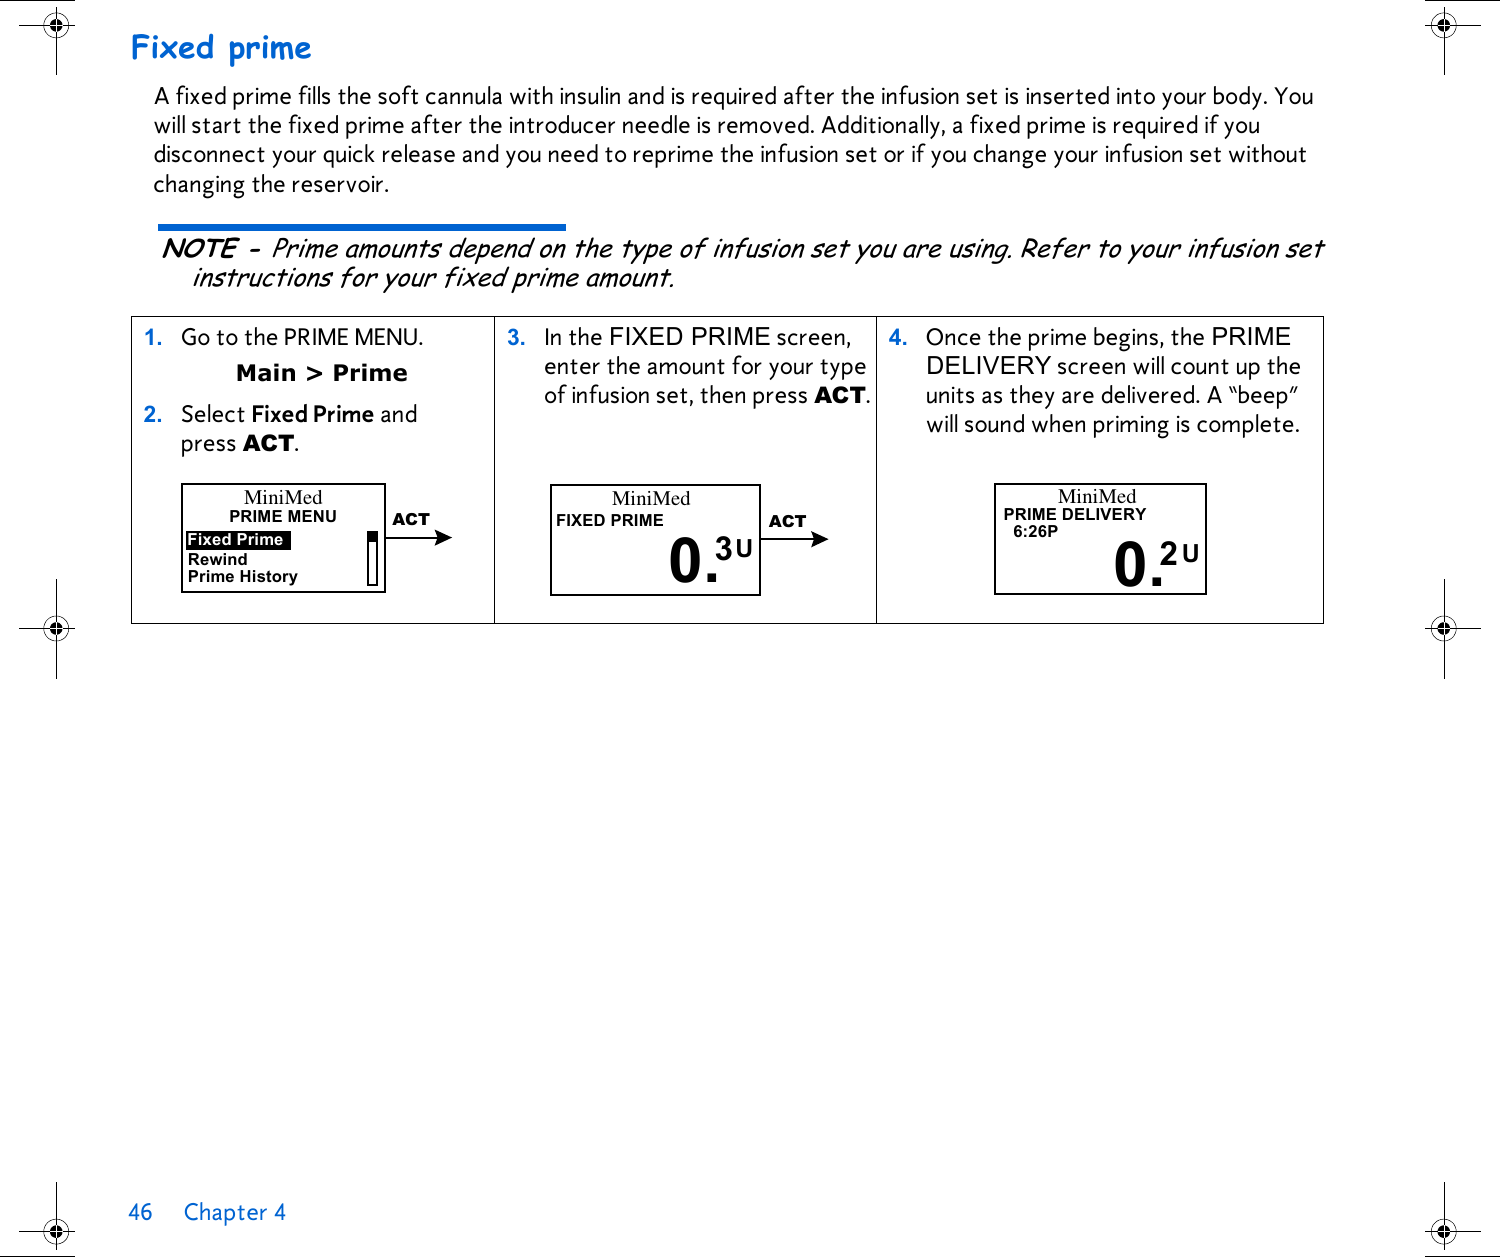
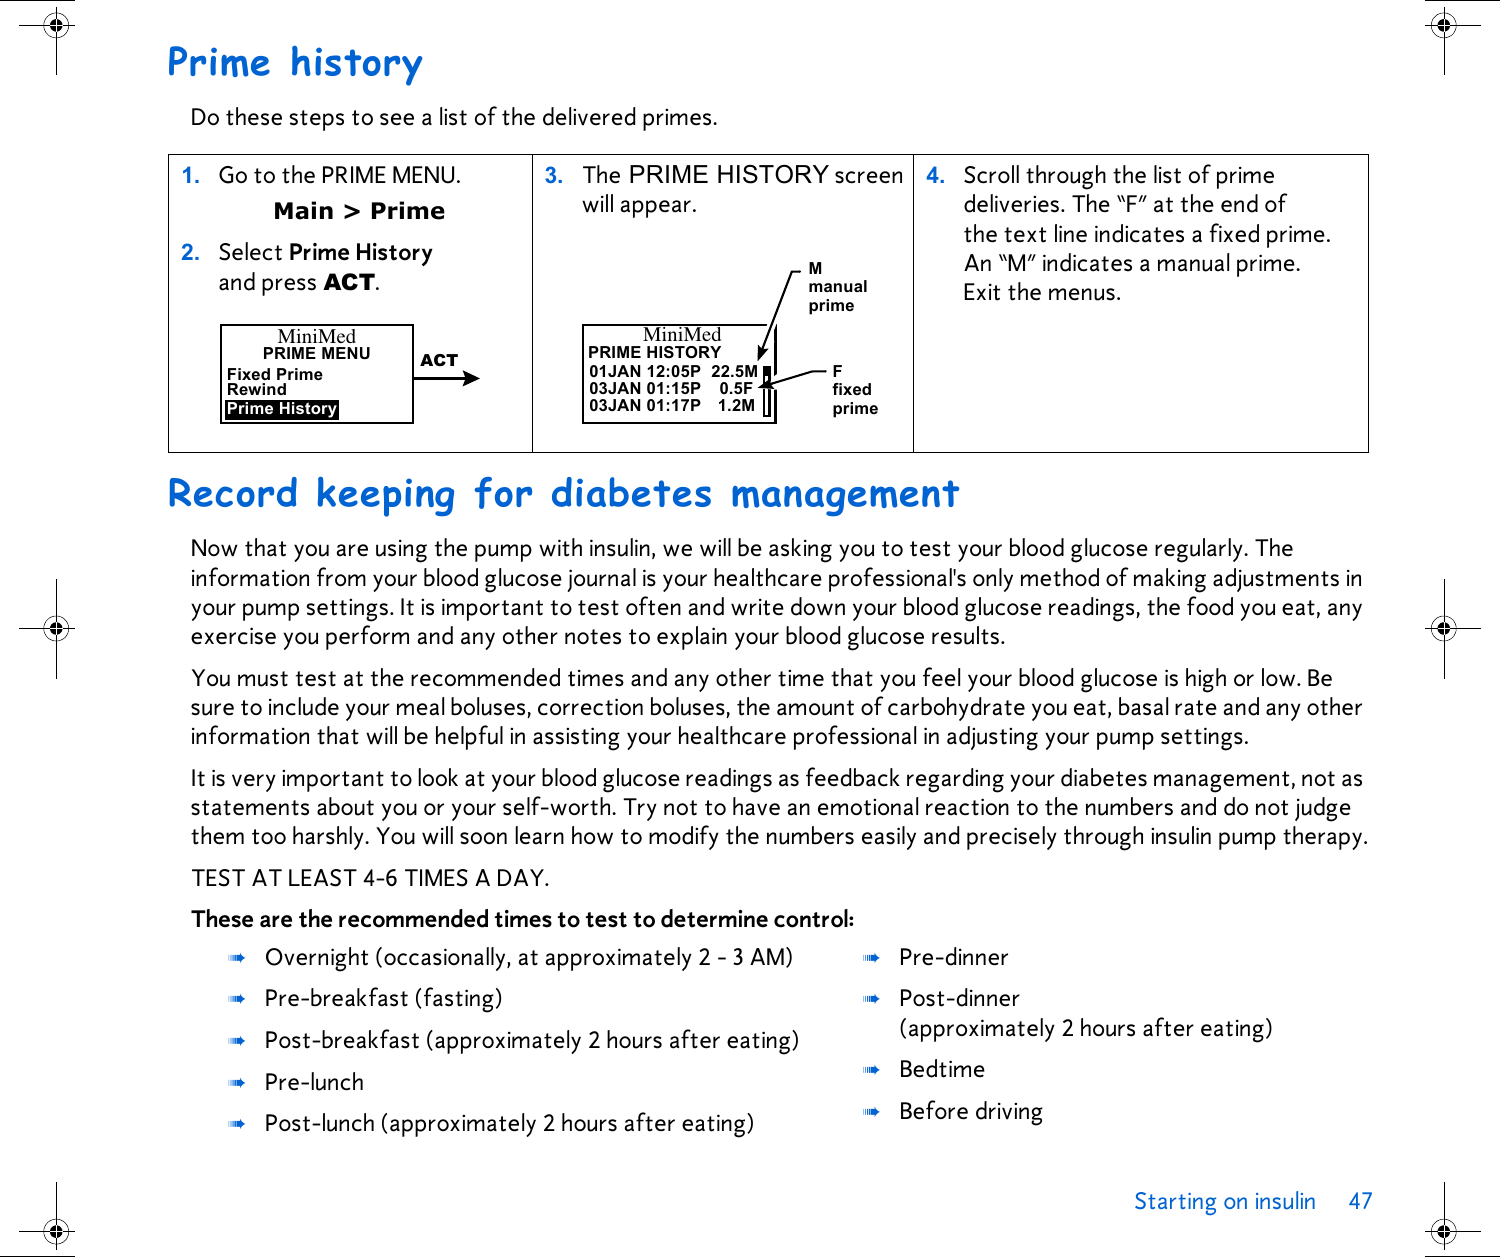
Medtronic MiniMed, Inc. Paradigm 712 Mp6024914 012 a
UserManual.wiki
>
Medtronic MiniMed
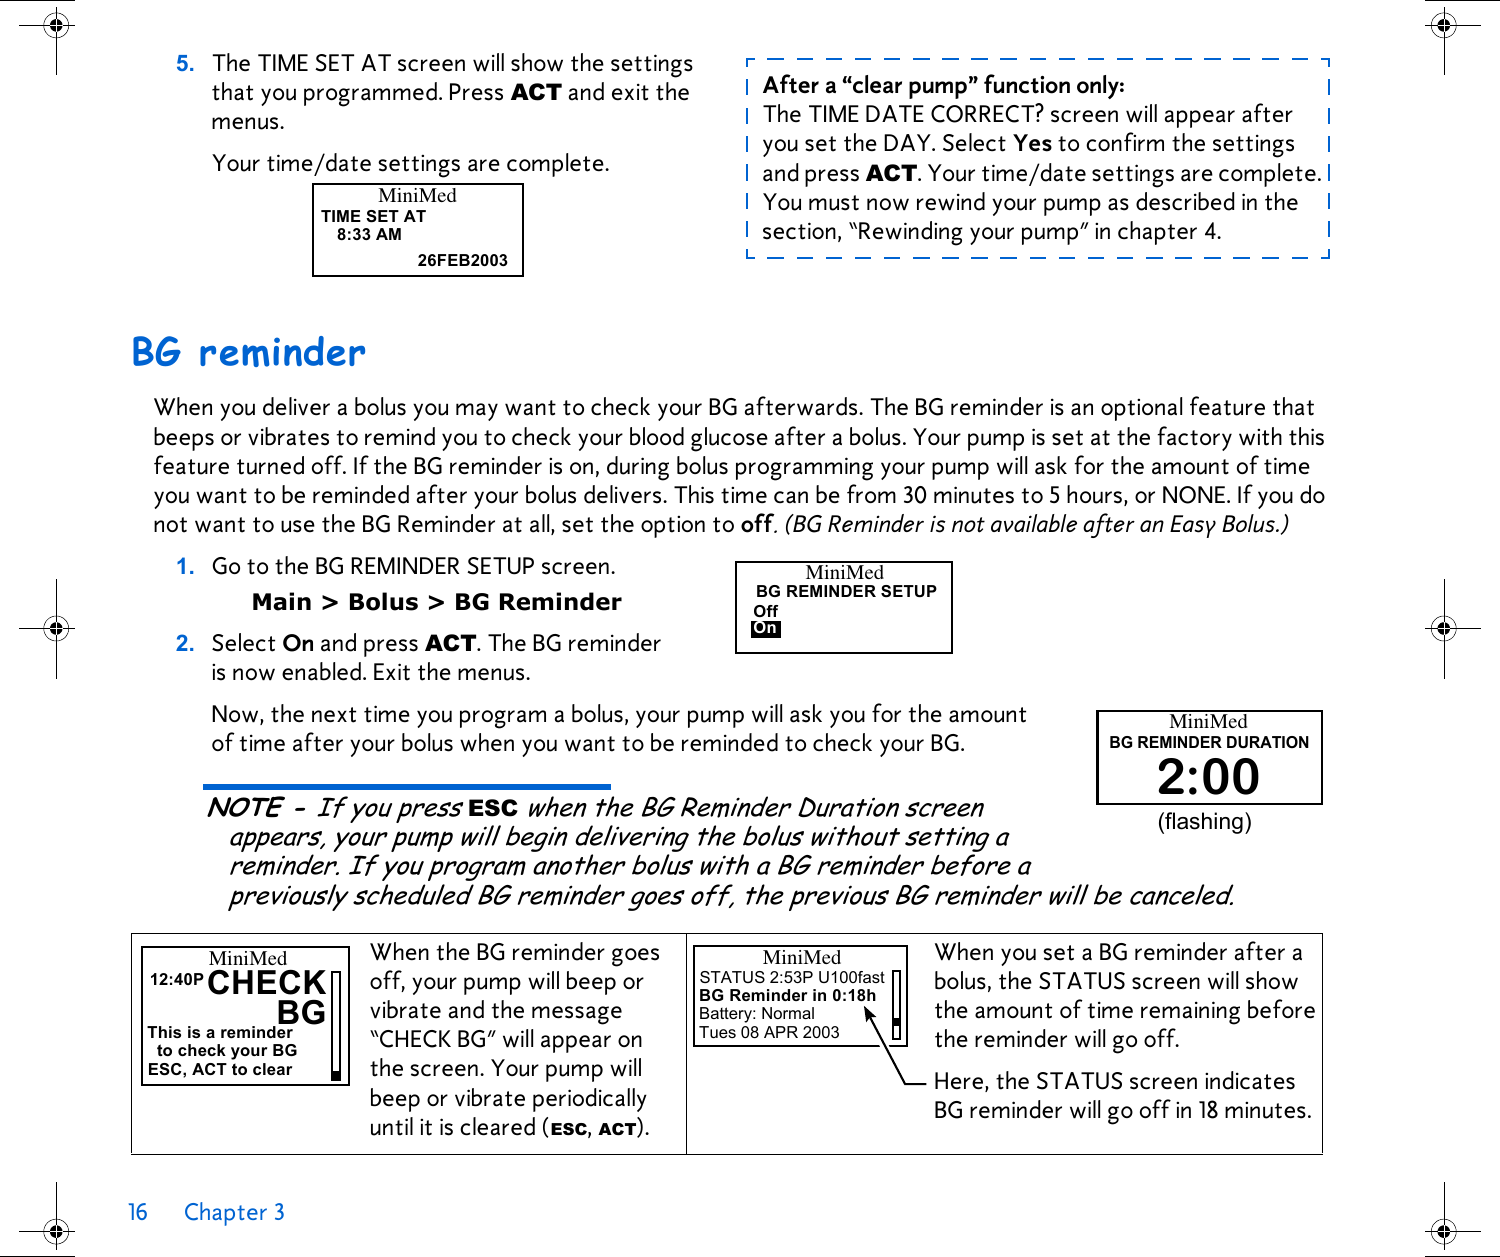
>
712 User Manual
manual
Navigation menu
Upload a User Manual
Namespaces
Wiki Guide
HTML
PDF
Info
Views
User Manual
Discussion / Help
Navigation


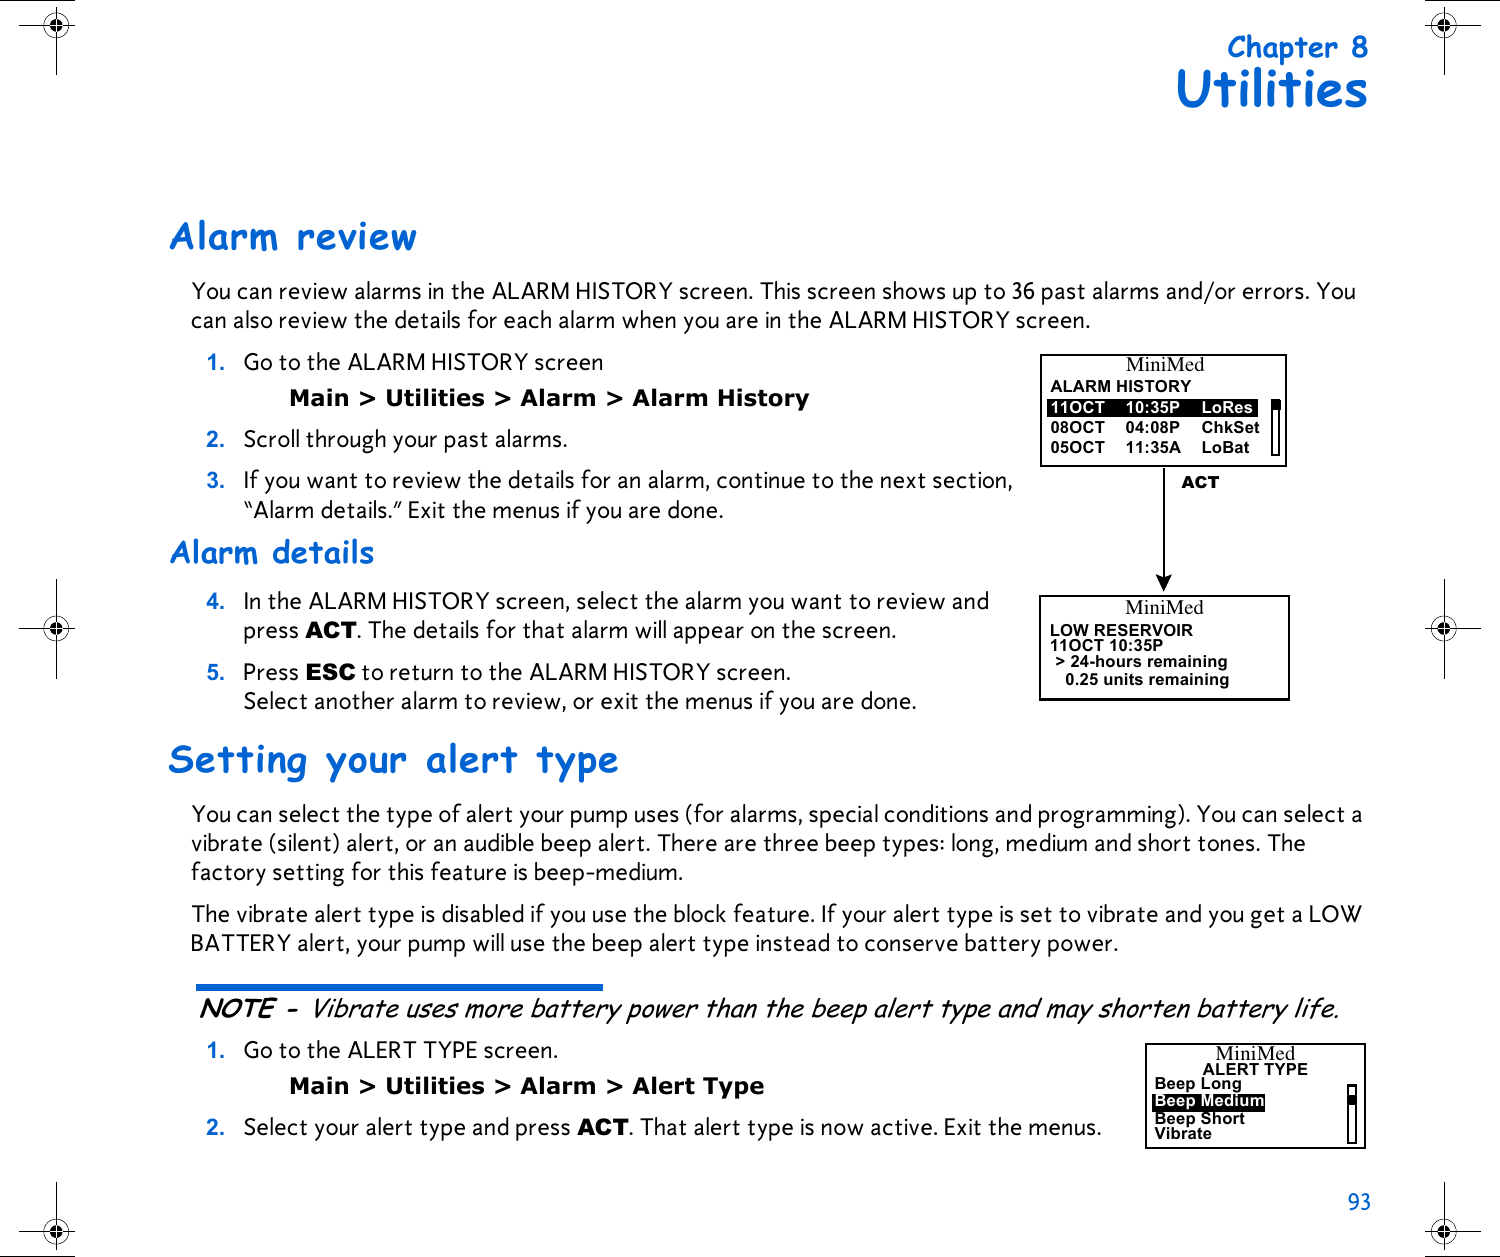
![6 Chapter 2 Install batteryMedtronic MiniMed designed the pump to only accept a NEW battery. As a safety measure, if you install a battery that does not have full power, the “failed batt test” alarm will sound. The pump uses one AAA alkaline battery.1. Use the edge of a quarter to remove the battery cap. Turn the cap in a counter-clockwise direction. 2. Put the battery in the pump with the negative end [(-) symbol] going in first. Check the label on the back of the pump to make sure the battery is inserted correctly.NOTE - Do not use batteries that have been in cold storage (i.e., in the refrigerator or your car in the winter).3. Place the battery cap on the pump so that the slot is aligned in the orientation shown here: 4. Turn the battery cap clockwise 4 half-turns so the slot is aligned horizontally with the pump as shown here: Do NOT apply force when you turn the cap. CAUTION: Do not use a rechargeable or carbon zinc battery in your pump. A new AAA Alkaline Energizer battery is strongly recommended. The use of any other battery type may not offer the same battery performance.CAUTION: Do NOT over-tighten the battery cap. You should not turn the cap more than four (4) half-turns. If you over-tighten the cap you may not be able to remove it, and you can damage your pump. Align the cap slot horizontally with the pump.one half-turnone half-turn](https://usermanual.wiki/Medtronic-MiniMed/712/User-Guide-365712-Page-30.png)


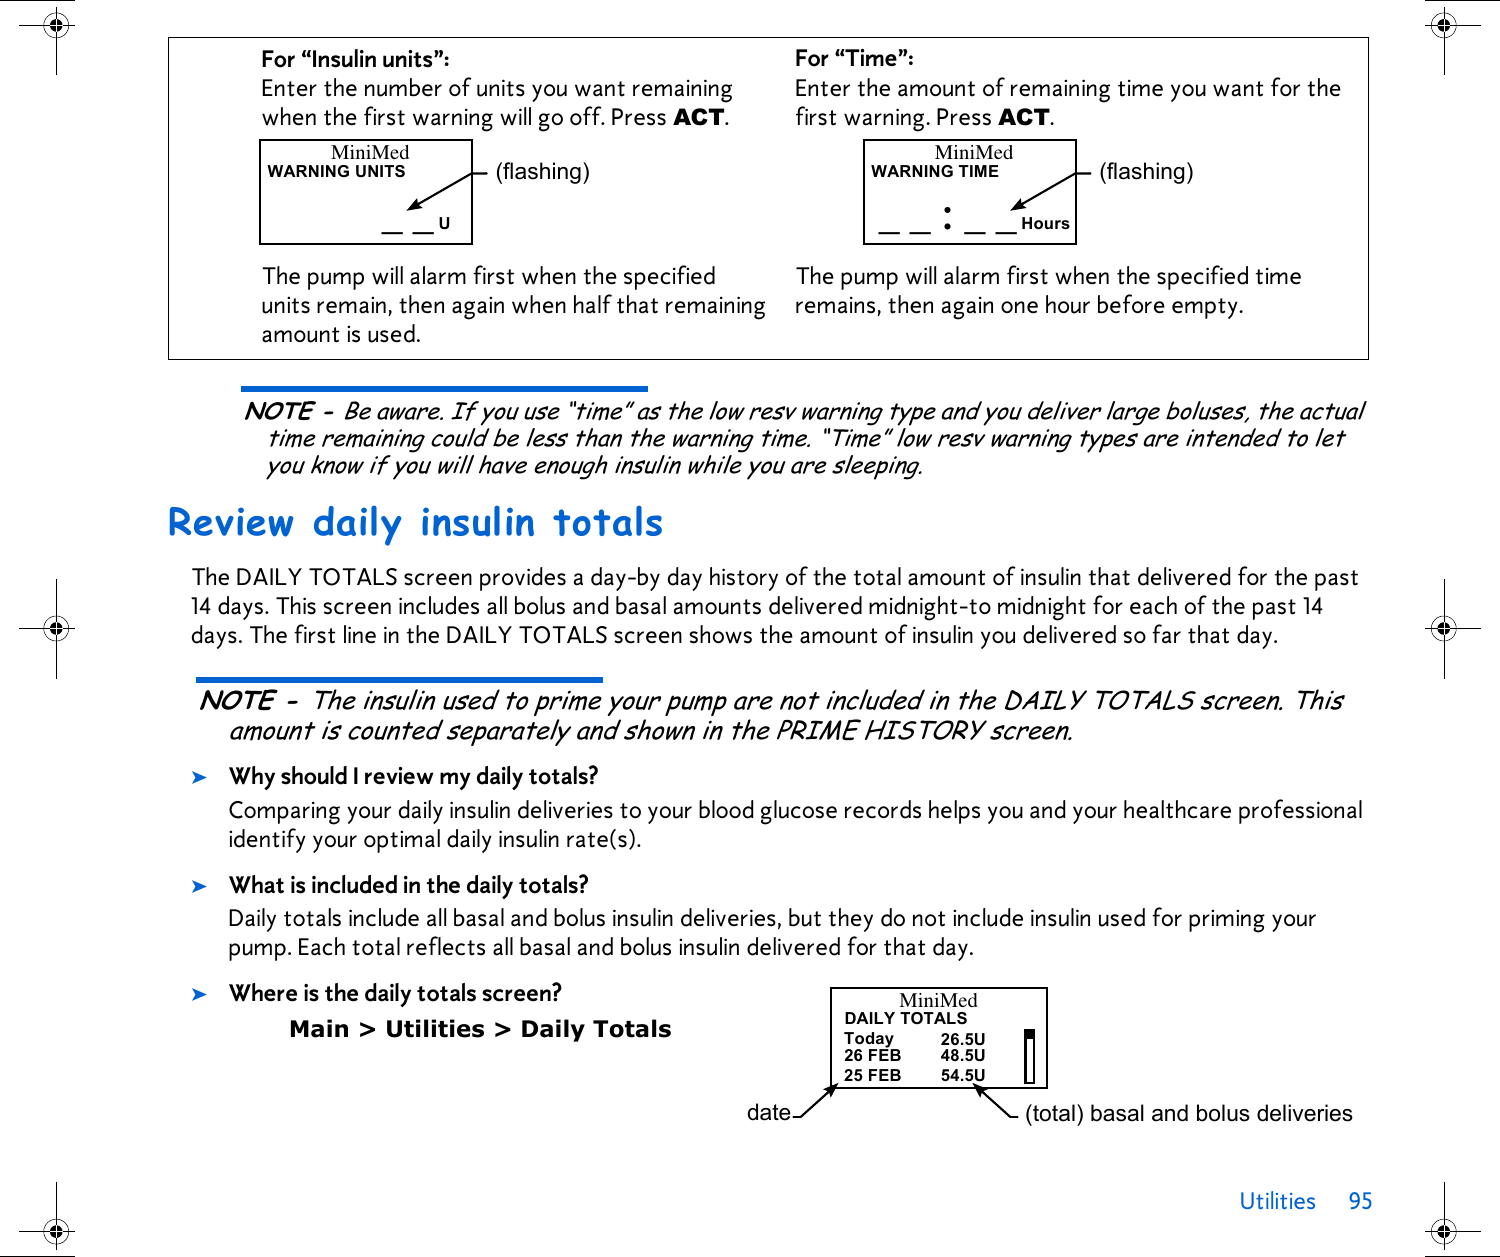


![124 Chapter 12 Pump sizeThe dimensions of the pump are:512 Pump: 2.0 x 3.0 (2.8 at the battery cap) x 0.77 inches [5.0 x 7.6 (7.1 at the battery cap) x 2 cm]712 Pump: 2.1 x 3.7 (3.5 at the battery cap) x 0.8 inches [5.3 x 9.4 (8.9 at the battery cap) x 2.0 cm.].Pump weight512 and 712 pump: approximately 103 grams (with battery installed)Remote controlUses radio signals to allow users to program Normal boluses or to suspend/resume their pumps.ReservoirThe user-filled reservoir is made from impact-resistant, insulin-compatible polypropylene.512 Pump volume: up to 180 units of U100 insulin712 Pump volume: up to 300 units of U100 insulin.Square Wave bolusDelivers bolus insulin over a duration of 30 minutes up to 8 hours (limited by the max bolus setting).](https://usermanual.wiki/Medtronic-MiniMed/712/User-Guide-365712-Page-148.png)